


|
Slugworth posted:Me at the start of the thread: "Oh cool, maybe I'll build one of these someday" ^^ This ^^ I started looking at building one during the pandemic because I love woodworking and like to think of myself as fairly handy, but quickly noped out once I realized the care and attention that needs to be paid to get everything fitted, sealed up, roadworthy, and finished out. It's not just a set of shelves I can slap some trim on to cover the big gaps everywhere. I really appreciate all the writeups and photos in here, that's given me an even greater appreciation for all the work needed to get one across the finish line! I'm just impressed as all get out by what you've built here!! Raised by Hamsters posted:
That's a really great idea to split up your front boxes like that, makes access and organization nice and easy. Especially if you do something like toss batteries and charge controllers/trailer brakeaway controller into one or something. I have no idea about these in particular or how they'd fit into the space, but I feel like some sort of side mount truck toolboxes might fit the bill. Or even something like a rotomolded chest might work (though that sorta thing might be too heavy at the tongue). Tongue weight is my big limitation... I've got a nice front box but after 200Ah of LiFEPO4 batteries and an 11 gallon propane tank, it's right at the limit of my Outback can handle, which either means I need to toss in new overloaded springs from rallitek or switch to a Tacoma or something. I love your side table mount, that's exactly what I want to do with my trailer, like maybe above the fender or as a perpendicular galley extension. Is this similar to what you're using for that? What are your plans for the table itself and storage? That would be really neat if you could hinge it to store in the galley somewhere and then slide out, fold out, pop the legs on, and attach to the camper Edit: For the projector this is what we cobbled together with a blackout curtain and ball mounted kodak pico projector on the ceiling, but I just bought one of these screens on amazon to mount to wall hooks with an adjustable cord. Less volume, hopefully quicker and easier overall. For content we either stream to the projector from our phones or use a 256gb thumb drive with movies and tv shows loaded up on it. Gonna test it out this weekend over at New River Gorge! Catatron Prime fucked around with this message at 13:44 on Apr 23, 2024 |
 #
?
Apr 23, 2024 13:23
#
?
Apr 23, 2024 13:23
|
|


|

|
| # ? May 14, 2024 20:50 |
|
|
Oh nice! I did not realize small form factor truck boxes existed like that, those are probably perfect. I had been thinking about some of those waterproof storage plastic clamshell bins, but the narrow ones tend to also be way too long. Plus I don't really need that box to be totally sealed. We have switched out the Outback for midsize truck, so I've got a lot more tongue weight too play with now. Those are the exact side table mounts were using. Was prepping them to final size for anodizing last night. One thing that was irritating in my case is that the pre drilled holes either have a pattern, or are not regular at all. Probably not normally an issue at all but for me with my hatred of wall penetration and use of fixed threaded inserts to mount everything, I had to do a ton of re-checking that I was working with the right section. Also it will make replacing them harder which kinda defeats part of the point of my inserts. Table itself- I don't remember what I explained in here but I set up both sides of the trailer, with a table mount. Planning a general perpendicular to galley setup, that's ambidextrous so we can adjust the layout to for the spot. To start though I'm probably just going to prototype some thing out of random scraps to see what we like. One thing I'm really eager to see the interaction on is our shelter dome tent. Coleman makes these "event shelter" pavilion dome things, but they didn't sell them in the US. They're like a huge overgrown pop up shade canopy. One of my uncle's has had one for about a decade and it's been great in a camp site, so we imported one from the UK. It should have some flexibility to either fit over the raised hatch, or sit to one side as an entry canopy. Too huge for an on the go kind of trip but great if you'll be in one spot a while. Anyway, need to see this in place to get ideas on how the table layout will work. As far a stowing the table, we do have space above the fridge or at the top of the utility cabinet. Kinda holding those to see what we want though. Might turn into a pop out sink holder or a cutting board tray. Raised by Hamsters fucked around with this message at 18:46 on Apr 23, 2024 |
|
#
?
Apr 23, 2024 18:44
|
|

|
That little shelter looks good. The luxury of shade when you are outdoors is so nice to have. One thing in the Bean community I have seen that is popular is the Kelty Backroads Shelter. It is not a full free-standing awning but it can be used to help keep space off the back of the rear galley. Since I have the ARB awning on my Lexus I have never really worried much about any covering for shelter.
|
|
#
?
Apr 24, 2024 17:26
|
|


|
Charging ahead with things that make this whole contraption road worthy. To that end: Fenders! 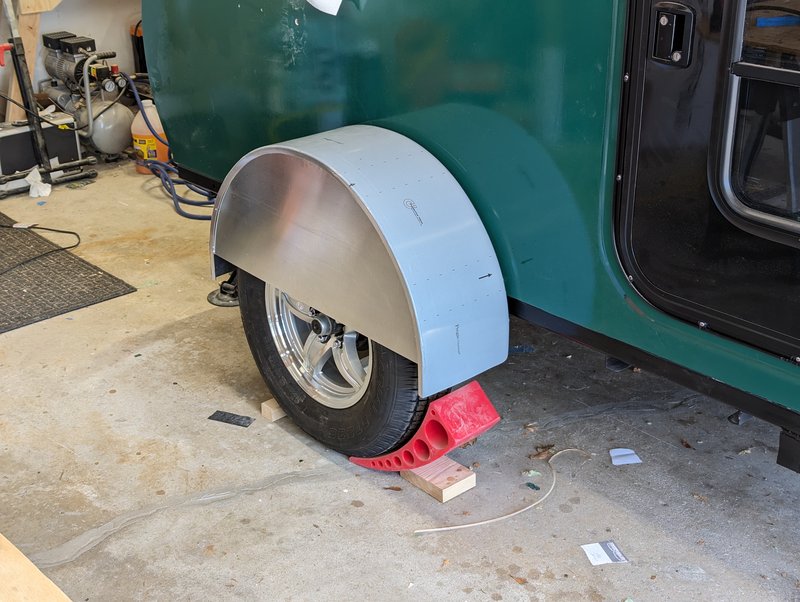 Plopped one in place, more or less. Too much crap in the way to get a decent shot from any distance but I’m liking how these fit with the style of the whole camper. Once these are on and done should look pretty good. And no, they do not have an outer cover plate over the tire – In the photo above, it’s on backwards. That’s because with this torsion axle, this interior cover plate is too long. Doesn’t hit the spindle or anything since that drops lower than the trailer frame, but it does hit the articulation point for the spindle arm. It don’t fit. Hemmed and hawed on this for a bit. Which, actually became kinda a common theme with the fenders in general. Needed to cut about 2” off of this back plate. 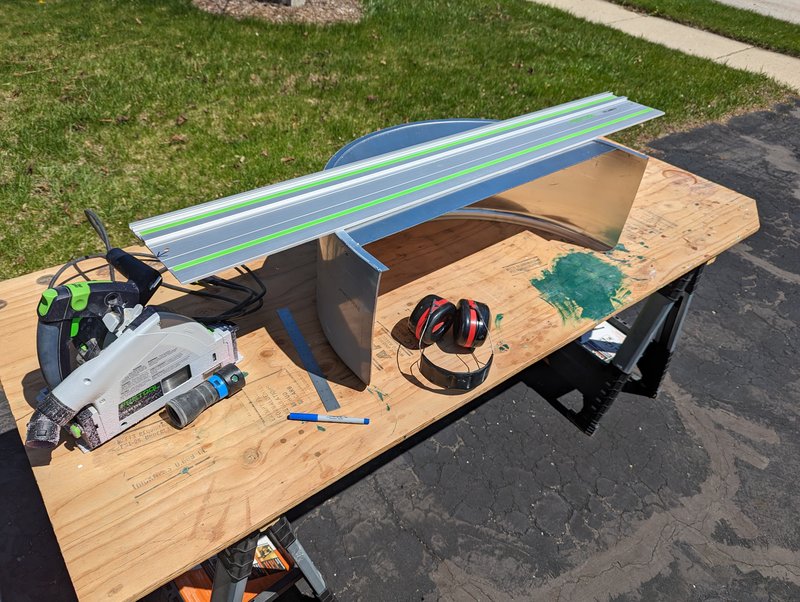 Ultimately just decided to use the track saw to do it. I didn’t have any real way to clamp down any other guide boards so the friction strips under the track guide were critical. But also I didn’t have enough space to just use the guide as an edge for a circular saw to run against. Plus the plunge control on the track saw was really handy. 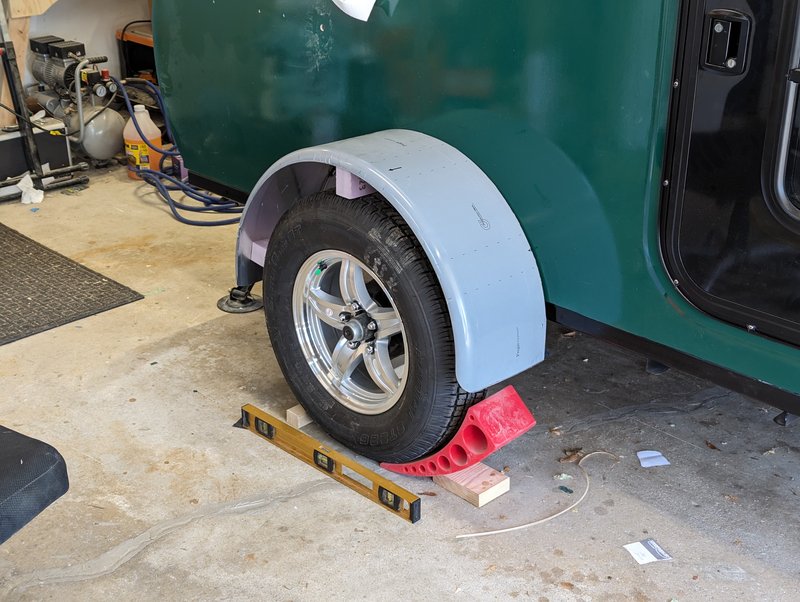 Ok now we fit in the correct orientation. Cut up some foam blocks as spacers, and started pondering on how I wanted these to fit and line up. Ended up settling on about 4” vertical clearance above the resting tire, with around 2.5” clear front and back. Still have around 350 pounds of junk to load on to this thing. It’s just now occurred to me that I could have chucked a bunch of weight plates in the trailer to check how it would settle. Anyway decisions were made, had to figure out how to attach them to the trailer.   The cabin has a little more than Ľ” overhang beyond the chassis. And, the wheel itself sits pretty far outboard of the whole thing from difficulties in sizing the axle and getting accurate info on what I was buying. So this is what I’m working with. One unnecessarily long figuring period later and 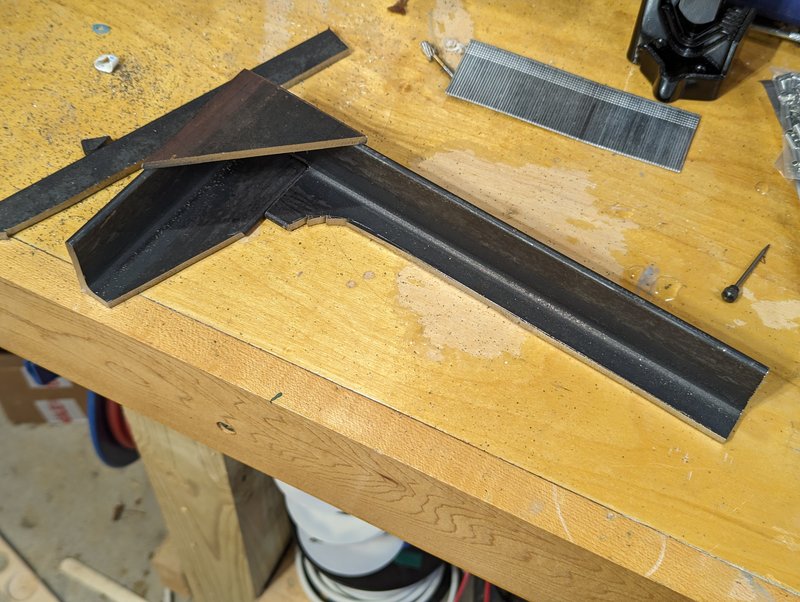 I’ve decided to fabricobble myself a bracket out of some angle iron and a bit of plate. 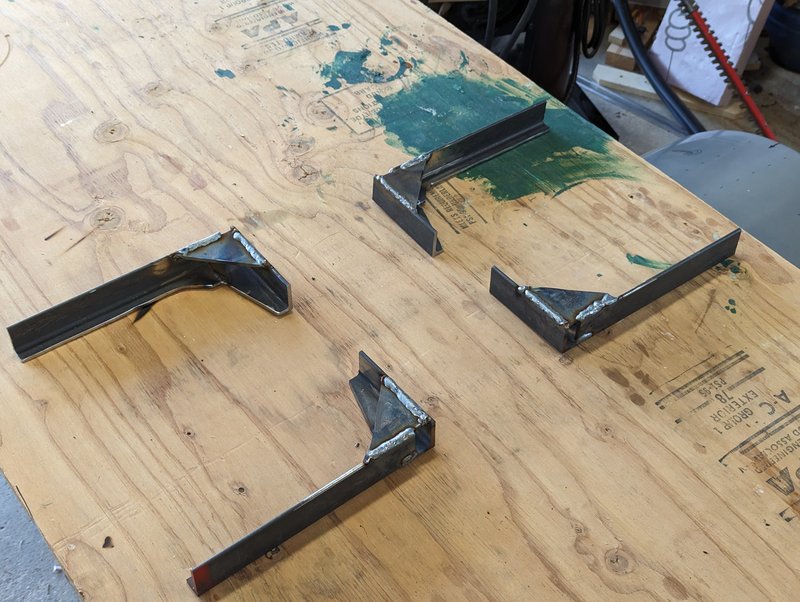 I’ve made, uh, four ugly shelf brackets. And, not pictured because apparently I took zero photos of it – I cut a notch out of the right angle corner of each one of them, to account for the fender not actually sitting flush with the trailer chassis. I trimmed the long leg of the angle down both to increase tire clearance (though I should have plenty) and also to minimize the amount of crap that these are going to collect on the road. 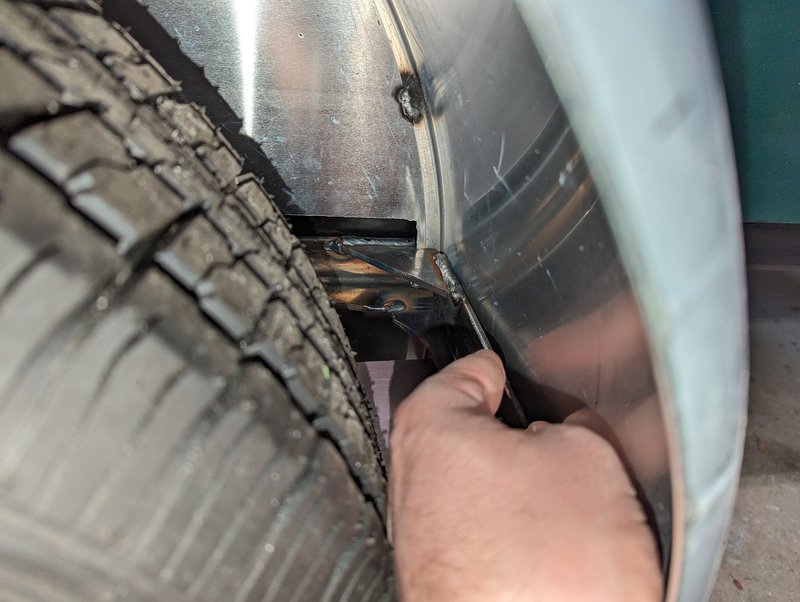 These things are going to go front and rear, low down on the fenders. The fenders themselves are still kinda lumpy from their poor packaging. I’m hoping the angle iron will help yank them back straight. Still, I’m doing a little guessing as to what straight really is. My brackets did turn out square, at least. 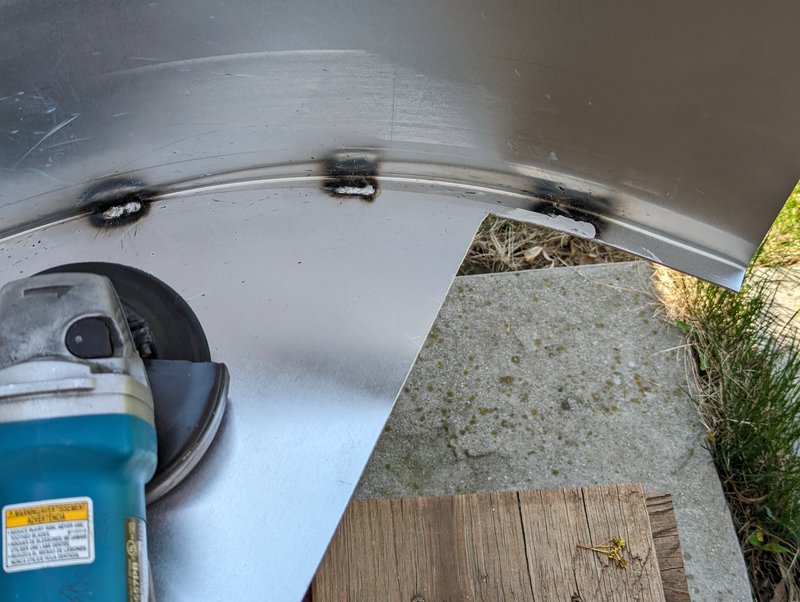 Thus began another period of figuring, to see if I could come up with a plan on how to actually sequence all of this and attach everything. An early step was grinding some of these ugly welds on the fenders smooth, since they were in the way of my brackets. Still though I couldn’t clamp the brackets to the fenders since they are bent. And actually I couldn’t really clamp the fender itself to anything because… what was I gonna clamp it to? And where? 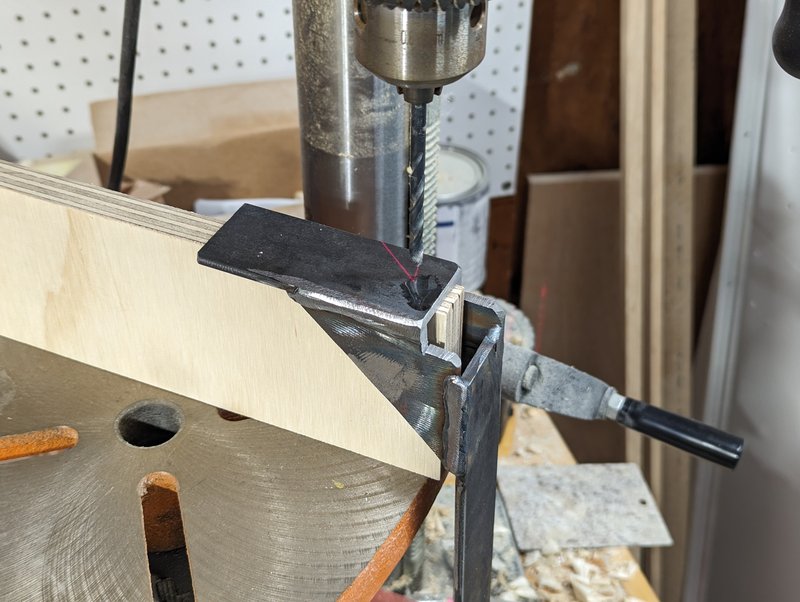 During this I also put pilot holes through the back of the brackets. Should have done this before I welded them up when it wouldn’t have required an awkward, tall perch for the part.  Ultimately, finally just visually balanced out the whole thing and did my best to make sure it was uniform. Then, my wife went under the camper while I sorta kinda barely positioned things from the front. 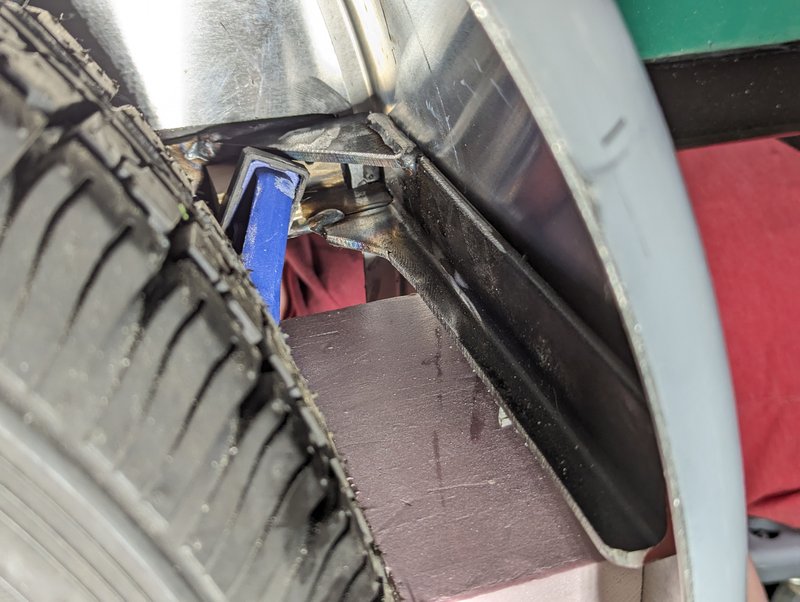 She was able to get a clamp onto the bracket, and we eventually got both dialed in where we wanted them. The photo above also shows the relative bending distortion in the fender – The bracket is square, and perpendicular to the frame. Which is not a big deal or anything it’s just making planning and doing this harder than I expected. Once both brackets were set and everything looked well aligned, I stabbed a paint pen through the pilot holes I’d drilled earlier. Tire was too in the way to do anything more accurate with a punch or awl or anything.  Up top I had pre-drilled a few 1/8” holes. 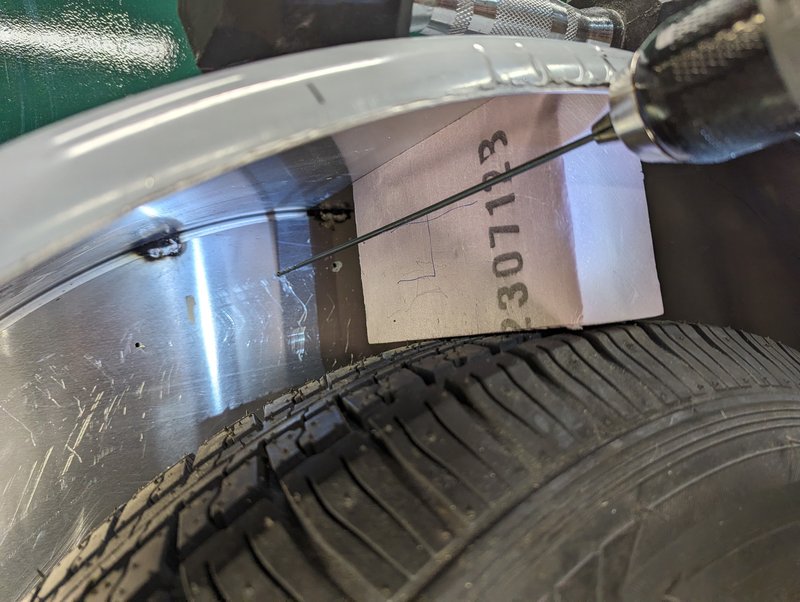 So chosen because I have a 1/8” aircraft length drill bit, which can reach past both the tire and fender and allow me to transfer a mark onto the camper. 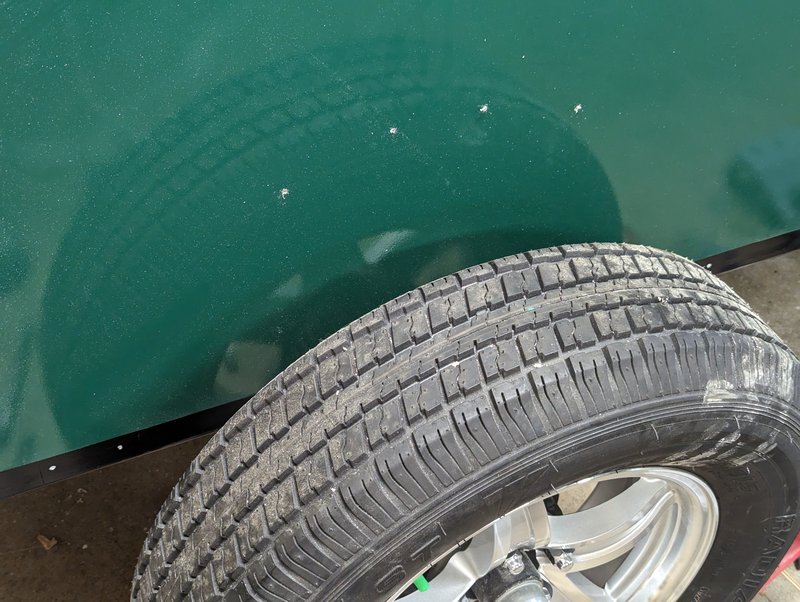 Pulled the fender off and I’m left with a set of marks along the top edge, and a pair in front of and behind the tire.  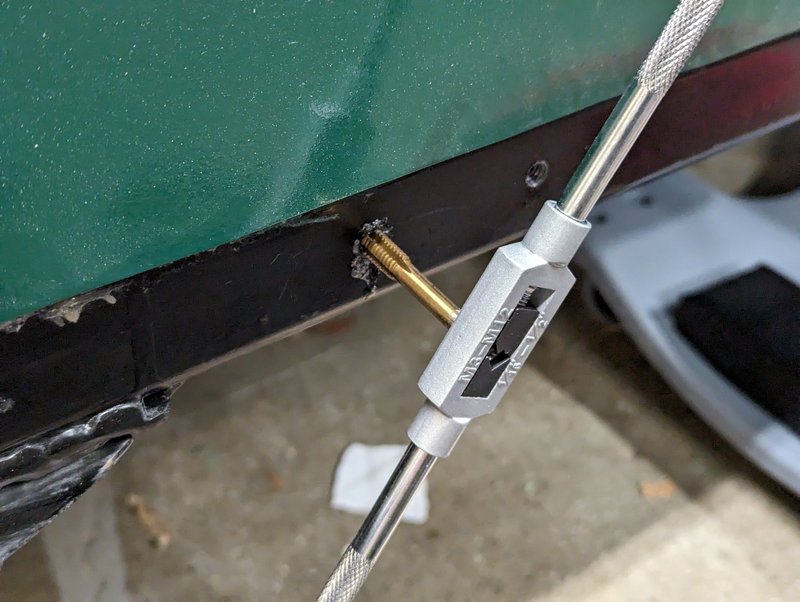 Drill and tap the holes in the frame rail.  And bore out the marks on the top for threaded inserts. Now, as soon as I get those inserts set I should be able to bolt my brackets onto the trailer. Then lower the fender down and bolt it against the camper frame. Then I can clamp and crush the fender until it flattens out against the bracket, and bolt those two together. Somewhat Heroic posted:That little shelter looks good. The luxury of shade when you are outdoors is so nice to have. One thing in the Bean community I have seen that is popular is the Kelty Backroads Shelter. It is not a full free-standing awning but it can be used to help keep space off the back of the rear galley. Since I have the ARB awning on my Lexus I have never really worried much about any covering for shelter. That's a neat looking setup. I'm curious to see how we end up liking things and if we use our pavilion as something that captures the galley, or fits off of one side and gives a rain-resistant entrance to the camper. Plus I didn't buy any of the side walls for it yet. I like that they are modular but not thrilled with how the screened/windowed portion is set up. So, might just DIY a tent wall because why not.
|
|
#
?
Apr 28, 2024 02:20
|
|
|
969.75 A double update weekend because stuff’s happening now.  Moved the camper over briefly to take care of the driver side fender, same as the first. But otherwise hatch prep has been going on.  Inside the skeleton of the hatch, there’s a reinforced solid wood section for mounting this pull handle to. Thankfully I took a photo of this with the skin still off, with a dimension reference down from the hole for the locking latch. Started laying this thing out.  Masking around the feet took some doing.   Bedded it in and screwed it down, cleaned it all off. We added the handle as soon as we could because the whole thing is quite hard to hold on to, just for moving it around.  Today was forecast for eternal rain so we got this back in the garage yesterday afternoon.  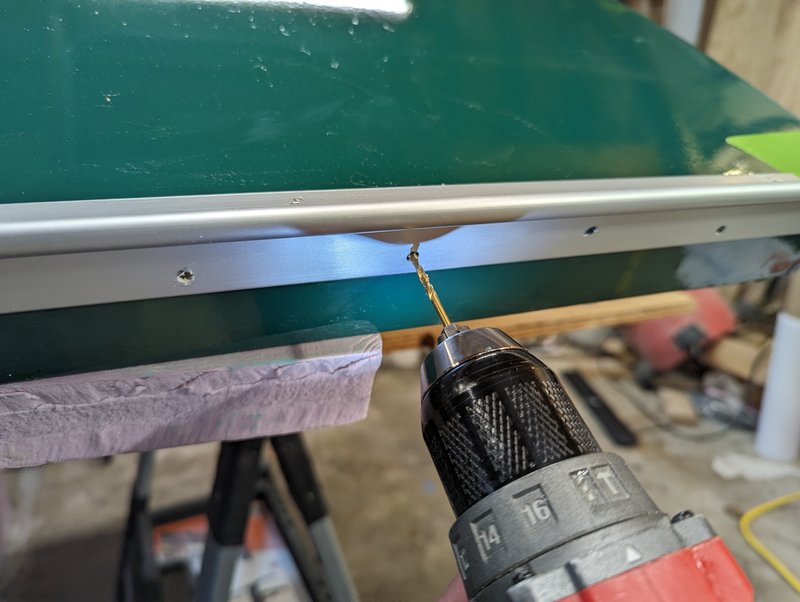 The hatch half of the hurricane hinge, never had pilot holes drilled before I had it anodized. So, had to do that first, and then transfer pilot holes for everything onto the hatch itself. Many people seem to put screws for this only onto the concealed face that is hidden between hatch and camper body. Which does look nicer but considering the forces these are under, I put 5 through from the top also to help with stabilizing it. 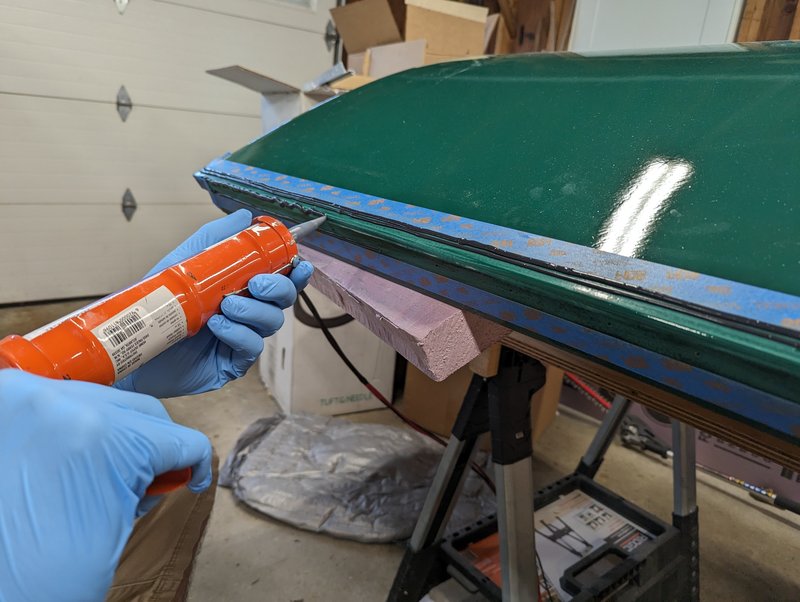 The shape of this hinge half is not conducive to the “stop water from getting in, but also let it out if it does” concept. So the whole thing got bedded down with sealant. 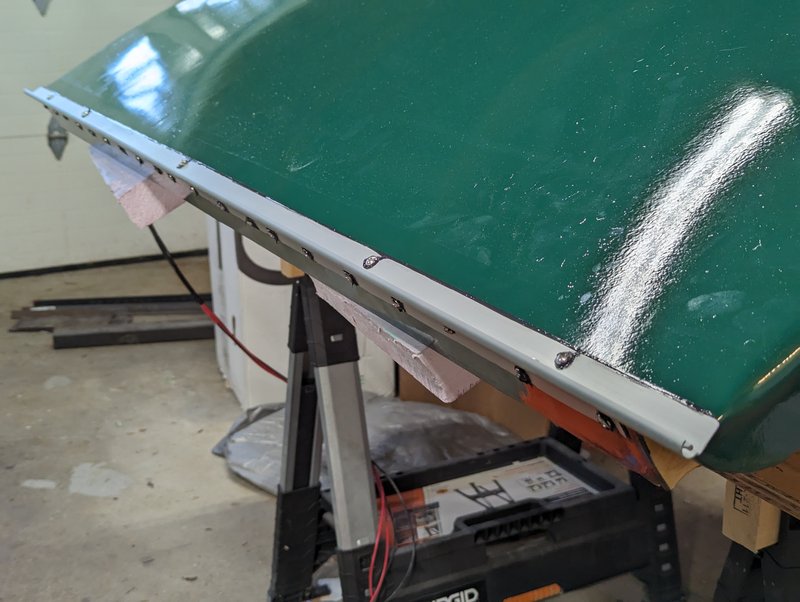 Acetone washed my screws before using them to ensure a good bond with the sealant, and bolted the whole thing down. Left this to sit and cure from yesterday afternoon until this morning, when I could get a pack of family assistants to help fit the hatch on the camper. 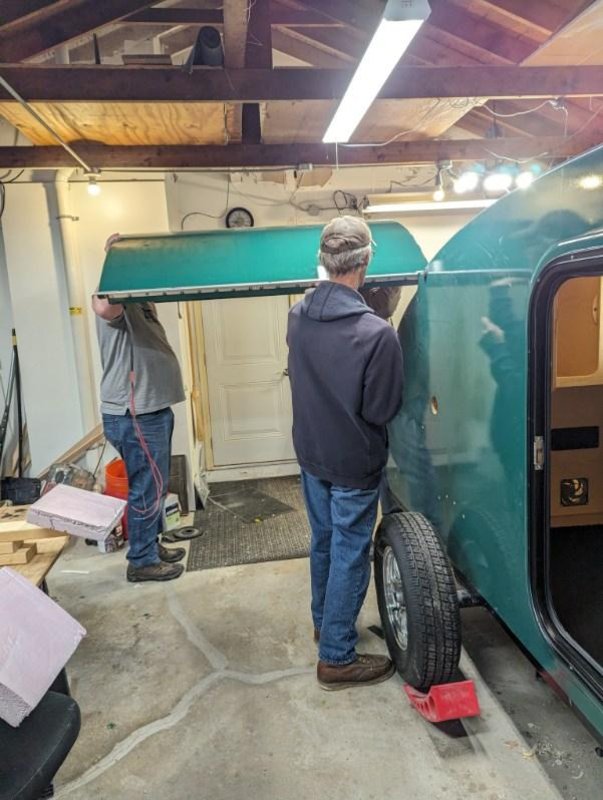 Because of the way a hurricane hinge works, you have to slide the two halves together, feeding one into the other along their whole length. Also because of the way my hatch seals work, this has to be done at half open or more, hatch height. So, my brother and I carried it and slowly slid the halves together, while my dad guided the nose. My wife sighted down the length of the two halves and gave us movement instructions so we didn’t rip the hinge apart while doing this. 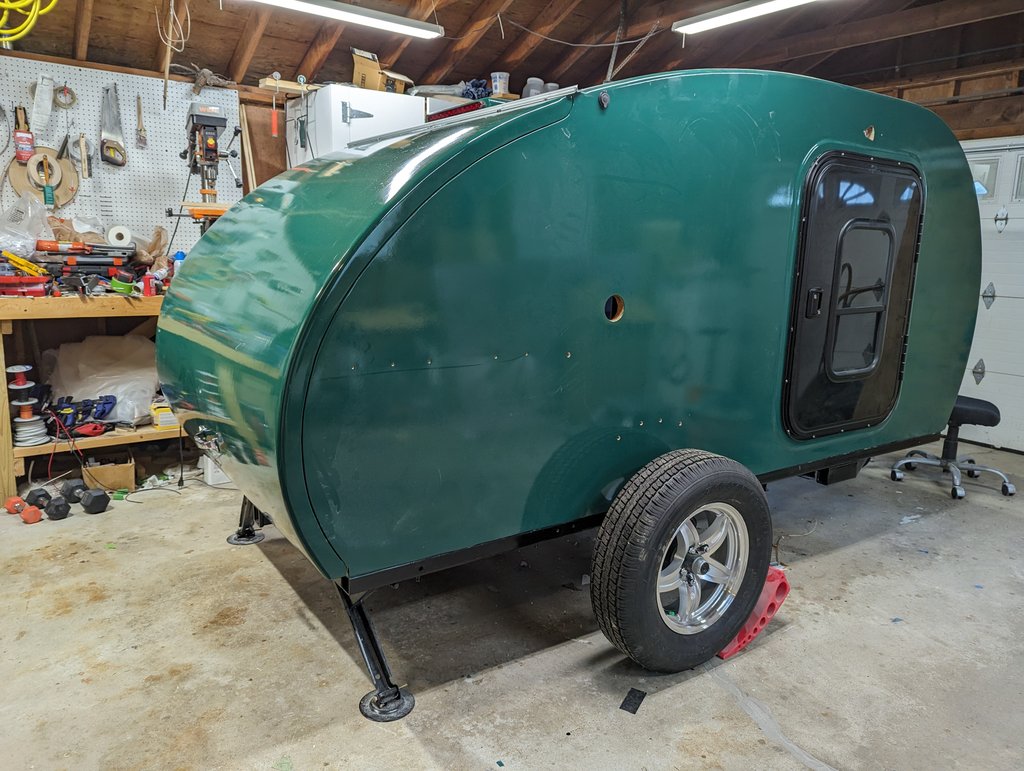 And we’re on! This was incredibly satisfying, and relieving. Hatch lowered down and closed with essentially no fuss, and everything is lining up very well. Looking way more road worthy, now. With this on, I could finally make the last load measurement and get the gas struts calculated. Unfortunately, I need a lot more gas strut power than expected. Required force is about 105 pounds per strut, at full open. When closed, the force on the struts is more like 150 pounds each. Collectively this is a LOT of force on the fittings and the hinge structure itself. I went ahead and ordered the struts immediately per what the calculator says I need. In the event these seem destructive to the structure here, I’ll have to go to plan B. Plan B would be to get new struts at about half the total load calculated above. They won’t be strong enough to lift and open the hatch but they won’t damage anything, either. They will take a lot of the weight off while opening and lowering the hatch, though. I’ll end up having to use prop rods to keep the hatch open in this case. Not what I want to do, but, the lower strut mounts that I attached to the galley walls earlier should make a pretty ideal place to do this. I’ll be able to attach something to the main gusset of the hatch for the other end. Not ideal but it should work fine. We’d also made preparations to get the mattress in the camper.  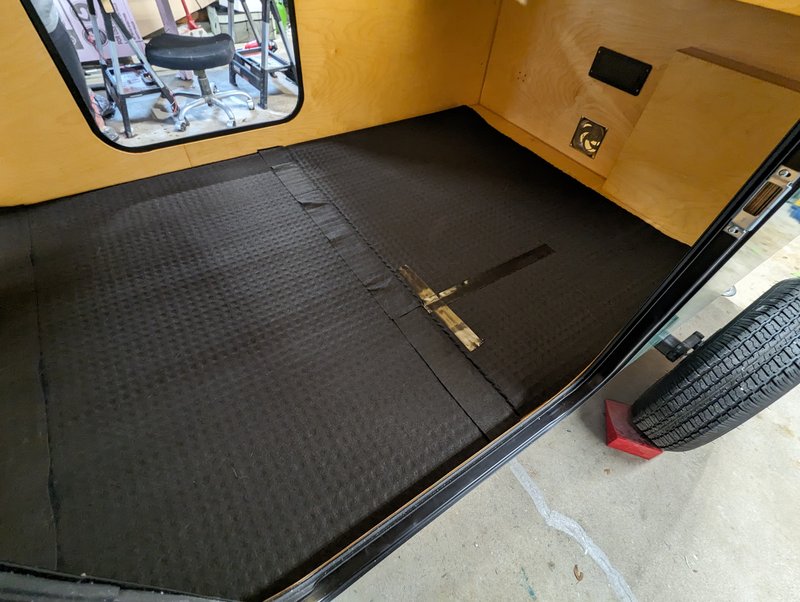 I’d seen this “Den Dry” mattress underlayment recommended before and thought it might be a good idea here. A tough plastic mesh faces down toward the floor, with a breathable felt backing between itself and your mattress. The plastic won’t collapse, so this allows for just a little air movement under the whole thing, to help dissipate moisture. Cut this and fit it into the camper. Please pay no mind to the structural duct tape from where we started cutting it in the wrong direction. 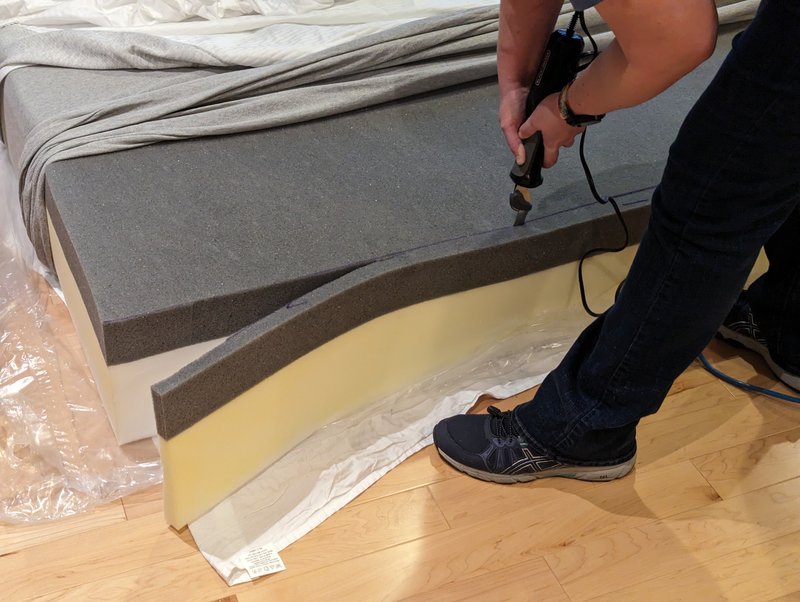 The mattress itself has been laying in our living room because it needed shaving – the camper interior is about 58.5”, while a queen mattress is a full 60”. So we cut a bit off just to reduce the internal tension a and make it easier to handle. An electric knife is the perfect tool for cutting foam like this, incidentally. 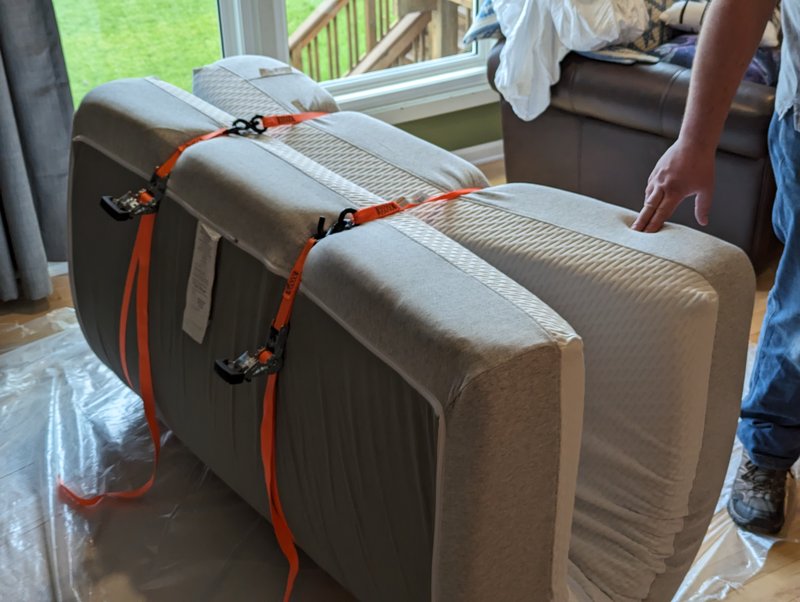 Before my family could escape I had extra hands help fold the mattress into a taco with ratchet straps.  Carried it out, and stuffed it in through a door. I was a little worried we were going to have to fight the thing the whole way but this actually worked very well, only a few minutes and the whole thing was in place. 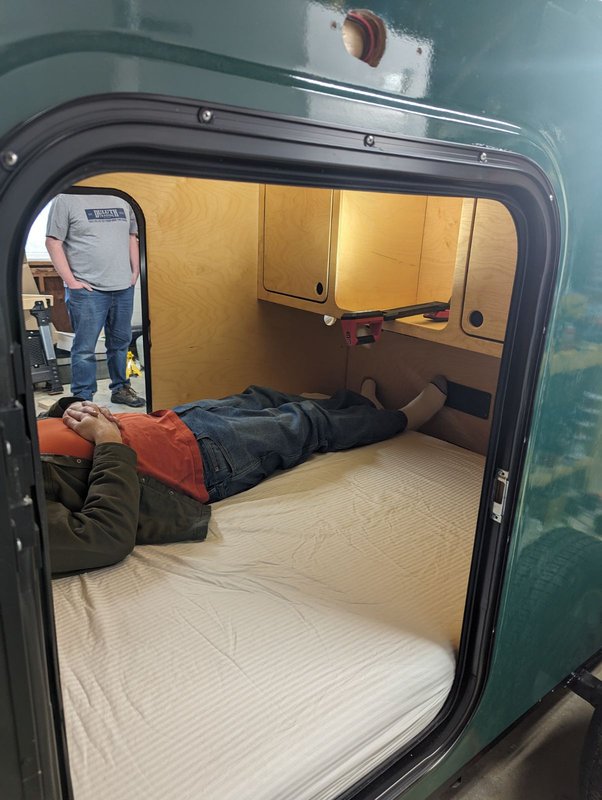 My foot room works! I was slid down the mattress a little more than normal here, too. Took a nap in there this afternoon. I think we’re going to love this thing. 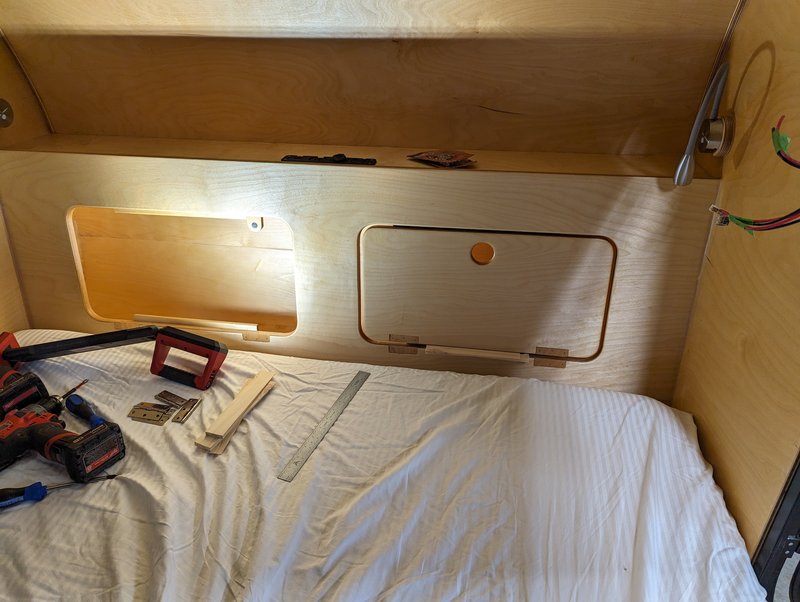 With the mattress in, it’s now way more comfortable to do any of the remaining work in the camper. Got the cabinet doors for the headboards out and popped them in place. 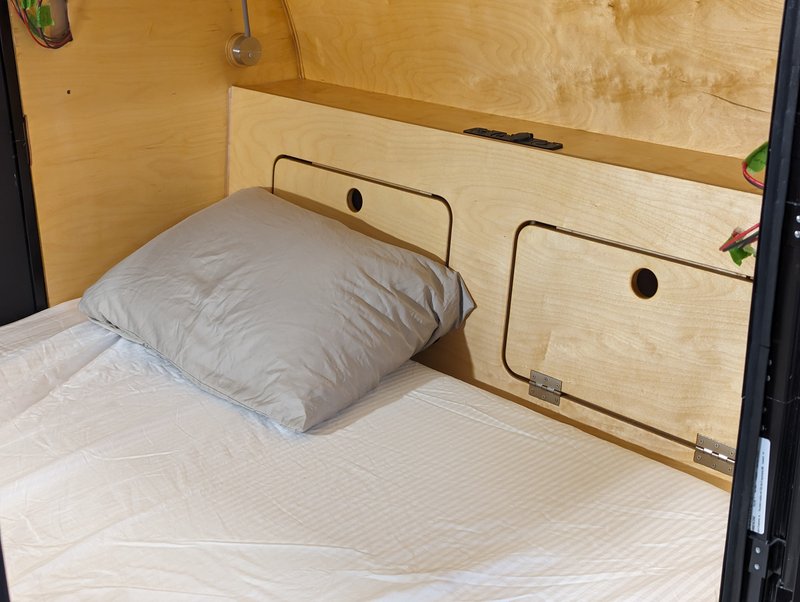 The utility hinges are ugly as expected, but, when pillows are there they are pretty hidden. Plus with the hinge barrel fitted into the gap between panel and door, and the hinge itself being recessed, these have pretty much no chance of raking your hand if you brush it in your sleep. I actually pretty aggressively ran the back of my hand across these and they were still pretty smooth. I’m also happy with the matched woodgrain panel cutouts, and the particular board I picked to make the headboard with. Plus the tilt angle does make a comfortable backrest to slouch or sit against, I think this whole part turned out pretty well. Finally, finished up with a bit more work on the diamond plate.  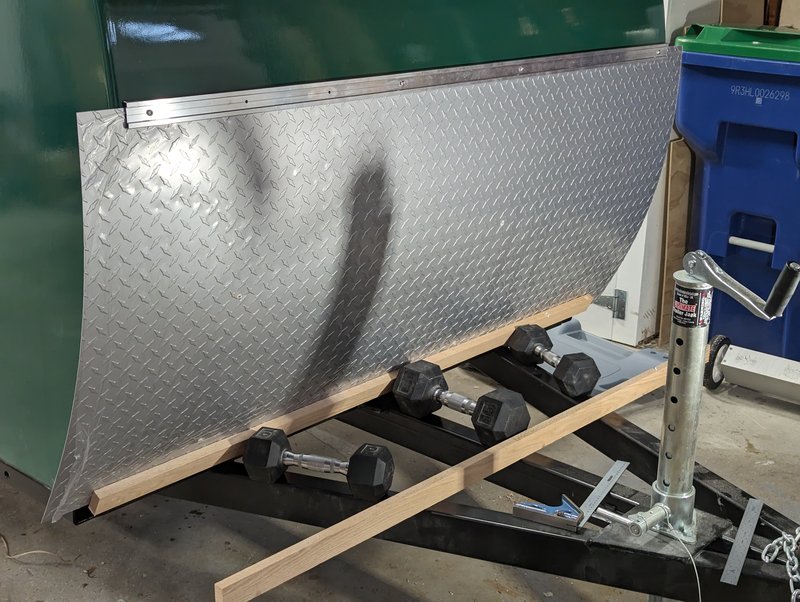 Enlarged all of the pilot holes that I’d previously made in the front rock guard piece, now big enough to pass a mounting bolt through. Dry fit the whole thing by hanging it from the threaded inserts that were installed yesterday. Did this so I could mark and pilot drill a bunch of other mounting points across this sheet. With that done I don’t need my top mounting strip any more, so I’m going to take that out for anodizing tomorrow.  The other parts I’m anodizing right now are just the side table mounts. I toyed with the idea of shaping those pieces so they had nice rounded lead in / lead out ends. The backside shown above looks like it would work out nicely but I couldn’t find a decent way to soften and shape the parts that stick out away from the camper. Ended up just abandoning this idea.
|
|
#
?
Apr 29, 2024 03:39
|
|
|
It's all coming together and looking great!! Especially nice work on the hatch -- so many things that could've gone sideways with the fit, finish, and hinge, but all your attention to detail paid off! On the topic of your hatch struts, that does seem awfully high, but it kinda makes sense as they have to be mounted higher up out of the way where there's not much lever force multiplier. I don't have any idea whether this is a realistic option for you, but have you looked at the possibility of hatch lift springs? For example: https://www.wolfsmarine.com/sea-dog-stainless-hatch-spring-11-5-8/ Basically you have this spring that is under tension that helps push a hatch up, and then locks into place when fully extended. To release, you just push the spring sideways a little to pop it free, and then it flexes back down. There's one teardrop manufacturer that does use these things, but I don't recall who, and I have no idea how these are rated. I just saw it someplace or another and was like oh that's neat! Also digging the full size mattress -- that was such a great idea! Our trailer came with a 4" tri fold mattress because there's a hatch and table underneath I've never used, and the very first thing we did was get the thickest topper we could on the road to make it more comfortable. I put Den Dry in ours too, and it's worked absolutely perfectly! Cracking windows and the vent(even down to freezing) also does a lot to get ride of any condensation as well. Everything is coming together great!! What's the first trip with this thing going to be?
|
|
#
?
Apr 30, 2024 05:12
|
|
|
Oh heck yes full size mattress. If you're building a bed on wheels I don't see the justification for anything less. Not sure I understand how that spring is supposed to connect, is it a torsion thing? In any case I've subsequently found I'm only like 15% higher on the load than some similarly shaped builds, so as long as they weren't pushing the safety factor of the hinge it'll be fiiiiiiiiiinnnee. Got my ship notice today on the struts, so I'll know by this weekend. First trip is Memorial day weekend - we'll be taking it out to a nearby state park. Just need to get it road worthy by then, plus preferably have the systems operational.
|
|
#
?
May 1, 2024 02:39
|
|
|
990 Spent a bunch of this week just doing more threaded inserts on the outside of the camper. Pretty straightforward at this point. Some time ago I bought a 4 pack of countersink bits in various sizes – the largest one was pretty much comically large though.  But I pulled it out on a whim and found out that it works great as a hand-held deburring tool.  Still too cold overnight for epoxy to cure so each one of these requires a heat tent setup with space heater for overnight curing.  Had to set up and do this for a bunch more on the front of the camper, then also each fender where it bolts to the side of the camper. Decided to do this for the solar charge connector port also. By the time this was done the gas struts arrived, wanted to find out if this was going to work.  ThingsIShouldHaveDoneBeforeMountingTheHatch.jpg Really though why didn’t I remember to clear any epoxy out of these threads, and maybe mounting the brackets? Had to have my wife hold the hatch open behind me while I crawled in there.  Picked socket head cap screws because I thought they looked nice. Well than and also Ace had them in 10-24 thread in stainless at a 5/8” length. Got everything set up, put these all in with a little low-strength Loctite.  Went to hook the struts onto the mounting points and immediately ran into a problem. The gas strut tubes do not clear the standoff mounts very well at all. Photo above is a mockup, strut is going in the wrong direction – but you can see how it would overlap with the cap screws. They aren’t going to work. Frankly a pan head screw isn’t going to work. That killed work for the night, time to come up with a new plan. Looking into it further only 4 bolts have to be changed out, the left and right ones on each triangle mount, for the cylinder side of the strut. The center one sits back far enough that it isn’t in the way of anything.  Feeling very glad that I specifically hunted around for mounting plates with a thicker 1/8” plate base, I added some countersinks so I could switch to flat head screws for these problem points. Popped the modified plates back on, then clipped on the struts. https://gifyu.com/image/Saluc] This was incredibly satisfying. 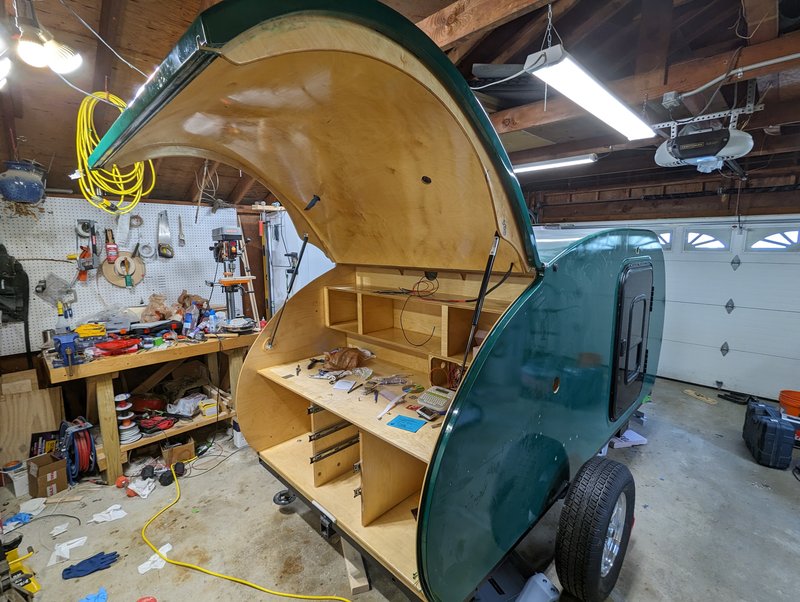 The math mathed and the geometry geometered. I had a heck of a lot of relief when the hatch fit properly – but lifting it into the air and having it support itself really set it in that this worked. The hatch hinge does not seem to care at all, either. There’s some slight distortion or error in that the right strut is under more load than the left side, which you can visually see in the hinge engagement. But even so on the right side, I held a square up to the hinge and watched for any kind of motion as the hatch opened and closed, and I couldn’t see anything. So I think we’re all good on this front. Major relief.  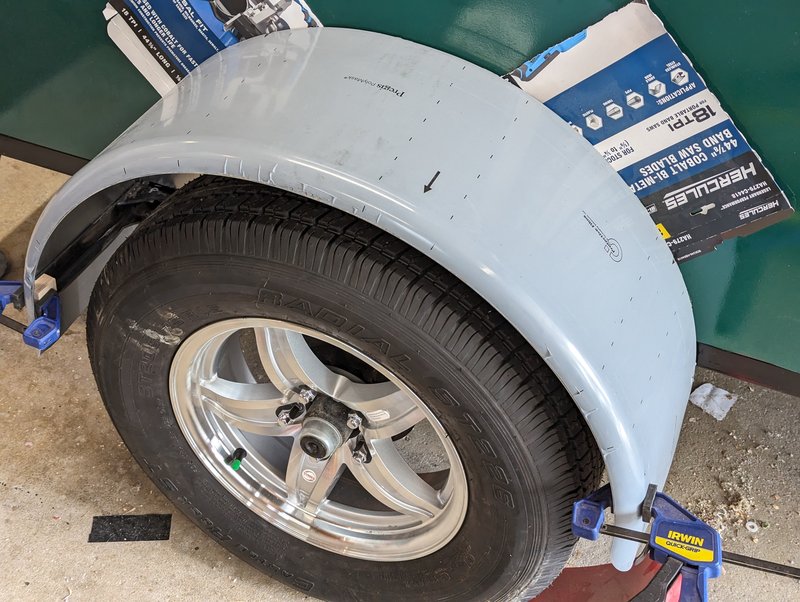 Also took the fender brackets and bolted them up, and then bolted the fenders themselves to the newly secured inserts in the camper wall.  With that set and clamped, I could then pilot drill through the fenders into the mounting brackets, to lock down the last bolt hole positions. Pulled everything off and opened up holes to final clearance sizes. 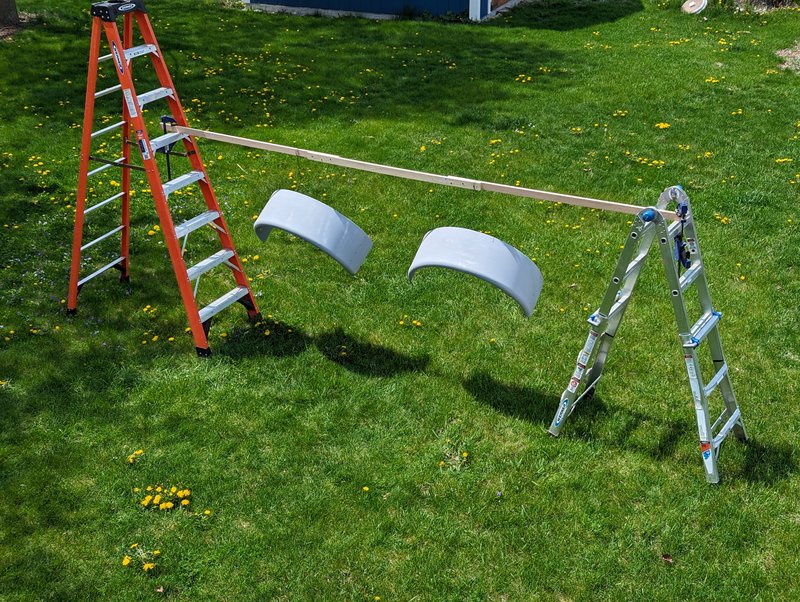 Out to ye olde backyard paint booth. Nothing fancy here, just cans of spray paint. Painting the interior black and the exterior a light gray. 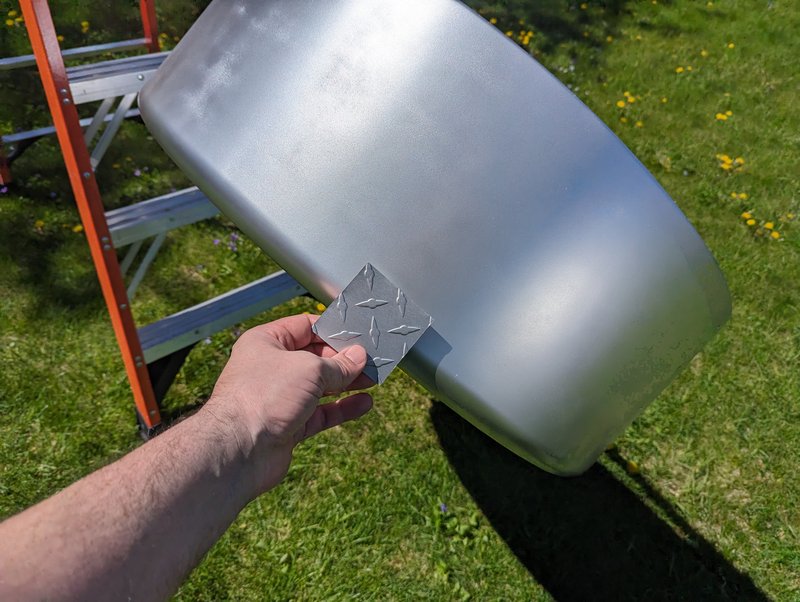 Of course, once it was finished we realized we did not like the color so today I painted them again¸ and this time nailed the diamond plate match pretty well. So as a recap here: I bought painted diamond plate to try to cut down on blinding reflective glare. And painted the fenders light gray while trying to match this paint. Only to screw it up and re-paint them Ending up with aluminum-colored fenders with a blinding reflective glare. And the painted diamond plate is high gloss and still incredibly blinding anyway. Success! 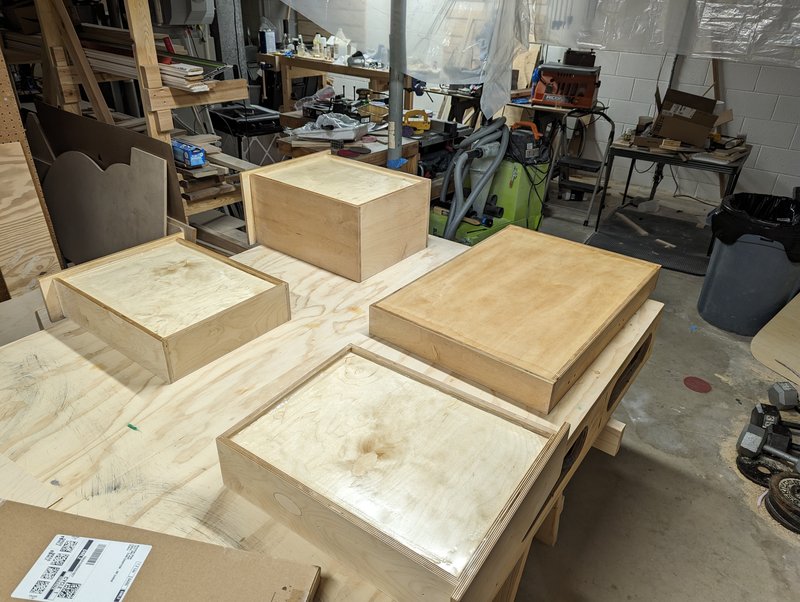 With the hatch out of the way I’ve got my work table open so I’ve been putting a bunch of polyurethane onto everything I can. Got a few coats onto the bottoms of these drawers last night, flipped them over and did a bunch of light coats on the rest of them today.  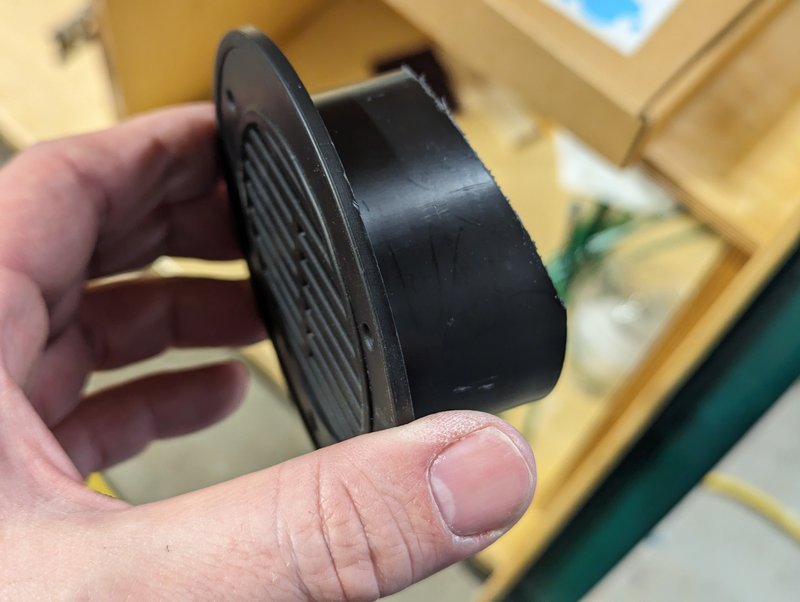 Started attaching more stuff to the exterior. We have an air vent on each side of the camper that’s for all-weather use, in fact it can’t be closed at all. But it also had no method for keeping insects out so some screen got hot glued to the inside portion. Also shaved down the top a little to make more clearance for air, this design just about sandwiches the inside and outside parts together with very little passage space.   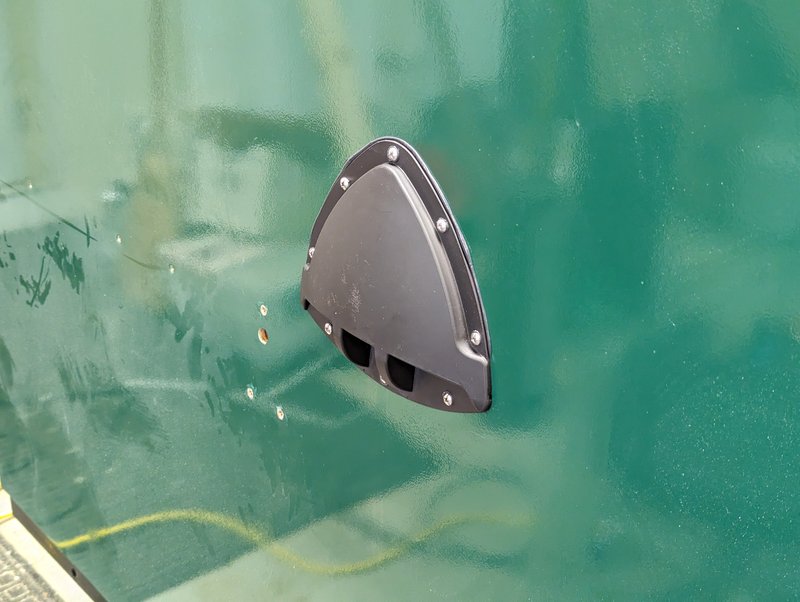 They also have these pockets with no water drain, which seems like a poor idea. Added a hole to each. Got both installed  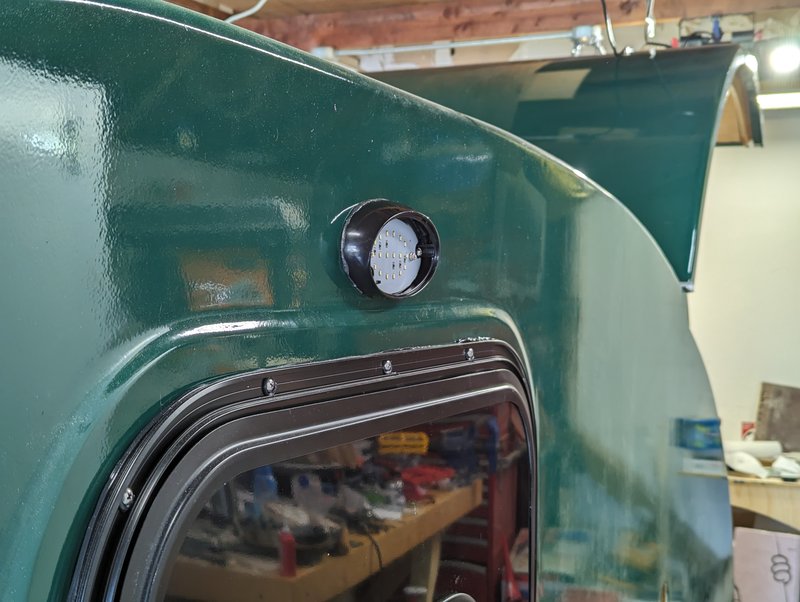 Also got the exterior porch lights prepped. Used butyl tape on the back of these – I don’t really trust them to survive very long and I don’t want to deal with a more severe sealant. These were kinda a fun process on their own. I wanted LED models, that did NOT have an exterior power switch anyone could flip, that had amber lenses. No one had them with the amber lens, but they did exist and were interchangeable. Whatever, I’ll get replacements later. Later came and I went to get the replacements. Couldn’t. But for $4, I could buy the incandescent version of this system with the amber lens. Got those, stole the lens, all good. Except the back of the incandescent one had a small “for dry locations only” sticker. On the thing made for and marketed as for RV exterior lights. So anyway I’ve got the back sealed up pretty well with the butyl except at the bottom (as a drain), and I think I might use some sealant to glue the stupid lens right to the housing. Should make it pretty water tight although removal will be destructive.
|
|
#
?
May 6, 2024 01:38
|
|
|
1001.50 Raised by Hamsters and the Quest for the Minimum Viable Product Crunch time is on. My wife has stepped up as full-on project manager and has plotted out the remaining critical tasks and sequences we need to get done. 14 days until we need to be on the road – and we’re taking tonight off. 46 specific tasks have been identified, some are quite simplistic – others not so much. 11 of them have been completed since last Sunday. Also last night marked 251 days doing actual work on this thing, and as above we are now just over 1000 hours labor. The average based on those numbers pops readily to mind, and causes a small headache. Anyway this and following updates will likely be somewhat chaotic as there is a bunch going on at once. Also I am much more frequently forgetting to photo document things. So!  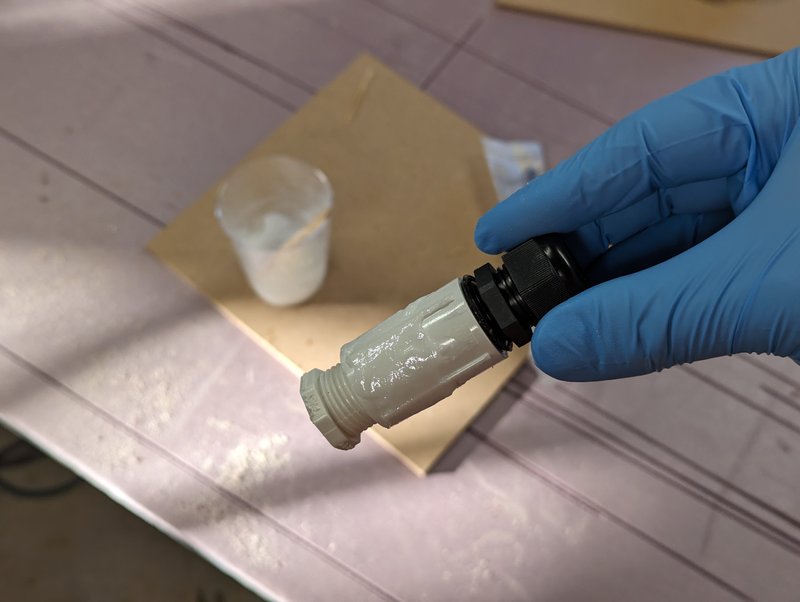 Bored a hole in the floor. Into the hole, I’m shoving this ˝” PVC coupler. I’ll be able to thread a cable gland into both ends but for now one just has a cap threaded in, to keep epoxy out. 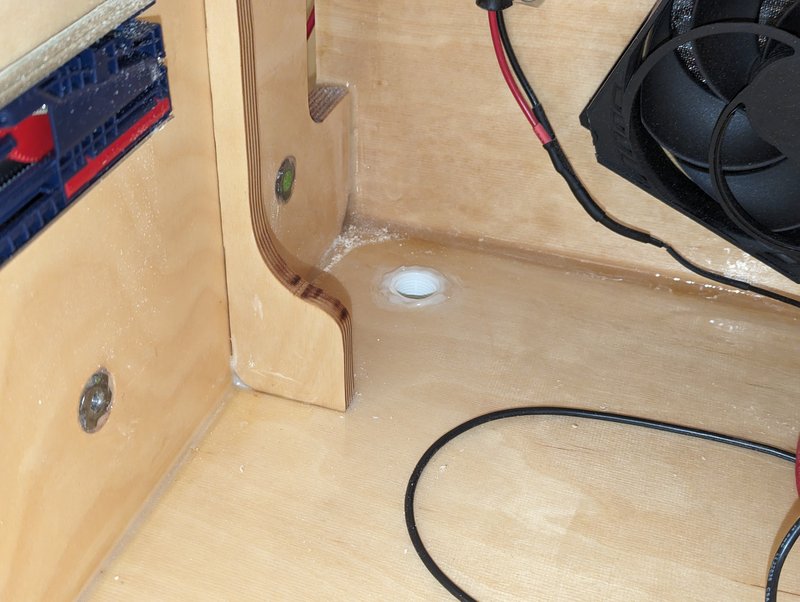 I need to get a number of wires between the galley and the underside of the camper. Left and right turn signals and ground from the trailer wiring, will need to come up for the 3rd / high center brake light. A pair will need to go down, for the underbody lights. And I might bring one more up to have the auxiliary 12v source from the tow vehicle. Might give me some options around travel power for the fridge, I could see that being useful.   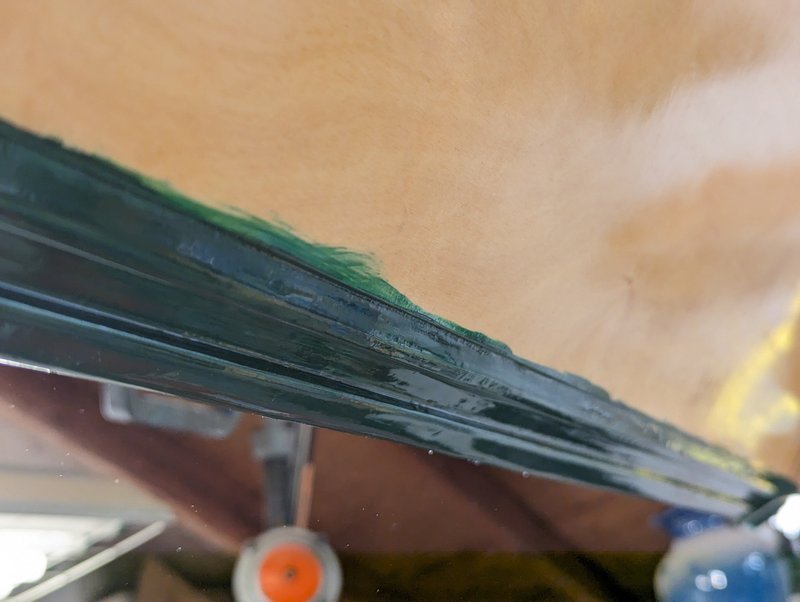 Up on the hatch, there’s a variety of messes that need to be cleaned up. I was initially careful while painting but eventually gave up on that, as being completely impractical. Also one of the gussets on the hatch would very light bind against the side wall of the camper. Gently scrape, really, it didn’t hold anything up. Sanded that area back more completely, and sanded everything else back far enough to remove paint traces. Did a little polyurethane touch up on all of the exposed areas. Is having a pretty hatch mission critical? No – But, I need to jam the seals in there and I don’t want to be running polyurethane against those, later on.  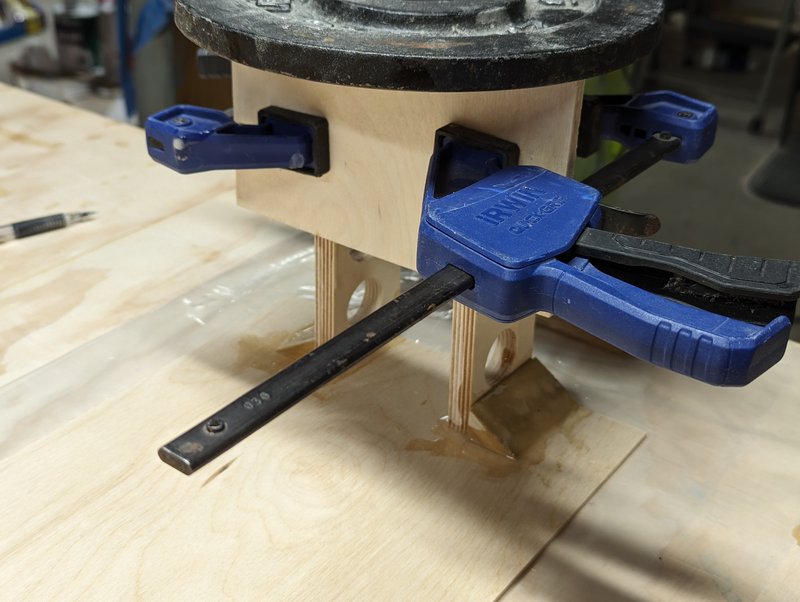 I’ve got tons of scraps hanging about now which I am finding quite handy. This pile got crudely popped into the shape of this little brace thing. 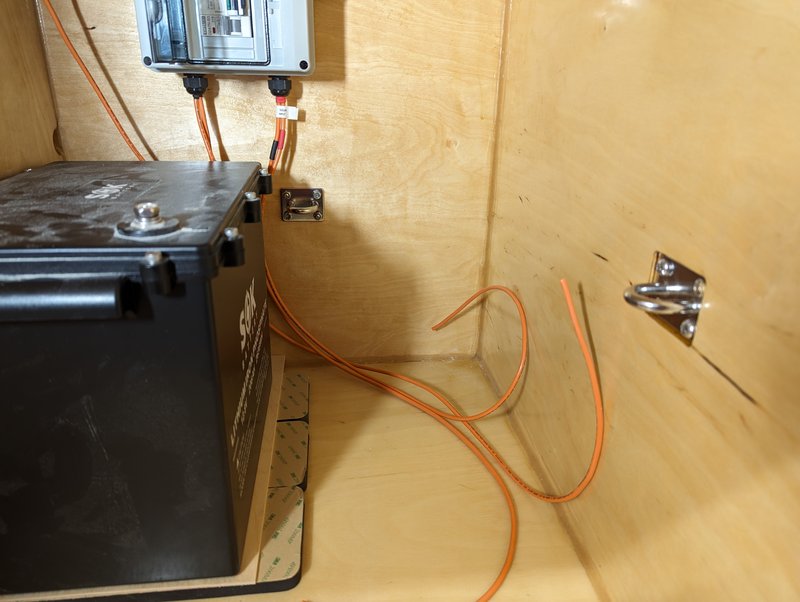 The brace thing is a seat for the battery to sit on. It will hold it off of the wall, so as to not block my air vent back there. It’s also going to sit on top of these foam pads just to give it a little extra suspension cushion, since this is sitting behind the axle. I’ve also popped in the hold down points that will strap the battery and water jug into place. 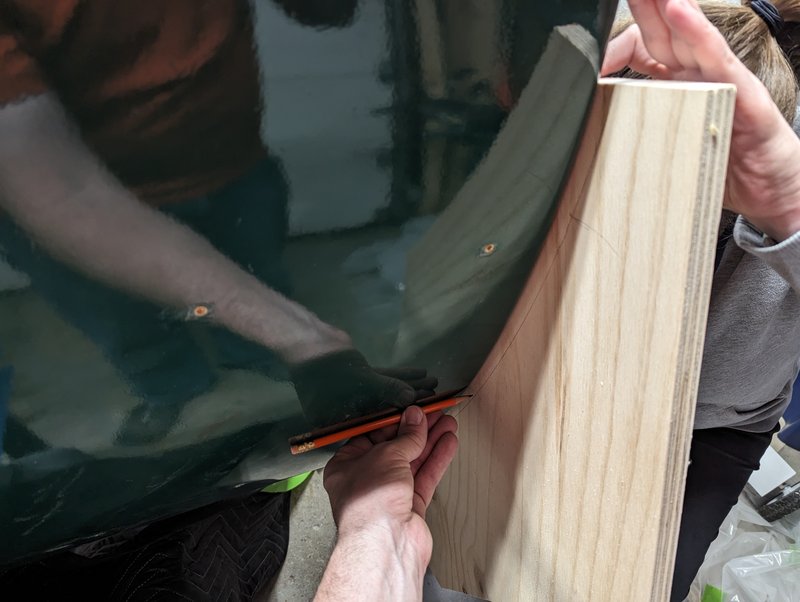 Also from the scrap pile, made a tracing of both the left and right walls at the front of the camper. I think I’ve solved my edge trim problem, more on that later. Have a plan for these offcuts though. 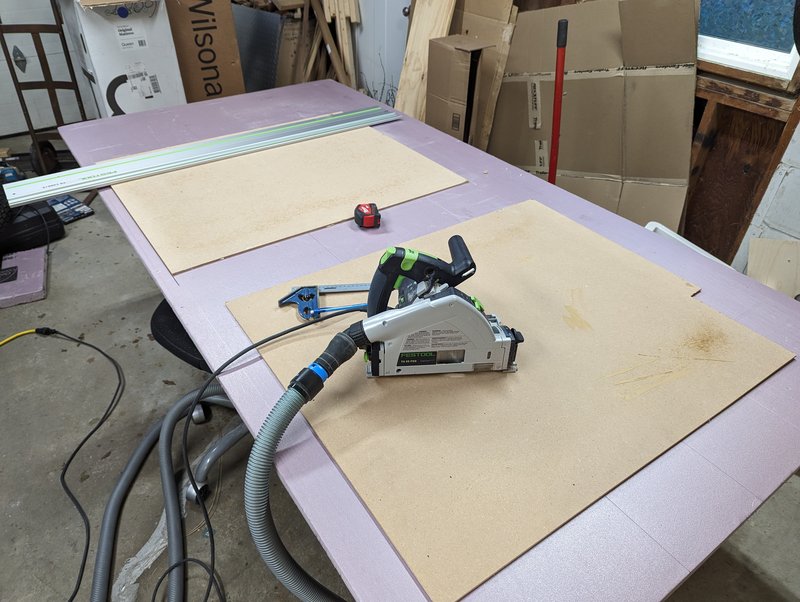 Speaking further of scraps, I wandered toward my flat good scraps aiming for a piece of Masonite / hardyboard, whatever that stuff is called. Had to move these Ľ” MDF sheets out of the way first and… hey… wait a minute. Where did these come from and why do I have them? Also they’re perfect.  Some parts got chopped out, then dialed in until the fit against two edges of the galley layout.  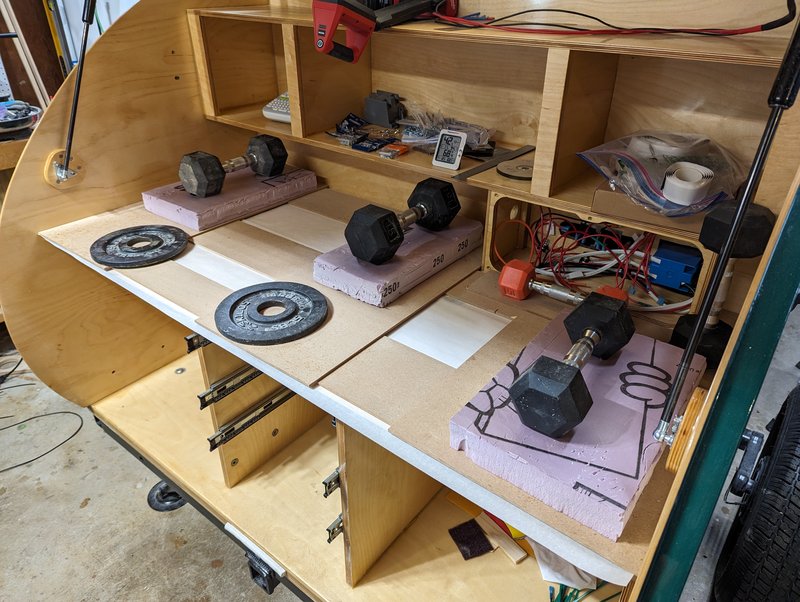 Cut up some spacer strips, and then glued them to the tight fitting pieces. 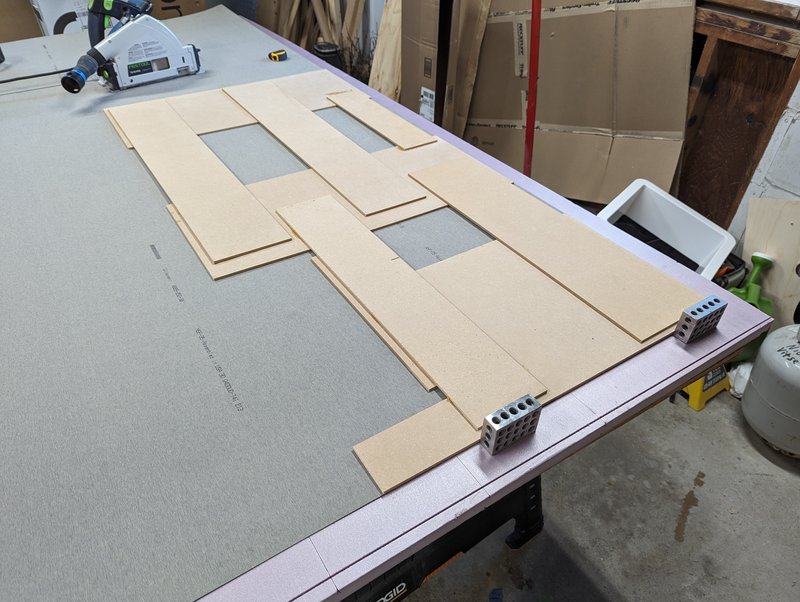 Creating a template that I can lay out on our countertop laminate. 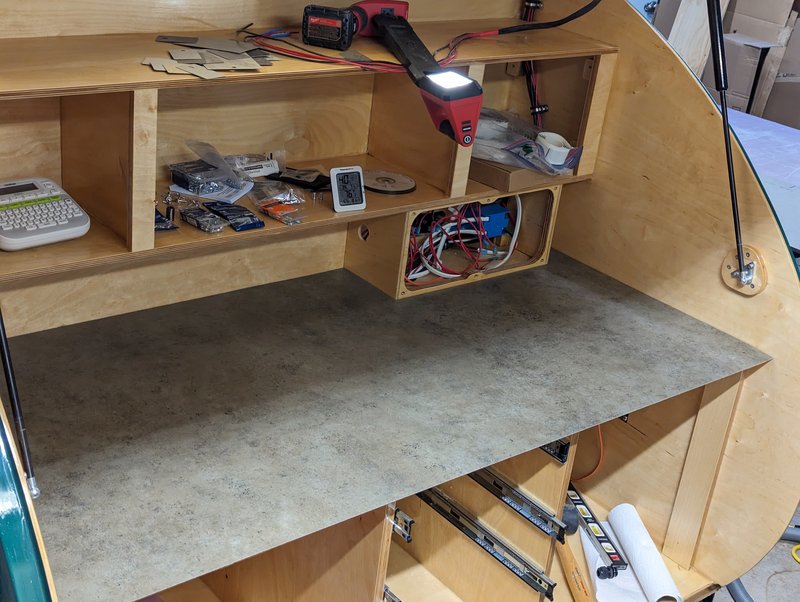 Which worked overly well and we nailed the fit in one go, save for a few small spots that had excess epoxy and needed to be custom chiseled and filed away. 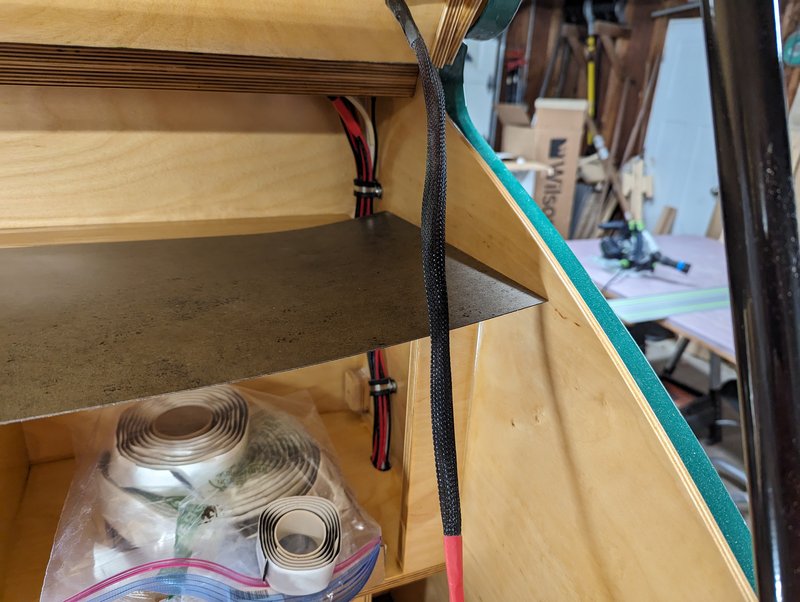 Top went in much the same except without a template, so this was a slow iterative process of creeping up on a width that could drop into place. Made a small notch for the wire passage in the back, I still haven’t made a cover for that. The cover is not on the critical items list. 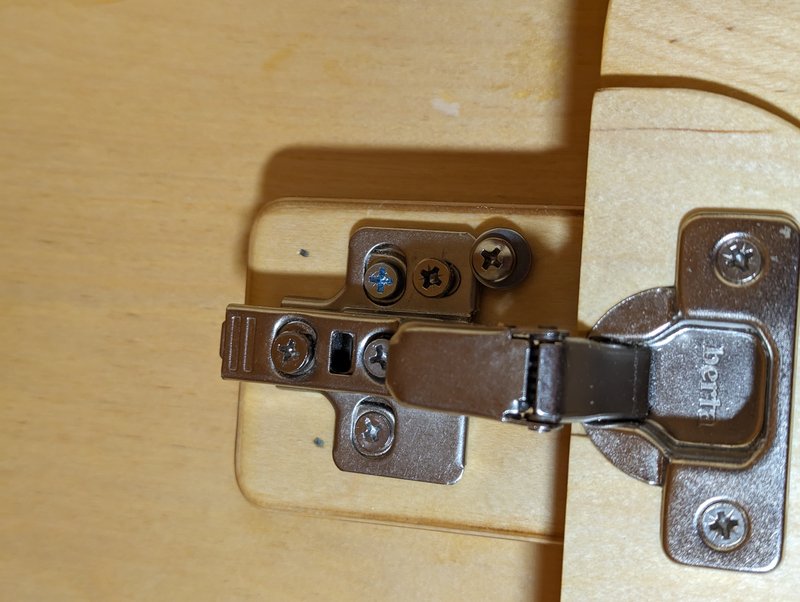 If you remember my saga of the broken screws for the internal cabinet doors, had noticed one of them in particular was pretty wobbly. Decided to just clamp the sucker down with an extra screw and washer helping to pinch it into position. Will do for now, seems pretty strong actually. Have also finished painting up the fenders and their mounting brackets. The fenders really needed an extra coat of paint but I didn’t notice this until I started clear coating them. Not going to worry about that for now, they can take some road abuse and come of for repainting later on. We both took off of work tomorrow, I’m hoping to nail down a lot of the work over the next three days.
|
|
#
?
May 10, 2024 01:22
|
|
|
Finished dialing in the countertop sheets. Upper piece had more epoxy in the way from the bonding of the shelf to the walls. With the main countertop I had been really careful to avoid this just so it wasn’t in the way for this sheet. Up top though this had not originally been the plan. Had to back bevel the sheet a little, over long distances in some areas. Turns out a block plane works great for this. Back to the diamond plate rock guard – really wanted to get this done with. With the top mounting strip anodized and returned, we could get this done. 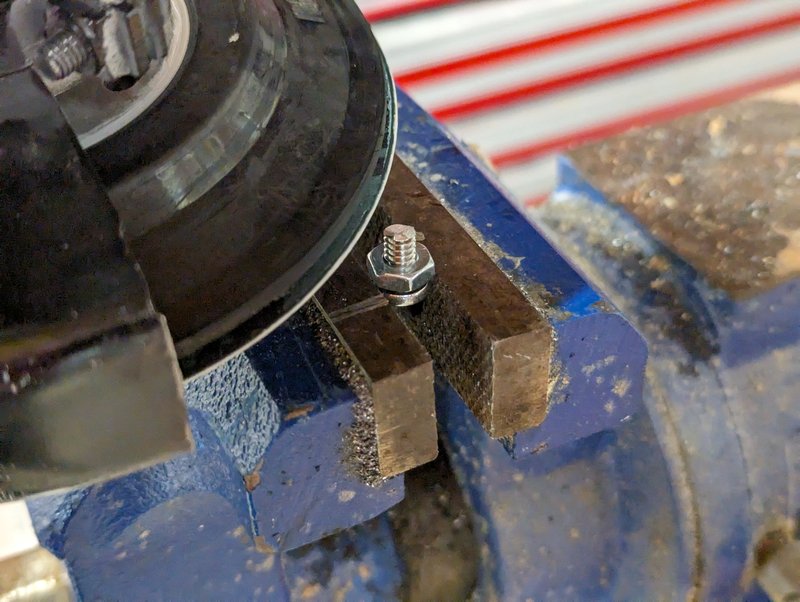 Had to start by shortening 19 screws with the grinder. Half inch 10-24 were the shortest I could get, but the threaded inserts are only a bit over Ľ” internal depth. And the aluminum sheet adds essentially no material thickenss. I am using some EDPM Neoprene backed washers behind the screws which take up some of the distance, but not enough. I got pretty good at this though and was able to dress the bolts quite well with the grinder by the time I was done. Had to run a few through a die to clean them up but mostly just spin the pre-threaded nut back off, and good to go.  Sheet’s still oversize but now it’s completely held in place.  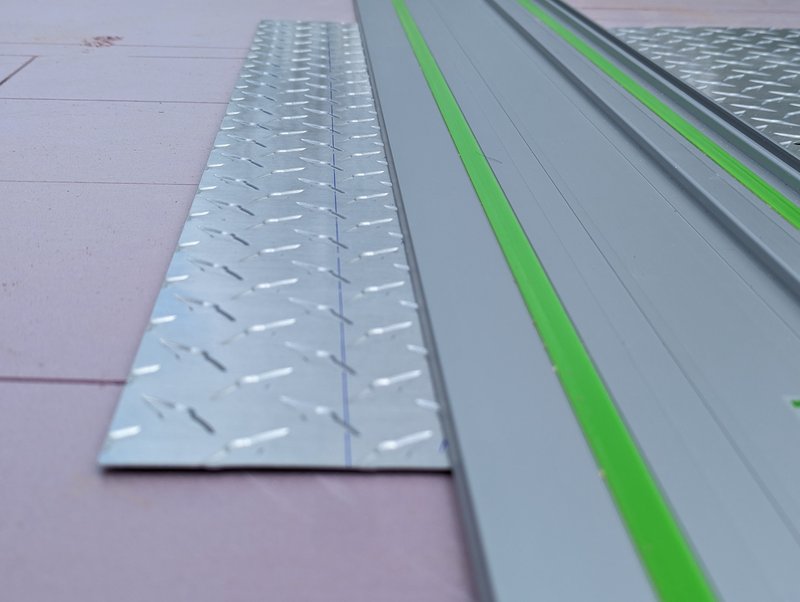 Traced following the edge of the camper wall, then off-set from that line to account for the radius between front and side wall. Don’t want the sheet hanging over that.  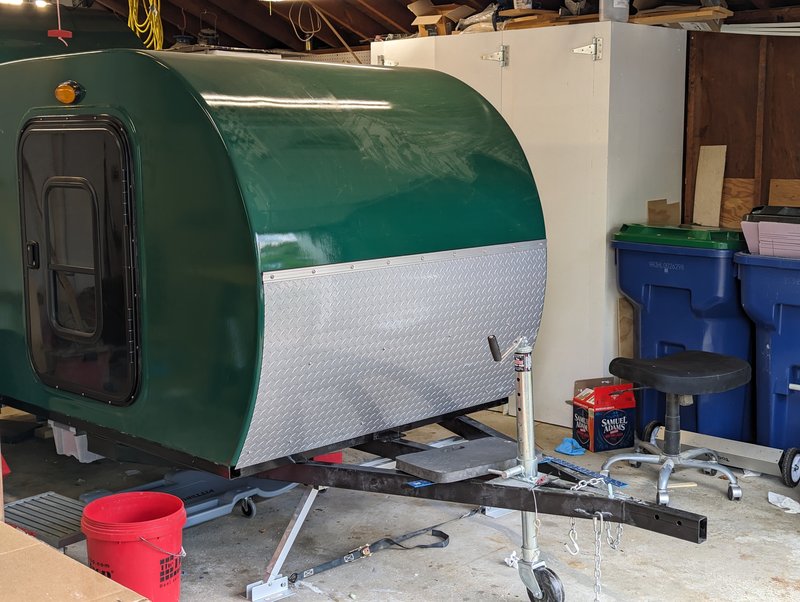 Sealed up the perimeter and added some material to help keep the sheet from rattling at all, then mounted it for real. 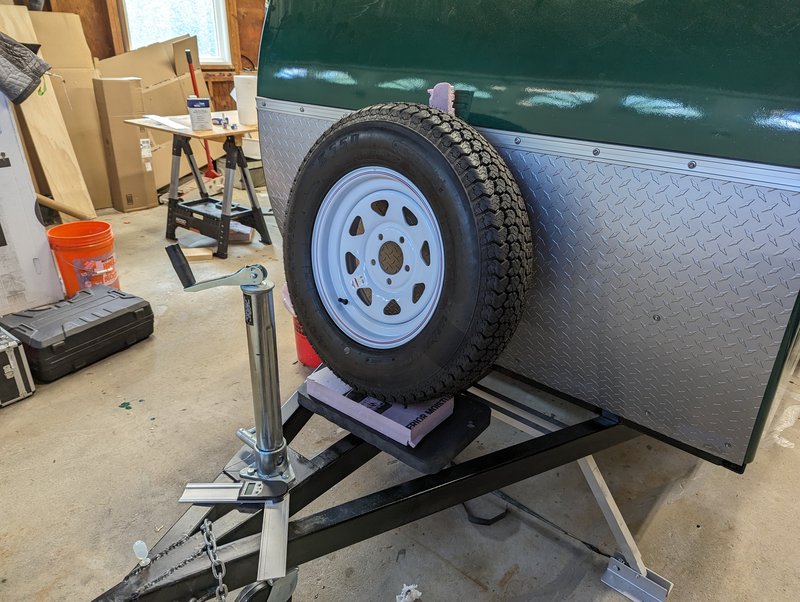 Which lead to the reason I really wanted the diamond plate on – the spare tire. These two are high up on the food chain of precursor items stopping other major progress – trailer lights specifically. Had the approximate plan for the spare but needed to actually design this mount. Pushed it around until we found a spot we liked that should allow for saddle bag tongue boxes to be added later, then I modeled it up so that Sketch Up would do the piece math for me.  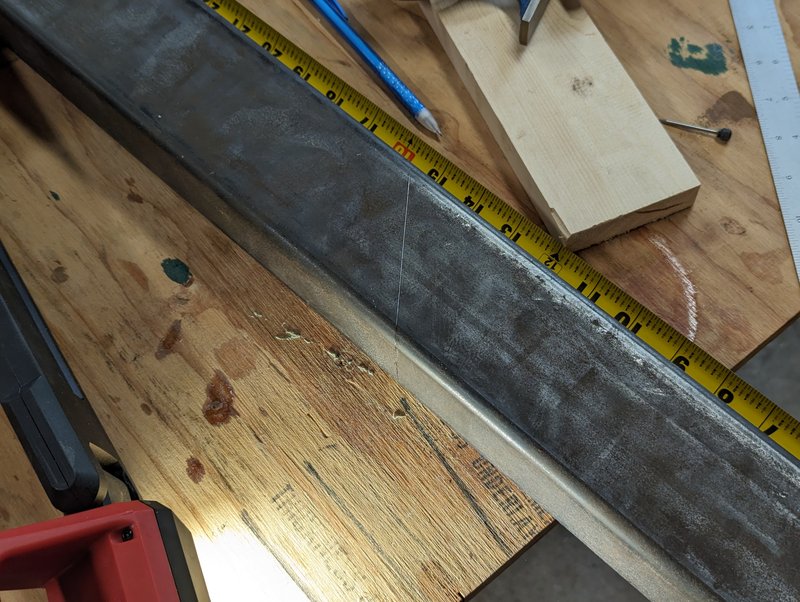 I only have one piece of stock to build this so made a quick test piece out of wood. Too much clearance from the tire. Tightened it up and then started cutting up material. I had briefly planned to form up a pattern for the mounting studs and make that from a raw plate…. Instead I just bought one with multiple hole patterns pre-drilled. Cut some of the excess off the top. 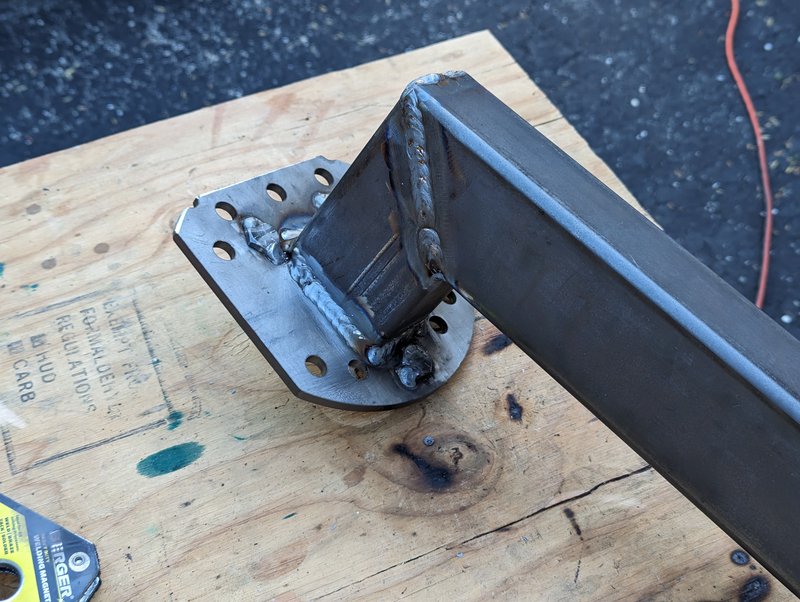 Putting it together went OK enough. 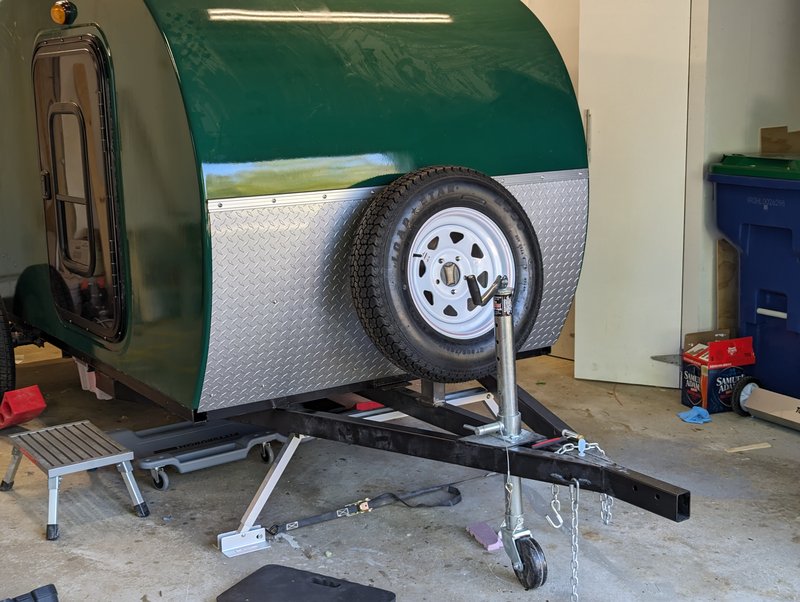 Got it tacked in place annnnd…. My welds went completely to poo poo. I mean they aren’t great in the first place, though functional I believe. Struggled for a bit before realizing I’d run out of shielding gas. With two welds left to do, on a Friday night. When all of the weld gas supply stores have closed for the weekend. Really want to get this finished up though so I think I’m going to try using some flux core wire, since I can get my hands on that right now.
|
|
#
?
May 11, 2024 14:13
|
|
|

|
| # ? May 14, 2024 20:50 |
|
|
1028.25 Well I’m beat, and I simultaneously feel like we got a lot done, and not enough. Going to write this down before I forget what we did.  Flux core wire saved the day and I was able to get the last welds cleaned up and finished. Ground away most of the last one I had attempted to make while running out of gas – was full of little voids. Overall I think I prefer having the gas and solid wire but, flux core was just fine and got the job done. 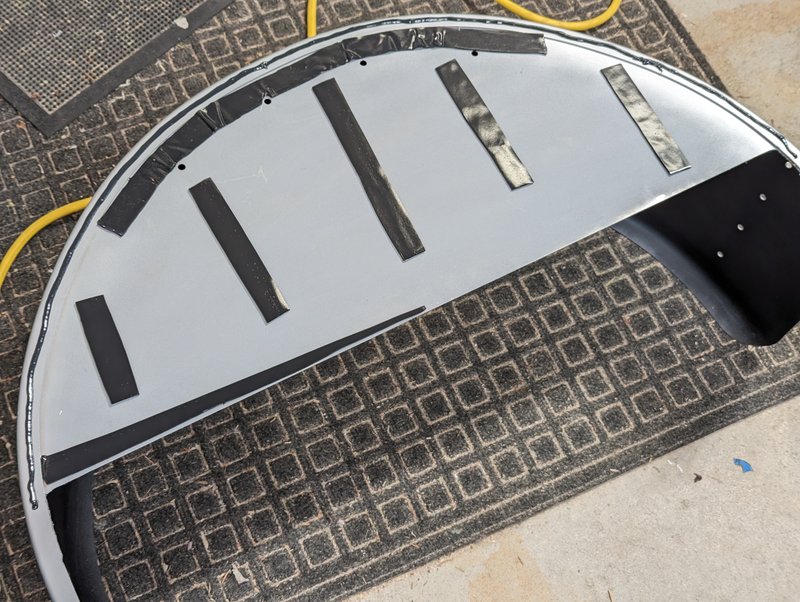 Fenders got some butyl tape strips along the back, and a bead of sealant at the top. No need for these to be water tight or anything, but if I can keep them from turning into a muck pocket that’d be nice. Hence the horizontal strip of butyl tape at one side – that’s on the “up” spinning end of the tire. I figure that should help with water getting blasted in there. Most of the butyl tape is really because the back is inset from the rim, and this helps even it out. That, with the sealant at the top, is all about stopping rub against the camper body.  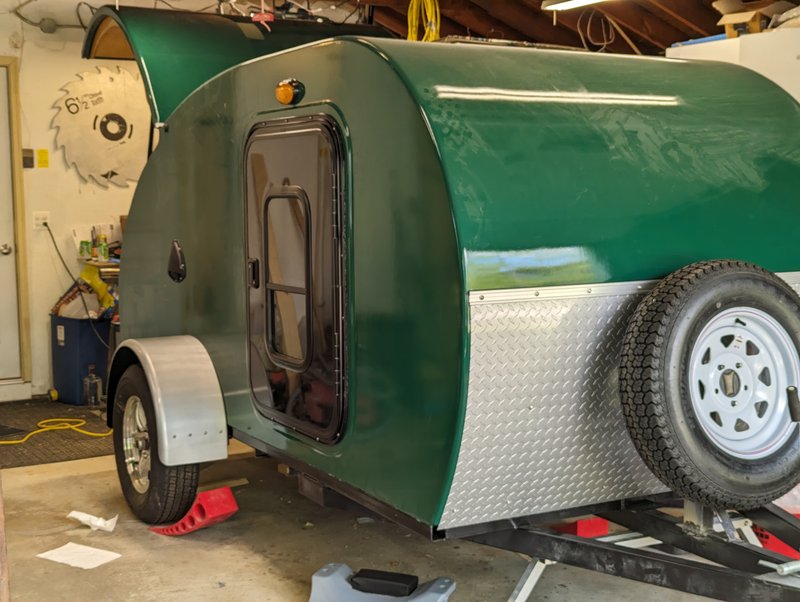 Bolting them up wasn’t bad but it was fiddly and slow, while working with a goo-covered fender. Got there eventually, and I’m pretty happy with how they look.   A variety of little tasks got knocked out – Paper towel holder for one. Which, you know, is hardly a task when you already plotted the location and drilled the pilot holes before completely skinning the hatch so you really just had to drive two screws. Also got the J channel fitted around the doors. This is an alternative to the junky metal “gutters” that come with the doors, does basically the same thing – helps divert flowing water and block the worst of the driven water from the main gaskets. Also looks fairly clean.  Interior light switches are in. Tight fit but not recklessly impossible to get all of the wires into my in-wall junction box I’d left for myself. I did later find out I put these all in upside down – I thought the red dot being in / pressed, was the “on” direction. It is not. Going to have to flip these, and a bunch of other ones at some point. At least I didn’t screw up enough to actually power any of the red status indicator lights. 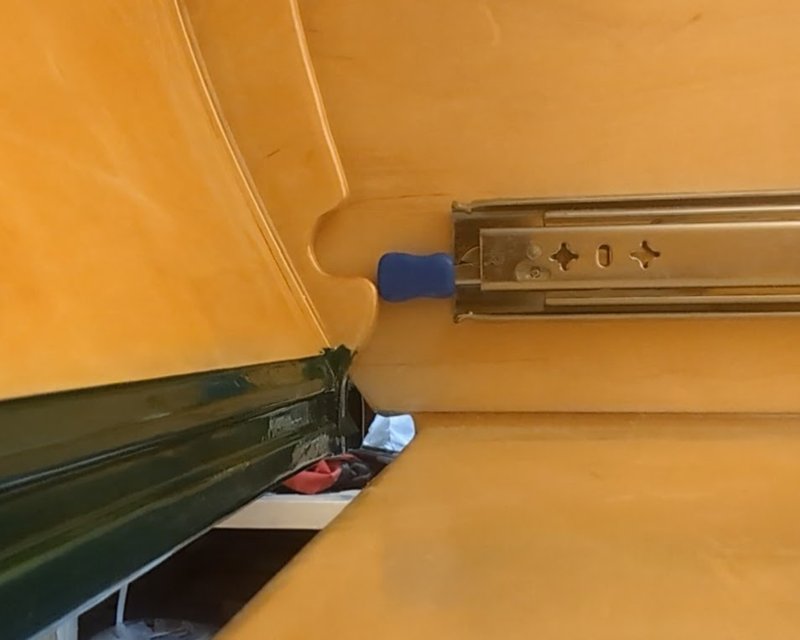 Put in the left side fridge slide to see if our clearance notch in the hatch, cleared. It did not.  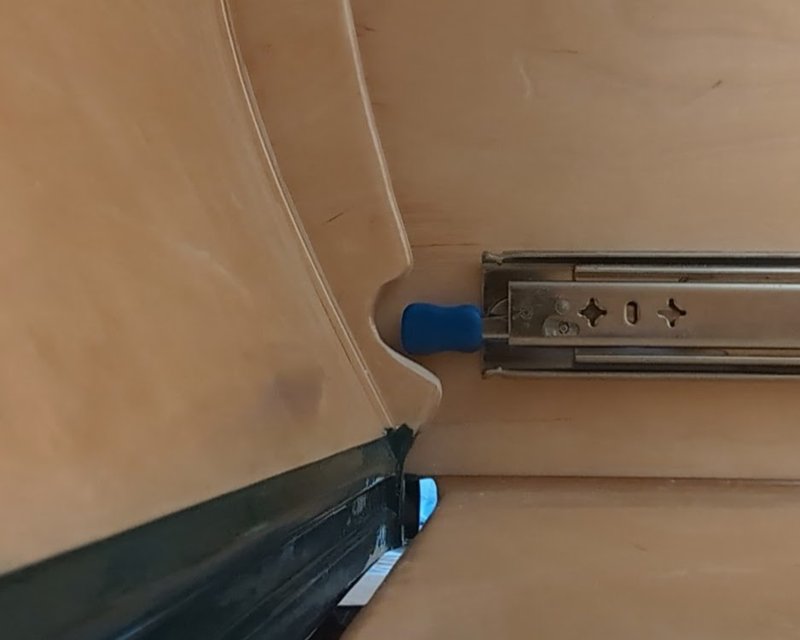 A quick bit of emergency surgery is performed, then a touch of smoothing. Slides past no problem, now. 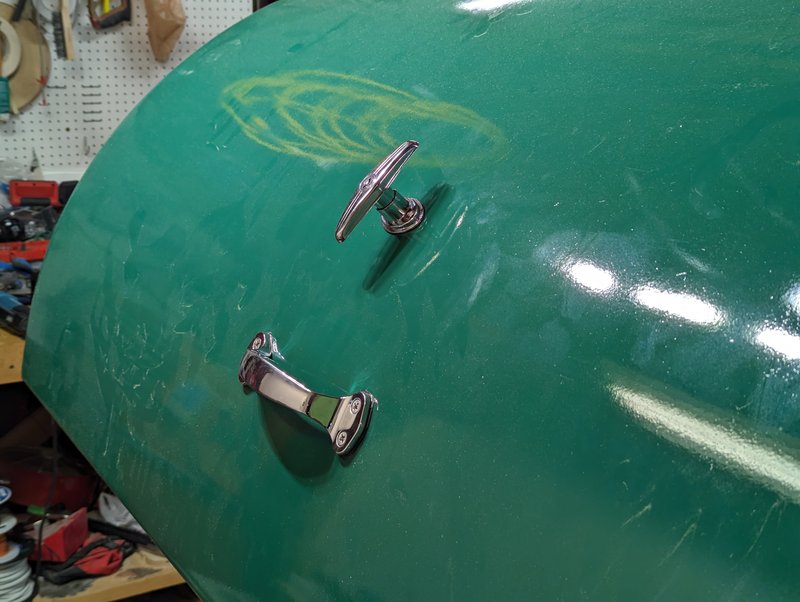 Some bigger tasks, too. The latching/locking system for the hatch is mostly installed now. Fitted this handle first – Hole was already there and prepped months ago. This handle free rotates and can be locked horizontally or vertically. Trying to pay very close attention to where exactly it is aligned at any given time. 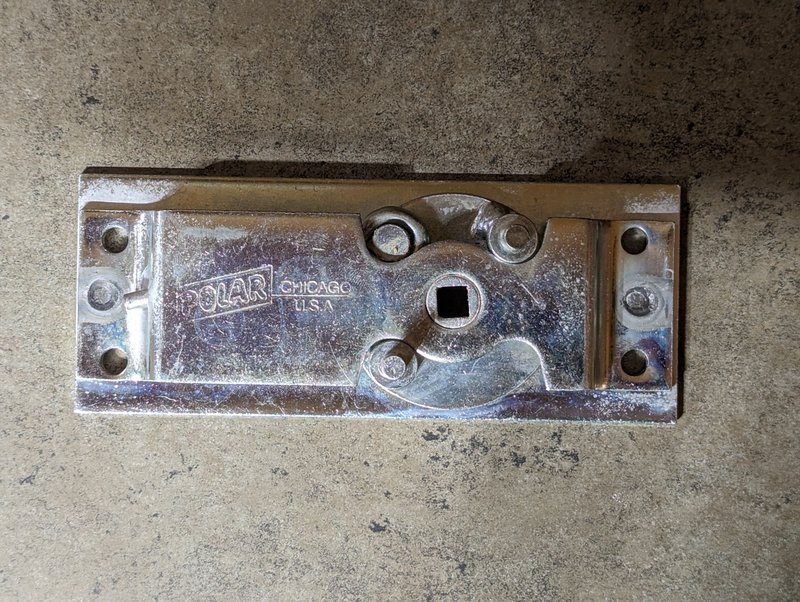 If you look at the latch mechanism itself, you may notice that the slot for the shaft, is not aligned with the body of the latch. There is zero play in this. We have to either misalign the outside handle with the whole vehicle body, or misalign the latch mechanism inside the hatch. 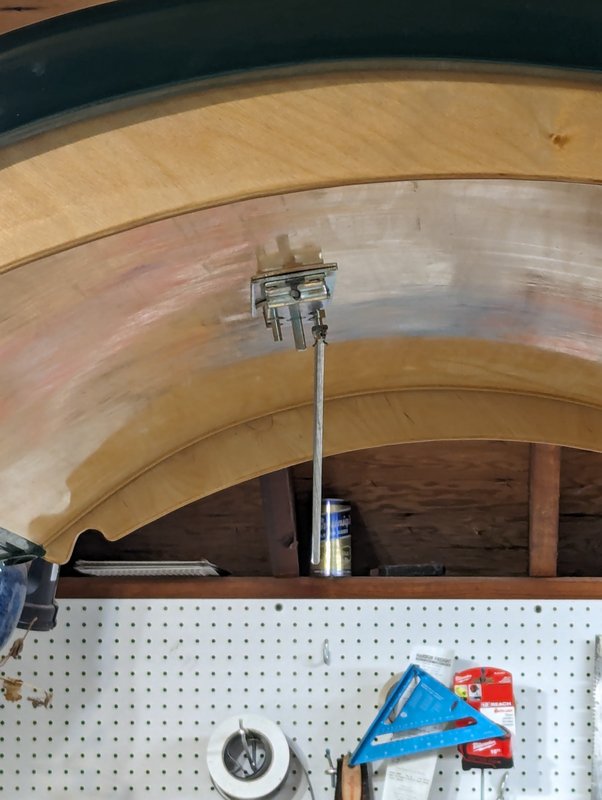 We chose to keep the outside nice and level. Inside though, we now have to align the closing rods themselves. These need to go from the latch out to the sidewalls, and should be as straight as possible with reference to the hatch itself. 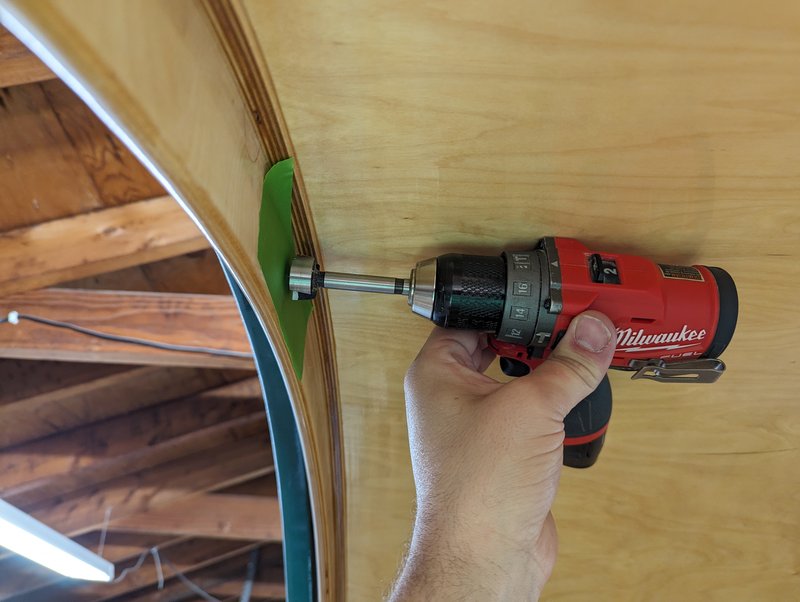 Once we picked an angle, marked the spot. Used a 1” forstner bit to make a small spot face. I was just barely able to get the forstner to land flat where I wanted, when my drill’s body was pressed up against the hatch wall.  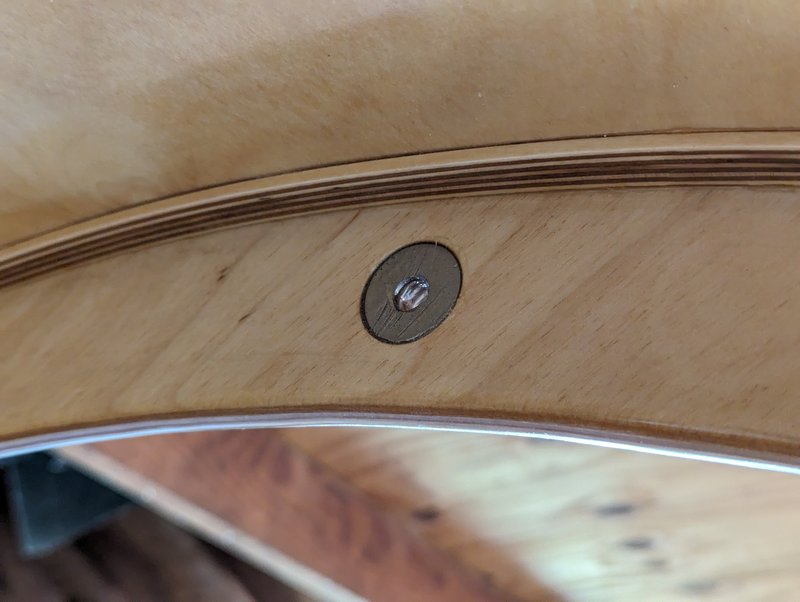 A spot face, so that the fender washers here can sit snugly into the hole. Scratched these up to try to give something for the epoxy to bite onto.  The whole reason for the washer is to give these rods something to wear and push against, other than the wood of the hatch gusset. 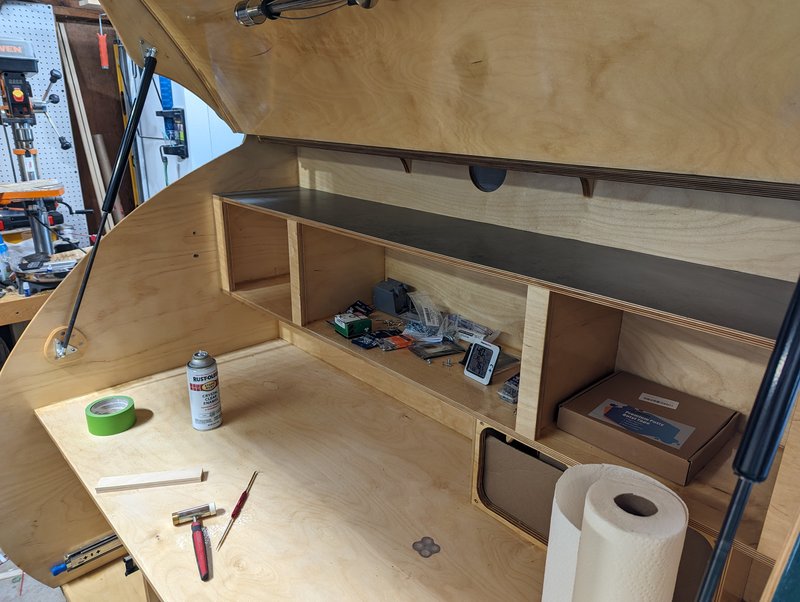 Got the cabinet topper piece of laminate installed. This was fun, because I discovered that contact cement is a fantastic stripper for polyurethane finish. Laid it out on top of the wood up there, then scrambled to scrape it all back off, then frantically try to rub the remaining glue off, and eventually tackle it with solvents and sandpaper – all the while the laminate itself was already covered in glue. Main countertop fortunately was much less eventful, for one thing I had never polyurethaned it because I always planned for the laminate.  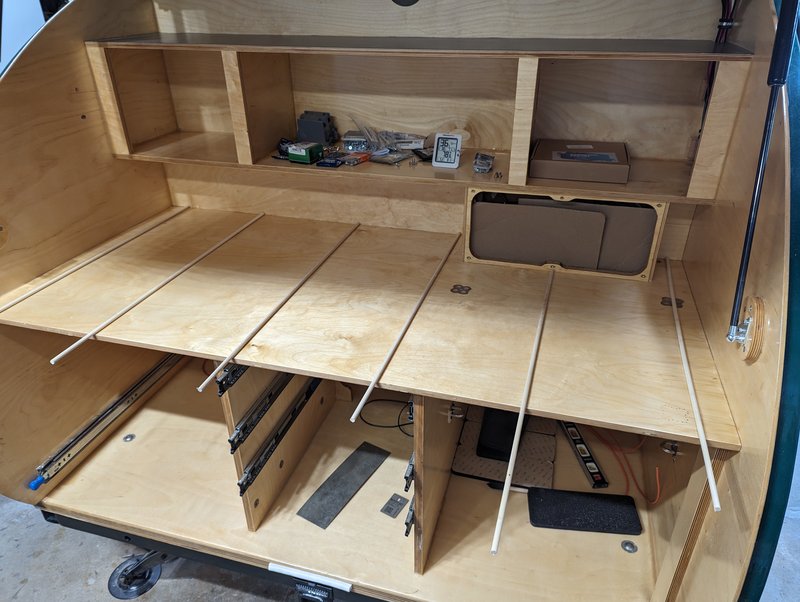 I’d seen this done before but never actually tried this myself, or really used contact adhesive like this. Basically you liberally slop cement out and brush it around on both parts, then let the glue dry until it’s just kinda tacky feeling. Lay some dowels down to make sure your pieces don’t touch each other. 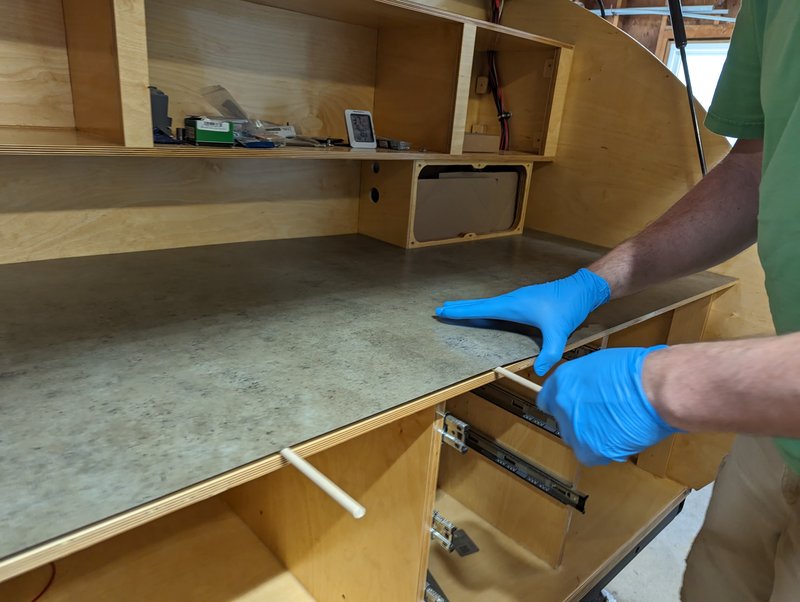 Set the sheet in place. Then, pull the dowels and let it drop. Pressure roll it to set the glue but honestly the bond is pretty strong just from the two parts touching. Countertop is sorted out now, just need to flush trim the edge once it cures.   Went back to work on the power system. Had to emergency order some extra lugs because I realized yesterday, there was another size I still needed. The primary wire here is 4 gauge. There had originally been a plan that these were going to pick up with a charge inverter but that didn’t happen so I’m left with somewhat overkill wire. Oh well. We’ll be able turn literally everything on at once and not have any worry at all. Anyway if it seems like I keep fitting the battery into it’s slot for fun, I assure you I do not. 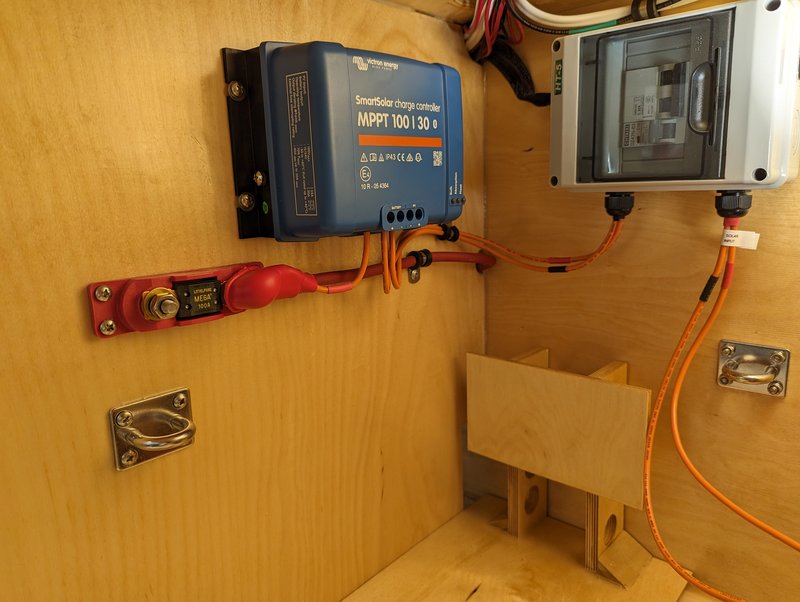 It’s just that this all barely fits. 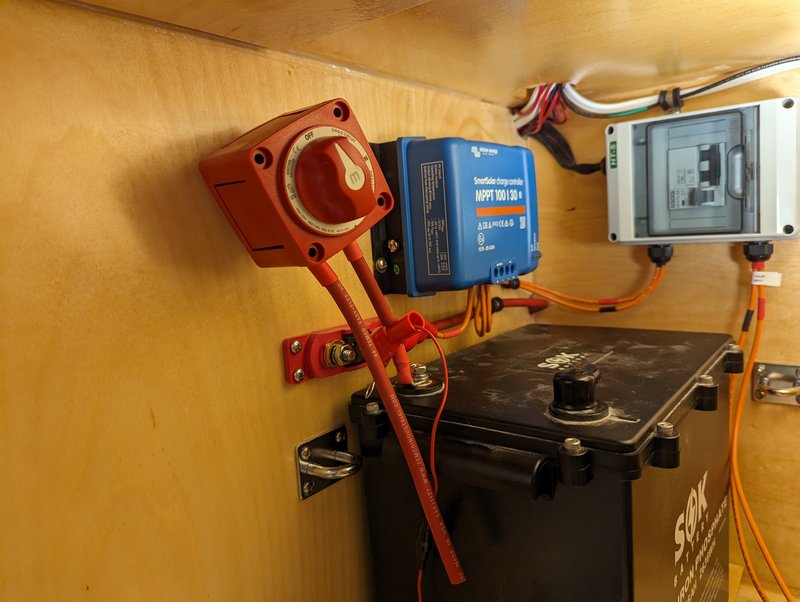 And this is a very slow, iterative process of slowly adding things to the mix. Crimp and test fit and align and bolt and unbolt and plan.  On my negative terminal, I’m running things through a Victron smart shunt. So picked because I like their app and the physical device controls aren’t bad, for whenever they stop supporting the app. Anyway to mount the shunt I am running low on room. So I used a solid copper strip, beaten into a bit of an offset, to both connect the shunt and also tie it in place. Left it just resting on top of the battery but anchored by this strip. 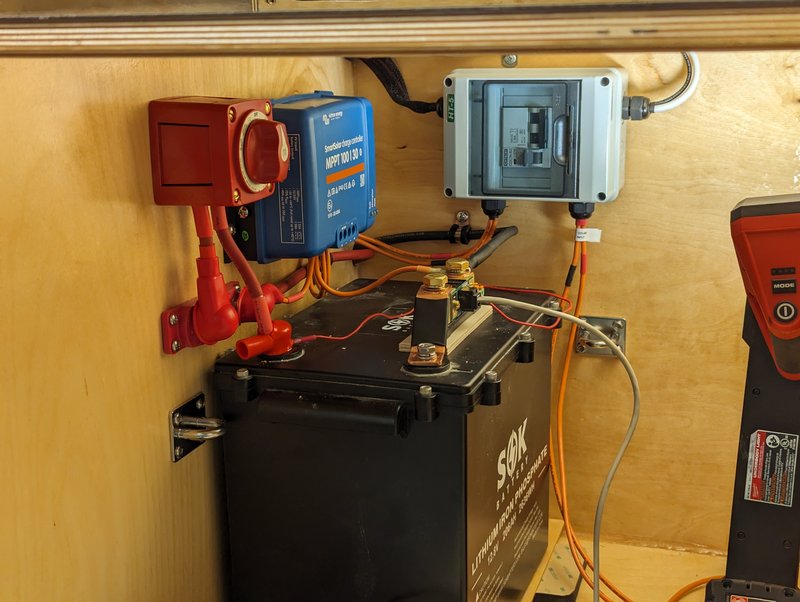 Finally got it all connected.There's some things here I'm not thrilled with and may change later. For one thing, it was right about as I took this photo that I realized I forgot to trim my foam pads for the battery seat, or pull their adhesive backings off. So that's waiting for a while now. But also I may want to move the battery shunt after all. I think it's fine where it is, but, it does pose some risk of a dead short to someone who goes in there to work on the solar charge controller, specifically if they go for the positive wire connections on the controller. You're extending a screw driver pretty much straight over the negative terminals on the shunt, and with pretty much no clearance.  But anyway - switched on for the first time. Everything I’ve tested so far works, with the exception that all light switches are irritatingly upside down. The LED light strip I used in the cabinet is a bit of a power hog, I think around 9 watts by itself. The main cabin lights, are only 8 watts. Super happy to see this on though. The timing is good too – the contact cement for the countertop wants to be warm for 72 hours straight. So I switched on my cabin/galley air circulator, closed the hatch, and left a heater in the cabin. The circulator seems to work great – it’s actually moving more air than I expected. Have thermometers monitoring for whatever low they see overnight tonight, will check up on that tomorrow.
|
|
#
?
May 13, 2024 03:23
|
|