


|
Man, lots of butcher block counters and benches and such around lately. Which is remarkable to me personally, because I'm doing the same drat thing. Mine is going to be 9' long and 30" deep and will be my workbench/desk in a room I'm redoing, just finished the floor and walls actually. Anyhow, I spent the weekend taking a bunch of money and turning it into dust. This is what roughly 40 gallons of pure walnut chips and dust looks like:  I like that you can see exactly where I switched from the jointer to the planer. To get all that sweet dust, I started with some rough boards (they'd been skip planed on one side, but that was it), cut them down to a manageable length (no reason not to, since I was going to chop them up anyhow):  Then I planed them down to a thickness:  Found some really nice grain in there!  In fact, some of it I had to save out for other stuff, it was just too nice to chop up:  After that, I cut them into sticks of their final thickness/width:  And then laid them out on the ground because the way I'm doing this is pretty wasteful and I wanted to know just how short I was going to be. I need about 6 more square feet, so like 10 board feet or thereabouts.  Obviously that's not the actual layout. They'll be all spread around so the ends don't line up, and I'll cut some of them shorter than they are now for more of that butcher block style. I mean yeah it's not precisely butcher block style, but it's in the area. I'm probably going to cut a thin dado along the edge of all of them and put a spline in there, kind of faking a tongue and groove assembly. More like tongue and groove and groove I guess, kinky. The alternative is putting in biscuits and that just sounds like a huge fuckin' hassle. Might also rabbet the ends of the boards so the end seams have some face to glue on as well.
|
 #
?
Apr 24, 2017 16:10
#
?
Apr 24, 2017 16:10
|
|


|

|
| # ? May 30, 2024 21:05 |
|
|
Skippy Granola posted:Get thee a jack plane son.  I recently dug this out of my dad's loft and repaired the rear handle but I've no idea how to sharpen or use it. The blade has a slight curve to it (and some notches too) I also have a corded power planer, would that work? I mean I'd not be that bothered if there were slight gaps in the face of the bench, I just need something flat that I can clamp things to easily.
|
|
#
?
Apr 24, 2017 16:34
|
|


|
Oh Paul Sellers has a video on restoring a hand plane. That's what I learned from - also I really like Record planes. Nice find! Anyway with a bench top I found it was pretty easy to roughly glue up my slab (do it in halves if it's more than 18 inches otherwise the glue sets midway through) and plane the whole thing flat at once. Ain't gotta be perfect but running the hand planer your boards will probably give a smoother gluing surface. I think what's more critical is just making sure it's all clamped together tightly and letting it cure for long enough
|
|
#
?
Apr 24, 2017 16:40
|
|

|
Ooh, that looks in nice shape if the blade isn't rusty. If you're interested in woodworking, that's a keeper. You'll need to learn to sharpen tools at some point anyway.
|
|
#
?
Apr 24, 2017 16:43
|
|

|
ColdPie posted:Ooh, that looks in nice shape if the blade isn't rusty. If you're interested in woodworking, that's a keeper. You'll need to learn to sharpen tools at some point anyway. Just surface rust, the blade edge is rust free but blunt as gently caress. I can keep my flat edged chisels sharp but yeah I need to invest some time learning how to do the curved plane blade.
|
|
#
?
Apr 24, 2017 16:55
|
|
|
After cleaning it a bit, get a rag and some light machine oil and put a light coat of oil on there to prevent further rust. IMO that plane doesn't need any "restoration", just disassembly, cleanup, and sharpening. If the blade has a noticeable radius, then it's set up for rapid material removal and you'll need another iron or plane to get a smooth, flat surface. There's loads of resources for how to use a plane. I think the Handplane Essentials episode of the Wood Wright's Shop (22 minutes) is a good intro and discusses maintenance and different types and uses of planes, including curved blades. Should be free on PBS's website, at least in the US.
|
|
#
?
Apr 24, 2017 17:23
|
|
|
When you guys say "butcher block" what do you mean? Edit: nevermind, according to Wikipedia at least, butcher block can be used to describe end and edge grain table tops, whereas I've always used butcher block to describe end grain and laminated to describe edge grain. GEMorris fucked around with this message at 18:01 on Apr 24, 2017 |
|
#
?
Apr 24, 2017 17:56
|
|

|
GEMorris posted:When you guys say "butcher block" what do you mean? I'm used to your definition as well, so this whole edge-grain butcher block thing confused me as well. I guess the vernacular is to use "butcher block" for any wooden countertop made out of a lot of small pieces of wood, regardless of how they're oriented.
|
|
#
?
Apr 24, 2017 18:09
|
|

|
Yeah I think the "butcher block" term has just become overloaded to mean "a bunch of small bits glued up to make a bigger bit." In my case, that's why I specifically say butcher block style, as even aside from the edge/end grain thing, it'd have to be a hell of a lot thicker to really make a block. Anyhow, I'm not sure what else you'd call that style. "Bowling alley" I guess.
|
|
#
?
Apr 24, 2017 18:18
|
|
|
ColdPie posted:After cleaning it a bit, get a rag and some light machine oil and put a light coat of oil on there to prevent further rust. IMO that plane doesn't need any "restoration", just disassembly, cleanup, and sharpening. If the blade has a noticeable radius, then it's set up for rapid material removal and you'll need another iron or plane to get a smooth, flat surface. http://www.pbs.org/video/2172600556/
|
|
#
?
Apr 24, 2017 20:34
|
|

|
Finished the table frame glue up tonight. This is the second of the two projects that pushed me to get into woodworking. I'm pretty excited to be nearly done with it.    The pegs are all drawbored, and that gave me one oh-poo poo moment at the very end of the glue-up. The bottom of one of the shelf stretchers splintered. I guess I drawbored a little too hard. It's not really visible at all from above, so I'm not too broken up about it, but the shoulder gap is definitely wider than I'd like. Correct:  Oh poo poo:  Next up is cleaning up the pegs, leveling it for our kitchen floor, then finishing and attaching the top! Probably have it done early next week, then I can move on to building a real bench.
|
|
#
?
Apr 25, 2017 02:04
|
|
|
Very nice work ColdPie, what's the top going to look like?
|
|
#
?
Apr 25, 2017 03:17
|
|
|
Thanks! The top is an edge laminated maple "butcher block," about an inch thick. I bought it from Michigan Maple via a local lumber yard. It's in that big piece of cardboard in the back of the first picture.
|
|
#
?
Apr 25, 2017 11:58
|
|
|
That will be a nice table. At least your little oops is on the bottom.
|
|
#
?
Apr 25, 2017 14:41
|
|

|
 Almost done, just got to finish the top and assemble the drawer.
|
|
#
?
Apr 25, 2017 15:12
|
|
|
ColdPie posted:Finished the table frame glue up tonight. This is the second of the two projects that pushed me to get into woodworking. I'm pretty excited to be nearly done with it. NIce work ColdPie. The workmanship looks great, especially for just starting out. Since this is one of your first big projects, how did you do the mortises'? I am pretty new at things, and struggle to do more advanced stuff like this without having very many tools.
|
|
#
?
Apr 25, 2017 15:18
|
|

|
Falco posted:NIce work ColdPie. The workmanship looks great, especially for just starting out. Since this is one of your first big projects, how did you do the mortises'? I am pretty new at things, and struggle to do more advanced stuff like this without having very many tools. If you are just starting out, don't get sucked into thinking you need the latest whizzbang piece of equipment. A hammer and chisel will dig mortices just fine, and there are plenty of YouTube clips on how to do it. Like all things, practice is essential.
|
|
#
?
Apr 25, 2017 17:16
|
|


|
Falco posted:NIce work ColdPie. The workmanship looks great, especially for just starting out. Since this is one of your first big projects, how did you do the mortises'? I am pretty new at things, and struggle to do more advanced stuff like this without having very many tools. Well, I've been at this for about two years. This is actually my fourth project, after a wall hanging coat rack (the first of the two impetus projects), a smaller table for my desk, and a tool chest. This is definitely the largest and best executed project so far, though. Earlier this year I wrote a blog post about my tools. Every tool I used is in this blog post, except the bit brace I picked up later. I used that for the drawbore holes. http://www.smokingonabike.com/2017/01/01/hand-tools-for-a-newbie-woodworker/ As for mortises, like NPR Journalizard said, it's just a mallet, a chisel, and time. I used bench chisels for the wider mortises and I picked up an expensive 5/16" mortising chisel. The mortising chisel is very nice to have, but you can get by with bench chisels to start. I also used the brace to bore out much of the waste for the deeper mortises in the lower stretcher. It wasn't as clean, but was much faster and got the job done. I like writing  and I've been taking pictures, so I'm planning to document my projects as I complete them. What I did, why I did it that way, what went well, what didn't, etc. and I've been taking pictures, so I'm planning to document my projects as I complete them. What I did, why I did it that way, what went well, what didn't, etc.
|
|
#
?
Apr 25, 2017 22:11
|
|
|
Anyone familiar with a Scheppach DMT 175 wood lathe? There's one for sale locally for cheap (95�). I am going to look at it tonight or tomorrow. I have an old Coronet Major lathe at the moment, I am happy with the lathe, high quality whereas the Scheppach brand is only mediocre (the model looks solid enough from pictures though). But this lathe has two important things my current lathe lacks: -Headstock clearnace is massive on this lathe, my current lathe is limiting me, I want to turn an entire stool seat on the lathe but I cannot. -5 speeds, going down to 100rpm, that is excellent, my current lathe even with the retrofitted 1400rpm motor is too fast most of the time. So anyone familiar with this, world ugliest color scheme: 
|
|
#
?
Apr 26, 2017 07:55
|
|

|
After making my first drawer I've come to the conclusion that I hate drawers. Dry fit everything and it was perfect! Glued it up yesterday, clamped it up nice and solid. Go to slide it in today and the bottom edge of the sides is bowed out slightly so it doesn't fit, top edge is still perfect though. Did the mdf in the bottom slot swell out or something? It's taken me a lot of hours with sandpaper and a wide chisel slowly paring it down because the front of the drawer has a lip out to the sides meaning I can't plane or saw it down.
|
|
#
?
Apr 27, 2017 12:17
|
|
|
What's up goons, first time DIY & Hobbies poster here. My girlfriend and I decided to try our hands at building a simple sound diffuser from internet plans. Admittedly, we should have done more sketching/planning beforehand, but the end result is decent for a first attempt. The original plans called for a 2' x 2' sheet of plywood, and multiple cuts of 2" x 2" slabs. Should mention that we're stationed overseas in China, so everything is in metric. We decided to build a 2' x 3' diffuser instead (roughly 61 cm x 91.5 cm), using the only square slabs we could find (roughly 3.7 cm diameter). The end measurement conversion happily gave us pretty much the perfect amount of space to take the original plans, double, and mirror them on each side. The downwards length was longer than the internet plans, so we continued for another 1/3rd of the pattern downwards. After cutting, hand sanding each slab, gluing, and applying 1 coat of mineral oil, the end result is this: Here it is halfway through the oil process.  After the final drop of oil is applied. All in all, definitely a first attempt. But it did however open up a new appreciation and desire to do more projects. EDIT: changed the image host. They should appear now no problems. Primordial Soup fucked around with this message at 11:45 on Apr 28, 2017 |
|
#
?
Apr 27, 2017 13:42
|
|
|
Well Igot that lathe, came with a half dozen good looking chisels and a 3-jaw chuck (didn't think they had those for wood) and jacobs chuck and other stuff. Hard to say no to that.
|
|
#
?
Apr 27, 2017 17:37
|
|
|
Yeah 3-jaw is pretty uncommon for a wood turning Chuck. How rigid is the frame? That was my only reservation based on the photo.
|
|
#
?
Apr 27, 2017 19:12
|
|
|
I don't think I've ever seen a lathe mounted on a wall before.
|
|
#
?
Apr 27, 2017 20:05
|
|

|
Spookydonut posted:After making my first drawer I've come to the conclusion that I hate drawers. MDF does have a habit of swelling up a fair bit when it gets wet so i guess glue could cause swelling.
|
|
#
?
Apr 27, 2017 20:22
|
|

|
GEMorris posted:Yeah 3-jaw is pretty uncommon for a wood turning Chuck. How rigid is the frame? That was my only reservation based on the photo. I didn't notice anything obviously wrong with it. I think the design will rely on a solid base to be bolted to. Mine does not look as good as the one in the photo. I bought this as a project mind you. I will stip and repaint and clean all the parts. I might even weld on some structural supports. I found the catalog and the 3-jaw chuck was a factory option, as was a 4-jaw chuck: http://www.scheppach.nl/downloads/DMT%20175.pdf
|
|
#
?
Apr 28, 2017 04:42
|
|
|
Primordial Soup posted:
tinypic doesn't play nice with the forums. I suggest imgur
|
|
#
?
Apr 28, 2017 05:04
|
|


|
What do you call this type of turning in english? In swedish its called sk�rsvarvning or "cut turning", I think it might be called shear cutting. Not sure. The long and short of it is, lower RPMs and you angle the tools much more to make it slice and cut like a plane, instead of a scraping action. Upside is way less dust, way nicer finish, sometimes no sanding required. Downside is you need very sharp tools and a lathe that can run lower RPMs, as it's more prone to get catches. https://www.youtube.com/watch?v=Esul3DOI5pw
|
|
#
?
Apr 28, 2017 06:33
|
|
|
A bunch of lathe tools will do cutting provided they are used correctly and also sharp. Bowl gouges do a lovely job of that sort of stuff and once you have it balanced can turn the speed up. When I've done between centres stuff with a skew chisel I had the lathe running as fast as it would go and the shavings I was getting where pretty close to a plane shaving just thinner. A bowl gouge when it's working correctly will do the same sort of cut. There is video's on Youtube that show how they work as theyre a little different to most other tools.
|
|
#
?
Apr 28, 2017 10:49
|
|
|
Yeah, I was gonna say, a skew should make nice shavings, but plenty of others will as well. Heck, even a nice sharp roughing gouge will produce meter-long shavings, if the wood allows for it. And that's the other part, the wood has to be able to do it. As a reference, you aren't going to get long shavings with kiln-dried oak, but a bit of firewood-pile hemlock? Sure.
Bad Munki fucked around with this message at 15:11 on Apr 28, 2017 |
|
#
?
Apr 28, 2017 15:08
|
|
|
Over here it's recgonized as a distinct form of old-timey turning dating back to when lathes where man powered and thus much slower. I got a book about this kind of turning infront of me as I type this. The intro to this old book I found 2nd hand says (translated from swe):quote:An old respectable technique, that as we've previously mentioned almost disappeared entierly, is the woodturning using the shear cutting method. It is a method that with older generations was considered the only acceptable method of turning, and one used primarly two types of turning tools, that is gouges and chisels ... In most cases lathes were made from wood and hand forged metal parts. Despite substandard equipment and low RPMs a high rate of production was achievable using a well learned cutting technique .... This book is called "Tr�svarvning enligt Sk�rmetoden" by Willie Sundqvist and Bengt Gustafsson and I was recommended it by other turners as a good intro book. No longer in print and only in swedish. Other sources like an intro to a turning course describes it thusly: quote:There are two basic methods when turning in wood, scraping and cutting. In scraper turning, the tool is bluntly sharpened and a fairly high speed is used on the lathe. The material removed from the wood becomes dust or fine chips, which gives a dusty environment to stay in. The technique requires that the objects be sanded a lot after the turning is complete. So here they are regarded as different techniques, maybe the lines are more blurred in anglo-saxon countries. Anyway got my lathe home: 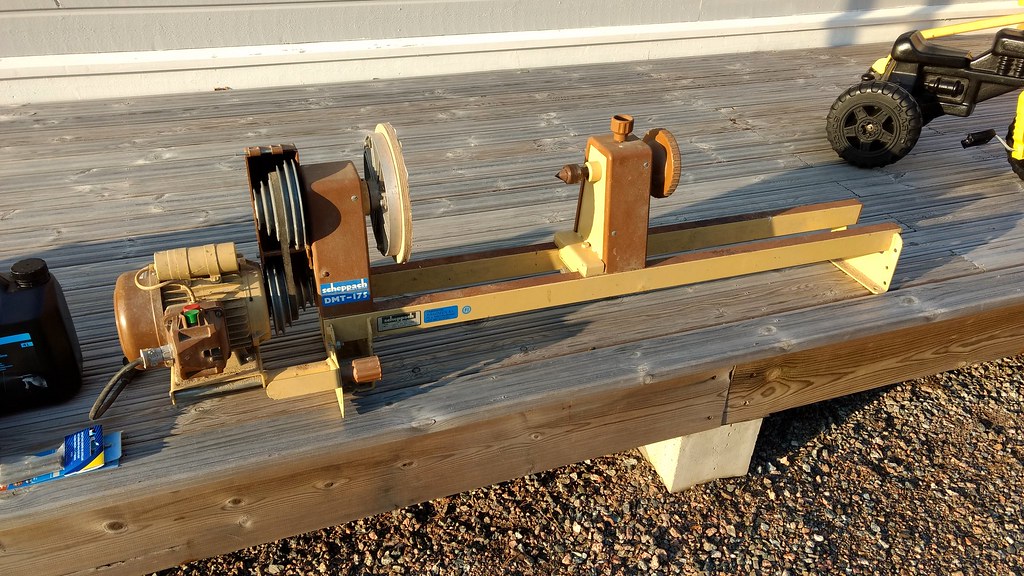 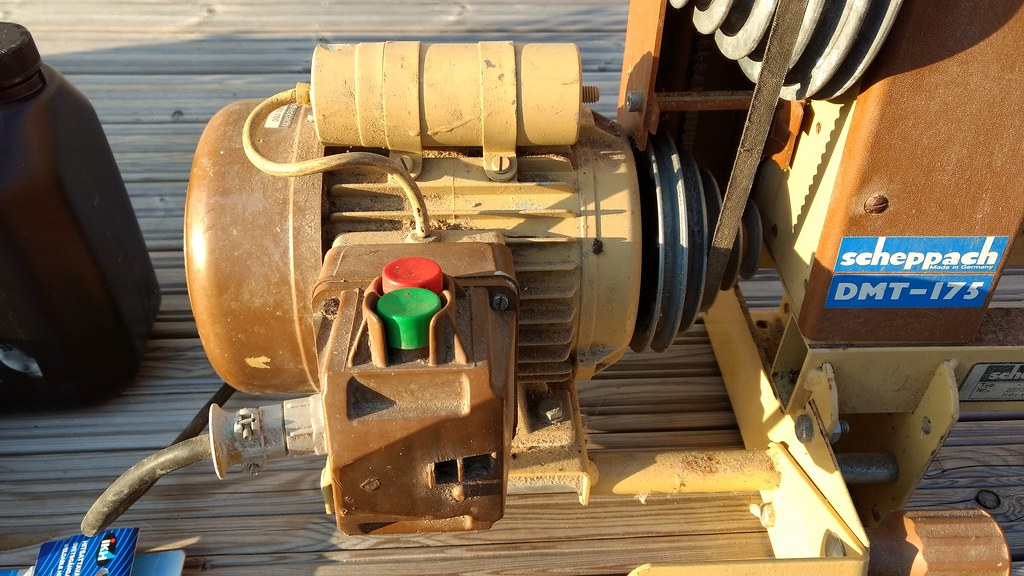 Basket of tools 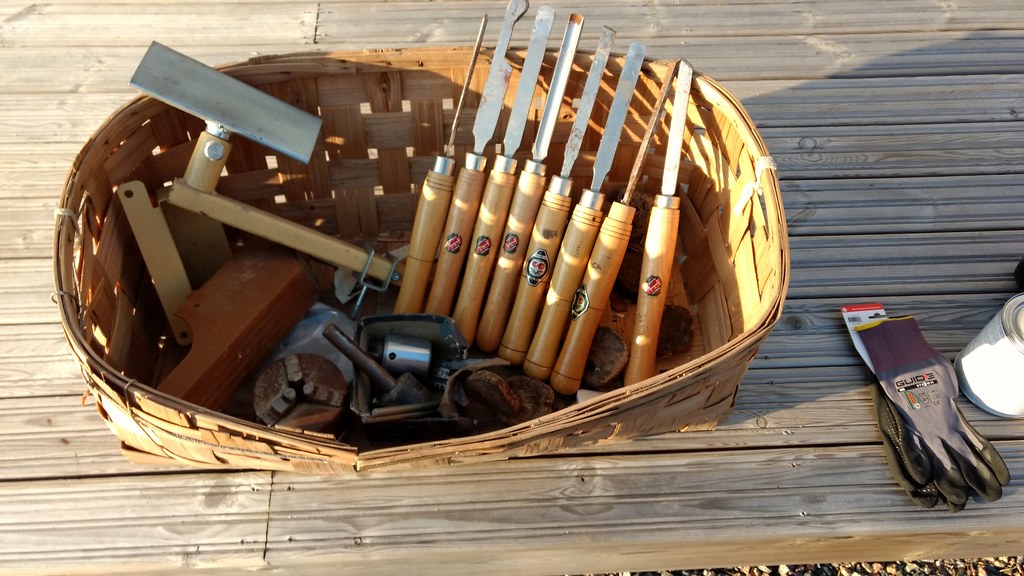 Chuck but no chuck key that I can find. 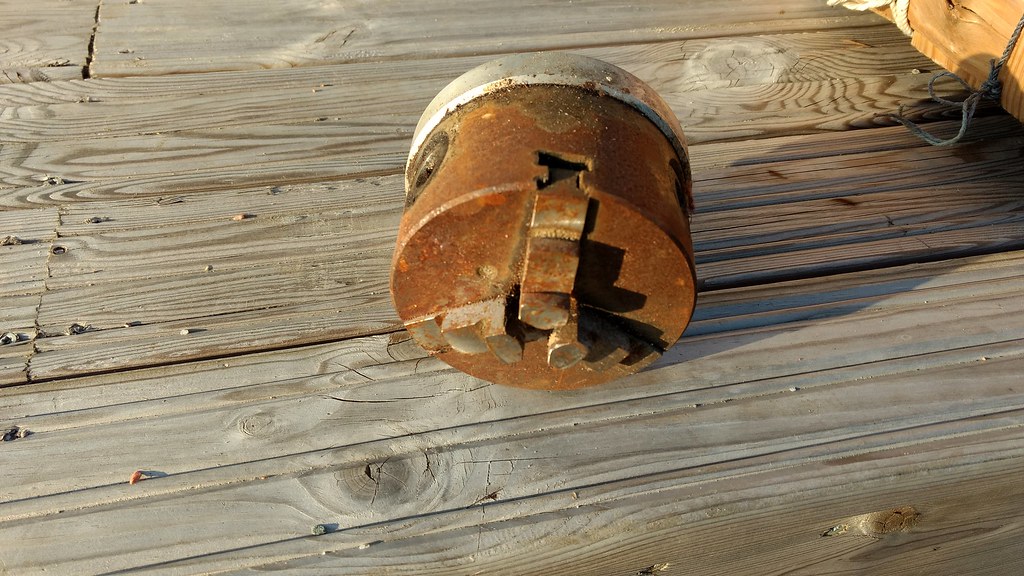 Says made in west germany on some:  And some other brand on others: 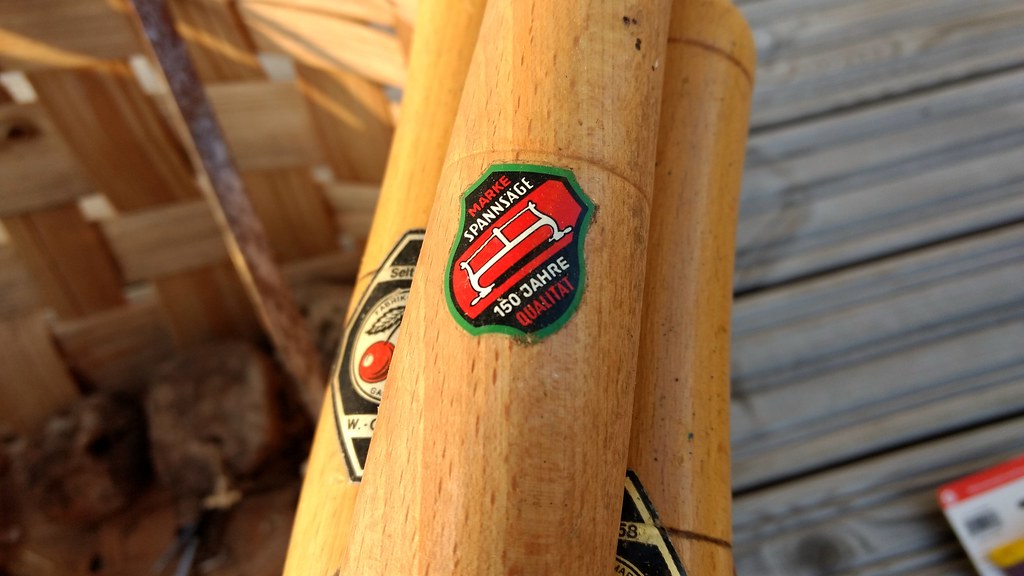 Build quality wise, nowhere near the Coronet Major which is like an artwork. But it's pretty solid nonetheless and yeah, 5 vs 3 speeds and almost 7" height of the headstock vs 4.5" It's already disassembled and today I will be removing the paint and giving it a new color because screw this look. Silver grey hammerite and black is what I am thinking.
|
|
#
?
Apr 29, 2017 07:09
|
|
|
I made my first purchase today for a piece of wood (5"x1/2"x24") that I have no planned project for it. Is there a place, or do you guys have cool ides of what I might be able to do with it?
|
|
#
?
Apr 29, 2017 18:09
|
|

|
What kind of wood?
|
|
#
?
Apr 29, 2017 18:42
|
|

|
huhu posted:I made my first purchase today for a piece of wood (5"x1/2"x24") that I have no planned project for it. Is there a place, or do you guys have cool ides of what I might be able to do with it? I suggest rebranding it as a primitive distressed cheese board and reselling it for 50 bucks.
|
|
#
?
Apr 29, 2017 19:27
|
|

|
Thumposaurus posted:What kind of wood? african padauk I want this piece of wood for me! Not some shmuck on Etsy.
|
|
#
?
Apr 29, 2017 20:26
|
|
|
His Divine Shadow posted:Over here it's recgonized as a distinct form of old-timey turning dating back to when lathes where man powered and thus much slower. I got a book about this kind of turning infront of me as I type this. The intro to this old book I found 2nd hand says (translated from swe): Nice haul 
|
|
#
?
Apr 29, 2017 20:32
|
|


|
Holy poo poo the Taunton's complete illustrated guide is amazing. Also that drawer I was raging over? I made it like 5mm too long.
|
|
#
?
Apr 30, 2017 09:04
|
|
|
Spookydonut posted:Also that drawer I was raging over? I made it like 5mm too long. Time to cut a 5mm-deep depression into the false front.
|
|
#
?
Apr 30, 2017 15:26
|
|
|
TooMuchAbstraction posted:Time to cut a 5mm-deep depression into the false front. That would turn a 5mm problem into a 10mm problem? I just glued some blocks to the front so it looks like its closed.
|
|
#
?
Apr 30, 2017 15:43
|
|
|

|
| # ? May 30, 2024 21:05 |
|
|
My first piece of furniture, covered in flaws that probably only I'll notice. The cheat I used for the too deep drawers.  In the final location, but still need to paint it. 
|
|
#
?
Apr 30, 2017 17:15
|
|