


|
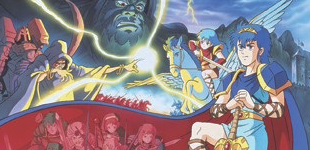 What is Fire Emblem? It’s a strategy RPG developed by Intelligent Systems for Nintendo. It generally has a pretty generic fantasy plot, permanent characters, and most importantly, permanent death, emphasizing player choice and consequence. There are 16 games in the series currently, and I’m hoping to play most of them, starting with the very first game, and moving forward chronologically. Rules of the LP There are three main rules for this LP (or series of LP’s). First, it will be an ironman run. I will be posting every movement every character makes, the first time they make it. No resets for unfortunate deaths (outside of Lords), or missing bonus content/objectives. Second, I must use my lowest level characters currently on the roster. Levels are cumulative (so promotion is just +1 to level, I’m not considering a character level 21 if they promote at level 10), and pre-promotes are presumed to have promoted at level 20. Third, Lords are not suicidal. This means I can’t just soft reset a level if something doesn’t go my way. If at any point the game becomes unwinnable, I will restart the game in its entirety. I fully expect this to happen several times. I also won't be killing off characters specifically to get them off the roster (though I reserve the right to send them on dangerous missions). Are you any good at Fire Emblem? Absolutely not! I’m no Fire Emblem pro. I’m not Artix, Fedule, or Blastinus. I’ve got limited experience with the franchise (I beat Fire Emblem GBA and Sacred Stones not too long after release, took a run at Path of Radiance in my early teens, beat Awakening when it came out, and recently beat Sacred Stones again on Normal), and no in-depth familiarity with the mechanics. Math formulas bore me, and I can only keep track of growth rates in the most basic way. Generally, I play conservatively, reset when people die, and almost always end up leaning on a small core of god units by the endgame. Hence the rules. I think it will be interesting for readers to get a more in-depth play-by-play, to see the thought process, or lack thereof, behind the moves that lead to death or success. I’m hoping that by using my lowest level characters, I’ll be forced into different playstyles than I normally use, and the difficulty of the rules combined will force me to engage more heavily with the numbers side of things (Kind of like Nuzlocke runs in Pokemon). Because of the above, this will not be a comprehensive LP. I won’t be getting everything there is to be got. I won’t be looking up things that are mission-specific, and because of the low-level character restriction, there will be times when I miss a recruitment because I can’t bring that character, or where I miss loot because, whoops, my thief is too high level. Why start at the first one? Because my brain is broken in a specific way so that when I look at something comprehensively, it must also be chronologically. I`m also hoping this lives long enough to be able to showcase the development of the series, and generally, I feel like the older games get less love than the newer ones, specifically GBA onwards. Anything else? I’m going to try not to get too far ahead of the thread. Because of the rules, there will be limited thread participation. Because of the second rule we can’t pick favorite characters to go on missions, but I’m hoping for discussion on strategy during levels (because I’m going to be showing each characters moves, I’m thinking it will not be long at all before each stage takes multiple updates), and should the LP get far enough, how to develop characters. Also, please avoid any spoilers for any plot not yet covered, and for any gameplay mechanics we haven't touched on. So if there is, for example, magic that can hit me from across the map on a specific map, please don't bring that up, or even tease at it in a way that makes it so it can be guessed. Thanks in advance!
|
 #
?
Sep 30, 2019 02:27
#
?
Sep 30, 2019 02:27
|
|


|

|
| # ? May 2, 2024 10:06 |
|
|
 Me and Fire Emblem? Almost exactly the same age.   Should I be going screenshot by screenshot through the very basic opening? Who knows, probably not. Am I? Yes, absolutely. 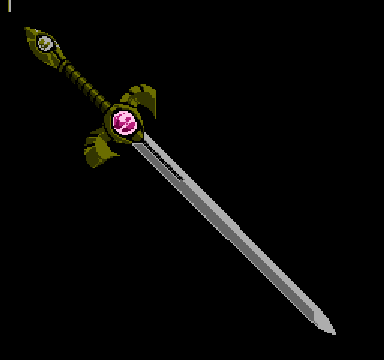 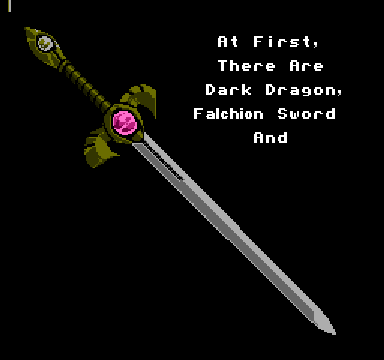 Also, for this intro, I’m just using basic png screenshots, once we get into the game proper I’ll be resizing and editing to make things look nicer. I haven’t learned how to make .gifs yet, but I’m hoping the animations here are bad enough we don’t need them until way later. The sword flashes here, by the way.  Name drop. Alright, so we have our three macguffins. 1 Dark Dragon, 1 Falchion Sword, and 1 Fire Emblem.  And title drop. I’m guessing the Falchion Sword and the Sword of Light are the same thing, but who knows, maybe we get two magic swords here. Now, for the splash screen. Are you ready to look at every class in the game? Because that’s what’s happening now. 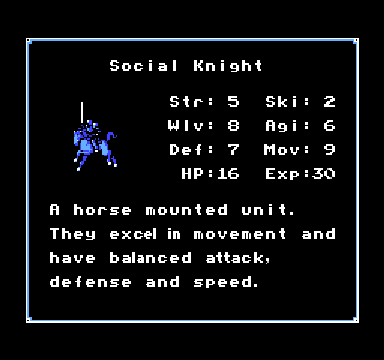 Social Knights are what later become Cavaliers. From my knowledge, they move quick, and have no real weaknesses, other than movement becoming tricky in rough terrain. These stats are also interesting to me for a few other reasons. They imply each class has identical starting stats, which will definitely not be the case going forward. Also, they have starting experience points? Alternately, this splash screen doesn’t know what it’s talking about. 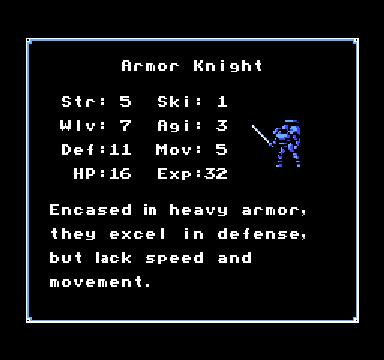 Armor Knights are strong, move slow, and hit hard. They have two more EXP than Social Knights. This is crucial. 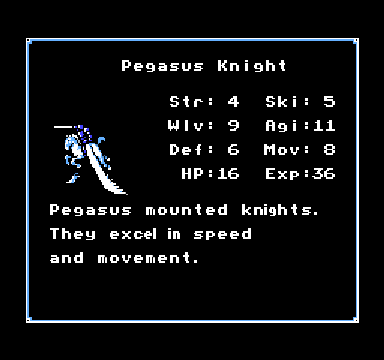 Pegasus Knights are like Social Knights, but squishier, with the ability to fly. I suspect we are going to see a lot of these things die. In this first game, they attack by a sword protruding from their face. 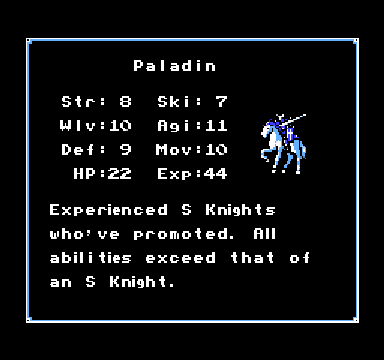 Paladins are promoted Social Knights. This (and Serene’s Forest, I promise I’ve done at least some research), tells me we still have promotions in this game. Good to know. They have two more wolves than Social Knights. 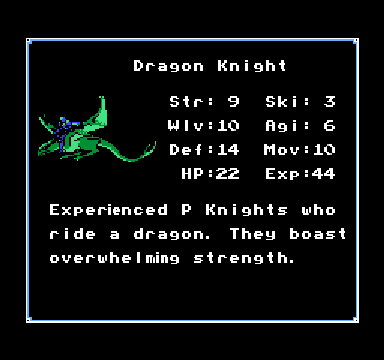 Pegasus Knights promote into Dragon Knights. They seem to get way tankier, but actively lose stats compared to the P Knights, which is interesting. 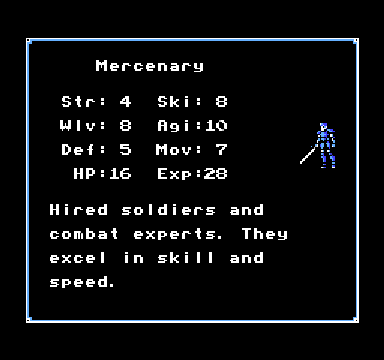 Mercenary’s, like Armor Knights but dodgy. 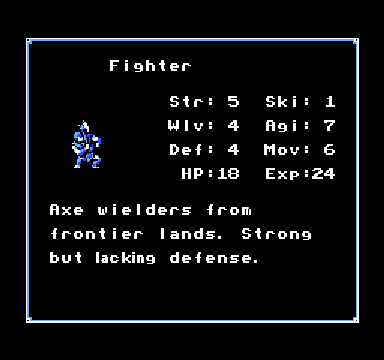 You can’t see it, but the Fighter seems to move by alternating squats. If this game is like any of the others, these guys will get little love. 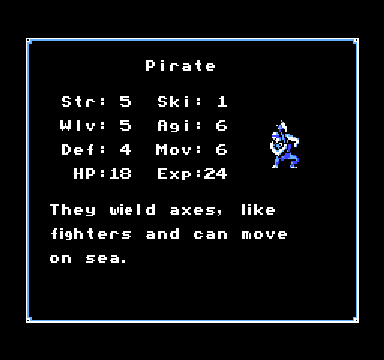 Pirates. Are they promotes from Fighters? The squats tell me yes, but the box text is indifferent. Stat-wise, they look equal to the Fighter, so maybe it’s a side-class here. 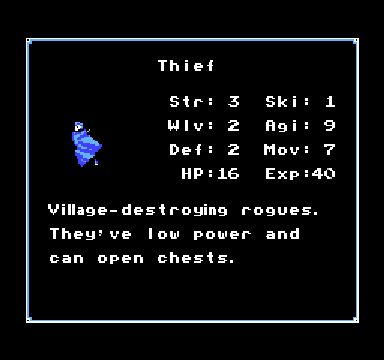 Village-destroying? That seems bad. That seems very bad. 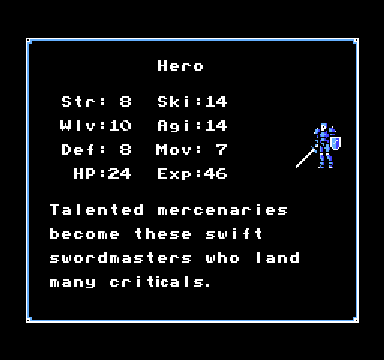 Promoted Mercenaries. Solid all-rounders. Our main character? Not a hero, apparently.  Archers here seem to be significantly less squishy than the games I’m used to, so it’s possible they won’t all immediately die. 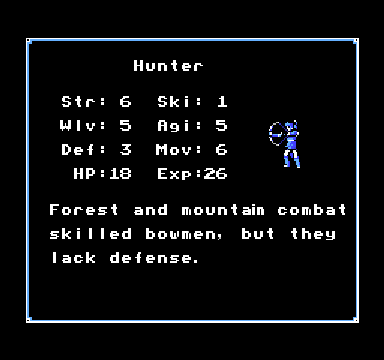 Archers Part 2. Eh. 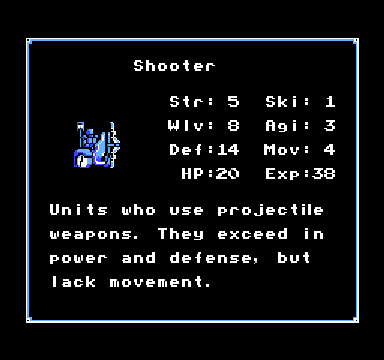 I don’t know if these are any good, but I want one. They have a chariot, an automatic bow, and what is either a flag or a parking meter. 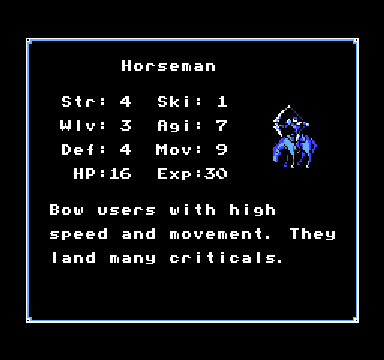 Archers on horses. This is a lot of classes, huh? I’m starting to think doing the full splash screen was a bad idea.  Archers Part Five, Arch Harder. 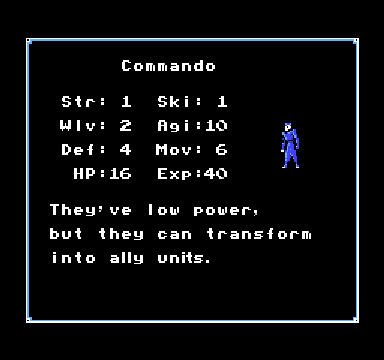 This, um…What? I am completely unfamiliar with this. Maybe it’s just an enemy unit? That could get real bad. Alternately, I get a person Ditto later. 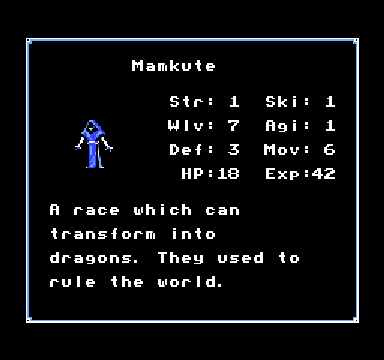 This seems pretty intense, given the other classes. If it’s like other games, they’re limited by their weapons, which won’t have a ton of uses. They used to rule the world. As dragons. As a game with Shadow Dragon in the name, I’m sure these guys won’t be plot-relevant at all. 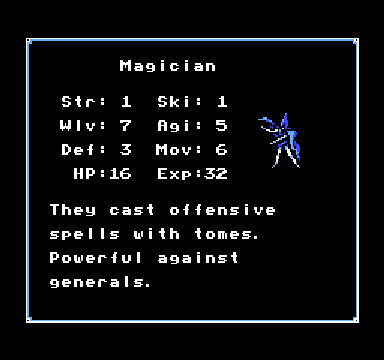 Magic! But no magic stats? Maybe Strength and Defense means both physical and magical? I like mages, they tend to be able to do very high damages from distances. 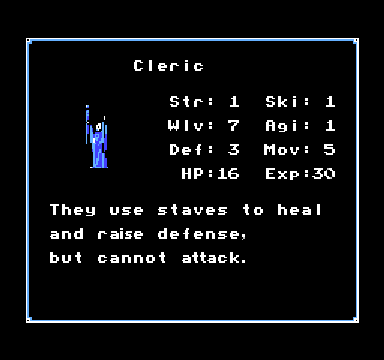 These guys will be bread and butter for us. They keep our people with sharp things able to keep stabbing. 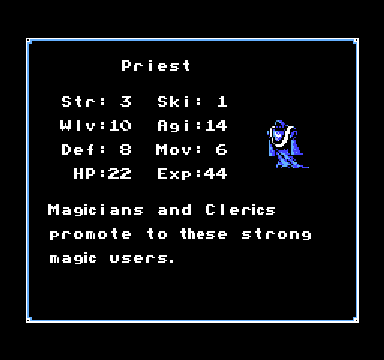 The apparent promotion of both Magicians and Clerics. Hopefully able to both heal and attack. I’m noticing there isn’t a 1 to 1 ratio of unpromoted to promoted classes, so maybe there’s just a lot of unpromoted classes that converge into the same promoted classes. 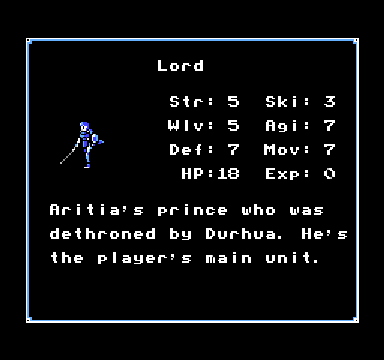 Our boy, Marth. He has no experience, and no throne. We hope to change both of these things. 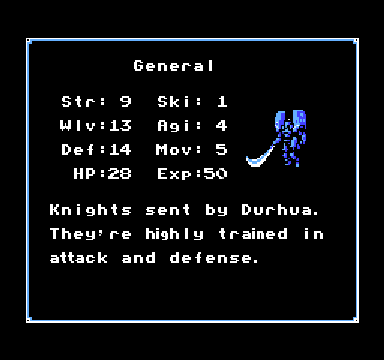 Those are…Some shoulderpads. I see now Kellam from Awakening was just following an age-old tradition. And that is a big sword. However, the blurb says they were sent by the people who dethroned us, so I’m guessing we might not get to control these guys ourselves. At least Magicians are powerful against them?  And that’s our splash screen reset, so there we have it, 21 classes! Next time, the game actually begins, and I try to avoid dying horrifically on the first level.
|
|
#
?
Sep 30, 2019 02:27
|
|
|
That general looks like a space marine from warhammer 40k.
|
|
#
?
Sep 30, 2019 18:38
|
|

|
Pharohman777 posted:That general looks like a space marine from warhammer 40k. Fortunately they don't seem to be proper pauldrons, so Games Workshop can't sue for trademark infringement.
|
|
#
?
Sep 30, 2019 21:02
|
|


|
This game and its remake are the only games in the series that I'd call well-designed for an ironman playthrough so you're playing the right one for your ruleset
|
|
#
?
Oct 1, 2019 00:13
|
|
|
Jumping in on ground floor. No resets and always lowest level units? Good luck!
|
|
#
?
Oct 1, 2019 02:42
|
|

|
cheetah7071 posted:This game and its remake are the only games in the series that I'd call well-designed for an ironman playthrough so you're playing the right one for your ruleset Yeah, this is something I have a bit of hesitation about, creating a ruleset around a fairly famously difficult series, which makes it even more difficult. But hell, hopefully it works. SMaster777 posted:Jumping in on ground floor. No resets and always lowest level units? Good luck! Thanks! Post coming up shortly!
|
|
#
?
Oct 2, 2019 16:05
|
|
|
 Alright, let’s begin. 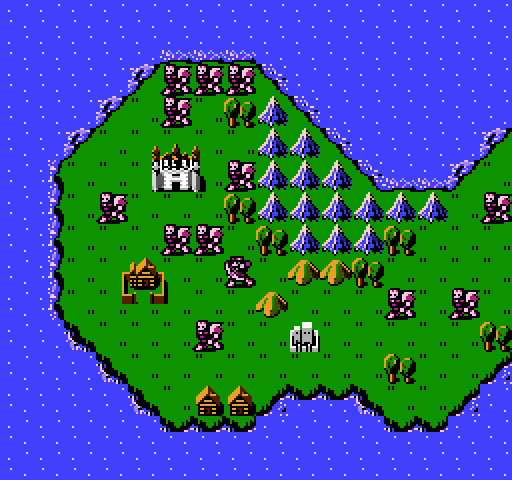 And while we’re at it, let’s up the resolution. I think that looks much better. 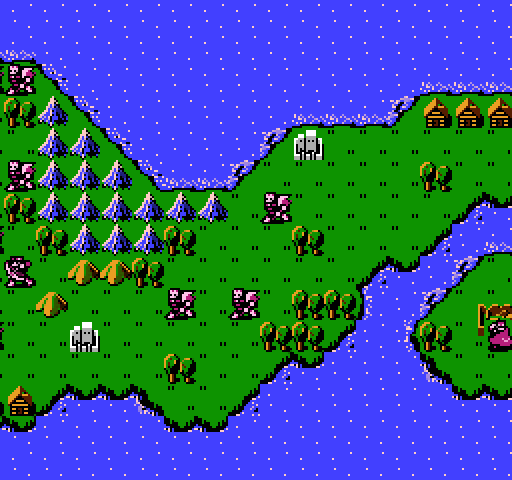 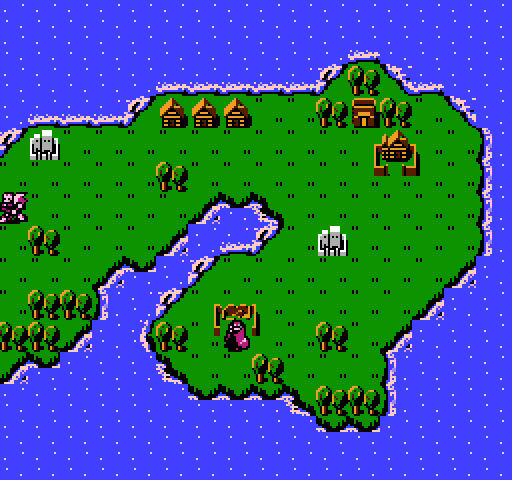 The game pans across the first map. It’s roughly half red units with sharp things.  Click here for the full 995x480 image Here’s how it looks all pieced together. After the pan, it fades to black, then suddenly  Blue units and text spontaneously appear. 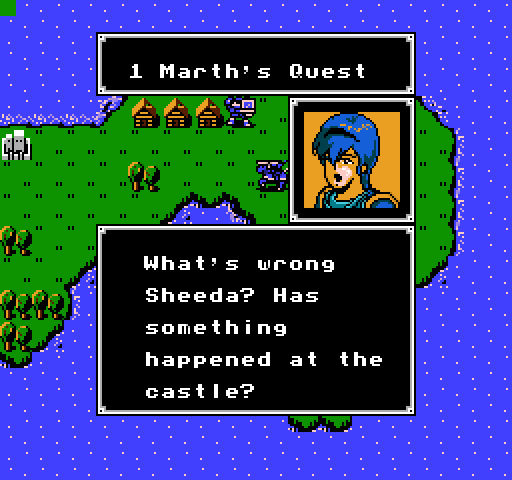 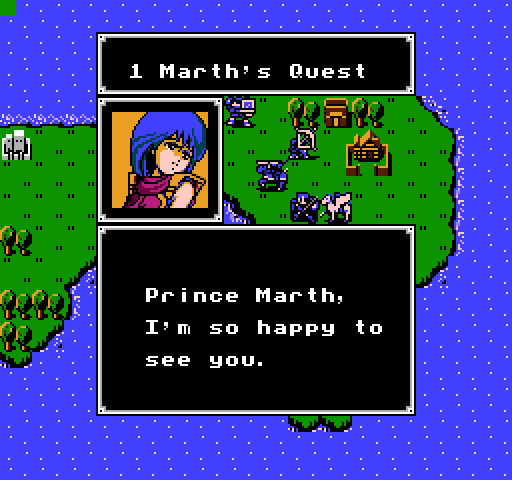 With our main mooks introduced, let’s make this a bit more space-friendly.  The Pirates of Garda suddenly attacked us. The castle has been taken and many people have been killed. Please, save my father! The Pirates of Garda suddenly attacked us. The castle has been taken and many people have been killed. Please, save my father! It’ll be alright Sheeda. Aritia’s courageous knights are inside this fortress. We won’t lose to a gang of pirates. Now, come with me to Talis Castle! It’ll be alright Sheeda. Aritia’s courageous knights are inside this fortress. We won’t lose to a gang of pirates. Now, come with me to Talis Castle! Meet our army in full, as it currently stands. At this point we’re given control of our forces. So, who do we got? 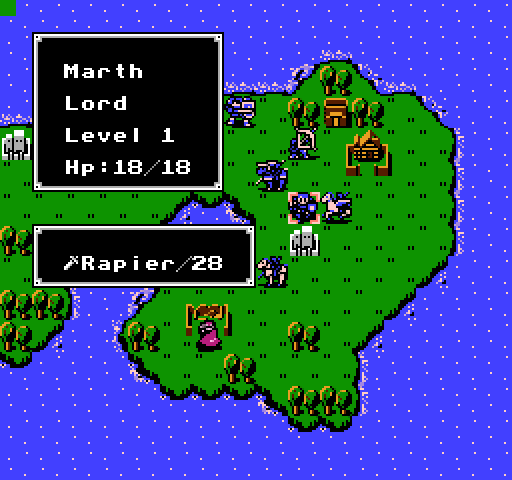 When you select him, Marth turns to face the camera. He’s got a rapier, pretty standard for a starting Lord. He’s level 1, with these stats. 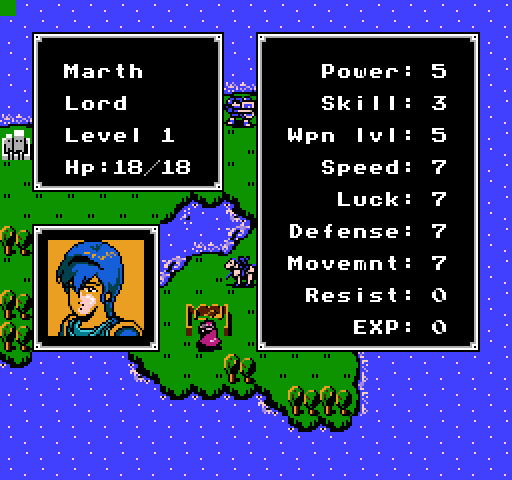 What do you know? It actually matches perfectly with the splash screen. Only now we have the additional stats of Resist and Movement, and we can’t make wolf jokes anymore. 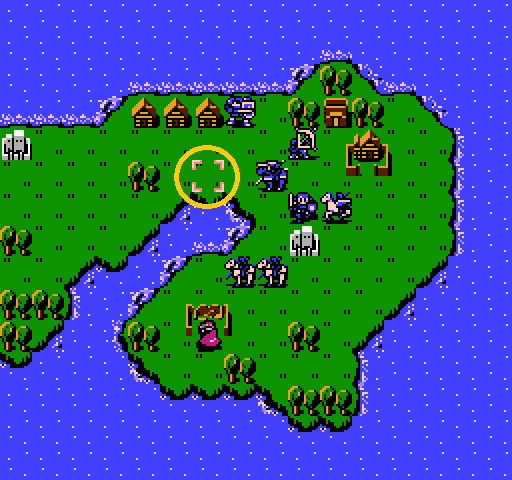 By the way, this little pink cursor is us, and is currently showing us a limitation of this first game. Marth is still selected, which is why he’s facing the camera, but we don’t get the blue/red squares showing movement and attack radius that we would in later games. Here, the only way you know you’ve reached the edge of a characters movement range is the cursor just won’t go any further. I’m sure this won’t bite us horribly. Moving forward in a look at our motley band of fools, here’s Jeigan. 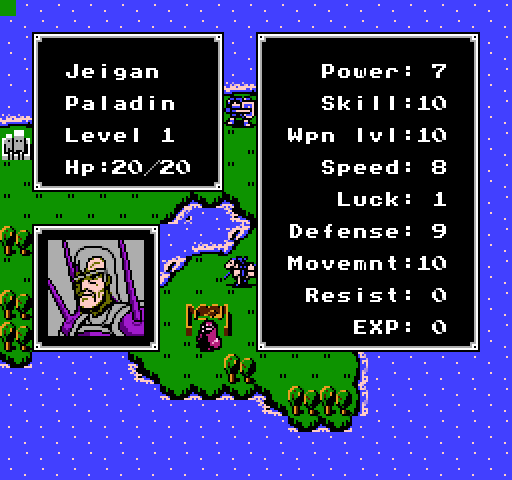 Jeigan is a punk. I may not know Fire Emblem very well, but I know Jeigan. His name is myth in bad growths, and Fire Emblem is a game all about growths. Luckily, Jeigan is a prepromote, which means he is effective level 21, and according to my second rule, will be immediately be benched for most of the game. Also? Jeigan lies. His abilities don’t even match the splash screen. Going forward, I’m going to be providing looks at our army semi-regularly, to see how they’re keeping up with their growths. Here’s the format I’m thinking about using.   We can see that Jeigan is below average in everything except skill, and that’s a problem, because here are his growths, as percentage likelihood per level.  With these growths, it is unlikely Jeigan will ever get better than a mediocre level 1 Paladin. Ever. The first mission we have to use this guy, he’s getting assigned to the most dangerous missions, and we’re hoping to have to make a call on his wife to share the bad news, because we do not want to use this guy. 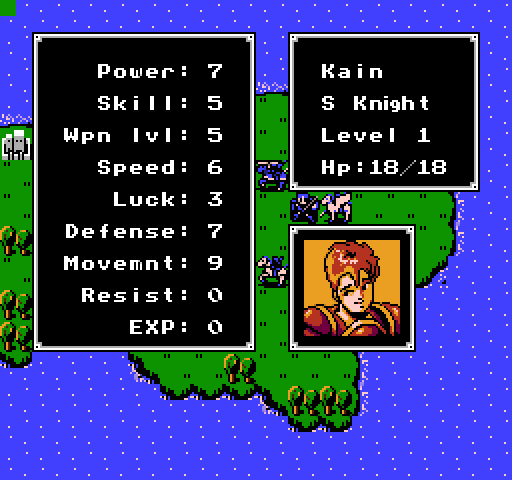 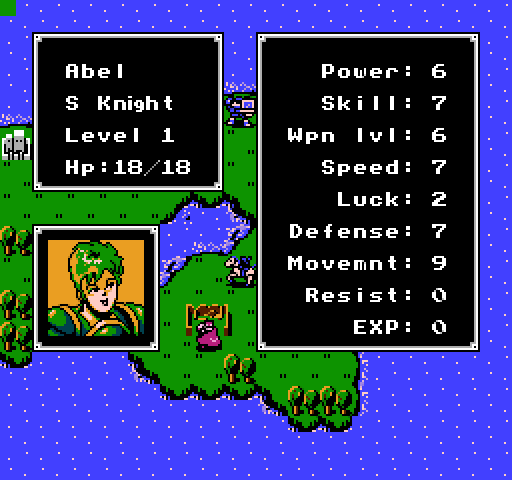 Down below we have Kain and Abel, named for the biblical brothers, hopefully with a better end. Fire Emblem games generally have a green and red cavalier that join super early, and are almost always decent units that can be used all game long. Abel’s a bit faster, Kain’s a bit stronger. I like cavaliers, so I’m hoping to get to use both a fair bit. 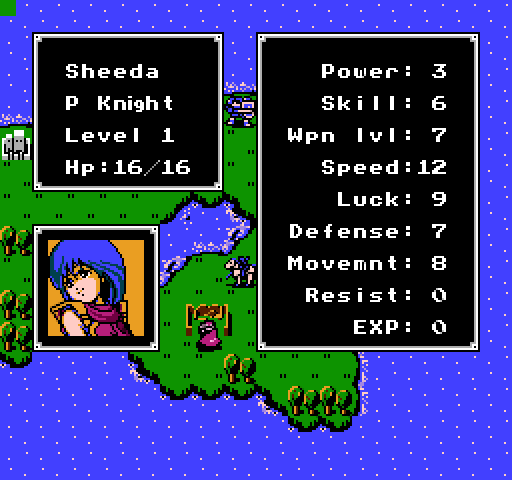 Sheeda, who we saw earlier, is a Pegasus Knight. She’s going to fly around a lot and probably get one-shot after I carelessly put her in range of an archer, if my history with these games stays consistent. She’s plot-important though, seemingly, so I’ll do my best to keep my clumsiness from sending her to her terrible death.  Gordon’s an Archer. I have very little to say about archers. Maybe being forced to use them will make me like them?  Doga is an Armor Knight. I like them, but goddamn are they ever slow. I think Doga will actually see a good amount of use, just because his speed means he won’t be able to keep up and earn as much experience as, say, Kain and Abel. So we have one terrible old man, two royalty, and four level one mooks. Not exactly the greatest fighting force known to man. But who are they up against? 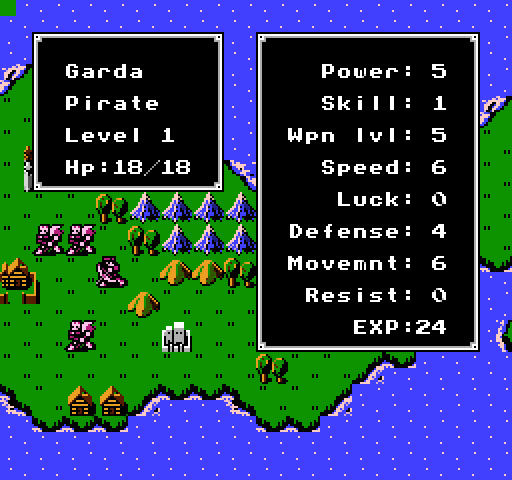 Pretend I posted this about twelve times. Plus an archer and that thief in the town below us. We may not be the strongest force on the planet, but I think we might just be the strongest on this island. Now, as for that thief… Remember this? I remember this. Villages are good in Fire Emblem. They give you items, money, sometimes even people. We want them the opposite of destroyed. So this guy needs to die as soon as we see him. Which means I guess I’ll have to actually play this game, instead of just type about it for several hours. 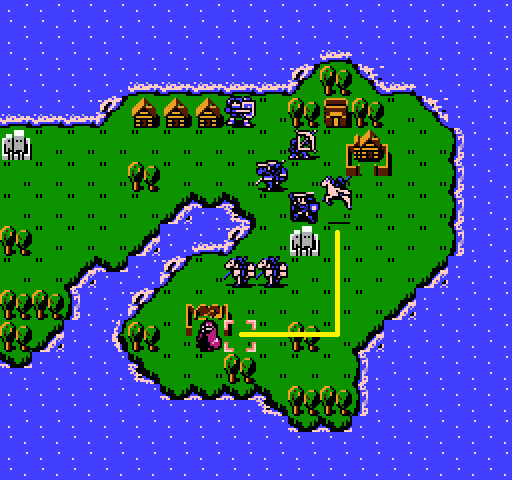 Sheeda will be our angel of death, as my MS Paint skills are tested to their limits (If anyone knows a good, easy way to draw visible arrows, please let me know. As it is, I’m only showing the rough route taken, unless it matters for some specific reason). I’m using Sheeda because she can probably take at least a hit from this guy, and when she’s done, she can fly across that river to join the rest of our forces, whereas sending one of the cavaliers, they would need to backtrail and hook around that water. 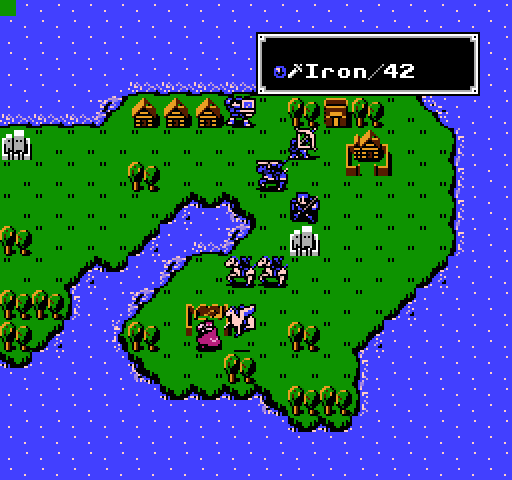 Moment of truth… 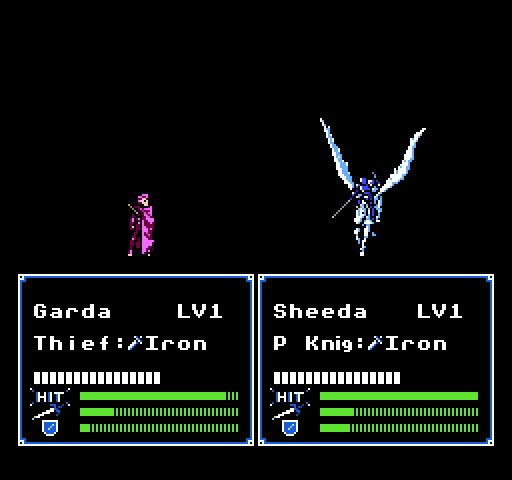 I gotta say, I really do like the sprites in this game. The UI, maybe less? The top bar is health, I’m guessing. Hit seems self-explanatory, as do the sword and shield, but I will be really relieve when we get to a game with numbers instead of bars. 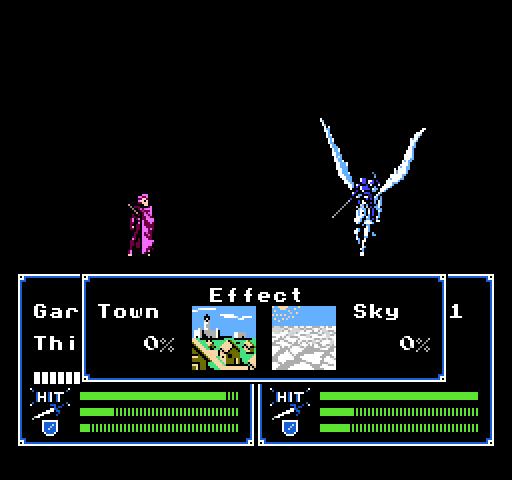 It also shows the field both units are on. If this is anything like later games, things like forests and forts will increase survivability, providing defense and dodge bonuses, and sometimes letting us regen health. Flying units avoid that, which isn’t always great given their fragility. Here, it looks like an even playing field. 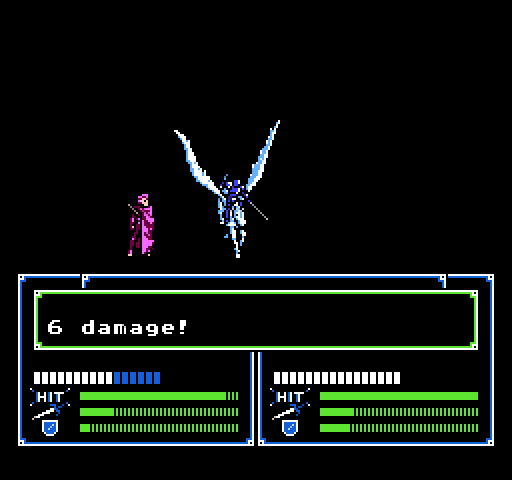 Sheeda does 6 damage. At this rate, it looks like we’ll need to take two more swings at this guy. 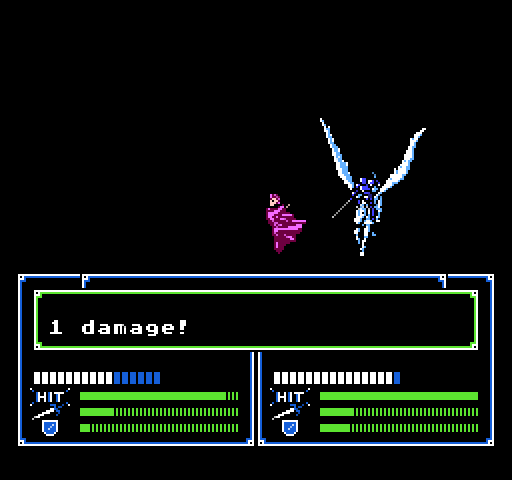 And I am fine with that.  Sheeda gets one more hit in. When one units speed is significantly higher than the others, they get to attack twice in a round. This is good, we want this, all the time.  And Sheeda gets some experience for her troubles. Fire Emblem has static EXP requirements, it always takes exactly 100 to level up, so this is pretty okay for a standard combat. Hopefully, the kill will give out a good bit more. 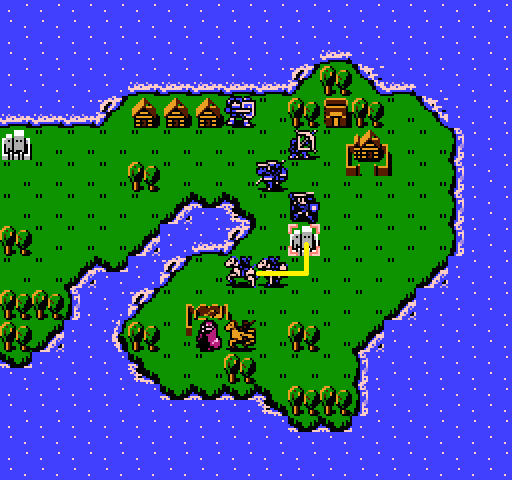 Kain goes to town. 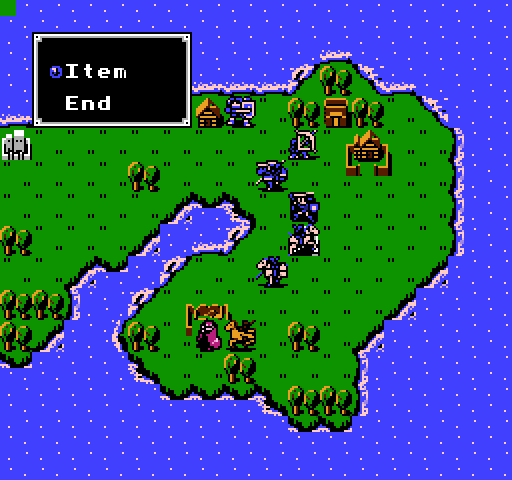 I notice there is no visit option. Is it because towns are automatic visits in Fire Emblem 1?  It is not. It is because it is a fort, or at least that’s what I’m guessing. This sub-optimal play, all for you, the people thirsting for the ineptitude of a man stubbornly refusing to look up any more than is strictly necessary to explain the most basic game mechanics. 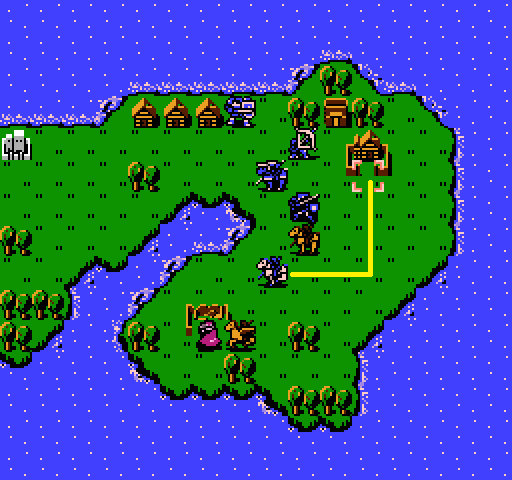 And Abel goes to this…Village, right? Please tell me this is a village. 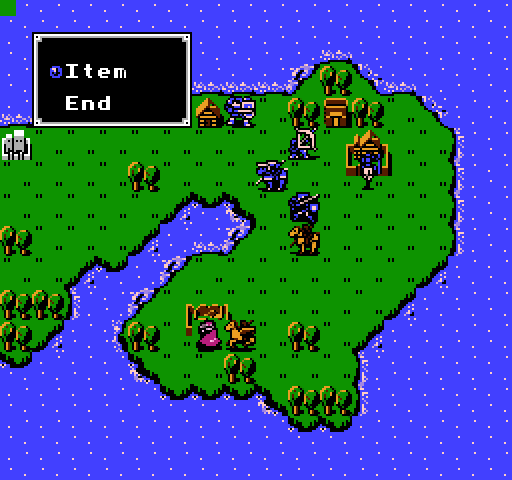 Again, no visit option… 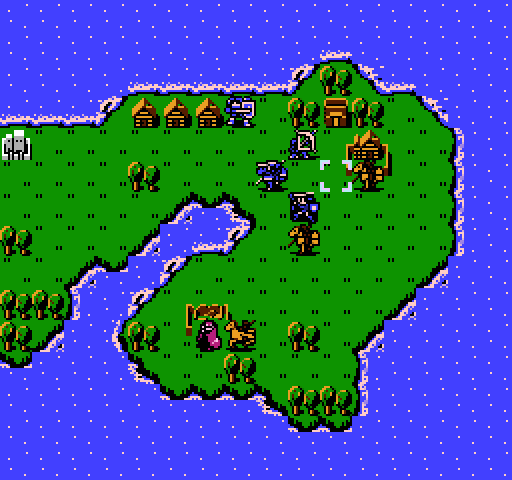 And it isn’t? That can’t possibly be right. I have a suspicion of what’s happening here, but given Abel is just too bushed to move, it’ll have to wait for next turn. Gordon decides to hit up the third house-looking thing, directly to his top, right. 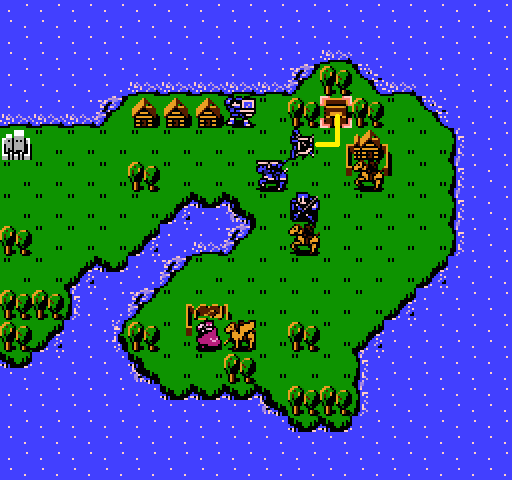 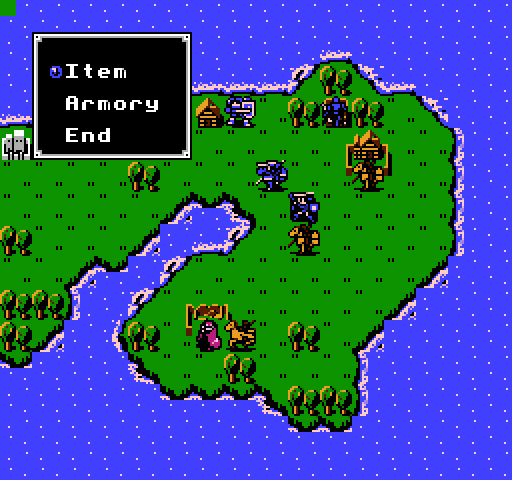 Success! Ha! Let’s take a look at our finances.  Wait, no, that isn’t right… One second. 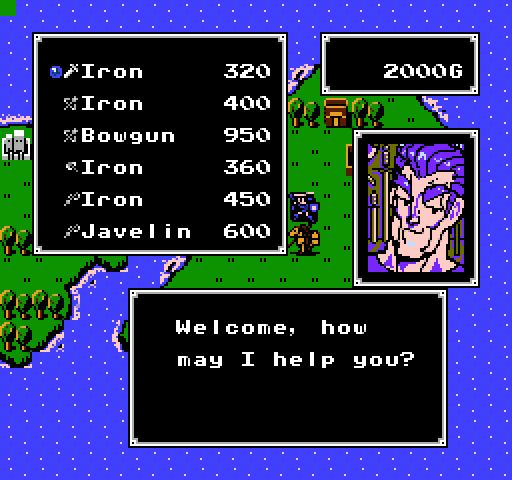 That is a rough face. This man, he is not doing well. We are doing pretty okay though, with enough in the bank for pretty much anything. Swords, axes, and lances are the basic weapon triangle in all Fire Emblem games. Swords have high crit chance but low damage, axes have high damage but miss a ton, and lances…are also there. Swords beat axes, axes beat lances, and lances beat swords. Most of our characters. Right now, I’m ignoring the bows and axe, as we have only one user of each. Meanwhile, our Cavaliers can use both lances and swords, Sheena and (ugh) Jeigan both use lances, and our Lord is a swordboy. Javelins are especially tempting, given that they can attack at range two, making our Cavaliers and Pegasus Knights effectively back-row units, great for healing them up before sending them back to the front (Or just throwing javelins from safety forever, in the Pegasus Knight’s case).  Gordon tries to buy a javelin, and the man gives this warning, leading to one of the few times I actually look something up for this LP.   Click here for the full 805x56 image Ah. Well then. I will say, while not looking stuff up for this LP is at least a small portion laziness, it’s also intended to be as close as possible to a genuine playthrough, along with all the stupid mistakes that come from that. That being said? I’m really glad I looked that up and didn’t have my archer buy two javelins he could never use. I’ve handicapped myself enough, I think (at this point I also accidentally spoiled myself on the fact that there is no weapon triangle in this installment of the series. Whoops!). 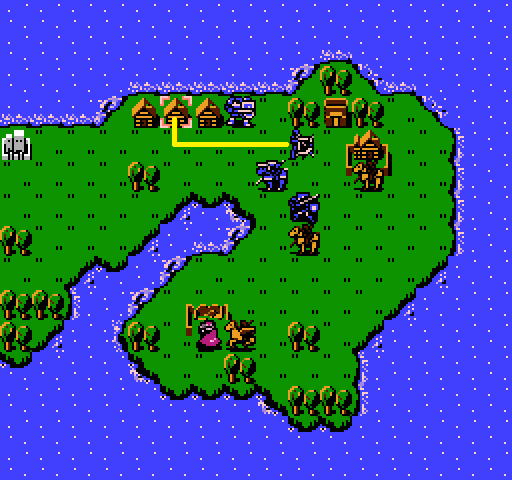 Gordon, sensible chap that he is, decides he doesn’t need shiny weapons, he just needs the calm influence of a stable community. 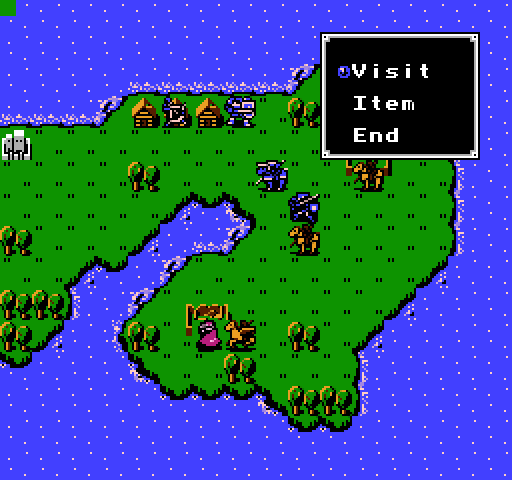 And I know I’m putting a lot of screenshots of options on specific tiles, it’s just that village really threw me. I’ll stop once I’ve confirmed my hunch, and I image we’re pretty close to running out of unique landscape tiles. 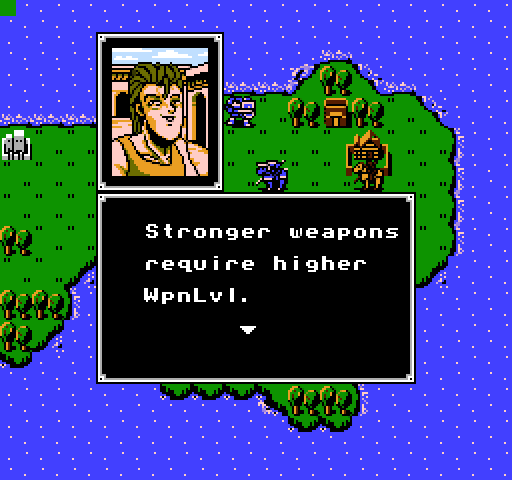  Watch out for arrows. Watch out for arrows.Thank you villager who won’t look at me directly! I’d guessed that was what weapon level was for, but glad to confirm. 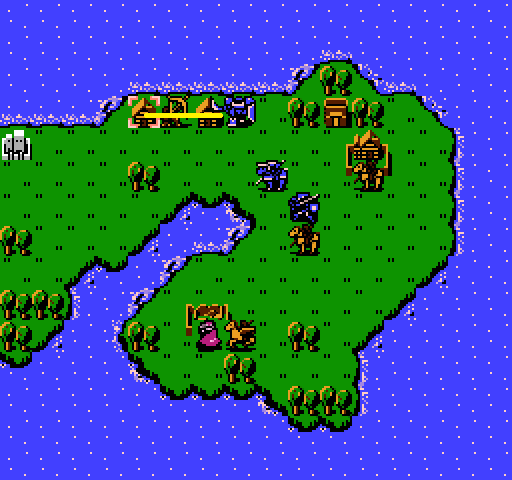 Doga follows suit. 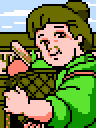 South of the castle in a village lives Riff. South of the castle in a village lives Riff.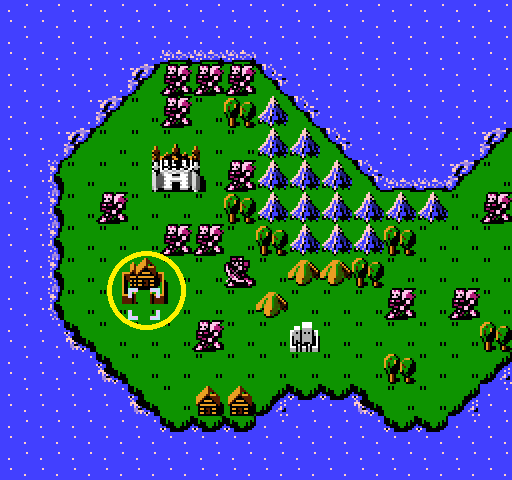 Presumably, this village, and presumably, Riff is recruitable, because he has a name. So. Bonus Objective 1 – Visit this village, recruit Riff if possible. Left to move are Jeigan and Marth. Jeigan is going to stay nearby, just in case things get hairy. Marth meanwhile, is going to head right into the forest south of Doga.  That pirate has a movement of six, and is exactly six tiles away from that forest. If this is like later games, special terrain tiles also have movement costs, so he couldn’t get onto it, but we can’t assume that’s the case. If it isn’t, then next turn we’d be dealing with a dodgier and/or tankier pirate, which is bad, and instead they’ll have to deal with a dodgier/tankier Lord, which is good. My only problem with this is it means I have to put my village theory on hold.  Villagers opened their gates for the prince. Visit them before bandits do. Villagers opened their gates for the prince. Visit them before bandits do. And that more or less proves my village theory. In later games, there are some things only Lords can do, whether that’s accessing caravans, or speaking to plot-important npcs/enemies. I guess here, all villages with walls can only be accessed by Marth (and maybe Sheeda, since she’s royalty? I’ll test that out as well). That means we’ll need to send Marth back, which is going to slow us down a little bit, since he’ll need two turns to get there, and two to get back. 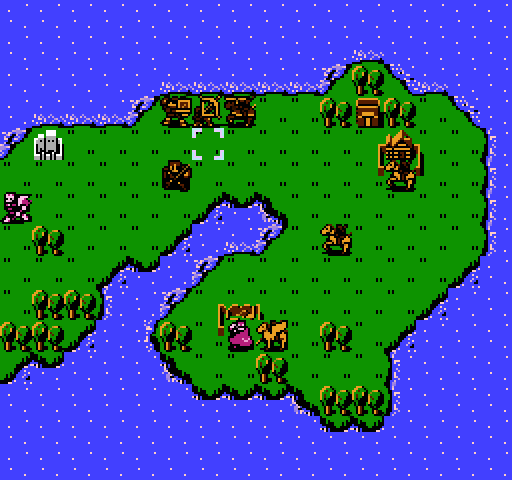 With that, all of our units are gold with exhaustion, and it’s time to let the enemy take their turn.  I’m not going to be showing each enemy’s movement, because that would be infeasible and boring. I’ll just be giving a rough description of their movements, and any combats that take place. 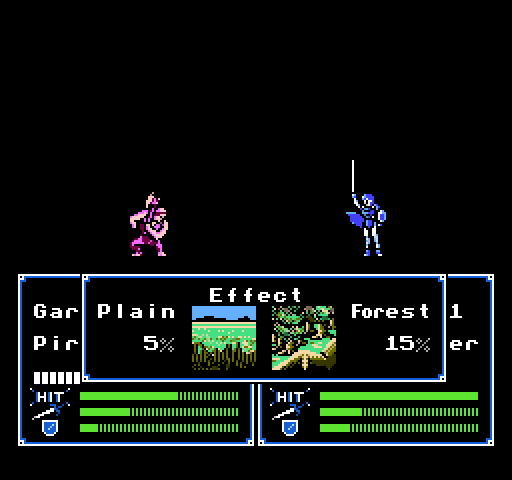 Like this pirate attacking Marth, both showing our Lord’s combat sprite, and proving that the forest has a 15% bonus to…something. 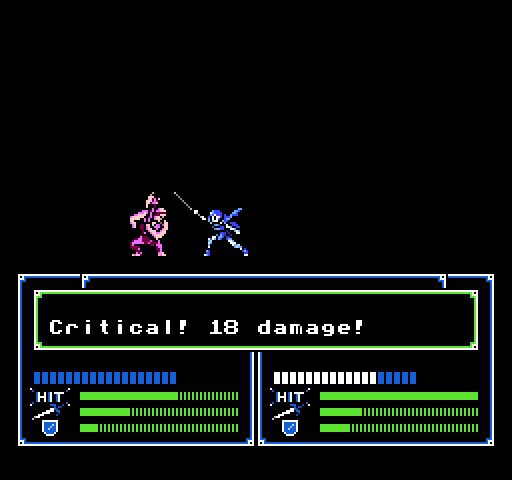 The pirate hits us for 5, and then Marth makes a very strong first impression by caving his skull in with a rapier. 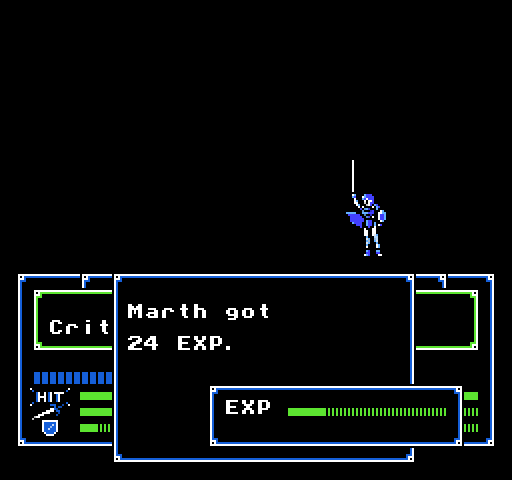 The experience gain for a kill is higher than for combat, but not as significantly so as I was hoping. 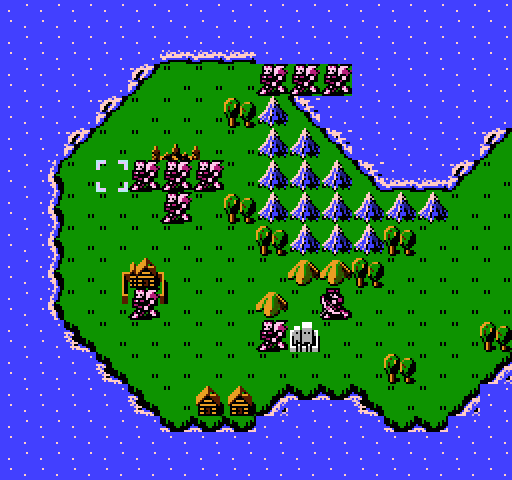 Turn 2, and the pirates are in action. Four crowd around the castle (good, they won’t be bumrushing us), three are going it by sea (also good, they’ll be slower than their land counterparts), and one went to a village, I guess just to show us his inability to destroy it? 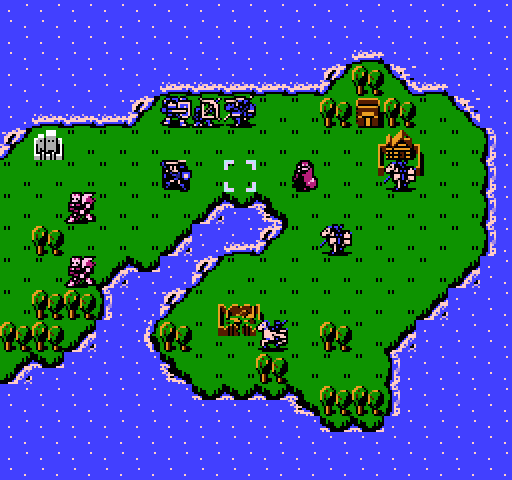 Meanwhile on our side of the island, two more pirates are coming by land, and that thief entirely ignored Sheeda, which is fine with me, because she sure as hell won’t be returning the favor (Originally, I wanted to send her across the river to attack the axeman, but that seemed very dangerous when it was just two pirates, and suicidal when I remembered the ranger over there, with his bow).  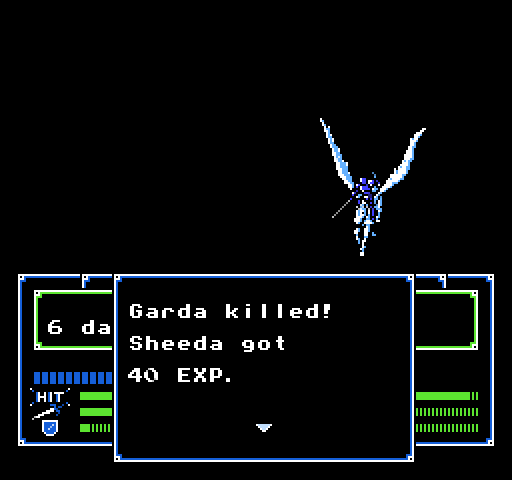 See, when I was saying I was expecting kill EXP to be more significant, this is what I meant. Maybe being a Lord means Marth just gets less, it definitely isn’t due to his level. Both Kain and Abel can get to Marth’s forest, so it’s a coinflip. I go with Abel, because Kain already has a javelin, and I want both to have ranged potential. Meanwhile, Abel and Marth swap places. 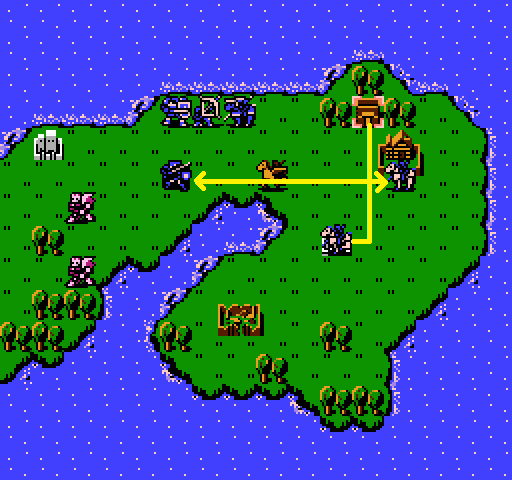 Or they would, if two units could stand in the same space. Because they can’t Marth hangs around awkwardly (better than than moving Abel first and giving the pirates the forest). 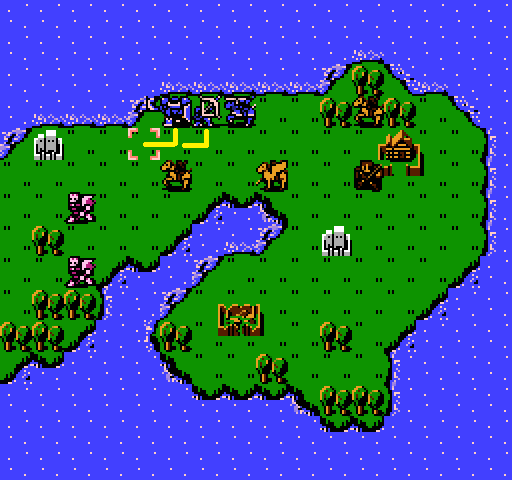 Doga and Gordon both shimmy down and to the left, giving Gordon the wall he needs to tackle these guys without fear of reprisal. Being on a field will make Doga a more appealing target to the pirates, which I’m hoping they go for. Doga just barely can’t make it to the fortress, but even if he could I think the pirates would just ignore him and attack Abel, and I need Doga getting at least some EXP this mission. Meanwhile, Jeigan… plays bridge, I guess (He actually visits the same village to see if maybe their dialogue updates. It doesn’t). 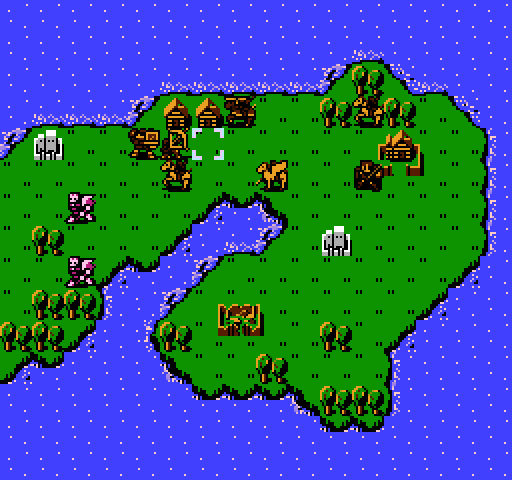 End of round two, and I think this is where I’m going to end this update. Hopefully, with introductory chat out of the way, next post will go much faster. I’m going to have a couple updates in the bag before posting, but I’m not getting too far ahead, so I can respond to comments/criticism and adjust accordingly. One thing I’ll note ahead is that I am posting every player move intentionally, and don’t intend to change that. While I love the other FE LP’s around, most end up giving brief synopses of what happens outside of level ups, and at least a few times I remember getting lost in what was happening. This is definitely going to make the LP slower, and I imagine every level will take at least a couple updates, but I’m hoping this also allows strategic chat in the thread, which will partially make up for unit selection not being in the threads hands, and also hopefully prevent me from making too too many stupid mistakes. That said, if people resoundingly dislike it, I’ll go back to the drawing board and see if I can come up with a different solution.
|
|
#
?
Oct 2, 2019 16:06
|
|
|
I don't mind the length, but you're definitely going to run into character limit issues with later maps; they can get long, even in the NES titles, and while you aren't necessarily doing a lot with each turn if you cover every turn in detail it will balloon rapidly.
|
|
#
?
Oct 3, 2019 01:42
|
|


|
I fully agree. The next update I'm experimenting with showing way more moves per screen, right now it's just ensuring the screenshots are still readable and not too ugly (I really wish my visual skills went beyond MS Paint).
|
|
#
?
Oct 3, 2019 02:14
|
|
|
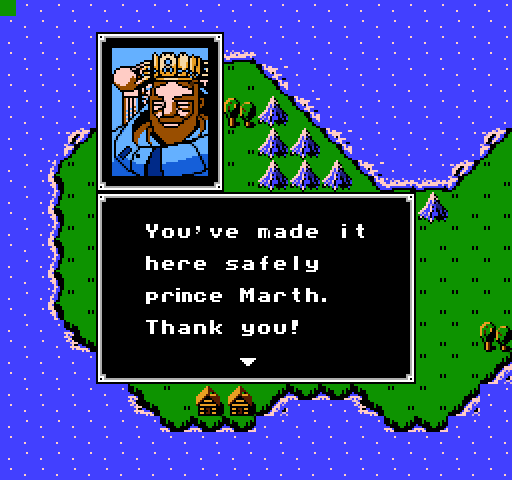
Welcome back, to Part 2 of the first mission of Fire Emblem – Dark Dragon and the Sword of Light! Last time, we introduced our heroes, insulted Jeigan, and killed two men. Now, it’s the enemy turn, let’s see what they can do.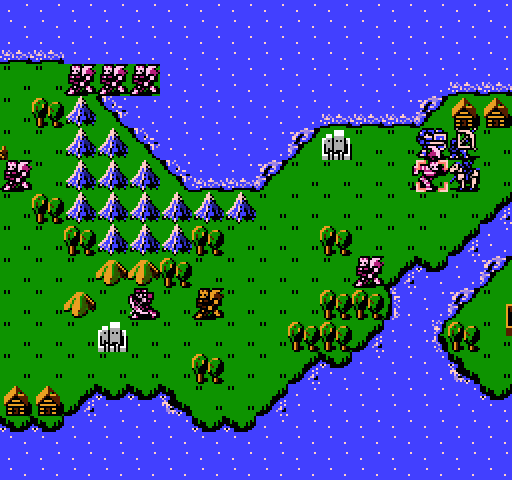 A pirate runs up to take a swing at Abel. 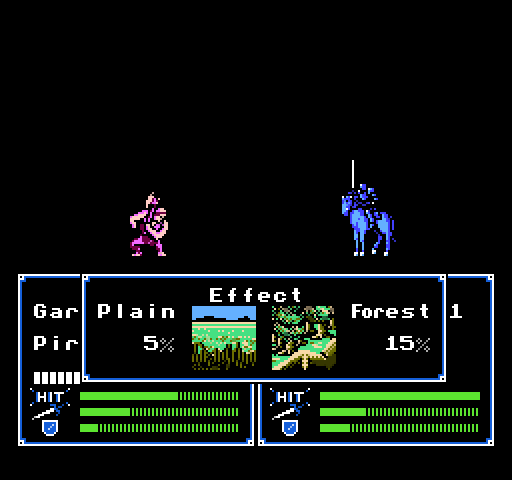 The pirate hits for just over a quarter of Abel’s health, and Abel brings the pirate down to a third with two blows. 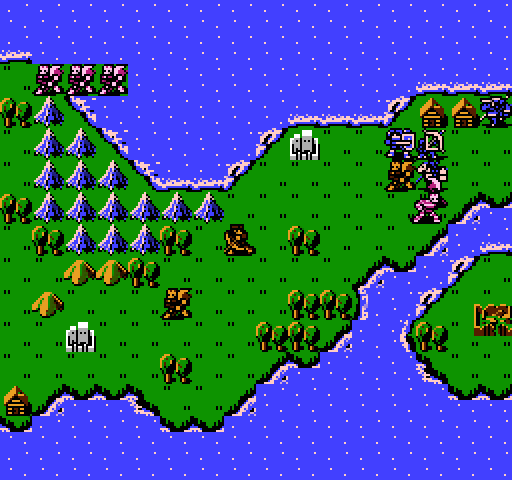 Pirate two also thinks this is a good idea, for some reason, and gets the exact same results.  State of the board at the start of round 3. The pirates by the castle stayed put, and the pirates at sea moved ahead. They can only move three spaces by sea, so they can’t reach land next turn, but they’ll be able to the turn after that. Before we start picking units off, I move Marth over to the village (After moving Sheeda into the tile first and confirming she can’t visit). 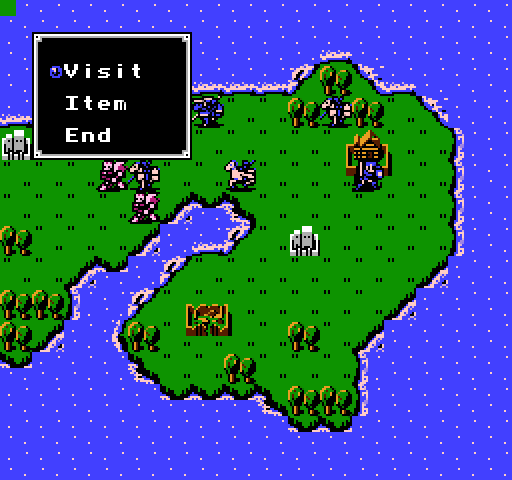 Luckily, Marth is a bit more social. 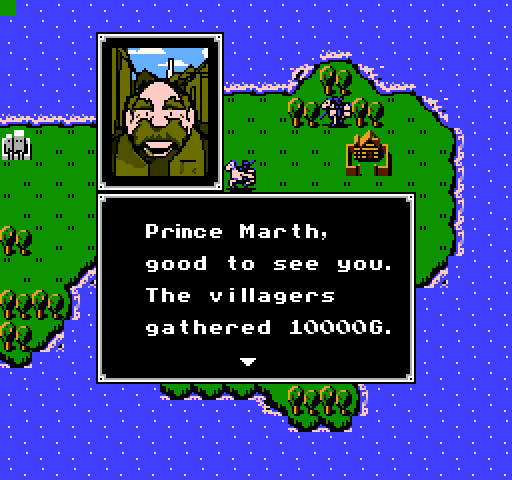  Buy weapons with this and save the country! Buy weapons with this and save the country!Good idea! I think I’ll try to spend maybe half, since I can’t be sure when the next time we’ll see an armory is. 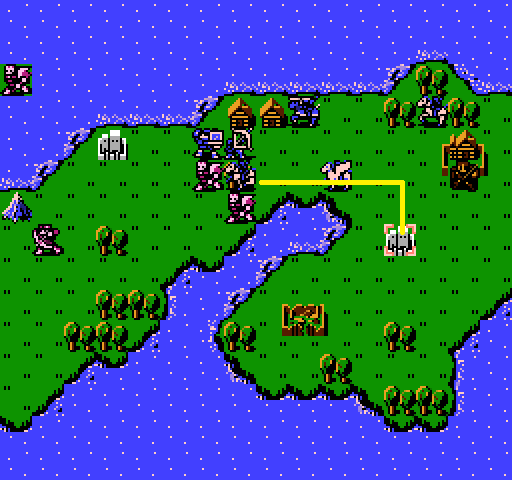 Abel runs back to the fort, to see if they have healing per round like later games. I kind of wanted to move him to the forward fort, but I don’t trust him not to die from a very unlucky archer hit. I decide to more or less hold position, with Doga and Gordon both attacking the wounded pirates directly below. While it would be nice to put Doga on that fort, that would mean either leaving a pirate alive, or putting Kain or Sheeda into archer range. This will leave Doga as the only target, and I really don’t think arrows will do much to dent him, even off the fort. 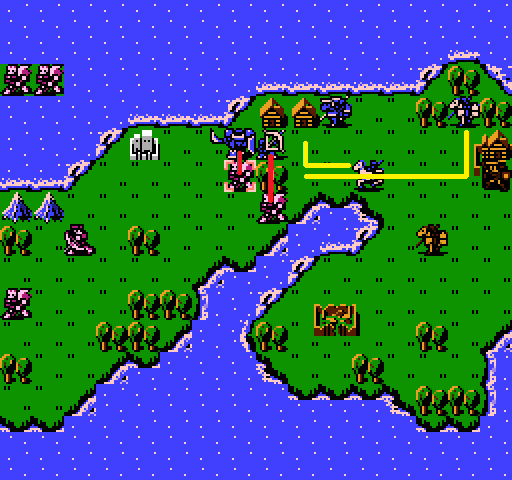 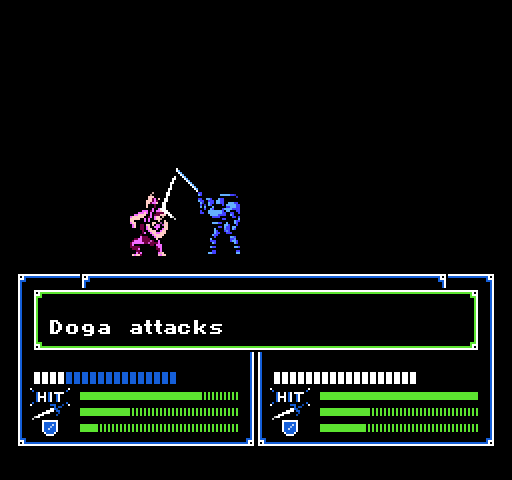 Doga suffers no fools to live. 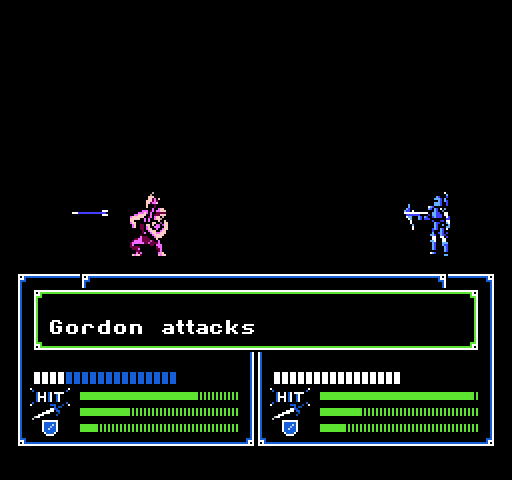 One thing archers have going for them in this game is looking vaguely like Boba Fett. Like Boba Fett, Gordon underperforms here, missing once before making the killing blow. I thought double-attacking was based on speed, but Gordon only has four, while the pirate has six, so I’m wondering if it’s a per weapon thing? 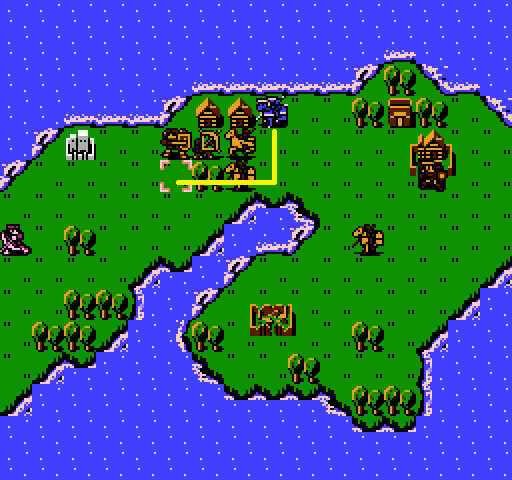 Lastly, I decide to have Jeigan advance, on the off chance the archer wants to shoot a wall instead of a unit I actually want to use.  Where I learn, to some surprise, that there actually is a give function, just not a trade function. 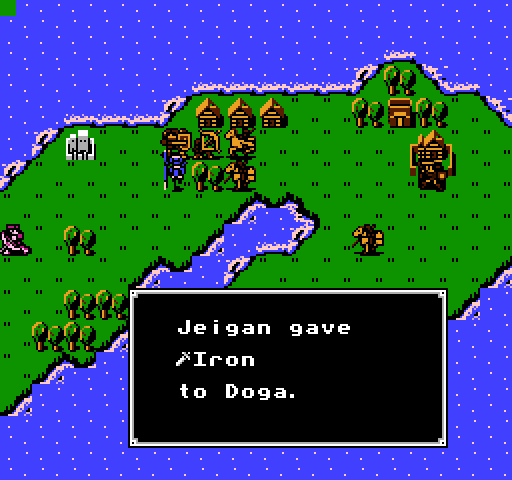 Jeigan doesn’t need that sword. 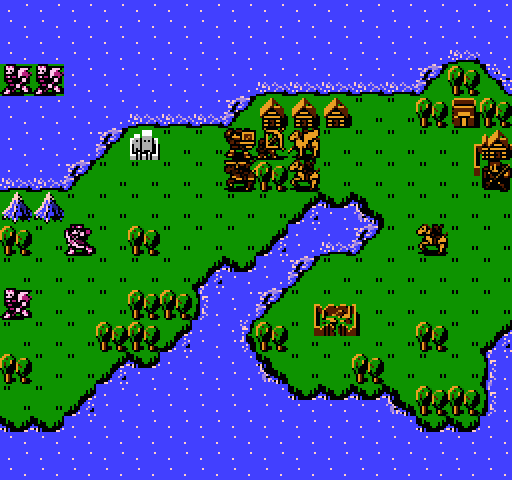 And with that, turn three draws to a close. Let’s see who gets an arrow. 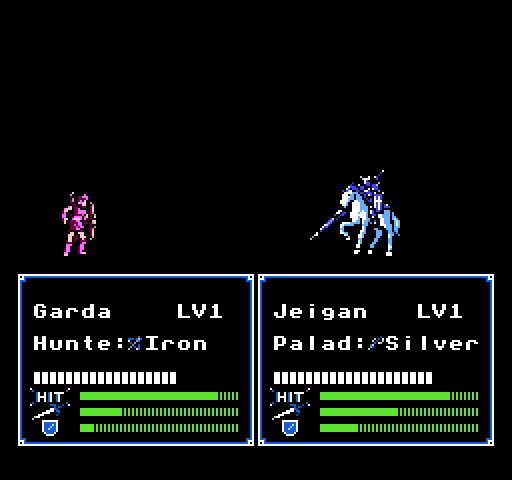 Ha! 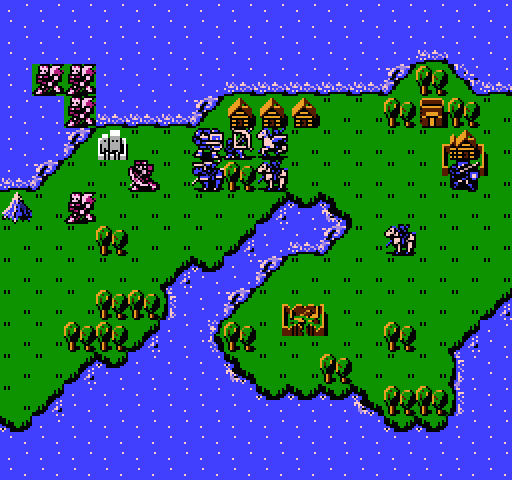 Man, that worked like a charm. Jeigan took all of two damage. Besides the archer, the other four move up. 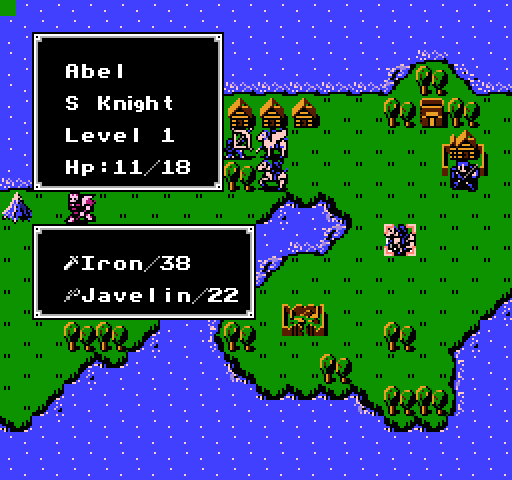 Abel is looking a touch healthier, so I think the forts do recover HP. I don’t think the team needs his assistance quite yet though, so he’s going to sit there for another turn. 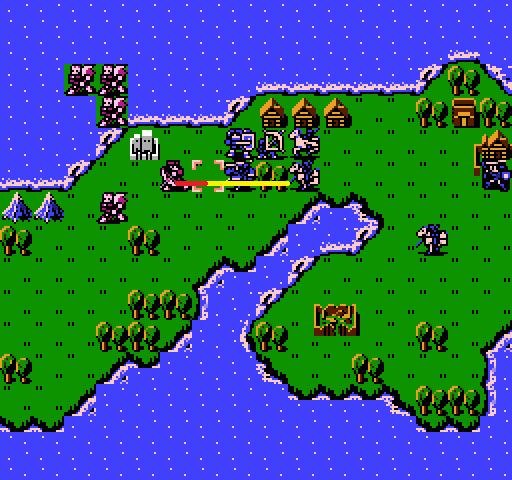 Kain runs forward to kill the archer. 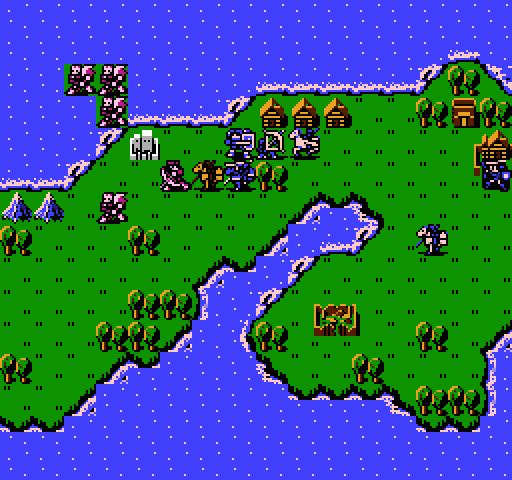 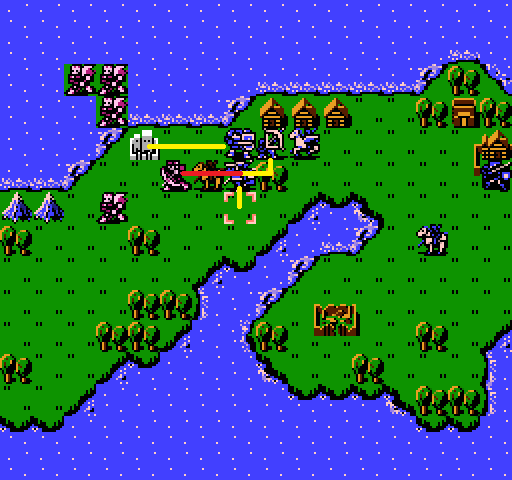 Unfortunately, he fails to double, so we’ll need to give him a second tap. I decide Gordon should so it, since I think it’s more likely for Sheeda to be on the front lines on the other half of the map, since the enemies there seem sedentary. Meanwhile, Doga claims what is his. 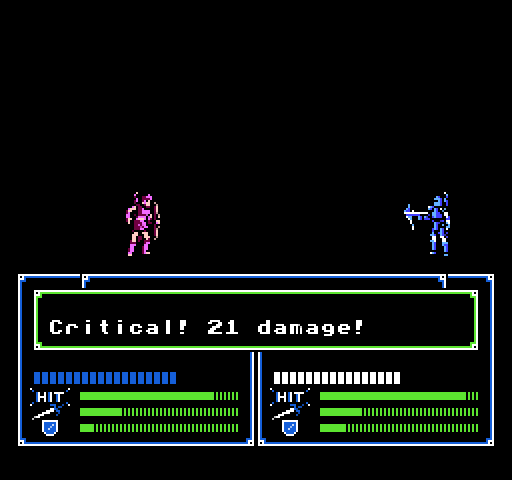 I want to emphasize that the archers attack animation can hardly even be called one. He literally doesn’t move aside from nocking an arrow. Regardless, he overdoes it, and gets the kill. 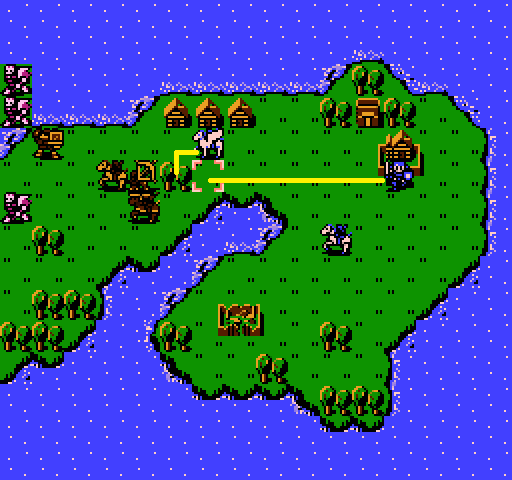 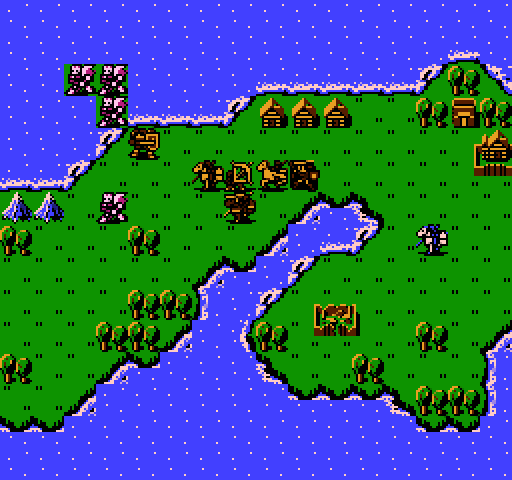 Lastly, Marth moves forward and Sheeda repositions slightly. End of round 4. 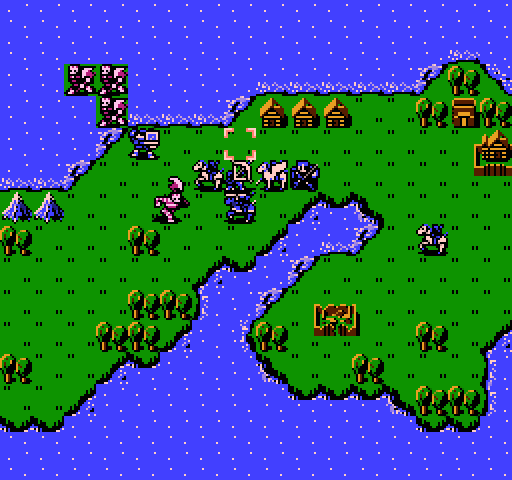 The enemy, unfortunately, knows exactly where he’s going. 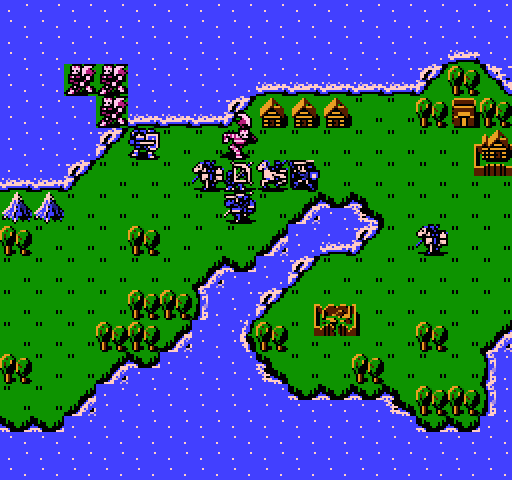 Good luck Gordon! 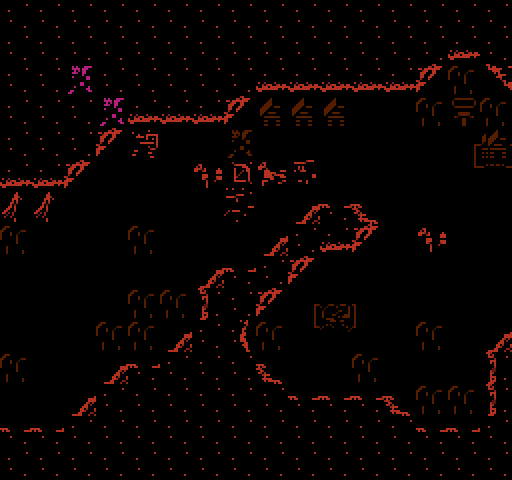 Gordon takes a very survivable lump, and I miss my screenshot to show that the sea pirates are converging on Doga.  Doga begins by doing what no knight has ever done. 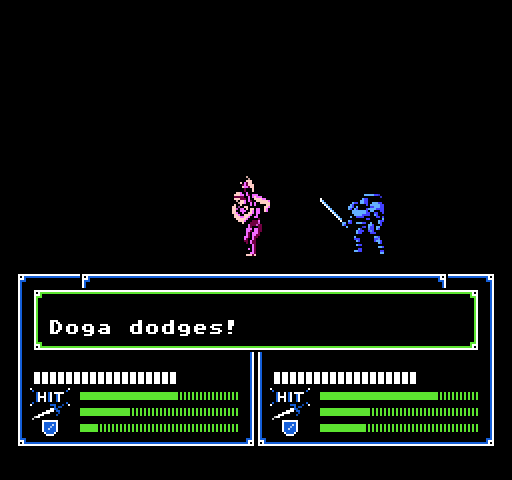 Doga dodges a second attack, meaning either he’s very very lucky, or forts are very very good. The third sea pirate goes for Kain and nicks him. 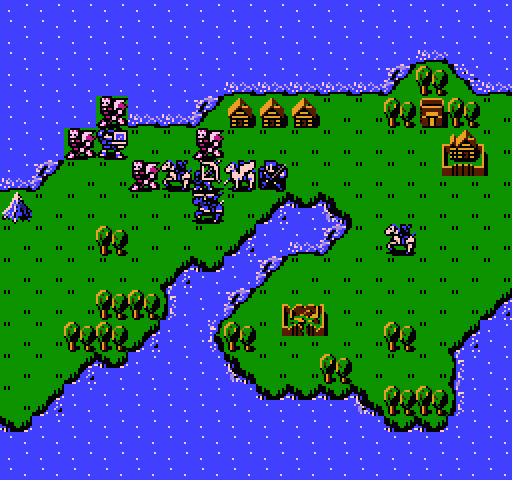 Start of round 5, and I feel pretty good. 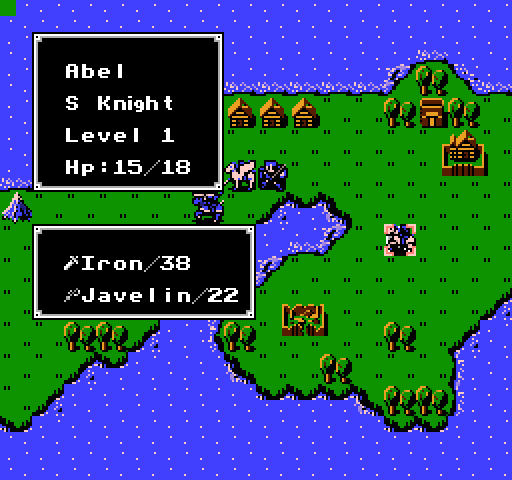 First, I confirm that forts heal, seemingly 4hp per round. I am going to abuse this fact. A lot. Now, we need to clean up the remaining pirates. First, Gordon takes a shot at the one engaging Kain. 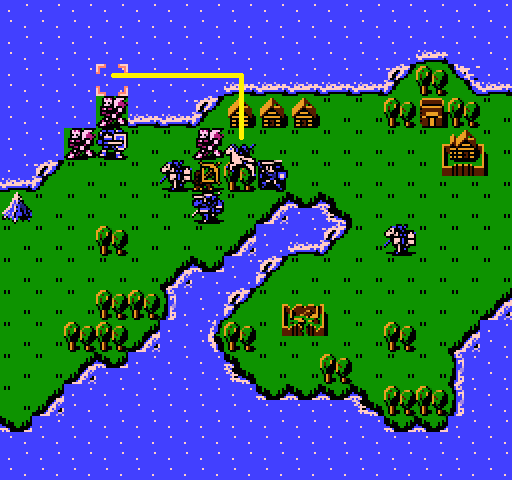 Sheeda moves up to attack with little fear of retribution. 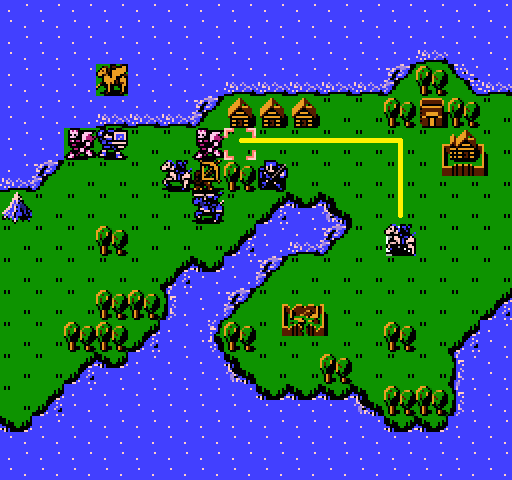 Abel moves up to rejoin the battle. 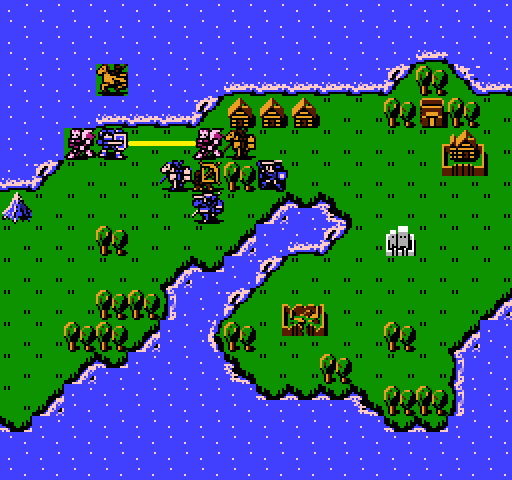 …Right. That pirate hadn’t taken a hit yet. That’s fine! That’s fine. Doga backtracks to clean up. 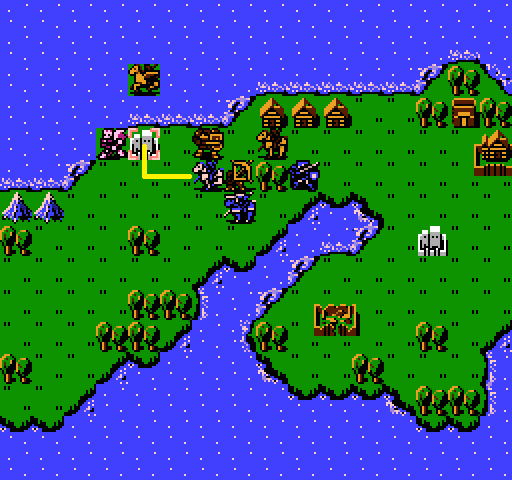 Kain moves onto the fort, both to heal up slightly and finish off the final bandit we’re engaged with. 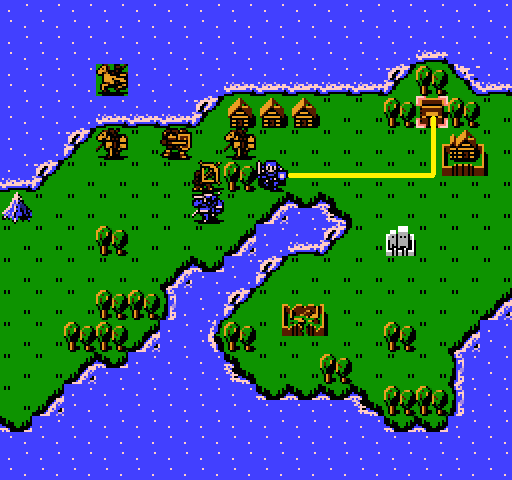 Finally, Marth runs back to the armory, to ensure we’re not using up too many of those rapier charges. He buys two iron swords, bringing our cash on hand to 10760G. At this point, I’m deciding whether I want to rush forward, or have everyone do an armory run. Jeigan stays put. On the enemy turn, they do nothing, so I start moving again. 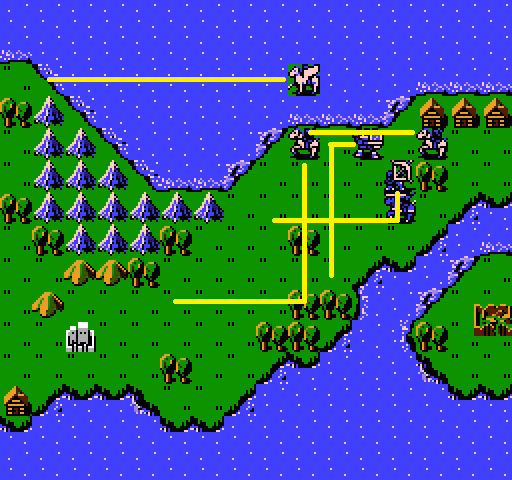 Kain, Gordon, and Doga move up as well as they’re able. Abel hops on the fort for a quick rest. I question whether this many movement lines will make things visually ugly or difficult to read. Sheeda is doing something risky. 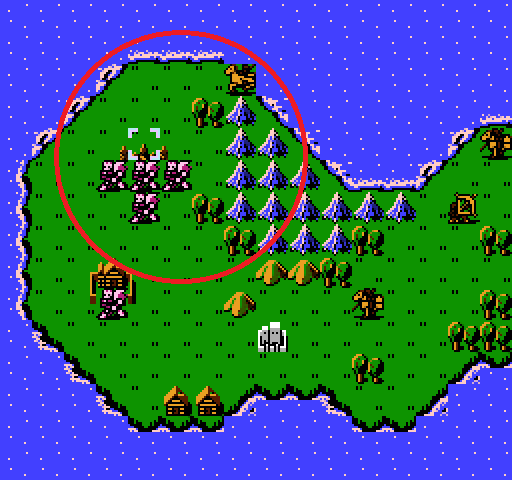 Here’s why it’s risky. Sheeda can definitely take a hit from one pirate. But I’m nervous that how I’m calculating movement is incorrect. What I expect to happen is that one pirate engages her, the other moves towards her, but can’t get far enough due to ocean movement. Worst case scenario? Both can reach her, and I lose a Pegasus Knight to a dumb risky early move. But I want to test this, and the move is made, so let’s see what happens. Also, Marth moves up and Jeigan doesn’t. 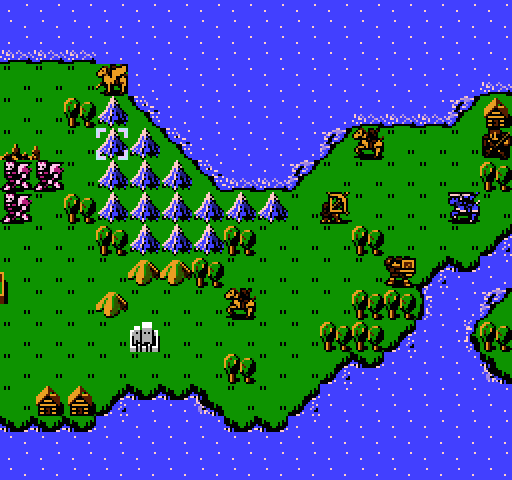 God help me. 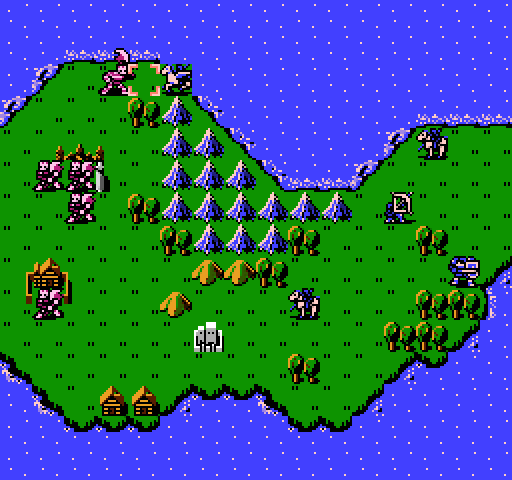 This is a very encouraging sign. The pirates move six, so the closest pirate taking the closest position means that the further pirate can’t even make it here.  Sheeda is hit for 5. She had a nick on her before from the thief, so she can take exactly two more hits before going down. Nobody else moves, so round seven begins. 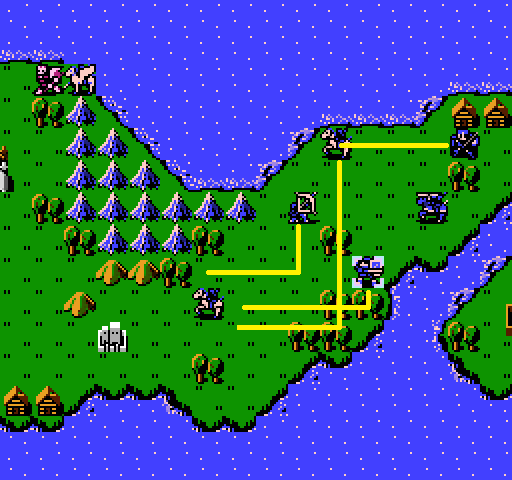 Doga, Gordon, and Abel continue up. Marth takes the middle fort. 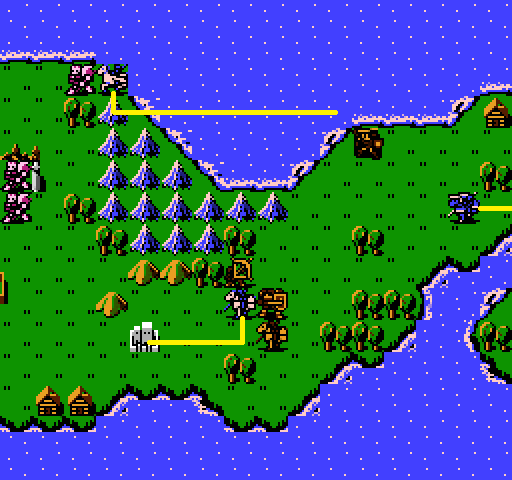 Sheeda’s position has me worried, I feel like it’s possible that she accidentally kills this pirate, and then another takes its place to take her down, so I have her move back to get a fort heal next turn. Hopefully she’ll have the chance to nab another kill by end of map. Kain moves up, hoping to draw out the pirate on the village. Jeigan runs way back to pick up two iron swords and an iron lance, now that I know that giving is a thing. 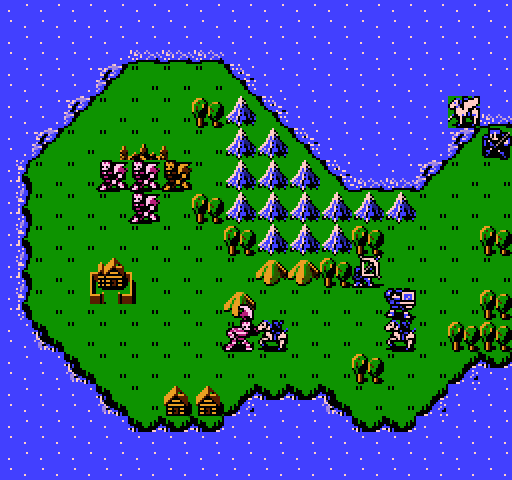 The village pirate happily obliges. 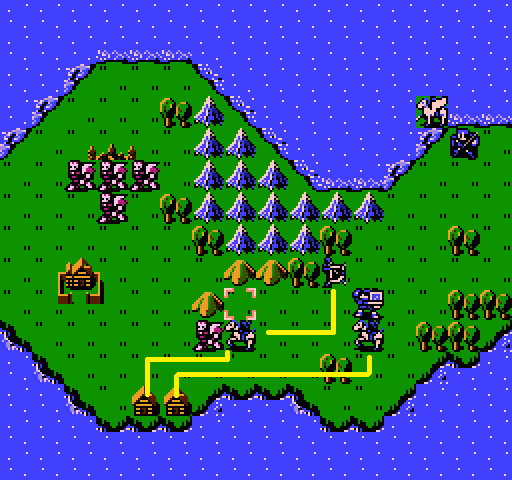 Our twins check out the villages, while Gordon finishes off this weakened pirate (The cursor is where I was originally moving him before re-terrifying myself with the possibility of the castle pirates being able to get onto the hills and get two hits on him, killing someone on map 1). He’s at 80XP, so he should level up. 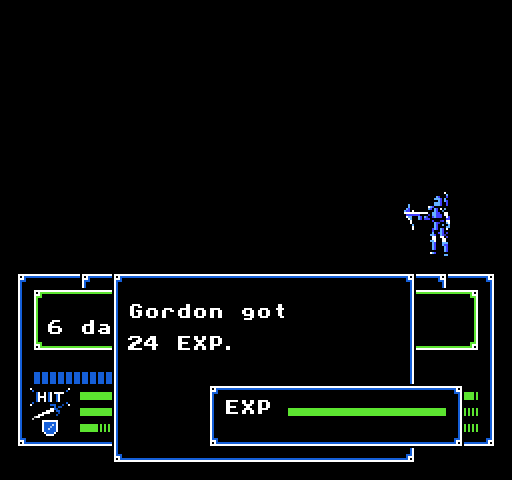 My first level up. I’m so happy. 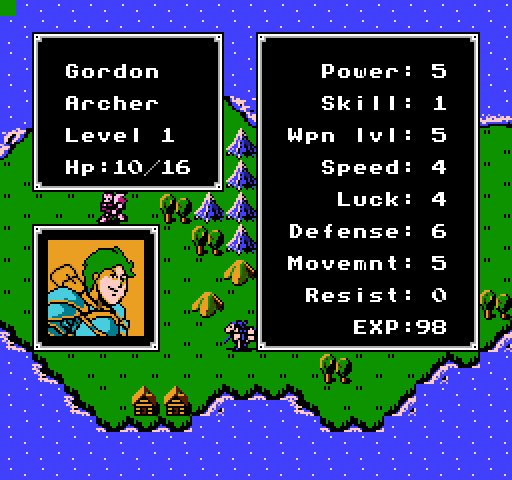 …Or not. Soon. Soon. Village 1 Rest at a fort if you’re hurt to recover HP.Lady, I am way ahead of you. Village 2  Garda’s a port town west of Talis. A man named Gomes turned it into a pirate base. Garda’s a port town west of Talis. A man named Gomes turned it into a pirate base.If we do not fight or recruit this Gomes, I will eat my socks.  Doga and Marth move up, and Sheeda takes a knee on the fort. Jeigan remains offscreen, and the turn ends. 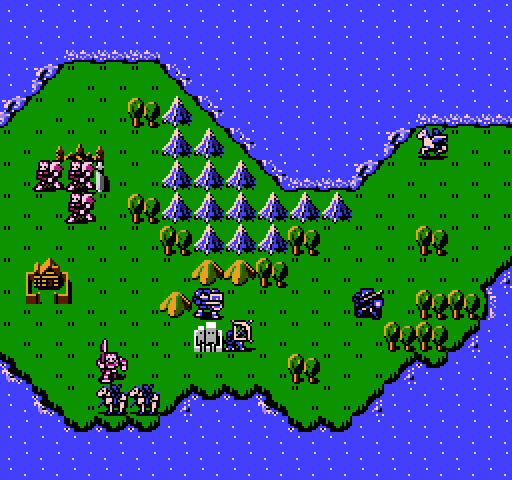 Please give me a level. 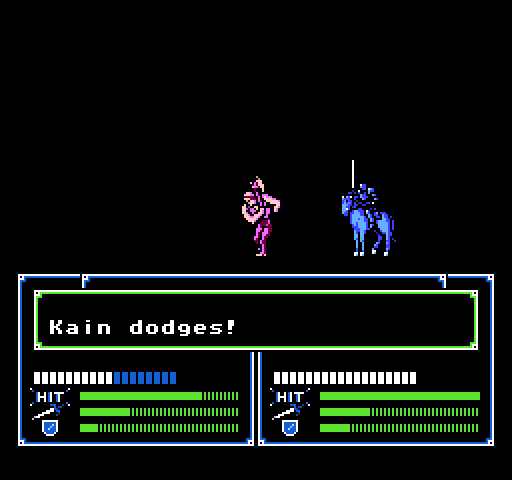 I promise eventually I’ll stop showing the dodges, I’m just so proud of the little guys. 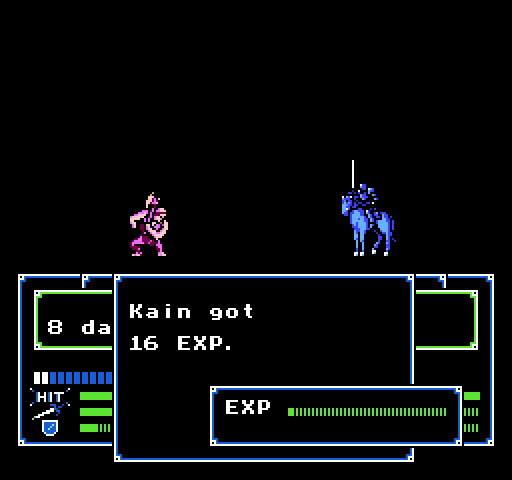 Finally! (This is actually a second pirate attacking Kain) 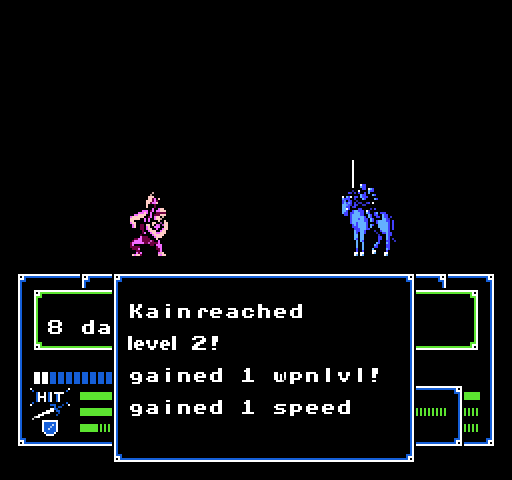 Gained 1 luck! Gained 1 HP!  That’s actually not bad, given Kain’s growths. Nothing unexpected, for good or ill. 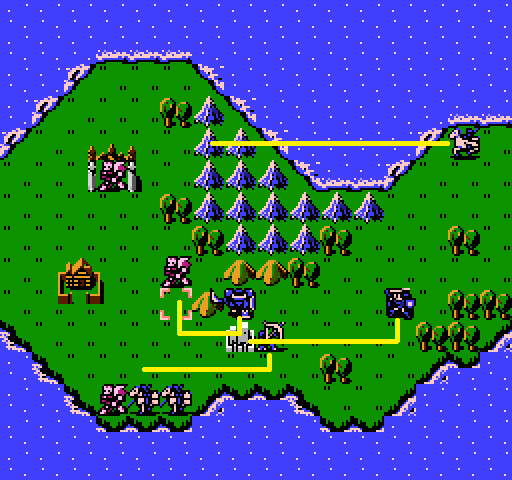 This is starting to feel pretty well wrapped up. Doga and Gordon go for their closest pirates, and Marth runs onto the fort (I think I’m wanting him to take on the boss, to keep him up to pace level-wise). One interesting thing I note is that Doga can’t cross those hills at all. Same with the cavaliers and Marth. Gordon plinks the pirate to death, and levels. Gordon reached level 2! Gained 1 skill! Gained 1 wpnlevel! Gained 1 HP!  Huh. This is my first time looking at Gordon’s growths and they look… Unspectacular. For comparison, Kain’s combined %’s are 370, while Gordon’s are 230 (Jeigan’s are 40). Not unworkable, but Gordon might not be our champion of the people. 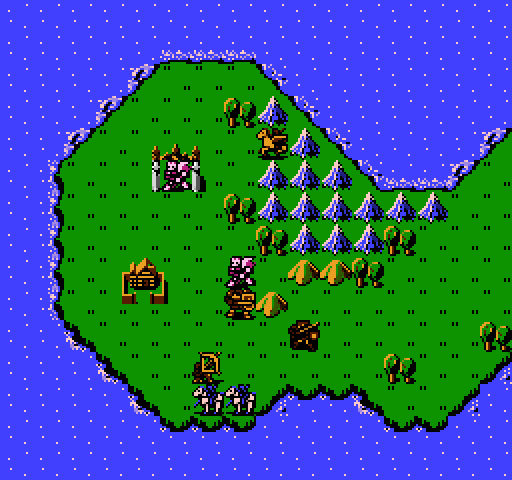 For right now, Kain and Abel hold position (Abel could kill that pirate, but Doga is so close to leveling, and I want to keep my cavalier’s levels staggered a bit, so I can use at least one per map). For the pirate’s part, drat fool that he is, runs and attacks Marth on the fort, instead of that nice juicy unguarded archer, right there! 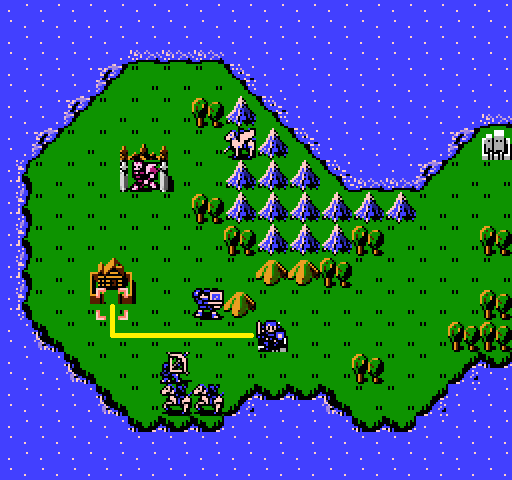 Now, what do we have here?  I’m cleric Riff. I can’t fight, but I can heal. Allow me to join you. I’m cleric Riff. I can’t fight, but I can heal. Allow me to join you.Short, sweet, to the point. 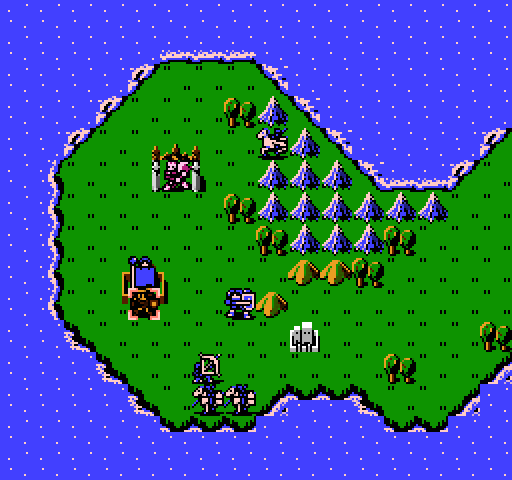 Riff demonstrates his skills on Marth, to celebrate.  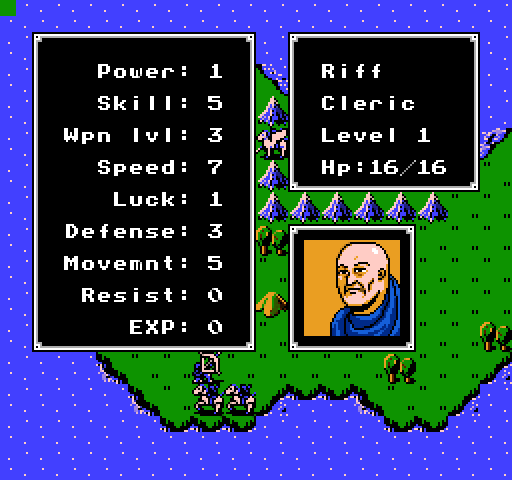 And…Um. Gets no experience for it (Here are Riff’s starting stats by the way). Well that’s a kick in the teeth. 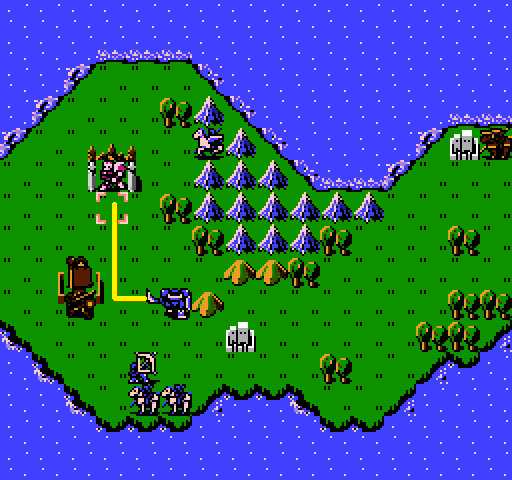 Doga runs up to test the boss’s armor. If anyone can take a hit from this guy, it’ll be Doga. Also, Jeigan is back! (After I realized I really ought to have him give those weapons I had him buy). Doga does not attack, beginning a series-wide tradition of letting a boss attack first, so you can still get damage in without guaranteeing a sad accidental death. Everyone else just kind of hangs out. 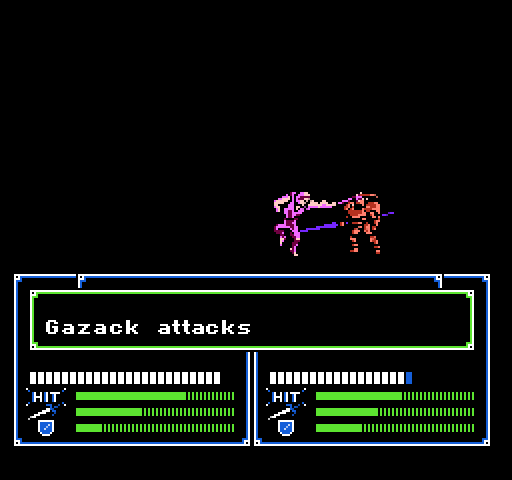 The boss’s name is Gazack, I learn. I also learn he’s a chump, he only does 5 damage to Doga. 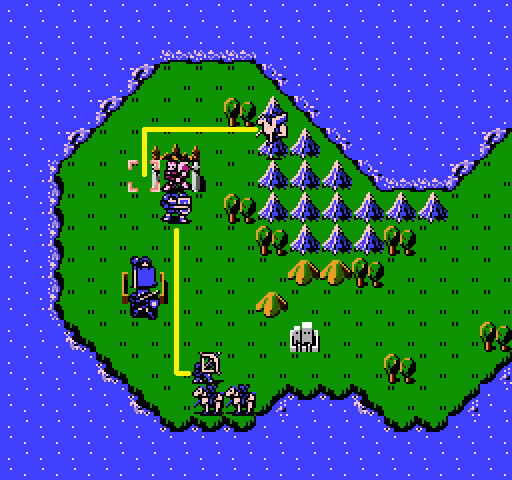 My turn. First, Sheeda and Gordon take their shots. I’m not too worried about Sheeda, since Riff can step in if things get hairy. This is good, because Sheeda takes over half her health in one shot. Gazack has also dodged more than half the attacks against him, so this might be a multi-turn affair. 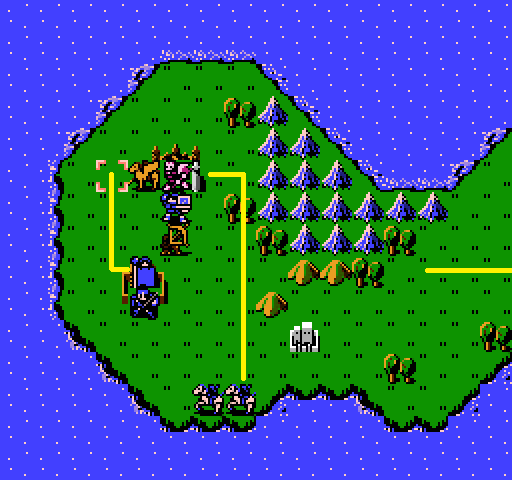 Riff comes to assist, Abel comes close to the boss but doesn’t attack, and some other yellow line signifies something. 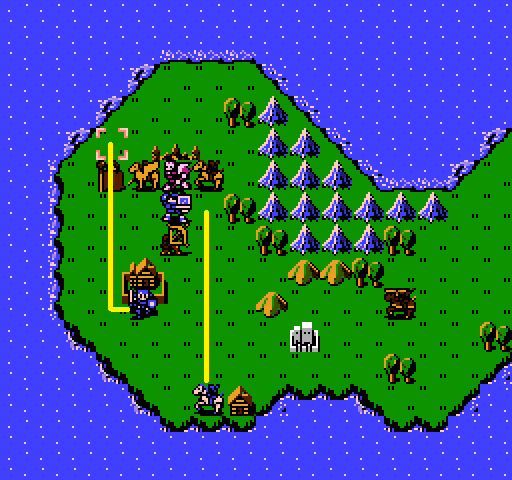 Marth and Kain get into position (This is also where I remember Kain has a javelin. He chucks two, and Gazack dodges two, the rear end in a top hat). Doga holds, as he can survive one more attack, but not two. On his turn, Gazack actually goes for Abel, which is totally fine by me. 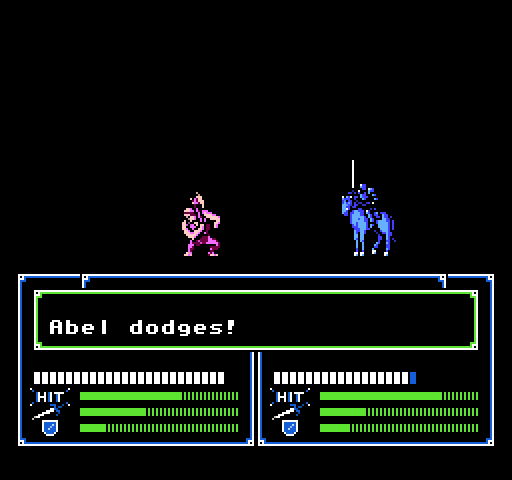 Abel provides him a taste of his own medicine. At this point, I notice the bosses full health and remember, oh right, castles heal as well. 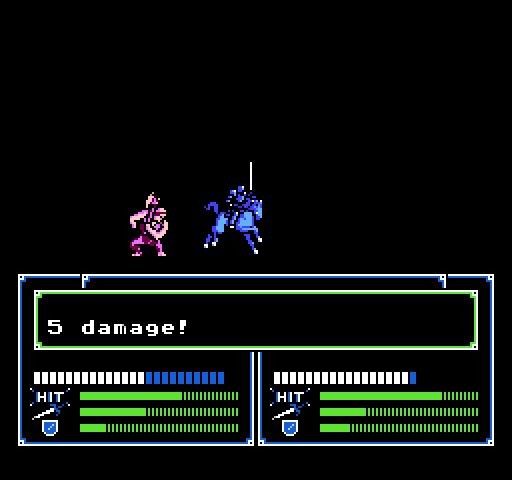 God I like cavaliers. 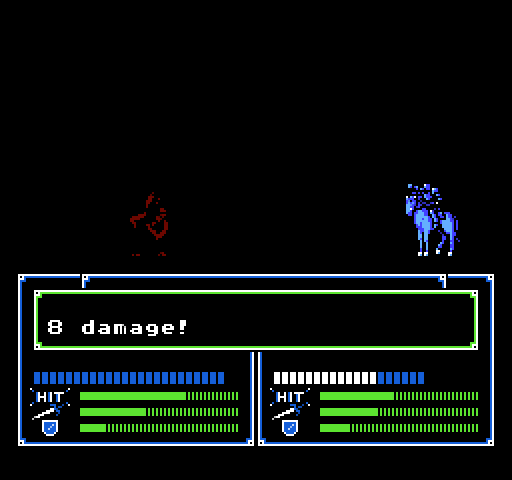 Gordon takes a potshot at him, and then I kind of forget the plan as I just throw everything I have at him. The first javelin lands, accidentally killing the guy. RIP Gazack. He left us with a vulnerary (basically a potion). 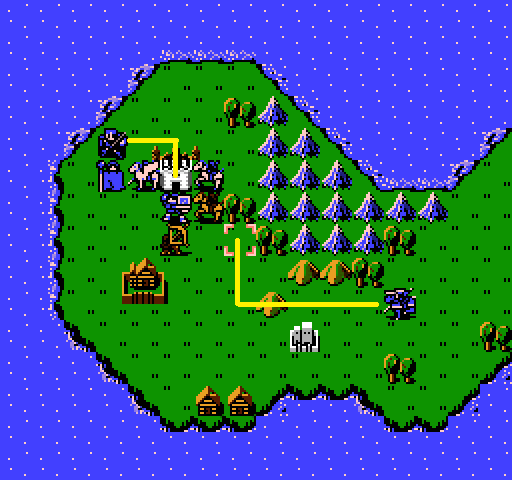 Jeigan gets one square away from contributing, but I refuse to wait another turn. (If I were smart and thinking clearly, I would’ve moved Sheeda and Abel down first. Shame, that). 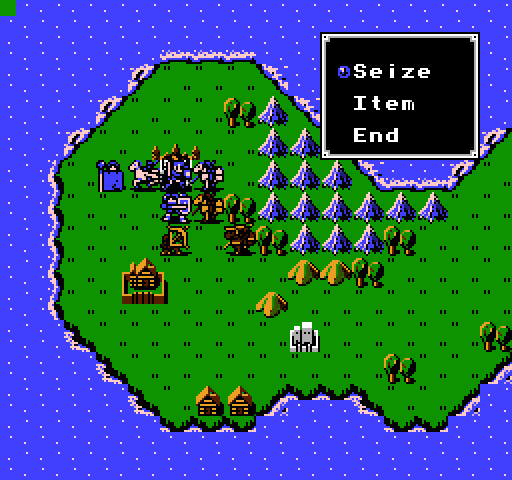 Marth seizes Castle Talis! I’m going to end the update here, since it’s getting pretty long. Next time, plot, and preparation! AlouetteNR fucked around with this message at 16:43 on Oct 7, 2019 |
|
#
?
Oct 6, 2019 15:07
|
|
|
AlouetteNR posted:
This translation is really rough but man, this is just boring. Let me correct this...  Perfect. quote:And…Um. Gets no experience for it (Here are Riff’s starting stats by the way). Well that’s a kick in the teeth. Healers can only get experience by getting hit in FE1. At a rate of 1 EXP per hit. Also, you keep switching between Sheeda (correct, although the American English translations use Caeda instead) and Sheena.
|
|
#
?
Oct 6, 2019 15:58
|
|

|
Healers are actually special cased to gain xp as if they killed their opponent whenever they survive combat.
|
|
#
?
Oct 6, 2019 17:44
|
|
|
Blaze Dragon posted:This translation is really rough but man, this is just boring. Let me correct this... That is a thing of beauty. Also, thanks for the heads up, I've updated the post for consistency. Next update will be coming this evening!
|
|
#
?
Oct 7, 2019 16:45
|
|
|
 Welcome back! Last time, we seized Castle Talis. Sheeda’s probably happy about that.  So, you’ll travel to Orleans. I’ll send captain Oguma and his brave soldiers to assist you. So, you’ll travel to Orleans. I’ll send captain Oguma and his brave soldiers to assist you.I mean, sure? Seems like that should’ve been a request, not a statement, but kings are dicks, so sure. Off to the French Quarter. Let me tell you that you will encounter people who are bitter to Durhua. Some are imprisoned or fighting against their own will. Search for them and fight with them as allies. It’s time prince Marth. I wish you good luck on your journey. Fight with your heart!Right, Durhua are the baddies. I remember that. 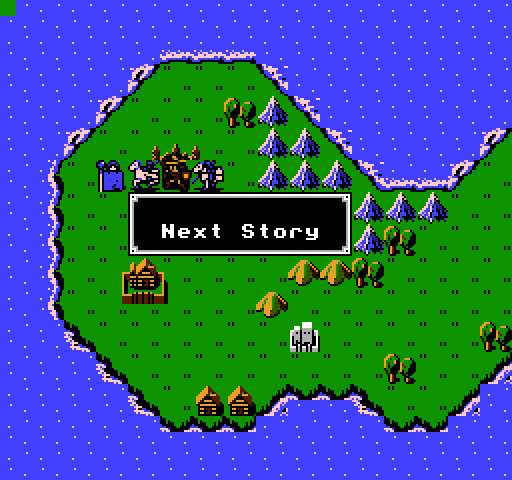  Sure thing, mystery sweater girl! The first map fades to black, and we’re immediately moved into our next battle. 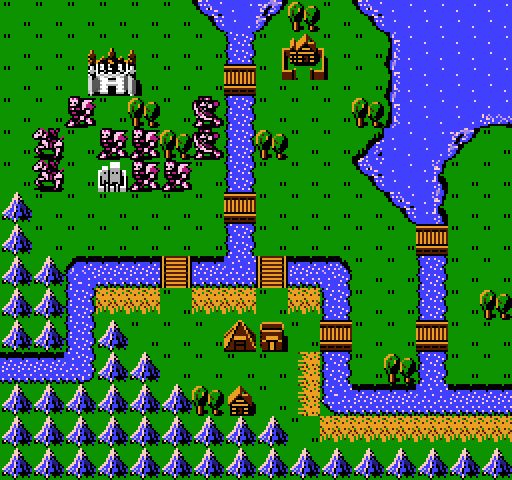 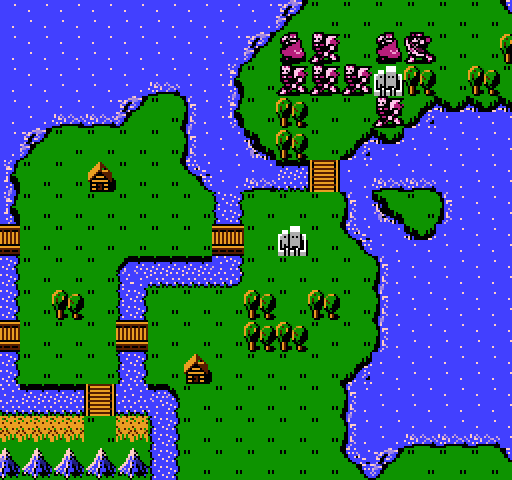 Here’s our standard pan. 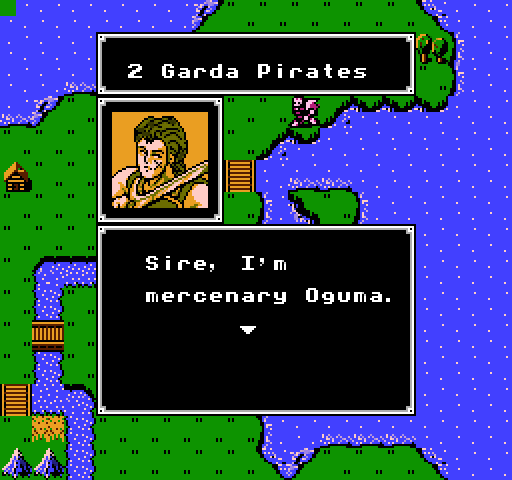 And here’s our opening text. But before that, let’s take a look at the overall map. We’ll do this again once we see our own units. 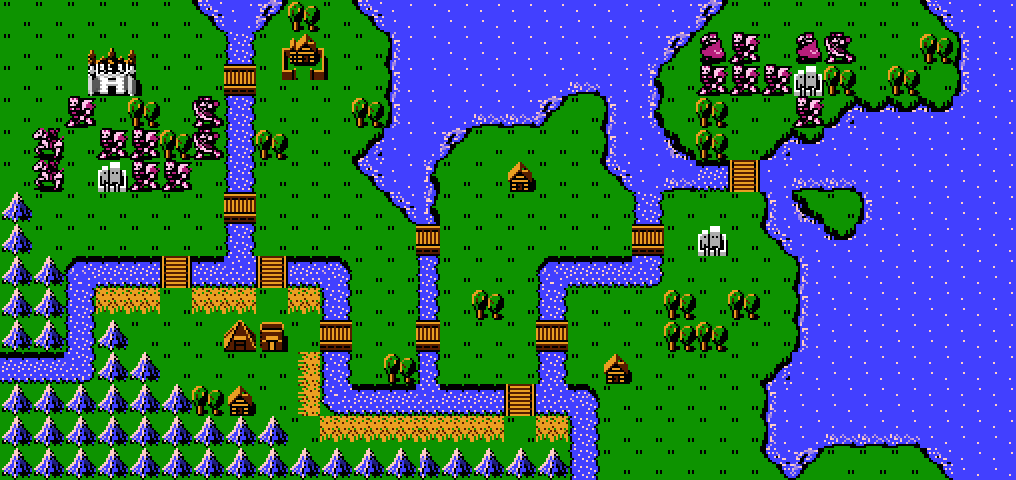 Click here for the full 1016x480 image Not much bigger than the last map. Two enemy groups, lots of choke points, and few forts accessible to us. A couple houses, which are unimportant, and a village close to the castle, which is very important. In our top-right enemy group, we’ve got two thieves, who are public enemy number one. Lastly, we’ve got an armory and another building beside it, which I’m guessing is more of a general store. Let’s see what Oguma as to say.  Sire, I’m mercenary Oguma. By the king’s request, we’ll be joining your army. This place’s filled with pirates and soldiers who wish to kill you. Be careful. Sire, I’m mercenary Oguma. By the king’s request, we’ll be joining your army. This place’s filled with pirates and soldiers who wish to kill you. Be careful.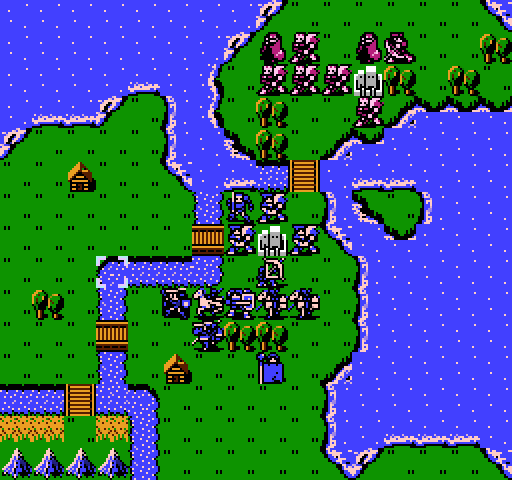 And with that, we’re right into it, no preparation screen or reformation of the troops allowed. We’ve got four new soldiers to introduce, so let’s do it. 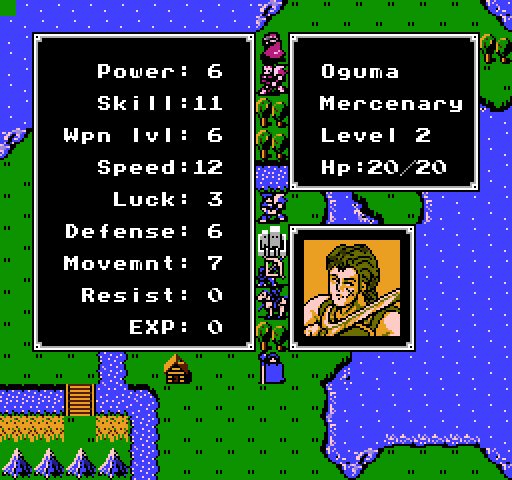 Oguma is a mercenary, a speedy guy with a sword. Will probably get really strong, and then die to a poorly thought out move, wasting much effort and experience. 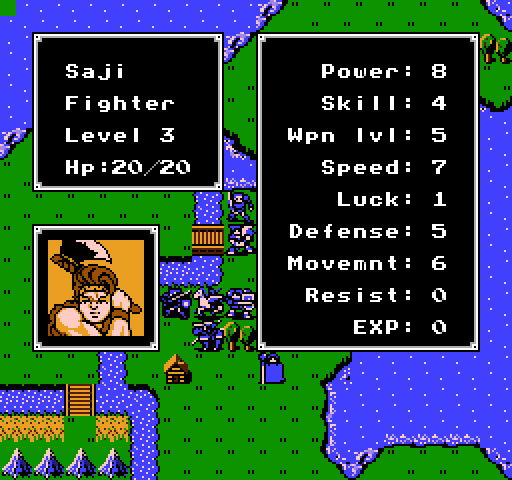 Saji is an axe boy. Normally, I wouldn’t use him as soon as I can drop him, but I guess that’s not possible this run! He endears himself somewhat by bringing a hammer, which is usually effective against armored units (like Doga).  Maji is a carbon copy of his brother, but weaker, faster, and luckier. Also? No hammer. 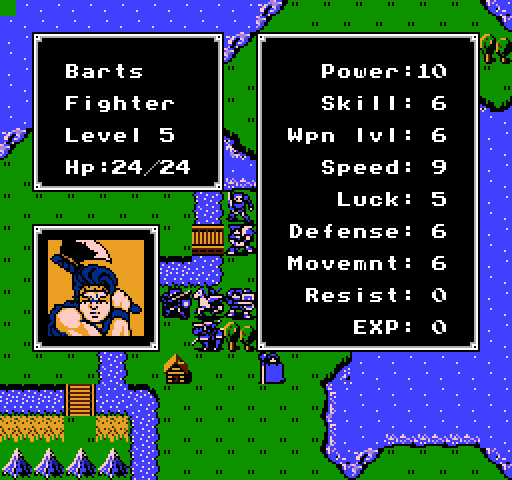 Barts comes in at level 5, with a steel axe, a handaxe (can be thrown from two tiles away, like a javelin), and clearly something to prove. His high level means he will be right next to Jeigan on the bench, first time we pick units. It’s at this point that I create an excel sheet to start to keep track of everyone. 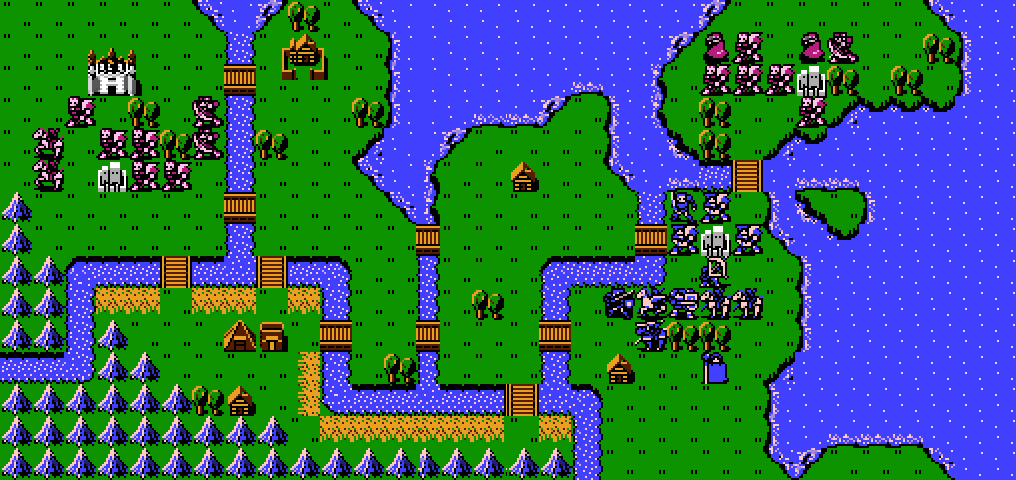 Click here for the full 1016x480 image Here is our revised map. Objectives Objective 1 – Get to the village quickly, or kill both enemy thieves. Don’t know what’s in the village, but we want it. Objective 2 – Level weaker units. We aren’t going to be facing scrubs forever, and we’ve got 5 level 1’s on the field. Marth, Sheeda, Abel, Doga, and Riff (By the way, I learned in the interim that clerics only gain exp by dodging or getting hit…So that’ll be fun). Sheeda and Riff will be tricky, but should be manageable once we whittle down enemy numbers (specifically the archers, we do not want Sheeda around those). Objective 3 – Chokepoints. Pirates can go across rivers, most likely, but those cavaliers, archers, and thieves can’t. We need to block them up asap. Luckily, most of these objectives overlap a good deal.  Click here for the full 1016x480 image First, the choke points in the west. Marth will take the bottom bridge, Abel the middle, and Kain the top. Riff will stay within movement/healing distance of Marth and Abel, but not Kain, since he picked up the vulnerary last map and should be able to take care of himself. 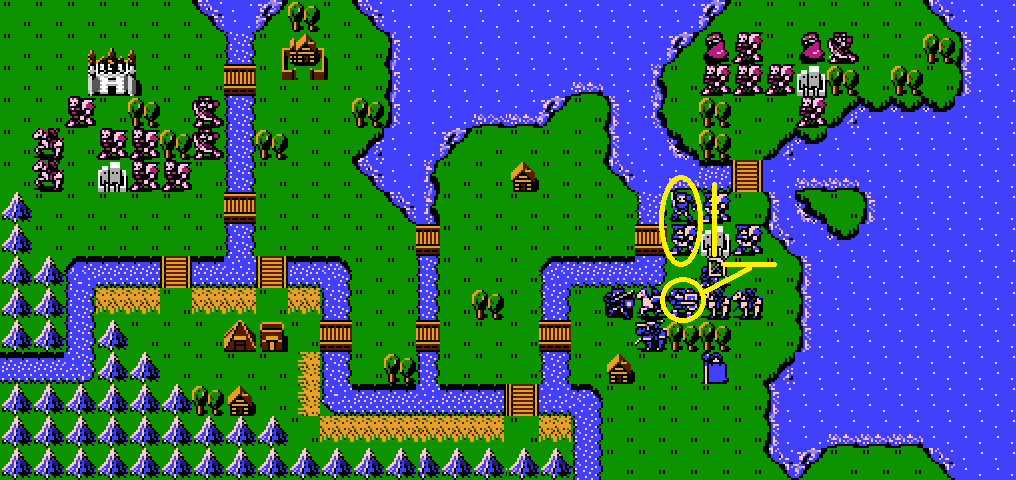 Click here for the full 1016x480 image Doma, Oguma, and Maji will be our wall in the top, with Maji on the fort, as he has lowest survivability. Gordon will hopefully get the chance to take pot shots at the archer. The rest will stay in the middle, as emergency backup. If someone takes a nasty hit, we should have someone able to jump in and take their place. Sheeda will get Abel to pass her a javelin, hopefully letting her get hits in without putting her in danger herself. Will this work? No clue! It might fall apart by turn 2. Right now, the weak parts of the plan are lack of healing capability, and the chance Oguma has to fall back because he can be attacked by a pirate from the river above his square. Regardless! Next time, we’ll see the plan succeed or fail, in motion. AlouetteNR fucked around with this message at 03:49 on Oct 8, 2019 |
|
#
?
Oct 7, 2019 23:00
|
|
|
This translation is really confusing but at least it taught me that Bord and Cord were Saji and Maji originally (or is it the other way around? Hell if I know). I also can't say I'm against getting the protagonist of Final Fantasy V here, that's an unexpected cameo but a very nice one.
|
|
#
?
Oct 8, 2019 01:47
|
|
|
Blaze Dragon posted:Healers can only get experience by getting hit in FE1. At a rate of 1 EXP per hit. Actually, they gain EXP equal to what a kill would've gotten them. Clearly Wrys should face Gomes for this reason! (Clerics are awful anyways though so maybe not)
|
|
#
?
Oct 8, 2019 07:54
|
|
|
Last update was pretty short, and light on actual game, so I'm throwing another up. Let’s try to enact that plan from the last post.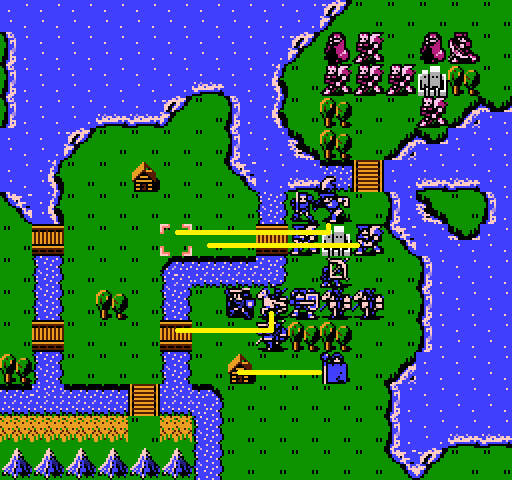 Saji and Barts get out of the way. Sheeda gets in position for the swap, and Riff visits the house on the way to his post. A pirate named Daros wants to meet the prince and join him. You should listen to him.I’ll take a pirate. Their overworld sprites have such jaunty walks. 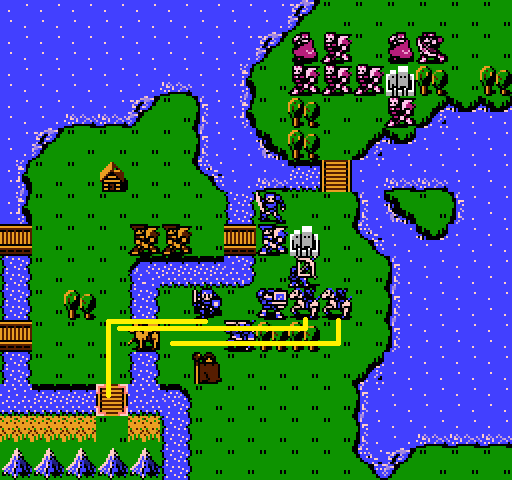 Marth takes his bridge. Kain and Abel start moving up, with Abel passing along the javelin. 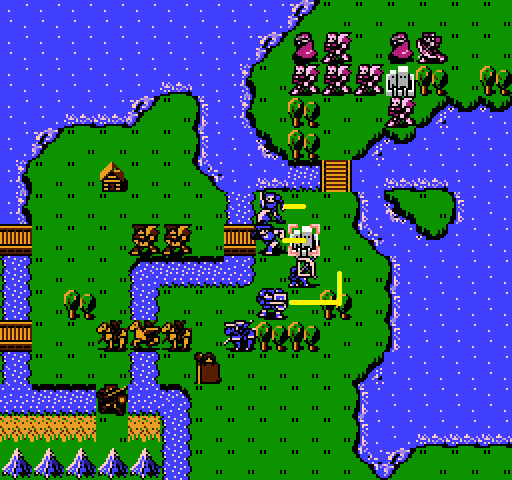 See what I mean about the walk for axe users? It’s adorable! Once Oguma, Maji, and Doga are in place, I end the turn. Gordon can stay where he is, and I don’t have a firm idea of what to do with Jeigan yet, aside from walking weapon repository. On their turn, a pirate comes up to attack Maji on his fort. 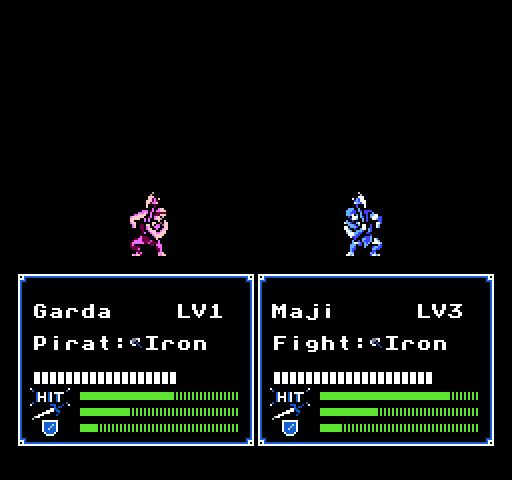 Axe vs Axe, fight of the century. Maji gets hit for 7, which feels like a lot, what with the fort reducing and all. He misses one counter, but his second brings the guy near death, so I’m not complaining too much. The strategy is contain, not murder, for now. Next, another pirate goes for Oguma.  He also does pretty okay for himself, bringing the pirate within a hit of death on his second strike. 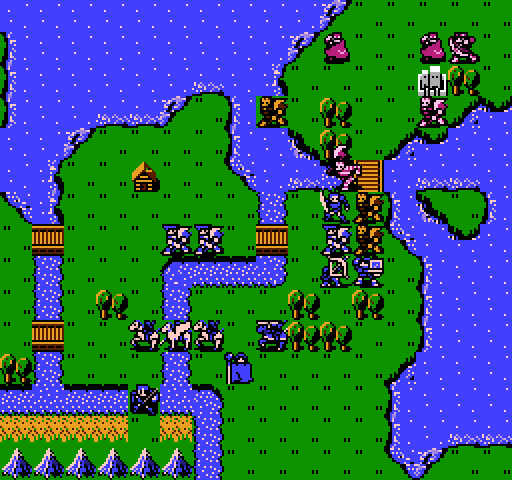 Then, as I somewhat feared, he gets attacked by a river pirate. Luckily, I don’t think the archer is in range of him this turn, so even if he gets hit here, he should be safe. 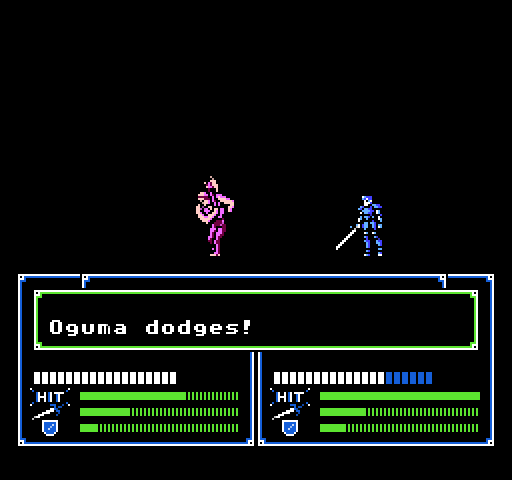 But Oguma decides to show off and make that a non-issue. 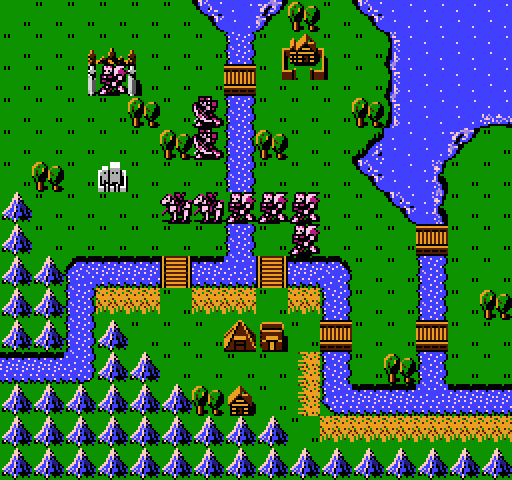 My turn. First, in the west, the enemy moved up imperfectly. The cavaliers wasted a good amount of movement staying behind the pirates, and the archers didn’t move at all. 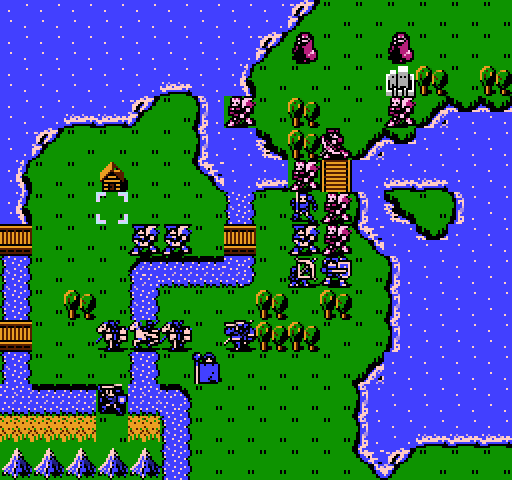 In the east, things aren’t horrific either. Maji’s healed up to 19/20 from being on the fort. Oguma is at 14/20, and would’ve been at 8/20 if he didn’t dodge before. I want to level him, but he absolutely cannot stay there. Before anything else, let’s see if we can’t clear some scrubs away. 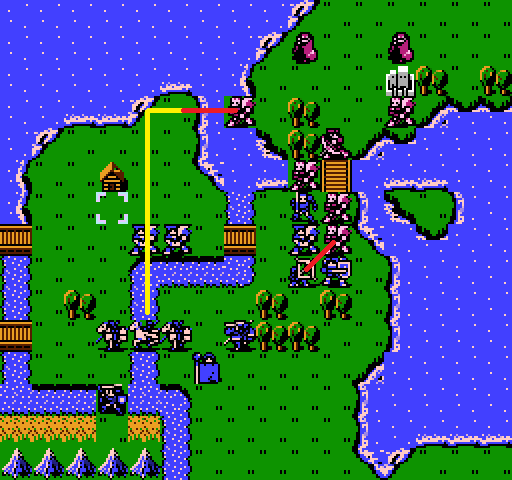 Sheeda’s going to intercept the pirate trying to be sneaky up top. The battle should get her a level, and I think she can handle one pirate. Gordon is going to try to make room for my next move. During the combat with Sheeda, I notice that pirate has a name. 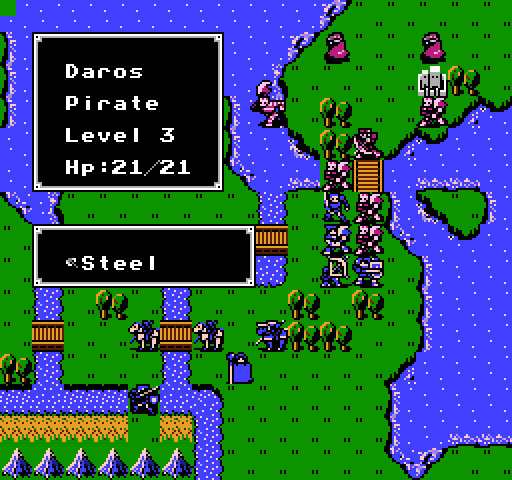 Hey Daros! Thanks for dodging both of those javelins! Wanna join my army? 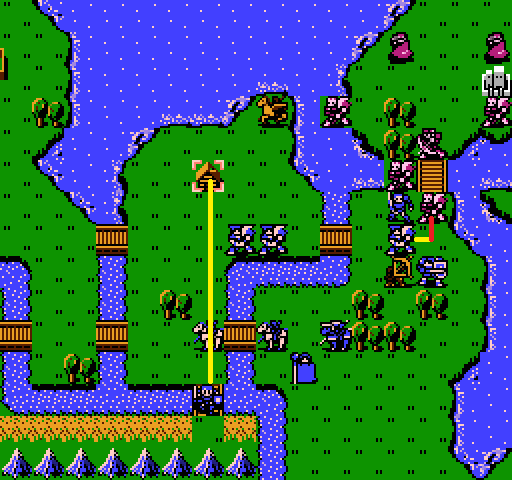 Marth immediately leaves his bridge to go talk to the cool pirate (and whoever lives in this house, I guess). Meanwhile, Maji clears space for Doga. When a priest’s attacked he gets Exp.Thanks, but cheetah and Blaze Dragon got me covered!  Kain and Abel take up positions, and Doga becomes my wall. 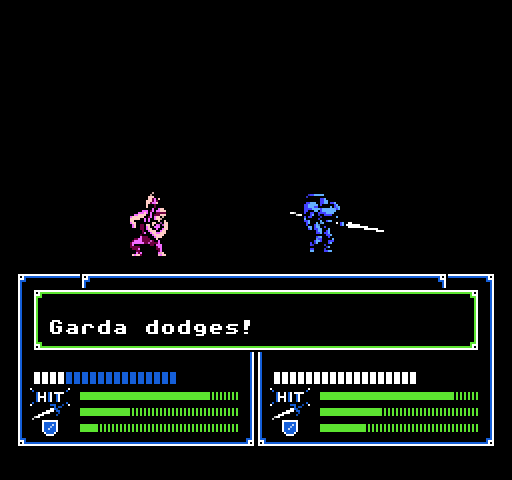 Damnit, Doga.  That put a hiccup in my plans, but just a minor one. Oguma still retreats to the fort to heal up, but now Saji needs to take up his position. 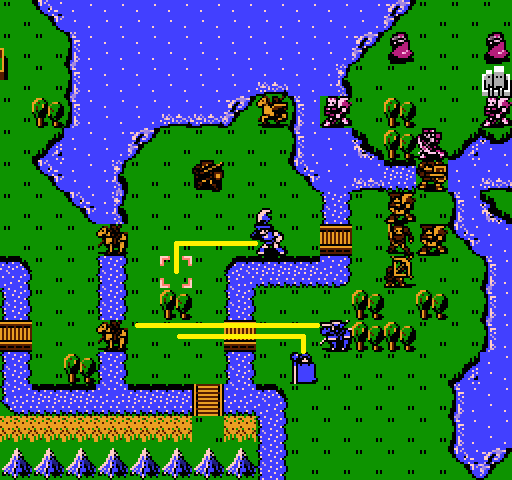 Barts is still my backup in the west, and with how contained the east is, Riff also moves closer to our cavalier boys. Jeigan, remembering he’s carrying a bunch of weapons, gives Abel a second iron sword and an iron lance. With that, round two is over, and I actually feel in pretty strong command of the map. 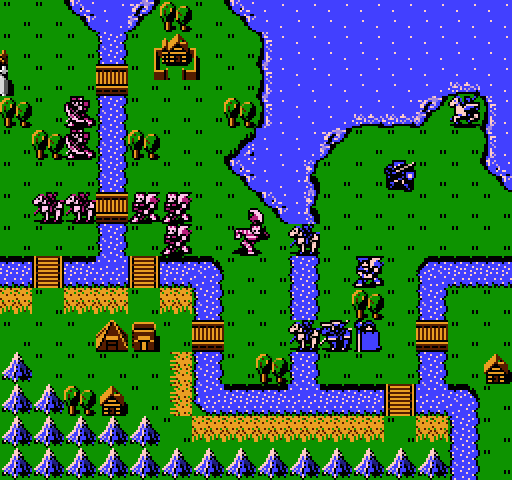 But now, the pirate waves start to come down on Kain and Abel. 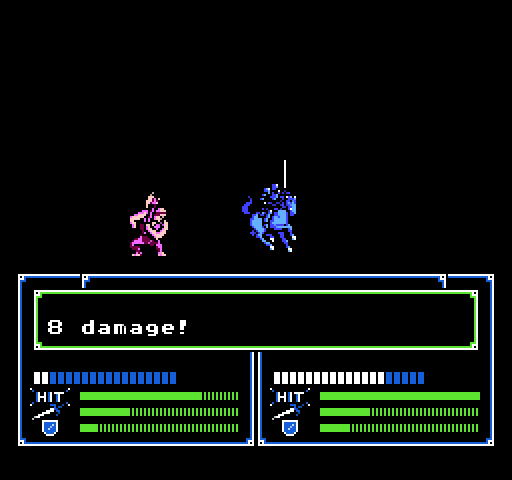 Luckily, Kain is our resident badass. 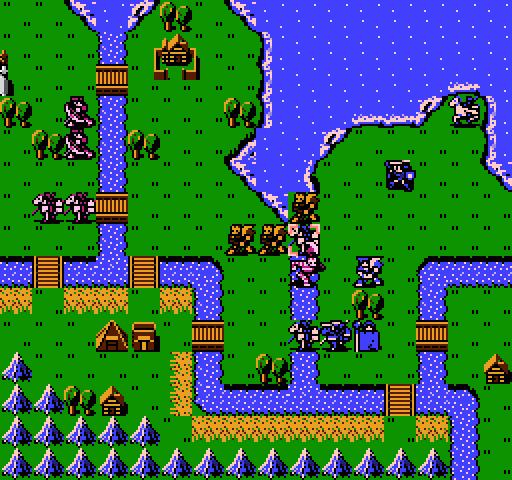 He’s not invincible though… 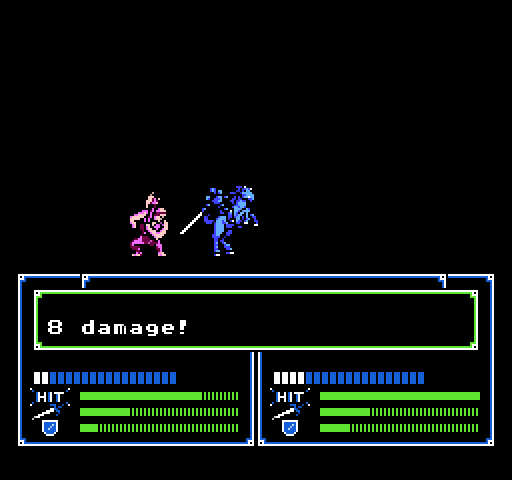 Kain, you need to get out of there right the hell now. Meanwhile, a pirate attacks Doga from the sea (I forgot they could do that). They barely scratch him, he puts them nearly out, and gets a nice level in return. 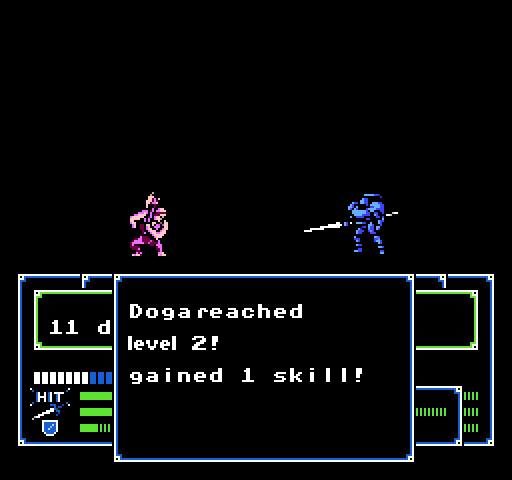 gained 1 hp!  Well, I mean, nice might be overstating it. Those aren’t great growths. Not Jeigan bad, but worse than Gordon even. Whatever, he can hit things more reliably now, and health is good on a tank. The hunter (not an archer) takes a few potshots at Saji across the river, doing enough damage that I don’t’ feel good about keeping him there. The cavaliers move up at a strangely slow pace. On my turn, the first move is obvious. 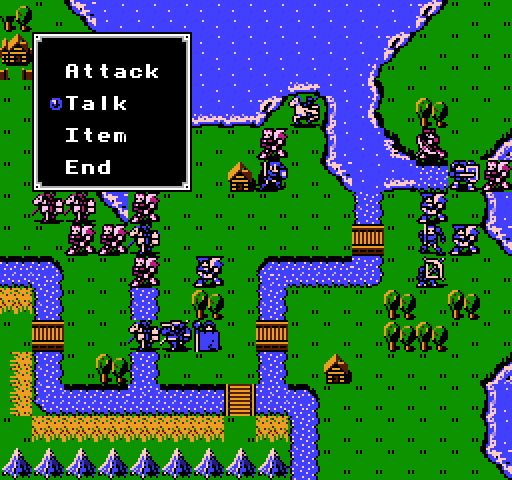 Marth is going to make us a friend.  Sire, I’m sailor Daros. I wish to quit pirate life. I’ll work hard, please let me join you. Sire, I’m sailor Daros. I wish to quit pirate life. I’ll work hard, please let me join you. With that, we have our fourth axe user. Of the mission. At least this one can walk on water. 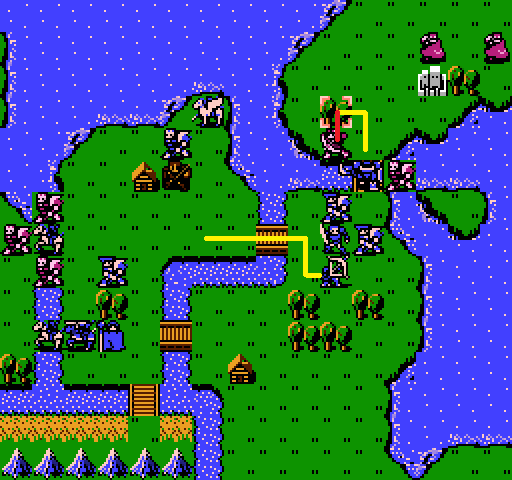 Doga moves into a forest, more to leave room open than for the defense. Gordon moves to set up for a brilliant plan. Doga misses, squandering that skill up from earlier. 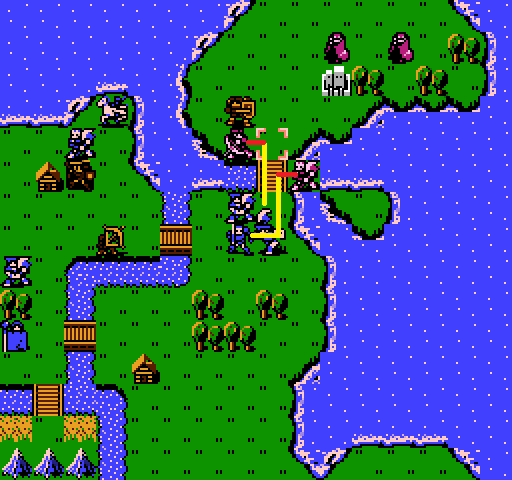 Maji hopes to clean up this archer, and Oguma want to take out that pirate. Oguma succeeds, but Maji? 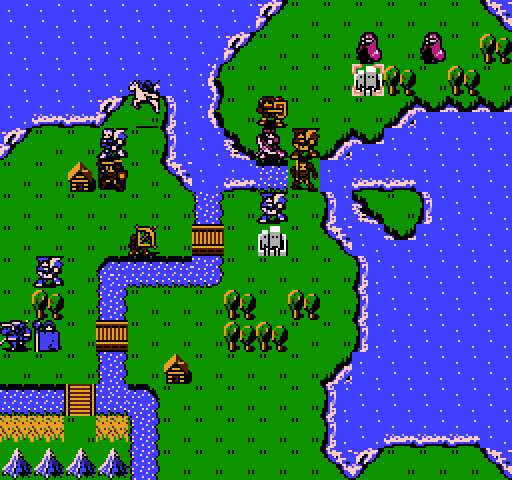 They just cannot get a goddamn hit in. Now, originally, I wanted to move Sheeda (Sheena? Sheeda. Paranoid now) over to that fort. She could take down both thieves with little difficulty. Now, there’s the off possibility the hunter could get to her there (I don’t know if the hunter can walk on that corner of island, then curve around). Instead… 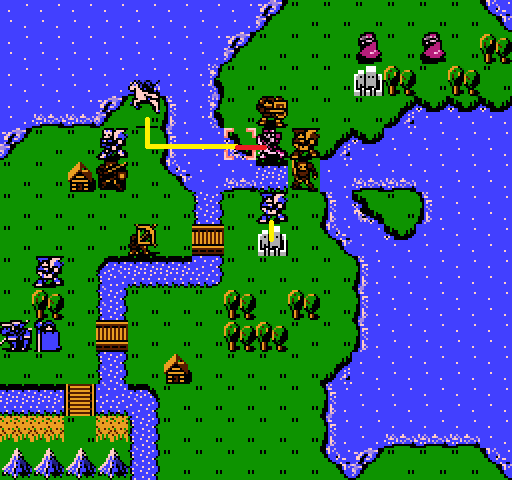 We alter the plan slightly, and ensure the hunter can’t get range? Can you walk on water, bowman? I think not. We block off the hunter, but Sheeda is 2xp away from a level. Saji pops onto the fort, but I’m not sure how much more action he’ll see this map. For my next move, I do a quick check to ensure none of the western enemies have any sort of ranged attacks. Once that’s done.  Everyone backs the hell up, Kain pops a vulnerary, and Riff tops him up. 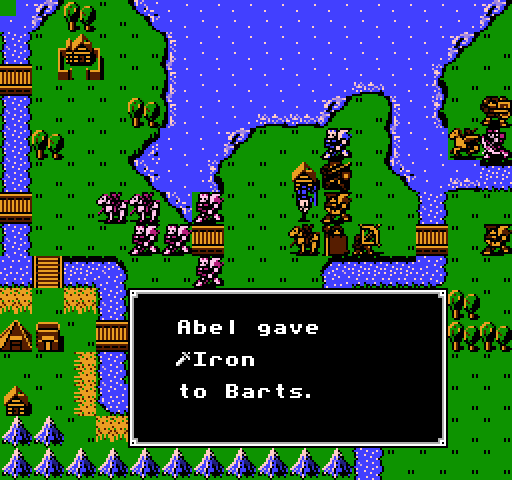 But why is Abel giving Barts an iron sword? Basically, I am nervous about every enemy swarming either Kain or Abel. Enough of the enemies are weakened enough that they’ll die, meaning either cavalier could take a significant number of hits, and may die if not lucky. I want to avoid this, if at all possible. Enter Jeigan. 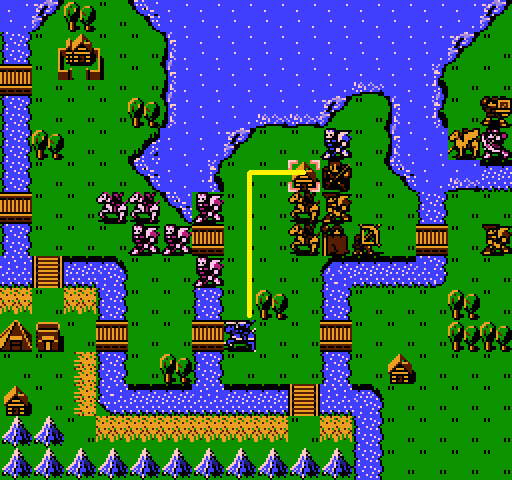 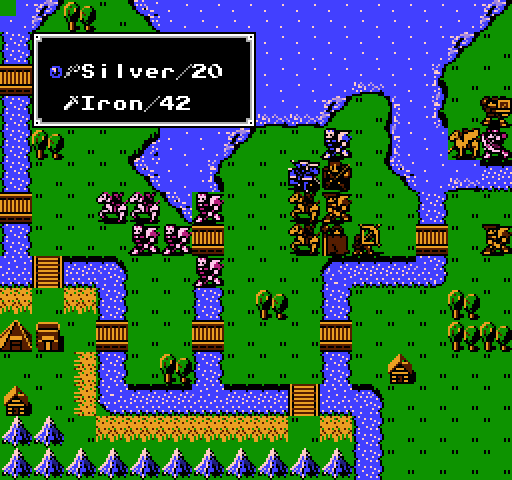 Jeigan is going to give both of his weapons to Abel, making himself my (hopefully attractive) naked target. With that, we pray. 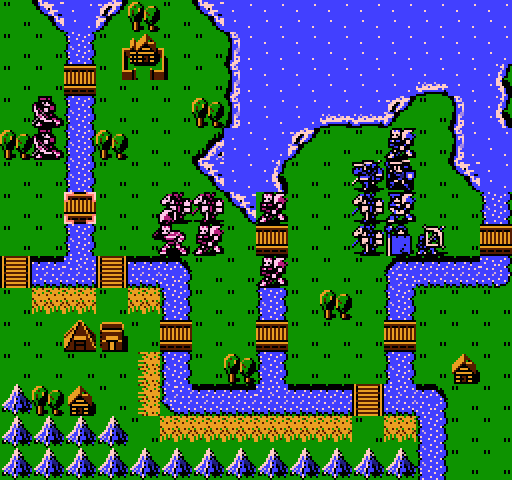 The first enemy pirate… runs away. Hell, I’m not complaining. 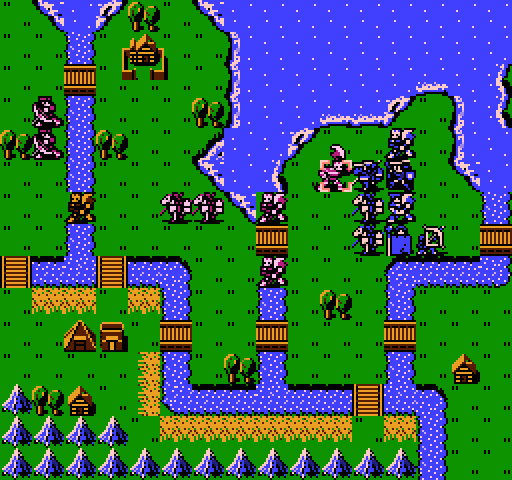 The second, sweet child, goes for the ruse. So does a third. 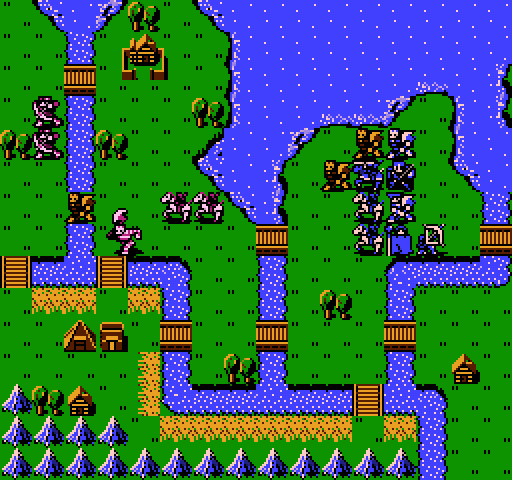 The fourth also runs away, and I think I made myself very anxious over nothing? You guys, what if NES level AI isn’t very smart? 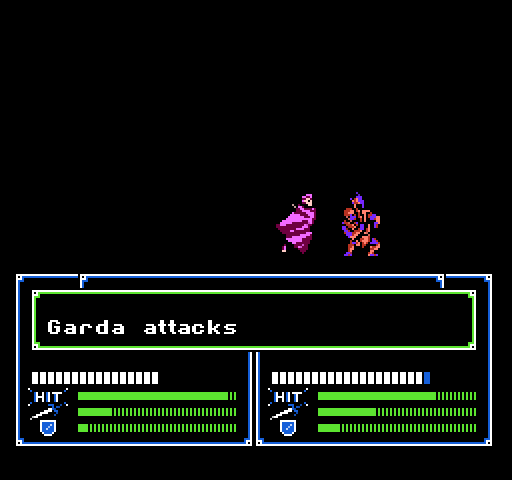 A thief attacks Maji. It’s not really a thing. 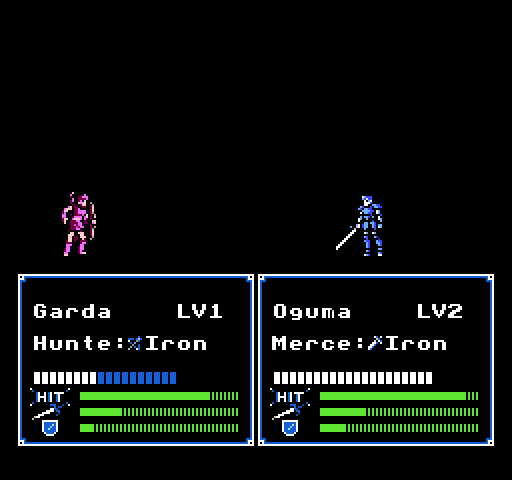 Ohhhh, right, Oguma was in range. Whatever, Oguma dodges. 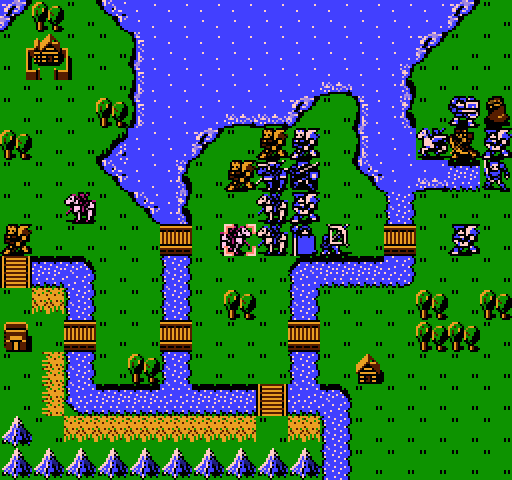 The cavaliers humor me and charge. 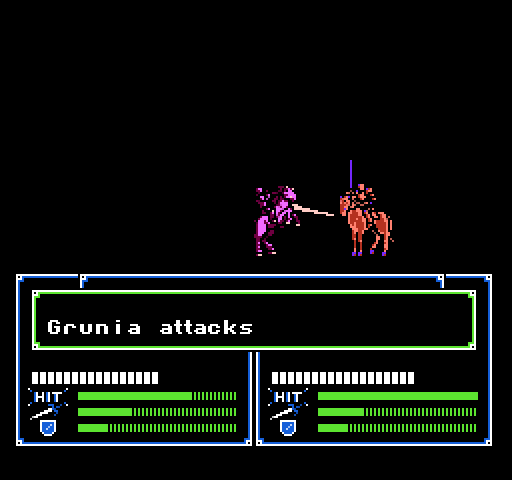 Grunia’s new. Maybe another country? Or maybe just a town, like Garda? 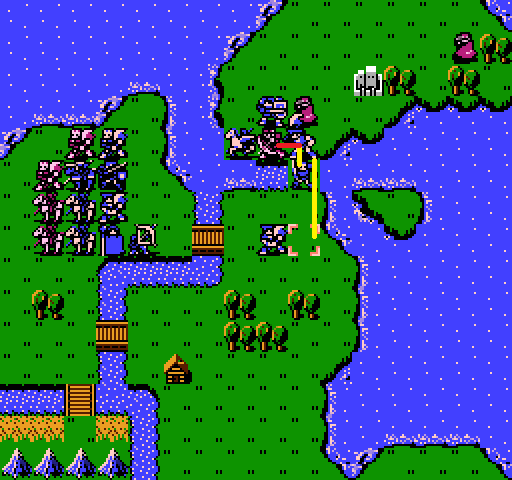 Most of the enemies are still alive, but I feel like I’m in mop up mode. Maji makes room for Oguma to get some experience on the hunter. 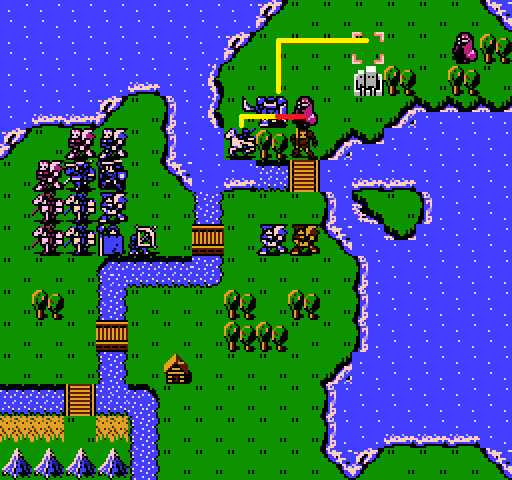 Doga makes sure Sheeda can do some thief-slaying in peace. 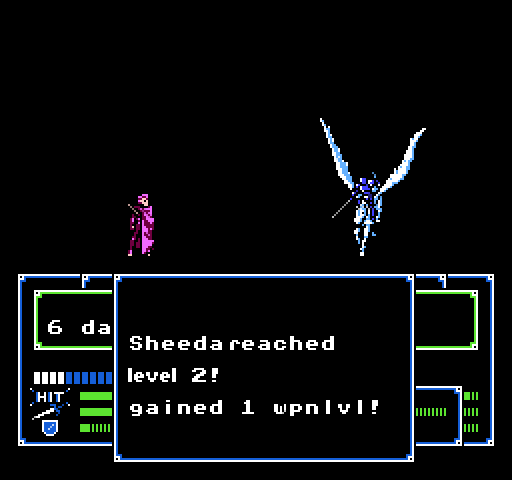 gained 1 speed! gained 1 luck!  It’s standard, I can’t complain. Health would’ve been nice. 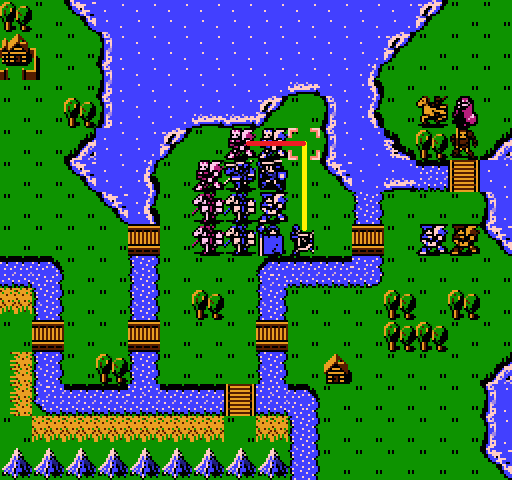 Gordon attempts to clear a path for us. 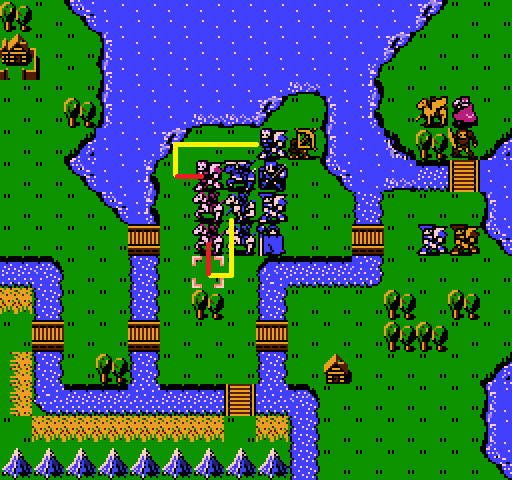 Abel is going to take down the weaker cavalier, hopefully in one hit so he doesn’t get hit again himself. This also puts him just north of the forest, where Riff can situate himself should Abel need healing. Daros should be able to weaken up that full-strength pirate enough to let Marth finish it off.  Abel pulls it off, admirably. 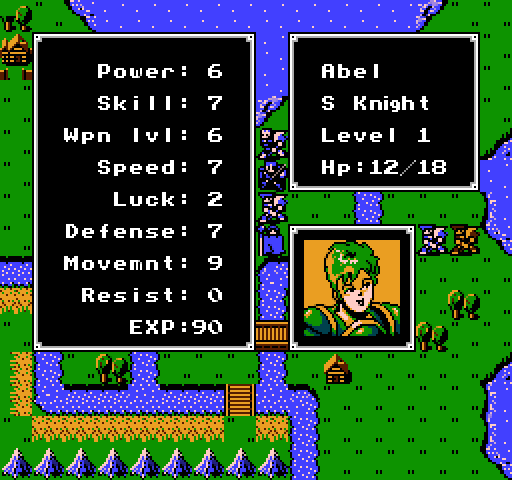 But my guy, I need you to level up. 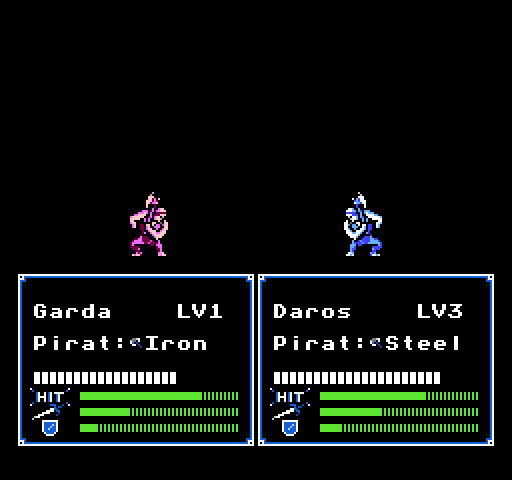 Pirate duel! Daros gives a good hit, and takes none in return. So far, good showing. 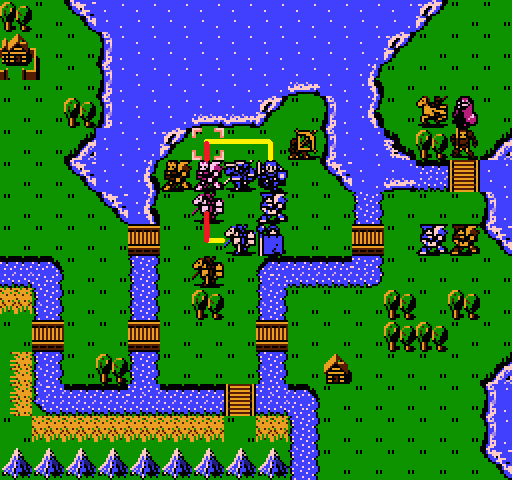 Marth moves to finish the pirate, and Kain the cavalier. Before Kain moves though, Riff heals him up again. He’s at 13hp, and I am nervous that somehow he’ll miss and get hit twice. Over-anxious? Probably. But safe is good. Safe is safe. 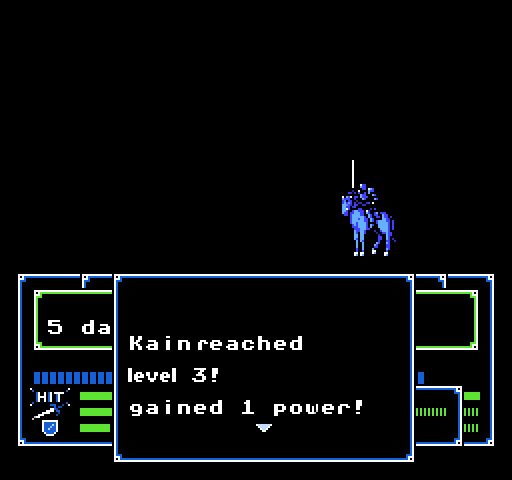 gained 1 skill! gained 1 luck! gained 1 hp! That is actually really nice, I will always want more power. 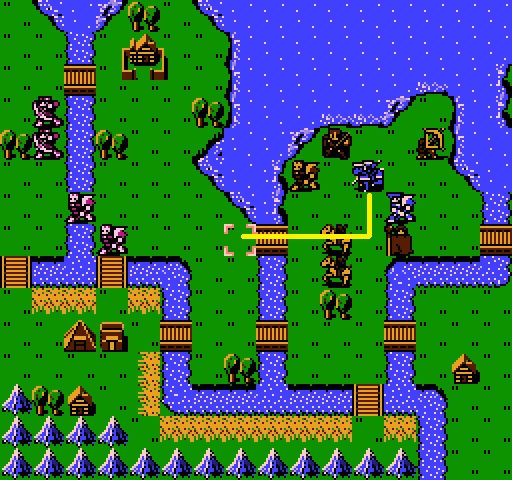 To finish off the round, Jeigan once more throws himself into the line of fire. The enemy more or less retreat. The pirate already retreating got to the back fort, which, fine. The closer pirate threw himself beside Jeigan, but didn’t actually attack. And one of the island thiefs also went on the fort without attacking. Very strange. 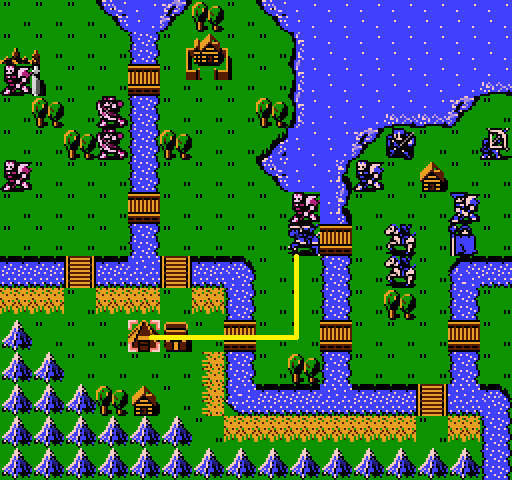 Whatever, Jeigan’s going shopping. 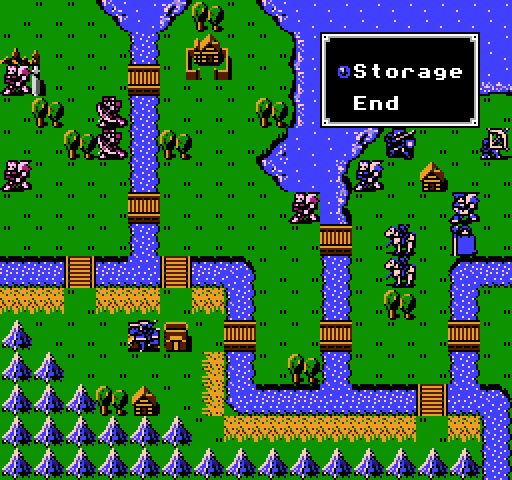 Ahhhh, interesting. 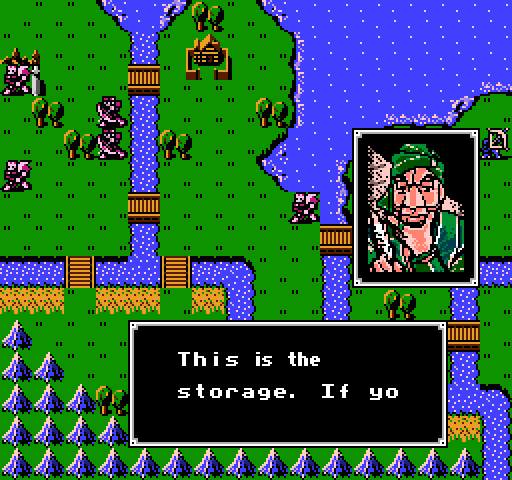  If you bring items here, you can retrieve them from storages. If you bring items here, you can retrieve them from storages.We have the option to Store or Take. Jeigan has nothing, and our storage has nothing, so we leave it be.  In the east, Oguma kills Thief 1, and levels up.  gained 1 hp!   Doga is going to soften up the thief, so Sheeda can knock it down.  At this point, while checking the hunters’ movement ranges to see if I’m safe to take down the closest pirate without taking a shot, I realize, hey, this fella’s got a name and a face! Marth might want to have a chat with this young blue-haired man.  But first, Abel needs to level. 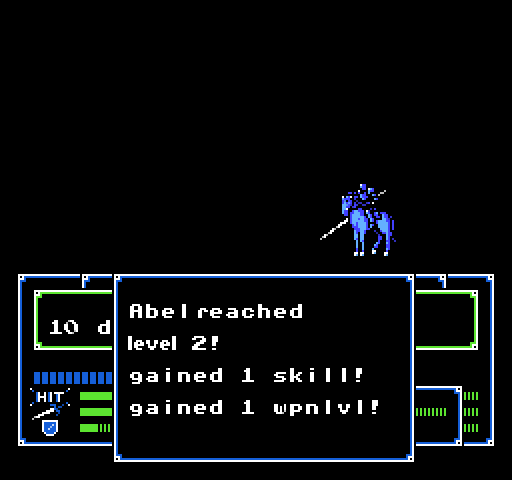 gained 1 hp!  I mean… I’ll take it, but I can’t say I’m not a little bummed. 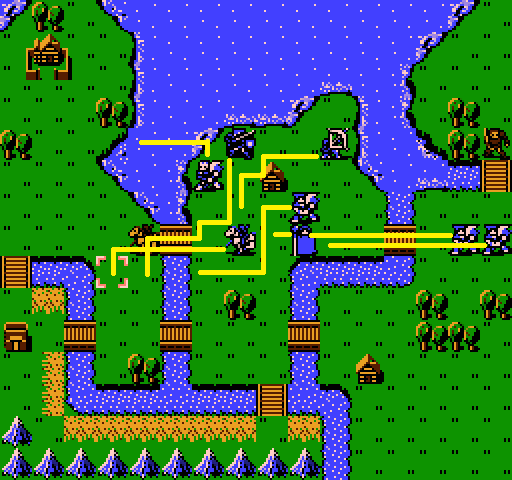 Everybody moves up. This update is getting a little long, so I’m gonna cut it here. Next time, recruitment, boss murder, plot, and map prep!
|
|
#
?
Oct 8, 2019 13:05
|
|
|
Hey all, just wanted to give a brief update. Next post should be up this evening. I'm just a bit ahead of this point in updates, and I can say we've already had our first casualty of war! Also, cheetah's comment about how later games may not be well-designed for ironman runs got me worried, so I've been doing some test runs of later games. In particular, I've been doing a run of Sacred Stones - Ephraim Hard Mode. I'm at chapter 11 there (it's amazing how quickly you can play when you aren't trying to take screenshots every fifteen seconds), and so far, it's actually doable. A lot (and I mean A LOT) of deaths, to the point where it feels like it might become unwinnable eventually (In the chapter where Natasha was introduced, there were four deaths. Natasha, Joshua, Colm, and Neimi. Losing out on treasure chests in later levels, as well as all your healing staves, suuuuucks), but it definitely makes for a good amount of dramatic tension, so I'm feeling good about the viability of this project, long-term.
|
|
#
?
Oct 10, 2019 14:49
|
|
|
They're definitely doable especially if you're good at FE like you would be by the time you get there but you will just be fighting against the game instead of playing it the intended way
|
|
#
?
Oct 10, 2019 16:31
|
|
|
You're definitely not wrong, during certain levels the atmosphere felt less like a strategy game and more like survival horror.
|
|
#
?
Oct 10, 2019 21:42
|
|
|
Welcome back, let’s finish this map up.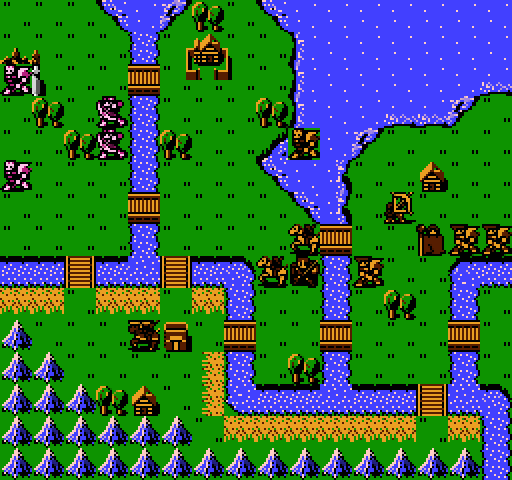 We’re more or less done, we just need to recruit a hunter, kill two basic enemies, visit a village, and kill the boss. We may also do some light shopping, we still have a ton of money. 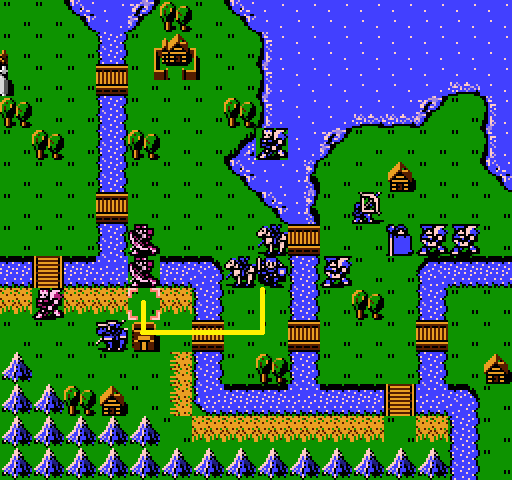 The enemies all move up, Kashim included. Marth goes to make a friend. 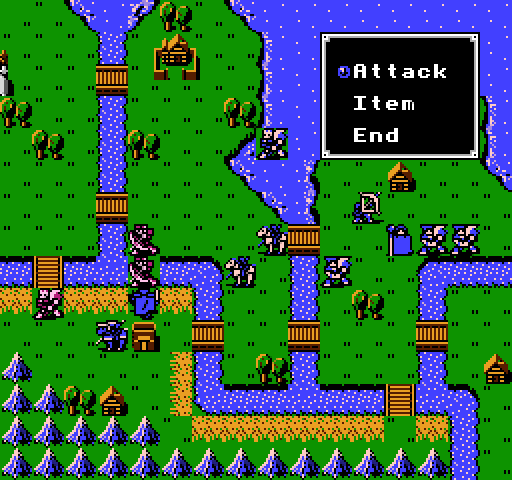 Erm… Hrm. Huh. He has to be recruitable, right? He’s got a face and everything. Let’s not do that move. I have a plan. 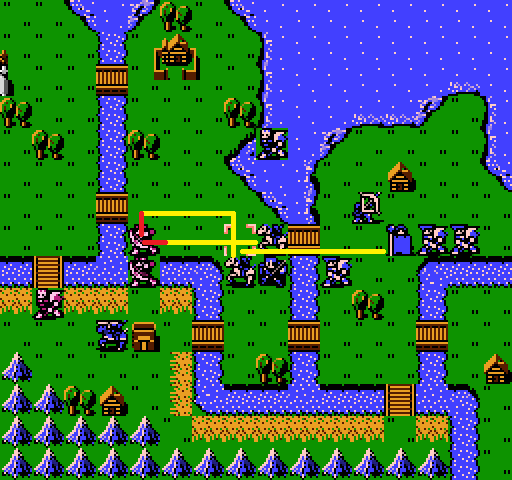 First, Riff heals up Kain. He’s got the most defense, and he’s almost guaranteed to take two hits next turn, we want him to live (he gets good level ups). Kain and Abel take out that nameless hunter.  But then Kain kills the hunter in one go, so hang back, Abel. Now, part two of the plan. 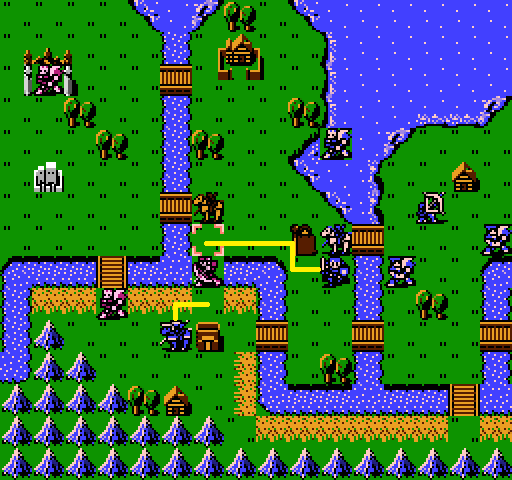 See, Kashim has two things working against him here. One? Can’t walk on water. Two? Only carrying an iron bow. So if we block him in like so, he can’t attack us, and he can’t move. We have him pinned until we figure out why exactly he’s being so shy. Originally, I was going to reverse Abel and Marth’s position, have Marth finish off the hunter and Abel do guard duty, but they have identical defense and speed, and Marth currently has one hp and five luck over Abel, so he’s more likely both to dodge and survive, plus he’s still level one, so I really want him getting kills. 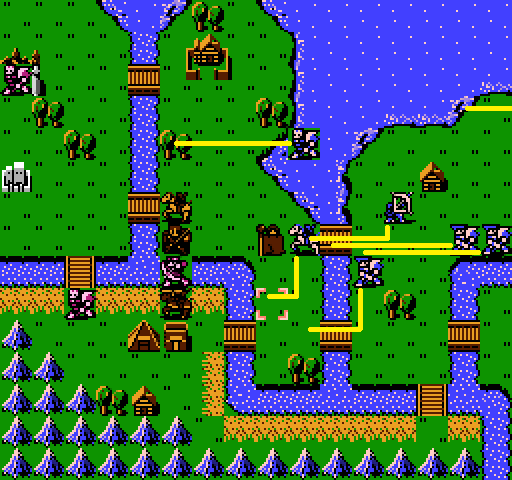 Everyone else moves up. The top-right line is Sheeda, Oguma’s also moving up, just offscreen, and Doga is staying put (he knows he’s not making it to the castle before that boss dies). Abel meanwhile, is moving into position to visit that house. One house told me what Daros’s deal was, maybe this one will tell me about Kashim. Also, Abel? Two down and one across? Classic knight move. 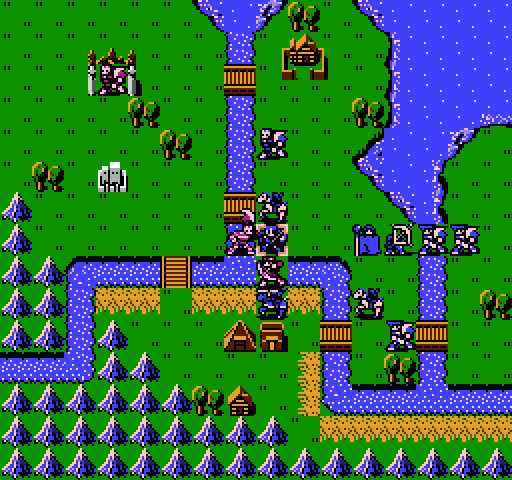 The pirate takes the bait! 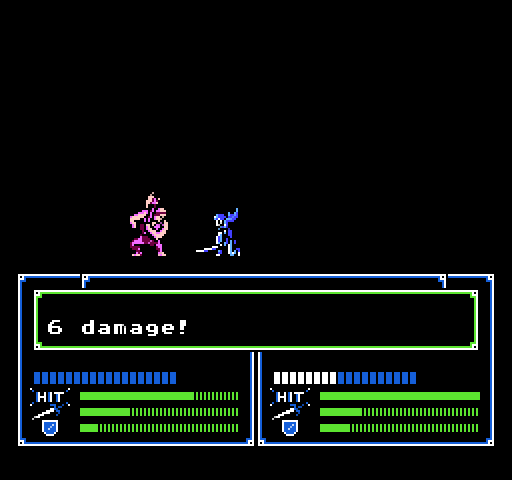 Something interesting to note is that Marth has different animations for the rapier versus normal swords. It’s a small touch, but nice. 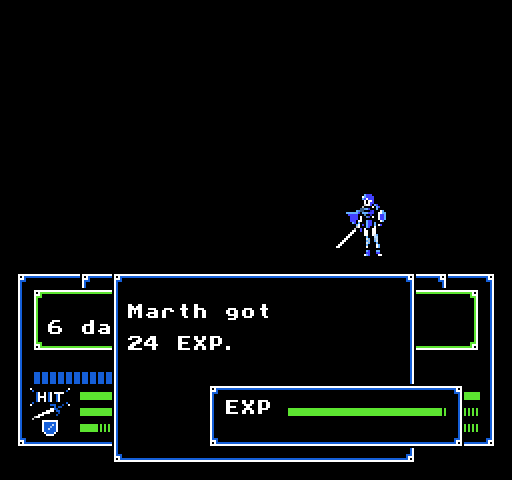 …  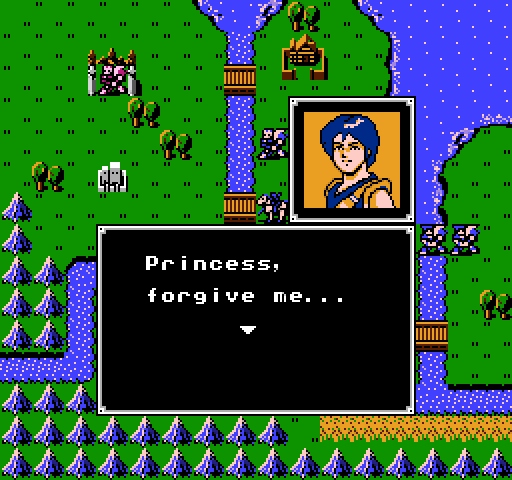 Ohhhhhhh. I really wish Sheeda wasn’t on the other side of the map. But whatever, Kain dodges, making it a moot point. 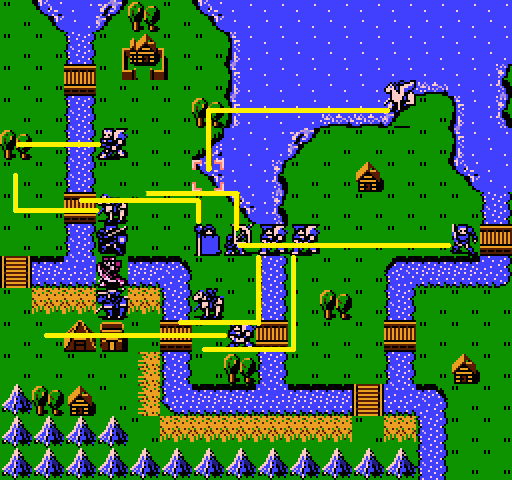 People move up (please ignore where I clearly forgot putting Gordon in Kashim’s range is a godawful idea and fixed it by decapitating Kain). 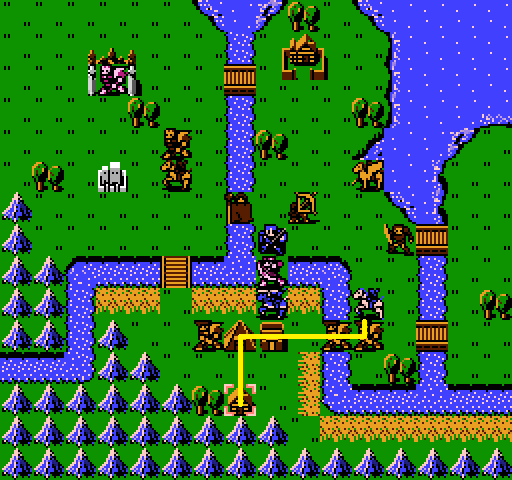  I gotcha. Recruit Kashim with a hammer. For his turn Kashim can’t do jack, so it skips back to me. 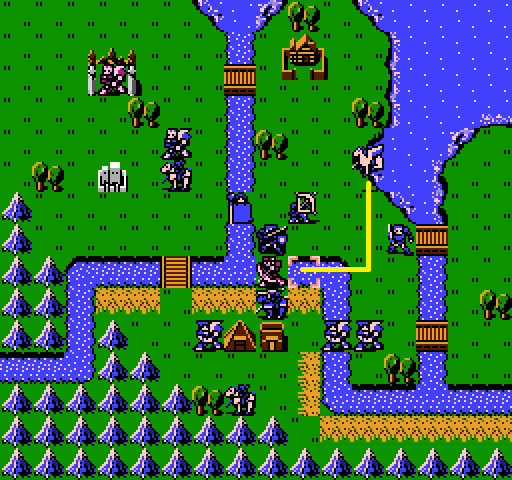 So, what do you say Kashim? 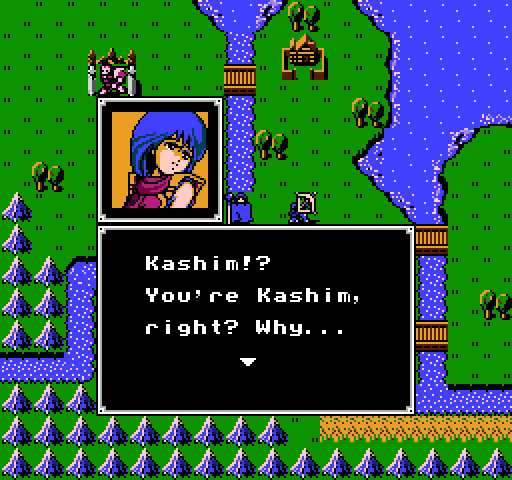 So you joined pirates. So you joined pirates.I kind of love that they end this line with a period instead of a question mark. I just imagine Sheeda saying this deadpan, looking at Kashim like he’s the dumbest man she’s ever met. I see. I have some money. Take this to your mother.Not sure this is the most solid investment, but I don’t think it actually takes money from us, so whatever. We now have Kashim. Something to note is his stats are identical exceeeept. 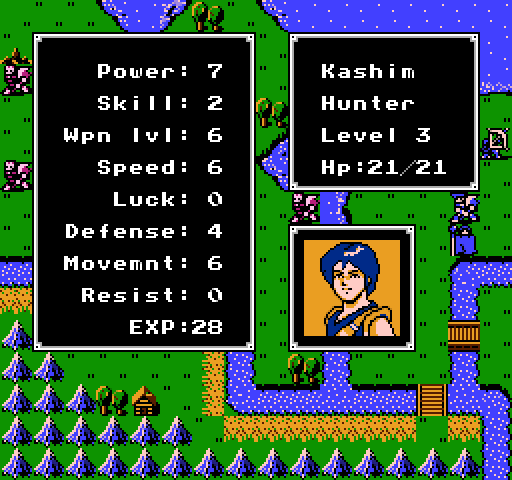 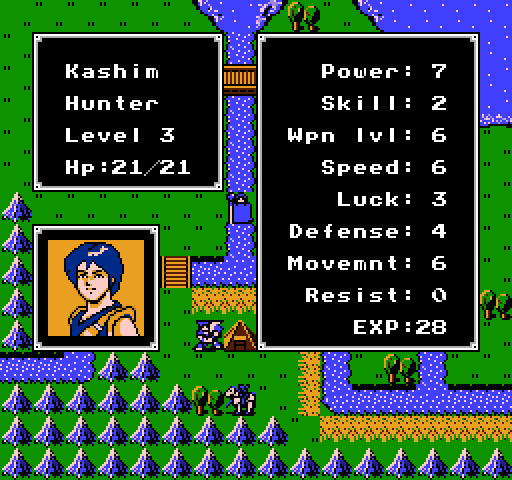 Kashim got lucky! You dog! 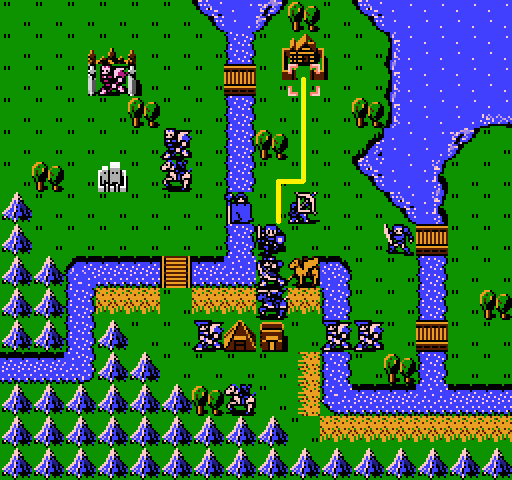 Hey! Aritian man, please save Rena! Rena, who cures people’s sicknesses, ignored our warnings and went to the Devil’s Mountain. She hasn’t returned. Hey! Aritian man, please save Rena! Rena, who cures people’s sicknesses, ignored our warnings and went to the Devil’s Mountain. She hasn’t returned.Well sure, she went to the Devil’s Mountain. Doesn’t sound, uh, safe. Here’s 5000G. Please save Rena with this! She’s like an angel to us.Hell, don’t have to tell me twice. 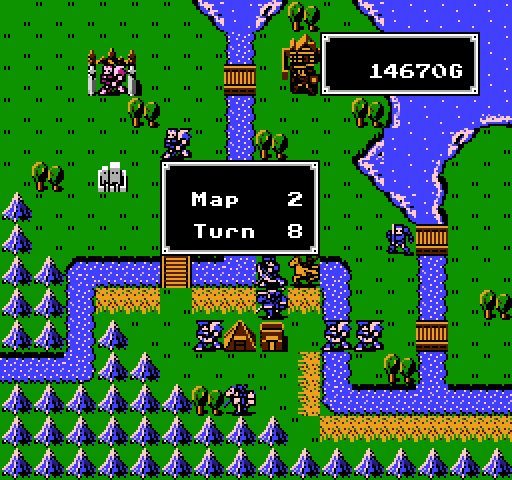 This game is just handing out gold like candy. I think it’s time to do some shopping. 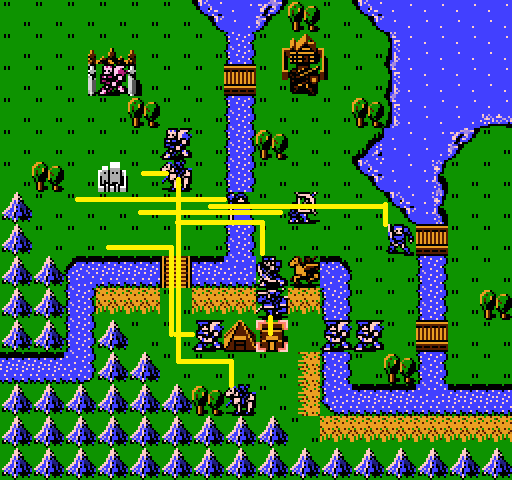 While Jeigan shops, people move up. Saji and Maji are kind of bummers so I leave them behind.  That isn’t a great selection. I have Jeigan pick up two iron bows, a hammer, and a handaxe. Before I end my turn, I take a look at the boss. 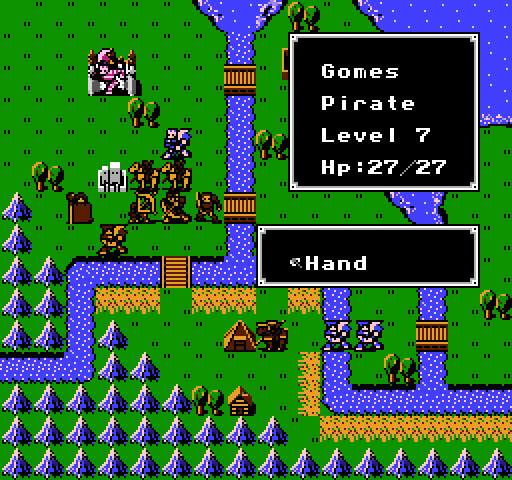  It’s Gomes! We remember Gomes! I guess we’re killing him. Hi Gomes!  I move forward some people who need experience. Marth, for sure. Riff to heal Marth, but also to tank a blow to make progress towards levelling. Oguma I want as strong as possible, and Gordon can take advantage of that forest. Abel hops on the fort, to hopefully get healthy enough to join in next turn. Sheeda also gets closer, and Jeigan delivers a handaxe and hammer to Daros, and an iron bow to Kashim. 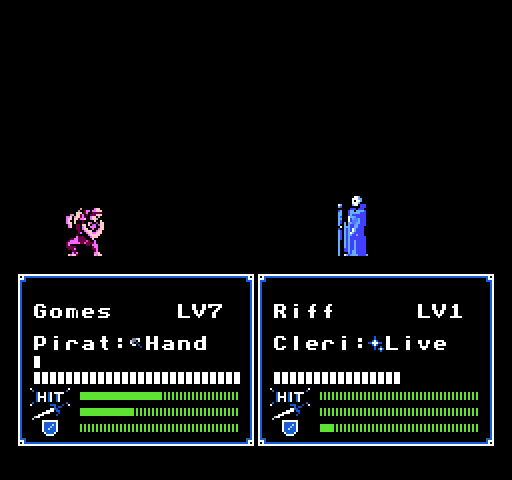 You got this buddy! 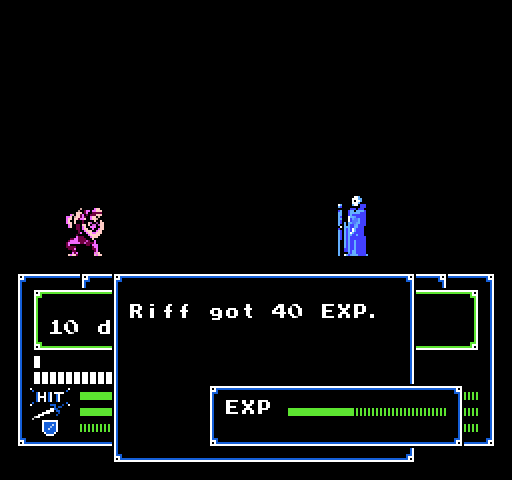 Good job! I strongly consider abusing this with my 4 remaining vulnerary charges, before realizing I don’t know when I’ll get more vulneraries, and it’s a bit too cheat-y for me (for now). Now it’s time for basic math. I know it’s pretty simple for Fire Emblem. Now Riff took 10 damage from one hit, and has 3 defense. I’m not looking up the exact formula, but Marth and Oguma both have 7 defense. I’m pretty sure that means a single hit will do 6 to either, but I’m not 100%. If so, that means Marth can take three hits, Oguma four. Let’s have Oguma test this theory. 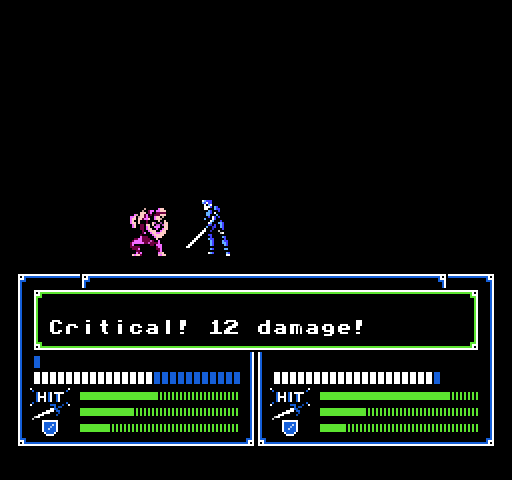 Jeez buddy, calm down, leave some for the rest.  The answer is Gomes does 0 damage, because Oguma is too much of a badass to be hit. Marth, you wanna try?  Ha! So, once we know damage, we can make moves more safely. 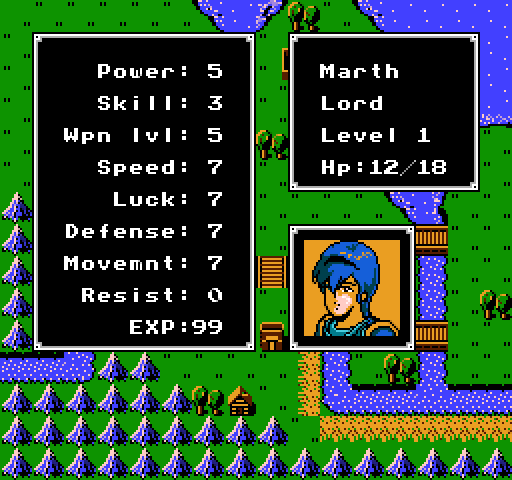 Dude! Come on! 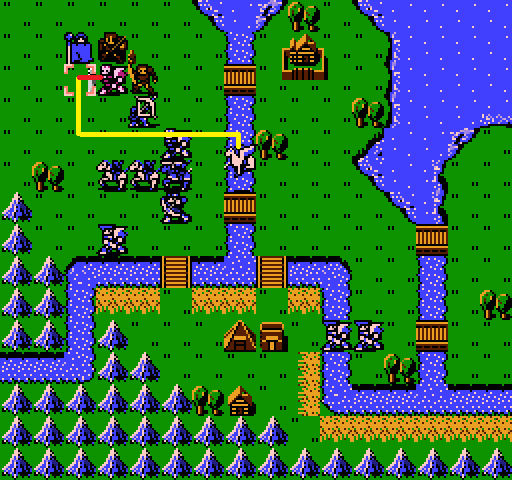 Sheeda is actually really speedy and lucky, and has as much defense as Marth, so she’s pretty safe making this move. She has fifteen health, so even if we don’t land this, and somehow don’t kill this guy this turn, I think she’s safe. She actually gets a crit, dodges, and gets a second hit it! All told it does a whopping 4 damage to Gomes. Sheeda is not a heavy hitter. 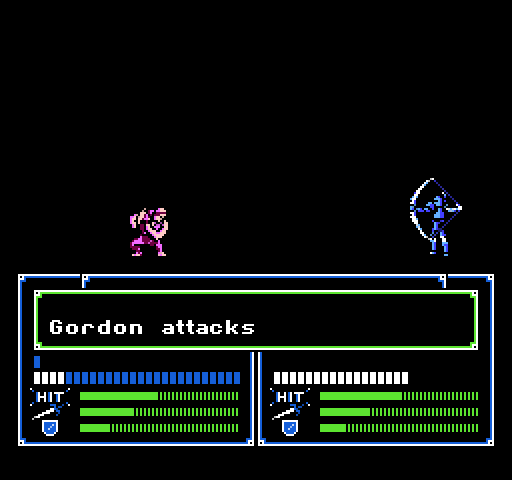 Gord, you got this? 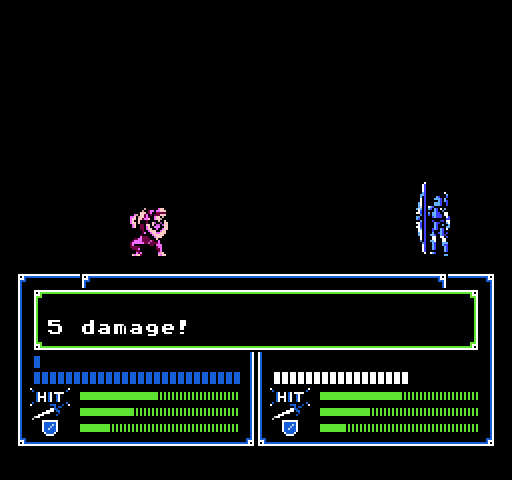 Yeah you do, champ. Gordie levels up, and Gomes even drops a nice steel sword for us. 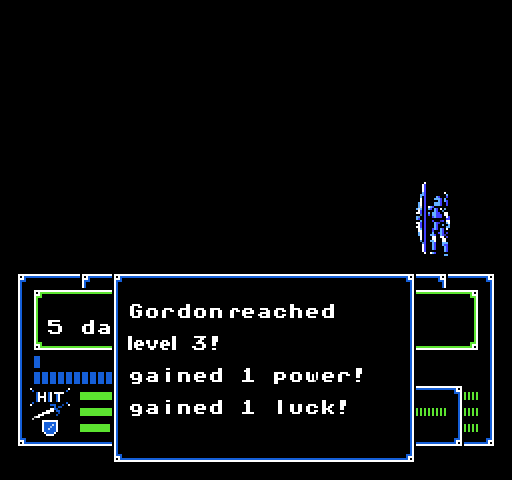 Gordon didn’t get many stats, but he got them where it counts. He shouldn’t be taking hits, so I’m not too too worried about his health or defenses, and this makes him more of a crit machine. 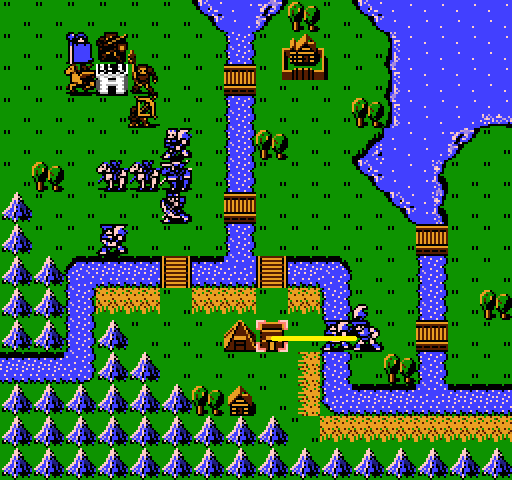 Oh, and uh, Maji buys two handaxes. 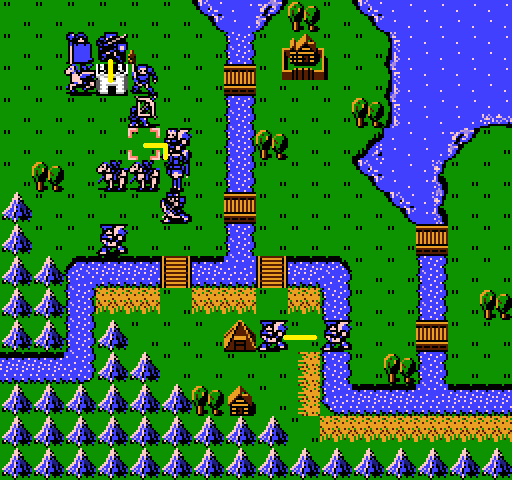 To celebrate, Jeigan gives Gordon that iron bow he bought, and Gordon gives Oguma that steel sword. Marth seizes the throne, and Maji gives his brother a hand(axe) (I realize here they only have 13 charges, which is a bummer). 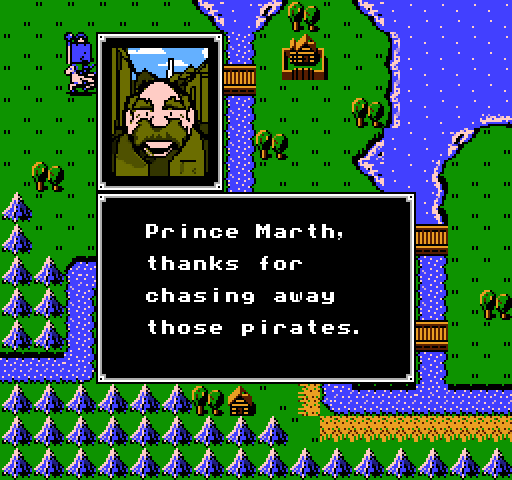 Now we can live without fear. To get to Orleans, you’ll need to cross Devil Mountain. Now we can live without fear. To get to Orleans, you’ll need to cross Devil Mountain.Well poo poo, handy that. But, is it Devil Mountain, or Devil’s Mountain? I’m a stickler for details. Be careful. There are bandits who rob villages and harass people.I’ve been dealing with murderous pirates, I think I can handle some serial harassers and robbers. A skilled man named Navarre’s especially dangerous. Please be careful. We’ll pray for your safety.So Navarre. Kill? Recruit? Time will tell.  I miss the pan for the next map. It’s basically 2x2 screens. Tall maps are new, at least. 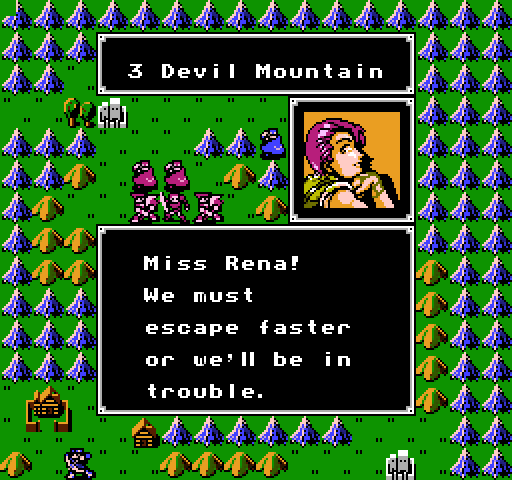  I heard Aritian men are here. I heard Aritian men are here.Hey! I resemble that remark! That’s our chance!Oh. Nevermind. You’re cool, for now. 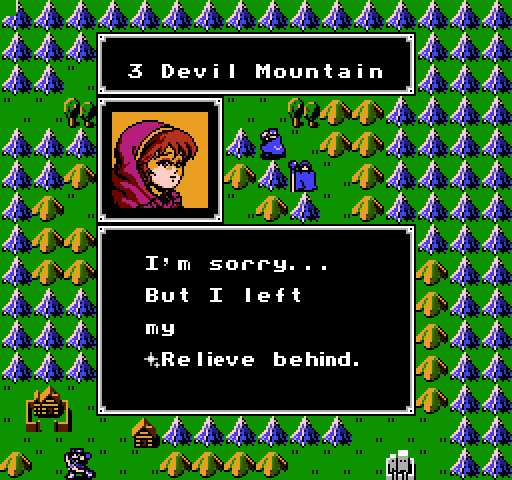 I’m imagining that sparkle is Fire Emblem’s version of a trademark, and Rena just chose a horrible time to advertise her brand.  I need to get it back… Forget about me and save yourself. I can warp you to a different location! I need to get it back… Forget about me and save yourself. I can warp you to a different location!You can do what now? No way. If you do that, I won’t know why I betrayed them. I will get the staff later. Just focus on running away. Let’s go! Click here for the full 1022x704 image Here is our third map. Please ignore my irritated mutters about not getting a prep screen. Honestly? This feels kind of laughable. We literally outnumber the enemy. In our first map, enemies outnumbered us 2 to 1. There are forts everywhere to abuse, and a single village that those two thieves could only get to with effort on our part. What’s meant to happen here is obvious. The enemy fortifies south of the castle. Maybe the bandits advance, maybe they don’t, it does not matter. While our new units retreat, we move up the east, and take out those basic foes. Then we move on and let natural chokeholds have the enemy kill themselves on us. I honestly think we can do this map in one update. 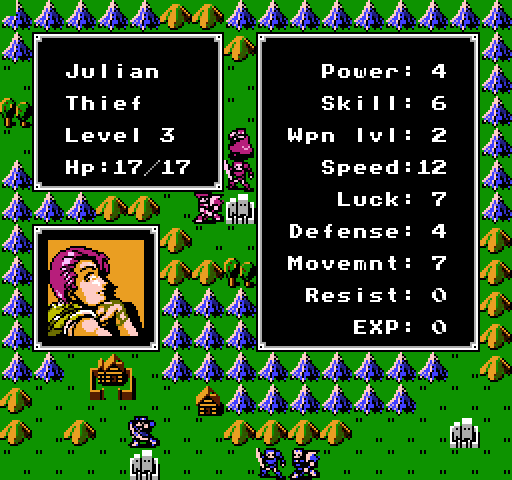 Julian is our own thief. Very fast, and comes with a sword and lockpicks 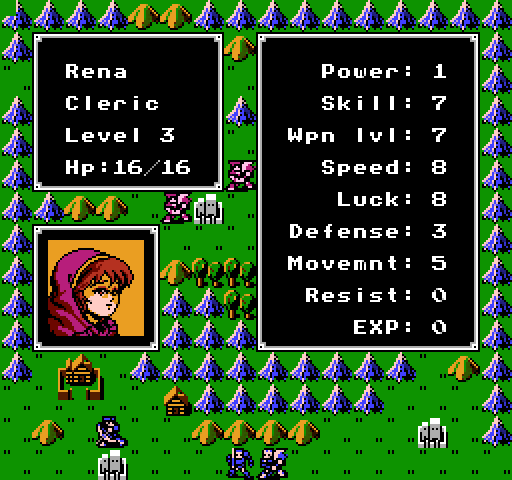 Rena is our second priest. She is better in just about every way than Riff. At two levels higher, she has 4 more weapon level, one more speed, and SEVEN more luck. They match in HP and defense, meaning if Riff is lucky, MAYBE he’ll be two points ahead of her on both. Her growths are also even or better on everything except HP (Where Riff has a whole 20% chance to get 1 hp. Wow). I’m going to use both, because the rules mean they are going to be my most consistently under-leveled characters, but Riff just went through some character development, and he’s about to get a lot braver about throwing himself into danger for the sake of the team and xp. Rena comes with a warp staff, so she can follow up on her promise to warp Julian away. Why we would do that, I have no idea. 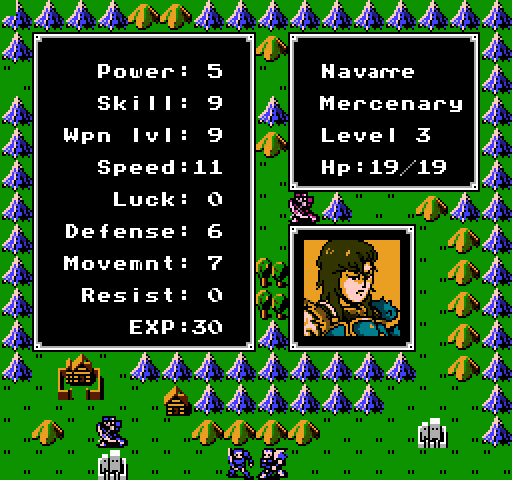 Navarre is also here, he’s the merc just above the fort near Julian and Rena. Name, face, long haired mercenary showing up on the same map as a female priest who’s better than our original male priest… Why do you seem so familiar? 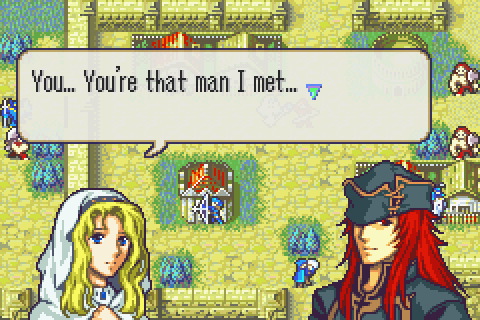 Whatever, it’s probably nothing. Nothing we need to worry about for a long, long time (fun fact, given that I’d just finished Sacred Stones on Eirika Normal Mode before starting this, I figured I would try my rules on Ephraim Hard Mode. It went well, up until this chaper, where over half of my team died horribly, including both figures shown above. Things can go very, very, very wrong with the ruleset I’m using). Honestly, this map looks easy enough that I’m not even doing a start-of-map strategy. Useless axemen will run to houses. Marth will get the one village, then try to get levels. Whoever will murder bad guys until Marth and/or Rena can convince Navarre to mincemeat his former allies. I am honestly hoping that the enemy gets reinforcements from that northern gap in the map near the castle. Next time, I face my greatest challenge, finishing the map in a single update!
|
|
#
?
Oct 11, 2019 00:30
|
|
|
Aaaand we're back! Just a heads up, next update may take awhile! It's Canadian Thanksgiving weekend, so the next couple days for me will be spent solidly in a food coma, and I don't have a ton of free time during the remainder of the week. I more or less have the next update in the can, but uploading pictures to lpix always takes a bit longer than I expect, so who knows. 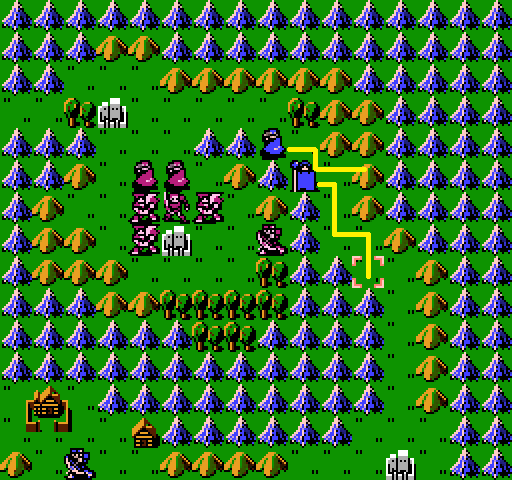 For my first move, Rena runs, and Julian moves to the hills. The thieves have 7 movement, so the closest one should be just able to reach him. Whether Navarre retreats onto the fort or attacks us will determine how we move next turn. 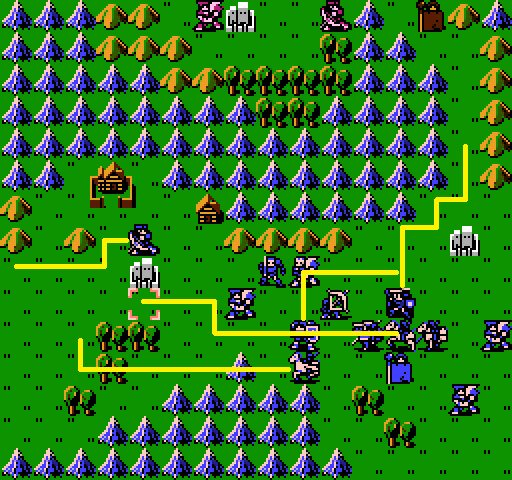  We don’t need a huge force in the west. Sheeda, Daros, and Oguma should be the stars, once those hunters are down. Barts and Kain are there to help with weeding out bowmen and so Kain can hand off the vulnerary, if necessary. Marth, Abel, and the Ji bros go north. Riff joins them, more to give Rena his staff than anything else. Barts, anything interesting in the house? Be careful of mercenaries. They are very skilled! Negative, chief! Negative, chief!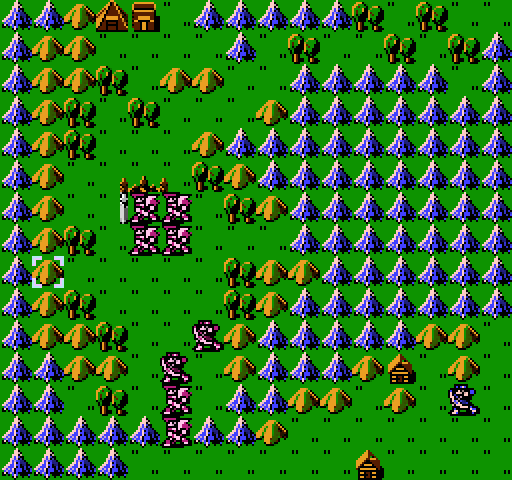 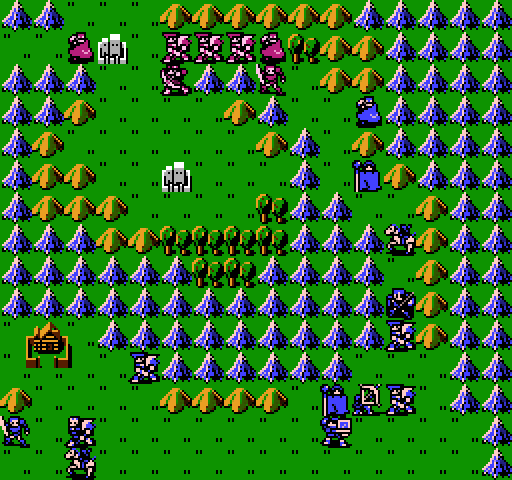 Their turn. In the west, the boss and three of his bandit buddies huddle at the castle, and two bandits move up (the hunters stay still. This prompts me to see if maybe any of them have names, but alas). In the north, one thief runs away, but everyone else moves up. I notice that Navarre is out front, and Rena can actually move beside him. I see if maybe, just maybe, she can talk to him. She can’t, unfortunately, so it looks like it’ll be up to Marth. Now Navarre is fast. Also, he’s equipped with a killer sword. If we run literally anyone up to block the path, he will double them, and that’s twice the chance to get a critical. A critical and a hit will probably kill most of my dudes, outside of Doga, and he’s not getting up there this round. So I do something a bit risky. 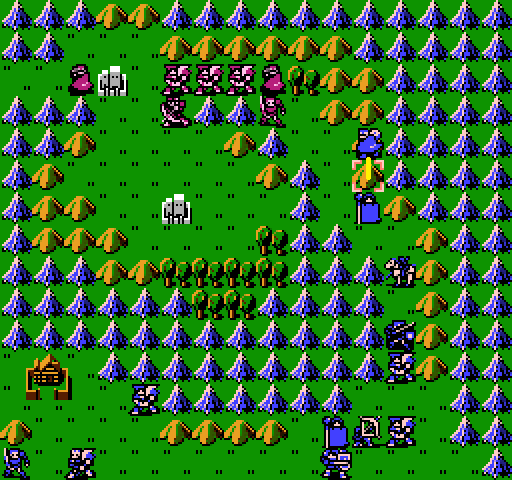 I move Julian down exactly one space. My guess is he can take a hit, maybe even a crit, from Navarre with the extra defense from the hill. His speed actually slightly outmatches Navarre, so if anyone is doing a double attack, it’ll be Julian, and I don’t think he’ll kill a mercenary in one round. Plus, the hill means he gets dodge bonuses, and he’s super dodgy already. If I’m wrong though? Who knows when, if ever, I get another thief. He has lockpicks, so theoretically this is a lot of treasure ahead down the drain. But still, it’s a calculated gamble. 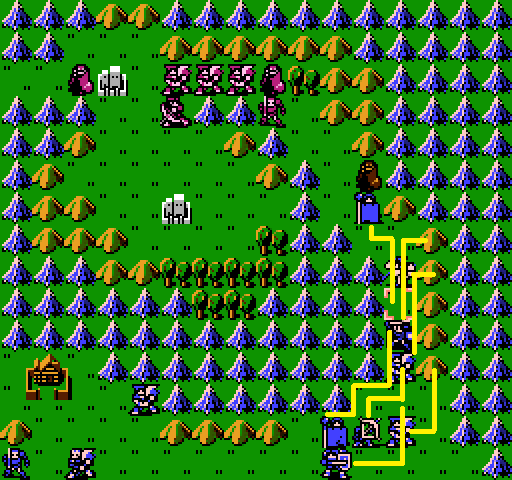 Everyone else moves up as far as possible without being hit, and Riff hands off the Live staff to Rena. 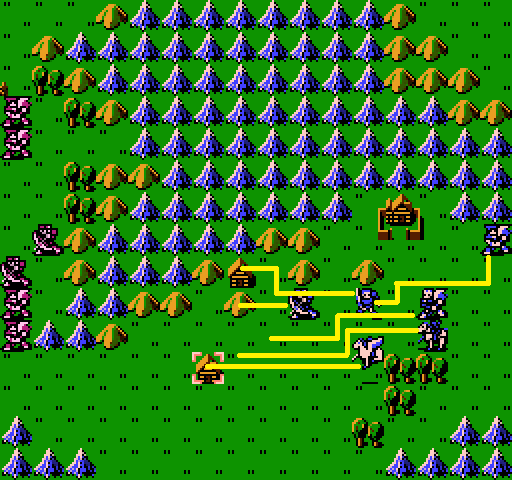 On our other front, Sheeda and Oguma make house calls, and the rest of the team backs them up. Sheeda is just in range of that front bandit, so she might take one hit, but she can take it. House 1  House 2  The more speed, the more dodging. The more speed, the more dodging.Insightful. Their turn. 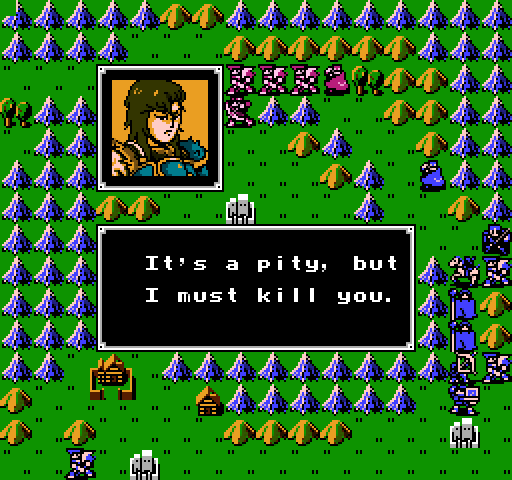 Kinda intense Navarre. Dial it down a notch. 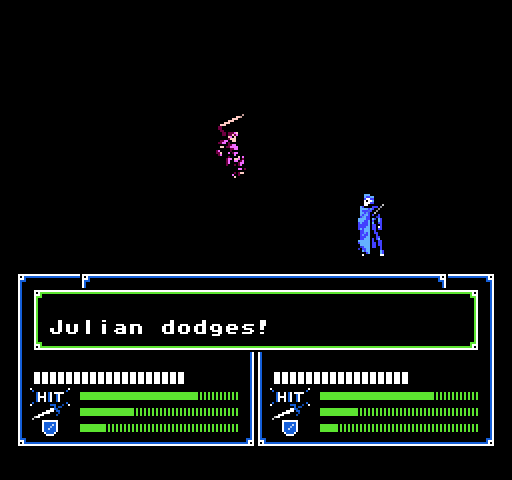 I am very nervous here, but Julian does his job admirably.  I just imagine them whistling, whenever they walk.   So Sheeda and Julian both took a scratch, but that went well. Most importantly, the bandits stopped their assault, more or less, so we’re at our own pace here. 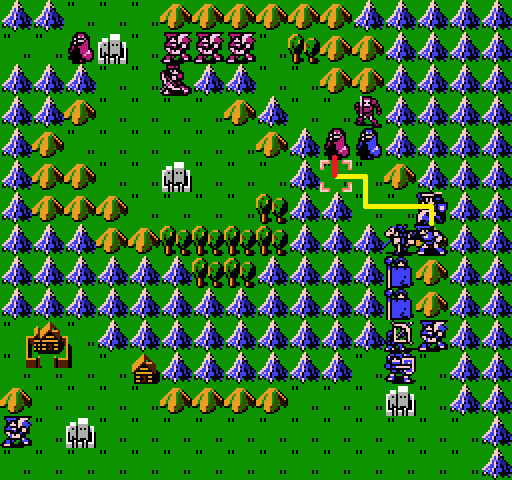 Maji isn’t strong, but he should be able to take down a weakened thief. 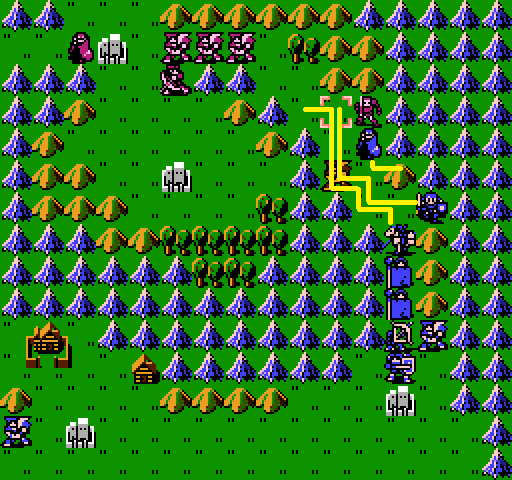 Marth can go talk to Navarre while Abel blocks up the pass, preventing Marth from getting overrun, and Julian can run back. As a thief, he shouldn’t spend too much time in the fray.  Or not. Or maybe Marth isn’t that convincing. Okay. Okay. New plan. 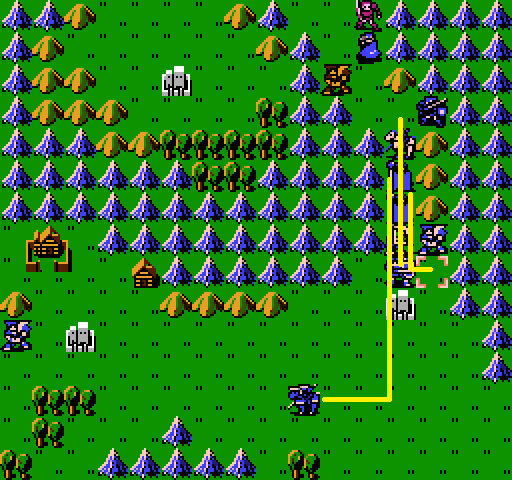 Rena runs down. Doga moves up to be a temporary wall for Marth. Even with two crits, I don’t think Navarre kills him, and Doga should miss, especially if Navarre takes the hill north of him. Jeigan rushes up to be a more permanent wall against an aggressive mercenary with a killer sword that we aren’t allowed to kill. 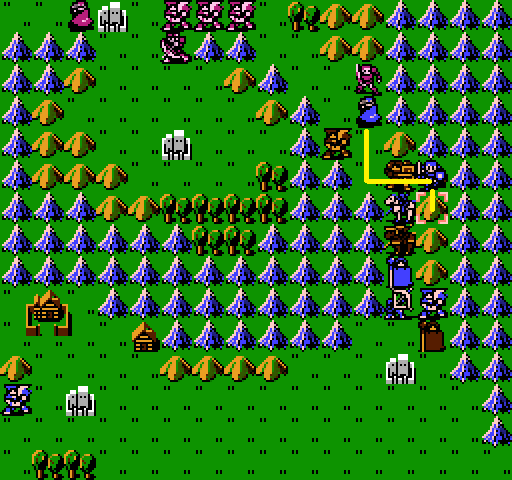 Julian runs back to where Marth is, after Marth vacates. Normally, this sort of thing would be where I reset a map to reformulate my initial plan. But that isn’t possible here, so now we’re in damage control. Not too bad of damage control I think. We might lose out on recruiting Navarre if we accidentally kill him. This would suck, since mercenaries are good, and killer swords are VERY good, but it’s a very survivable sort of loss. Maji might die… Okay. Doga might die if my math is off and Navarre gets lucky, and again, that would suck, I like armor knights, but I think we’ll live. 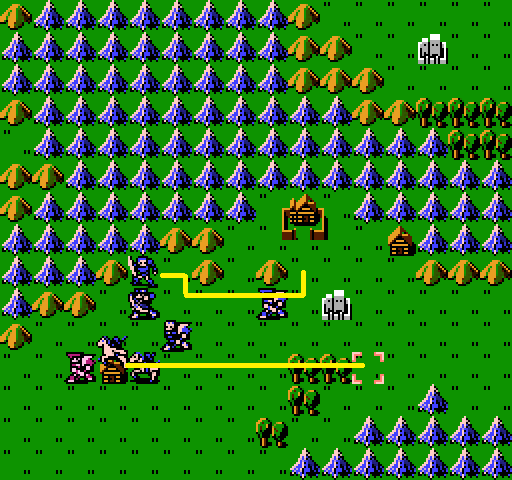 Of everyone in my party, my two guesses for who can recruit this guy, if not Marth, are Oguma and Sheeda. For Oguma, two mercenaries of the same camp ending up on opposite sides of a battle happens later in the series, maybe it’s a callback to this. For Sheeda… I mean, it worked with Kashim? Royalty tends to work with these things. So we’re running them back ASAP (Oguma can’t get onto that fort, so he’s running around to save a space of movement next turn). I don’t feel their front needs so much firepower anyways, what with the hunters staying put. By my calculations, it will take four turns for Sheeda to get there, more for Oguma. Hence why we need Jeigan. With heals from Rena, we might be able to stall this out however long we need. 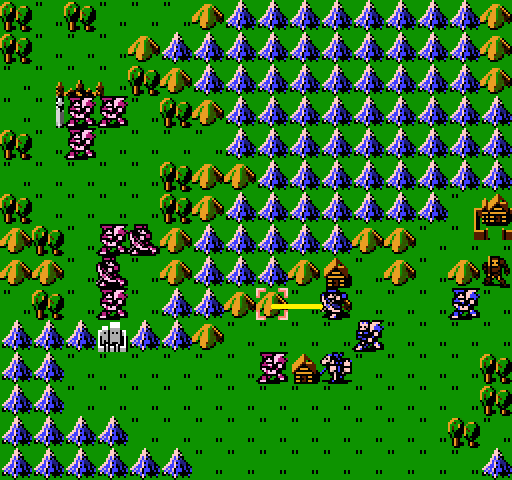  Kashim goes a-hunting. After that, we end our turn. 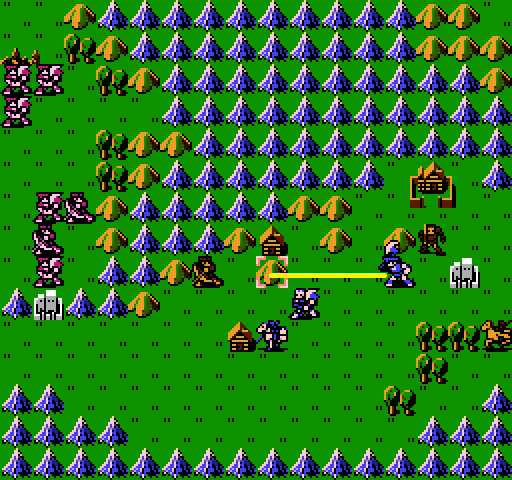 For our last move, Barts moves up. Let’s see how this next turn goes. 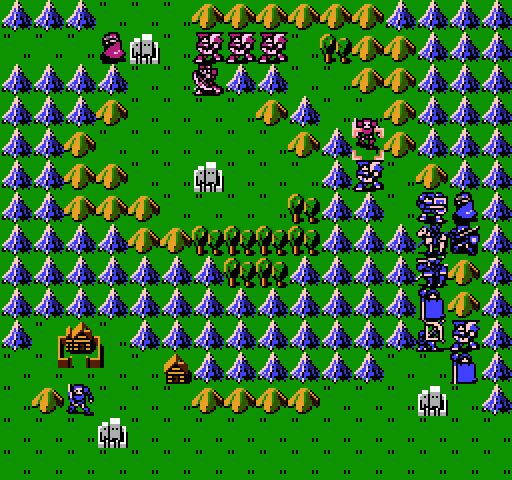 Good luck Maji! 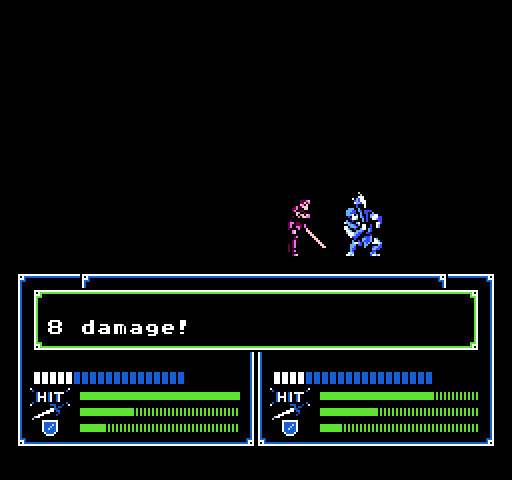 Oh man. Oh boy. Woof. I can’t believe this was one of the best possible outcomes (outside of a miss-fest). 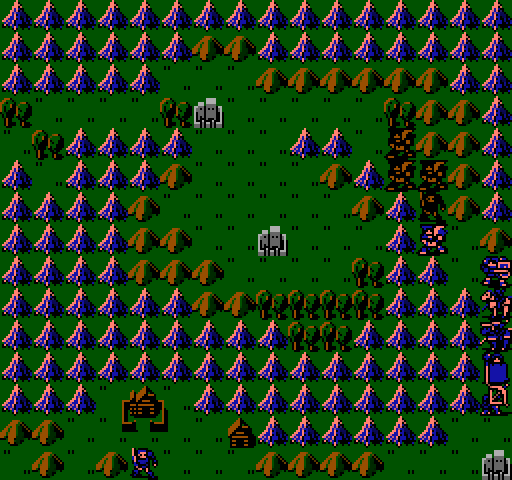 Oh damnit, right, the hunter. 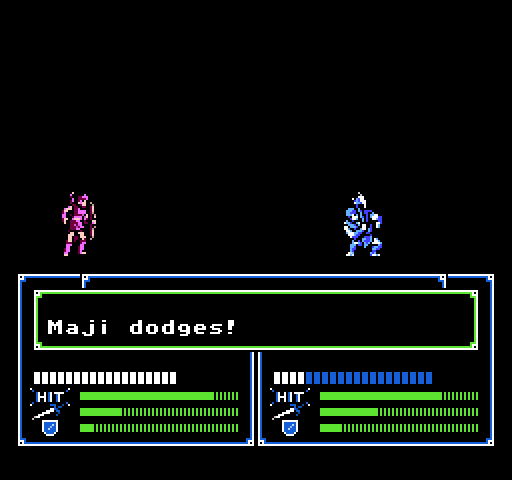 Maji you’re a star! 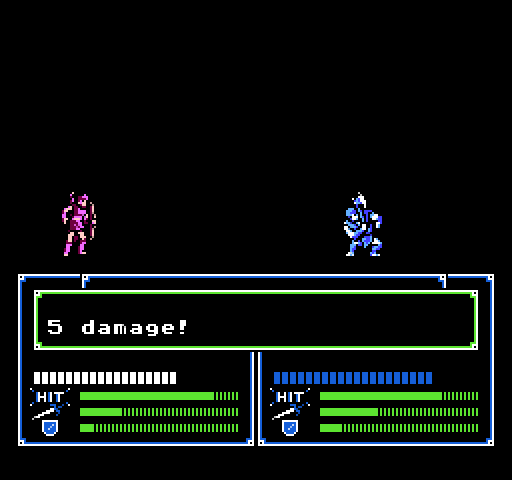 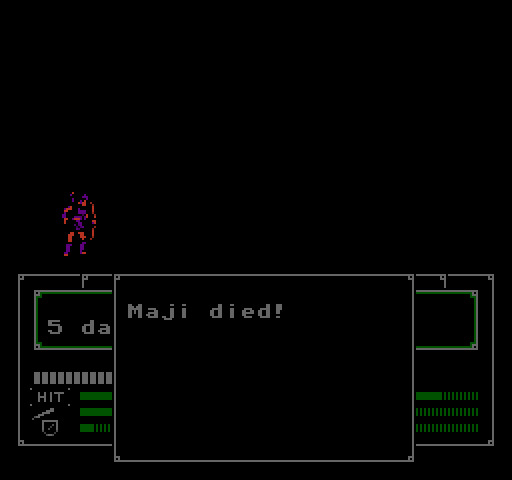 I’m sorry Maji. That was just too many dice rolls not in your favor. 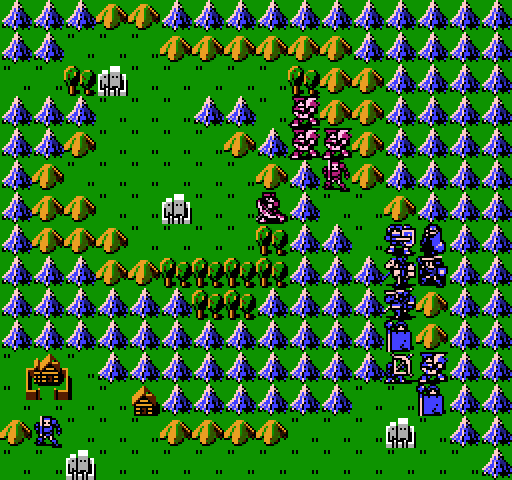 That’s where I’m going to cut this update, I think. We’ve lost our first troop, likely far from our last. I think on maps with recruitable enemies, going forward I’m going to need to avoid splitting my forces, as that put me in a really awkward spot here. Still, some benefit in that it made an otherwise pretty tame map somewhat interesting. Next time, we actually recruit Navarre (Or kill him, we’ll see), and run through the rest of Map 3.
|
|
#
?
Oct 12, 2019 20:08
|
|
|
Alright, we’re back, and we’re looking to save lives. Specifically, the life of one bloodthirsty mercenary.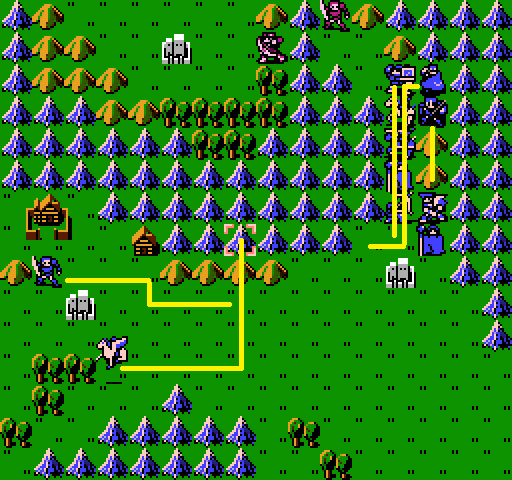 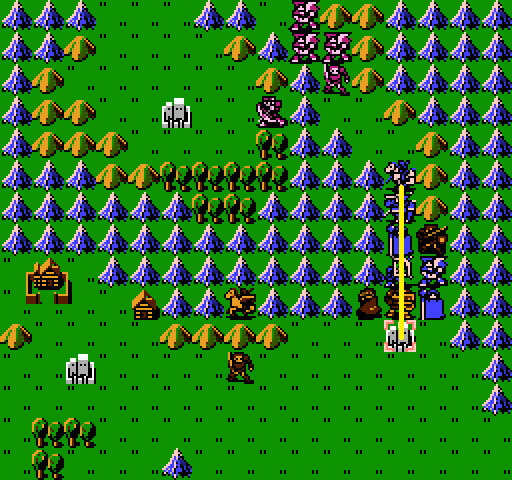 Sheeda and Oguma get as close as possible, and the rest of the team falls back as much as possible. 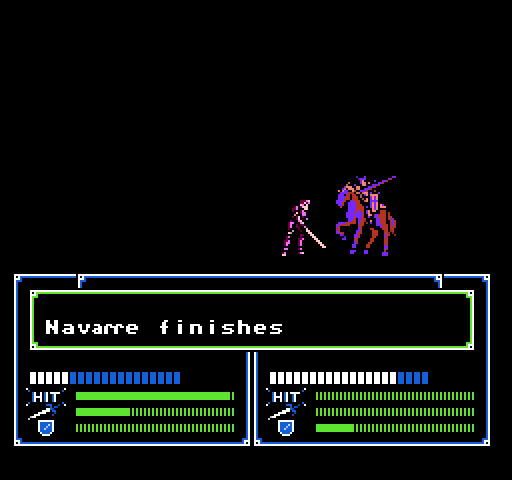 Jeigan’s got his uses. 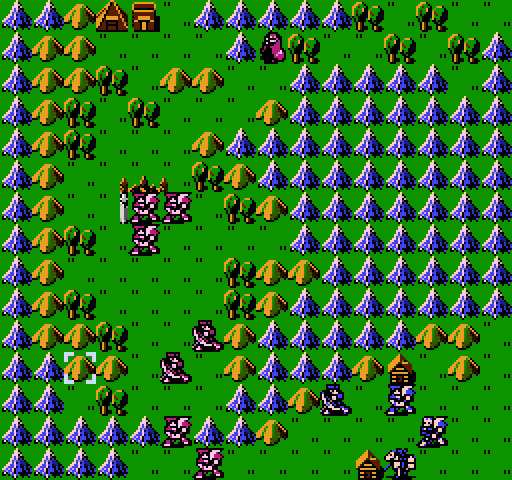 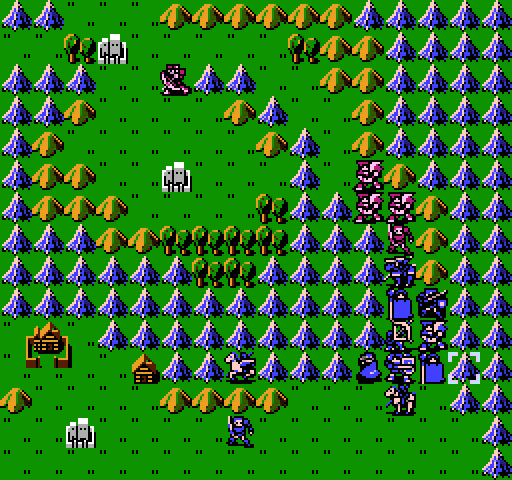 On my turn I notice, hey, that thief keeps running backwards. If he’s going for the village, he is taking the scenic route for sure. I get a bit nervous that maybe he’s going to run off the map, but he isn’t carrying anything valuable, so I’m not sure what point that would be. 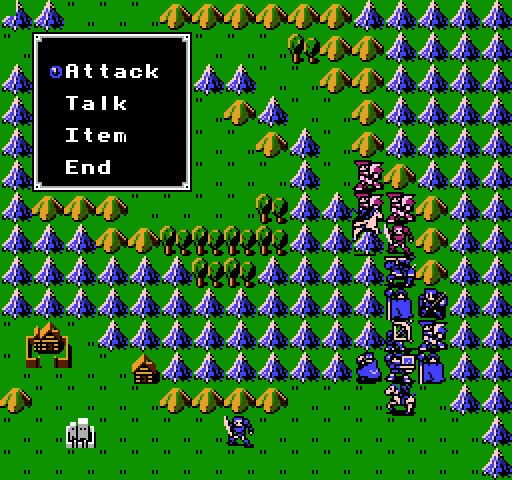 I test out a move, and find Sheeda can talk to Navarre. That works for me, but she’s injured, and that puts her in a bad place, so let’s do this a bit better. 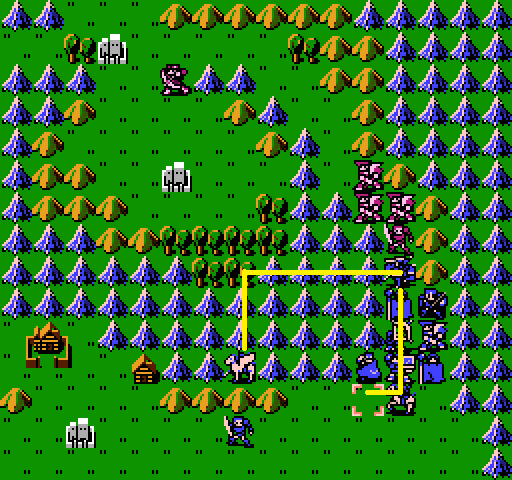 Jeigan’s going to back up a bit so Sheeda can talk to Navarre from the south. This means we can block the bandit’s access to her. 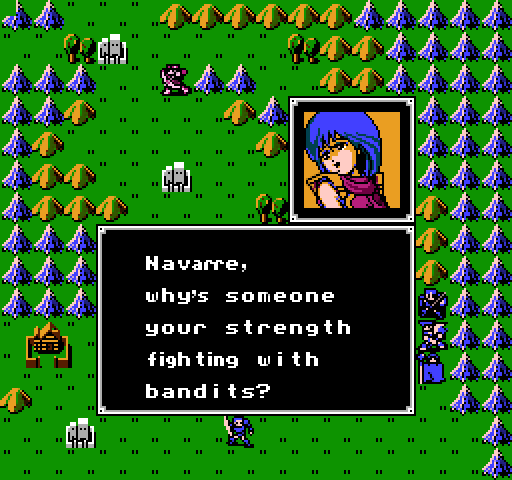  ?!... Who are you? I’ve no business with you! Please stop this pointless fight and join us. If you can’t say yes, do what you want to me! ?!... Who are you? I’ve no business with you! Please stop this pointless fight and join us. If you can’t say yes, do what you want to me!Yikes, Sheeda. ..My sword won’t harm a woman. If you risk your life to recruit me, I have no choice…Thanks Squall. 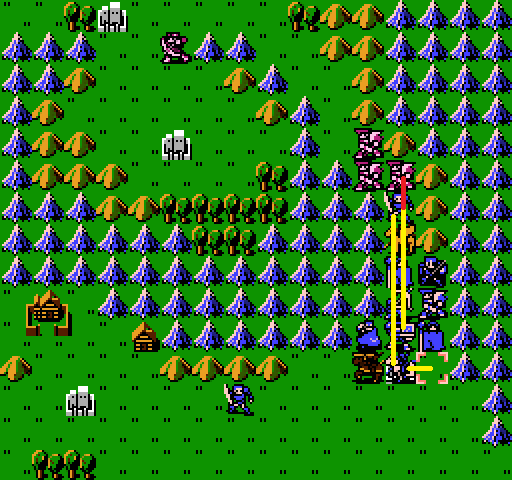 Now as much as I’d love to show off my new toy, Navarre is pretty dinged up, so Abel relinquishes the fort to let him get up to strength. In his place will stand Doga, the mighty! 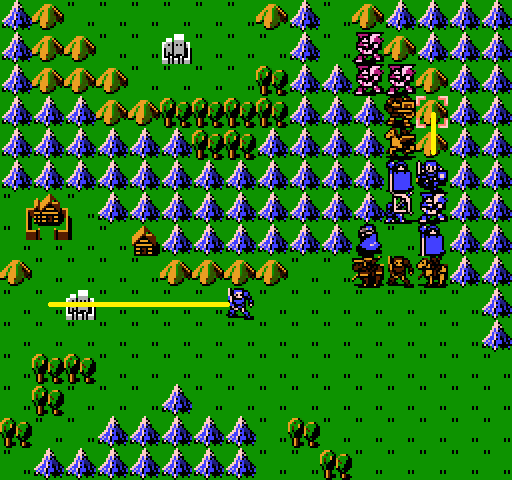 Oguma runs back to get some experience before Kain hoovers it all up, and Marth moves up, hoping to get to level 2 by hill abuse. I know, I know, he needs to go to that village, but we all know it’s just going to be that staff that Rena dropped, and we don’t need that right now. Plus, that thief is never making it to the village anyways. 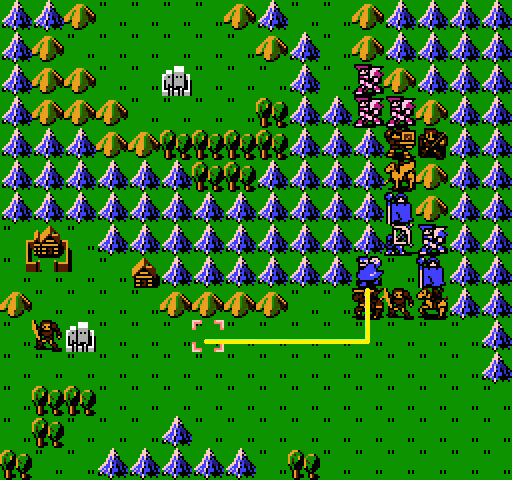 And Julian will join him, as low level bandits attacking a thief on a hill is probably the best way for a thief to get experience. 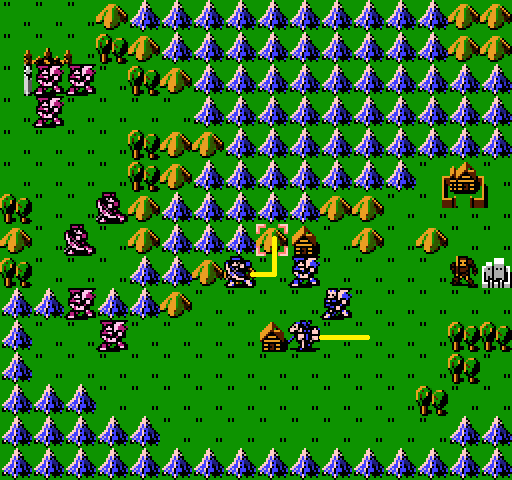 Now let’s move Kashim and Kain just out of this jerk’s movement range, and let the enemy do what they can. 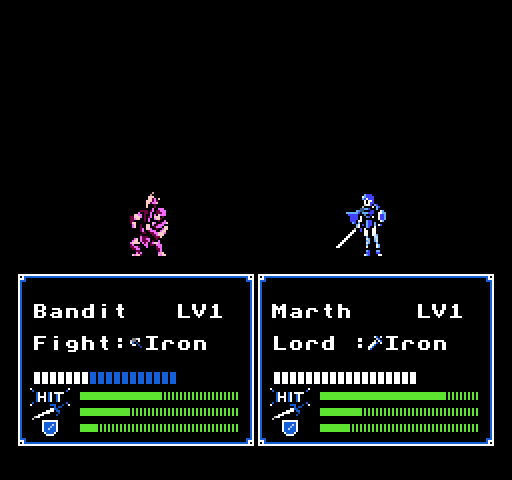 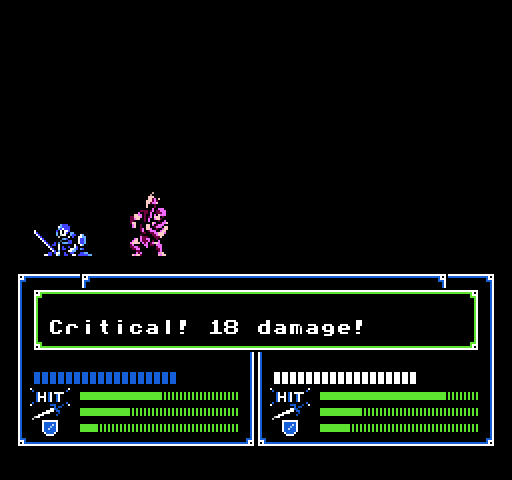 A bandit tries to engage Marth on a hill. It goes poorly. Also I… I might have accidentally deleted the level up screenshot Marth reached level 2! gained 1 skill! gained 1 wpnlvl! gained 1 luck! gained 1 hp!  Pretty good! Luck and hp are gimmes for Marth just about every level, but weapon level and skill are nice!  Another bandit hits Marth, which he does not take kindly to. 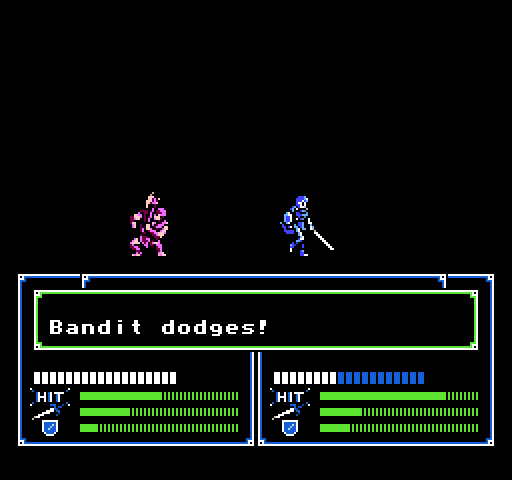 And he kinda just gives up by the third (that health though, yikes). 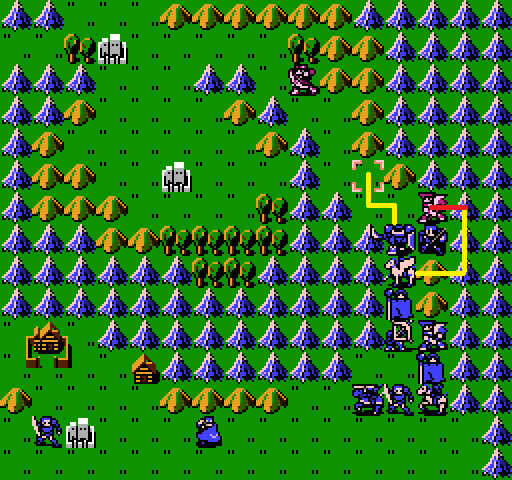 Unseen here, Abel tosses Navarre an iron sword. We don’t want to be wasting that killer sword, it’s not for scrubs. Doga does that thing where he’s an impenetrable goddamn wall, and Sheeda tried to get to level 3. 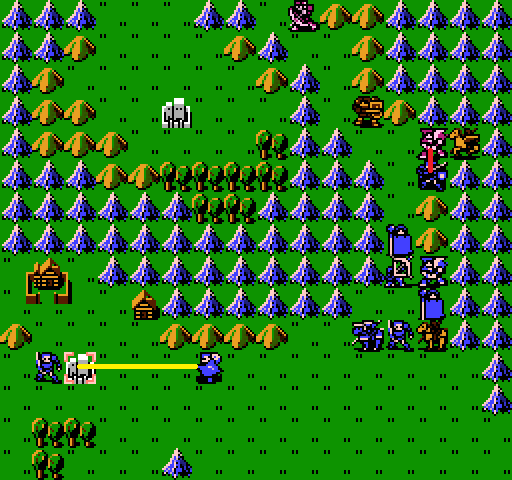 She doesn’t succeed, but she weakens the bandit up enough for Marth to jump in again, while Julian runs onto the fort to heal his minor wounds. 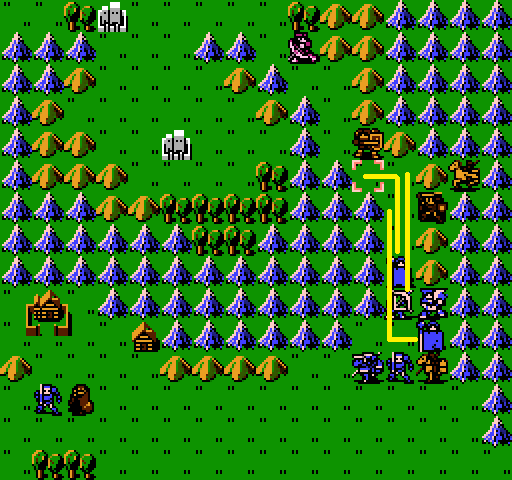 But now that the map is more or less over, we need to plan. Riff is level 1, which means no matter what, he’s on our team next time. He’s also probably not going to get a better chance to farm levels than against a single enemy who can’t pursue (due to Doga). Unfortunately, it seems clerics can’t climb hills (no cardio), so we can’t abuse dodging, but I’m hoping for maybe a miss, or at least two hits that don’t kill. If the archer gets to hit twice, or crits or something? Well, I’ve always felt two clerics is overdoing it. We also need to get Abel moving, he’s level 2, which puts him just a bit below our averages. If we can get him to level 3 this map, I’ll be glad. 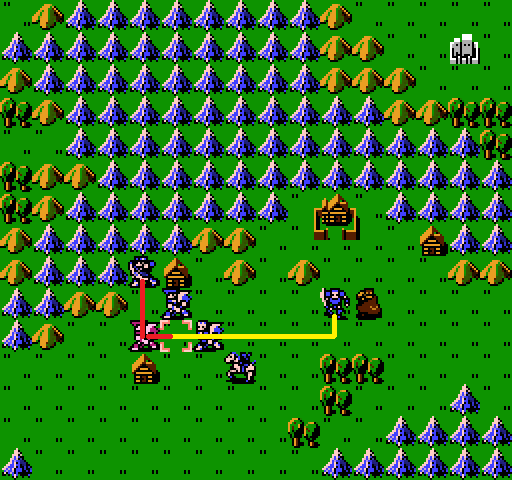 Oguma and Kashim go nuts on this guy. 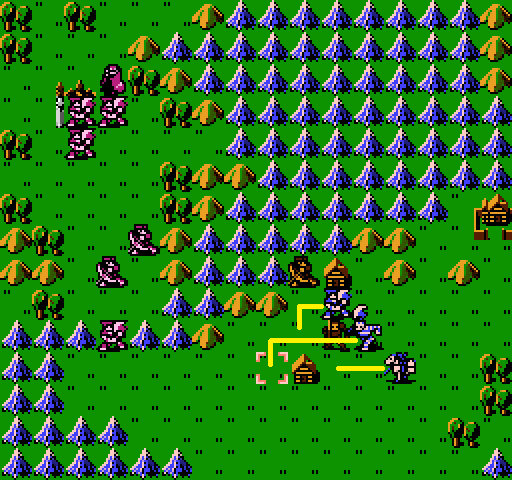 And hey Daros, wanna go be bait? 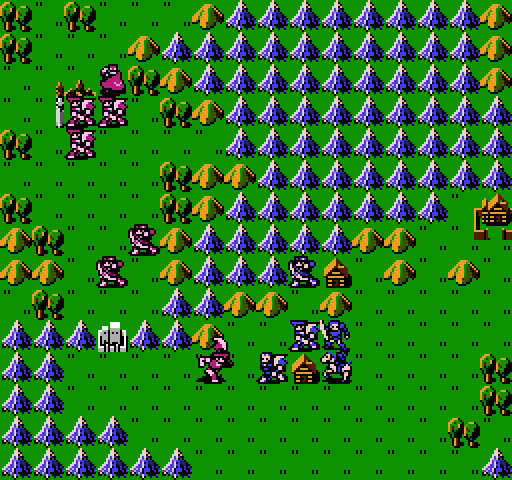 Thanks Daros 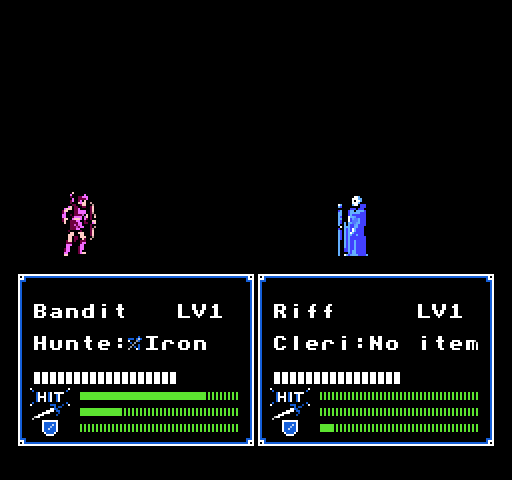 Riff, you good buddy? 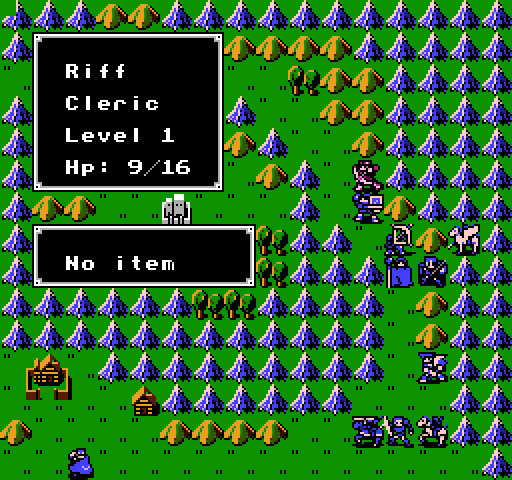 I hate this strategy. I hate this strategy.He can take another hit. It’s fine. 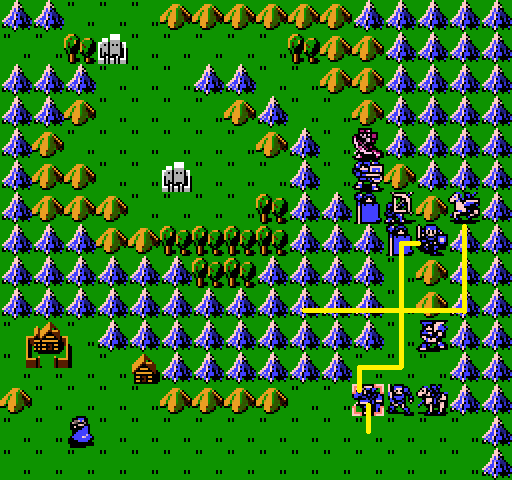 Marth speedwalks towards that village, and Sheeda takes an indirect route to the fort Navarre was originally on (Indirect as I’m not sure if the ranger would try to chase after her, if it knew it were possible to get in range of a flier). 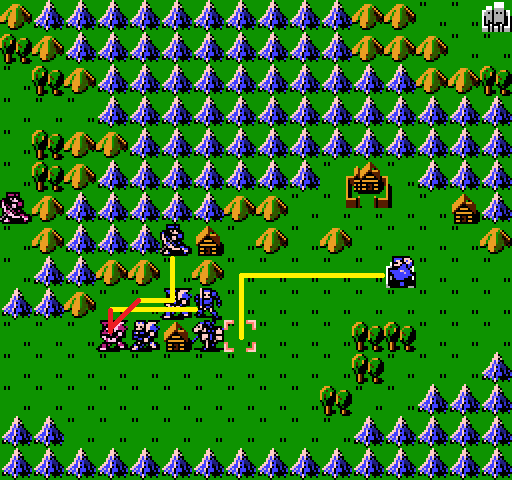 Julian tries to get into the thick of things, but for this bandit, it’ll be last turn, redux.  gained 1 hp! Eyyy, good job champ! Power and skill are basically what I’m looking for in you Kashim, keep it up. 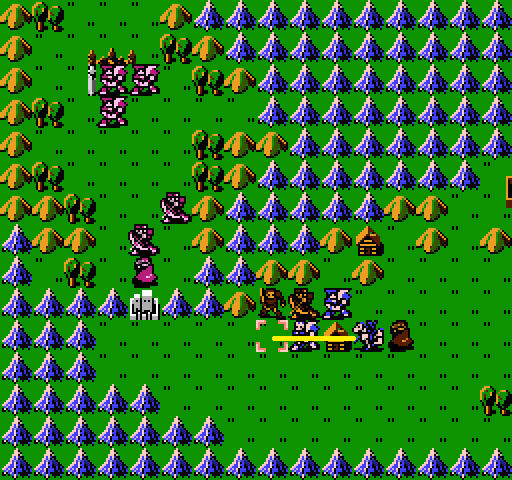 This is just in case AI isn’t affected by movement penalties on cities. If they aren’t, both that thief and the hunter could hit Oguma (or Daros, I guess), and with 9 hp, I don’t think Oguma survives that. One hit though? He’ll be fine. 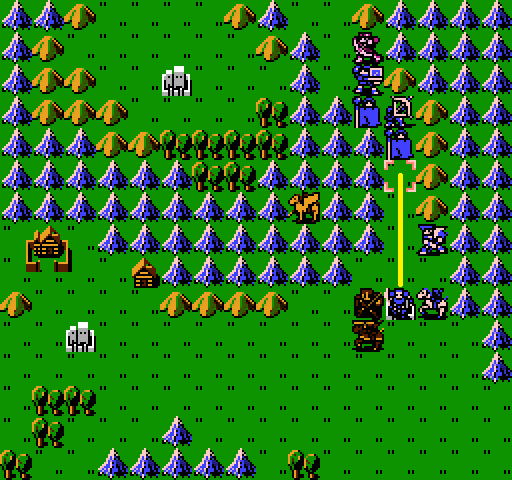 Navarre is back to fighting form, so he also moves up. Enemy turn, Riff, you got this?  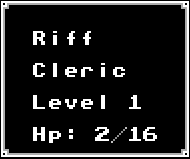 I promise you I don’t! I promise you I don’t!Ah Riff, you’re wacky. Now, I could exploit this all day. Run Riff back to the fort while the hunter plinks off of Doga, run him back, rinse, repeat. I won’t though. I feel like it’s not in keeping with the spirit of the LP, it’s kind of cheesy. … That said, I’m 100% doing this with Rena right now. I’ll abuse the mechanics, but just a little. Just a small bit. 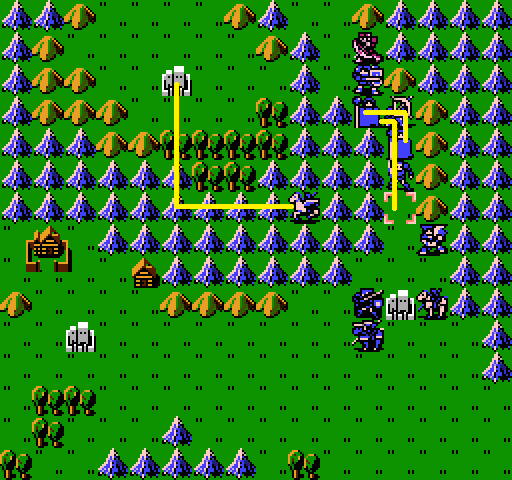 And Sheeda will also move onto the fort, mainly to heal her, partly to test whether the AI goes for her, or Rena. 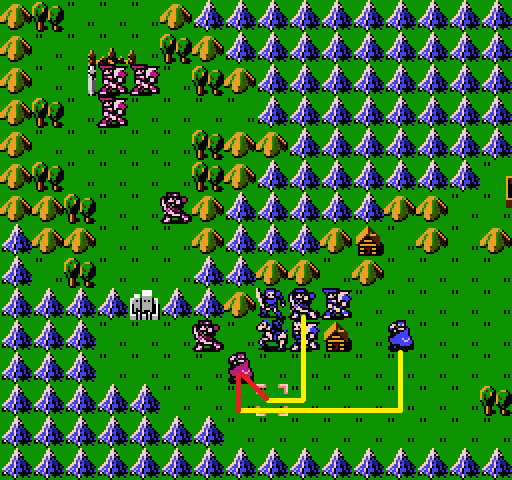 Kashim will be doing the setting up this time, with Julian (hopefully) knocking them down. 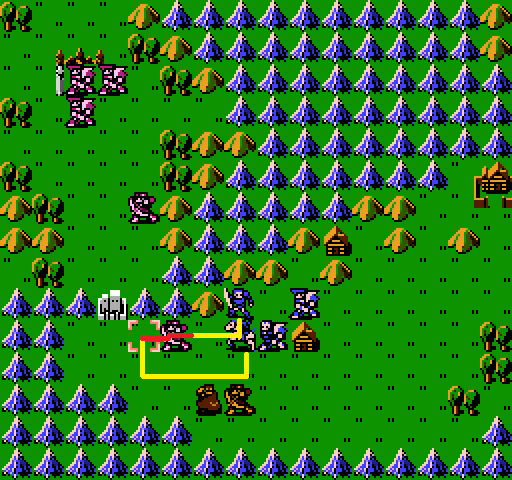 Kain is here to be an able weakener and wall for Oguma. 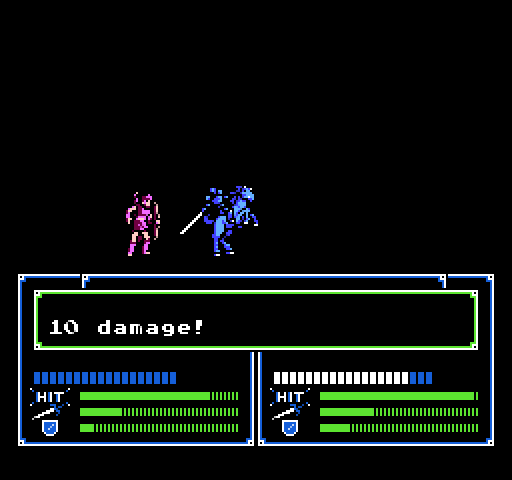 Or at least 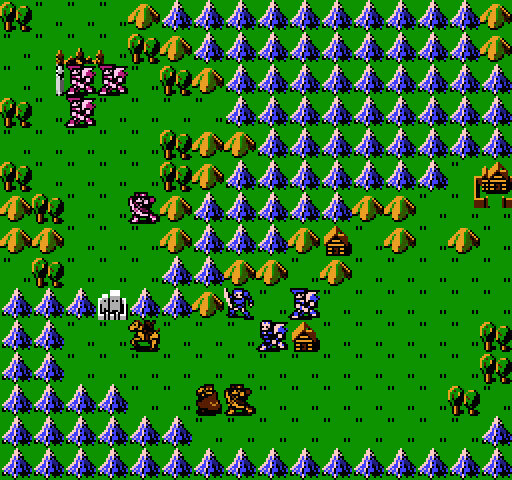 That was the plan originally. Right, speaking of Abel, did I move him last turn? 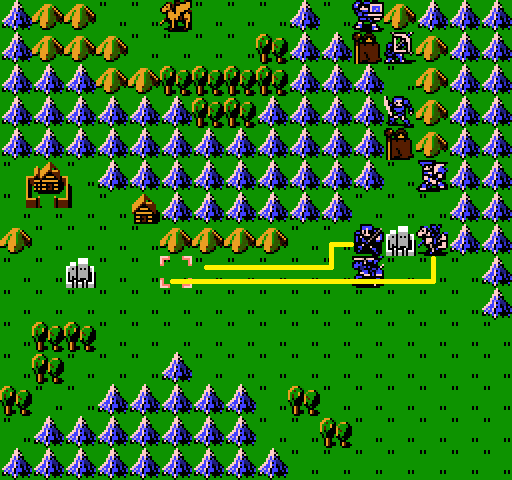 I did not. Smooth, me. Very smooth. Whatever, go, AI. 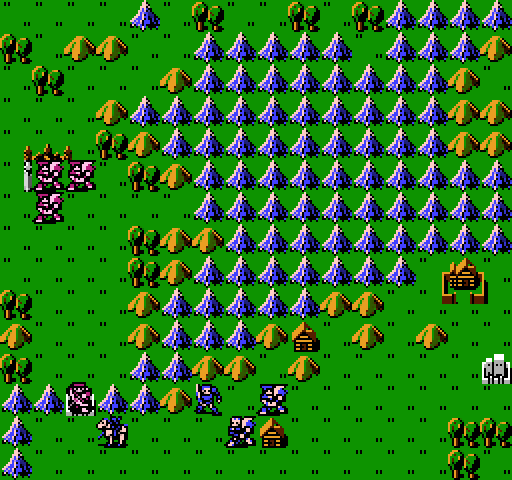 I guess I did give the hunter the perfect spot to take a shot at me from the fort. 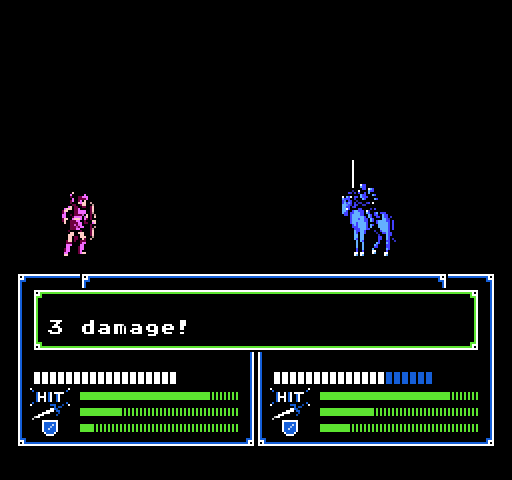 Not that it does much. 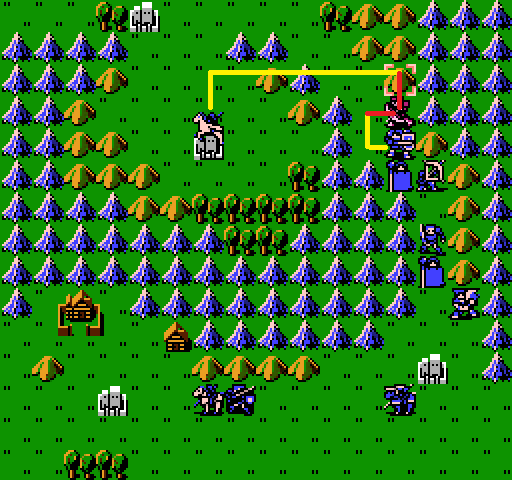 Rena could definitely survive another round, but at this point, I’m ready to finish things. Doga, Sheeda, would you kindly? 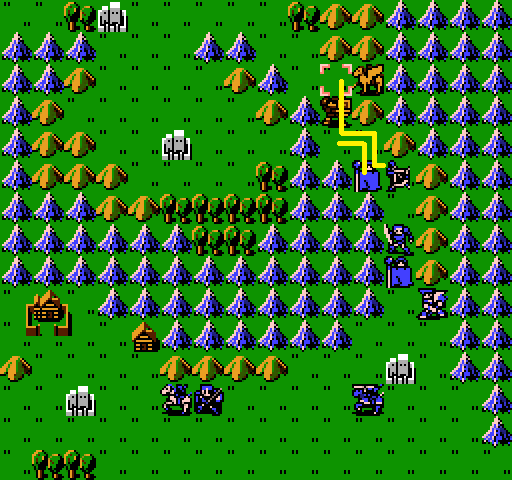 I feel like I’m starting to get a decent sense of what’s survivable and what’s not, but there are things here where I’m flying blind. 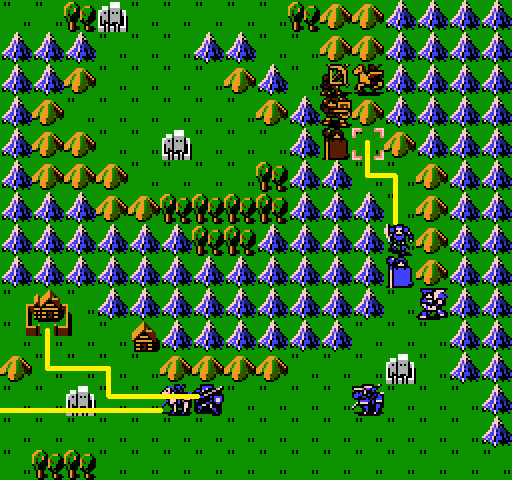 Like how likely I am to hit, or when to use a spear over a sword. 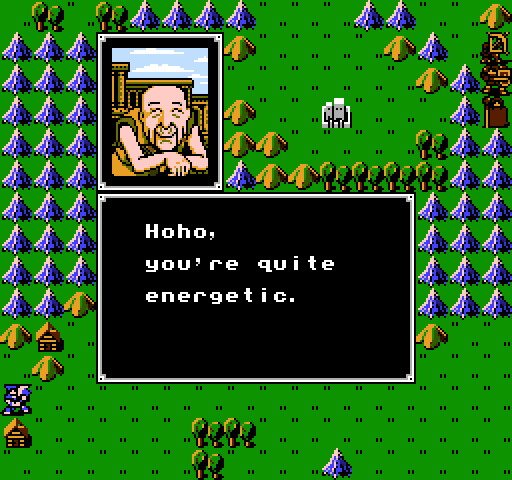 Since you came all the way here to get this axe as a gift. Since you came all the way here to get this axe as a gift.I did? Did I? But this will suck your blood and eat your flesh.WHAT? I’m sorry, could you please repeat that, I could’ve sworn you said something absolutely insane. Never use it!!  I uh… I don’t think I’m going to be touching that. Devil weapons are a trap. Generally high damage, high crit, but a chance to hit your own guy. I can see maybe giving this to Saji as a joke. Maybe. 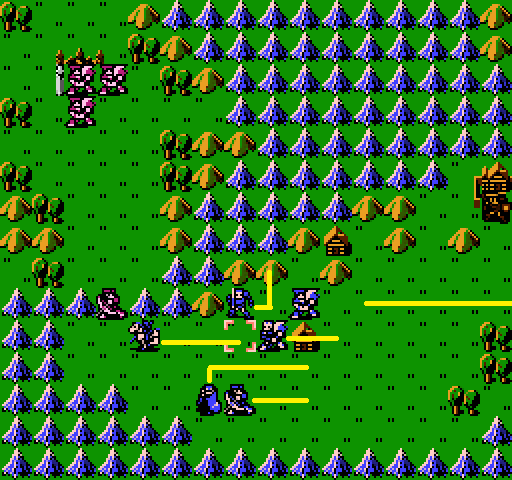 Anyways, let’s get this hunter off his fort so Abel can eviscerate him. 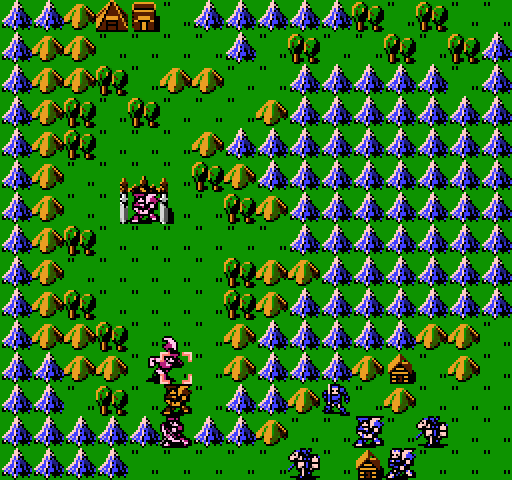 Helloooo, look who’s getting frisky. 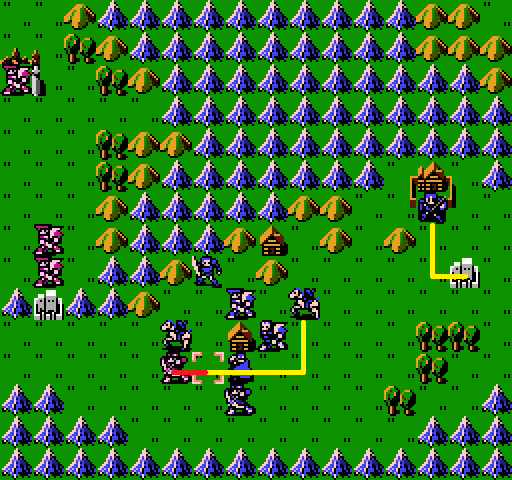 Abel, you got this? Tell me you got this. (So here, for instance, I’m choosing to attack with an iron lance instead of an iron sword. Abel has 7 speed to the hunter’s 5. The hunter has 18 hp. I am certain he would double attack with the iron sword, but I’m not 100% that it would be a kill. I’m more confident the lance can kill, if he gets two hits off). 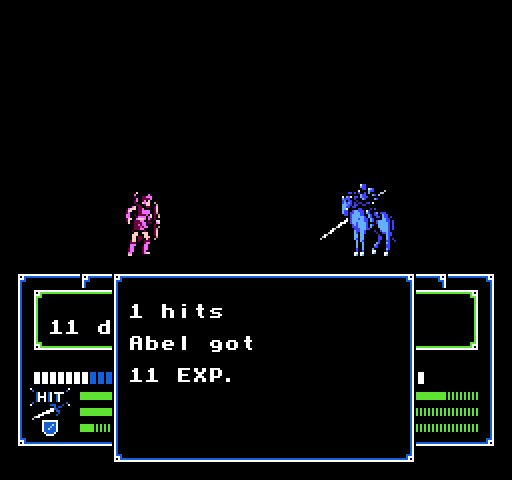 Abel does not got this. (Here, my choice was shown to be a mistake. Assuming he did 9 damage with the iron sword, he would have killed the guy). 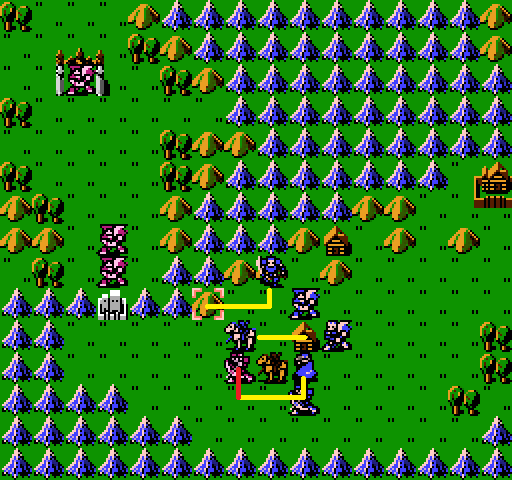 Julian does though. Oguma sticks to the hills, moving up juuuust enough that I think the one bandit can reach him. With 9hp and a good chance to dodge, I trust Oguma to survive just fine. Kain, his job being done, moves back. 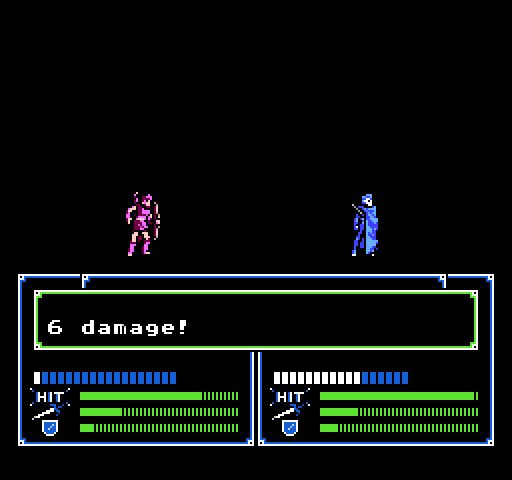 Julian, you punk! 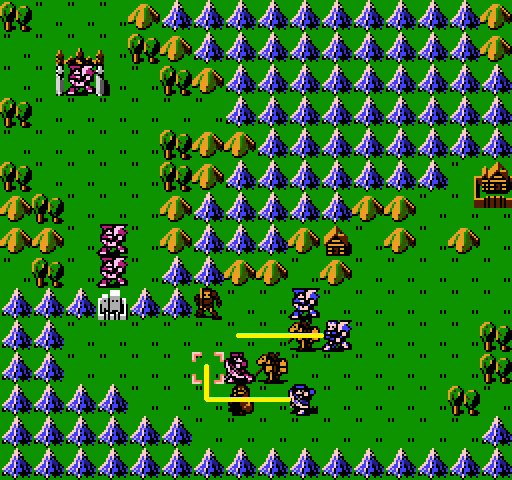 Walling off hunters feels comforting, at this point. (This is a real vote of confidence for me, that enemy AI is in fact impeded by terrain. If not, two bandits can hit Kashim, and that’s bad. I think survivable, but bad). 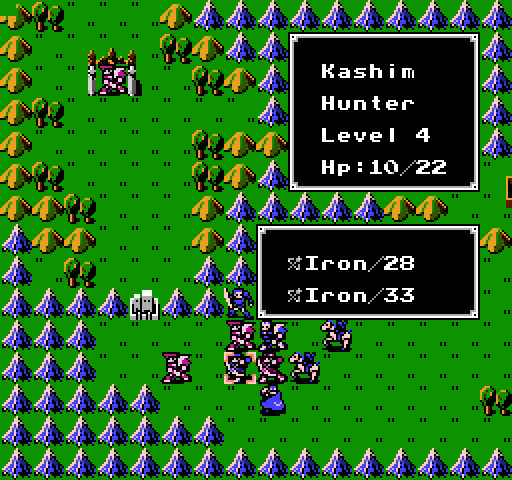 Ha! Learning! Very good. 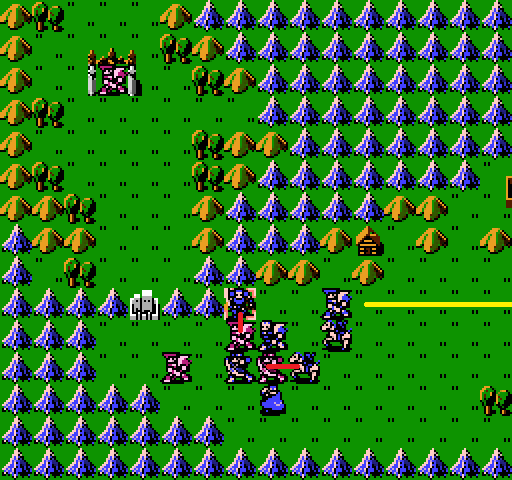 Oguma attacks first, then Abel. Daros, Barts, and Kain are on wall duty if required, and Kashim can clean up from behind said wall should people miss badly. 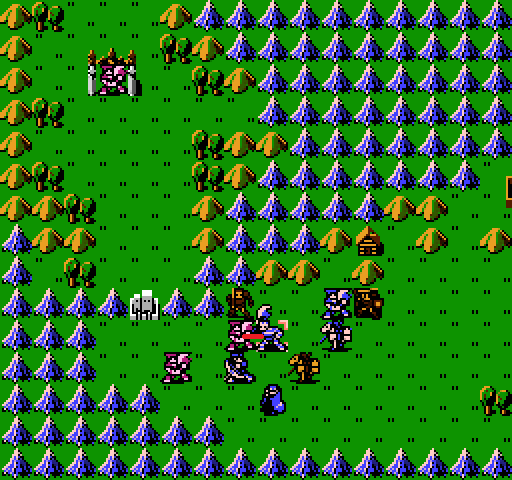 I decide Daros gets the kill, as the low level guy most likely to kill this bandit in one shot. He’s got decent power, and a steel axe. I got faith.  Which is rewarded (But my that was close, I don’t think an iron axe would have cut it there). 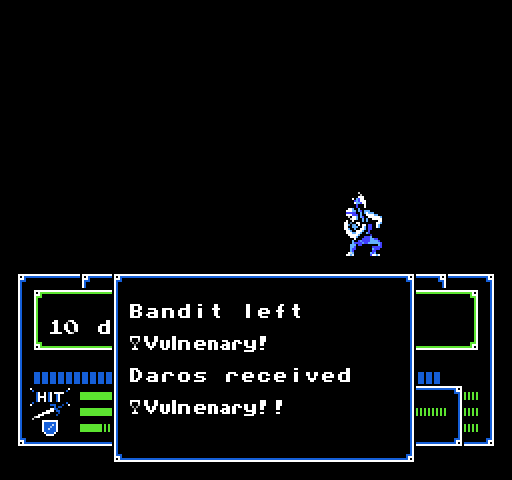 This is also a godsend. I need so many of these. 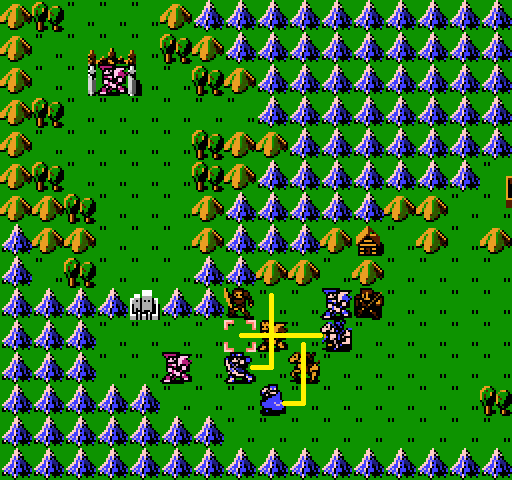 Right now, Oguma’s still got 9 hp, Kashim 10, Julian 11. They’re all fairly squishy, so I think they are in one shot range (Oguma might scrape by with 1-3 hp, but I really don’t want to test that). Kain protects Oguma, while Kashim and Julian get behind the wall. Kain, Daros, and Abel all have higher defense and/or hp, so they’re fine. The rest of the team on the other side of the map move up, but let’s face it, they aren’t getting getting here anytime soon. Trust me that they’re moving up. On their turn, the bandit goes for Daros. He survives admirably, and whacks back with good force.  Marth needs the kill more than Abel, I decide. Abel is more than capable of levelling up all on his own, whereas Marth generally has needed babying.  I decide Abel gets the kill, who needs a high level Lord! 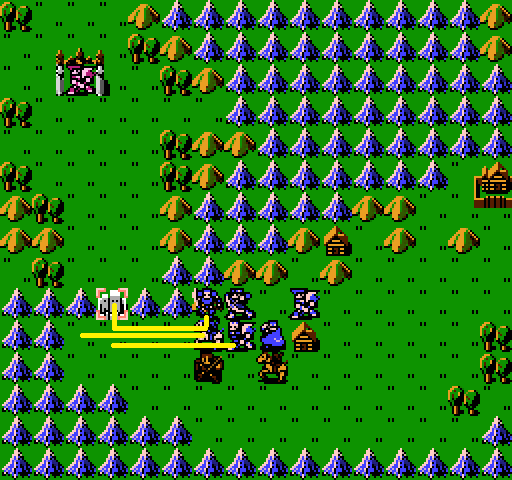 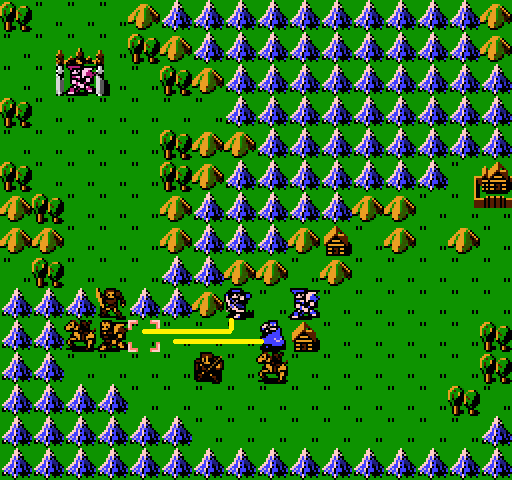 I wonder if the boss is lonely, up there all alone. 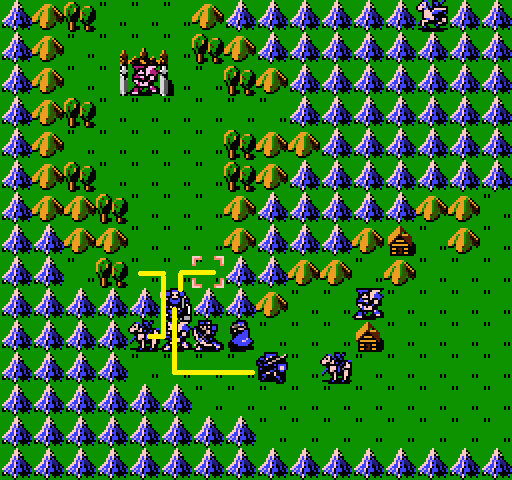 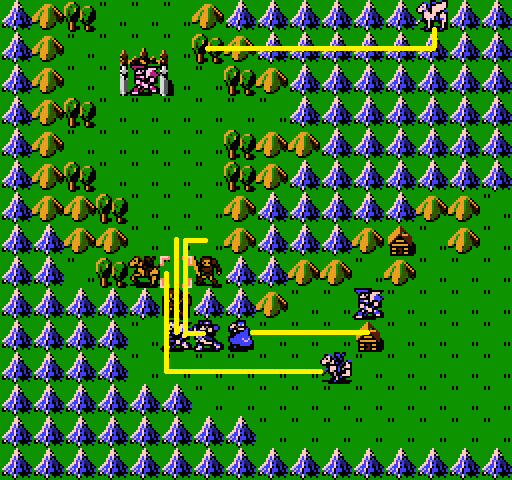 Oguma gives Marth the fort. Oh, Sheeda’s back, by the way. 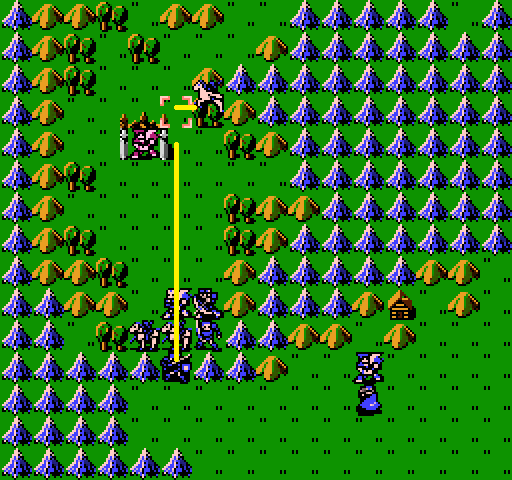 Sheeda moves over a scooch and equips a javelin. Marth gives her the devil axe, so later she can fly up and chuck it into storage where we never have to deal with it again. Now that we’re here, what’s the boss like?  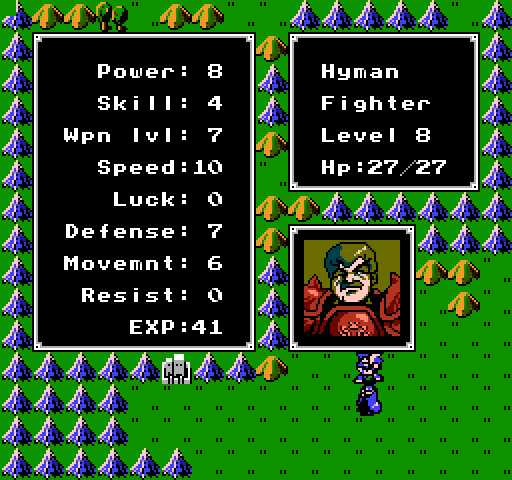 Hyman is not impressive. At all. For example, let’s compare him to Gomes from last level. 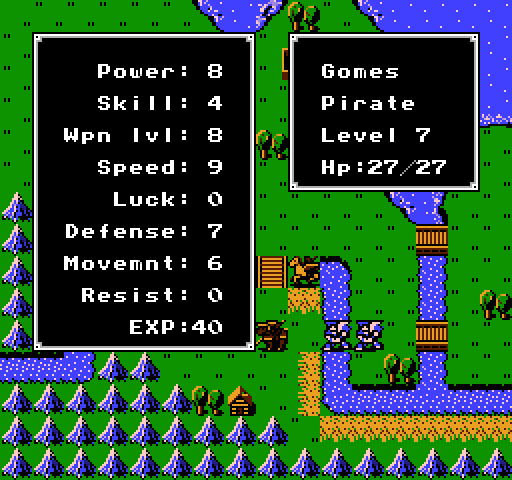 Effectively identical. With one more speed, oh no (and one weapon level, but that means literally nothing here). At least he has a portrait? Your moustache sucks, Hyman. 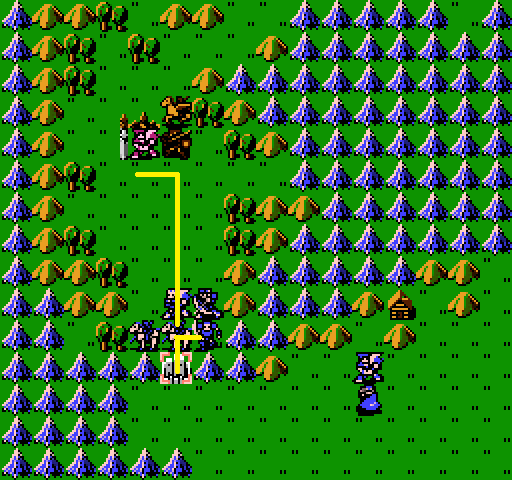 Oguma gets back on his fort, and Abel sees if Hyman wants to get him to level 3 this map. 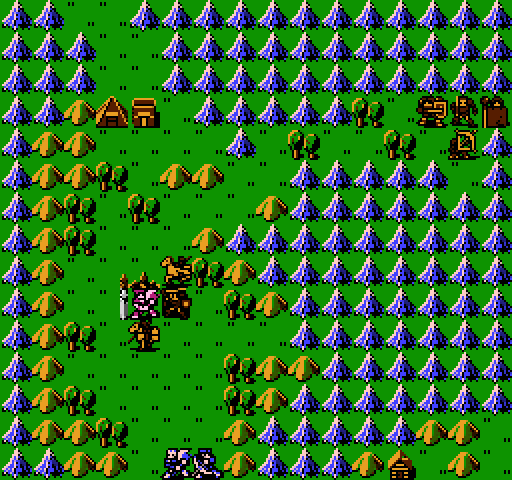 Oh, Team East caught up, by the way. 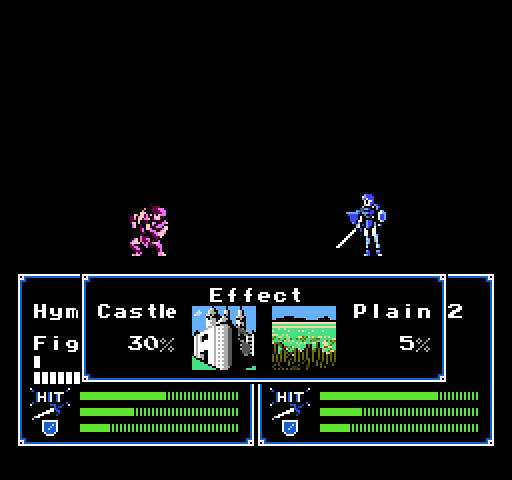 On his turn, Hyman goes for Marth. He does 6 damage. Once. He has 3 more speed, but he can’t even double Marth. And if he can’t double Marth, that also means he can’t double Abel, who has the same defense, and 19 hp. Meaning Abel can survive three hits. 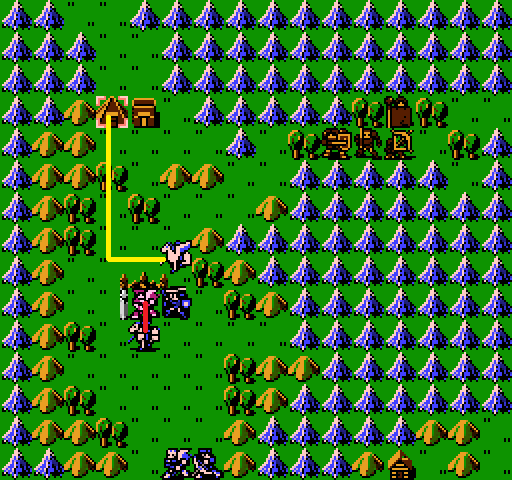 Sheeda goes and puts the Devil Axe away first, though. I’m thinking about skipping the movement lines when it’s unimportant and has no strategic purpose, like the move in the top-right. What do you guys think? 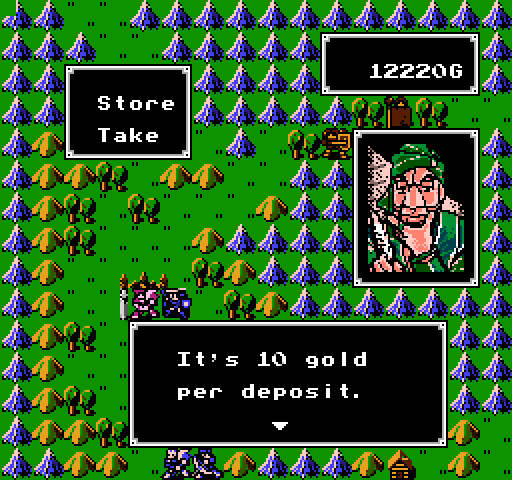 Apparently it costs money to use storage. Yeah, sure. Whatever guy. Take the cursed weapon of yore. There are also a total of 40 spaces in storage, but I feel like I won’t use them all. 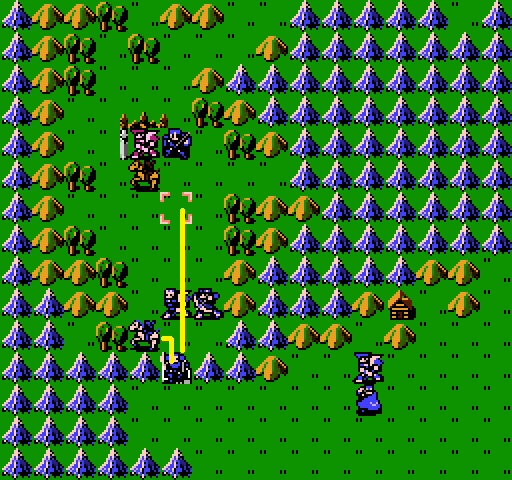 Abel doubled Hyman (only hit once though). We’re only getting 4 xp per encounter though, so I’m thinking I’m going to end this quick, the weapon charges aren’t worth such piddly experience. Oguma isn’t fully topped up, but close enough. He stays out of handaxe range, while Kain gets a quick hp boost. 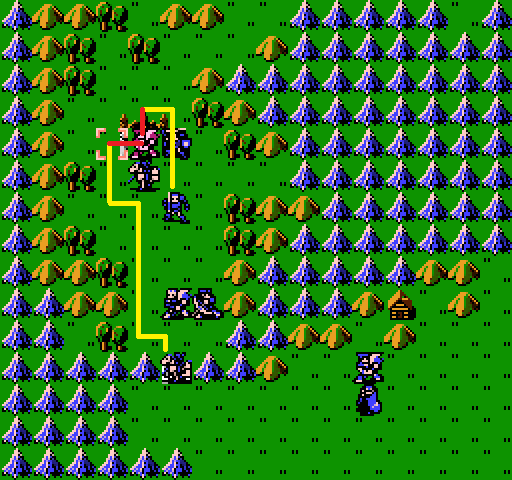 Alright, this guy’s gotta go. Originally, I was going to have Oguma attack with a steel sword. Given this guy can’t double with significantly less speed than him, there’s no chance he doubles Oguma, who has significantly more, no matter how heavy his sword is. But then Kain put him low enough that I was pretty sure that would kill him, so instead I do this. 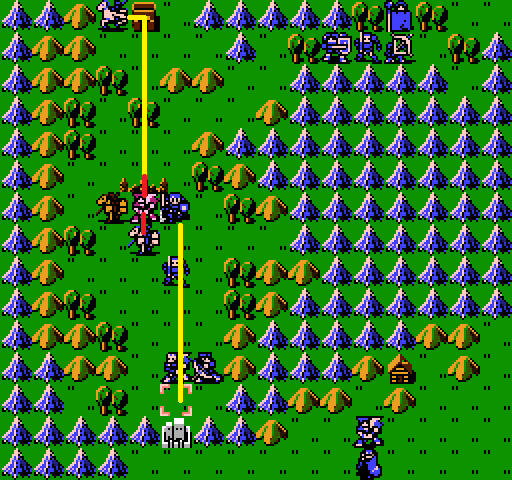 Marth runs, and Abel and Sheeda take a stab at him. If, somehow, neither gets the kill, Oguma will do the honors. If that doesn’t work, Kashim and Barts are right there with ranged weapons. Sheeda goes first, as the person who needs xp the most, then Abel. Sheeda does one damage (ugh), and Abel 6. This puts Hyman down at 5. I hold Oguma back and decide to let it play out one more turn, as both Sheeda and Abel can survive another hit, and Sheeda is at 97xp, so goddamn close. 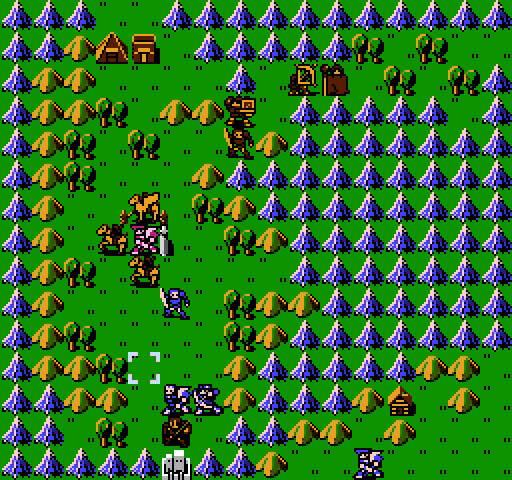 He goes for Abel… 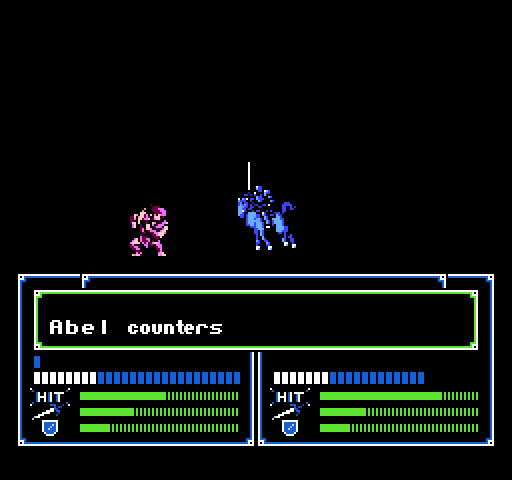 Do it Abel. 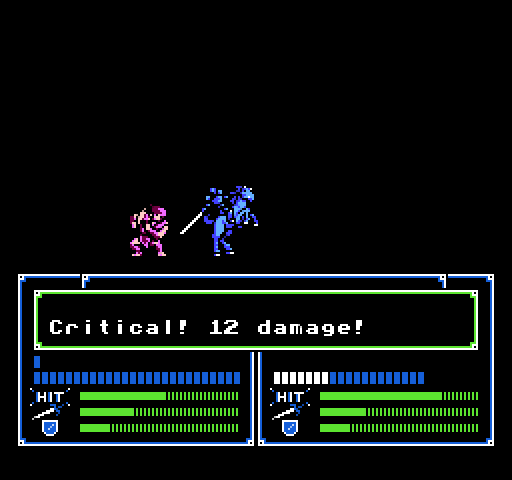 Hellll yeah. 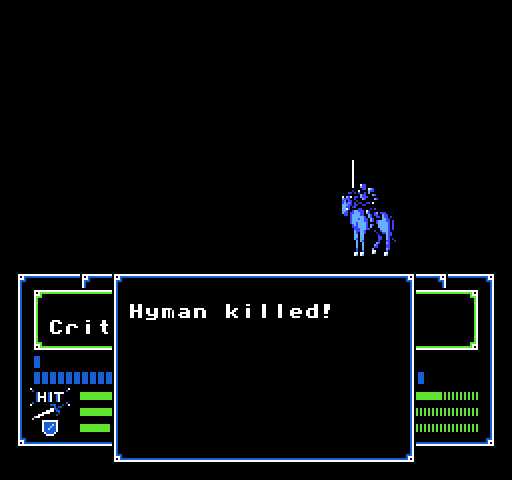 He sure was! 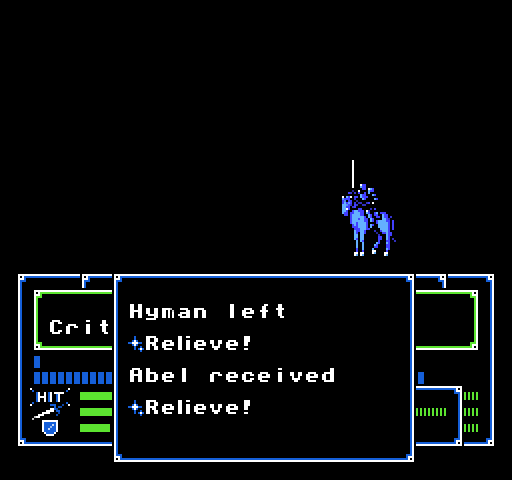 Ohhhhhh that’s where the staff was. 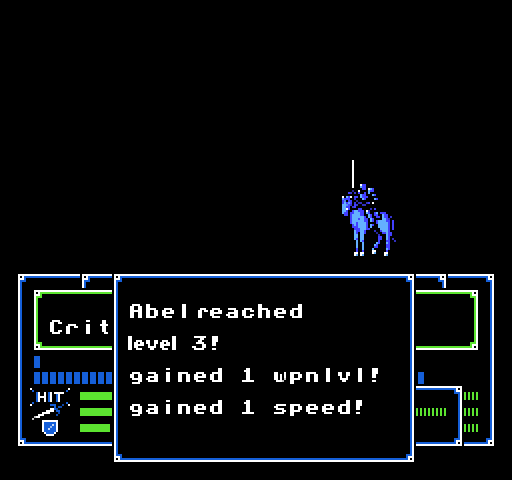 gained 1 hp! Nice, nice. Now, one thing to note is that, if weapon level only affects what weapons a character can use, I think it is officially useless for Abel. I’m pretty sure he’s holding onto Jeigan’s old silver lance, and can use it, and unless I’m crazy, silver is the highest weapon tier in these games. Also, going forward, my plan for levels is to showcase growths for the first time a character levels up, and afterwards when they hit a milestone (5, 10, 20, etc), to compare them to an ‘average’ version of themselves at that level, based on growths. 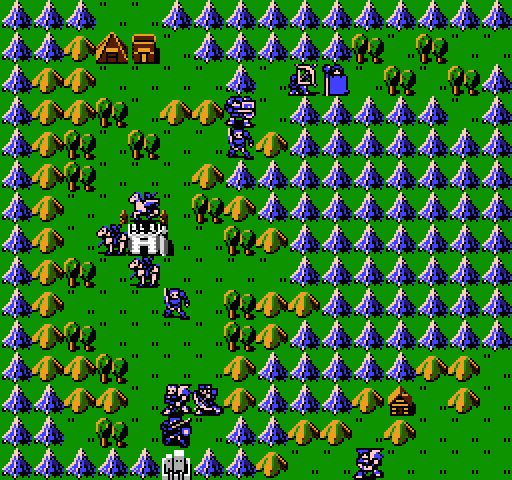 Next time, light shopping, a seized throne, plot, and map review! AlouetteNR fucked around with this message at 14:42 on Oct 16, 2019 |
|
#
?
Oct 14, 2019 17:54
|
|
|
Welp, RIP Also.... yeesh, losing Josh, Natasha, Colm AND Neimi all in one shot? Yeah, um.... to that run I say "Good luck."
|
|
#
?
Oct 14, 2019 22:43
|
|
|
It did not last long. I think I got to Chapter 13? The one just after the boats with monsters, where the boats land. You absolutely do not appreciate just how much you get from stealing. Actually though, one of the losses that I hadn't considered until that run was the loss of equipment on people who die. Whoops, there goes a heal staff, mend staff, and killer edge, plus however many vulneraries! That many losses early game on Hard really cuts your legs out from under you for the rest of the campaign (this might be why you see some more defense-oriented strategies from me for the next while...)
|
|
#
?
Oct 16, 2019 14:40
|
|
|

|
| # ? May 2, 2024 10:06 |
|
|
Last time, we recruited Navarre, and broke Hyman (ugh). For now, because we have time, and we don’t know whether we’ll be thrown right into the next map, we need to do some downtime maintenance.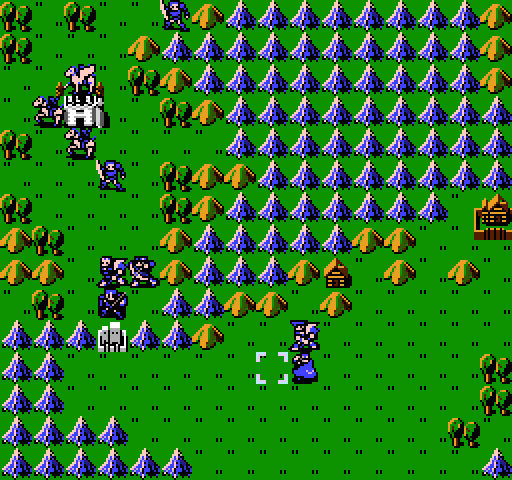 Because we’re not on a time limit, I won’t be showing this, just describing it. Barts gives Julian an iron sword. 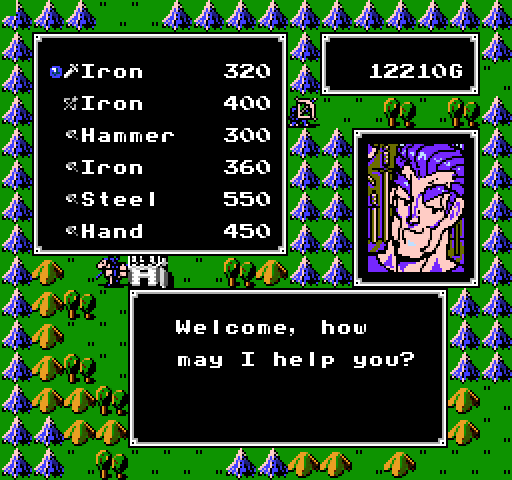 Here’s our merchant for this map, by the way. Selection and prices are identical to last time, so we don’t need to worry about swapping everyone from iron to steel or anything like that. Navarre buys a second iron sword (I will horde that killer sword far far too long, I’m certain). Sheeda and Oguma buy second iron swords as well, and Abel gives the relieve staff we got from Hyman back to Rena. With this, everyone has three or four weapons. The majority have three, so they can pick up vulneraries from enemies later. 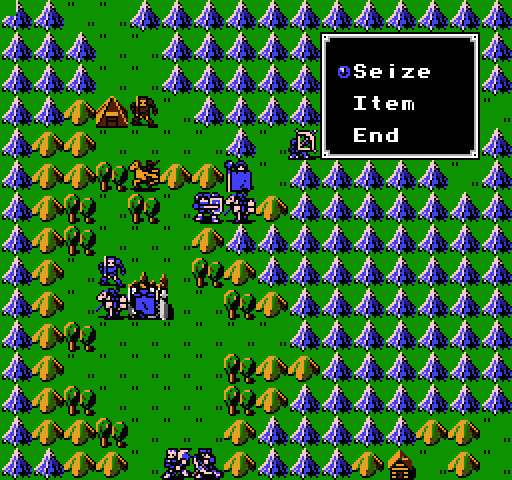 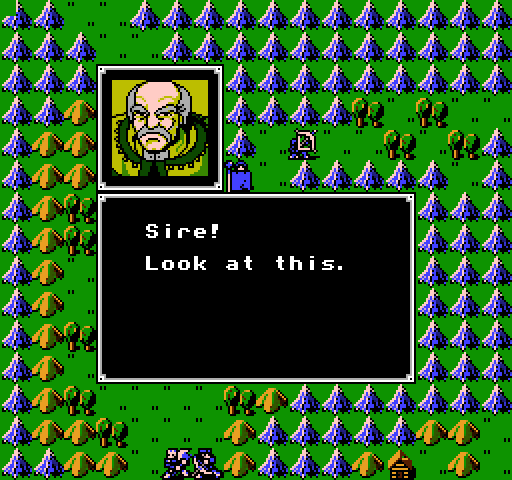 Of course. And I’m sorry, you are?  The bandits left 15000G in the castle! The bandits left 15000G in the castle!Haha, nice. Sure. Give me all the money. Every map. Tomorrow we’ll arrive in Orleans. Please get plenty of rest tonight. 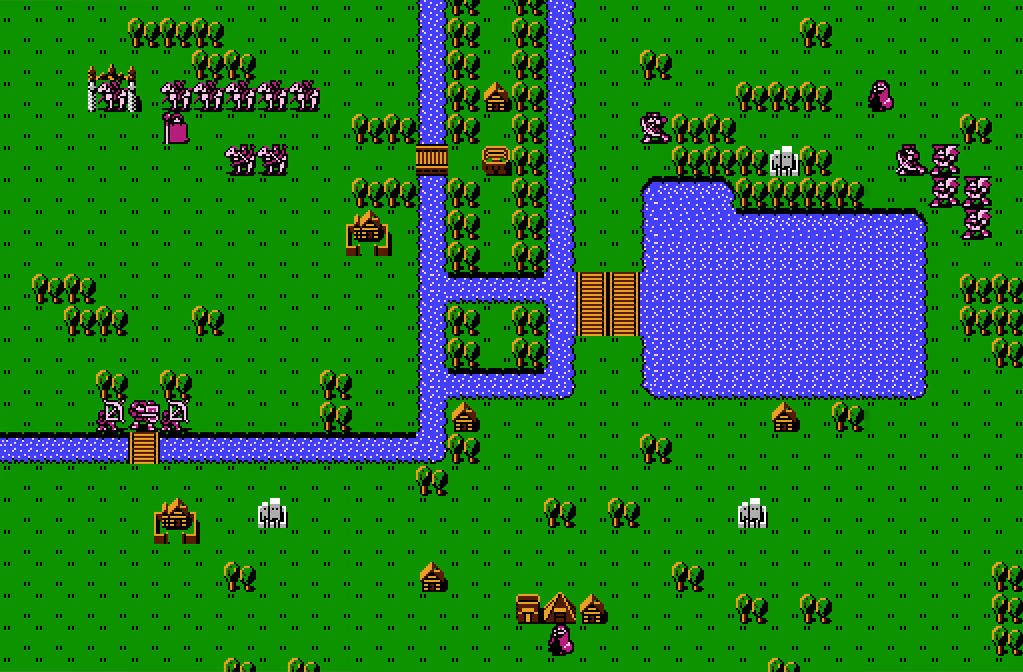 Click here for the full 1023x672 image My thanks to DKII for this stitched up version of the next map (I tried doing it myself, but ended up continually missing bits due to how quickly the camera pans, and eventually got frustrated and gave up). 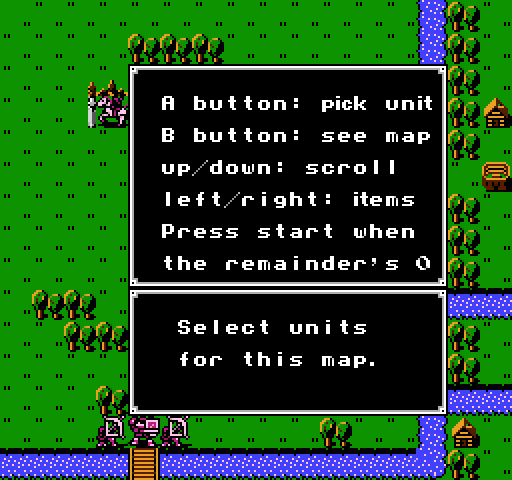 Ooooooh poo poo. Alright. Looks like LP rules are now in effect. 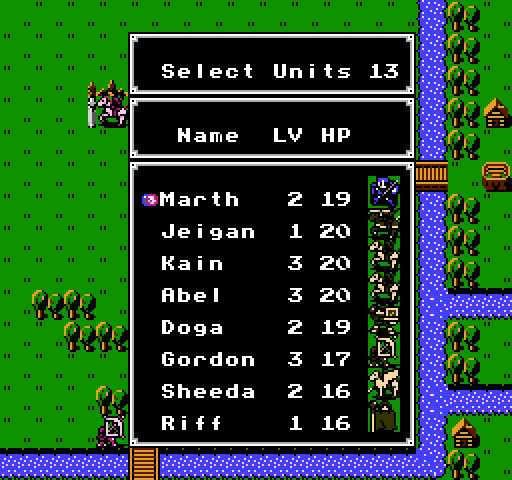 We get 13 units, plus Marth, which is generous. Because I’ve been focusing on spreading xp around (and because Maji died), my team is already more or less set for me. 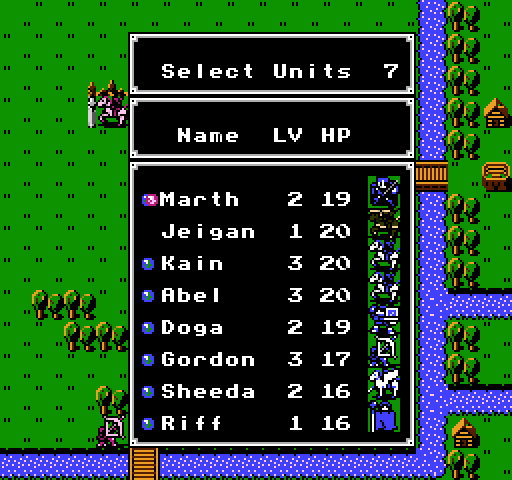 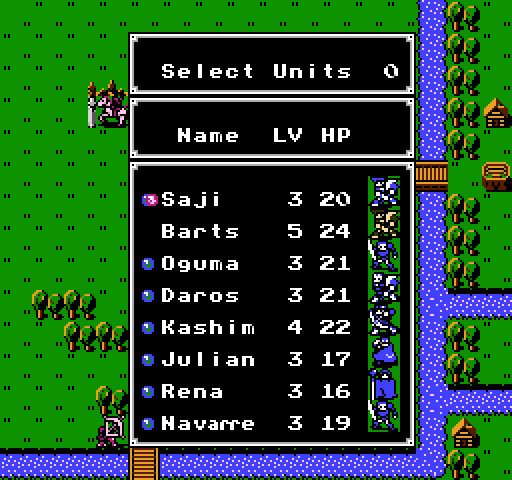 Barts and Jeigan are staying home today! Jeigan, see you in about 20 levels! 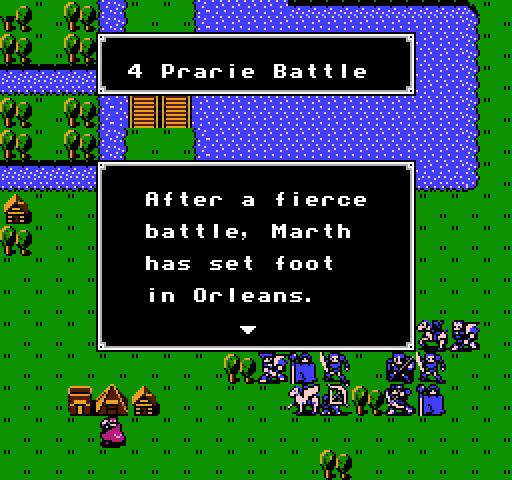 One thing to note, we do not get to manage items, nor formation. 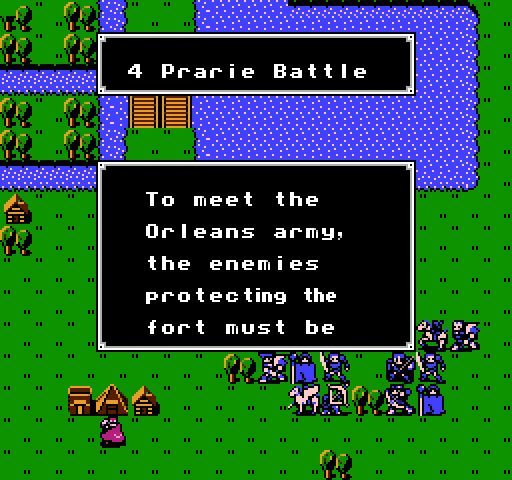 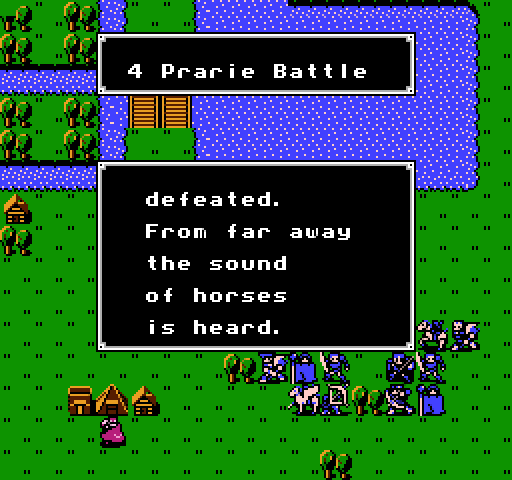 I think I also need to settle on a narrator, if these text descriptions are going to start to be a pre-battle thing. 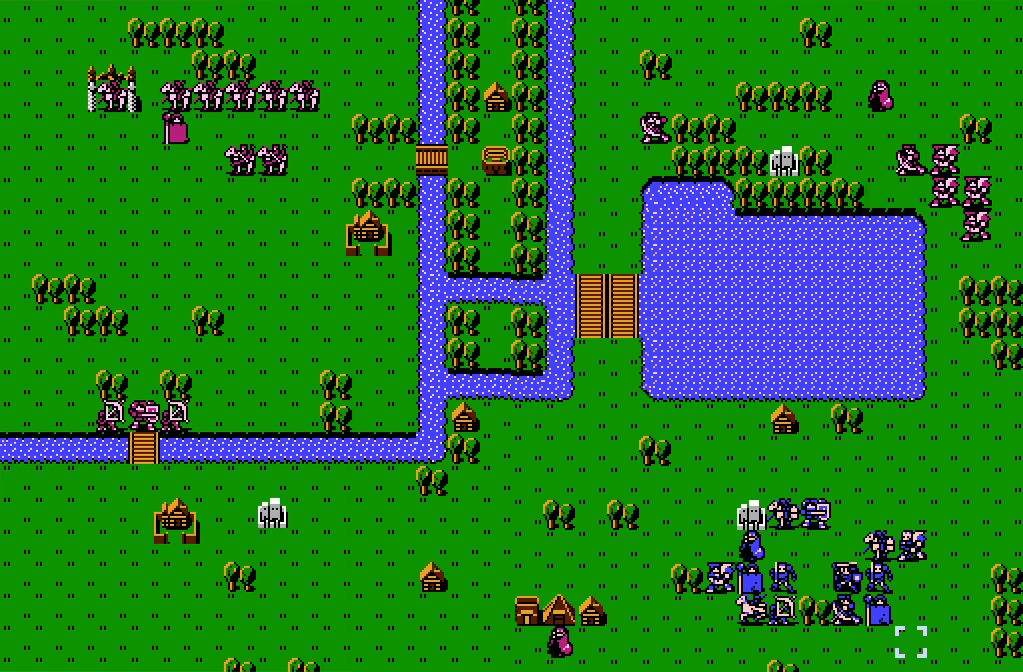 Click here for the full 1023x672 image Here’s the map again, with our guys. First thing to note, the AI is now playing with multiple enemy types. As you can see, that’s a lot of horses, and they’ve even got their own Doga. 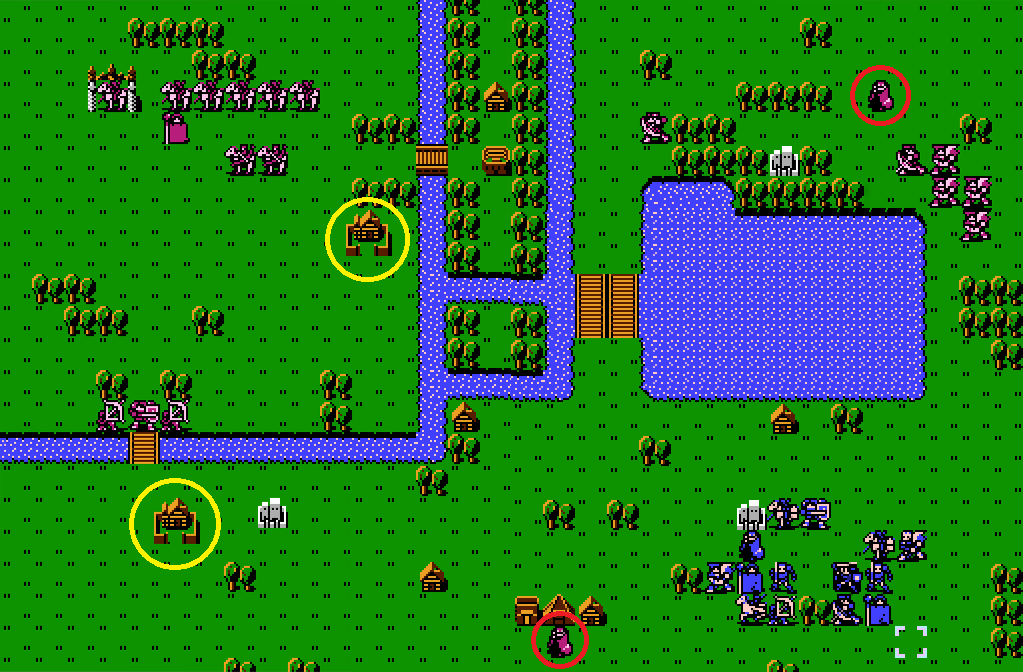 Click here for the full 1023x672 image As usual, villages are top priorities, which means these thieves are our immediate concern. 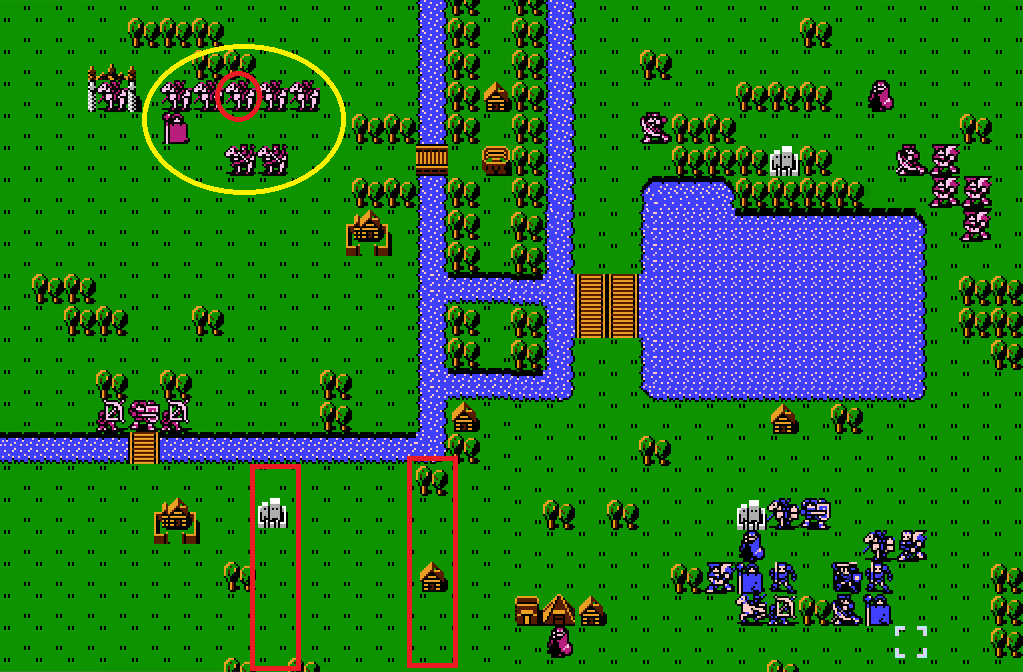 Click here for the full 1023x672 image Enemy social knights. These are fast, and there’s no terrain obstacles between them and us. I suspect they are going to rush us, to try to get us in a pincer. Luckily, they are far, so even with their movement, it’s going to take them a few turns to get to us. Originally, I was thinking of a wall in one of the two selected areas, but that is a very wide wall, with very little defensive advantage. Plus, even rushing, I’m not sure we get there first. The red-circled cavalier in particular is a problem. He has an armor sword, which means whatever we do to wall them off, Doga can’t be part of it. Everyone else, thankfully, are just on iron. That cleric isn’t something I’m worried about with the cavaliers. I suspect it’ll be more helpful to… 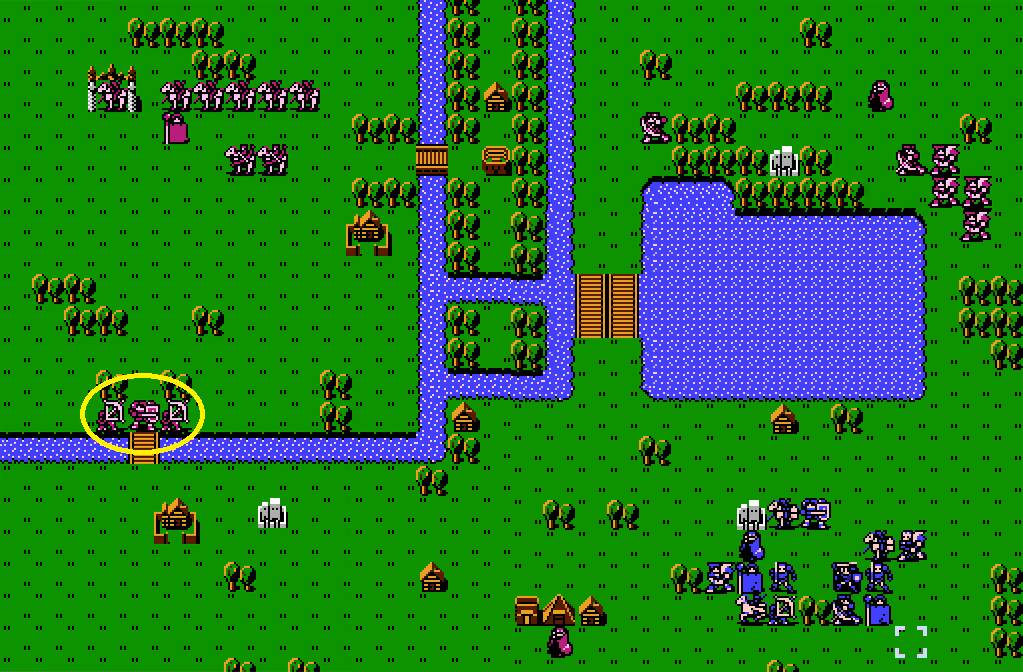 Click here for the full 1023x672 image These jerks. The archers have steel bows, which are going to hurt, and the armor knight is going to let them plink at us unless we can get around him somehow. They have a natural choke on that bridge, so we need to get around that. My thought is an alpha strike, with Daros crossing the river to take one down, while Sheeda flies across to hit the other, with both being supported by Gordon and Kashim. This could also be where Saji gets a chance to shine, if we hit the armor knight with his hammer, it could give us the opening we need to flood in with everyone to take down the archers. A third option would be to place Daros in the forest just east of them as bait. With a handaxe and a vulnerary, he can tangle up one archer solo while the rest of the team goes for the remainders. 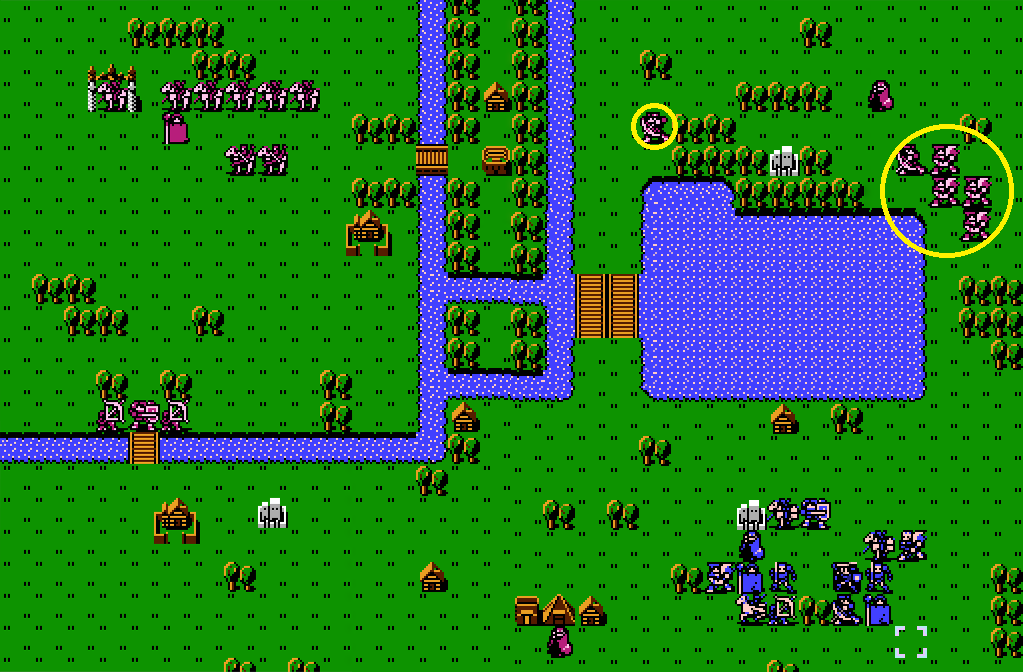 Click here for the full 1023x672 image These guys are nothing we haven’t seen and dealt with before. Level one hunters and bandits with iron weapons. Once the thieves are dead, we want them dead, just so we don’t get encircled. 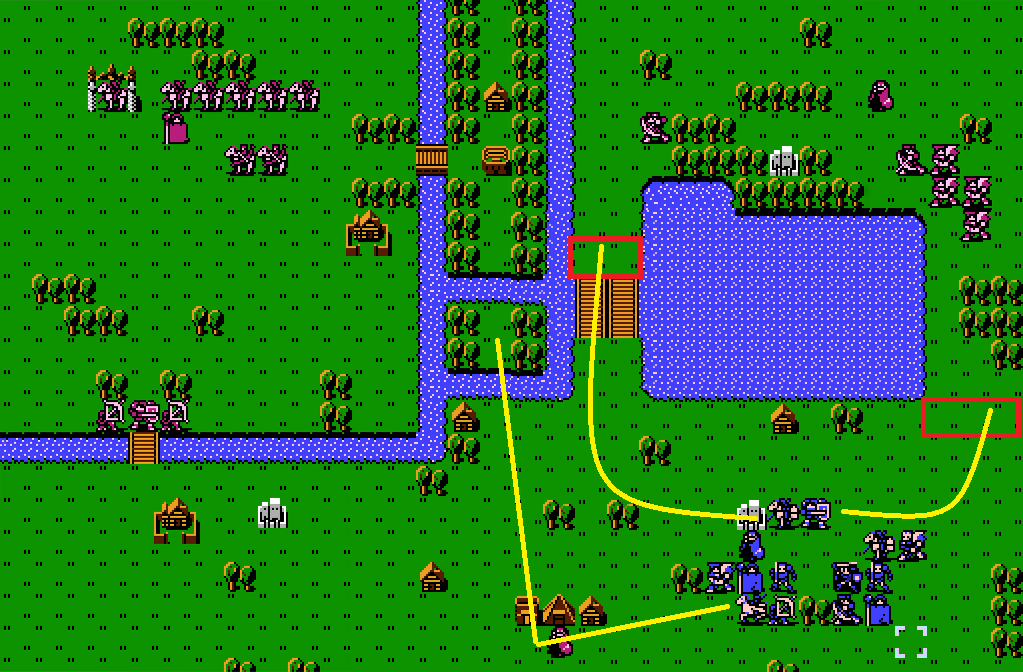 Click here for the full 1023x672 image So here’s the rough plan. Sheeda gets around that thief, hopefully kills it in one turn, then gets to safe ground until those bowmen are dealt with. The faster units take the bridge, since I’m expecting just that hunter and the northern thief will be there. Our tankier guys will take the eastern path around the lake. We’re stopping short of the forest so the enemy doesn’t get to take advantage of them, but once they’re dealt with, we’re taking over. 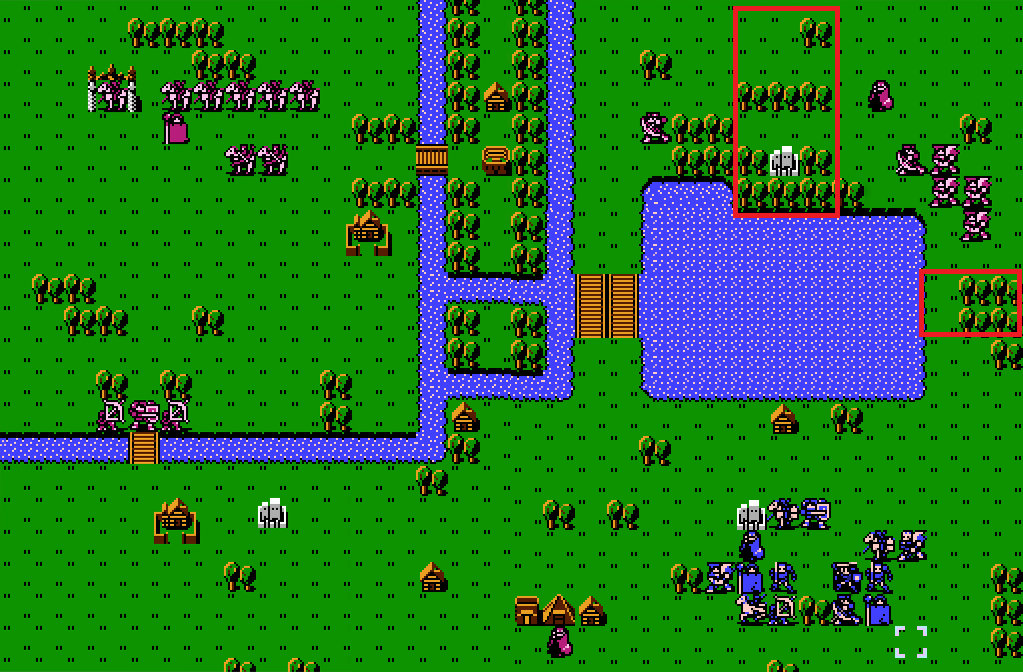 Click here for the full 1023x672 image Once the eastern enemies are dealt with, we’ll retreat further, so we occupy more or less where they are now. The forests on the north short of the lake will make it difficult for the cavaliers to maneuver, so I’m hoping we can separate the cavalier from the bow knights. If we can split that group up in any way, it’ll be far far easier to deal with. With that, we’ll end the update. Next time, we execute.
|
|
#
?
Oct 19, 2019 00:30
|
|