


|
Slugworth posted:Me at the start of the thread: "Oh cool, maybe I'll build one of these someday" ^^ This ^^ I started looking at building one during the pandemic because I love woodworking and like to think of myself as fairly handy, but quickly noped out once I realized the care and attention that needs to be paid to get everything fitted, sealed up, roadworthy, and finished out. It's not just a set of shelves I can slap some trim on to cover the big gaps everywhere. I really appreciate all the writeups and photos in here, that's given me an even greater appreciation for all the work needed to get one across the finish line! I'm just impressed as all get out by what you've built here!! Raised by Hamsters posted:
That's a really great idea to split up your front boxes like that, makes access and organization nice and easy. Especially if you do something like toss batteries and charge controllers/trailer brakeaway controller into one or something. I have no idea about these in particular or how they'd fit into the space, but I feel like some sort of side mount truck toolboxes might fit the bill. Or even something like a rotomolded chest might work (though that sorta thing might be too heavy at the tongue). Tongue weight is my big limitation... I've got a nice front box but after 200Ah of LiFEPO4 batteries and an 11 gallon propane tank, it's right at the limit of my Outback can handle, which either means I need to toss in new overloaded springs from rallitek or switch to a Tacoma or something. I love your side table mount, that's exactly what I want to do with my trailer, like maybe above the fender or as a perpendicular galley extension. Is this similar to what you're using for that? What are your plans for the table itself and storage? That would be really neat if you could hinge it to store in the galley somewhere and then slide out, fold out, pop the legs on, and attach to the camper Edit: For the projector this is what we cobbled together with a blackout curtain and ball mounted kodak pico projector on the ceiling, but I just bought one of these screens on amazon to mount to wall hooks with an adjustable cord. Less volume, hopefully quicker and easier overall. For content we either stream to the projector from our phones or use a 256gb thumb drive with movies and tv shows loaded up on it. Gonna test it out this weekend over at New River Gorge! Catatron Prime fucked around with this message at 13:44 on Apr 23, 2024 |
 #
?
Apr 23, 2024 13:23
#
?
Apr 23, 2024 13:23
|
|


|

|
| # ? Apr 30, 2024 03:02 |
|
|
Oh nice! I did not realize small form factor truck boxes existed like that, those are probably perfect. I had been thinking about some of those waterproof storage plastic clamshell bins, but the narrow ones tend to also be way too long. Plus I don't really need that box to be totally sealed. We have switched out the Outback for midsize truck, so I've got a lot more tongue weight too play with now. Those are the exact side table mounts were using. Was prepping them to final size for anodizing last night. One thing that was irritating in my case is that the pre drilled holes either have a pattern, or are not regular at all. Probably not normally an issue at all but for me with my hatred of wall penetration and use of fixed threaded inserts to mount everything, I had to do a ton of re-checking that I was working with the right section. Also it will make replacing them harder which kinda defeats part of the point of my inserts. Table itself- I don't remember what I explained in here but I set up both sides of the trailer, with a table mount. Planning a general perpendicular to galley setup, that's ambidextrous so we can adjust the layout to for the spot. To start though I'm probably just going to prototype some thing out of random scraps to see what we like. One thing I'm really eager to see the interaction on is our shelter dome tent. Coleman makes these "event shelter" pavilion dome things, but they didn't sell them in the US. They're like a huge overgrown pop up shade canopy. One of my uncle's has had one for about a decade and it's been great in a camp site, so we imported one from the UK. It should have some flexibility to either fit over the raised hatch, or sit to one side as an entry canopy. Too huge for an on the go kind of trip but great if you'll be in one spot a while. Anyway, need to see this in place to get ideas on how the table layout will work. As far a stowing the table, we do have space above the fridge or at the top of the utility cabinet. Kinda holding those to see what we want though. Might turn into a pop out sink holder or a cutting board tray. Raised by Hamsters fucked around with this message at 18:46 on Apr 23, 2024 |
|
#
?
Apr 23, 2024 18:44
|
|

|
That little shelter looks good. The luxury of shade when you are outdoors is so nice to have. One thing in the Bean community I have seen that is popular is the Kelty Backroads Shelter. It is not a full free-standing awning but it can be used to help keep space off the back of the rear galley. Since I have the ARB awning on my Lexus I have never really worried much about any covering for shelter.
|
|
#
?
Apr 24, 2024 17:26
|
|


|
Charging ahead with things that make this whole contraption road worthy. To that end: Fenders! 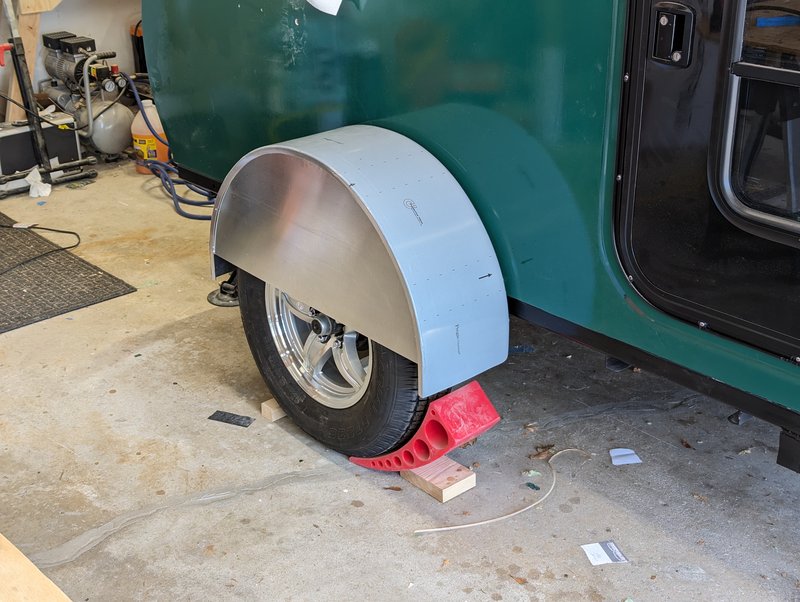 Plopped one in place, more or less. Too much crap in the way to get a decent shot from any distance but I’m liking how these fit with the style of the whole camper. Once these are on and done should look pretty good. And no, they do not have an outer cover plate over the tire – In the photo above, it’s on backwards. That’s because with this torsion axle, this interior cover plate is too long. Doesn’t hit the spindle or anything since that drops lower than the trailer frame, but it does hit the articulation point for the spindle arm. It don’t fit. Hemmed and hawed on this for a bit. Which, actually became kinda a common theme with the fenders in general. Needed to cut about 2” off of this back plate. 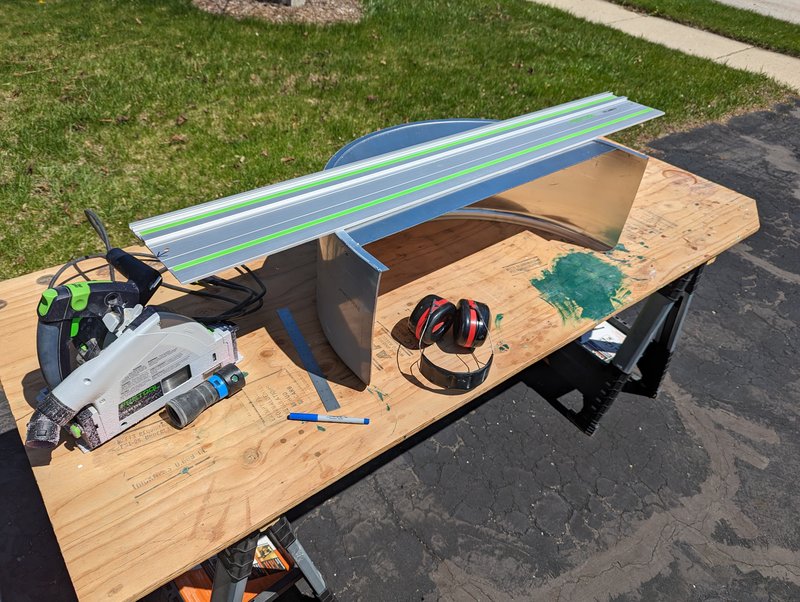 Ultimately just decided to use the track saw to do it. I didn’t have any real way to clamp down any other guide boards so the friction strips under the track guide were critical. But also I didn’t have enough space to just use the guide as an edge for a circular saw to run against. Plus the plunge control on the track saw was really handy. 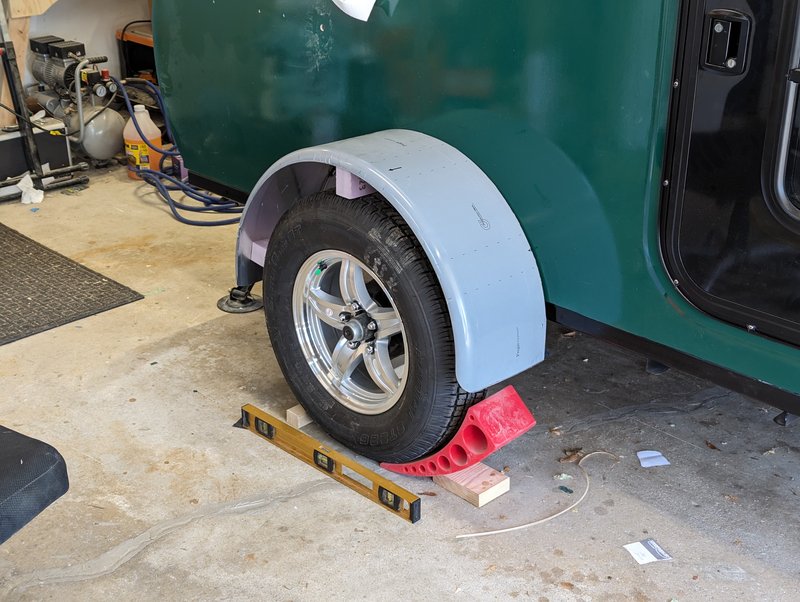 Ok now we fit in the correct orientation. Cut up some foam blocks as spacers, and started pondering on how I wanted these to fit and line up. Ended up settling on about 4” vertical clearance above the resting tire, with around 2.5” clear front and back. Still have around 350 pounds of junk to load on to this thing. It’s just now occurred to me that I could have chucked a bunch of weight plates in the trailer to check how it would settle. Anyway decisions were made, had to figure out how to attach them to the trailer.   The cabin has a little more than Ľ” overhang beyond the chassis. And, the wheel itself sits pretty far outboard of the whole thing from difficulties in sizing the axle and getting accurate info on what I was buying. So this is what I’m working with. One unnecessarily long figuring period later and 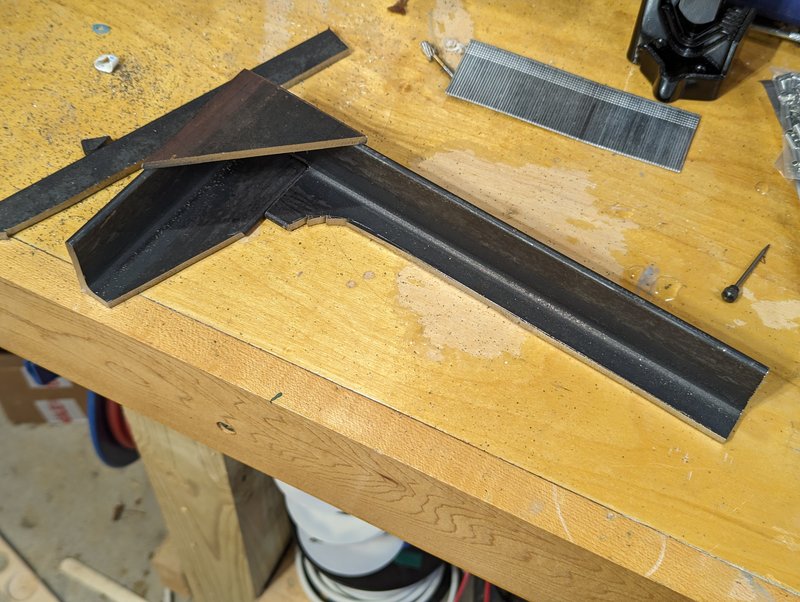 I’ve decided to fabricobble myself a bracket out of some angle iron and a bit of plate. 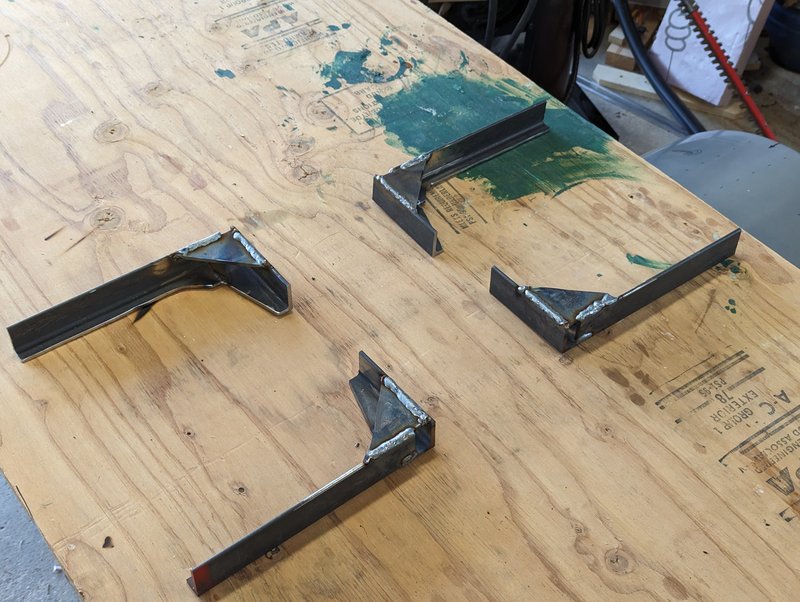 I’ve made, uh, four ugly shelf brackets. And, not pictured because apparently I took zero photos of it – I cut a notch out of the right angle corner of each one of them, to account for the fender not actually sitting flush with the trailer chassis. I trimmed the long leg of the angle down both to increase tire clearance (though I should have plenty) and also to minimize the amount of crap that these are going to collect on the road. 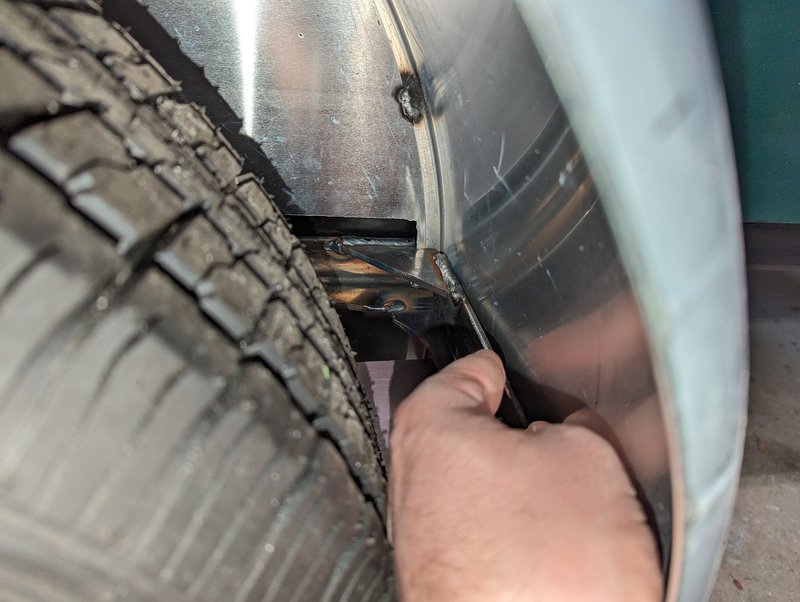 These things are going to go front and rear, low down on the fenders. The fenders themselves are still kinda lumpy from their poor packaging. I’m hoping the angle iron will help yank them back straight. Still, I’m doing a little guessing as to what straight really is. My brackets did turn out square, at least. 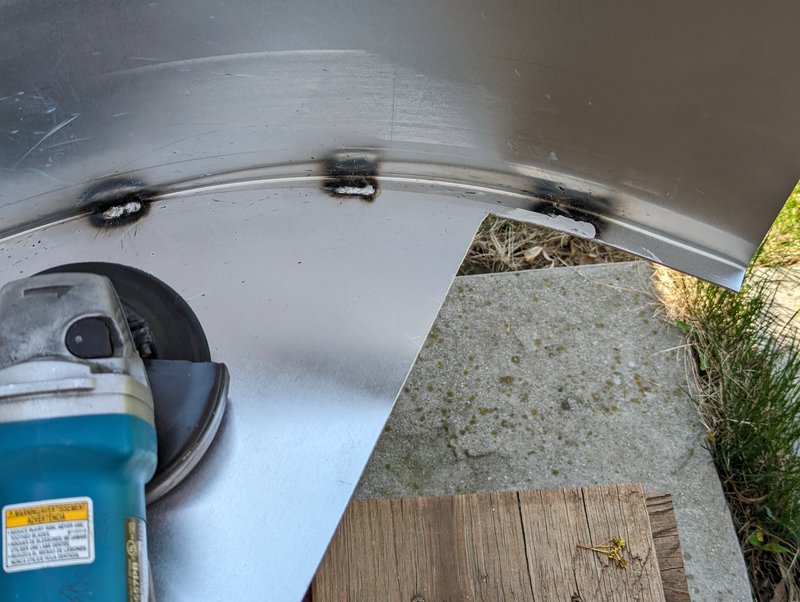 Thus began another period of figuring, to see if I could come up with a plan on how to actually sequence all of this and attach everything. An early step was grinding some of these ugly welds on the fenders smooth, since they were in the way of my brackets. Still though I couldn’t clamp the brackets to the fenders since they are bent. And actually I couldn’t really clamp the fender itself to anything because… what was I gonna clamp it to? And where? 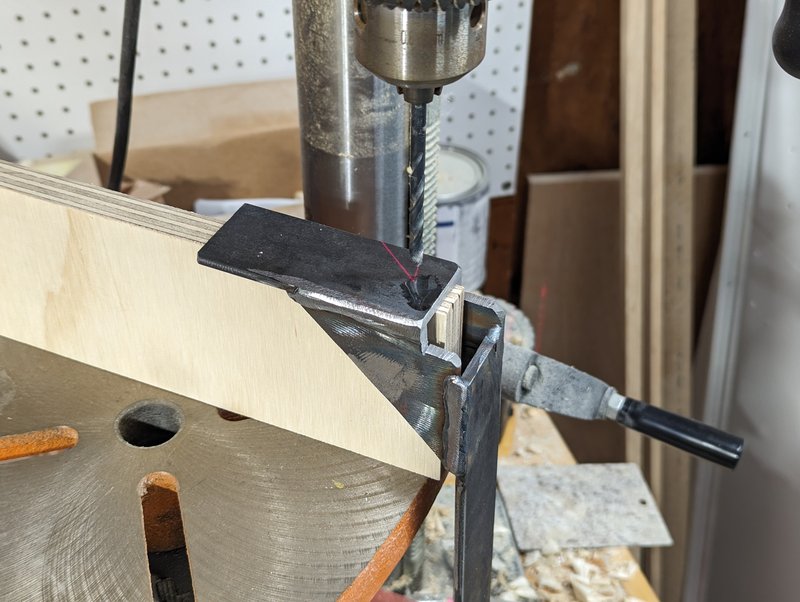 During this I also put pilot holes through the back of the brackets. Should have done this before I welded them up when it wouldn’t have required an awkward, tall perch for the part. 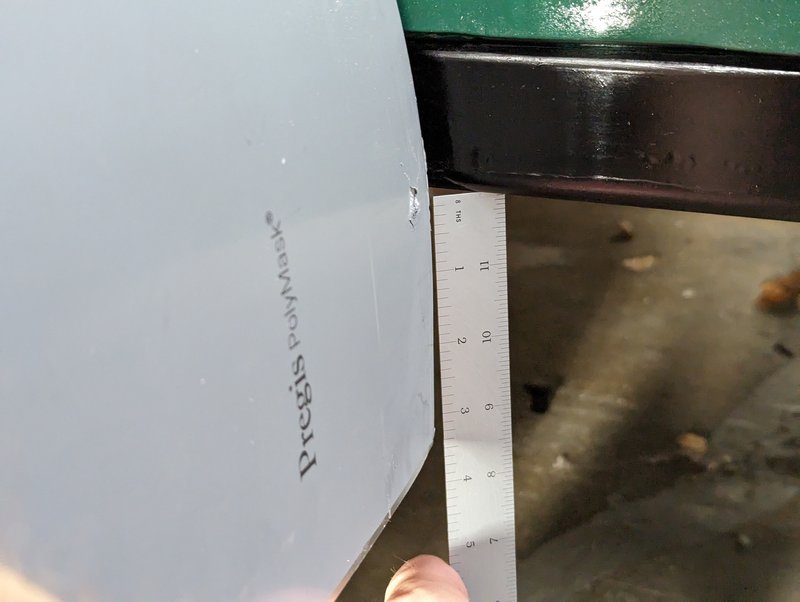 Ultimately, finally just visually balanced out the whole thing and did my best to make sure it was uniform. Then, my wife went under the camper while I sorta kinda barely positioned things from the front. 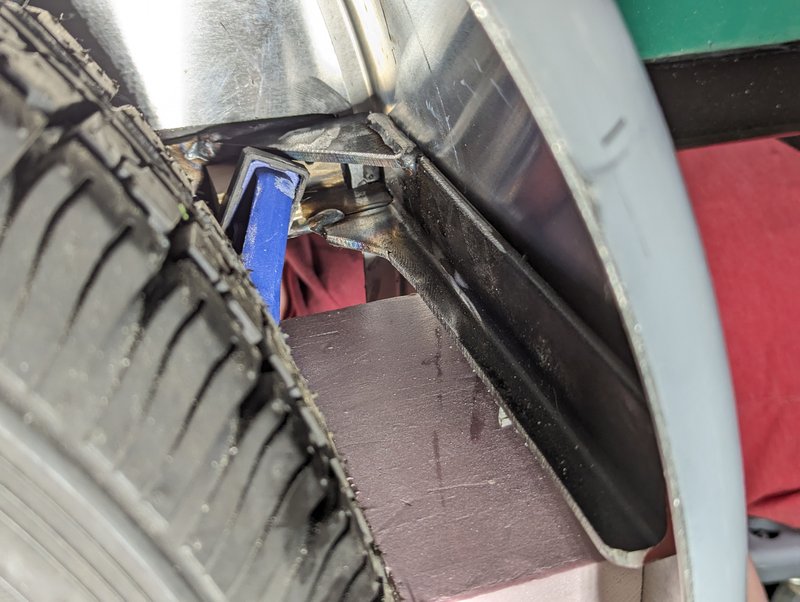 She was able to get a clamp onto the bracket, and we eventually got both dialed in where we wanted them. The photo above also shows the relative bending distortion in the fender – The bracket is square, and perpendicular to the frame. Which is not a big deal or anything it’s just making planning and doing this harder than I expected. Once both brackets were set and everything looked well aligned, I stabbed a paint pen through the pilot holes I’d drilled earlier. Tire was too in the way to do anything more accurate with a punch or awl or anything.  Up top I had pre-drilled a few 1/8” holes. 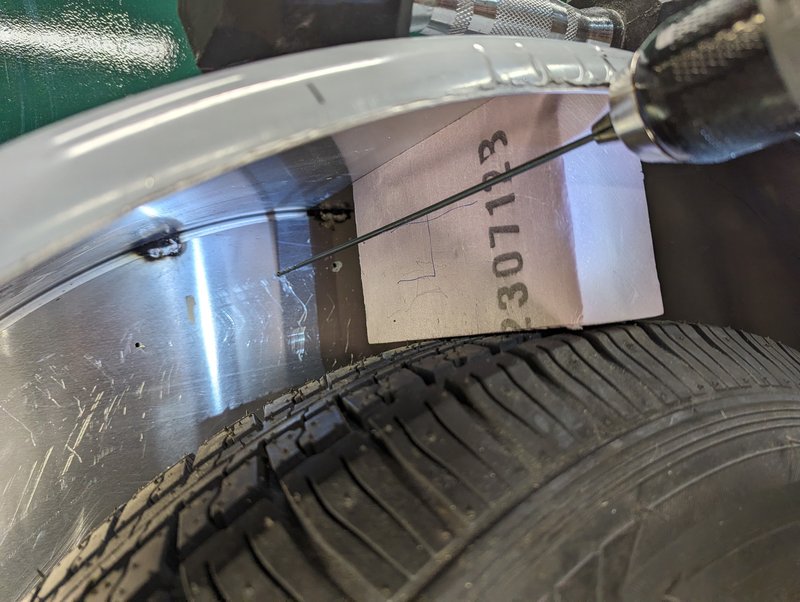 So chosen because I have a 1/8” aircraft length drill bit, which can reach past both the tire and fender and allow me to transfer a mark onto the camper. 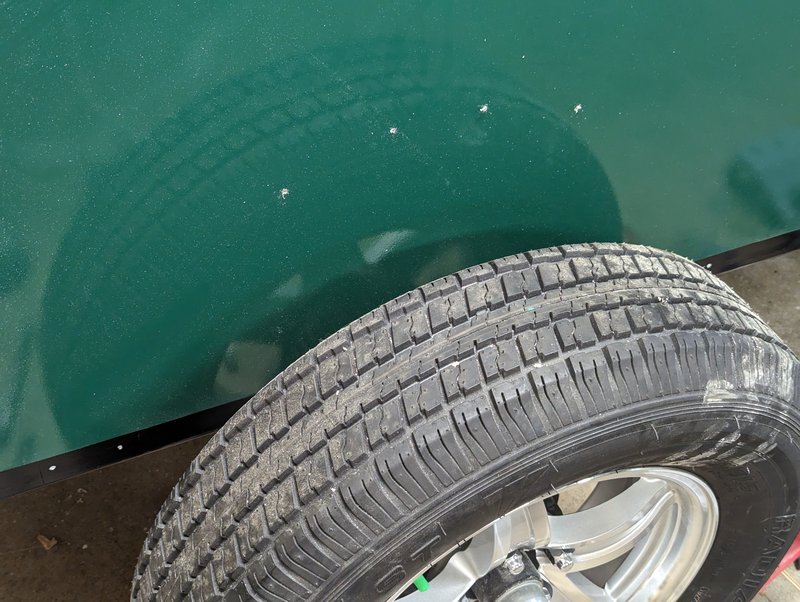 Pulled the fender off and I’m left with a set of marks along the top edge, and a pair in front of and behind the tire.  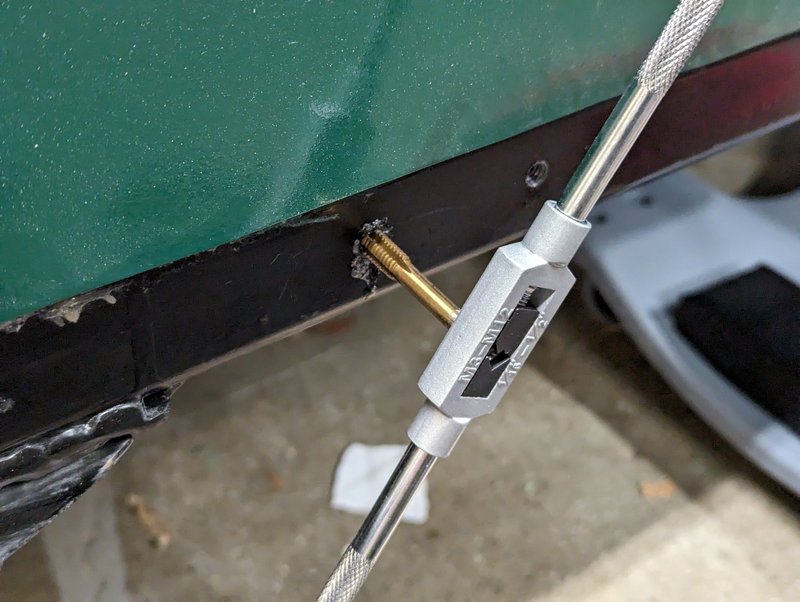 Drill and tap the holes in the frame rail.  And bore out the marks on the top for threaded inserts. Now, as soon as I get those inserts set I should be able to bolt my brackets onto the trailer. Then lower the fender down and bolt it against the camper frame. Then I can clamp and crush the fender until it flattens out against the bracket, and bolt those two together. Somewhat Heroic posted:That little shelter looks good. The luxury of shade when you are outdoors is so nice to have. One thing in the Bean community I have seen that is popular is the Kelty Backroads Shelter. It is not a full free-standing awning but it can be used to help keep space off the back of the rear galley. Since I have the ARB awning on my Lexus I have never really worried much about any covering for shelter. That's a neat looking setup. I'm curious to see how we end up liking things and if we use our pavilion as something that captures the galley, or fits off of one side and gives a rain-resistant entrance to the camper. Plus I didn't buy any of the side walls for it yet. I like that they are modular but not thrilled with how the screened/windowed portion is set up. So, might just DIY a tent wall because why not.
|
|
#
?
Apr 28, 2024 02:20
|
|
|
969.75 A double update weekend because stuff’s happening now. 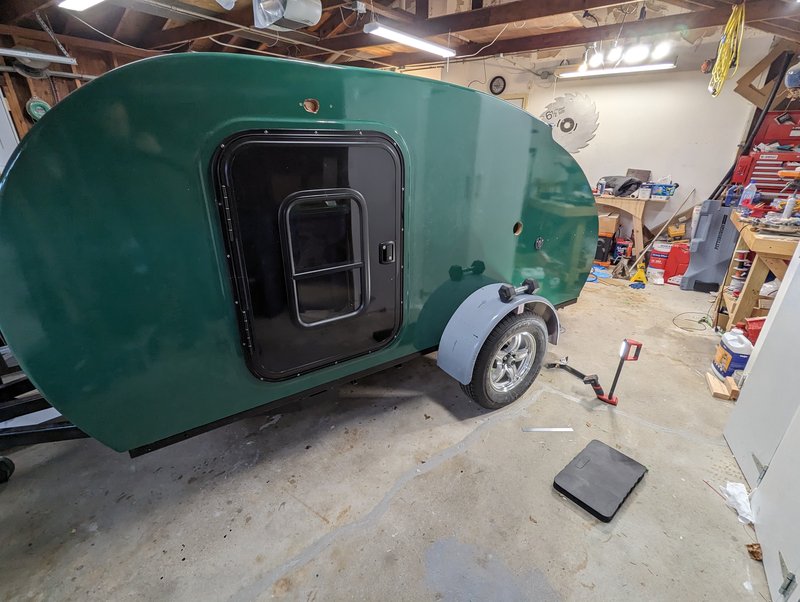 Moved the camper over briefly to take care of the driver side fender, same as the first. But otherwise hatch prep has been going on.  Inside the skeleton of the hatch, there’s a reinforced solid wood section for mounting this pull handle to. Thankfully I took a photo of this with the skin still off, with a dimension reference down from the hole for the locking latch. Started laying this thing out. 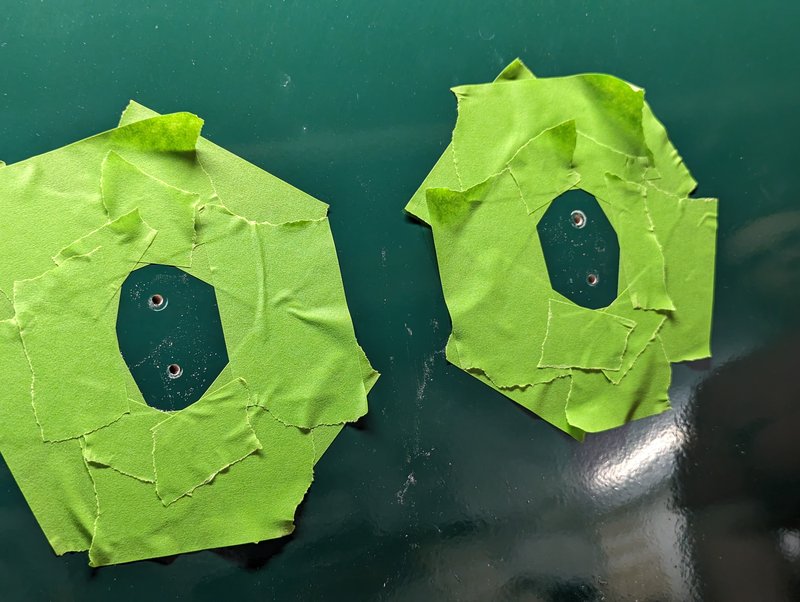 Masking around the feet took some doing.   Bedded it in and screwed it down, cleaned it all off. We added the handle as soon as we could because the whole thing is quite hard to hold on to, just for moving it around.  Today was forecast for eternal rain so we got this back in the garage yesterday afternoon.  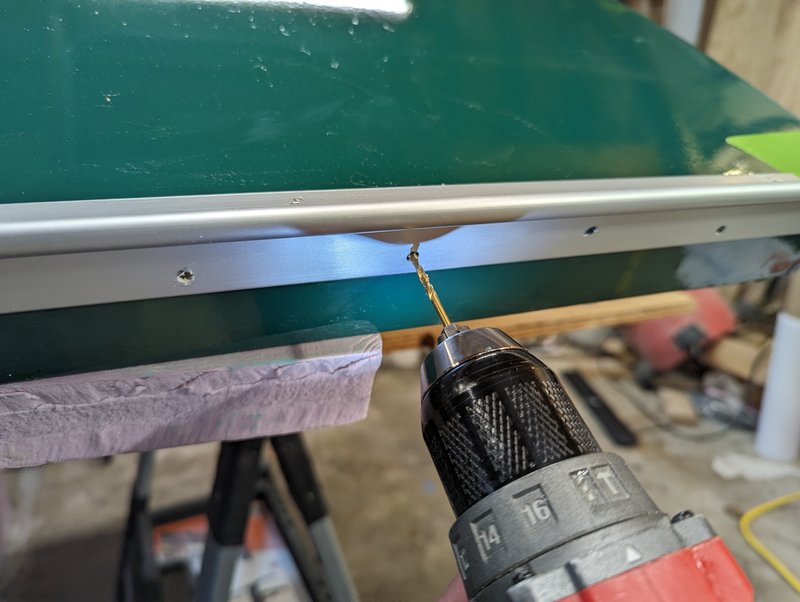 The hatch half of the hurricane hinge, never had pilot holes drilled before I had it anodized. So, had to do that first, and then transfer pilot holes for everything onto the hatch itself. Many people seem to put screws for this only onto the concealed face that is hidden between hatch and camper body. Which does look nicer but considering the forces these are under, I put 5 through from the top also to help with stabilizing it. 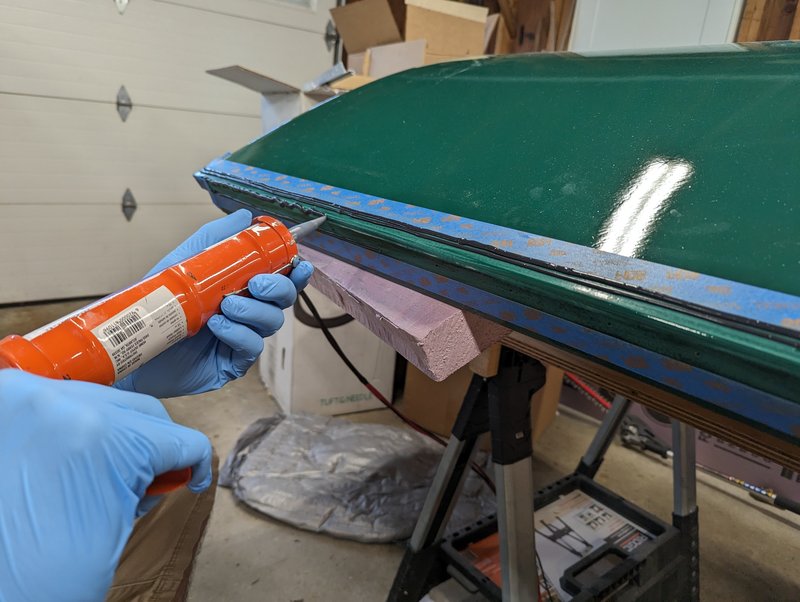 The shape of this hinge half is not conducive to the “stop water from getting in, but also let it out if it does” concept. So the whole thing got bedded down with sealant. 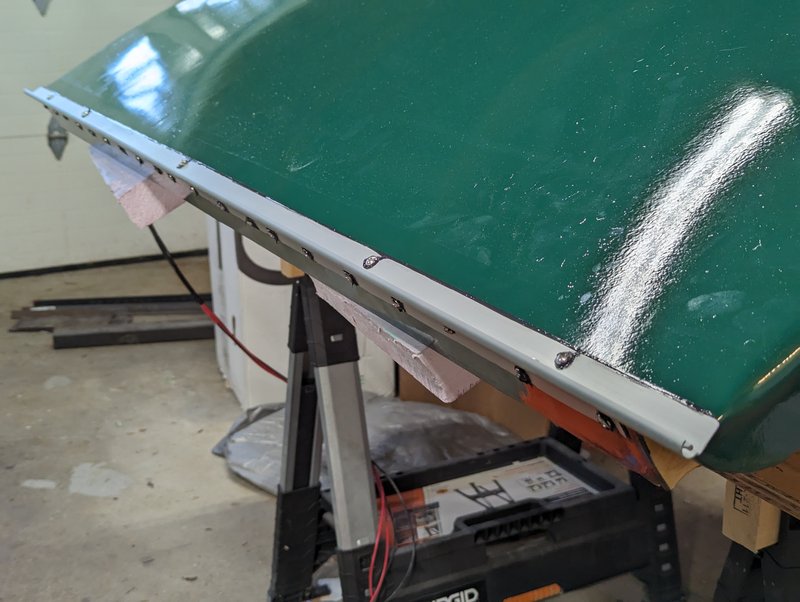 Acetone washed my screws before using them to ensure a good bond with the sealant, and bolted the whole thing down. Left this to sit and cure from yesterday afternoon until this morning, when I could get a pack of family assistants to help fit the hatch on the camper. 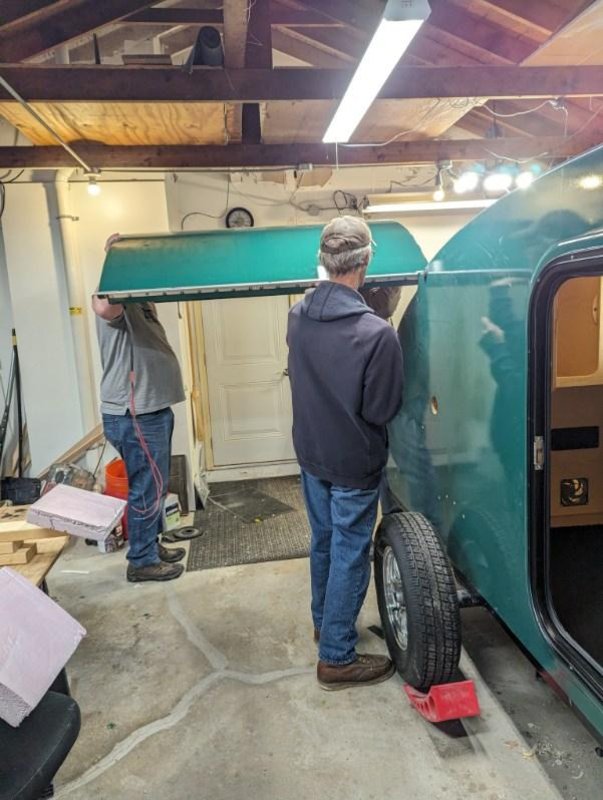 Because of the way a hurricane hinge works, you have to slide the two halves together, feeding one into the other along their whole length. Also because of the way my hatch seals work, this has to be done at half open or more, hatch height. So, my brother and I carried it and slowly slid the halves together, while my dad guided the nose. My wife sighted down the length of the two halves and gave us movement instructions so we didn’t rip the hinge apart while doing this. 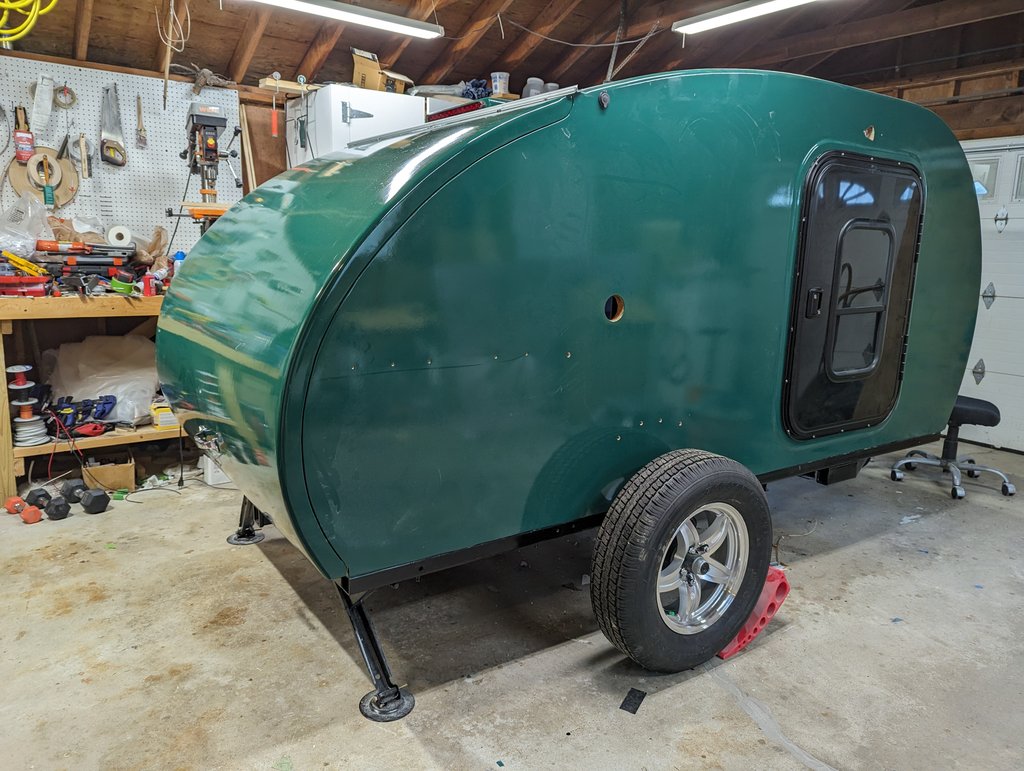 And we’re on! This was incredibly satisfying, and relieving. Hatch lowered down and closed with essentially no fuss, and everything is lining up very well. Looking way more road worthy, now. With this on, I could finally make the last load measurement and get the gas struts calculated. Unfortunately, I need a lot more gas strut power than expected. Required force is about 105 pounds per strut, at full open. When closed, the force on the struts is more like 150 pounds each. Collectively this is a LOT of force on the fittings and the hinge structure itself. I went ahead and ordered the struts immediately per what the calculator says I need. In the event these seem destructive to the structure here, I’ll have to go to plan B. Plan B would be to get new struts at about half the total load calculated above. They won’t be strong enough to lift and open the hatch but they won’t damage anything, either. They will take a lot of the weight off while opening and lowering the hatch, though. I’ll end up having to use prop rods to keep the hatch open in this case. Not what I want to do, but, the lower strut mounts that I attached to the galley walls earlier should make a pretty ideal place to do this. I’ll be able to attach something to the main gusset of the hatch for the other end. Not ideal but it should work fine. We’d also made preparations to get the mattress in the camper.  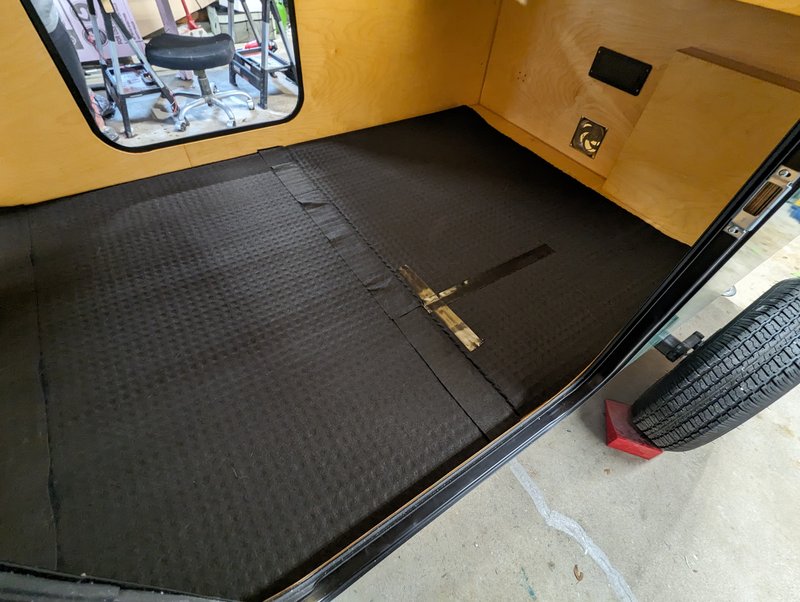 I’d seen this “Den Dry” mattress underlayment recommended before and thought it might be a good idea here. A tough plastic mesh faces down toward the floor, with a breathable felt backing between itself and your mattress. The plastic won’t collapse, so this allows for just a little air movement under the whole thing, to help dissipate moisture. Cut this and fit it into the camper. Please pay no mind to the structural duct tape from where we started cutting it in the wrong direction. 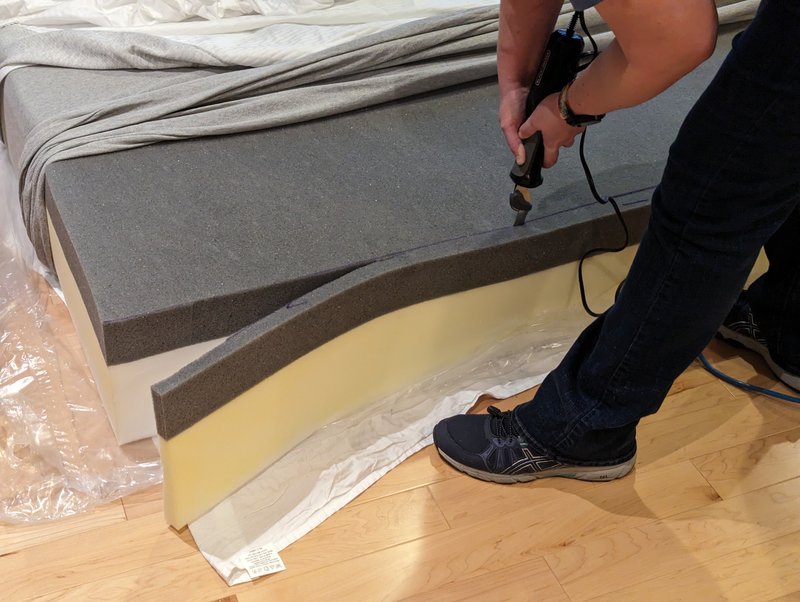 The mattress itself has been laying in our living room because it needed shaving – the camper interior is about 58.5”, while a queen mattress is a full 60”. So we cut a bit off just to reduce the internal tension a and make it easier to handle. An electric knife is the perfect tool for cutting foam like this, incidentally. 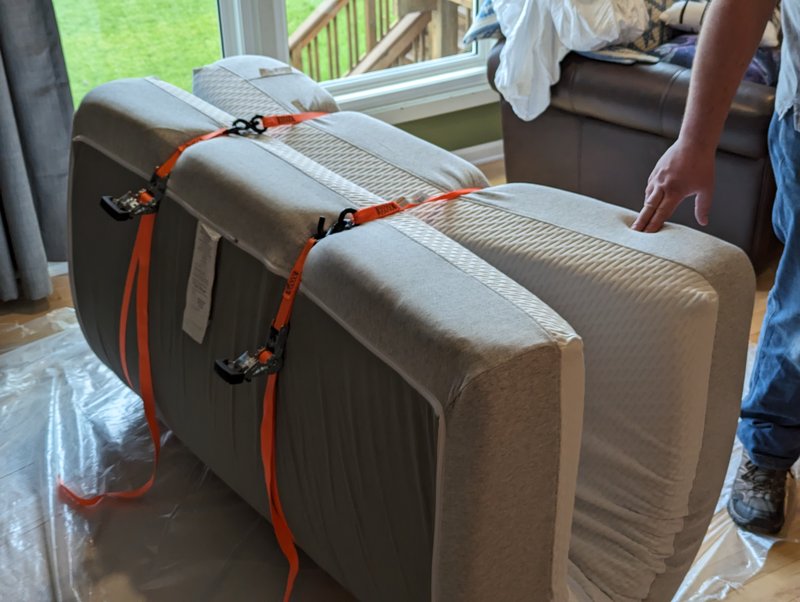 Before my family could escape I had extra hands help fold the mattress into a taco with ratchet straps.  Carried it out, and stuffed it in through a door. I was a little worried we were going to have to fight the thing the whole way but this actually worked very well, only a few minutes and the whole thing was in place. 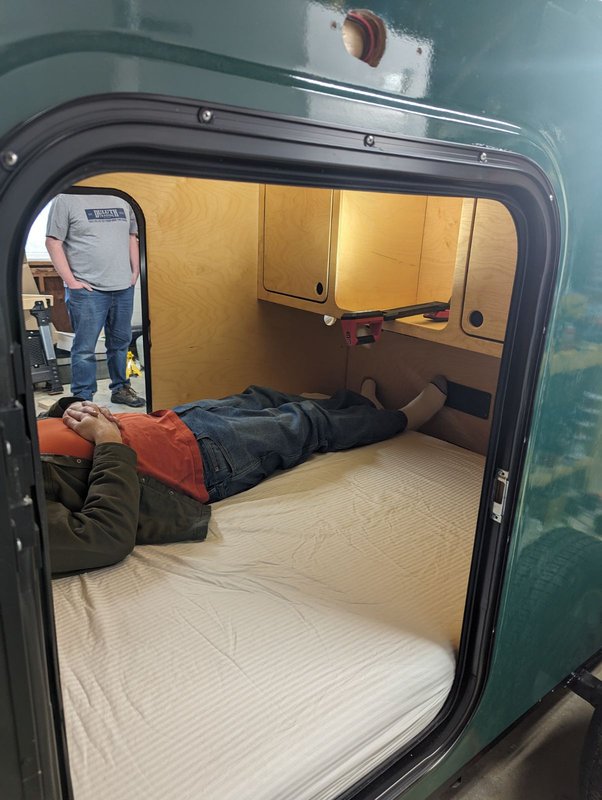 My foot room works! I was slid down the mattress a little more than normal here, too. Took a nap in there this afternoon. I think we’re going to love this thing. 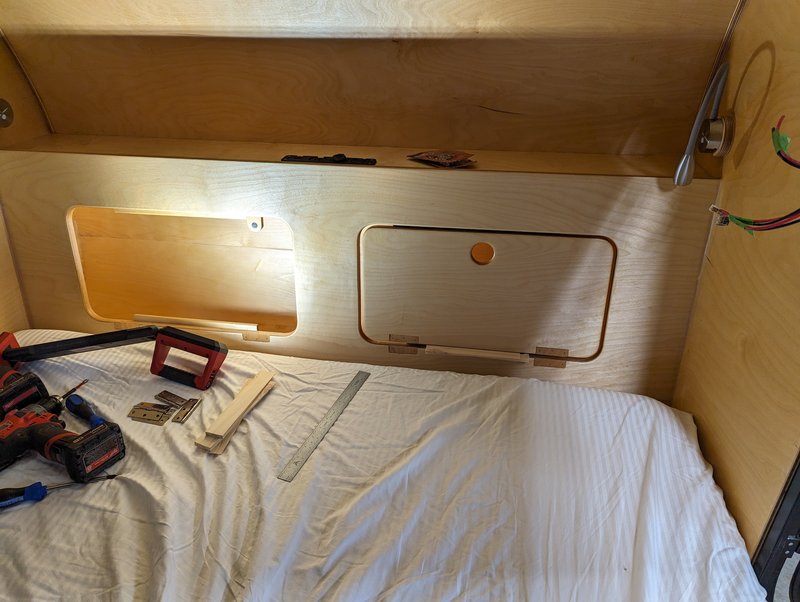 With the mattress in, it’s now way more comfortable to do any of the remaining work in the camper. Got the cabinet doors for the headboards out and popped them in place. 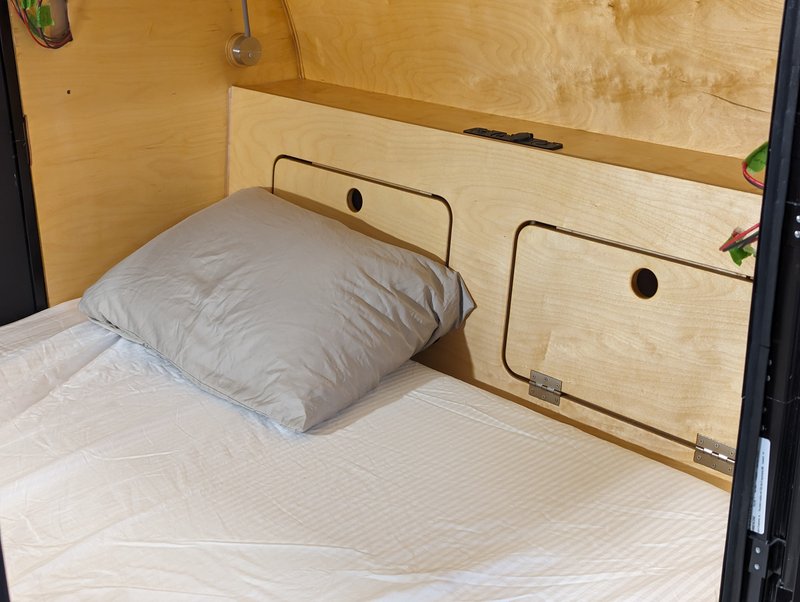 The utility hinges are ugly as expected, but, when pillows are there they are pretty hidden. Plus with the hinge barrel fitted into the gap between panel and door, and the hinge itself being recessed, these have pretty much no chance of raking your hand if you brush it in your sleep. I actually pretty aggressively ran the back of my hand across these and they were still pretty smooth. I’m also happy with the matched woodgrain panel cutouts, and the particular board I picked to make the headboard with. Plus the tilt angle does make a comfortable backrest to slouch or sit against, I think this whole part turned out pretty well. Finally, finished up with a bit more work on the diamond plate.  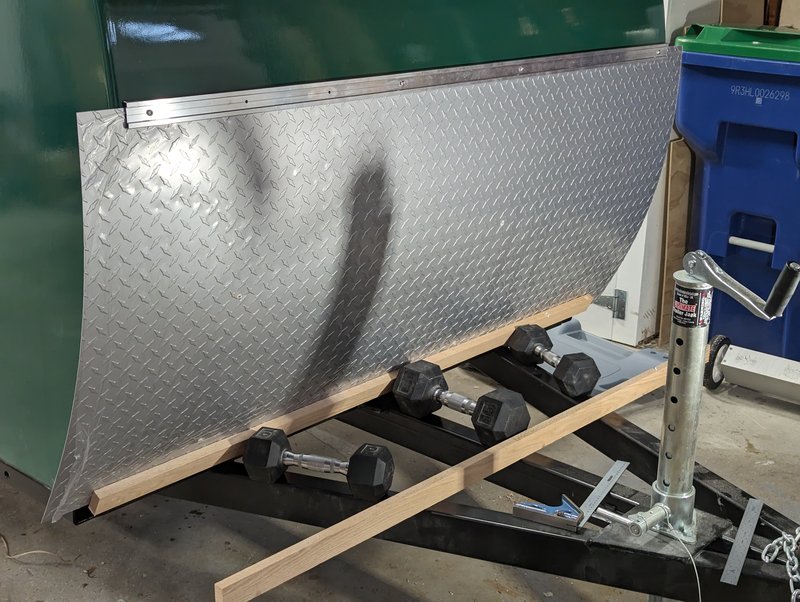 Enlarged all of the pilot holes that I’d previously made in the front rock guard piece, now big enough to pass a mounting bolt through. Dry fit the whole thing by hanging it from the threaded inserts that were installed yesterday. Did this so I could mark and pilot drill a bunch of other mounting points across this sheet. With that done I don’t need my top mounting strip any more, so I’m going to take that out for anodizing tomorrow. 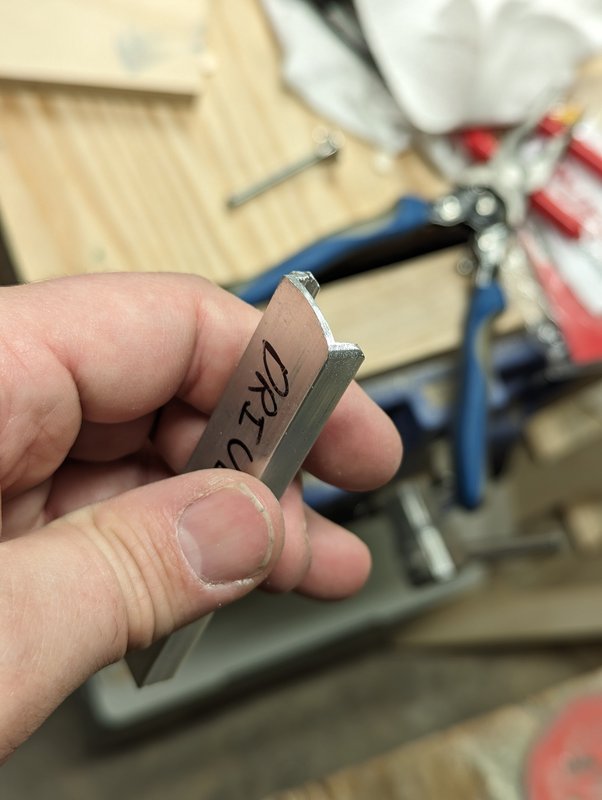 The other parts I’m anodizing right now are just the side table mounts. I toyed with the idea of shaping those pieces so they had nice rounded lead in / lead out ends. The backside shown above looks like it would work out nicely but I couldn’t find a decent way to soften and shape the parts that stick out away from the camper. Ended up just abandoning this idea.
|
|
#
?
Apr 29, 2024 03:39
|
|