
|
jackpot posted:Easier said than done. I don't have access to where it attaches inside the wall; there's an access panel on the other side, in the bedroom, but it's meant for the faucets, only three feet high starting at the floor. The shower head arm is four feet above the highest point I can get to. I don't like the idea of unscrewing it, screwing in a new one, and having it leak like a bastard in a space I can't get to without tearing a hole in the wall. Actually, it's even easier than what you want to do. That's just it, you don't need access. The elbows for shower head arms are designed for this. In fact when your house was first being built, your shower head arm wasn't even installed until after the tile in your shower was put up. If you're worried about leaks, then use a shitload of pipe thread tape. It's possible that your shower head could be on there so tight that you could twist the arm's threaded end for the shower head right off the pipe. You could very well end up needing to replace the arm anyways, this was happened to me before. Don't go crazy with the wrenches, it's VERY easy to strip the finish right off the pipe or shower head. Your wife might not like that very much... You can use a rag in between the wrench and pipe to help prevent this. There's a trick you can use to help screw in the new shower head arm tightly without marring the surface. Simply insert a long screwdriver down the angled pipe, then use this to turn and tighten the pipe. edit: As for your other home problems, patching drywall is easy enough to do yourself, depending on the size of the hole. It just takes time, waiting for one coat to dry before you put up the next, etc. What are the symptoms for your sink? Is this a 1 or 2 tub sink? Does it have a garbage disposal? Does one side drain freely while the other doesn't? kid sinister fucked around with this message at 20:19 on Apr 13, 2009 |
 #
?
Apr 13, 2009 20:07
#
?
Apr 13, 2009 20:07
|
|

|

|
| # ? May 12, 2024 15:57 |
|
|
kid sinister posted:edit: As for your other home problems, patching drywall is easy enough to do yourself, depending on the size of the hole. It just takes time, waiting for one coat to dry before you put up the next, etc. ") As for the drywall, it's a 2x4 foot hole in the living room ceiling, where the plumber busted into it to see where the leak was coming from. As for the sink, it's a 2 tub sink, the disposal is on the right side. Sometimes it doesn't clog, most of the time it does (and I can't tell if I'm doing anything different during the times it doesn't clog). When it clogs, the two sinks seem to equalize, so the water level is the same in each. If I turn on the disposal, the water immediately goes down in the right while the left sink level goes up (when I turn it off they equalize again). The left sink trap is easy to get to, but I opened it up and it's clear. The right side trap (disposal side) is easy to see, but there's not much room to work and I haven't messed with it yet. I doubt it's that one, though, because both sinks feed into one big drainage pipe, and if the right side was blocked I figure the left sink would always flow fine. Seems like something's causing a block further down the line. I'm thinking about trying a plunger, if I can find a good way to seal up the other sink when I'm using it; I've tried it once, but obviously it just blows air in the one sink and out the other.
|
|
#
?
Apr 13, 2009 21:41
|
|

|
jackpot posted:Goddamn I'm liking this thread. I've cleared a lot of sink drains by plunging. Don't you have a little drain plug for the left side? I found a loving COMB in our drain at our old apartment. Also some earrings. A child must have SHOVED the comb down the drain with a stick I have no idea how else it even got in there that far in the first place. I'm not super handy with home stuff but I found our garbage disposal pretty easy to take off and scope out the pipes and connections when I dropped a bottle cap in there one time. Just remember to unplug it first
|
|
#
?
Apr 13, 2009 22:18
|
|

|
jackpot posted:A wet rag stuffed in the other drain will do a good job of sealing it. Might have to have someone hold it down for you. I use a 4" pipe cape, with a 3/8ths " hole drilled in it that I stick my air nozzle in to unclog sinks. 150 or so PSI usually does the trick on stubborn clogs.
|
|
#
?
Apr 13, 2009 22:22
|
|


|
jackpot posted:As for the drywall, it's a 2x4 foot hole in the living room ceiling, where the plumber busted into it to see where the leak was coming from. For a hole that large, you're probably best off cutting edges of the hole back until it hits the ceiling joists with a utility knife. Drywall comes in 4 foot wide sheets, or 48 inches. That's wide enough to span 2 joists in the middle and lip up onto joists on either end, assuming you have joists 16" apart on center. Here's a quick and dirty summary of drywalling: 1. cut piece to fit 2. attach with drywall screws (just "dimple" the surface, they make special bits for this) 3. put up tape (you can use fiberglass tape here) 4. with 4" knife, cover screws and tape with drywall compound 5. let dry 6. sand flat 7. mix a second coat with a little water to make it thinner, apply with 8" knife for tape seams, 4" for screws 8. let dry 9. sand flat 10. if it needs it, apply a third coat, sand, let dry 11. paint A second set of hands really helps when attaching large pieces to the ceiling. Do you have a popcorn ceiling texture in that room?
|
|
#
?
Apr 13, 2009 22:33
|
|
|
I know jackpot was the person who originally posted that question, but I'm actually about to move into a house with almost the same problem myself. It does have popcorn ceilings, any tips? I know I need to get it tested for asbestos before I start going crazy on it. They sell the replacement popcorn in a can now right?
|
|
#
?
Apr 13, 2009 22:55
|
|


|
Just for clarification, youre not torching the thing to molten hot to peel it apart. A little heat on the joint will loosen things up, and it's likely that the shower head would be salvageable afterwards if you did want to use it for some reason. I used a tiny torch like this, and it got the job done. You might be able to get it working with a spirited pocket lighter.
|
|
#
?
Apr 14, 2009 00:42
|
|
|
benitocereno posted:I know jackpot was the person who originally posted that question, but I'm actually about to move into a house with almost the same problem myself. It does have popcorn ceilings, any tips? I know I need to get it tested for asbestos before I start going crazy on it. They sell the replacement popcorn in a can now right?
|
|
#
?
Apr 14, 2009 02:48
|
|


|
I need some help! Access to our shower pipes and drain is through the closet in one of our bedrooms which is now the nursery for our baby. The access is sloppily cut from the wall and held in place by screws. The problem is, that the basement smell is creeping up through the panels and into the nursery. Is there some type of sealant or foam or something I could spray around the panels to seal them that would also be safe to use in the nursery? Uziel fucked around with this message at 13:45 on Apr 14, 2009 |
|
#
?
Apr 14, 2009 13:38
|
|

|
Uziel posted:Is there some type of sealant or foam or something I could spray around the panels to seal them that would also be safe to use in the nursery?
|
|
#
?
Apr 14, 2009 13:50
|
|

|
Fire Storm posted:The foam in a can stuff should work. What basement smell? We don't have sewers in my town, everything drains into the abandoned mine (I wish I was kidding) so when it's cold out, some smells creep up the pipes. We have to constantly pour PineSol down the drains to combat it.
|
|
#
?
Apr 14, 2009 14:01
|
|
|
Just go to home depot or walmart and ask where to find insulation in a can. It's all the same stuff.
|
|
#
?
Apr 14, 2009 14:08
|
|
|
Local Yokel posted:Don't forget to turn of the water from inside first. I am so excited, I know it's a stupid little thing to fix but it made my day to be able to say that I fixed something myself! Thanks for all of the help, guys!
|
|
#
?
Apr 14, 2009 19:37
|
|
|
Uziel posted:Got a link to the specific stuff? Try this: Great Stuff There is something wrong w/ your piping. U and P traps (that weird bend under your sink) fill with water and are for the specific purpose of blocking sewer smells. Your toilet has such a trap inside the porcelain. If you have a utility drain in your clothes washing room, your garage or anywhere else in the house that is rarely used, it is possible that the smell could be coming from there. What happens is that the trap goes dry through evaporation allowing sewer smells to enter the home. Pour a half bucket of water down these monthly (depending on your humidity level where you live) to alleviate these smells. Sounds like you might have actual sewage seepage (not good not good) or perhaps your stack (where your drain lines attach to the outbound sewer pipe) has a leak as you mentioned it happened when cold (pipe contracting, causing leak). In any case, it is not likely that the smell comes up from the collection area (the mine or tank or whatever). Does it smell anywhere outside? Especially when warm? To poster Moana: Remember remember remember NEVER try to remove a tight hose bibb without TWO wrenches. Code even requires that enough pipe be showing from the house to allow two wrenches to be used. If you don't you can tear a hole in the pipe via twisting inside the wall and it is not fun to fix. A vicegrip style plier works well if you are doing it by yourself...hold the pliers still against the house and turn the other wrench. Congrats on your DIY job tho
|
|
#
?
Apr 15, 2009 03:14
|
|

|
Flay Minion posted:To poster Moana: Remember remember remember NEVER try to remove a tight hose bibb without TWO wrenches. Code even requires that enough pipe be showing from the house to allow two wrenches to be used. If you don't you can tear a hole in the pipe via twisting inside the wall and it is not fun to fix. A vicegrip style plier works well if you are doing it by yourself...hold the pliers still against the house and turn the other wrench. Congrats on your DIY job tho  ). Guess I dodged a bullet but it's good to know for next time! ). Guess I dodged a bullet but it's good to know for next time!
|
|
#
?
Apr 15, 2009 06:24
|
|
|
moana posted:I never thought about the possibility of being able to TWIST METAL PIPES Copper is very soft. My most common (and expensive) call is from folks with a spraying pinhole leak from trying a DIY replacement of an old hose bibb/sillcock w/a big rear end wrench!
|
|
#
?
Apr 15, 2009 12:01
|
|
|
I hope this wasn't recently addressed but I remember a goon made a perler bead program that mapped out sprites and other stuff. Does anyone have this still or can point me to a host for it?
|
|
#
?
Apr 15, 2009 15:59
|
|


|
Sooo the knob on my shower is stuck, which means that I can't turn the water off. I shut off the supply to my unit so there's no concern of it overflowing, and hopefully the landlord will actually get the message that I left him soon. Any idea what I can do short of calling a plumber? I'm worried about breaking it if I force it too much.
|
|
#
?
Apr 18, 2009 00:48
|
|
|
Rogetz posted:Sooo the knob on my shower is stuck, which means that I can't turn the water off. I shut off the supply to my unit so there's no concern of it overflowing, and hopefully the landlord will actually get the message that I left him soon. Any idea what I can do short of calling a plumber? I'm worried about breaking it if I force it too much. Force it. It's not like it's going to get any more broken. If it breaks, it needed replacing anyway.
|
|
#
?
Apr 18, 2009 01:46
|
|


|
babyeatingpsychopath posted:Force it. It's not like it's going to get any more broken. If it breaks, it needed replacing anyway. No, don't force it. He could end up breaking off something and creating a leak inside the wall, then he really would need to call a plumber. A stuck handle is usually due to hard water buildup or a rubber washer breaking off and getting stuck in the threads. This is something you should be able to fix yourself. Do this: get yourself some screwdrivers of varying widths and maybe some hex keys and a wrench. Now the steps involved depend on the manufacturer and handle style, so this may require some foresight on your part on how to disassemble it. You already did the first step: turn off the water at the main. The next step is to turn on the water at the tub. This will relive the pressure and empty any water out of the valve. The third step should be obvious: plug the drain! You don't want to drop any screws down it. The next step is to take off the handle. If you have a knob-style handle, there should be a cap on top in the middle. Look for a little area on it to gently pry it up, the screw holding the handle on will be underneath. If you have a lever-style handle, look for a set screw on the side of the handle's base. After the handle, remove any cover or sheathe underneath. After that, remove the valve stem. Here's the tricky part, depending on how jammed it is and where. Some stems have 2 parts, with the central part spinning inside the outer part. You want to make sure that you're unscrewing the outer part. Ever so gently unscrew the stem from the wall. Now the fun part: figuring out what is keeping the stem from turning! This could be a couple things: hard water buildup, a piece of rubber jamming up things, something got stuck between the stem and faucet housing, or some brass or teflon just plain broke. Look inside the housing and see if you find any obstructions. If your stem is designed to be further taken apart, do that. If it isn't or you just can't get it apart, you may need to get a replacement valve stem. They're sold individually, so you won't have to buy a whole new handle assembly.
|
|
#
?
Apr 18, 2009 18:47
|
|
|
How do I use a router roundover to make round edges? I'm going to practice on some scrapwood tomorrow, but I don't understand how you get a straight, even cut with a hand tool. I'm going to be using a plunge router. There's a guide on the bottom of the bit that will prevent it from going too far into the wood and keep it at the same distance, but how do I control for the height? I figure I can just plunge it to a certain depth, but there must be more to it since this is usually done with a non-plunge router.
|
|
#
?
Apr 20, 2009 06:00
|
|

|
The bottom of the router itself will sit on the surface of your wood. The bottom of the bit has the collar that hits the side of the wood. You should be able to adjust the height of the bit relative to the router. That's all there is to it. Try on a practice piece, it'll be obvious when you do it.
|
|
#
?
Apr 20, 2009 14:34
|
|

|
NickNails posted:The bottom of the router itself will sit on the surface of your wood. The bottom of the bit has the collar that hits the side of the wood. You should be able to adjust the height of the bit relative to the router. That's all there is to it. Try on a practice piece, it'll be obvious when you do it.
|
|
#
?
Apr 20, 2009 19:30
|
|
|
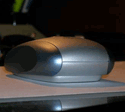
Got a leak in my new showerhead. An oh-so-loving-small leak, but it's there. I've got teflon tape wrapped around the threads three or four times, and it's wrench-tightened as far as I can go without putting all my weight on it. And still, drip...drip...drip. Every three seconds or so.
|
|
#
?
Apr 23, 2009 20:59
|
|
|
We have some heavy sliding patio doors. The slide along a runner on I presume some sort of bearings. Recently these have become grabby and feeling like they're grinding a little. A liberal application of WD40 sorted it out for a couple of weeks or so. However, it's doing it again and I'm assuming it needs some form of proper lubrication. Do I just grab any old lubricating grease from a hardware store and liberally apply it to the runner or is there something more specific I should be looking for or doing?
|
|
#
?
Apr 23, 2009 23:32
|
|

|
I'd say use regular old auto grease.
|
|
#
?
Apr 24, 2009 00:11
|
|
|
Hello Pity posted:We have some heavy sliding patio doors. The slide along a runner on I presume some sort of bearings. Recently these have become grabby and feeling like they're grinding a little. A liberal application of WD40 sorted it out for a couple of weeks or so. However, it's doing it again and I'm assuming it needs some form of proper lubrication. You want something that doesn't attract dust. Use dry graphite, NOT grease or WD-40. Also, make sure the doors are adjusted, they should have a screw adjustment on each side of the door on the bottom (under a dust cover usually). Adjust these until the door slides smoothly. Richard Noggin fucked around with this message at 01:00 on Apr 24, 2009 |
|
#
?
Apr 24, 2009 00:57
|
|

|
Hello Pity posted:We have some heavy sliding patio doors. The slide along a runner on I presume some sort of bearings. Recently these have become grabby and feeling like they're grinding a little. A liberal application of WD40 sorted it out for a couple of weeks or so. However, it's doing it again and I'm assuming it needs some form of proper lubrication. It doesn't run on bearings, it runs on springloaded wheels. You can get at the wheels better if you lift the door off its track and remove it from the frame. Something probably got stuck between the wheel and its mounting. If the wheel is cracked, you'll have to replace it.
|
|
#
?
Apr 24, 2009 02:15
|
|
|
jackpot posted:Got a leak in my new showerhead. An oh-so-loving-small leak, but it's there. I've got teflon tape wrapped around the threads three or four times, and it's wrench-tightened as far as I can go without putting all my weight on it. And still, drip...drip...drip. Every three seconds or so. So wrap it around 7 or 8 times. If that doesn't work, is the arm's threaded end nice and flush, without any burrs or missing bits? Did you forget the washer inside the shower head's socket? Is it flat and supple, or does it need to be replaced?
|
|
#
?
Apr 24, 2009 02:19
|
|
|
Too much teflon tape can cause leaks sometimes. Try using half what you used the first time.
|
|
#
?
Apr 24, 2009 17:21
|
|
|
ease posted:Too much teflon tape can cause leaks sometimes. Try using half what you used the first time. I've tried re-wrapping it about four times, each time using a little less or more than the time before. I haven't gone as far as wrapping it 8 times yet, I'll give it a try.
|
|
#
?
Apr 24, 2009 19:10
|
|
|
In a rental, I used this stuff to fix a leaky pipe : I was pretty amazed it worked 100%.
|
|
#
?
Apr 24, 2009 19:16
|
|
|
jackpot posted:I did that the first time. If it's still leaking after 2 turns of teflon, there's a bigger reason. Look at the threads on both sides to make sure those aren't damaged. Then check the washer. It might have some grit on one side or the other preventing it from making a seal.
|
|
#
?
Apr 25, 2009 15:21
|
|
|
Fire Storm posted:I have a cheap thumbdrive (USB memory stick/jumpdrive/USB Flash Drive/flash drive, since so many people use so many different words for them) and the cheap as hell plastic shell came off and I want to put my own cover on it. Would something like Clear Polyester Casting Resin work or do I need to go for something more along the lines of an actual electronics-grade epoxy potting compound? If anyone was interested, I used Castin'Craft EasyCast Clear Casting Epoxy and it seemed to work quite well. I tried embedding an LED it in to see if it works, and it worked fine, so I created a mold for the thumb drive and it still works nicely. The mold didn't work great (leaked), the drive shifted, but it's sealed so that works for me.
|
|
#
?
Apr 25, 2009 17:00
|
|
|
My incontinent dog was pissing in our hallway, and after shampooing the carpet a million times and going over it constantly with de-scenting stuff and things like that, she was still pissing there. Being that I couldn't get the dog pee smell out no matter how hard I tried, I figured the best thing to do was rip up the carpet and be done with it. The floors under there are a pretty nice natural woodwork, except for the two spots she was constantly pissing are black and stained. What's the easiest way to take care of the black stained spots? Is there anything I can do?
|
|
#
?
Apr 25, 2009 19:13
|
|
|
Bzzz posted:What's the easiest way to take care of the black stained spots? Is there anything I can do? The best method would be to treat it. I haven't tried these methods, but they could work: http://www.homeimprovementsdepot.com/how-to-remove-black-urine-stains-from-hardwood-floors-for-under-a-dollar/ http://www.ehow.com/how_2266989_remove-stains-from-hardwood-floors.html
|
|
#
?
Apr 25, 2009 19:46
|
|
|
You can killz the whole subfloor, but if it's wood floors, and the wood is actually stained, well, thats just gross. I'd probably apt for new wood flooring, or put carpet back over it after you seal it with killz.
ease fucked around with this message at 20:50 on Apr 25, 2009 |
|
#
?
Apr 25, 2009 20:47
|
|
|
 Here's my shower faucets. I'm about to caulk them because there's no seal to keep water from going behind them, but the one in the middle (controls the flow between the showerhead and tub faucet) leaks. I thought if I peeled off the front cap I'd be able to get where I need to tighten it up or something, but all I've got is this green thing blocking my way. How should I go about this? Is that something I can take a hooked coat hanger and remove, or should it stay there or what?
|
|
#
?
Apr 25, 2009 23:07
|
|
|
That's called the diverter. Handles go on one of two ways. It appears your H&C handles have the little chrome cap in the middle. You pop off this cap and you unscrew the screw underneath that cap. The other way handles attach to stems is by set screws on the sides of the handles near the base. You may need some hex keys to turn those screws.
|
|
#
?
Apr 26, 2009 03:51
|
|
|
|
| # ? May 12, 2024 15:57 |
|
|
I want to make a podium out of an electrified tree trunk. A tree in my yard got hit by lightning, and I need a new, heavier stand for my keyboard. I am thinking about a big Roman Numeral II, with vertical trunk sections and two pieces of flat plywood or MDF for the bases. Most of this is going to be simple, except for one big thing: How in the hell can I cut up this trunk? At the moment, the biggest saw I own is about a foot long, and this trunk is probably more like a foot-and-a-half at its widest. (Also: I refuse to rent a chainsaw because every story I have heard about chainsaws involves someone coming THIS CLOSE to cutting off their own head)
|
|
#
?
Apr 27, 2009 13:27
|
|
