


|
wormil posted:Nice job, really. If you haven't already, you should consider attaching those bookcases to the wall so they don't tip over. That's a good idea. It was built so that the books would overhang back slightly, but you never can be too sure. The gf painted the nightstand white, and I decided to build a drawer for it. Needs a handle and the same stain as the top, a protective coating of some sort and then I'm considering it done. 
|
 #
?
Sep 13, 2009 23:30
#
?
Sep 13, 2009 23:30
|
|

|

|
| # ? May 15, 2024 11:22 |
|
|
Hey all, first time poster in DIY. I'm just finishing up a desk and realized I don't know anything about finishing. I want a perfect/piano finish yet didn't realize the need for wood filler (whoops) and I already have about 5 coats of clear satin polyurethane on the drat thing with pours just about everywhere. Also using a brush must be bad because it always needs that one-more-sanding that ruins the finish all over again. Help. //edit// Just read this: http://thewoodwhisperer.com/how-to-finish-without-streaks/ Looks like I'm off to the shop to buy chemical stripper? Also looking for a more matte look than satin.. Blah. Alystair fucked around with this message at 07:27 on Sep 14, 2009 |
|
#
?
Sep 14, 2009 07:00
|
|

|
Alystair posted:Also looking for a more matte look than satin.. Blah. Okay, before you start with stripper lets talk about what you have so far... If you have an open pored wood like oak then you'll want to use a wood filler. Tighter woods like maple do not require a wood filler. Disclaimer: I hate wood finishing and always go for the simplest finish I can get away with. What I would recommend is heading to your local library and looking for a finishing book written by one of these three guys, Jeff Jewitt, Bob Flexner or Michael Dresdner. They don't always agree on technique but none of them will steer you wrong. Personally I have Bob Flexner's book and find it invaluable. If you want a matte finish, you don't have to start with matte varnish. You can leave the satin and put down a topcoat of matte. What I recommend is sanding the existing coats down smooth and starting again wiping a thinned matte poly. It takes forever to build thickness by wiping but it sounds like you already have 5 thick coats anyway, just be careful not to sand all the way through to the wood, but if you do, you can always put on another coat.
|
|
#
?
Sep 15, 2009 08:39
|
|

|
wormil posted:Awesome text here Thanks a ton Wormil, I'll check out those books. Here's a pre-paint/finish shot of the 10ft monster:  I'll post comedic timelapse video later.
|
|
#
?
Sep 15, 2009 17:37
|
|
|
We're letting the polycrylic sit for another 10 hours or so, then we can actually use the top... but other than that it is done.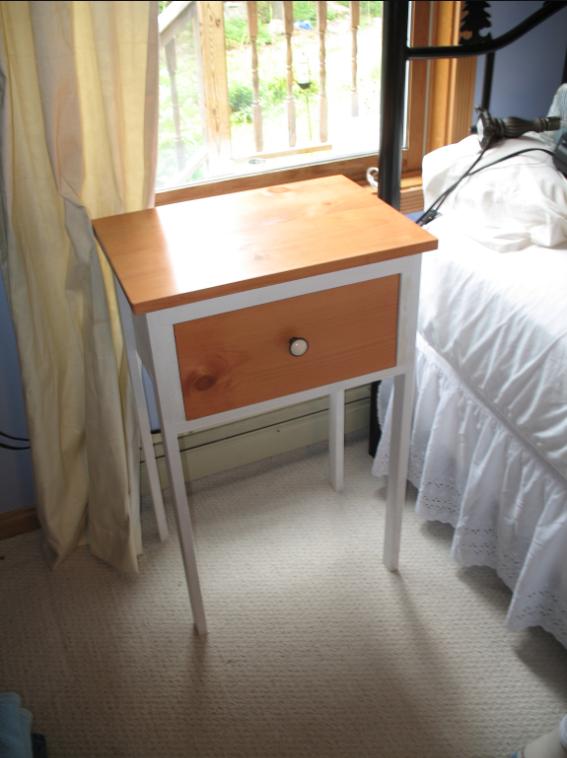 And I'm officially hooked on building stuff now.
|
|
#
?
Sep 16, 2009 15:01
|
|
|
Carta posted:And I'm officially hooked on building stuff now. Again, nice job, especially since you have no woodworking experience. Next time you can expand your skills and taper the legs something I actually managed to do with a circular saw ... once, then I bought a tablesaw.
|
|
#
?
Sep 17, 2009 04:32
|
|
|
Okay. I'm planning out a project to build a workbench in my garage. I'd appreciate any input into the design. The overall size will be 8' wide by 2' deep, with the top made of two pieces of 3/4" plywood. The bench will stand 36" high and will be supported by 6 4x4 posts at the corners and in the middle of the sides. Along the back and front of the bench, I'm going to lap a 2x4"x8' board flush with the top and back (or front in the case of the front one) edge of the posts. I'll probably glue and screw these together. In between posts I'm planning to span the posts between front to back with more 2x4's cut to size and pocket screwed to the posts, flush with the outside edge in the case of the ends and in the middle of the center posts. About 6-8" from the floor (suggestions, advice very welcome) I'm going to lap and pocket-screw another rectangular frame of 2x4's to support a lower storage shelf. I've done a fair bit of remodeling, but this is the first real attempt I've made at something which could generously be called furniture. I'd appreciate any advice or criticism of my plans. I'd rather plan right than build wrong. I'll post drawings if needed to clarify what I'm planning. Most importantly, will this design support a reasonable amount of weight?
|
|
#
?
Sep 17, 2009 16:54
|
|
|
Has anyone made anything out of this book? I saw one of these locks in action and I wanted one, so I'm building one. I have the book, and it doesn't look too hard, I'm just curious if anyone else has done this.
|
|
#
?
Sep 18, 2009 03:38
|
|
|
Dooey posted:Has anyone made anything out of this book? I saw one of these locks in action and I wanted one, so I'm building one. I have the book, and it doesn't look too hard, I'm just curious if anyone else has done this. No, but it looks interesting.
|
|
#
?
Sep 18, 2009 06:50
|
|
|
Saint Melmoth posted:Okay. I'm planning out a project to build a workbench in my garage. I'd appreciate any input into the design. I would recommend not messing with the pocket screws or anything like that. Just frame it up out of 2x4s 16" OC like you're building a house, set the posts inside this, and screw or bolt them together. Then throw one sheet of 3/4 ply on top (two is overkill- you can always add it later if you want) and BAM! Lesson learned: you can't clamp very well to a bench built this way. When I built my new bench, I built the 2x4 box 1.5" narrower than my plywood, and screwed a 2x2 board under the overhanging edge. Gives a great place for reasonable sized clamps.
|
|
#
?
Sep 18, 2009 17:03
|
|


|
Is there any source for woodworking plans to make nicer looking furniture than the typical plans I find at Rockler? A few years back I bought the plans for their heirloom crib and made it and it is a nice piece but I'm having trouble finding anything else there that is nice enough looking I'd want it in my home. For example I want to make a nice dining room table, something really high quality. I stumbled into the NW Fine woodworking store a few weeks ago and the craftmanship of the furniture there is absolutely stunning. I would love to be able to recreate something on that level or close to it but realize it might take me alot of time, practice and learning. For example here is their page ofdining room tables. So I ask is there any woodworking plans of higher quality than the simpler stuff at Rockler or if I wanted to replicated something on the level of NWFW would I be best picking up some books (if so which ones?) or taking some classes somewhere? How would one get started to work towards making stuff on that level?
|
|
#
?
Sep 22, 2009 20:56
|
|

|
There are no shortcuts if that is what you're looking for. Creating high quality furniture is more than just plans and equipment, it does take practice and experience. Having said that, once you understand the wood joinery and some intermediate and advanced techniques it isn't impossible to recreate anything you see in a catalog. The NWFW website represents a variety of styles from Greene & Greene, Asian, classic to more modern, I don't know of a source for plans of that complexity and variety. Wood Magazine has the greatest variety of plans but they are generally intermediate level. Fine Woodworking sometimes has plans but they are almost always Shaker or Mission. edit: here is a group for Greene and Greene style furniture http://groups.yahoo.com/group/Greene-style-furniture/
|
|
#
?
Sep 23, 2009 05:53
|
|
|
Hey folks, I started reading the thread on Monday and managed to finish the whole thing just now. I've not done any serious woodworking, but I've done a couple of projects that I've enjoyed. I've been wrapping my head around a practical amount of equipment, and I think I can swing that. There's been some really great advice in this thread about tools. However, I don't have a pickup truck. The only way I can get a 4'x8' sheet home is to have them rip it to 32" in the store and chuck it in the car that way so that I have two narrower strips. I'm not totally convinced that this is a huge handicap since I can fit most dimensional lumber in the car as is, and it seems like hardwood stock tends to come in small enough pieces as well. I've been looking at a workbench for my first actual project because what else could be better to start with, but it seems that every plan requires that you can either surface your lumber, or that you use a big sheet of plywood. I guess I could make a smaller bench to start that could do double duty as an outfeed table later maybe. Also, any thoughts about using a sled to make your bench planer serve double duty as a jointer? Is that something that could be useful long term, or would it get frustrating. The wood whisperer has a video where he mentioned it briefly, and it seems like a genius way to save on an extra tool when starting out. Thanks for the awesome thread, it's made learning about this way more accessible.
|
|
#
?
Sep 24, 2009 21:08
|
|

|
TehSaurus posted:Hey folks, I started reading the thread on Monday and managed to finish the whole thing just now. Do you have a home depot or lowes nearby? They usually rent a truck / van for $20/hr, and it doesn't even matter if you're buying the stuff there or not. In fact, the Lowes near my place stopped renting trucks so when I went to buy some lumber, I asked them about it and they referred me to home depot. You could just as easily rent the truck from your home depot / lowes, then go pick up your lumber from a specialty yard.
|
|
#
?
Sep 24, 2009 23:57
|
|
|
You could also hire a small hertz/u-haul for around the same price. As far as using a planer as a jointer the thought had crossed my mind as well but I think it would be problematic for two reasons. One, the base on a good jointer is dense and will as much absorb shock as support your work. Without it vibrations from the motor will leave an edge that may still need work to be perfectly true. Also, and I'm not as sure on this one, but I think the drum that holds the knives has more diameter to make a smoother cut. It could probably be done well enough to get rough edges more or less in shape, but you'd probably still have to finish it with something like a handplane and a shooting board.
|
|
#
?
Sep 25, 2009 02:57
|
|

|
I've been watching The Woodsmith Shop on my local PBS station and I've seen them use three different tools as a jointer. You can use a router table, drill press (with a sanding drum), or a table saw. The table saw looked really easy to do - you could make an auxiliary fence for your saw and swap it in and out as needed. Of course, that'll only work for edge jointing. I don't know if it's the planer I use or just the way we dry wood, but I've never face jointed boards for my projects. I still wouldn't want to be without a jointer in the shop.
|
|
#
?
Sep 25, 2009 11:48
|
|


|
With hand tools, is there a quick way to cut 1/8" off the end of a 5x1 plank without going insane from planing the endgrain on a shooting board? to clarify, after the 1/8" is gone it's the correct length, so it needs to be as clean as possible. I ask because I've done it a few times already and I can feel my resolve to complete this project slipping. Southern Heel fucked around with this message at 13:43 on Sep 25, 2009 |
|
#
?
Sep 25, 2009 13:35
|
|

|
LordOfThePants posted:I've been watching The Woodsmith Shop on my local PBS station and I've seen them use three different tools as a jointer. You can use a router table, drill press (with a sanding drum), or a table saw. The table saw looked really easy to do - you could make an auxiliary fence for your saw and swap it in and out as needed. Yeah, I saw the stuff about using a table saw or a router table for edge jointing. They both seemed like great ideas except that they have very obvious depth limitations. Thanks mcrandello for the feedback about vibrations, this is exactly the kind of information I was looking for. I suppose I can always try it and if I'm not happy with the results I can get a proper jointer at some point down the line. Of course, this is all academic right now as the first thing I have to do is clean up my garage and figure out how I can lay out a decent wood shop in there. I have plenty of space, but I've been using the garage as generic storage which will have to stop if I decide to get into this. And then the craigslist hunt for cheap tools.
|
|
#
?
Sep 25, 2009 15:25
|
|
|
I'm almost done building a fairly basic set of short bookshelves. The shelves themselves are white pine with one coat of pre-stain treatment, two coats of stain, and two coats of polycrylic. I'm going to cap the shelf unit with a really pretty piece of maple, but I'm concerned about how to fasten it to the shelf unit. I've stained and sealed the top and edges of the maple, but I haven't done anything to the bottom yet. My main concern is that the pine and maple will expand differently once they're stuck together and cause cracking or warping. Any advice? What's the best way to affix the two?
|
|
#
?
Sep 25, 2009 19:22
|
|

|
I'm in the process of planning some hardwood bookshelves to replace my lovely wood-laminate ones. I've done some woodworking in the past, but don't know poo poo about joinery. So far I'm planning to use solid oak for everything except the backing, for which I'll use oak plywood. Dado's seem to be the easiest, best looking solution for attaching the shelves. I'm not sure if Dado's are the best way to secure the top, and bottom though, I've planned for a baseboard I'm sure how to go about secure as well. Any advice is appreciated.
|
|
#
?
Sep 26, 2009 02:22
|
|


|
I was tired of mooching tools off the members of my family so I went out and bought about 100 bucks worth of them: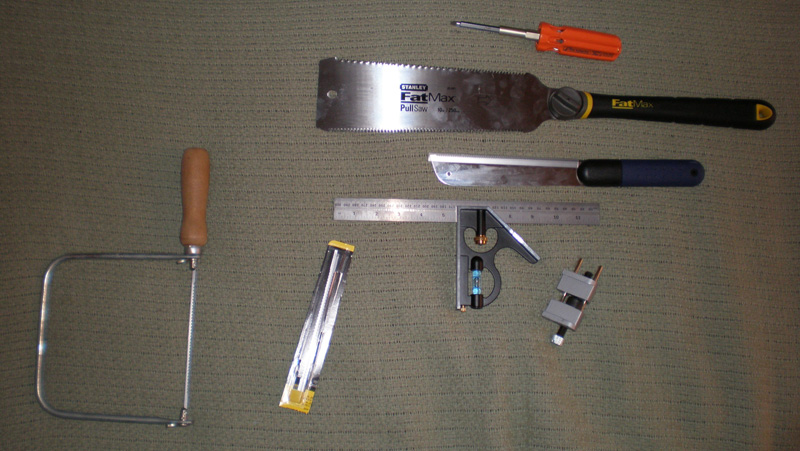 solid screwdriver - 14 bucks. Blades for my coping saw (already had the saw)- 5 bucks square - 17 bucks Saws: Chinese-made japanese stanley saw - 26 bucks Marples Japanese saw - 15 bucks I'm not expecting much from a 26 bucks saw but the prices for bonafide 10 inch japanese saws on the internet are much higher (this is all in canadian dollars by the way) and a sharpening jig: 13 bucks. I haven't found any good chisels or wetstones (gently caress mastercraft) so I'll prolly buy those off the internet. I've had good experiences with marples(irwin) chisels before but they dont seem to be sold in hardware stores around here. Next step: buying some drat chisels and making a toolbox!
|
|
#
?
Sep 26, 2009 21:30
|
|
|
Jagtpanther posted:With hand tools, is there a quick way to cut 1/8" off the end of a 5x1 plank without going insane from planing the endgrain on a shooting board? to clarify, after the 1/8" is gone it's the correct length, so it needs to be as clean as possible. Nevermind, I ploughed ahead anyway. My wooden jack plane's blade has dulled since last use and I didn't feel like spending hours sharpening it up (see previous posts,  ) - but my metal Record pulled through great, after I remembered to plane at a 45 degree angle. ) - but my metal Record pulled through great, after I remembered to plane at a 45 degree angle. I'm commited to getting my magazine trough finished by the end of this week - it shouldn't be too hard. It's been so long since I've been playing woodshop that I thought I'd refresh myself, and you guys too ") : : The overall size is 16" x 6" 12", the materisls are maple and sapele. The walls are lapped into each other and fixed with dowels, and the floor has through-tenons on either end.
|
|
#
?
Sep 27, 2009 12:25
|
|
|
Archives posted:I was tired of mooching tools off the members of my family so I went out and bought about 100 bucks worth of them: Speaking of hand tools and sharpening, does anyone have experience with DMT Diamond Whetstones? They seem expensive, but I ran across this youtube of some hilarious (awesomely so) dude sharpening chisels with them: http://www.youtube.com/watch?v=iB8QQpr4L_0 Any idea if that's representative of their effectiveness? It's $100 all together from Amazon to get the coarse, fine, and extra fine stones. Kind of expensive, but if they are really as easy to use as that video indicates it would be worth it to me I think.
|
|
#
?
Sep 27, 2009 15:41
|
|
|
Got an (unfortunately) vague question for you guys. I recently visited home, and my old man had the old, rotten deck re-built using some cheap labor, so to speak. What he bought is regular treated wood. I asked him if he opted for a certain variety, but he said it was just marked as treated. I'd assume this means pressure-treated? Anyhow, he needs a sealant for protection against evil mother nature. Following that, he wants to stain it, which he has done before. The sealant is something he is uneasy about, regarding brands/quality. I thought "no problem" and googled it. Unfortunately, there was no really simple answer/result from this. Can any of you guys recommend a good outdoor sealant for a treated wood deck? Also, a bit of a reach here, do you guys know a good brand/website regarding staining colors and such? Much oblige, goons.
|
|
#
?
Sep 27, 2009 19:59
|
|

|
Geop posted:Got an (unfortunately) vague question for you guys. I've used Deft Epoxy fortified deck stain on standard treated lumber with pretty good results. It's slightly tinted and available in a variety of shades. Depending on how long ago he rebuilt the deck, you may need to wait for the wood to dry out and weather a little before you finish it. When Dad and I rebuilt their deck, we actually didn't use the Defy product until a year later (I think we bought some "new deck sealer" that was specifically for new decks for that first year). I refinished their deck after two years, but honestly it could have gone another year easily. My sister bought a house last year and finally got around to refinishing her (severely neglected) deck with Defy - I haven't seen it yet but apparently it looks very nice.
|
|
#
?
Sep 28, 2009 00:43
|
|
|
LordOfThePants posted:I've used Deft Epoxy fortified deck stain on standard treated lumber with pretty good results. It's slightly tinted and available in a variety of shades. Depending on how long ago he rebuilt the deck, you may need to wait for the wood to dry out and weather a little before you finish it. When Dad and I rebuilt their deck, we actually didn't use the Defy product until a year later (I think we bought some "new deck sealer" that was specifically for new decks for that first year). Well, this was done just about a week or two back, so the wood in general is relatively fresh. We're getting lots of rain, so I'm sure how I can pull off letting the wood "dry", I'm afraid  I googled the subject and came up with an article referring to using something for the first twelve months called "new wood treatment". I assume that's what you're referring to? Source! Geop fucked around with this message at 03:55 on Sep 28, 2009 |
|
#
?
Sep 28, 2009 03:52
|
|
|
ChaoticSeven posted:Go to Woodcraft.com and search for "Foredom" and "Power Carver". Wicked, thanks much. I've got a few more questions related to walking staffs if anyone has answers. (I love the information here) 1.) Once, out of about 7 staffs I've made thus far, I came across a particular fallen sapling. I started whittling away the bark when I noticed it was spongy enough to actually peel away with the hand. After peeling it all, the core wood was freaking perfect, no knife gooves, just an awesome white core with natural grooves that were smooth and awesome. I love how it feels. I'd like to get that again. Could anyone tell me what type of tree this is from the picture so I can identify it in the future? (sorry for the quality. I can try to get better pics later.)  Click here for the full 401x1024 image. 2.) After a staff is finished, what's the best thing I can use to give the entire thing a protective glossy finish? (Preferably transparent, lasting and durable. Bonus: being able to keep an underlying paint job safe. Bonus 2: usable on clay for other projects if possible.) Thanks guys
|
|
#
?
Sep 28, 2009 20:33
|
|

|
Geop posted:Well, this was done just about a week or two back, so the wood in general is relatively fresh. We're getting lots of rain, so I'm sure how I can pull off letting the wood "dry", I'm afraid Even with a lot of rain the wood will dry out over time. I built some raised planters for my mom for her birthday out of treated wood and they were so wet that I would get water squeezeout when I drove the screws. They've been sitting on their sidewalk for a month and a half now and they're significantly drier already. I'm almost positive the "new deck treatment" we used was from Flood, but I can't seem to find it now. And now for something completely different: Anyone ever make bowls with the router using a bowl and tray bit? Do you need a variable speed router for it? There's a local guy with a Porter Cable 7518 for sale for a pretty good price and I'm trying to decide if I really need it or not. I've got an old Craftsman router (~1.5 HP I think) right now.
|
|
#
?
Sep 28, 2009 23:50
|
|
|
LordOfThePants -- Found it! Flood Seasonite is what it's called. I read up on it some more and will recommend this to the old man. Much oblige for the tips! 
|
|
#
?
Sep 29, 2009 00:18
|
|
|
Mouse Has Knife posted:I'd like to get that again. Could anyone tell me what type of tree this is from the picture so I can identify it in the future? (sorry for the quality. I can try to get better pics later.) From experience, sycamore behaves exactly like that, and since they are closely related I would be willing to bet other types of maple could well be similar. The picture isn't much help, but the wood does look very light which would be consistent with my guess.
|
|
#
?
Sep 29, 2009 14:15
|
|

|
Small update on my dresser Started as this:  Click here for the full 982x756 image. It's now completely framed out+a drawer, my g/f was kind enough to pose next to it [with her creepy rape face] for a size comparison. She's 5'8.  I'm making the drawers before I panel it so I can set up drawer stops as I make each drawer, in case anything is a tiny bit off. Once every drawer is made I'm going to disassemble them and run them through the saw all at once to make channels for the drawer bottom. I did a test run on some junk wood just to as proof of concept. 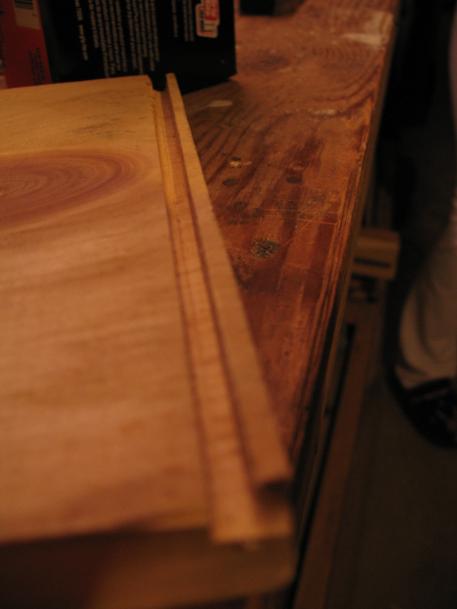 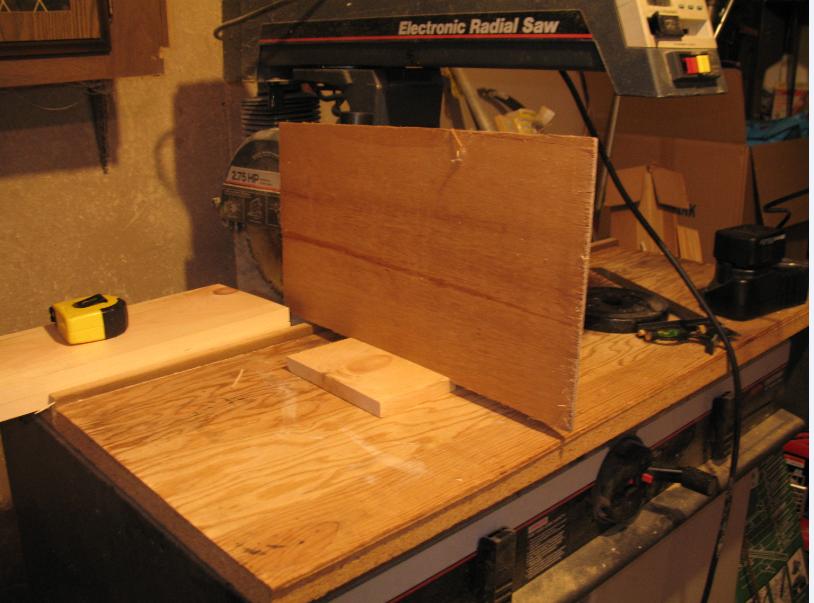 That's it for now.. I still have 6 more drawers to make before I go any further.
|
|
#
?
Oct 3, 2009 01:01
|
|
|
Got Kelly Mehler's 2010 schedule in the email... if anyone doesn't mind spending money on woodworking classes from a master cabinetmaker... I've met the guy and seen his work first hand. His attention to detail and perfection is second to none. http://www.kellymehler.com/newsite/classesandschedule2010.htm quote:Continuous Arm Windsor Chair with Peter Galbert New!
|
|
#
?
Oct 3, 2009 19:30
|
|
|
So that's how they made moldings back in the day... Still, at 2.5k for a set of planes, I think I'll stick with the router. At least for a while.
|
|
#
?
Oct 4, 2009 06:07
|
|
|
Page 2, for shame...Well, to keep this thread alive, here are the newest tools I've bought: Not pictured : Norton whetstones, one 220/1000 and one 4000/8000. Now here's a question about lapping stones: What I had planned to do is use the scary sharp method to lap them. I've seen granite slabs on sale. Now what I don't know is, what grit of sandpaper do I need to use to lap the stones, do I need to use higher grits for the finer stones? If I used for example, 80 grit on all the stones wont it make the surface of the 4000/8000 stone too rough?
|
|
#
?
Oct 9, 2009 21:50
|
|
|
Tell me about finishing cherry. My first time working with it, I got some to make a few picture frames out of. I've read a bunch of different things about finishing it, from setting it out in the sun and using minimal products, to using a whole slew of different things from oil to shellac. Is there an accepted "best method"?
|
|
#
?
Oct 18, 2009 23:34
|
|

|
PMan_ posted:Tell me about finishing cherry. My first time working with it, I got some to make a few picture frames out of. I've read a bunch of different things about finishing it, from setting it out in the sun and using minimal products, to using a whole slew of different things from oil to shellac. My only comment is that stain will splotch so dye is a better choice, or just leave it a natural color if you have all heartwood.
|
|
#
?
Oct 19, 2009 05:23
|
|
|
You can set it out in the sun, after the first 48 hours the darkening process drops off considerably so you may as well finish it past that and let time do it's thing. A high powered tanning bed can speed this up but don't tell anyone my secret or I...Well actually I don't care so tell anyone you meet about tanning your big cherry. I'm working on a new OP so if theres anything in particular or certain websites and resources you'd like to see mentioned (such as specific books, important folk in woodworking, people whos work inspires you or you find fascinating) start thinking of those now and I'll try to work in what I can. Whats the character limit on a post, or is there one?
|
|
#
?
Oct 19, 2009 06:21
|
|

|
Woodworking Man-Crushes: Roy Underhill Norm
|
|
#
?
Oct 19, 2009 13:39
|
|
|
Does anyone have a Porter-Cable dovetail jig? How do you like it? I'm not really sure how much I'd use one and was considering the Rockler jig since they have it on sale today for $110. The Porter-Cable jig is only $40 more and it has standard half inch shank bits (not the 8mm bits the Rockler jig uses) and aluminum templates (the Rockler jig has phenolic templates).
|
|
#
?
Oct 19, 2009 22:46
|
|
|

|
| # ? May 15, 2024 11:22 |
|
|
I went back and forth between various jigs for a while, and determined that I really didn't need to do custom-width dovetails and that being fixed doesn't affect me at all. I got some $30 or $40 harbor freight jig thing instead, and it created perfect joints the first time I used it. Pretty complex set up, though
|
|
#
?
Oct 20, 2009 05:33
|
|