


|
WildFoxMedia posted:Lasers on power tools - Useful or gimmicky? I've got one on my circular saw and my miter. The one on the circular saw lets you "aim high" and keep it on the line. My miter laser is spot on. Keeps me from having to bring the saw down and line it up every time. It's really good on double-angled cuts.
|
 #
?
Feb 19, 2010 15:29
#
?
Feb 19, 2010 15:29
|
|

|

|
| # ? May 15, 2024 22:34 |
|
|
Unless the lasers are in the teeth they'll always bee a little off or won't line up early enough to be useful on every thickness (I guess there are other ways to get them coplaner now that I think about it). The key is to know the relation between the laser line and the kerf. Maybe I'm just butt-hurt that there isn't an awesome laser drill press that IO know about. If I say laser a few more times I qualify as a sham venture-capitalist engineering firm. Laser.
|
|
#
?
Feb 19, 2010 16:56
|
|
|
My drill press has a laser on it ") Works great, but I never remember to flip it on. It has adjustment screws to line everything up. Usually I have marked where I want to drill on the workpiece and with a bradpoint drill I just line the tip up with my mark. Works great, but I never remember to flip it on. It has adjustment screws to line everything up. Usually I have marked where I want to drill on the workpiece and with a bradpoint drill I just line the tip up with my mark.Steel City floor stander.
|
|
#
?
Feb 19, 2010 17:48
|
|

|
That's how I do it, It's just hard to line up a large piece and clamp it with just my two hands. Ideally, does it have a laser on the chuck fro the outer edge of the bore and a center point? if so you made my day, stranger.
|
|
#
?
Feb 19, 2010 19:38
|
|
|
If your asking what I think you are, then no. But here are some pictures I took to illustrate. It's a simple add-on, you can buy it separately. The back of the assembly is curved, and it attaches with a pipe/tube clamp thinger. Mine is slightly out of adjustment because I moved it 350 miles in a bouncy trailer.  Ideally the laser lines would be thinner, maybe that could be rigged up somehow. Edit:Thats a 1/4" bit I think. ChaoticSeven fucked around with this message at 01:08 on Feb 20, 2010 |
|
#
?
Feb 20, 2010 01:05
|
|
|
Once you get used to how 'off' they are, they're pretty handy. But yes, really only good for 'rough' work. The laser guide on my Ryobi miter saw is off by about 3/32". I just position the laser line just to the side of my pencil mark and it comes out nearly perfect every time.
|
|
#
?
Feb 20, 2010 05:16
|
|
|
So, I ended up buying a $140, 10" Hitachi miter saw from Lowes. It certainly isnt cream of the crop, but the difference it has already made is astounding - Im in love. Edit: loving spelling nullfox fucked around with this message at 01:22 on Feb 21, 2010 |
|
#
?
Feb 21, 2010 00:52
|
|
|
optikalus posted:The laser guide on my Ryobi miter saw So Ryobi is pretty much the walmart of all the brands, though, right? The only Ryobi stuff I have is a dreml-type kit which I am absolutely not impressed with, and a lone 1/8th inch high speed bit which gets the job done. Like I should avoid a Ryobi planer if I see one? As opposed to the Dewalt DW734 or 735 which I'm currently looking at...
|
|
#
?
Feb 21, 2010 08:19
|
|


|
I figured since i can't sleep and he constantly bashes my 10 minute bookshelf, i'd surprise my neighbor with this "fix" for my office door. Since the latch was about 1/2" from the striker, i folded up two strips of paper and placed them between the striker and door jamb. Obviously i'll just go out and get some real shims for it later, but i can't wait to show him this, considering he's mentioned so many reasons my bookshelf sucks:
|
|
#
?
Feb 21, 2010 09:44
|
|

|
So, I think I just suck at this whole woodworking thing... I built another stand for the aquarium, this time with 2x4s using plans from a reef keeping forum. For whatever reason, by the time I got to screwing this thing together, I was having to put some pressure on things to keep them lined up while I drilled pilot holes and eventually screwed them together. Looking at it from certain angles I can see daylight between 2x4s that are sitting on top or butted up to each other which says to me that my boards are not even. There are 8 vertical uprights 31" each - I cut 3-4 of them with the hand miter saw and the rest with the new Hitachi miter saw. The only conclusion I can come up is that the hand miter saw cuts were uneven and generally sucked. To make matters worse I think when I sanded them down to the "perfect length" I rounded or otherwise sanded them unevenly with the foam Gator handle thing for the sanding pads which caused them to go together like poo poo. I'm now contemplating building the stand a 3rd time, with 2x4s again and hopefully having it be less hosed up this time. To even skin this thing with plywood I would need a belt sander to even up portions of 2x4 that are tweaked out in some places. Aside from measure twice and cut once, does anyone have any tips for making things that you know... actually go together square?
|
|
#
?
Feb 21, 2010 11:32
|
|
|
You need three things to make anything with wood come out great, and you can't get them immediately. 1. Patience 2. Practice 3. Time Take a slow, thoughtful approach to your work, and constantly think of how you can do it better. You'll get there. What I'm saying is, you can't just go out, buy some tools, and immediately expect to be a master craftsman. Your first projects aren't going to be that great, and you want to view them as learning experiences.
|
|
#
?
Feb 21, 2010 14:24
|
|

|
Also of note is that construction grade 2x4's are generally pretty much hosed if you're looking for anything even approaching true. See if your local supplier offers a "select" grade or something similar. Those are usually much better. For instance, Menard's (Iowa/Midwest version of home depot/lowe's) offers "sierra select" and those are about as true as I would expect nice s4s to be. And their pricing still beats lowe's. The point being that while those three ingredients from above are absolutely critical and essential, they still fall victim to the natural law of garbage in, garbage out. Of course, the definition of "garbage" changes for every project, sooo...
|
|
#
?
Feb 21, 2010 17:57
|
|
|
WildFoxMedia posted:So, I think I just suck at this whole woodworking thing... Let me just reassure you, you're trying to do something that's very tricky to do in the best of circumstances on the smallest of boxes: Get perfect miters. I have to be super careful when I make one of the mitered boxes I've posted here. Perfect jointing, planing, crosscutting to square. I tweak the table saw back and forth doing testcuts till I think it's perfect, and still sometimes things are just a hair off. What I'm saying is, cutting a perfect fitting on some 2x4's might be possible, but it would be really, really hard. You have to make sure the two opposing sides are PRECISELY the same length, also, not just close. 1/64th isn't close enough. What you might try is either buying some pre-dimensioned "real" lumber (it'll still be off slightly but much, much better), or rethinking the design and using butt joints. You could screw it together using countersunk screws and maybe use contrasting wood plugs to cover them and make it a design element at the same time.
|
|
#
?
Feb 21, 2010 18:24
|
|
|
Thanks for the kind words guys. The new stand I built yesterday doesn't use miters. Instead, it is butt joints that I planned to skin with ply and make nice with trim after the fact. The 2x4s I picked up were supposedly some select or "better then the rest" 2x4s and were a buck more a piece. Some of them still a little bow to them, but more then anything, they were full of knots and far from being smooth. As for these first few projects being a learning experience - Its definitely true. Each time I've built this I have picked up new things, whether it be from you guys or from first hand experience. I may pull a 3rd time is a charm and pick up some more lumber and give it a go again now that I have a miter saw from cut one. The other nifty thing someone brought up on the reef keeping forum is using pocket joinery to secure the 8 vertical uprights to the top and bottom box. I bought a mini Kreg jig and some 2 1/2" pocket screws and I all I can say is that its incredible. It seems to be one of the most stable and rock solid joints I've made.
|
|
#
?
Feb 21, 2010 21:10
|
|
|
Yup, kreg jigs are the poo poo. Like any tool they aren't a silver bullet for all your joining needs, but when they're appropriate they rock.
|
|
#
?
Feb 21, 2010 21:14
|
|
|
Just got a good deal on a planer...it's a Dewalt DW735, has about four hours of use on it, and comes with the stand. It's certainly more planer than I'll ever need. Exciting! New tools are always fun. I was a bit concerned for a while that maybe something fishy was going on with the guy due to payment demands, but in the end it all worked out. I'd like to put some nice long infeed/outfeed trays on it. They're pretty easy to build, right? Any advice on that?
|
|
#
?
Feb 22, 2010 04:33
|
|
|
Bad Munki posted:Just got a good deal on a planer...it's a Dewalt DW735, has about four hours of use on it, and comes with the stand. It's certainly more planer than I'll ever need. Exciting! New tools are always fun. I was a bit concerned for a while that maybe something fishy was going on with the guy due to payment demands, but in the end it all worked out. They built an outfeed stand on the New Yankee Workshop that looked fairly easy to build. It had a roller top made out of PVC pipes, an adjustable height mechanism, and a rolling stand to get it in and out of the way. You can sort of see it sitting behind the table saw: http://www.newyankee.com/getproduct.php?0603 It wouldn't be hard to modify the design to make the top a bit longer for better support, and you could use it for more than just your planer since it's mobile.
|
|
#
?
Feb 22, 2010 20:29
|
|

|
Spend as much time as you can in the layout phase. Don't get all excited about making your first ever dovetail joint by hand; and cut off the pins and leave the negative. 
|
|
#
?
Feb 22, 2010 21:40
|
|
|
Barn Owl posted:Spend as much time as you can in the layout phase. Don't get all excited about making your first ever dovetail joint by hand; and cut off the pins and leave the negative. Steve? I found an old handplane like, a year ago that was encrusted in gunk and rust. Decided to toss it in an electrolysis bath and make it my first restoration attempt. I think it's a Fulton plane, #409. Google says they aren't top tier super collecters items so I figured the shape it was in, what harm could I really do? Heres the starting point, waiting on a knob to dry for the finish.  
|
|
#
?
Feb 22, 2010 22:14
|
|
|
I have decided to start doing a little woodworking as a hobby and I was wondering where you guys get your wood. Do you just go to lowes or home depot or to a local lumber yard that carries specialty stuff?
|
|
#
?
Feb 22, 2010 22:35
|
|

|
Price/quality shop. It all depends on what you're after. If you have a Menard's in your area, they usually beat Lowe's and Home Depot, and they carry a small selection of more interesting woods. Otherwise, your local woodworking store?
|
|
#
?
Feb 22, 2010 22:42
|
|
|
As an example, I can get kiln dried, nice and clear white oak for 2.00 a board foot from a hardwood dealer I just discovered semi-locally. Next time you go to Lowes or Home Depot take a look at what the charge for that absurd shrink wrapped stuff. Of course, you'll need a jointer and planer or start buying and learning to use hand tools if you don't want to be stuck paying those prices. Anyway, knob is dry. Not happy with the way said knob turned out. As you can see, it had quite a bit of dimpling and knicks under all that grime. I sanded it down until I though I might be changing the shape too much, but since it looks like poo poo I think I'll just sand until it's perfectly smooth.  Still don't know poo poo about handplanes!
|
|
#
?
Feb 22, 2010 23:44
|
|
|
Looks great!
|
|
#
?
Feb 23, 2010 00:24
|
|
|
ChaoticSeven posted:Still don't know poo poo about handplanes! It's all in adjustment and sharpening. You want as even of a cut as possible. You should be able to shear off a piece of wood as wide as the knife. Also hold tha plane at a bit of an angle for easier cutting. Youtube may have some videos. Did you call me Steve as in "Steve Thomas"? He's my third fav. after Norm and Tom Silva.
|
|
#
?
Feb 23, 2010 00:59
|
|
|
So sometimes a piece of maple will have some sort of iridescent tigerseye-like patterning, kind of in stripes that run perpendicular to the grain. Is it the cut from the tree that causes that? If so, how can I get more? Do I have to just pick through the boards and try to spot a few? That looks so cool, like it's got water running down it.
|
|
#
?
Feb 23, 2010 02:31
|
|
|
It's in the grain of the wood, there's not really any way to tell from looking at an uncut tree whether or not the wood will be figured. Wiping a piece of wood with a damp cloth or some naphta can bring out the grain if you are looking at boards in a lumber yard. The technical term for it is chatoyancy 
|
|
#
?
Feb 23, 2010 03:04
|
|

|
Barn Owl posted:It's all in adjustment and sharpening. You want as even of a cut as possible. You should be able to shear off a piece of wood as wide as the knife. Also hold tha plane at a bit of an angle for easier cutting. Youtube may have some videos. Nah, I know of another guy on a woodworking forum who uses Barn Owl. His names Steve. Thought you may be he. As for the maple, is this what you mean:   I made those with whats called curly maple. The generic term is figured. You might see names like curly, tiger, striped, birdseye, quilted. All mean something different, except usually Curly, tiger and striped seem to be interchangeable. And yeah, you do have to pay for it, usually out the nose.
|
|
#
?
Feb 23, 2010 03:05
|
|
|
ChaoticSeven posted:Nah, I know of another guy on a woodworking forum who uses Barn Owl. His names Steve. Thought you may be he. Livestock gave me this name in a name change thread. Name's Sherwood though, nice to meet you. Bird's eye maple is awfully rare anymore. The highest quality being from the timbres sunk in the great lakes.
|
|
#
?
Feb 23, 2010 05:39
|
|
|
Yeah, I saw birdseye when I was picking up the maple for my table. They had a fair stack of it. Almost went with that instead, kind of wish I had now. It looks neat. But yeah, that curly/figured maple is gorgeous. We just ended up with a few feet of it mixed in with the regular stuff, so a couple parts of the apron on the table have that look. It'd be amazing if it went all the way around. 
|
|
#
?
Feb 23, 2010 06:25
|
|
|
ChaoticSeven posted:
That looks so beautiful I might just start weeping. Edit* I'm about to start my next project, which is a Mission-style headboard/footboard/frame for my queen size bed - I'm still trying to decide on what kind of wood I want to use though; I had my heart set on mahogany but after seeing the prices for a board foot I had to change my mind. Right now I'm thinking white oak and then I can just stain it whatever color I want, my dad recommended birch for something with an interesting grain that still wasn't terribly expensive and was hard enough to withstand wear and tear. Any thoughts/ideas? DJJustice fucked around with this message at 16:12 on Feb 23, 2010 |
|
#
?
Feb 23, 2010 16:09
|
|

|
dv6speed posted:Rabbets really are a pain in the rear end unless you have a table saw or radial arm saw. Router. WildFoxMedia posted:I built another stand for the aquarium, this time with 2x4s using plans from a reef keeping forum. Can you link to the plans or post them so I can see what you're doing? Generally it comes down to knowing the correct way to build something otherwise you have to drastically over-engineer to make it sturdy. WildFoxMedia posted:The other nifty thing someone brought up on the reef keeping forum is using pocket joinery to secure the 8 vertical uprights to the top and bottom box. Let me take a look at the plans before you go this route, most likely there is a more elegant and stronger solution.
|
|
#
?
Feb 24, 2010 05:28
|
|

|
Here are the plans in question: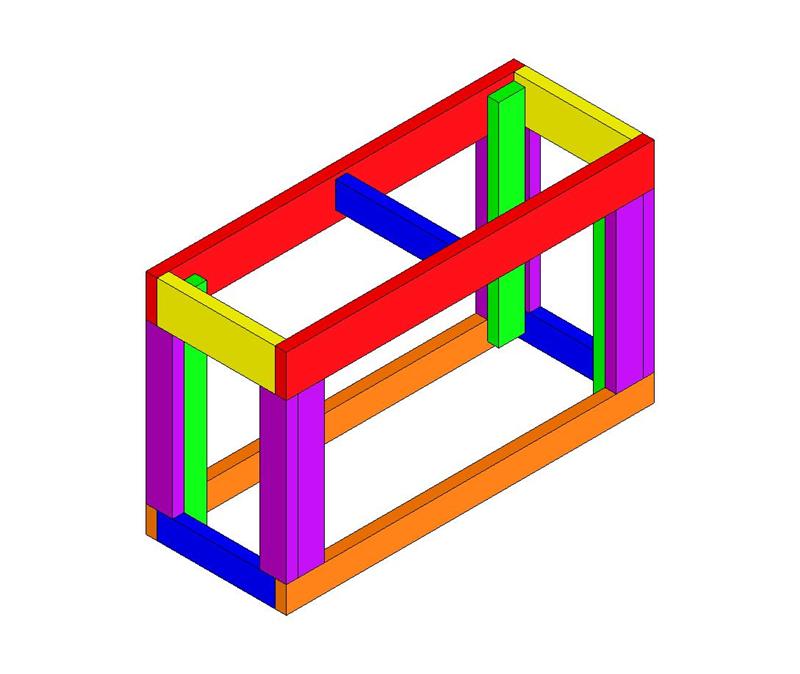 Click here for the full 800x674 image. The original stand I built and posted pictures of was built with 1x3s it felt sturdy, but its hard to say whether it would have held up to the weight. I would like to build it out of 1x4s if it would hold, 2x4s seem to be grossly overbuilt and make it incredibly heavy. Not to mention, it seems like finding straight, clean 1x3 and 1x4s is easier then good 2x4s. The plan is to build the frame, skin the entire thing in 1/4" ply and then put on some finishing trim pieces with mitered corners and moulding/trim.
|
|
#
?
Feb 24, 2010 09:41
|
|
|
Anybody got some tips on fixing a miter that I've glued with Titebond and brads? I clamped up a dart board cabinet before I left for hockey last night and when I got home for some reason my joints were completely hosed. I think someone touched it. Regardless, now it's hosed and I'm out of wood. I'd prefer to just take it apart and restart but not sure if there are solvents that work on Titebond/Wood glue. Conversely, is there any way I can fix gaps in a miter? It looks great from the front/inside, but from the side you can see a 1mm gap pretty much on all 4 corners. It's still square.  Click here for the full 654x772 image. Help! MarshallX fucked around with this message at 15:04 on Feb 24, 2010 |
|
#
?
Feb 24, 2010 14:55
|
|
|
How much would new wood cost you? It's probably easier to start from scratch then do re-work. I don't know of any solvents that will work on dried glue... however paint stripper MIGHT work.
|
|
#
?
Feb 24, 2010 14:59
|
|
|
dv6speed posted:How much would new wood cost you? It's probably easier to start from scratch then do re-work. Thing is, I'm building this because new cabinets are 100$+. New wood would put me over 100$ and I'd never hear the end of it. How do you feel about wood filler on the outside corners? We're talking a 1/16th gap here, and its on the outside, so really will never be seen once the board is mounted. MarshallX fucked around with this message at 15:11 on Feb 24, 2010 |
|
#
?
Feb 24, 2010 15:02
|
|
|
MarshallX posted:Thing is, I'm building this because new cabinets are 100$+. New wood would put me over 100$ and I'd never hear the end of it. Dude, just go for the wood filler and mark it up to experience. I think as a team we should just decide to never do miters again. Rabbets! Half laps! Box joints!
|
|
#
?
Feb 24, 2010 15:46
|
|
|
iwannabebobdylan posted:Dude, just go for the wood filler and mark it up to experience. I think as a team we should just decide to never do miters again. Rabbets! Half laps! Box joints! Seriously, I've had absolutely no luck with miters. Way too finicky, even with the right clamping. Frustrating as all hell.
|
|
#
?
Feb 24, 2010 15:48
|
|
|
Well at least they aren't as bad as compound miters, or this classic:
|
|
#
?
Feb 24, 2010 15:50
|
|
|
Speaking of compound miters... I made this scale model of Khufu's pyramid in High School for a history class project. It was right around Christmas time, and I managed to convince my parents to buy me a contractor's tablesaw (which I still use) as an early present. This model was my very first time using a tablesaw actually. Figuring out the geometry was a challenge, I forget how the hell I did it. I do remember, however, that I had to make an ASSLOAD of test cuts and prototypes before I got it right. Never in my life, have I had such a hard time trying to get any sort of a fabrication project to come out right. I don't think the teacher truly appreciated the amount of effort this required. And no, I didn't use any wood putty! (I did get an A) It's painted that color because the pyramids were originally encased in limestone, which has long since been eroded away over thousands of years. 
AbsentMindedWelder fucked around with this message at 16:08 on Feb 24, 2010 |
|
#
?
Feb 24, 2010 16:05
|
|
|

|
| # ? May 15, 2024 22:34 |
|
|
Titebond I or Titebond II? Titebond I you can use steam to disassemble joints. Titebond II is supposed to be water proof. Get some way to generate steam and a thin putty knife. Steam the joint good and work the blade of the putty knife into the joint, go slow and don't force anything once you heat/moisten the glue up enough it should come apart easy. If you can get the brads out first it might be easier to get the glue apart.
|
|
#
?
Feb 24, 2010 16:16
|
|