


|
dwoloz posted:Railroad ties are filled with all sorts of toxic junk; I wouldn't touch it I've been thinking of filling my backyard much the same. When the weather gets nice I want skim the beach for driftwood and try to make furniture or something out of it. I like the rawness of that type of wood, it has a lot of character.
|
 #
?
Mar 9, 2011 07:16
#
?
Mar 9, 2011 07:16
|
|


|

|
| # ? May 22, 2024 12:00 |
|
|
Yeah, after doing some research I don't think I'll be doing much with those sleepers - creosote and possible asbestos doesn't sound too good. I think I'll get a respirator for cutting the rest of those things up.
|
|
#
?
Mar 9, 2011 19:46
|
|

|
Its funny how you Aussies call what we call rail road ties, rail road sleepers. I always thought a rail road sleeper was a sleeper car, like the car you sleep in on a passenger train. But regardless, is anyone else pretty impressed with how good those grain patterns look on the inside? Who knew that basically the most mass produced wood product ever made could sometimes look so nice on the inside? I bet its years and years old. I've been trying to rive some logs of we call "Live Oak" here in Florida (USA). Goddamn that poo poo is hard. Big old logs that got pruned off a tree and were just lying around for about a year, according to everyone else that's been around that long. Took my froe, which is just a leaf spring from an '86 Ford F250 (but is incredibly hard high carbon steel) with a dull-but-not-blunt 90ish or less 2 sided bevel ground on one end, made a froe mallet out of the same tree, eventually split the mallet into 3 pieces, then used a giant sledge hammer, and FINALLY got on complete log split into 3 bolts. Unfortunately its not very straight-grained, and it definitely looks like what you would define as red oak. Took one log, been flattening it out with the drawknife I made out of the same leaf spring, then even took my knock-off Stanley #4 (recently restored, minus the unfortunate lack of the original front knob handle). Been trying to decide if I should sacrifice one of the 2 used stanley blades I bought with it and round off the corners of the bevel of the blade (if your looking at the blade from the top, like if its laying flat on a table, making it look like a 1/4 mi running track from the air). That way I'd be able to use it like a scrub plane. It is a lot of work. But my muscles are getting bigger already. And the oak, for all its lacking in the straight grain department, looks awesome inside. Soon I'll get a digital camera and take pics of all this poo poo.
|
|
#
?
Mar 9, 2011 22:18
|
|

|
The Scientist posted:I've been trying to rive some logs of we call "Live Oak" here in Florida (USA). Goddamn that poo poo is hard. You call them live oaks because that is their name!  I grew up in Florida also, and we had tons of these in my hometown. Pretty sure it was this species, they are beautiful trees. I grew up in Florida also, and we had tons of these in my hometown. Pretty sure it was this species, they are beautiful trees.
|
|
#
?
Mar 9, 2011 22:51
|
|


|
The Scientist posted:Its funny how you Aussies call what we call rail road ties, rail road sleepers. I always thought a rail road sleeper was a sleeper car, like the car you sleep in on a passenger train. Actually we call them rail way sleepers ") I think sleeper is pretty common outside of North America. I think sleeper is pretty common outside of North America.
|
|
#
?
Mar 10, 2011 00:43
|
|
|
disregard.
jvick fucked around with this message at 00:53 on Mar 10, 2011 |
|
#
?
Mar 10, 2011 00:47
|
|
|
truncated aardvar posted:Actually we call them rail way sleepers I get tie, but sleeper? How does that make sense? I salvaged a few of them from a pile south of town here and made a base for my backyard shed, doubt I'd use that wood for much of anything else though.
|
|
#
?
Mar 10, 2011 03:15
|
|

 It's burgin' time!

|
Hm, I had no idea sleeper = railroad tie. The more you know Soo, I picked up this plane at a yard sale for two bucks. Makes a nice decoration and all but it would be nice to actually use it too  I just can't figure out how. Special blade? Missing a piece? Any help? Visible is one long screw that is screwed in to its maximum. Barely visible are two recessed that have screws that adjust the fore/aft of the blade holder dwoloz fucked around with this message at 07:05 on Mar 10, 2011 |
|
#
?
Mar 10, 2011 06:59
|
|

|
Nah, it looks like it takes a regular stanley blade, there's just not one in there. Along with the blade, it needs a chip breaker. I think they usually come in pairs. Also you need the little screw (its short and stubby and has got a wide head with ridges on the side like a dime and a big ole slot for a standard screw driver [does anyone else call slotted screwdrivers standard?]). The screw holds the blade and the chipbreaker together, and screws into threads in the chip breaker. Also it looks like its missing the wedge, too. I betchyu if your good with a dremel you could make them all out of a leaf spring. But that's a lot of work, I think you can just buy the blade and chipbreaker new at like Home Depot (is this right?) Wedge IDK. BTW, jealous of your knob. Here's my restoring planes guide I just messaged to jvick. If anyone has anything else to add, I'd really like to hear it: I posted:I actually prefer working with metal, I post alot in the blacksmithing/metalworking thread in DIY. So maybe it came a lil naturally for me. One last thing, it looks like the USS Constitution was built of live oak. So live oak is the thing that gave her the name "Old Ironsides", if that gives you any indication how hard this poo poo is.
|
|
#
?
Mar 10, 2011 07:09
|
|
|
dwoloz posted:Soo, I picked up this plane at a yard sale for two bucks. Makes a nice decoration and all but it would be nice to actually use it too As The Scientist noted, you�ll need a blade, chipbreaker/cap iron, and lever cap (Wiki) to complete the tool. A video on Lie-Nielsen�s YouTube channel may be of interest to you if need a primer on bench planes.
|
|
#
?
Mar 10, 2011 08:44
|
|
|
I heart bacon posted:I get tie, but sleeper? How does that make sense? I never said it made any sense. Old words are often organic in origin and make little sense. One could imagine that sleepers look a bit like sleeping people in a dormitory or a barracks or something like that. I can picture the phrase being coined by a rail worker 150 years ago after waking up in a workers dormitory. (edit)Or maybe the beds they slept in were called sleepers and the "ties" resembled those(edit) Huh! I just realised how weird the expression "coin a phrase" is. Dammit, now I have thoughts in my head 
truncated aardvar fucked around with this message at 09:31 on Mar 10, 2011 |
|
#
?
Mar 10, 2011 09:28
|
|
|
The Scientist posted:Here's my restoring planes guide I just messaged to jvick. If anyone has anything else to add, I'd really like to hear it: I cannot thank you enough, that was FAR more than I was expecting! I'll keep you updated on my progress!
|
|
#
?
Mar 10, 2011 17:32
|
|
|
MasonChumpia posted:As The Scientist noted, you�ll need a blade, chipbreaker/cap iron, and lever cap (Wiki) to complete the tool. That video was helpful. Thanks to you and The Scientist From the video I now realize that the depth adjust lobe thing is broken; the piece where the adjustment screw would go has been sheared off. Oh well, this does not seem worthy of repair. You want the knob Scientist?
|
|
#
?
Mar 10, 2011 22:17
|
|
|
dwoloz posted:That video was helpful. Thanks to you and The Scientist If you don't want the rest I'll take it and cover shipping.
|
|
#
?
Mar 11, 2011 01:45
|
|
|
dwoloz posted:That video was helpful. Thanks to you and The Scientist Uh, yeah. But how do we go about doing that?
|
|
#
?
Mar 11, 2011 02:20
|
|
|
I heart bacon posted:I get tie, but sleeper? How does that make sense? I was curious so I looked it up, turns out the 2nd definition of sleeper is: : a piece of timber, stone, or steel on or near the ground to support a superstructure, keep railroad rails in place, or receive floor joists : stringpiece And just for shits and giggles... tie: a structural element (as a rod or angle iron) holding two pieces together : a tension member in a construction (2) : any of the transverse supports to which railroad rails are fastened to keep them in line So either is correct, at least according to Merriam Webster.
|
|
#
?
Mar 11, 2011 03:21
|
|

|
Yes but now I'm going to refer to it strictly as a "stringpiece."
|
|
#
?
Mar 11, 2011 04:58
|
|


|
I guess you learn something new every day.
|
|
#
?
Mar 11, 2011 05:09
|
|
|
Does anyone have advice on drying lumber? I have a piece of timber (I'm pretty sure it's oak) that's bucked to about 10' long and 2 1/2' in diameter. It's been sitting on the ground for at least a few years, but there's no sign of rot and it sounded pretty solid. My goal is to make a breakfast bar for a house my parents are remodeling, and I was thinking I could probably get a solid 3"x2 1/2'x9' (ish) plank out of it that could end up very nice. My plan was to mill it down with a chainsaw to rough dimensions (leaving a bit extra so I can work it), then let it sit in a pole barn (attic maybe?) for a year or so and hope it doesn't decide to split too much. I know I lose a lot of usable stock by milling with a chainsaw but we don't really have a way to move it, and getting a portable mill to come out would be pretty pricey. Is there anything I'm not considering?
|
|
#
?
Mar 11, 2011 06:49
|
|
|
The Scientist posted:Uh, yeah. But how do we go about doing that? Unscrew it? Shouldn't be hard at all.
|
|
#
?
Mar 11, 2011 07:13
|
|
|
Some projects so far: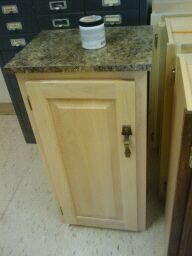 Upper wall cabinet for class. Laminated some MDF and threw it on top so I can use it as a night stand. It's square, my camera is terrible. 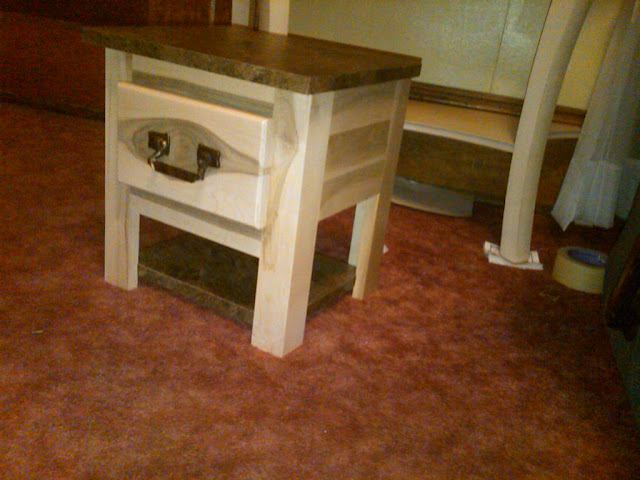 Printer stand with drawer. Bottom shelf is dadoed in. I think it looks like a little animal. All legs are 45 degree bevels. Practice piece for the computer desks I'm making next. 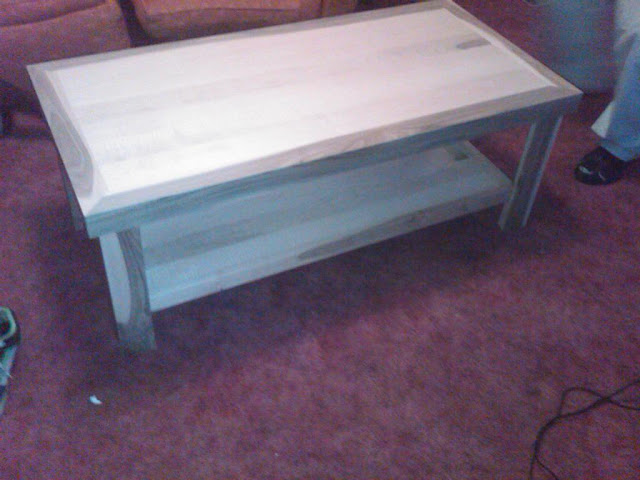 My awesome new solid maple coffee table. The dark wood is heartwood. Features 48 miter/bevel cuts. It took forever, but seriously look at this table. No filler anywhere on this thing. So many clamps. The bottom shelf is a tray. 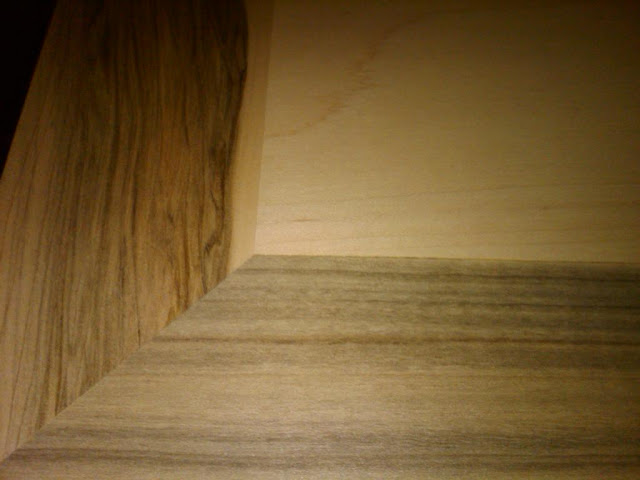
|
|
#
?
Mar 11, 2011 08:30
|
|

|
Silver Nitrate posted:Some projects so far: That's a beautiful table. In fact, those are all pretty neat. Is that printer stand maple/do you have plans for it? I'd kinda like to make one myself. Magnus Praeda fucked around with this message at 20:54 on Mar 11, 2011 |
|
#
?
Mar 11, 2011 09:08
|
|
|
Silver Nitrate posted:Upper wall cabinet for class. Are you going to school for cabinetmaking?
|
|
#
?
Mar 11, 2011 19:33
|
|
|
Magnus Praeda posted:That's a beautiful table. In fact, those are all pretty neat. Is that printer stand maple/do you have plans for it? I'd kinda like to make one myself. It's a fine looking printer stand, and I wouldn't mind seeing the plans too if you have them.
|
|
#
?
Mar 11, 2011 21:14
|
|

|
Silver Nitrate posted:table
|
|
#
?
Mar 12, 2011 00:50
|
|
|
dyne posted:Aren't you worried about the wood expanding and breaking the joints/rippling? Didn't want to say it, but that was my first thought. Is there any expansion accommodation built into that somehow? I can't imagine where it would be, but let us know how you're thinking that top slab will do over the seasonal cycles.
|
|
#
?
Mar 12, 2011 01:16
|
|
|
The printer stand is just something I drew up. I can scan my notebook, but it's pretty messy and I changed stuff around as I made it. Basically, I cut the legs, put a bevel on them, pocket screwed them to the rails/sides/back. Then I glued it all together with the bottom tray in. I had to tape it for spraying. The legs are 17 tall. Drawer is dado and rabbet with the front nailed on. I used drawer slide extenders because the sides are about 2 inches from the actual drawer. If I make another one, I'll probably skip the bottom rail. The table has clear coat, three coats of sealer, and two coats of finish. My instructor told me it should be pretty solid. We have a weird kind of finish this time so it has an eggshell texture. I go to a full time cabinet making program. It's pretty awesome.
|
|
#
?
Mar 12, 2011 07:27
|
|
|
stubblyhead posted:I live in the US, and I was really only obliquely aware of the term skilsaw until I saw a bunch of ads for them on craigslist when looking for other stuff. To me they've always been circular saws. I concede that could also refer to a table saw or radial arm saw, but I just call those table saws and RASs. The only thing in my lexicon that seems to be at odds with the world at large is that my dad always called his jigsaw a sabersaw. I gather to most people a sabersaw is a sawzall type tool rather than the small jigsaw. Skil popularized the circular saw in the U.S. back in the 1940's and 50's, thus the genericalization. <- I don't even know if that's a word. You could tell alot of the old-timers who'd first played around with them- guys missing fingers. Alot of power in a small frame. Same with Milwaukee's Sawzall.
|
|
#
?
Mar 12, 2011 19:12
|
|


|
dwoloz posted:yum, looks like my stanley bedrock 605. If you don't want it I'll take it!
|
|
#
?
Mar 12, 2011 21:34
|
|

|
I found a couple more planes at the flea market, so I don't need the knob anymore. In other news, I am abandoning any hopes of working with live oak.
|
|
#
?
Mar 13, 2011 01:36
|
|
|
Seriously, my Stihl chainsaw with an aggressive cut chain on it couldn't conquer this poo poo. I am become crestfallen. And soar. I am become crestfallen and soar. If you guys could just see the grain on this poo poo, you'd understand. The tree had been prune back and these massive logs were just left lying around for about a year, drying but not all the way through and also exposed to the elements. And still, this poo poo. I swear, if I had a 40 ton hydraulic shop press, I'd attempt the Janka Hardness Test myself. It honestly boggles my mind that they were able to construct an entire warship (the USS Constitution, or "Old Iron Sides", like I mentioned before) in 1797 with this poo poo. 
|
|
#
?
Mar 13, 2011 02:07
|
|
|
The Scientist posted:In other news, I am abandoning any hopes of working with live oak. This is the only correct answer, it is a serious pain in the rear end to work with. Might as well be black gum.
|
|
#
?
Mar 13, 2011 08:25
|
|

|
Wife and I are looking to get our shop set up, and want to do it right. Our main interest is in building pieces for our 1902 farmhouse. Basically, anything we can do ourselves, we want to do, even if it ends up being the same price as it would be to buy/have somebody else do. We have a nice radial arm saw already, but no table saw or planer/jointer. First thing we're looking for is a table saw; no issues with buying used. What should we be looking for in a saw? Any models/brands to specifically look for? Budget could be $300-$500, but willing to spend a bit more if it makes a big difference. A first glance on craigslist really only gets me this delta, for $800, and I don't know enough to know if that's a good deal or how much I should offer the guy for it.
|
|
#
?
Mar 13, 2011 14:25
|
|
|
unprofessional posted:Wife and I are looking to get our shop set up, and want to do it right. Our main interest is in building pieces for our 1902 farmhouse. Basically, anything we can do ourselves, we want to do, even if it ends up being the same price as it would be to buy/have somebody else do. We have a nice radial arm saw already, but no table saw or planer/jointer. That is maybe a little on the high side probably for an old Unisaw, although it depends on condition and how it's running. It looks like it's got a pretty nice fence. I don't like right tilt saws (and that is a right tilt saw). The blade tilts towards the fence if you keep the fence to the right of the blade (where you have the most capacity). This is a dangerous because it traps wood between the blade and the fence, increasing chances of kickback. You could move the fence to the left of the blade and be safer, but then you lose some of the capacity. It seems like all of the old unisaws were right tilt, I'm sure there was a reason Delta made that decision but given the option I will always take a left tilt saw (it probably helps that I learned on one).
|
|
#
?
Mar 13, 2011 16:50
|
|


|
I kinda like it. Its a delta, which is a brand I like (I'm limiting myself from the generalization that its a "good brand", although I think that), and its body has that construction that looks like a 1950's refrigerator, which is a characteristic that I hold in high esteem. Old poo poo is often solid and therefor good for that reason. Just a couple quick tips: -Check to make sure the blade is true. perpendicular to the table (when set at 90o, perpendicular to the mitre guide lines on the table, and that the fence either runs parallel to the blade or can easily be set to be held firmly in parallel to the blade. -Check with like a good level that the table's surface is true. The edge of the level revealing any pits/vallies -Take a gander at the arbor for the blade to see how hard it is to change blades, that you could find blades for the saw easily, and that it could accept a stacked dado head cutter. -Fiddle with all the parts that you would normally touch the most in use to see if the most common things that would get sloppy have gotten sloppy. Also, try it. And if you pick that particular table saw you posted, talk that mamma jamma down some.
|
|
#
?
Mar 13, 2011 21:13
|
|
|
I would rather check that the motor spins without much sound (bearings busted?) and see how it spins powered up. Check all adjustments to see they are working and if you can, take a look at the inner workings to see if it has been damaged at all. If the table is no longer adjusted to the blade, that's pretty easy to fix and you can even ask for a reduction if you are bold. Bring a ruler and see if the table is warped. Removing a huge dent in a cast iron table is going to be a lot of work. (I have no idea what I'm talking about, but I have absorbed so much restoration info over the last few days that it's spilling out of my ears. Some thread somewhere mentioned looking inside in the saw to check)
|
|
#
?
Mar 14, 2011 15:22
|
|
|
LordOfThePants posted:That is maybe a little on the high side probably for an old Unisaw, although it depends on condition and how it's running. It looks like it's got a pretty nice fence. This. I'd pay $500 for that saw, maybe $550 if I couldn't find anything wrong with it.
|
|
#
?
Mar 14, 2011 15:29
|
|
|
Thanks, guys. I sent him in inquiry with a bunch of questions, including wiggle room in the price (saying I was hoping to spend closer to $500), and here's what I got back:seller posted:serial # KR 2117. 34-466. As stated it has new belts, and fence. Otherwise it has not needed any work on it. I bought it from an individual who had used it in a home shop. It has a 3 hp motor. Blades change as easily as any table saw, I often use a stacked dado head cutter without a problem, and have used all the blades. I will go as low at $700, I am leaving Fri AM for spring break, but I can show it anytime this week.
|
|
#
?
Mar 14, 2011 15:55
|
|
|
Go see it, fall in love, buy it? Sorry, I'm still high from my latest purchase.
|
|
#
?
Mar 14, 2011 16:00
|
|
|

|
| # ? May 22, 2024 12:00 |
|
|
I was thumbing through Fine Woodworking magazine at Lowe's yesterday, and there's an article in this month's issue about buying used tools and things to look for to make sure it's worth buying.
|
|
#
?
Mar 14, 2011 16:05
|
|