


|
Just did our first test of the 20KW PFCs for the tesla coils. Everything seems great, here are a couple pics of the setup: Center left is all the main power electronics, part of the test load (just a bunch of nichrome hanging on alumina tubes) in the upper left, control electronics are in the open aluminum enclosure leaning against the heatsink, a little remote control/telemetry lit up in the center, and the oscilloscope is showing a drat beautiful sinusoidal input current. We measured power factor at 0.99 at full load (which at the moment is just 50A from 120V). Next time we're going to go to a 240V input, and try to pull 50A from that. Sadly that will be our limit for now, because we want to run two in parallel, and our line is only rated for 100Arms. ANIME AKBAR fucked around with this message at 14:52 on Apr 25, 2011 |
 #
?
Apr 25, 2011 14:37
#
?
Apr 25, 2011 14:37
|
|


|

|
| # ? May 21, 2024 15:09 |
|
|
I was going to make a mains-powered coilgun as my next project. I calculated that if you charge a capacitor through a resistor, the total energy dissipated by it is equal to the energy stored by the capacitor. This isn't really optimal because it gets very hot if you select a value that charges quickly. Since the next one is going to be mains powered I was thinking of doing something like this (diagram ripped off from another site):  Except with the capacitor bank instead of the battery. Are there any problems or concerns with doing it that way? ANIME AKBAR posted:Just did our first test of the 20KW PFCs for the tesla coils. Everything seems great, here are a couple pics of the setup: Pretty badass stuff. That's a lot of power!
|
|
#
?
Apr 25, 2011 22:38
|
|

|
BattleMaster posted:I would be careful to make sure that the capacitor really rated for this, since that's not a common component. Frankly, a good power resistor (or a few cheaper power resistors in parallel) might be cheaper and easier. I would also probably want an isolation transformer, just because. Also consider incorporating switching. Even if it's not a SMPS, you could probably still make it dissipate less power. I have some other designs for similar stuff lying around, but they are somewhat more parts intensive.
|
|
#
?
Apr 25, 2011 23:26
|
|
|
BattleMaster posted:I was going to make a mains-powered coilgun as my next project. I calculated that if you charge a capacitor through a resistor, the total energy dissipated by it is equal to the energy stored by the capacitor. This isn't really optimal because it gets very hot if you select a value that charges quickly. Your transient currents into that capacitor bank will be very high, since you're relying on the ESR of the capacitors themselves. If you exceed the recommended ripple current rating, you risk catastrophic capacitor failure. I don't think you can't get around dissipating energy when charging a capacitor this way. Those diodes will drop voltage and will dissipate power at the standard P=I*V, which could be significant for your currents. A power resistor would be the easiest and safest thing to add.
|
|
#
?
Apr 25, 2011 23:42
|
|

|
It's not uncommon to use capacitors instead of resistors in low power AC/DC converters. That circuit is often used as a lossless precharge mechanism (and yes, you do have watch the ripple ratings on the caps). You would normally bypass the line capacitor with a contactor relay once the output is charged. In your case, that would be a bad idea; you want to disconnect the line completely once the cap bank charges fully. Maybe leave in a high value trickle charge resistor to stop the voltage from drooping over time.
|
|
#
?
Apr 26, 2011 00:30
|
|
|
SnoPuppy posted:Your transient currents into that capacitor bank will be very high, since you're relying on the ESR of the capacitors themselves. If you exceed the recommended ripple current rating, you risk catastrophic capacitor failure. Basically this, your inrush currents will likely be incredibly high. It may be best to charge through a large power resistor or some other sort of simple current limiter.
|
|
#
?
Apr 26, 2011 04:45
|
|
|
I have a project that I want to undertake, and the biggest part of it is a laptop and some sort of hardware interface. What I need is 4-8 digital outputs, a couple 5v analog ins (low frequency is fine, just sensor reading) and 4-8 digital ins. I'd like a couple PWM channels too but it's not a necessity at all. Should I just use a low end Arduino and write a program to access/set the hardware lines? Any other simpler suggestions?
|
|
#
?
Apr 26, 2011 05:07
|
|


|
Alright, looks like I'll just deal with hot resistors. Thanks everyone!
|
|
#
?
Apr 26, 2011 05:09
|
|
|
Jonny 290 posted:I have a project that I want to undertake, and the biggest part of it is a laptop and some sort of hardware interface. What I need is 4-8 digital outputs, a couple 5v analog ins (low frequency is fine, just sensor reading) and 4-8 digital ins. I'd like a couple PWM channels too but it's not a necessity at all. In terms of cheap and simple hardware-wise, the Arduino really is your best bet. The available libraries don't hurt, either. If you want even more digital inputs or outputs, throwing on a shift register or multiplexer (if you want actual I/O) is ludicrously easy, so it wouldn't be worth throwing down extra for a Arduino Mega or anything. As long as you've used C/C++ before, this should be really really easy to interface with, especially since most programming languages have a library for using the serial ports. If you want to do more than just polling the analog sensors (ie, you want to read them at exactly 1kHz while still doing all the other I/O) you'll need slightly more code, but it's pretty straightforward.
|
|
#
?
Apr 26, 2011 05:37
|
|
|
sixide posted:Basically this, your inrush currents will likely be incredibly high. It may be best to charge through a large power resistor or some other sort of simple current limiter. The capacitor itself has a finite impedance, so all the transients will be limited. If you're really worried about inrush current, then putting a very small series resistor would probably solve it. But the impedance of your average 120V 20A line will likely have enough impedance built in. If you used a bunch of properly X-capacitors to give about 10uF with a 1ohm power resistor in series, you could charge a 1mF cap to 100V in half a second with a 120VAC line, and the capacitors would tolerate it just fine. ANIME AKBAR fucked around with this message at 13:21 on Apr 26, 2011 |
|
#
?
Apr 26, 2011 05:48
|
|
|
I'm having trouble working out how to do something mainly because I don't know what components would do what I want. Basically I have a device which has say 8 outputs, each of which is never on at the same time as another output. I want to modulate the strength of the output to roughly 10%, 20%..90%. My PIC only has 1 DAC which makes it hard to do directly. I originally thought about having two n mosfets and then using one to use as a variable resistor and the other as a on/off but that obviously won't work. I tried using P mosfet as the VR but it didn't really work maybe because of the high voltage? I looked at some OP AMPS but the high voltage killed that idea. I've tried to make a simple diagram of what I want. I've just used two loads for simplicity.
|
|
#
?
Apr 26, 2011 17:08
|
|
|
Unparagoned posted:I'm having trouble working out how to do something mainly because I don't know what components would do what I want. Ok, so it's a variable 80V supply with 8 switched outputs. Focusing on the variable supply: you're not going to find a digital potentiometer that can withstand anywhere near that. If, somehow, someone does make it, it's going to be very very expensive. So forget that. You have two (east) options that I can think of. I'm not sure how much I'd trust trying to keep a mosfet in the linear region, so here are two alternatives: 1. You can use a 3-4 bit R-2R DAC to create a few of different voltage levels, or the PIC's DAC. Either way, use a power amplifier to scale it accordingly. If you go this route, you either have to throw a simple amplifier together, or if you're lucky, you might be able to use a high voltage op amp. A quick search shows that TI makes a few cheap 80V op amps, OPA452/OPA453. The catch is that they can only supply 50mA, so it depends on the load. 2. Use PWM from a digital output to drive a MOSFET. Low pass filter the output a little after that. I have no idea what your loads are, but you might be able to get away with plain PWM.
|
|
#
?
Apr 26, 2011 18:21
|
|
|
Jonny 290 posted:Should I just use a low end Arduino and write a program to access/set the hardware lines? Any other simpler suggestions? 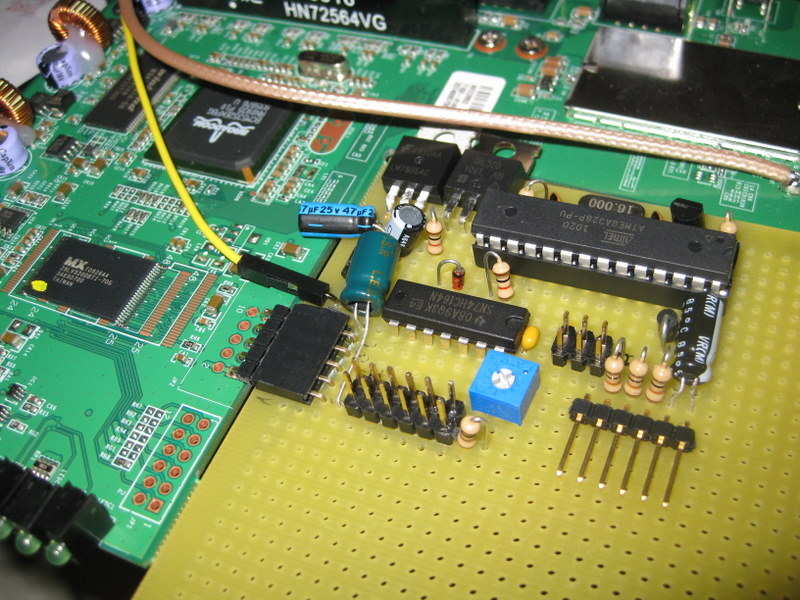 I came here because I actually have a question too though, because I know crapall about electronics. I'm running a 12V 0.18A blower motor using an IRL510 MOSFET but it feels like overkill. Can anyone recommend a TO-92 footprint part that I can drive with a 3.3V 1mA gate, and power a 12V 250mA device?
|
|
#
?
Apr 26, 2011 21:16
|
|

|
Well, I don't know any C other than "the two weeks I took in college in 1997", but that's no reason to stop. I just want to use it as a serial interface so I can use Python to actually r/w the values and set pins. Not really interested in comprehensively learning C at this point in my life, though, but the basics to use them as i/o look easy.
|
|
#
?
Apr 26, 2011 21:20
|
|
|
CapnBry posted:I came here because I actually have a question too though, because I know crapall about electronics. I'm running a 12V 0.18A blower motor using an IRL510 MOSFET but it feels like overkill. Can anyone recommend a TO-92 footprint part that I can drive with a 3.3V 1mA gate, and power a 12V 250mA device? The BS170 is probably the go-to jellybean in this case, but if you're not having any issues with the IRL510 there's no reason to switch.
|
|
#
?
Apr 26, 2011 21:47
|
|
|
Wait,am I reading this right? This is the bread and butter of an Uno at a much lower price? Hot drat, I may have to read up on this poo poo some more. That is much more reasonable considering that I already have breadboards and poo poo.
|
|
#
?
Apr 27, 2011 04:27
|
|
|
Jonny 290 posted:Wait,am I reading this right? This is the bread and butter of an Uno at a much lower price? Yeah, all the Arduino boards are a preflashed ATmega microcontroller with a power supply and some kind of interface for the bootloader plus some kind of breakouts for the I/O pins. If you're comfortable wiring stuff up yourself than go ahead and get that instead.
|
|
#
?
Apr 27, 2011 04:30
|
|
|
Jonny 290 posted:Wait,am I reading this right? This is the bread and butter of an Uno at a much lower price? The chips sparkfun sells already have the bootloader on board. The chips from mouser/digikey don't have a bootloader so they must be flashed using SPI from a second arduino, or a ICSP programmer such as the usbtinyisp. You can even make your own low-speed (1.5MBit) USB device with them using the V-USB library. sixide posted:The BS170 is probably the go-to jellybean in this case, but if you're not having any issues with the IRL510 there's no reason to switch.  Doesn't this say that if my gate voltage is 3.3V that I can only get a max of about 100mA of drain-source current (@12V Vds)?
|
|
#
?
Apr 27, 2011 14:35
|
|
|
One option for "I want a smaller arduino" is the Teensyduino. Advantages include being able to identify as a usb keyboard/mouse, standard pin spacing, smaller than (I believe) all arduino models, Mini-B USB connection, not limited to being a usb serial device, full-speed usb comm...and you still get to use the arduino development environment/feature set. Plus, you can get them with header pins soldered in so they'll plug straight into your breadboard. Oh, and it looks like they're cheaper than the arduino, too. I haven't bought one yet, but I'm on the verge. This little thing may become a permanent replacement for my arduino(s).
|
|
#
?
Apr 27, 2011 16:14
|
|


|
Thanks, dudes! I'm going to flip a spare laptop for a $100 Arduino slush fund. I can't wait to goof off with these things - man, I wish they were around when I was a kid.
|
|
#
?
Apr 27, 2011 16:16
|
|
|
Bad Munki posted:One option for "I want a smaller arduino" is the Teensyduino. Advantages include being able to identify as a usb keyboard/mouse, standard pin spacing, smaller than (I believe) all arduino models, Mini-B USB connection, not limited to being a usb serial device, full-speed usb comm...and you still get to use the arduino development environment/feature set. Plus, you can get them with header pins soldered in so they'll plug straight into your breadboard. That one looks pretty fantastic because at least one of the versions of it (edit: maybe both of them? only one of the AVRs has "USB" explicitly in the part number) uses an AVR microcontroller with hardware USB. After using PICs with hardware USB I always cringe when I see people recommend the bit-banged software USB library for AVRs. It's likely cheaper because it uses its own on-chip USB rather than adding a separate USB to serial chip. Pretty smart design. BattleMaster fucked around with this message at 17:52 on Apr 27, 2011 |
|
#
?
Apr 27, 2011 16:40
|
|
|
Yeah, agreed on all of that. If I get one, I'll post a trip report or something.
|
|
#
?
Apr 27, 2011 16:46
|
|
|
CapnBry posted:Doesn't this say that if my gate voltage is 3.3V that I can only get a max of about 100mA of drain-source current (@12V Vds)? You should get very nearly the full 180mA the fan is rated to. Rds(on) will be in the 5-10 ohm range when you're that far above the threshold. TO-92 is an uncommon package, but there's a few other devices that might exceed your requirements like the ZVN4306 and TN0201.
|
|
#
?
Apr 27, 2011 18:50
|
|
|
sixide posted:You should get very nearly the full 180mA the fan is rated to. Rds(on) will be in the 5-10 ohm range when you're that far above the threshold.
|
|
#
?
Apr 27, 2011 19:19
|
|
|
I guess if this is essentially purchasing advice I should attack a disclaimer: If you get devices with a 3V threshold voltage (the maximum) they'll probably suck. If you get the nominal 2.1V they should be fine, and if you get closer to the minimum they should be great.
|
|
#
?
Apr 27, 2011 21:59
|
|
|
I feel like a dipshit asking this because it seems so simple. I want to be able to switch on a 12v 1.5a pump via an Arduino & relay. What would be the best way go to about doing such a thing? It seems like this relay (http://www.sparkfun.com/products/100) should do the job. I'm just at a loss as I've never done this before.
|
|
#
?
Apr 28, 2011 01:48
|
|

|
You can't drive that relay directly from a microcontroller pin. The 320-ohm coil resistance means 156mA at 5V. You'd need to use a transistor as a switch which could then drive the coil, and additionally protect the transistor from the inductive kickback from the coil. 156mA is a lot of current, so I suspect you'd want a Darlington pair or a FET to limit the current at the microcontroller. Some introductions: http://www.jaycar.com.au/images_uploaded/relaydrv.pdf (BJTs) http://www.rason.org/Projects/transwit/transwit.htm (BJTs) https://www.diodes.com/_files/products_appnote_pdfs/zetex/an10.pdf (MOSFETs)
|
|
#
?
Apr 28, 2011 02:14
|
|
|
Thanks for the links. I'll definitely check them out to brush up. I actually have driven that relay from a digital pin on the Uno with a transistor (P2N2222AG) and then yes, a diode. I'm just lost at switching the 12v. Like I said, I feel like I'm missing something stupid. e: Figured it out. Thanks! SixPabst fucked around with this message at 02:26 on Apr 28, 2011 |
|
#
?
Apr 28, 2011 02:24
|
|
|
So is anybody from this thread going to ESC 2011 in San Jose?
|
|
#
?
Apr 29, 2011 04:16
|
|
|
Operational Amplifiers? gently caress Op-Amps! So me and a ragtag team of individuals with a combined electronics talent somewhere around the microscopic level The group consensus was to use a current feedback design. Nobody really knew what the gently caress that meant but we saw it in a book so it had to be good. We chose to design this out in Multisim first before ordering parts and lathering solder flux all over ourselves. And we came up with this color coded work of art!  And it has two of these things attached to it as well:  Now simulating this sleek fucker in Multisim (which by the way is a colossal piece of lying poo poo, don't let others deceive you) gave us a bandwidth of 186MHz  That's over triple what we need as a minimum! That's over triple what we need as a minimum! Now let's build this op-amp! Here's a picture of it in its infancy...  And here's the final product!   Uhm that looks really bad! This is actually the 4th attempt at soldering this sucker so that should speak for how talented we are. But how does it perform? Uhm that looks really bad! This is actually the 4th attempt at soldering this sucker so that should speak for how talented we are. But how does it perform?First up is the gain:  Well that looks to be right on target for ~25 hurray! Next up we need to test the slew rate:   I think we just set some sort of landspeed record! I can't do math in my head but that looks to be about 1100~ V/uS awesome! Now what about the bandwidth? I think we just set some sort of landspeed record! I can't do math in my head but that looks to be about 1100~ V/uS awesome! Now what about the bandwidth? Well Multsim told us it would be about 100MHz better but hey it still meets our specs! From this project I have learned that I really really do not like Multisim when it gets my hopes up and the real world crushes them. The dead bug method of soldering stuff for high frequencies produces hilariously ugly circuits. Apparently Agilent still thinks it's the 80s because one of the spectrum analyzers had a loving floppy drive for saving images onto! Oh and this thing is rated at 1 Watt and pushes some fine current to any load. You may all critique this or comment on how bad we are at soldering- I'm looking for (in hindsight) tips to increase our bandwidth. Honestly I just felt like sharing since this took up so much of our time lately and I find the final product picture still cracks me up! PS: If these images are a bit large let me know and I'll replace all of them with small thumbnails.
|
|
#
?
Apr 29, 2011 16:15
|
|


|
Master Stur posted:And here's the final product! Hahaha what the gently caress! That's hilarrifying.
|
|
#
?
Apr 29, 2011 16:32
|
|
|
Master Stur posted:And here's the final product! Oh God get it away. 
|
|
#
?
Apr 29, 2011 16:34
|
|
|
BattleMaster posted:Oh God get it away. We keep it locked up in the back room now 
|
|
#
?
Apr 29, 2011 16:42
|
|
|
Master Stur posted:That's.... something. As for the frequency, you have a hilariously length leads, and no benefit of a ground plane. Perhaps in the future you can try "manhattan style" soldering. I guess it's some old school poo poo, and I really can't tell you much about it... But the idea is, you start with copper-clab PCB, and you either use an exacto knife to isolate little pads on the board for circuit nodes, or you glue little squares of copper clad to the board, and solder to these elevated islands. Then you just solder the components point to point, keeping the lead lengths as short as possible, using the copper plane as your common ground, and keeping your components relatively close to the surface of the copper. Maybe that would help?
|
|
#
?
Apr 29, 2011 16:50
|
|
|
[timg ball-of-crap] That is pretty badass. Seems like you could do dead-bug style with much smaller lead lengths to improve performance/looks. Honestly, after seeing the completed picture, I did not expect it to work as well as it did. That is pretty badass. Seems like you could do dead-bug style with much smaller lead lengths to improve performance/looks. Honestly, after seeing the completed picture, I did not expect it to work as well as it did.
|
|
#
?
Apr 29, 2011 17:26
|
|


|
I suspect even a horrible amateur PCB would help bandwidth (not to mention noise), but that levitating dead bug thing is horrifyingly cool in some sick way. Transistor selection is probably the biggest factor in the bandwidth. After that, maybe making your CCSes closer to ideal?
|
|
#
?
Apr 29, 2011 18:45
|
|
|
I've wrought something horrible into this world:  The transistors we used were some MPSH10s and MPSH81s from Fairchild, if the data sheet is to be believed they are capable of 650MHz bandwidth. I would've loved to use some PCB but for the limitations of this project we "weren't allowed". Though according to some of our sources the RF type board is supposed to be better I suppose if we could get the thing trimmed down to a reasonable size. Manhattan style sounds rad as gently caress though. The original design of our CCSs included a 500ohm resistor in series with a 5k pot that we could adjust but trying to solder that in was a disaster so we ditched it for a single resistor. If making them more ideal would lead to a more complex design then that was a bit of an afterthought. For a little story: This was part of a design contest and the three specs that were most heavily weighted were slew rate, bandwidth, # of transistors. The goal was to have the fastest, highest, fewest (respectively) and still meet the other limitations/goals. As far as I know we probably came in "first" because by far we had the best real world bandwidth and slew rate. (Best simulated too, but that doesn't count). Not sure on # of transistors though! As for noise, uhm well, I'm not sure how bad we had it. There's certainly noise in the slew rate measurement- However that's a square wave zoomed in to the nanosecond scale. The gain is a little wobbly between 40-78MHz too. The only thing as far as meeting the requirements of the project went that we failed was DC Offset Voltage. We were supposed to try to get it under 10mV but we ended up with a stupid number around 270mV which was a bit disheartening. For the record, I'm taking all these responses and feedback in for personal learning and such. I sort of doubt I or any of us will go back and try to improve this monster anytime soon. It's pretty neat to go "here's how we approached this design" and then see how others would've gone about it. One of my teammates did mention wanting to make a plasma speaker so we might make a really ugly one of those this summer  e: I should probably mention that the biggest thing we've all gathered for improving this is to cut down on the solder-poo poo-balls and lead length. Our first go at making this involved a lot of solder and trimmed leads, but it failed horribly. The second try involved long leads and a tiny amount of solder, but also failed due to a dead pair of transistors. The 3rd and 4th was doing it in parts and testing it as we went. By the final stretch we were sorta in a rush and carrying a "don't give a gently caress" attitude so we didn't bother to trim leads or worry about solder. Somehow it worked! double e: I forgot to mention that we used the spice model of the transistors above and imported it to Multisim. Master Stur fucked around with this message at 20:26 on Apr 29, 2011 |
|
#
?
Apr 29, 2011 20:10
|
|
|
Hi all, my current project is to build an LM3886 based amp to replace my 20W mono amplifier I use with the TV. I ordered the dual mono kit from Chipamp.com for the actual amplification, and now I've been working on the input selector/control system. My goal is to have 3 standard inputs and USB. To get USB I ordered an Alien DAC kit which should be here in a week or two, I plan to power this from an 8V regulator (board has an internal regulator as well). Another design goal is excellent SNR and simplicity, my current plan is to use signal relays to toggle inputs, directly driven by 12V via a 4-way selector. The relays I ordered have 12V 17mA, the ratings for the selector knob only say 500V for up to 1 minute. Should I continue with the direct drive design or should I put in some drive transistors and protection diodes? Probably the most important design feature is support for headphones, so my plan is to use more relays to switch the output from speakers to the headphone jack (with 20R in series), and also switch to a second volume control. I also want a separate "trim" control for each input (some sources are louder than others), my plan is to just connect this like a normal volume and chain that to the main control, would that be problematic wrt. impedances/loss? I've ordered a 10x pack of 10k log stereo potmeters so I'll be using those. It doesn't look like the amplifier module has any DC blocking caps, so any recommendations for what types would be best suited are appreciated. Lastly I was wondering if there would be any disadvantages to using coaxial cable (RG-6) for internal signal wiring, I have a large spool of flexible cable so if I can use that instead of buying some special audio cable I'd prefer that. If that was hard to follow I have some schematics here:  Input selector with volume controls. There's also a relay and switch for aux send, that's to support an equalizer I have lying around.  Block schematics for the amplifiers + main PSU and the design for the USB+relay PSU (already built). I also have a time-delay relay in there to give the system time to stabilize, I'll consider removing this after I've built it. The mains switch will be front panel mounted.  Basic mockup of the front and rear panels. My reason for powering the leds from so many sources is to allow me to diagnose potential failures in power supplies based on which LEDs go dark. longview fucked around with this message at 21:05 on Apr 29, 2011 |
|
#
?
Apr 29, 2011 20:36
|
|


|
My electronics knowledge is basically non-existant (I'm a computer scientist by education) but I've picked up a couple of Launchpads with the abstract goal of learning more about microcontroller programming and the more concrete goal of setting up some discrete monitors of things around my house that can interface with a central server. As an example, I'm forever putting clothes in the dryer and then missing the buzz because it's rather far away from my office - I'd like to build a little module that will hook onto the buzzer and send a signal of some kind (wireless via an XBee? Haven't gotten that far) to my computer telling me to get off my rear end and fold things. In any case I'll probably be hitting up this thread for recommendations and advice from time to time. First up: could someone recommend a digital multimeter for around the $50 mark? I'm not sure what I should be looking for as far as a feature set goes. My uncle tried to get me into electronics when I was a kid and the multimeter I had then had such features as an analog dial which you calibrated by turning the big dial to RESISTANCE and touching the leads together, then fiddling a screw until the needle hit zero 
|
|
#
?
Apr 29, 2011 23:51
|
|

|

|
| # ? May 21, 2024 15:09 |
|
|
There's really nothing wrong with analog meters. In many cases they're significantly easier to use. But for your question, the Uni-T UT61E is a solid choice. It's a low-end meter but good luck coming anywhere near the features/quality for the price elsewhere. Otherwise, go get a pair of bottom-of-the-barrel meters from your favorite local store and keep them far, far away from any dangerous voltages. edit: As for what features to look for: Autoranging: Nice, but slow autoranging is far more annoying than manual ranging True RMS: A must-have if you need to measure AC signals that aren't perfect sines, but it usually doesn't come cheap Frequency: Very nice to have if you're measuring AC Capacitance: Can be useful for smaller caps that aren't labelled (SMDs) Hfe: Unless you have to match transistor pairs, this will never get used Diode: I don't recall ever needing this feature Continuity: If the meter doesn't have this, don't buy it The most important things aren't on the spec sheet, though. Decent probes, usable switch action, readable screen/gauge, screen update rate, etc. are all far more important than the featureset. sixide fucked around with this message at 00:18 on Apr 30, 2011 |
|
#
?
Apr 30, 2011 00:03
|
|