|
The detail is lost in this particular JPEG. You can make her darker, but instead of a bright white blob she'll be a dull gray blob. Do you have the original RAW file? There might be some hope if that's the case, but even then I wouldn't expect any sort of miracle.
|
|
|
|

|
| # ? May 16, 2024 13:48 |
|
Yea of course I have the original raw file. I was thinking copying it, dropping the exposure/brightness and maybe adjusting the highlights then exposure merging just for her.
|
|
|
|
Auditore posted:Yea of course I have the original raw file. I was thinking copying it, dropping the exposure/brightness and maybe adjusting the highlights then exposure merging just for her. Ignore the rest of the photo and try to pull detail back in her. If you can then great something can be done, if you can't, well then you are SOL.
|
|
|
|
AIIAZNSK8ER posted:I am never happy with BW conversions. I just use desaturation in LR3 and adjust contrast and black levels. Auditore posted:Yea of course I have the original raw file. evil_bunnY fucked around with this message at 17:06 on Jun 26, 2011 |
|
|
|
I feel like a total dumbass for not knowing about this before. Behold, the clone source panel: http://www.petapixel.com/2011/06/21/using-the-photoshop-clone-source-panel/
|
|
|
|
poopinmymouth posted:I feel like a total dumbass for not knowing about this before. I loving love you.
|
|
|
|
Very cool, the ability to flip your clone on the fly is a great time saver.
|
|
|
|
Please, someone else who is a photoshop expert tell me they also were unaware of this panel? I feel like I need to turn in my card or something.
|
|
|
|
poopinmymouth posted:I feel like a total dumbass for not knowing about this before. This is totally sweet
|
|
|
|
poopinmymouth posted:Please, someone else who is a photoshop expert tell me they also were unaware of this panel? I feel like I need to turn in my card or something.
|
|
|
|
I knew about it, but only because I went into the Window menu and decided to check out every tab that I didn't immediately recognize just to see what they did a while ago. But its not like I had it in my bag of tricks for years though. I'm also don't consider myself any sort of expert compared to everyone here, I'm just naturally curious
|
|
|
|
poopinmymouth posted:Please, someone else who is a photoshop expert tell me they also were unaware of this panel? I feel like I need to turn in my card or something. That panel (and other clone stamp updates) was pretty much the reason to buy CS4  . Every time I have to work with <CS4 I go crazy. . Every time I have to work with <CS4 I go crazy.
|
|
|
|
I have a watermark question. I never watermark my photos but I shot a roller derby bout on the weekend and the league asked that I watermark each photo with the league's website address and my name. The type of watermark I want to add is a thin black box along the bottom of the image with the website address inside that black box. I would prefer to add this box to the image dimensions rather than paste it over top the image. There are about 100 photos, so I'm wondering if this is something that can be done as a batch, or if I'm going to have to do each image individually. I have Lightroom 3 and Photoshop CS4 (I think it's CS4, I don't use Photoshop much. It's a newer version anyway).
|
|
|
|
I think mogrify will do exactly what you want, but it's been a while since I fired it up so hopefully I'm not way off base. It's a lightroom export filter so you should be able to run all the photos through there at the same time.
|
|
|
|
You could probably do a photoshop action? The only thing is that it'll be exactly in the same spot and you would have to separate portrait/landscape shots depending on the location of the watermark. I think you could also turn your watermark into a brush and just do that too.
|
|
|
GWBBQ posted:I'm not an expert, but I think I've spent more time using the clone tool than I have holding my camera and I never knew about it. Yeah, I didn't know about it and I've been using photoshop since around 2003 (though back then it was for web design/signatures for forums, but I still did use the clone tool.)
|
|
|
|
|
If I have like 30 portrait shots on a plain white background, and the model is wearing a white t-shirt ( I feel like there must be a simpler way to do this than my ghetto techniques.
|
|
|
|
Do a clipping path. Or send it to India and pay some guy a few cents to do a clipping path.
|
|
|
|
Martytoof posted:I think mogrify will do exactly what you want, but it's been a while since I fired it up so hopefully I'm not way off base. It's a lightroom export filter so you should be able to run all the photos through there at the same time. This actually worked out pretty well. Thanks.
|
|
|
|
Anybody have any idea what sort of PP is involved in these shots? I really like this style. All I can seem to point out is that there's some split-toning going on with plenty of contrast and sharpness. http://www.flickr.com/photos/marenk/5590545496 http://www.flickr.com/photos/marenk/5787120846
|
|
|
|
Shoot things with back light and move sliders to right.
|
|
|
|
Sometimes when I'm in Lightroom and I have a stack of a few photos, say a raw file and a jpeg of the same image, it doesn't expand the stack automatically, or even when I tell it to. I want to select the jpeg, but it's hidden under the raw file and I can't get at it! Usually they're displayed side by side so I can choose either. This happens randomly and I want to know if it's something I'm doing wrong or just LR screwing up.
|
|
|
|
brad industry posted:Shoot things with back light and move sliders to right. Which sliders, exactly?
|
|
|
|
CarrotFlowers posted:Sometimes when I'm in Lightroom and I have a stack of a few photos, say a raw file and a jpeg of the same image, it doesn't expand the stack automatically, or even when I tell it to. I want to select the jpeg, but it's hidden under the raw file and I can't get at it! Usually they're displayed side by side so I can choose either. How are you telling it? Should be a simple click of the "1 of X" badge in the top left.
|
|
|
|
teamgod posted:Which sliders, exactly? Fill light. Though I prefer using the curves, darks up, shadows down a bit, to maintain contrast, but you can use curves and fill light in conjunction.
|
|
|
|
There also appears to be a texture applied to the first image, though it just makes the trees look noisy as gently caress as if from excessive fill, not to mention what it does to the sky. Dumb.
|
|
|
|
teamgod posted:Which sliders, exactly? It looks like almost all of them. Fill light, saturation, contrast, clarity, etc.
|
|
|
|
scottch posted:How are you telling it? Should be a simple click of the "1 of X" badge in the top left. Yeah, I tried that, but didn't work. It appears to only happen when I have just imported photos, or use "previous import" in the library. If I go to the actual full folder, everything works fine. I assume because the duplicate photos are not actually located in the previous import catalog.
|
|
|
|
I'm trying to blend this with this  In order to get rid of that horrendous blank background which was unavoidable on the day. Unfortunately blending using Blend if isn't really working because of the horrendous and apparently unremoveable aberration around the branches top left. Even in the low Q jpegs I've put up they're pretty obvious and I'm having real trouble getting the background to sit in nicely around them. Is there an easy solution or am I going to have to mask it out manually? I know I need to adjust the exposure of the sky layer a bit and I've tried masking it out via color but nothing looks natural. There's always hot lines around the branches. EDIT: Defringe in lightroom seemed to help a little with the edges, the mask is still pretty rough though. XTimmy fucked around with this message at 13:15 on Jul 3, 2011 |
|
|
|
What about ditching the branches entirely, and the white thing on the right side? I did a quick test and it looked nice, though I was too lazy to properly mask the woman.
|
|
|
|
tarepanda posted:What about ditching the branches entirely, and the white thing on the right side? I did a quick test and it looked nice, though I was too lazy to properly mask the woman. Tempted but alot of the other photos in the set revolve around her being inside this little area looking out. I've got it up to an acceptable standard through some careful masking now so I'm relatively happy.
|
|
|
|
XTimmy posted:I'm trying to blend this Try putting the sky image on the bottom, and the woman on the top, in a multiply layer. Works well. Then you just need to do some quick masking of the horizon, and her.
|
|
|
|
I ran into this guy on flickr, and it looks like he's living the dream of taking pictures of cute scene girls. I was wondering, how do you get that vintage processing look that he uses for a lot of these photos? It looks like he's shooting directly into the light to blow out the image on purpose, but is there any split toning or action that I'm not seeing that he's using? his flickr: http://www.flickr.com/photos/willteeyang/
|
|
|
|
Chim posted:I ran into this guy on flickr, and it looks like he's living the dream of taking pictures of cute scene girls. I was wondering, how do you get that vintage processing look that he uses for a lot of these photos? It looks like he's shooting directly into the light to blow out the image on purpose, but is there any split toning or action that I'm not seeing that he's using? Looks like some of the filters in ColorEfx Pro. Maybe Cross Processing or Bi-Color Filters. It's possible to do in Photoshop but ColorEfx is the easier/better way. Here is a preview of the effects: http://www.niksoftware.com/colorefexpro/usa/entry.php?view=intro/cep3_filters.shtml The effects are highly customizable so it may not look exactly like what that guy did until you do some tweaking.
|
|
|
|
Haggins posted:Looks like some of the filters in ColorEfx Pro. Maybe Cross Processing or Bi-Color Filters. It's possible to do in Photoshop but ColorEfx is the easier/better way. these look great. looks like a sale for the complete edition at 99 bucks, worth the money?
|
|
|
|
Your other option is their complete collection for $300, assuming you have Lightroom or Aperture. (You can also try searching online for coupons.) Dfine is an excellent de-noising tool that allows you to be more selective rather than just processing the entire image. I find it generally works better than what's built into Lightroom 3 anyway. Viveza allows you to make Lightroom-like corrections/adjustments by region rather than affecting the entire image. A lot of people swear by Silver Efex for their B&W conversions. HDR Efex is useful if you want to do HDR and don't already have a method to do so. I don't have any experience with Sharpener Pro yet. Search this stuff on YouTube and Google though to see what people are doing with it, and how quickly they work. edit: Dfine before & afters:   HDR Efex: 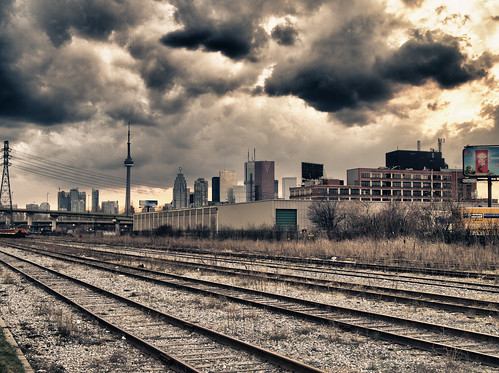 I should probably give Color Efex another go. teethgrinder fucked around with this message at 20:21 on Jul 4, 2011 |
|
|
|
Chim posted:these look great. looks like a sale for the complete edition at 99 bucks, worth the money? I'd agree with teethgrinder in that it's best just to get the complete collection and like he said you can google around for a 20-25% coupon. Just to add a couple things Silver Efex is the absolute best way to do digital black and white and I think HDR Efx is the best HDR tool out there. Sharpener is cool too because it takes out the guess work of sharpening for viewing distance and allows you to selectively sharpen. Check out their website, they have a lot of great webinars that show you how to use them all and what you can do with them. Also, each plugin has a 30 day trial.
|
|
|
|
Silver Efex + Color Efex for $179, but expires tomorrow. Damnit, I don't want to decide yet  I've still got 2 weeks to get Silver Efex for $99 as a student, Color is probably worth it, but I'm moving and just bought a Hasselblad and a new lens for my NEX. Maybe I'll just put it on the plastic. Procrastinating until tomorrow in hopes someone chimes in telling me Color Efex is the best thing ever and I'd be as dumb as a Pollack not to buy it.
|
|
|
|
Some of the filters in ColorEfx can be gimmicky if you over use them, but there are some that are very useful and not at all gimmicky. Some of the more useful ones are: 1. Darken/Lighten Center. It's kind of like a vignette (which I use in Aperture to some degree on almost every photo) but a lot stronger. Great to use when you want a lot of focus on a certain area of the photo. Doesn't have to be the actual center, you can place center anywhere. You could do the same thing in photoshop, but I heard it takes a long time. 2. Pro Contrast. You really have to play with this to see, but basically it's great for making textures pop. It does a lot more than the contrast slider in LR/PS. 3. Film Grain. This is one of those subtle effects that make a big difference. Sometimes digital is just too "clean" and you don't get that feeling you get with old film photos. With this you can add it back in. It's kinda like a vignette in that it's subtle but makes a big impact. 4. Graduated ND. Made to replicate the filter except more useful because you have more control. 5. Monday Morning/Classic Soft Focus/High Key - each a bit different but great for portraits when you want an "airy" "dreamy" look. Lowkey and Midnight are also there if you want to do the opposite. 6. Film Effects. I'm not the film expert but from my understanding, these are pretty accurate. These weren't made by a bunch of interns eyeballing photos and trying to match up the features. The were made by a team of engineers in Germany that processed hundreds, maybe thousands of rolls to develop the software (same goes for SilverEfx). Other than that, I still wouldn't go as far to say that the others are gimmicky and useless. The more I use ColorEfx, the more I understand what filters work with what photos. It's just a matter of learning how to use them correctly.
|
|
|
|
|
| # ? May 16, 2024 13:48 |
|
Haggins posted:1. Darken/Lighten Center. It's kind of like a vignette Haggins posted:4. Graduated ND. Haggins posted:3. Film Grain. Half a second in lightroom Haggins posted:2. Pro Contrast. You really have to play with this to see, but basically it's great for making textures pop. It does a lot more than the contrast slider in LR/PS. Clarity slider. Haggins posted:5. Monday Morning/Classic Soft Focus/High Key - each a bit different but great for portraits when you want an "airy" "dreamy" look. Lowkey and Midnight are also there if you want to do the opposite. Clarity+contrast sliders, sharpness panel, desat. (Personally, I think these filters look pretty terrible on their own, and I'd much rather spend the time with some selective sharpening/dodging/burning if that's a look I want.) Haggins posted:6. Film Effects. I'm not the film expert but from my understanding, these are pretty accurate. These weren't made by a bunch of interns eyeballing photos and trying to match up the features. The were made by a team of engineers in Germany that processed hundreds, maybe thousands of rolls to develop the software (same goes for SilverEfx). For this kind of thing, I can definitely see the value in third party filters. Sure, you could duplicate in with a PS action or whatever, but that seems like a bunch of work for not much gain. The results some of the guys in here have gotten with the Nik presets are stunning.
|
|
|


