


|
MrBlandAverage posted:Half assed googling gets you half assed information. I'm sure some of the AH layer comes off in the other baths, but it's the fix that does the real work. To get back to the original question: yeah, sure, I guess you could develop sheets back to back and re-fix in trays or something, but then you'd also have to redo the hypo clear and rewash. At that point it makes way more sense to just do a second set of six negatives the normal way. Yeah, I'll just do it the normal way. I'd rather dilute the developer and have to wait longer than have the negatives get all hosed up.
|
 #
?
Jun 13, 2014 20:47
#
?
Jun 13, 2014 20:47
|
|

|

|
| # ? Jun 5, 2024 15:26 |
|
|
MrBlandAverage posted:Half assed googling gets you half assed information. I'm sure some of the AH layer comes off in the other baths, but it's the fix that does the real work. To get back to the original question: yeah, sure, I guess you could develop sheets back to back and re-fix in trays or something, but then you'd also have to redo the hypo clear and rewash. At that point it makes way more sense to just do a second set of six negatives the normal way.
|
|
#
?
Jun 14, 2014 00:32
|
|

|
notlodar posted:Just fix twice in a row? We're already playing with dangerous cancer parkinson's planters wart chemicals here. I recommend making a solution of 10 parts Phenol to 5 parts DMSO and 1 part TCDD, put it in a tray and use your fingernails to gently scrape the layer off. If that doesn't work, try mixing up some Pyrocat and mercury intensifier. Give the film a soak, and then lick it. Paul MaudDib fucked around with this message at 01:27 on Jun 14, 2014 |
|
#
?
Jun 14, 2014 01:23
|
|

|
notlodar posted:Just fix twice in a row? We're already playing with dangerous cancer parkinson's planters wart chemicals here. Enjoy having your negatives gradually eaten by residual fixer.
|
|
#
?
Jun 14, 2014 02:00
|
|

|
MrBlandAverage posted:Enjoy having your negatives gradually eaten by residual fixer. Just the highlights you alarmist. 
|
|
#
?
Jun 14, 2014 04:44
|
|


|
Yeah, you have to hypo-clear and wash it again after you put it back into the fixer, genius. The same logic about residual fixer scavenging silver from the reduced silver still applies so you still have to clear and wash but apart from that no reasonable amount of fixing will affect the image. If you leave it in there for 24 hours or for a month or something, maybe, but I used to excessively fix Tri-X to try and minimize the tint (something like 30 minutes to an hour depending on how bored I was) and it didn't seem to hurt it. I've also screwed up and mixed the fixer stronger than normal (I think it was 3:1 vs the recipe's 7:1 or something) and fixed for a good long while (15-30m?) and all the rolls on that batch of fixer also came out fine. Don't worry about it.
|
|
#
?
Jun 14, 2014 07:28
|
|
|
And if only doing 6 sheets at a time REALLY bothers you, get together a Jobo system with a roller base and as many tank extension modules as you can find. Then the number of sheets you can develop at once is limited only by your imagination! Or maybe your funds...
|
|
#
?
Jun 14, 2014 17:50
|
|
|
Some I just scanned from the trusty xa. Point Reyes by spikemccue, on Flickr 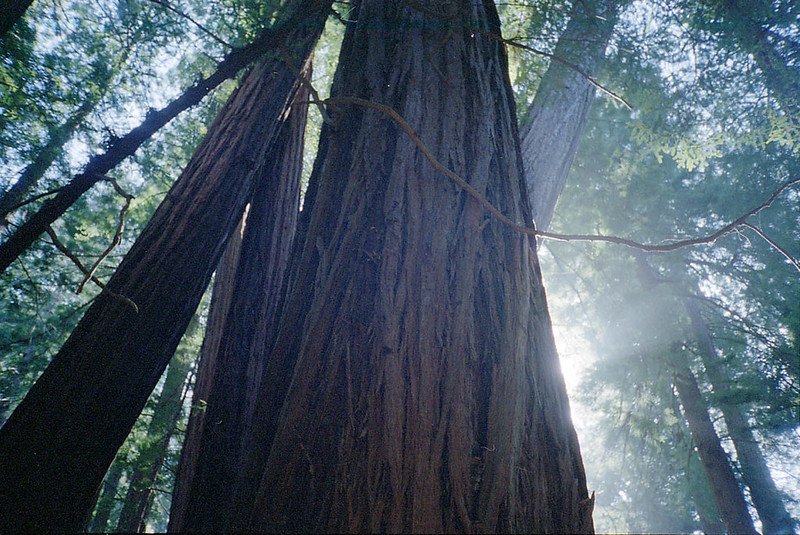 Muir Woods by spikemccue, on Flickr 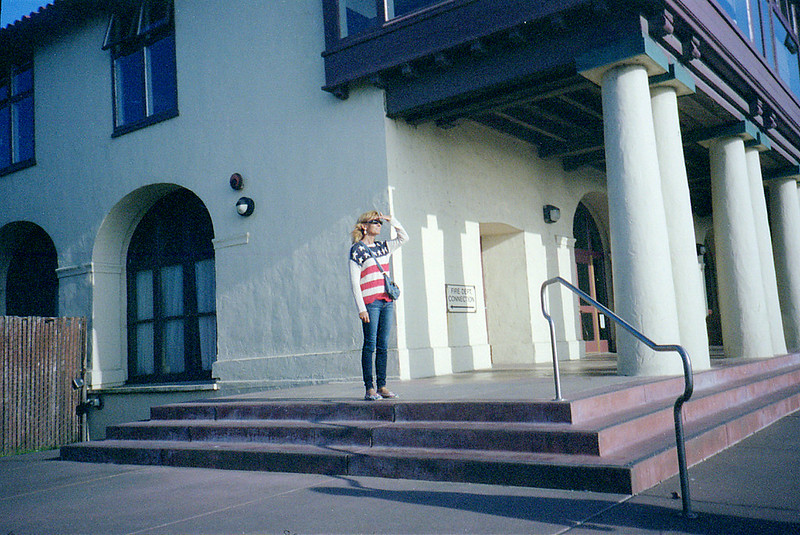 San Francisco/America by spikemccue, on Flickr Awkward Davies fucked around with this message at 04:36 on Jun 15, 2014 |
|
#
?
Jun 15, 2014 04:21
|
|
|
I shot a roll of 400tx at 3200 last night, unfortunately I scratched the poo poo out of the negatives because it just would not go on to the reel but I am really happy how the film look being pushed like that. Stand developed in Rodinal. I took some shots in near darkness at a party last night that look amazing but I pretty much ruined the negs  Here's the last shot that survived with minimal damage: Here's the last shot that survived with minimal damage:
|
|
#
?
Jun 15, 2014 15:29
|
|

|
So last weekend my grandfather bequeathed to me his old photography stuff, i finally got around to looking at this stuff... Ok some Illford paper older than I am...  Oh look a brochure with a really excited looking guy on it!  Ok where the hell am I going to set this up? I now also have a whole box of darkroom lights, trays, some chemicals from kodak, another paterson tank (yay!) and a bitch-en giant rear end timer. Couldn't find the lamp for the enlarger and I would need to get a 6x7 negative holder but I want to try making my own prints even if it is likely a huge pain in the rear end, anyone know of some good guides for making prints?
|
|
#
?
Jun 21, 2014 16:25
|
|
|
Ezekiel_980 posted:I now also have a whole box of darkroom lights, trays, some chemicals from kodak, another paterson tank (yay!) and a bitch-en giant rear end timer. Couldn't find the lamp for the enlarger and I would need to get a 6x7 negative holder but I want to try making my own prints even if it is likely a huge pain in the rear end, anyone know of some good guides for making prints? If you have archives, there used to be a wet printing thread with some guides, but it's fallen off the active forum.
|
|
#
?
Jun 21, 2014 19:33
|
|
|
Scanning 14 rolls from a few months abroad. 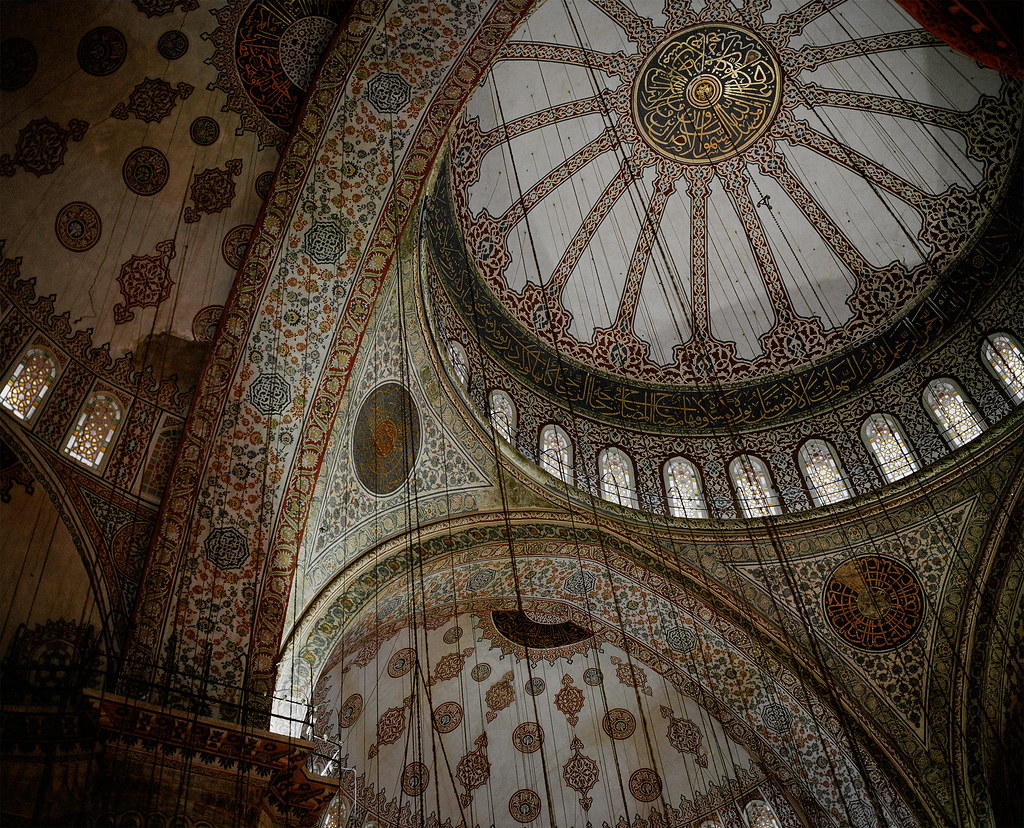 The Blue Mosque, Istanbul by JaundiceDave, on Flickr
|
|
#
?
Jun 21, 2014 19:39
|
|

|
Ezekiel_980 posted:I now also have a whole box of darkroom lights, trays, some chemicals from kodak, another paterson tank (yay!) and a bitch-en giant rear end timer. Couldn't find the lamp for the enlarger and I would need to get a 6x7 negative holder but I want to try making my own prints even if it is likely a huge pain in the rear end, anyone know of some good guides for making prints? I have a bit of time, so I'll summarize the old wet-printing guide. What to buy: Equipment: you need an enlarger, a safelight, timer, and an easel, you want a paper safe and an enlarger focus aid. You either need a large darkroom and a tray setup, plus a film-washing hose, plus (IMPORTANT) adequate ventilation. If you have a small darkroom, you need a rotary development setup. Omega made some cheap ones ("chromega" if I recall), or there's Jobo on the expensive side. Consumables: Paper, paper developer, stop bath, fixer, and some way to wash the paper. There are three big differentiations on paper. There's resin-coated (RC) and fiber-base (FB). RC is like a sheet of plastic coated with emulsion, while FB is real paper. FB is generally agreed to look nicer, and it has the benefit of 100 years of demonstration that it is archival, but it's more difficult to handle. It gets soggy when wet, you need to flatten it after drying, etc. It's also about 2x as much per sheet last time I checked. There's also the surface finish - there's glossy and matte, with pearl somewhere in between. The usual wisdom is that glossy finishes show deeper blacks, the gloss doesn't show up when you've mounted and framed it behind glass anyway. Finally there's the "contrast type" - "fixed grade" or "variable contrast" (VC). The cliffnotes on this is that VC absorbs some colors of light better than others, so you can use light filtration (as well as some printing techniques) to control the contrast of the print very easily. The normal range of filtration is 0-5, higher numbers are higher contrast. There's also 00, which is extra-flat. Fixed grade papers are sold as a single grade - you buy a box of Grade 3 paper, and can't change it. It's getting hard to find anything except grade 2 and 3 nowadays, so your negatives need to be exposed fairly accurately for this to work. Usually I buy VC RC Pearl for contact sheets and prints for my own edification, with VC FB Glossy for serious prints. Printing: The most complex step. There's two ways of doing it, the "official" way and split-grade printing. They're two different ways of getting at the same goal, which is an image with proper contrast and exposure. Either way, you will need to load your negative and focus the enlarger. Turn the enlarger off, pop open the film drawer, load the film, blast it with canned air (important), pop it back in. If you leave the enlarger on, you'll throw light all over the darkroom. Switch the timer to "focus" mode, set the lens to wide open, mount a throwaway sheet of photo paper in the easel (to keep the focus distance right), and focus your image. If you have the focus aid, put it on the paper in the easel, look directly down the tube, and focus until you see "salt and pepper" grain. The "official" way to print is you control contrast grade with filtration (or paper selection) and you alter the exposure until it looks right. Set the filtration to grade 3, set the lens to working aperture (something like f/8) and run a test strip. Print the entire strip for (say) 4 seconds, then cover 1/4 of it up. Then print the rest of the strip for 4 seconds. Then cover another 1/4 up, repeat. Find the exposure that looks right, and print the entire image. If the contrast isn't right, change it and re-tweak the exposure. I don't honestly remember how you precisely do that - you control the shadows with grade and the highlights with the exposure, I think, but I never do this method because it sucks. The cool-kids way to print is split-grade printing. Rather than using grade and exposure to indirectly control the highlights and shows, we can exploit the fact that VC paper absorbs some colors of light better than other. So: run a test strip as above, but at grade 5 (max contrast, full magenta). Pay attention only to the shadows, find an exposure with good shadow detail. Then run a test strip at grade 0 (00 makes the exposure kinda grey), and pay attention only to the highlights. Print your two exposures together and the highlights+shadows makes a full image! You can print some super-lovely negatives this way, ones that are super thin or way out of the contrast-control capability of filtration, they'll all work great and it's super easy to do. Scanners can do a lot too, if you put in the time, but this gets better results with no effort whatsoever. It's that good. Remember your equivalent exposures: if you're ending up with like 2 second exposures that's gonna be hard to reliably control, waiting for 60 seconds sucks too. You can open up your lens a stop and cut your time in half, or vice versa. Just ideally don't get too close to wide open, focus becomes a real issue and diffraction becomes an issue when stopping down. Your best sharpness is going to be at like f/8 to f/11, like a normal camera. B+W paper can be printed under a safelight, but the colors you're allowed to use vary by the paper. Most use red/amber but some need a dark green safelight. The safelight still MUST be dim, or it will still cause fog. Read the instructions for the paper to find out the wattage, distances, and colors. Paper safes allow you to unload a dozen or so sheets of film and then put your box away, so if you have an "oops" you don't destroy $100 of paper at a go. To get test strips, cut up a regular sheet of the paper, don't go buying pre-made ones. Developing: Real simple. You need to develop, stop, fix, and wash. How you do that varies by your setup. If you have a small darkroom, use your rotary development system just like a film tank. Paper goes into the tank, the lid goes on, and you take it outside to develop where you're not going to gas yourself. Don't take risks, kids. If you have a big darkroom, you can put it in trays and use tongs to agitate it a little. Don't get developer/fixer on your fingertips, otherwise when you handle the next sheet there will be fingerprints on it. Stop bath is a weak vinegar solution, or you can just use water. Technically paper developing is basically done to completion, so time doesn't matter, but in the real world it really helps to keep consistent developing times, otherwise you're changing multiple variables in the process at once and it's harder to track what's causing what. Then fix it up, and wash like crazy. For tank developing, use hypo-clear and then less water, I think. Put it on a screen to drip-dry. If it's FB, after it's dry you put it through a press or flatten it out in a book, because it'll be all warped. Dodging, Burning, Spotting: Advanced printing stuff. Basically you can lighten up areas of the image by taking a piece of paper on a wire coathanger and waving it over an area (dodging). If you keep it moving, the edges will be too blurry to notice. Similarly you can do the opposite, take a piece of paper with a hole in it and burn in an area that needs to be darker. Spotting is an artform all its own. It's real important to be clean through the process (blast the negative off with air, etc), because dust will show up as white spots on the print. To fix them, you take black ink, dilute it to grey, and then paint tiny hash marks to darken up the spot. You can also do the opposite, take an exacto knife and carve out tiny buts of the emulsion to lighten an area up. There's a whole host of other manipulation techniques too. Unsharp Mask got its name from an actual printing process. Toning and mounting: The final step in an archival print. Reduced silver is real stable all on its own, but it can still be attacked by various things. Archival toning binds the silver to extremely stable compounds like gold or platinum, which further extends the longevity of the print. You can also do it for the color, it can look pretty cool. Ilford has a guide here, and there's a guide to how the toning changes the colors here. Unless you want a specific color change, Selenium toning is generally the best option. It's neutral or gives a subtle dark blue (depending on concentration), it's reasonably safe to handle, and it's got great archival qualities. It can also be used to increase the density of really underexposed negatives (Selenium Intensification), basically getting extra speed/push out of film, so it's a cool thing to have around anyway. Ansel Adams' The Negative is the go-to reference on selenium intensification, if I remember. The only things that are better are horrifically toxic even by film standards, like mercury intensifier. Mounting also helps protect the image. Good mounting board has calcium in it which buffers acid in the air, which protects the image. A properly toned, mounted, and framed FB image will last practically forever (hundreds of years), it's surrounded on all sides by things which protect it. Direct sunlight will still fade it, but if you treat it right it'll last like crazy. There's also various fancypants papers like Platinum or Azo paper. These are super expensive, some of them need to be contact printed (meaning you either shoot 8x10 or use an internegative process, etc), and they only come in fixed grades. On the other hand, they have crazy archival properties too, and often unique looks. This also obviously doesn't cover color printing, which is a fair bit more complicated and challenging (temp+time control, no safelights, etc) One other cool thing you can do with wet printing is staining developer. Essentially, when developing the film, the developer also imparts a color stain to areas of the film it develops, which allows you an additional vector to control contrast in parts of the image and theoretically carve out a little more usable dynamic range when printing those negatives. Pyrocat (Pyrocatchetol) and Pyrogallol developers are the major player here, they fall into the "pretty toxic" range and you should be careful with them. The color of the stain can be useful when dealing with VC papers - Pyrocat HD supposedly allows you to hold highlights substantially better when printing on VC. Paul MaudDib fucked around with this message at 19:16 on Jun 22, 2014 |
|
#
?
Jun 22, 2014 18:26
|
|
|
more portra Lake K�yceğiz, Turkey by JaundiceDave, on Flickr Genderfluid fucked around with this message at 04:42 on Jun 26, 2014 |
|
#
?
Jun 23, 2014 04:26
|
|
|
That's fairly gorgeous.
|
|
#
?
Jun 26, 2014 04:17
|
|
|
Nice rear end shot.
|
|
#
?
Jun 26, 2014 06:09
|
|
|
Portra is god
|
|
#
?
Jun 26, 2014 18:56
|
|

|
Quantum of Phallus posted:Portra is god Portra is creator
|
|
#
?
Jun 26, 2014 19:48
|
|
|
A good time for my question! I inherited a cheapo film rebel a while back to go with my EF setup. I have a family portrait thing coming up and I was thinking of shooting it on Portra, coming from only ever shooting Fuji whatever gas station film. Talking to a photo friend about where to get portra by the roll (vs a brick), he suspected that I would only see a difference in results if I was processing out of a pro photo lab. I'm going to be driving them down to the local Walgreens, and he made it sound like the difference would be lost without pro handling. So film thread: is it a waste of money getting the portra if I'm just going to get them processed/digitized at Walgreens?
|
|
#
?
Jun 26, 2014 19:55
|
|


|
You will see a difference. You won't get as much benefit from the expanded DR without raw scans, but you will definitely see a difference.
|
|
#
?
Jun 26, 2014 20:00
|
|

|
depends on what you are shooting. something with lots of dramatic range will see a bigger difference than a fairly flat scene. the scanners in walgreens are not going to be that good regardless of what film you're shooting though.
|
|
#
?
Jun 26, 2014 20:02
|
|
|
Huxley posted:So film thread: is it a waste of money getting the portra if I'm just going to get them processed/digitized at Walgreens? Developing of the film (i.e. the chemistry baths turning exposed film into negatives) should matter very little, unless the machine used for it is dirty or poorly maintained. Digitizing the negatives matters very much, a cheap lab scan will always look poo poo.
|
|
#
?
Jun 26, 2014 20:02
|
|


|
365 Nog Hogger posted:You will see a difference. You won't get as much benefit from the expanded DR without raw scans, but you will definitely see a difference. I've always wanted to know, how DO you do a raw scan with something like the Epson scan software? (I might have misinterpreted your wording but can you scan a negative and get a file like a .DNG that allows you to mess with the exposure to a great degree? Like, the scanner scans it at different exposures?)
|
|
#
?
Jun 26, 2014 20:14
|
|
|
You don't technically get RAW files, no, but you get high bit depth lossless files (TIFFs) that do contain a great deal more information than a JPG, which let you adjust the exposure more than a regular photo. They are simulated RAWs. Maybe some Big Deal pro scanners do actually produce RAW files though, I dunno.
|
|
#
?
Jun 26, 2014 20:24
|
|
|
Quantum of Phallus posted:I've always wanted to know, how DO you do a raw scan with something like the Epson scan software? 16-bit TIFF positive is about as close as you can get.
|
|
#
?
Jun 26, 2014 20:30
|
|
|
BANME.sh posted:You don't technically get RAW files, no, but you get high bit depth lossless files (TIFFs) that do contain a great deal more information than a JPG, which let you adjust the exposure more than a regular photo. They are simulated RAWs. i use one of those high end fancy super duper scanners and i still scan as a 16 bit tiff. scanning in the raw format just hasn't been worth the hassle.
|
|
#
?
Jun 26, 2014 20:31
|
|
|
BTW DNG isn't really "RAW" it's an extension of TIFF that contains extra metadata.
|
|
#
?
Jun 26, 2014 20:32
|
|
|
Yeah, it is identical, just a different wrapper for the Tiff.
|
|
#
?
Jun 26, 2014 21:07
|
|
|
I put a few rolls of Kodak Ultramax through my new Yashica Electro last weekend. I'm very happy with this camera - although lack of full manual control is annoying it is fun to walk around in happy snap mode. The look of this film is quite nice too but it just has no shadow detail at all, even though I am overexposing by 1 stop (rating it at 200 ISO) the shadows are just crushed.   
|
|
#
?
Jun 27, 2014 13:19
|
|
|
Genderfluid posted:i use one of those high end fancy super duper scanners and i still scan as a 16 bit tiff. scanning in the raw format just hasn't been worth the hassle.
|
|
#
?
Jun 28, 2014 06:27
|
|
|
I've been lusting after an all-mechanical 70s/80s SLR for a while, after missing out on a few on ebay I just said gently caress it and clicked order on KEH for a black Om-1n w/ 50mm 1.8 and 135 mm 2.8. Hoping it was a good decision haha.
|
|
#
?
Jun 29, 2014 09:47
|
|
|
I got myself a film tent so hopefully I'll get away from my lovely dusty negatives. Really frustrating. I meticulously clean/vacuum my film holders but I'm guessing they just pick up dust & crap in the darkbag. Sludge Tank fucked around with this message at 10:41 on Jun 29, 2014 |
|
#
?
Jun 29, 2014 10:27
|
|

|
Sludge Tank posted:I got myself a film tent so hopefully I'll get away from my lovely dusty negatives. Really frustrating. I meticulously clean/vacuum my film holders but I'm guessing they just pick up dust & crap in the darkbag. Film holders aren't air tight so they get dusty even with darkslides inserted. Some people use ziplock bags to seal them after loading maybe try that? Or just do what I do and spot your negs in PS.
|
|
#
?
Jun 29, 2014 11:04
|
|
|
I'm still thinking it's my darkbag. I keep my holders in a plastic bag after I've loaded them, and when I'm taking a shot I always try and brush off any dust I see on the slides before putting it back in. But I'm forever finding little hairs and poo poo on the negs when scanning which I can only guess happen when I'm loading film from holder > mod54. I dunno, hope the tent eliminates most of the problem because I seem to get way TOO much dust. I got the tent for the 8x10, so I'm hoping it'll help out a bit :P
|
|
#
?
Jun 29, 2014 11:11
|
|
|
Sludge Tank posted:I'm still thinking it's my darkbag. I keep my holders in a plastic bag after I've loaded them, and when I'm taking a shot I always try and brush off any dust I see on the slides before putting it back in. But I'm forever finding little hairs and poo poo on the negs when scanning which I can only guess happen when I'm loading film from holder > mod54. I dunno, hope the tent eliminates most of the problem because I seem to get way TOO much dust. I got the tent for the 8x10, so I'm hoping it'll help out a bit :P What color is the dust? If, on your finished, inverted scans, the dust is black, it was on your film before exposure. If white, it was on your film when scanning.
|
|
#
?
Jun 29, 2014 16:48
|
|
|
 Han in the Window, St. Andrews by JaundiceDave, on Flickr
|
|
#
?
Jun 29, 2014 19:20
|
|
|
MrBlandAverage posted:What color is the dust? If, on your finished, inverted scans, the dust is black, it was on your film before exposure. If white, it was on your film when scanning. A bit of both. I try to keep my scanner as dust free as possible but I must live in squalor because as soon as I blow any dust from the scanner bed it just magically appears straight away again. I need to find a better way to control the dust.
|
|
#
?
Jun 29, 2014 21:27
|
|
|
I find wiping the scanner glass with a microfiber cloth works best, cans of air just seem to reorganise dust.
|
|
#
?
Jun 30, 2014 00:01
|
|
|
I'm scared to even do that lightly for fear of scratching the glass? Or am I being too paranoid. I just use my little air-douche-blower thingy that came with my camera cleaning kit. Sludge Tank fucked around with this message at 00:07 on Jun 30, 2014 |
|
#
?
Jun 30, 2014 00:04
|
|
|

|
| # ? Jun 5, 2024 15:26 |
|
|
Sludge Tank posted:I'm scared to even do that lightly for fear of scratching the glass? not until you grab life by the horns and conquer your fear will you be able to achieve your true scanning potential
|
|
#
?
Jun 30, 2014 00:06
|
|