


|
movax posted:Hmm, OK, so the kits are on the way and I ordered some cements and glues and stuff. I have these sitting in my cart right now: I believe Harbor Freight sells their store brand of that cleaning station for cheaper, if you have one of those nearby.
|
 #
?
Aug 5, 2014 01:49
#
?
Aug 5, 2014 01:49
|
|


|

|
| # ? May 21, 2024 03:39 |
|
|
Fortunately, when dealing with air tools, painting is an undemanding application, so if it is a general-purpose compressor, it should be fine. I'm using 1/3rd a hp myself. Just remember to get a moisture filter for the hardware store one. (It will attach to the air line via brass fittings and cost $20-30.) Teflon tape for sealing air gaps is useful, too. You just put it on screw threads and other things you want to make air tight.
|
|
#
?
Aug 5, 2014 03:13
|
|


|
Buy some home depot compressor with an air tank, should have no problems with what you're doing. Pick up a moisture trap as well, and a pressure regulator too if you can. That way, you can keep the compressor far away from where you are using it, so it isn't so loud. And to trap the moisture too. I used to have it set up with the compressor in another room, a 20 foot line with a moisture trap and a pressure regulator on the other end, and then i plugged in my airbrush to that.
|
|
#
?
Aug 5, 2014 06:16
|
|


|
Sounds like a plan -- one of the guys at work showed me his ~25 year old Badger compressor that was still going rock-solid, but I doubt I'd be lucky enough to get that kind of build quality today. Think I'll go to Home Depot and check out the noise levels of the compressor -- on my list is basically: Compressor Tank (possibly integrated into above) Regulator (possibly integrated into above) Moisture / Oil Trap
|
|
#
?
Aug 5, 2014 06:35
|
|

|
movax posted:Sounds like a plan -- one of the guys at work showed me his ~25 year old Badger compressor that was still going rock-solid, but I doubt I'd be lucky enough to get that kind of build quality today. Think I'll go to Home Depot and check out the noise levels of the compressor -- on my list is basically: If the ones at your store are plugged in more power to you, but I grew suspicious when I noticed that airbrush compressors list a decibel value, and construction site compressors hardly ever do, and it's always a great deal higher when present. For the moisture trap there's this bastard, which nearly every company I've seen pretends is their own design. Really TCP Global is a crazy place to go window shopping. Stuff that should be on your list: spray booth (or a cardboard box and a central air filter; the commercial versions are basically that plus a fan) respirator with P100 particulate (mandatory  ) and organic vapor (depending on your choice of ) and organic vapor (depending on your choice of Assuming your Home Depot is the same as mine, they stock the 3M system. P100 filters are pink discs. Sadly they only stocked a P95/OV cartridge pack the last time I checked, but Amazon carries them all and the mask comes with a fanfold listing all the compatible cartridges. P for particulate rating keeps you from painting the inside of your lungs, the vapor cartridges will keep you from gassing yourself if you're using enamels or lacquers.
|
|
#
?
Aug 5, 2014 07:12
|
|

|
home depot compressors are loud. Much louder than dedicated airbrush ones. you'll want a separate regulator so you don't have to go to a different room to change the pressure.
|
|
#
?
Aug 5, 2014 08:40
|
|
|
Well well, looky here. Thanks Keyser! Super keen to try out the Eclipse, but got stuff on for at least the next week. Also I promised myself when I started doing this I would never build a stash, buuuuut  Now just need to weather the I-15, finish the F-111 and then chose between the Il-2 and the Hurricane...  Hey, Ensign, got any of your insane model building output I can borrow?
|
|
#
?
Aug 6, 2014 09:22
|
|

|
I saw that Il-2 on skis in a store the other day, and it was a really tempting buy, even though I don't usually do planes or 1:48. Tell me if it's a nice kit, maybe it's worth it anyway. And I need to trade my model output for diorama output, I have an unfinished trench line, most of a house, a pillbox base, and now I'm putting the finishing touches on a Tiger that I really want to put in a winter road diorama.
|
|
#
?
Aug 6, 2014 15:28
|
|

|
Do model goons not like getting C02 tanks for airbrushes anymore? The delivery is so smooth and reliable. A 20 lb tank would last at least a year before having to be refilled. Those cheapo airbrush compressors are awful and "pulsey"....meh. Someone grab the P-40's, Avenger and Arados.......see pics in earlier post...and you'll get whatever paints I have left that will fit in the box. $10 plus shipping. My house is in escrow and I have to move pretty soon so I don't want these kits/supplies making another trip. Sanguine: Glad everything showed up safely. USPS is kicking rear end these days.
|
|
#
?
Aug 6, 2014 17:22
|
|

|
   Russian T-90, Zvezda. 1/35. Was applying some finishing touches to the model when I dropped the whole loving thing to the ground. I fixed what I could but there are still some parts missing or damaged. Oh well. It is what it is. I'm done with it. Like to learn something new with every project. This one's lesson was: don't do scale modeling when having a hangover and/or trembling hands.
|
|
#
?
Aug 6, 2014 22:52
|
|

|
Has anyone brought this guy up yet? http://www.tokyogoodidea.com/galleries/ Definitely something I'd be interested in getting into.
|
|
#
?
Aug 6, 2014 23:37
|
|
|
Tanks tanks tanks! I did this one a while ago, but haven't gotten around to posting it.    It's a Dragon "IS-2M" (really it's an IS-2 mod. 1944). Not a super impressive kit, overall. No insides of the turret or hull. The tracks are plastic, link to link (thankfully, they stick together nice and tight when connected, even if they need some extra sanding). The decals included are for three different armies (Soviet, Polish, and Czecholovakian). The Soviet decals are wrong. Not only is the tank named "Boyevaya Podruga" (fighting girlfriend), the name of a T-34 tank, but it's misspelled. Congrats, Dragon. You made this in 1994, how hard was it to get a hold of a Russian for 15 minutes and make sure it wasn't horribly wrong? At least the insert with a very brief history of IS series tanks wasn't that bad. The decals have yellowed with time, making them stand out against the freshly painted white stripe. I had to go over the decals with white paint, but matching the stripe colour to the decals is also a reasonable option. The details on the kit are pretty good, especially the roughness on the casting and welding seams, which makes it easy to do some nice dry brushing effects. Pretty good kit overall. I am happy that I got it for $30, I've seen it go for $40 and more, and it's really not worth that much.
|
|
#
?
Aug 7, 2014 00:51
|
|
|
Holy poo poo those tanks look awesome. I'm seriously impressed!
|
|
#
?
Aug 7, 2014 01:14
|
|


|
First time doing extensive CF decalling. Not too bad, a little wrinkle here and there, but I'm satisfied
|
|
#
?
Aug 7, 2014 19:19
|
|
|
A sticking point I ran into when I'm working on a Hurricane fighter from revell, when in the order do I put the decal on? The instructions say right now, but nothing is painted yet and I've noticed that using tamiya glue I start to melt the primer. And this is the decal for the control dash. So do I prime and paint everything and stick the decals on? Which leads into point 2, how do I do decals? do I need a special solution to do it?
|
|
#
?
Aug 8, 2014 02:02
|
|


|
Prime, paint, gloss coat, decals, gloss coat, wash/weather, dull coat. There's some fancy decal melter or something you can get, but I never tried it.
|
|
#
?
Aug 8, 2014 02:06
|
|
|
Chillyrabbit posted:A sticking point I ran into when I'm working on a Hurricane fighter from revell, when in the order do I put the decal on? The instructions say right now, but nothing is painted yet and I've noticed that using tamiya glue I start to melt the primer. And this is the decal for the control dash.
|
|
#
?
Aug 8, 2014 02:10
|
|

|
Arquinsiel posted:Whoa, there seems to be some major misunderstanding at work here if I'm reading this right. Here is how you do it: http://www.scalemodelguide.com/painting-weathering/decals/apply-waterslide-decals/ Okay let me state my thought process on assembly. quote:Cut and sand parts I did try googling it and thats the page I got, but what I am curious about is if the decal solution is necessary as then I would need to make a trip to the store. And then going by the pictures I need to prime and paint everything first and hope the glue doesn't melt my paint. Or maybe just prime and paint that one section, since it goes inside the cockpit.
|
|
#
?
Aug 8, 2014 02:34
|
|
|
If it's the dash instrument decal it might go on now, and then a second plastic piece (the actual instrument panel face) gets glued on over the decal. If there is a part that glues on over the decal make sure you paint it before putting it on. Depending on the decal you might need to paint the part it goes on white or black before putting the decal on. Check to see if there are any clear parts - if the instrument hands are clear, paint the back part (that the decal goes on) white. If the decal is just white marks, paint the back part black. If there's no clear parts then don't bother painting the back part. The idea is that once you put the panel face on the decal will have the instrument detail looking good in the instrument recesses. Some kits don't have anything to go over the decal, usually ancient ones. Also just use water for putting on the decal. Plenty of people swear by black-magic solvent based decal solutions but water, in a normally warm room, does fine. Get a cup of room-temp water, submerge the decal on its backing for a couple of minutes, then pull out the decal and backing. Slide the decal off the backing using a paint brush to where it needs to go - you might want to pre-wet the area first. Once it's in the right spot use a cotton swab or brush to draw away most the water so it doesn't float around. Pretty much all other decals go on as Ensign said - dash decals (and some cockpit decals) are a bit of an oddity in the order you put them on.
|
|
#
?
Aug 8, 2014 02:41
|
|
|
Yeah, but that 10% is what makes a decent model into a loving awesome model. Here's my process: - Cut and sand - Glue partially - Paint parts that will not be available after assembly (engine/transmission group, turret inside) - Finish gluing - Prime - Base coat - Wash black - Decals - Dry brush - Wash again when I inevitably hosed up - Paint parts of the tank that are a different colour like shovels and tracks and whatever - Weathering (mud, dust wash, snow) - Dull coat - Bragging on internet
|
|
#
?
Aug 8, 2014 02:49
|
|
|
Ensign Expendable posted:Yeah, but that 10% is what makes a decent model into a loving awesome model. Here's my process: Huh a lot more detailed than what my model shop guy said. Now to see if I can make that 10%
|
|
#
?
Aug 8, 2014 02:53
|
|
|
Chillyrabbit posted:Which leads into point 2, how do I do decals? do I need a special solution to do it? You don't need a special solution, but it gives amazing results. The most popular are a pair of products called Micro-Set and Micro-Sol. They're basically the same thing, just that Micro-Sol is like the industrial strength version. They both soften the decal until it's almost a gelatin consistency, and then provide the perfect substrate for the decal to sit down onto. As they dry, they suck down the decal onto the surface, eliminating air bubbles, and helping the decal conform to the surface. Micro-Set is for standard applications. Micro-Sol is for when you want to put down a decal on a highly irregular surface, such as a craggy rock face, or a piece of armor plating where part of the decal will lay on top of a protruding bolt head. It softens the decal even more so it'll settle down into all the nooks and crannies on the surface. You can still do great looking decals with just water, but it seems like everyone who tries out Micro-Sol and Micro-Set never go back. Although the super secret to decals is not to use decals, and go for stencils.
|
|
#
?
Aug 8, 2014 02:55
|
|

|
Just to balance out all the amazing, well done models in this thread, here's my lovely Tamiya R32!  Everything painted was done dry brush with Testor enamel stuff. I'm currently at an impasse, because there are a few paints i'm lacking and i'm figuring out how i'm gonna go about finishing things up. Ideally I'd use clear red to paint the taillights like the manual suggests, but my local hobby place doesn't actually have clear red. Debated on doing a very thin sheen of metallic Wine Red, but we'll see. Issues so far: Fiddly hyper detailed suspension bits are both amazing and loving obnoxious to work with. Front driver side wheel is glued on as a result of fiddly suspension bits being too fiddly and breaking. Also, when the kit arrived, the driver side A-pillar was cracked clean in two because of shipping issues, so that's had to be reglued. Lastly, the interior doesn't exactly fit amazingly well inside the body, so not everything lines up properly. Overall though, I'm happy with the way the build has gone. Except for the lack of gauge cluster, because gently caress waterslide decals forever 
|
|
#
?
Aug 8, 2014 03:17
|
|
|
Thought I'd drop some choo-choo updates here. Working on an art nouveau grain elevator, still a long way to go but at least it has windows now. 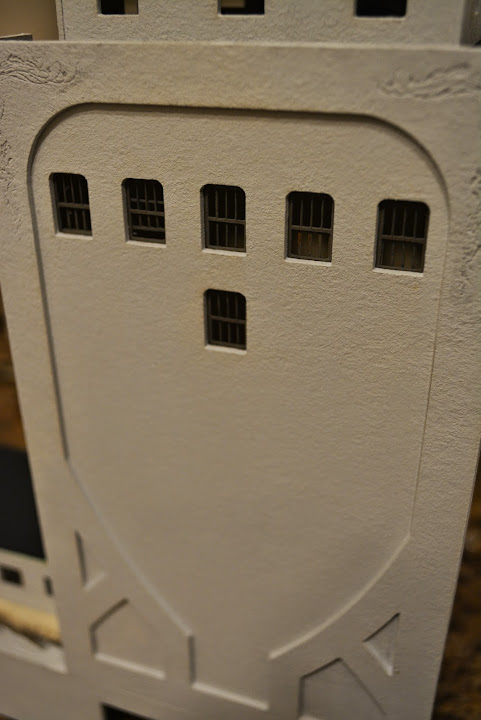 Did my first scenery now that I have some of my fascia up. 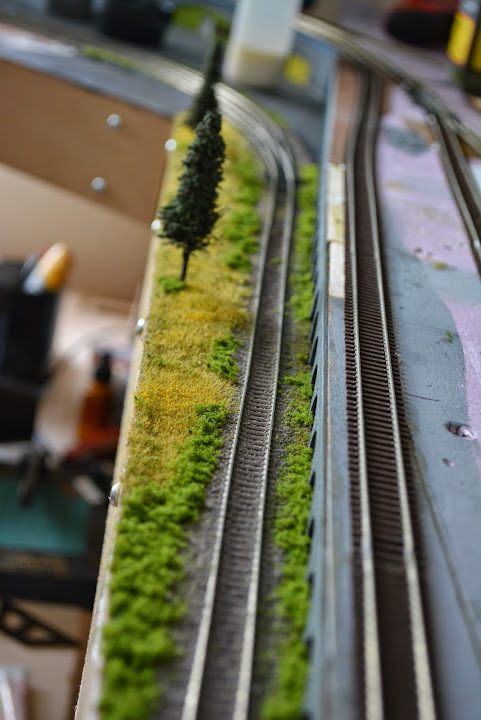 Some little retaining walls and what will be a little parking zone. 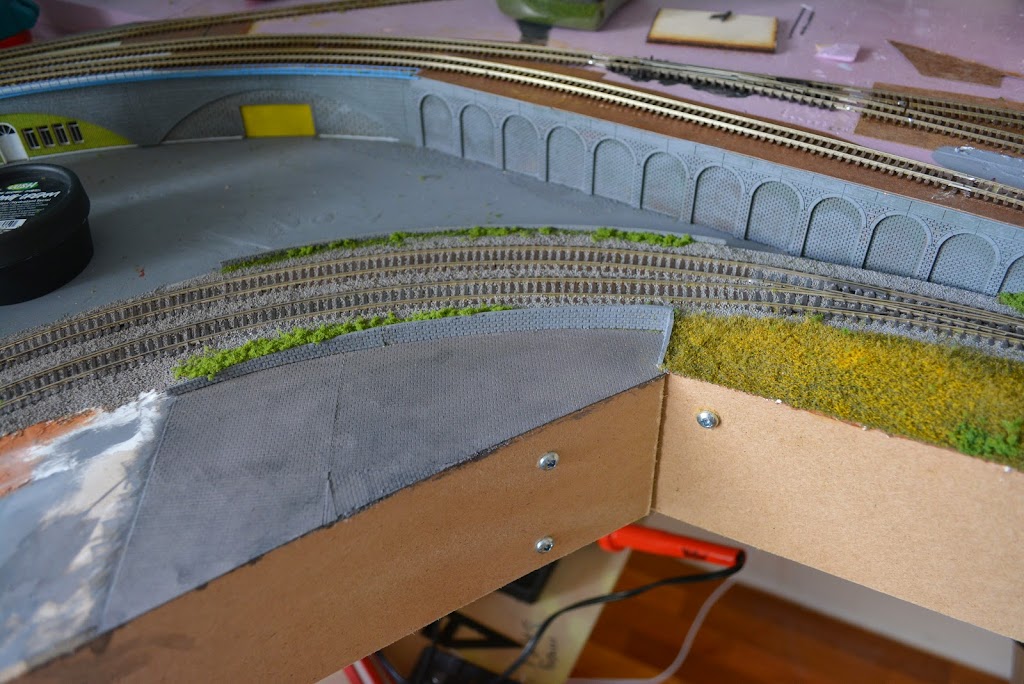 Close up of the static grass. It's the smallest 1mm size they make.  A tree??? A friend in Florida gave me a huge box of about $400 worth of these trees because he said they weren't up to his level of quality. 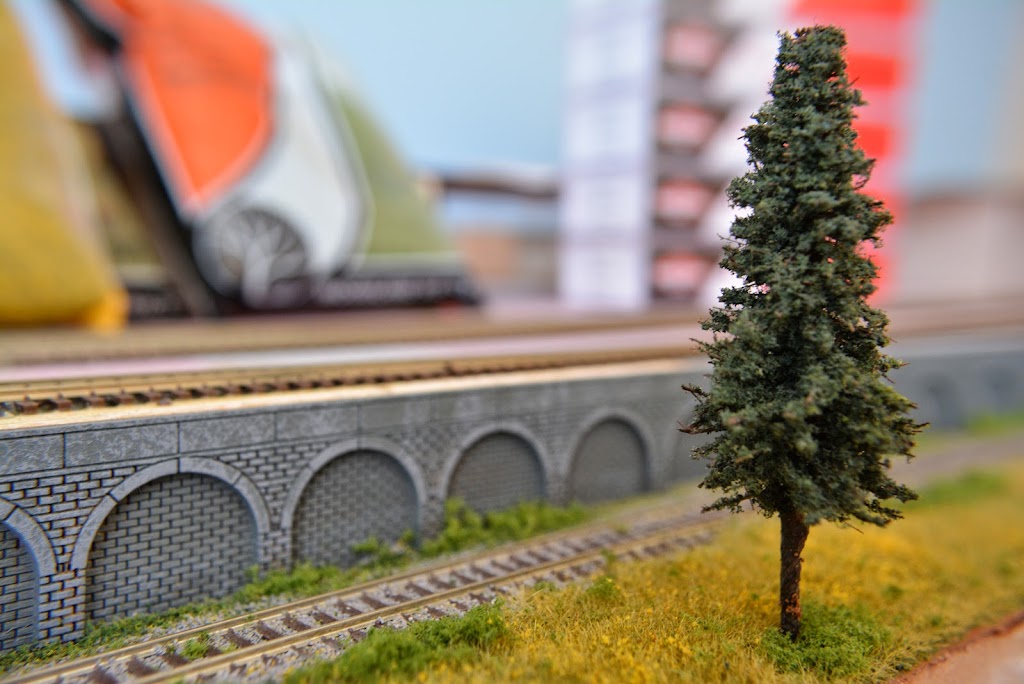 One of the few actual almost presentable scenes I have on the layout so far. 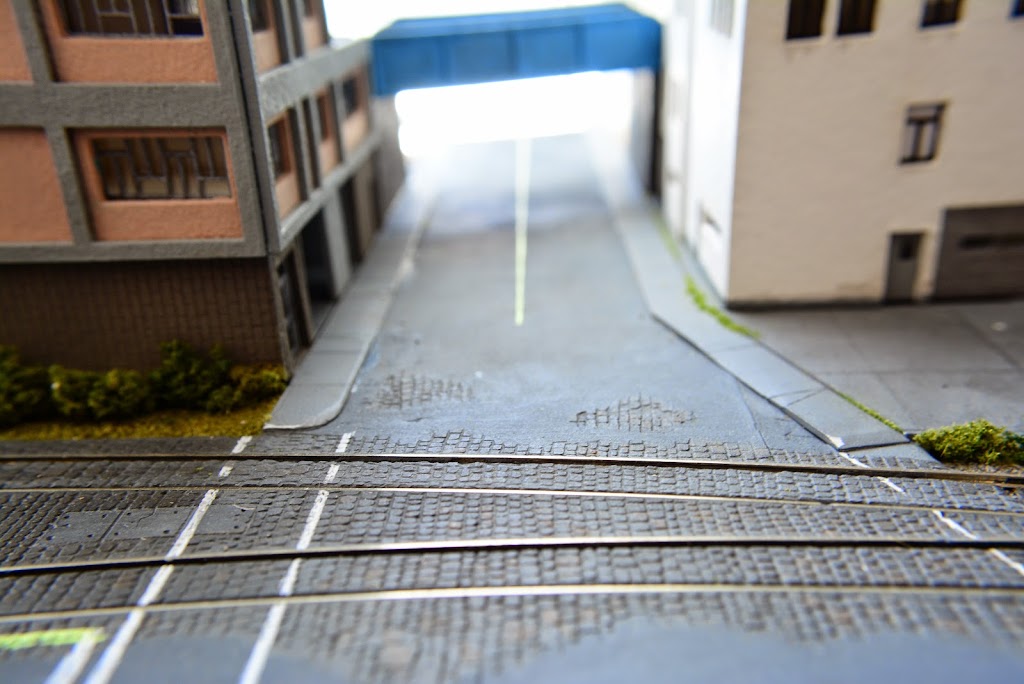 A tiny bridge I'm working on. 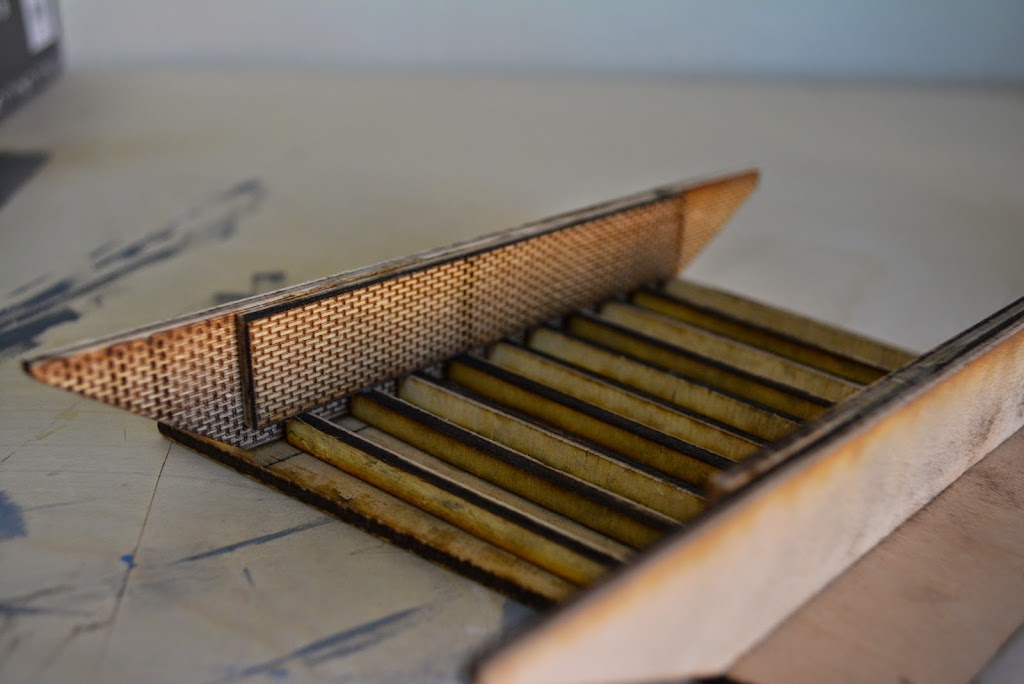 My "berlin wall" of railway arch spaces. 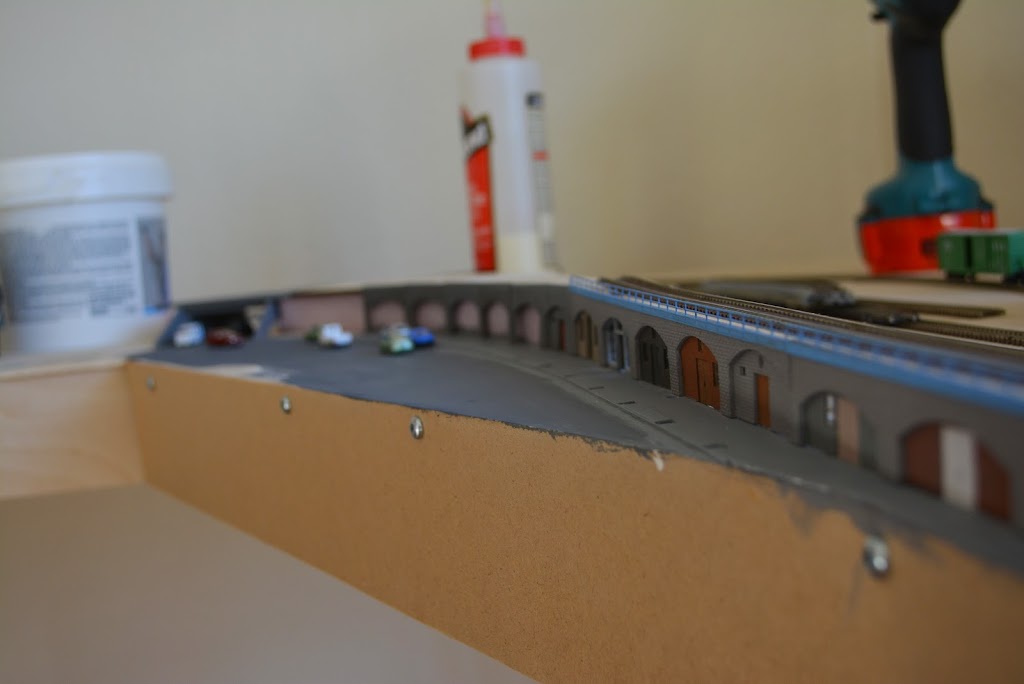 My first ever lighting!!! I'm learning all about resistors and LED's and ohms laws. 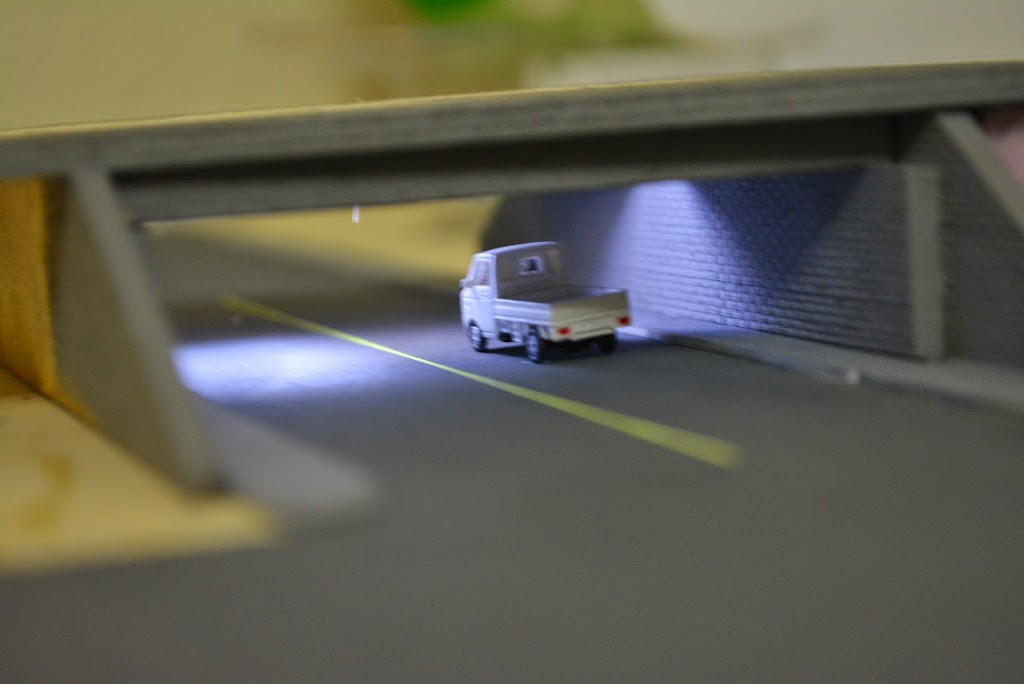  Everything will of course be getting way more detailed and I'll be sure to have an accurate low clearance sign for the bridge.
|
|
#
?
Aug 8, 2014 04:45
|
|


|
Sanguine posted:If it's the dash instrument decal it might go on now, and then a second plastic piece (the actual instrument panel face) gets glued on over the decal. If there is a part that glues on over the decal make sure you paint it before putting it on. In the case of (1) then PVA glue is your friend. In the case of (2) then... well I'm a heretic and I use superglue for everything because gently caress waiting for stuff to dry. But again, PVA will actually hold poo poo like canopies etc on without ruining anything.
|
|
#
?
Aug 8, 2014 05:17
|
|
|
Chillyrabbit posted:I've noticed that using tamiya glue I start to melt the primer. Model glue works by some molecular chemistry poo poo where it "melts" the surface of the two pieces of plastic you are joining and they form a bond. Those surfaces cure or harden (or whatever the term is) and become one with each other. It is not the same as using Elmer's glue to stick things together where the glue acts like the peanut butter between two slices of bread. If you are gluing two things together, you need to get down to the bare plastic because putting glue on paint will end up in a slimy mess that never cures. If the pieces are painted, I remove the paint by scraping the paint off using an Exacto blade perpendicular to the surface. Sometimes, it is easier to prime and paint, then scrape and glue. Other times it is easier to mask the glue surface prior to painting. Either way, if you are trying to glue painted surfaces, it will not work. I agree with Bloody Hedgehog on Microset and Microsol. I submerge my decal (using a tweezer) in a bowl of warm water for about 30-60 seconds until it curls and then starts to uncurl. Take it out of the water and set it face up on a paper towel and pad the top with a bit of paper towel to suck up any big drops of water. Let it sit - too long is better than not long enough, so don't worry about it. If you have Microset, use a brush to "paint" the surface of the model where you plan to put the decal and don't be stingy. When the decal has sat long enough (a minute, two, three, whatever it takes) to slide across the backing paper like butter on a hot frying pan, then line it up where you need to put it, hold it in place, and slide the backing paper out of the way. Microset and a gloss finish make it a lot easier to reposition your decal once it is on the model. Once it is close to the position where you need it, brush Microsol on the top (which will cause it to move) and then reposition it exactly where it needs to be. Let it dry and then recoat the whole model in your choice of clearcoat (flat, gloss).
|
|
#
?
Aug 8, 2014 07:23
|
|


|
I haven't been putting much time into modelling recently but here's my partially finished R32. No bonnet yet because color matching is hard, also missing a couple of accessories here and there.. like wing mirrors.  
|
|
#
?
Aug 8, 2014 17:26
|
|

|
RillAkBea posted:I haven't been putting much time into modelling recently but here's my partially finished R32. No bonnet yet because color matching is hard, also missing a couple of accessories here and there.. like wing mirrors. Looks good! Got a nice shine going
|
|
#
?
Aug 8, 2014 18:54
|
|
|
Baronjutter posted:awesome stuff Dude thats amazing!
|
|
#
?
Aug 9, 2014 07:10
|
|
|
 I decided to make my first foray into whitewashing, on another zvezda 1:100 tank (seemed like an appropriate choice). It's still not done, so the tracks aren't pushed on the whole way (want to weather the engine area, maybe varnish it, but I actually like the slight glossiness). To do the whitewash I just hit it with about 6 or 7 super thin washes of pure white slowly building up thicker and thicker (almost like a white...wash of sorts), then hit it with a really slight wash of umber to give it a dirty tinge, then drybrushed back to green for worn areas. Rust got a little out of hand, but I sort of like it over the top as it is, though I may try to bring it back a little bit. I'm probably going to make a base for this, I need to figure out how to get a good snow effect though, I got some Vallejo snow gel that I have no idea how to use.
|
|
#
?
Aug 9, 2014 16:40
|
|

|
Baronjutter posted:I'll be sure to have an accurate low clearance sign for the bridge.
|
|
#
?
Aug 9, 2014 17:02
|
|
|
Cool T-34! I just use baking soda for snow, seems to work well.
|
|
#
?
Aug 9, 2014 18:05
|
|
|
This link was posted over in the terrain threadThe Dark Project posted:I googled "making scale model concrete" and one of the results that came back was this website here. The attention to detail is crazy amazing; it'd love to produce results like those  . Even if I'd never be able to get that good; there are some really good techniques to crib. . Even if I'd never be able to get that good; there are some really good techniques to crib.
|
|
#
?
Aug 10, 2014 01:21
|
|


|
No Pun Intended posted:This link was posted over in the terrain thread That's some nice work but does the dude know you can just buy brick-sheet in all sorts of nice textures??
|
|
#
?
Aug 10, 2014 01:36
|
|
|
Baronjutter posted:That's some nice work but does the dude know you can just buy brick-sheet in all sorts of nice textures?? I'd assume he does, but I find the prefab textured PVC sheets don't have enough variation in texture, and the price can be an issue too. For the cost of a single sheet of the PVC stuff, he can probably make ten times that size out of cheap foam board.
|
|
#
?
Aug 10, 2014 05:51
|
|
|
Ensign Expendable posted:Cool T-34! I just use baking soda for snow, seems to work well. Thank you! I ended up going with baking soda(made a paste from elmers PVA+ bicarb+water+white paint with a tinge of blue to make it look colder, put that on the base which i sculpted from green stuff, and then threw on more baking soda... ricky ross would be proud). I read some places that it might end up being reactive and going bad in a few years, but it looks good for now I like the texture and its not like I spent more than a few bucks total on the thing. I still need to tidy things up and I may try to make some sort of dirty slush mixture for the roadway but it's mostly done I think. They were low on resources, somebody scavenged the bow mg but at least they plated it off ") (also the tank must have been kept under a shelter during the snow storm, because I didn't feel like risking its finish; I might slush up the tracks while finishing everything up) (also the tank must have been kept under a shelter during the snow storm, because I didn't feel like risking its finish; I might slush up the tracks while finishing everything up)
|
|
#
?
Aug 10, 2014 23:31
|
|
|
Protip for snow: get a bottle of lovely spray-on silver glitter from somewhere. The shittier the better. You want a low density of flakes to solution. Then you cover your snow in the stuff, so when you look at it from the right angle (about "head height" for the toy mans) it sparkles like a real snowfield. Looks AWESOME.
|
|
#
?
Aug 11, 2014 21:24
|
|
|
Goddamn, that's an awesome idea. I should try it someday.
|
|
#
?
Aug 11, 2014 23:18
|
|
|
Alright, fine, no more messing with it. The lil' Polikarpov I-15 is now done.   I really didn't want to use the skis, but then I put it near a heater to dry and melted the wheels. So skis it is! Also if any one figures out where the cockpit door went, let me know  However, I'm fairly happy given the number of firsts for me here - first air brush, first time using CA accelerator (I have no idea how I lived without it), and first time trying to rig something. Let's also chalk this down as the first actually finished model, as I haven't built one in a decade and they never really got past a rough brush coat of paint. Given the awesome snow advice above I think I'll do the Il-2 up with skis as well, and then try my hand at a bit of a diorama. Maybe with some sort of wrecked German equipment, some crew.. hmm. next, though, got this pig to finish:  It's.... bigger.
|
|
#
?
Aug 13, 2014 13:34
|
|
|

|
| # ? May 21, 2024 03:39 |
|
|
Trying out a lot of "firsts": First time using an airbrush First time building a 1/48 kit First time using weathering pigments First time using a iphone camera because my real camera got stolen  Lots of big mistakes all over, but it was a fun little project to finish in just a few hours. Next time I'll try to get more use out of the airbrush (pretty much just basecoated panzergrau with it) and improve my weathering skills!
|
|
#
?
Aug 13, 2014 20:46
|
|
