


|
Anybody here do rigging? I'm making a little skateboarding shark for a Unity game, and I'm wondering where to put the root bone/how to handle the skateboard for something like this: Should I put the root bone at the base of the tail? Or should I make it up near the head and put an IK handle on the base of the tail? Maybe this is super obvious/doesn't matter but I'm not sure how to proceed (and the animator's MIA right now so I can't ask her).
|
 #
?
Nov 24, 2015 03:50
#
?
Nov 24, 2015 03:50
|
|


|

|
| # ? May 29, 2024 22:12 |
|
BonoMan posted:Yeah holy poo poo you'd think it'd be a no-brainer considering the money you'd save in productivity. Seriously, since I got onto this project (I'm a Maya guy) literally almost all character and weapon assets had to get completely rebaked and re-exported via Maya because Max is such a pile of steaming poo poo when it comes to how it smooths out vertex/face normals, uses smoothing groups, and also how it handles internal triangulation (CUT IT OUT WITH THAT INVISIBLE EDGE ORIENTATION poo poo, gently caress!). And yet there are still guys who absolutely refuse to use Maya at my studio and thusly their models and normal bakes look like STEAMING HOT GARBAGE in our actual engine. No matter how many times they rebake it, always looks like poo poo, I TRY TO TELL THEM BUT THEY DONT WANT TO LISTEN. GG Max, you suck, no wonder every other game studio I know of has switched to Maya.
|
|
|
#
?
Nov 24, 2015 05:28
|
|
|
Sounds very odd that Max's bakes would be terribly different from Maya's unless some settings are screwed up somewhere. Could be that Max's tangent bias is different from your engine's. Even as a heavy Max user though, I do all my baking in xnormal. The UI is stuck in 1997, but it's still the best out there.
|
|
#
?
Nov 24, 2015 06:38
|
|

|
The problem is the fact that riggers and animators use Maya and if they need to export geo it completely fucks it up cause they have to import Max meshes. They've done this for almost all skeletal meshes, and it was only recently caught when I joined the project and started adding more gloss/specular to the materials. All of a sudden shitloads of bake/vert normal errors in-engine because the tangent basis was completely wrong the whole time. Using Maya if something looks right in my viewport it almost always looks correct in-engine.
|
|
|
#
?
Nov 24, 2015 07:10
|
|
|
I've... never had those kind of issues before with max. That sounds very odd. There's gotta be SOMETHING they're doing wrong for the bakes to go that badly. That, or the format used isn't exporting tangent and normal data correctly. I've definitely had that cause issues in the past.
|
|
#
?
Nov 24, 2015 07:33
|
|

I don't think the FBX exporters for Max and Maya match up which could be the issue. But regardless if your animators and riggers use one piece of software you should at least figure out how to get assets to them without any chances or opportunity of mesh data breaking. Also learned that Max uses angle-weighted normals instead of both angle and area weighted normals.Gearman posted:I do all my baking in xnormal. The UI is stuck in 1997, but it's still the best out there. Same, I finalize low poly assets in Maya and export them to XNormal for baking. I've got a good batch baking setup currently which allows me to not have to explode meshes which is a pain in the butt if you're exporting your high resolution meshes from an application like ZBrush. I recently saw that you can now export FBX files from ZBrush which contain all subtools and if you tag/name the same as your FBX of your low poly you can batch bake in Substance Painter pretty easily using just those 2 files. Might be giving that a shot in the future since Substance seems like a pretty handy tool to use when authoring. They store every texturing action as history so even if you texture an asset at 1024 in Painter you can upres to 4096 and it'll repeat all the texturing functions. Fills, brush strokes, etc. And if you need to change the UVs of your low poly and you don't want to re-texture anything you can just re-import your low's FBX and it'll re-bake to your new UVs. ceebee fucked around with this message at 07:45 on Nov 24, 2015 |
|
|
#
?
Nov 24, 2015 07:40
|
|
|
ceebee posted:keyframe where you gettin this insider information fill us in bruv I have been on the maya beta for like six years now. ")
|
|
#
?
Nov 24, 2015 08:19
|
|

|
Haledjian posted:Anybody here do rigging? I'm still in uni doing this kind of work, so I'm not 100% sure but I'd guess the base of the tail, since that will probably move around the least.
|
|
#
?
Nov 24, 2015 08:39
|
|

|
Haledjian posted:Anybody here do rigging? I'm making a little skateboarding shark for a Unity game, and I'm wondering where to put the root bone/how to handle the skateboard for something like this: The root bone doesn't need to affect the actual IK of the other bones, just the overall movement of the character so I'd put it at the base of the skateboard, probably at 0,0,0 Otherwise you'd have to like move him around at 6,127,34 which is really messy.
|
|
#
?
Nov 24, 2015 11:46
|
|

|
Cross-posting from polycount because that geometry thread seems dead to me:StickFigs posted:...I'm trying to figure out the best way to make this shape (ignore the weird vertex normal artifacts...): I'm using MODO 801 and/or Blender. Something tells me NURBS would be useful here but I don't know the first thing about them.
|
|
#
?
Nov 24, 2015 17:50
|
|

|
StickFigs posted:Cross-posting from polycount because that geometry thread seems dead to me: This seems like a good use for Modo's Mesh Fusion.
|
|
#
?
Nov 24, 2015 17:56
|
|

|
bonds0097 posted:This seems like a good use for Modo's Mesh Fusion. Yep! Also you might need more geo in your sphere. Unfortunately, I haven't used MODO much, so outside of "just use mesh fusion" I can't help a whole lot. I could bang that out in Max in like 5 minutes though 
Gearman fucked around with this message at 18:21 on Nov 24, 2015 |
|
#
?
Nov 24, 2015 18:16
|
|
|
keyframe posted:I have been on the maya beta for like six years now. And given I'm just getting 2016 now in my sub, I'm guessing it's gonna be a year before I get to try out these new awesome mograph tools. Thanks for the tease Keyframe!
|
|
#
?
Nov 24, 2015 18:18
|
|

|
bonds0097 posted:This seems like a good use for Modo's Mesh Fusion. I agree, but there's a good chance he won't have access to Mesh Fusion as prior to 901 it was not bundled with Modo but sold separately as a plug-in. If you want to upgrade to 901 now is a good time though, as The Foundry is having a sale on Modo and Mari in a few days.
|
|
#
?
Nov 24, 2015 18:26
|
|

|
Cyne posted:I agree, but there's a good chance he won't have access to Mesh Fusion as prior to 901 it was not bundled with Modo but sold separately as a plug-in. If you want to upgrade to 901 now is a good time though, as The Foundry is having a sale on Modo and Mari in a few days. I definitely dont have the plug-in and I can't be buying 901 right now. Is there a good way to do this in Blender then?
|
|
#
?
Nov 24, 2015 20:05
|
|
|
StickFigs posted:I definitely dont have the plug-in and I can't be buying 901 right now. It's low poly so you can do it manually easily. 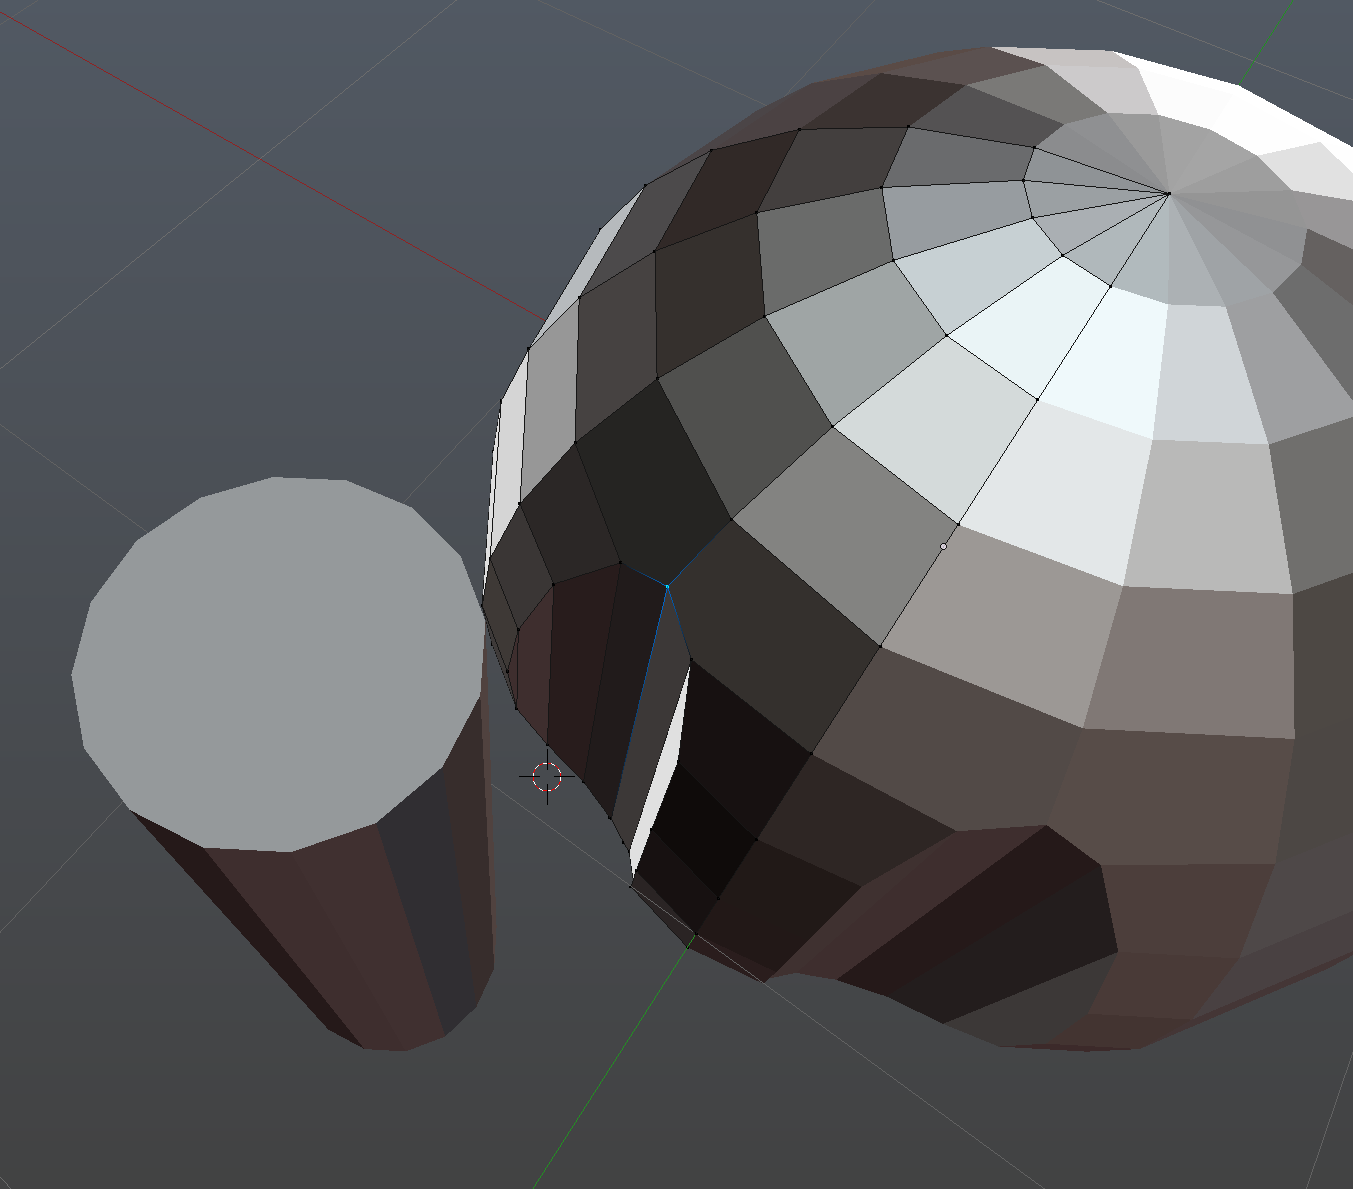 Boolean of the sphere and cylinder, manual cleanup, took less than a minute. It will get more of a pain if you have to do it 50 times with minor variations, but if you're staying low poly doing something like this isn't bad.
|
|
#
?
Nov 24, 2015 21:03
|
|


|
Taffer posted:It's low poly so you can do it manually easily. I tried a couple times with boolean and manual cleanup but I kept getting tiny slivers of tris that messed up my vertex smoothing. I see in your pic you have lower res on the sphere than what I need and that made manual cleanup significantly harder.
|
|
#
?
Nov 24, 2015 22:10
|
|
|
BonoMan posted:And given I'm just getting 2016 now in my sub, I'm guessing it's gonna be a year before I get to try out these new awesome mograph tools. I think mash has a demo version you can check out in 2016.
|
|
#
?
Nov 24, 2015 22:12
|
|
|
keyframe posted:I think mash has a demo version you can check out in 2016. Their site says it's no longer available since the Autodesk purchase. But I'm going to email them directly and ask.
|
|
#
?
Nov 24, 2015 22:15
|
|
|
StickFigs posted:I tried a couple times with boolean and manual cleanup but I kept getting tiny slivers of tris that messed up my vertex smoothing. I see in your pic you have lower res on the sphere than what I need and that made manual cleanup significantly harder. Cut out the shape, select the edges and set them to sharp, go into modifiers and add edge split then turn off Edge Angle but keep Sharp Edges selected, this should sort it.
|
|
#
?
Nov 24, 2015 22:17
|
|

|
StickFigs posted:I tried a couple times with boolean and manual cleanup but I kept getting tiny slivers of tris that messed up my vertex smoothing. I see in your pic you have lower res on the sphere than what I need and that made manual cleanup significantly harder. Are you going to subdivide it or make a huge number of copies of the same thing? If no, then it should still be fairly easy to do a higher poly version. Same thing just a little more. If you're going to subd it then you'll have to approach the mesh completely differently.
|
|
#
?
Nov 25, 2015 02:14
|
|
|
Taffer posted:Are you going to subdivide it or make a huge number of copies of the same thing? If no, then it should still be fairly easy to do a higher poly version. Same thing just a little more. If you're going to subd it then you'll have to approach the mesh completely differently. Actually do you have a copy of the mesh from your screenshot before? Maybe that would help me out. EDIT: Here's a good example of the hosed up topology/smoothing I end up with https://skfb.ly/IJUn StickFigs fucked around with this message at 02:35 on Nov 25, 2015 |
|
#
?
Nov 25, 2015 02:23
|
|
|
15 minute hack job, but it should be decent enough reference. If you were going to sub-d it then you'd want to build it a bit differently and account for support loops, but for a low-ish poly that smooths pretty well, it should be good enough. I also noticed at the end that I didn't cap the flat surface above the equator, so the thing is a bit oblong if you mirror it. Overall I give it a B-.
|
|
#
?
Nov 25, 2015 04:52
|
|
|
spotted ngons I give it an immediate F shame gearman shame
|
|
|
#
?
Nov 25, 2015 04:55
|
|
|
I bring much shame to my family. I was too lazy to collapse those two top edges to convert the ngons to quads. I'm keeping the tris though, because  Please forgive me, senpai ceebee. Please forgive me, senpai ceebee. Also made it a bit better for sub-d, but the topo is still not very well suited for it. 
|
|
#
?
Nov 25, 2015 05:25
|
|
|
Gearman posted:15 minute hack job, but it should be decent enough reference. If you were going to sub-d it then you'd want to build it a bit differently and account for support loops, but for a low-ish poly that smooths pretty well, it should be good enough. I also noticed at the end that I didn't cap the flat surface above the equator, so the thing is a bit oblong if you mirror it. Overall I give it a B-. Wow that's exactly what I want. How did you go about making this and keeping the nice topology? EDIT: I'm assuming you didnt use booleans? And no I don't plan on doing sub-d. StickFigs fucked around with this message at 05:28 on Nov 25, 2015 |
|
#
?
Nov 25, 2015 05:25
|
|
|
It was booleans, yeah. I've gotten lazy in my old age, and I try to setup my shapes in advance so that I have to do as little manual cleanup as possible. Here's a quick 3DS Max step-by-step in an imgur album: http://imgur.com/a/34tlT
|
|
#
?
Nov 25, 2015 07:04
|
|
Gearman posted:I bring much shame to my family. I was too lazy to collapse those two top edges to convert the ngons to quads. I'm keeping the tris though, because Tris are a-ok. Hell, I would even collapse the topmost edge on that cutout arch so it's triangles instead of quads, looks like the small side of the quads are causing weird shading. But props to you for even taking some time to demonstrate this, I'm way too lazy.  Gearman posted:It was booleans, yeah. I've gotten lazy in my old age, and I try to setup my shapes in advance so that I have to do as little manual cleanup as possible. Here's a quick 3DS Max step-by-step in an imgur album: oh sheyt #wizdom edit: your imgur album one has good edgeflow yo no ngons A+ good job old man, everybody watch and learn ceebee fucked around with this message at 07:12 on Nov 25, 2015 |
|
|
#
?
Nov 25, 2015 07:07
|
|
|
All that work and I still aligned the cylinder to the wrong edge loop
|
|
#
?
Nov 25, 2015 07:17
|
|
|
Just use zbrush cmon.
|
|
#
?
Nov 25, 2015 07:21
|
|


|
keyframe posted:I think mash has a demo version you can check out in 2016. They emailed me back saying they couldn't help but I should try joining the Maya beta. However it doesn't show up in my "opportunities" page... I'm guessing it's closed at the moment?
|
|
#
?
Nov 25, 2015 07:30
|
|
SynthOrange posted:Just use zbrush cmon. I would not make a low poly for a shape like this in ZBrush. Your example is also pretty sloppy and is gonna subdivide without nice clean bevelz. The best option for a high res for that kinda shape is either subd model/bevel Gearman's model or take the low poly model with creasing into ZBrush, and/or use ZModeler with the low poly for more exact 45 degree style beveling. There are other options to get cleaner edges out of ZBrush for that kinda shape such as keeping your polygroups when you dynameshed the booleans out, but it won't be nearly as clean as getting fancy 45 degree bevels out of a blockout. ceebee fucked around with this message at 09:11 on Nov 25, 2015 |
|
|
#
?
Nov 25, 2015 09:07
|
|
|
Hahah, yes that was a deliberately terrible model. It wouldnt be a bad idea though to start with that and then retopo if you really wanted to. But overall I still say that shape looks completely wrong for a spaceship. It looks more like.. I dunno. A pressure cooker or something?
|
|
#
?
Nov 25, 2015 09:13
|
|
|
alot of ships are pressurized systems, so yeah, a pressure cooker's not far off from the stuff in them.
|
|
#
?
Nov 25, 2015 10:15
|
|
|
Sort of reminds me of the dropships from Battletech. Very egg shaped.
|
|
#
?
Nov 25, 2015 10:22
|
|
|
StickFigs posted:Wow that's exactly what I want. How did you go about making this and keeping the nice topology? Is this what you're looking for?  http://we.tl/qsSEn1qFoy
|
|
#
?
Nov 25, 2015 12:25
|
|
|
Gearman posted:It was booleans, yeah. I've gotten lazy in my old age, and I try to setup my shapes in advance so that I have to do as little manual cleanup as possible. Here's a quick 3DS Max step-by-step in an imgur album: This is incredibly informative. Thanks! I didn't ever think to use booleans that way (flipping the normals and doing a union) Thank you everyone else as well for your contributions. I will try this technique later today and post my results.
|
|
#
?
Nov 25, 2015 16:05
|
|
|
No problem, happy to help. I do recommend, whenever possible, to try to match the geo as closely as possible when booleaning two objects. I remember when I first learned about booleans, I thought they were greatest loving thing since sliced bread, and I would just boolean everything together. I would then spend a good half hour cleaning up the giant mess that it made of the topology. For a while I stopped using them altogether and just resorted to using reference geo and snapping + cutting to get intersections, but again, it was a lot of work. With the workflow I have now, it allows me to use booleans in a way that isn't going to wreck havoc on my geo, and I only have to spend a couple minutes cleaning up the intersection. For shapes with a lot of symmetry, this means you can get some really good results in a very short of time, with some nice clean topology. Much like most things in art, the more time you spend in pre-planning (lining up shapes, adjusting number of loops to match, etc.) the less time you spend later. Booleans are no different.
|
|
#
?
Nov 25, 2015 17:15
|
|
|
If I'm modelling a realistic capuchin monkey, should I model it into a forced t-pose, standing more or less like a human, or a more naturalistic quadrupedal stance? I'd like to create it as if it were going to be taken through to a fully functional animated model, capable of standing up on two legs and running around like the animal would. I want to make it with hypothetical other departments in mind. The most this little guy will get is some kind of shifting around in Zbrush unless I can enlist some help from here. I'd really love to learn how to do everything all myself. I've asked around at my university but learning to rig isn't really a thing they do on my course at all. Sketched out the 3 poses I'm thinking of. A is much more naturalistic, very close to how the animal stands in real life. But would that lend itself well to standing up, too? B is really forced. Monkeys aren't humans and don't stand like that, so finding accurate reference for that is hard too and I want it to look as realistic and nice as I can possibly make it. But B would be easier to rig, right? C is some kind of weird compromise. I thought maybe sticking his arms out like a zombie would allow a greater flexibility for the model to look more natural both upright and on all fours? Any advice would be appreciated. The monkey is one of two models I'm doing for my Honours project so I'm going to really go all out and do the absolute best I can and part of that is starting the right way. Thanks.
|
|
#
?
Nov 25, 2015 18:08
|
|


|

|
| # ? May 29, 2024 22:12 |
|
|
uglynoodles posted:If I'm modelling a realistic capuchin monkey, should I model it into a forced t-pose, standing more or less like a human, or a more naturalistic quadrupedal stance? B, because that will give the creature TDs the most options when setting up muscles/flesh/skin.
|
|
#
?
Nov 25, 2015 19:11
|
|
