

|
I realize they want to give you floor tips, but how do all the adventurers in town know about the monsters when you're the first guild to get permission to go there?
|
 #
?
Mar 5, 2016 15:25
#
?
Mar 5, 2016 15:25
|
|


|

|
| # ? May 28, 2024 08:42 |
|
|
Glazius posted:I realize they want to give you floor tips, but how do all the adventurers in town know about the monsters when you're the first guild to get permission to go there? Presumably the party breaks for a week after every boss battle?
|
|
#
?
Mar 5, 2016 19:28
|
|

|
Dr. Fetus posted:I was looking through the enemy data and found something weird. Gatekeeper, Keeper Head and Keeper Body, are all level 15. For comparison, the Wicked Queen is level 38, Ketos is level 27, and Narmer is level 16. The dev team apparently considers the 3rd boss to be weaker than Narmer. Obviously it's because 15x3=45
|
|
#
?
Mar 7, 2016 15:57
|
|

|
Game Mechanics: Action Speed One thing that's important to keep in playing these games is how fast your party members are. Being able to act before the enemy is a pretty huge advantage in these games. The last thing you want to happen is something like a monster killing one of your front liners, and then having your healer waste their time healing a dead guy. Action Speed is primarily determined by the AGI stat, but it can be adjusted by a few other things. In EO1 speed was only determined by a character's AGI stat, and the speed modifier on their skills, which were multipliers in that game. The system remained mostly the same in EO2, with one big change. The weapons a class could equip now had speed modifiers of their own. However, they added a lot to the user's AGI stat, almost making it so that the turn order would play out the same way every time. While the devs realized that while giving weapons different speed modifiers could be an interesting idea to spice things up, making speed modifiers that extreme wasn't ideal. The idea stuck around, but the speed system pretty much got reworked. Speed modifiers were changed from multipliers to be additive values in EO3. (While equipment speed modifiers stayed as additive values in the Untold games, skill speed modifiers reverted back to multipliers.) And all pieces of equipment affected your character's action speed, not just weapons. The speed formula is as follows: Action Speed Formula posted:Speed = AGI + Total equipment speed + Skill action speed + SPD Forge Power + a random number from 0 to 5 Skill action speed is the Action Speed modifier within skills, and SPD Forge Power is dependent upon how many SPD Forges your character has on their equipment, with a value of +2 being added for each SPD Forge. Equipment speed is determined by these values: Weapons:
The equipment speed modifiers on a character are then added up and applied to the formula. It can be worth it just to give a Knife to a slow character who barely makes use of their regular attacks (i.e. a Monk or a Zodiac) just to ensure that they move faster. Boots are pretty much the best way to increase a character's action speed, which is why people like putting those on their characters, despite the fact they don't provide as much defense as other pieces of equipment. There's also another aspect to Action Speed, Priority. To ensure that some skills go first or last, they are given priority over other skills. If two or more characters are in the same priority bracket, the game uses the Action Speed formula to determine which one will go first. The exception to this is Limit Skills. They will always go first or last, but if two or more people are using Limit skills in the same priority bracket, then the game simply checks the party slots, starting from the top left, and causes the Limit skills to be used in that order. The Priority brackets are as follows: +2: Cross Slash, Indomitable, Charge Tactic, Mumyouken, Guard Tactic, Lethal Tactic, Aegis Defense, Wind Tactic, Aegis Barrier, Sungrazer, Regroup Tactic, Aegis Shield, Star Smasher, and Uroboros Guard. +1: Knighthood, Quick Draw, Defend. 0: All other skills. -1: Charge, Etheric Charge, Snipe, Sharpshooter, Strange Seeds, Cloudbuster. -2: Second Wind, Hellfire, Absolute Zero, Typhoon Bolt, Quintessence, Lucky Hammer, and Immortal. Note: Anyone under the effects of Knighthood or Fore Honor are not actually placed in the +1 priority bracket, they simply gain a +6000 or +5000 boost to their action speed. Rear Dignity doesn't fall under the -1 priority bracket, nor is anyone affected by its buff, as it is simply a -5000 penalty to a character's action speed. Araxxor fucked around with this message at 03:47 on Sep 14, 2016 |
|
#
?
Mar 16, 2016 02:15
|
|

|
Class Showcase: Wildling Known as Beast Kings in Japan (for the record, they didn't have gender specific names like the Prince/ss), Wildlings are the class that specialize in inflicting status ailments and binds. They're comparable to Hexers in the first two games (although FAR less broken than EO2's Hexer), only less straightforward to use. Unfortunately, due to how ailments got reworked in this game, their effectiveness at their job is actually kind of minimal. Unless you can time the usage of one of their abilities right, they're very TP intensive. That aspect doesn't matter as much as you go further into the game, but early on, Wildlings can run dry very fast. Another aspect to be aware of is that they are incapable of inflicting Petrification, Curse, and Blind on their own, so if you want to make use of those ailments, this is not the class to go to for that. The way the Wildling works is that they can summon animals to fight with the party. When the Wildling summons an animal, they'll appear in an empty slot. This includes the 6th party member slot, which you can't have a class make use of. Unfortunately, that aspect makes it so that Wildlings don't play nice with Ninjas (Or for that matter, Yggdroids) since in a 5-man party, a clone and an animal cannot be summoned at the same time. And clones tend to be considered a lot more useful than any other summon, so combined with the issue of ailments not being as good in this game, Wildlings tend to be overlooked. Wildlings are the main class to go to if you want to make use of ailments. They're not a bad class if used right, and they are vital for a few post-game fights, so you do want at least one on the bench with Combat Study maxed out so they can make your life easier when the time comes. Equipment: Weapons: Spears, Knives, and Books. Armor: Clothes, Shields (Some, but not all) Stats 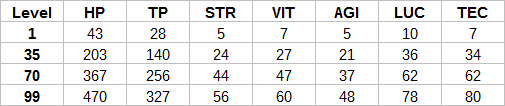 Wildlings are one of the slowest classes in the game, what with having the 3rd worst AGI stat in the game. Spears giving a pretty big penalty to their action speed doesn't really help. They have pretty middling stats all around, with the exception of their LUC and TEC stats, which are what they mainly use to inflict ailments. They have the highest combination of LUC and TEC, so they're the best class for inflicting and resisting ailments. They have fairly decent sized HP and TP pools, and a decent VIT stat, so they're relatively tanky. Their high TP pool is nice, because their skills cost a lot of TP. Their STR is okay, though Wildlings themselves don't make for great physical attackers. About Animals Animals follow a couple of rules that you should be aware of. A Wildling can only have one animal out at a time. Period. Unfortunately, that means sending out an army of animals to destroy your enemies is impossible, no matter how many empty slots are in the party. However, using multiple Wildlings can enable you to use multiple animals. If a Wildling dies, the animal they summoned will disappear as well. All animals use skills to attack and inflict ailments. Because of that, they cannot deal critical hits. If they get Confused, their attacks will only deal 100% damage and are incapable of inflicting ailments. Animals are basically a copy of the Wildling in terms of stats. However, some animals apply a multiplier to the Wildling's stats, so some animals are stronger or weaker than the Wildling. And they do follow the same formulas as other player controlled units. STR determines how strong their attacks are. TEC is only used for elemental defense, accuracy, and determining how often they can inflict ailments, since none of the animals use TEC to deal damage. LUC is used for evasion, ailment defense, and determining how often they can inflict ailments. It's not used to determine how often they can crit, since animals can't crit unless they're using regular attacks. AGI is used for determining their speed, accuracy, and evasion. Most animal skills don't have an action speed modifier, so AGI is the only thing that determines their speed. And VIT is just used to determine physical defense. That's all. Animals cannot wear equipment, so the Weapon Attack on the Wildling's weapon and the defense values on the Wildling's armor is irrelevant. But, any stat forges and resistance forges on the Wildling's equipment are applied to the animal. However, all other forges are ignored. The HP of the summoned animal is determined through this formula: Animal HP Formula posted:HP = [{(Base HP * Beast Soul HP Boost + (10% of Wildling's Current HP)) + Wildling's Level} * Beast Soul HP Boost] + A random number from Summon Skill Level to 3 * Summon Skill Level The animal's TP pool is exactly the same as their resulting HP pool, but their TP pool is merely cosmetic, as animals never use TP. Since animals can't wield weapons, their Weapon Attack is determined through 2 * STR. However, animals do not have a defense stat at all. The only way for them to mitigate damage is through the defense boost from Beast Soul. And while you can have an animal target a specific enemy (or all enemies depending on the skill) on the initial cast, afterward, the animal's AI will determine who they will target. And the AI attack is actually weaker than the initial attack in most cases, so be aware of that. Fun little fact, most of the animals you can summon in this game are actually enemies from this game or a past EO game. The only exception to this is the Lion King, who went on to become an enemy in EO4. Beast Soul Skill Type: Class Skill Maximum Level: 10 Stats Used: N/A Prerequisites: N/A This Class Skill passively increases the max HP, damage output, and defense of summoned animals. The higher the skill level, the more HP, attack, and defense they gain.  Notes:
Wild Mastery Skill Type: Passive Maximum Level: 10 Stats Used: N/A Prerequisites: N/A This passive increases the success rate at which the Wildling's animals can inflict ailments. Leveling up the skill increases the passive boost.  Notes:
Nature Pact Skill Type: Passive Maximum Level: 10 Stats Used: N/A Prerequisites: N/A Gives animals a chance to take a mortal blow in the Wildling's place. The Wildling is healed afterward. Higher skill levels increases the activation rate and amount healed.  Notes:
Sacrifice 1/Sacrifice 2 Skill Type: Passive Maximum Level: 10 Stats Used: N/A Prerequisites: Nature Pact � Level 3 Animals may protect an ally in the same row as them, and take physical/elemental damage in their place. Higher levels increase the activation rate.  Notes:
Alertness Skill Type: Passive Maximum Level: 5 Stats Used: N/A Prerequisites: N/A If the party gets blindsided by an enemy, the Wildling has a chance of canceling it out, and forces the battle to start on equal footing. Increasing the skill level increases the activation rate.  Notes:
Dismiss Beast Skill Type: Active Maximum Level: 5 Equipment Needed: N/A Body Part: Arm Target Type: N/A Action Speed: -3 Prerequisites: Wild Mastery � Level 1 Calls back any active animal, and returns any TP used to summon it in the first place. Leveling up the skill only reduces the TP cost.  Notes:
Call Bird/Call Snake/Call Mole Skill Type: Active Maximum Level: 10 Equipment Needed: N/A Body Part: Arm Target Type: Summon Action Speed: -3 Prerequisites: Wild Mastery � Level 1 Summons a Glowbird/Great Anaconda/Clawed Mole to deal damage to a single target and bind a specific body part. Increasing the skill level increases the animal's damage output and infliction rate. Summon Info Stat Multiplier: 100% Skills Used: Bind Feather/Wind Wrap/Scratch (Bind Feather Animation, Wind Wrap Animation, Scratch Animation) Notes:
 If you plan on doing the post-game, max these out! There are a few boss fights in the post-game that these skills can make so much easier. And binds tend to be more reliable in big fights, since FOEs and bosses don't resist those as much as ailments. They can also shut down a few random encounters Call Insect Skill Type: Active Maximum Level: 10 Equipment Needed: N/A Body Part: Arm Target Type: Summon Action Speed: -3 Prerequisites: Wild Mastery � Level 3 Summons a Venomfly to deal damage to a single target and Poison them. Increasing the skill level increases the animal's damage output and Poison damage. Infliction rate stays the same at all levels. Summon Info Stat Multiplier: 70% Skills Used: Poison Dust (Poison Dust Animation) Notes:
 It's strong in the 1st Stratum, but the Poison damage falls off very quickly after that. As neat as it is to have a Venomfly on your side for once, they kind of suck at fighting other monsters. Poison is a pretty bad status in this game, even though the Venomfly has the strongest version of it. Take it to unlock Call Elephant, but don't bother with more levels in this skill. Call Owl Skill Type: Active Maximum Level: 10 Equipment Needed: N/A Body Part: Arm Target Type: Summon Action Speed: -3 Prerequisites: Wild Mastery � Level 5 Summons a Hypnowl to put all enemies to Sleep. Increasing the skill level increases the infliction rate. Summon Info Stat Multiplier: 100% Skills Used: Sleep Powder (Sleep Powder Animation) Notes: Notes:
 Sleep is kind of an iffy ailment to work with. It can lock down random encounters, but Call Elephant is far better for doing that, and it actually deals damage. And in boss fights, Sleep isn't really a reliable ailment, especially since it's dispelled once you attack the boss. You could try using it to get a free 50% damage boost for one attack, but the best physical attacks in this game are multi-hit skills, so only the first hit would benefit from the damage bonus. Call Slime Skill Type: Active Maximum Level: 10 Equipment Needed: N/A Body Part: Arm Target Type: Summon Action Speed: -3 Prerequisites: Wild Mastery � Level 5 Summons a Venom Ooze to deal damage to a single target and attempts to inflict Plague on them. Increasing the skill level increases the animal's damage output and Plague damage. Infliction rate stays the same at all levels. Summon Info Stat Multiplier: 90% Skills Used: Plague Gunk (Plague Gunk Animation) Notes:
 Plague is not a good ailment for the player to make use of. It deals less damage than the Venomfly's Poison, and the Venom Ooze isn't that reliable of an ally. However, it can serve as a physical meatshield, especially when Sacrifice 1 is taken into account. Just avoid summoning them in fights where elemental attacks are thrown around a lot, since they're fragile in that regard. Call Cow Skill Type: Active Maximum Level: 10 Equipment Needed: N/A Body Part: Arm Target Type: Summon Action Speed: -3 Prerequisites: Wild Mastery � Level 7, Call Owl � Level 4 Summons a War Bison to deal damage to random targets and Paralyze them. Increasing the skill level increases the animal's damage output and infliction rate. Summon Info Stat Multiplier: 120% Skills Used: Bull Run (Bull Run Animation) Notes:
 Paralysis isn't that great of an ailment to use, and I consider this to be a worse version of Call Elephant. While the War Bison does deal more damage on its attacks, the Elephant is far better at locking down enemies, and that skill's initial attack is actually an AOE. Call Elephant Skill Type: Active Maximum Level: 10 Equipment Needed: N/A Body Part: Arm Target Type: Summon Action Speed: -3 Prerequisites: Wild Mastery � Level 7, Call Insect � Level 4 Summons an Elephant to deal damage to all enemies and Confuse them. Increasing the skill level increases the animal's damage output and infliction rate. Summon Info Stat Multiplier: 120% Skills Used: Reckless Rush (Reckless Rush Animation) Notes:
 Want to trivialize random encounters for the whole game? Then max this skill out. Confusion will pretty much neutralize any threats in a random battle, and the Elephant hits decently hard. It's also a good skill to have by the 1st boss fight, since the initial attack is an AOE. Though it's a little less effective on FOEs and bosses. Call Tiger Skill Type: Active Maximum Level: 10 Equipment Needed: N/A Body Part: Arm Target Type: Summon Action Speed: -3 Prerequisites: Wild Mastery � Level 10, Sacrifice 2 � Level 5 Summons a Sabretooth to inflict Instant Death on all enemies. Afterward, the Sabretooth will counter any attacks that target it. Increasing the skill level increases the animal's damage output and infliction rate. Summon Info Stat Multiplier: 150% Skills Used: Death Fang, Fierce Counter, Tiger Counter (Death Fang Animation) Notes:
 If you want your Wildling to contribute to dealing damage, take this skill. The Instant Death component is nice, and thanks to Wild Mastery, it can even take down bosses if you're extremely lucky. Though Lethal Resistance makes that extremely unlikely. In order for the Sabretooth to really do work, Sacrifice 1 and Sacrifice 2 should be maxed out, so it can take as many attacks as possible to activate Tiger Counter. Oh and don't worry about the Sabertooth dying, as its stat multiplier pretty much ensures it's very tanky. Call Lion Skill Type: Active Maximum Level: 10 Equipment Needed: N/A Body Part: Arm Target Type: Summon Action Speed: -3 Prerequisites: Wild Mastery � Level 10, Sacrifice 1 � Level 5 Summons a Lion King. On the initial cast, it will fall asleep. If woken up, it will attack all enemies, and has a chance to Paralyze or Stun them. Afterward, it will fall asleep. Increasing the skill level increases the animal's damage output and infliction rate. Summon Info Stat Multiplier: 150% Skills Used: Sleeping Lion, Regal Authority (Regal Authority Animation) Notes:
 This is the other animal that lets the Wildling contribute to dealing damage. The Lion King is a bit harder to work with than the Sabretooth. For one thing, the Sacrifice skills don't work with it when it's Sleeping. So you really need to plan around that. Prevent Order won't stop the Lion King from falling asleep, but you can make use of Refresh to keep the Lion King awake, or use the Regroup Tactic Limit can ensure that the Lion King attacks for 5 turns. However, while the Lion King can ignore enemy resistances thanks to Regal Authority being Almighty damage, that does means that the only damage buff that affects it is Charge Tactic. And it can't deal as much damage if the enemies don't have any ailments, so it's a bit unreliable as a damage dealer. Beast Roar (Animation) Skill Type: Active Maximum Level: 5 Equipment Needed: N/A Body Part: Head Stats Used: N/A Target Type: AOE Action Speed: -6 Prerequisites: N/A This skill lowers the physical attack power of all enemies for 4 turns. Leveling up the skill increases the damage reduction. Notes:
 Well this does let the Wildling have a bit more utility and it could be a nice defensive option. Take it if you want, though I don't consider it a vital skill. If your party is pretty squishy, you may want to take this. Primal Drums (Animation) Skill Type: Active Maximum Level: 5 Equipment Needed: N/A Body Part: Head Stats Used: N/A Target Type: AOE Action Speed: -6 Prerequisites: N/A This skill lowers the physical defense of all enemies for 4 turns. Leveling up the skill increases the defense reduction. Notes:
 It's one of the few defense debuffs in the game, along with Eagle Eye and Wolf Howl, so it's very worth it. In fact, subclassing Wildling can be worth it for this skill alone, since it can amplify the damage output of your physical attackers. Sure it's not as strong as most physical buffs, but there's only 3 defense debuffs in the game, so this one is well worth it. Subclasses: Unfortunately, due to the nature of the Wildling being incredibly skill point hungry, people tend to ignore getting them abilities from a subclass and just pick a random one to get them 5 extra skill points. Some classes just don't do much as a subclass, and others offer some benefits, but not enough to be worth investing a lot of skill points in. Prince/ss: The Prince/ss' skillset is pretty stat independent, so Wildlings could function as buffing supports on top of inflicting ailments. Unfortunately, that will cost them a lot of skill points, which is unfortunately an issue the Wildling has with the subclassing system. Gladiator: Wolf Howl is a nice debuff to have access to, especially when you consider the rest of the Wildling's skillset. The Gladiator does have a few skills that inflict ailments, but the animals tend to be better at that job. Hoplite: Probably the most popular subclass for them, because it gives them the ability to equip all shields to further their defenses. And then the rest of the skill points from taking a subclass are spent in the Wildling's skills. While the Hoplite's skills are stat independent, they also need a lot of skill points for their skills to be effective, so combining two skill point hungry classes isn't really a good idea. Though the Parry skills can give some more survivability to the Wildling. Buccaneer: A Buccaneer subclass gives Wildlings access to Eagle Eye, which can debuff an enemy's defenses even further. Lights Out also gives them access to Blind, which is one of the few ailments they can't actually make use of on their own, so this can give the Wildling some more utility, but it falls under the problem of making the Wildling even more starved for skill points. Ninja: The only real use for this subclass is to give Wildlings access to Petrification with Izuna. That's about it. Don't go for Bunshin, as that horribly conflicts with the Wildling's skillset. And in the Wildling's case, having access to animals is better than having 2 Wildlings at once. On the other hand, if you're making use of Call Tiger or Call Lion, you could use Otori to make it so that those animals are targeted more often so that they can deal more damage. Monk: Wildings do have a high TEC stat, so they can make for good healers. But I really don't suggest using a Monk subclass just to get access to Darkness Fist, as Curse is a terrible ailment to make use of. If you're making use of Call Lion, you could take Refresh to ensure that the Lion King attacks the enemy every turn. Zodiac: Wildlings could make for decent elemental attackers since they have a high TEC stat. Dark Ether could be a nice support skill to make use of. But really this class doesn't offer much to a Wildling. Arbalist: Arbalist can be subbed to access Smoke Grenade, which gives them access to Blind. And while it doesn't deal damage like with Lights Out, it does have a higher infliction rate, is an AOE, and has a lower TP cost. There's also Snipe and Sharpshooter, which can work with the Wildling's ailments, but aside from that, this subclass has very little to offer a Wildling. Farmer: Well there's Rotten Egg, which works with the Wildling's ailments. That's about it. Lullaby is outclassed by Call Owl, since it doesn't put the user to sleep, and Strange Seeds is just unreliable, and the binding animals do that job a lot better. Shogun: You could try turning your Wildling into a bit of an offensive support with a Shogun subclass, but there's not really that much this subclass has to offer to a Wildling, though Endure is a nice passive. Wildlings are a bit of an interesting idea for a class that kind of fell flat due to how ailments got reworked in this game, and due to how summoning was handled in this game, since Ninjas or classes with a Ninja subclass could contribute more to a fight than an animal. Still, don't underestimate them, as they can be useful in the right situations. Araxxor fucked around with this message at 00:01 on May 29, 2017 |
|
#
?
Mar 16, 2016 02:16
|
|
|
I had a Wildling when I played this game, and yeah, he pretty much trivialized every random encounter by summoning elephants, and then sat around during boss fights not accomplishing much after inflicting confusion for a couple of turns. I think I did go with Prince subclass and give him a few basic buff moves.
|
|
#
?
Mar 16, 2016 05:42
|
|

|
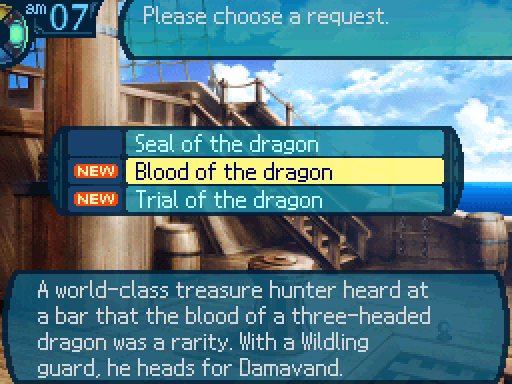
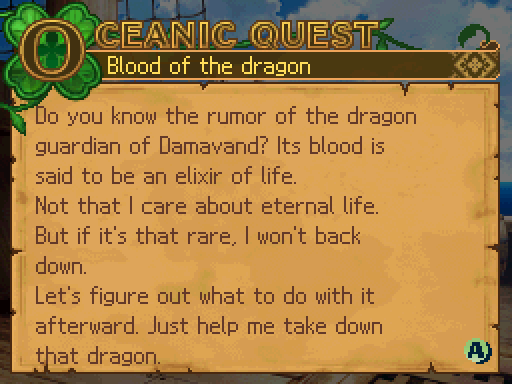
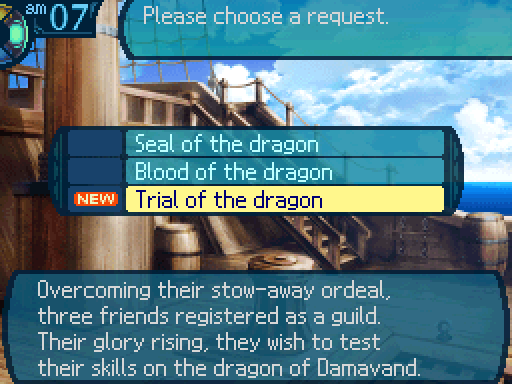
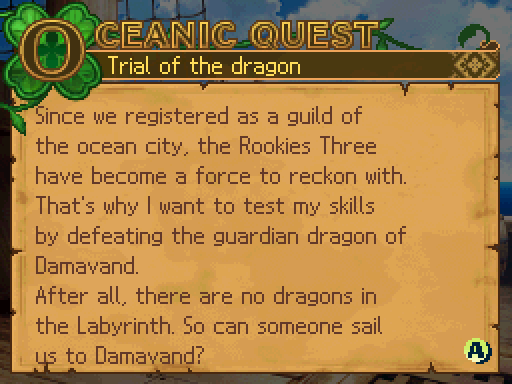
Update 60: Preparing for Trade City Damavand's Sea Quests DS Version DS VersionI've unlocked a bunch of equipment while grinding up my characters for the next Sea Quest. Let's take a look.  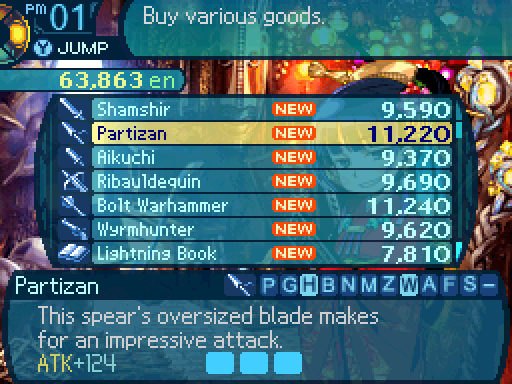  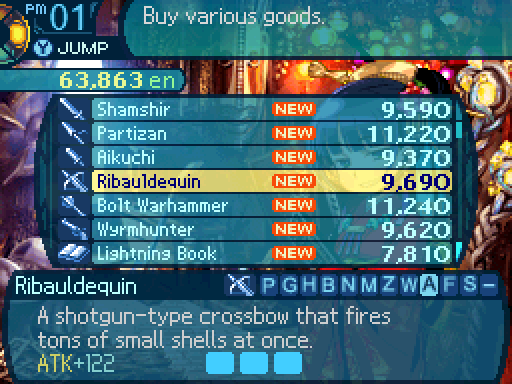  This club is imbued with Volt forges, and gives a 30% damage boost if you use a regular attack. Could be handy for Gladiators or Monks. 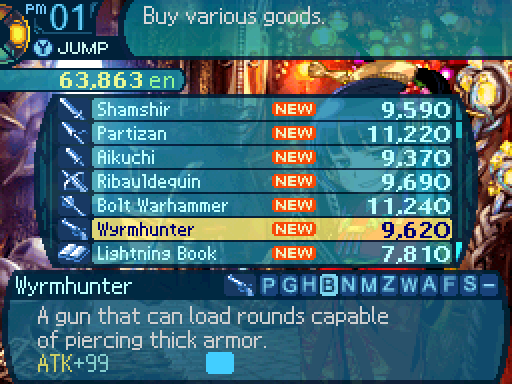  The Lightning Book is a questionable investment, as while it does give a 30% damage boost when using regular attacks, why would you have a Zodiac use regular attacks?  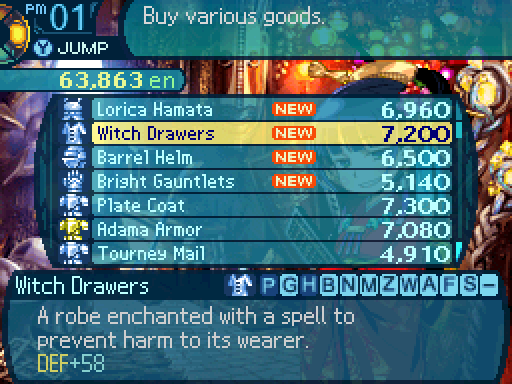   Provides the wearer a 10% resistance to Strike attacks. Not exactly something special.  Increases the wearer's max HP by 25%. I find that there's better pieces of defensive equipment.  Increases the wearer's resistance to Ice attacks by 50%. Stack 2 of these babies and you'll be immune to Ice attacks.  And this provides the wearer a 50% resistance to Blind. Blind isn't so bad an ailment that I find that it's worth using an equipment slot to defend against. Besides, Prevent Order exists. 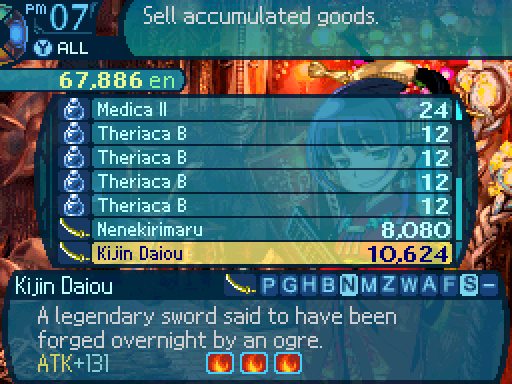  Hi, I'd like a refund on this please. Hi, I'd like a refund on this please.   You know, it's probably for the best. Yes. This doesn't exactly seem to be working out between us. We can still be friends, right? You know, it's probably for the best. Yes. This doesn't exactly seem to be working out between us. We can still be friends, right? Oh don't be so dramatic. It's just a weapon. Oh don't be so dramatic. It's just a weapon.If you paid for any forges on a weapon, that actually factors in slightly on its sell cost, so forging isn't a complete loss if you do decide to make use of it. I suppose we should head to the Celestial Palace again. Man, I can't believe they keep letting us go there. Hm? Hey Charlotte, you dropped your book! ...Journal! ...Whatever this is. ...Huh, I always wondered what she wrote in here. ...Hee hee hee. ...Oooh! ...Whoa. ...HEY! DS Version DS Version I'm not gonna make use of Warrior Might anymore, so I'm gonna rework some skillsets.  Heeeey, Akatsuki! You mind teaching me about the ways of the Ninja or whatever? Heeeey, Akatsuki! You mind teaching me about the ways of the Ninja or whatever? ...Do you actually wish to learn the techniques of the Ninja, or do you just want to clone yourself? The cloning thing. ...Fine, whatever. ...Do you actually wish to learn the techniques of the Ninja, or do you just want to clone yourself? The cloning thing. ...Fine, whatever.Ninja is pretty much one of the better subclasses for a Gladiator if you want to boost their damage. 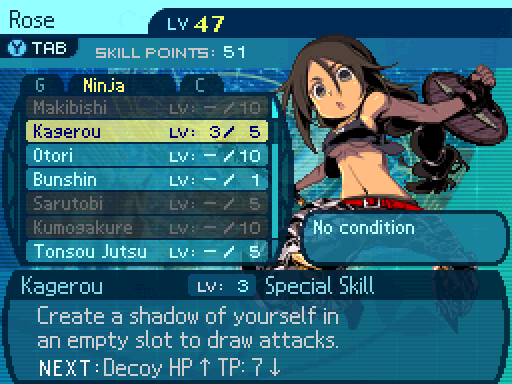 C'mon, Akatsuki! Just get to the good stuff already! If you wish to get to the �good stuff�, you must learn the basics first! C'mon, Akatsuki! Just get to the good stuff already! If you wish to get to the �good stuff�, you must learn the basics first!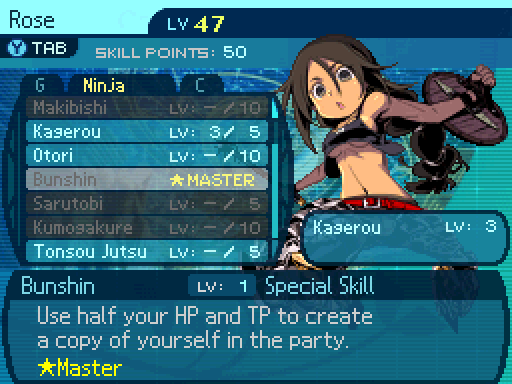 Hey Rose! What's up, Rose? Rose number 3, reporting in! Please do not abuse the ways of the Ninja, Hey Rose! What's up, Rose? Rose number 3, reporting in! Please do not abuse the ways of the Ninja,Mainly cause Bunshin gives use access to 2 Roses, which boosts her damage even further. As for the rest of her skillset, I reverted it back to the Blade Rave build. 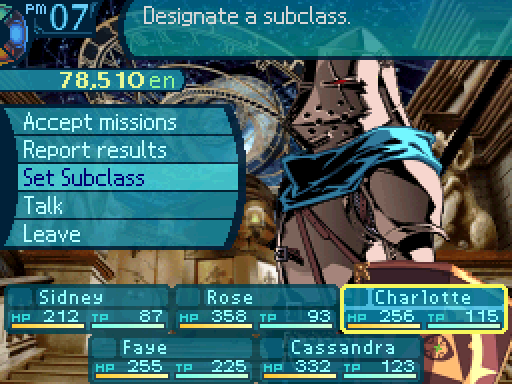 As for Charlotte... 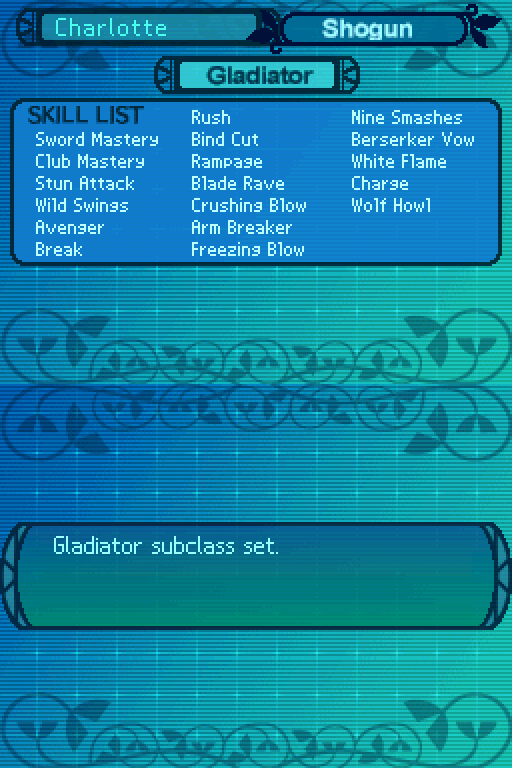 Um, Rose? Yeah? I would actually be interested in learning about your style of fighting. Would you mind teaching me? Despite what happened when it was the other way around. Sure! It'll be fun! C'mon! Um, Rose? Yeah? I would actually be interested in learning about your style of fighting. Would you mind teaching me? Despite what happened when it was the other way around. Sure! It'll be fun! C'mon!I'm turning Charlotte into an actual offensive character instead of a Limit building support. Should make her a little less redundant with MEGAQUEEN. 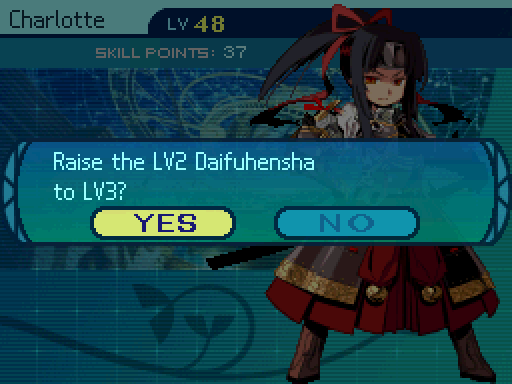 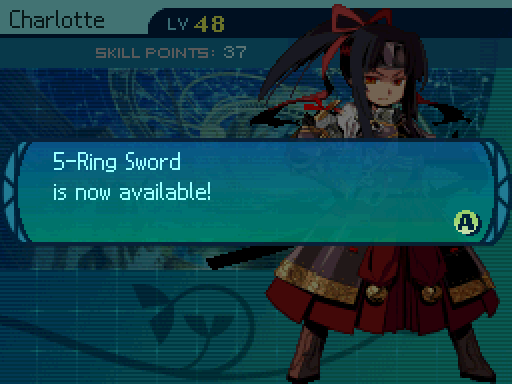 I mainly took this skill to unlock Charlotte's best damage skill. 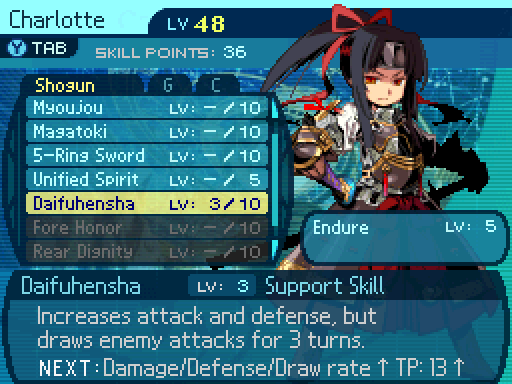 None can compare with me. Be careful who you say that to. You're likely to aggravate more than a few people in the process. None can compare with me. Be careful who you say that to. You're likely to aggravate more than a few people in the process.Daifuhensha (Great Militarist) increases Charlotte's attack power by 21% and her defense by 19% for 4 turns at level 3. However, it also functions as a Provoke skill, and places up to a maximum aggro value of 7 on her for the buff duration. It's a pretty risky skill to use in some cases. 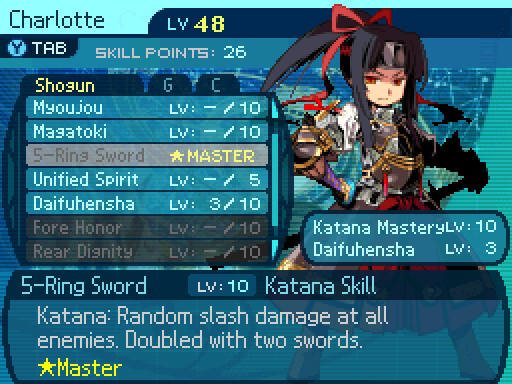 Our enemies will be nothing but ribbons fluttering in the battlefield! Our enemies will be nothing but ribbons fluttering in the battlefield!5-Ring Sword is Charlotte's best damage skill. At level 10, it randomly hits all enemies with 90% Slash damage 2 to 5 times. However, if Charlotte is dual wielding, it hits all enemies 2 to 10 times instead, possibly dealing a total of 900% damage if she's lucky. This does mean that Shoguns are the only ones who can get the most out of this skill, as Second Sword is needed to increase the number of hits. 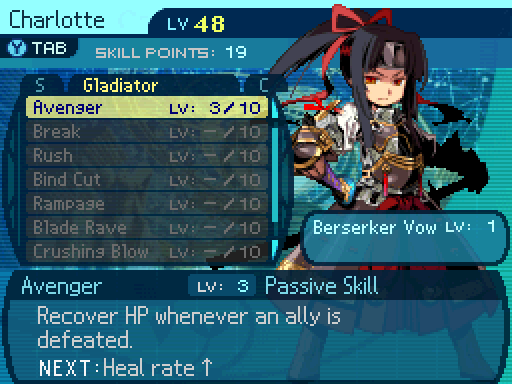 My friends, you will be avenged. My friends, you will be avenged.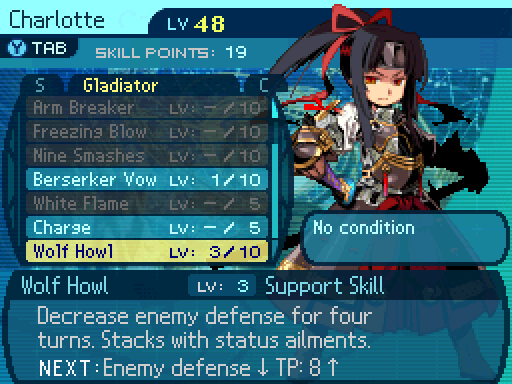 This seems... undignified. You gotta do whatever it takes to win a battle! This seems... undignified. You gotta do whatever it takes to win a battle!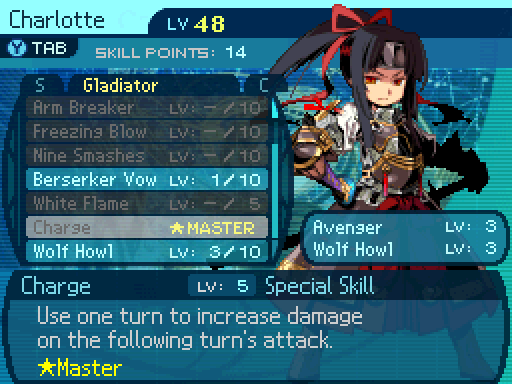 Patience is a virtue. Patience is a virtue.Just gonna grab Charge for Charlotte to increase her damage even further. 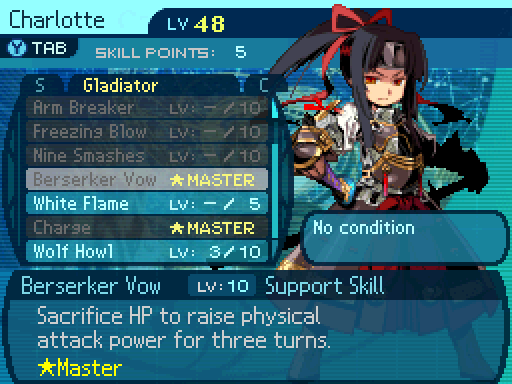 I IMMEDIATELY REGRET MY DECISION! C'mon, Charlotte! Pain is weakness leaving the body! I IMMEDIATELY REGRET MY DECISION! C'mon, Charlotte! Pain is weakness leaving the body!And Berserker Vow to increase her damage to even more ridiculous levels. 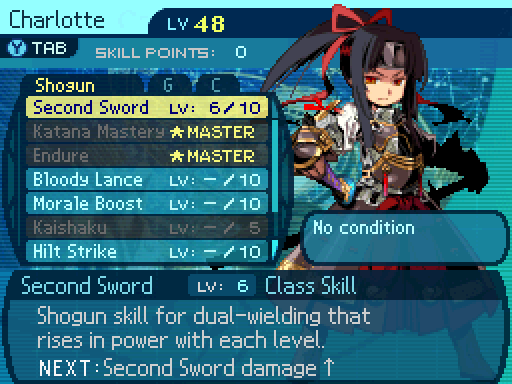 I also decided to grab some more levels in Second Sword to increase her damage for random encounters. At level 6, the offhand attack deals 35% damage. Now there's a few other things I'd like to take care of. There's one conditional drop that's kind of a pain to get. It involves the Curse ailment. The only member in our guild that has access to Curse is... 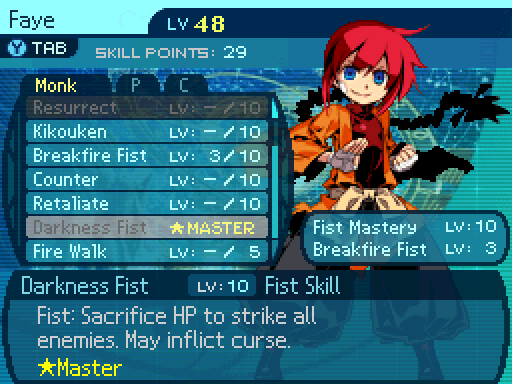 I've come to put an end to hope! Miss Faye, there's a reason why your teachers forbade the use of that technique! I've come to put an end to hope! Miss Faye, there's a reason why your teachers forbade the use of that technique!Darkness Fist is a pretty awful skill. It's an AOE that causes Faye to sacrifice 25% of her current HP to deal 210% Strike damage to all enemies at level 10. It also has a 60% chance to inflict Curse, which is what I'll need for this conditional drop.  DS Version DS Version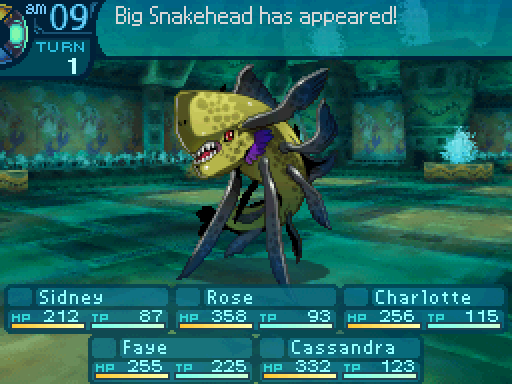 So. Here's the Big Snakehead. It's conditional drop requires killing it with Curse damage. That's NOT killing it while Cursed. No, that would be too easy. Essentially, the Big Snakehead has to kill itself through the Curse ailment. This kind of conditional drop tends to be one of the most hated in the series due to many factors that make them irritating to pull off. You have to apply the ailment when the target is close to dying, since no point to applying Curse early, and Accumulative Resistance limits the number of times you can attempt to inflict it. The conditional drop gets harder to snag as your characters get stronger, as they will be taking less damage overall, decreasing the amount of leeway you have to fulfill the condition. Oh and you can't just make a bunch of weak party members for the target to kill, as Curse damage does not apply from killed victims, they have to survive the attack. 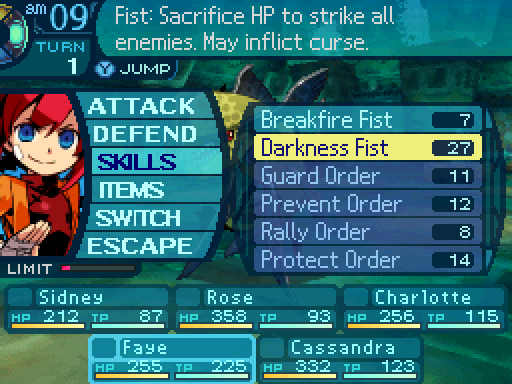  I'll strangle you with your own hatred! I'll strangle you with your own hatred!Well, I landed the ailment, off to a good start.  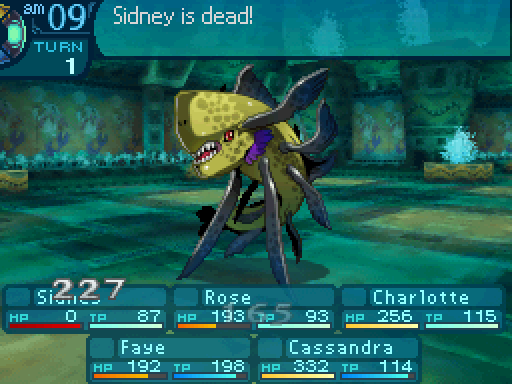  Bury me with my crossbow... Sidney! Rrrgh. You miserable little creature... Bury me with my crossbow... Sidney! Rrrgh. You miserable little creature...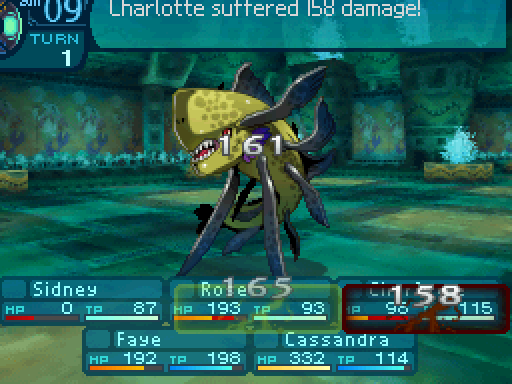 And the damage that Sidney took doesn't get factored into the Curse damage because he died.  YOU'LL PAY FOR THAT! YOU'LL PAY FOR THAT!The Avenger activations should hopefully help keep the other two alive. 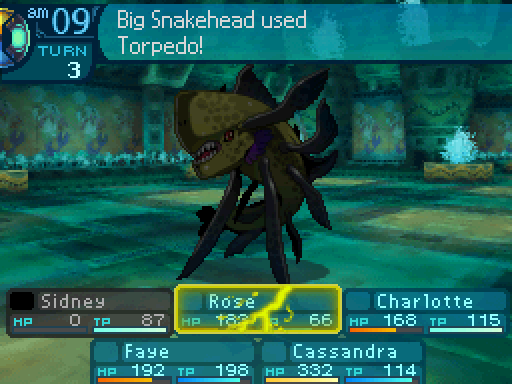 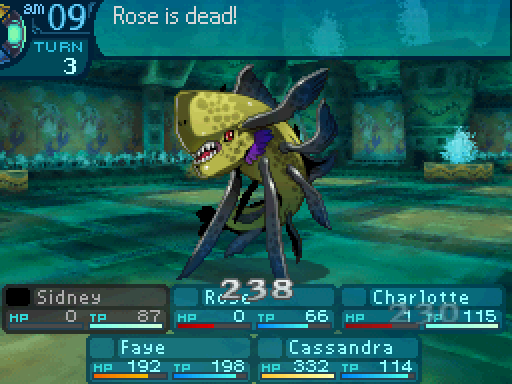 You think you're tough...? You think you're tough...?Or not. 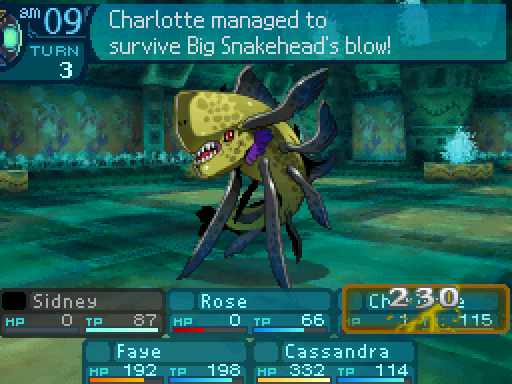 I won't fall that easily! I won't fall that easily!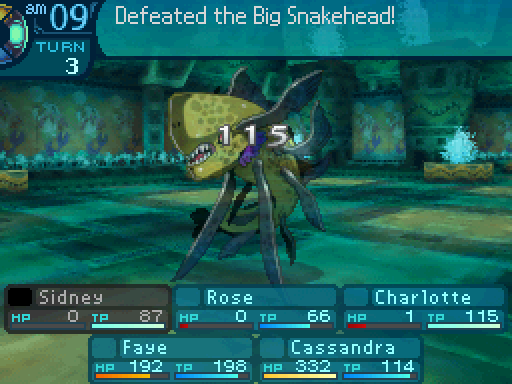 Consumed by the power of hate! Faye, why don't you take a little nap at the guild? I'm sure you're very tired after all this. You have no power over me, crone! Naptime. Now. Consumed by the power of hate! Faye, why don't you take a little nap at the guild? I'm sure you're very tired after all this. You have no power over me, crone! Naptime. Now. Well there's the conditional drop. Probably didn't seem too bad. For random encounters, that conditional drop is a bit irritating. The problem is, bosses have this kind of conditional drops as well. Unsurprisingly, most people decide not to do those legitimately, and just used a Formaldehyde to spare themselves the pain. However, I'll be nice and show how to get those the proper way. But I went ahead and unlocked all the pieces of equipment we can get right now, so let's go take a look at those. 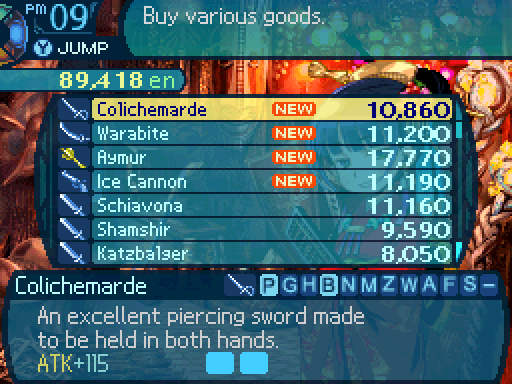  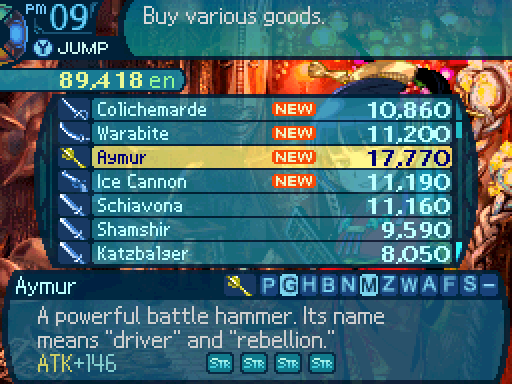  The Ice Cannon provides a 30% damage boost to regular attacks and come imbued with Ice. Could be okay for Swashbuckling Buccaneers. 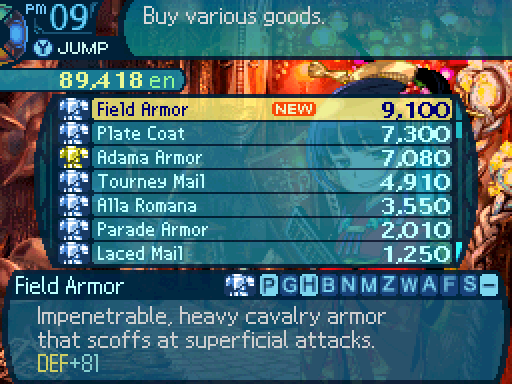  The Strength Ring increases the wearer's STR by 5, and if you want to make your physical attackers deal as much damage as possible, this is the best accessory for them. There aren't any accessories that come with ATK forges in this game.  The Storm Amulet increases the wearer's Volt resistance by 50%. Stack 2 of them to get immunity to Volt attacks, but I find it redundant with Antivolt. If you don't have that skill though, feel free to make use of these.  The Venom Charm gives a 50% resistance to Poison. Like the other resistance accessories, stack 2 of them to gain total immunity to Poison. Though honestly, I don't know what situations this would be handy in. Since all that has been taken care of, let's go ahead and do the next set of Sea Quests. It's been a while since we did those.  DS Version DS Version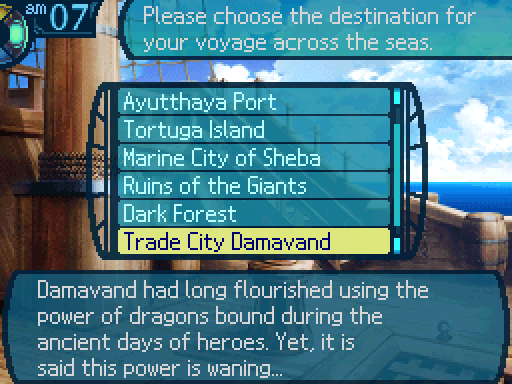 Ooh, I actually really like this set of Sea Quests. I find the fights to be really fun. 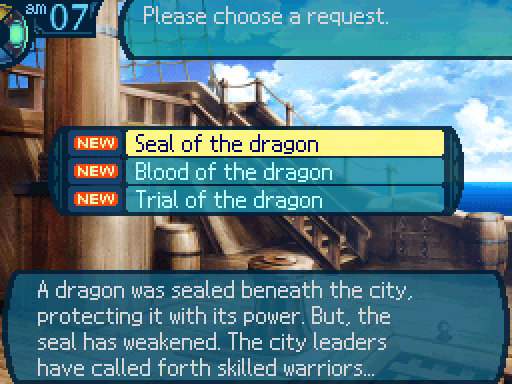 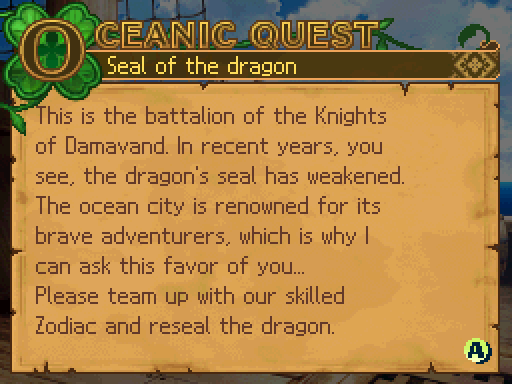 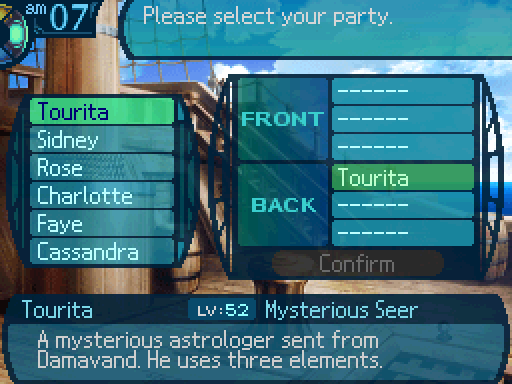 Tourita Class: Zodiac Stats:
  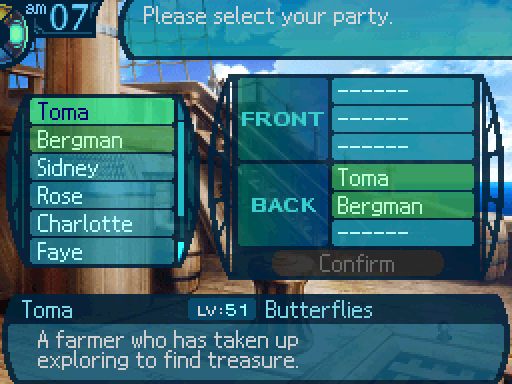 Toma Class: Farmer Stats:
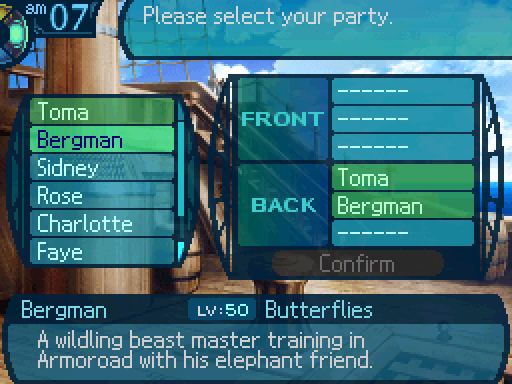 Bergman Class: Wildling Stats:
  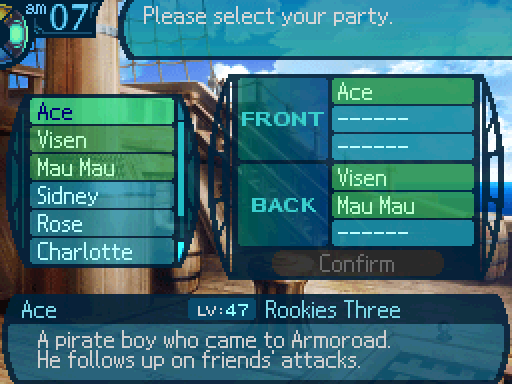 Ace Class: Buccaneer Stats:
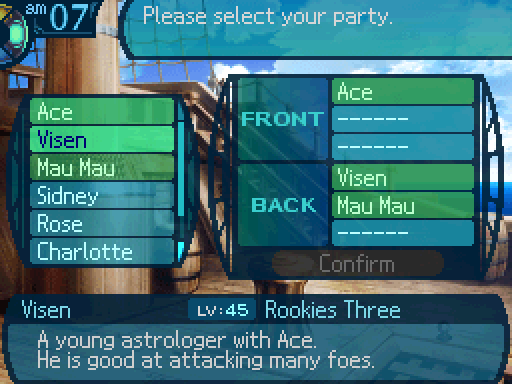 Visen Class: Zodiac Stats:
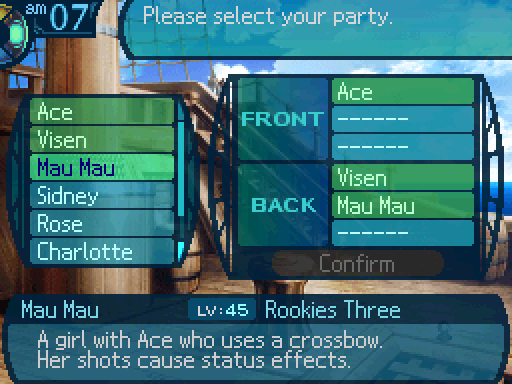 Mau Mau Class: Arbalist Stats:
Now let's take a look at our guild. 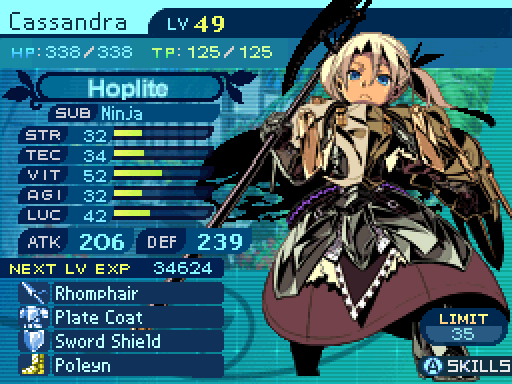 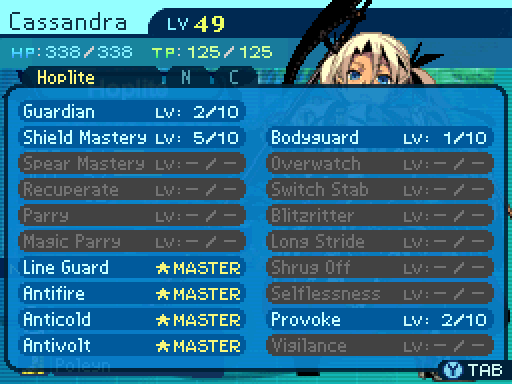  Cassandra is a fantastic support to bring to the fight, as there are a lot of elemental attacks being thrown around, so her Antiskills can make life so much easier for the party. Bunshin also enables her to defend against 2 different elements at once, making life even easier. 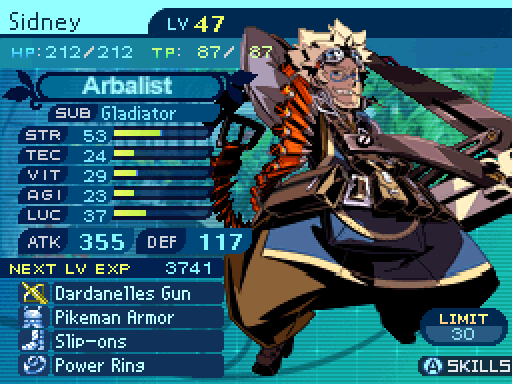  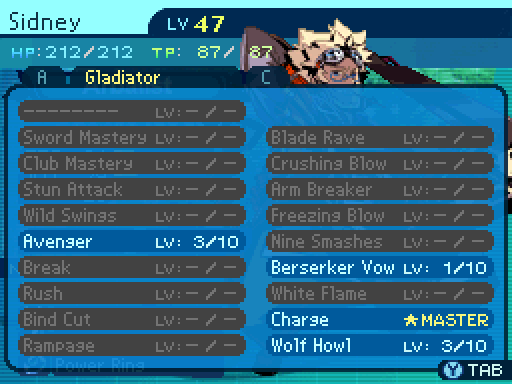 Sidney is a strong offensive party member to bring along, as he has access to both physical and elemental attacks, and it's vital to make use of both in this fight. Granted his elementals aren't as strong as Asteria's. 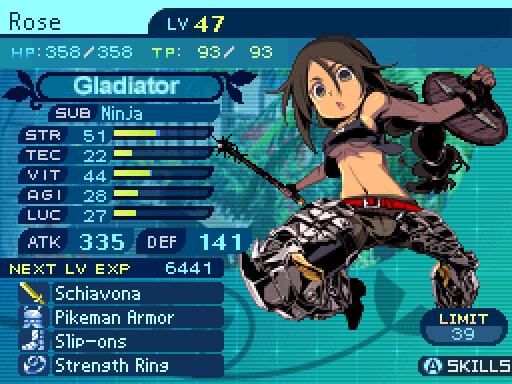 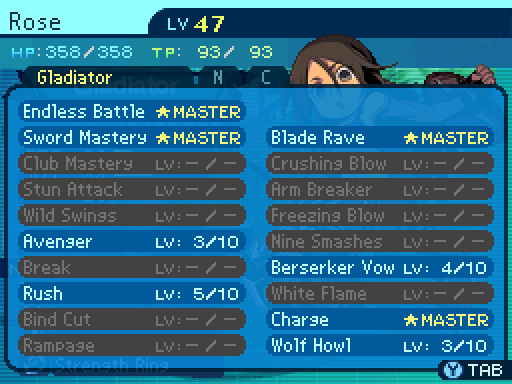 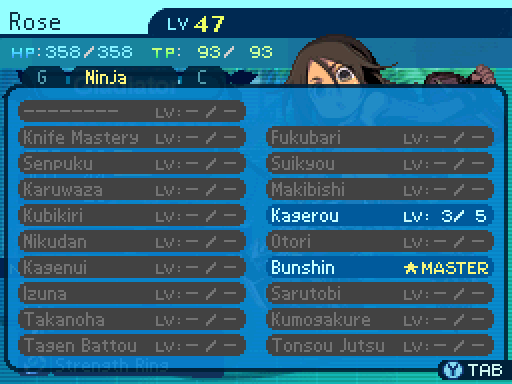 Rose is a strong physical attacker, but her low TEC provides little defense against the minion's elemental attacks. Blade Rave can at least hit multiple targets for a bit of crowd control. 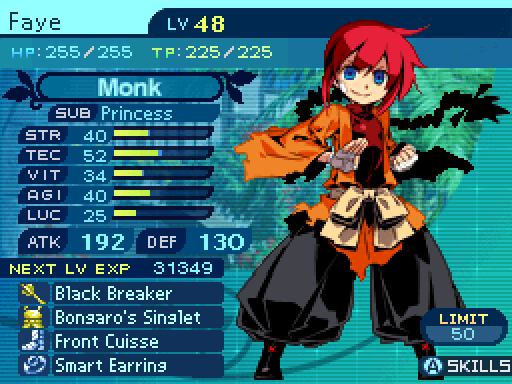  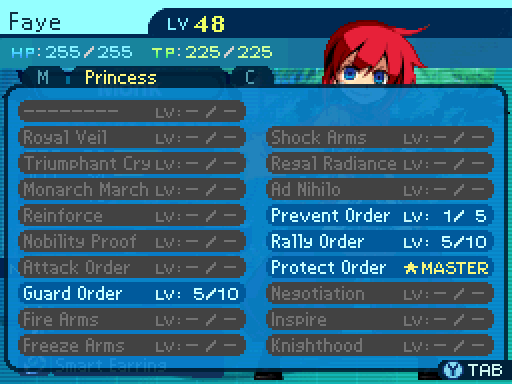 I restored Faye's skillset to what it was before. She's another great support, with fantastic healing capabilities and being able to prevent ailments. 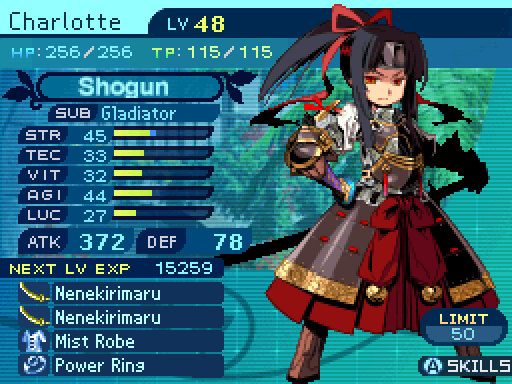  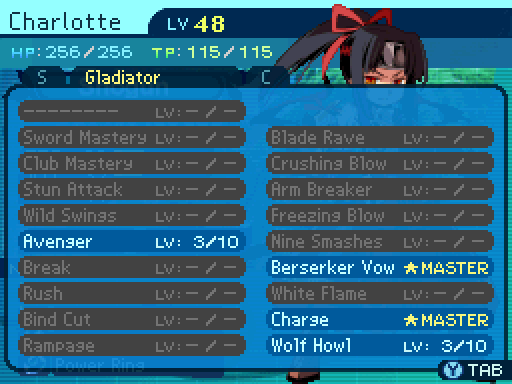 Charlotte is another strong physical attacker, and also one of the most fragile party members. 5-Ring Sword at least gives her the ability to attack multiple targets at once for a bit of crowd control. Oh as an aside, if you have a character with Bloody Lance, bring them to the fight for some hilarity, as Bloody Lance is a really good passive. Sadly I have no party members with that ability anymore. 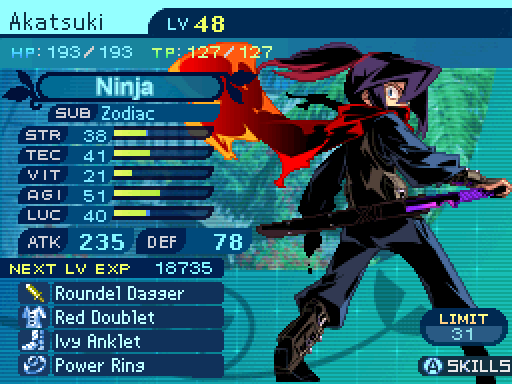   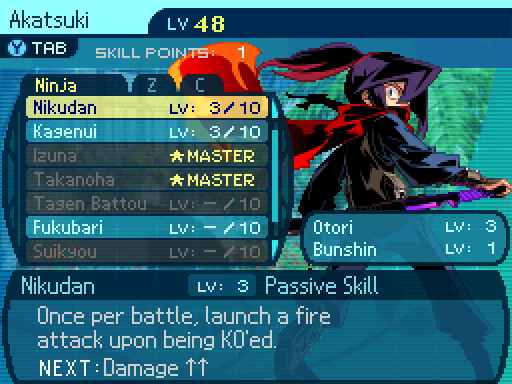 Nikudan deals 240% Fire damage to whoever kills Akatsuki. And that's pretty much all the skill points I'll put into this skill. 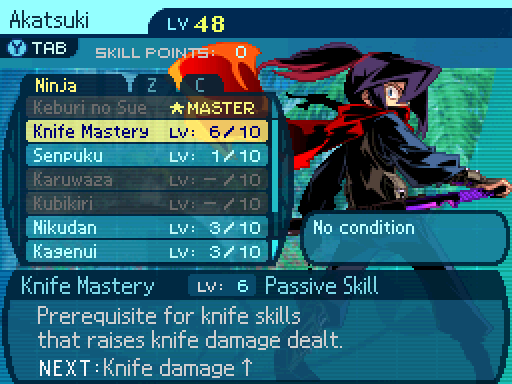 To unlock Akatsuki's next big skill, I want to max out Knife Mastery. Akatsuki is a nice support unit, providing infinite TP to a row and can provide a bit of crowd control with his attacks. Unfortunately, he can't just use Izuna on the boss' minions, as they have Lethal Resistance. 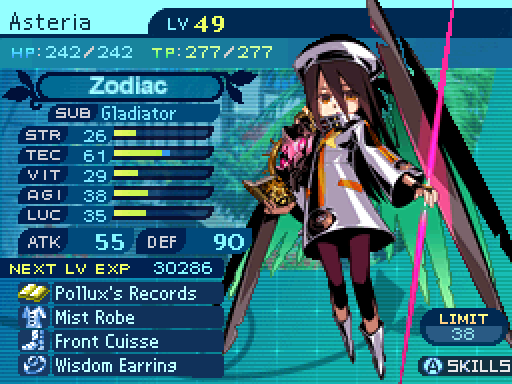  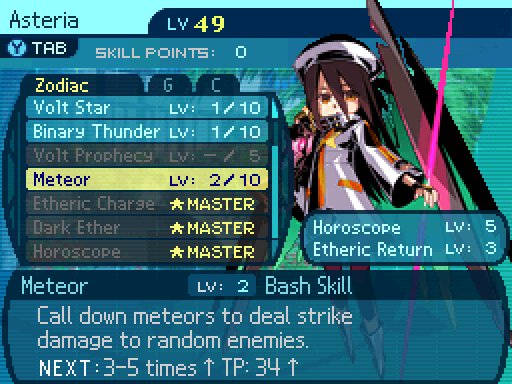  Time to do some clean up with a little meteor shower! Time to do some clean up with a little meteor shower!And Asteria finally has her best damage skill. Meteor is a Strike attack that randomly hits all enemies 3 to 4 times, dealing 38% damage per hit. And it's TEC damage too, so that actually hits really hard. It's why I got the Gladiator subclass for Asteria, as their physical damage boosts work with Meteor. Asteria is a fantastic damage dealer to bring along, as her elemental can wipe out the boss' minions easily, and she has a physical attack in the form of Meteor, so she can deal heavy damage to the boss itself. 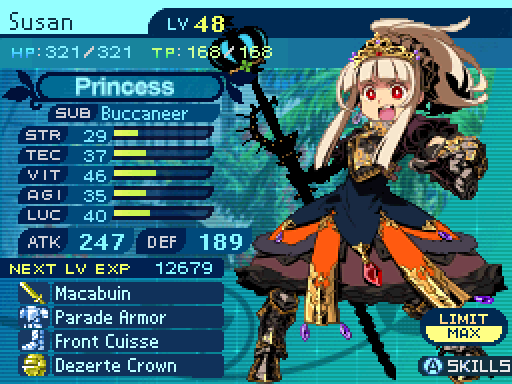 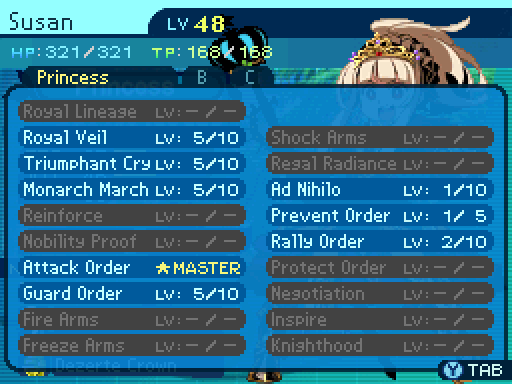  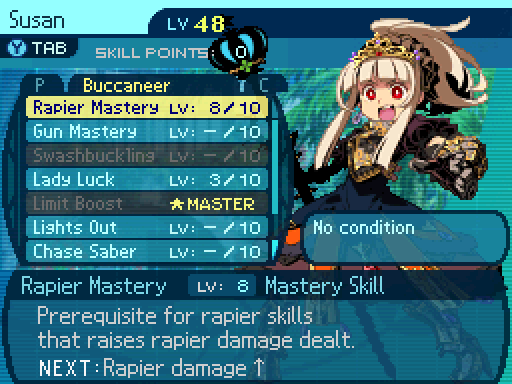 Megaqueen just got Rapier Mastery up to 8, so I'll be working on Gun Mastery now for Swashbuckling. Megaqueen can build up Limit really fast, and can enable our party to kill things faster with her buffs. Prevent Order is also great at stopping any of the ailments the minions try to dish out. 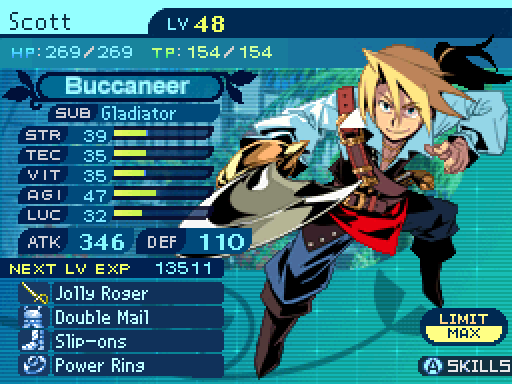   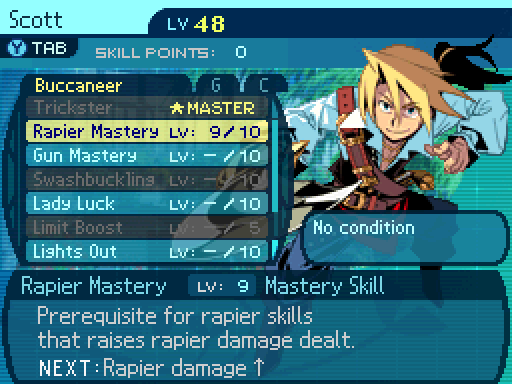 Unfortunately, Scott is about to fall off since he no longer has a damage advantage over the other physical attackers. So I'm trying to get his best damage skill for him, but I may respec him to get him at that point sooner. Scott can increase our party's damage with Eagle Eye, but it's a single target skill. He's an okay physical attacker, and head binds can help out the party a bit. 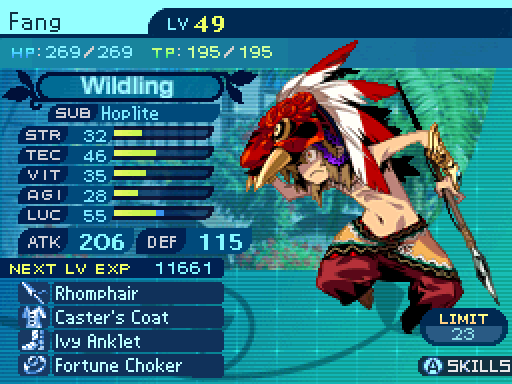  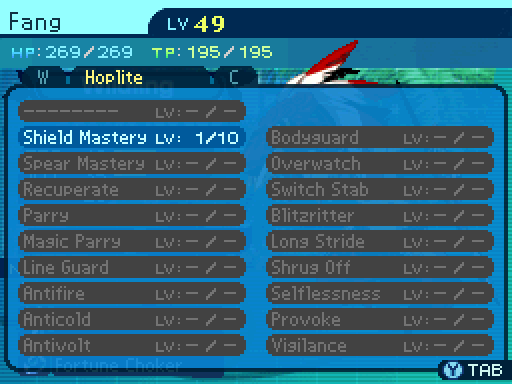 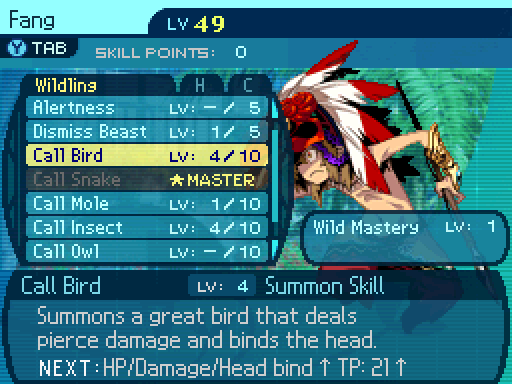 Call Bird has a 32% chance to inflict head bind, the bird comes with 55 base HP, and its initial attack deals 95% damage, while its AI attacks deal 85% damage. Fang is actually a fantastic support to bring to this fight. He pretty much excels in fights that involve multiple minions being summoned over and over due to the accumulative resistance mechanics. He can decrease all enemies' physical defenses with Primal Drums, and Call Elephant is fantastic lockdown in these fights. Unfortunately he kind of conflicts with other Bunshin users due to how summoning is handled in this game. 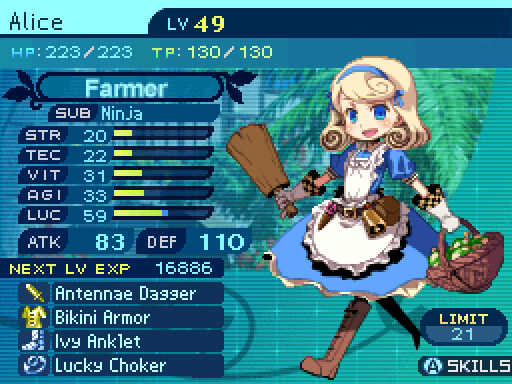  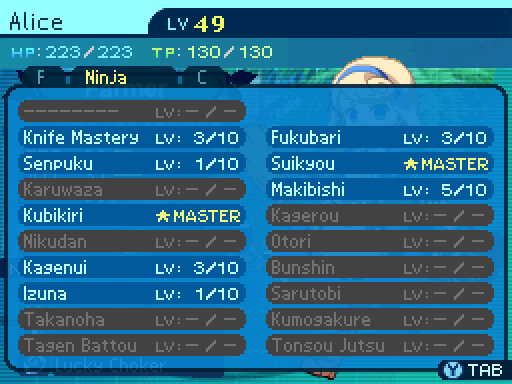   Finally. Getting Knife Mastery to 3 unlocked Izuna. 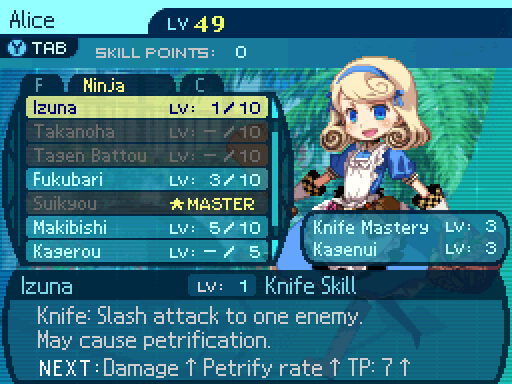  Um, this seems dangerous. That may be true, but it is necessary for fast eliminations. Um, this seems dangerous. That may be true, but it is necessary for fast eliminations.Now that Alice has Izuna, she can spend some TP to eliminate targets I really want gone fast. Alice is well, Alice. If you think she would excel in fights where there are a bunch of minions being summoned, you would be right. Except in this fight, the minions have Lethal Resistance. So she really can't do much. Aside from maybe putting them to Sleep with Lullaby. Vote for up to 3 party members you want to see participate in these Sea Quests. Votes must be in bold. Araxxor fucked around with this message at 06:32 on Aug 18, 2016 |
|
#
?
Mar 22, 2016 00:10
|
|
|
Sidney, Asteria, and Cassandra.
|
|
#
?
Mar 22, 2016 00:27
|
|

|
Asteria, Cassandra, Faye
|
|
#
?
Mar 22, 2016 01:13
|
|

|
MEGAQUEEN, Sidney, Fang.
|
|
#
?
Mar 22, 2016 01:13
|
|

|
The person who came up with the idea to make Curse kill conditionals is too cruel.Hivac posted:Sidney, Asteria, and Cassandra.
|
|
#
?
Mar 22, 2016 01:30
|
|
|
Asteria, Fang, Sidney
|
|
#
?
Mar 22, 2016 01:36
|
|


|
Fang, Asteria, Scott
|
|
#
?
Mar 22, 2016 01:56
|
|

|
Alice, Cassandra, Charlotte
|
|
#
?
Mar 22, 2016 02:12
|
|

|
Asteria, MEGAQUEEN, Cassandra.
|
|
#
?
Mar 22, 2016 02:14
|
|
|
Votes so far: Asteria: 6 Cassandra: 5 Sidney: 4 Fang: 3 Susan: 2 Scott: 1 Alice: 1 Charlotte: 1 Faye: 1 Akatsuki: 0 Rose: 0
|
|
#
?
Mar 22, 2016 18:27
|
|
|
Then weapon speed modifiers are a bit funny. Apparently, if a guy with a knife fights a guy with a spear, the knife guy is expected to get the first attack.
|
|
#
?
Mar 22, 2016 18:50
|
|
|
Rose, Susan, Asteria
|
|
#
?
Mar 22, 2016 19:35
|
|
|
Cassandra, Sidney, Fang
|
|
#
?
Mar 22, 2016 20:06
|
|

|
Rose, Sidney, and Faye
|
|
#
?
Mar 22, 2016 22:34
|
|


|
Sidney, Rose, and Cassandra.
|
|
#
?
Mar 23, 2016 02:27
|
|
|
Alice, Charlotte, Faye
|
|
#
?
Mar 23, 2016 05:40
|
|
|
Killed by a backlash that can't kill you. Yeah, I see why you'd go formaldehyde.
|
|
#
?
Mar 24, 2016 01:25
|
|
|
I quite like this set of fights. And I agree, Bloody Lance is pretty great here. Adding Warrior Might is just ridiculous overkill.
|
|
#
?
Mar 24, 2016 01:52
|
|

|
Hivac posted:Sidney, Asteria, and Cassandra.
|
|
#
?
Mar 24, 2016 06:36
|
|
|
Asteria, Faye, Rose. They mentioned dragons a lot. I know they don't usually show up until the postgame, but I'm a little worried that our old friends Wyrm, Wyvern and Dragon might show up.
|
|
#
?
Mar 25, 2016 20:38
|
|

|
Whoever will allow you to make the next boss whimper like a pansy.
|
|
#
?
Mar 26, 2016 01:50
|
|
|
Doesn't look like we're getting anymore votes so VOTING IS CLOSED! Final results: Asteria: 9 Cassandra: 8 Sidney: 8 Fang: 4 Rose: 4 Faye: 4 Susan: 3 Alice: 2 Charlotte: 2 Scott: 1 Akatsuki: 0 My choice: 3 Well looks like there's a bit of a tie. Fortunately that very last vote enables me to break it. I'll give 2 of those votes to Susan, and one of them to Fang. Reasons being I'd rather have another support than a damage dealer, so I'm not using Rose. And I'd rather have a buffing support instead of a healing one, so I'm not going with Faye either. So that makes the party Cassandra, Sidney, MEGAQUEEN, Fang, and Asteria!
|
|
#
?
Mar 26, 2016 04:33
|
|
|
I've got the next update recorded. Though something funny happened when I tried to go for the boss' conditional drop. It's don't kill with physical. Dunno if I'll include this bit in the next update, since it wasn't supposed to happen. 
|
|
#
?
Mar 26, 2016 09:03
|
|
|
Sidney: Embodies the word Overkill. Doesn't give no fucks about conditionals.
|
|
#
?
Mar 27, 2016 04:40
|
|

|
The next update is a bit image heavy and we're pretty close to the next page. So, why don't you all post about your favorite Etrian portraits or whatever?
|
|
#
?
Mar 28, 2016 21:03
|
|
|
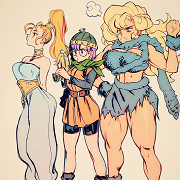
Dr. Fetus posted:The next update is a bit image heavy and we're pretty close to the next page. I like the pink haired imperial from 4.
|
|
#
?
Mar 28, 2016 21:10
|
|


|
I like the blonde imperial 
|
|
#
?
Mar 28, 2016 21:11
|
|
|
The Raquna arbalist from EO3. Dunno why- I think I just like the class and I don't really like the other designs that much.
|
|
#
?
Mar 28, 2016 21:20
|
|
|
I like the super-smug Shogun from this game, actually no i'm not sad she didn't get picked shut up
|
|
#
?
Mar 28, 2016 21:35
|
|

|
I'm definitely biased, cause Fetus picked my character in EO2, but I really like the second Medic portrait, with his dumb hair and happy go lucky attitude. The other portraits from those games I'm a bit eh about cause they've been in four games now and we could use some different ones. It's also why I'm a big fan of the EO3 portraits cause they really sell how different and unique the characters and setting are when compared to 1 and 2.
|
|
#
?
Mar 28, 2016 21:36
|
|

|
I also really like Cassandra's, and just the Hoplite visual design in general. It's rad and their armor is cool. (Imperial armor is really silly and dumb.)
|
|
#
?
Mar 28, 2016 21:42
|
|
|
I like the blonde female Dark Hunter portrait
|
|
#
?
Mar 28, 2016 21:43
|
|
|
Old-man Ronin is good portrait from EOU2 totallynotbiasonmypartfromtheEOU2LPgoingonrightnow
|
|
#
?
Mar 28, 2016 21:47
|
|
|

|
| # ? May 28, 2024 08:42 |
|
|
If your favorite portrait isn't EO1/2 Medic 3 (orange-haired male) then what is wrong with you? EO4 Medic 1 isn't as good but is an acceptable substitute
|
|
#
?
Mar 28, 2016 21:48
|
|