

|
VW parts houses either don't have, or charge ludicrous prices for, m8x1.25 56mm exhaust studs. I mean, like $6 apiece. Well, would you look at that. Also, is there anything better or cheaper than this Time-Sert kit? EZ-Lok isn't available on Amazon.
|
 #
?
May 30, 2016 22:48
#
?
May 30, 2016 22:48
|
|

|

|
| # ? May 19, 2024 16:25 |
|
|
Geirskogul posted:Well, would you look at that. What an appropriate price for a fine automobile such as yours! 
|
|
#
?
May 30, 2016 23:02
|
|

|
Yeah, really happy with that find. Also, since the bus is (again) going to be parked for the week because I don't want to burn up an exhaust valve, I took some lovely photos.   And the beetle:    (the wax I did last year is finally failing) I also took a lovely video: https://www.youtube.com/watch?v=_Lsjgvvmrl8 And the kitten has finally learned to use the big water fountain. In-between destroying everything in sight, he'll sit and stare at the other cats doing things, and then emulate them. It's so cute.  I watched him watch me pet another one of our cats, Isis. When Isis laid down and rolled over to get her belly scratched, he procedded to awkardly lay down on his back and roll over, too (but keeping his eyes locked on her to judge if he was doing it right) 
|
|
#
?
May 30, 2016 23:28
|
|
|
What did the vet have to say about him?
|
|
#
?
May 31, 2016 01:11
|
|


|
Blood tests negative, but he has an eye infection. Also they wait until 6+ weeks to neuter.
|
|
#
?
May 31, 2016 01:55
|
|
|
Dude, thanks a ton for this. If I hadn't known about the heater channels I wouldn't have thought they were a problem, let along a huge one.
|
|
#
?
May 31, 2016 19:15
|
|


|
Ugh, here goes the play money And, let's look at tomorrow's temperature    
|
|
#
?
Jun 4, 2016 10:41
|
|
|
Geirskogul posted:And, let's look at tomorrow's temperature Yeah, I feel your pain. Projected high of 116 here. 106 at 10 AM. I think I'll be staying indoors and home today.
|
|
#
?
Jun 4, 2016 18:02
|
|

|
I'm pleased to share that I chose this weekend to be in San Diego instead of Phoenix. I think it's supposed to get up to a blistering 73 today.
|
|
#
?
Jun 4, 2016 18:06
|
|


|
"It's a dry heat" doesn't apply any more when it's well over 100F. That's just drat hot.
|
|
#
?
Jun 4, 2016 19:47
|
|


|
It does to a limited extent because your sweat actually evaporates eventually, but... yeah it's loving hot. Made sure to hammer out my yard work so it was all done by 10AM.
|
|
#
?
Jun 4, 2016 19:59
|
|


|
The Locator posted:I'm pleased to share that I chose this weekend to be in San Diego instead of Phoenix. I think it's supposed to get up to a blistering 73 today. That's already too hot 
|
|
#
?
Jun 4, 2016 20:06
|
|
|
poo poo, I overslept. Meant to start in the morning. Instead of doing my usual mechanics coveralls, I might lay a disposable blanket down instead and stay in shorts and a tee shirt. A preheated oven is also a "dry heat." And you cook turkeys in those.
|
|
#
?
Jun 4, 2016 20:36
|
|
|
Wrar posted:"It's a dry heat" doesn't apply any more when it's well over 100F. That's just drat hot. My cutoff here for being outside for things is about 107. Below that and I can handle light work. Above 107 and it just feels like I'm being cooked to death.
|
|
#
?
Jun 4, 2016 22:14
|
|
|

|
|
#
?
Jun 4, 2016 23:59
|
|
|
Kit:  Tools. MY BODY IS READY  New studs:  Compared to old:  While I was down there, I noticed I had a remanufactured alternator:  Removing the exhaust, along with the PO's (and my) futile attempts to stem this exhaust leak.   Annealing the copper exhaust gaskets, because Amazon forgot to include mine in this last order:  Step 1: remove fuckered stud (sometimes the longest step)  Step 2: Drill out hole   Step 3: Counterbore hole  Step 4: Tap hole  (Step 4a: clean out tapped hole) Step 5: Using insert tool and plenty of oil, thread in the Time-Sert insert. Insert will initially thread in easily, then it will become difficult for 3-5 turns at the tool expands the last few threads in the insert to lock it into place.    Step 6: Using high-temperature red loctite, thread in new exhaust stud.    The exhaust gaskets were cool by now, so I flattened them out and gave them a very light sanding, and will re-anneal them before installation.  (pictured: sanding not complete) Also, note how the PO or PPO or PPPO has already done this to the other cylinder: 
|
|
#
?
Jun 5, 2016 00:07
|
|
|
Okay, so I had to time-sert two other studs, as they also spun out when I went to do the final nut tightening on them after installing the tailpipe (both sides are loosely installed, tailpipe is installed and tightened, then you tighten the manifolds to the head -- otherwise they often are too "narrow" to allow the tailpipe to go on). After that, there was one broken off stud left. Vice grips weren't cutting it, and I tried torching the area and cooling over and over, along with penetrating fluid. Eventually, I went on a vision quest for a stud extractor set. Harbor freight was a no-go, so was Home Depot. Autozone and the local Oreilly's didn't have one, either. Defeated, I turned around to go home, but stopped off at a NAPA just to check. They didn't have one in stock, either, but on the way out I spotted a yellow Irwin blister pack on their "will call" order wall. There it was! Exactly what I needed! I asked about it, but the cashier said it was a customer pickup. On the way out, the manager called me back and said that the guy was supposed to pick it up weeks ago, so he let me purchase it. Ta da!  Armed with the 8mm extractor, I attacked the stud after another heating and cooling round. It snapped off nearly at the base of the head. Having wasted $30, I decided to call Time of Death and just went on with the project. I know that may seem like bad ownership, but when I started this project last weekend each cylinder only had ONE stud holding the exhaust on (4 total), and now only ONE was missing (7 total). I'm calling that a success anyway, and resumed reassembly. I also used two, full tubes of that silica-based exhaust sealing paste on every joint and crack and rattle.
|
|
#
?
Jun 5, 2016 04:21
|
|
|
Alternately: https://www.youtube.com/watch?v=YJi3G2oUOfY I'm pretty sure this thing isn't even snap-on (I haven't managed to find it in their catalog) but a bunch of aftermarket chinese companies seem to make them. Maybe the impact action would have gotten it out easier than trying to twist it out with one of those extractors?
|
|
#
?
Jun 5, 2016 06:08
|
|
|
I looked up buying one of those, but there's really not enough room around the stud for it to fit. It's even on Amazon Prime Now in phoenix and I could have had it in one day. E: also thank you CA: https://www.youtube.com/watch?v=4PYt0SDnrBE Queen_Combat fucked around with this message at 08:24 on Jun 5, 2016 |
|
#
?
Jun 5, 2016 08:19
|
|
|
Probably not viable for you, but if you ever really have to do something on your car/bus on a weekend (or on a Wednesday/Thursday when I work at home) and you want to make the stupid drive out to Buckeye to escape the sun/heat, you are welcome to drive out here and use my garage. Have a big air compressor that's noisy as hell, and a fairly decent selection of tools (no air-impact though, just an air-ratchet).
|
|
#
?
Jun 5, 2016 09:49
|
|
|
That's a very generous offer, and the drive isn't bad compared to our 250-mile daily average on the ambo, so it doesn't bother me. A few dollars in gas is nothing for a garage. If something comes up where I can still drive it but need a garage (like the ever-increasingly "that oil spot is getting bigger"-inevitable engine pull to replace the front main seal in the beetle) I'll be sure to post here and send you a PM.
|
|
#
?
Jun 5, 2016 09:58
|
|
|
Cool, just need to make sure to chat so you don't assume I have tools you'll need when I may not! When I'm working on my car (pretty much just oil changes these days) I close the garage and use a box fan to send sweet cooling air from the house out into the garage to keep it somewhat cool (or at least not nearly as hot as outside). The garage door/walls/ceiling are all insulated, so it works moderately well.
|
|
#
?
Jun 5, 2016 10:04
|
|
|
I've been there before... removing busted off studs is just a miserable, thankless, usually-fruitless task. Busted off studs in aluminum is even worse, I can't believe you got as lucky as you did. At around 3-4AM I finally gave up on getting a busted stud out of the cylinder head on my red XJ's 4.0L and did what you did, I slammed the motor right back in and said gently caress it, it'll do for now. And it did. It lasted a few months before it started leaking again. One missing stud is better than 50% missing studs, you did well. If you have to drill that fucker out it is going to be truly horrible, since I'm sure it's not coming out because it's corroded in place and the surrounding aluminum is so much softer than the steel that it'll be impossible to keep the drill on target. That being said, I'd pull the head, flip it over so the busted stud is on the top, and use alum to dissolve it out.
|
|
#
?
Jun 6, 2016 22:16
|
|

|
Yeah, after discovering our AI spirit guide, AvE, I've been pondering that. I'm just lazy enough to leave it as-is until the next head removal is required, which could be anywhere between 1 and 300 more hours of operation.
|
|
#
?
Jun 7, 2016 00:02
|
|
|
How to fix an ambulance, brought to you by compensateme and geirskogul. https://www.youtube.com/watch?v=TS_LMSXmu_s Also, how to murder an ambulance, brought to you by compensateme and geirskogul. https://www.youtube.com/watch?v=WKfLrm8dlyo Illegal Alienation fucked around with this message at 05:53 on Jun 11, 2016 |
|
#
?
Jun 11, 2016 05:45
|
|

|
compensateme posted:Here's how to fix an ambulance, brought to you by compensateme and geirskogul. https://www.youtube.com/watch?v=TS_LMSXmu_s
|
|
#
?
Jun 11, 2016 05:52
|
|
|
It's okay, you guys don't need to run code anytime soon. What the hell is the purpose of that screeching (when it's not malfunctioning)?
|
|
#
?
Jun 11, 2016 06:52
|
|

|
When a rear door is open. However we did a psych run down to Tucson and it was pouring rain. Inside the truck as well. We lost all mod electrical (the box is the mod) and the door switches started freaking out. It's normally a solid buzz, not a pattern.
|
|
#
?
Jun 11, 2016 07:33
|
|
|
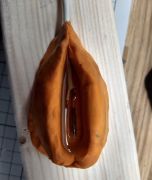
 I have no money right now, and the next thing I need to do with the bus is fix the sliding door again. The V-grooved bearing that the door rests on split in half suddenly on Thursday, so the side door is Out of Order until I spend $25 on a special VW bearing. What I do have, however, is two mini-kegs of Heineken and a 3D printer, along with a few little issues on the beetle. The first (and maybe only) thing I'm tackling this weekend is the rear turn signals. The beetle's rear turn signal lenses have been bleaching clear over the past two years, so they're no longer yellow. This is bad, because the COB LED bulbs I have back there are a bright white, and we all know that a car with white turn signals is annoying as poo poo. They look kind of like this:  I hate the fact that my phone does auto white balance (and I can't change the setting, LG G3 Vigor) because I need you to believe that the following picture has a white flasher:  It looks yellow, but that's just a trick of the remnants of the yellow coating. I wanted a double-walled 3D printed object that had no infill, so it would diffuse the light from the LED bulb evenly. I could easily print a cylinder that fits snugly over the bulb, but where's the fun in that? It took a few trial-and-error iterations.   Signal before:  Signal after:  It's a neon/transparent orange, so it looks a bit funky, especially in low light. It's fluorescent so it kind of looks brighter than everything else. The hole was meant to vent hot air (even LEDs get hot, especially in the summer) but I had a brain fart and forgot about orientation when I was designing it.  Again, you're going to have to trust me on this, but this turn signal flash is a brilliant orange/amber, with no trace of white anywhere. It's not as bright as the bare bulb, but at night through testing it honestly was way too bright before. I've been driving around for a year as that rear end in a top hat that has blinding turn signals, apparently.  E: I made two gifs showing the difference, hopefully.  
Queen_Combat fucked around with this message at 04:29 on Jun 12, 2016 |
|
#
?
Jun 12, 2016 04:21
|
|
|
That's super awesome - how cost effective are the 3d printers if you don't take purchase price into account? How much does a piece like that cost to make?
|
|
#
?
Jun 12, 2016 04:35
|
|
|
A roll of filament is 2.2 lbs (1kg), varies between $15 and $20 depending on color (transparent orange is $17/roll), and each of my prototypes was estimated to be .06lbs on the slicer. So around .45 cents each. Add electricity, which is (off-peak) 7c/kWh, and the printer that consumes about 300 watts to heat up and 180 watts to maintain heat and movement, so let's say 250W average (heat-up is pretty long). Each prototype was about 45 minutes of printing plus heat-up, so let's just say one hour of use at 250W. That's, what, 2-4 cents? Each nozzle is around $3, and they last about 100-150 hours of printing before I throw them out due to contamination and wear, because they're brass. Also the belts on the printer are $10/apiece, and there are three, and each set of belts is probably good for 2000 hours or so with proper care. I have nearly that many hours of printing (I think) but I can see some good wear on the belts and they'll probably eat it sometime this year. 90% of the belt wear was from when I was learning and crashed the head a few times, causing the belts to skip. That still happens on occasion. So each part cost between $.50-1.00. Queen_Combat fucked around with this message at 04:47 on Jun 12, 2016 |
|
#
?
Jun 12, 2016 04:44
|
|
|
That's the answer I was hoping for - can't wait for the future.
|
|
#
?
Jun 12, 2016 04:46
|
|
|
I've been able to replace impossible to find things by printing them in my own home for pennies, and I've been able to think up a thing I want one day, and have it the day after. And nearly everything I own uses the same charger. I can change my thermostat from my phone without getting up, and if there's a fire my house lets me know and I don't have to pay for a monitoring service. But on the flipside, awhile back I couldn't charge my book because I was already charging my cigarette, and it's nearly impossible to "own" music now, only to rent a license to use it. The future is already here, and it is kind of dumb. E: I know it looks super bizarre, too. I'm already printing a better one, now that I have the measurements figured out. Queen_Combat fucked around with this message at 06:22 on Jun 12, 2016 |
|
#
?
Jun 12, 2016 05:03
|
|
|
Geirskogul posted:
Have you tried any third party camera apps? I use Open Camera when I need more control over the settings than the bundled Motorola app I normally use offers.
|
|
#
?
Jun 12, 2016 09:20
|
|
|
Welp, the 98 explorer 4.0 SOHC is having a lot of issues, suddenly. Elizabeth says she drove to work just fine, but when she started it to come home it was suddenly not idling and very rough. It is making what nearly sounds like a belt squeaking noise, but it's not the belt, and feels like it's only running on a few cylinders. Like, less than 4. I got it to idle a bit better by cleaning the felt air filter element on the IAC valve, which allowed the truck to surge up more easily, but it's still very rough. I've already done the intake gaskets (2 years ago), but there's a chance that the aftermarket kit (FEL PRO) was actually crap. That's always a possibility. I need to find my code reader.
|
|
#
?
Jun 14, 2016 03:58
|
|
|
Well, after cleaning the IAC valve and lubing it up, it is an issue. But even after doing that (which allowed the truck to idle) it still had no power, and was dumping fuel. I cleared the codes with the battery, and gave it some time to start up again. Pinged the Check Engine light (with flashes for the first bit, code in progress) when I tried to give it throttle. I started searching for hours and hours for a solution. Cleaned MAF and Air Charge Temp sensors, tried to run with MAF unplugged, etc. Eventually, I gave up and started to look for "Ford 4.0 SOHC noise" videos on Youtube, and I found one that matches it perfectly. https://www.youtube.com/watch?v=ALRCRqv7kxs poo poo. Let's look in the comments:  And his followup video: https://www.youtube.com/watch?v=lkYaqxoVaTc  I was just posting in the stupid questions thread about how I was counting down the days when something like this happened. Four days ago 
|
|
#
?
Jun 14, 2016 07:43
|
|
|
Hey, my 4.6L SOHC did that too! Just Ford Things: https://www.youtube.com/watch?v=3k_9Ty664tg
|
|
#
?
Jun 14, 2016 08:30
|
|

|
Yours says dying oil pump and sounds different. Did it have the same result of grenading the tensioner? What did you do afterwards with the Explorer.
|
|
#
?
Jun 14, 2016 08:37
|
|
|
Geirskogul posted:Yours says dying oil pump and sounds different. Did it have the same result of grenading the tensioner? What did you do afterwards with the Explorer. What actually happened is:
Mine was also in a Mustang, not an Explorer, but of a similar era (2000). Here's what the oil pump looked like when I pulled it out:  I know in my case, we didn't catch it early enough to prevent massive metal contamination. If you've caught it early (or if the 4.0 is sufficiently different), you may be able to just replace the tensioners and be fine. I paid someone nearly a grand to do it and it didn't do jack. (Sorry if this isn't terribly helpful, I intended it more as commiserating.) Krakkles fucked around with this message at 08:55 on Jun 14, 2016 |
|
#
?
Jun 14, 2016 08:48
|
|
|

|
| # ? May 19, 2024 16:25 |
|
|
Oh, well, this poo poo isn't worth $1000. I'm already selling off some car parts etc on ebay to come up with funds to buy a <$1000 craigslist beater for her. I'm thinking a crown vic, or a SOHC forester within my price range. Unless the crown vics have anything major other than oil consumption. Already see a few specials with no back seat (irrelevant) for $750 or so. Any gotchas with those? SOHC Forester because I've already dealt with DOHC head gasket replacement with my (RIP) 97 Outback. Anybody want to buy a never-installed Motogadget M-Unit V2 for way less than the $400 MSRP? Titleless (lost it) 2009 Royal Enfield AVL for a grand? Only needs a hone!
|
|
#
?
Jun 14, 2016 09:57
|
|