

|
W.T. Fits posted:Missy, you're drunk. Go home. And stop stealing Edie's sister's lines. That's not cool. Oops. I don't even know how that happened. Fixed.
|
 #
?
Oct 23, 2016 05:33
#
?
Oct 23, 2016 05:33
|
|


|

|
| # ? May 29, 2024 00:23 |
|
|
Hobgoblin2099 posted:Thousands of birds pooping in unison. Giant, violent, horse-sized birds no less.
|
|
#
?
Oct 23, 2016 09:36
|
|


|
Man, the serious sidequests are starting to come out of the woodwork now, aren't they?
|
|
#
?
Oct 23, 2016 20:36
|
|


|
Eh, I was able to finish that last quest before exploring 20F, with a party that's pretty similar to yours. It was certainly a thing though.
RegalStar fucked around with this message at 20:42 on Oct 23, 2016 |
|
#
?
Oct 23, 2016 20:36
|
|

|
Nice.
|
|
#
?
Nov 3, 2016 19:28
|
|


|
Class Showcase: Monk Monks were one of the few classes that did not have their name changed when the game was localized for the US. They're the main healing class in this game. Essentially, they're the Medic class from the first two games. The healing mechanics in Etrian Odyssey III underwent some huge changes compared to the first two games. In the first game, healing skills restored a specific amount of HP, and that could not be adjusted aside from one passive only the Medic had. The 2nd game gave more classes healing skills, while still keeping the base healing concept, though it made it so that the TEC stat had a slight effect on them. With the introduction of subclassing in EO3, handling healing in that manner was no longer an option. If healing skills still operated on the concept of providing a base amount of healing, any class could become a healer and render the Monk pointless. So instead, EO3 made it so that healing skills were multipliers that were heavily influenced by the TEC stat, and the games kept that way of handling healing skills since. And because TEC has a really heavy influence on healing skills, the whole tiered healing skills concept (The first two games had multiple versions of healing skills, with stronger ones healing more, but were slower to go off) the first two games made use of isn't really in this game. In the first Etrian Odyssey game, Medics weren't just healers. They were also incredibly strong front line fighters that could stun lock everything in the game, including every single boss while dealing hefty amounts of damage. Their combat capabilities were heavily nerfed in the 2nd game, and their offenses never reached the levels they did in EO1 ever again. The reason I'm explaining this is because for some reason, the devs insist on saddling the healing class with combat skills. The Monk is no different, as their offenses center around punching things in the face. Unfortunately, like the Medics in EO2, they really aren't good at that job. Their offenses fall short compared to the other dedicated attacking classes in this game. Though the intention may have been for the Monk to use them whenever they weren't healing. Which was fairly plausible, as Monks do get a lot of free turns in practice. Unfortunately, subclassing exists, which lets them use those free turns for something more useful. As such, there is very little reason to increase the Monk's mediocre offenses, when you could increase their support capabilities instead. Anyways, Monks are pretty strong in the early game, whether you're using a Punch Monk or a support Monk. Punch Monks actually deal a decent amount of damage to enemies in the 1st Stratum, but their damage will fall off very quickly since a Monk's fists aren't as powerful as most weapons you have access to at those points. Though oddly enough, once you reach the post-game, fists actually start dealing respectable damage again due to the mechanics of how fists work. (More on that later.) Support Monks are invaluable in the early game, as that is easily the roughest part of any EO game that isn't the post-game. After that, they're still pretty great at keeping your party alive. A support Monk is a valuable class to have on your team. Punch Monks, not so much, but there are ways to make them work. Equipment: Weapons: Clubs, Knives, and Books. Armor: Light Armor and Clothes. While everyone can use fists by simply not having any weapon equipped, the game does impose a damage penalty for attempting to do so, making that not really an option for other classes. Monks are a little special in that they have a passive that eliminates said damage penalty on fists. It should also be noted that while most weapons have a base accuracy of 98, fists have a base accuracy of 95 instead, making them slightly more inaccurate than weapons. Stats 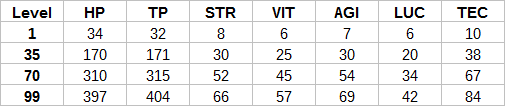 Monks have the 2nd highest TEC stat in the game, making them fantastic healers and heavily lessens the damage taken from elemental attacks. They also have the 2nd largest TP pool out of all the classes, so they don't have to worry about running out of it, especially since their skills don't cost that much TP. Their VIT stat is only 1 point lower than the Buccaneer's at level 99, so they are capable of front lining if needed. Though their HP stat is on the low side. However, to make up for the fact that they have the 2nd highest TEC stat in the game, Monks have the 2nd worst LUC stat in the game, only being beaten out by the Yggdroid. This actually renders them severely susceptible to being hit with ailments and binds which means that they can be locked down very easily, putting your entire team in a hard position, or outright causing a game over because they couldn't heal the team. Not only that, their low LUC causes them to be locked down by ailments and binds longer than usual compared to other classes. Their STR and AGI are okay, but while Buccaneers can get away with having an okay STR stat (which is lower than the Monk's, for the record), this actually kind of makes a Punch Monk ineffective for most of the game. More on that in a bit. Form Qi Skill Type: Class Skill Maximum Level: 10 Stats Used: N/A Prerequisites: N/A This Class Skill passively increases the amount of non-fixed healing the Monk can do. Leveling up the skill increases the healing bonus.  Notes:
Now obviously if you are making use of a Punch Monk, this skill is completely useless since it does nothing for the Monk's damage output at all. Fist Mastery Skill Type: Passive Maximum Level: 10 Stats Used: N/A Prerequisites: N/A This mastery skill increases the attack power of fists. Higher levels increase how powerful the user's fists are. Drastically increases the attack power of fists once learned. The fist power formula changes from (Level + STR) / 2 to (Level + STR) * Fist Mastery Skill Power. Both of these formulas are substituted for the user's Weapon ATK in the damage formula.  Notes:
Now as for why I consider Punch Monks to be ineffective in general, the way fists scale is why. At the start of the game and throughout the 1st Stratum, their fists will be either on par, or slightly behind the other classes' weapons, so they do make for effective damage dealers then. However, as the game goes on, fists fall off pretty hard and their attack power just doesn't compared to most weapons you can get if you're diligent enough to update the shops' stocks constantly. Not only that, you can't forge fists, so there's a lot of little bonuses Monks will miss out on compared to the other classes. Though once post-game comes by, the formula actually makes it so that fists start being on equal standing with weapons again, due to how they scale. In fact, if you can get a Monk's STR stat up to 99 while they're at level 99 and have Fist Mastery maxed out, their Weapon ATK will be equal to 219. This is actually the 2nd strongest �weapon� in the game, heavily outclassing almost every ultimate weapon the other classes have access to. For comparison, the strongest weapon is obtained by beating the final post-game boss, which clocks in at 225 Weapon ATK. The problem is that Monks have a mediocre STR stat, so fists aren't as good as they could be for a majority of the game. In fact, if you really want to use one, I highly recommend using a Gladiator, Zodiac, or a Yggdroid for that purpose instead. However, this skill does have an interesting glitch. For some reason, if a character has at least one level in this skill, equips a weapon, but leaves the first equipment slot empty, the character can use fist skills with a weapon equipped, and the fist skills will take on the properties of that weapon. (If I had to say why, I'd think the way the Shogun's Second Sword skill is coded is the culprit here.) And this unarmed glitch makes said skills use the weapon's attack power, letting Monks stay on even footing with the other classes. However, this doesn't really work in the post-game, as you want to be making use of every single one of a character's equipment slots by that point. Still, it's something to keep in mind if you're intent on using a Punch Monk. Ascetic Reward Skill Type: Passive Maximum Level: 10 Stats Used: N/A Prerequisites: N/A Once per battle, if a Monk dies, everyone else in the party will restore some HP. Leveling up this skill increases the amount of HP restored.  Notes:
Blood Return Skill Type: Passive Maximum Level: 10 Stats Used: N/A Prerequisites: N/A Every time an ally dies in battle, the Monk recovers some TP. Leveling up this skill increases the amount of TP restored.  Notes:
Ascetic Deeds Skill Type: Passive Maximum Level: 10 Stats Used: N/A Prerequisites: Ascetic Reward � Level 3, Blood Return � Level 3 Every time the Monk uses a skill, the recover some HP. Leveling up this skill increases the amount of HP restored.  Notes:
Waking Chakra Skill Type: Passive Maximum Level: 10 Stats Used: N/A Prerequisites: N/A Increases the Monk's recovery rate from ailments and binds. Increasing the skill level increases the recovery rate.  Notes:
Healing Skill Type: Active Maximum Level: 10 Equipment Needed: N/A Body Part: Head Stats Used: TEC Target Type: Single Action Speed: -6 Prerequisites: N/A Heals one party member. Increasing the skill level increases the amount healed.  Notes:
Full Heal Skill Type: Active Maximum Level: 10 Equipment Needed: N/A Body Part: Head Stats Used: N/A Target Type: Single Action Speed: -6 Prerequisites: Healing � Level 5 Fully heals one party member. Increasing the skill level only decreases the TP cost.  Well believe it or not, this is a somewhat situational skill. Mainly because depending on your party setup, this can be entirely redundant. You could probably ignore this skill entirely, depending on the circumstances. Most of the Monk's other healing skills can fully heal the party in most cases, especially if the party is either full of low HP classes, or isn't taking much damage in the first place. Granted if you're using a Prince/Monk, who lacks Form Qi, this skill may be more desirable. With that said, if you're using a Gladiator with Berserker Vow, this skill can be useful in getting them out of the danger zone immediately. However, you really don't need this skill early on since most other healing skills will suffice at that point. But whatever you do, don't max out this skill unless you really don't have a better place to spend your skill points. The TP cost may seem intimidating, but it will become less of an issue as the game goes on and the Monk's TP pool gets bigger. Line Heal Skill Type: Active Maximum Level: 10 Equipment Needed: N/A Body Part: Head Stats Used: TEC Target Type: Row Action Speed: -6 Prerequisites: Healing � Level 4 Heals one row. Increasing the skill level increases the amount healed.  Notes:
Party Heal Skill Type: Active Maximum Level: 10 Equipment Needed: N/A Body Part: Head Stats Used: TEC Target Type: AOE Action Speed: -6 Prerequisites: Line Heal � Level 5 Heals one the entire party. Increasing the skill level increases the amount healed.  Notes:
Refresh/Unbind Skill Type: Active Maximum Level: 10 Equipment Needed: N/A Body Part: Head Stats Used: N/A Target Type: Varies Action Speed: -3 Prerequisites: Healing � Level 2 Dispels all ailments/binds on the specified targets. The range increases at certain skill levels, while the TP cost decreases until those skill levels are reached.  Notes:
Resurrect Skill Type: Active Maximum Level: 10 Equipment Needed: N/A Body Part: Head Stats Used: N/A Target Type: Single Action Speed: -6 Prerequisites: Refresh � Level 2, Unbind � Level 2 Revives one dead party member. Leveling up this skill increases the amount of HP the dead party member is revived with.  Notes:
Kikouken (Qigong Fist, Animation) Skill Type: Active Maximum Level: 10 Equipment Needed: Fist Body Part: Arm Stats Used: STR, LUC Target Type: Single Action Speed: -3 Prerequisites: Fist Mastery � Level 1 A single target Strike attack that has a chance to inflict Paralysis. Higher levels increase the damage dealt, infliction rate, and accuracy.  A very basic damage skill, but probably not one I would max out. Paralysis isn't that great of an ailment to make use of in this game, and the Monk's low LUC makes it hard to inflict Paralysis in the first place. Breakfire Fist (Animation) Skill Type: Active Maximum Level: 10 Equipment Needed: Fist Body Part: Arm Stats Used: STR Target Type: Random Action Speed: -3 Prerequisites: Fist Mastery � Level 3, Waking Chakra � Level 3 The Monk lashes out their fists at random enemies, dealing Fire/Strike damage to them. Higher levels increase the damage dealt, number of hits, and accuracy.  Notes:
Counter/Retaliate Skill Type: Active Maximum Level: 10 Equipment Needed: Fist Body Part: Arm Stats Used: STR Target Type: Counter Action Speed: +7 Prerequisites: Fist Mastery � Level 8 When used, the Monk prepares to counter certain attacks that come their way. When the Monk gets hit with a Physical/Elemental attack, they will deal Strike damage to the enemy that attacked them.  Notes:
Darkness Fist (Animation) Skill Type: Active Maximum Level: 10 Equipment Needed: Fist Body Part: Arm Stats Used: STR, LUC Target Type: AOE Action Speed: -9 Prerequisites: Fist Mastery � Level 10, Breakfire Fist � Level 3 Sacrifices 25% of the Monk's current HP to deal Strike damage to all enemies, and has a chance to Curse them. Higher levels increase the damage dealt, infliction rate, and accuracy.  Notes:
Fire Walk Skill Type: Active, Field Skill Maximum Level: 5 Equipment Needed: N/A Body Part: N/A Stats Used: N/A Target Type: N/A Action Speed: N/A Prerequisites: N/A When used, the amount of damage the party receives from damage tiles is reduced for a certain number of steps. Increasing the skill level increases the damage reduction, and the duration.  Notes:
Subclasses: Prince/ss: Possibly the most well known class/subclass combo in the game, whether it's a Monk/Prince or a Prince/Monk. Though the former is objectively better than the latter. The sheer amount of support this class combination provides through buffing and healing makes it a very popular subclass for a Monk. This is pretty much the only good use of using subclassing to mash two classes roles together instead of having the subclass only enhance the main class, as both Monks and Prince/sses don't really do that much in battle on their own. One of the most popular reasons to give them this subclass is because of the Prince/ss' Protect Order skill, which Form Qi actually works on. Making it an insanely good form of proactive healing. However, the main downside to this combination is that not only is it skill point hungry, a Monk/Princess is going to be incredibly busy in battles. They will pretty much have no free turns to do anything, which can be really tough to work around depending on your setups and how you play. And at times it will seem like that they have too many problems to take care of in one turn, yet they can only solve one at a time. Gladiator: If you're really want to use a Punch Monk, the class/subclass combination would be better the other way around. Mainly because Gladiator's have a higher natural STR stat, and they also have Endless Battle, which actually boosts their damage output. Anyways, like with all physical classes, Berserker Vow and Charge are the skills to go for here. However, something to consider is that a Zodiac subclass can increase the damage output of Breakfire Fist more than a Gladiator subclass can, but only in certain conditions. So the Gladiator subclass gives a more consistent damage output, while a Zodiac subclass can grant more damage, but isn't always reliable in doing that. More on that in a bit. Hoplite: Well the Parry skills can increase their survivability. And they could take a few Hoplite skills to help out the team a bit. But a main class Hoplite can do the job a lot better since they're a lot more tanky. Spears are considered ranged weapons, so if you're using the unarmed glitch, you could make use of that to turn their fist skills into ranged attacks and increase their damage output a bit. Buccaneer: What Buccaneers have to offer are Limit Boost and Eagle Eye. Limit Boost helps Monks build up the Limit Gauge faster, while Eagle Eye is a nice debuffing skill. Another thing a Buccaneer subclass can offer a Monk is the use of Guns, which can be used for the unarmed glitch to increase the range of their fist skills from melee to ranged. Ninja: Monks aren't that great at inflicting status ailments due to their low LUC stat, but Bunshin does let you use two Monks. It's not a great option for a Punch Monk, as a Gladiator or a Zodiac subclass will actually increase their damage output more, but for a support Monk, it's a fairly decent skill. You can make use of two healers, so if one of them gets disabled for whatever reason, you still have the 2nd Monk helping out the party. Of course this does create issues with other classes that want the 6th party member slot more. Zodiac: Again, if you are making a Punch Monk, this class and subclass combination would be better the other way around. Mainly because while Zodiacs do have a lower STR stat, their class skill actually boosts Breakfire Fist's damage. Though you're going to have to farm up a lot of Power Books if you want to make those usable. At any rate, a Zodiac subclass increases the Monk's damage output quite a bit. Etheric Charge does affect Breakfire Fist, so it does provide more of an increase than Charge. This subclass can even increase Breakfire Fist's damage more than a Gladiator subclass can, but only if Singularity activates, which means the enemies in question are gonna need to be weak to Fire or Strike attacks. Otherwise, a Gladiator subclass will increase the Monk's damage output more. Wildling: If you're stuck on what subclass to give them, Wildling is a good option because Primal Drums is a really good debuffing skill. They don't have much to offer aside from that. The Monk's stat spread isn't really ideal for any of the animals. Arbalist: Yeah uhhh, these two classes really don't mix all that well. There is very little the Arbalist can offer a Monk, no matter which role you put them in. I guess you can take this to give them a ranged weapon to make use of if you're putting your Monk on the back row. Extend can increase their survivability, I suppose. Though like with the other ranged weapons, you can make use of the unarmed glitch to turn their fist skills into ranged attacks if you wish. Farmer: If you're that desperate to have a field support, have another class do it. Though Play Possum can be somewhat decent at getting enemies to target party members that aren't your Monk. Monks don't really have TP problems, so Brave Heart isn't that great of a passive for them. Shogun: Endure can be a nice passive for them to have, and they do have a nice assortment of offensive oriented support skills. Though a Prince/ss subclass is much better if you want to do something like that. Monks are pretty much the most powerful support class in the game that can make life so much easier for your party, and having them subclass a Prince/ss can increase their supporting capabilities even further. Offensive oriented Monks aren't as effective, though there are worse options you can put in your party. Araxxor fucked around with this message at 07:04 on Nov 4, 2016 |
|
#
?
Nov 4, 2016 05:37
|
|
|
Dr. Fetus posted:Offensive oriented Monks aren't as effective, though there are worse options you can put in your party. Like an offensive oriented princess (Regal radiance is really weird and unwieldy, I've tried it.)  I really like the punchmonk with a zodiac subclass personally, but that's just me. I'm probably the odd one out on that. It really does rely on hitting a fire or bash weakness though.
|
|
#
?
Nov 4, 2016 06:49
|
|


|
Tyty posted:Like an offensive oriented princess (Regal radiance is really weird and unwieldy, I've tried it.) I am very curious to hear how you tried to make that work out. I've heard about some people trying to make use of Regal Radiance, but the skill seemed like it was more trouble than it was worth.
|
|
#
?
Nov 4, 2016 18:43
|
|
|
I remember when I used a Prince/Monk and Ragnar told me that I should have eventually swapped him out for a Monk/Prince. I didn't listen to him. I should have listened. It's honestly a miracle I beat this game with my terribly optimized party.
|
|
#
?
Nov 4, 2016 19:20
|
|

|
I'm looking forward to how the post-game's gonna look like. Wonder how much bullshit they managed to stuff in EO3.
|
|
#
?
Nov 5, 2016 19:23
|
|

|
Efe posted:I remember when I used a Prince/Monk and Ragnar told me that I should have eventually swapped him out for a Monk/Prince. I didn't listen to him. You use a Princess/Monk because they look fab as gently caress, not because they're optimal, jeez.
|
|
#
?
Nov 5, 2016 19:53
|
|

|
It's not mandatory to have a Monk/Prince. It's better than Prince/Monk, but a PM can still get you through the game. There's not much you really have to optimize for during any part of the game. Gonna be moving the music tracks over to Clyp since browsers like Firefox are starting to block Flash by default, which Tindeck runs on. Might take a while for the next update to come out as a result.
|
|
#
?
Nov 5, 2016 22:57
|
|
|
Dr. Fetus posted:I am very curious to hear how you tried to make that work out. I've heard about some people trying to make use of Regal Radiance, but the skill seemed like it was more trouble than it was worth. I had a ninja tossing elemental oils onto a Shogun (Second playthrough, didn't want to use a gladiator again) and the princess popping them the same turn. It's a really... weird skill. It worked surprisingly well for damage but I just ended up swapping out for a pirate instead and running a support princess. Even though they fall off a Zodiac probably still works better for elemental damage. It's a really weird skill. Admittedly, I probably could've used a N/P to do the setup instead but it'd still feel like having only 4 party members, and both the characters would have better things to do anyways. I also remember it hitting a resistant enemy for full damage as if it was also untyped for some reason but I'm kinda foggy on that bit. It could've been the enemy wasn't actually resistant to slash or something.
|
|
#
?
Nov 6, 2016 00:01
|
|
|
Tyty posted:I also remember it hitting a resistant enemy for full damage as if it was also untyped for some reason but I'm kinda foggy on that bit. It could've been the enemy wasn't actually resistant to slash or something. It's composite damage depending on the imbued character's weapon type, so if what you're hitting isn't resistant to the character's weapon type they'd still get hit for full damage.
|
|
#
?
Nov 6, 2016 00:26
|
|
|
Yeah but I'm thinking I was just misremembering an enemy's weaknesses and thought they resisted both fire and slash or something when they only resisted one. This was also... A year ago? More? It was before this LP started. It's a really weird skill and I'm not surprised it just got replaced with a chase in eo2u
|
|
#
?
Nov 6, 2016 00:44
|
|
|
   Okay, I got this in the bag.   What do you mean that didn't kill it!? Whatever, one more turn of damage should get the conditional drop.  Are you kidding me!?  gently caress Curse conditionals. Araxxor fucked around with this message at 07:21 on Nov 9, 2016 |
|
#
?
Nov 9, 2016 07:12
|
|
|
Ouch, that's just rude. Keep fighting the good fight? 
|
|
#
?
Nov 9, 2016 13:41
|
|

|
Use a formaldehyde. You know you want to.
|
|
#
?
Nov 9, 2016 14:02
|
|


|
Why would you ever do Curse conditionals fairly? 
|
|
#
?
Nov 9, 2016 15:16
|
|

|
Curse conditionals are the reason Formaldehyde was invented.
|
|
#
?
Nov 9, 2016 15:33
|
|
|
Welp. Just Formaldehyde the fucker. It's ALMOST AS IF THE AI KNOWS YOU'RE DOING IT!
|
|
#
?
Nov 9, 2016 21:32
|
|
|
As far as I can tell, Clyp doesn't come with its own embedded images like Tindeck did. So I had to make my own. And just to make sure I'm not spending a bunch of time making terrible looking things... How do these look?
|
|
#
?
Nov 15, 2016 06:40
|
|
|
Dr. Fetus posted:As far as I can tell, Clyp doesn't come with its own embedded images like Tindeck did. So I had to make my own. And just to make sure I'm not spending a bunch of time making terrible looking things... They're serviceable, but the combination of typeface, bolding, and outlining doesn't make the ones with smaller font sizes look very good. The line thicknesses of the letters look uneven, the kerning's noticeably off on the first one, and the third one doesn't look like it's been done in the same typeface as the others.
|
|
#
?
Nov 15, 2016 08:45
|
|
|
a busted-up mailbox posted:They're serviceable, but the combination of typeface, bolding, and outlining doesn't make the ones with smaller font sizes look very good. The line thicknesses of the letters look uneven, the kerning's noticeably off on the first one, and the third one doesn't look like it's been done in the same typeface as the others. Ah, thank you. I thought something seemed off, but I wasn't too sure. Also I did not realize I had the bold font on.  Adjusted the font (and kerning in some cases) so this is what I have now:
|
|
#
?
Nov 16, 2016 00:38
|
|
|
Update 72: Suicide Curse I went ahead and unlocked all the items I could through gathering in the 5th Stratum. Let's take a look at them.   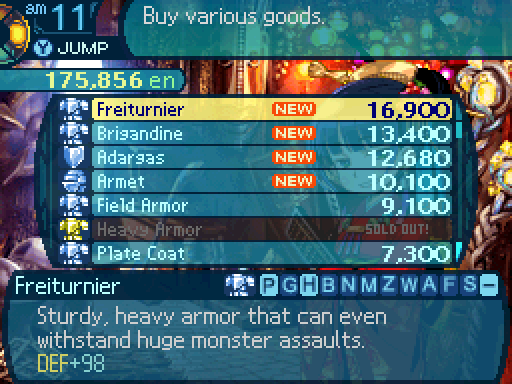  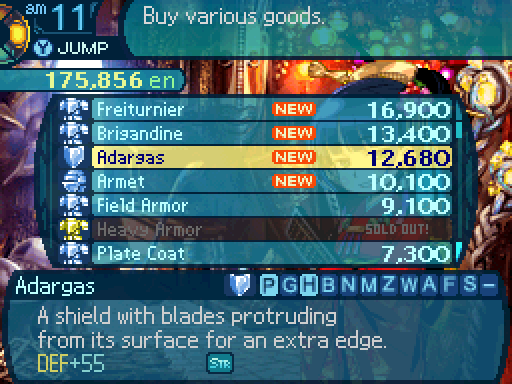  The Armet provides a 20% resistance to Paralysis. Could be handy, as it also provides a defense boost.  Metopons are really handy items to have, especially if you don't have an Ad Nihilo user on the team. While they're usefulness in the main game is a little questionable at this point, a few enemies and bosses do buff themselves in the post-game. Metopons can make them much easier to deal with.  Amrita IIs restore 100 TP. Once you unlock these, there's no reason to farm for Amritas anymore.    Like with the elemental mists, they physical mists increases everyone's resistances to the specified damage type by 50%. Honestly they're not that great. Unlike the elemental mists, I find these to be too situational to be useful. The target type change from party to everyone really destroyed these items. Anyways, while I'm here, I stock up on a ton of Curse Gases. Why? Because there's a loose end to tie up after reaching the 20th floor.  After reaching the 20th floor, the boss you fought in the 4th Stratum respawns on the 16th floor.  I'm curious as to how our more powerful foes keep coming back. I'm curious as to how our more powerful foes keep coming back. I keep telling you, they're gho- Oh, not this again! I keep telling you, they're gho- Oh, not this again! Eh, who cares if it's a ghost or not? We'll just kill it again, like we did with the other ones! Eh, who cares if it's a ghost or not? We'll just kill it again, like we did with the other ones! Don't you mean exorcise? FOR THE LAST TIME, THEY'RE NOT GHOSTS! Don't you mean exorcise? FOR THE LAST TIME, THEY'RE NOT GHOSTS! Not that I want to back up Faye's active imagination, but if they're not ghosts, then what are they? They're... Uhhh... Oh, screw this. Sure, they're ghosts. Whatever. I don't care anymore. Let's just get rid of this thing again. Not that I want to back up Faye's active imagination, but if they're not ghosts, then what are they? They're... Uhhh... Oh, screw this. Sure, they're ghosts. Whatever. I don't care anymore. Let's just get rid of this thing again. Though for some reason, it actually has a patrol path, unlike most other bosses who just sit still. Anyways, let's take it on.  What we're here to accomplish is...  getting Kirin's conditional drop. Which involves killing it with Curse damage. I already covered this with a regular enemy in an earlier update, but getting these conditionals for bosses are a different story. For regular enemies with that conditional, it's annoying but fairly doable. But for bosses, they're utter hell to go for. You have to basically whittle down the boss while making sure not to kill them. And then when they get low on HP, you have to inflict Curse on them. Which is a pain in the butt to pull off since bosses are resistant to status effects. And once you pull it off, you have to hope that the boss attacks you and kills itself before the ailment wears off. getting Kirin's conditional drop. Which involves killing it with Curse damage. I already covered this with a regular enemy in an earlier update, but getting these conditionals for bosses are a different story. For regular enemies with that conditional, it's annoying but fairly doable. But for bosses, they're utter hell to go for. You have to basically whittle down the boss while making sure not to kill them. And then when they get low on HP, you have to inflict Curse on them. Which is a pain in the butt to pull off since bosses are resistant to status effects. And once you pull it off, you have to hope that the boss attacks you and kills itself before the ailment wears off.If you really want to know how bad Curse damage conditionals are to go for, just watch this video. Because I'm gonna cut out most of that in this update. Now if you chose to side with the Deep City, you don't have to worry about this, as the boss you fight there has a much easier conditional drop to snag. (Kill it while its head is bound.)  After 9 turns of dealing damage, I have Kirin really close to death.  So I'm gonna have Alice chuck Curse Gases at it, as she's the best person for that job with her TEC and LUC stats. Kirin has a Curse resistance of 50%, so I only have 2 shots at this. Right now, Alice has a 40% to 44% chance of landing the ailment with one. Cover your mouths, everyone! Nice! Now I'll just have Sidney soften Kirin up a bi-  FIIIIIIRREEE!! FIIIIIIRREEE!!  Oops. Forgot that Retribution was coming out this turn.  Yeah, this is how little Curse damage does in general. It's essentially equivalent to trying to kill something with a slightly more powerful regular attack. To make matters worse, if a party member gets killed, any damage they took doesn't count towards the Curse damage, so you can't cheese the drop that way.  At least Kirin's still Cursed, but it's not killing itself anytime soon with that much HP left.  I decide to soften it up with a cast of Meteor.  Oh here's the skill that Kirin didn't get to use when we fought it for the first time.   ...Sometimes I wonder what I did to deserve this. ...Sometimes I wonder what I did to deserve this.    Mrgrgr...! Mrgrgr...!Imperial Pride is very likely to hogtie any unlucky people who decided to attack it, and makes them very susceptible to Divine Wrath.  Every time Kirin gets hit when it prepares to use Imperial Pride, it'll attempt to fully bind the person who attacked it. For each hit they landed. Unfortunately, Imperial Pride is the other reason that the conditional drop can be difficult to snag, as Kirin does not attempt to deal any damage at all when it uses this skill. So if you're unlucky and Kirin decides to spam this skill repeatedly instead of attacking, you're gonna have to do this fight all over again.  Oh and while I lowered Kirin's HP to killing range on the next turn, the Curse decided to wear off.   So now I have to have Alice inflict it again, except now her chances for doing so is only 16% to 17%.   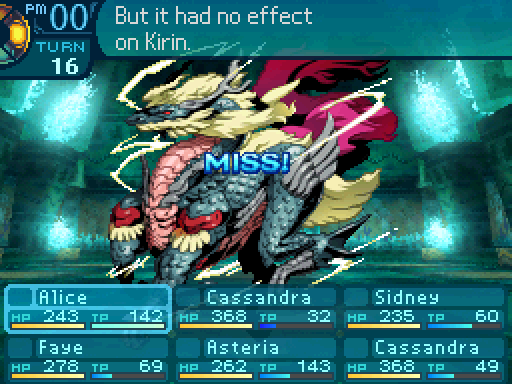 At least I tried. At least I tried.As you can see, you really don't have a lot of room to screw this up. Because if you botch the first attempt, the 2nd attempt will be far harder to pull off. 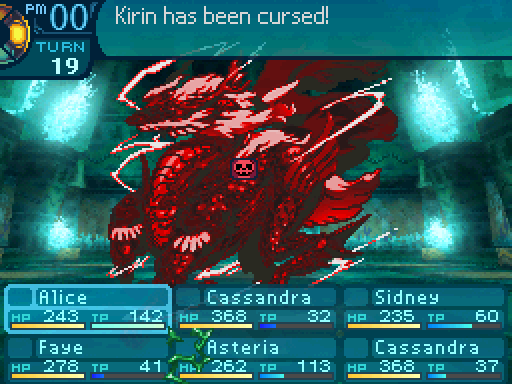 It took 7 more turns for Alice to Curse Kirin again. 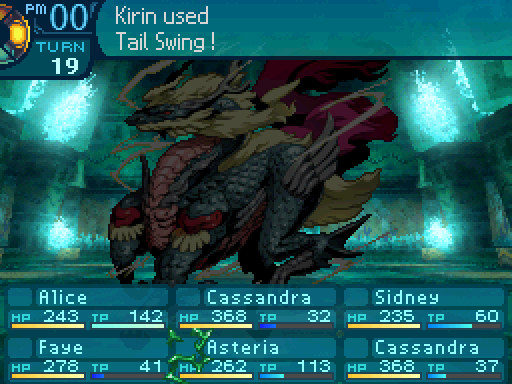 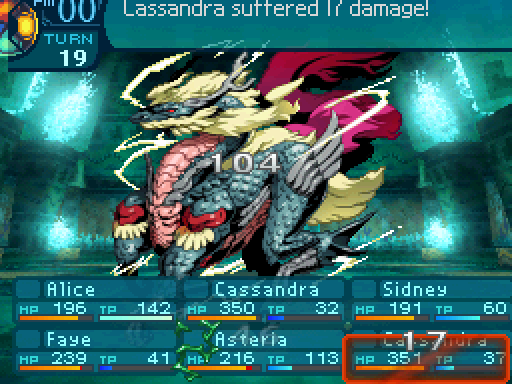 And despite that HP bar being only one pixel long, that wasn't enough to kill it.  However, Kirin is guaranteed to cast Retribution on this turn, so I don't have to worry about Imperial Pride coming out. Unfortunately at this point, Retribution will be at its strongest, so it might end up killing my entire party. Still, I don't want to risk using Antifire, only for the Curse to wear off next turn, or have Kirin use Imperial Pride again, so I just have everyone defend and hope for the best.   Ow. Ow. A million times ow. Ow. Ow. A million times ow.Well, everyone aside from Sidney managed to survive that.  Um, I hope you find peace in the afterlife? I dunno if you should really be saying that, since you cursed it to death. Um, I hope you find peace in the afterlife? I dunno if you should really be saying that, since you cursed it to death.But Kirin finally kills itself through Curse Damage!  And there's the conditional drop! I hope you can see why Curse damage conditionals are loathed among EO players. They're a massive pain to get legitimately, and most people just opt to use a Formaldehyde instead. But the worst part? Kirin wasn't the only boss with that conditional in this game. There's one more boss in the post-game that also requires you to kill it with Curse damage. What makes it worse is that it's a Sea Quest boss, so you also have to worry about the NPCs stealing the kill. And unlike with Kirin, you only have one shot at it. (Its Curse resistance is only 10%.)  But that's for another time. But that's for another time.Mercifully, there's no need to rush to get all of Kirin's drops. If you opt to side with the Deep City instead on your second playthrough, the game will allow you to fight Kirin again once you reach the 20th floor. The same applies for the other way around.   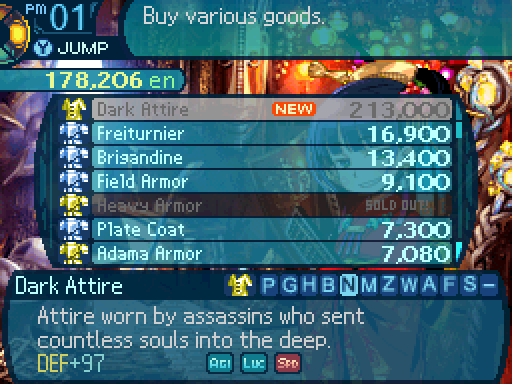 The Crimson Tail unlocks the Dark Attire, which is the Ninja's ultimate armor. It provides a bit of AGI, LUC, and 2 points of Action Speed. Sadly, we can't afford it yet.  I remembered to spend Cassandra's new skill point after selling the Crimson Tail. Parry now has a 10% activation rate. I'm gonna end things off here, as I just wanted to dedicate an update to this awful conditional drop. Next time, we'll go through the final floor.
|
|
#
?
Dec 7, 2016 21:39
|
|
|
Curse is...it's...it's bad. Real bad. If the hp to damage ratios weren't as skewed as they are it'd be fine, but it effectively is an enemy-only ailment, and curse conditionals are why Formaldehyde is a thing.
|
|
#
?
Dec 7, 2016 22:16
|
|

|
I got this conditional once, just because I could. Any future dumb conditionals I came across, I used a Formaldehyde. Cause gently caress that.
|
|
#
?
Dec 7, 2016 22:30
|
|

|
So Fetus, what's harder? The Ur-Devil or doing this game with an all-farmer party  ? ?
|
|
#
?
Dec 7, 2016 23:08
|
|

|
SSNeoman posted:So Fetus, what's harder? The Ur-Devil or doing this game with an all-farmer party Doing the game with an all Farmer party, because that is literally impossible without grinding for a ton of stat books.
|
|
#
?
Dec 8, 2016 00:30
|
|
|
Dr. Fetus posted:Doing the game with an all Farmer party, because that is literally impossible without grinding for a ton of stat books. Oh you can't multiclass them into usefulness?
|
|
#
?
Dec 8, 2016 01:50
|
|
|
SSNeoman posted:Oh you can't multiclass them into usefulness? You CAN, but the main problem is their stat spreads are too low to do anything of note. Unless you abuse Call Tiger over and over and get lucky with the Instant Death procs. Also one of the post-game bosses is a flat out damage check, and is impossible to win unless your party can deal enough damage within a few turns.
|
|
#
?
Dec 8, 2016 02:25
|
|
|
Dr. Fetus posted:Also one of the post-game bosses is a flat out damage check, and is impossible to win unless your party can deal enough damage within a few turns. Huh. It occurs to me that I haven't seen a whole lot of gear checks outside of MMOs. Is that getting more common in single-player RPGs?
|
|
#
?
Dec 10, 2016 17:14
|
|
|
Update 73: The Final Trek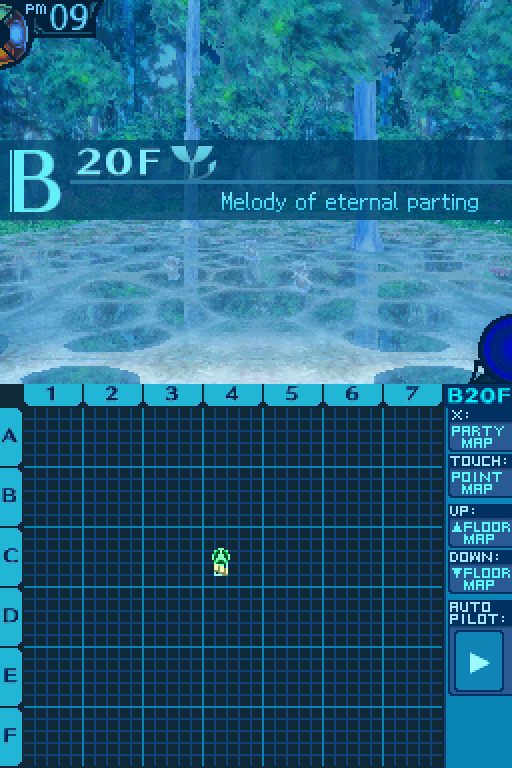 Alright, the final floor. Let's get this done. 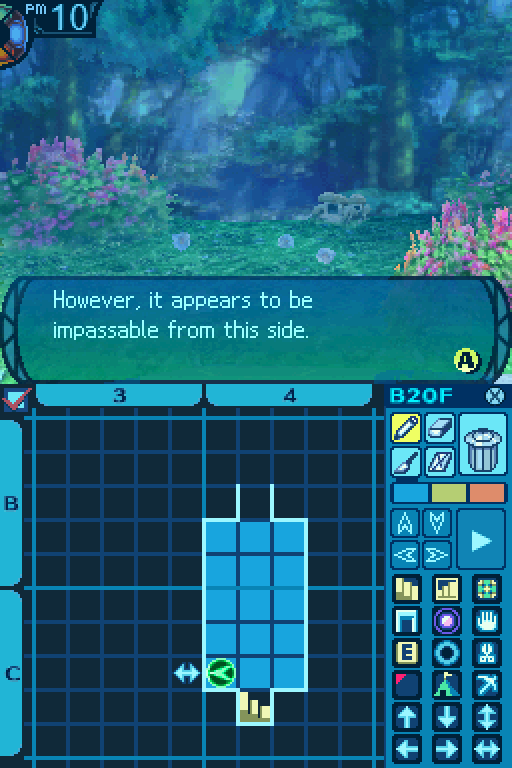  And here's the final new enemy in the 5th Stratum.  Volt Cat Level: 54 HP: 984 STR: 55 VIT: 51 AGI: 44 LUC: 31 TEC: 49 Attack Type: Slash Exp: 3999 Item Drops: -Drop 1: Dark Fur - 40% Drop Rate. 1 needed for Ice Fang Rapier (Rapier.) 2 needed for Genesis Book (Book) and Great Coat (Clothes.) 4 needed for General Leather (Light Armor.) --Used by black cats to conceal themselves in the darkness. -Drop 2: N/A -Gold: Sharp Claw - Kill with Fire. 80% Drop Rate. 1 needed for Claymore (Sword.) --Delivers fatal wounds to the unsuspecting. Description: A beautiful mountain cat which stalks its prey in the Porcelain Forest. Was once the pet of nobles. Damage Resistances: Slash: 100% Strike: 100% Pierce: 100% Fire: 100% Ice: 100% Volt: 50% Ailment Resistances: Sleep: 100% Confusion: 50% Plague: 100% Poison: 100% Blind: 100% Curse: 100% Paralysis: 100% Bind Resistances: Head: 150% Arm: 50% Leg: 100% Other Resistances: Death: 100% Petrification: 100% Stun: 100% Skills: Thunderclap: Uses the Arms. Deals 180% Volt damage to one person. Has an action speed of -50. Has an accuracy of 20. Volt Cats are the final palette swap of Great Lynxes and... They're not really that threatening. I mean Thunderclap can pretty much instantly take out anyone who has a low TEC stat, but it's very inaccurate and very slow to go off. Also if you have Antivolt, these things aren't a threat at all. Really the only notable thing about them is that they take a while to kill due to their huge HP pool. 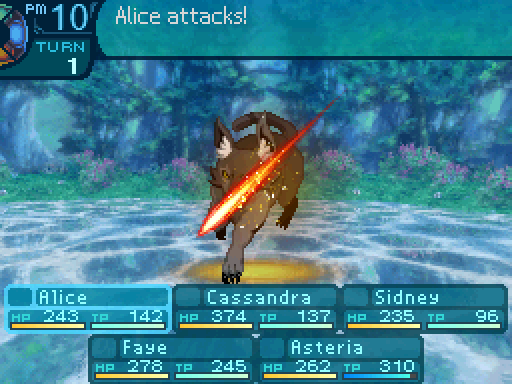 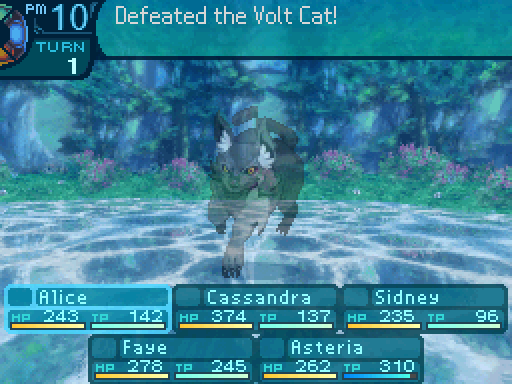 YEEEAAAARRRT! YEEEAAAARRRT! Unless you instantly kill them.  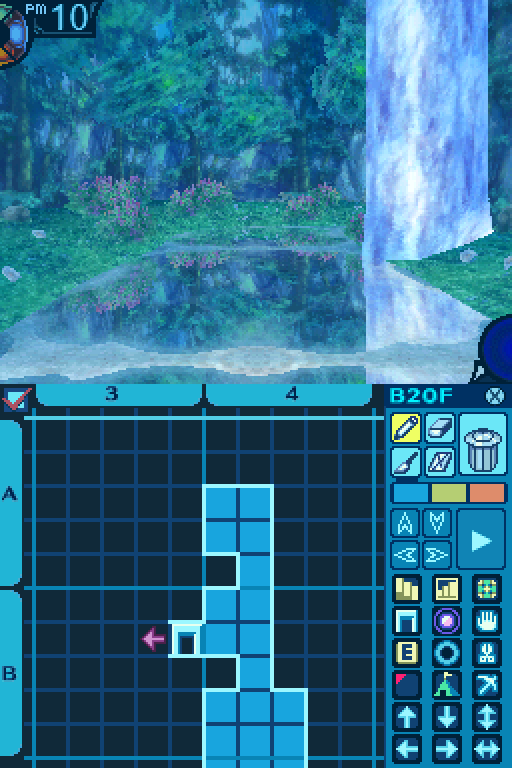 Another mapless area.  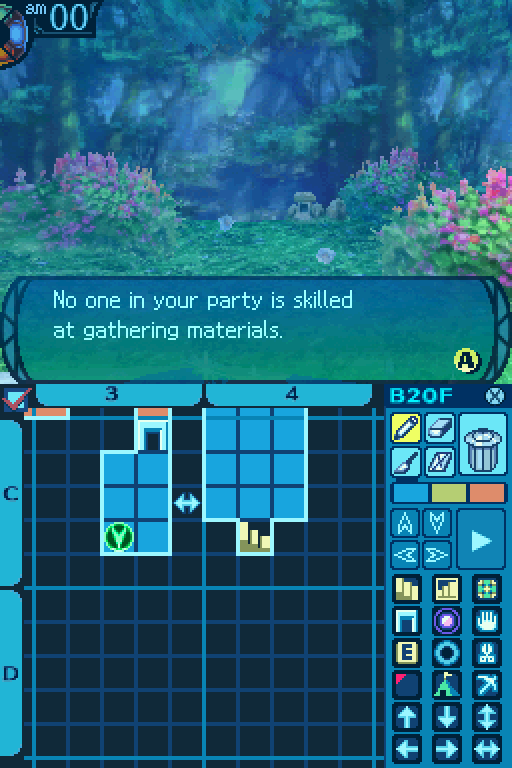 C3 Take Point: Mint 70% Gather Rate. Life Honey: 30% Gather Rate. Aloe: Rare. Common Gather Periods: 0 to 10. Rare Gather Periods: 1 to 4. Though there's a room off to the side with a Take Point in it. 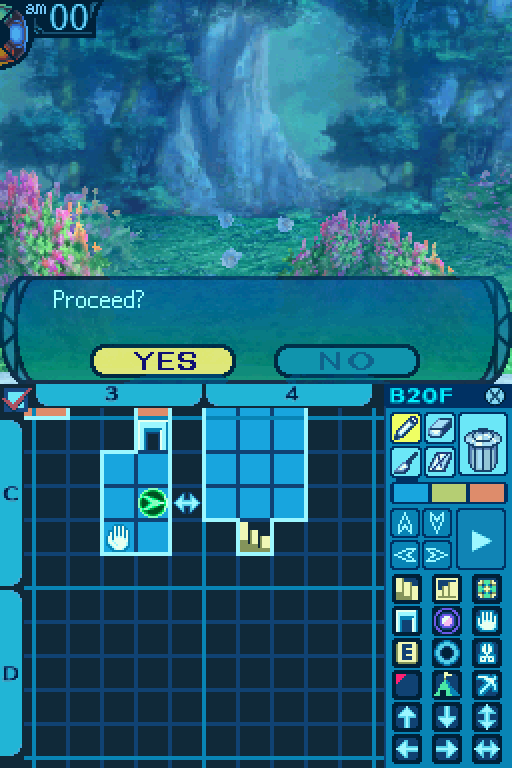 As well as letting us open up that shortcut from the start of the floor.  Now there are actually 2 Divine Judges in this area.  Their patrol paths at night.  Their patrol paths at day. Now as you can see, there are 2 routes to take in the middle of this map. No matter which time you come at, you want to take the bottom path.  On the way to the middle of this mapless section, Sidney and Faye get level ups.  Leveling up Proper Form to 3 unlocked this skill. 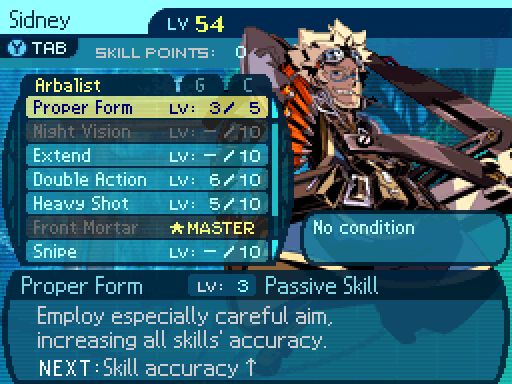 Proper Form now increases Sidney's accuracy by +15. 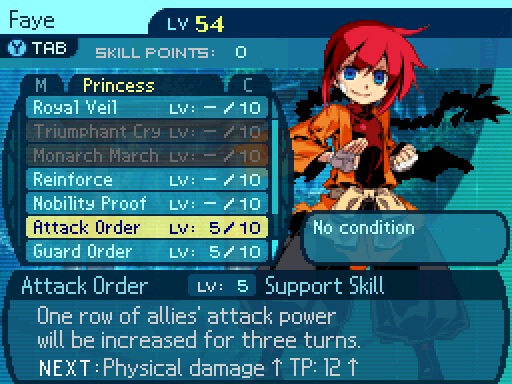 Faye now has 5 points in Attack Order, which also unlocked Ad Nihilo. I'll grab that skill later.  Now the reason you want to take the bottom path is because... 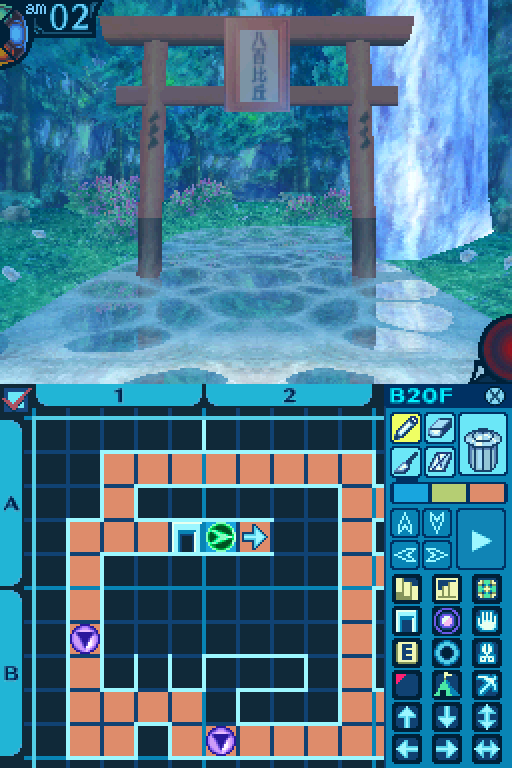 I wonder where this one leads. I wonder where this one leads.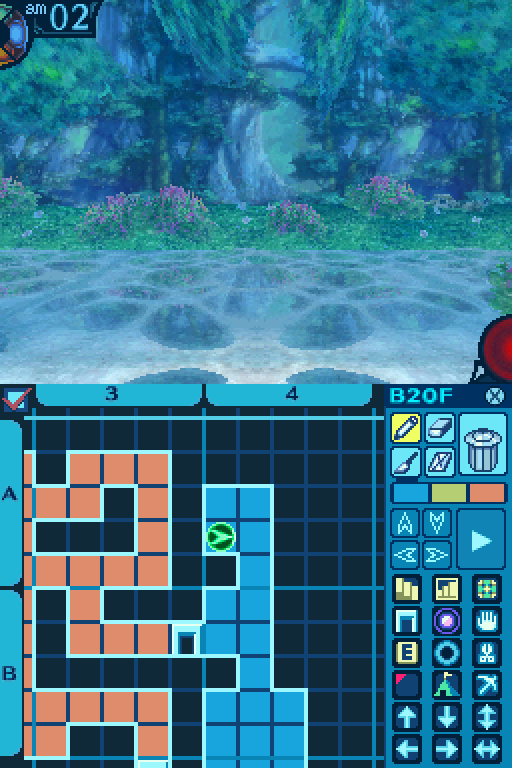 ...Really. Really!? Back to the entrance, apparently. ...Really. Really!? Back to the entrance, apparently.The top gate is just a waste of time.    Everything inside me is burning! Everything inside me is burning!Unfortunately, Sidney died on the way back there.  Second time's the charm, right? Second time's the charm, right? This gate is the way forward.  This is another instance of double stacking gates, being forced to guess which one to go through.  But for now, let's ignore those and press onward.   Well that was a complete waste of time. Well that was a complete waste of time.There was absolutely nothing of note in here.  And that gate took us back. But as for the gate marked with yellow, that one brings us...  This isn't fun anymore. I wasn't having fun with those things in the first place. Look on the bright side. We're getting a lot of exercise this way. This isn't fun anymore. I wasn't having fun with those things in the first place. Look on the bright side. We're getting a lot of exercise this way.Backtracking to where we were before, again... 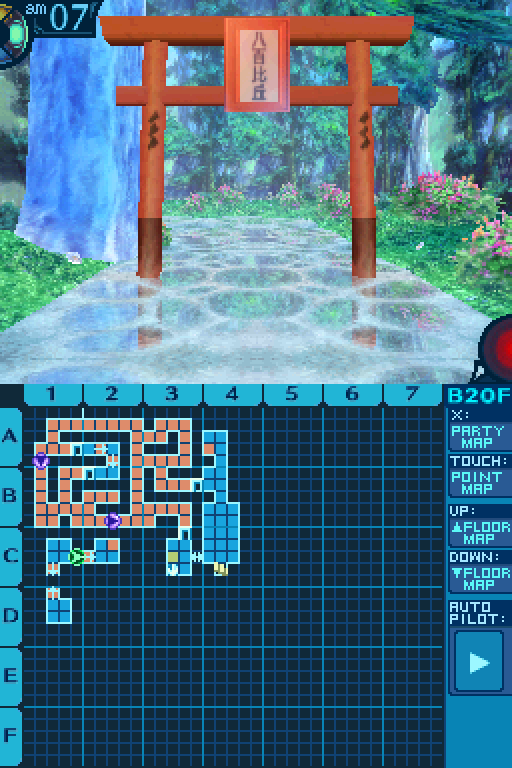 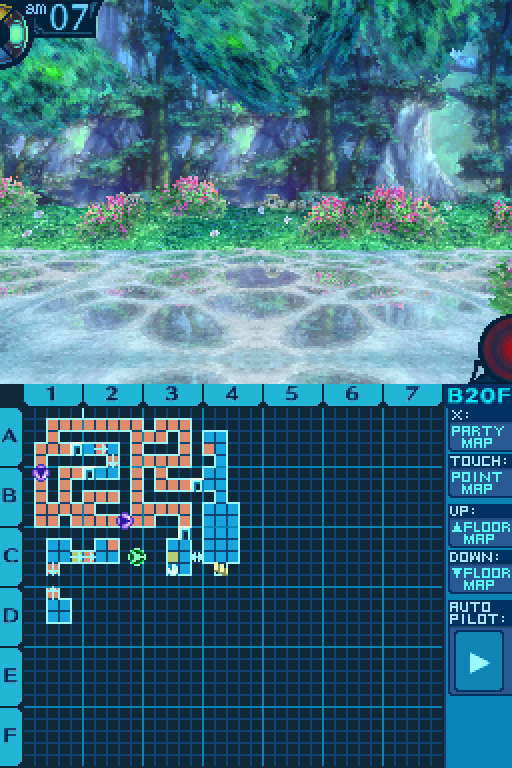 This is the way forward. 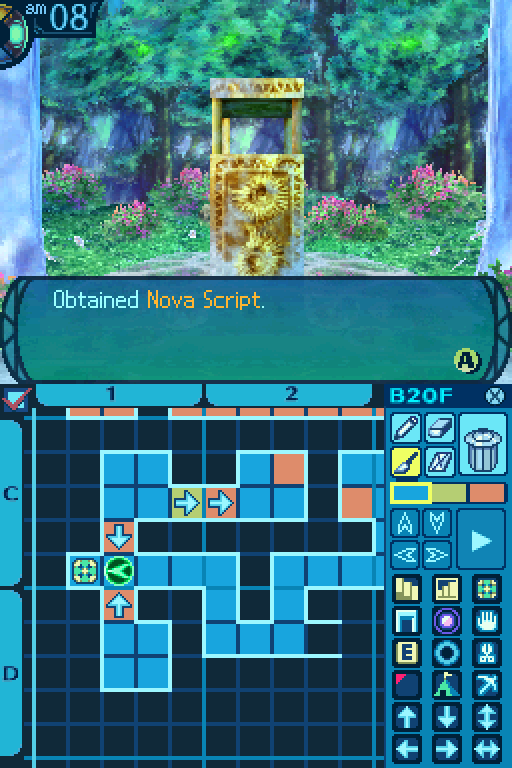 And over here, we get another Limit skill to make use of.  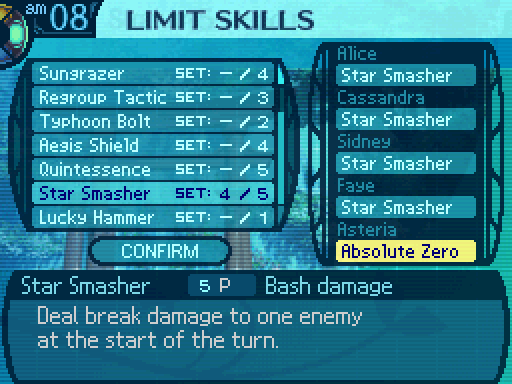 The Nova Script grants us the Star Smasher Limit skill, which requires all 5 party members to make use of. Surely it must be truly powerful if it demands 5 people to cast it. 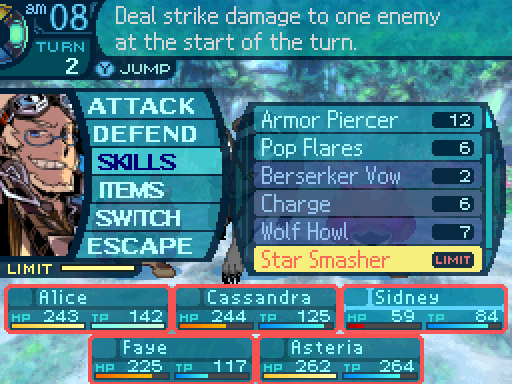 Okay, let's see this in action.  Uhh... boom, baby? Uhh... boom, baby?Okay, what Star Smasher does is that it deals 800% Strike damage to one enemy at the start of the turn. It may sound impressive, but there are several problems with it. Since it's a STR based attack, it takes into account the average STR and Weapon Attack of the entire party. So if you have a lot of support party members in your team, and haven't bothered to update their weapons, the damage output isn't gonna be particularly impressive. The other problem is that it requires 5 party members to use, which means you lose out on the utility Limits and the Elemental Limits, which can get you far more results. Though since it is a physical attack, it can be boosted by Charge and Berserker Vow, but I really have a hard time justifying losing out on the Aegis Limits for more damage. 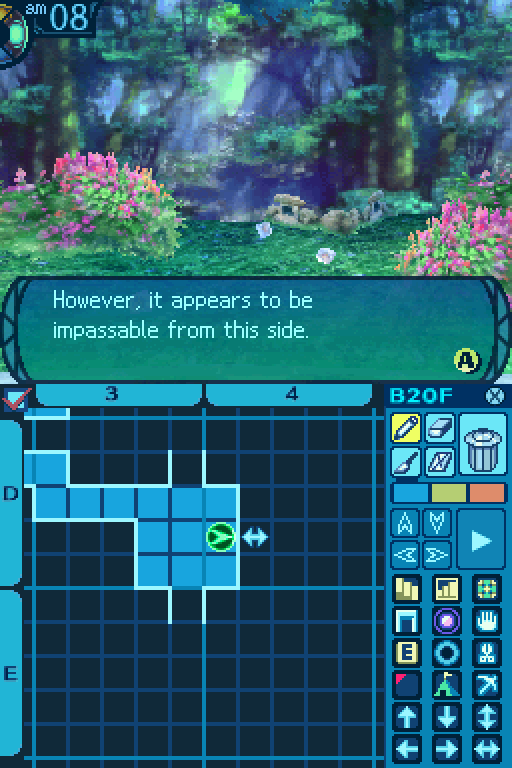 Another passage that can't be opened yet. 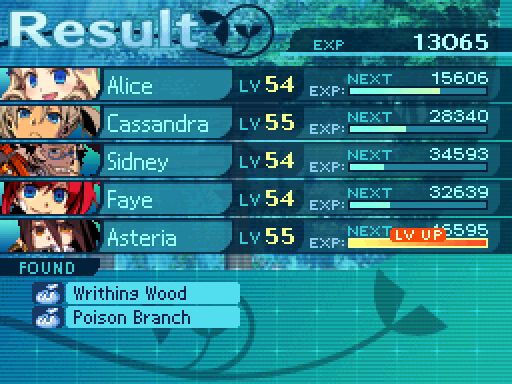 Asteria got a level up shortly after.  Meteor now deals 47% damage per hit.  I missed the other side of this shortcut earlier, but now we don't have to go through that mapless section and have to deal with those gates again. 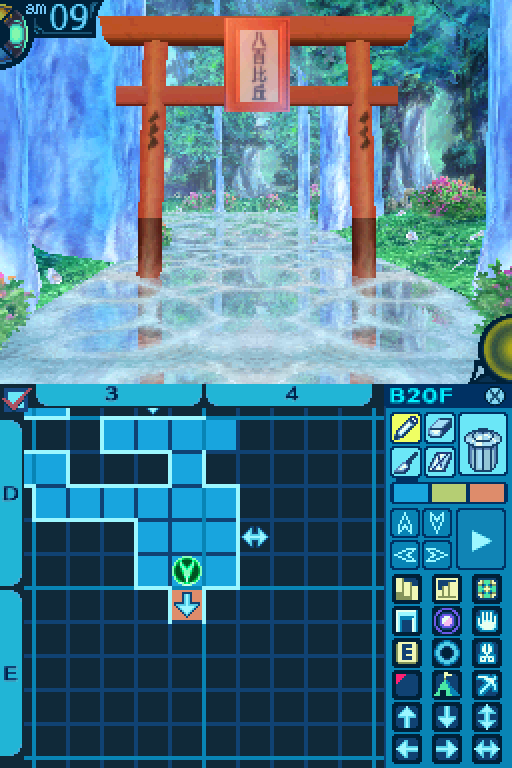 That's not to say we're done with the gates entirely.   F4 Chop Point: Mahogany: 70% Gather Rate. Aesculus Wood: 30% Gather Rate. Paulownia Bark: Rare. Common Gather Periods: 0 to 8. Rare Gather Periods: 1 to 4. Here's the Chop Point on this floor.  And this gate just takes us out of this little side area.  Guess what, more gates.  And the way back, if you need to take it. 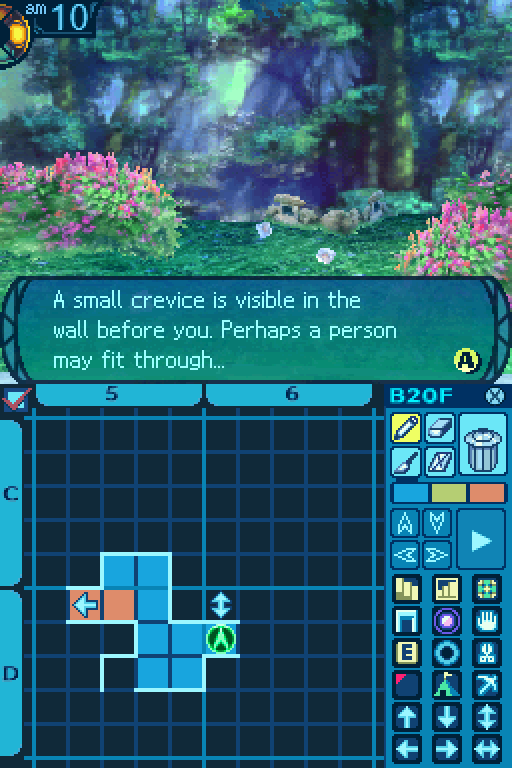 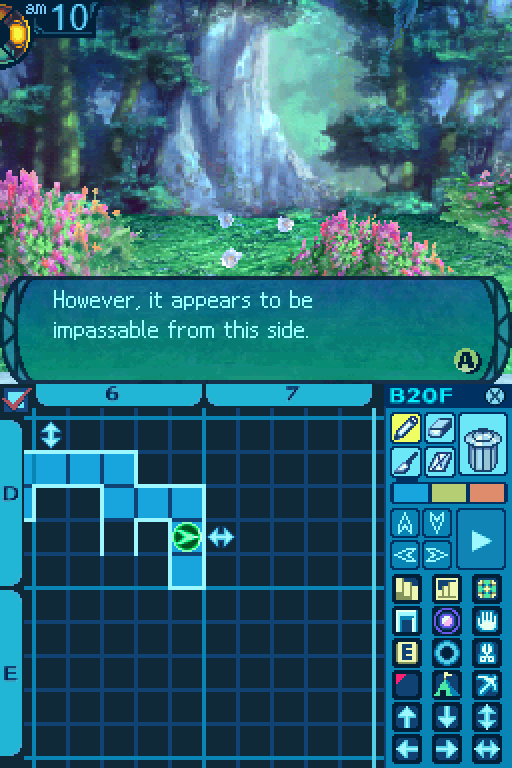 More inaccessible passages.   And a campsite. 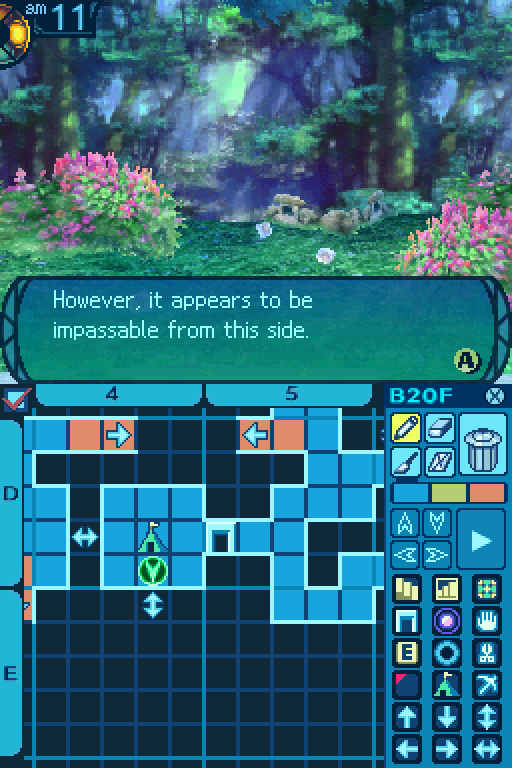  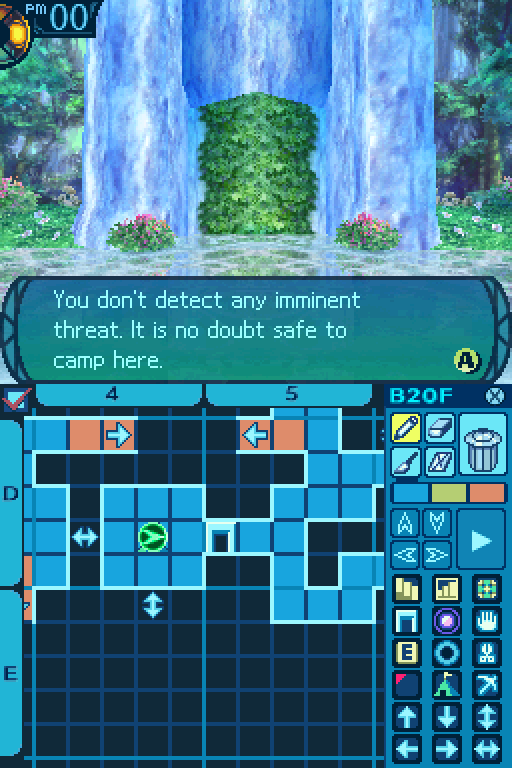   I decide to camp here to fill up my party's HP and TP a bit. We've really come a long way, haven't we? Yeah. I gotta say I wasn't expecting too much from this whole thing, aside from exploring a tree and taking down monsters. Yeah... Kinda funny how crazy this whole thing turned out. What with joining up with Armoroad and all... Faye? Is something wrong? It's just... I dunno. Sometimes I wonder what would've happened if we sided with the Deep City instead. I mean for one thing, I don't think we would have met Charlotte. Maybe we might've gotten someone else to help us out. Stuff like that. Ha ha, you too? I'll admit it's something I've thought about as well. But we've made our choice. It's too late to go back and change our decision, you know? ...Yeah, I guess.  Oh, sorry about rambling like that. Guess we better get going. Oh, sorry about rambling like that. Guess we better get going. Here's the last Divine Judge on this floor.  Now if you're on this floor at night, you can get around it.  However, there's no avoiding it during the day, so we're going to have to take it out.  Better me than the others... Better me than the others... Well aside from that mishap, the battle went relatively smoothly. 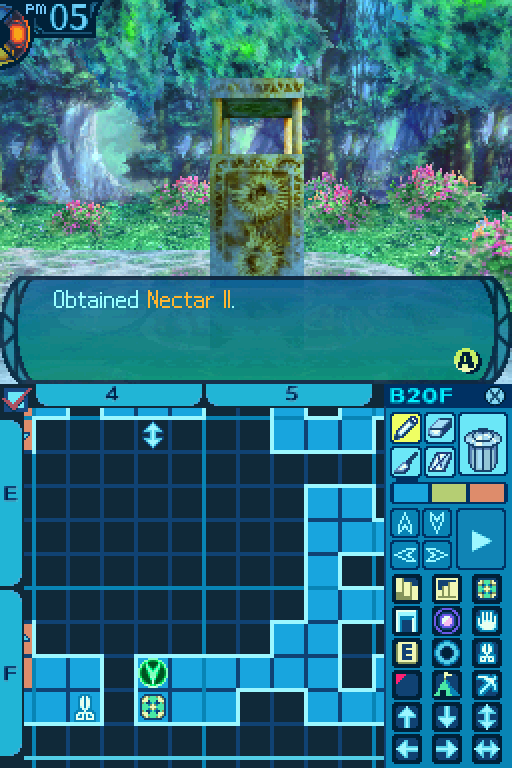 There's a nice bit of treasure off to the side. 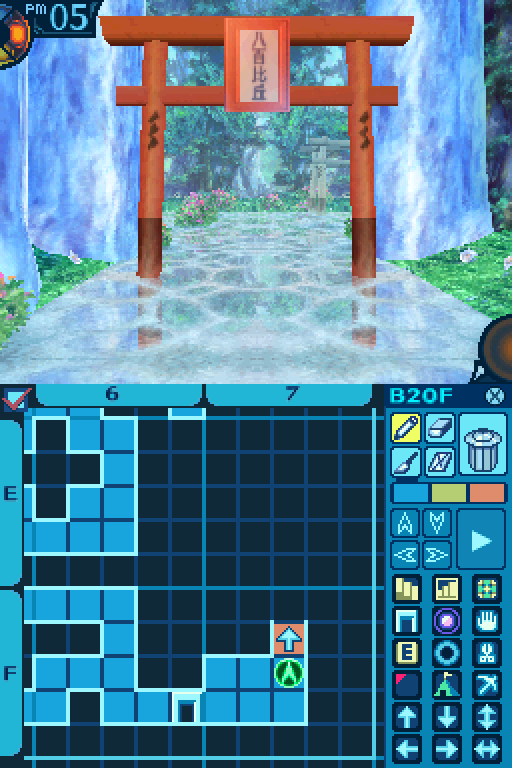 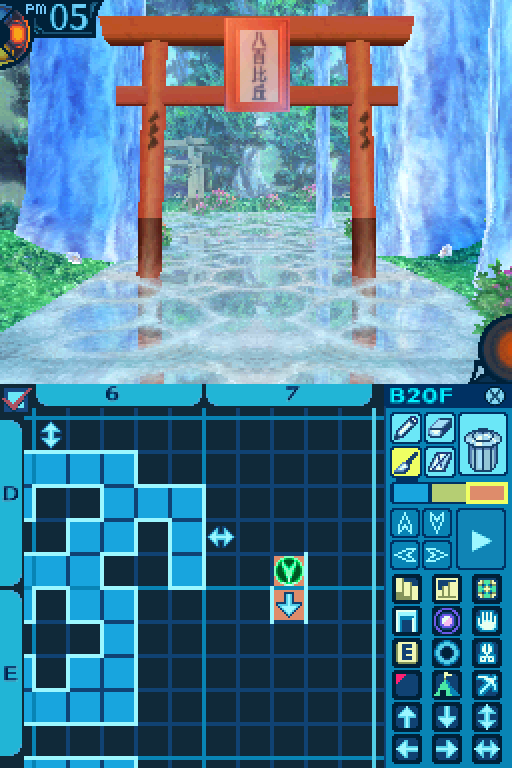 And some more gates. Huh. What is it, Alice? I thought I saw something between those gates, but I can't make it out right now... Eh, it's probably not worth worrying about. We'll probably get there soon enough.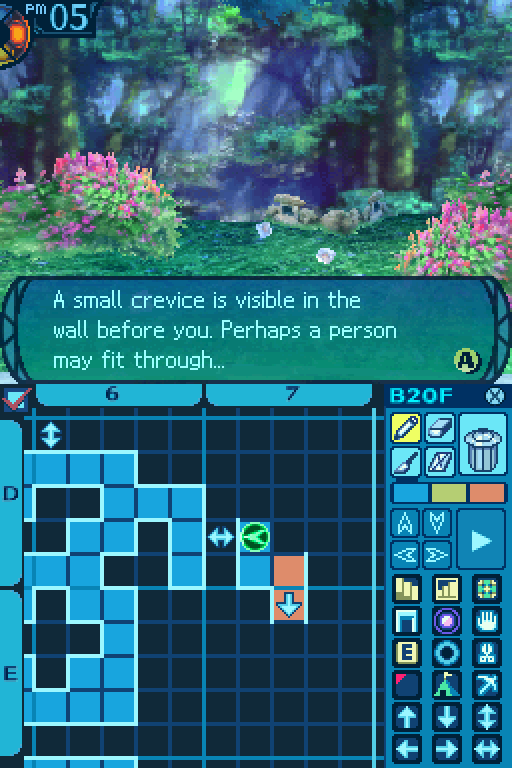 And here's the shortcut back. Wow, there's a lot of those on this floor.   You can't see it due to the terrible draw distance, but this mapless area has a Mortal Hunter in it. You'll need to take a particular route through this room to avoid it.  Just take this route through the room and you'll be good. 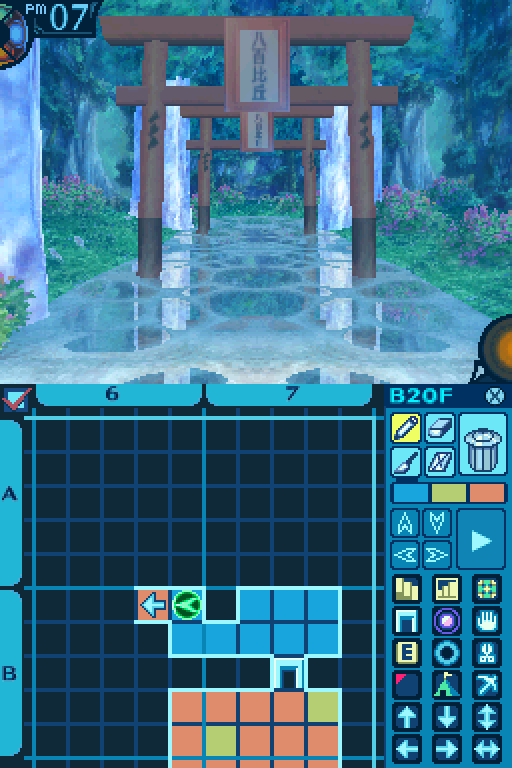 Now the game's just teasing us with the double gates.  Our objective now is to get back to that 2nd gate.  We'll have to go through a few mapless areas first to get back there.  Oh, look at that sheep over there! It's so fluffy! Yes, fluffy. And crazy! Why do you say that? Oh, look at that sheep over there! It's so fluffy! Yes, fluffy. And crazy! Why do you say that? This is the Somnovore's patrol path. It's actually the last Somnovore in the Stratum. Just make sure to stay right behind it, and it won't be able to catch up to you, despite all those mud tiles.  We're not getting to that second gate just yet.   Now we can skip through all those mapless sections on future visits.  But there's still one more we have to go through. The good news is that it's the last one in the 5th Stratum. Anyways, there's another Mortal Hunter in here, but again, you can't see it due to the bad draw distance. If you want to avoid it, follow these directions. If you don't have any way of negating mud tiles, walk up 2 tiles.  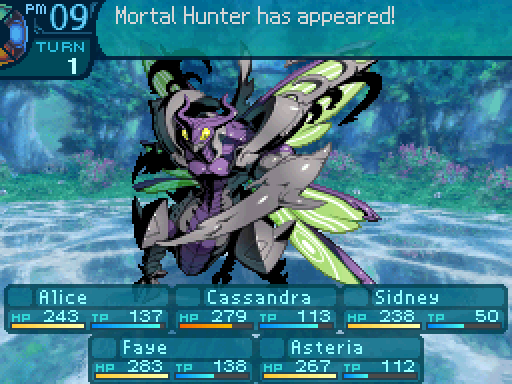 Yes, you'll get into a battle. This is what's supposed to happen. 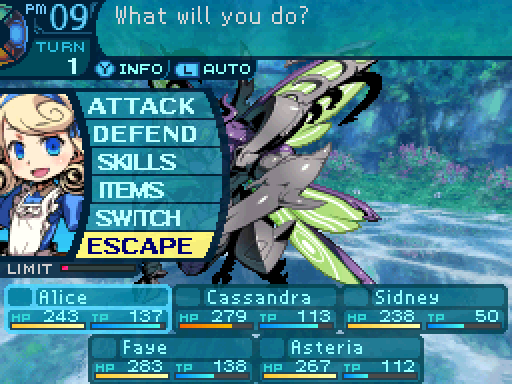 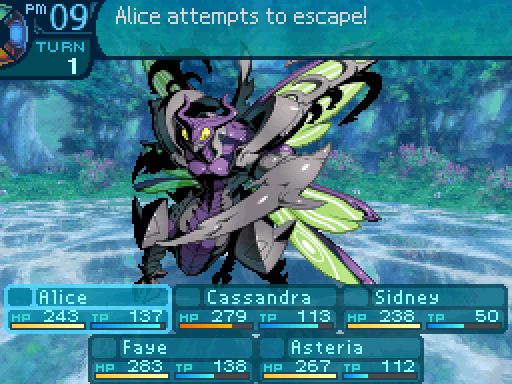 Please excuse us! Please excuse us!But just escape from it.  You'll be pushed back, but also reposition the FOE in the process. You should probably remember that little technique for future reference. Just saying.  From there, you can take this route to get to the door.  But if you have Guard Soles or Rain or Shine active, you don't have to bother with any of that nonsense, and just take this route to avoid the Mortal Hunter entirely.  Now we can go through the 2nd gate.  Which flings us a bit further on the 20th floor.  A4 Mine Point: Nephrite: 60% Gather Rate. Dolomite: 40% Gather Rate. Akaganeite: Rare. Common Gather Periods: 0 to 9. Rare Gather Periods: 1 to 4. This room up here contains the final gathering point in this Stratum, the Mine point.  AAAAAUUUUUGGGGGHHHHH! Ugghhhh... Oh my, that's a lot of gates. AAAAAUUUUUGGGGGHHHHH! Ugghhhh... Oh my, that's a lot of gates.And moving onwards, there's a chain of gates.  At least it didn't send us too far. But which one do we go through now? I'm afraid we'll just have to try them out, one at a time. At least it didn't send us too far. But which one do we go through now? I'm afraid we'll just have to try them out, one at a time.This part is just a bit of a time waster.  But the gate I marked in yellow is the way forward. All of the other gates just send you back to that orange tile.  And now we're at the final part of the 20th floor.  There's another gate over here but... I wonder where this leads. Huh? Huh?Yeah, I'm not sure what the point of that gate is. 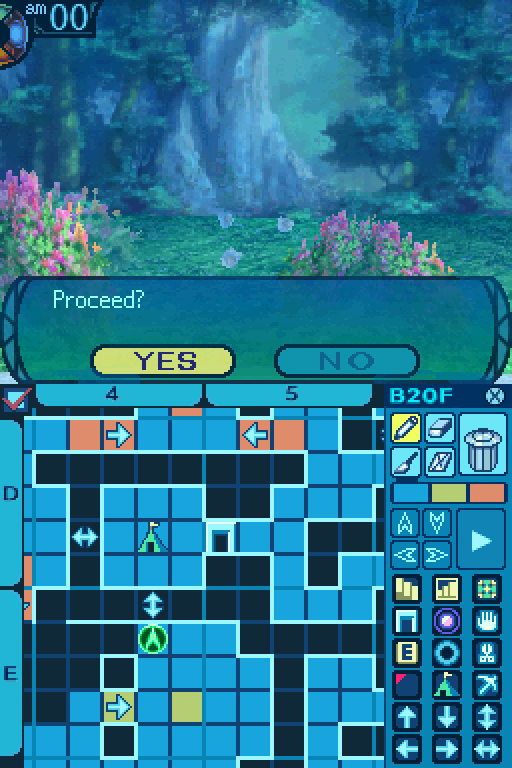 And with this shortcut, We now have a quick route to the end of the floor. 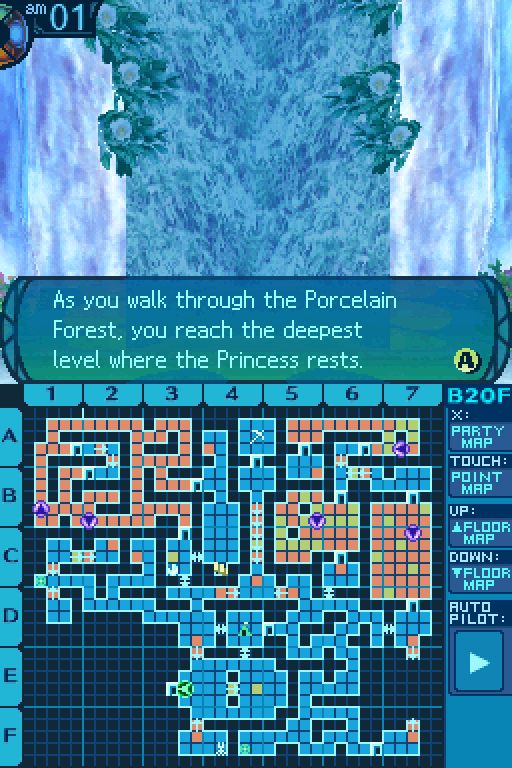 You may seize this opportunity to open the door and protect the Princess, or withdraw and rest. I get the feeling we're gonna be in for something big pretty soon. Yes, we should probably rest up in preparation.Incidentally, that much of the map is as much as we can complete at this time. But now I'm going to go back.  The Ice Fang Rapier was made from Scylla's drop. Provides a good amount of attack, and adds 30% Ice damage to regular attacks.  The Genesis Book provides a 10% boost to the user's TP pool.  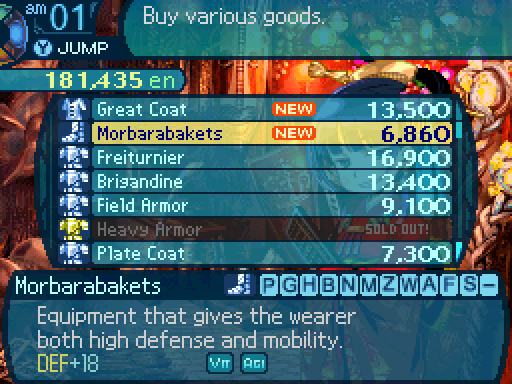 And that's all for new equipment. There's one more loose end to tie up. 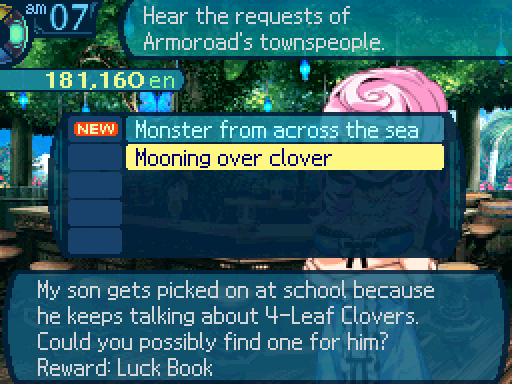 This little quest. Hmm, I think we have time for one more quest. Hey, Missy! What's the deal with this one? Ah, welcoming! You are taking on that request, yes? Thank you, as always! The client is wanting a 4-Leaf Clover for her son, who gets picked on a lot. I don�t believe it is right for a parent to butt into problems between kids... Well, whatever. She put up a request, and I am not going to stop her. You can do it! I remember reading about the 4-Leaf Clover in a picture book about the royal forest. It might be easier if you talk to that person over there. He�s a botanist! Go on, then. Help this overprotective mother hen keep her chick safe! Ah, welcoming! You are taking on that request, yes? Thank you, as always! The client is wanting a 4-Leaf Clover for her son, who gets picked on a lot. I don�t believe it is right for a parent to butt into problems between kids... Well, whatever. She put up a request, and I am not going to stop her. You can do it! I remember reading about the 4-Leaf Clover in a picture book about the royal forest. It might be easier if you talk to that person over there. He�s a botanist! Go on, then. Help this overprotective mother hen keep her chick safe!  Hibiscus... the flower of delicate beauty. Perfect for me, no? How may I help you, explorers? Missy told us you knew something about four-leaf clovers. We're looking for one. You�re looking for a four-leaf clover? Hmm... Do you know of the ancient monster called Mistletoe? Uhhhh... Oh right, those plant things in that forest the Manticore used to live in! But... You look as if you�ve no idea why I ask... Borage... the flower of dull, slow wits. Simply put, bring me the remains of a Mistletoe and I will tell you where you can find your clover. Quince... the flower of effort. All things worth having require effort. Good luck, explorers. Hibiscus... the flower of delicate beauty. Perfect for me, no? How may I help you, explorers? Missy told us you knew something about four-leaf clovers. We're looking for one. You�re looking for a four-leaf clover? Hmm... Do you know of the ancient monster called Mistletoe? Uhhhh... Oh right, those plant things in that forest the Manticore used to live in! But... You look as if you�ve no idea why I ask... Borage... the flower of dull, slow wits. Simply put, bring me the remains of a Mistletoe and I will tell you where you can find your clover. Quince... the flower of effort. All things worth having require effort. Good luck, explorers.You need a Proboscis from one of the Mistletoes in the Manticore Sea Quest. By this point, you should easily be able to take it out. I already had a spare so, let's talk to him again. Welcome back, explorers. And have you brought the remains of a Mistletoe for me? Right here! I told you keeping this thing around would be handy. Ah, so this is the specimen... Campanula... the flower of gratitude. You have my thanks. Then as promised, I�ll tell you where to find four-leafed clover. Your desired variety is a mutation of white clover. It�s said they become four-leaves when trod on. Where, then, do many people tread, where three-leaves also grow? Fuki... the flower of... One truth. Near the waterfall by the entrance of B1F. It is where many explorers set out from, no? Ah, and one more thing. The fourth leaf of these clovers... it is the leaf of happiness. I�ll be praying for happiness to reach the boy.Incidentally, that's not the only place to get a four-leaf clover. Missy also gave us another hint, telling us that one can be found in the Porcelain Forest. Let's take a look there, first.  You recall the request you accepted to find a 4-Leaf Clover... There may be one among all the 3-Leaf Clovers at your feet. You can search here.  This seems like a good place to start looking. This seems like a good place to start looking.You diligently search through the clover, looking for the elusive 4-Leaf Clover. Fade to black. ...There are only 3-Leaf Clovers here. I don't think we're going to find any here. Let's not give up just yet. We didn't search the whole place after all. Unfortunately it's random whether you get one from here or not. You might have to search a few times but after several tries... 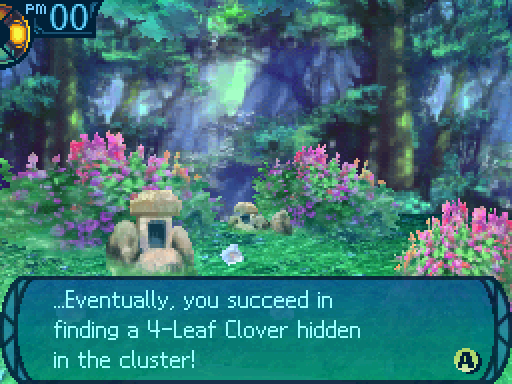 Ha ha! found one! Ha ha! found one!You joyfully pick the 4-Leaf Clover that took so much effort to find! You have found the requested item. Take it back to the bar for your reward. 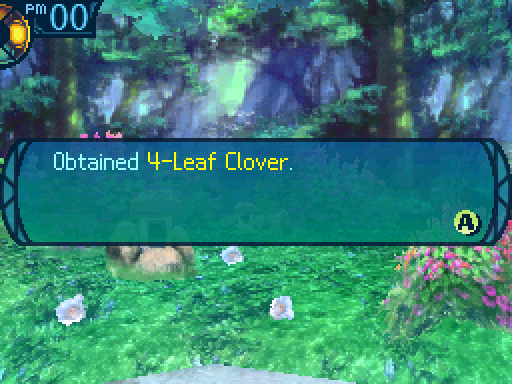 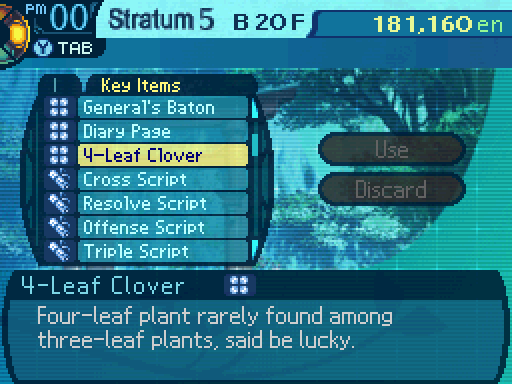 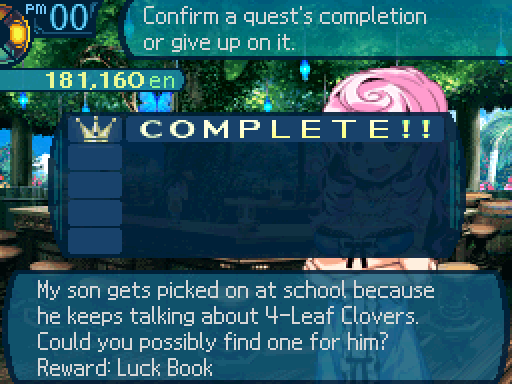 Hello! Back again, yes? Did you find the 4-Leaf Clover? Right here. Whoa! You did it! Now the client�s son will not be teased anymore! One less thing for a nervous parent to worry about, yes? You are earning a reward, too. As always... Good job! Take your reward! Hello! Back again, yes? Did you find the 4-Leaf Clover? Right here. Whoa! You did it! Now the client�s son will not be teased anymore! One less thing for a nervous parent to worry about, yes? You are earning a reward, too. As always... Good job! Take your reward!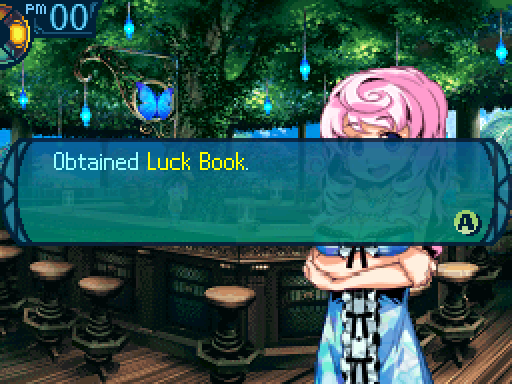 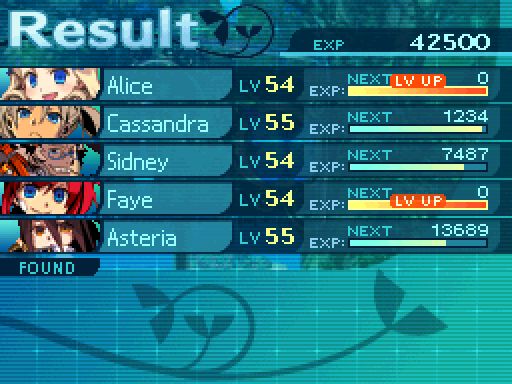 That's one way to complete the quest. There's another way we can do so. Let's take a look at that method. 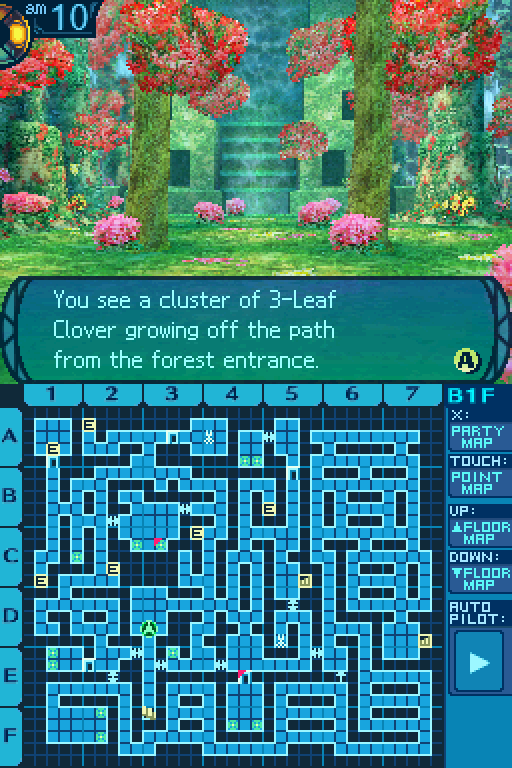 If you hadn�t accepted that request, you would have walked right past, obliviously... You then see a boy desperately searching for something in the clover on the ground. You can search this place for a 4-Leaf Clover, or leave. We can search a few of the tiles around here to try to find one.   You ignore the other adventurers who pass by with odd glances and perform your search...  Unlike with the Porcelain Forest, the 4-leaf clover is actually found on a specific tile.  Namely, this one. As you joyfully reach for it, you sense something watching you from behind... The boy who had been here is staring at you. You can ignore him, or leave the 4-Leaf Clover here.  Unfortunately for the kid, we need this clover more. So we're going to have to take it. Sorry kiddo, but this thing's ours.You worked hard to find this 4-Leaf Clover, and you happily pick it. You have found the requested item. Take it back to the bar for your reward.   Hello! Back again, yes? Did you find the 4-Leaf Clover? Right here. Whoa! You did it! Now the client�s son will not be teased anymore! One less thing for a nervous parent to worry about, yes? You are earning a reward, too. As always... Good job! Take your reward! Oh, by the way... The client�s son was always looking for this on B1F. Wait, what? But he came back crying the other day. I wonder what happened to him... Uh oh. Oops. A-at least he got it in the e-end? Hello! Back again, yes? Did you find the 4-Leaf Clover? Right here. Whoa! You did it! Now the client�s son will not be teased anymore! One less thing for a nervous parent to worry about, yes? You are earning a reward, too. As always... Good job! Take your reward! Oh, by the way... The client�s son was always looking for this on B1F. Wait, what? But he came back crying the other day. I wonder what happened to him... Uh oh. Oops. A-at least he got it in the e-end?We get the exact same rewards, for the record. Now there was something else we could have done instead.  Instead of taking the 4-leaf clover, we can leave it for the boy. You nod at the boy and walk away without saying a word. You were unable to officially complete the request, but you can report what happened. As nice as that was, I wonder what we'll have to put in for our quest report. Eh, we'll just have to explain what happened to Missy. It's not like there's only one 4-leaf clover out there. Ah, it�s you. Welcomes. The client and her son came by a moment ago and cancelled the request. So no reward. She said some kind-hearted adventurer gave a 4-Leaf Clover to her son. Really now? This might sound crazy coming from me... but it sounds like you know what�s important. I am proud to have people like you working for me... Here! This is an official reward from me to you for doing your best. I�m so glad that I can trust you to do the requests I hand out! Be proud! Ah, it�s you. Welcomes. The client and her son came by a moment ago and cancelled the request. So no reward. She said some kind-hearted adventurer gave a 4-Leaf Clover to her son. Really now? This might sound crazy coming from me... but it sounds like you know what�s important. I am proud to have people like you working for me... Here! This is an official reward from me to you for doing your best. I�m so glad that I can trust you to do the requests I hand out! Be proud! We get 2 Luck Books for our trouble.  And despite the quest technically being cancelled, we still get the exp reward, which doesn't change.  Alice increases her pickoff capabilities even further.  Try making yourselves stronger, I dare you. Try making yourselves stronger, I dare you.And Faye now has the ability to dispel enemy buffs.    I'm feeling lucky! I'm feeling lucky!I use the Luck Books on Faye to lower her ailment susceptibility. Now there's only one thing left to do. But first, let's take a look at our guild.            The last thing we have to do is to take down the final boss. So vote for up to 5 characters to handle that duty. Votes must be bolded. Araxxor fucked around with this message at 20:22 on Dec 14, 2016 |
|
#
?
Dec 14, 2016 06:57
|
|
|
Akatsuki, Susan, Scott, Fang, Charlotte All the classes that I haven't used on my EO3 run other than Alice.
|
|
#
?
Dec 14, 2016 15:22
|
|
|
Bookends. Start to finish.
|
|
#
?
Dec 14, 2016 15:35
|
|
|
You wrote the "You worked hard to find this 4-Leaf Clover, and you happily pick it. You have found the requested item. Take it back to the bar for your reward." line twice, both before and after the "Obtained 4-Leaf Clover" image. Sidney, Akatsuki, Scott, Fang, Alice. I wanted to vote for an all male party then realized that is literally impossible, so Alice can join her master.
|
|
#
?
Dec 14, 2016 16:37
|
|

|
theshim posted:Bookends. I agree.
|
|
#
?
Dec 14, 2016 17:13
|
|

|
Dr. Fetus posted:Another mapless area. Yep, that was the room I got ganked in because I went through the west path and the time changed while I entered the room so I didn't notice that their patrols changed. Good times. Charlotte, Faye, Susan, Fang, Asteria, Akatsuki.
|
|
#
?
Dec 14, 2016 17:20
|
|
|
Yeah, let's go with bookends.
|
|
#
?
Dec 14, 2016 17:26
|
|
|

|
| # ? May 29, 2024 00:23 |
|
|
theshim posted:Bookends. Agreed.
|
|
#
?
Dec 14, 2016 18:19
|
|