|
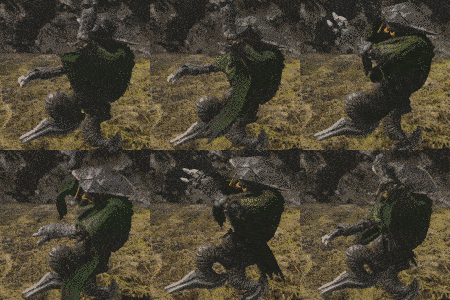
This part of "dolls/babies getting to understand the world together" is very beautiful. It is a level of depth other ffs do not have, mainly since it is about the world and not just the main characters. Also, saw a dude up there with a ghost AV... Can we have an AV version of Kuja kicking Garland? The looping ARGH kick? This game's gifs are the best for AVs
|
|
|
|

|
| # ? Jun 8, 2024 03:19 |
|
Looks like there hasn't been a fight against Quale in Record Keeper yet. The other optional superbosses in the game are not represented either, so the sprites will have to wait for when we focus on progressing the story once more.
|
|
|
|
The day I bench Steiner is the day someone takes the controller from my cold, dead hands. You're a monster, OFS. If I had any know-how I'd hack him in during the Outer Continent section
Rabbi Raccoon fucked around with this message at 06:52 on Nov 7, 2016 |
|
|
|
I think the real monsters are the ones who made the player eat unavoidable experience for that sequence. What do we care for your event scripting, devs? Give me back my entirely level 1 team!
|
|
|
|
It's kinda neat though, that this isn't one of those 0-boss-exp games where low levels are, if not outright supported, at least easier, yet by coincidence a LLG winds up being level 1 anyway. Especially considering even said 0-boss-exp games often don't.
AlphaKretin fucked around with this message at 07:02 on Nov 7, 2016 |
|
|
|
I like the fact that this is the first Final Fantasy Big Bad whose plans fell through before the final confrontation. Every single other villain succeeded at their plans to the end and only lost because the party ended up kicking their face in. Kuja dropped his own plan, true, but he never quite succeeded at his ultimate goal. And that's when he drops the theatrics.
|
|
|
|
Kinda sad this LP is coming to an end. It's been a year and a half of nostalgia for one of my very favourite games. I don't have the time to replay it (for the seventh time), but seeing it here regularly brings me back many good memories. It's been a really great LP so far, and I'm very happy you brought it back, Mega64; you've done the game justice.
|
|
|
|
Am I missing something or did the old dude in Daguerreo plan on cutting off his fingers grafting on Gogo's dead ones and then make a creepy doll of his late wife?
|
|
|
|
Khmer_Ruse posted:Am I missing something or did the old dude in Daguerreo plan on cutting off his fingers grafting on Gogo's dead ones and then make a creepy doll of his late wife? That sounds like an excellent DnD campaign idea.
|
|
|
|
campaign for vecnas fingers.
|
|
|
|
Khmer_Ruse posted:Am I missing something or did the old dude in Daguerreo plan on cutting off his fingers grafting on Gogo's dead ones and then make a creepy doll of his late wife? He thought they were magic gloves that could make anything and then found out that they were just gloves that had hard work put into them.
|
|
|
|
quote:Gonna preface from now on to prevent possible confusion: I'm quoting from the Excalibur 2 Perfect Game Guide! This is how not to only beat the game at low level, but to also make a speedrun of it, and how to also not miss any missable items! It's elaborate as hell and maybe slightly insane! It's time for this nonsense. This is what all the different path stuff has been leading up to, and I will just post this handy table: code:I'll just jump to the strategies if you don't mind. code:Abadon is boring: Quina has Auto-Life and uses Limit Glove. If Quina is Level 45, they might need to kill themselves as Abadon isn't strong enough (haha). But now the real fun begins, and you might remember that this has been prepared for extensively - for almost the entirety of Disc 3, the Perfect Game Guide has strung Zidane along with him almost, but never quite entering Trance. This means that yes, it is actually useful here and vital for the strategy...if you spend agonizing hours of tedium setting it up juuuuust right. I need to quote all of it, because the numbers game at play is...special. code:And there we go, the "perfect" way(s) to tackle YNA.
|
|
|
|
Simply Simon posted:Insane quantum mechanics time cube snippets When I played a single class solo challenge for FFV last year I thought I was being crazy for opening a spreadsheet to count NEDs health and try to determine the best point to switch from flare boosted chicken knives to drain assassin daggers or trying to consider if a black garb boosting speed to fuel the chicken knife further truly offset the lower defense. Then I see the payoff of this and know that I'm not crazy well not crazy because of that
|
|
|
|
I have to respect the dude for not going 'THIS is how you do the thing' but also accounting for all the possibilities where 'If A, then Z, if B then Y' to still accomplish the goal of the Perfect Game.
|
|
|
|
In (spoilers inside) the speedrun they arrange for Trance to go off in the first fight because as noted it will always cast Bio, then fly up, so you can do the time-wasting Trance animation while it's working on the flying part.
|
|
|
|
Contrary to the extensive trance planning described by Simply Simon, this TAS completely avoids the issue by extensive luck manipulation. There's also commented videos of disc 1-3 and part of disc 4 in the TASer's channel. Just beware the obvious disc 4 spoilers. I don't think I could ever do a FFIX lvl 1 challenge. Between the Alexandrian gauntlet, Iifa tree and Pandaemonium battles there's simply too much rng bullshit involved.
|
|
|
|
I like that you can just forget about two physical attackers and a summoner/white mage and you've still got the makings of an alright party.
|
|
|
|
Zidane, Freya, Eiko, and Quina were the team I used for the superboss even.
|
|
|
|
Fairly sure you can beat superboss with any team makeup really. The 'least optimal' team if you're doing it before Disc 4 is probably Zidane/Vivi/Amarant/Steiner, and that'll still do fine.
|
|
|
|
there 's a very fun reason to use Vivi and Amarant in that battle
|
|
|
|
 Let's finish up some side quests!   First, Ragtime Mouse.  Obviously false. They're dwarves.  False. It's simply "First sight", no love anywhere.  False. There's definitely at least one on the Outer Continent, may be one on the Forgotten Continent as well but I can't remember offhand. And this last question is always the final one.  Actually true. Anyway, after we answer this last question, we have to find him again...     By getting all questions correct, we get bonuses.  EXP, a nice chunk of gil, and a Protect Ring. Not too shabby!  Next up, Mognet. For this one, we have to return to Ipsen's Castle. Despite there being no other reason to return here, the graphic designers bothered adding a Mist-covered version of the outside. That's dedication to detail!    That item...? Oh! That item...? Oh! Mois is right outside Fossil Roo.    They gotta tell me more than 'that item'! Kupo!!! They gotta tell me more than 'that item'! Kupo!!! Next is Noggy, who's over at Daguerreo.    That thing... Oh, I know! Kupo! Kupo! That thing... Oh, I know! Kupo! Kupo! And now we go back where we started, over to Kupo in Alexandria.    If you return here with Vivi or Eiko, they can play jump rope again. Hooray.    Ah, 'Superslick'! Kupo! But I don't know who has any... Ah, 'Superslick'! Kupo! But I don't know who has any...Well, it's someone in Alexandria, so it shouldn't take too long to find, right?   You want to try some? How come you be a-needin' it? You wanna be beautiful like me? Yer pullin' my leg, aren'tcha? No? Well, I'll get my folks to send some more. You can have this one. You want to try some? How come you be a-needin' it? You wanna be beautiful like me? Yer pullin' my leg, aren'tcha? No? Well, I'll get my folks to send some more. You can have this one. Now all we have to do is deliver it to Mognet Central and we're finished playing mailman.   Moogles are obsessed with their fur, it seems.    It'd be kind of a waste to keep it, so sure.   And with that, the machine works again.   Another Protect Ring! We're swimming with the drat things now.  I was happy because my coat became so soft, but I took everyone's fun away... I'm sorry. I was happy because my coat became so soft, but I took everyone's fun away... I'm sorry. At least we no longer have to deliver letters.  I slacked a bit.  Another side quest done!  Next up, we've finished finding all the hidden treasures with Choco. It's time to let him live with his kind.   This is pretty much what all the Chocobos say.  Except this one.   Kweh. Kweh.  How could you forget about me, kupo!? I'm gonna live here, too! How could you forget about me, kupo!? I'm gonna live here, too! ...It's you again, eh? Like I said before, only chocobos can live here. I'm sorry. ...It's you again, eh? Like I said before, only chocobos can live here. I'm sorry. But Choco needs me, kupo. But Choco needs me, kupo. There are no exceptions. I apologize, small one. There are no exceptions. I apologize, small one. Kupo!!! Kupo!!! Forget about it, Mene. This world is only for chocobos. Let's go home. You can come visit. It's not like you'll never see Choco again. Forget about it, Mene. This world is only for chocobos. Let's go home. You can come visit. It's not like you'll never see Choco again.  You led Choco here, but now that he is here, you can no longer enter. You led Choco here, but now that he is here, you can no longer enter.  But I'll give you something in exchange. But I'll give you something in exchange. Oh, boy! A card with your face on it! That makes up for losing your best friend!   K-Kweh! K-Kweh! ...Kupo. Are you sure, Choco? ...Kupo. Are you sure, Choco? ...Kweh. ...Kweh. Kupo... I understand. Kupo... I understand.  Take care, Choco. Take care, Choco. Kweh. Kweh. -----    Aren't we flying...? Wait! You can't fly, Zidane! Aren't we flying...? Wait! You can't fly, Zidane! ...I'm not that heavy. You can carry me, Mene! ...I'm not that heavy. You can carry me, Mene! Hmmm. I never expected to run into a problem like this, kupo! Hmmm. I never expected to run into a problem like this, kupo!  Try hanging onto my feet, kupo. Try hanging onto my feet, kupo.   Whoa! Whoa!  Hey! Hey!  This is not good. This is not good.  Hey... Listen, Mene. Hey... Listen, Mene.   This is Chocobo's Paradise, kupo. It's probably some other chocobo. This is Chocobo's Paradise, kupo. It's probably some other chocobo.   Kupo! I knew you'd come back! See? Choco needs me, kupo. Kupo! I knew you'd come back! See? Choco needs me, kupo.  Kweh. Kweh. Let's go back to the forest, kupo! Let's go back to the forest, kupo! Kweh. Kweh. Well, I can finally go home now. Well, I can finally go home now. Another happy ending. There's one last side quest we can do with Choco.  Now all the chocobos wonder why Choco isn't living in paradise after all.   You may take them back, if you wish. You may take them back, if you wish. Any rare cards discarded due to the player being at the 100-card limit are stored with Fat Chocobo for retrieval later. To access the next side quest, you have to challenge Fat Chocobo to cards. You don't have to actually play him, though.   I'll grant you peace and restore you once you've visited them all. I'll grant you peace and restore you once you've visited them all. Basically we go to each beach in the world, mark it with a button, and continue until we get them all. There's twenty-one beaches total, six of which are off on islands, the rest surrounding the Mist/Outer/Lost Continents (since Forgotten has no beaches).  Once you get all of them, you can now fully heal for free every time you're on a beach. It's...pretty useless since there's no reason to bother with the world map anymore, but oh well!  Next up, let's check in on Lindblum. Like Alexandria, most dialogue is the same as Disc 3, but there's a few things different.    We get this now that we've finished Mognet.   Some people don't like it, but I'm glad, because my series on the Mist wasn't done yet! Some people don't like it, but I'm glad, because my series on the Mist wasn't done yet!  Where's Cinna and Marcus? Where's Cinna and Marcus? Let's go look! Let's go look! Yeah. Yeah. This incidentally sets off a rather interesting and annoying side quest. Ugh...   Be sure to take some of my pickles with you! Be sure to take some of my pickles with you!    Hmm? That's what I thought. I ordered some more for you. Hmm? That's what I thought. I ordered some more for you. Wow, you're sharper than I thought. Wow, you're sharper than I thought. What do you mean by that!? What do you mean by that!? And that's it. Though when I entered the Invincible, I triggered a conversation with Amarant.   What the... What are you talking about? What the... What are you talking about? You said you were going to Terra because you wanted to find the truth. You said you were going to Terra because you wanted to find the truth. Yeah, but don't forget we move forward to discover new things about the world and about ourselves. Yeah, but don't forget we move forward to discover new things about the world and about ourselves. ...... ......Business as usual.  We also get this neat view of the Invincible bridge from inside Lindblum's hangar.  Alright. Time for the main event. I've been bringing it up for a long time, but now we're finally going to fight the game's superboss. It's located in Chocobo's Air Garden, and in fact we've had access to it since we could first access the Air Garden.      Is it bad? Is it bad? I've never felt anything like it, kupo! It's not of this world, but not like a ghost, either... It feels...otherworldly, kupo. I've never felt anything like it, kupo! It's not of this world, but not like a ghost, either... It feels...otherworldly, kupo. If we leave it alone...  So let's check it again.   The game gives you the opportunity to switch your party and gear up. I'd say we're ready...    This is the game's superboss.  It's a giant ball, and it's pretty drat scary. This ball goes by Ozma.  Completing the friendly monsters quest makes this boss easier. First, it brings Ozma close enough so physical attacks can hit it. Otherwise, characters would need Long Reach or rackets. The other key is it transforms Ozma's Shadow-element absorption into a weakness, which is key for one of its attacks.   Ozma, as you may expect, is very powerful, but the entire battle is bizarre. First off, Ozma has a completely hosed ATB. If Ozma is not currently acting when you give a command, Ozma cheats and immediately goes before that character. Thus you'll want to enter commands while Ozma is doing one of its many actions. This makes handling it tricky.   Ozma has a huge variety of attacks, but one of its scariest is Curse. It does heavy physical damage and inflicts a variety of status effects. You can block most of them (Darkness, Confuse, Poison, and Slow through Auto-Haste), but Mini will nerf your offenses significantly. It can also cast Mini on its own, as well as Berserk.   Doomsday is a powerful Shadow-elemental spell that deals heavy damage to everyone.  That's why doing the Friendly Monsters quest is recommended (as otherwise this would heal Ozma), and also why every character should at least be immune to Shadow damage (though if everyone can absorb Shadow then Ozma won't use it). Pumice Pieces absorb Shadow and Holy, so definitely equip both if you have them.  It can also cast Curaga on itself and Esuna to heal from its status effects. It's only vulnerable to Slow and Darkness, but the latter is nice to get it to waste turns on Esuna (especially since Zidane can inflict it with 100% accuracy with Soul Blade).  There's also Death. It'll use L5 Death if at least one character is a level multiple of 5, and L4 Holy is at least one character is a level multiple of 4.  Its steals are amazing, but good luck surviving long enough to get them all! It holds an Elixir, Robe of Lords, Dark Matter, and Pumice Piece.  Its HP is surprisingly low, only 55k. Six 9999 hits will do it. The problem is there's a lot of luck in simply surviving its attacks. Curse will ruin your day, and it has a Meteor attack that will randomly wipe you, and that's above keeping up with its brutal offense and how it cheats the ATE.  I actually grind a bit to get L5 Death and L4 Holy to trigger. Quina can heal from L4 Holy, and Steiner is the L5 Death target since he's most expendable. Zidane will Steal until I get the Pumice Piece (Robe of Lords would be nice but I can get more later and I don't want to waste time against Ozma if I can help it), then spamming Thievery for 7.5k damage (hell yeah). Steiner gets the Excalibur (since it deals Holy damage, which Ozma is weak to) and spams Shock. Quina is utility, essentially spamming Auto-Life, or Angel's Snack to heal Mini if needed. Eiko's doing full-on Curaga duty since Ozma's onslaught is too intense to waste turns on Holy.     It also has Kuja's Flare Star, though Ozma's does 50 * Character's Level.   Meteor is random and can ruin your day.  Fortunately, Phoenix's Rebirth Flame happens to trigger here.    This has a (# of Phoenix Pinions/256) chance of reviving your entire party from a wipe if Eiko is in the party.  Of course Ozma immediately uses Curse and kills me again.  It takes a few tries, but eventually I get what I want and finish it off.     Spectacular death animation.  The rewards are great. 100AP is huge, and with Double AP is enough to instantly learn drat near any ability in the game.  More importantly is the Pumice. This teaches Dagger Ark, her final summon. Ark, which you may remember at the airship boss from Oeilvert, is a Shadow-elemental summon that deals more damage the more Lapis Lazuli you have. It also has a ludicrously long summon animation.    I recorded how I feel right now on card, kupo! I'll give you secret info, too! I recorded how I feel right now on card, kupo! I'll give you secret info, too!  One more bonus, kupo! One more bonus, kupo! We get an Ozma card, a free heal, and the Strategy Guide.  To get the highest rank of card master, every single card must have a different arrow configuration. Your reward for doing that is the game freezing on you because it cannot handle someone being so insane.  Our last trip isn't really a side quest, but there's a good bit of backstory we can pick up now.    If we come here without Dagger or Amarant, Lani won't flee and we can talk to her.   I tried getting back to the Mist Continent, but Fossil Roo was blocked, and the Alexandrian Fleet was destroyed before my eyes. I became so weak after wandering around for days. Then the moogles here rescued me. I tried getting back to the Mist Continent, but Fossil Roo was blocked, and the Alexandrian Fleet was destroyed before my eyes. I became so weak after wandering around for days. Then the moogles here rescued me.  It's so wonderful living with moogles. I haven't thought about money once since I've been here. I'm glad I lost our last fight. It's so wonderful living with moogles. I haven't thought about money once since I've been here. I'm glad I lost our last fight. Lani did some soul-searching since we've last seen her. Good for her!   Maybe it's because of the seawater... Maybe it's because of the seawater...   Movement of time...? If it's talking about a clock, forward is clockwise, and backward is counterclockwise. Movement of time...? If it's talking about a clock, forward is clockwise, and backward is counterclockwise.  If you go to the Eidolon Wall during Disc 4, you get this perspective.   The trick is to go clockwise (right) until you reach the entrance again, then go counterclockwise (left), and back and forth nine times.  Once you do this, you heal up, but also unlock descriptions for all the eidolons here (which are ten of the twelve eidolons Eiko and Dagger get, excluding Madeen and Ark, as well as Alexander). For this section, I'll type out what's mentioned in quotes so you can see each eidolon.  quote:Fear not the power of summon magic, but the ones who use it. Madain Sari was formed from people fleeing from Alexandria after a mishap there 500 years ago. More details in a bit on that.  quote:This is where the fault lines collide. Madain Sari's location was chosen because it was the best place to hear the heartbeat of the planet. This let them more easily harnass the power of summoning.  quote:The Legend of Eidolons FF14 took this tidbit and ran with it to describe their primals (summon monsters created by people believing in them really hard), which leads to poo poo like giant moogle kings.  quote:The First Eidolon Discovered, Shiva This may be an explanation as to how Madeen took the appearance of Mog.  quote:When the arrogant one summoned a power that could not be controlled, holy judgment was passed. 500 years ago, summoners used a crystal to summon Alexander, who wrecked poo poo immensely. The crystal was split into four pieces (the four royal jewels we currently possess). That attack was why the founders of Madain Sari left Alexandria, taking a piece of the crystal with them.  quote:We repeated the mistake our ancestors made 500 years ago. Shortly before the destruction of Madain Sari, the tribe members failed to summon Leviathan. Rather than create further risk, they used Carbuncle to seal Leviathan at the foot of the Iifa Tree, where it remained until Dagger unsealed it.  quote:Eiko, my lovely child. The age of 16 is important for summoners. Remember that Zorn and Thorn said eidolons could not be properly extracted from a person until the age of 16.  quote:Eiko, Thus the origin of Mog/Madeen.  quote:This information is yet to be confirmed, but there was an eyewitness account of a previously-undiscovered eidolon. There was talk awhile back about why Kuja would travel to Mount Gulug and why there was a summoning circle there. This strongly implies that the Mole People that lived there were summoners as well and may have summoned a great beast, and Kuja went there to try to obtain that eidolon to defeat Garland, at least before opting to go the Trance route. This doesn't explain why Hilda's lounging around in sweet digs hours after Kuja unlocks access to the volcano, though.  After reading everything, there's a hidden piece of information we can find by examining Ifrit again.    This is heavily implied to be Dagger's father, meaning Dagger's mother is Jane and her real name is Sarah. These are callbacks right to the first game, with Princess Sarah and Queen Jane. Thus the origin of Mrs. Queen Sarah "Princess Garnet 'Captain Dagger' Til Alexandros XVII" Tribal. That's it for side quests, lore, and all that! Next time, we go to the Iifa Tree and proceed to the final dungeon!
|
|
|
|
In regards to Ozma, he actually does some sort of set pattern to his attacks; half his attacks are only done on his odd-numbered turns, and the rest on his even-numbered turns. The trick is that he won't use the same move on back-to-back chances. So some ideal run of Doomsday-x-Doomsday can't happen. In addition, I believe that Vivi and Amarant can use Return Magic on Doomsday as well as Holy and Flare.
|
|
|
|
I always rename Dagger to Sarah after I find that message via the Namingway guy in Daguerreo. Here's how I dealt with Ozma. Party: Zidane (Level 64), Freya (Level 52), Quina (Level 60), Eiko (Level 56) Equipment Set-Up: Make sure everyone has high Magic Defense. Eiko and Quina are equipped with Pumice Pieces to absorb Shadow and Holy damage, to help keep them alive so that they can heal. Zidane and Freya both have Protect Rings to reduce the damage, but not absorb it, ensuring that Ozma will continue to use those attacks. Ability Set-Up: Auto-Haste, Auto-Regen, Antibody, and Clear-Headed on everyone. Zidane and Freya also equip Bright Eyes. If you can spare it (I couldn't), Boost on Eiko would probably also be helpful. In-Battle: The goal of this party is fairly simple. Zidane and Freya use Thievery and Dragon's Crest for damage, ideally with both maxed out. Quina sets Auto-Life on everyone, predominantly themselves and Eiko due to being the healer, before assisting with Frog Drop which is also ideally maxed out. For a Level 60 Quina, I had to catch 170 frogs to get it to do the max damage. Eiko is there for healing and throwing out the occasional Holy for damage or Eidolon animation for both damage and allowing Auto-Regen to last longer. While I never tried it, I suppose Eiko can also assist by throwing a tent on Ozma, which will inflict Blind on him due to getting bitten by a snake. Ideally, this would be best to do after tossing Reflect onto him, since he will continually attempt to use Esuna or Curaga on himself, but wind up reflecting it to the party instead. Ozma: It's worth noting that this strategy is based on the assumption that you finished the Friendly Monster sidequest, otherwise Ozma will absorb Shadow damage and also not be in range for physical attacks. I'm not sure if Thievery and Dragon's Crest will affect him in this case. Ozma will immediately get a full ATB bar and a free action whenever you try to do anything before his next turn. I'm not sure if that includes healing or using a Phoenix Down on your party members, but I wouldn't risk it. As a result, it's a good idea to wait until Ozma is acting to begin doing anything. Because this requires you to act during his spell animations, it's a pretty good idea to set the menu to Memory for this fight. Ozma's main threat is Meteor, which can either be a party-wipe or a really major setback to recover from. The first time I tried this strategy, I was unfortunate enough to get hit by Meteor before fully setting up, which wound up killing all of my party members except Freya. Needless to say, the battle didn't last much longer after that. This is mainly because Ozma seems to use Curse afterwards, which does decent enough damage to pick off characters below half their HP and also inflicts a myriad of status effects. With the above abilities equipped, the only status effect that is unavoidable is Mini, which shouldn't detriment anyone in this party. It can also apparently cast Mini directly on the whole party, which should be considered a breather turn. The levels above are used to prevent Ozma from using Meteor so often by introducing new attacks into its repertoire. Everyone in my party is at a multiple of four (an accident; Zidane wasn't supposed to be, but leveled up), which baits him into using Level 4 Holy. Quina is also Level 60, which baits him into using Level 5 Death; Quina's turns are typically devoted to setting Auto-Life onto themselves to get around this. Eiko is set up to absorb Holy damage so she can stay alive, and Quina is likewise set up to absorb it on the off-chance that Ozma targets them after they revive via Auto-Life. Ozma also has Holy and Death, but they can generally be treated like the level variations of these attacks, with Eiko using Full-Life on a person not protected by Auto-Life or Curaga on someone who is. Aside from those, Ozma has three other attacks that should be of little issue. First, there's Doomsday, which everyone should be set-up to resist or recover from with the above equipment set-up while Ozma takes damage. He also has Kuja's Flare Star, which shouldn't be too problematic, but will likely require a heal from in the case of your squishier characters; the damage formula is (Character Level * 50). In this case, that'd deal 2800 damage to Eiko. There's also Flare, which is single-target. In my case, he only used this on Freya in both attempts, and it one-shot her both times, so treat this the same as his Death spell. The last defenses that Ozma has are two counter-abilities, Curaga and Berserk. The former tends to come out at lower HP and he can occasionally get caught doing nothing other than Curaga on some turns, which generally signifies he's near death. It also only heals about 7000-ish HP, so if you have max damage skills, you can catch him in a loop until his death. Berserk is a bit more annoying, since the only preventative measure for it is Auto-Reflect. I don't think that Berserked characters can trigger Ozma's Full ATB measure, but it's still an annoying status effect not worth leaving up; cure it as quickly as you can with a Gyshal Green. With Ozma set to use so many attacks (Holy, Flare, Level 4 Holy, Level 5 Death, etc.), Meteor rarely comes out; if it does, hopefully you'll have set up enough to be able to recover from it quickly.
|
|
|
|
Also, I forget where it is, but it's heavily implied that Dagger is actually 17, not 16, and that if Kuja had known that fact the game would have never happened and he would have won.
|
|
|
|
Fat Chocobo's a goddamn racist. I never knew that about Ozma's ATB. Obviously, I got hosed over a lot. I think the first time I beat it was because Freya Tranced and stayed in the air for a long time.
|
|
|
|
|
Mega64 posted:
Forward and back And then forward and back... I never knew Eiko could also do the jump rope minigame. This lp continues to amaze me.
|
|
|
|
I think you need Quina in your party to find the entrance to Fossil Roo, right?Senior Woodchuck posted:Fat Chocobo's a goddamn racist. Have a trading card and forget about that.  Seriously though, I think he's more isolationist than anything since that paradise is a haven for abused Chocobo.
|
|
|
|
Ozma is unsettling here, but when it turned up in FF14's Weeping City of Mhach it also gained the ability to reconfigure itself into tetrahedron and cube shapes. Oh, and suck all the battlers into itself. It simultaneously looks amazing and "what the heck is that?!".
|
|
|
|
I love the design of Ark and the animation is excellent. And then it does half the damage an exploding box does and man summons are just disappointing in battle.Hobgoblin2099 posted:I think you need Quina in your party to find the entrance to Fossil Roo, right? Yep, huge pain in the rear end if you don't know why.
|
|
|
|
You need a ton of gems to make Summons worth it. Curse probably helps too.
|
|
|
|
Hobgoblin2099 posted:I always rename Dagger to Sarah after I find that message via the Namingway guy in Daguerreo. I only ever played through this all the way once, but yeah, same. I'm also that boring guy who always renamed Frog "Glenn" and Magus "Janus" on subsequent playthroughs of Chrono Trigger. 
|
|
|
|
I mean, in fairness, if you didn't want to bother beating Ozma or the assorted other grotesquely overpowered optional encounters, would grinding up Dragon Crest/Thievery/Frog Drop all the way be worth the time? The core game isn't all that difficult.
|
|
|
|
Rangpur posted:I mean, in fairness, if you didn't want to bother beating Ozma or the assorted other grotesquely overpowered optional encounters, would grinding up Dragon Crest/Thievery/Frog Drop all the way be worth the time? The core game isn't all that difficult. You can do these optional bosses just fine without them, too. Ozma happens to be really random because Curse just wrecks your day and Meteor frequently rolls 6000+ damage and there just isn't much you can do about those.
|
|
|
|
To be fair, grinding Frog Drop is never really worth it. Even if you do the bare minimum to get the Gastro Fork (which Quina doesn't even need since s/he shouldn't be physically attacking after what, Disc 2), Quina still can't hit 9999; the minimum number of frogs you need is 101 frogs for a level 99 Quina to hit 9999 damage (okay, you can stop at 100 frogs for 9990). For a less insane level 50 Quina, you need 200 frogs.
|
|
|
|
I clocked in at 170 at the end of my recent playthrough. That's the most I've ever obtained.
|
|
|
|
Grinding for frogs is mind numbingly boring, and I say this as a man who has, on multiple occasions, grinded steals and grand dragon kills.
|
|
|
|
https://www.youtube.com/watch?v=GIM-Zo2xsNw Ozma was made into a boss in the latest 24-man raid in FF14. At the time it came out and for a significant time after, it was the hardest boss outside of the savage 8-man raids, not because the mechanics are difficult, but because any of the up to 23 agents of chaos that you get matched with can completely ruin your day. https://www.youtube.com/watch?v=CfAXRqkgrtk Also, the music of the dungeon Ozma is in is reminiscent of FF9's battle theme.
|
|
|
|
XIV is a very strange and mysterious game. I hope I can get a laptop that runs it soon. Worth noting about Ozma is that it's apparently an Eidolon that lost its form due to no one that knows what it looks like being alive at present. Additionally, its light half uses White Magic, its bottom half uses Black Magic, and both halves dual cast Doomsday for some reason.
|
|
|
|
So many things I've never seen before in this update. I finished the Mognet quest and got the Eidolon Wall stuff, and fought Quale, but everything else here is new to me (except dying to Ozma whoops) What makes the Mognet quest even more bullshit than needing Quina in your party to get back to Fossil Roo is knowing you're supposed to go there at all; Mois was originally the moogle in Ice Cavern, which you can't enter on Disc 4. I found him completely by accident after like half an hour of running around the world map and swearing.
|
|
|
|

|
| # ? Jun 8, 2024 03:19 |
|
Ozma wrecked my days many times before I got a lucky run where both his Berserk counters missed and he didnt use Curaga counters for some reason The later extra boss was amusing after that for various reasons
|
|
|


