

|
You've really got to add an 'attempted quits' at the end of the LP when it gets archived.
|
 #
?
Aug 18, 2017 21:50
#
?
Aug 18, 2017 21:50
|
|


|

|
| # ? May 29, 2024 22:25 |
|
|
I thought these dragon fights were supposed to be difficult. Did a single one even take more than 10 turns? This dragon god better be a real kick in the balls or I'm gonna have to pick up my EO3 save again and suffer because my team is horribly optimized and I can't make things look as easy as you make it look.
|
|
#
?
Aug 19, 2017 00:07
|
|

|
Efe posted:I thought these dragon fights were supposed to be difficult. Did a single one even take more than 10 turns? This dragon god better be a real kick in the balls or I'm gonna have to pick up my EO3 save again and suffer because my team is horribly optimized and I can't make things look as easy as you make it look. It is. I'll let Fetus explain, but I think it was head bind or die.
|
|
#
?
Aug 19, 2017 02:30
|
|

|
I think the dragon fights tend to be "know what to do or die" sorts of things. If you can plan for their nasty stuff then generally only really bad luck will sink you. Which is good when it becomes time to start farming the big jerks.
|
|
#
?
Aug 19, 2017 14:31
|
|

|
Part of it was that I also got lucky with these fights. For example, the true Drake experience for most players:        Cue rage quit. Also gently caress fully bound conditionals.    I miss Dominate. Araxxor fucked around with this message at 06:44 on Aug 23, 2017 |
|
#
?
Aug 23, 2017 06:42
|
|

|
Eh it's just another condition that's basically "You must use formaldehyde". I forget how easy it is to farm up in EO3 though.
|
|
#
?
Aug 26, 2017 06:25
|
|
|
I read through all of this recently. Good stuff, thanks Dr. Fetus. Fire dungeon is my favorite music by far.
|
|
#
?
Sep 12, 2017 03:15
|
|

|
Update 97: The Final Voyage We won�t be exploring the 6th Stratum in this update. There are some loose ends I would like to tie up before doing so.  First up is the Otherspawn�s conditional drop. I grabbed this offscreen, but forgot to show off how to get it. You get it by killing them with Ice damage, but they�re immune to it.  Grabbing it is simple. Just use a composite damage attack like Ice Barrage. You can also use an Ice Oil, or a weapon with Ice elemental forges to snag the drop as well.    Maybe I should take a career in making ice sculptures after we�re done with all this. Maybe I should take a career in making ice sculptures after we�re done with all this. I don�t think shooting at water with a crossbow counts as sculpting ice. I don�t think shooting at water with a crossbow counts as sculpting ice. Oh, and while I�m in the 4th Stratum, I would like to bring your attention to this room. This is the room that we fought the Progenitor in. Yeah, they made a full room for it, even tough you wouldn�t see it unless you came back here.  At any rate, the map for this floor is fully completed now.  Next up is the Mortal Hunter�s conditional drop, which is to kill it on the first turn. It�s rather trivial once you�re overleveled.    Just refrain from using Charge, and just attack it. You may want Aegis Defense so Amputate can�t instantly kill anyone and ruin your plans. Alternatively, you could try going for Instant Death or Petrification procs, but your chances of pulling that off are really low. Anyways, I advise grabbing two of these if you have a Shogun.  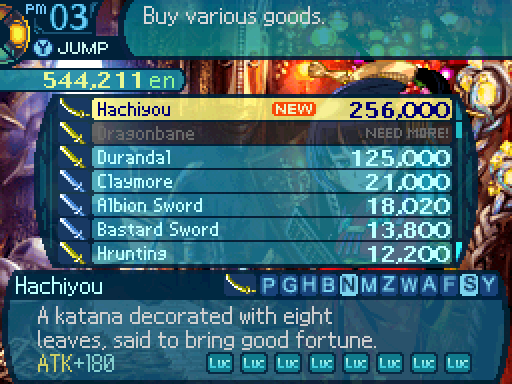  Fortune shall be in our favor with weapons of this quality in my possession. Fortune shall be in our favor with weapons of this quality in my possession.As this unlocks a Katana. But more importantly, the Hachiyou is the penultimate Katana. However, the ultimate Katana is unlocked after beating the 6th Stratum Boss, AKA the true final boss of the game. So for all intents and purposes, this is the Shogun�s ultimate Katana. The Hachiyou boosts LUC by 8 which uhhhh, isn�t exactly the ideal stat to boost for a Shogun. Though subclassing a Wildling to a Shogun just so they can wield this Katana and get a massive boost to their LUC is certainly an option you can take. 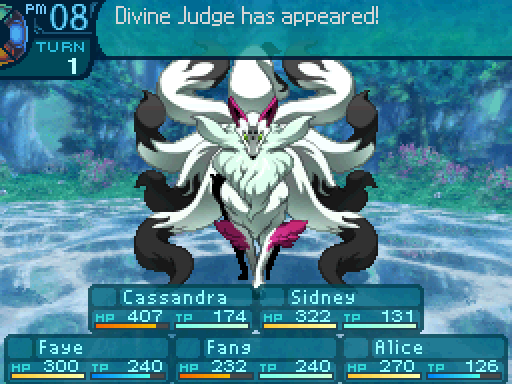 Next conditional drop we�re going to snag is the Divine Judge�s. We have to kill it while it�s fully bound. Which is unfortunately, pretty tricky to pull off. It has a 25% resistance to every single bind, meaning that we only have one shot for each bind. If those wear off, you�ll have to retry the battle, since you can�t reset accumulative resistance. 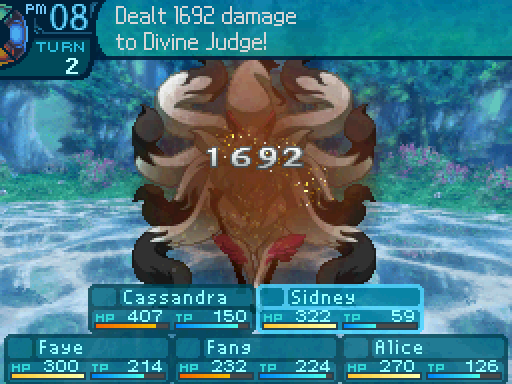 Before I go for the drop, I want to soften it up a bit, so that it won�t take much time to finish it off once I hogtie it. Fortunately, the minimum chance of the Divine Judge recovering from an ailment right now is 34%. Not great, but it�s something. 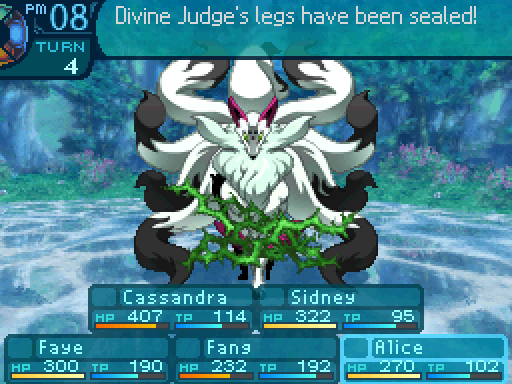  Excuse me while I sew your shadow to the ground. Excuse me while I sew your shadow to the ground. ...Remind me to never let that snake hug me. ...Remind me to never let that snake hug me. Aww, but he loves all of you! Aww, but he loves all of you!  That has to be a nasty headache that fox is having right now. That has to be a nasty headache that fox is having right now. Took me a few battles to get this to happen, but now I�ve fully bound the Divine Judge.  Uh, I think we should probably just kill that thing already. I�m pretty sure this falls under all kinds of animal cruelty. Uh, I think we should probably just kill that thing already. I�m pretty sure this falls under all kinds of animal cruelty. Putting them out of their misery is my favorite part! Putting them out of their misery is my favorite part! And there�s the drop! It was pretty hard to get, and took me several tries to pull off, so surely this has to unlock something go-   ...Thanks for nothing, game. ...Thanks for nothing, game.  Oh, and there�s me getting the Forest Hare�s drop the proper way, since I snagged it with Lucky Hammer before.  Time for a bit more cleanup. This time I�m going after the dragons� other drops. Now there�s actually a way to trivialize their fights that a lot of people who enter the post-game make use of. Accessorizing. Aside from their elemental breaths, the dragons only have access to 2 damage types. So equipping 3 physical resistance accessories were far more effective than just wearing armor. This lead to accessory stacking getting kicked out of the series entirely by the next game.  However, if you�re using a Hoplite to block the breaths, they�ll need a shield to be able to use their Anti-elemental skills. So they�re only stuck with 2 slots to accessorize with. Though Hoplites are extremely durable by this point, so it�s not that big of an issue.   And watch as Drake fails to do anything meaningful to the party.  2 Crush Amulets and 1 Pierce Amulets will pretty much shut Drake down. Crush Amulets are prioritized since Ice Crush deals more damage than Shower. 2 Crush Amulets and 1 Pierce Amulets will pretty much shut Drake down. Crush Amulets are prioritized since Ice Crush deals more damage than Shower. I guess that�s what I get for not being in uniform... I guess that�s what I get for not being in uniform...Except for Faye. I completely forgot to change her out of her sonic build. Whoops.  Somebody give that thing hell for me... Somebody give that thing hell for me...Which caused her to die again later.   Hell, given. Hell, given. And there�s Drake�s conditional drop.  Guardian now reduces physical damage by 28%, making Cassandra even more unkillable. Let�s see what Drake�s conditional unlocks.    Ooh, looking fierce and imposing there, Charlotte! Hmmhmm, why thank you, Rose. I do feel more fit to be on the battlefield with this garb. Ooh, looking fierce and imposing there, Charlotte! Hmmhmm, why thank you, Rose. I do feel more fit to be on the battlefield with this garb.Okay, that�s far more fitting as an ultimate piece of equipment. (Yes I know the Hachiyou isn�t the ultimate Katana, but still.) All those stats boosts are something a Shogun really wants, especially the 5% HP increase since they�re rather fragile.  For Dragon, you still want 2 Crush Amulet�s as Blow is Dragon�s strongest move. However, you�ll want a Slice Amulet instead to deal with Dragon�s other attacks. If you�re that desperate for damage nullification, you can also pack mists to deal with the damage type you couldn�t fully cover, but I wouldn�t recommend doing that at all for this guy, since Corrupt doesn�t give a drat about damage resistance accessories.  Uh, wait, what? She�s not bound, she�s paralyzed! The heck? Anyways, the fact that you don�t have to worry about Dragon damaging you all that much eliminates the need for Protect Order, and you can just focus on having Prevent Order up.  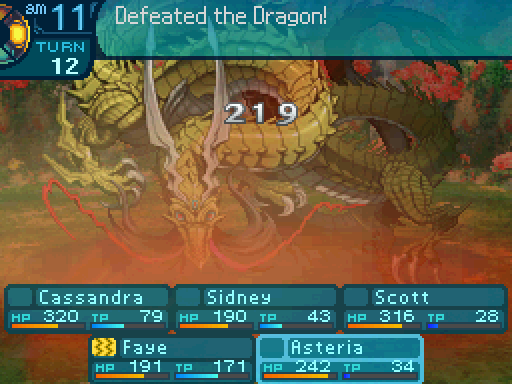 Since I already got Dragon�s conditional before, I can just beat the stuffing out of him without worry. 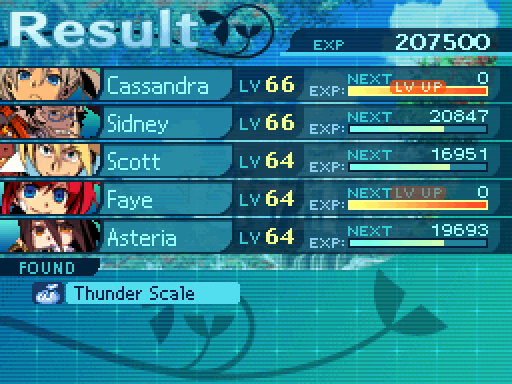  Looks like the scales just weren�t tipped in his favor. Looks like the scales just weren�t tipped in his favor.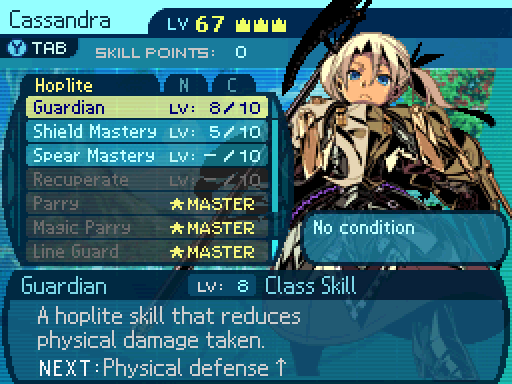 Guardian now reduces physical damage by 32%. 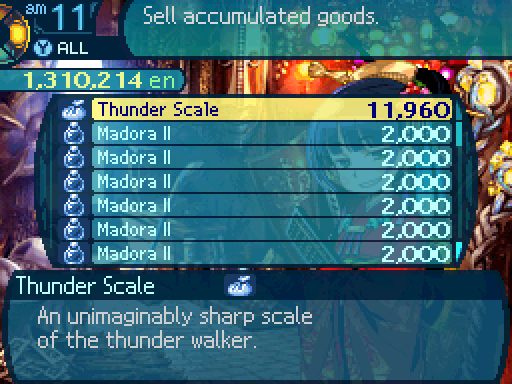 Now that we�ve got all 3 scales, we�ll unlock something rather special.  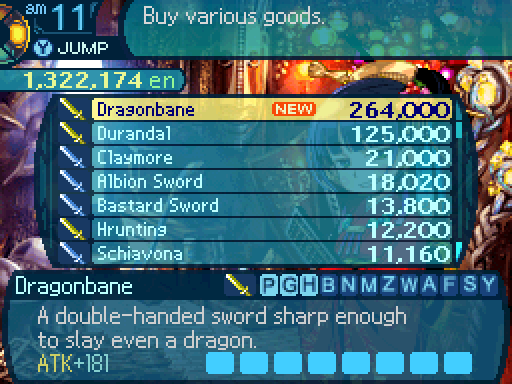 Ye gods... I can feel so much power just radiating from it. Are swords allowed to be that sharp!? Not that your equipment has been faulty or anything like that, but you really came through this time, Edie! Come to mama! Ye gods... I can feel so much power just radiating from it. Are swords allowed to be that sharp!? Not that your equipment has been faulty or anything like that, but you really came through this time, Edie! Come to mama!Say hello to the Dragonbane, which is generally considered to be the ultimate Sword, and possibly the strongest weapon in the entire game. (That isn�t the actual ultimate weapon. In terms of raw attack power, there�s one Sword that�s stronger than it, but it�s not considered to be the ultimate Sword for various reasons.) The attack power is fairly high, but it also comes with 8 empty forge slots. Sure, you�ll have to kill the dragons 8 more times to fully forge the thing, but the dragons give out so much exp that people were willing to grind up the materials since grinding levels in EO3 is pretty slow otherwise. This weapon is considered to be a staple of any Warrior Might team that gets to the post-game, and all the dragons can be fought as soon as you beat the game at least once. When fully forging the weapon, the Fire forge is the most popular forge to use, as Fire is the element all the post-game bosses resist the least. Once you get this weapon in your grasp and fully powered it up, nothing will be able to stand in your way if you�re using Warrior Might. As for normal usage, well it�s another strong weapon, but won�t snap the post-game in half or anything like that. I suppose 8 ATK forges would be nice to have as that is a 24% damage boost. 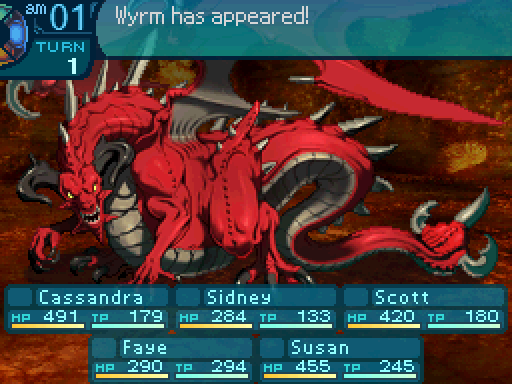 And here�s the last of the dragons again. For Wyrm, you�ll want 2 Slice Amulets to deal with Red Fang, and 1 Crush Amulet to deal with Beat. 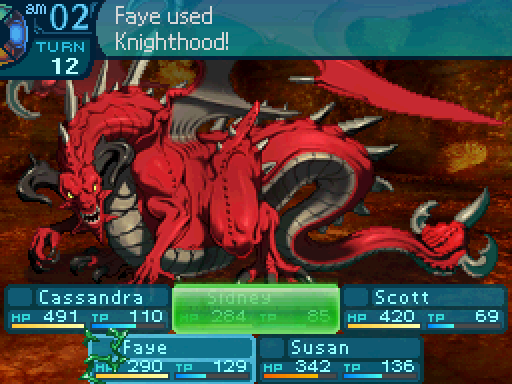 He�s on the ropes! Get him, Sid! He�s on the ropes! Get him, Sid! 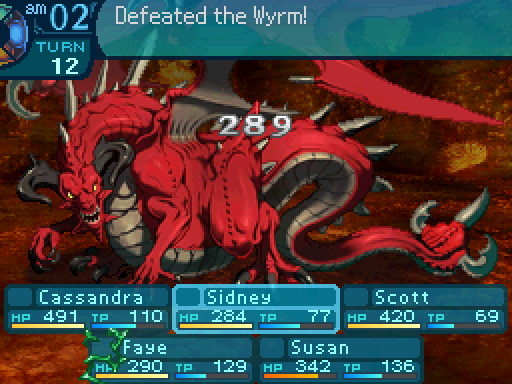 Doesn�t it get kind of old watching everything blow up over and over? ... Uhh... Forget I said anything. Doesn�t it get kind of old watching everything blow up over and over? ... Uhh... Forget I said anything. And there�s the last of the dragons� alternative drops.    That rapier! It�s so divine! I must have it! Edie, I wish to purchase this- Aaaaand it�s mine! Wha- HEY! That rapier! It�s so divine! I must have it! Edie, I wish to purchase this- Aaaaand it�s mine! Wha- HEY!The Sunblade is the ultimate Rapier. If you�re wondering why in the world it has 4 Fire forges, this was meant to be used with the Buccaneer�s Chasers. Unfortunately, nobody really uses the Chasers since they�re bad and completely outclassed by Warrior Might. Oh well, at least Scott can get some mileage out of the 2 STR forges there. Oh. Well then. If that�s the game you wish to play Scott, then... I wish to purchase this weapon please! Wha- HEY! You can�t have that! But I purchased it. With my own money. It is my gun now, Scott. ...Oh dear god. There has to be some sort of law against a 13 year-old owning a weapon like that! ...Isn�t there? Please? Huh? Why would there be one? Anyone is allowed to explore the Labyrinth, and they�ll need all kinds of tools to get the job done. But- Besides, you have a 15 year-old girl in charge of the entire guild. This seems like a rather frivolous thing to argue about in comparison. She�s got you there! I wish to purchase this weapon please! Wha- HEY! You can�t have that! But I purchased it. With my own money. It is my gun now, Scott. ...Oh dear god. There has to be some sort of law against a 13 year-old owning a weapon like that! ...Isn�t there? Please? Huh? Why would there be one? Anyone is allowed to explore the Labyrinth, and they�ll need all kinds of tools to get the job done. But- Besides, you have a 15 year-old girl in charge of the entire guild. This seems like a rather frivolous thing to argue about in comparison. She�s got you there!I give MEGAQUEEN a gun since the Yatgarasu�s 10% HP and TP boost, as well as the +4 speed boost, are all good stats for her to have.  Alraune is even easier to trivialize with accessorizing, as you just need 2 Crush Amulets to neutralize Tentacle Beat. A Slice Amulet will also cut down on Vampire Kiss� damage, and reduce the amount of healing she gets from it as a consequence. And since her elemental attacks can be neutralized with a Hoplite/Ninja, the end result is that she can�t touch your party at all, as long as you make sure to keep up Prevent Order to deal with Pollen.   You know, looking at her when she�s frozen like that, you gotta say, she�s kinda cute when she�s not trying to kill us. Oh my, Faye! I didn�t know you were into that sort of thing! That explains so much... I�ll have to write down this new revelation. Wha- OH EW NO! NO, OH GOD NO! Forget I said anything! Hey, did you hear me!? Stop writing! Give me that stupid journal! You know, looking at her when she�s frozen like that, you gotta say, she�s kinda cute when she�s not trying to kill us. Oh my, Faye! I didn�t know you were into that sort of thing! That explains so much... I�ll have to write down this new revelation. Wha- OH EW NO! NO, OH GOD NO! Forget I said anything! Hey, did you hear me!? Stop writing! Give me that stupid journal! Just kill Alraune with composite damage to get her conditional more easily.    Maybe I won�t need Cassie covering me all the time now that I�ve got this baby! As much as we would both love for that to be the case, you and I both know that won�t be true. ...Yeah. Maybe I won�t need Cassie covering me all the time now that I�ve got this baby! As much as we would both love for that to be the case, you and I both know that won�t be true. ...Yeah.This unlocks the Interceptor, the Arbalist�s ultimate armor. Provides a nice little boost to STR, and Arbalists will like the 5% max HP and TP it provides.  Oh, and Guardian now reduces all physical damage by 36%.  Last boss conditional we�re going after will be Anemone�s. If you want to trivialize this fight, bring 2 Crush Amulets. Anemone doesn�t do that much damage, however, Tentacle Suck deals Strike damage and will heal Anemone by a lot if it hits anyone with a bind. Negating Strike damage will make the fight take much less time to finish. You can also try wearing Death Magatamas to reduce the chances of Tentacle Reap instantly killing anyone if you wish.   Goddammit, Faye. Goddammit, Faye.If it wasn�t for Tentacle Suck being so annoying to deal with, I would recommend prioritizing Death Magatamas. But I can deal with the occasional death over Anemone healing itself for massive amounts.   You are nothing but a mere sea anemone. I on the other hand, have the power of the sun. Just what were you expecting? You are nothing but a mere sea anemone. I on the other hand, have the power of the sun. Just what were you expecting? In order to snag this conditional, you�ll have to finish off Anemone with anything but elemental damage. This means that composite damage kills are out the window, but thankfully, Anemone isn�t completely immune to physical damage. You can also use Almighty or Poison/Plague damage to finish it off. Even instantly killing it with Call Tiger, while extremely unlikely (You�re looking at a 0.15% chance there), will get the job done.    With this, I�ll ensure that no harm comes to everyone from now on. With this, I�ll ensure that no harm comes to everyone from now on.A 5% HP increase and 1 point of VIT? That�s it? Oh well, at least it provides the most amount of defense in the game. Not one of the better ultimate pieces of equipment, but you could do worse. Anyways, while I�m here, I decided to buy everyone their ultimate gear. I also ended up using up all of my coupons in the process.  Come to think of it, that armor Smith�s wearing is basically made from Olympia�s corpse, right? Yeah, it pretty much is and... That�s uh, really kind of- okay just straight up creepy when you put it that way. Come to think of it, that armor Smith�s wearing is basically made from Olympia�s corpse, right? Yeah, it pretty much is and... That�s uh, really kind of- okay just straight up creepy when you put it that way. ...Excuse me while I wipe what you all just said from my memory banks. ...Excuse me while I wipe what you all just said from my memory banks.Wow, Hoplites got ripped off in comparison. 10% extra resistance to all physical damage types? Yes, please! Unfortunately, in order to get this piece of equipment and actually get some use of out it, you�ll have to play through the game at least twice.  Hmm, how do I look? Hmm, how do I look? Oh, um. You uh, look uh, very good in that. Very pretty, even. Yes, very. Smooth. Hee hee, why thank you, Akatsuki! It means a lot to hear that from you. Um, is he okay? I- well- I- um- guhh- heh heh- I- I- I- I think you broke him. Oh, um. You uh, look uh, very good in that. Very pretty, even. Yes, very. Smooth. Hee hee, why thank you, Akatsuki! It means a lot to hear that from you. Um, is he okay? I- well- I- um- guhh- heh heh- I- I- I- I think you broke him.The Kokopeli Vest provides +2 to LUC and increases minimum and maximum Limit gain by 1. Not exactly a stat I would go for on a Farmer, but I guess it lets them be slightly more useful.  But my friends are already good animals! Um... Admittedly, they could use a bit more training. I�m sure Edie would have a fit if you were to let loose your bull or tiger in here. Really, now? Don�t even think about it. But my friends are already good animals! Um... Admittedly, they could use a bit more training. I�m sure Edie would have a fit if you were to let loose your bull or tiger in here. Really, now? Don�t even think about it.That 1 point of STR can be nice for the more offensive animals, and LUC is always good to boost for a class like the Widlling. The only questionable forge on there is the LIM forge, but I won�t complain about being able to get full Limit gauges faster.  Oh my, this tome has such valuable info! I�ll have to study this intensely once we�re done. Ooh, there are even some classical puns in here, too! Ugh, that�s just great. Oh my, this tome has such valuable info! I�ll have to study this intensely once we�re done. Ooh, there are even some classical puns in here, too! Ugh, that�s just great.The Origin Tablets provides a decent amount of TEC to increase Asteria�s damage, as well as increasing her already high TP pool even more.  And that�s it for ultimate equipment. The last loose end we�re tying up is everything related to the ocean. First things first, let�s fill in that empty space on the north ocean map.  Much better.  And with that, we�ve completed both the north ocean...  And the south ocean maps!  We don�t get a Guild Card medal for that, but see that statistic that says �charted?� If we made any mapping mistakes, that number displayed next to it would be less than 100.00% right now. So we�re done with the maps, but there�s still quite a bit left to do on the ocean.  Like catching fish. West Congers can be found in this area.   Sea Turtles are found in this part of the South Ocean, but don�t fret if you can�t find one. I�ll explain why later.   For this next item, you�ll want the South Banner and the Carronade, and set sail somewhere in the South Ocean.    Destroying a black pirate ship while having the South Banner equipped will net you the Torn Flag.     Likewise, destroying a black pirate ship in the north ocean with the North Banner equipped will snag you the Bloody Flag.  Now if you remember from a long while back, there was a guard at this spot that wanted some Garum. We have that now, so let�s talk with him again. After you dock and disembark, you find a soldier cooking some dried victuals. The sizzling sound of the dried fish�s fat on the fire makes your mouth water... Noticing you staring hungrily at the scene, the soldier calls out to you.   Thanks to your good work, we�ve been plenty busy. Meals are the only pleasure I get on this island. This here is Bacalhou, dried cod... It�s really great! Of all the preserved foods to take on a voyage, I like this the best. I usually put some Garum on it when I have some, but I don�t have any here. Hold on, did you say Garum? Thanks to your good work, we�ve been plenty busy. Meals are the only pleasure I get on this island. This here is Bacalhou, dried cod... It�s really great! Of all the preserved foods to take on a voyage, I like this the best. I usually put some Garum on it when I have some, but I don�t have any here. Hold on, did you say Garum?You are suddenly reminded of the man you met who had been freediving with a harpoon. He gave you a bottle of Garum, the fermented fish sauce that this soldier just mentioned. Don�t bite into that yet! Hold on while we get something, okay?As the soldier is about to sink his teeth into his meal, you tell him to wait just a moment. You go to your ship and return with the Garum. He delightedly pours it on his fish and eats it. Nothing beats bacalhau with Garum! Man, this is great! Everybody should eat like this!After devouring his meal, the soldier finally realizes your plight and goes to his camp. He returns carrying some bacalhau. Life�s all about give-and-take, huh? Thanks for the Garum. ...I�ve got to get back to work.   With that, we now have the cheapest 20 turn food available to us. Not that we can really do much with it at this point.  I killed a Tanniyn in the north ocean and got this to drop from it.  Though you don�t need to hunt down north ocean Tanniyn to get it, as there�s an easier way to get that item.  Holy ship. Holy ship.This ship has the largest cannon you�ve ever seen, with a huge harpoon in the barrel! It is obvious that this cannon was built to shoot at something very different than yours were! What the heck is that thing, and what are you trying to hunt down with it!?You call out to the frigate from your own deck and ask the crew what that thing is. They reply that they are fishermen from the north, and that it is a Whale Cannon. They are going to a gulf west of here to hunt Pendra, a rogue whale that attacks ships. The sailors wave goodbye to you and sail away to the west, as they said. If you are interested in seeing the power of the Whale Cannon, you could go watch them. 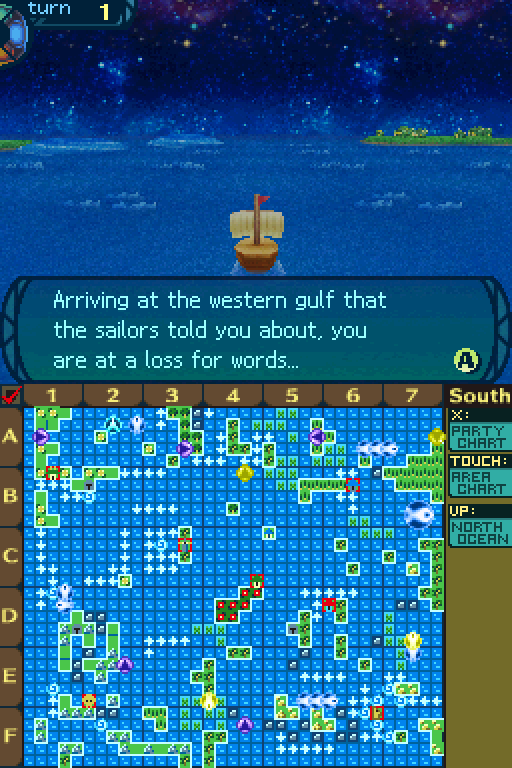 Ye gods... Don�t tell me that the whale they were hunting down did this! Ye gods... Don�t tell me that the whale they were hunting down did this!The wreckage of what certainly appears to be their ship floats all about these waters! Perhaps their campaign against Pendra, the giant whale they were hunting, ended in failure... You then spot the Whale Cannon in the midst of the remains in front of you! You consider salvaging the great weapon... 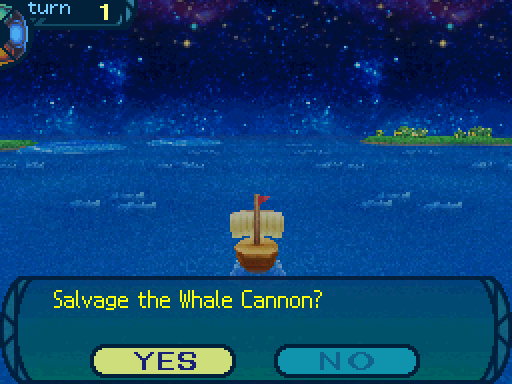 Might as well finish their job for them. It�s only the right thing to do. Might as well finish their job for them. It�s only the right thing to do.You hoist the Whale Cannon with a block and tackle. It seems to be in good condition still... You vow to take the cannon with you and defeat Pendra in place of the fallen sailors. 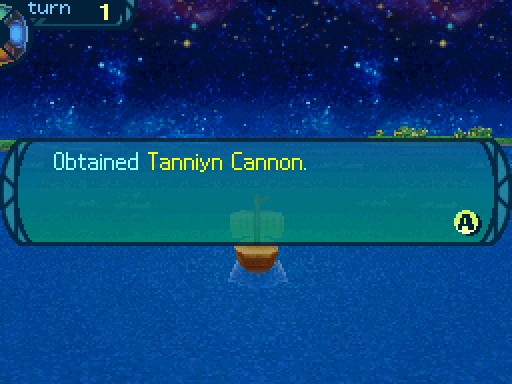  The Tanniyn Cannon is a lot stronger than Ned�s Harpoon. How much stronger? Ned�s Harpoon deals 4 points of damage to Tanniyn. The Tanniyn Cannon deals 16. Anyways, do you see that big gold fish icon that�s near the top of the bottom screen? That�s our target.  Suddenly, a huge shadow appears beneath the waves ahead of you! Thar she- what the hell!?The giant shadow leaps into the air intimidatingly, revealing itself as a whale in plated armor! ...That�s something you don�t see everyday.Its monstrous form and evil look can only belong to Pendra, the whale which sunk the frigate! If you are brave enough, you can attempt to capture it, though the wiser course may be to flee... Hmph! We�ve dealt with worse. A mere whale in metal coating shall not stop us! Let us begin the hunt!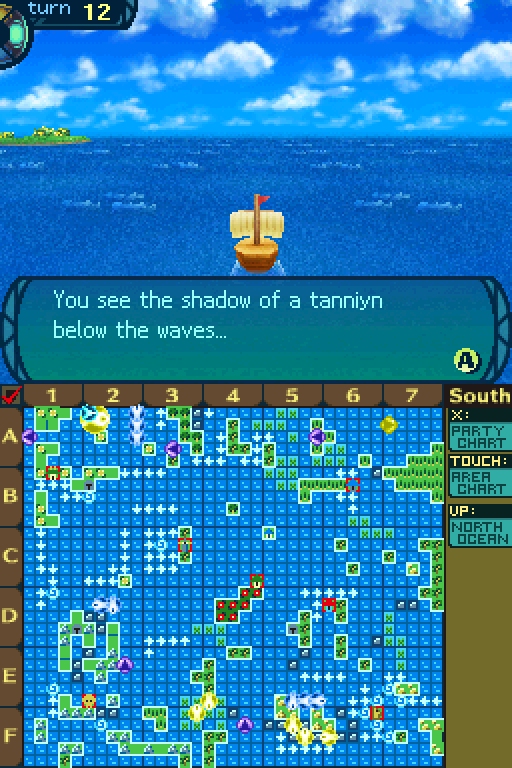 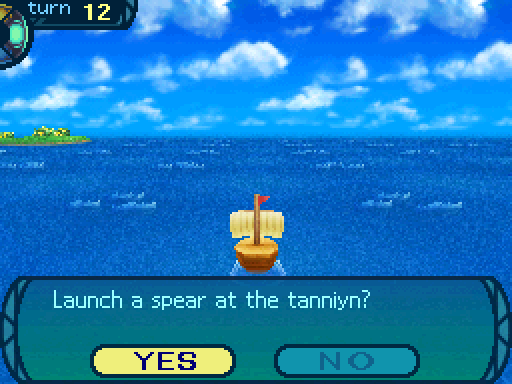 The game is kind of hyping up Pendra here, but it�s really just another Tanniyn. Nothing we haven�t really dealt with before.  After a few hits, we kill Pendra. 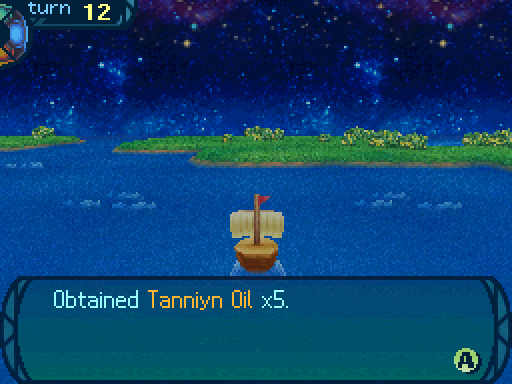 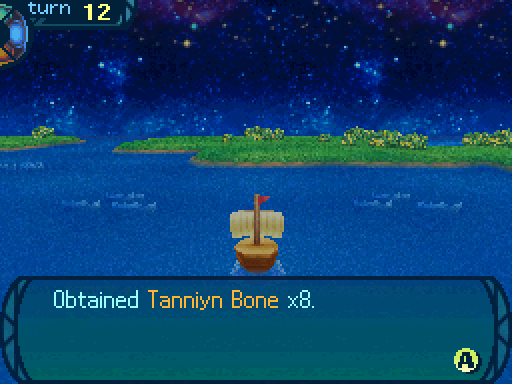 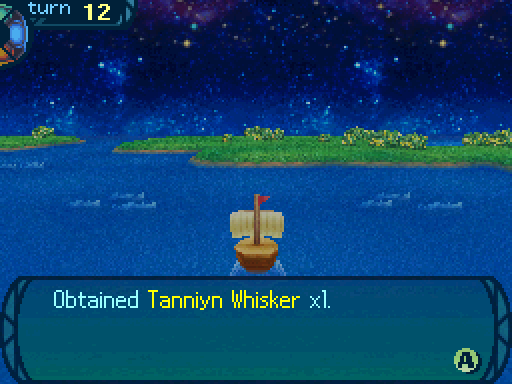 And get the other 2 Tanniyn related items we were missing before. 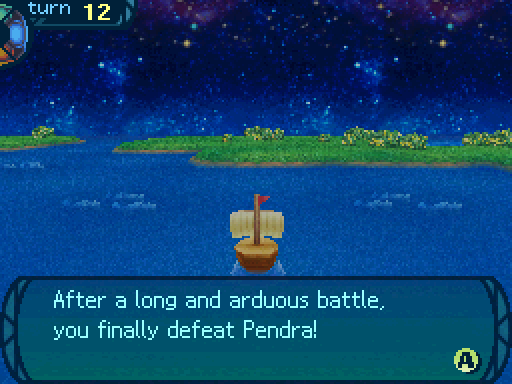 Rest well, fellow sailors. That demonic whale is no more. Huh? Hey, you all might wanna have a look at this! Rest well, fellow sailors. That demonic whale is no more. Huh? Hey, you all might wanna have a look at this!While flensing the meat from the whale�s bones, you find a bundle of old parchment inside of it. Wondering if the writings could be valuable, you decide to take them back to Armoroad. 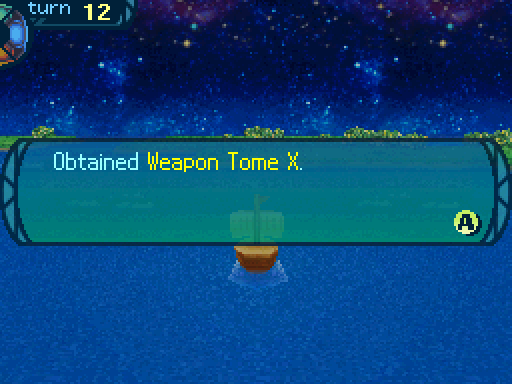 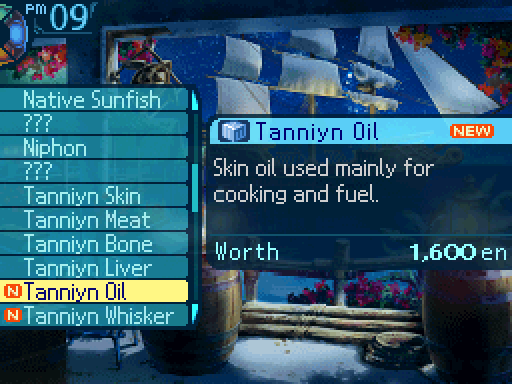 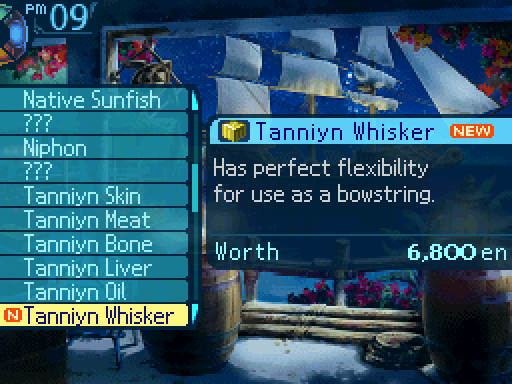 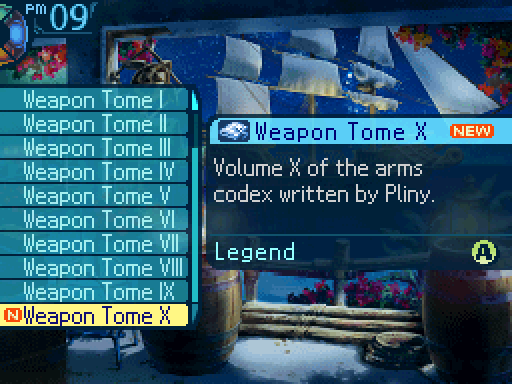 And there�s the last weapon tome we were missing. 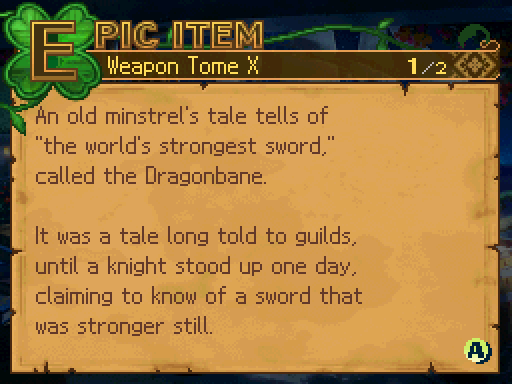 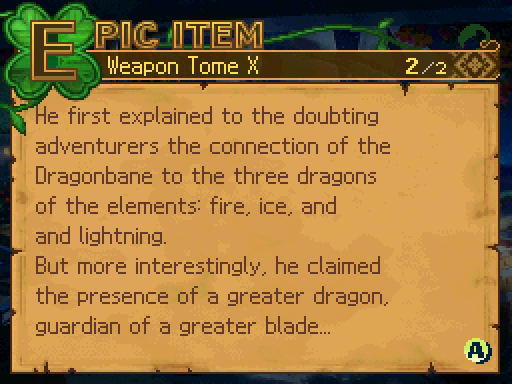 An even stronger sword than this one? I�ll believe it when I see it. I guess this has something to do with that dragon god we met, huh? You think he�s getting antsy to fight us already or something? Eh, he�s probably waited a long time before. I�m pretty sure he can wait for a bit longer. Yes, rushing into a fight like that would be incredibly unwise without preparing. A lesson I would have hoped you learned from the last two times things didn�t end well for us. Hey, only the second time was my fault! You five rushed in yourselves the first time! ...Oh. Right. Yes, let�s forget that any of that ever happened. An even stronger sword than this one? I�ll believe it when I see it. I guess this has something to do with that dragon god we met, huh? You think he�s getting antsy to fight us already or something? Eh, he�s probably waited a long time before. I�m pretty sure he can wait for a bit longer. Yes, rushing into a fight like that would be incredibly unwise without preparing. A lesson I would have hoped you learned from the last two times things didn�t end well for us. Hey, only the second time was my fault! You five rushed in yourselves the first time! ...Oh. Right. Yes, let�s forget that any of that ever happened. And now back to fish hunting. Sea Irises can be found right near Armoroad. 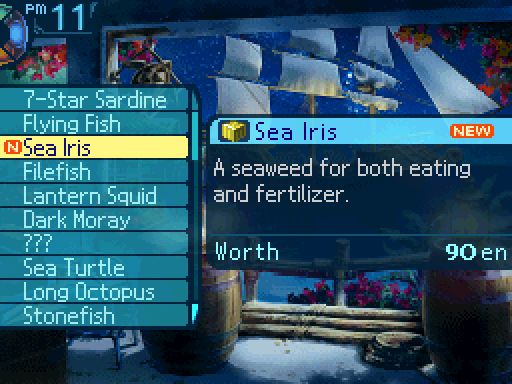 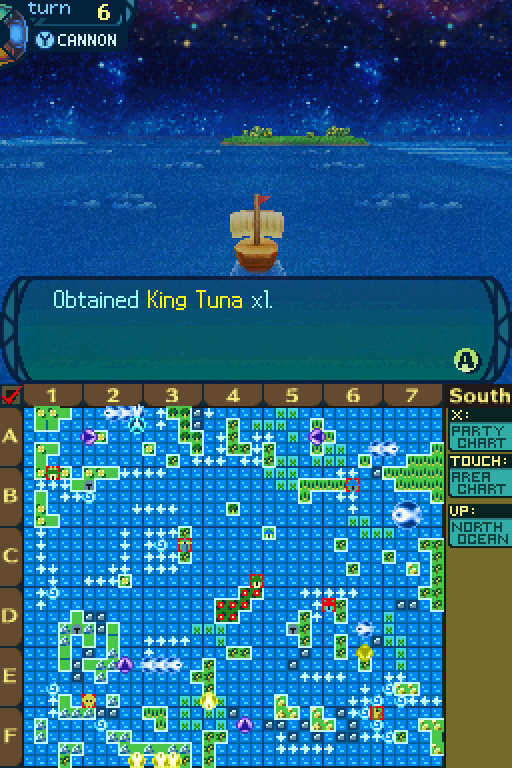 King Tuna can be found in the area where Pendra was fought.   Emperor Crabs can be found near the Aerial Forest. 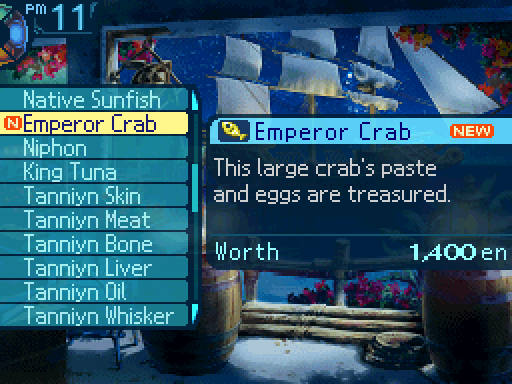  It looks like foam, but it also appears to be a living being... you think. It just sits there... 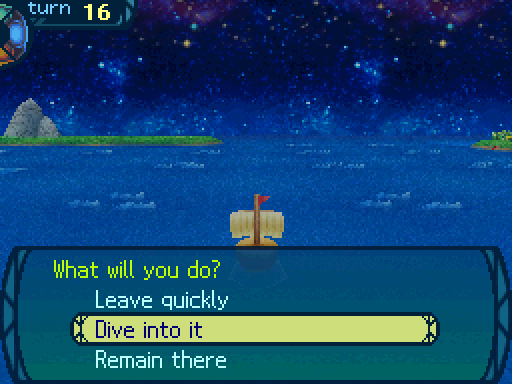 Huh, what should we do about- I�ll investigate that phenomenon. Huh, what should we do about- I�ll investigate that phenomenon.Charlotte volunteers to investigate, and leaps into the water without another word! Whoa! Careful now, Charlotte!...................................................Everyone holds their breath and watches... and Charlotte happily pops out of the water. Sheesh, you�re a jerk for giving me a scare like that. Hmmhmm, worry not. That dive was fairly productive, see? Hmmhmm, worry not. That dive was fairly productive, see?You can see Charlotte is holding a large sea turtle that is struggling to get free. Once back on board, Charlotte reports a vent of hot water at the bottom of the sea. This Sea Turtle must have come here to feed on plants that grow on the minerals here. You put the turtle Charlotte caught in the hold and set sail.  You can get a free Sea Turtle this way without having to worry about hunting it down for yourself. Would have saved me a lot of time if I knew that before, but whatever. 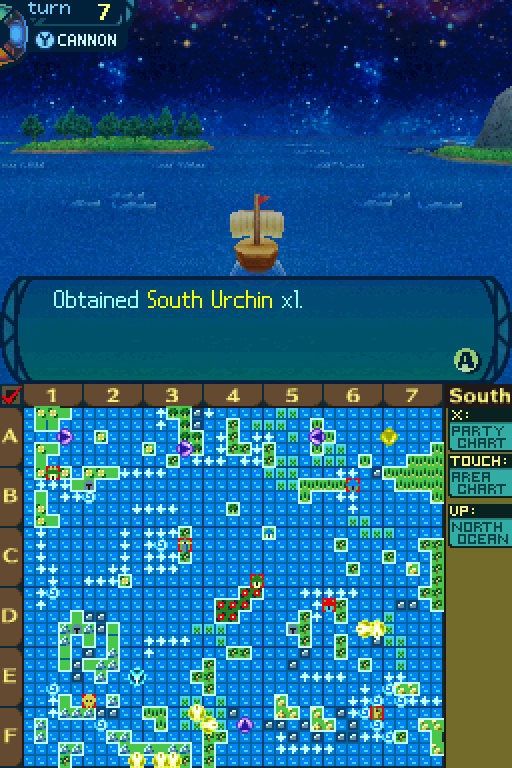 South Urchins can be found in this area.  And that does it for all the fish in the Barter Log. But we�re missing one more item. So let�s go after that now. 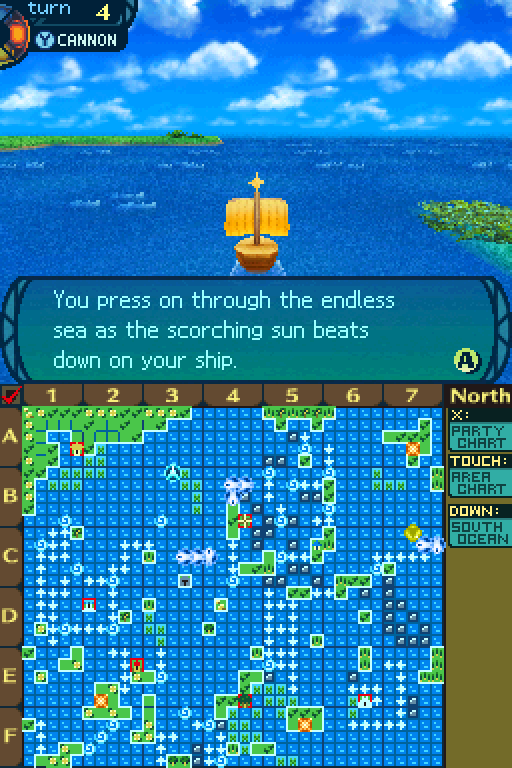 Burned and weary, you can�t bear the thought of wearing your armor any longer. As you despondently gaze upon the beautiful blue waters, one word pops into your mind... Swimming! Luckily, the sea is calm, making this the perfect time for a dip! Any potential dangers lurking beneath the surface cannot hold back the temptation... You can choose to enjoy a swim in the water, or hold out and continue, avoiding any threat. 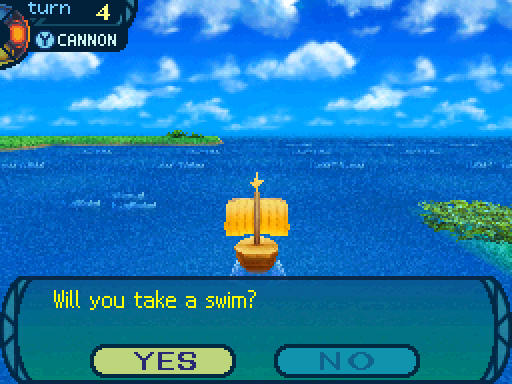 WOO HOO! Last one in is a rotten durian! Um, Smith? Should you really be swimming with us? I mean, what if you short circuit or rust? ...I lived underwater for my entire life before I met you all. I think I�ll be fine. CANNONBOT! Oh, right. I forgot about- wait a minute, that just raises even more questions! I�ve got an answer for you! Ma- Never mind, forget I said anything. WOO HOO! Last one in is a rotten durian! Um, Smith? Should you really be swimming with us? I mean, what if you short circuit or rust? ...I lived underwater for my entire life before I met you all. I think I�ll be fine. CANNONBOT! Oh, right. I forgot about- wait a minute, that just raises even more questions! I�ve got an answer for you! Ma- Never mind, forget I said anything.You decide that everyone needs a break once in a while and strip off your armor. The cold seawater feels good on your burnt skin, and the brightly-colored fish cheer your spirits. For a brief moment, you are able to forget your troubles and duties, and simply relax. But, when the party returns to the ship refreshed, you notice Faye has yet to return... You all begin searching the area and see Faye pop out from the below holding something. Hey guys, look at what I found!On closer inspection, you see that it is a Basket Star, a starfish known for its many arms. The tentacle-looking arms look eerie, but the creature is harmless. In high spirits at discovering such a strange creature, you decide to take it with you.  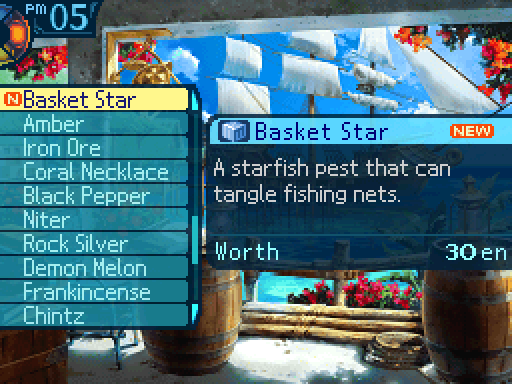 And with that, we�ve filled out the entire Barter Log, Cargo Manifest, and Epic Glossary. 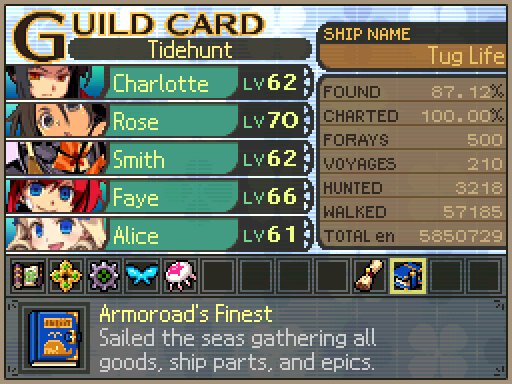 We get another Guild Card medal to commemorate that accomplishment. Now we don�t ever need to touch sailing ever again. Does this mean that I can bring Tug Bot back? NO! We still need to sail to the dragon god later to fight him, remember? Oh, sure. Whatever. You know, someday, you�re going to run out of excuses. And when you do, I�ll be waiting right there to rebuild him. It�s a bucket of bolts, Asteria! I don�t see what�s the big deal about that thing.And those are all the loose ends I wished to cover in this update. We�ll be heading back the Labyrinth next time. Araxxor fucked around with this message at 16:33 on Sep 25, 2017 |
|
#
?
Sep 25, 2017 02:37
|
|
|
Why, after finding every item and mapping everything, is the found ratio at 87.12%? Events you didn't see?
|
|
#
?
Sep 25, 2017 03:06
|
|

|
the littlest prince posted:I read through all of this recently. Good stuff, thanks Dr. Fetus. Fire dungeon is my favorite music by far. Ah, you're welcome. Glad to see more people enjoying this. Blaze Dragon posted:Why, after finding every item and mapping everything, is the found ratio at 87.12%? Events you didn't see? Those actually include the Labyrinth stuff, such as the monster and item entries.
|
|
#
?
Sep 25, 2017 03:28
|
|
|
Thanks for coming back to wrap up the last of this. It is appreciated.
|
|
#
?
Sep 25, 2017 05:35
|
|


|
I think, while fire is a really good choice for the first dragonbane, I'd go with Ice actually. You do get resisted by Alraune, but she's not actually a difficult fight. Wyrm is probably the most annoying of the dragons to take down if he gets howling happy. Also I already told you this on discord, but thank you for the LP Fetus. It's been a very entertaining read.
|
|
#
?
Sep 25, 2017 16:15
|
|


|
gently caress B24F.
|
|
#
?
Sep 25, 2017 19:01
|
|
|
Dr. Fetus posted:gently caress B24F. https://www.youtube.com/watch?v=PGNiXGX2nLU
|
|
#
?
Sep 25, 2017 19:05
|
|


|
So. Much. Fish. I found it pretty annoying to even map towards all the towns on the sea chart because of the step limit. Trying to hunt down schools of fish with that limitation sounds even worse.
|
|
#
?
Sep 25, 2017 19:30
|
|

|
werbear posted:So. Much. Fish. That entire ocean cleanup section was scrapped from 47 minutes of footage. Being forced to play with the fish generation RNG for a long time was not fun, and trying to find where those fish were located and actually snagging them was headache inducing. Fortunately, sailing stuff isn't requried to see the 2nd set of credits. All the game cares about there are the monsters and items. Glazius posted:Thanks for coming back to wrap up the last of this. It is appreciated. Ha, at this point, this LP is running on hatred as its fuel source. Well, when it comes to playing the game anyway. For once, writing the updates is the less painful part. My sole motivation for finishing this now is that there is some pure loving bullshit of the highest caliber that I wish to uncover and showcase to the world.
|
|
#
?
Sep 25, 2017 21:34
|
|
|
Dr. Fetus posted:Ha, at this point, this LP is running on hatred as its fuel source. Well, when it comes to playing the game anyway. For once, writing the updates is the less painful part. My sole motivation for finishing this now is that there is some pure loving bullshit of the highest caliber that I wish to uncover and showcase to the world.  Yaaaassssss Yaaaassssss
|
|
#
?
Sep 25, 2017 22:16
|
|

|
LPs running on hatred are always more entertaining, so that's good news.
|
|
#
?
Sep 25, 2017 23:43
|
|

|
Yes this continues. THE PUNS MUST FLOW.
|
|
#
?
Sep 26, 2017 23:50
|
|
|
 I'm free at last! The end is in sight!   And it only took a good hour to go through! 
|
|
#
?
Sep 29, 2017 17:41
|
|
|
You're a hero to us all.
|
|
#
?
Sep 29, 2017 21:10
|
|

|
Update 98: You Spin Me Right Round, Baby Right Round Like a record, baby right round round round~. Please don�t make a mockery of our suffering. I am going to preface this update by saying gently caress floor 24. So before we tackle that monstrosity, we�re gonna go clean up floor 23 first, since I didn�t really explore that floor all too well before. Well, actually... there are a few things we need to take care of first before we do that.  First of all, here�s the party that was voted in to explore the last part of the Labyrinth. We�re gonna explore the 6th Stratum, just not the 24th floor yet.  First order of business, getting into a battle on this spot.  I just need to knock you out for a little while, okay? I just need to knock you out for a little while, okay? Then wasting some turns so that this FOE joins in.  Vampire Tree Behavior: Spawns at certain spots when the party is in battle, and attempts to join in as soon as possible. Aggressive: Yes Level: 66 HP: 6558 STR: 60 VIT: 60 AGI: 52 LUC: 48 TEC: 66 Attack Type: Pierce Exp: 17890 Item Drops: -Drop 1: Sapping Root - 65% Drop Rate. 1 needed for Dampener Armor (Light Armor. Must be restocked.) --Root that stores life energy robbed from its host. -Drop 2: Ruler�s Blade - 20% Drop Rate. 1 needed for Zirah Bouk (Rapier. Must be restocked.) --Tongue that aims for the neck to constrict its prey. -Gold: N/A Description: A plant warped by the miasma found in the Labyrinth. Damage Resistances: Slash: 100% Strike: 100% Pierce: 100% Fire: 125% Ice: 100% Volt: 100% Ailment Resistances: Sleep: 10% Confusion: 10% Plague: 10% Poison: 10% Blind: 10% Curse: 10% Paralysis: 10% Bind Resistances: Head: 10% Arm: 10% Leg: 10% Other Resistances: Death: 10% Petrification: 10% Stun: 25% Skills: Spirit Dry: Uses the Head. Deals 10% STR-based Almighty damage to the entire party. Damages their TP pool instead of their HP pool. Has an accuracy of 99. Has an action speed of -5. Parasite Venom: Uses the Head. Deals 120% STR-based Almighty damage to the entire party. Heals the Vampire tree for 1.5 times the damage dealt. Attempts to inflict Poison, with a 60% success rate. The Poison ticks for 80 damage. Has an accuracy of 99. Has an action speed of -10. Vampire Trees aren�t really that deadly. They�re really more annoying if anything. They have the ability to attack your TP pool with Spirit Dry. Though the damage that skill will deal is fairly minor. Parasite Venom is the real annoyance, as that can knock off a chunk of your party member�s HP and heal the Vampire Tree at the same time. Though if you can deal enough damage to outdamage the heal from Parasite Venom, this thing shouldn�t be too much of a problem. Oh, and in case you�re wondering how an FOE�s brain works, well... Vampire Tree�s AI Script posted:On the 1st turn: Unless the FOE in question has a gimmick, their AI is considerably more simple than most bosses. They�re even more simple than some regular enemies. But hey, who needs strategy when you can just beat the tar out of helpless adventures with the power of your sheer raw stats?  Nothing much to these FOEs, so I�m just gonna have Charlotte and Rose Charge up and then attack. 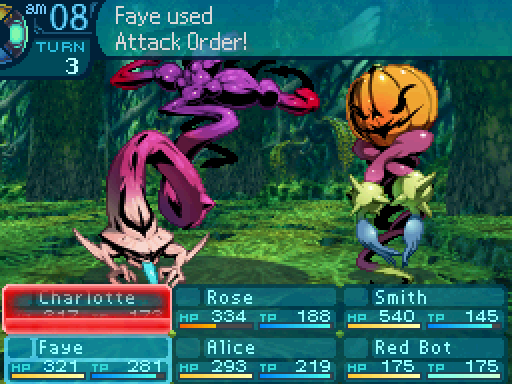 Raise those swords with pride! Raise those swords with pride!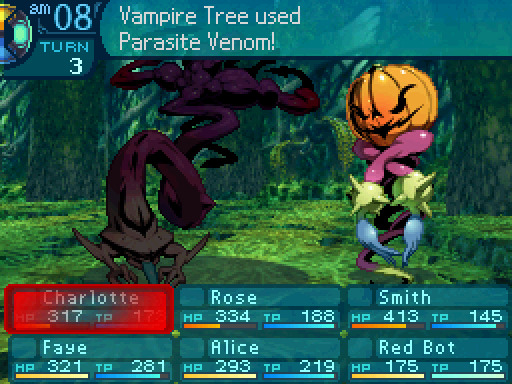 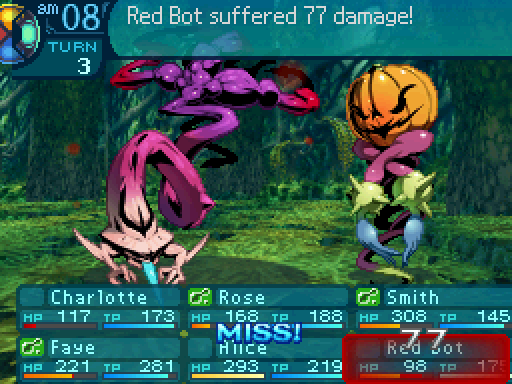 The key to beating a Vampire Tree is just being able to deal with Parasite Venom. If you can do that, then it can�t really do much to you.  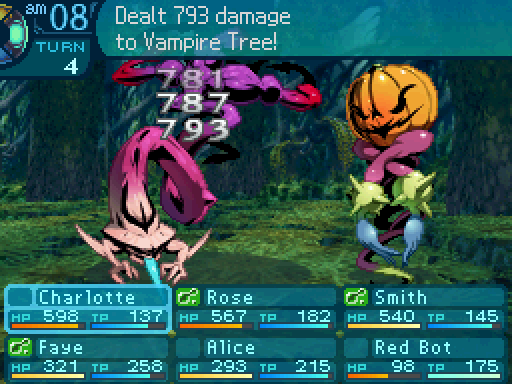 We slice... We slice...   And we dice! And we dice! They�re not too bad to deal with overall. Unless your party happens to have no damage, then uh, good luck with that.  Next up is this FOE on the 23rd floor.  It�s pretty easy to get the preemptive attack on these, since they move one space every 3 steps. Unless you�re in their sights, at which point, they�ll move at normal speed. Anyways...  Dreamsmasher Behavior: Walks around in a circle, moving one space every 3 steps. If they catch sight of the party, they will chase them down at normal speed until they leave the room. Aggressive: Yes. Level: 66 HP: 7651 STR: 67 VIT: 63 AGI: 50 LUC: 50 TEC: 56 Attack Type: Pierce Exp: 18200 Item Drops: -Drop 1: Atrocity Sigh - 80% Drop Rate. 1 needed for Formaldehyde (Item. Must be restocked.) --Breath of an evil sheep that sends its prey to the abyss. -Drop 2: N/A -Gold: Eye of Insanity - Kill with Poison or Plague damage. 95% Drop Rate. 1 needed for Barsus Gun (Gun. Must be restocked.) --Bit of a dangerous eye that drives the reckless mad. Description: A sheep that imbibed the Labyrinth�s miasma and now emits that miasma from its very pores. Damage Resistances: Slash: 100% Strike: 100% Pierce: 100% Fire: 100% Ice: 100% Volt: 100% Ailment Resistances: Sleep: 0% Confusion: 0% Plague: 10% Poison: 10% Blind: 10% Curse: 10% Paralysis: 10% Bind Resistances: Head: 10% Arm: 10% Leg: 10% Other Resistances: Death: 0% Petrification: 0% Stun: 25% Skills: Mad Charge: Uses the Legs. Deals 170% STR-based Pierce damage to one row. Has an accuracy of 99. Has an action speed of -3. Stone Eye: Uses the Head. Attempts to Petrify the entire party with a 30% success rate. Has an action speed of -3. Dreamsmashers are considerably more dangerous compared to Vampire Trees. For one thing, they can actually deal some heavy damage. And they can also petrify the entire party. Prevent Order or some other way of dealing with Petrification is a must have, or you�re gonna be looking at a game over screen very fast. Oh and, they�re immune to both Instant Death and Petrification, so if you�re hoping to see Alice pull off something like she did with the Vampire Tree, you�ll be sorely disappointed. In fact, the Vampire Tree is the only FOE in the entire Stratum that she could kill through those methods. Dreamsmasher�s AI Script posted:On the 1st turn: Not much to their AI either when their skills are already that dangerous to deal with. If you�re gonna be fighting these things, getting the pre-emptive attack is a must, since it skips one of the most dangerous turns in the battle. Dreamsmashers are far more likely to cast Stone Eye on the first turn than in any other circumstance.      The Dreamsmasher didn�t get to do much in this battle. The one free turn it did got, it just opted for a regular attack.  If you can deal with Stone Eye, well, you still have Mad Charge to deal with. But Stone Eye is the big threat here.   Unfortunately, the next fight with a sheep did not go so smoothly. ROSE! Oh dear, this is not goo- I must say, I never noticed how chiseled her abs were before. And those muscles, she must work out a lo- Uhhh, Charlotte? I don�t mind if you�re that touchy feely with her normally, but can you a) not do that in public, and b) save it for when a giant sheep is not trying to eat us!? Ahahaha, what�s the matter there? My tough bod too hard for you to crunch on? Mmm, seems like everything is under control. And for the record, we don�t have that kind of relationship! I stand corrected... Uh, wait a sec. Don�t chew on those, those are Oh boy, I hope Asteria can fix that. Smithy didn�t need these, right...? So... Time to run? Yes. Very yes. I stand corrected... Uh, wait a sec. Don�t chew on those, those are Oh boy, I hope Asteria can fix that. Smithy didn�t need these, right...? So... Time to run? Yes. Very yes. I gave up on trying to kill that sheep. Instead, I opted to go after another FOE we haven�t fought yet.   Revelationer Behavior: Immobile until it spots the party, at which point, it will chase them down. However, their movement is restricted to moving forwards and backwards only. Aggressive: Yes. Level: 70 HP: 8420 STR: 70 VIT: 63 AGI: 50 LUC: 55 TEC: 61 Attack Type: Slash Exp: 27890 Item Drops: -Drop 1: Volt Scale - 85% Drop Rate. 1 needed for Caladbolg (Sword. Must be restocked.) and Dragon Blade (Ultimate Sword. Must be restocked.) --Sharp scale from one of the multi-headed dragon�s heads. -Book Drop 1: Power Book - 1% Drop Rate. -Book Drop 2: Intelligence Book - 1% Drop Rate. Description: An atrocious dragon with seven heads. Each head is said to embody a negative human emotion. Damage Resistances: Slash: 10% Strike: 10% Pierce: 10% Fire: 10% Ice: 10% Volt: 10% Ailment Resistances: Sleep: 10% Confusion: 10% Plague: 10% Poison: 10% Blind: 10% Curse: 10% Paralysis: 10% Bind Resistances: Head: 10% Arm: 10% Leg: 10% Other Resistances: Death: 0% Petrification: 0% Stun: 25% Skills: Dragon Head: Uses the Head. Randomly attacks the entire party with STR-based Slash damage 7 times, dealing 100% damage per hit. Has an accuracy of 70. Has an action speed of -5. Seven Plagues: Uses the Head. Attempts to inflict Instant Death, Petrification, Sleep, Confusion, Poison, Curse, and Paralysis on the entire party with a 5% success rate. The Poison ticks for 100 damage. Has an action speed of -10. Revelationers are the toughest FOEs in the stratum, and by extension, the entire game. They hit very hard, and Seven Plagues can be a nightmare to deal with if the RNG is not in your favor. It essentially has a 30% chance to inflict any status effect on a party member. Prevent Order can deal with most the things it can inflict, however, it can�t do anything about Instant Death. I should note that it�s far easier to farm for Power Books from them. There are a lot more Revelationers in the 6th Stratum, compared to the 2 Deep Coistrels you could fight in the 4th Stratum to farm for them. Revelationer�s AI Script posted:On the 1st turn: The first turn is one of the more dangerous turns when dealing with a Revelationer. Though thankfully, it won�t cast Seven Plagues for multiple turns in a row at the very least.   Same strategy as with the other 2 FOEs. Just have Charlotte and Rose beat them down with their Charged attacks. You know the drill. Though the Revelationer�s slight physical resistance makes the process take a little longer.   Ooh, unlucky seven. Tsk tsk. Ooh, unlucky seven. Tsk tsk.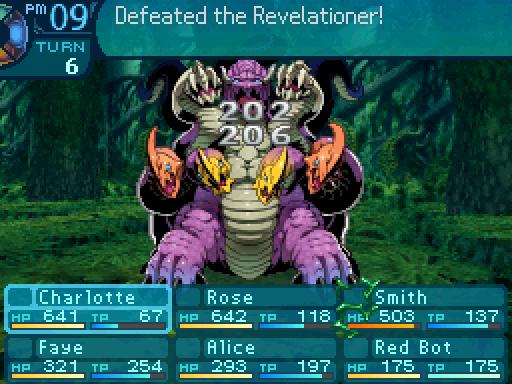 How many of your heads do I have to cut off!? Uh, Charlotte? I think we got them all. It�s bleeding out pretty badly. How many of your heads do I have to cut off!? Uh, Charlotte? I think we got them all. It�s bleeding out pretty badly.It never did bother casting Dragon Head throughout the entire fight.  The Revelationer is more of a stat/party composition check. They�re fairly manageable once your party is strong enough. 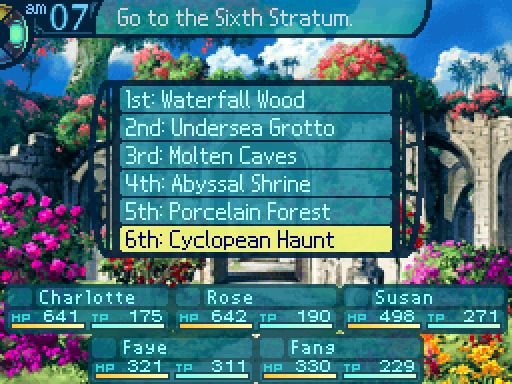 Also, switching to this party for a bit since I want to snag the Dreamsmasher�s conditional. 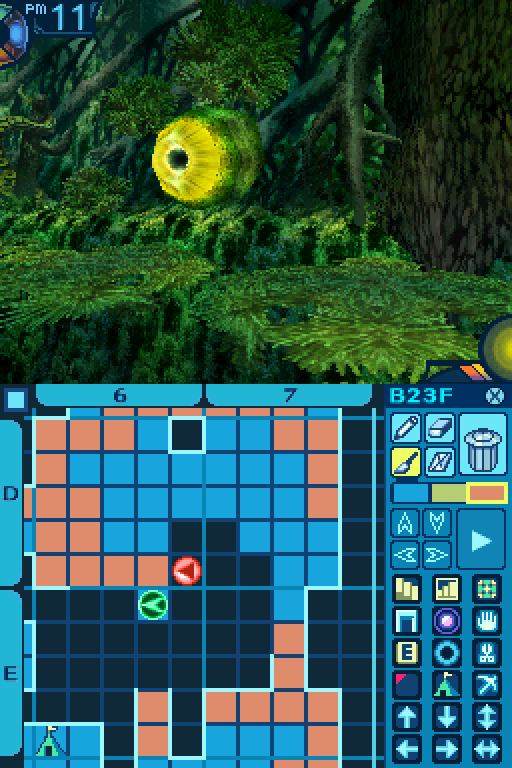 There�s another one of the Evil One�s eyes in this area. 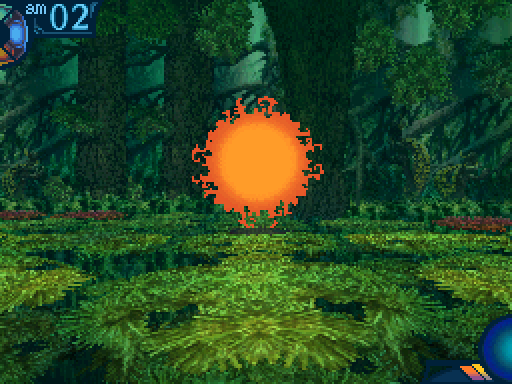 And the Dreamsmasher, to boot.  Oh yeah, Dreamsmashers just move around in a small 2x2 area. They take 1 step for every 3 steps you take, unless they catch sight of you, at which point they move at normal speed.    You think you can beat me in a staring contest? Ohoho, that�s rich! You think you can beat me in a staring contest? Ohoho, that�s rich!  You were amazing, Mr. Butterfly! You were amazing, Mr. Butterfly!After several attempts, the Poison from Call Insect lands.  Wow, that looked painful. What a way to go. Wow, that looked painful. What a way to go. For the record, both Poison and Plauge damage works for this. This is because internally, the damage aspect from both those status ailments are coded as the exact same thing.  Let�s see what these drops unlock.  The Atrocity Sigh unlocks one of the most useful consumable items in the game. Formaldehyde. Just farm up enough of these babies and you�ll be able to get any pesky conditional drops, or any items with a low drop rate, such as books, far more easily.   The Eye of Insanity unlocks the 3rd most powerful Gun in the game. Could be worth going after.   And the Volt Scale unlocks the 3rd most powerful Sword. Alright, enough goofing around. Let�s head on back to the 23rd floor.  There�s another Dreamsmasher in this area. It�s guarding a treasure chest. 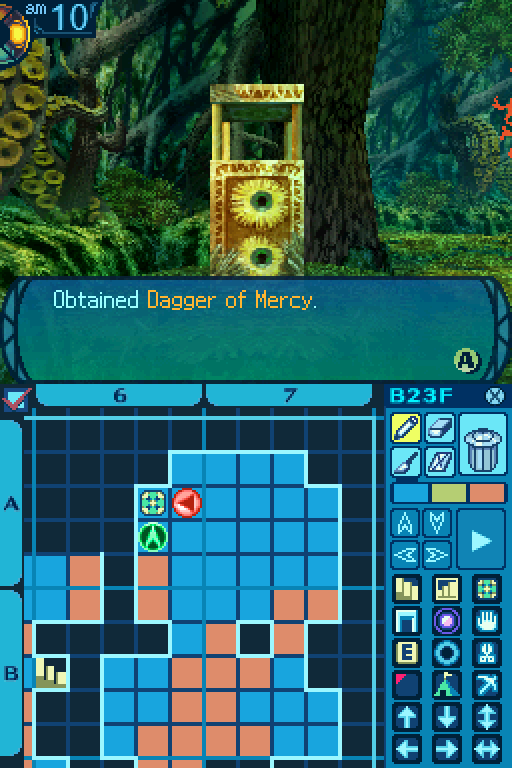 Which contains this baby.  The Dagger of Mercy gives the wielder a 14% chance to instantly kill their target with regular attacks. Now, you�re probably thinking, this is totally worth putting on your weaker characters, right? Not really. You see, like with the more powerful gimmick weapon, the Dagger of Mercy sadly has a base accuracy of 50 instead of 98. Yeah, that�s something to be aware of, and I won�t have Alice equip it for that very reason.   More Dreamsmashers patrolling the 2nd area. 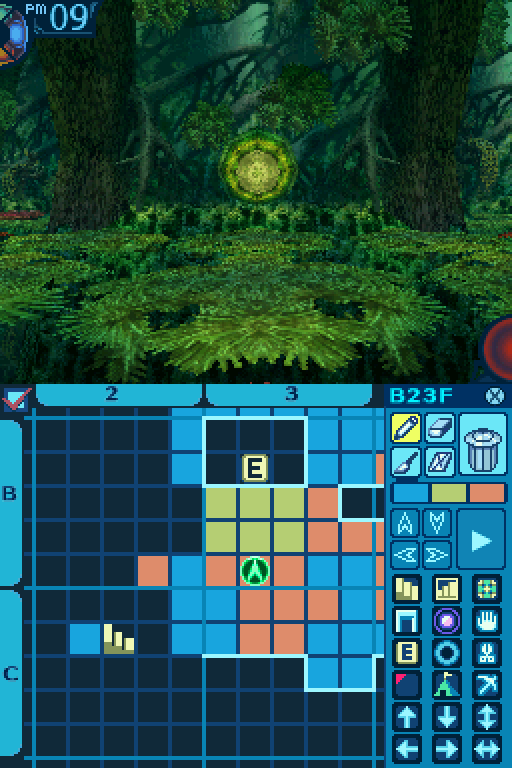 Another eye down here. 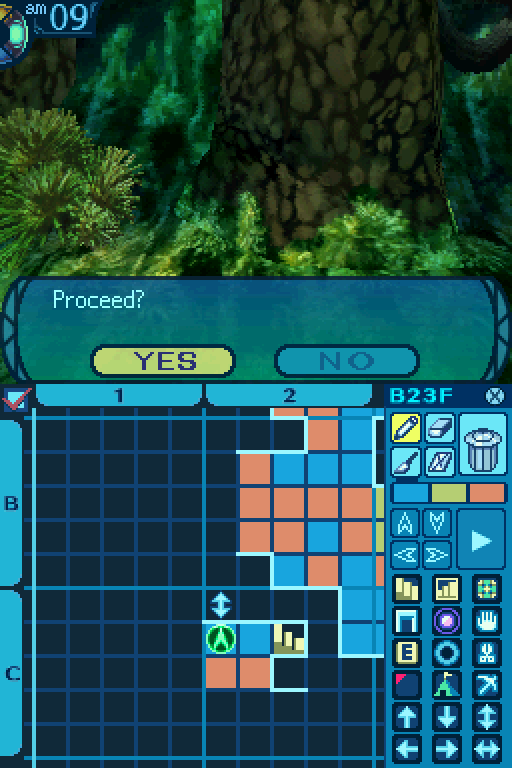 The 3rd section has a shortcut to the 2nd section right over here. 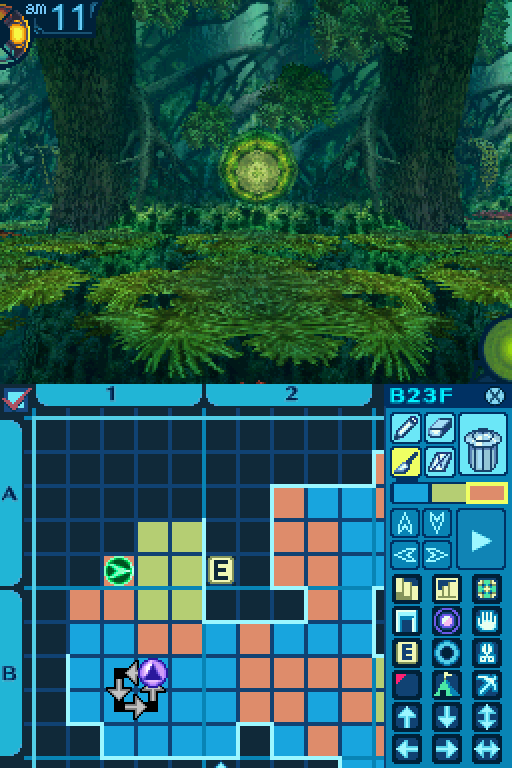 There�s an eye and a Dreamsmasher here. 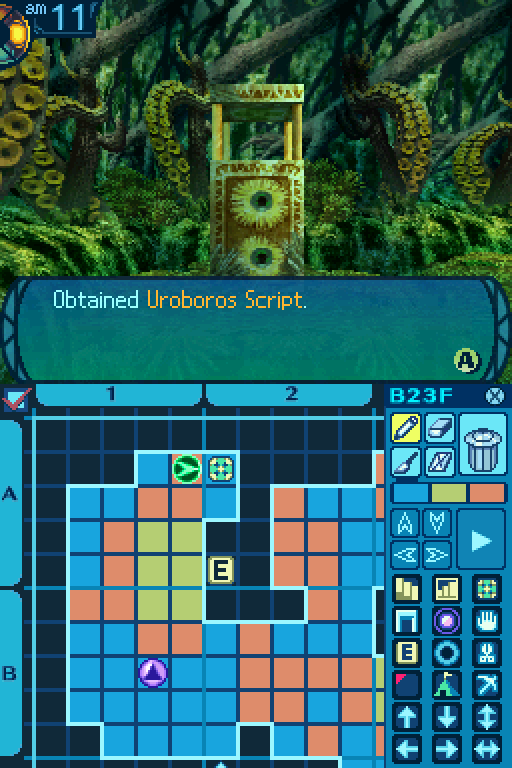 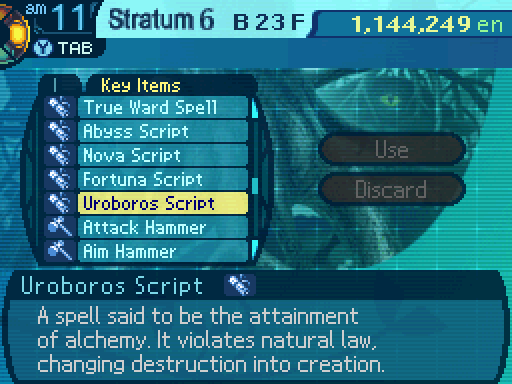 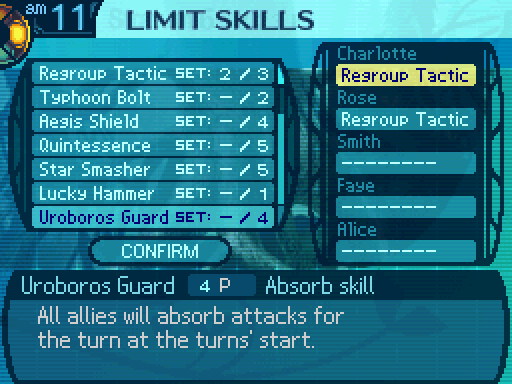 Which happened to be guarding this baby. 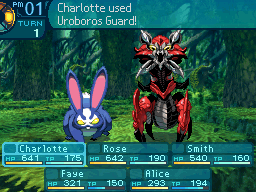 Harm is healing! Harm is healing!  Uroboros Guard is another defensive Limit skill. It blocks all damage done to the party for the current turn. However, half of any damage the party would have taken is then converted into healing. You�re probably thinking that this sounds like a better version of Aegis Shield, so what�s the catch? There�s none. Uroboros Guard really is a straight upgrade, and is just a flat out better version of Aegis Shield. However, keep in mind that Aegis Shield can be obtained far earlier as long as you can take down King Penguin, while you have to reach the 23rd floor to get Uroboros Guard. Though once you get it, there is pretty much no good reason to use Aegis Shield anymore (unless you want to avoid compromising any strategies using HP Cannon or something like that.)  Oh whoops, ran into another eye while I was down here.  And yet another one while I was in the 4th section. 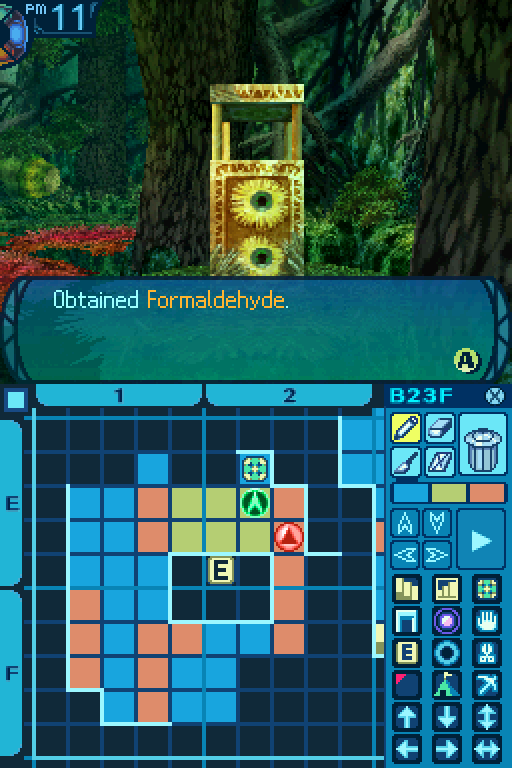 Always nice to have. Even if I haven�t really used it to grab any tricky conditional drops.   Uhhh, Alice? Oh boy. Sometimes I can�t help but wonder what you would do without me. Uhhh, Alice? Oh boy. Sometimes I can�t help but wonder what you would do without me.One To Market later.  Okay, here�s how the bottom Dreamsmasher moves normally.  And the top one�s movements.  Back on the 22nd floor, you�ll want to fall into this pitfall here.   It leads to a Vigor Book.  Which I give to Charlotte.  Take this one way passage to get out of this room. 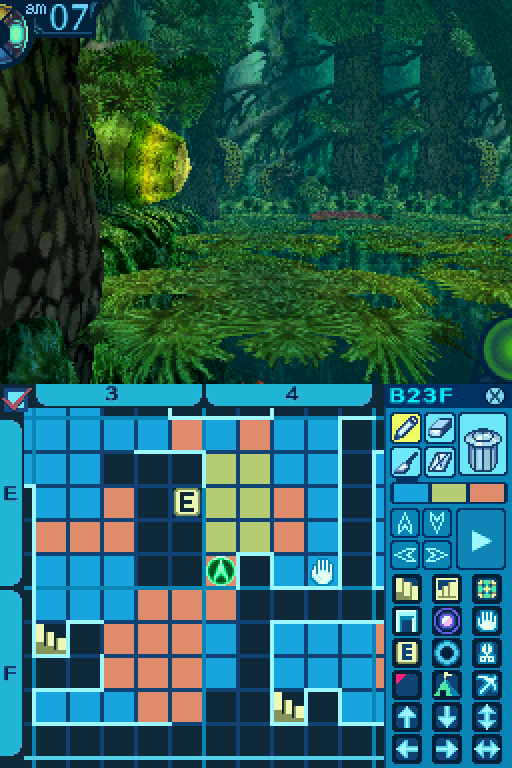 Watch out for this eye, though.  And this Dreamsmasher. 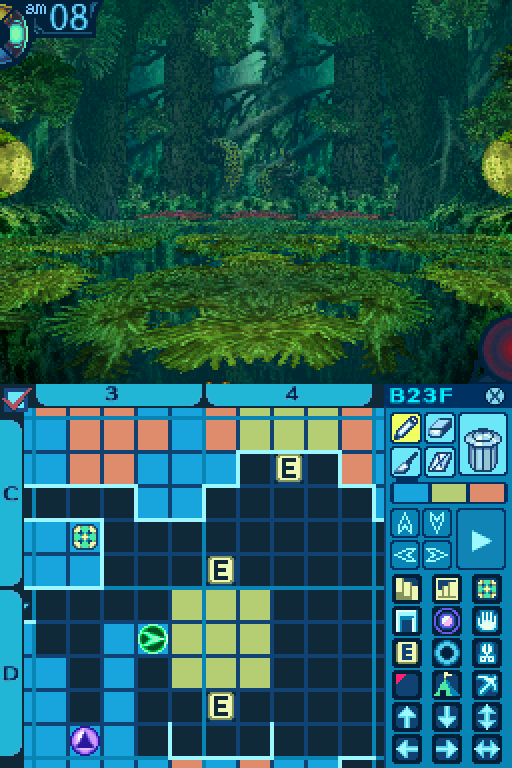   Last set of eyes and a Dreamsmasher. What in the world is being so heavily guarded? 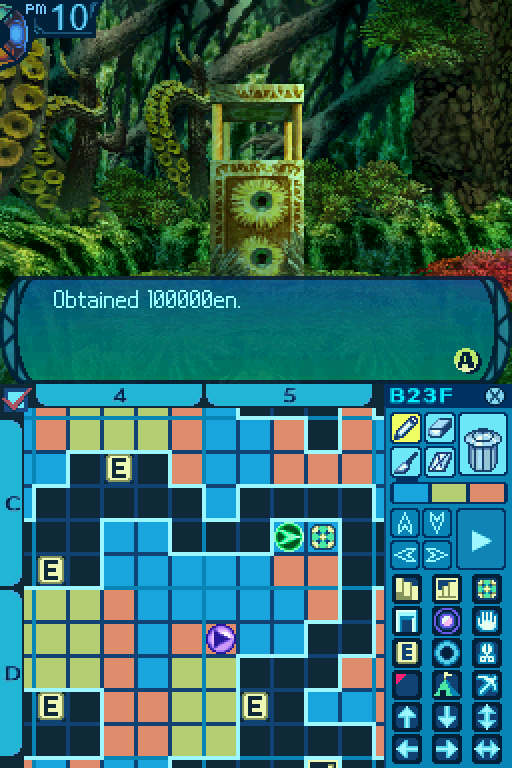 ... I have to wonder if the Evil One is mocking us. ... I have to wonder if the Evil One is mocking us.Not the greatest treasure, but...  We�re now completely done with the 23rd floor! 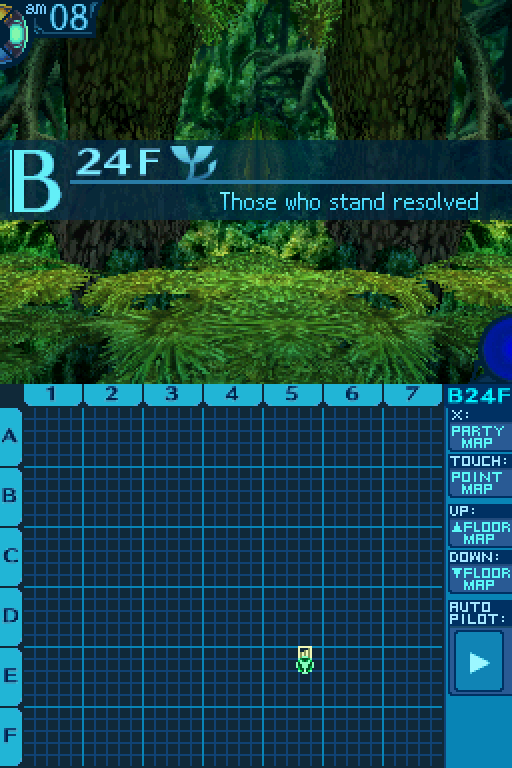 Now onto the main attraction.   After a battle with a new enemy, first.  Ammonite Level: 61 HP: 813 STR: 68 VIT: 55 AGI: 49 LUC: 46 TEC: 59 Attack Type: Pierce Exp: 4472 Item Drops: -Drop 1: Invader�s Eye - 20% Drop Rate. 1 needed for Nuctemeron (Book) and Cianontedae (Boots.) 6 needed for Mons Meg (Crossbow) and Arm Seal (Accessory.) --Cursed eyeball that tries to violate onlookers� minds. -Drop 2: N/A -Gold: N/A Description: An ancient mollusk whose hard shell repels most impacts, protecting it to this day. Damage Resistances: Slash: 0% Strike: 0% Pierce: 0% Fire: 150% Ice: 100% Volt: 100% Ailment Resistances: Sleep: 100% Confusion: 100% Plague: 150% Poison: 150% Blind: 100% Curse: 100% Paralysis: 100% Bind Resistances: Head: 100% Arm: 100% Leg: 100% Other Resistances: Death: 50% Petrification: 100% Stun: Skills: Withering Glare: Uses the Head. Lowers the entire party�s physical defenses by 60% for 3 turns. Has an action speed of +3. Ammonites are basically walking screw yous if your party has access to physical damage only, and completely lacks any other methods to kill enemies with. Otherwise, they�re fairly unremarkable, other then letting other enemies kill you slightly faster? Look, if there were more enemies that hit harder physically, they would be a threat. But as it stands, they�re just annoyances.   Your hard shell is no match for a fistful of flaming hot justice! Your hard shell is no match for a fistful of flaming hot justice! If you completely lack the means to deal with them, just run away.    Let�s get this started. Let�s get this started. Oh joy, another mapless room. Oh, but guess what? We�re not alone in here.  We�re stuck in a hallway with 3 Revelationers! But worry not, there�s a way past them. 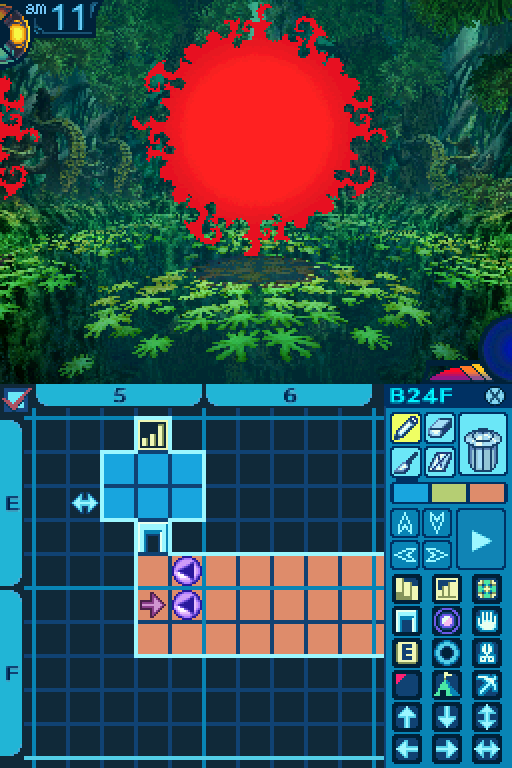 First, lure the Revelationer in the 2nd row to this position. Where the Revelationer in the first row is doesn�t matter.  Then walk forward in the 3rd row for a bit until that row�s Revelationer is in front of you, then take that path to walk around it. Easy enough, right? Well... 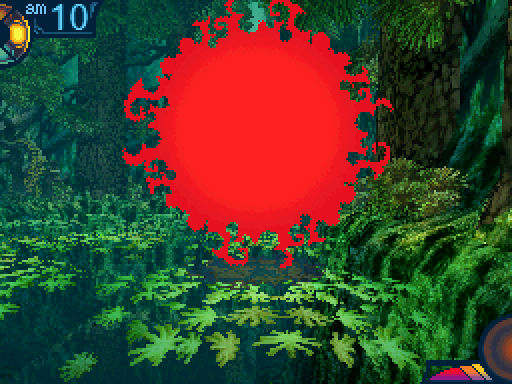 All I know is that to me.  None of this is any fun.  Open up those lovin� doors.  Watch out, here it comes!  Consider this the official soundtrack for the rest of the update. Wha- What just happened? Oh. Right. These things. I should have just given myself a break here. Uh, does anyone remember which direction we were facing before? I think it was this way...?In case it isn�t quite clear what happened, allow me to explain. These are spinners. Stepping on them will forcibly turn you in a certain direction a certain number of times. And yes, they only show up in mapless rooms. Starting to realize the implications? Yeah, if you thought it was hard to keep track of your position in mapless rooms before, these will do their best to screw with your sense of direction even more. If you�re familiar with Wizardry, this might sound familiar to you. Yes, these are in fact, a homage to the spinners in Wizardry, though EO3�s versions are considerably more merciful. For one thing, the spinning isn�t random in EO3. You�re always spun in a set direction and a set number of times for a specific spinner. That said, it doesn�t make this floor any less painful to go through. 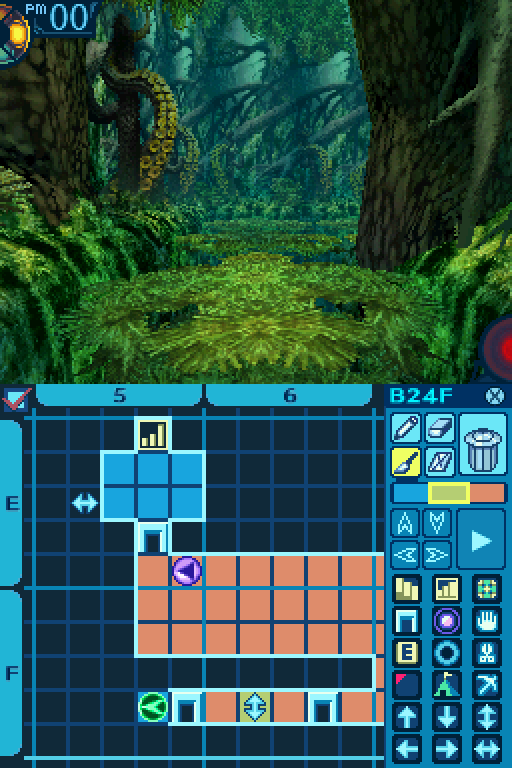 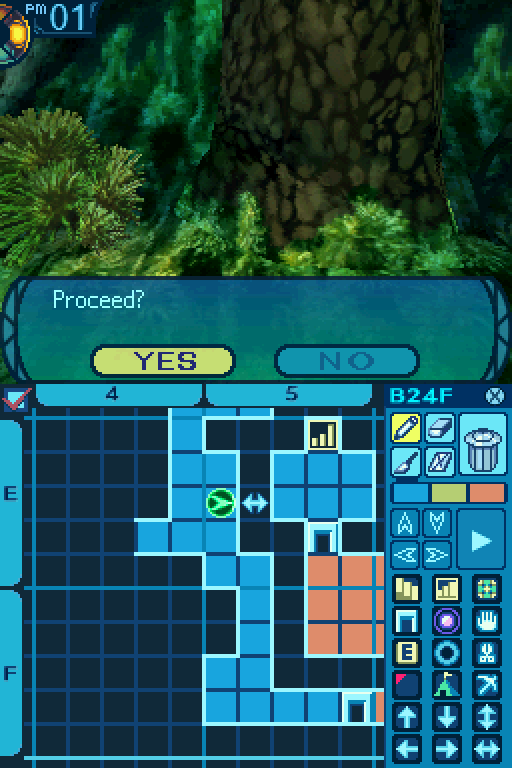 At least we won�t have to re-solve that Revelationer puzzle. 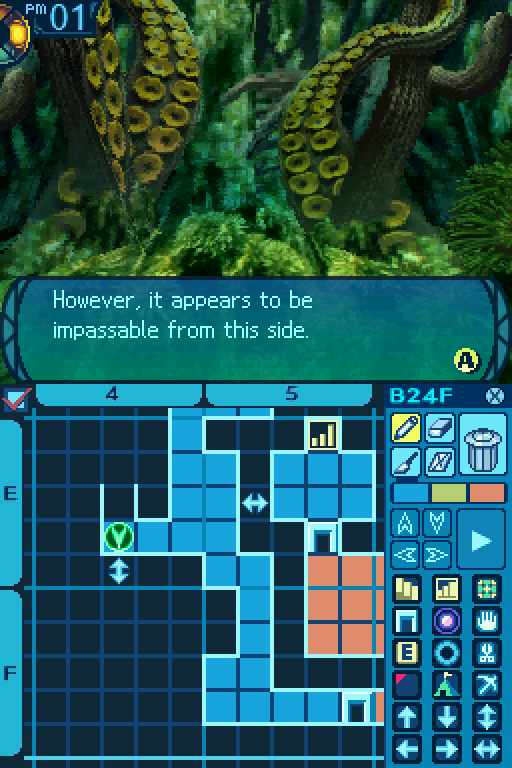  E3 Chop Point: Polyamide Fiber: 50% Gather Rate. Star Driftwood: 50% Gather Rate. Stardust Twig: Rare. Common Gather Periods: 2 to 16. Rare Gather Periods: 1 to 4. 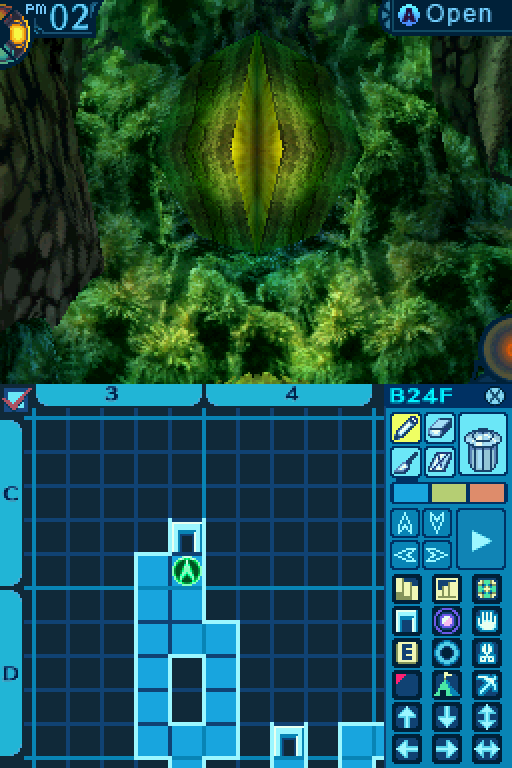 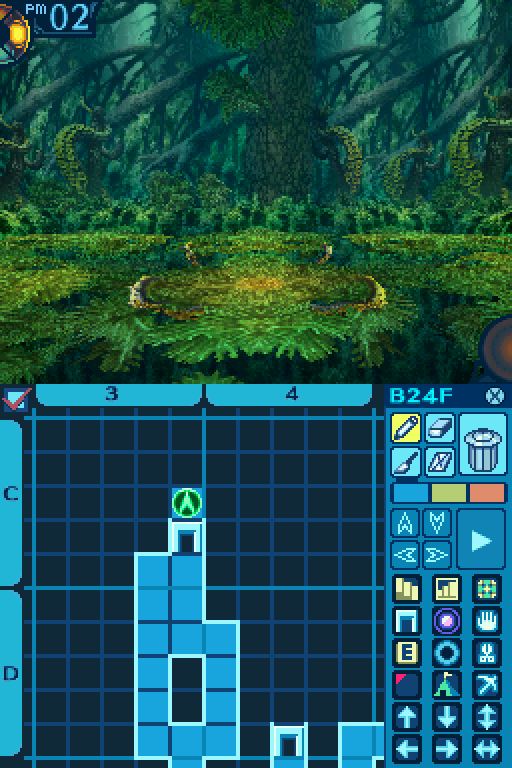 That door leads to a campsite. 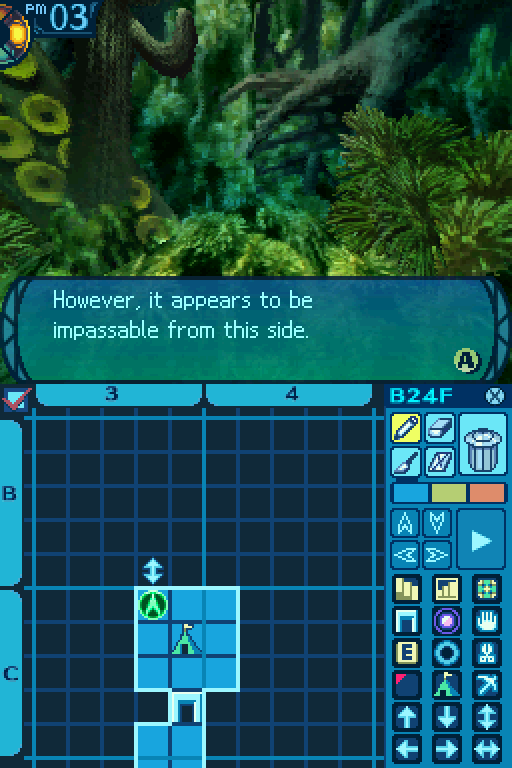 Which also has a shortcut in it.  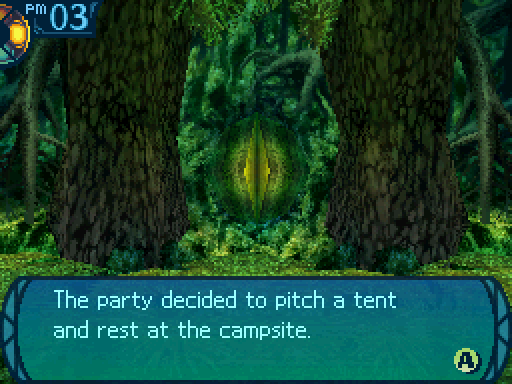 I opt to rest here since my party got a bit beat up. So, Faye. There�s something I�ve been meaning to ask you. Ask away! Did... did you ever remember how you got those weird time traveling powers? Yes, it�s certainly not natural for a girl like you, or for anyone to have the power to undo their own death. Huh? Oh, right! Uhh, let me think... Oh, yeah! Now I do! You see, it all started this one fateful day when I was taking a stroll through the woods... 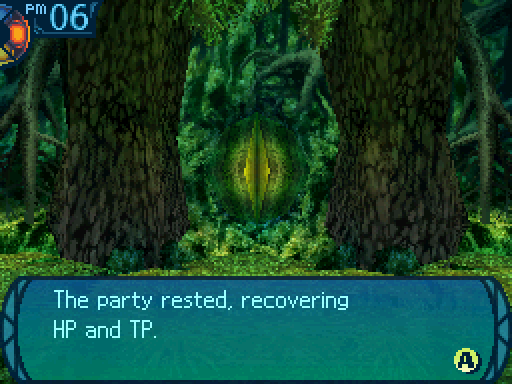 ... Um. That�s um... Quite the story, Faye. If I had a bull honky detector built into me, I�m pretty sure it would be going cuh-razy right now. ...Let me get this straight. You punched a little girl in the face- She was a witch! An evil witch! Because she was doing uhh... what to squirrels? Torturing them! Said they were evil or something. I mean can you believe it? Who�s ever heard of an evil squirrel!? And then she cursed you to �suffer for all eternity� or something like that? Yeah, but I think she like botched it or something, cause I ain�t suffering all that much! ...Oh, look at the time! We�ve been here for way too long We really must get going! If I have to hear any more of that nonsense, my head is going to explode. ...If you didn�t want to tell us the real reason, you could have just said no. Tch! Believe what you want, I guess. ... Um. That�s um... Quite the story, Faye. If I had a bull honky detector built into me, I�m pretty sure it would be going cuh-razy right now. ...Let me get this straight. You punched a little girl in the face- She was a witch! An evil witch! Because she was doing uhh... what to squirrels? Torturing them! Said they were evil or something. I mean can you believe it? Who�s ever heard of an evil squirrel!? And then she cursed you to �suffer for all eternity� or something like that? Yeah, but I think she like botched it or something, cause I ain�t suffering all that much! ...Oh, look at the time! We�ve been here for way too long We really must get going! If I have to hear any more of that nonsense, my head is going to explode. ...If you didn�t want to tell us the real reason, you could have just said no. Tch! Believe what you want, I guess.There�s actually something special about this campsite, but I�ll show it off later. 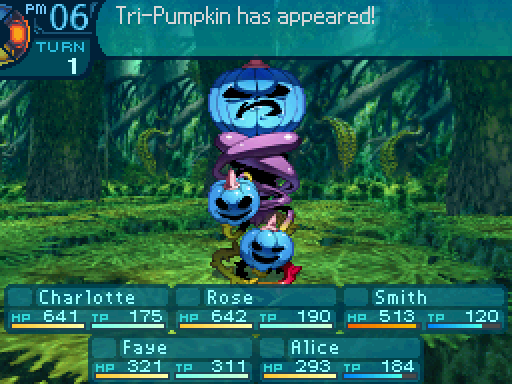 And here�s the last new enemy on this floor.  Tri-Pumpkin Level: 0 HP: 1430 STR: 58 VIT: 55 AGI: 45 LUC: 50 TEC: 56 Attack Type: Pierce Exp: 4722 Item Drops: -Drop 1: Cursed Femur - 45% Drop Rate. 1 needed for Zweihander (Sword.) 2 needed for Fatal Magatama (Accessory.) 5 needed for Melputtahbehmo (Rapier) and Cathbharr (Helmet.) --Mysterious, bony part of a three-headed pumpkin. -Drop 2: Pumpkin Head - 10% Drop Rate. 7 needed for Dvergr Sword. (Sword.) --Highly impact-absorbent head of a three-headed pumpkin. -Gold: N/A Description: The most dangerous form of the Death Pumpkin, it can call on allies to overwhelm its foes. Damage Resistances: Slash: 75% Strike: 75% Pierce: 75% Fire: 75% Ice: 75% Volt: 75% Ailment Resistances: Sleep: 100% Confusion: 100% Plague: 100% Poison: 100% Blind: 100% Curse: 100% Paralysis: 150% Bind Resistances: Head: 10% Arm: 10% Leg: 10% Other Resistances: Death: 50% Petrification: 50% Stun: 25% Skills: Crazy Noise: Uses the Head. Attempts to inflict Confusion on the entire party, with a 20% success rate. Has an action speed of -10. Binding: Uses the Arms. Attempts to inflict Arm bind on the entire party, with a 90% success rate. Has an action speed of -5. Halloween: Limit Skill. Requires a Tri-Pumpkin, Death Pumpkin, and Hell Pumpkin. Uses the Head. Deals 80% TEC-based Fire damage to the entire party, and has a 60% chance to inflict Head bind, Arm bind, and Leg bind. Has an accuracy of 90. Has an action speed of -10. Tri-Pumpkins are the last member of the pumpkin trio, and are the deadliest member as well. They can lock down your party members by confusing them with Crazy Noise, and shut down any physical attackers you have with Binding. Oh, but that�s not all! They have a skill called Halloween, which is a decently strong attack that can completely cause the fight to go south. And they can even summon Death Pumpkins and Hell Pumpkins to help pull that off. Though Halloween can be completely blocked by Antifire and Fire Prophecy if you have access to those skills. 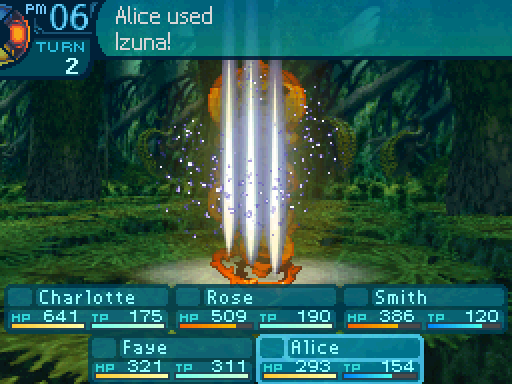  Yeart yeart yeart. Yeart yeart yeart.I didn�t want to deal with any potential nonsense it could fling at my party and just sicced Alice on it. 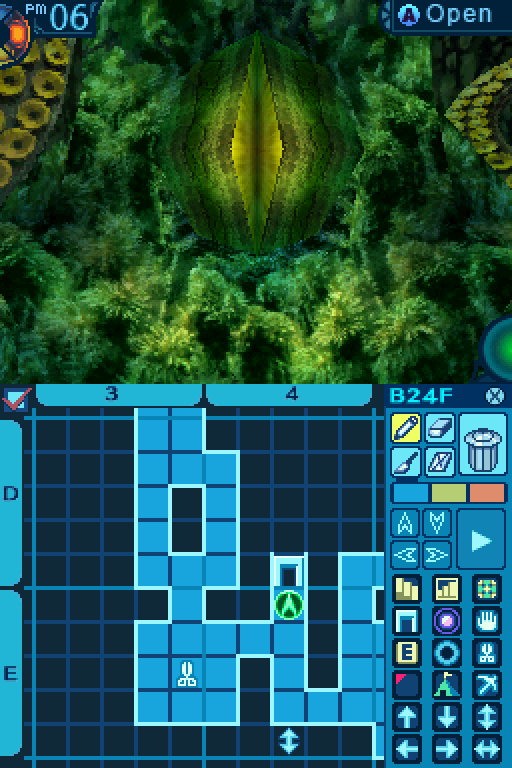 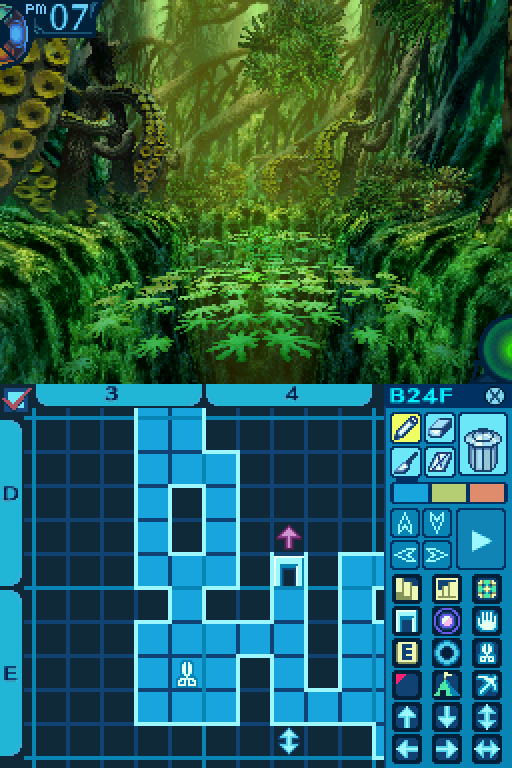  So here�s the gimmick of this floor. Mapless mazes with one way passages.  And spinners. If you don�t keep track of where you are, you�ll get lost very easily. And yes, this happened to me. Several times. To the point where this floor took an entire hour for me to complete! 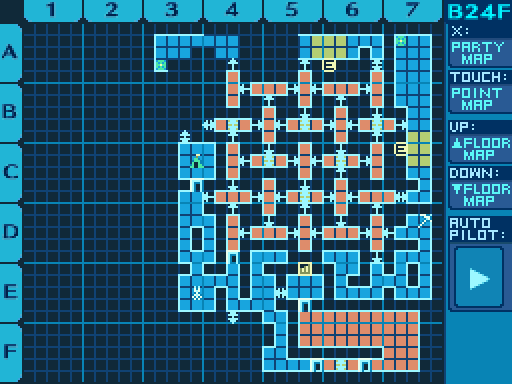 Instead of going into excruciating detail on everything in the maze (unless you really like seeing the same textures over and over), I�ll just cut to the chase and show you the map and show what the game expects from you. Yeah. 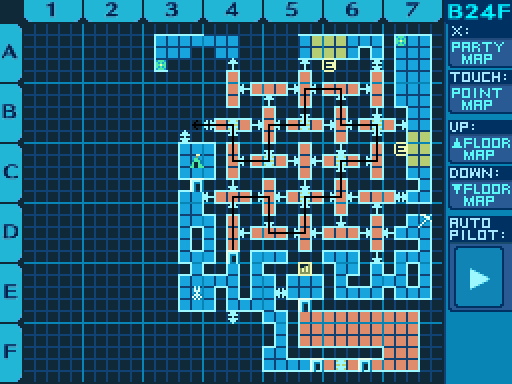 And this is the path you have to take to get through it. Just try not to get dizzy, because one wrong step can end up throwing you off completely! It�s definitely the most annoying floor in this entire game without question. Mapless mazes with spinners in them might not be as bad as teleporter mazes, but boy does it get close! Now you might�ve noticed a few side areas on the map, so lets go check those out.  There�s a Dreamsmasher in the right side area guarding a chest. 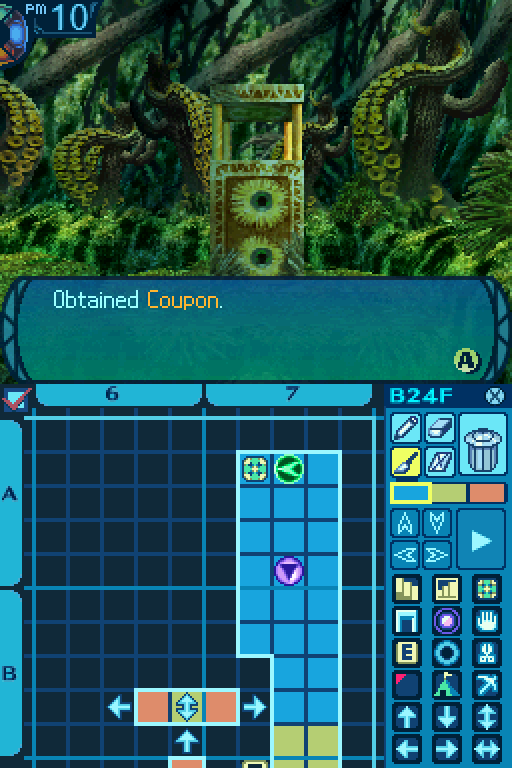 It contains the final coupon in the game. 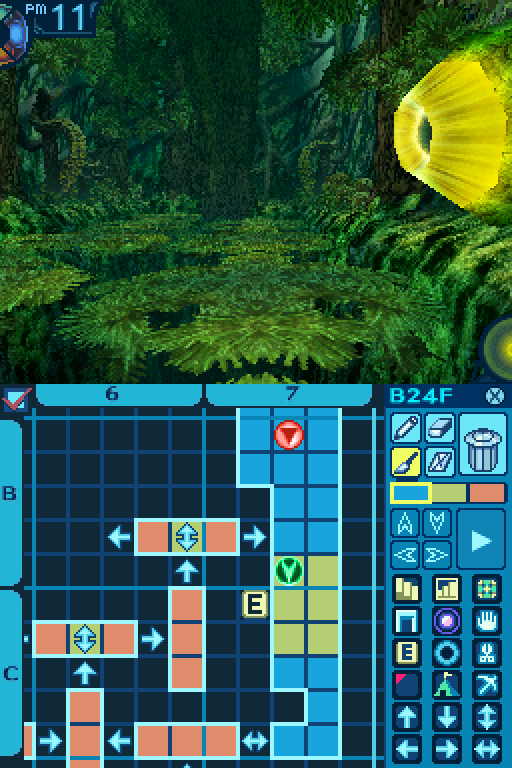 Oh, and these side areas love forcing you to walk by an eye to get out.  D7 Mine Point: Star Sapphire: 50% Gather Rate. Perlite: 50% Gather Rate. Zircon: Rare. Common Gather Periods: 2 to 10. Rare Gather Periods: 1 to 5. The bottom side area contains a mine point.  There are 2 Dreamsmashers patrolling in the top side area. 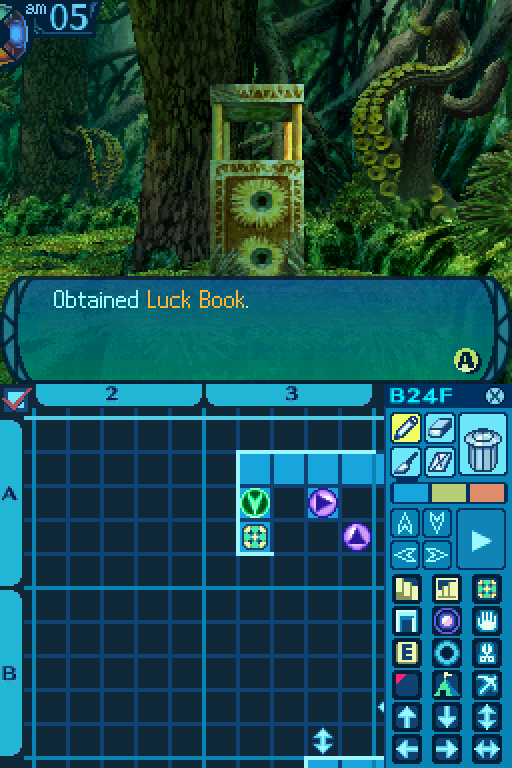 Eh, I�ll give it to Fang later.  And with that, I never have to go through that part of the map ever again. Oh, but we�re not out of the woods yet. 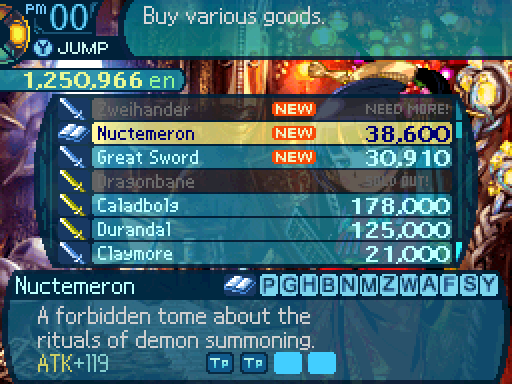 But first, unlocking equipment at Edie�s, since I want to take a break from all that craziness. Provides a 10% boost to max TP. Could be handy if you don�t have access to the ultimate Book. 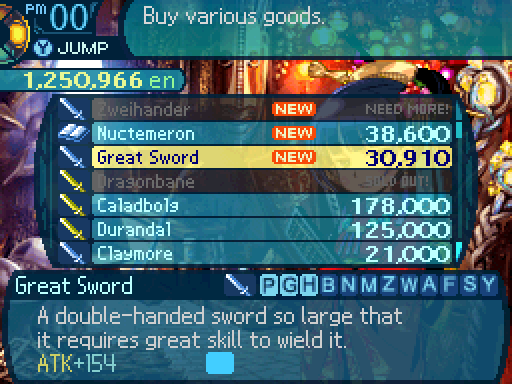  Fatal Magatamas provide a 50% resistance to Instant Death. Handy, especially when dealing with certain bosses like Anemone. Well, now back to spinner hell.  Four-way intersection edition! I dunno how much more of this I can handle. Stay strong, Faye! There�s not much room on the map left. We must be getting close! C3 Take Point: Ambrosia: 50% Gather Rate. Hogweed Oil: 50% Gather Rate. Maiden�s Wheat: Rare. Common Gather Periods: 2 to 12. Rare Gather Periods: 1 to 4. Last item point on this floor.  And here�s the next mapless maze section.  But at least the path through it is fairly straightforward.  ... Now I�m certain that the Evil One is mocking us. ... Now I�m certain that the Evil One is mocking us.Thanks, game.  And with that, I am finally free. 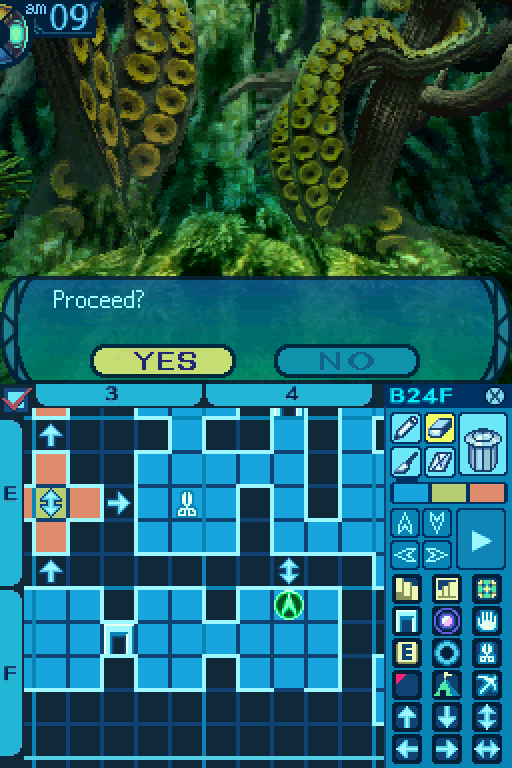 I don�t have to do any of that ever again. 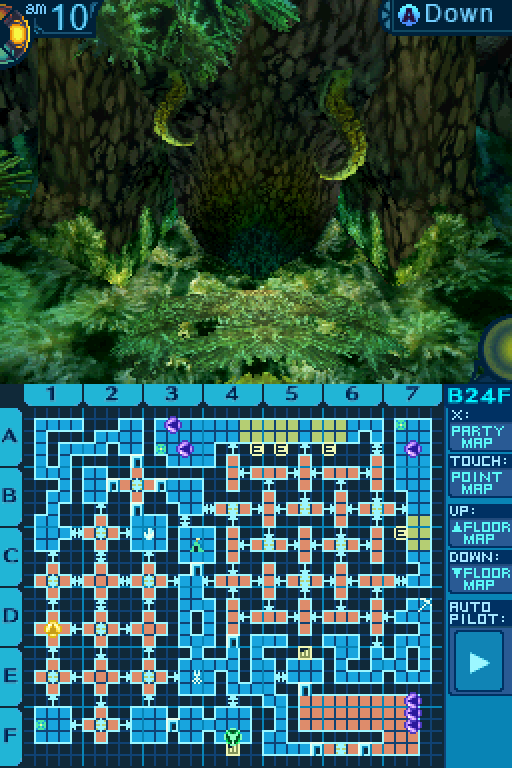 I am completely done with this floor!  And now, the end is in sight. Unlike all the other Strata in this game, the 6th Stratum actually has 5 floors for us to explore. But we won�t be exploring this just yet. We still have some loose ends to clean up. But first. The last of the town dialogue in this game.  Exhausting. But we�re close to the end! Exhausting. But we�re close to the end! ...I won�t get to use that line much longer, huh? But I don�t feel too sad about that. The old man at the port said that friendships are like waves. Armoroad is getting to be its old self, thanks to you. Even the sea lanes are on the road to recovery. With all that going on, there�s no way I won�t see you guys somewhere out there again... As long as the seas tie the nations together, our friendship is unbreakable! So don�t be sad when you leave for your next journey! Remember that I�ll be rooting for you! Heh heh, thanks kid. ...I won�t get to use that line much longer, huh? But I don�t feel too sad about that. The old man at the port said that friendships are like waves. Armoroad is getting to be its old self, thanks to you. Even the sea lanes are on the road to recovery. With all that going on, there�s no way I won�t see you guys somewhere out there again... As long as the seas tie the nations together, our friendship is unbreakable! So don�t be sad when you leave for your next journey! Remember that I�ll be rooting for you! Heh heh, thanks kid. Um... Well... Um... Well... ......You know... With our parting so near at hand, I don�t know how I should interact with you. Wow, I guess she does care about something other than money! Ha ha ha! ...Wh-What!? Do you find it funny to see me tear my hair out over something besides P/L sheets!? You�d never have made it as far as you did without the generous help of this Firm! Rude to the end, I see! What beastly parents you must have had to lack all consideration and... ...Pfffthahaha. ...Ahaha. It always seems to go thus between us, doesn�t it? It seems a tearful farewell would be impossible. But then again, maybe that�s how things should be. ......You know... With our parting so near at hand, I don�t know how I should interact with you. Wow, I guess she does care about something other than money! Ha ha ha! ...Wh-What!? Do you find it funny to see me tear my hair out over something besides P/L sheets!? You�d never have made it as far as you did without the generous help of this Firm! Rude to the end, I see! What beastly parents you must have had to lack all consideration and... ...Pfffthahaha. ...Ahaha. It always seems to go thus between us, doesn�t it? It seems a tearful farewell would be impossible. But then again, maybe that�s how things should be.Ah, Edie. Definitely the best shopkeeper in the series and I�ll miss seeing what she has to say. Anyways, that trip through the 24th floor got me some new equipment, so let�s have a quick look. 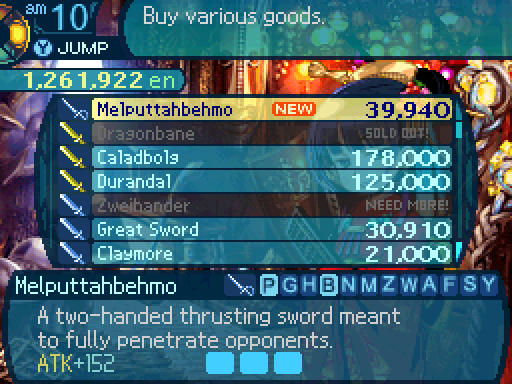 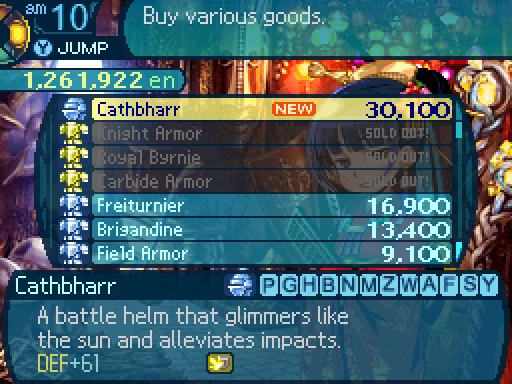 The Cathbharr is the best helmet in the entire game. Not that really means much, but the 10% resistance to Strike attacks is nice.  Oh? Do go on. Oh? Do go on. The client is this really cute and awesome girl who runs a bar in Armoroad! It�s really easy, okay? Just listen to the details. When you leave Armoroad for more adventures, she wants you to send letters to her! ...But she wants to keep her identity a secret, so just send your letters here to me. You�ll get your reward when you come visit here again! ...Okay? You�ll do it? Well, you don�t have to give me an answer now. Just write the letters when you can. I want you to remember this request, though! Remember! Send me letters! ...For her! Aww, you don�t have to- we will! The client is this really cute and awesome girl who runs a bar in Armoroad! It�s really easy, okay? Just listen to the details. When you leave Armoroad for more adventures, she wants you to send letters to her! ...But she wants to keep her identity a secret, so just send your letters here to me. You�ll get your reward when you come visit here again! ...Okay? You�ll do it? Well, you don�t have to give me an answer now. Just write the letters when you can. I want you to remember this request, though! Remember! Send me letters! ...For her! Aww, you don�t have to- we will!  I�ve heard from the Senatus that those Deep Ones worship the monster down there, right? Yep. We�re probably gonna be in for one hell of a time down there. You�ve gotten so strong... Both as warriors and as people, I mean. That�s why I�m okay leaving this one to you. Protect Armoroad for the both of us! We�ll succeed. I�m sure of it. I�ve heard from the Senatus that those Deep Ones worship the monster down there, right? Yep. We�re probably gonna be in for one hell of a time down there. You�ve gotten so strong... Both as warriors and as people, I mean. That�s why I�m okay leaving this one to you. Protect Armoroad for the both of us! We�ll succeed. I�m sure of it. Yes, they are. Once we�re done, we�ll be taking our leave. Yes, they are. Once we�re done, we�ll be taking our leave. Wouldn�t you say that meetings and farewells are like the tide? The waves bring in all sorts of things, and they send just as many right back out... With that in mind, I know the sea will bring us together again some day. Now, sail on, young ones. Head to wherever adventure awaits! Wouldn�t you say that meetings and farewells are like the tide? The waves bring in all sorts of things, and they send just as many right back out... With that in mind, I know the sea will bring us together again some day. Now, sail on, young ones. Head to wherever adventure awaits!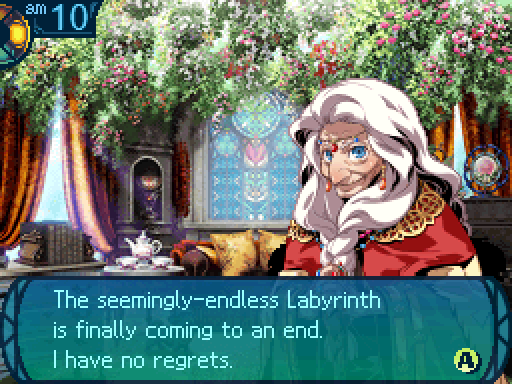  You all did well... The Princess is quite pleased. As am I, of course. When you first came here, I thought you were typical explorers with eyes bigger than your stomachs. I never dreamed my fate would be so intertwined with yours. Ah, but it�s early still for me to be reminiscing like this... It�s time you finished the job! And don�t leave any loose ends! Hee hee! We won�t! Ooh, wait. Almost forgot about that! Forgot about what? I�ll tell you in a bit. You all did well... The Princess is quite pleased. As am I, of course. When you first came here, I thought you were typical explorers with eyes bigger than your stomachs. I never dreamed my fate would be so intertwined with yours. Ah, but it�s early still for me to be reminiscing like this... It�s time you finished the job! And don�t leave any loose ends! Hee hee! We won�t! Ooh, wait. Almost forgot about that! Forgot about what? I�ll tell you in a bit.  The Abyssal King once told me to manage this inn for explorers, and I intend to honor that duty. But... will that duty come to an end someday...? Ehhh, who knows? But it ain�t ending just yet! The Abyssal King once told me to manage this inn for explorers, and I intend to honor that duty. But... will that duty come to an end someday...? Ehhh, who knows? But it ain�t ending just yet!  I mean, of course not, since we first met when I came to the Deep City. I find myself wishing I�d gone to my sister�s store more... But it�s a little late for regrets. Some things I�d have only learned here in the Deep City. That�s one thing I have to give my sister. I�ve made my choice. I�m going to use what I�ve learned here and outdo even my sister someday! So if we ever meet again, out there in the wide world, please shop at Napier�s Branch then too. Hmmhmm, you�ll have to give it your all to accomplish that. Despite her... insatiable desire for money, she is quite the hard worker. I mean, of course not, since we first met when I came to the Deep City. I find myself wishing I�d gone to my sister�s store more... But it�s a little late for regrets. Some things I�d have only learned here in the Deep City. That�s one thing I have to give my sister. I�ve made my choice. I�m going to use what I�ve learned here and outdo even my sister someday! So if we ever meet again, out there in the wide world, please shop at Napier�s Branch then too. Hmmhmm, you�ll have to give it your all to accomplish that. Despite her... insatiable desire for money, she is quite the hard worker.  You must win out over it. The Abyssal King and Princess, were they here, would say the same. Yeah. We won�t let all our effort go to waste! We�ve come too far to fail now! You said it! Oh yeah, so uhhh, what was that thing you just remembered? Oh, yeah. The dragon god�s challenge? Remember? Right. He said that if we can beat him, we�ll get more power, right? And I feel like we�ve kept him waiting long enough. Uh huh. And if we�re gonna take on the Evil One, we�re gonna need all the help we can get! Rest up, everyone. We got a big day tomorrow! You must win out over it. The Abyssal King and Princess, were they here, would say the same. Yeah. We won�t let all our effort go to waste! We�ve come too far to fail now! You said it! Oh yeah, so uhhh, what was that thing you just remembered? Oh, yeah. The dragon god�s challenge? Remember? Right. He said that if we can beat him, we�ll get more power, right? And I feel like we�ve kept him waiting long enough. Uh huh. And if we�re gonna take on the Evil One, we�re gonna need all the help we can get! Rest up, everyone. We got a big day tomorrow!
|
|
#
?
Oct 2, 2017 11:14
|
|
|
Gotta say I never had much trouble with the spinner mazes personally.
|
|
#
?
Oct 2, 2017 14:54
|
|

|
That was almost two floors in one update. Although you tankfully cut out most of the actual tedium of B24F. At least you get properly rotated on the spinners so you can still keep track of where you are looking even if it gets harder. Iirc in Wizardry you did not get rotated, you just looked into a different direction immediatly. With walls that are "drawn" with two lines - so most of the time they all looked the same...
|
|
#
?
Oct 2, 2017 16:46
|
|
|
Ah the spinner maze, great fun. While it's not hugely difficult keeping track of where you are, if you get distracted, or try and puzzle out how to get to a side area and don't keep complete track of where you are, then this place is a paiiiiiiin. Still, I like the aesthetic of this place so I didn't end up hating this stratum too much, even with some of its real nasty tricks.
|
|
#
?
Oct 2, 2017 18:17
|
|

|
I solved the spinner maze problem in this game by putting a directional arrow down that points to where you wind up facing after entering the room for the first time. An additional arrow to indicate which direction you first enter each room from also helps.
|
|
#
?
Oct 2, 2017 18:32
|
|
|
At least you can see both the direction and the times you turn around so it's annoying but not bullshit. The first Class of Heroes game (which is a Wizardry reskin) on the other hand had this thing  "Rotating" tiles which just changes your direction randomnly when stepped, on top of dark zones where you can't see anything that are also on top of anti-spell zones. At least there's not a single damage tile, or damaging walls. And since I'm talking about it, here's one of the first maps you can run into:  Those green orbs are teleporters, and they transport you back at the beginning or the end, depending if you're on the top half or the bottom half of the map.
|
|
#
?
Oct 2, 2017 18:43
|
|

|
Hi I haven't checked this in nearly two years. I'm glad MEGAQUEEN got a really big gun.  I'm queen bitch! I'm queen bitch! With or without comma? Either way, really. With or without comma? Either way, really.
|
|
#
?
Oct 2, 2017 21:55
|
|

|
Yeah, that is not as bad as a spinner maze can be, and I'm glad you can open a way past it. Still, as the penultimate level with the penultimate monsters, it's got to sting.
|
|
#
?
Oct 2, 2017 22:13
|
|
|
OgretailFood posted:The first Class of Heroes game (which is a Wizardry reskin) on the other hand had this thing The biggest saving grace with Class of Heroes that stops it from being even more ridiculous and bullshit is that at least it doesn't interrupt all that stuff with random encounters if I remember right. That (some of?) its dungeons are randomly generated completely invalidates that point several times over, though.
|
|
#
?
Oct 2, 2017 22:39
|
|


|
Dragonatrix posted:That (some of?) its dungeons are randomly generated completely invalidates that point several times over, though. 1) Each dungeon has a center map that will never change. 2) The left side and right side in a dungeon, while randomly chosen, are part of a set. Each set has a pool of 4 maps to chose from, since there's 48 maps, that means there are 12 sets (starting with map 18, and ending with map 65) Tohaus Trail, for example, has three sets plus the center and goes like this (From/To Boesthaus) - Left 1 - Left 2 - Left 3 - Center - Right 3 - Right 2 - Right 1 - (To/From Yamhaus) Left and Right 1 are always from the 5th set (maps 34 to 37); Left and Right 2 are always from the 6th set (maps 38 to 41); finally Left and Right 3 are from the 7th set (maps 42 to 45) 3) Since maps are reused between them, that means if you unlock the shortcuts they will carry over the next time you land on that same map even if it was a different dungeon. 4) Most of the maps are mirrored, so if you mapped one part (be it left/right or top/bottom) it makes finding the exit a bit easier. I'm a bit sad that this system was scrapped in the sequels but on the other hand, each dungeon now has their own maps with their own typical Wizardry bullshit. It's not that funny trecking all the way to the exit with a single fairy alive because the deep water tile happened to have an anti-spell effect killing everyone who doesn't fly naturally.
|
|
#
?
Oct 3, 2017 01:49
|
|
|
Something 'nice' about the spinners is that since there are only four directions they can deposit you, if you step on the same one four times (without ever changing your camera, just back off and back on) it will end up pointing you in your original direction.
|
|
#
?
Oct 3, 2017 01:51
|
|

|
Putting spinners in mapless rooms is a seriously nasty move.
|
|
#
?
Oct 3, 2017 04:02
|
|
|
Oh, and thanks for the gold! Kind of a surreal feeling to see that bar pop up next to the thread title.
|
|
#
?
Oct 3, 2017 04:07
|
|
|
Still not Wizardry IV and Realm of Whirling Dervish.
|
|
#
?
Oct 3, 2017 07:37
|
|

|
McFrugal posted:I solved the spinner maze problem in this game by putting a directional arrow down that points to where you wind up facing after entering the room for the first time. An additional arrow to indicate which direction you first enter each room from also helps. I did exactly this. It still sucked because by the end of the maze, I was feeling motion sick.
|
|
#
?
Oct 3, 2017 16:43
|
|
|
Listening to the town music tracks gave me a very distinct 1970s bossa-nova vibe, which seems to be pretty common in JRPGs. I wonder how that came to be...
|
|
#
?
Oct 3, 2017 18:43
|
|


|
Hahaha MEGAQUEEN is learning Swashbuckling too, with her big gun. : Hey Susan, can y- : Hey Susan, can y-*BLAM BLAM* : The name's MEGAQUEEN, motherfucker.: And I always double-tap.
|
|
#
?
Oct 3, 2017 20:41
|
|
|
Oh, looks like we've entered the part of the postgame in the EO3/EO5 LPs where the level design begins to hate you and everything you stand for. I can't decide which is more spiteful, Mapless Spinner Hell or the EO5 thing. (edited for spoilers) vdate fucked around with this message at 15:31 on Oct 7, 2017 |
|
#
?
Oct 4, 2017 00:46
|
|
|

|
| # ? May 29, 2024 22:25 |
|
|
That spinner maze makes me want to vomit uncontrollably. That's the kind of thing that'd make me quit the post-game or give up and find a guide. Though it makes me wonder, does every post-game EO stratum have that one floor that's basically a giant middle finger? I've only done the post-game in EO2U, where I can say from experience that the answer is yes, though probably not to this degree.
|
|
#
?
Oct 4, 2017 11:11
|
|