

|
Zaodai posted:I love that the Steam Giant's intro letter is "We could totally kick all your asses because we are better than you in every conceivable way, but, uh... if you could spot us some guns, and money, and maybe an army or two, we wouldn't turn it down..." Ah, the typical Civilisations diplomacy... (Our words are backed by nuclear weapons! We surrender.)
|
 #
?
Sep 12, 2017 21:39
#
?
Sep 12, 2017 21:39
|
|


|

|
| # ? May 3, 2024 08:27 |
|
|
Synkora posted:We also only started the rebellion because the racists decided to strike first. There's one bit I should've mentioned in a mob description earlier: the Atmos invasion force's armor was of Allied Kingdoms manufacture, and the Kruk orcs would've noticed where the Atmos got their shiny new equipment - going on the offensive is a fairly reasonable response to someone who, by all appearances, is trying to organize your genocide by proxy. By the time you figure out it was just one rogue commander, you've already started the war and killed their ruler's lover. At best, it makes your character a step beyond Charles Bronson in the old Death Wish movies. I mean you're out for vengeance, but at some point when you're killing their families and burning town outposts you aren't even an anti-hero anymore. Plus there's the whole ordeal of basing it on planned genocide where if the Orcs actually had the firepower and the numbers to murder everyone on the entire continent (as we are in the process of doing), that maybe the others were equally justified in fearing their eventual genocide by crazed gun-and-saw wielding orcs? This whole continent, kind of a shithole.
|
|
#
?
Sep 12, 2017 21:48
|
|


|
What a heap of nonsense. A hero is someone who does great deeds. They don't have to be good, whatever that's supposed to mean. Thus, as we are slaying many enemies of our people, adding to the fame of our name and species, we are absolutely the heroes of this story. The Saga of Dr Orktopus, Psyshot, will be told to the survivors, either in celebration or warning, but that doesn't matter so long as it is told at all.
|
|
#
?
Sep 13, 2017 00:27
|
|
|
The world of Eyal seems to be a shithole in its entirety. The only major power that seems to have its heart in the right place is the one that previously destroyed the world and is trying to atone and ensure it doesn't happen again, and even then they make devastatingly poor decisions regularly and mass-produce rogue agents that become villains. Everyone else is a bunch of consequence-blind warmongerers or war profiteers at best, genocidal lunatics at worst. It's so relatable...
|
|
#
?
Sep 13, 2017 14:06
|
|

|
 Our next destination is Dominion Port, just south of where Gorbat Pride used to be.  The first couple of floors of Dominion Port consist largely of slogging through musty old sewers. Troll guards (basic bulwark types) and troll pirates (rogues) block our way. The sewer water is poisonous and will poison us if we step in it, though our Cloak Tessellation allows us to more or less ignore it if we don�t linger too long. Also, I forgot we�re still wielding a crappy basic radius 2 lamp. Unfortunately we haven�t come across a better one or a lamp shop yet. EoR is somewhat short on some types of loot compared to the main campaign.  Troll Marauders are a step up from the basic pirate types, but we can still take them.  Sewer gators and giant alligators are the second most common enemy type here. They�re surprisingly bulky compared to the trolls, and can be a bit of a challenge to the unprepared.  More dropped letters lying around in the sewers.  Troll Captains are a step up from the common troll pirates here. They know the usual dual-wielding skills, but dual-wield 1h weapons, so they hit a good deal harder than their dagger-wielding brethren.  Sometimes, conduits like this can be found on the wall. The plain ones can�t be interacted with, the yellow ones can be cracked open. Watch out though, because�  �they spit out either a large collection of giant alligators, or a couple of rare/randboss ones (sometimes both, if you�re unlucky). Incidentally, fighting these guys is a pain because our light radius isn�t large enough to see them if we get any significant distance away from them, so we have to either place ourselves in harm�s way or cast Condensates into the darkness.  Mindslayer Gators are a surprisingly common combo. I have no idea as to why.  Of course, I�ll take a mindslayer over something like, say, a sawbutcher/bulwark. What a pain.  Our strategy is mostly running around this loop while firing Solidify Air at his general direction to damage him while buying us time. We have to be careful because he has Assassin�s Surprise equipped � a set of artifact gloves that can shoot Crippling Poison darts at us from a distance, which gives us a high chance of failing non-instant talents. Using our Frost Salve to cure it will always work, but if we have any other physical effects on us then that�s a problem because our basic salve can only cure one effect at once.    It takes an eternity of wearing him down before we get to the point where�we realize this strategy is ineffective once he hits 50% health due to Vitality healing him. Then it takes even longer to wear him down with our regular repertoire while also having to stand way too close for comfort. Eventually he goes down, though, and drops his fancy gloves plus a decent artifact mindstar. We�ll take the gloves for now until we find something better.  Anyway, time to head down. The sewers are gargantuan, sprawling levels, and if you want to save your sanity it�s recommended to just mash autoexplore until you hit the exit staircase. 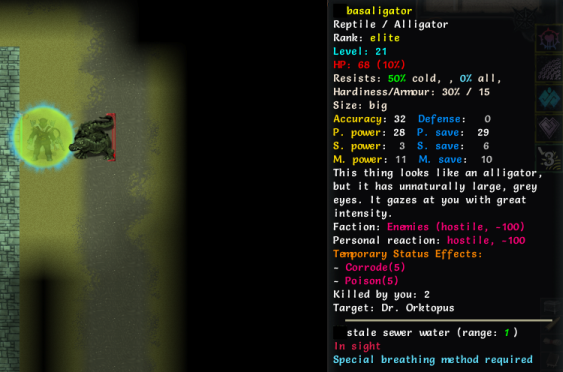 A new enemy on the second sewer floor, basaligators are the top tier of the sewer alligators. They can use Petrifying Gaze to turn you into stone, which paralyzes you for a few turns and reduces some of your resistances. We gained a few more levels from all the killing we�ve been doing, so let�s look at the new skills we picked up.  The last skill in the Thoughts of Iron tree. A free medical injector! Very useful. Leveling it up increases the efficiency modifier and decreases the cooldown.  active gestalt shield or for Improved Gestalt to be off cooldown. If you invest heavily in this one, it makes for a decent shielding talent, but at low-levels the main benefit of it is that it restores a large amount of psi at once, which can be hard to regenerate. It costs all our steam to use, but steam regenerates quickly by comparison, and our steam generators can be activated once every 20+ turns to instantly restore a large amount of steam.  The last skill in the Chemistry tree. This one just straight-up grants us bonus Steampower � in fact, it�s pretty much where the bulk of it comes from. We neglected this skill on Skeletor because he was just in it for the tinkers and didn�t actually need steampower, but now that we�re a tinker class it�s one of our most important skills.  While moving along, we stumble upon this hidden vault staircase. You might recall them from High Peak � they take us down to a sub-level that contains a single hidden vault. The staircase will crumble from too much use, so we can only retreat/re-enter so many times. We can take a look, but no promises of completion � some of these hidden vaults can be pretty tough.  So far, so good � mostly common enemies, just tougher than usual. We�re advancing by slowly tossing out Condensates and Solidify Airs into the darkness, so quite a lot of the weaker ones are dying without ever getting into sight range.  We didn�t find that much gear, but there was a nice prize � a radius 7 lamp, which alleviates our vision issue quite a bit. You can see there�s slightly more vault to the right, but we have to dig to access that area, and we don�t have any digging tools.  Troll Aquamancers are ice wizards, with a focus on freezing spells and Water Bolt. 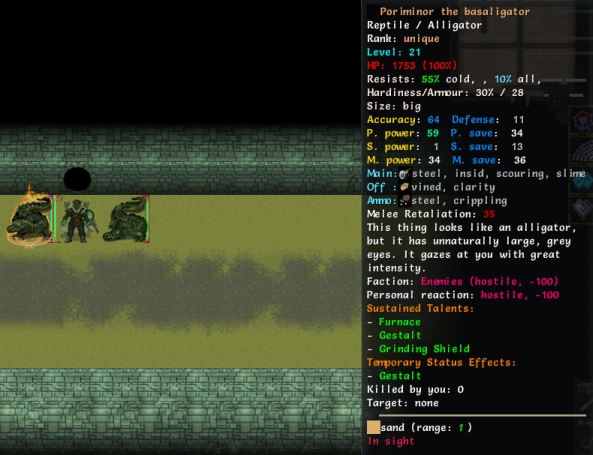 What an odd combo � a psyshot/sawbutcher alligator. Naturally, he can�t shoot at us, and just wielding one saw decreases his damage, but we still don�t want to get into melee range. Fortunately, our better lamp means we can actually shoot at him from a distance now, and not in the general direction of where he�s assumed to be. He drops a randart steamsaw which we don�t really need, but we�ll take the EXP and pick up a couple of new skills.  The third Action at a Distance skill. A ranged lightning bolt that jumps from wet foe to wet foe. All enemies hit are inflicted by the Seared effect, which greatly lowers fire resistance and mental save. Searing enemies is pretty useful for setting up for big combos/psionic debuffs, but we first have to beat physical save to inflict Sear.  Our Metalstar effect now burns affected foes and saps steam from them. The burn damage doesn�t break daze, so that�s helpful.  The third floor of Dominion Port is, thankfully, a nice change of pace from the sewers. Similar to the prides, it�s a large open floor with various troll pirates wandering about, with buildings scattered about.   We pick up some ship logs from the corpse of one of the pirates.   The most significant feature of this floor is, naturally enough, the chests of loot lying around. They can be safely looted similar to the market stalls of the Vaporous Emporium � this floor alone accounts for at least 80% of the loot in the EoR campaign.  Couple of nice things. That artifact heavy armor is tempting, though only a minor improvement over our current gear. It�d take 48 strength to get there though, which means we�d have to invest/statstick our way there, and by the time we get there we might very well have found something better (it�s not exceedingly good as far as randart armor goes). Maybe better to just melt it down for voratun lumps for now.  Ascending to the top floor of Dominion Port removes the staircase, trapping you on the top floor unless you recall out. Of course, if you�ve cleared the rest of Dominion Port, that shouldn�t be too much of a problem. Lots of troll pirates here, but the Condensate-Boiling Shot combo is enough to take out a crowd of almost any size.  We find yet another dropped pirate log lying around on the ground.  Moving along, we run into the chief of the pirates: Admiral Korbek, a unique troll gunslinger. He wields a gun in his offhand, and a longsword in his mainhand.  Also, uh, Darkgod randomly came on and granted everyone a few turns of invulnerability, plus the Bunnyficated effect � every time we deal damage, we have a 5% chance of turning into a Vorpal Bunny for a couple of turns, which increases our crit chance by 10%.   Upon Korbek�s death, he dropped this fancy spyglass.  Also, he dropped this note. Stay off cheerblossom, kids.  And as a final surprise, this Yeti Behemoth is lurking in a corner. The Yeti Behemoth is a large, bulky foe with high racials and a couple of antimagic skills. Fortunately, we aren�t affected by antimagic, and can pelt away at him from a distance at our leisure while he tries to close in.  He dropped yet another set of muscle tissue. I�m sure we�ll find a use for those eventually.  Someday, we�re going to find a problem that can�t be solved by bombing its structural weakness. Today is not that day.  On our way back, we stop by Kaltor�s, using all our gold to buy the one item that we know for sure won�t be outclassed.  The Brass Goggles have many benefits, but foremost among them is that +0.2 mastery to Physics and Chemistry. Wearing them grants us the ability to craft high-tier tinkers at a far lower level than that which would be usually needed, potentially saving us a lot of generics in the long run. Even if we find a hat that outclasses it, we can still keep it for tinker crafting. Also, we now have 81 Cunning thanks to our various equipment bonuses, and haven�t even been investing in it that heavily. Plus, Cunning increases steampower as well, so that�s helpful too. 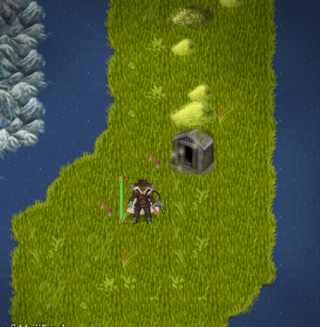 While we�re back on our starting peninsula, might as well check out that Krimbul area.  The first floor of Krimbul Territory consists of this fancy cave with glowing walls. Whitehoof ghouls and regular ghouls are common here. 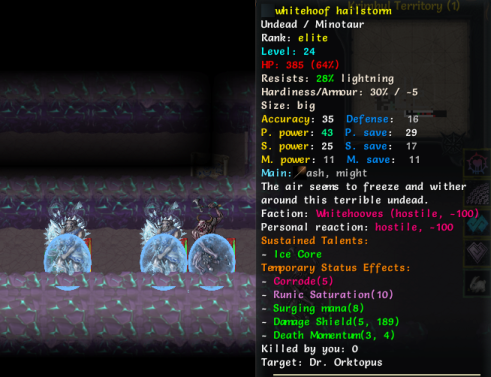 Also whitehoof hailstorms, undead minotaur wizards with a focus on ice spells.  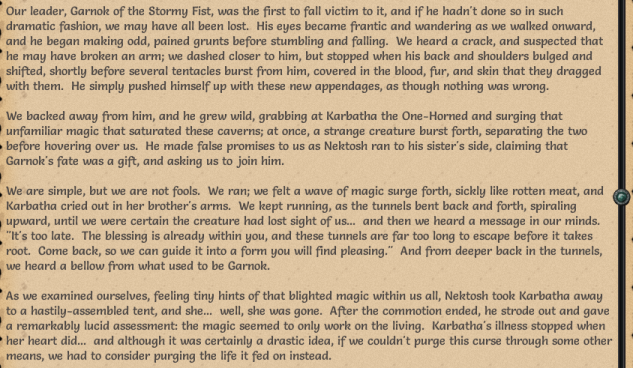  We found a history of the whitehoof tribe, carved on the walls of the Mana Caves.  One thing to keep in mind about whitehoof ghouls: unlike regular ghouls, they actually have a bonus to global speed instead of a penalty. Combined with the increased speed from Death Momentum, they move at lightning-fast speeds and attack only slightly slower than that. 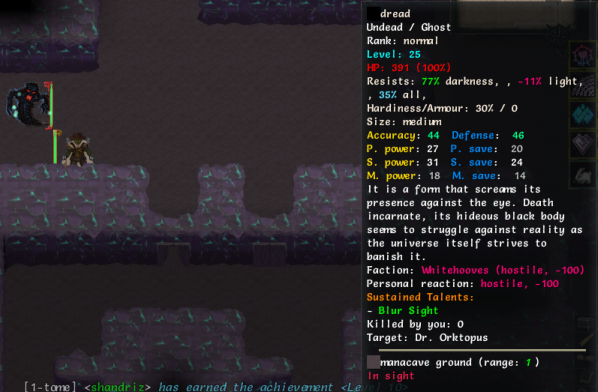 On the second floor, we run into an old rival. Oh well, at least it�s a regular dread and not a dreadmaster. We can shrug off its hexes easily, at least. 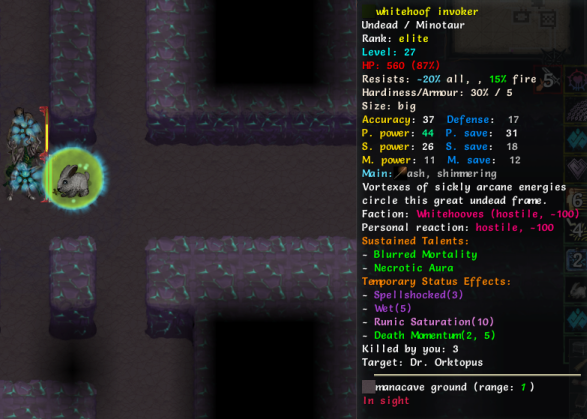 Whitehoof invokers are whitehoof necromancers, and the usual necromancer caveats apply to them. Unfortunately, we can�t Attenuate them away like Skeletor could, so we have to just wear down their negative health the slow way.  One of the ghouls was clinging on to this note. We�d deliver it to Korbek, but�well, you know.   And carved on the walls, we find�definitely not more whitehoof history. We�ll make sure of that.  The third floor of Krimbul Territory is entirely underwater. The usual aquatic enemies roam the land, as well as the unbreathing whitehoof ghouls.  We could hop from bubble to bubble Lake of Nur-style, but we�ve got a better alternative. Even a tier 1 Air Recycler restores enough air to completely counter air loss from being underwater, allowing us to safely explore.  It isn�t very long before we find our destination, anyhow. Entering the crack in the airship hull takes us to the final floor.  Heading up into the airship, we run into Nektosh himself. He�s a whitehoof mage with an eclectic collection of spells � a couple of corruption spells, some necromancy, and some Doomed/Cursed talents on top of that.  His most notable attack, however, is this powerful laser attack. Luckily, the gigantic warning sign, the glowing beam path and the several-turn windup means you have to be either very dense or unlucky to get caught in it.  Good thing we got out of the way, too � look what it did to that wall. He�s not going to get another chance to pull that off, as weakened as he is now.   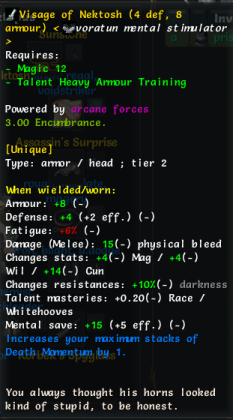 From his corpse, we picked up this note and his fancy laser hat. It�s out of laser charges now, though. 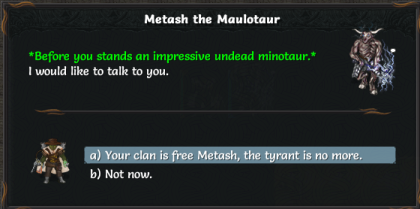  We head back and tell our drinking buddy the good news. The first time you complete this quest, it unlocks the Whitehoof race. Also, we picked up a few new skills, so let�s take a look at them.  Finally, an explanation for our name. The first skill in the Steamtech/Dread tree, a high-tier tree we unlocked with our level 20 cat point. Every turn, the mechanical arms will automatically mindstar-punch up to two enemies in radius 3, inflicting the Harassed effect on them, which reduces their total damage by a pretty large amount for a few turns.  Setting up for the special effect of this one can be a little difficult. We don�t have that many �fear or nightmare� effects, and even if we successfully inflict the associated debuff, the target in question will probably still go for us unless we�re completely out of his line of sight, possibly with maxed-out Cloak Gesture or the like. We can still use it as a high-damage shot, though. 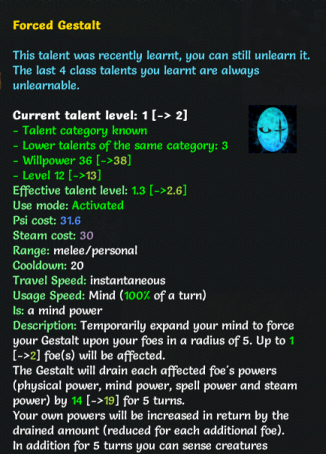 beyond your sight, even through walls in radius 11. A little costly, but effective when it works. Drains the powers of any foe nearby and adds them to us. Enemies can save against the Gestalt, though I think we might still benefit from the boosted power nonetheless. Also acts as a wide-radius scouting move that works through walls, which is always helpful.  Our third orc racial. Free damage resistance for killing enemies and bonus resistance penetration. Always helpful, and we might invest a little more in it if we�re short on respen late game. That�s about it for this update. In the next one, we�re probably going to get around to working on that Sunwall issue.
|
|
#
?
Sep 15, 2017 17:11
|
|

|
I have to wonder if the flavour text writer changed between Age of Ascendency and Embers of Ruin, because, well, some of the flavour text in this expansion is funny in a rather different way from the stuff in AoA. (I think the Saw Horror's description is probably exhibit A, with Nektosh' Visage being exhibit B.)
|
|
#
?
Sep 15, 2017 19:07
|
|
|
I still grin whenever I see a Saw Horror's description.  Also I think the main difference is that 95% of AoA was written and designed entirely by DarkGod himself, with a few people coming on board later to help with class balancing/design/redesign after most of the core was finished. But for EoR, those people were wholly on board, and I think their influence is part of what you feel.
|
|
#
?
Sep 15, 2017 19:58
|
|


|
For my part in it: I sorta took over the job of making the lorenotes from a slew of volunteers, most prolifically Darren Grey, starting with the actual notes in Tannen's Tower (not the rest of the quest), the Conclave Vailt / Ogre stuff, High Peak, and a handful of assorted little things in the main campaign in addition to doing all of the lorenotes found in the expansions (rexorcorum's illustrations excepted, naturally). Dialogue is mixed between me and DG; mob descriptions are mostly DG's doing (I think I just did descriptions for Nektosh and one late-game boss in this campaign), but Saw Horrors were another dev's brainchild entirely, and I think said dev also came up with most of Embers' artifacts and corresponding descriptions. There's a fair bit of overlap - Razakai's helped me greatly with creative stuff for the next campaign, in addition to making or revamping a ridiculous number of classes.
Synkora fucked around with this message at 21:06 on Sep 15, 2017 |
|
#
?
Sep 15, 2017 20:44
|
|
|
The description for that rare gator was pretty drat funny.
|
|
#
?
Sep 15, 2017 22:29
|
|


|
Is there a place I can go look up creature descriptions for? I don't want to backtrack through the thread, but the TOME Wiki has very little, for example searching for Saw Horror turns up zero pages whatsoever.
|
|
#
?
Sep 16, 2017 00:03
|
|

|
Meanwhile, on Maj�eyal� So I hear you ogres are good with handling big weapons. I�ve got a big weapon you can handle, if you know what I mean.  I�m talking about my�hey, wait a minute, this isn�t Elvala!  The Abashed Expanse is the starting zone of Doomelves, Demonologists and Doombringers. It�s one of the harder starting zones � you start out in a wide-open area with very little cover, and hard-hitting demons surround you. The one to our right is a demonic clerk, a reskinned fire imp.  A few losgoroths and manaworms float around in space near the platform. They aren�t much of a threat compared with the demons, but they certainly don�t help.  A 2-handed weapon user, Investigators like to close in with Rush, then follow up with Draining Assault to shred our defenses while healing themselves.  Mutilators, by contrast, like to use Abduction to pull us towards them before stabbing us. This open area can be a little difficult when you�re facing multiple Investigators and Mutilators at once, particularly since you�re level 1 and probably have few movement or healing options. A good survival tip is to use the Fire Havens (as shown in the picture) to heal from the fire spells of the demonic clerks.  Fortunately, the next bit is this nice, relatively safe spiraling corridor, where you only have to face one foe at a time.   Upon heading to the next floor, more of our lost memories return to us.  The second floor of the Abashed Expanse is a tangled mess of rectangular rooms. It�s still easier than the large open area that the first floor was, though.  There are some demon statues standing around in this zone. We look, but don�t touch � even a generic wretchling or quasit can give us trouble if summoned at this level. 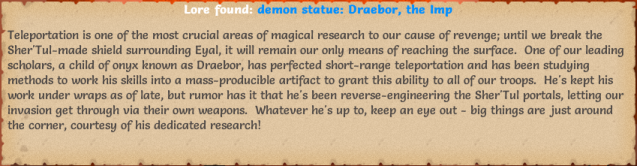 Draebor is a souped-up fire imp who leads the Fearscape regiment in the alternate farportal, which can only be accessed by refusing to give the Orb of Many Ways to Tannen (in which case he swaps it out for a demonic fake instead).  Harkor�Zun is an interesting demon. He tends to show up in fragmented form in mountainous zones, most likely Daikara or Tempest Peak. Defeating all his fragments causes him to reassemble, and defeating him in his reassembled form unlocks Stone Magic for all classes to use.       Also, we found this pile of stone tablets lying around.  Crystal, eh? We�ll have to keep an eye out for that.  Oh, there it is.  Smashing the crystal summons the Planar Controller, the boss of the Abashed Expanse. Compared to some of his underlings, he�s not too difficult by comparison. His big trick is Fearscape Shift � a move that teleports him and summons a field of demonfire at his new location, which heals demons and burns all non-demons. Just make sure to walk backwards and draw him out of the field whenever he pulls that trick.  And once he�s defeated, this planar portal pops up, which teleports you to the second level of a random t1 dungeon. You can just Rod of Recall out straightaway if you don�t like your chances, though. So there I was, a demon longsword at my throat. Hey, speaking of longswords�  Damnit, not again! The Anteroom of Agony is a mid-tier zone that has a chance to trigger every time a character who started in the Abashed Expanse uses their Rod of Recall once past level 17 or so, with a near 100% chance at about level 20+. It can be a pretty challenging zone, so if you want to be extra-careful, remember which zones require the Rod of Recall to exit (pretty much just Tempest Peak and the Mausoleum, though other zones may require a bit of tedious backtracking), then hold off on completing those until much later.  The view up here is lovely, at least. Unfortunately, jumping back down doesn�t seem to be an option.  This one just takes us to the next section of this area, unfortunately.  Some torture equipment. Lovely.  And a note that a nearby fire imp dropped. 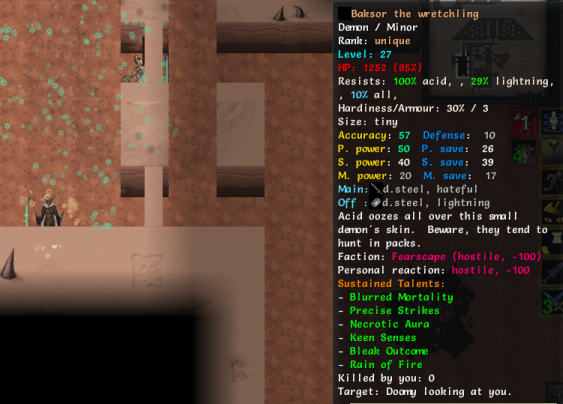 Most of the demons in this area are common fire imps, wretchlings and quasits, with the occasional quasit squad leader � a quasit with a couple of extra demonologist skills. The portal guardians spice things up a little more, though. Demonologist/necromancer combos are common.   Upon his death, he dropped this history text, and cleared the path to the next section.  To shake things up, this one appears to be a necromancer/archmage instead. Still just as annoying.  He dropped this one, and cleared the path to the last and final section.   The last section was lying just in front of the entry portal.  For our final challenge of the Anteroom of Agony, we face Rogroth, the Eater of Souls. Rogroth himself doesn�t have many skills, but he can summon demons and use his custom skill � Soul Eater. Every time we kill a demon in his general vicinity, he devours their soul on death, turning them into a demonic husk � a higher-leveled version of themselves with additional bulk and a couple more demonic skills.   Upon his defeat, he drops this note. He also has a high chance to drop his custom belt, the Jaw of Rogroth, which boosts the maximum amount of vim and souls you can store.       And before we head back, we stop for a moment to appreciate the art. So you�re an archmage? That�s cool, I�m a mage myself. I�ve got an elven-wood staff to show you, if you catch my drift�
|
|
#
?
Sep 17, 2017 10:18
|
|
|
I like a lot of the alternate race starting zones, but I can honestly never get myself to play anything but Cornac these days because the extra skill and cat points are just such a massive boon. I think my favourite's ultimately the extra dwarf T1 stuff... but racial skill-wise they always seemed kinda dull to me.
|
|
#
?
Sep 17, 2017 14:23
|
|
|
Wait, so if you pick doomelf (what are they again?) you are forced into the demon campaign or what?
|
|
#
?
Sep 18, 2017 02:14
|
|
|
Deceitful Penguin posted:Wait, so if you pick doomelf (what are they again?) you are forced into the demon campaign or what?
|
|
#
?
Sep 18, 2017 02:49
|
|


|
Deceitful Penguin posted:Wait, so if you pick doomelf (what are they again?) Doomelves, like that last document said, are Shalore that the demons have kidnapped and modded into something new. Each of their racials is thematically a 'corrupted' version of one of the Shalore racials : - a Shalore's Grace of the Eternals (activated ability granting global move speed increase for a few turns) becomes Haste of the Doomed (a 0instant-speed short-range teleport that you can follow up with a similar teleport, albeit one which does take a turn) - Magic of the Eternals (bonus to crit chance and power) becomes Resilience of the Doomed (decreased duration of detrimental effects and reduced incoming crit damage) - Secrets of the Eternals (a sustain that grants invisibility and deactivates itself on taking spike damage beyond a certain threshold) becomes Corruption of the Doomed (a sustain that deactivates itself and turns you into a duadlathen - which among other benefits has permanent stealth - on taking spike damage beyond a certain threshold) - Timeless (an activated ability that ticks down time remaining on all debuffs and most cooldowns, and increases time remaining on buffs, for the character) becomes Pitiless (an activated ability which increases cooldown of any talents presently on cooldown, increases the duration of detrimental effects, and ticks down turns of beneficial effects, for a target creature).
|
|
#
?
Sep 19, 2017 03:14
|
|
|
Huh. So this Embers stuff isn't a fully fledged campaign? Because it seemed like it was building up for some big stuff; I was expecting raids into demon lands, maybe teaching them the power of love or some such. Maybe some deific fratricide?
|
|
#
?
Sep 19, 2017 04:39
|
|
|
Deceitful Penguin posted:Huh. So this Embers stuff isn't a fully fledged campaign? Because it seemed like it was building up for some big stuff; I was expecting raids into demon lands, maybe teaching them the power of love or some such. The demon stuff (Ashes of Urh'Rok) is not a full-fledged campaign, just a couple of zones that all Doomelves, Demonologists, and Doombringers go through. It's priced accordingly though - like half the cost of the Embers expansion.
|
|
#
?
Sep 19, 2017 09:07
|
|
|
MagusofStars posted:Point of clarity: Embers of Rage refers to the Orc campaign that the psyshot is going through. Which is a full-fledged expansion campaign about 20% shorter than the main AoA campaign that Skeletor ran through. In terms of "main" zones, at least. The core campaign has a lot more optional areas.
|
|
#
?
Sep 19, 2017 09:15
|
|
|
 Our next destination is the Ritch Hive, located north of where Eruan used to be.  Our mission here is to collect ritch eggs and hide them in a secret spot underneath the Sunwall. With luck, the eggs should hatch and unleash a distracting wave of ritches across the Sunwall, which we can take advantage of. 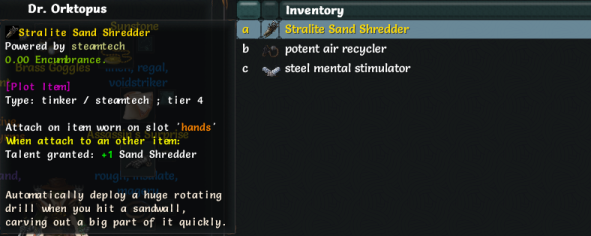 As mentioned in the intro text, we have the Stralite Sand Shredder tinker, which automatically digs out a 1x3 line of sand whenever we walk into a sand wall. However, as with the sandworm caves, the walls will eventually collapse, so we can�t spend too much time hanging around. And yes, they just popped up in our inventory out of nowhere. Sometimes there are plot holes in this thing? Incidentally, if playing as a non-tinker class, you get the Stralite Sand Shredder in glove form instead. 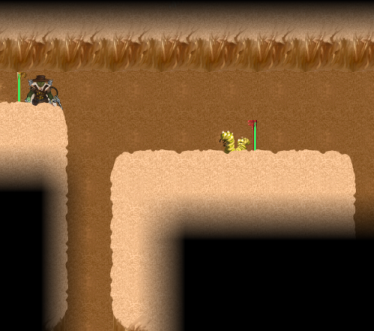 Naturally, most of the enemies in here are ritches. The majority of them are common types, but there�s a few new variants to shake things up. 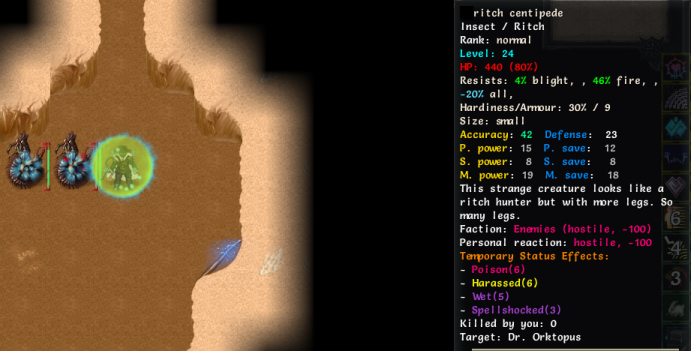 One of the new ritch forms. The Ritch Centipedes know the Sandrush technique, a variant of Rush which also generates a 3x3 square of sandpits at the destination. The sandpits are hidden traps, and will daze any enemy that steps into them for a few turns. If you see one of these rush up to you, it�s a good idea to take a step backwards so you don�t fall into a pit.  The ritch eggs we came here to gather. We don�t need all of them, but picking up more than we need can�t hurt. 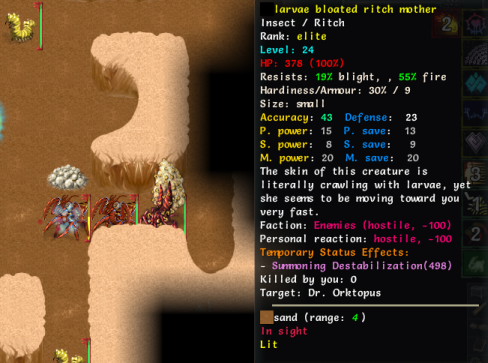 A slightly disgusting new enemy, the Larva Bloated Ritch Mother can summon other ritches. In melee, their main attack is Ritch Larva Infect, a low-cooldown attack which infects us with ritch larva. The larva do increasing amounts of physical damage over a few turns before ripping themselves free, dealing additional fire and physical damage and spawning a pair of ritch hunters. It�s not an especially debilitating effect and can be ridden out without much issue, but it is annoying. As a side note, that �Summoning Destabilization� debuff you can see is a special debuff that only applies to the generic NPC �summon� skill, since they aren�t really limited by resources. It increases the cooldown of the summon skill every time you use it while Summoning Destabilization is still active, and prevents bulky enemies from overwhelming you with summons. Not something to be concerned about, unless you�re playing a possessor. 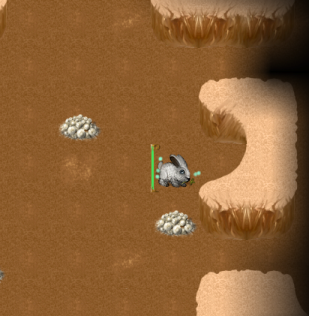 Also, we�re a bunny again.  One annoying thing about this area is that the fire-associated ritches have very high fire resistance, and thus our Condensate-Boiling Shot combo isn�t quite as effective. Of course, we can still finish them off easily with raw shot damage.  Our Mechanical Arms in action, mindstar-punching a nearby larva. It�s both a useful crowd-control and anti-boss move, thanks to the Harassment debuff.  Another hidden vault. Worth taking a look.  Oh, it�s this type. You might remember the time we came across one of these in Dreadfell. We don�t really need staves, and those robes don�t look like much, but we might as well check them out since we�re here. 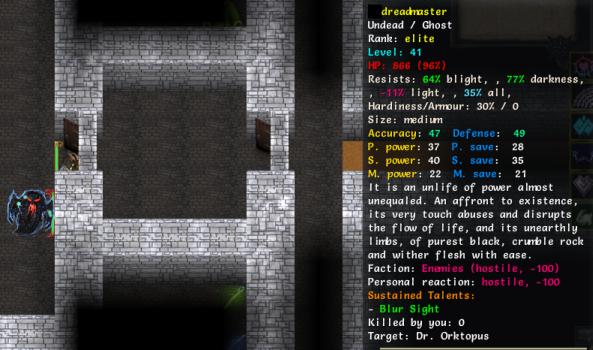 Hello again. 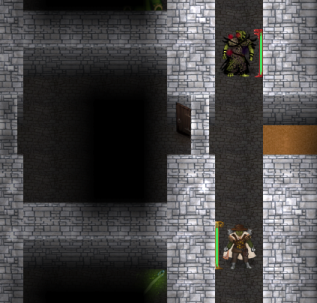 The mages have much higher range on their spells than we do with our shots, so we hit-and-run to draw them out. Once they�re within range, we can win the damage race easily.  As you can see, the dread room has a pickaxe in it. We can�t reach it without a digging implement of some kind � such as, say, a pickaxe.  We picked up a new gun, at least. A fairly generic t3, but it�s still an improvement over Talosis Counterpoint.  Its special effect is Overgrowth � every bullet that hits has a 10% chance of generating an AOE field of pinning moss, which deals nature damage and slows enemies for a few turns. Not much else loot-wise, but we picked up a couple of new skills with the EXP we earned.  The third skill in the Psionic Fog tree. Generates a large area of burning steam which does small amounts of mind damage and Sears them, though not to the extent of Superconduction. 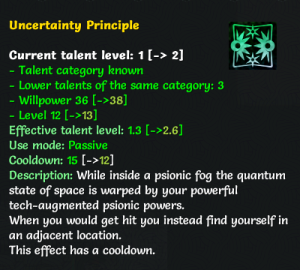 A free teleport whenever we�re standing in our Psionic Fog, with a somewhat long cooldown. It�s worth going 1/1 in these two skills just for a free escape every once in a while, if you�re completely out of other options. 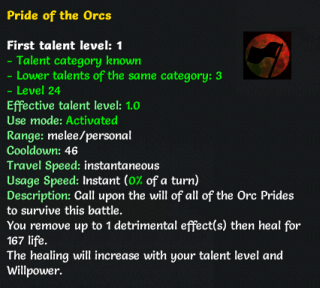 And our last and final racial. Removes debuffs and heals us. Offers a decent amount of healing just for one point of investment.  Moving on. The first two floors of the ritch hive are fairly ordinary dungeon floors, and can be autoexplored without much issue. The third one, however, consists of small isolated air pockets, similar to the Sandworm Lair. No sandworms, so we have to make our own way through it with the Stralite Sand Shredder.  Track is useful here, or some other scouting move if you have it. Enemies will show up on your minimap, allowing you to beeline for them with the Sand Shredder.  Our Wind Worn Shot in action. The shot has a 10% chance to proc Tornado, a wyrmic skill that spawns a slow-moving lightning projectile. Should the projectile hit its target, it will explode in an AOE burst of lightning damage.  Battle of the psyshots! Of course, we do ten times the damage he does, so it�s not exactly a fair fight.  Har har.  Our main goal is to reach the exit on this floor, which takes us to the final level of the Ritch Hives.  Our general direction on this floor is a little clearer, at least. We have nowhere to go but up.  Every so often, we run into one of these ritch parties. They tend to contain a few high-level ritches (especially hive mothers and centipedes), and at least one rare ritch. Annoyingly, shredding through walls takes a turn, so they almost always get the jump on us.  On the plus side, if we make it out of here, we�ll be rich. 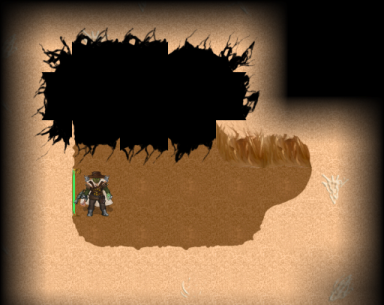 These large holes in the ground show up from time to time. We can�t jump into them, so they mostly just get in the way.  The walls collapse pretty quickly. The main strategy of these ritch parties is not to outright kill you with raw damage (though the rares certainly make a valiant effort), but to bog you down with sandpits and larva while summoning other ritches to fill up all available space, until the wall collapses on top of you and you suffocate.  We picked up our first shot tinker. We could have bought one at Kruk Pride, but we don�t really need the ones they�ve got on offer. Shot tinkers go on our ammo slot, and grant us a custom shot talent depending on tinker type. Unfortunately, you can�t tell what the shot talent actually does unless you manufacture the tinker and equip it, then check out the talent description. The Magnetic Shell magnetizes foes, decreasing their defense and boosting their fatigue by a large amount. It�s not a particularly significant effect � most enemies generate resources too quickly for the bonus fatigue cost to be a real setback. 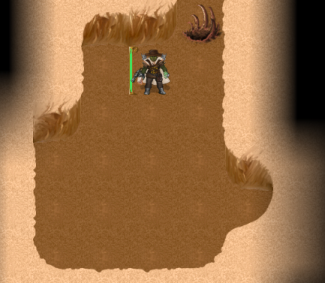 Finally, our destination. It�s nothing spectacular � just this comfy ritch nest at the end of the tunnel. We drop off our eggs, and recall out. 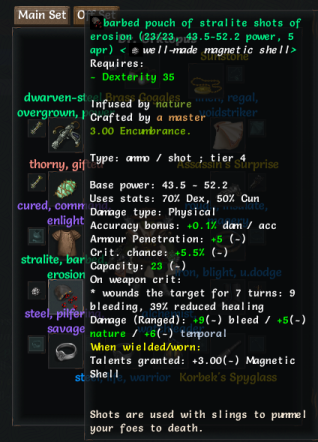 Heading back to Kaltor, we trade in our mountain of gems for some more gold, and pick up a couple more items, though nothing too fancy. We grab that ring of misery we�ve been eyeing, and pick up this bag of shots � despite being a basic green pouch, it still outclasses our Wind Worn Shot damage-wise. We could have bought it earlier (it was even cheaper than the Wind Worn Shot), but lacked the Dex to wield it back then.  For our next area, we�re headed to these fancy ruins in the middle of the Eruan desert.  Despite being a fairly low-level area, it�s worth putting this area off for a bit. That�s because Eruan is horror-central � luminous horrors, saw horrors and oozing horrors are common here, alongside more commonplace fare.  Also common � sandworms and dragons. These hatchlings don�t pose much of a threat, but they�re often accompanied by their larger cousins.  Oh, speak of the devil.   Some fun items in this room. Aetherwalk grants us a small Cunning/Mag bonus and a free Phase Door. We don�t need the arcane bonus, but we might keep it on because we have no better boots at the moment.   The Shard of Insanity drops our mind resistance and removes 100% of our confusion resistance, but grants a large amount of mental save, a bonus to mind damage and a small chance of confusion. Can be activated for Inner Demons, which might be fun.  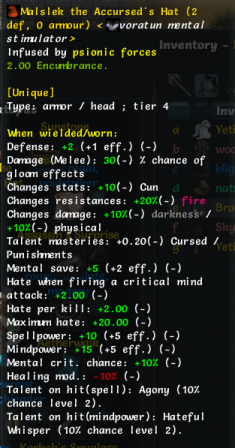 The ultimate Doomed hat, Malslek�s hat boosts our mindpower, mental crit chance and physical damage, and grants our melee attacks a large chance to proc gloom effects. In addition, our mindpower-based skills have a chance to proc Hateful Whisper. All these items are promptly going right on us. Dropping the Brass Goggles means dropping a large amount of Cunning, but we can still keep it around for whenever we want to craft tinkers.  Our destination lies down these stairs. Moving along.  No more trash enemies cluttering up this next floor. It�s horrors all the way.  Worms that Walk are still a gigantic pain in the rear end, but one helpful bit is that we can now stand right in the middle of the overlapping worm blight areas and shrug it off, thanks to our resist all and flat damage resistance.  How do these letters keep turning up everywhere? Oh right, the crappy interdimensional postal service. 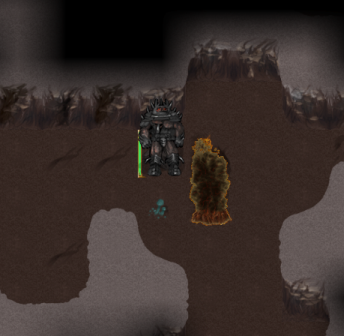 This demon statue turned us into a powerful demon for a few turns. Handy! There were no enemies around, though, so it went largely to waste.  Oh, hello again. Grgglck might claim to have 500% all resistance, but it�s closer to 100%, which means we can chip away at his health by shooting away at him thanks to our small amount of resist piercing. It�s still more efficient to kill off his tentacles whenever they appear, but there�s no reason we can�t do both. We can shrug off his hexes easily thanks to our high mental save, so that part isn�t a problem.   He dropped the Stone Gauntlets of Harkor�Zun, which grant even more physical respen and would have been handy a couple of minutes ago. Oh well, we�ll hang on to them anyway.  While moving along, we picked up a fun tinker. Payload is a powerful t5 steamgun that creates explosions whenever we score a critical with it. It would be nice to have, but look at those requirements! Getting to it would require a lot of investment, and we wouldn�t be able to make it until late-game at best. 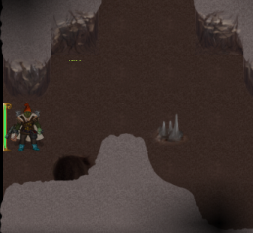 Oh well, let�s keep going.    Huh. Well then.  These guardian psi-ghosts keep popping in and out of existence while spouting lines about vengeance. Ominous. Anyway, let�s see what this machine wants.   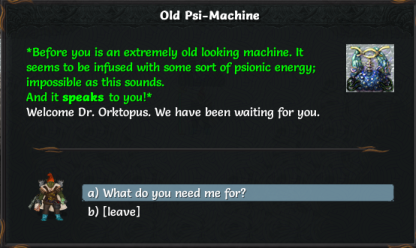    Finally, we have a use for the yeti tissue we�ve been collecting. Handing over one to the machine allows us to pick up one of three things: - a talent category we can learn from the usual main campaign escorts, unlocked (but at 0.8 mastery) - +1 to a talent we can learn from the usual main campaign escorts, at 0.8 mastery. - +4 to any stat As with escorts, the former two options are generally the better choice. Also, reaching this machine for the first time unlocks the psyshot class.  Every time we hand over one of our yeti tissues, the machine spits out a little more of its backstory.  Our first choice is fairly straightforward. We pick up Mindstar Mastery, and start investing in Psiblades. Even without Psiblades active, the mastery still boosts our physical power and mindstar damage, increasing the damage of our mindstar-punches by a large amount.  Our second choice, on the other hand, is not quite as simple. We hit level 30 a while ago, so our choices are compounded by the fact that we�ve got a prodigy we can still put into play. Here�s my general thought process on where we are now: Offense: - Damage: We�ve got a lot of mind-damage boosting gear at the moment, but not too many sources of actual mind damage at the moment, our psyshot active aside. We could pick up Mental Tyranny to solve this, but that would more or less lock us into stacking Mind damage for the rest of the game (which, as a reminder, isn�t that great a damage type because anyone can save against it and drastically reduce any mind damage instance by a large amount). Prodigy-wise, the two most offensive prodigies available to us are Vital Shot and Eye of the Tiger. They could be useful, but we�re good on offense for the most part. Another option would be picking up Superpower for a bonus Will modifier on weapons, but we�d have to start investing in Strength now and it would still be a while before we get there. - Debuffing: Malslek�s hat and the Shard of Insanity allow us to stack a lot of debilitating debuffs. Something I�ve been considering � we actually have a decent amount of talent-fail debuffs that we can stack: Crippling Poison from Assassin�s Surprise, Gloom confusion and regular confusion, and Mind Drones. If we went Antimagic, we could also pick up the Spell Feedback prodigy. If we went all-in on this route we�d probably need to max out Forced Gestalt and Superconduction for max mindpower boost/mind save lowering. Defense: - Armor: An area of least concern for the most part, as we can do a pretty good job of staying out of melee combat (though all the gunslingers mean it�s not something we can completely ignore). We still have yet to commit to either light or heavy armor as far as Armor Training goes, and thus the option to go massive is still technically open to us. There�s still the possibility that we could find and complete the Steam Powered Armor, and thus the Steam Powered Set, which would be a gigantic power boost to any tinker class. However, we still haven�t got enough Strength to reliably wield any heavy or massive armor of a decent tier. We could pick up Chant of Fortress from the psi-machine, which would give us a free 15% armor hardiness. However, doing so would lock us out of Antimagic. We could also pick up ICCTW (and then PES or Superpower for our next prodigy to capitalize on that), but that would require making it to 50 strength first. - Resistance: Molten Iron Blood gives us 23% resall, but we�re still taking a hefty amount of damage from spells � a little too much for my taste. We could start investing in Thick Skin, but we don�t have the Con to get far in it yet. Another option available to us is Antimagic. Some of our gear is still arcane, though not the stuff we really care about, so replacing them wouldn�t be too much of a hassle. As a psyshot, most of the endgame-tier stuff we�re looking out for isn�t arcane-powered anyway. We don�t have the generics to spare to get very far in Antimagic right at the moment, though, so taking it would be more of a detriment than anything right now. If we went down this route, we could pick up Tricky Defenses or Spell Feedback with our prodigy. Yet another option is going for Technique/Mobility. Picking it up and investing in Trained Reactions would allow us to mitigate a lot of really big hits. However, we�d be locking ourselves into light armor for the rest of the game. That wouldn�t be much of an issue (given how much we�d have to go out of the way to start going for massive/heavy armor at this point), but as with Antimagic, we don�t have the generics to spare either. If we go down this route, there�s another point to consider: do we pick it up via the psi-machine, or via Worldly Knowledge? The former gives us 0.8 category mastery, the latter 0.9, but takes up a prodigy point. There�s a fourth option � we could invest heavily in Instant Channeling and Improved Gestalt, which would give us a fairly large, low-cooldown psi-shield. It would cut into our offensive investment, though. - Debuffs: Right now, we�re relying on our salves and racials for dealing with debuffs, and it�s been working out decently well so far. If we wanted to be extra-safe, we could pick up Technique/Conditioning for Unflinching Resolve, which would give us a decent chance of automatically curing the worst physical debuffs (stun, blindness, etc.) every turn. If we go down this route, we�d have to face the same question as with Technique/Mobility: pick it up via the machine, or via Worldly Knowledge for the extra mastery? Another option is picking up Spine of the World, but we don�t have anywhere near enough Con or Con statsticks, so we�d have to hold off on that for a while. Expect very few of these questions to be answered in the next update, because we don�t have the generics for any one of them to be a viable option yet. Most probably, we�ll muddle along and see how things go for a bit.
|
|
#
?
Sep 19, 2017 10:41
|
|
|
Depending on available Generics, I'd probably take Antimagic if I had a bunch, for the defense(being able to drop down huge AoE silence is nice for avoiding hurt from mages, and antimagic shield and... I forget the first passive... can provide a good bit of extra defense against a lot of sources of injury), otherwise Vital Shot, because killing things before they can kill you is a very effective defense.
|
|
#
?
Sep 19, 2017 16:09
|
|
|
Well, the gently caress Destiny Ghost Brigade seem like pretty cool dudes. Nothing bad could possibly come of helping them!
|
|
#
?
Sep 19, 2017 17:58
|
|
|
We�re already fairly familiar with the next two areas, so they�ll be covered fairly briefly. The Ruined Dungeon is also accessible from the Embers campaign, largely so that you can take your Embers characters into the Infinite Dungeon if so desired.  Psyshot-on-psyshot violence was a common theme in this area.    This is the alternate riddle for the Ruined Dungeon.  To solve this one, activate the orbs in this order: water orb (river), dust orb (stone), wind orb (feather), seeds orb (tree), magical orb (eldritch) and fire orb (flame). We pick up the usual ruined dungeon loot. Some nice stuff, but none of it useful to us.   A light-damage boosting dagger. Comes in a set with Moon, a darkness-boosting dagger.   We�ve seen this one before, I believe. Attack speed scales with strength and size, caps at 125%. Okay mid-tier 2-hander if you can find it early.   We�ve seen this one too, I think. A solid t3 2-hander � small amount of stun/confusion chance and a lot of bonus light/darkness damage.  Moving on. Darkgod also dropped Poosh on everyone at the same time he dropped Bunnyfication, so it looks like we�re off to that lost land once more.  These teluvortas are a lot easier to deal with now that we aren�t reliant on temporal damage anymore. 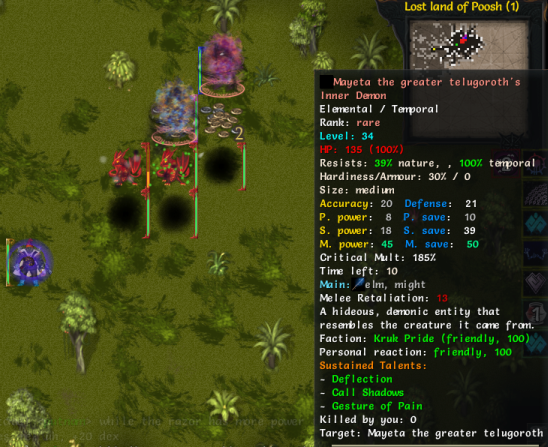 Inner Demons in action. I love this stupid skill. 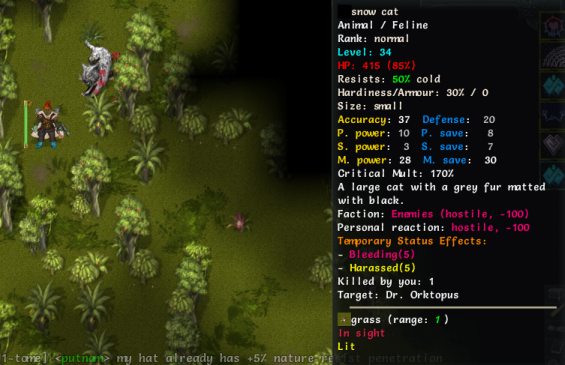 One useful thing about Mechanical Arms is that they�re never taken by surprise and will auto-attack enemies stealthing/rushing/teleporting up to us, even if we can�t. This does a lot to blunt the advantage gained from the element of surprise.  Time for a rematch. Let�s hope he goes down a little quicker than he did for Skeletor.  More fun with Inner Demons. Even better once you add temporal duplicates in the mix.  And we grab the Heart of Poosh again. It�s doubtful we�ll ever use it, but it�s nice to have the option. Not much else of note. I don�t want to progress any further without upgrading ourselves to the fullest extent possible, so it�s time to start spending money.  We head over to Kaltor and pick up some more stuff. Dreamweaver is a gun that gives us more mindpower and mental crit, and can be used for an AOE mind/sleep attack. It�s doubtful that we�ll use that much, but again, it�s nice to have the option.  We can never have too much mindpower. Also, Lucid Dreamer, more saves, and the Slumber ability to set up for Inner Demons.  An odd little mindstar. Most of the damage done is physical, but slightly over half its damage is split up into four different elements, as you can see. It can also be activated for a random-element breath attack every 30 turns.  And we pick up a few more tinker schematics from the store. We round out our Salves, pick up the Kinetic Stabilizer for our boots and replace Magnetic Shell with Saw Shell (a very strong custom shot that also deals bleeding damage).  Finally, we bite the bullet and pick up Antimagic. We can only pick it up at 0.8 mastery, but that�s better than nothing. Our first antimagic skill is Resolve, which works similarly to Premonition � every time we take non-physical/mind damage, we gain bonus resistance to that element for a few turns. If AM shield isn�t active, our equilibrium also decreases and stamina increases when taking elemental damage. Boosting this skill to level 5 allows this secondary effect to work even while AM shield is active, but with our lowered mastery I�m not sure we can do that.  An AOE move that attempts to silence everyone around us. It has a pretty high chance of being shrugged off, but it never hurts to try.  Flat damage resistance to non-physical/mind damage, and the attacker takes a small amount of manaburn. However, it raises equilibrium with every hit and will fail if equilibrium gets too high. We don�t have any way of lowering it right now (though we will in one more level), but we might as well keep it on anyway. Our mindpower is high enough to keep our equilibrium failure rate down, and if it fails we�re pretty much just right back where we started.  Finally, we pick up Spell Feedback for our prodigy, which automatically retaliates with mind damage whenever we get hit by a spell (though it has a cooldown), and inflicts a spell failure-causing effect proportional to the cooldown of the spell used to trigger it.  Moving on. The next area we�re headed to is the Sunwall observatory, just south of the Sunwall proper.  The first floor is a long winding grassy road, reminiscent of the Caldera. We�re not in any hurry to complete it this time, though. This first bit is fairly easy, with only common animals blocking our way. 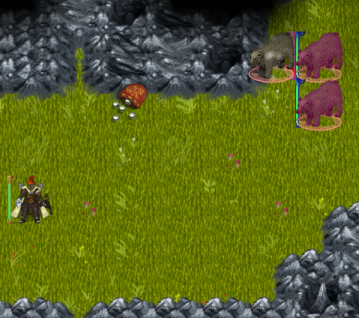 Inner Demons is so fun goddamn.  Occasionally, orbs similar to the ones back in the Sunwall Outpost pop up, with the same field effects.  This path actually hides a secret that might not be immediately obvious. There�s a small side-path halfway through that leads to a set of stairs to a hidden chamber.  There�s a couple of common horrors in here, but it�s nothing we can�t deal with.  The reward is well worth it. This area is the equivalent of the fortress in the main campaign, though slightly less fleshed out. We can drop stuff here with no worry of it despawning, change our appearance with the Mirror, and vault/unvault equipment with the orb.  The proper exit at the end of the main path leads instead to the Caverns below the Observatory, where we�re met with a detachment of Sun Paladin and Sunwall Archer guards.  A new enemy, the Astral Conjurer is a mage with a focus on the new Celestial spells. He shot a Lunar Orb at us, a slow-moving darkness projectile that moves until it hits a wall or the level edge, then bounces back to its origin, restoring negative energy to the user if it successfully returns to them.  Now we�re getting fancy. In addition to knowing the new and classic Celestial spells, the Elven Astramancer also dabbles in Chronomancy/Gravity.  It bears repeating, but Mechanical Arms is really good and useful at crippling enemies that sneak up on us, if not destroying them outright.  Well now, what�s this?  Oh. The Astral-Infused Yeti is a yeti with a focus on Anorithil skills, as well as being part-brawler for some reason.  He goes down without much hassle, and we pick up some new muscle tissue shortly.  The final floor of the Sunwall Observatory. What awaits us here?  Just a shitload of fancy wizards, apparently. We face several Star Gazers � souped-up Astramancers with even more Gravity spells. It�s a bad idea to just jump right in without knockback/teleport resistance � the Star Gazers will just knock you around with Gravity spells forever while you struggle to close in on them.  As we begin our opening salvo, they begin theirs. The purple projectiles flying towards us are Plasma Bolts, which do a large amount of both light and darkness damage and slow enemies hit.  The Star Gazers are now firing off Galactic Pulses, large slow-moving projectiles that try to pull us into them if they get close. Also, more fun with Inner Demons.  Gah, one snuck up behind us and tossed us in a Gravity Well. Oh well, it won�t take much long to finish them off. A burst of focused fire finishes him off. Time to collect our just reward.   Hmm. Dreamweaver gives us slightly more mindpower and mental crit chance, but SH spear grants us more mental/steamtech speed. On the other hand, Dreamweaver also grants us a slight damage bonus, while SH Spear grants a slight damage penalty. Finally SH spear lowers the cooldowns of our shot talents by 1 turn, but we�re not using any of those other than Boiling Shot. It�s a lateral move, I�d say, but we�ll stick with Dreamweaver for now, not least because we just spent a good chunk of our gold on it.   Aww, and we just went Antimagic too. The Untouchable is one of the best light armors you can find, thanks to a solid amount of armor, defense, and the auto-shield feature. Even as a t3 item, it�s worth keeping on till the endgame, especially with a class that synchronizes well with shields. Oh well, I�m still confident that Antimagic will pay off, though that�s largely contingent on getting some really good AM artifacts later on.  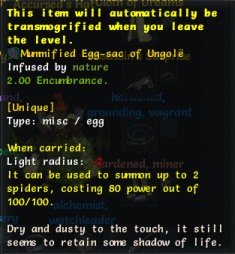 Free spiders! The light radius penalty isn�t too bad now that we have a proper lamp, too. No harm hanging on to it.   A high-damage, short-range gun that knocks us back whenever we fire. We don�t have the strength to use it anyway, and I�ve always found it a little clunky to use.   The Cap of the Undisturbed Mind is a plot item that always drops here. It�s a cap that penalizes you in many areas, but grants you 100% confusion resistance. We aren�t forced to use it (not that we can now that we went antimagic, anyhow), but there�s an upcoming area where it could come in handy.  We also pick up a pair of randart boots which we keep, and a randart hat, which we don�t, cause we have significant competition for that slot already.  And finally, we pick up this astronomical note. A pity we�re not well-versed enough in astronomy to make use of it. Now that the Sunwall Observatory is down, the Sunwall loses a lot of field support. The rate of Sun and Moon Orbs scattered around the area will drastically decrease. But before we begin our final assault, there�s still one more task we have to accomplish.  And before we do that, we�ll spend our new muscle tissue first.   We spent this one picking up a point in Heightened Senses. Stealth/invisibility detection could come in handy.  Okay, now we�re ready. Our next destination is the Orc Internment Camp, where the last remnants of what used to be the four great prides are kept under lock and key. Surprisingly nice place, all things considered.  Our intrusion does not go unnoticed. We�re facing off against the Mindwall, an elite Halfling solipsist with a focus on Dream Hammer, a close-combat tree that scales with mindpower.  His trump card is Mindblast, a confusion move that ignores saves, can�t be cured with ordinary methods and inflicts a 100% talent fail chance. The only way to guard against it is by equipping the Cap of the Undisturbed Mind. Of course, another method is to just ride it out. It lasts for a very short duration (1-2 turns), and if we focus on crippling him beforehand, he can�t do very much to take advantage of our helplessness.  He isn�t much of a threat if he doesn�t get into melee range, but he is absurdly tanky thanks to Solipsism, Forge Shield and his ridiculous Psi regeneration rate. Over half the damage we do that actually gets past his shield is absorbed into his psi and instantly healed away. Nonetheless, we�re making progress, and he has no way of healing his actual health. Also, Inner Demons good, news at 11.  One more shot should do it.    He dropped his fancy mindstar, Overseer. It reduces mental save every time it hits, and can be activated for a psionic pin/stun every 60 turns.  That was quite the battle, but our job here isn�t done yet.  There are four areas of the Orc Internment Camp � one for each of the prides. Each zone is essentially a mini-pride, with mind-controlled orcs of the corresponding pride as our main enemy. We won�t hesitate to cut down any that stand in our way, but we�re not going out of our way to slaughter them all either � we came to free them, not destroy them. 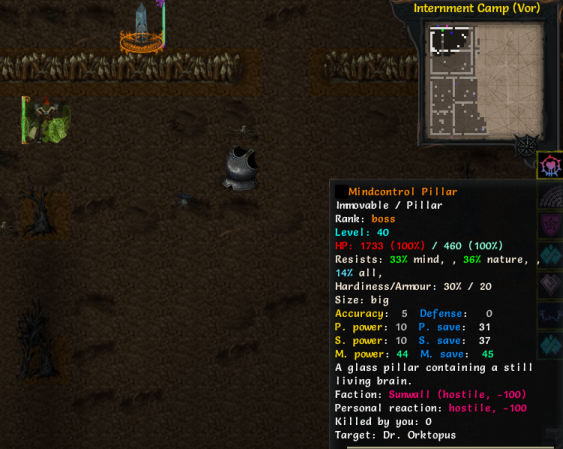 To break the mind control, we have to take down the Mind Control Pillar, located somewhere along the opposite wall from the entry point. The Mind Control pillars are decently bulky, but they�re not too difficult to kill. Like the Mindwall, their focus is on Solipsism and hammer skills, with a long-range psionic attack that can confuse. If you can isolate them, they�re pretty much sitting ducks � being an immobile enemy with a focus on melee skills does them no favors. 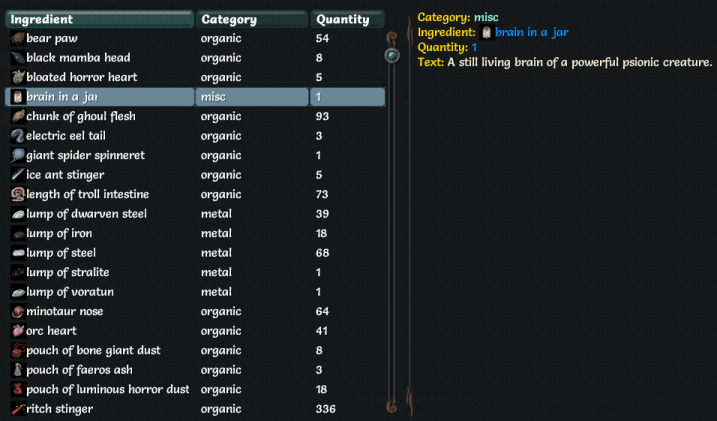 They don�t drop any loot when killed, but they do drop the Brain in a Jar ingredient, a necessary component for a couple of rare tinkers.  Once the zone�s pillar is down, any surviving orcs immediately turn friendly.  Naturally, the ogre guards still hate us, though.   The first in a series of letters exposing the seamy underbelly of prison management.  Next up, we�re heading through the Rakshor zone. We�ll try to avoid killing off our orc buddies as best as we can, but necromancers and corruptors on our tail are just too dangerous to be left alive.  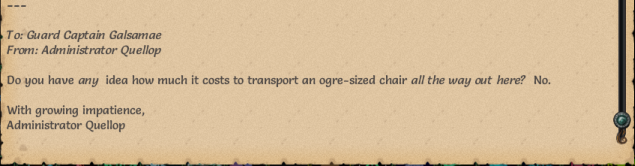 The second letter of the series.  All the Mind Control Pillars are pretty much functionally identical. 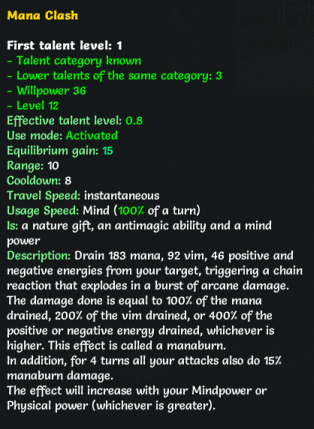 We leveled up from killing the last one, and finally picked up Mana Clash, the last antimagic skill. Mana Clash removes a fairly large amount of different magical resource types � while it might not actually take out an enemy�s entire mana pool (due to how gargantuan those tend to be), it�s fairly effective at removing more limited magical resources like vim or positive/negative energy. Almost as important is the fact that using it (even against empty air) reduces our equilibrium, giving us a decent way to regenerate it while in/out of combat.  Following it up with the Gorbat zone. Mage-hunters are still a pain, but now that our main damage type(s) bypass AM shield they�re not too difficult to take down, and of course we don�t have to worry about getting Mana Clashed or Silenced. 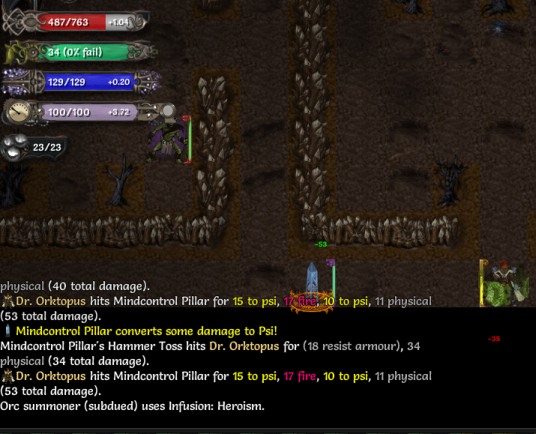 Pillar 3, check.   Letter 3, also check.  Finally, Grushnak zone. Naturally, berserkers and bulwarks are the theme of this area.   The last and final pillar goes down, and the Orc Internment Camp is officially no more. Completing this zone unlocks more classes for use in the Embers campaign � prior to clearing it, only tinker classes can be played. The first completion unlocks Warrior and Rogue classes, the second Mage classes, and completing it a third time unlocks all classes for use. There�s also an achievement for clearing out the zones without killing any mind-controlled orcs. The easiest class to accomplish this with tinker-wise is probably the sawbutcher, who can zip through the zone at superspeed with Saw Wheels and shred the Mind Control Pillars to bits before anyone realizes they�re there.  Freed orcs will happily turn against their ogre captors and join us in finishing them off. Just as soon as they work out the concept of �a wall�.  The resolution of that little affair. By which I mean we killed or liberated every entity involved in the matter. We�re just about ready to take down the Sunwall once and for all. We�ll get to that in the next update.
|
|
#
?
Sep 24, 2017 10:34
|
|
|
I always found Mana Clash to be a bit of a wasted purchase. The actual damage is a bit anemic, and in the late game, most bosses rolling with any of the resources it can drain will have huge enough pools that you can't actually empty them out in most cases. Spell Feedback, similarly, is a nice skill, but really only useful in solo caster-boss encounters where you're piling on disabling conditions. In some sort of group wrangle it'll partially lock down one guy and the rest of them are free to keep on blasting due to the cooldown.
|
|
#
?
Sep 24, 2017 15:43
|
|
|
I think the 15% bonus manaburn damage that using Mana Clash adds to your attacks is equally as important. With builds focused on doing large amounts of damage in short amounts of time, four turns of bonus manaburn damage can surpass the raw magical resource drain of Mana Clash itself. Plus, now that using it restores your equilibrium instead of raising it, there's no reason not to use it whenever it's off cooldown.
|
|
#
?
Sep 24, 2017 17:20
|
|
|
Inadequately posted:I think the 15% bonus manaburn damage that using Mana Clash adds to your attacks is equally as important. With builds focused on doing large amounts of damage in short amounts of time, four turns of bonus manaburn damage can surpass the raw magical resource drain of Mana Clash itself. Oh, yeah, I forgot they'd changed Mana Clash. It used to just be straight damage and worsening your equilibrium.
|
|
#
?
Sep 24, 2017 18:33
|
|
|
 One final detour before we settle the Sunwall matter. The Primal Forest is located in the woods west of the observatory, across the river.  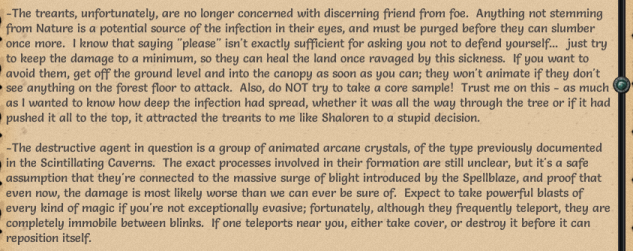  Upon entering it, we�re immediately greeted with this letter right in front of the entry point.  As with Alt Old Forest, animals and crystals are the two most common enemies here. The crystals can be pretty high-leveled, but they aren�t much of a threat.  As the letter mentioned, the forest itself is coming to life. This zone follows the same rules as the Sludgenest � every once in a while, a forest wall transforms into a treant or crystalbark, a treant tainted with magic. Crystalbarks know Frost Grab and Phantasmal Shield, and annoyingly enough our Kinetic Stabilizer doesn�t seem to be protecting us from being pulled around via Frost Grab.  As with the Sludgenest, treants and crystalbarks can occasionally spawn as rares. Luckily, they don�t spawn at anywhere near the rate or strength of the Sludgenest oozes.  Yet more hot psyshot-on-psyshot action (ft. the return of Gunbear).  Ugh, an oozemancer treant. Treants synchronize with Oozemancer skills very well thanks to their enormous natural bulk and their nature damage bonuses, and since this one isn�t bound to the same rules as the player it can summon far more bloated oozes than would otherwise be physically possible. We can load it up with debuffs so we have nothing to fear damage-wise, at least, but taking it down is still a slog.   The times, they are a-changin�.  We finally get a good look at the Queen Ant, the unique enemy we one-shot offscreen in our last run. It�s pretty obvious what her deal is.  Rare treants and crystalbarks are starting to spawn at a fairly high rate now. We need to get a move on.   Looks like Zigur underwent some rebranding in the past year. 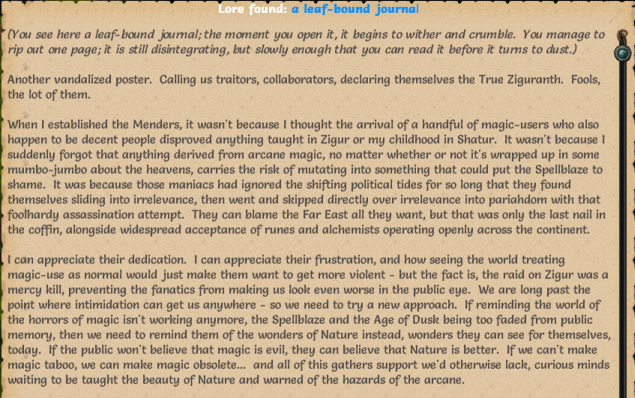  An entire diary lying around. How convenient.  It might not be immediately obvious where we�re supposed to go. The next level of this zone is accessible by climbing this giant tree, represented here by a small tree stump that does not look like a giant tree at all.  One good thing about this zone: as with the Sludgenest, it�s a good place to hunt for rare items. If you survive. 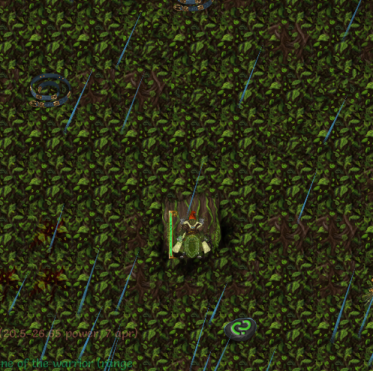 Climbing the tree takes us up to this big platform, with a few treants and crystals wandering around. A small path at each of the four edges leads to another mini-platform.  Each mini-platform is guarded by a Crystallized Primal Root, an extra-strong crystalbark. As with most treants, the main issue is their incredible strength and bulk, but they�re not too much of a threat if we can stay out of melee range. They can still Frost Grab us, though, and summon crystals or treants to guard them.  The Primal Roots are more or less identical, and differ only in resistances. If you can take down one, you can probably take down the rest.  They don�t drop items, but they do drop schematics and a rare ingredient, the Primal Core, which is required for a couple of high-end tinker items.  Such as this one. The Life Support Suit is a t5 light armor that grants bonus health, healmod and an emergency heal when low on health. It might be a fun project to work on, if we don�t find any better light armor by the end of the game.  We could really use some space to maneuver. We need a distraction.  Spider buddies, go! They won�t really do a lot of damage or last very long, but every turn spent focusing on them is a turn we can spend retreating and recovering. There we go. There�s no extra reward from clearing these guys out except for a modicum of loot, some EXP and the knowledge of a job well done. The treants and crystalbarks will still spawn on the previous floor, though with all that loot that�s more an upside than anything.  We take a moment to admire the view. The floor below us really does correspond to the map of the previous floor � it�s a good idea to take a moment to check for any areas you might have overlooked or items you might have missed while up here. 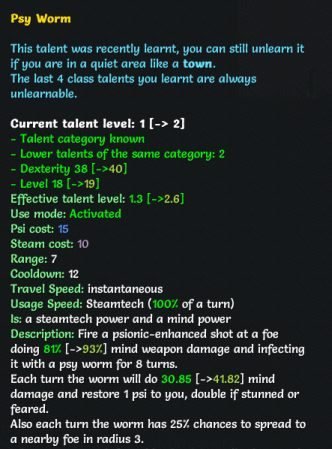 We picked up a couple more skills from the Dread tree. Psy Worm is a low-powered shot that infects enemies with a psi-sapping debuff. We probably won�t use it much � Instant Channeling is a more reliable psi-restoring skill, and crowds generally don�t last that long thanks to Condensation + Boiling Shot anyway.  We need at least a point in it to pick up this skill, though. No Hope is a big costly debuff that reduces an enemy�s damage by a large amount for several turns. Decent if you can get it to stick.  Alright, we�ve been putting it off for long enough. It�s time. 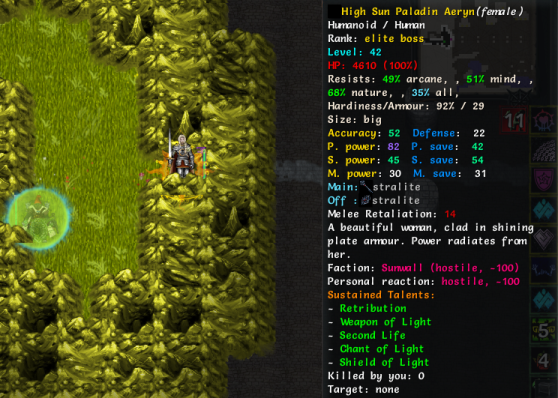 Looks like they�re rolling out the full red carpet for us. 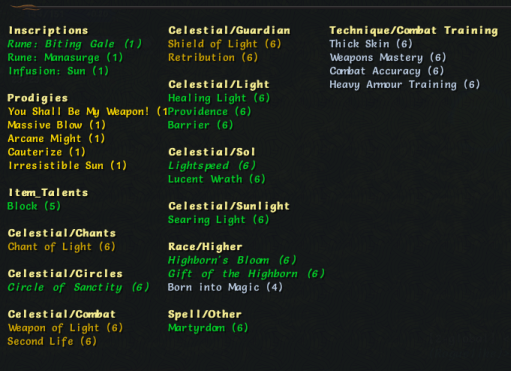 Aeryn is a monster, and unquestionably one of the hardest bosses in this campaign. Being the prototypical Sun Paladin, she sports incredible armor, resistances and healing capacity, and can hit like a truck with her celestial skills. We also need to watch out for Martyrdom, which can very easily lead to us killing ourselves if we�re not careful.  For our opening move, we drop a Fatal Attractor to distract her, allowing us to pile on the debuffs. For her part, she opens with Irresistable Sun to pull us towards her. 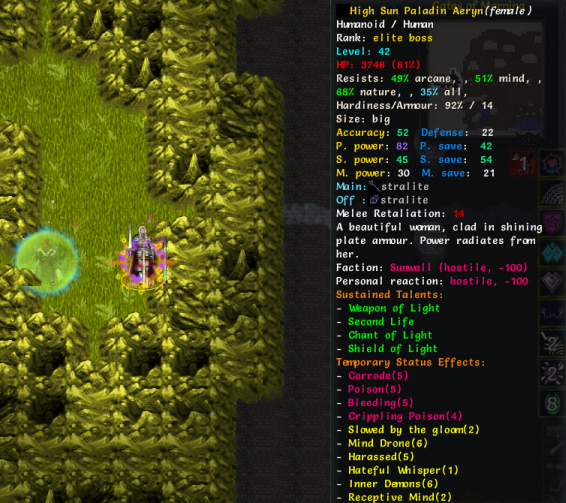 One area she is thankfully weak in � her mental save is abysmal, allowing us to pile on the mental debuffs without much issue.  Lucent Wrath is one of the new Celestial skills. It creates a large circle of light around the target creature, which explodes into a gigantic AOE burst of light in a turn or two. 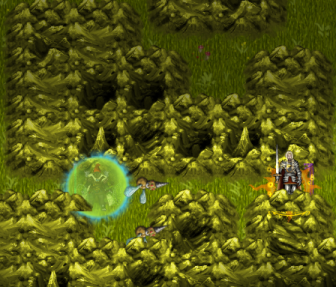 We have to be careful with our resource management. It�s tempting to use our big fancy skills like No Hope and Forced Gestalt whenever they�re off cooldown, but if she can�t hit us then they�ll largely go to waste. Our main method of Psi regeneration is Instant Channeling, which uses up all our steam in turn, and our main method of steam regeneration is activating our injectors, which has a fairly long 20+ turn cooldown.  Couple more shots should do it. It�s still a good idea not to let our guard down � we have the defenses of a wet paper bag and Aeryn can still easily shred us with a normal attack if she gets into melee range. We�re keeping No Hope and Vaporous Step on standby for that occasion. 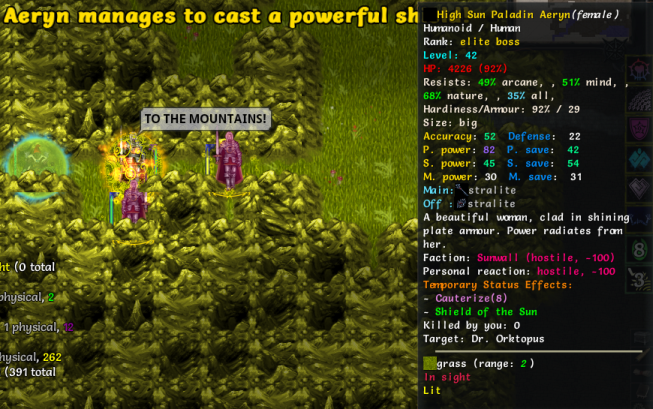 When Aeryn is first reduced to 0 HP, she immediately casts Shield of the Sun, then dashes off. This can�t be prevented in any way, and Shield of the Sun renders her straight-up invincible. Don�t worry, we�ll finish the job sooner or later, but for now all we can do is stay out of the way.  With Aeryn out of the way, the other inhabitants of the Sunwall line up to take their shots. First up are the Halfling pyremasters, flame-based wizards who focus on Alchemist skills.  Shalore Liberators are also common. They�re Shalore Brawlers and�that�s about it, really.  One of those Sunwall Vindicators I mentioned in an earlier update. They�re a lot easier to take down now than they would have been back then, of course.  A couple of familiar faces. RIP Melnala, at least you got your husband back.  RIP Limnir, who apparently never reached the pinnacle of jewelrymaking in this timeline.  Oh hey, a farportal. Time to hop in and-    Nope. Oh well, at least we got what we came to do. We�ll save slaughtering an entire continent for another time and content ourselves with finishing off this town. 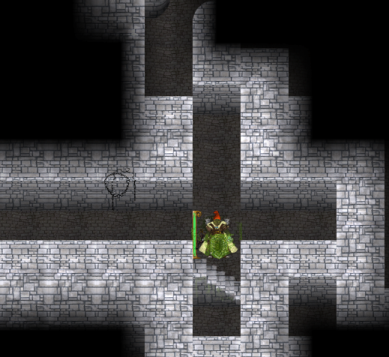 Aeryn and her kin fled to the Caves of Morning, a twisted, tangled labyrinth of a dungeon floor.  Thanks to our little detour earlier, these ritches show up in the caverns as well. They attack the Sunwall guards, but they also attack us, so their overall usefulness is dubious at best. At least we get a little extra EXP from killing them.  Couple more dropped letters lying around. Interesting, but of no use to us right now.  These Shalore Liberators can be surprisingly bulky, and their high defense allows them to dodge a lot of our shots. We just toss Condensates and Solidified Air in their direction instead.  We ran into a familiar vault while clearing this place out.   Couple of fun items in here. The Frost Lord�s Chain is one of the very, very few standard artifacts that actually boost Cold damage. It also grants Shivgoroth Form, which turns you into a shivgoroth for a few turns, increasing your cold damage and ice block penetration as well as granting Ice Storm.   Useless to us, but always a nice find.  Ooh. A quick inventory shuffle to swap some of our statsticks on, and we emerge with a nice boost to armor, health and fire damage.  One last bit of the caves we need to clear out. Time for round 2. 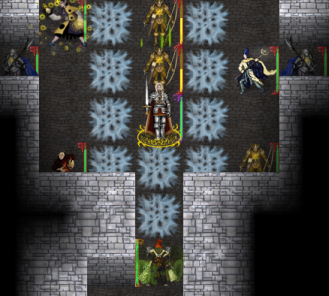 Step 1: Open door, drop Solidify Air, run away. With the enemies alerted, they�ll funnel through the corridor towards us, allowing us to pick them off easily.  Aeryn is just as strong as she was in the previous battle, and all her skills have gone up a level, to boot � though she starts with all her sustains off, which gives us a short window of opportunity. Our strategy is largely the same as last fight, but with all the cover this tangled labyrinth provides we�re in a much better position. 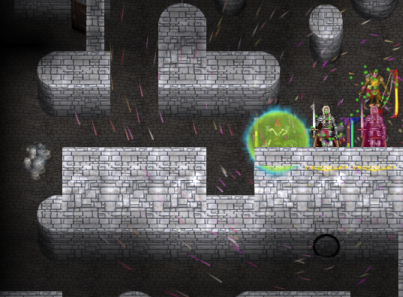 Can�t forget about the others, and by �the others� I mostly mean �the goddamn archers�. On the plus side, we finally managed to get Inner Demons to stick on the second try. Let�s hope that pays off.   Success! With the Inner Demons distracting her, one last bout of focused fire finishes her off.   We pick up a fancy ring from her corpse. We�ll hang on to it, but I don�t think it�s a good idea to wear it just yet.  With nothing else to hold us back, we stride out from the ruins of the Sunwall, head held high. It was a long and hard battle, but at last the orc race can finally � eh? Oh, right, giants. We�ll see what that�s all about in the next update. Inadequately fucked around with this message at 19:32 on Sep 30, 2017 |
|
#
?
Sep 30, 2017 04:39
|
|
|
There's a bit of comedy in that our only option is always just to kill everything. Bit Borderlands-ish. Combined with a bit of "are we the baddies?"
|
|
#
?
Sep 30, 2017 05:51
|
|
|
Deceitful Penguin posted:There's a bit of comedy in that our only option is always just to kill everything. Bit Borderlands-ish. Well, at first its self defense, but since we don't really have anyone there to take note of that... by the time we reach someone who might once have wanted to talk to us... as far as they know, we've just committed like 500 war crimes and attacked people unprovoked, so they're taking aim right away. Mind, you can actually neglect to pursue Aeryn into the caves and finish her and the rest of the Gates of Morning off, but the EoR ending text doesn't acknowledge it(or, at least, it didn't when I played, might've been changed since).
|
|
#
?
Sep 30, 2017 06:55
|
|
|
Apparently, the next major update is going to include a slightly different ending for those who complete the EoR campaign without taking down the Sunwall (which I imagine is going to be along the lines of �well, you didn�t kill them, and turns out they still hate your guts and want to kill you. Whoops�).
|
|
#
?
Sep 30, 2017 09:10
|
|
|
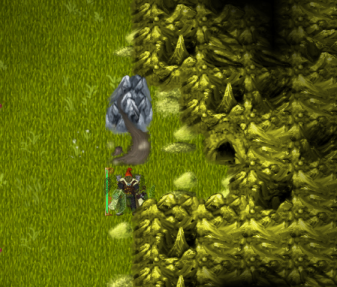 Looks like the giants just bumped themselves a notch or two up on our agenda.  The outside of the mole is crawling with hostile mecharachnid constructs. Mecharachnids tend to be sawbutchers or gunslingers, loaded with additional tinker abilities and steamcaster skills.  There�s a unique Half-Mechanized Yeti here, a powerful yeti sawbutcher. It starts out neutral to us, but we can attack it if we want to. And we want to, because it drops one final bit of yeti muscle tissue.  That�s about it for the outside. Once more into the breach.  The inside of the mole is a maze of rectangular rooms, similar to the doomelf starting zone. Steam giant constructs are common here, as are steam giants themselves. 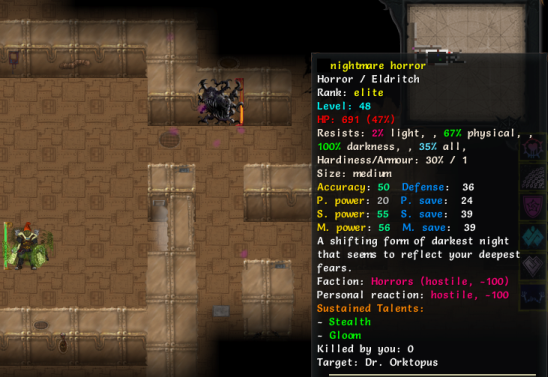 Luckily, we can take those guys out without much issue, so it looks like it�s going to be a nice easy stroll to - oh poo poo  Well, the horrors just made our life much harder. Continuing the psionic theme, there was a Dreaming Horror just around the corner. Let�s hope we can kill it before it puts us in the �   �Dreamscape. The Dreamscape is a skill unique to Solipsists and Dreaming Horrors, similar to the Fearscape, and can only be used on sleeping targets (which we count as, thanks to our Cloth of Dreams giving us Lucid Dreamer). Every turn, the Dreamscaped target automatically spawns a dream projection of themselves, a clone with a fraction of their health and damage. Each Dream Projection killed causes the target to lose 10% of their health upon waking, though no more than 70% of their max health can be removed in this manner. Using Dreamscape spawns you into the target�s dream as yourself, getting Dreamscaped tosses you into the role of one of the Dream Projections, switching to another one if your current one is killed. Like Fearscape, it can be a useful tool for isolating an enemy or riding out debuffs and cooldowns, but it�s a little clunkier to use. If you can�t kill Dream Projections quickly then you may easily find yourself overwhelmed by them, and unlike the target, the Dreamscape user can be killed there - as this Dreaming Horror shortly demonstrates.  Moving on. We found some strange black disks lying around. We can�t do anything with them yet, but we�ll hang on to them in case they come in handy.    Also some�notes, of a sort. I suppose that explains the current state of the ship.  Mecharachnids aren�t too threatening, but they are annoyingly bulky. The giant supporting them is a Steam Giant Flameshot, a gunslinger with a focus on exploding bullets.  Mecharachnid swarms often come with a Repairbot for support (the little blue one in the center of the swarm). The repairbots have almost no offensive capability, but they spawn with absurdly high armor and resistances, and pack an AOE healing move that only heals constructs.  I would say this was a surprise, but it really wasn�t. Incidentally, you can see he�s targeting an Oozing Horror. Even enemies on the same faction can fight each other, sometimes. Usually it happens because one of them hit the other with an AOE move while aiming for an enemy of a different faction, but once in a while I�ve seen enemies attack themselves for lack of anything else to hit, so who the hell knows.  The steam giant gunslingers might not be the most exciting enemy here, but we can�t discount them. Damage-wise, they surpass the horrors easily, and can shred us in seconds if we�re not careful.  We picked up a fun tinker from that gunslinger. The Toxic Canister Launcher creates a bulky canister that lasts for 8 turns and spits out a poison cloud every 2 turns, plus another one when destroyed. Combos well with Solidify Air for a slow and steady enemy killer. We probably get more use out of Fatal Attractor, though.  On to the next le � oh my god.  My kingdom for a beam attack.  It keeps happening.  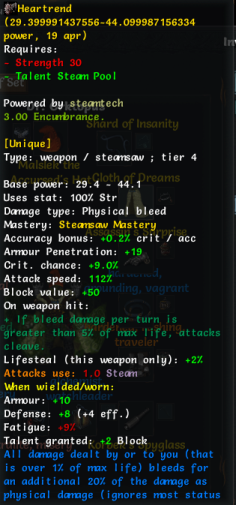 One of the constructs dropped Heartrend, an artifact steamsaw. Wielding Heartrend causes us to take additional bleeding damage from any attack, but powers it up based on how much the user is bleeding. It also has a messed up power display, for some reason. (Incidentally someone made an addon class along these lines ages ago, the Bloodknight. It�s fun but unfortunately it hasn�t been updated in ages, so expect occasional bugs and LUA errors if you try to run it in 1.5+).  Atmos Retaliators are upgraded Steam Giant Gunslingers. Annoyingly, they have far more range and movement speed, forcing us to use Vaporous Step for closing in rather than as an escape. In addition, they have a couple of archer skills just to make our life a little more difficult: Intuitive Shots, which gives them a high chance of ignoring any melee attack and instantly retaliating with a shot, and Slow Motion, which slows down any incoming projectiles.  Time to finish this. Haze Commander Parmor is a powerful sawbutcher who comes with Steam Powered Armor equipped (though thankfully not the entire Steam Powered set). The trap she tossed on the field is a Tremor Engine, which shakes the ground and attempts to stun/pin/disarm any enemy caught in it. It�s not bad, but you won�t see actual sawbutchers using this skill much, on account of the fact that as a sawbutcher any turn not spent either rushing up to an enemy or stabbing them in the face is a waste of a turn.  Of course, the enemy�s inefficiency works in our favor. While Parmor fiddles with her crappy steamcaster skills, we can pile on the debuffs and the demons. Soon enough, Parmor is too busy fighting off her own clones to do anything about us, allowing us to leisurely blast away at her.  She dropped the Steam Power Armor schematic upon her death. The Steam Powered Armor grants additional movement speed and automatically retaliates with lightning damage whenever the wielder is hit, as well as granting additional bonuses when the full Steam Powered set is worn. While it would be undoubtedly superior to our current one, we currently lack the strength, the armor training, the ingredients, the crafting skills and the other items in the Steam Powered Set. We�ll give it a pass for now.    No actual answers on what happened here, just more erratic scribblings. Nonetheless, we can probably make an educated guess. 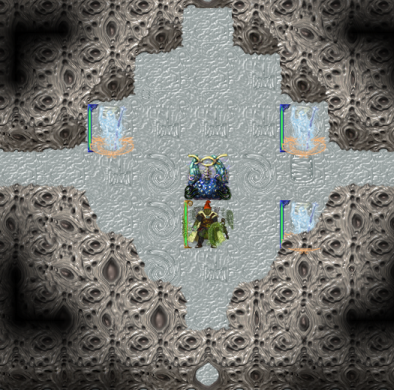 Well, nothing else to see here, might as well get a move on. On our way back, we stop by the psi-machine for the last and final time.  With our final bit of yeti muscle tissue, we pick up a point in Dream Walk. Dream Walk is a range 7 random teleport that gains 100% accuracy if targeted at a spot next to a sleeping creature. Decent as a distance-closer and a last-ditch escape move. (Incidentally, we�ve seen this name once before, in the main campaign. Bonus points for anyone who can remember where.)  Time to head back and�eh?   Regardless of which dialogue option is chosen, we�re immediately and wordlessly pulled into the Cave of Hatred. 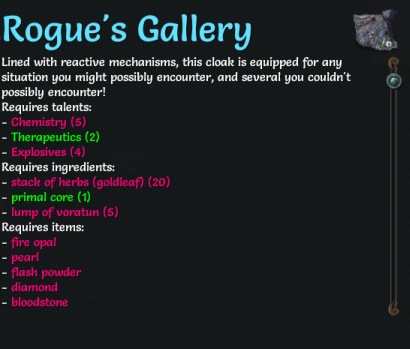  Lying nearby was the schematic for the Rogue�s Gallery, a very fancy cloak indeed. The super-tinker items are nice and fancy, but I doubt we�ll go for them this run � maybe another time.  The only enemies in this cave are Shadows. Each one specializes in a different Cursed/Doomed tree. The Shadow of Guilt here focuses on the Gloom tree, which makes him relatively easy to take down as long as we don�t get too close to him. 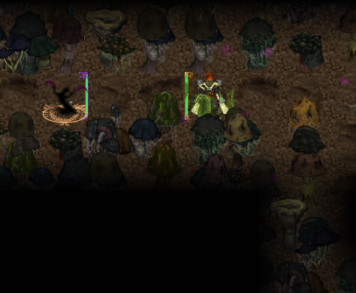 The Shadow of Pain here focuses on the Predator tree, which also makes him a simple matter to take down because the Predator tree is near-useless. (To expand on this: the Predator tree allows you to �mark� a chosen type/subtype of enemy, doing bonus damage to them and gaining more and more combat bonuses of them the more of them you kill. Of dubious benefit to the player, completely pointless to enemies that get it because they start with zero kill experience.)  Sometimes we get a psychic message when we destroy a shadow.  The Shadow of Remorse here focuses on Celestial skills, just to mess up the theme.  And the Shadow of Hate focuses on the Endless Hunt tree, which grants bonuses for attacking a single enemy ceaselessly without letting up. It�s okay as far as Cursed trees go.  More telepathic dying messages from the shadows.  The Shadow of Despair focuses on Fears and mindpowers. Of course, we�re nearly immune to mental debuffs, so it does bugger-all.  And the Shadow of Anger focuses on calling Shadow buddies. The only one that�s slightly more than a speedbump, if only because the drat shadows keep getting in our way.  With that, the ground shakes and a new enemy appears in the center.  Crimson Templar John is�pretty much the same as the last time we fought, skill-wise. His stats and skills have been appropriately boosted, however, and he can summon shadows as well. As with any shadow-wielding enemy, the Shadows are the more dangerous component than the user, but even they aren�t enough to tip the balance of this battle. 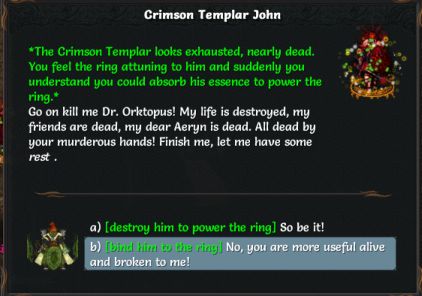 We have two choices here: solve our problems with murder once more, or be even more of a dick than usual.  Might as well be internally consistent and go with the first option.  Killing him turns the ring into a better statstick, absorbing him grants the ring a summon power. It�s decent, but not fantastic, though with the limited loot selection of the EoR campaign you often might not find anything better. A moot point for us since it�s arcane powered and we can�t use it, though.   He also dropped Warmaster Gnarg�s Murderblade, which is a solid statstick of a sword and a decent endgame 2-hander, if not quite as spectacular as the really broken ones like Legacy or Sawrd. Almost all the really excellent endgame weapons are 2-handed, which is another reason why being an ogre rules.  Now that that little detour is over with, we can finally head back to the starting continent and check out Kaltor�s new stock. There�s nothing we particularly want, but we can take a look at some of the more interesting items.  Elemental Fury is one of the few items with a 100% damage conversion rate � in this case, it splits up all your damage into fire, cold, arcane and lightning damage. It�s useful to hang on to for bypassing resistances, though in most cases it�s usually better to stack a single elemental bonus + the corresponding resistance penetration for day-to-day combat rather than rely on it. There are some builds that can make especially good use of Elemental Fury, nonetheless � for instance, turning every single damage instance into four works out pretty well for a Seal Fate Paradox Mage.  This sword�s effect is a little vague. What this actually means is that the crit chance and critmult bonus grows with each kill/crit you land. Once either of them surpasses 30% or so, the sword has a chance to spit out a friendly ooze monster and reset its bonuses. The friendly ooze monsters stick around forever (unless killed), and blast nearby enemies with hexes and curses.  A mindslayer-focused mindstar that boosts fire/cold damage. Comes in a set with the Charged Focus (lightning) and the Kinetic Focus (physical). Gains a boost from being wielded in a set with any one of the others, and an even larger boost when all three are wielded (which mindslayers can accomplish thanks to TK-wielding, though the boost is somewhat offset by the near-pointless effect of wielding a mindstar). Actually somewhat tempting, given our focus on fire damage. We�ll have to think about it.  A set of very silly shoes. Moving three spaces at once is more than a little impractical, to put it mildly, but it�s still fun rushing the Caldera without ever running out the timer, or completing the Charred Scar in a dozen turns or so. We�ll save up our gold for now, since we�re doing pretty well at the moment. We�ll come back in a couple more zones, before we head into the endgame proper.
|
|
#
?
Oct 4, 2017 15:36
|
|
|
Yeah, I'm continuing to love the descriptions for these artifacts; the Shoes of Moving Quickly have straightforwardness going for the name, and brevity for the flavour text. Also, they are indeed very silly, but neat nonetheless. Keep them around as a switch in case you need to peace out of something? Combine them with a movement infusion for murdertrain speed? The potential uses are endless! (And likely pointless.) Is John less worked up if you didn't destroy the Sunwall? Come to think of it, what is the main character of the original campaign up to during all this? You think the authorities would have, at some point during all this, gone 'hey, we need Orcblender Prime in here' and had time to track him down and lob him through a portal at Kruk Pride. ...double-come-to-think-of-it, it'd be a pretty funny ending for you to wrap up business here and return home only to find that the original PC's leveled the place in your absence. Given ToME I don't expect them to do it, but it'd be in keeping with the rest of the tone thus far. vdate fucked around with this message at 16:52 on Oct 4, 2017 |
|
#
?
Oct 4, 2017 16:48
|
|
|
If I remember right, John doesn't come for you if you break off the Sunwall butchery before killing Aeryn. That encounter simply doesn't happen, because you need Aeryn's ring to trigger it.
|
|
#
?
Oct 4, 2017 23:45
|
|
|
Are the Shoes at least good for those zombie minotaur guys who like moving long distances in straight lines? I forget how their racial power works exactly.
|
|
#
?
Oct 5, 2017 04:22
|
|


|
Is that Weissman, one of the pair of monster hunters? Because I remember one of them gets wiped out by the invulnerable horror with a bunch of tentacles.
|
|
#
?
Oct 5, 2017 11:10
|
|
|
I thought it was an odd change that the paladin lady dying in the final fight of the main campaign had her running away instead now. I see now. I am 100% unsurprised at the ham-handed tragedy play, though. fake edit: "HELLO I AM A GENERIC LOVE INTEREST FOR SUNWALL PALADIN LADY TO THE POINT THAT MY NAME IS JOHN OH YOU HAVENT HEARD OF ME BEFORE WELL I'M EXTREMELY IMPORTANT AND THE REASON I HADNT EVEN COME UP IN THE PRIMARY CAMPA- oh i'm dead ill be back tho i swear"
|
|
|
#
?
Oct 5, 2017 15:12
|
|


vdate posted:Come to think of it, what is the main character of the original campaign up to during all this? beach dates with melinda fake edit: "HEY IM BACK AFTER YOU KILLED MY BAE. WHAT? WHO AM I? MY NAME IS JOHN DONT PRETEND YOU DONT REMEMBER WHO I AM PLEASE INDULGE MY TRAGIC ANGST DUNGEON THAT I TOTALLY NARRATIVELY EARN- poo poo dead again"
|
|
|
#
?
Oct 5, 2017 15:18
|
|
|
habituallyred posted:Is that Weissman, one of the pair of monster hunters? Because I remember one of them gets wiped out by the invulnerable horror with a bunch of tentacles. No,but it�s an easy mistake to make, since you don�t get closure to that little subplot unless you play a dwarf. In one of the dwarf-only starter zones, you can find the remains of Weismann and Rolf combined into a hideous tentacled abomination as one of the Backup Guardians. And then slaughter it for loot. Hint: read The Spellblaze Chronicles.
|
|
#
?
Oct 5, 2017 15:36
|
|
|
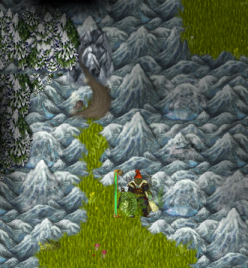 A couple more detours before the endgame. First off, we�re headed for Ureslak�s Host.  This zone is infested with dragons of all shapes and sizes, including a new elemental type. Undead drakes are dragons that are, well, undead. These ones are just hatchlings and aside from being undead, don�t have anything else in particular going for them, like most hatchlings.  Well, someone�s touchy.  Lots of dragon breaths buffeting us back and forth in this area. Our Antimagic Shield is getting quite a workout.  Blinkwyrms are rare dragons with a focus on spellcasting. They�re not quite as strong as the top-tier elemental wyrms, though. 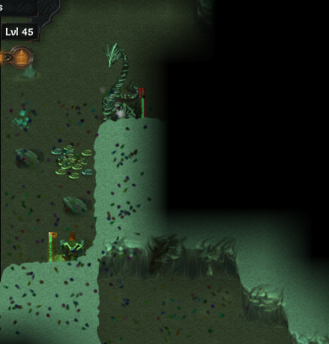 Undead Drakes are a step up from their hatchlings. This one used Infectious Miasma on us, an AOE field effect that lingers for a few turns, doing darkness damage with a chance to infect anyone in it with a random disease. They also know Necrotic Breath, a darkness breath attack with a chance to inflict Bane of Blindness or Confusion.  We�re finally getting t5 loot. We don�t need it, but we can melt it down for those sweet voratun lumps.  Upon entering this floor we�re immediately hit with a dozen different breath attacks, shredding our health to bits and inflicting half that many different debuffs. loving dragons.  A brief but exciting bit of combat later, involving a lot of Vaporous Steps and a judicious amount of Solidify Air, and we�re out of immediate danger. 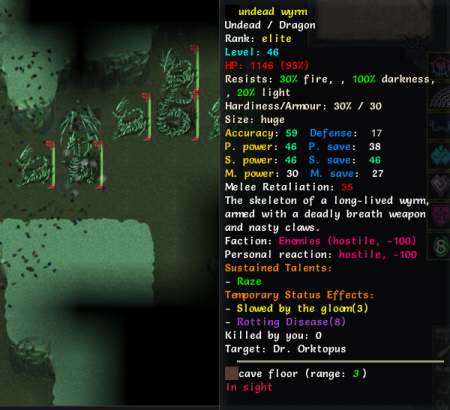 The top-tier of undead dragons, Undead Wyrms come with the Undead Drake skills as well as Vampiric Surge, which grants their attacks lifesteal, and Raze, which adds a small bonus amount of darkness damage to every damage instance they do, up to fifteen times a turn. A small effect, but it can really add up over time � though our flat damage resistance makes a mockery of the skill.  This blinkwyrm appears to have realized the archmage approach wasn�t getting him anywhere, and took a course in sawbutchery instead.  He activated Disruption Shield, one of the more interesting abilities in the game. Disruption Shield is an Archmage shield that can only be activated when under 25% mana. While active, all damage you take is absorbed and converted to mana, and once your mana is full, the shield explodes in a storm of arcane magic that damages everyone nearby, including the user. Useful for emergency mana regeneration, and if you�re willing to micromanage it even more, you can render yourself functionally invulnerable by constantly draining your mana. This wyrm is not that skilled, and falls shortly after.  Another hidden vault. I wonder what awaits us?  Oh, this one again. Ugh, I suppose we might as well clear it for the EXP. Our reward is some more voratun gear we don�t need and melt down for ingredients, the Black Robe again, and this:   The Rod of Sarrilon is pretty much the ultimate Paradox Mage staff. Would have been real handy to find on our last run � without it, we had to do all that mucking about with the Telos Staff halves and Temporal Form. Oh well, can�t say it didn�t all work out in the end.  As a side note, we picked up the Thermal Focus and are running with it for a bit. It�s hard to tell whether it�s better than Overseer or not as far as day-to-day combat goes � a large number of these wyrms are either heavily resistant or straight-up immune to its elemental damage, which doesn�t help its case. On the other hand, the bonus resistances it grants us are coming in very helpful right about now.  On the third floor, we come face to face with Ureslak the Eternal, the upgraded dracolich form of Ureslak the Prismatic. He comes with the standard Undead Drake loadout, as well as the Shadows tree and a couple of darkness-based Celestial skills.  Unfortunately, Ureslak is kind of a perfect storm of factors that make him really, really annoying to take down. The Shadows can Blindside us, skipping past our Solidified Air and damaging us with physical damage to get past our AM shield. Ureslak himself doesn�t play well with our debuff-heavy strategy � he Urcomes with Spine of the World and Draconic Will to render himself nearly debuff-proof, and Draconic Body and Vampiric Surge do a good job of keeping him healthy. On the flip side, most of his debuffs are magical, which we don�t have too many options for curing.  While Ureslak is distracted by a Fatal Attractor, we run the hell away and devote ourselves to clearing out his lesser kin. We�re going to need the entirety of the caverns to fight him, and running into one horde of dragons after another while at the end of our rope is not going to go well for us. 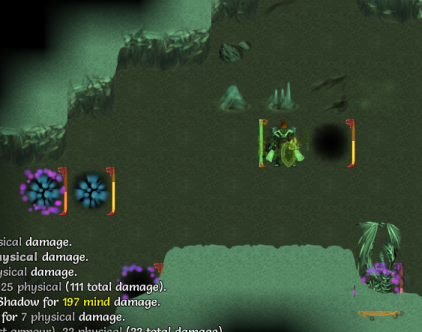 Time for round 2. This time we open with Fatal Attractor to distract the shadows, while we focus on the big guy.  Ureslak ran away, so we switched our plans and focused on taking out the Shadows instead. He can still Call more eventually, but we�ve got a bit of breathing room now that it�s just one-on-one. 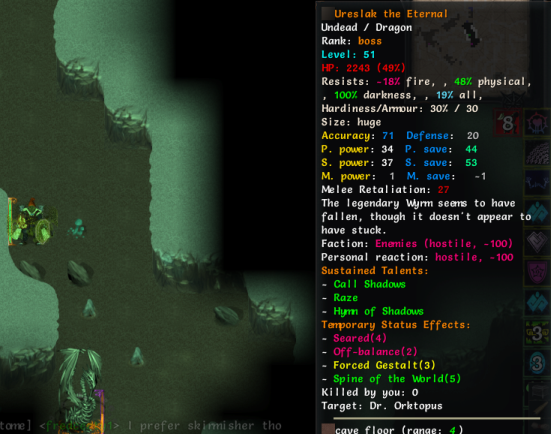 Even with Forced Gestalt and maxed-out Sear reducing his mind save, we still can�t land Inner Demons. Oh well, looks like we�ll just have to blitz him down with raw damage. With his lowered fire resist and Draconic Body on cooldown, just one more push should do it.   He dropped Ureslak�s Focus, a rare gem with a lot of fancy effects. Killing him also unlocks the Undead Drake tree for Wyrmics, which allows them to learn all those fancy undead dragon moves described up above. However, it�s a spell tree and not a mindpower tree, and as such is the only wyrmic tree that requires Magic to learn.  Finishing up the rest of the area. More dropped letters lying around.  Hidden vault? Don�t mind if I do.  Oh, it�s this kind. We�ll do our usual bit of waiting outside for a few hundred turns, then going in and clearing out anything fire-resistant.  Of course, �just� the fire-resistant enemies is still quite a challenge in itself.  Also, one of them was tough enough to survive being on fire for a surprisingly long time. Ak�Gishil is essentially a super-Blade Horror whose special ability is summoning animated swords to attack us.   He dropped The Bladed Rift, a t5 artifact tool that grants bonus physical and bleed damage, plus allows us to use that sword-summoning ability ourselves. Useful for any class that focuses on melee damage, especially berserkers, who gain a bonus from causing enemies to bleed. However, it�s arcane-powered so we can�t use it.  We got a consolation prize, though. The Animated Swords are constructs spawned wielding an actual t5 sword. Most of the time this is just a generic sword which disappears on their death, but if they�re spawned with an artifact they�ll drop it upon their death. And yes, this is also possible to abuse with The Bladed Rift.   Anmalice greatly lowers your mental save, but inflicts a variety of mental debuffs whenever it hits, and reduces the mental save penalty whenever you kill something with it. Could be fun to try, though I haven�t done much with it myself.   A sword that grants blight damage conversion, lifesteal, and the ability to summon friendly blood puddles. Perfect for reavers, though certainly not a bad choice for any other sword-user.   We saw this one in the last run. As before, it�s good because free Rampages.   Bonus light and darkness damage, always handy. Good on a shadowblade or a Sun Paladin.  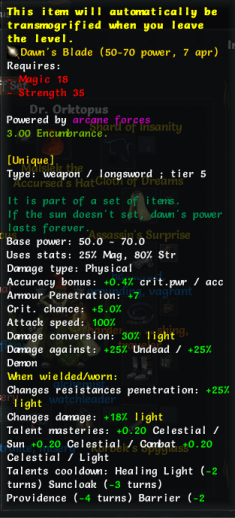 There�s better options for Sun Paladins, though. Dawn�s Blade is good enough on its own, but it becomes even better when paired with the artifact shield Unsetting Sun.   And finally, the Black Spike, which we�ve seen before too, I believe.  With that over with, just one last detour before the endgame. The Time-Locked Vault is a zone that appears in a random location on the main Var�eyal continent. It�s an extremely high-level area, with a recommended level of 45.  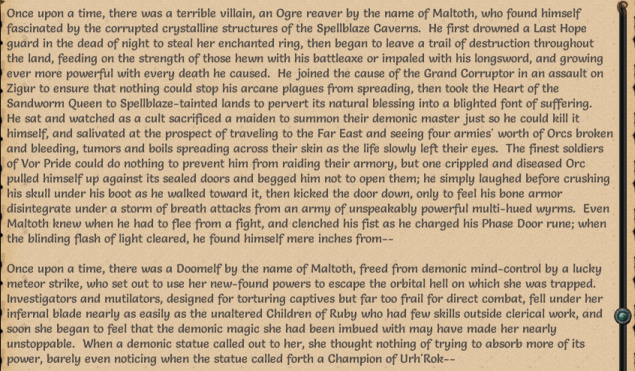  Upon entering it, we�re greeted with this message. The adventurer build mentioned down there is a fairly common one: Arcane Combat + Brawling for superspeed spellslinging, plus TK-wielding a staff for more spellpower and weapon hits. The death mentioned there is also a common one, which is why I vastly prefer Pulverizing Auger to Earthen Missiles on my Arcane Blades.  There�s a reason this zone is so high-level. Every enemy in here is a temporal variant of themselves, loaded with Chronomancy skills on top of their usual loadout.  These extremely disturbed pockets of time are also common. They create a major anomaly whenever triggered. We really want to avoid doing that.    We pick up this message on entering the second floor. As far as I know, it�s always a Paradox Mage in this story. The fact that we just completed a human(oid) Paradox Mage run is just a happy coincidence.  Clearing out more temporal enemies. They don�t put their chronomancy skills to good use for the most part, but all those damage-mitigating sustains make them incredibly bulky.  Temporal Orc enemies are also scattered about. Since they belong to the �Orc Pride� faction (as do we), they start out friendly to us. They won�t intervene in our fights, but they won�t get in our way either.  We accidentally set off a pocket of time and triggered a Dimensional Anchor field, which magically pins everyone in the area. Luckily, there�s no enemies around and we can just wait it out.  Temporal variants of almost any enemy can spawn in here. We�ve gotten fairly lucky with just regular trash mobs in this area. The last time I tried this zone, I spent most of it running from a timeswapped Nightmare Horror on my tail.   And with that, we�re immediately thrown into battle with the Scourge of the West. Or at least, one version of them from an alternate timeline.  Maltoth the Mad tends to take one of two forms: a Paradox Mage or an Archmage. We ended up with the latter, which works out well for us, since he�s vulnerable to Mana Clash. He also starts with none of his sustains enabled, which gives more offensive classes a large window of time to take advantage of before he works his way up to full power.  Unfortunately, the layout of this area makes getting to him difficult, and he got a few of them up before we could interrupt him. Oh well, we�ll make do. We open with our usual loadout of debuffs and talent-fail skills, before following up with Fatal Attractor.  Haha, we got Fatal Attractor up just in time for it to trigger his Meteoric Crash, drawing the meteor away from us. Now to press the advantage.  Whoa, we really hit the Inner Demons jackpot today. We�ll just wait it out for a bit and see how this plays out. Maybe we�ll toss a Slumber at him just to see if we can get a couple more.  This is getting ridiculous.   The demons finish him off shortly, and we move in to collect our loot after all those spells stop flying about. He dropped the Steam Powered Helm, which is, uh, nice to have, I suppose. I doubt we�ll replace Malslek�s hat, but it�s nice to have.  We�re just about ready to hit the final dungeon(s). We hit up Kaltor one more time, but he doesn�t appear to have improved his stock in any way. Oh well, I�m sure he has some more good stuff lying in those chests. Just one issue: getting him out of the way first.  Kaltor and his ilk would have been a slight challenge � thirty levels ago. As it stands now they barely qualify for �speedbump�.   Experimenting with this one might be fun, but we probably want the mindpower from Dreamweaver more than anything else.   One more of the Focus set. We�re just missing the Kinetic Focus now.   Would be a nice upgrade to our current belt. If it wasn�t arcane powered. Bah.  Oh well, can�t win �em all. We also unlock the training control room, which allows you to summon training dummies like the one in the main campaign fortress. Next up: the final stretch.
|
|
#
?
Oct 11, 2017 18:45
|
|
|
It's weird, I had completely forgotten that the Time-Locked Vault existed. EDIT: At this point I also feel a bit bad that I've run out of comments or questions. But I'm genuinely still digging the LP! It's not for lack of interest. PurpleXVI fucked around with this message at 01:57 on Oct 12, 2017 |
|
#
?
Oct 11, 2017 20:10
|
|
|

|
| # ? May 3, 2024 08:27 |
|
|
Yeah, I mean, I'm pretty curious where the whole arc of the game is going.
|
|
#
?
Oct 12, 2017 03:10
|
|