


|
Darchangel posted:Yesterday, I did install LED retrofits in the fixtures I installed on the back of my garage door a week or two ago. Pretty darn clever. I might steal this if I ever decide to fix my garage lighting situation.
|
 #
?
Apr 25, 2018 19:04
#
?
Apr 25, 2018 19:04
|
|


|

|
| # ? May 23, 2024 17:04 |
|
|
Larrymer posted:Pretty darn clever. I might steal this if I ever decide to fix my garage lighting situation. I could have set up some sort of power cabling accordion, like for overhead cranes, but decided for simplicity I could just plug it in when needed. Turns out, since my outlet is beside the door, at lightswitch height, I can even just leave it plugged in. You could probably do it even better with LED fixtures from the get go. I just happened to have these super cheap T12 fixtures I replaced with T8s several years ago when the reliability and lack of cold-starting overcame my reluctance to open my wallet. LED strips in under-cabinet aluminum rails with frosted diffusers would likely work a treat. Something like the stuff on this page: https://www.banggood.com/Wholesale-LED-Rigid-Strip-c-2772.html edit: I'll replace the T8s when I run out of the huge box of used ones I bought from the Habitat For Humanity ReStore. Still have like a dozen or so after replacing 3 in my fixtures this past weekend. Darchangel fucked around with this message at 20:28 on Apr 25, 2018 |
|
#
?
Apr 25, 2018 20:25
|
|


|
"Unfortunately, spare parts from your order have been discontinued by manufacturer and cannot be supplied. We will delete them from our website catalogue. We apologize for inconvenience. Your order is canceled. Money will be refunded to your PayPal account within 2 days, please check it later. If you kindly decide to make order through our service in future, for your convenience we will be pleased to clarify the availability of necessary parts before payment. Just let us know! Best regards, Anna" gently caress. Really needed that replacement control cable. I can do without the trim piece, and fabricate the clips.
|
|
#
?
Apr 25, 2018 23:29
|
|
|
Do you have the old cable? Maybe you can find another car that has a similar one.
|
|
#
?
Apr 25, 2018 23:43
|
|

|
What fittings are on it, making a new one might not be out of the question.
|
|
#
?
Apr 26, 2018 08:09
|
|

|
Seat Safety Switch posted:Do you have the old cable? Maybe you can find another car that has a similar one. cakesmith handyman posted:What fittings are on it, making a new one might not be out of the question. It's got a double 90 kink at one end, and a loop at the other. Part # 55907A (Actual part # 55907-12210) here: https://www.megazip.net/zapchasti-d...r-duct-17798854 I seem to recall someone posting on one of the AE86 forums that a Tacoma cable or some such could be made to work. Researching now. edit: the issue is that the cable is hard to move. Barely moved at all until I got a motorcycle cable luber on it. The issue is that the control cables on the AE86 are solid wire in a sleeve. Later designs use a plastic-jacketed stranded cable in a sleeve, which has better flexibility and slides more smoothly. Darchangel fucked around with this message at 22:30 on Apr 26, 2018 |
|
#
?
Apr 26, 2018 21:22
|
|
|
Yeah, it was a 91-95 4Runner/Pickup cable, but they were replacing the air mix cable with a slightly modified air mix cable from the 4Runner. The 4Runner heater valve cable is also NLA, but the air mix cable might be long enough. I need to measure the AE86 heater valve cable as a baseline. Looks like a lot of toyotas used a similar design. Tundra and Camry, for example, so it's time to hit the wrecking yards again and see what I can find.
|
|
#
?
Apr 26, 2018 22:28
|
|
|
OK, had some energy after work, and weather was nice. Lets get that package tray done! But first - applying fiberglass resin to the mostly good rear side panel.  It had a break, and the hardboard was getting soft, most noticeably around the holes for the mounting clips. It also had a bit of warpage from the side window on that side leaking, which I still need to fix. All the bottles and bucket are to try to get the thing flat after wetting it with the resin. There are 1/8" steel plates under the weight to spread the load and make for flatness. Of all things, those plates are 12" decorative tile samples I rescued from the trash bin in the visual department at my last job. Chromed steel. While I had the resin out, I applied some to the new side panel I made. I started out with just applying it around the holes for the panel clips, but I had mixed up enough that I did the entire panel on the back side. I have a water shield in the car, but this is added protection.  Crap picture. It was getting dark. It's just masonite with resin on it. Entire garage smells like Bondo (because Bondo is also polyester-based.) Now, onto the package tray. As you may recall, we had the basic board done.  I found I had some speed nuts that fit on the speaker cover posts, which was handy.  I thought maybe the "Bluemist" dye from SEM would be closer to the dusty blue that the interior trim was than the paint I picked up at Home Depot was, but no:  Too much grey. I guess everything gets changed to the blue I used on the speaker covers. I don't feel like paying to have a color custom mixed. I did need to drill the various holes for the speaker and hinge covers.  That was easy enough. Time to get on with the upholstery. First up was to apply the self-adhesive closed cell foam with aluminum heat shield I picked up from eBay.  This is actually two pieces, since it only came in 4' rolls, and I didn't want to buy an 8' long piece. Cut pretty easily, and stuck like gangbusters. Cut out all the holes:  And now the fun part: carpet! Blue non-woven speaker box carpet, which is similar too, but thicker, than the mouse-fur carpet that was on the package tray. This is the second roll. The first one I bought was too bright of a blue. Should have asked for samples, but it was less than $20. This time I bought 2 yards, so I could put some in the trunk and behind the rear seat as well.  I'm all pro and poo poo with chalk for marking. Cut and glued on.  The spray adhesive I bought from the same place as the carpet is pretty good stuff. Seems every bit as good as 3M 77, but half the cost. I figured if an upholstery shop sold it, it was likely to be decent stuff. Edges trimmed and wrapped around:  Big holes carved out:   The little holes were much more of a pain in the rear end. I really need to buy a set of sharp hole punches. That would have made this 200% easier. As it was, I basically twirled and Xacto knife in the holes until they were clear. A drill bit just bound up. Speaker covers installed:  The hinge covers will come later. One of them is badly deteriorated, and the other needs some attention as well. The plastic is crumbling on both, enough on one that it has holes in it. It was dark by the time I got the tray back in the car, so the pictures suck. I'll get more in the daylight later when I have time.      Much better. Need to paint the CHMSL housing as well, and get that installed. Probably nothing more this weekend. I plan to be at the annual Pate Swap Meet out at the Texas Motor Speedway all weekend. I have no money, so won't be buying a lot, just soaking in ~*car stuff*~. Darchangel fucked around with this message at 16:23 on Apr 27, 2018 |
|
#
?
Apr 27, 2018 16:18
|
|
|
That's a nice magnetic light, and those covers seem like a good candidate for a 3d printer replacement, if you know anyone with a printer?
|
|
#
?
Apr 28, 2018 06:10
|
|
|
Since RX-7s are part of this... https://www.tirerack.com/tires/tire...romCompare1=yes
|
|
#
?
Apr 30, 2018 16:24
|
|
|
cakesmith handyman posted:That's a nice magnetic light, and those covers seem like a good candidate for a 3d printer replacement, if you know anyone with a printer? Light is from Harbor Freight, and yeah, I really like it. It could swivel just a little more if I had my druthers, but it works well as is. Plenty bright. Good point on 3D printing - that's why I want one. A couple of people I know have small ones. Might be big enough. Good project to learn TinkerCAD with, maybe. Right after I look on Pinshape et al to make sure no one hasn't already done it. mekilljoydammit posted:Since RX-7s are part of this... https://www.tirerack.com/tires/tire...romCompare1=yes Oh wow, decent tires in 13". Perfect size for the 13x6 "+" wheels, even. Too bad mine has GSL-SE suspension now, and 16" wheels ") And the Corolla has 14". Although I do have the Corolla's original 13" steelies. Anyway, no progress - last weekend was full. I did drive it to a meet some 30 miles away with no issues. Some daylight pics of the package tray:   
|
|
#
?
May 2, 2018 21:10
|
|
|
Looks better than factory! Nice work.
|
|
#
?
May 2, 2018 22:28
|
|

|
Granite Octopus posted:Looks better than factory! Nice work. Thanks. The carpet quality is definitely better. The stuff that was there was a thin rodent fur. It came apart when I tried to remove it from the old package tray.
|
|
#
?
May 3, 2018 14:38
|
|
|
Looks very nice man
|
|
#
?
May 3, 2018 17:16
|
|
|
everdave posted:Looks very nice man Thanks. Let's hope the rear side panel goes as well. Reusing the original upholstery there. If that works, the driver's door panel is next.
|
|
#
?
May 3, 2018 17:56
|
|
|
Had some time this past weekend to get stuff done. When last we left the side panels, we had this:  and this: (That's the driver's side panel getting flattened, after applying fiberglass resin to repair a tear and strengthen the whole board.) The resin has dried on that one, and the new panel (Waterproofing and reinforcing the panel clip holes), so now it's time to finish this. First, since the foam on the original upholstery looks like this:  I scraped it all off. Well, more like helped it fall off. (Why did I not take a picture of the upholstery without the foam?) Then, I got out the remnant headliner material I bought (and was sold by the upholstery shop) for just this purpose:   Worked nicely, and the spray adhesive I bought from the same shop worked great. And then we apply the original upholstery (which we have already test fitted previously):     Then staple to make sure it stays put:  Confession: I almost screwed this up. Not fatally, but I almost had to start over. See, I made the mistake of spraying the entirety of both surfaces with adhesive. That's an issue when you need to get, say, one end in the right place, then make sure the other end ends up correct as well, especially with that bend at the top. I also didn't think to tape the flaps that fold over the back side open so that they wouldn't stick to the back side of the upholstery first. *That* was fun. I managed to get it all straightened out, but there's still a few wrinkles there that wouldn't be if I had thought it through. What I should have done was spray the top bent part, got that on securely, then moved down the panel gluing about 6" at a time. Still 100% better than what it was, and I can use the lesson learned for when I do the driver's door panel. Next up, the upper clips for the panel were missing from the passenger side. These things, one front, and one rear:  I tried to order a pair from Megazip, but they came back as NLA when they tried to get them, along with literally everything else I ordered. So, I had to fabricate.     Toughest part was getting that wiggle in the center leg, and adding a feature to retain it in the car body. The OEM piece has a tang knocked out during stamping. I can't do that, sI I just made a dimple with a pointed punch, and bent the leg with needle-nose pliers, bending out, then bending back with the leg over the end of a punch to add the kick-out. This is how it goes in the trim panel:  In place in the car:  I made two, and used one OEM and one fabricated clip on each side. And now, the moneyshot:  First time that back seat base has been in the car for a while, much less the side panel. I am happy with this. I need to get the headliner cleaned up so I can put it back in, and then the plastic trim on the pillars. I need to fix some of the trim, as it's a bit crispy. I'll probably fiberglass it back together, then paint, since there are small missing pieces. Also need to paint the CHMSL to match the speaker covers and reinstall, then the rear is complete as factory. I'd like to get some carpet on the steel behind the fold-down seat, but that is totally for cosmetics. Will probably tackle that when I upholster the trunk, if I do so. edit: It's a bit quieter with all that back in place, too.
|
|
#
?
May 7, 2018 16:27
|
|
|
Darchangel posted:And now, the moneyshot: Nice work.
|
|
#
?
May 7, 2018 16:49
|
|

|
Sunday, after doing the needful re: house and lawn, I decided to clean up the engine bay of the '79 RX-7 in anticipation of a replacement engine, previously seen, which is still soaking in ATF and LC20. I've been rotating the eccentric shaft 3 full turns every so often to keep the stuff coating everything. 3 full turns because I got it to where the offending apex seal is pointed down so it can be immersed in the liquid as much as possible, and 3 turns of the e-shaft = 1 full turn of the rotor. It's how rotaries work. Look it up. Before:    Sorry about the deep shadows. It's out in the driveway, and it was a bright mostly cloudless day. I hosed it down with Simple Green, and then went to town with my power washer.      I'm annoyed at myself for accidentally getting the radiator with the power washer on "needle". May have to replace the radiator anyway - the outlet and inlet are super soft and got mangled trying to get the hoses off. While I was blasting, I went after the underside of the hood. There was some schmutz on the underside from a leaking shaft seal on the AC compressor, and the poorly-prepped red paint has been falling off the white hood since I got the car. So I helped it along.  There's still some stubborn bits. Closeups of the underhood stickers, in case you have an '80 RX-7:   Mine's a '79, and no longer stock, exactly, so I don't even need these, actually. Also, my driveway is dirty. 
|
|
#
?
May 7, 2018 17:08
|
|
|
Oh, yeah. This showed up at our monthly Rotary meet, and it made me happy: Looked stock, except for the wheels, even had the factory stereo, but the engine was very much not stock.  It had the brap-brap. edit: I'd love to have a bunch of pictures of all the cars that showed up, but, well, the FB and this is it for this month:  Best part is all these guys but me (in my non-rotary, natch) are first-time attendees. I may have berated the other members on Facebook a little for making such a great impression on the newbies. To be fair, we had a grill-out the previous weekend. I guess everybody figured that was enough for the month. I live right near the meeting point, so it's easy for me. Both of those RX-8s sounded healthy, BTW. I really liked the body kit and wheels/fitment on the one on the right. Nothing wrong with the other one, either. Darchangel fucked around with this message at 17:22 on May 7, 2018 |
|
#
?
May 7, 2018 17:17
|
|
|
Threw the starter back on the 13B out of my GSL-SE parts car. Engine is actually an S4 13B, and so is the transmission, though it appears to have had the shift tower replaced or modified to put it in the correct place for an FB. I cranked the engine over to get a better feel for how the compression was. Jumper cables to my wife's (running) car for power.  https://www.youtube.com/watch?v=U0Jlw4-PpFk I moved the ground cable to the starter itself, and got a bit more cranking oomph: https://www.youtube.com/watch?v=0SpdIHw58nM ('S got a good beat, there.) As you can see from the sound and the way the rags move, the front rotor is healthy (steady pulses - 3 per crank rotation), and the rear still has one stuck apex seal (one "chug" per crank rotation.) Should be enough for it to start in the car, I think, which should free up that remaining apex seal. Hopefully. If not, it'll be a mockup, and get rebuilt. Now, for the rotary knowledgeable, can anyone tell me what I forgot about?  That's right! Rotaries use external oil coolers!   Well, the oil pump works... Big mess. 
|
|
#
?
May 9, 2018 15:53
|
|
|
Dagen H posted:Nice work. Thanks. It almost went sideways, but turned out decently.
|
|
#
?
May 9, 2018 15:54
|
|
|
Have you considered rotary into the Corolla? I think a running rotary might be rarer than an AE86 at this point.
|
|
#
?
May 9, 2018 16:36
|
|

|
I didn't show off my swap meet finds from a couple weeks ago. Didn't have much money, so I mostly bought tools - a set of hole punches, prybars, and a full set of chisels and punches, since all I had were a few random punches. The good deal was this:  Yeah, the complete assembly (minus one brake pad) for $20. Parking brake shoes look good. Mechanism works. Typical brake dirt, but no rust or grease.   Hopefully I can fit these to the O-type rearend in my '70 Cutlass. There will be some fiddly bits for the axle retainers (O-type axle is c-clipless) but should be do-able. I have a set of Cadillac Seville (RWD) rear discs, but they are: a) heavy (cast iron calipers), b) staggered (one caliper on front of rotor, one rear), which may not work with my coil spring rearend with non-staggered shocks, and c) have integrated parking brakes in the calipers, which makes them more expensive. Not to mention, 40 years old. On the plus side, the Seville brakes use bog-standard D3 brake pads, same as the front of the Cutlass and about a million other GM RWD products, but 4th-gen Camaro brake pads should be super cheap and available as well, possibly in better compounds. For $20, I couldn't pass them up.  Some guy had a bucket of these. $1 for a handful. Done! Panel clips are always handy. He had another bucket of a different type. I probably should have grabbed a handful of those, too. Yet another dude had a pile of these:   Standard 1/4" quick connect, but a nice quality with an extra retainer piece. Looks like 18-16 ga. I've already got the correct crimper for this type, so yeah. $1 for the pair of strips. Not from the swap meet, but I bought these from eBay:   I was just looking for vacuum caps and plugs for disconnected hoses for disconnected bits and stored engines, but actual vinyl vacuum caps are startlingly expensive. These things came up in the search. Silicone, for masking holes and tunes for powder coating, media blasting, and painting, but should work fine for my use, and as a bonus not get all crispy. $20 for 98 pieces up to about 5/8". https://www.ebay.com/itm/98pc-Masking-Kit-Assortment-High-Temp-Silicone-Powder-Coating-Plugs-Caps-Paint/332472825982 was what I bought, but there are other assortments and vendors. I'd like some larger ones, but an assortment gets more expensive quickly when they get big. Hoping to head to the wrecking yard this coming weekend to pick up some stuff for all of my cars. Mainly a later model Toyota heater valve cable to try and make work on the Corolla. Maybe a couple of Ford 4.9L straight-six throttle bodies to use as ersatz Webers in an EFI conversion for the 4AC in the Corolla and/or one of my rotaries. I already have a Ford 460 (7.5L) throttle body to use on my Cutlass. Similar throttle body used on the original '90s Mustang Cobra (a bit larger, I think). They look like this:  4.9, 5.0, 5.3, and 7.5L all look similar for these years ('90s), varying in size, of course. All of them have TPS, and some of them integrate the IAC, which is handy in some installs. The 460 puts the IAC on the intake elbow, which makes the TB cleaner. Unlike the six, 5.0 and 5.3, which mount the TB on a plenum, the 460 uses a "snake" that bolts to the top of the intake, carburetor-style. Kind of a weird looking critter:   BBK makes improved throttle bodies for these applications if you need something bigger, but the stock 460 TB is 52mm x 2, which should be enough for something like 500 HP. 5.) is 50mm x 2. It's a compact TB, super-common, and therefore cheap, and looks decent. No idea how close the bolt pattern is to an actual Weber or Dellorto, though.
|
|
#
?
May 9, 2018 16:52
|
|
|
DJ Commie posted:Have you considered rotary into the Corolla? I think a running rotary might be rarer than an AE86 at this point. Oh, absolutely. I want to get my '79 RX-7 operational first, but, yeah, a 13B in the AE86 would be hilarious, and I would be a hero at the rotary meets. Not to mention even a stock 12A would have 20 more HP than the 4AC... edit: and I should have an engine left over once I decide which goes in the RX-7. This may actually happen.
|
|
#
?
May 9, 2018 16:54
|
|
|
Hmmm. 52mm on those... seeing 61mm BBK ones on ebay... can you measure the center to center spacing? I'm working on a slide valve TB but it would be nice to have a cheap alternative.
|
|
#
?
May 9, 2018 17:20
|
|
|
mekilljoydammit posted:Hmmm. 52mm on those... seeing 61mm BBK ones on ebay... can you measure the center to center spacing? I'm working on a slide valve TB but it would be nice to have a cheap alternative. I will try to remember to do that.
|
|
#
?
May 9, 2018 19:00
|
|
|
Darchangel posted:I didn't show off my swap meet finds from a couple weeks ago. Hell yeah, vette brakes. Darchangel posted:I already have a Ford 460 (7.5L) throttle body to use on my Cutlass. Similar throttle body used on the original '90s Mustang Cobra (a bit larger, I think). What will you do for an intake manifold? Obviously you can make an adapter for the throttle body, but you need something that drops onto a SBC (BPO?) and has fuel injector bungs. Is there an affordable option?
|
|
#
?
May 10, 2018 07:01
|
|

|
Raluek posted:Hell yeah, vette brakes. Well, LSx Camaro, at least. quote:What will you do for an intake manifold? Obviously you can make an adapter for the throttle body, but you need something that drops onto a SBC (BPO?) and has fuel injector bungs. Is there an affordable option? My Cutlass is an A-body, so it has a small-block Olds, which, coincidentally, Cadillac used in the X-body-derived Seville in the late '70s, with Bendix multiport EFI. The ECU is beyond dated now, of course, but that means that there are multiport EFI intake manifolds for Olds small blocks, and they use more or less standard injectors. In the factory application, it uses a 2-barrel throttle body mounted like a carburetor, with a carb-style air filter. The Seville we're talking about :  Engine:  Boooooring. (There's an Olds 350 under all those hoses.) Intake:  This is the later aluminum ones. '76-77 had a cast-iron monstrosity. I have one of each. Original throttle body:  If I'm going to the effort of fuel injecting my hot rod, I don't *want* it to look stock or like it has a carb, so the Ford 460 shotgun TB. Just need to make a 90-degree adapter out of tube (or a basic sheet-metal plenum-style) and go to town. K&N makes a filter kit to fit. Something like this:  Additionally, someday I'd like to twin-turbo the thing, and a twin TB makes for easier piping.
|
|
#
?
May 10, 2018 15:28
|
|
|
mekilljoydammit posted:Hmmm. 52mm on those... seeing 61mm BBK ones on ebay... can you measure the center to center spacing? I'm working on a slide valve TB but it would be nice to have a cheap alternative. The bores are 72mm apart:  Interestingly, I noticed that I'd marked my TB as having 54mm throttle blades, and so it was:  However: 
|
|
#
?
May 10, 2018 15:44
|
|
|
Darchangel posted:Well, LSx Camaro, at least. I know the fronts are essentially identical between C5/C6 and LSx F-bodies. Apparently the Vette calipers are a bit stiffer with beefier ribs or something. I believe the rears are drat similar, too. I know those brakes will bolt right up to a Chevy 10 bolt, but I don't really know the differences with the BOP stuff. $20 for all that poo poo is a loving bargain and a half. The only thing I had to do on mine was hog out the center bore in the rotor just a bit to clear the axle. I had to make some brackets for the parking brake cables, too. 
|
|
#
?
May 10, 2018 15:56
|
|

|
I'm disappointed those throttle bodies are going on the olds
|
|
#
?
May 10, 2018 16:36
|
|

|
Boaz MacPhereson posted:I know the fronts are essentially identical between C5/C6 and LSx F-bodies. Apparently the Vette calipers are a bit stiffer with beefier ribs or something. I believe the rears are drat similar, too. At this point, I don't even know if the axle flange pattern is the same. There will be some additional fuckery because the O-type rear has an axle retainer that sits on the outside of the brake backing plate, using the same bolts, and has an offset in it to keep the bearing in the right location in the housing. Due to the backing plate/caliper mounts fro the discs being thicker, I'll need to get a shim in there of appropriate thickness to keep the axle from walking a bit. Would have to do that with any conversion. Other issue would be the relationship of the axle tube flange to the mounting surface of the axle. The OEM drums are pretty wide. Will have to see how that works out. Fo3 posted:I'm disappointed those throttle bodies are going on the olds There's nothing to say I can't buy another pair of 5.0 TBs and inject the 4AC in the Corolla, just for laughs. I think it would look pretty cool, similar to a dual Weber/Dellorto setup. edit: The AE86 is a newcomer. My Olds and my RX-7s are my babies, and I'm afraid they will always come first. I've got no real attachment to the AE86 beyond "I really liked Initial D" and "it's a neat little RWD Japanese coupe." Darchangel fucked around with this message at 18:31 on May 10, 2018 |
|
#
?
May 10, 2018 18:29
|
|
|
Darchangel posted:The bores are 72mm apart: Huh, weird. Not really ideal for rotary stuff, but ... oh. Oh hm. 4 of those vertical on a small block Chevy might be fun.
|
|
#
?
May 10, 2018 18:53
|
|
|
mekilljoydammit posted:Huh, weird. Not really ideal for rotary stuff, but ... oh. Oh hm. 4 of those vertical on a small block Chevy might be fun. Probably massive overkill, too, since this one is supposed to be big enough for a 460 BBF, and theoretically flows enough for about 500 HP. Still, the only thing too big of a TB (or TBs) does is make the engine a bit touch off-idle. Some sort of progressive linkage would help that. Could also use 4 of the 4.9L straight-six TBs. They're 50mm x 2, I believe. Probably not enough difference to bother, but they and the 5.0 TBs will be a lot more common. I *think* that the bore spacing is the same on all of them. On the rotary, what if you use two, like in some of the Dellorto setups, one feeding both ports of the front rotor, one the rear? 12A rotors are 70mm wide, 13B 80mm, so not too far out. End up something like this ITB setup: 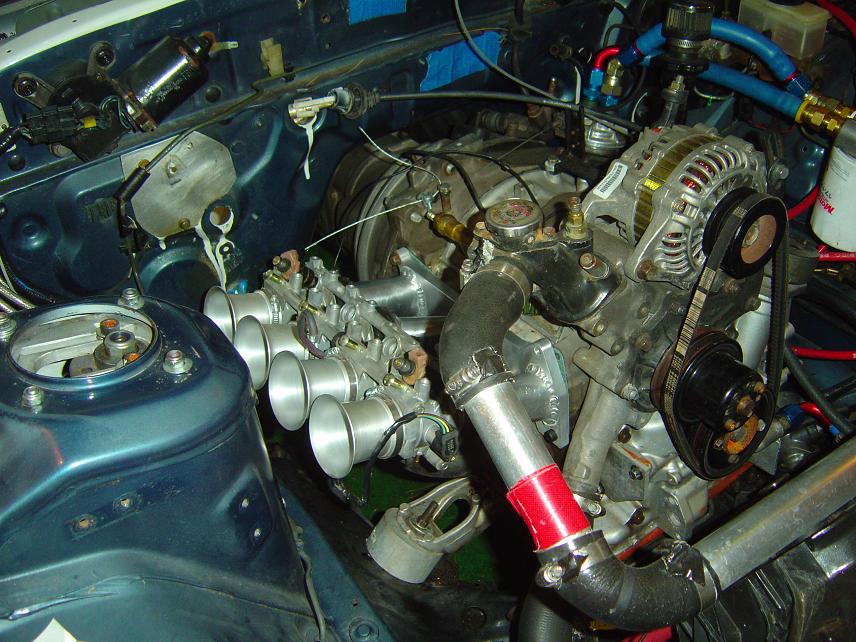
|
|
#
?
May 10, 2018 19:09
|
|
|
ITBs need a lot more flow - a throttle body feeding a plenum is flowing air basically all the time, one going to each cylinder on the one hand only sees 1/8th (or whatever) the flow on average, but is seeing no flow about 2/3rds the time. So 50-56mm per throttle for a healthy SBC isn't actually unreasonable. On a rotary, could do it like you posted with two of them, but all you really need for butterfly area is around 40-44mm going by the Aussie guys. Two 50mm butterflies is reasonable for a healthy streetport 13B, and for peripheral ports I'm looking in the 58-60mm range. Anyway, neither here nor there.
|
|
#
?
May 10, 2018 19:38
|
|
|
Boaz MacPhereson posted:I know the fronts are essentially identical between C5/C6 and LSx F-bodies. Apparently the Vette calipers are a bit stiffer with beefier ribs or something. I believe the rears are drat similar, too. This is what I was getting at. Although I didn't know the fronts were the same, but I thought the rears were. Aren't at least the C6 fronts bigger than the C5 and late 4th gen?
|
|
#
?
May 12, 2018 04:27
|
|
|
Raluek posted:This is what I was getting at. Probably. I do dig that the rear calipers a nice light aluminum PBRs. I didn�t measure the rotors, but they�re at least 11�, I�d say. Works for me. I plan to put 12� rotors on the front, so that should balance decently. Edit: internet says LS1 f-body rear discs are 12�. Nice. Darchangel fucked around with this message at 05:06 on May 12, 2018 |
|
#
?
May 12, 2018 05:01
|
|
|
Darchangel posted:Edit: internet says LS1 f-body rear discs are 12�. Nice. Measured them. They are indeed 12". Sweet. Guess that means I need to step up to 13" on the front. In AE86 news, I hit the wrecking yard on Saturday, and luckily found a recently-departed 4Runner with the cables I was looking for:   All three cables have the ends I need. I still need to pull the original cable out and see which length is closest to what the car needs. You can see where these cables have a jacke on the push-pull cable that makes them work a lot more smoothly than the original non-jacketed cables. That's it. Wrecking yard and some other stuff around the house on Saturday. Sunday was Mother's Day and dedicated to the wife, who wished to have a day of rest.
|
|
#
?
May 14, 2018 16:12
|
|
|
Great score with the cables.
|
|
#
?
May 14, 2018 16:25
|
|
|

|
| # ? May 23, 2024 17:04 |
|
|
Fo3 posted:Great score with the cables. Someone else posted about using the Tacoma/4Runner cables elsewhere, since the OEM cables are NLA, and lubricating mine was only marginally effective. I'll add some Teflon lube to whichever one ends up going in the car for added slippery, and make sure they're all adjusted properly. The temp control also moves an air door in addition to the water valve.
|
|
#
?
May 14, 2018 16:58
|
|