|
Oh man, you know this thread is going places when we go from  to "oh, you need to just build your own lens, [link to instructions]." to "oh, you need to just build your own lens, [link to instructions]."Tomorrow night the club I help run is doing a star party and I'm going to try and observe two occultations of stars by the Moon. Should be interesting!
|
 #
?
Aug 8, 2019 04:10
#
?
Aug 8, 2019 04:10
|
|

|

|
| # ? May 30, 2024 14:04 |
|
|
GSO coma corrector with spacer popped up used! https://www.cloudynights.com/classifieds/item/179650-gso-coma-corrector-wspacer/
|
|
#
?
Aug 8, 2019 19:35
|
|

|
Thought it may be best to ask here. https://m.imgur.com/a/z00EmH7 This picture seems to be a chart or diagram of the solar system showing the planets' positions at a certain period of time. Does this type of chart have a specific name? I ask mostly because I saw a person wearing a dress shirt with a bunch of these all over it.
|
|
#
?
Aug 9, 2019 02:07
|
|
|
I�m headed to Ecuador sometime soon with some camera gear and I�m hoping for reasonably dark skies. Any suggestions for getting good Milky Way pictures if I should get the chance? I understand it�s better further south thanks to having a view of the central bulge. Will have a full frame DSLR and a fast-ish wide angle lens but no real astro experience.
|
|
#
?
Aug 10, 2019 05:10
|
|


|
Agreeable Employer posted:Thought it may be best to ask here. I would call it a very stylised �Solar System diagram�. If you wanted to get really fancy you could call it something like �view of the principle bodies of the Ecliptic Plane, from the north�.
|
|
#
?
Aug 10, 2019 06:50
|
|

|
Seems like something smoked into Jupiter again https://www.ctvnews.ca/sci-tech/something-slammed-into-jupiter-so-hard-it-was-visible-from-earth-1.4543611 https://twitter.com/ChappelAstro/status/1159290187287015429?s=20
|
|
#
?
Aug 10, 2019 21:32
|
|


|
Stellarvue Access 102 sale: https://www.stellarvue.com/stellarvue-sv102-access-apo-refractor-blowout-sale-1/ Carbon fiber $100 more.
|
|
#
?
Aug 11, 2019 04:00
|
|

|
Managed to get a decent night for viewing, set up the gear, got all ready, aaaaaaand the next door neighbor had friends over to hang out in their back yard. Which of course required them to utilize their roof-mounted flood lights so their kids could play in the yard while they sat and chatted.
|
|
#
?
Aug 12, 2019 15:20
|
|
|
So... i'm interested in building a PiKon. (that is a home made telescope using the Raspberry Pi camera, and some janky gear to have a single mirror telescope) What I feel is missing, is photography that's been done on the PiKon. most of the examples I see, are all things that are like "first light" or "Obviously not well processed" stuff. Do any of you know people who have made observations and done good imagery with the PiKon? ... I'm going to build one regardless, because it looks to be a fun project. I just would ilke to see if people have gotten good results with them. "I" will be happy with ~any~ result.
|
|
#
?
Aug 12, 2019 22:51
|
|

|
Nerobro posted:So... i'm interested in building a PiKon. (that is a home made telescope using the Raspberry Pi camera, and some janky gear to have a single mirror telescope) https://makezine.com/projects/gaze-across-the-solar-system-with-a-3d-printed-raspberry-pi-telescope/ That looks like a lot of effort and a lot of hype for something that doesn't work very well, and isn't even complete. Their own demo image has that weird purple color cast and vague focus, I can't imagine it getting much better than that. [I'm going to just delete a whole bunch of details because it sounds like I'm just piling on and getting mean.] If you want to "make" something that might please you when you're finished, check this out: http://www.openspaceagency.com/ultrascope
|
|
#
?
Aug 13, 2019 03:45
|
|
|
Putting a camera at prime focus is cool & good. A Raspberry Pi could be a workable host, but do keep in mind what you�ll be losing versus a laptop. Whatever you do, don�t use that camera.
|
|
#
?
Aug 13, 2019 05:28
|
|
|
I bought the Rokinon 135mm F/2 to put on my Star Adventurer. 
|
|
#
?
Aug 13, 2019 05:38
|
|


|
Rolabi Wizenard posted:https://makezine.com/projects/gaze-across-the-solar-system-with-a-3d-printed-raspberry-pi-telescope/ The purple cast, and other... "well that looks like someone screwed up" bits are why I came here to ask. If you don't mind re-writing them, i'm all for the piling on stuff. Give me all you got, i'm not a camera nerd by any means so if it's accurate stuff, tell me. My first instinct, is that the track/rail the camera is on, is pretty trashy, and isn't maintaining good camera position. If it's not centered, and parallel to the plane of the mirror, and such, you're going to get .. focus that's not the same across the die. At the effort level of the ultrascope.. well I need to see what the status of the lasers at PS:1 is like. hah. Platystemon posted:Putting a camera at prime focus is cool & good. There's two generations of camera past the one used in that example. 8 and 13MP. "Any" usb camera is really an option too. Of course, at that point, "any" laptop becomes an option.
|
|
#
?
Aug 13, 2019 15:12
|
|
|
I definitely don't want to come across as insulting, nothing personal. Lots of effort for something that won't work very well. I'll just throw out my thoughts and maybe some of the more knowledgable/experienced guys can corroborate or disagree. If the RPi's camera is two generations better than the one they used to take their demo pictures then maybe something can be made interesting. The plans are for a mirror cell and a spider. You provide the mirror, and I assume the way to a mirror is to find a garage sale or craigslist scope. They specify a spherical mirror, which means that the mirror will have a long focal length (to minimize the aberrations due to it not being an actual parabola). You're going to put a long (long) tube on an equatorial mount for AP purposes? That mount will have to be a $1500 EQ-6 class or better, and the tube will have to be sturdy to prevent flexure. They spec a PVC pipe. Here's a 4.5" spherical mirror in a metal tube with a secondary mirror, so it would be a little shorter than your PVC OTA. The mount in the picture is a joke, even for visual use. Let alone holding that thing steady enough for taking pictures. https://www.bhphotovideo.com/c/product/285218-REG/Celestron_21045_PowerSeeker_114_EQ_4_5_114mm.html If you get a 4.5" parabolic mirror with a shorter focal length, you can make a shorter tube, requiring less mount. Parks has a 4.5" f/5 for $300 http://www.parksoptical.com/product...+Primary+Mirror You might find a 130mm f/5 newt out in craigslist land, that's relatively common (Celestron, Meade, Sky Watcher, Vixen, Orion all have made 130mm f/5 news for a while), but you'd need a different mirror cell, tube, and spider. The spider they show has three thick vanes. Three vane spiders produce 6 diffraction spikes, but the spider vanes on this thing are very thick and don't extend radially out from a central point. It makes me think you'll have a spike on either side of a star for each one of these vanes, and they won't cross at a central point. There is some app to model diffraction, but I don't know what it is. Seems like it'd be a very weird look. Seems nonsensical to scrap a mirror cell and a spider from a craigslist dumpster-newt so you can 3D print a new and inferior mirror cell and spider. You can just extend the old newt by a few inches and use the hardware you have to make something lighter and probably more collimatable. Some newts are long enough that you might just have to drill holes to move the spider up and the mirror cell down to get the prime focus where you need it.
|
|
#
?
Aug 13, 2019 23:43
|
|
|
Is anyone jumping on the Stellarvue SV102-Access deal? Seems like quite the buy. Normally $1,095.00, on sale for $695.00 as a close out. https://www.stellarvue.com/stellarvue-sv102-access-apo-refractor-blowout-sale-1/
|
|
#
?
Aug 15, 2019 01:08
|
|
|
Internet Explorer posted:Is anyone jumping on the Stellarvue SV102-Access deal? Seems like quite the buy. Normally $1,095.00, on sale for $695.00 as a close out. I would love to jump on that deal but I've spent way too much money on telescope crap in the past couple years. :\
|
|
#
?
Aug 15, 2019 03:23
|
|
|
Rolabi Wizenard posted:You're going to put a long (long) tube on an equatorial mount for AP purposes? That mount will have to be a $1500 EQ-6 class or better, and the tube will have to be sturdy to prevent flexure. They spec a PVC pipe. Also notice that the test photos were of the moon, by far the easiest thing to image in the sky. You don't need a $1,500 mount to image the moon, because it's so bright you can use 1 millisecond exposures. Any old mount including a cheap camera tripod will work if you just need a 1 ms exposure time.
|
|
#
?
Aug 15, 2019 07:49
|
|

|
Internet Explorer posted:Is anyone jumping on the Stellarvue SV102-Access deal? Seems like quite the buy. Normally $1,095.00, on sale for $695.00 as a close out. I bought mine this spring and was worth the full price I paid.
|
|
#
?
Aug 15, 2019 22:33
|
|
|
drat, that looks great but I've decided to put off getting a refractor until next year, most likely...
|
|
#
?
Aug 16, 2019 13:36
|
|

|
That RedCat 51 looks ridiculously awesome. I wonder if they are going to make other scopes in a similar vein? Something like a RedCat 70 or 80 would be really neat. Starting to get stoked about my Labor Day plans. Going camping in a Bortle 2/3 park. Got my StarAdventurer, my Fuji XT-20, my Rokinon 12mm F/2, my Rokinon 135mm F/2... Going to be my first time doing astrophotography. I think I have a grasp on most of the concepts. Still need to pin down how to do Darks/Bias/Flats. Also, still need to pick out a target or two for the Rokinon 135mm. Going to play with Stellarium for a bit. Anybody got any random suggestions for a first timer with the gear I've got on hand?
|
|
#
?
Aug 20, 2019 05:56
|
|
|
Internet Explorer posted:That RedCat 51 looks ridiculously awesome. I wonder if they are going to make other scopes in a similar vein? Something like a RedCat 70 or 80 would be really neat. Sure. Quick writeup here, everything bears double checking and some is just my opinion so I welcome others to jump in if they feel differently. Don't worry too much about calibration frames right now. They take time to do and you should worry more about getting good exposures first. Take things one step at a time. Astrophotography is an intersection of multiple, difficult to master tasks (camera stuff, mount stuff, processing) and if you try to take it all on at one time, you might hit a wall and get frustrated. I see you're starting with a normal camera and a Star Adventurer, I think that's a good way to go. With wide angles you don't have to worry so much about stars streaking. Expose to 1/3-1/2 histogram. You may not need a lot of shots if the skies are very dark. Try different ISOs (or maybe check what your camera's "best" ISO is for gain and read noise - on my Canons its usually 1600). Once you can pin down getting good exposures, you can add in doing darks/biases. They're straightforward to do: - Darks: throw your lens cap on and take some number of exposures exactly like your light frames (in temp, aperture, exposure, ISO). Basically just do it right after you take lights. Depending on how many you can do like 5 or up to 20 or 30. Just like with light frames, doing too many runs into diminishing returns. - Biases: throw your lens cap on and take the shortest exposure your camera can do. Maybe like 50 of these since it should be pretty fast. Flats are the tricky one... some people use the twilight sky, I prefer to use a light panel as then I'm not scrambling to take flats while the sky is changing. But that may not work in the field, so it just depends. It generally means taking an even 1/2 histogram exposure of a uniform lit background to highlight any differences in light levels due to the optical path. (e.g. vignetting) These are also taken at the same aperture/exposure/ISO as your lights. Of course, processing all this takes some time... which is why I say to just stack light frames first and see what you get. DeepSkyStacker makes it pretty easy to add in the darks/biases/flats once you can do those. Then you play around with what you have in an image editor - usually a curve transform or some sort to start (to bring out highlights and such). Plus stuff like sharpening and noise reduction but those can easily become advanced topics since there is no hard and fast rule for those. With Bortle 2/3 skies you probably won't have to worry too much about light pollution gradients unless you're looking right above a city.
|
|
#
?
Aug 22, 2019 05:24
|
|
|
Internet Explorer posted:Anybody got any random suggestions for a first timer with the gear I've got on hand? Pair of modest binoculars (I use some 8x40mm) for checking out wider areas of sky without having to train and adjust a scope
|
|
#
?
Aug 22, 2019 12:44
|
|
|
hannibal posted:Sure. Quick writeup here, everything bears double checking and some is just my opinion so I welcome others to jump in if they feel differently. Thanks for taking the time to post this. Definitely along the lines of what I was thinking. Going to play around with the exposure and ISO, maybe I can do that at home before we head out. Thanks for the dumbed down explanation of calibration frames. I won't worry about those too much unless everything else goes swimmingly. I am definitely going to start with the 12mm lens as I know that will be most forgiving. I am excited about trying out the 135mm, though. We'll see! DesperateDan posted:Pair of modest binoculars (I use some 8x40mm) for checking out wider areas of sky without having to train and adjust a scope Oh! I forgot to mention, I do have something near an 8x40mm set of binoculars. Don't have them in front of me, but very close to that. Excited about those! I also have a "Meade Instruments 209006 Infinity 102 AZ Refractor Telescope" to do some visual stuff through. Going to be 4 of us out looking at stars, all newbies.' I'm most excited about the astrophotography. I'll definitely enjoy the visual stuff, but I have been trying to learn about astrophotography for a while and this will be my first time. Internet Explorer fucked around with this message at 04:52 on Aug 23, 2019 |
|
#
?
Aug 23, 2019 04:48
|
|
|
Did another ISS solar transit today. https://www.instagram.com/p/B1j3KetnwE0/ Used a higher framerate this time so it came out a little better. Plus RGB instead of mono. Now to keep an eye out for a good lunar transit.
|
|
#
?
Aug 25, 2019 02:57
|
|
|
If anyone wants some really high quality narrowband and LRBG data to work with I found a great thread pinned on Cloudy Nights with around 20 sets of integrated FITS. This post has the onedrive link. Here's a crop of my finished Pacman Nebula from that data. 
|
|
#
?
Aug 25, 2019 16:44
|
|

|
hannibal posted:Did another ISS solar transit today. That's awesome. I got clouded out on the nearby transit that I tried, but I haven't checked the transit website since then. I need to keep trying!
|
|
#
?
Aug 25, 2019 18:56
|
|
|
Start of a nice long weekend here, I got out last night and the weather was perfect. Randomly picked a nebula and settled on NGC6823 - I like how it turned out! NGC6823 40x180sec light, 5x dark, 10x flat ASI294MC-Pro camera, EQ6-R Mount I think it turned out well, given that I've never tried to shoot or process a nebula with such fine structures like this before. I only did two hours on it, but I feel like it could really be one of those things that would benefit from several more hours. I might revisit it later this weekend if I get the chance, does anyone have any advice for shooting a target over multiple nights?
|
|
#
?
Aug 30, 2019 18:22
|
|
|
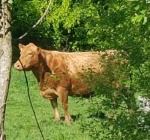
Humphreys posted:Through the trees at new house, and some colourisation:
|
|
#
?
Aug 31, 2019 13:38
|
|


|
^^ That's really awesome, the colors are gorgeous Got out again last night and found a spot where I could see the Andromeda galaxy through the trees!  M31 - The Andromeda Galaxy 40x180sec lights, 5x dark, 10x flat I turned the gain down a lot and the histogram looked good, but I still think I overexposed the light frames... there's not as much detail as I expected.  It still turned out neat, but I think a telescope with a really wide f-stop like a reflector may not be the best for shooting really bright targets like this. Something to try again once I have a refractor with a wider view. It still turned out neat, but I think a telescope with a really wide f-stop like a reflector may not be the best for shooting really bright targets like this. Something to try again once I have a refractor with a wider view.
|
|
#
?
Aug 31, 2019 17:37
|
|
|
Blurry as poo poo, really need to get myself back into the game with a proper tripod and remote shutter:
|
|
#
?
Sep 1, 2019 11:17
|
|
|
Y'all post some really awesome stuff. I love that Andromeda image. Got back from our camping trip. First time doing astrophotography! Really first time doing astronomy. It was a big success. Really happy with what I've got so far. Did two different shoots of the Milky Way and then set of shots of what I believe is the North American Nebula and another of Andromeda. I was shocked I could see Andromeda in my binoculars. Super neat. Anyways, now I need to figure out stacking and post processing. In the meantime, here's my very first astro shot with 0 post-processing as a thank you to this thread for helping inspire me to get into this hobby. ") 
|
|
#
?
Sep 2, 2019 01:14
|
|
|
Internet Explorer posted:Y'all post some really awesome stuff. I love that Andromeda image. That's a really great shot! Definitely something to be proud of. I love messing around with pre- and post-processing my images, I've only been doing it for a bit and there's just so much to learn, I'll probably never master it.
|
|
#
?
Sep 2, 2019 17:36
|
|
|
Hey all. It's been... uhh, years, since I've posted here. Moved around a bunch and sold off most of my gear in the process. We eventually bought a house and settled down about two years ago, but the skies here are pretty terrible. I resisted the siren song of astro for as long as I could but ultimately failed I figured since the skies were so poo poo here, I need to minimize the friction to start imaging. Which meant a permanent pier and observatory, instead of messing around with tripods and covers. My SO agreed as long as I tried to minimize the footprint. The best spot (aside from the front yard  ) is in our backyard right at the fence line. This is pretty visible from the street, so I tried to make the observatory no taller than the fence, and as few square feet as possible. The full build thread is over at CN, but I basically ended up with a triangle that folds down. It's a little over four feet tall, and about 56" per side. So ~9.5 square feet total. ) is in our backyard right at the fence line. This is pretty visible from the street, so I tried to make the observatory no taller than the fence, and as few square feet as possible. The full build thread is over at CN, but I basically ended up with a triangle that folds down. It's a little over four feet tall, and about 56" per side. So ~9.5 square feet total.Folded up:  And folded down. The roof/front-wall and right wall fold down, and rest parallel to the ground. There's not enough space for the left wall to do the same (would hit the fence), so it lifts straight out and is set aside.   An earlier construction photo, but you can see how the telescope parks here:  I'm pretty happy with the "micro-observatory". Seems to be weather proof, has power and ethernet, and folds down in a minute flat. A mini-pc and power supplies are stashed in cheap weatherproof boxes. The pier is ~10-12" diameter and about six feet deep (go go frost line). I still have some mechanical tuning to do on the scope itself. Namely a better polar alignment, fixing the spacing of my coma corrector, tuning the balance and better collimation. But I couldn't resist taking it for a trial run during some clear-ish nights recently. Seeing was hot garbage which didn't help the aforementioned issues. I didn't spend too long processing since there are some pretty obvious defects (coma and star trailing, as well as some double diffraction spikes), but it was fun to dust off some very rusty PI processing knowledge. Or rather, remembering everything I don't remember  Cygnus wall portion of North America Nebula
Hodgepodge of exposure times are from different nights, stealing a few hours at a time before clouds rolled in. All in all I'm pretty stoked to be back in the game. Going to spend some quality time getting everything tuned up before trying another target. When the skies were cooperating I was guiding at ~1" RMS (~2-3" RMS when seeing went to poo poo). I think I can get that down to 0.5" RMS with a bit of TLC and fine tuning guiding parameters.
|
|
#
?
Sep 4, 2019 02:40
|
|

|
Nice setup and lovely photo. How are you finding physical access to the scope? It looks annoying to work around with the structure so close, but that may not be true.
|
|
#
?
Sep 4, 2019 08:34
|
|
|
Thanks! Access isn't tooo bad. Most parts are accessible an arm's length away, and there's enough space you can sit/stand in the corners if you need to mess with something up close and personal. Albeit pretty cramped to do that. There's not really space for things like polar aligning through the axis bore, so I had to drift align instead. But the majority of the gear is mounted on the left side, and since the wall lifts out completely you can stand right next to the scope to access everything. I 3D printed a bracket to hold most of the gear on the OTA (focuser controller, dew heater, mini pc, usb, power distribution). I've since moved the PC to a box on the ground for unrelated reasons, so the empty spot in the bracket just holds excess cable:  Still working on de-cluttering the rat's nest heh. polyfractal fucked around with this message at 13:25 on Sep 4, 2019 |
|
#
?
Sep 4, 2019 13:23
|
|
|
Wow, that is a gorgeous shot. I'm 100% jealous of your mini-observatory, too, that turned out fantastic! I would love to build something like that eventually.
|
|
#
?
Sep 4, 2019 13:42
|
|
|
That mount is so awesome, the load bearing surfaces of your RA and Dec axes are almost a large as your OTA's primary mirror!
|
|
#
?
Sep 4, 2019 13:48
|
|
|
That's really neat!
|
|
#
?
Sep 4, 2019 13:50
|
|
|
That looks amazing! Is winter weather a concern?
|
|
#
?
Sep 4, 2019 13:57
|
|


|

|
| # ? May 30, 2024 14:04 |
|
|

|
|
#
?
Sep 4, 2019 16:55
|
|