


|
The roll of Fuji Pro 400H was more disappointing. No doubt that poor subject choices and light contributed, but the colors were difficult to get right too. I am only half-way happy with two frames.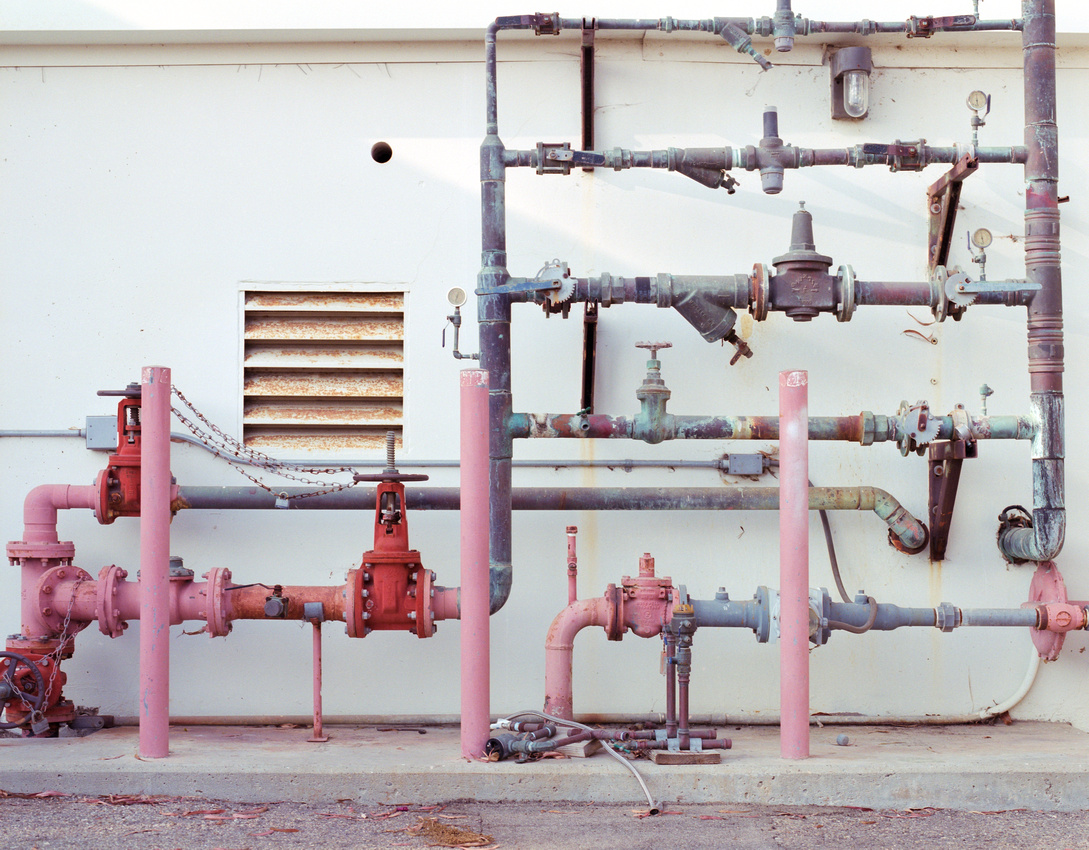 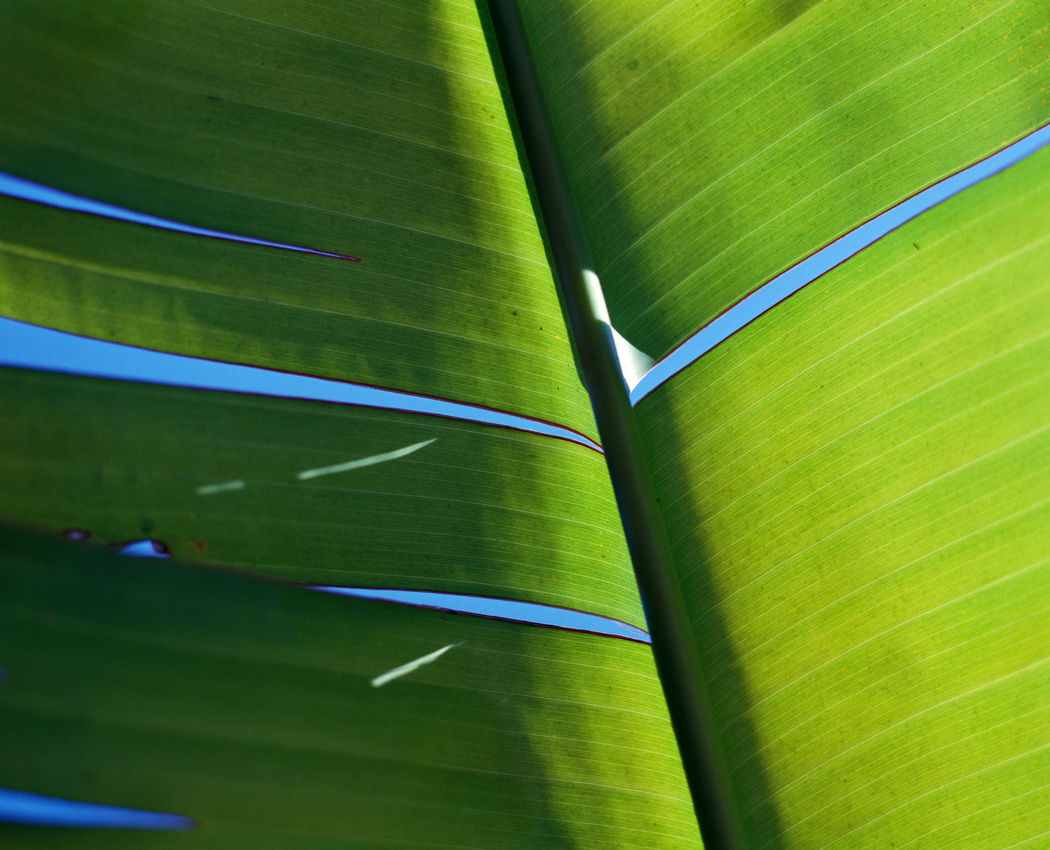
|
 #
?
Oct 8, 2020 01:08
#
?
Oct 8, 2020 01:08
|
|


|

|
| # ? May 15, 2024 03:07 |
|
|
theHUNGERian posted:The roll of Fuji Pro 400H was more disappointing. No doubt that poor subject choices and light contributed, but the colors were difficult to get right too. I am only half-way happy with two frames. Pro 400H just sucks like that to be honest. 
|
|
#
?
Oct 8, 2020 01:17
|
|

|
VelociBacon posted:Pro 400H just sucks like that to be honest. I heard about how awesome Fuji greens were, but I guess that only applies to Velvia/Provia? I don't think my metering skills are at a point where I will touch either of those yet. Edit: Or did I gently caress it up by overexposing a full stop? theHUNGERian fucked around with this message at 01:32 on Oct 8, 2020 |
|
#
?
Oct 8, 2020 01:30
|
|
|
400h really does suck, and your metering is probably fine for slides. a full stop overexposure on negative film should be just fine
|
|
#
?
Oct 8, 2020 01:42
|
|
|
ansel autisms posted:400h really does suck, and your metering is probably fine for slides. a full stop overexposure on negative film should be just fine Cool. Having only one choice for color film at iso400 simplifies my life anyway. I'm glad I only bought 5 rolls of it.
|
|
#
?
Oct 8, 2020 01:48
|
|
|
portra 400 is king for a reason, unironically
|
|
#
?
Oct 8, 2020 02:11
|
|
|
ansel autisms posted:portra 400 is king for a reason, unironically You honestly need to like, actively try to gently caress up the exposure for Portra 400. poo poo, you could probably dial in a completely random shutter speed and aperture and have a good chance of getting a usable exposure.
|
|
#
?
Oct 8, 2020 02:15
|
|


|
Yes, I am happy with Portra 400, but I wanted to know what I was missing out on.
|
|
#
?
Oct 8, 2020 02:45
|
|
|
I find 400H very neutral although I've gotten some decent colours out of it sometimes, but it's also 2/3rds the price of Portra 400 so...
|
|
#
?
Oct 8, 2020 03:00
|
|


|
I just developed a roll of 400H over the weekend and actually I think it's fine. Although I should have tried pushing it, it was a very overcast day. Burstall Pass by Cacator, on Flickr  Burstall Pass by Cacator, on Flickr Cacator fucked around with this message at 06:18 on Oct 9, 2020 |
|
#
?
Oct 9, 2020 06:11
|
|
|
Cacator posted:I just developed a roll of 400H over the weekend and actually I think it's fine. Although I should have tried pushing it, it was a very overcast day. Yeah, these look great! I'll be sure to shoot a couple more rolls with more appropriate subjects and better lighting.
|
|
#
?
Oct 9, 2020 22:35
|
|
|
theHUNGERian posted:Yeah, these look great! I'll be sure to shoot a couple more rolls with more appropriate subjects and better lighting. Thanks, there was a heavy magenta cast one some photos, I kept a little bit of it in for character but otherwise I'm happy with how the greens and yellows still popped under some flat lighting conditions. I've been getting some interesting results from Ektar:   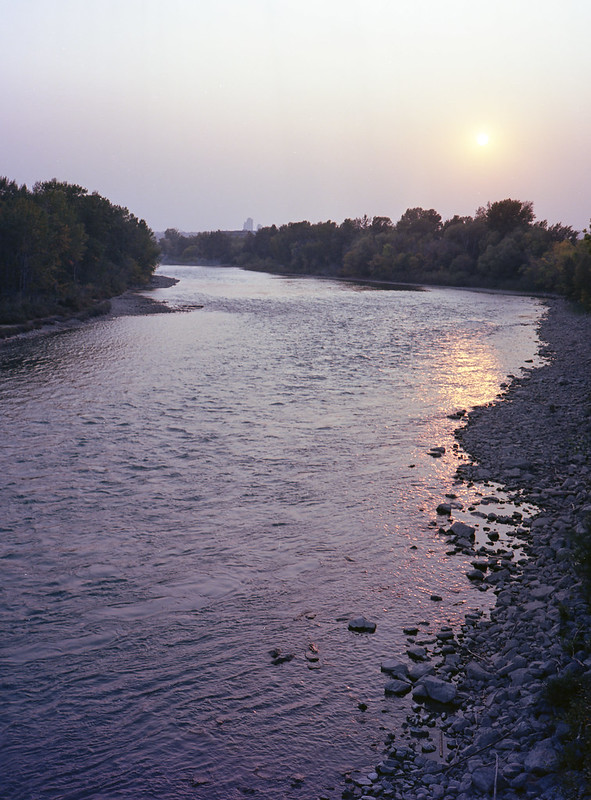
Cacator fucked around with this message at 17:45 on Oct 10, 2020 |
|
#
?
Oct 10, 2020 00:53
|
|
|

|
|
#
?
Oct 10, 2020 10:58
|
|

|
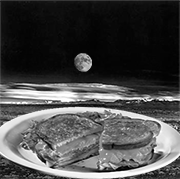
Wildlife*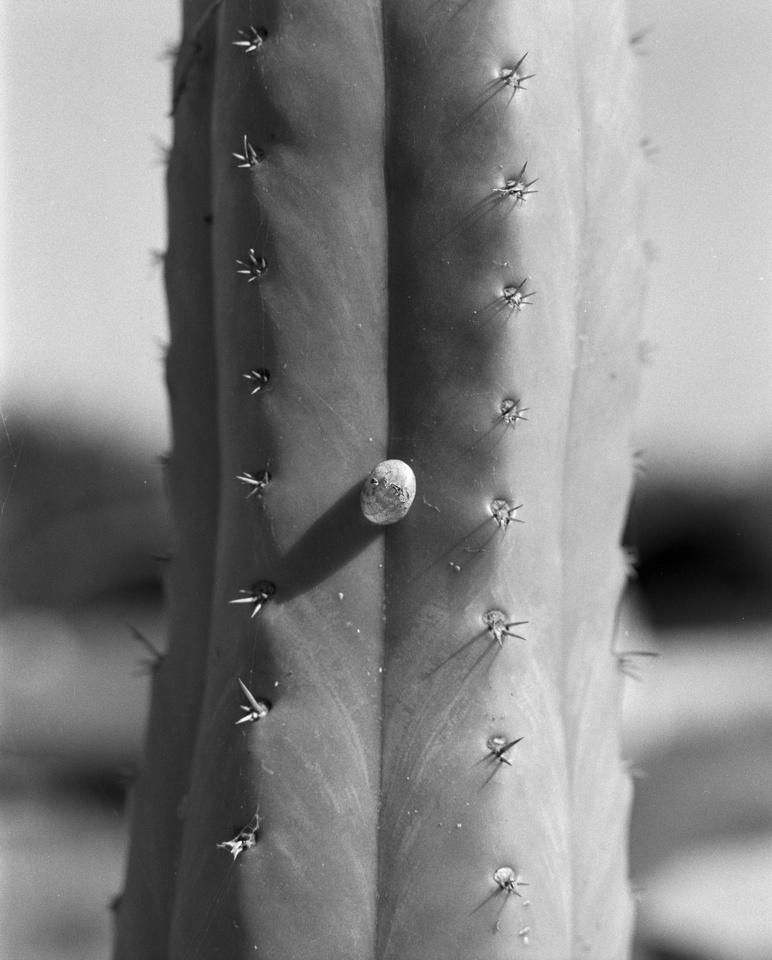  *not wild, not alive
|
|
#
?
Oct 10, 2020 20:52
|
|
|
Sooo I messed up winding a roll on my Autocord (tried to play around with the double exposure switch but hosed something up) and ending up wasting an entire roll of 120. Anybody ever reload a roll backwards before?
|
|
#
?
Oct 11, 2020 00:13
|
|
|
Cacator posted:Anybody ever reload a roll backwards before? Yes. I expected more suprises than i ended up getting.
|
|
#
?
Oct 11, 2020 01:40
|
|

|
King of Bees posted:Yes. I expected more suprises than i ended up getting. Pretty simple then? Any tips on how best to not gently caress it up?
|
|
#
?
Oct 11, 2020 03:36
|
|
|
theHUNGERian posted:The roll of Fuji Pro 400H was more disappointing. No doubt that poor subject choices and light contributed, but the colors were difficult to get right too. I am only half-way happy with two frames. I think this one is great fwiw
|
|
#
?
Oct 11, 2020 14:19
|
|

|
Cacator posted:Pretty simple then? Any tips on how best to not gently caress it up? I just rewound it in a 99 percent dark room so i did get a few tiny light leaks, but better than wasting 10 buck. Its super curly so it rewinds pretty tight.
|
|
#
?
Oct 11, 2020 19:29
|
|
|
Posted this in the film thread, but thought I�d try here too: I've found an enlarger on Ebay that's prettymuch exactly what i'm looking for at a reasonable price, but am a bit worried about shipping. Should I ask the seller if he's going to pack the condenser separately, or maybe wrap the lenses individually? Or are they robust enough that he can just leave everything together when shipping?
|
|
#
?
Oct 13, 2020 04:58
|
|
|
The condensers should be wrapped separately. They're normally installed quite close together and will smack into each other while getting bump around in transit.
|
|
#
?
Oct 13, 2020 10:54
|
|

|
rockear posted:"Explains" is a strong word but yeah I did LOL If you ever need it it's on the front page of the film thread. I don't quite get why this technique became the de facto thing here. It gets workable colors but the results are not consistent since there is no baseline for what's chosen as middle gray. The instructions are to pick something sorta white looking but what if that white looking thing has a color cast on it? The image ends up with weird colors and it's on you, the color corrector to fix it by picking what you feel is best. And that can take a lot longer than the "maybe one minute" the video says it takes. Though we're all ultimately responsible for the colors in our images and are free to make the artistic choices we want to make, this inexact color correction method has never sat well with me. I want a method that gives me a consistent starting point for my images. There are other methods where the color correction is based off of sampling an unexposed area of the film from the borders of the exposure. It makes sense to me that this method would give much more correct, consistent results since the starting point is unexposed film which should = the blackest black and allow for correcting the film's orange mask. The methods I've tried are Vuescan's color correction, Negafix in Silverfast, and the Negative Lab Pro Lightroom plugin. The method I've tried with Vuescan goes like this: 1. Preview the image with Media set to Color Negative 2. Select a bit of the film border as the crop 3. Preview again 4. Choose "Lock exposure" then "Lock film base color" 5. Set the crop to the photo 6. In the Color tab, choose something other than "None" for Color Balance This gives unsatisfying results that have a color cast and bad exposure. The end result still needs to be tooled with in Photoshop. Perhaps I'm doing it wrong. The instructions for how to do this in Vuescan aren't the clearest. Vuescan has the ability to choose color correction based on a film stock but it Portra 400 UC isn't an option. It only has the older VC and NC, these get the colors close but not correct for Portra 400 UC. Silverfast's Negafix just works. You tell it your film stock, click the button, and there you go. Unlike Vuescane, it has Portra 400 UC as an option. I'm not fond of Silverfast's per-scanner licensing because I have two scanners. Plus, I already own a Vuescan license. So I won't use Negafix. The Vuescan -> Negative Lab Pro workflow gives results I'm happy with. Start by scanning a 48-bit positive DNG from Vuescan then do the inversion with the Negative Lab Pro plugin in Lightoom based on color from the film border. Then, further edit in Photoshop as needed. The DNG is still there so all the stuff LR did can be stripped off by making a virtual copy, hitting Settings -> Reset All Settings, and setting the image profile to "Embedded". I'm sure there is a way to do color correction based on an unexposed area manually in Photoshop but the whole point for me is to cut out as many steps as possible so I haven't looked into it. If these methods and tools aren't giving me the "true" color I imagine they're giving me or are ruining my images in some other way, let me know what's wrong with them. Oh, and what's the Dorkroom opinion on using infrared dust removal? This is one area where Silverfast seems to have a leg up on Vuescan. Silverfast's iSRD feature is very configurable, has a live preview of what's marked as dust, and lets you see the IR layer if you hit certain hotkeys. Seeing the IR layer is cool. It helped me notice that my image was moving slightly between scans, causing the IR layer to not line up with the image and ruin the dust removal. I put something on the scanner lid to weigh it down a little and now it's fine. In Vuescan you just tell it "low", "medium", or "high" for the dust removal. I don't think I can go back to not using infrared dust removal and removing dust manually with the heal brush. Automated dust removal is much too convenient.
|
|
#
?
Oct 13, 2020 15:41
|
|
|
if you want that sort of "true" color you should be shooting slides or digital. the curves method for inverting negatives is pretty much what would be done for printing negatives individually (excluding minilab prints.) are you trying to shoot for the picture, or the film border?
|
|
#
?
Oct 13, 2020 18:22
|
|
|
Am I missing out by just using the software that came with my v600 and tweaking in camera raw if needed? I have vuescan but haven't played with it much.
|
|
#
?
Oct 13, 2020 19:31
|
|
|
in my experience vuescan gave me clipped blues on my scans, no matter how much fiddling i did, making it impossible to get good colors out of. i think you're missing out on control if you let your scanning software invert your negatives for you instead of scanning as 48 bit (16 per channel) tiff and inverting yourself, either by the curves method or something like ColorPerfect
|
|
#
?
Oct 13, 2020 20:14
|
|
|
King of Bees posted:Am I missing out by just using the software that came with my v600 and tweaking in camera raw if needed? I have vuescan but haven't played with it much. No, the Epson Scan software is actually decent. I was fighitng with Vuescan in the beginning as well, until I realized that Epson Scan just 'worked'. You still need to tweak ranges, etc, but its far easier to use than Vuescan and Silverfast. The only downside is the poor dust removal. (It can't handle 4x5's at any kind of reasonable resolution).
|
|
#
?
Oct 13, 2020 20:35
|
|

|
Thanks, that's what I suspected. Yes the dust removal isn't great, but out of all my scans I only really work on some and out of all of those only a handful are for print so I deal with it. My lack of ability to process or scan 4x5s is what's holding me back from playing with my graflex (i.e. paying someone to do it). I was wondering if I was missing out on something superior for scanning.
|
|
#
?
Oct 13, 2020 20:56
|
|
|
tweaking anything in the scanner software is a fool's errand unless you're tweaking it to give you the widest range, most untouched file possible
|
|
#
?
Oct 13, 2020 22:43
|
|
|
I�m trying to give Colorperfect a shot but I feel like I should be granted a masters degree if I figure out how to use it. I watched their 21 min video then gave it a shot and the first photo I tried was a trainwreck. Levels and curves are way easier and better. And I know photo software UI is bad but geez this thing is rough. I will have to dedicate a few hours to it if I�m going to get good results. Now that I�ve played around a bit more I might need to retract my praise for Negative Lab Pro. It left me with some washed out colors that were hard to get to be not washed out because what it had done was either totally not configurable or an annoying to mess with RGB tone curve with like 10 points on each curve. You can get very close to Negative Lab Pro�s results but better and maintain configurability if you: 1. Scan to DNG with Vuescan (or silverfast) 2. Apply the Negative Lab Pro Vuescan (or silverfast) profile to the DNG by doing �file > plugin-in extras > Update Vuescan/Silverfast DNGs� 3. right click the image and edit in photoshop 4. Run camera raw, use the white balance dropper and select the film border. I guess you could do this in LR before throwing the file over to PS 5. finish camera raw 6. Do invert, levels, curves as usual. What I really want is a one-click thing that will give me pretty good color and lets me batch process without losing latitude in configuring the color later.
|
|
#
?
Oct 14, 2020 00:36
|
|
|
the only thing i do in colorperfect is use Ring CC - click in and there's a grid of 8 squares to click. one in the center shows your image. clicking an image on the outer ring takes your center image halfway in between the inner and the outer image. beyond that it's a loving nightmare, but it nails my daylight negative shots in a few clicks. really struggles with high DR stuff like portra at night so i still manually invert those with curves. colorperfect also works really well to correct casts after doing base b/w points, using touchup mode and ringcc why expect a one-click solution? nearly every other step of shooting film is complicated, no reason to not take your time and get it right after scanning.
|
|
#
?
Oct 14, 2020 00:40
|
|
|
Ring CC was the one feature in their instructional video that got me excited. It�s a very good UI solution for color correcting. I thought a one-touch solution might exist because I feel like film manufacturers must have intended colors for their film to print as, so they must provide some way to get from the film to those colors. As I�ve looked into it more I see that Kodak used to publish film lookup tables (LUT) for a product called Photo CD that�s been discontinued. They stopped publishing the LUTs around the year 2000, which means there are no LUTs for the newer film stocks. Applying the LUTs gets you a usable image straight away, like the thing I want to exist. According to a rando forum post, the Kodak LUTs are what Vuescan�s film profiles are based on. I found a datasheet for Portra 400 that mentions the some of the difficulties in coming up with a profile for all scanners since every scanner is different. See the Scanning Negatives section on page 4 here, https://www.foto-r3.com/files/Kodak_Portra_400.pdf. I assume that�s why Silverfast�s software is per scanner model. Perhaps they correct for each scanner�s quirks to do all the mapping correctly.
|
|
#
?
Oct 14, 2020 01:21
|
|
|
Dren posted:assume that�s why Silverfast�s software is per scanner model. Perhaps they correct for each scanner�s quirks to do all the mapping correctly. Silverfast charges per scanner to scam you out of more money.
|
|
#
?
Oct 14, 2020 01:34
|
|

|
never had any good results with "eyedropper on the film border" - probably because that only sets black point, and the blackest black point possible, not the blackest black point of your image. If you're shooting for the image (as you probably are and should be), then correct the black point based on that. Color cast doesn't matter at this point of the process either since you're going in channel by channel, and only setting where the 0 and 255 values are.
|
|
#
?
Oct 14, 2020 02:24
|
|


|
again i pose the question: why shoot film if you are looking for the fastest process
|
|
#
?
Oct 14, 2020 02:36
|
|
|
Just use NLP and edit in lr/ps as needed Ez plz
|
|
#
?
Oct 14, 2020 10:02
|
|
|
ansel autisms posted:again i pose the question: why shoot film if you are looking for the fastest process That�s a false choice. I want to speed up baseline color correction because it seems like it could be sped up. Just like I use IR dust removal instead of scanning through the photo with the heal brush.
|
|
#
?
Oct 14, 2020 13:45
|
|
|
Vuescan is tedious as hell and short on documentation, particularly for color film, but after spending a couple hours messing with it I'm getting what I think are pretty decent results. It's all about the color tab and setting the white/black/red/green/blue points so that nothing is clipping on your histogram. Then you can adjust to taste using the ubiquitous goon video method. One thing it took me a while to notice, for b&w, is that unless you're shooting a really high contrast scene, your image probably doesn't contain pure black or pure white, so it's best to really use your eye to set those points, rather than just dragging them to the edges of the histogram.
|
|
#
?
Oct 14, 2020 19:53
|
|

|

|
|
#
?
Oct 15, 2020 07:55
|
|


|
Some recent shots   
|
|
#
?
Oct 16, 2020 03:19
|
|
|

|
| # ? May 15, 2024 03:07 |
|
|
I figured out Vuescan and ColorPerfect. I can get pretty good color correction from ColorPerfect in a few clicks. ColorPerfect's site has some instructions for scanning with Vuescan, https://www.colorperfect.com/scanning-slides-and-negatives/scans/Hamrick-Software/VueScan/. Use the relevant settings from the "Creating linear scans of slides and negatives with VueScan Professional" and "Putting out RAW Tiff files" sections. I don't know if doing 4 samples in the input section is really needed. But it causes Vuescan to do 4 scans which takes a long time so I turned it down to 1 and didn't spend any time testing the difference so I really can't say. To use the infrared channel to remove dust, follow the instructions in the "Removal of dust and scratches and putting out a suitable alpha channel if desired" section. If you put out the alpha channel, there are some photoshop actions for working with it here. There's some stuff the ColorPerfect instructions don't mention that are important. 1. If you're scanning a color negative and want dust removal or the IR alpha channel, Vuescan must be set to color negative media, NOT image or slide film. If you choose image or slide film as the media the IR channel will come out completely white and no dust will be removed. 2. Selecting RGBi as the input mode or turning on infrared clean in the filter tab causes Vuescan to do an IR scan even for previews. If you're going to do a bunch of previews you might wish to set 48 bit RGB and no infrared cleaning then turn those options back on when you actually scan. 2. With the output mode set to RAW Tiff, the settings in the Color tab and the preview image in Vuescan are totally irrelevant to the output file that is generated. Set them to whatever you like, it does not matter. 3. Go to Image -> Graph raw to see the histogram of the raw scan. This is the histogram of what the scanner actually saw and is what will be output to the RAW tiff. Image -> Graph image is the histogram of the preview with Vuescan's color correction applied to it. You care about the raw histogram. That's what the scanner sees and what you're outputting. 4. The input menu's RGB / Infrared exposure options and Red/Green/Blue analog gain settings vary the exposure time used by the scanner. They are not digital settings applied to the scan after the fact by Vuescan, screwing up the scan. See the Vuescan help. They should just be set to whatever gets you a appropriate scan. Speaking of which... Follow these instructions to scan. 1. Set up everything from the ColorPerfect instructions. 2. Make sure "Lock exposure" is not checked and click preview. Look at the raw histogram, it will probably look kinda bad and narrow. I'm not sure why but Vuescan seems to choose a bad initial gain value on the first scan, resulting in kind of a bad histogram. 3. To get a better gain setting, select an area of the film border in the preview, click "Lock exposure", then preview again. The raw histogram should look better than it did. As best I can tell, if you keep scanning the same film stock, the locked RGB exposure and Infrared exposure settings should hold up, so you can save them as a preset if you want. But I only tested three scans so ymmv. If you're not getting the results you think you should get just uncheck lock exposure, do a preview, select some film border, lock again, and preview again. 4. If a channel is clipping, adjust that channel's analog gain and preview again. This didn't happen to me with the method of selecting film border and choosing lock exposure, but again, I only tested three scans. 5. Click "scan" 6. Click "save" to save the tiff Once you've got your tiff you can load it in photoshop and run colorperfect or do the goon video thing but after using colorperfect I recommend that. Dren fucked around with this message at 04:37 on Oct 16, 2020 |
|
#
?
Oct 16, 2020 04:32
|
|