|
I personally find resting my forearms or elbows on the desk in front of me is very comfortable and gives me a more stable position for my hands as they’re not having to support anything
|
|
|
|

|
| # ? May 23, 2024 10:40 |
|
I just realized that I have a friend who paints in a prone painting position for exactly that reason. Dude just lays on the carpet with a pillow under his chest and the dog hanging around. I keep thinking I should try it, but I know my back would hate me.
|
|
|
|
Thanks for all the advice, goons! I might actually try the prone thing since I sleep in that position and it's very comfy for me.
|
|
|
|
moths posted:I just realized that I have a friend who paints in a prone painting position for exactly that reason. I can't be in that position before either my neck hurts from craning, or my elbows do because I'm putting all my pressure down on it, same reason I can't play handheld videogames that way, or games on the tv while laying down unless the tv is on the floor Yeast posted:I personally find resting my forearms or elbows on the desk in front of me is very comfortable and gives me a more stable position for my hands as they’re not having to support anything I do this, lean forward, plant elbows on desk, bottom of palms/wrist area touching. I will even do naruto-esque weird hand gestures, like touching pinkies to help steady myself depending on the angle
|
|
|
|
crank one out before painting moths posted:I just realized that I have a friend who paints in a prone painting position for exactly that reason. Or do this, I paint lying in bed using a small lap tray as a table and I never have issues with shaking
|
|
|
|
Silhouette posted:crank one out before painting This falls under my general suggestion to relax
|
|
|
|
Next overly expensive painting hobby purchase is going to be a sex swing at this rate.
|
|
|
|
Silhouette posted:crank one out before painting paint before cranking one out
|
|
|
|
Just like that, Kingdom Death Monster crystallized into focus.
|
|
|
|
Post nut clarity: This game isn't really that good
|
|
|
|
On that note I've been very happy with the Citadel painting buttplug.
|
|
|
|
Siivola posted:On that note I've been very happy with the Citadel painting buttplug. I find it's prone to spillage.
|
|
|
|
Siivola posted:On that note I've been very happy with the Citadel painting buttplug. Other models are better because they have more pronounced flaring.
|
|
|
|
This is beautiful, and I'm sad that it can't be the thread title.
|
|
|
|
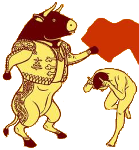
PoptartsNinja posted:Here's what helps me: i rolled and impinged all the important nerves in my right hand last year and need hand surgery now - this is very similair to my posture when painting and I can confirm this works very well if you've got a bum hand or two Miniatures Painting: You got hand problems? We do too. Let us draw you a little guy painting a little guy to show you how to paint little guys, guys
|
|
|
|
Bored Online posted:Can anyone recommend a good way to get a word bearers red basecoat out of contrast? I did some experimentation over a metallic zenithal, and trying to mix down fleshtearers red, but I haven’t found a formulation that “feels right.” Duncan has a recipe like that: https://twitter.com/two_thin_coats/status/1139641394786705411?lang=en https://twitter.com/Two_Thin_Coats/status/1139787339201257472 I use it myself, and I really like it as a darker subdued metallic red.
|
|
|
|
Attestant posted:Duncan has a recipe like that: Funny enough, this is one of the first things I tried, but it was on a 30k beakie that I already had undercoated with white scar. I will give it another shot with one of the metallic zenithal pieces hopefully tonight. Thanks!
|
|
|
|
Any tips on how to finish this off?
|
|
|
|
Edit whoops when I zoomed in I saw my suggestion. Nevermind
|
|
|
|
some rust spots?
|
|
|
|
Definitely needs some grunge to it.
|
|
|
|
GreenBuckanneer posted:some rust spots? I was thinking that, but i want to keep these looking fairly new and fairly clean. Cooked Auto posted:Definitely needs some grunge to it. Ive never really used washes to good effect, so im concerned about loving up what ive got. Does anyone have a good wash use video?
|
|
|
|
Hey guys quick question my kill team box set will arrive to me a couple weeks before the paints I bought will, is it alright if I assemble both factions before painting so I can start playing the game and learning its rules or am I making my painting much harder for myself if I pre-assemble them fully before painting?
|
|
|
|
Personally, i paint assembled. But thats going to be an ask ten people get 10 answers kind of question. Edit: without gluing riders to vehicles and big pieces that would make it difficult to paint, such as the slab shield. My Spirit Otter fucked around with this message at 18:26 on Oct 26, 2022 |
|
|
|
On my previous Super Mutant picture I used Doombull Brown, and Fire Dragon Bright and thought about where rust might be, and then placed them kind of like blotchy over each other like two camo spots? and then hit those places with Agrax Earthshade and I think it came out ok. Maybe you could do something similar to show like, maybe a little bit of rust on the rivets, or maybe an oil or enamel wash to add more shadows near the lower silver part of the shield on the green part? Like a panel line? edit: vvvv How about a "kill count" on the inside of the shield somehow? GreenBuckanneer fucked around with this message at 18:26 on Oct 26, 2022 |
|
|
|
My Spirit Otter posted:Any tips on how to finish this off? Chips and scratches on the hazard stripes, grunge around the bullet hole and gouges, and a nice skull decal in that blank circle in the center of the shield
|
|
|
|
Silhouette posted:Chips and scratches on the hazard stripes, grunge around the bullet hole and gouges, and a nice skull decal in that blank circle in the center of the shield 
|
|
|
|
My Spirit Otter posted:Personally, i paint assembled. But thats going to be an ask ten people get 10 answers kind of question. For reference this will be what I’’ll be assembling https://www.games-workshop.com/en-WW/kill-team-starter-set-2022-eng The veteran krieg and kommandos
|
|
|
|
Thanks for all the help, folks. I put some nuln oil panel lighting in and some agrax around the bottom and in the bullet holes and gouges. I also hosed the hazard stripes up a bit and its doesnt look right in the picture, but in person looks pretty natural. I havent dug through my big box o transfers yet to find something good for it. Did i go hard enough or too light? Al-Saqr posted:For reference this will be what I’’ll be assembling Beware that building some options prevents you from building others. I forget specifically which ones, but its a pain in the rear end and i suggest laying everything out before assembly so you can make sure youre not trying to build one guy with a better guy's parts.
|
|
|
|
Al-Saqr posted:Hey guys quick question my kill team box set will arrive to me a couple weeks before the paints I bought will, is it alright if I assemble both factions before painting so I can start playing the game and learning its rules or am I making my painting much harder for myself if I pre-assemble them fully before painting? It is absolutely alright. 99.9% of figures I paint are fully assembled. There are a few situations where it makes things awkward (primarily cloaks, robes, loincloths and so on where legs or armpits/backs make it difficult to hit a small section, or guns being held tight to the chest) but never impossible. Plus as a general rule if you cant reach it with a brush you cant see it on the tabletop anyway, so dont sweat it. If you were going for competition standard you might have to think about painting certain figures in sub assemblies, but for the tabletop? Perfectly fine. Nothing wrong with sub assemblies (partially assembling figures and painting the bits before finishing the build), but you almost never need to do figures that way, and if it gets in the way of you playing your new game why would you do that to yourself?
|
|
|
|
It's also worth considering if you can jab a small enough brush in there, or if you can put a larger brush with a glob of dark paint to just ensure that area is in shadow, first, before the rest of the model? I do that sometimes then go back over any collateral paint spillage with whatever color I can more easily reach later
|
|
|
|
Al-Saqr posted:Hey guys quick question my kill team box set will arrive to me a couple weeks before the paints I bought will, is it alright if I assemble both factions before painting so I can start playing the game and learning its rules or am I making my painting much harder for myself if I pre-assemble them fully before painting? nah, as mentioned it's worth thinking about whether arm positions or similar will make something super awkward to reach, but overall you're probably making things easier on yourself by assembling the minis first - it's way easier to envision color schemes and where you should highlight/etc., and there are some techniques that benefit from it (i.e. a simple zenithal prime as part of an underpaint is a stupidly quick/easy/low skilled way to add contrast, depth, and visual interest to a mini and more or less relies on said mini being assembled to get the best results)
|
|
|
|
In the breaking of my tradition of only posting half finished messes, i present 1 bullgryn     Please be very critical. My Spirit Otter fucked around with this message at 01:16 on Oct 27, 2022 |
|
|
|
looks finished to me, but still some tattoos wouldn't hurt
|
|
|
|
My Spirit Otter posted:Please be very critical. I don't think he's seen any battle maybe some blood splatter
|
|
|
|
Disagree! Red would complement but he looks good as is. Resist the siren's call to muddy him. Every muddy man started off clean.
|
|
|
|
I have trouble giving criticism on metallics because it photographs crummy, but you could glaze in some more depth. It looks unnaturally plain next to the depthful surrounding items. You have a shield mold line. The pants need more depth/shadow, they seem very monotone. Skin is complex - you'd benefit from some red glazing on spots of heavy blood flow or even some very very light blue or purple near veins. The leather could use some scratches or rough edge highlights - even good leather wears and stresses. Only saying this nit picky stuff because you asked for crit though - that is a handsome boy and I think you killed it. Harvey Mantaco fucked around with this message at 01:48 on Oct 27, 2022 |
|
|
|
My Spirit Otter posted:In the breaking of my tradition of only posting half finished messes, i present 1 bullgryn You missed a mould line on the arm and shield. A next step would be a few edge highlights or other kinds of highlights. Just to draw attention to areas like the weapon, shield, and face. The first thing you could add that would change it 1000% is to add a little of an off white to whatever red you used for the eye lenses and put a little circle in the middle of them, and then a real thin layer of just that off white directly inside. Little concentric circles to make the eye lenses look glowy
|
|
|
|
My Spirit Otter posted:Thanks for all the help, folks. I put some nuln oil panel lighting in and some agrax around the bottom and in the bullet holes and gouges. I also hosed the hazard stripes up a bit and its doesnt look right in the picture, but in person looks pretty natural. I havent dug through my big box o transfers yet to find something good for it. Looks great
|
|
|
|

|
| # ? May 23, 2024 10:40 |
|
My Spirit Otter posted:In the breaking of my tradition of only posting half finished messes, i present 1 bullgryn It's all subjective, so I'll just add to what others have said:
That being said I'd be fine with that bad rear end dude as is.
|
|
|


