


|
-Retrieve the Aquamarine from Crystal Lake - Climb Mt. Scurve and steal a feather from the nest of the lord of the birds - Get the ancient scroll from Hawke.
|
 #
?
Oct 23, 2023 22:50
#
?
Oct 23, 2023 22:50
|
|


|

|
| # ? May 8, 2024 12:52 |
|
|
You know what, since I've played the game before I won't vote anymore. Let's just enjoy the journey.
|
|
#
?
Oct 24, 2023 16:25
|
|


|
Voting is now closed.
|
|
#
?
Oct 27, 2023 00:38
|
|


|
Welcome back, everyone. Today's update is a short one, since the results of your votes resulted in some... complications. The top vote this time was to climb Mt. Scurve, so let's get to it! 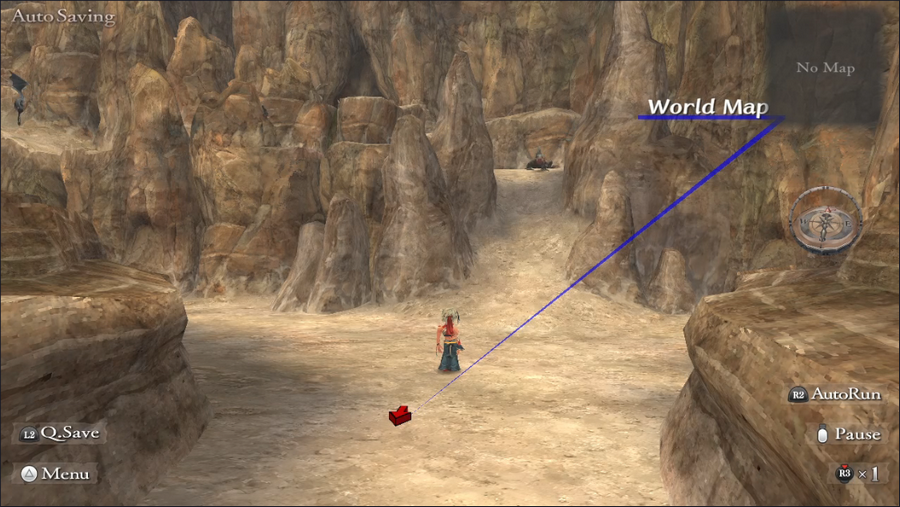 The base of the mountain is a surprisingly complex area with multiple exits and quite a few monsters. 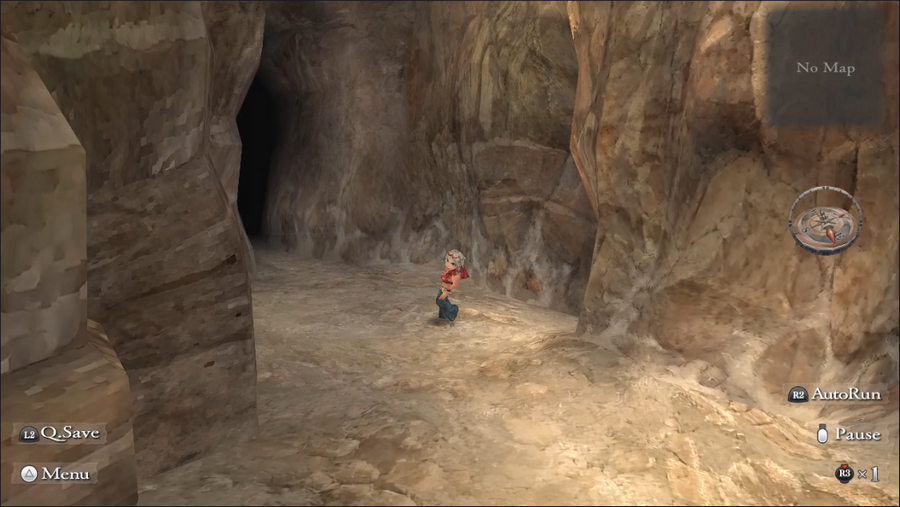 Some of these exits are caves, but the ones here on the ground won't take us where we need to go. For this task, I'm focusing on getting up the mountain as directly as possible, but we can come back to explore it more thoroughly as a separate activity. 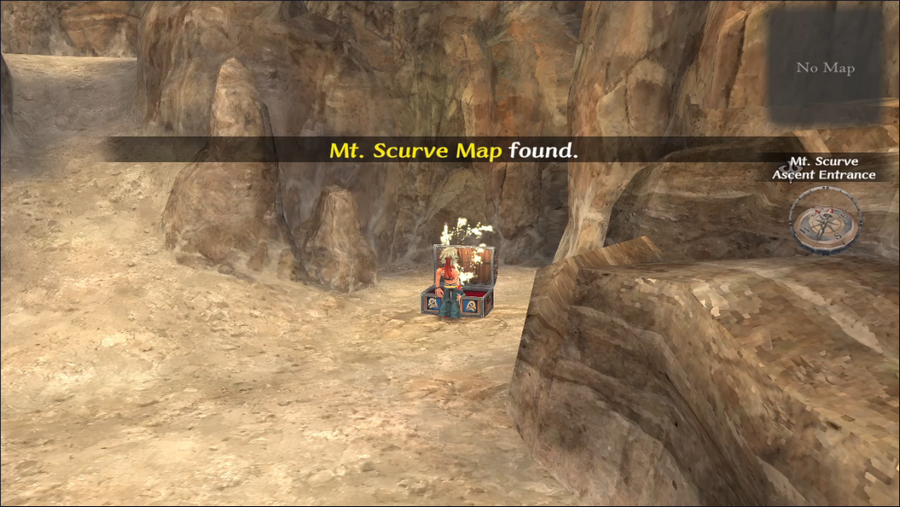 A chest near the entrance has the area map, which is convenient. After grabbing it, we fight the monsters barring the way to our destination. 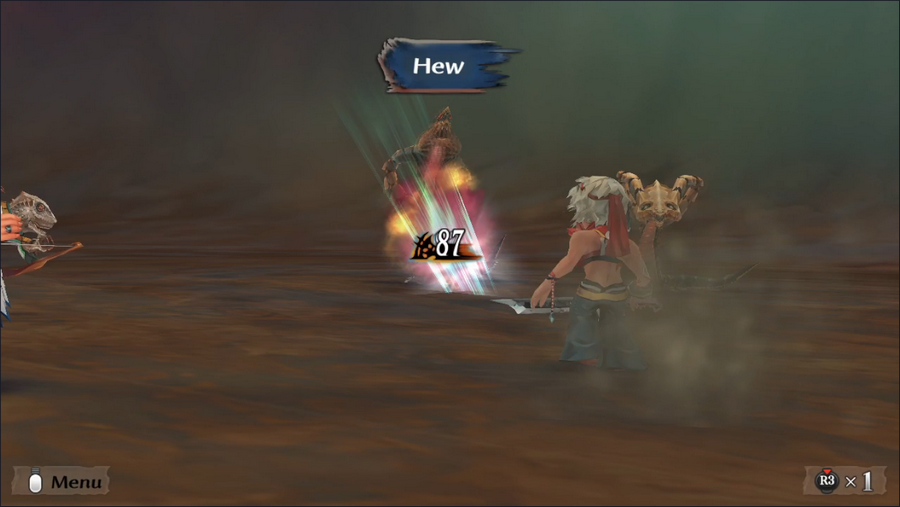 Barbara's new sword is a huge improvement. 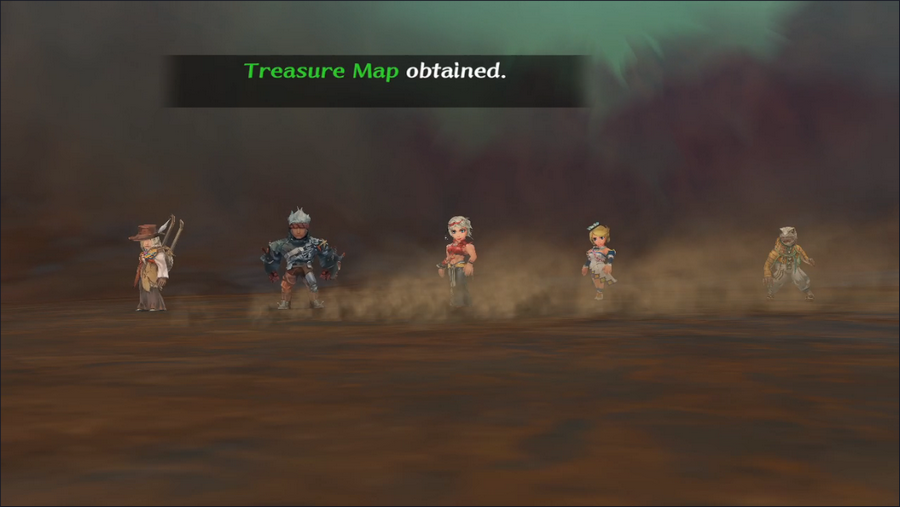 None of the battles get us any techniques, unfortunately, but they do get us this: our first Treasure Map! 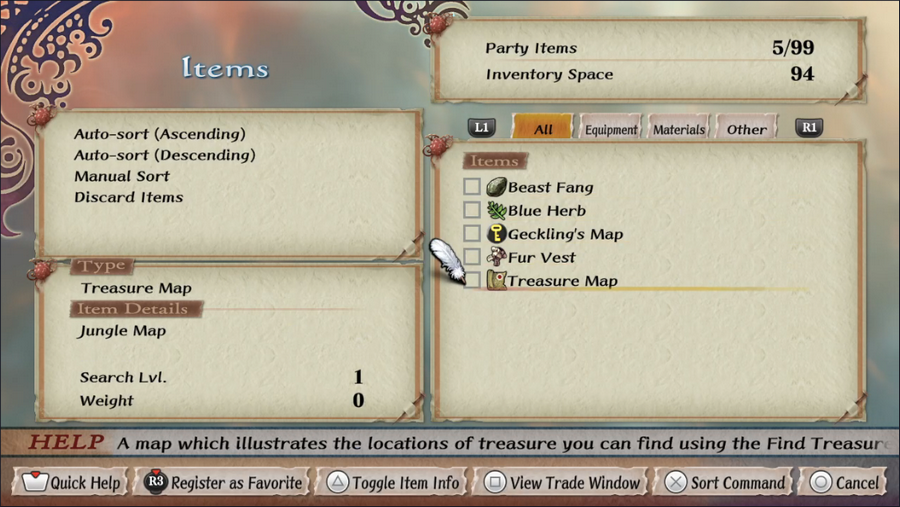 A Treasure Map is always tied to a specific area - the Jungle, in this case - and leads to a treasure chest which generally contains some very good loot. It could be a large cache of gold or a rare piece of equipment, for example. Getting the treasure, however, requires two proficiencies: one to locate it and another to dig it up. Each map also has a level, which determines both the quality of the treasure and the level of the proficiencies required to get it. As we lack the requisite proficiencies, treasure hunting is not yet an option to us. In the PS2 version, Treasure Maps had extremely low drop rates, and due to how the a map's level was determined, getting a level 2 map - never mind a level 5 map - was nearly impossible. The remaster fixed this issue by upping their drop rate and making the level random, albeit weighted toward lower levels. 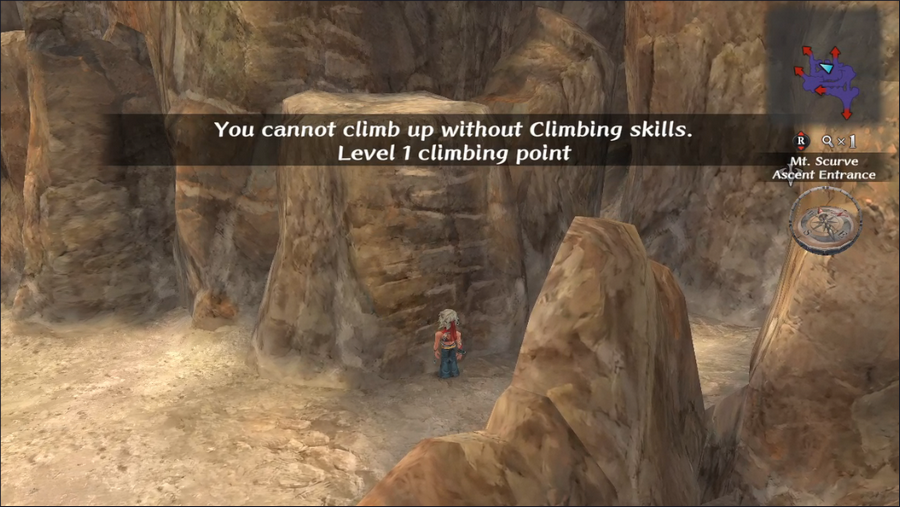 But back to the task at hand. After getting past the monsters, we come to the way forward - which is this. Did you really think we'd be able to climb a mountain without the Climb proficiency? Not a chance. The lord of the birds will have to wait. 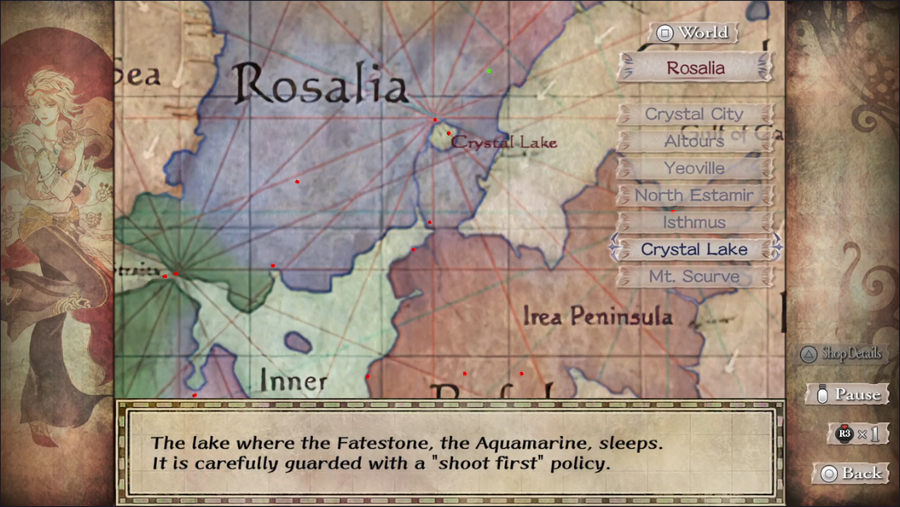 Since Mt. Scurve was a bust, let's go do the second-most requested task, finding the Aquamarine. 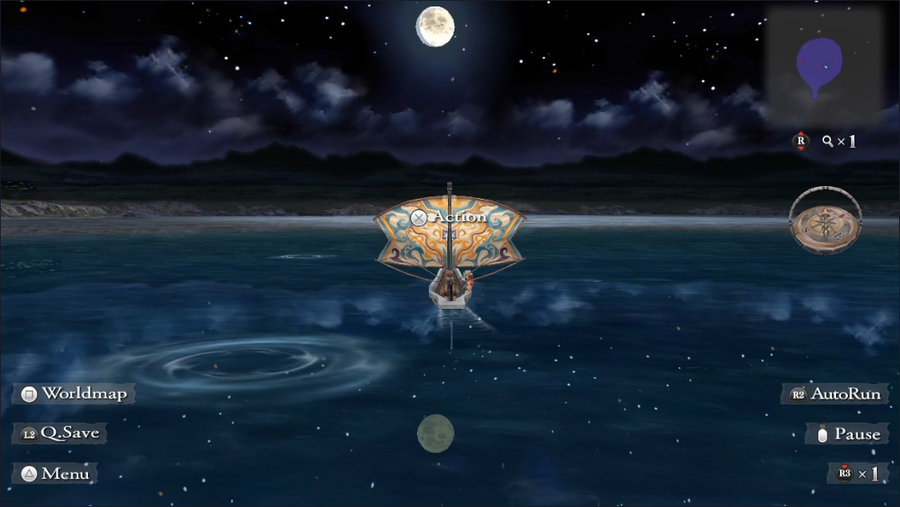 Crystal Lake is quiet, at least as first, but dotted with ripples. 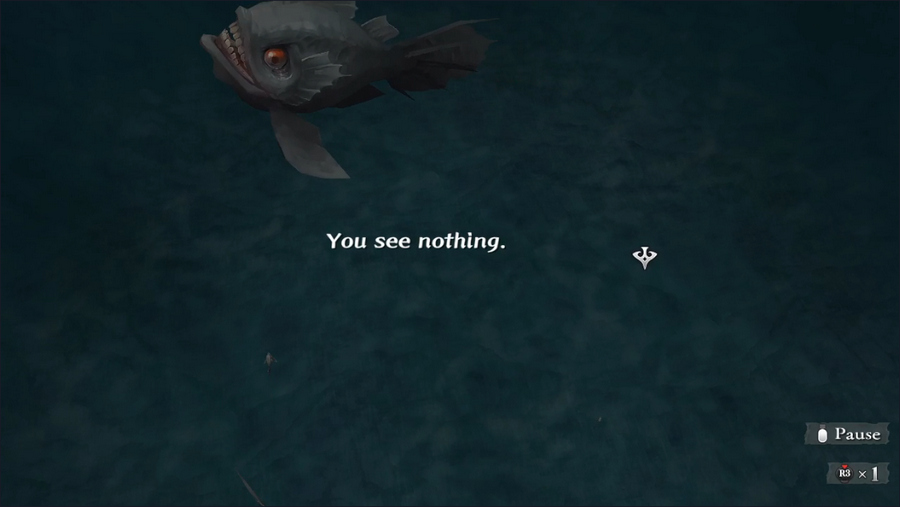 We can take an action at any time, but usually we just get a shot of the lake bed. 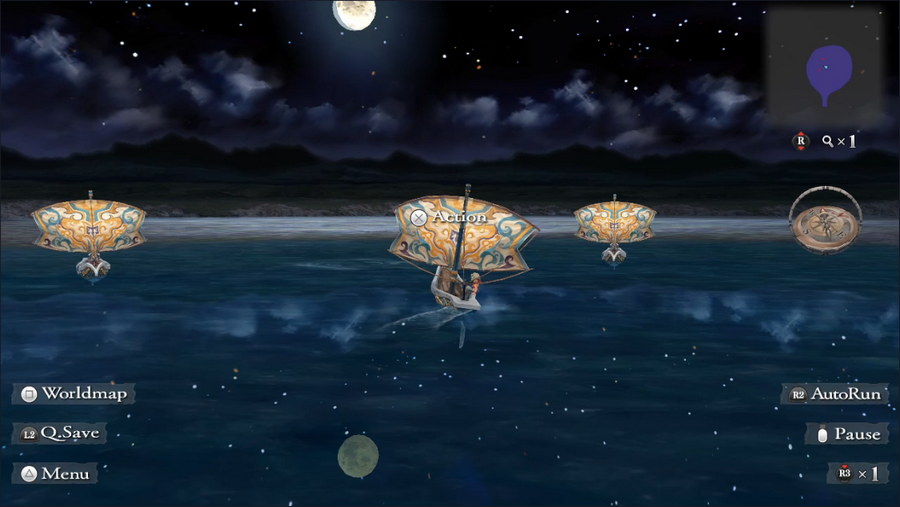 As we move through the lake, the patrol boats take notice of us and start to give chase. Luckily, the threat they pose has been overstated; if we're caught, we simply get kicked out. But that shouldn't be a concern, because that ripple just ahead is the one we need. 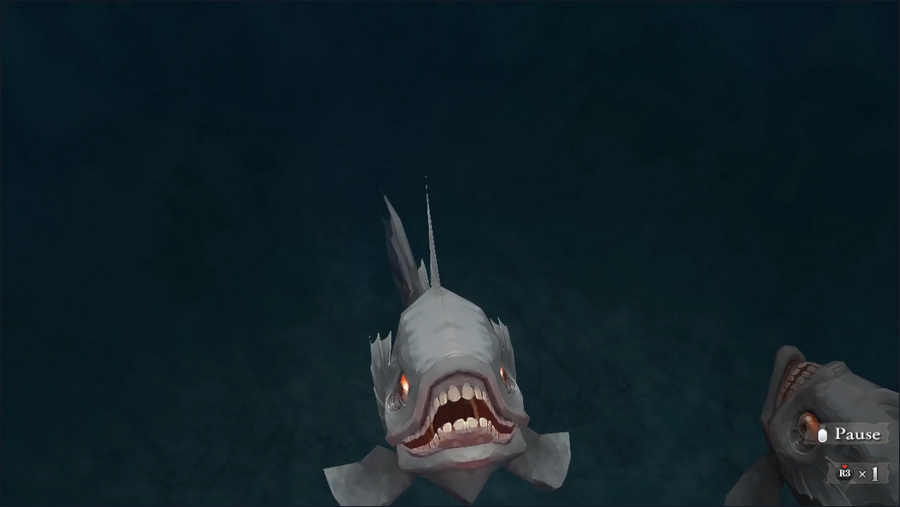 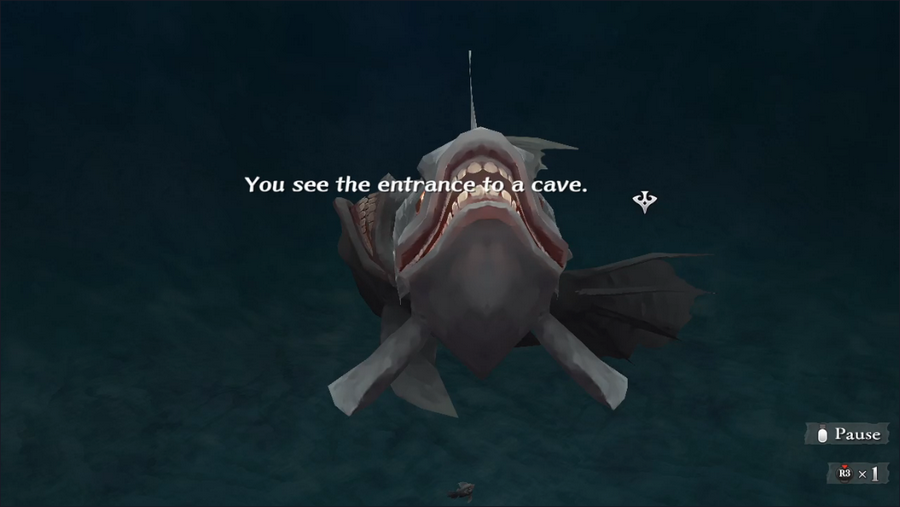 It's hard to see, but you can just make out a cave in the background behind the fish in the first picture. Each of the ripples on the lake leads to a different cave, and as with Mt. Scurve, I'll add a new exploration option to the votes in case you want us to more fully explore the place. 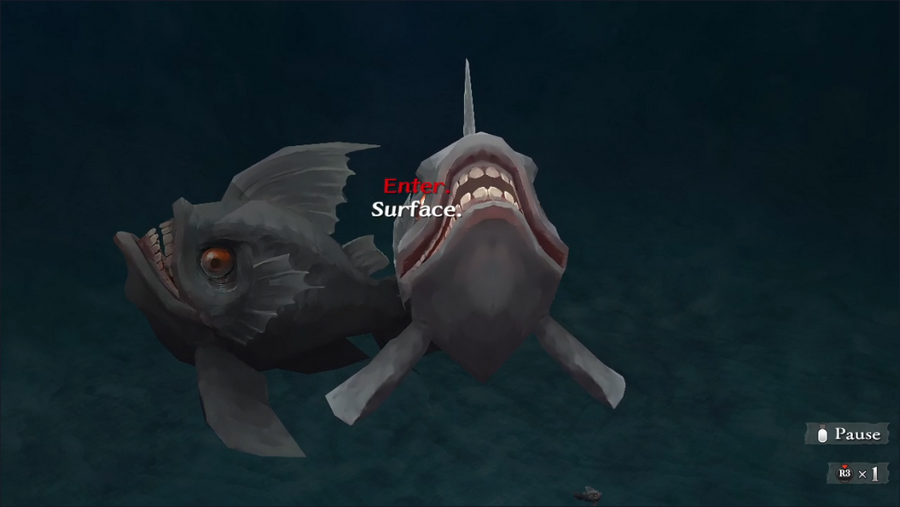 For now, let's go in. 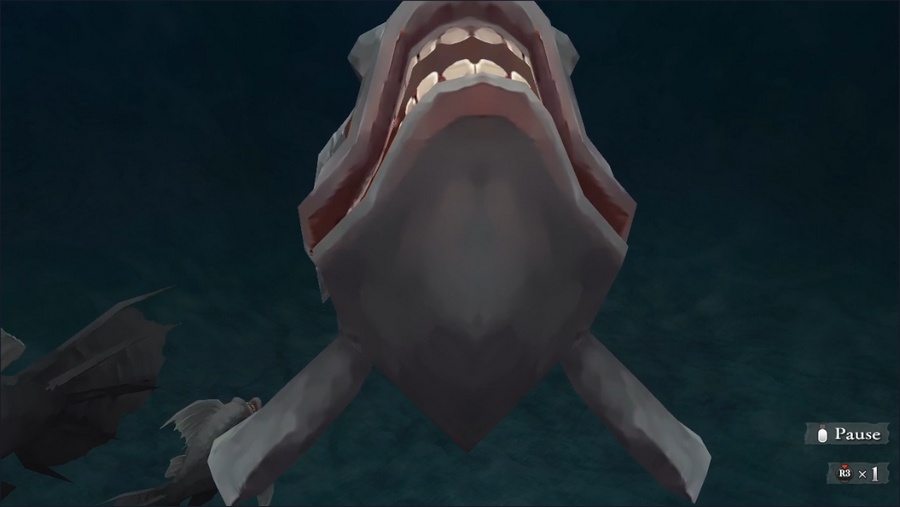 As you may have expected, the fish isn't just for show. We have to fight it to get in.  And that, it turns out, is a problem, because these are midgame enemies. As with the ambush fight in the last update, I won't go over their capabilities in detail now. Suffice it to say...  ...we can't win.  Well, that's two failures, but this update is still too short. The third place task in the vote was a two-way tie, so why don't we do both of them?  First, let's see a man about a tour of the catacombs. 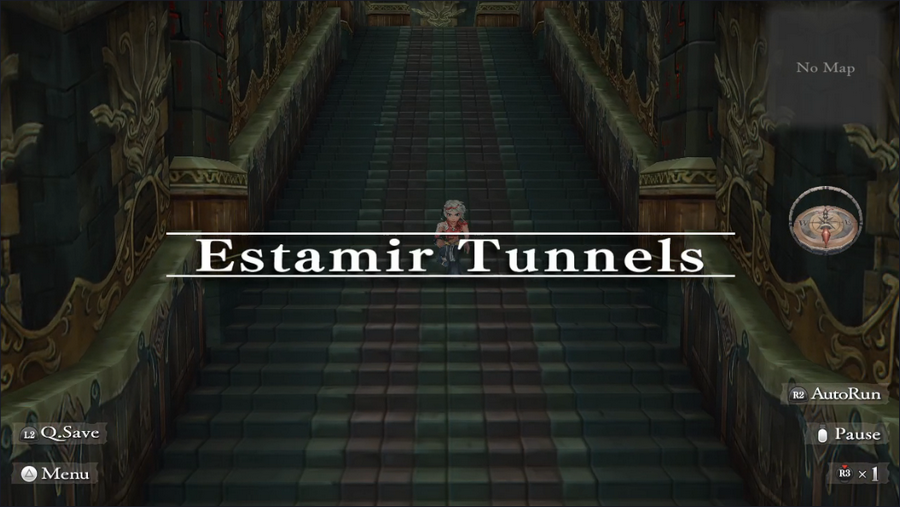 We're taken immediately to the Estamir Tunnels. Luckily, the route to our destination is extremely simple. Music Highlight: The Sewers Sewer music in video games is usually quiet and creepy. I like to imagine Kenji ito pondering this possibility, then angrily slamming his fist and shouting, "No! Disco!" 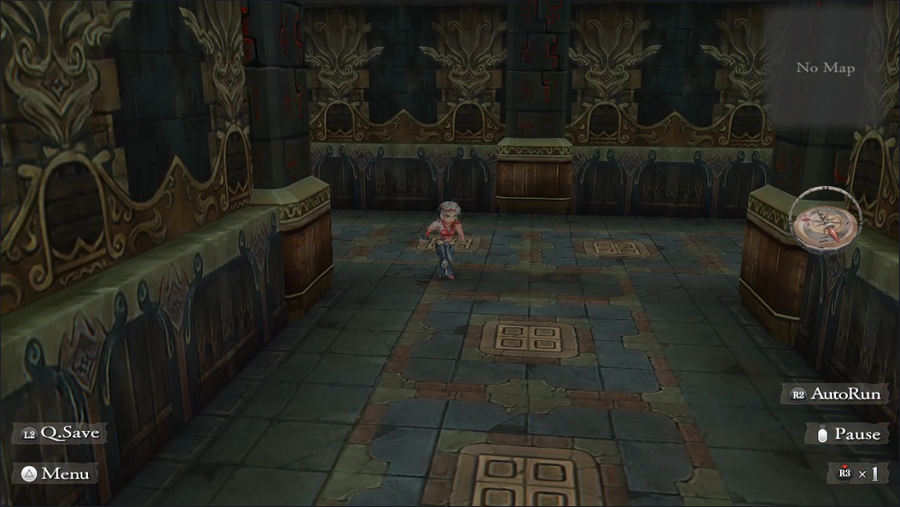 By taking a right at the first turn... 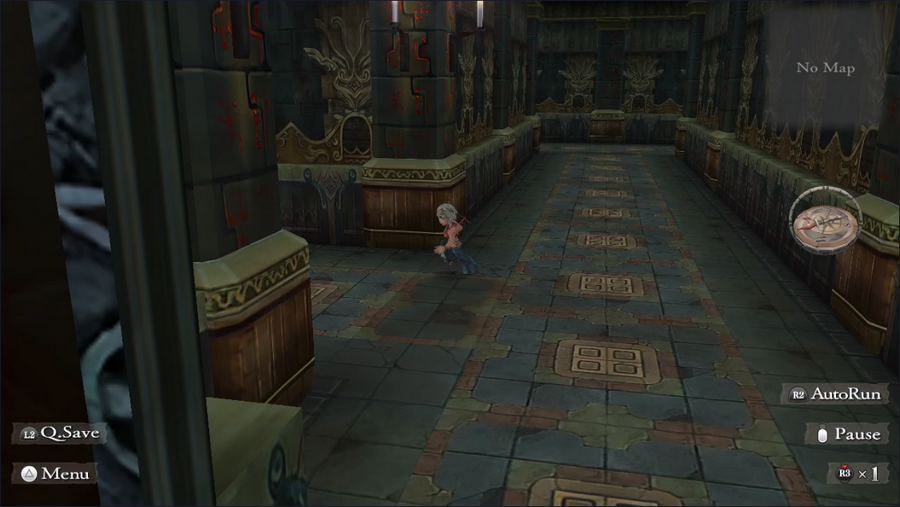 ...and then another right as soon as we can... 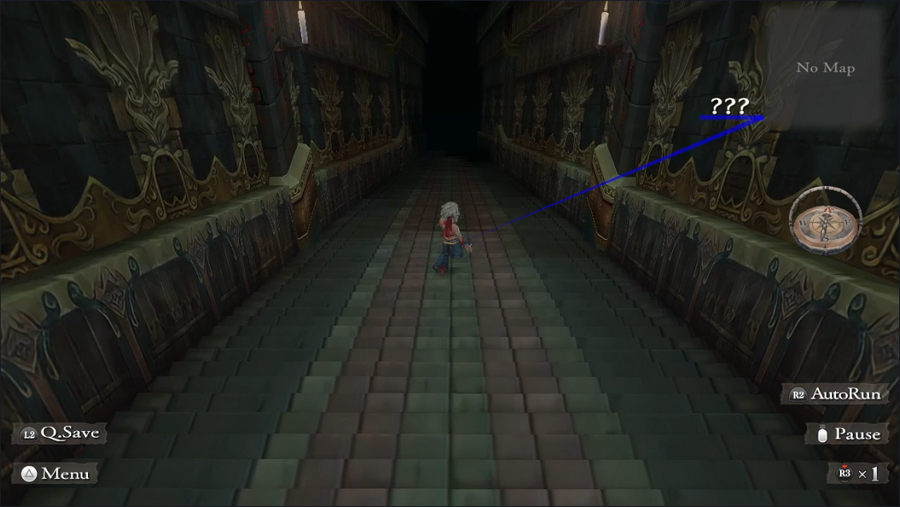 ...we locate the stairs down. There aren't even any monsters in the way. 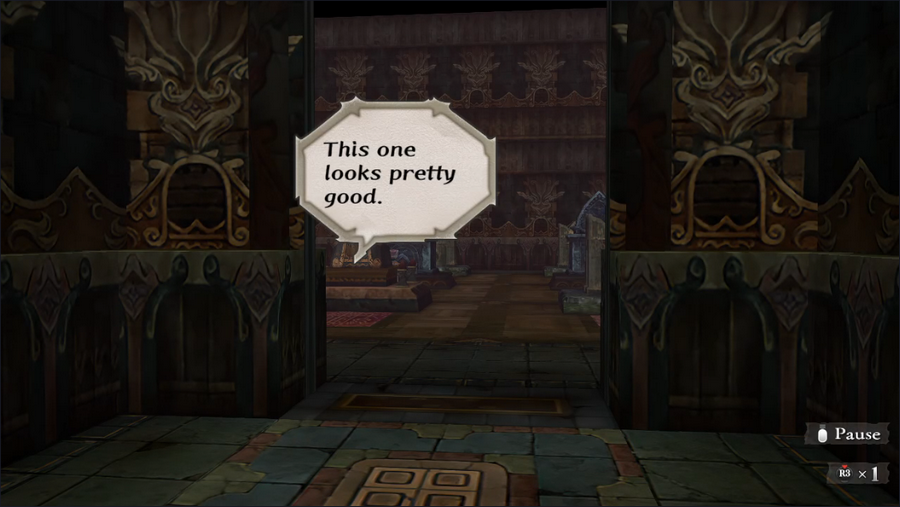 Once in the catacombs proper, we immediately get a cutscene.  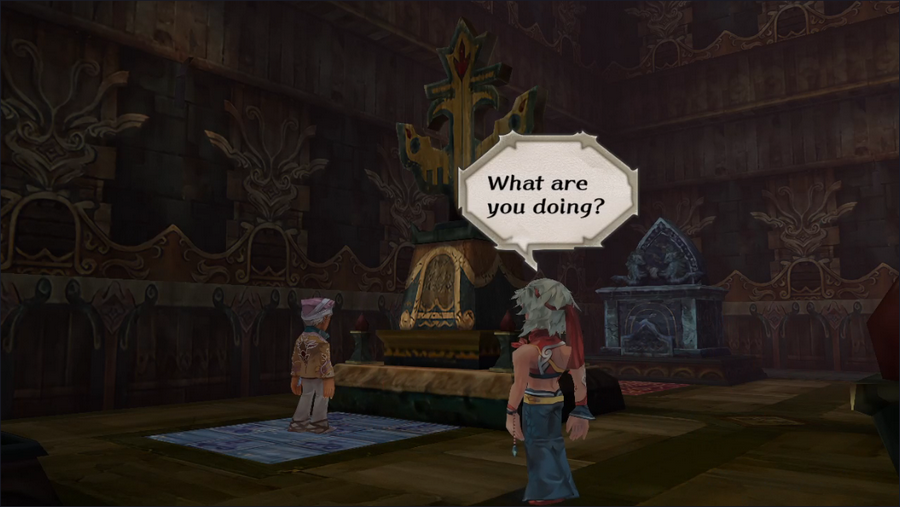 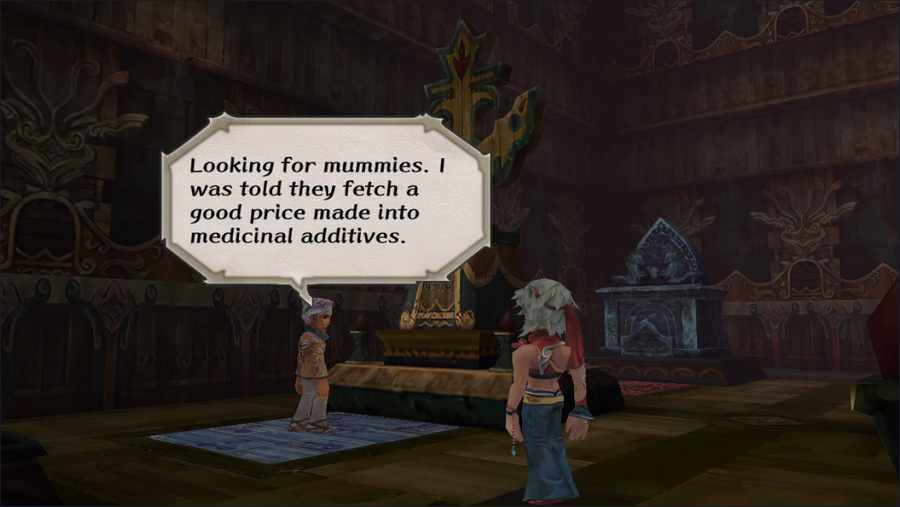  I don't even know where to begin dissecting that statement. I don't even know where to begin dissecting that statement.   Yeah, I'm with Barbara on this one.  This is an amusing jab at JRPG tropes, but since looting peoples' drawers isn't possible in this game, he really doesn't have a leg to stand on.  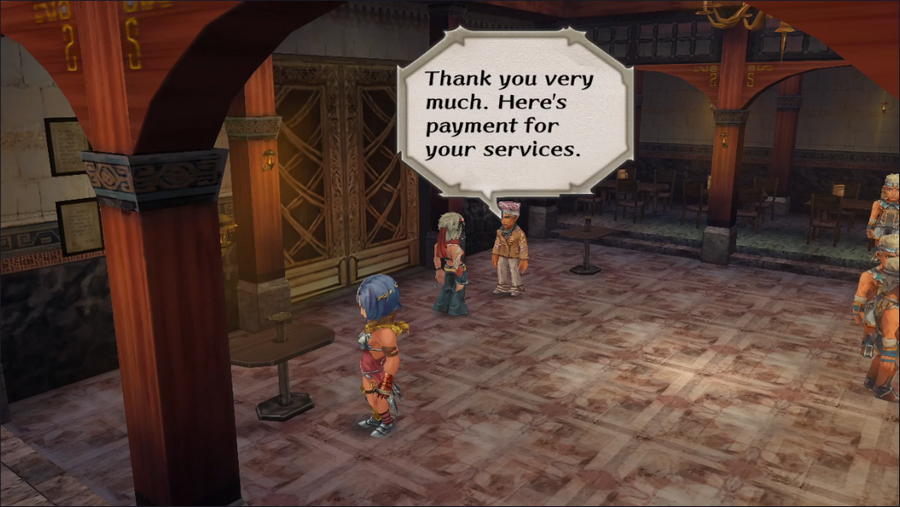 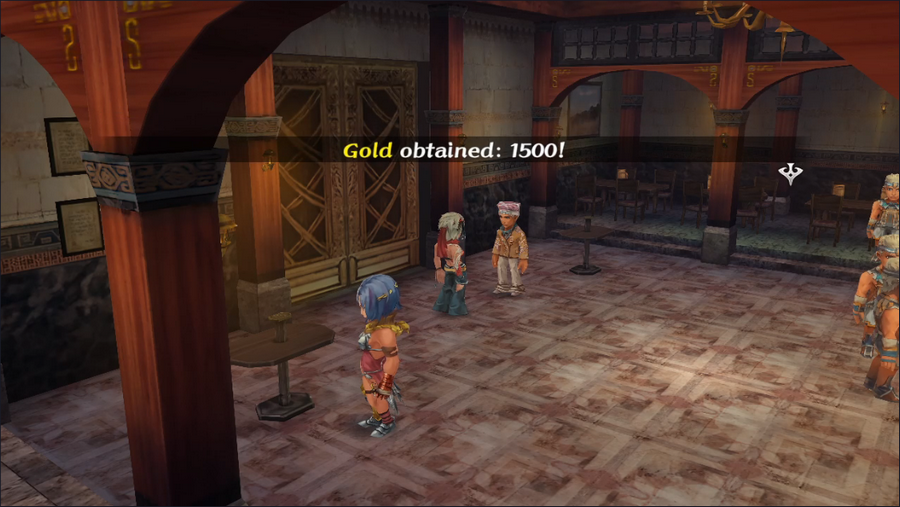  Despite the disagreement, we are immediately taken back to North Estamir and given our reward. This is just about the easiest money in the game, so let's savor it.   Next, let's go redo the quest from Jamil's opening. This guy is our only real clue about where to look, since the slave trader can only be confronted by Jamil.  Since our protagonist is female, we can get into the room easily. Albert, Gray, and Hawke have to fight the door guard. 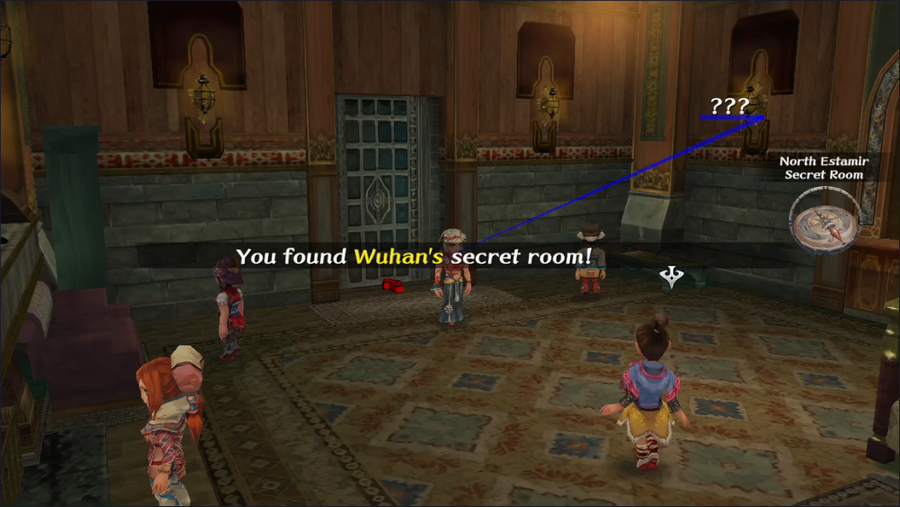 Things go much the same as they did for Jamil, including Aisha being available to recruit. 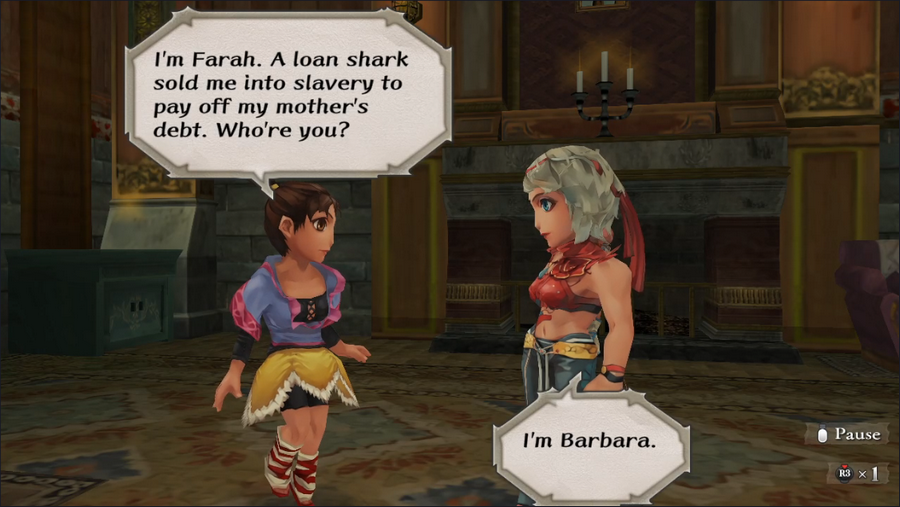 Farah catches us up in case we haven't played Jamil's intro. She seems remarkably blase about this. 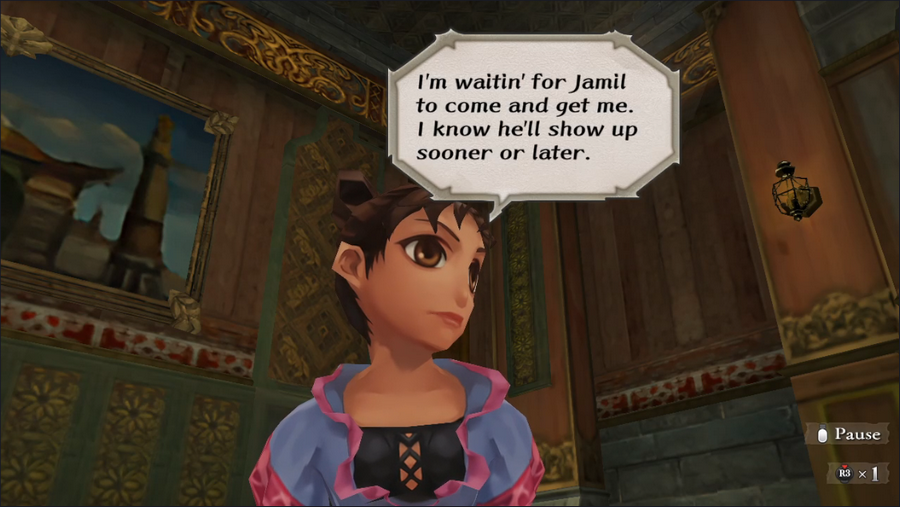  Farah exhibits classic tsundere behavior.    Jamil makes his entrance and things go pretty much the same, with Wuhan entering and telling his guard to attack us.   The fight is even easier than last time since we have a full, decently-equipped party.  And as before, Wuhan begs us to spare his life. Although the quest isn't quite done yet, I'm leaving it here to throw in another vote: Should we spare Wuhan or kill him instead? This one may seem insignificant, but it has some ramifications you may not expect. Since this choice won't affect any of the available tasks, feel free to cast your vote for our next destination as well. As usual, pick up to three choices. Current Event Rank: 2 Things to Do Find the boy who went missing from Yassi Retrieve the Aquamarine from Crystal Lake - We lack the means to do this Climb Mt. Scurve and steal a feather from the nest of the lord of the birds - We lack the means to do this Kill the bugs in the Altours orchard Investigate the death of Buck the shopkeeper in Melvir Find the Melvir innkeeper's missing daughter Find Captain Silver's treasure Get the ancient scroll from Hawke Places to Explore Estamir sewers The remainder of the Geckling cave - We lack the means to do this Melvir sewers Bayre Plateau Isthmus Keep, or what's left of it The Walon Isle jungle The Ligau caves - We lack the means to do this, at least to completion Mt. Scurve - We lack the means to do this, at least to completion Crystal Lake - We likely lack the means to do this Treasure Maps We lack the means to do any of these[/b] Jungle, Level 1
|
|
#
?
Oct 30, 2023 04:03
|
|
|
Making stuff out of Mummies was a thing in real history! https://en.wikipedia.org/wiki/Mummia
|
|
#
?
Oct 30, 2023 04:46
|
|
|
MonsieurChoc posted:Making stuff out of Mummies was a thing in real history!  I know I shouldn't be surprised, and yet... I know I shouldn't be surprised, and yet...
|
|
#
?
Oct 30, 2023 12:30
|
|
|
Its linked at the bottom of that page but you should also look at Mellified Man. It's more consensual but no less disgusting! Anyways, kill him. Slavery's a genuinely despicable act and the world's better off without him.
|
|
#
?
Oct 30, 2023 17:52
|
|


|
Arzaac posted:Its linked at the bottom of that page but you should also look at Mellified Man. It's more consensual but no less disgusting! Don't forget to vote on what to do next, as well!
|
|
#
?
Oct 30, 2023 20:28
|
|
|
Just wanna say I bought this on its release because my only Saga experience was Frontier, and back then I was probably twelve years old and looking for another hit of rpg goodness after FFVII. I'm sure I was far from alone in my inability to get what Frontier was going for. Anyhow I am much older but not much smarter so this one proved kinda inexplicable, but thanks to your LP I think I can make some sense of it. Thanks for doing this.
|
|
#
?
Oct 30, 2023 20:48
|
|
|
Investigate the death of Buck the shopkeeper in Melvir Find the Melvir innkeeper's missing daughter Get the ancient scroll from Hawke This seems reasonable. At least, the first two should be accomplishable next to each other...I think. At the very least, getting that scroll from Hawke should be easy...ish. Maybe  Edit: Whoops, forgot Wuhan's fate. I doubt I'll sway anything with my vote, but still, spare him. You've done your part, now's the time to let the justice system do its part...why do I hear bitter, jaded laughing? Gilgamesh255 fucked around with this message at 14:03 on Oct 31, 2023 |
|
#
?
Oct 31, 2023 02:56
|
|
|
Welp. Roadblocks abound. To be expected in SaGa. Anyways, - Find the boy who went missing from Yassi - Find the Melvir innkeeper's missing daughter - Kill the bugs in the Altours orchard As for Wuhan, 
|
|
#
?
Oct 31, 2023 03:16
|
|
|
unattended spaghetti posted:Just wanna say I bought this on its release because my only Saga experience was Frontier, and back then I was probably twelve years old and looking for another hit of rpg goodness after FFVII. I'm sure I was far from alone in my inability to get what Frontier was going for. My experience was basically the opposite of yours. Frontier never fully clicked with me, despite repeated efforts, but Minstrel Song really sucked me in. This is absolutely my pleasure, and I hope you enjoy it. ")
|
|
#
?
Oct 31, 2023 04:10
|
|
|
Investigate the death of Buck the shopkeeper in Melvir Find the Melvir innkeeper's missing daughter Find the boy who went missing from Yassi As for Wuhan... 
|
|
#
?
Oct 31, 2023 04:30
|
|

|
Voting is now closed.
|
|
#
?
Nov 3, 2023 00:56
|
|
|
Welcome back, everyone. When we last left off, we had Wuhan at our mercy and were deciding what to do with him. The votes were unanimous. His life ends here.  He doesn't go down without a fight, though.  He's not too dangerous, but his defense is pretty considerable. Regular attacks won't cut it.  Luckily, we're not lacking in techniques.  Wuhan dies with very little fuss. Hopefully Kjaraht isn't horribly destabilized by the assassination of its leader.   After the fight, we're sent to Farah's house as before, and we collect our jewel and gold rewards. 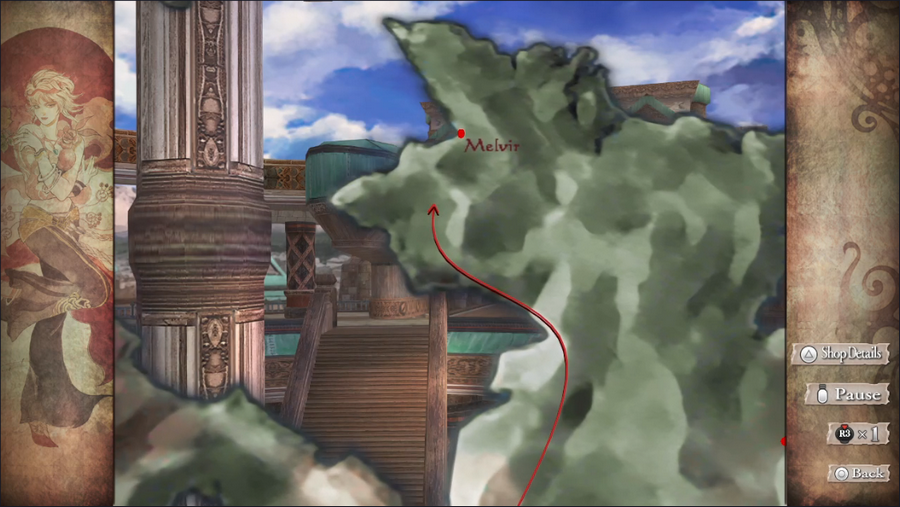 After that, we're off to Melvir to deal with the next quest: finding the innkeeper's missing daughter. 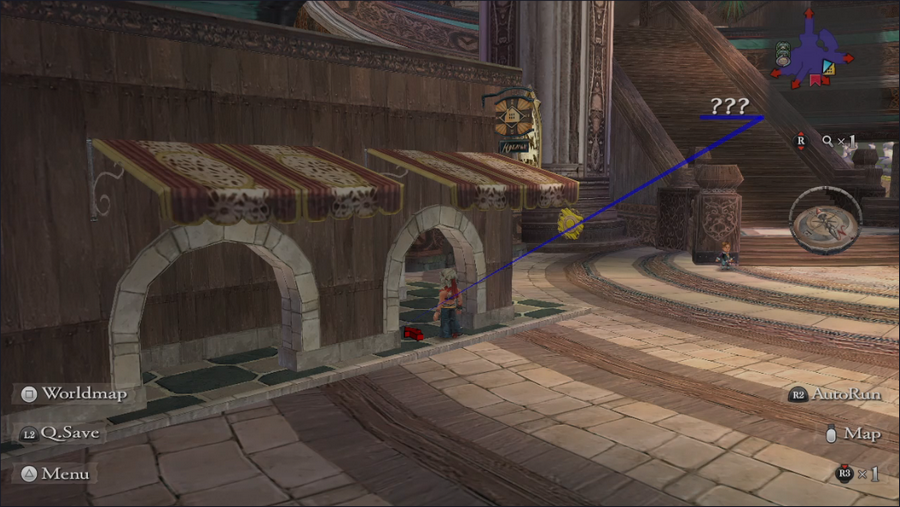 Heading to the inn itself is the logical first step.   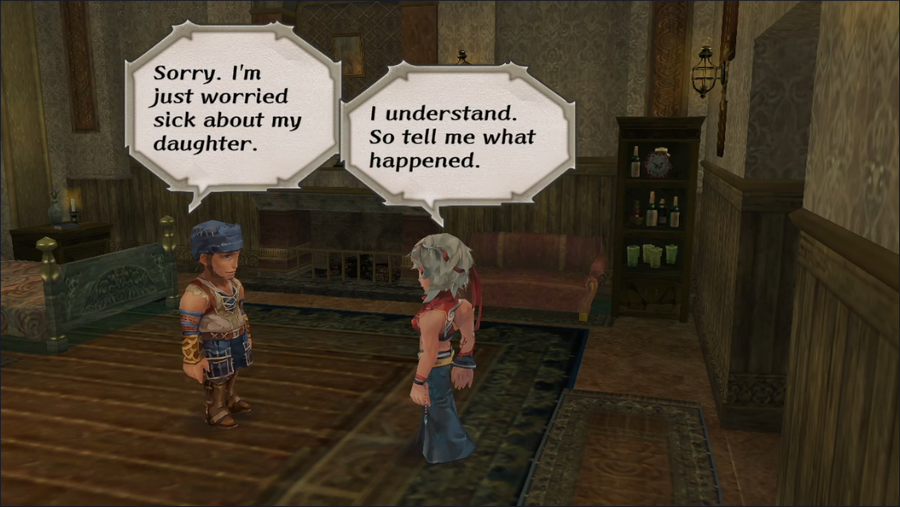 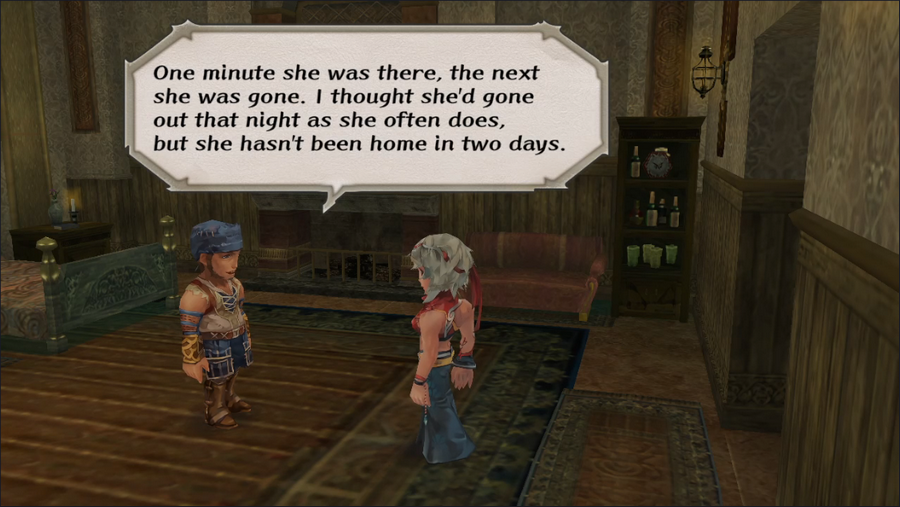 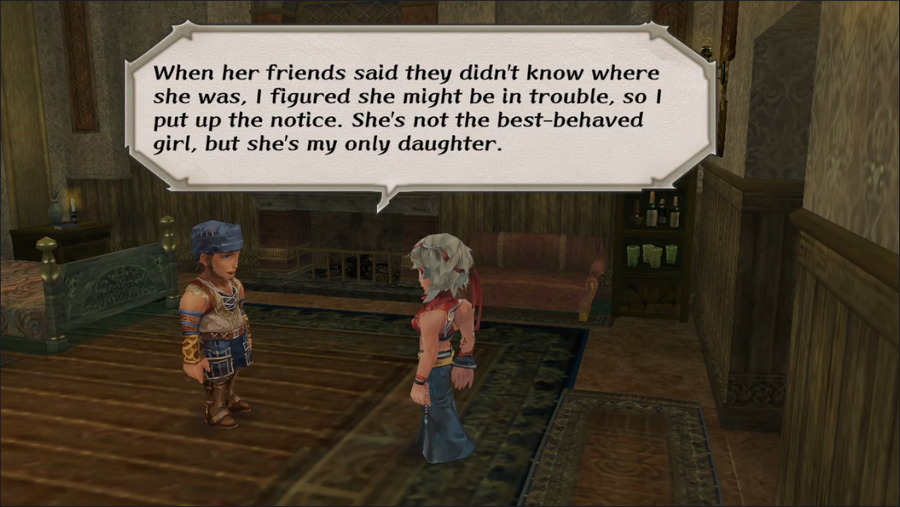 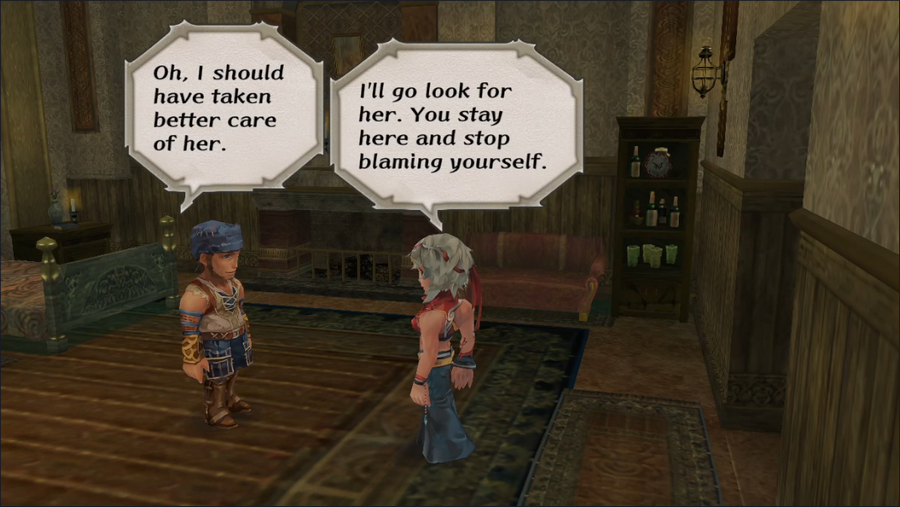 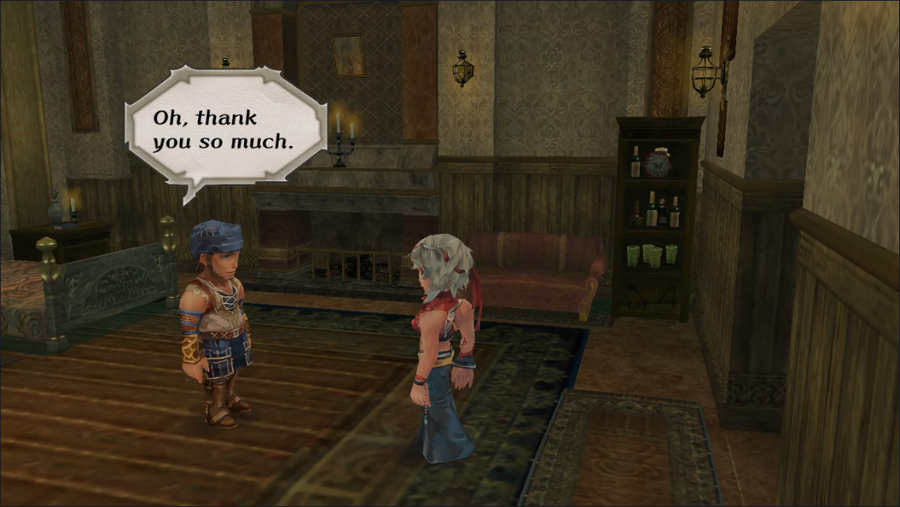 The innkeeper is understandably distraught. Though we promise to help, we're not given much information. This is, unfortunately, a dead end. 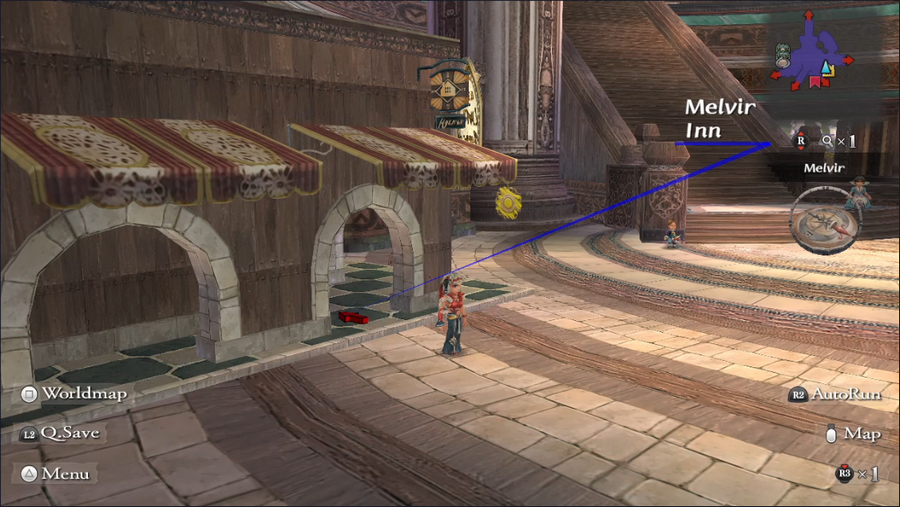 But since we're in Melvir, we'll tackle the next most requested task, which is investigating the death of Buck the shopkeeper. We don't have a lot to go on there either, but talking to the remaining shopkeepers seems like a logical move. 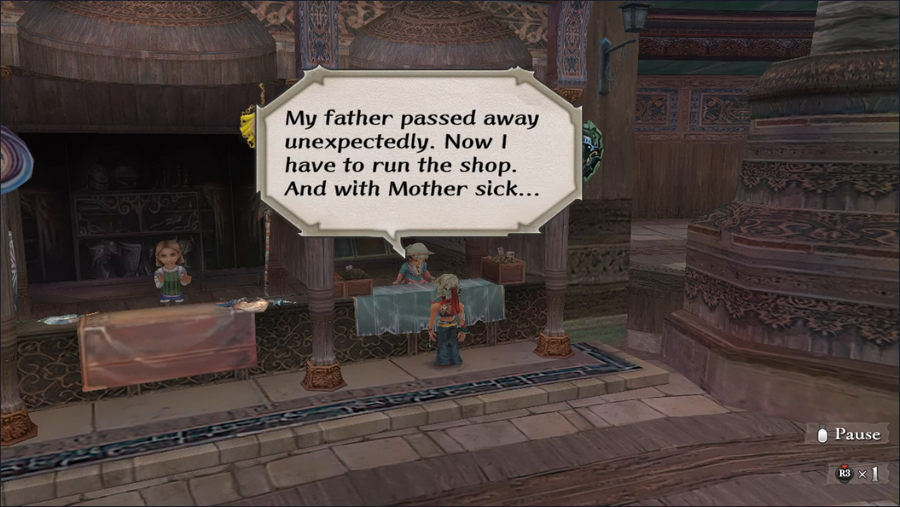 Sure enough, this girl on the first floor of the city seems to be his daughter. 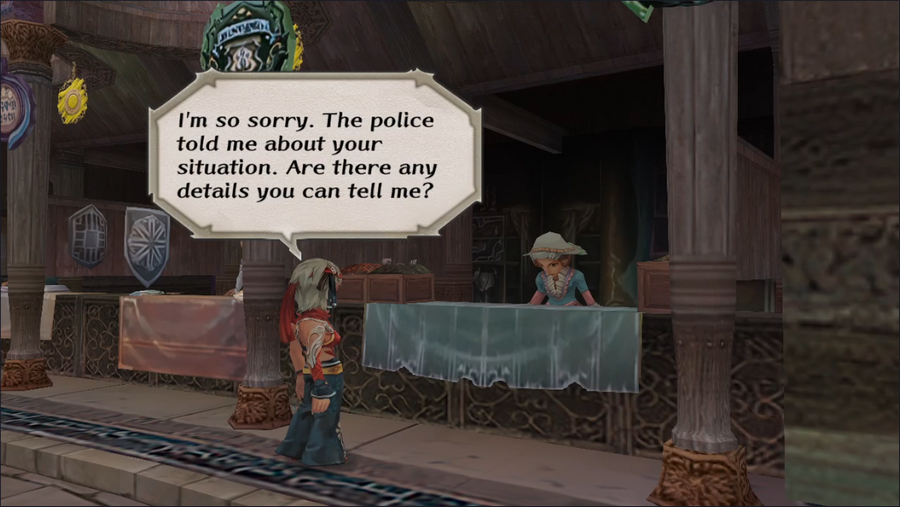 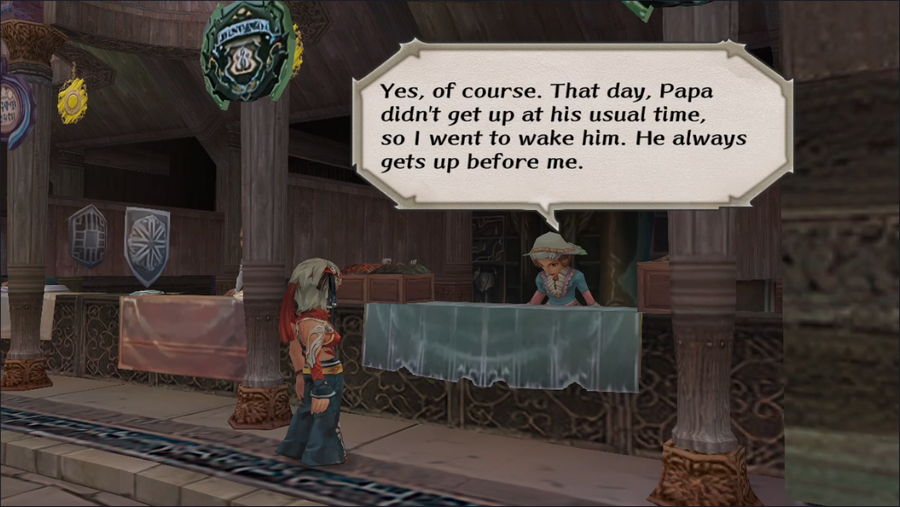 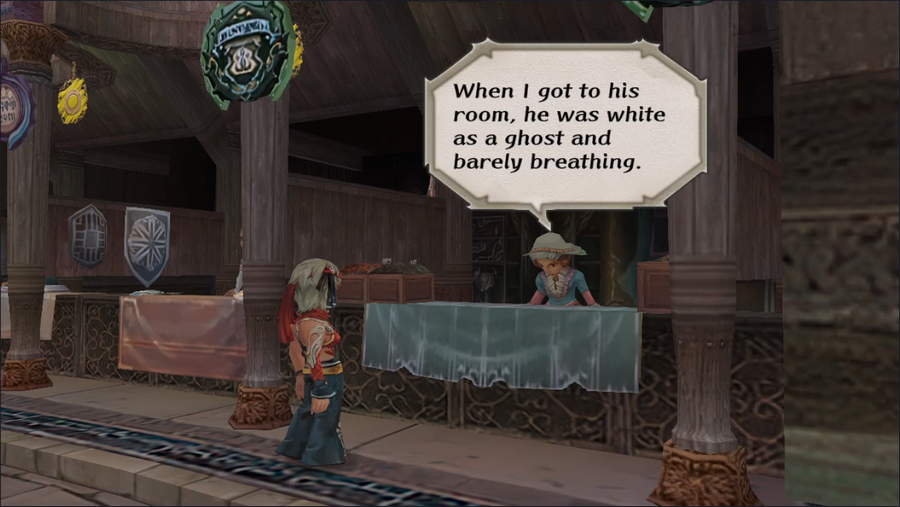 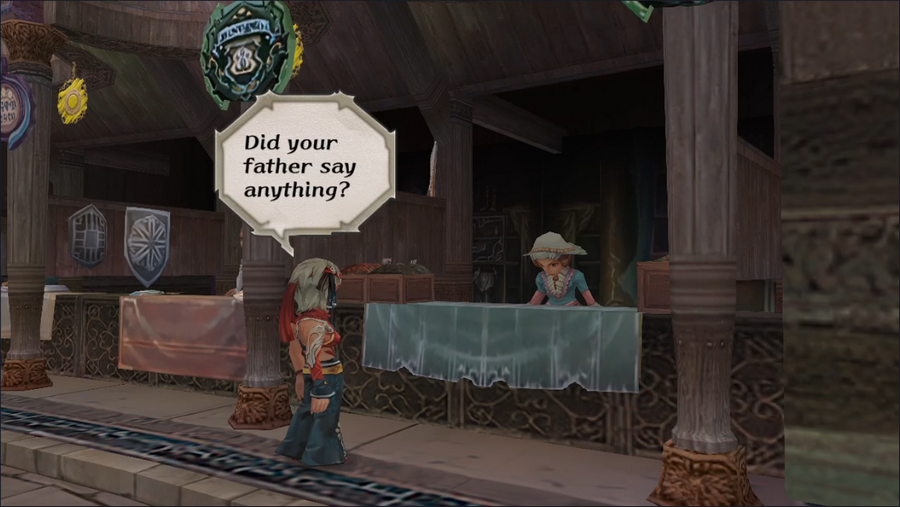 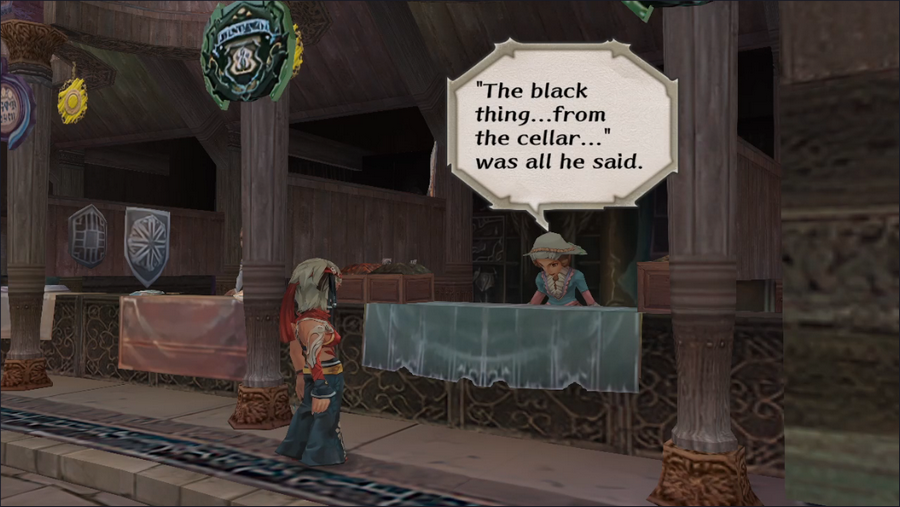 Well, that's especially ominous. 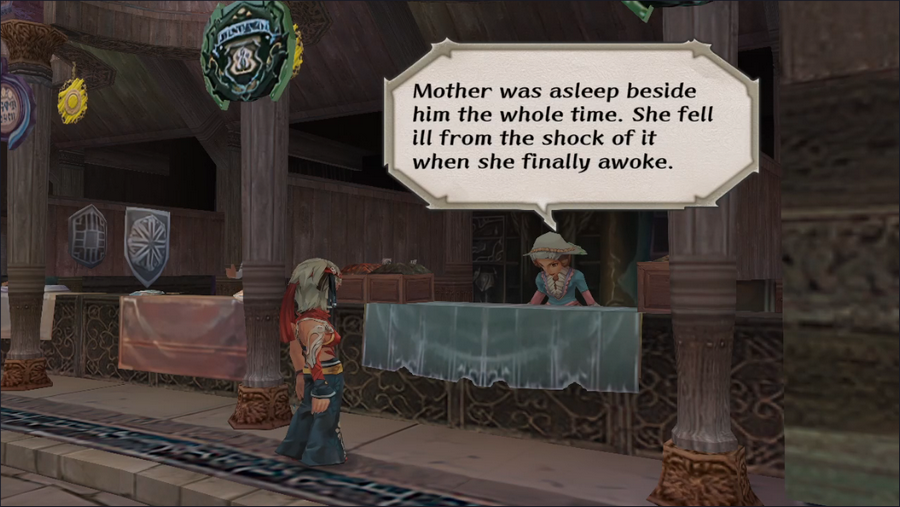  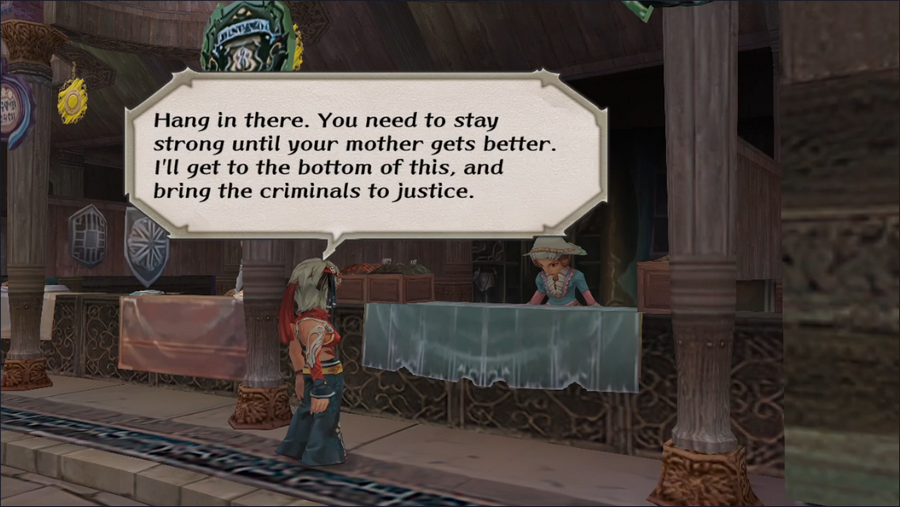 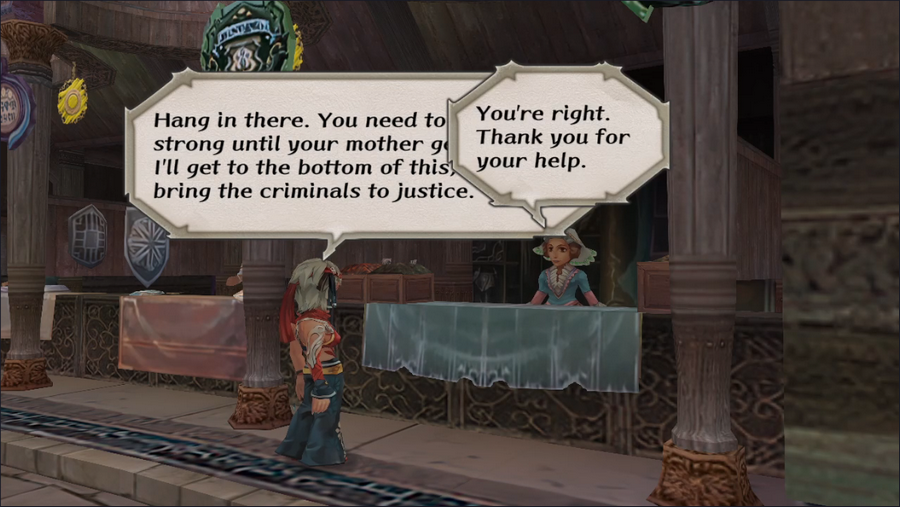 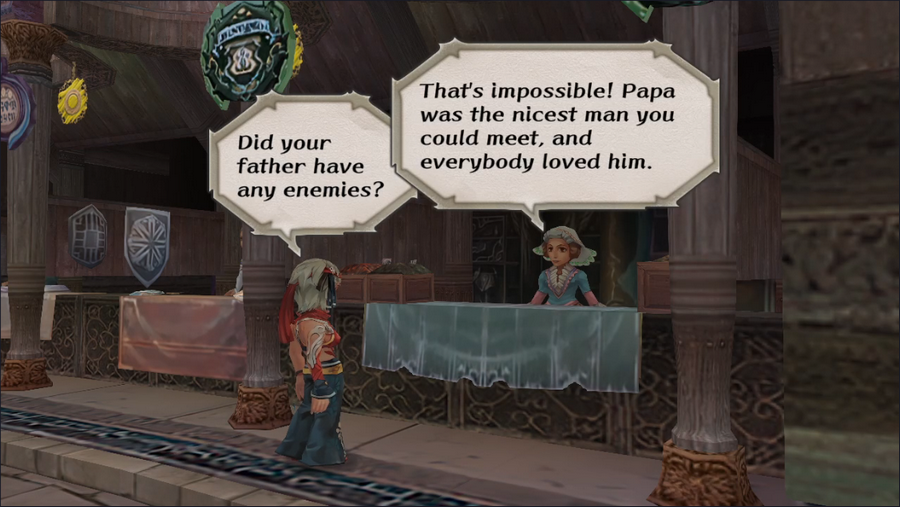 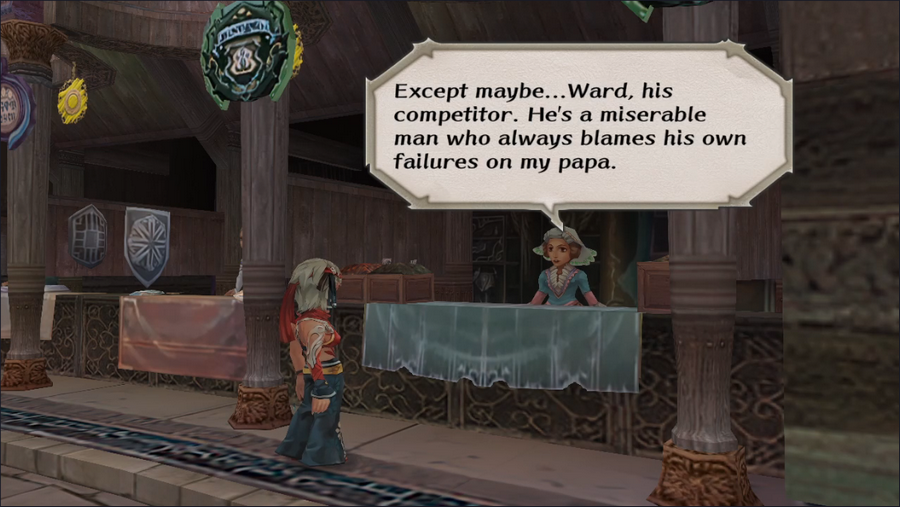 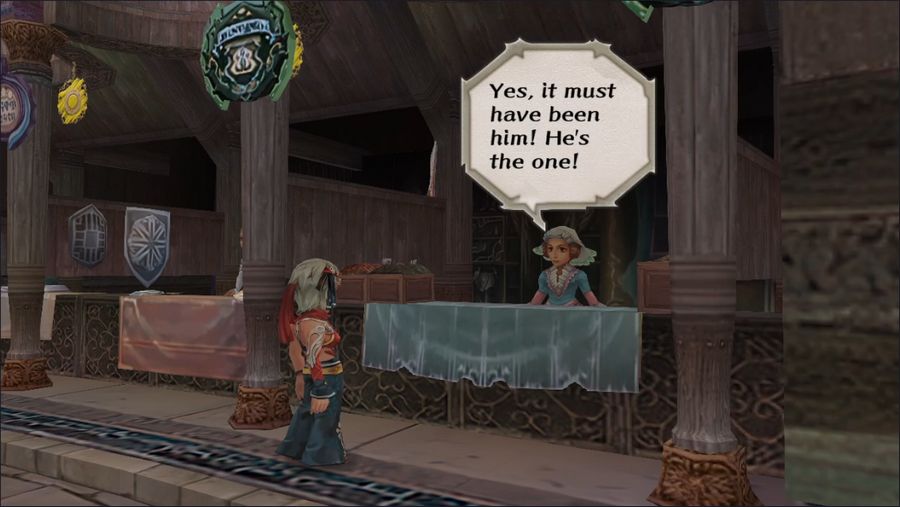   Well, we've got a lead, at least. Let's go talk to Ward.  He hangs out on the second level, running his own shop.   Despite what she told Buck's daughter, Barbara immediately accuses him of the deed.  Luckily, Ward is pretty even-tempered. 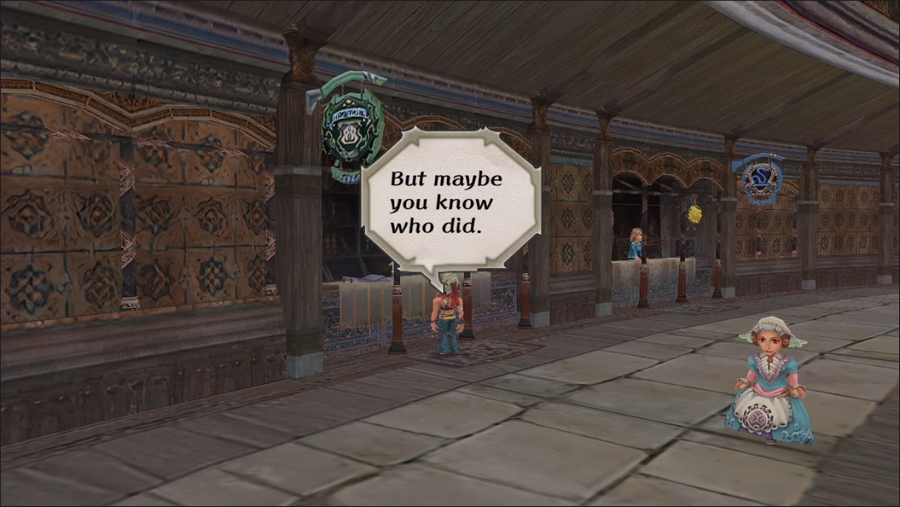 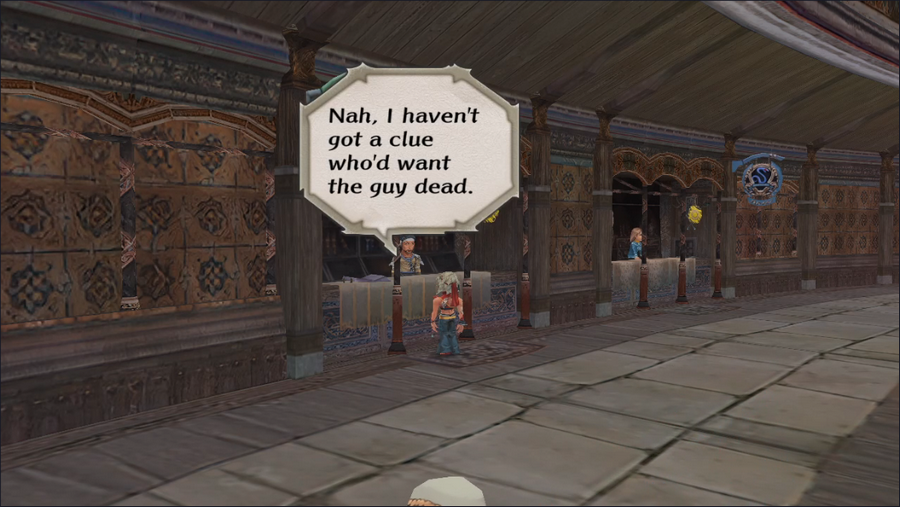 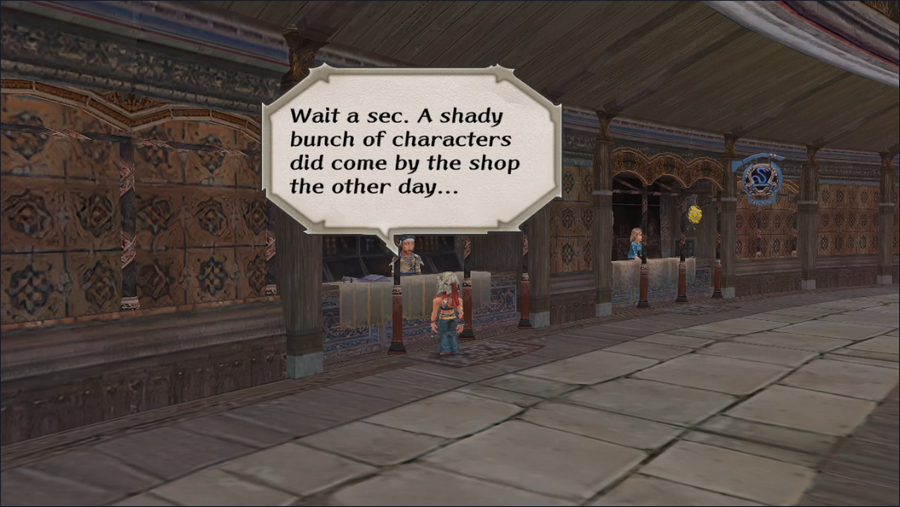 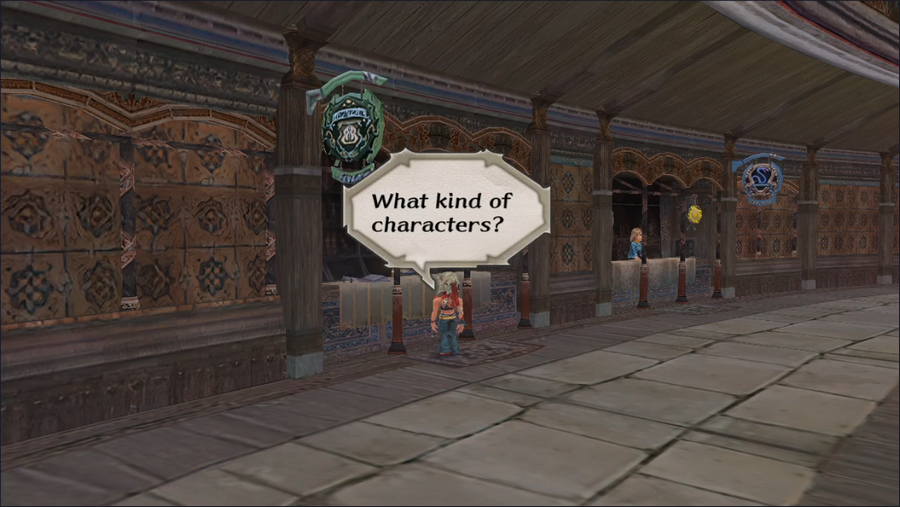 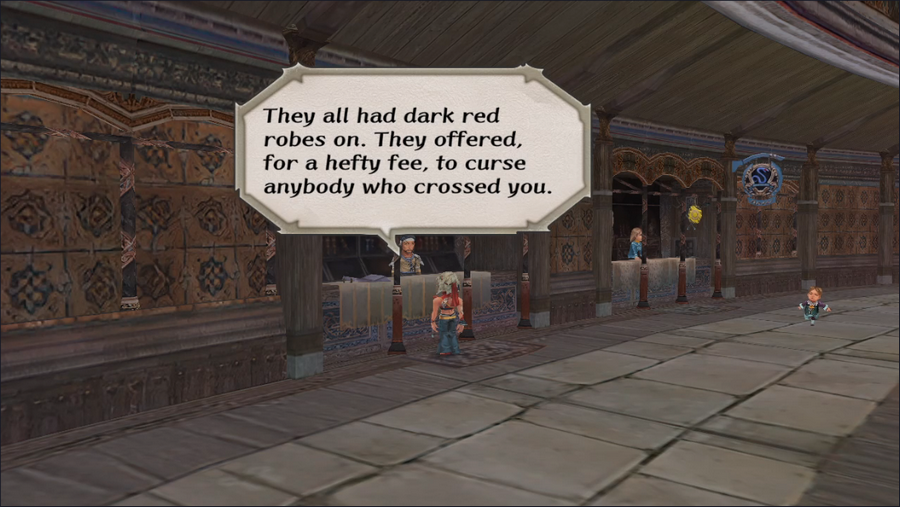 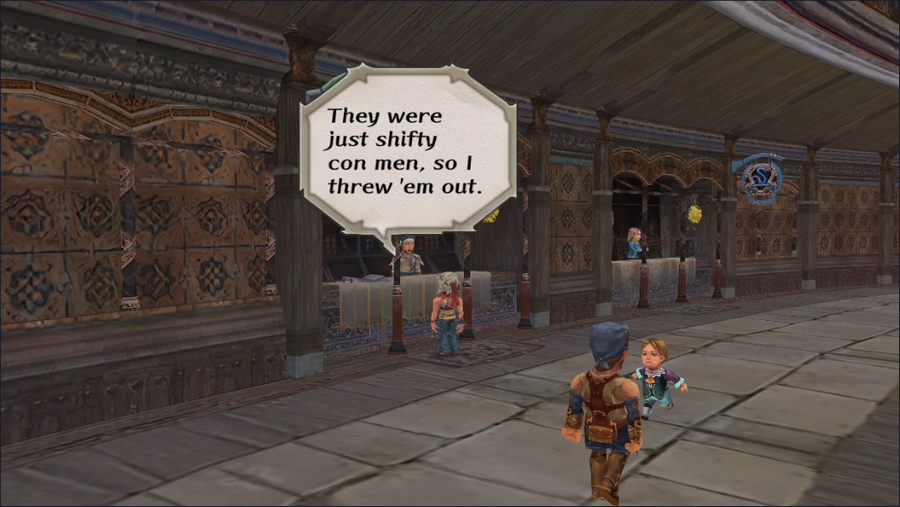 Given that these people live in a world where magic is real, Ward seems awfully quick to jump to this conclusion. 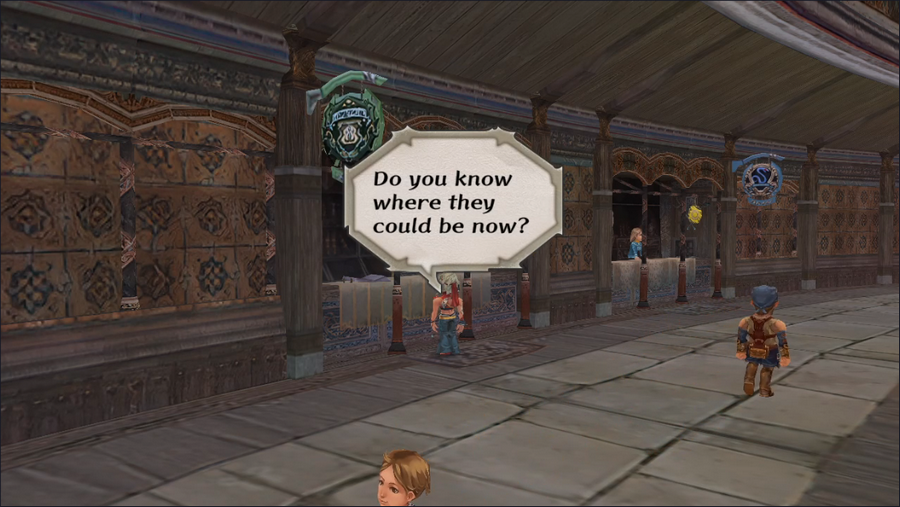 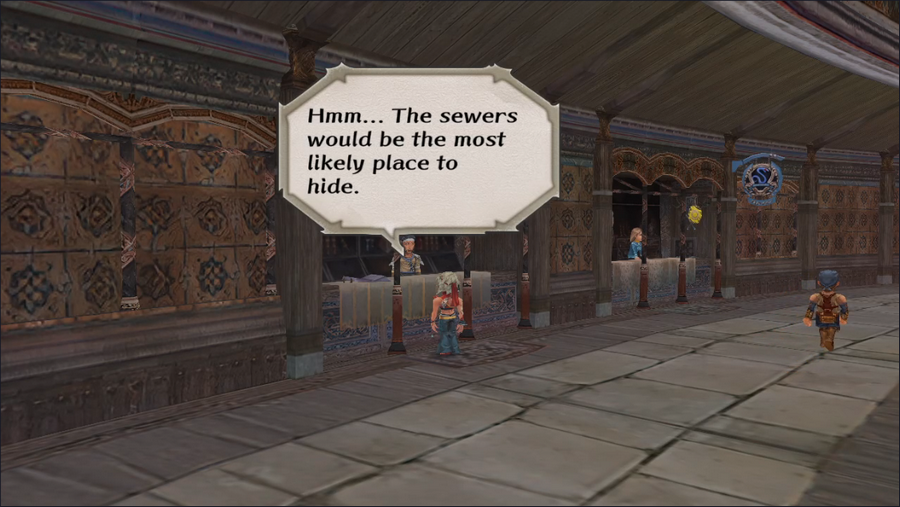 With that, the conversation ends, and the scene fades out. 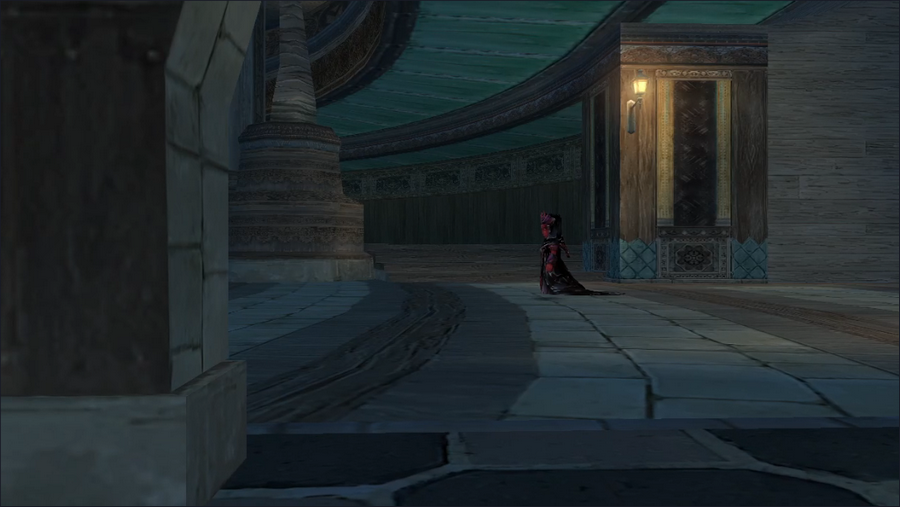 We cut to Melvir at night, as a mysterious robed figure crosses the empty promenade. 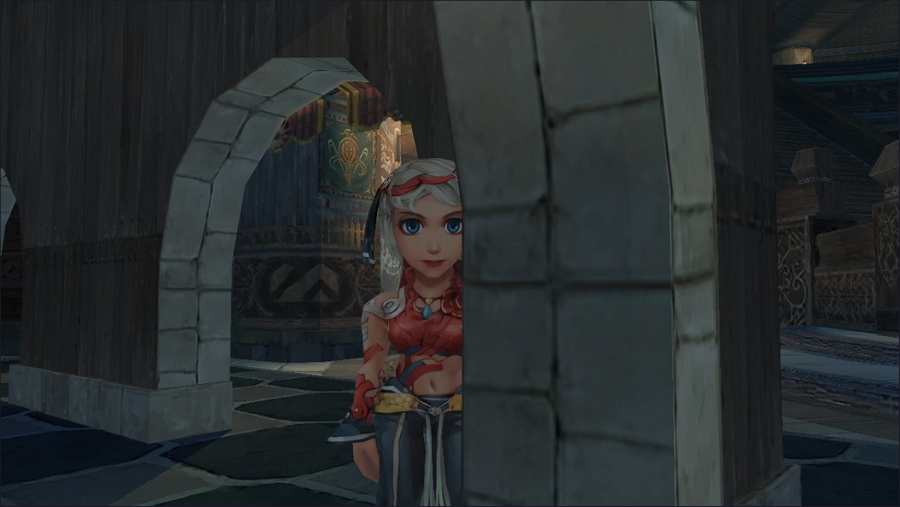 Barbara watches, hidden by the architecture of the inn. 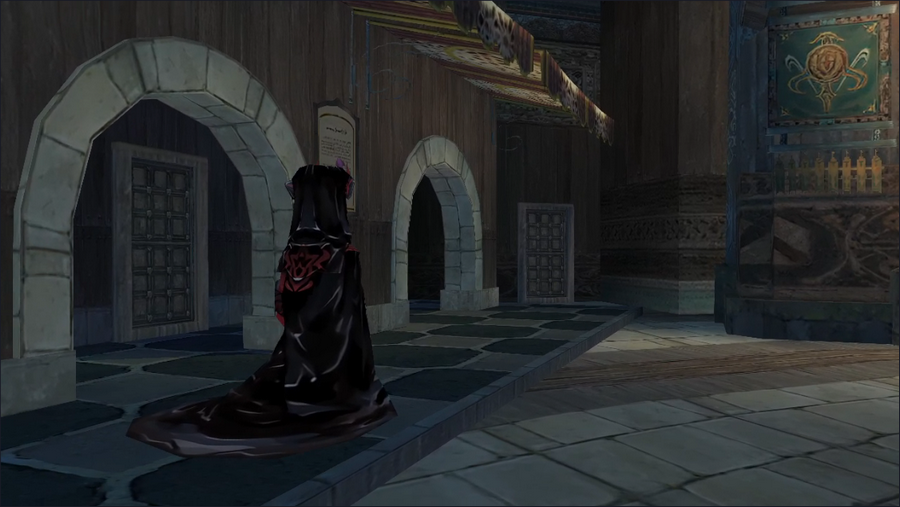 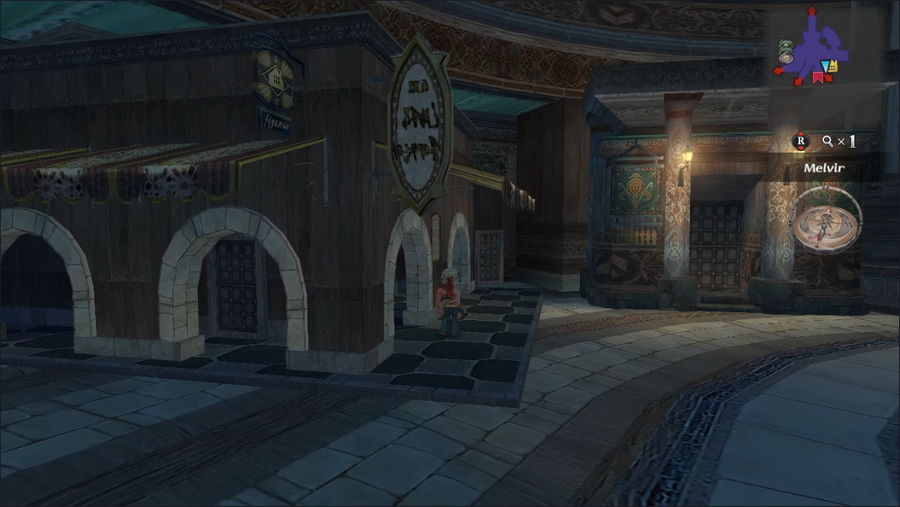 The figure heads into the sewers, as expected, and we regain control. Now, at this point, we could abandon the quest and leave the city. This would, obviously, fail the quest and deny us the rewards, but there are reasons to do it (which I'll cover later).  But we're supposed to be heroes, and a first time player probably wouldn't consider the option, so we'll pursue.   As we enter, the camera moves around the corner, showing us where our quarry is going. As we follow the mystery man, we get into a few fights, which are significant for two reasons.  First, we encounter a morlock as a regular enemy. This indicates that we've reached Battle Rank 2. 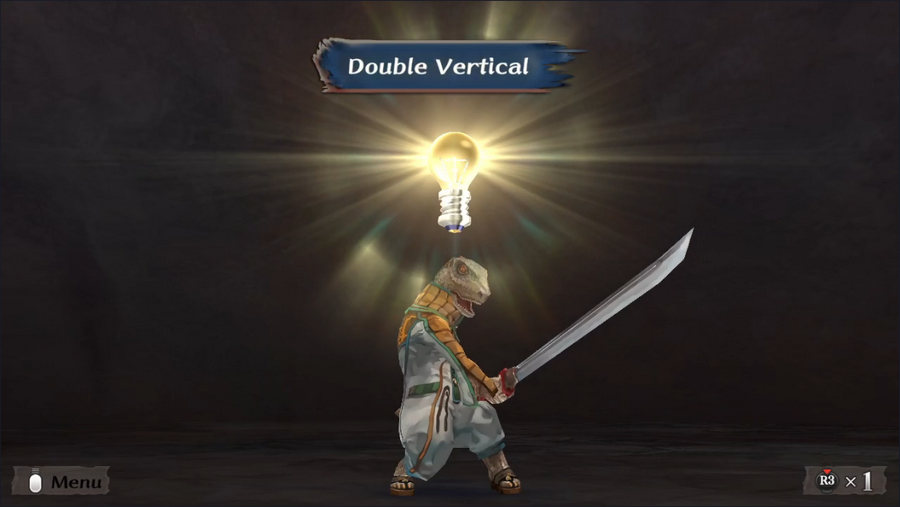 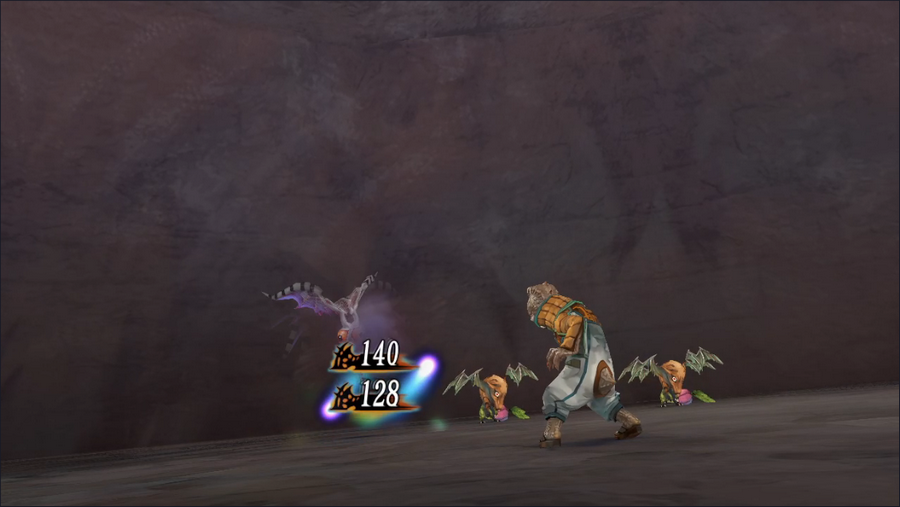 Second, Guella Ha finally Glimmers a technique, and for the brand new katana I bought off-screen. Double Vertical is a very good basic technique for two-handed blades, both inexpensive and with good damage. 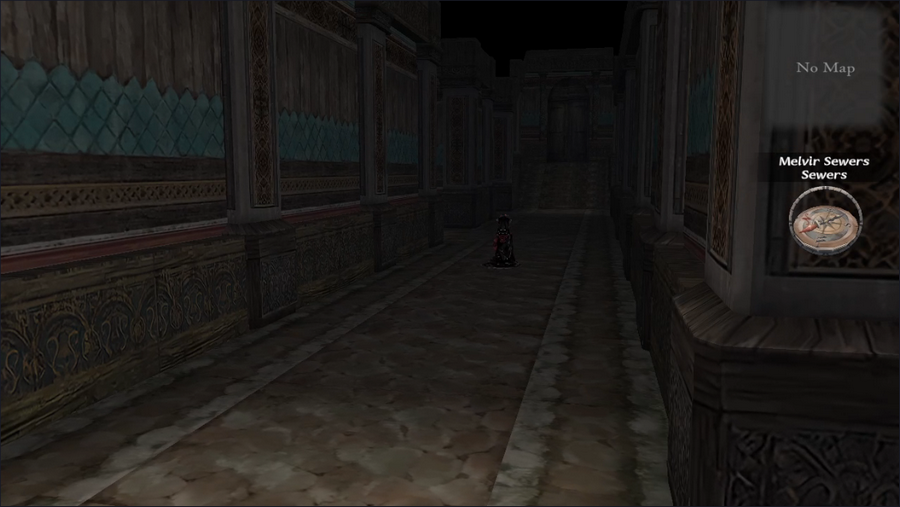 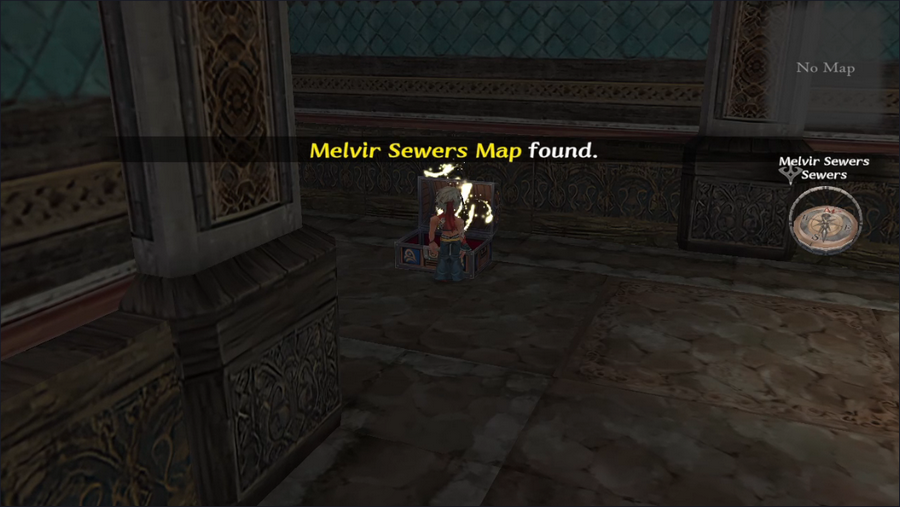 Moving on, we get another glimpse of the robed man, though we take a small side trip to grab the area map. 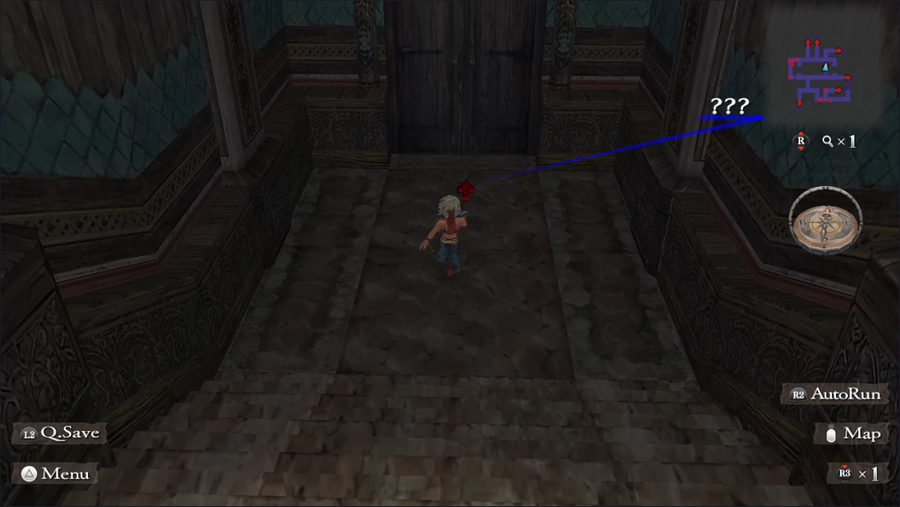 The path leads us to a door. Upon entry, we get another cutscene. 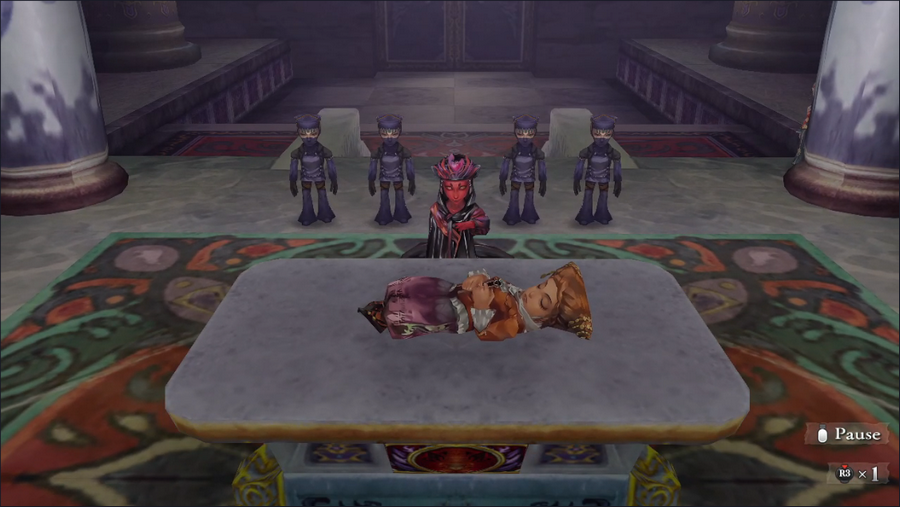  Oh that's bad. 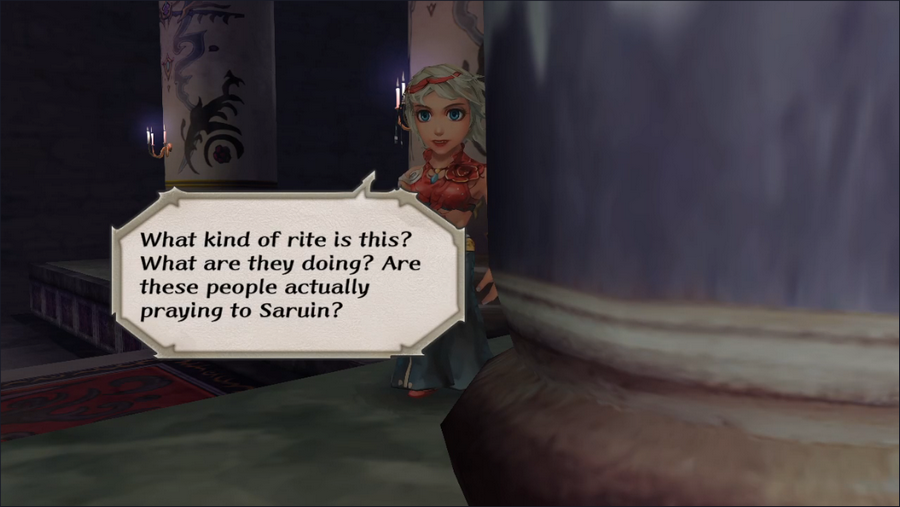 Evil cults dedicated to dark gods are kind of a fantasy staple, but I can still see a normal person being shocked that anyone would pray to a deity as thoroughly despicable as Saruin. 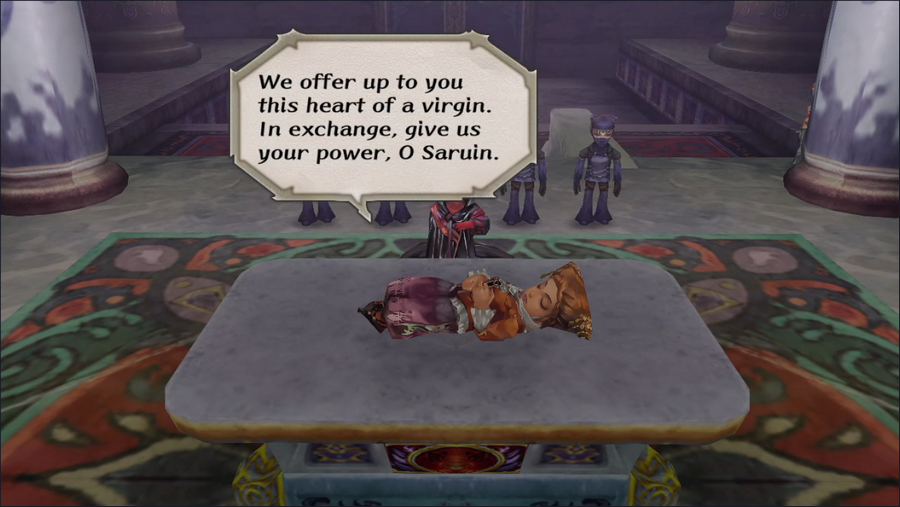  The girl is about to be sacrificed, but luckily we're here to intervene.  We'll see about that. Boss Fight: Saruin Cultists https://www.youtube.com/watch?v=U3k47ntt4eo Music Highlight: Chaos Labyrinth Minstrel Song's battle music is, for the most part, excellent, but I find Chaos Labyrinth to be closer to the low side of average. It does, at least, do a good job of sounding discordant while still being a cohesive piece of music.  Our boss fight today is against a whole host of foes: a Priest of Saruin and his four Saruin Cultists.  All five enemies exclusively stick to casting a single spell, Wracking, which is from the Necromancy school and, in addition to dealing damage, has a chance to stun. The cultists can't deal much damage with it, but with their numbers the stun can be a problem. The priest's spells actually hurt, as shown here.  Luckily, we outspeed the cultists, and we're able to take down all four before they can cast anything. 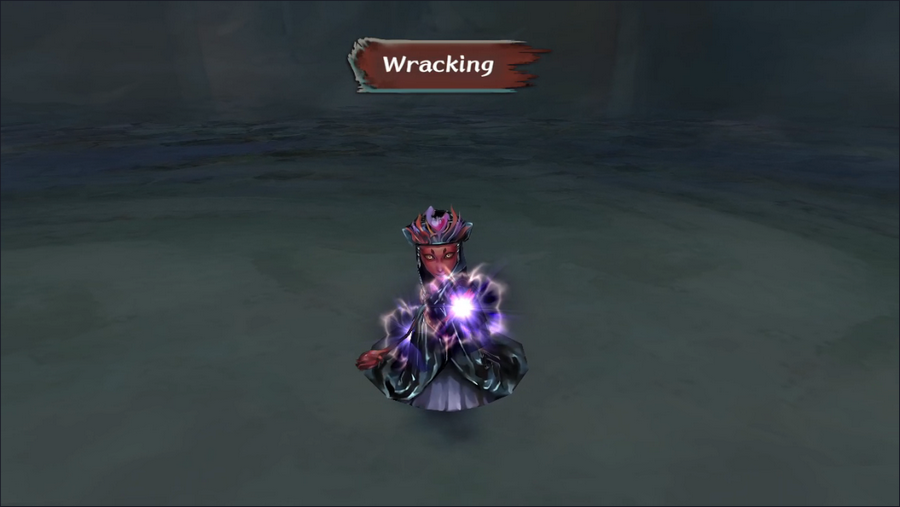  Unfortunately, the priest decided to target Barbara on both rounds, bringing her down before the fight ended and denying her any stat gains. 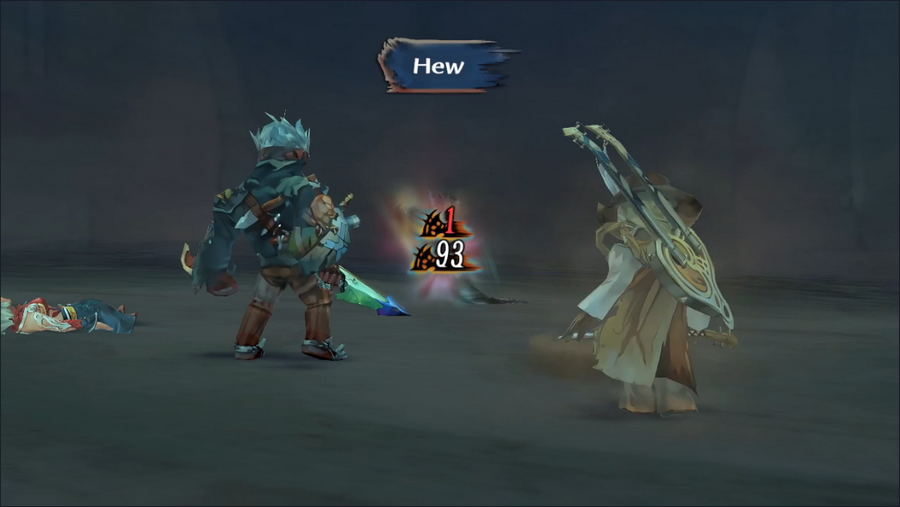 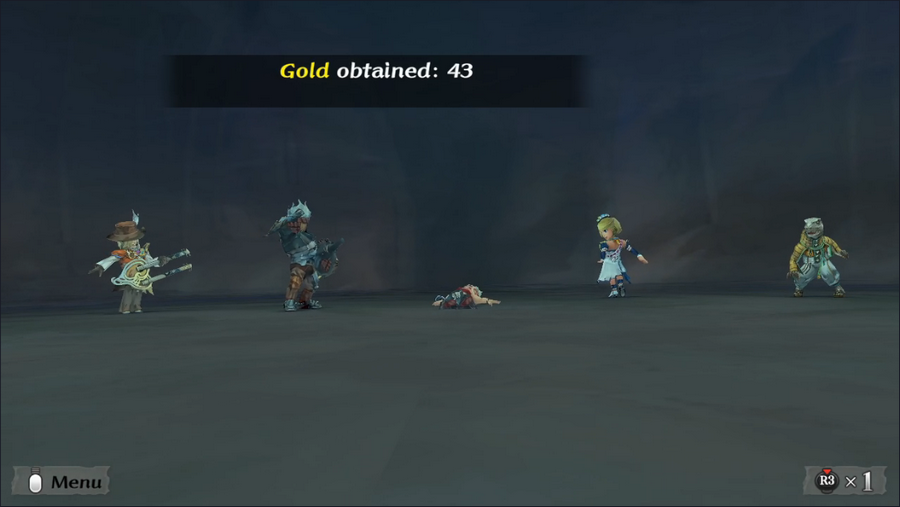 But a victory is a victory. 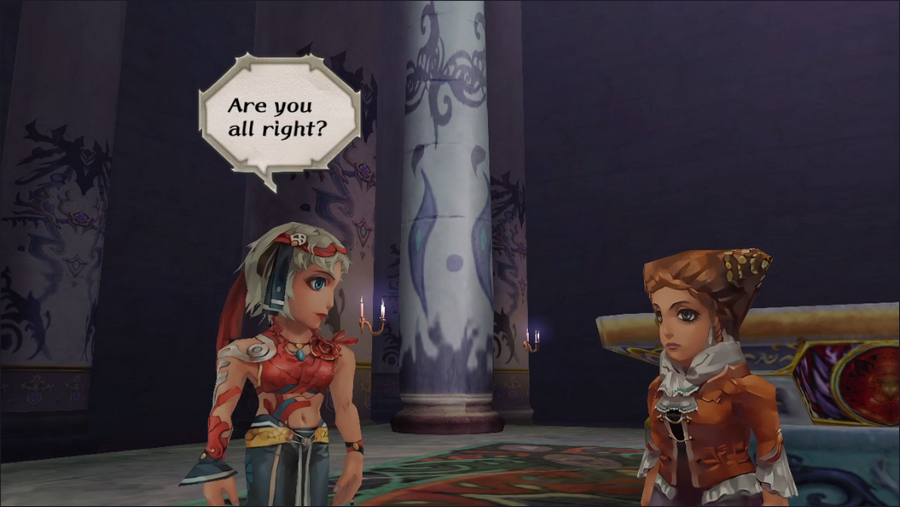    It turns out that the girl we saved was actually the innkeeper's missing daughter. Quests don't often overlap like this, but this isn't the only time they do.   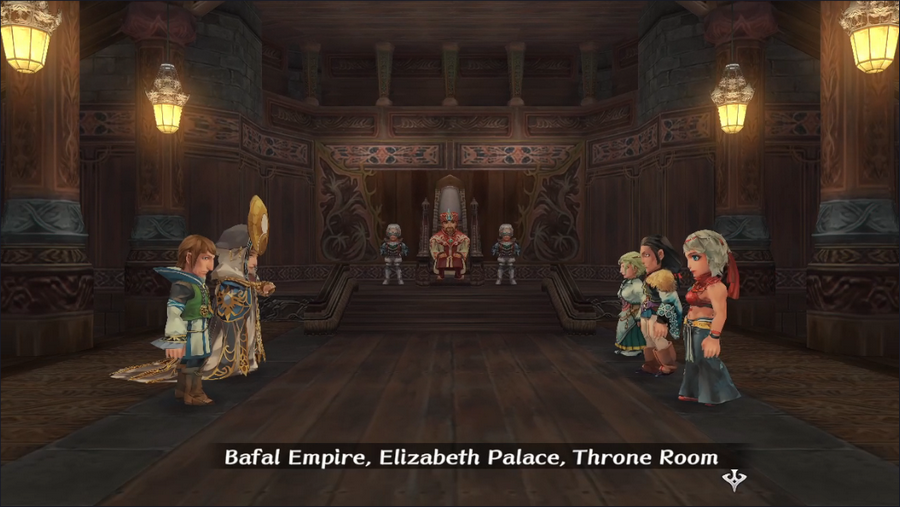 Following the rescue, we're taken to the imperial palace for an audience with the emperor himself. 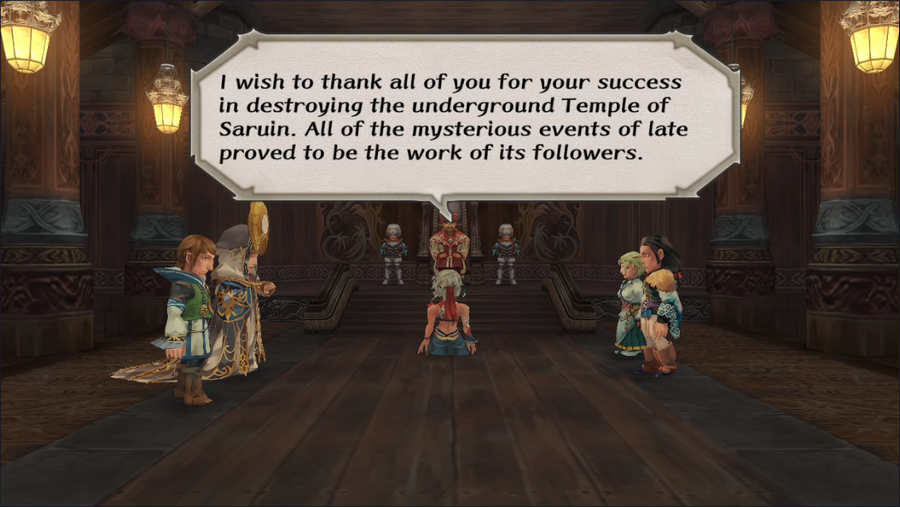 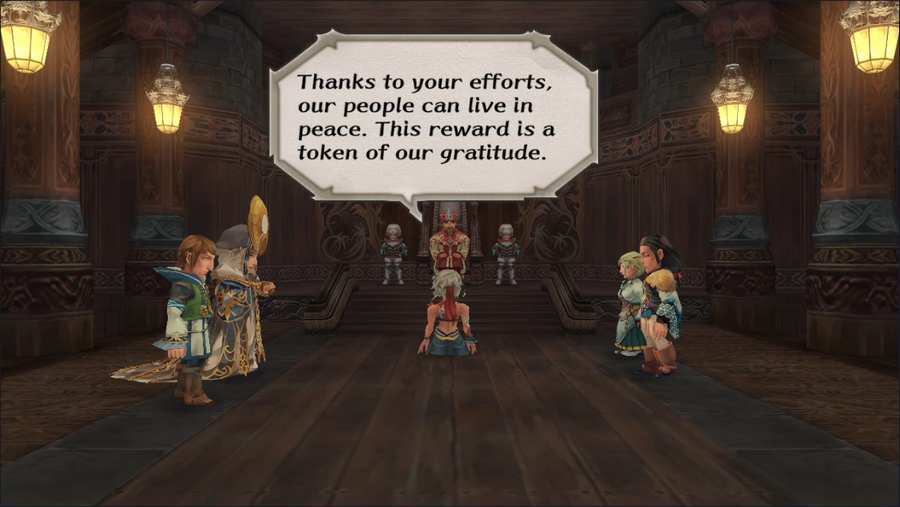 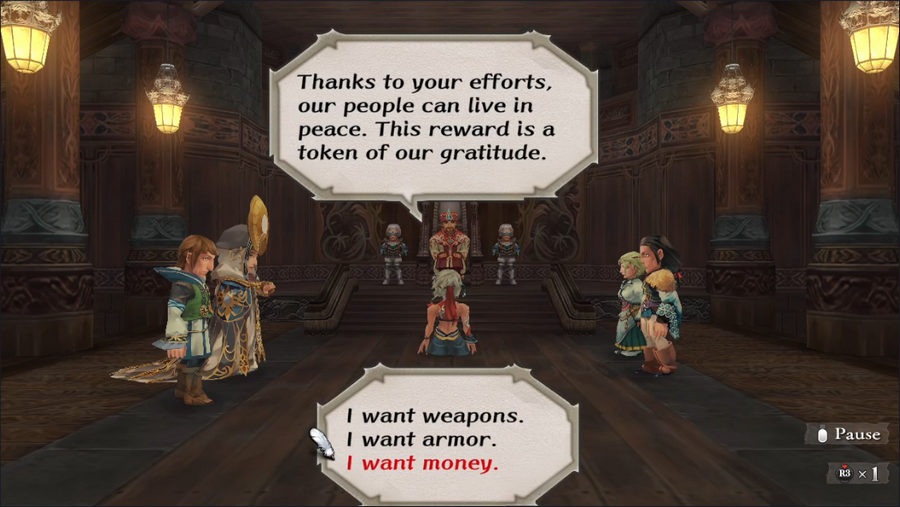 None of the rewards here are bad for the work we've done: a medium-strength foil, a mid-tier set of armor, or 2000 Gold. Since we're expecting to have a new character to outfit soon - including the purchase of spells - and because we spent a tidy sum on Guella Ha's new sword, we take the Gold. 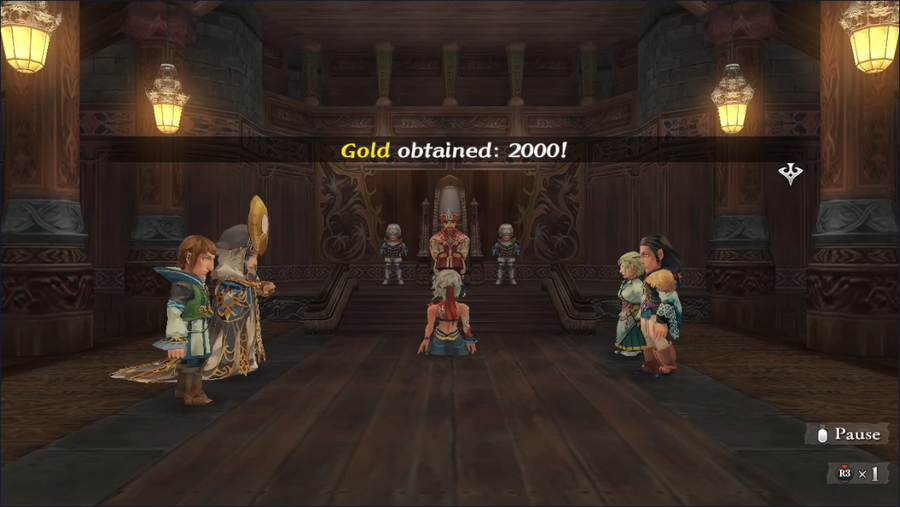 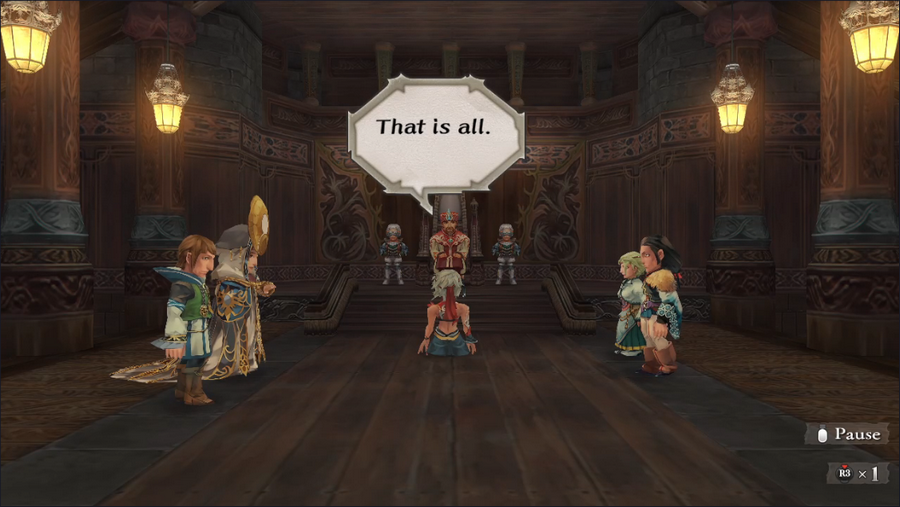 With that, we're dismissed. 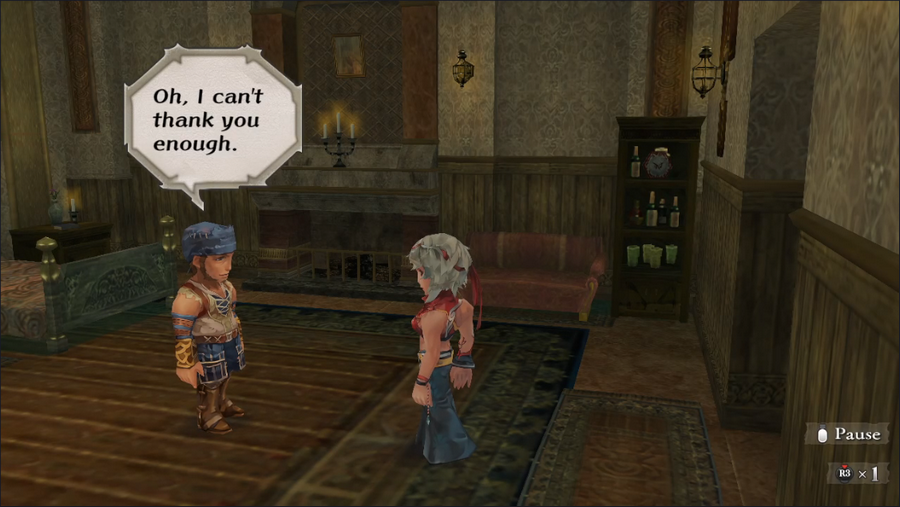   Before we depart Melvir, we also stop by the inn to claim the reward for that quest: Gold, jewels, and a free night's rest.  Speaking to Buck's daughter doesn't get us any further reward, though we can browse her wares.  This is normally the part where I'd end the update and let you vote on our next course of action, but we just his Event Rank 3, so we have something important to do.  We're going to Aurefont to deal with the raid on the depository. Claudia and Grey can do this as soon as they can get here, but everyone else has to wait until ER3. 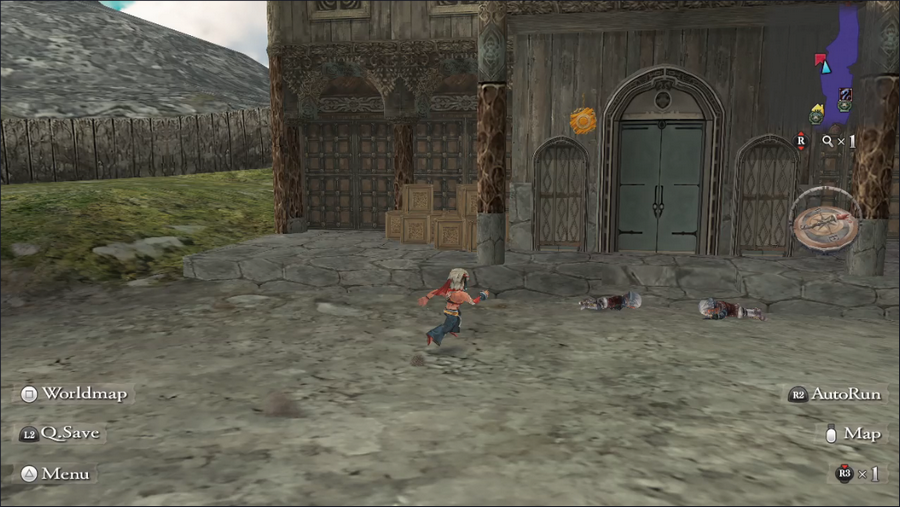 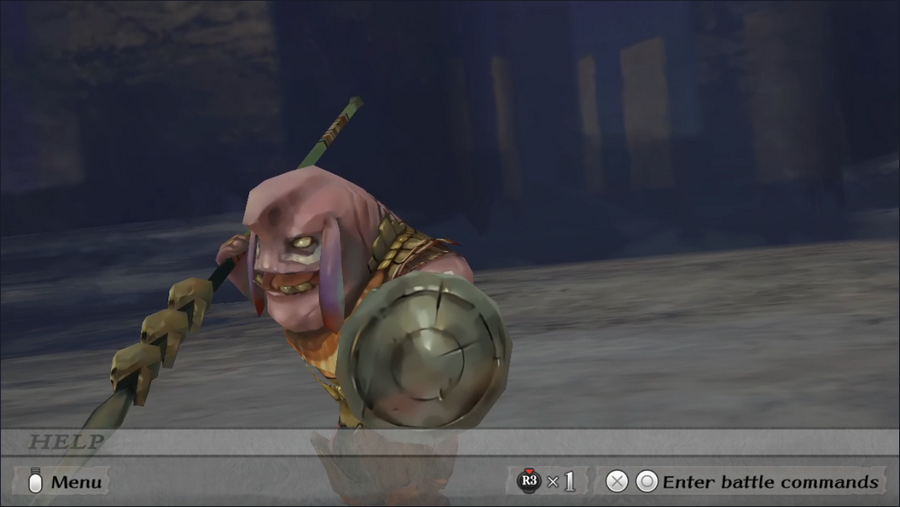 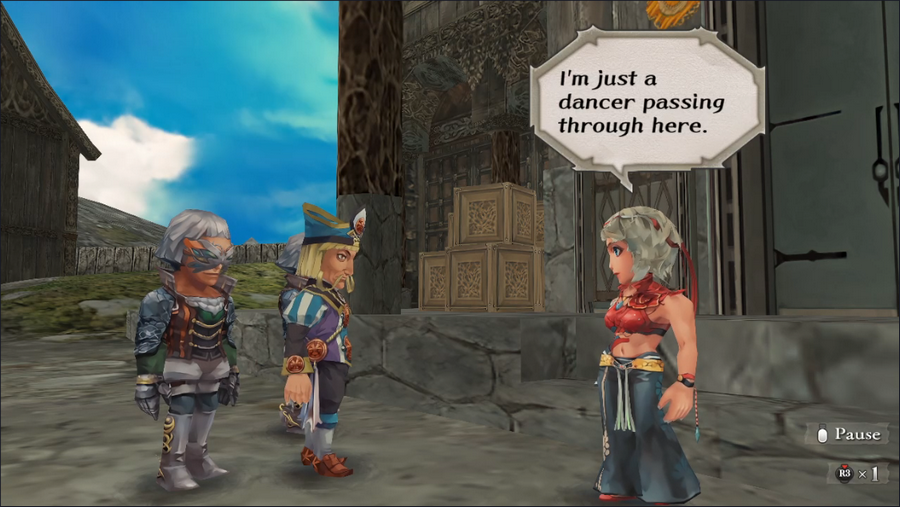 Everything in Aurefont proceeds just as it did in Claudia's intro. 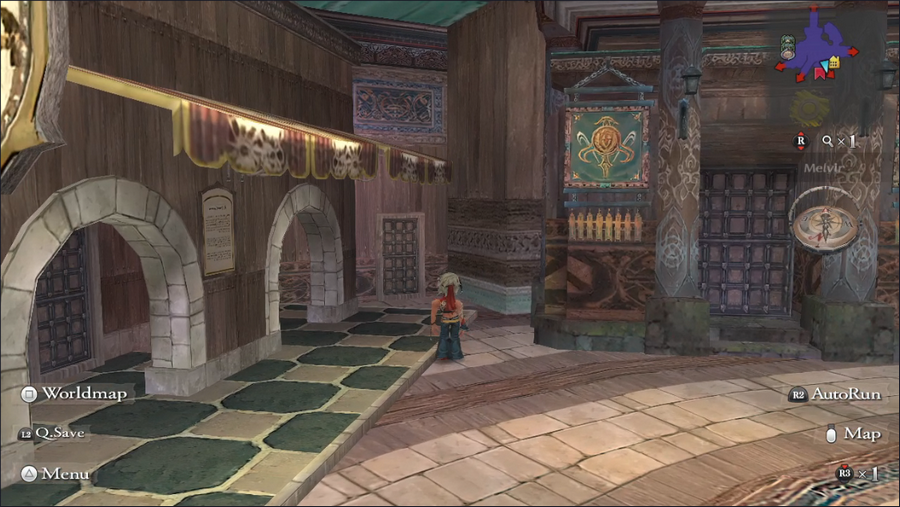 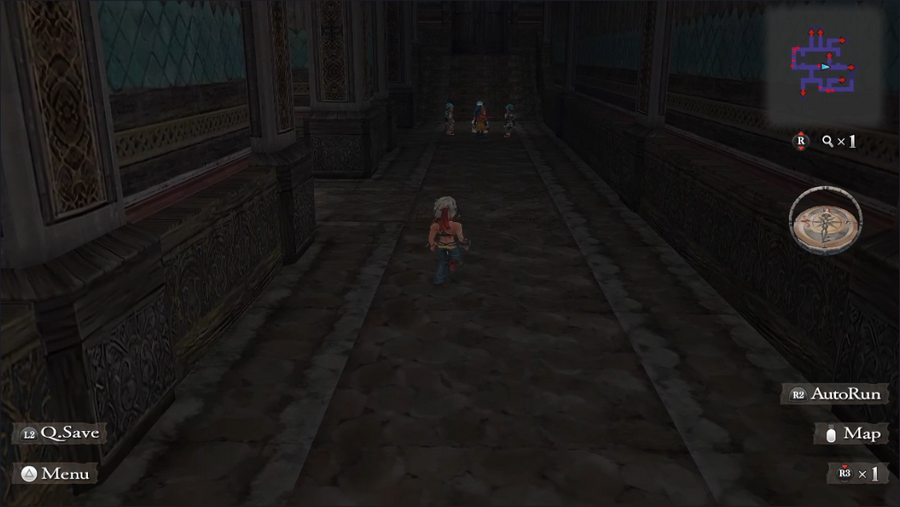 But we then head back to Melvir and into the sewers, where some people are standing around outside another door, looking at a package of some kind.  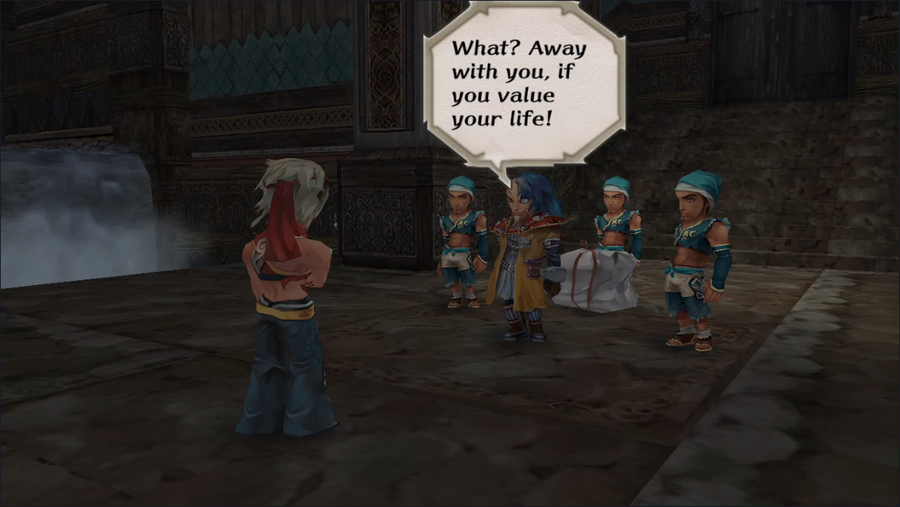 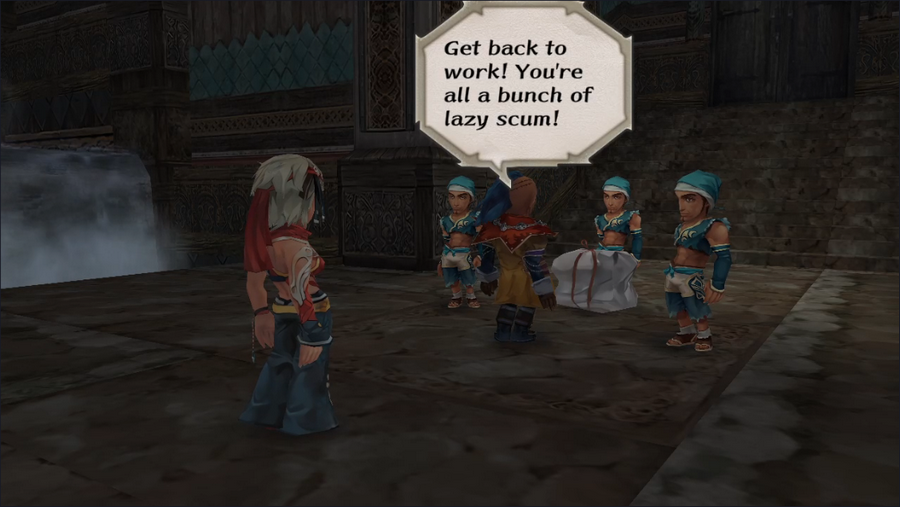 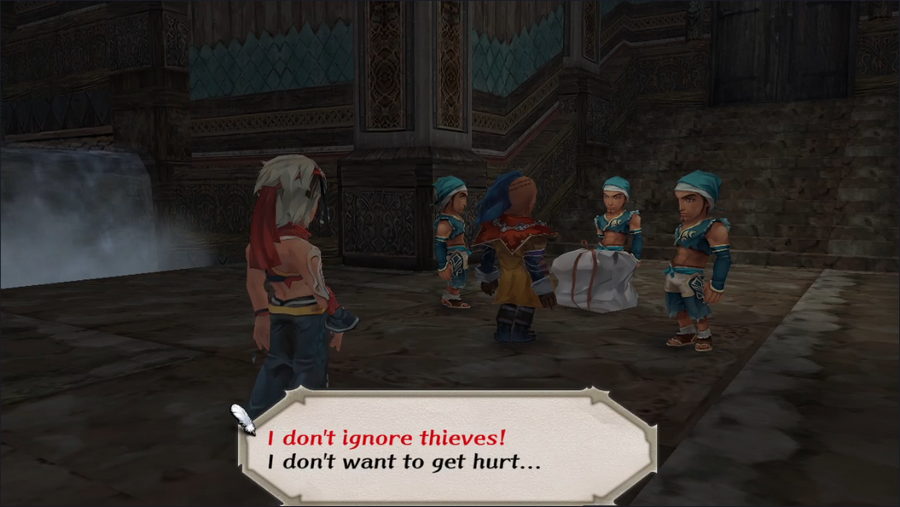 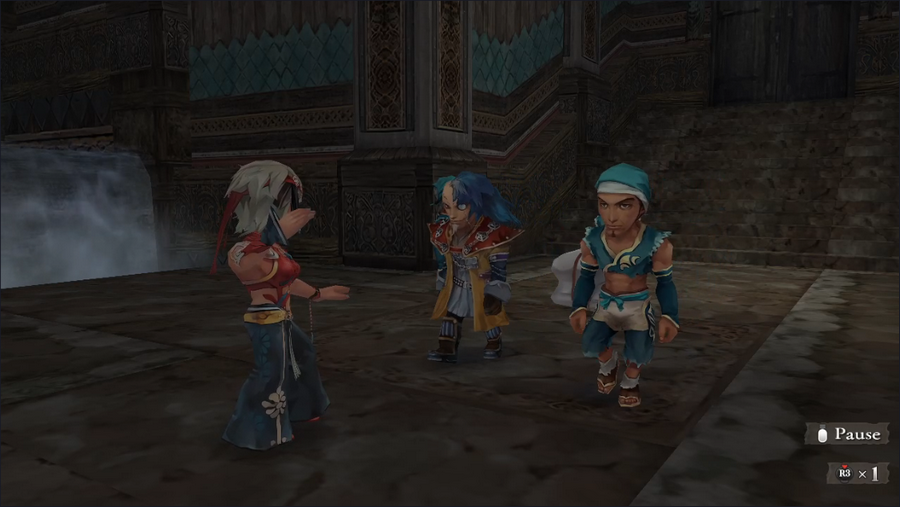 The game gives us a chance to back out, but nuts to that. What follows is a brief but brutal fight against a pirate and a thug. 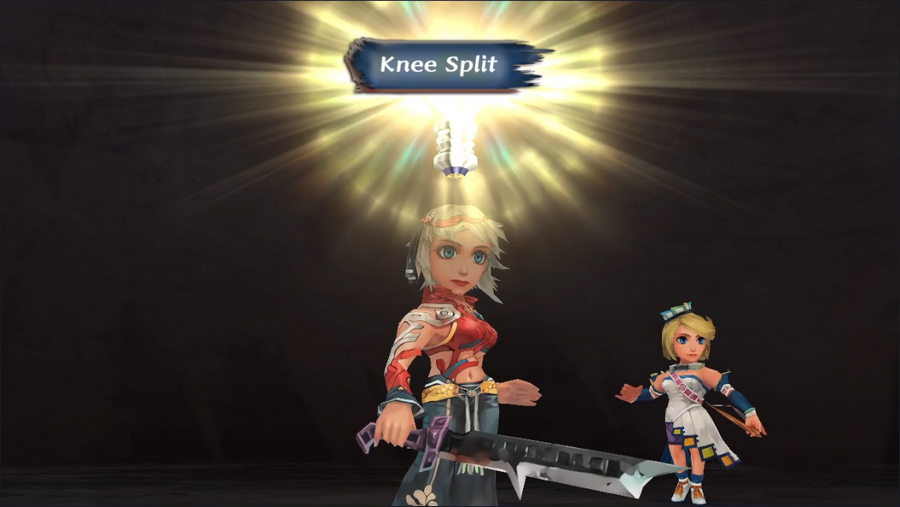 Good news: Barbara Glimmers Knee Split. 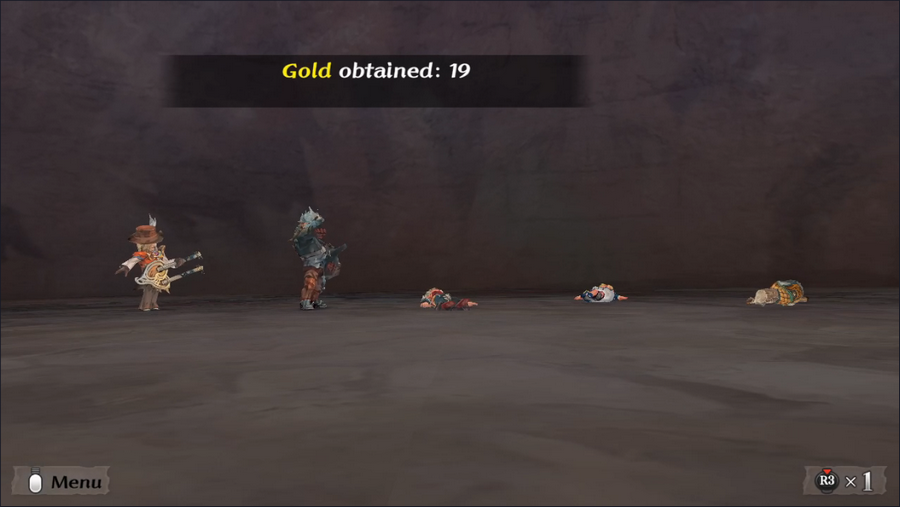 Bad news: both enemies know Impact Slash, and they kill 60% of our party before we win. Ugly, but again, a victory is a victory. 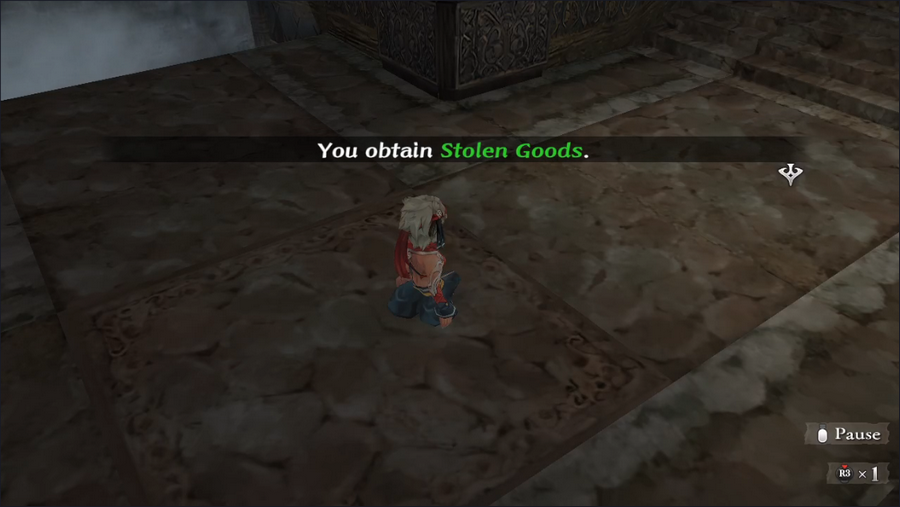 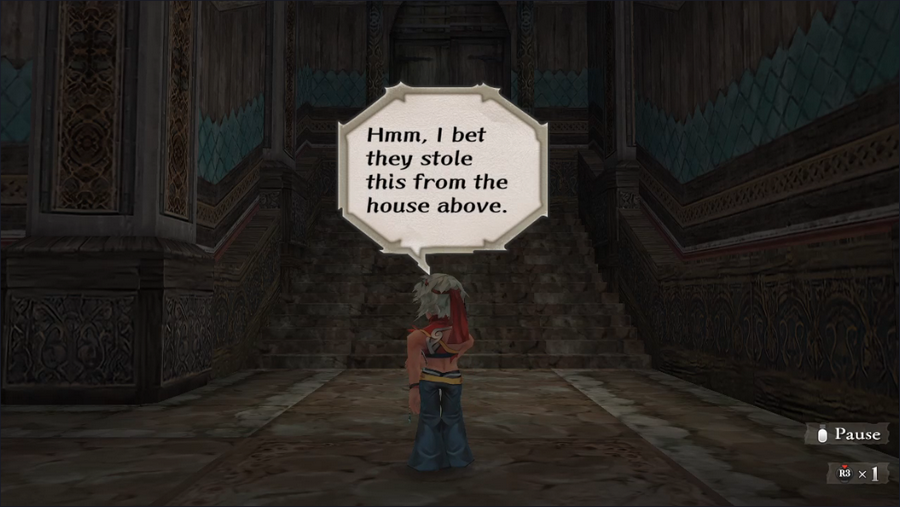 We grab the goods they stole, and Barbara assumes they came from the house above. Making a house accessible solely by monster-infested sewer seems like questionable design to me, but I guess that's why I'm not a fantasy architect.  The door leads up to a rather spacious courtyard, and we let ourselves in. 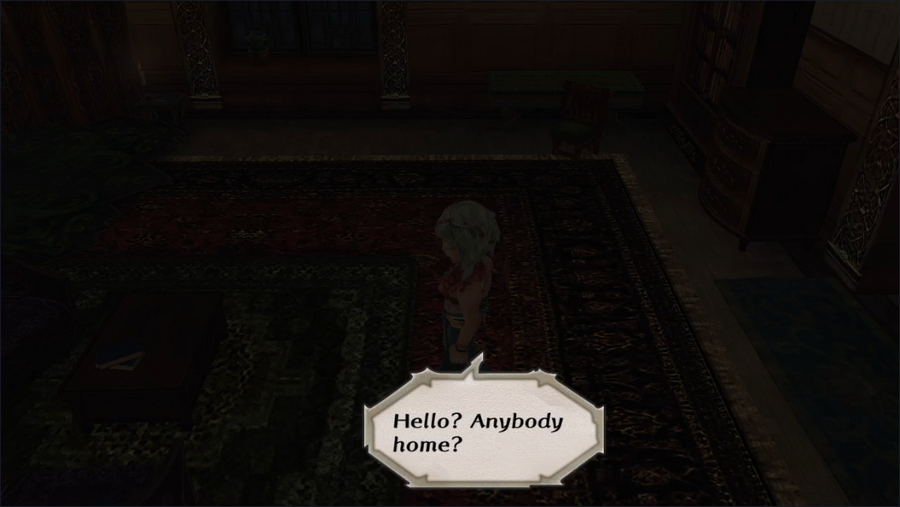 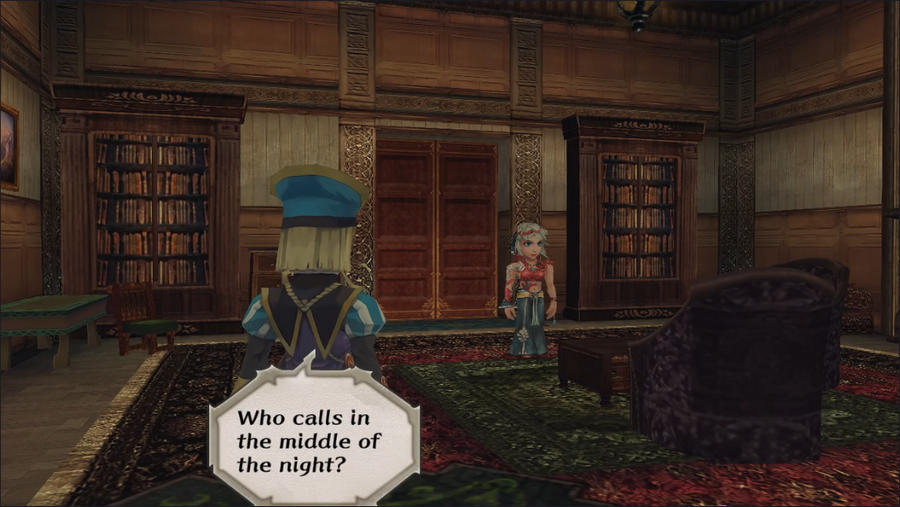 It's Patrick, understandably confused as to why we'd drop by at night. (Never mind that it was broad daylight when we entered the sewers.) 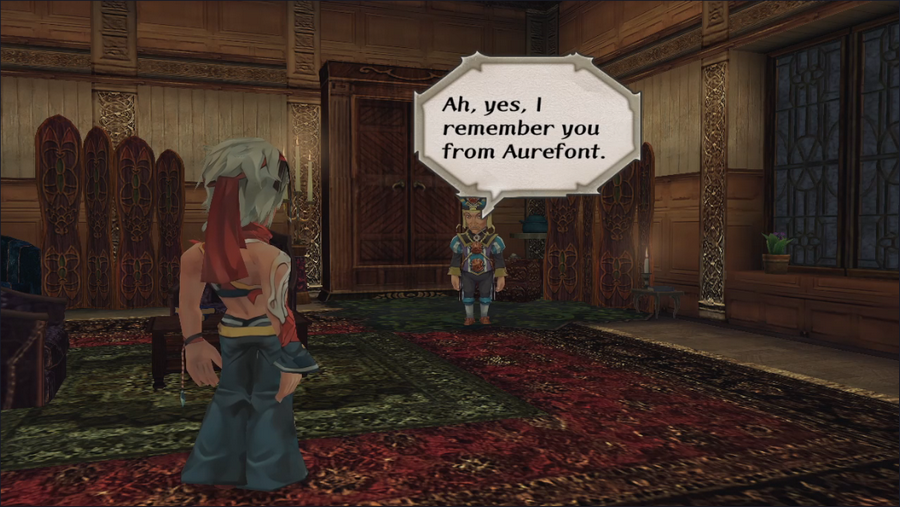 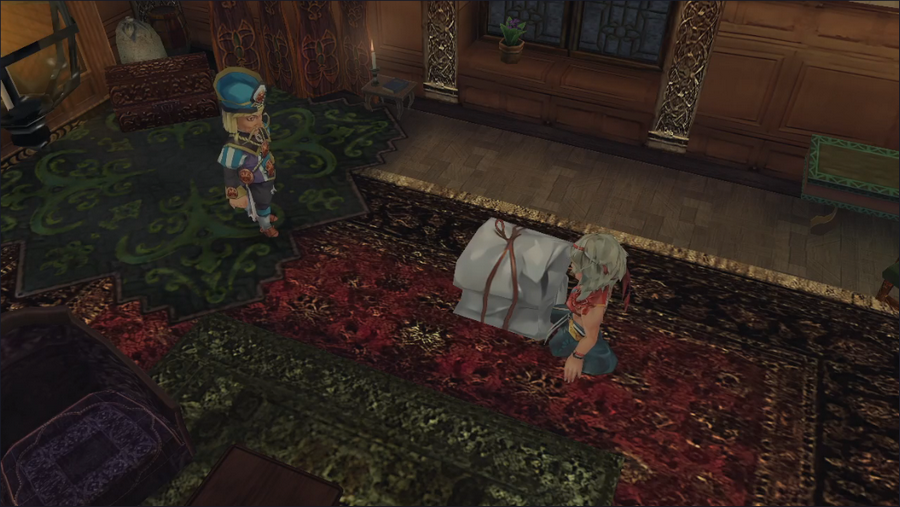 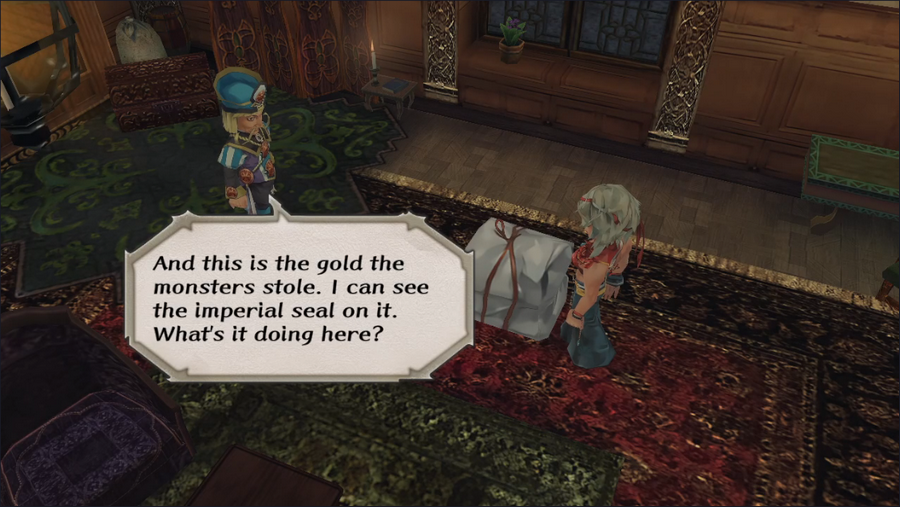 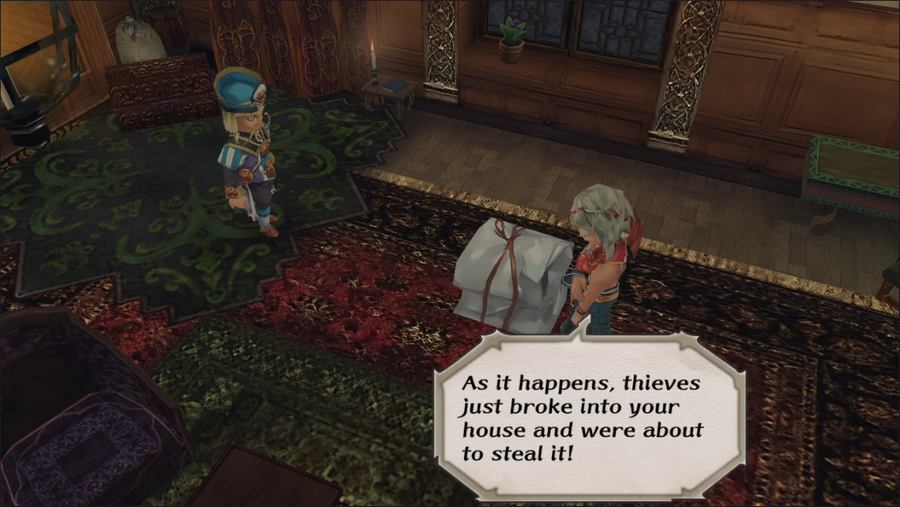 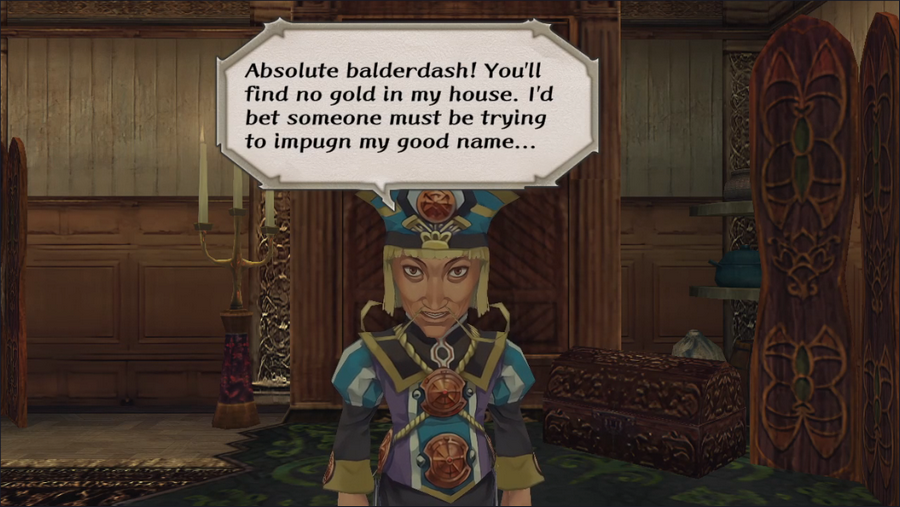 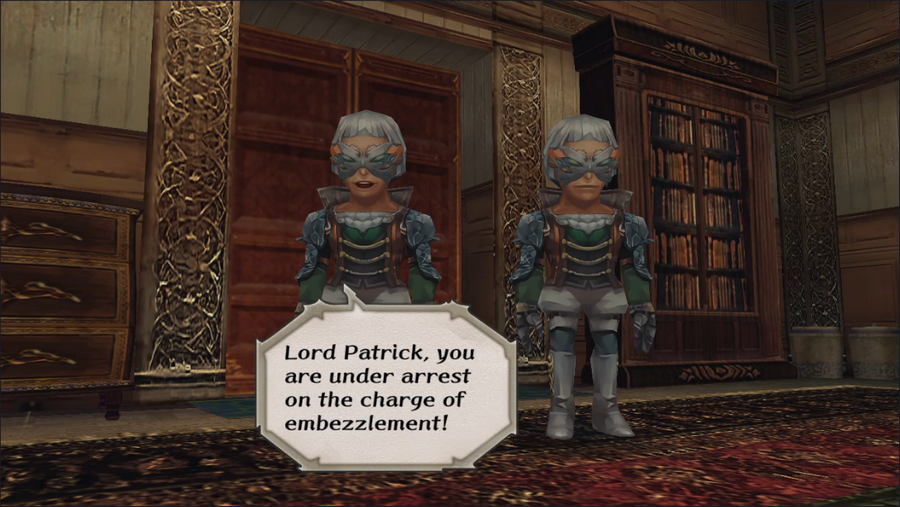 Patrick denies any wrongdoing, but it doesn't stop the guard from storming into his house and arresting him. 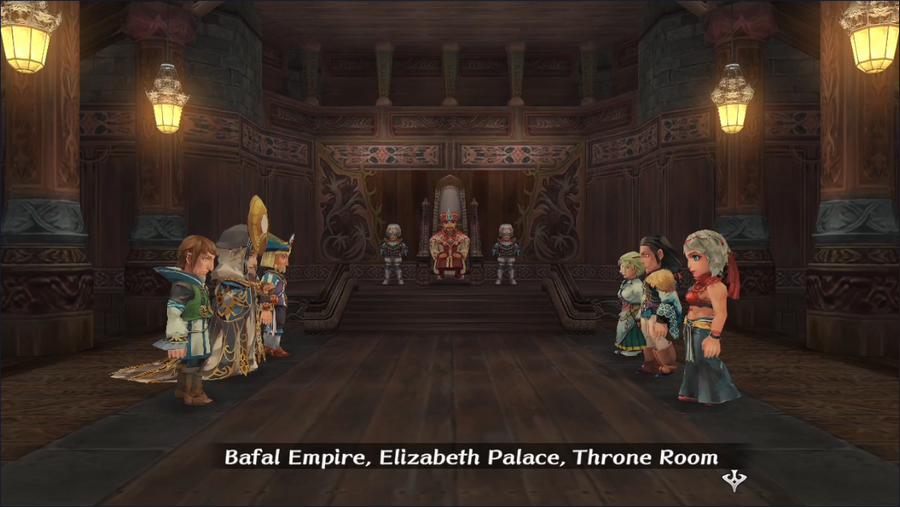 And we're back in the palace. 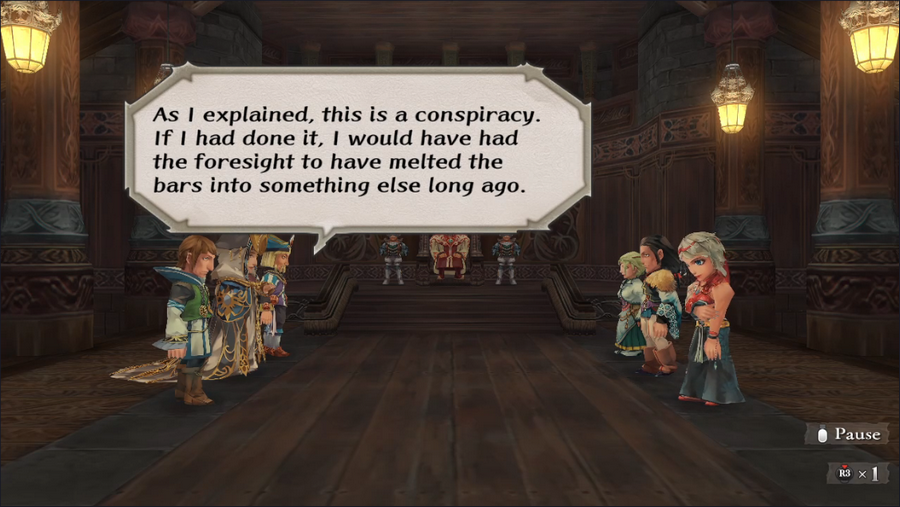  This fellow is the Duke of Loban, whom we heard about a while back. We'll be seeing and hearing more of him in the future. 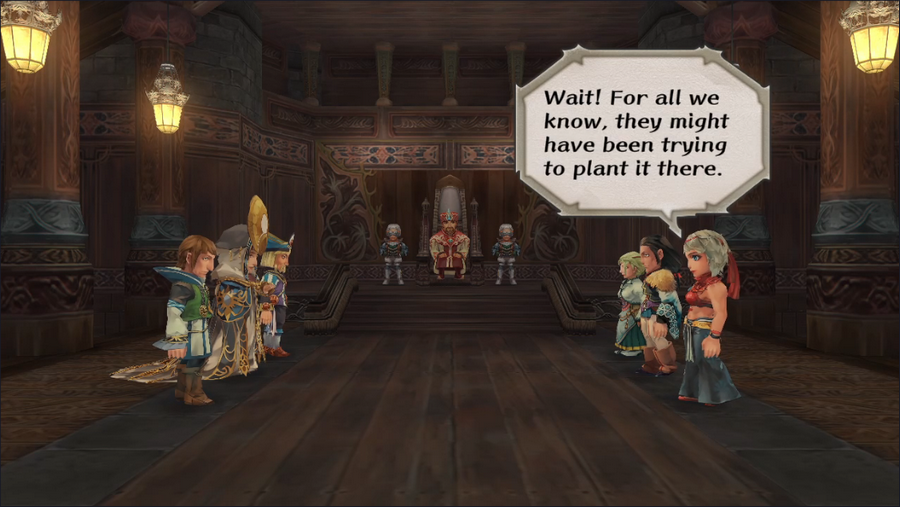 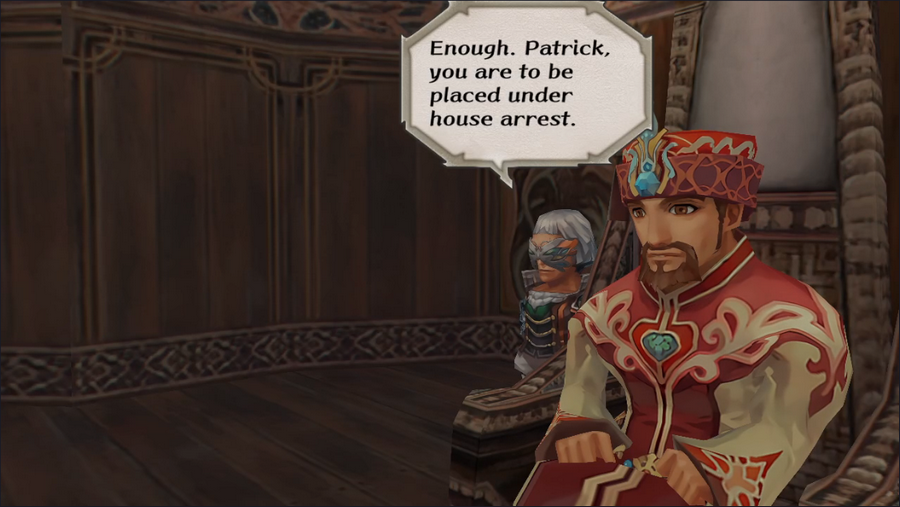 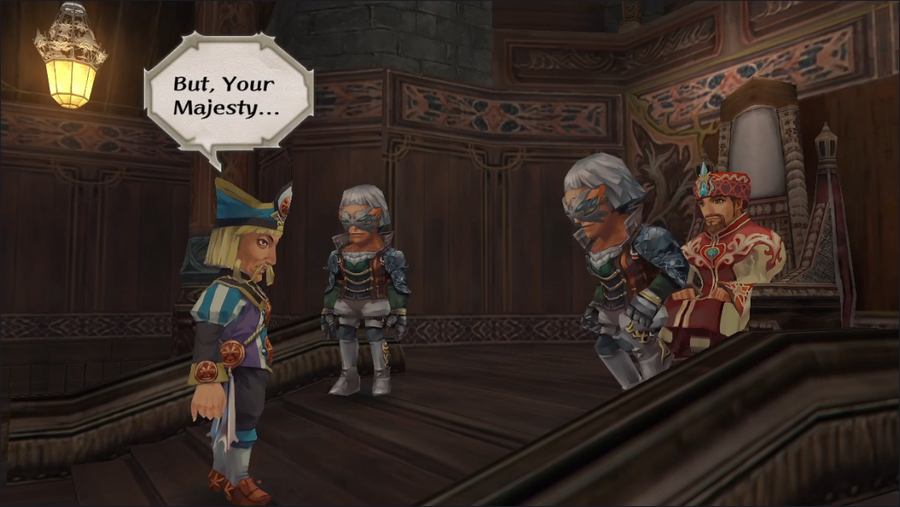  The truth of the matter is never 100% explained. I'm inclined to believe that the thieves were there to plant the gold, but it's not impossible that Patrick really is guilty.  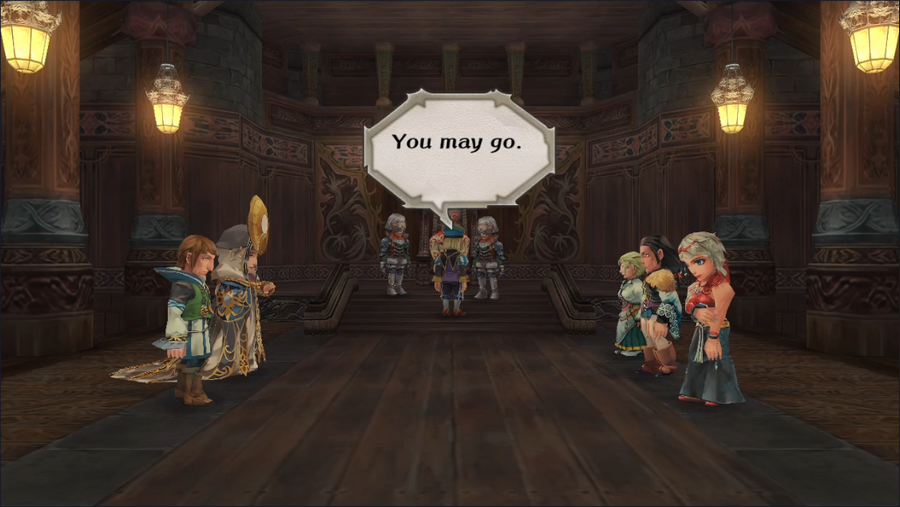 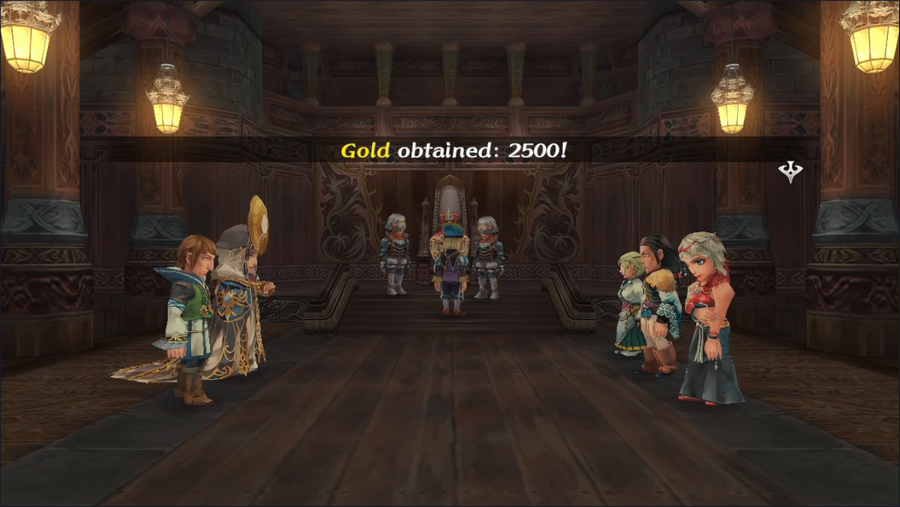 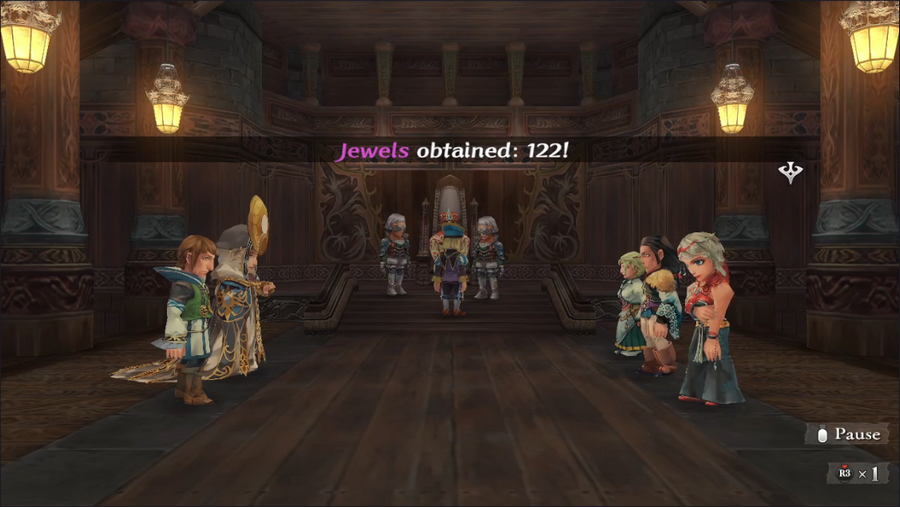 We're rewarded for our efforts and sent on our way, but we're not quite done with this plot thread. 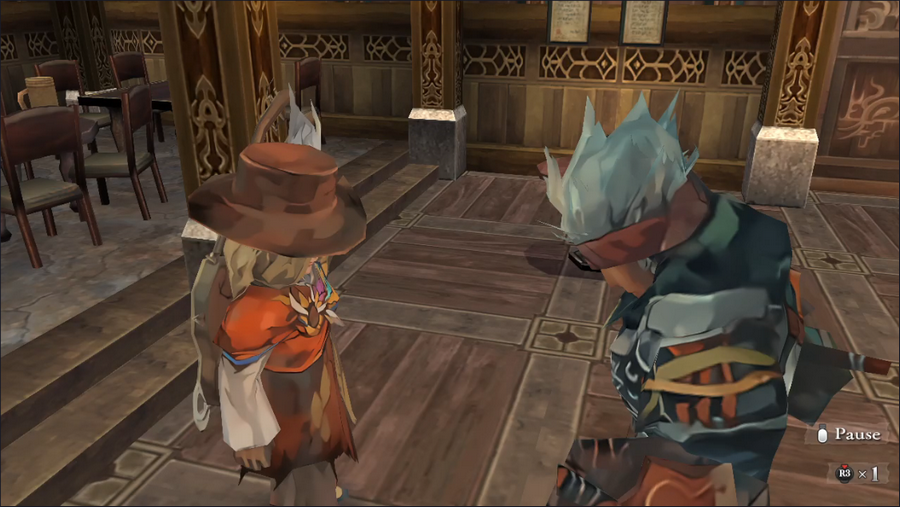 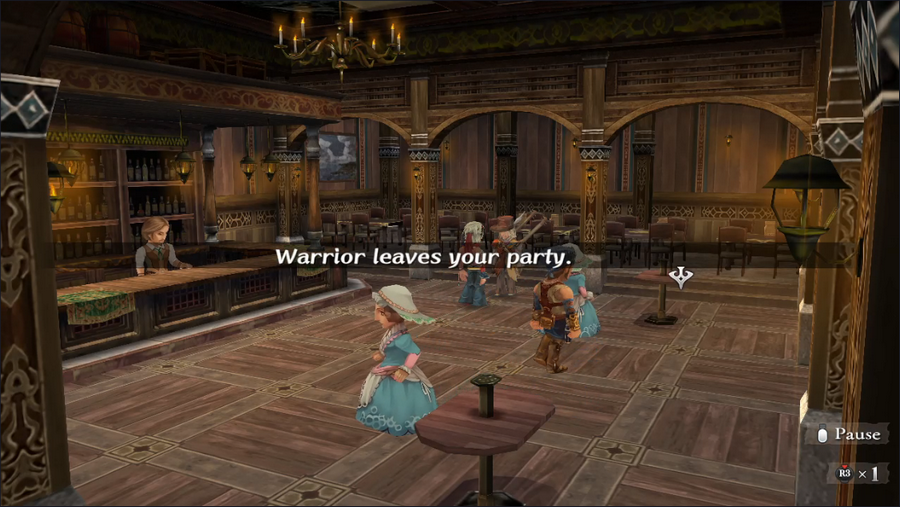 First, we strip the Warrior of his gear and dismiss him from the party.  Next, while we're here, we get another tale from the Minstrel. This is another one you can skip; it's about our exploits foiling the cultists. The Minstrel's dramatic acting is worth hearing though. https://www.youtube.com/watch?v=7kC6qZgT4dM 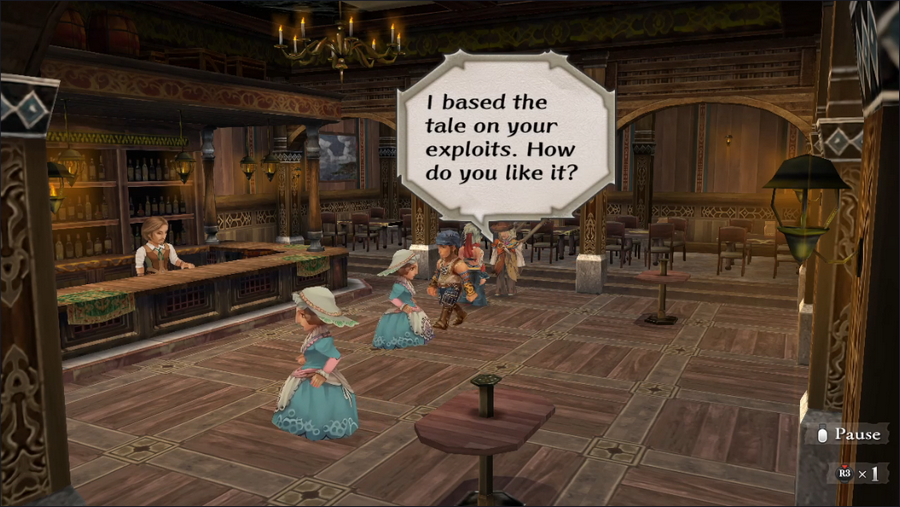 You don't say. It's not bad, I suppose. 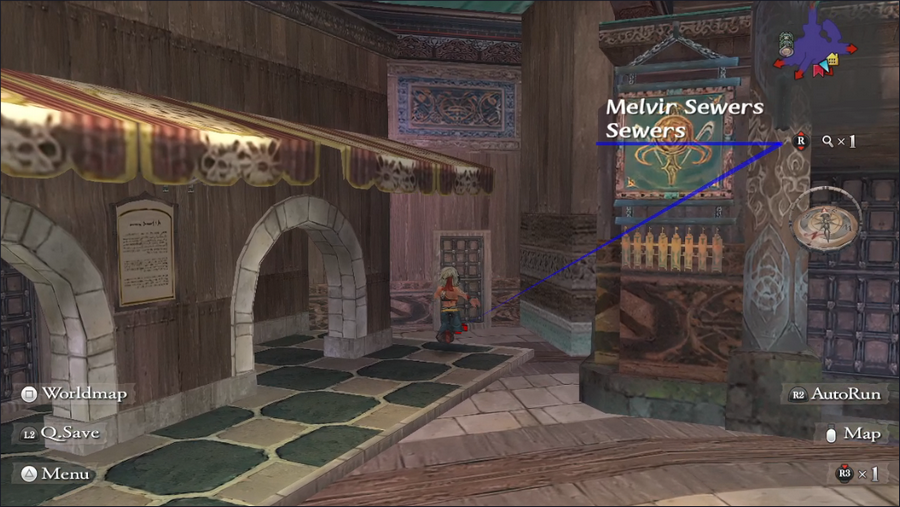 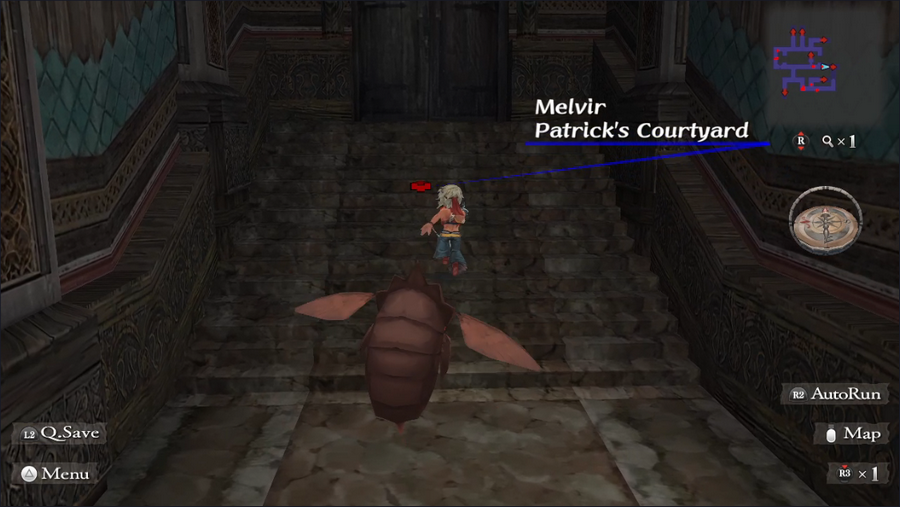 After re-recruiting the Minstrel, we head back into the sewers and make our way back to Patrick's house. 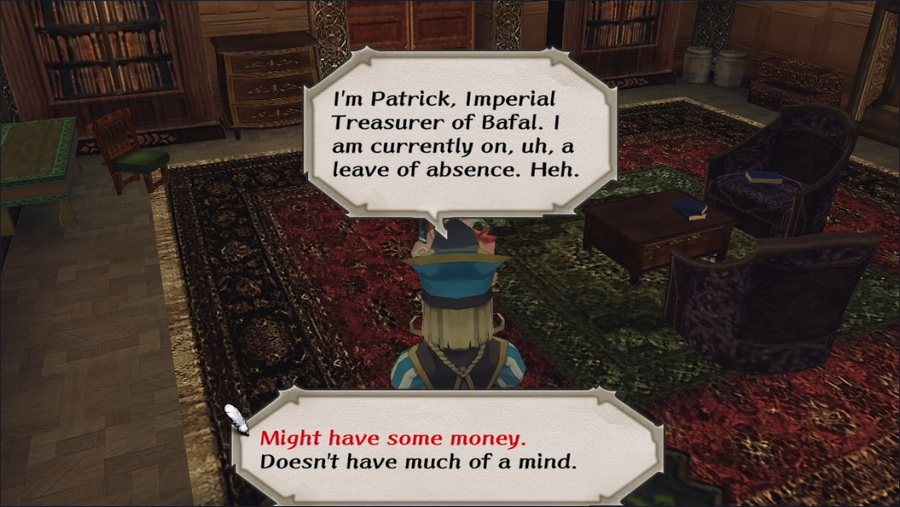 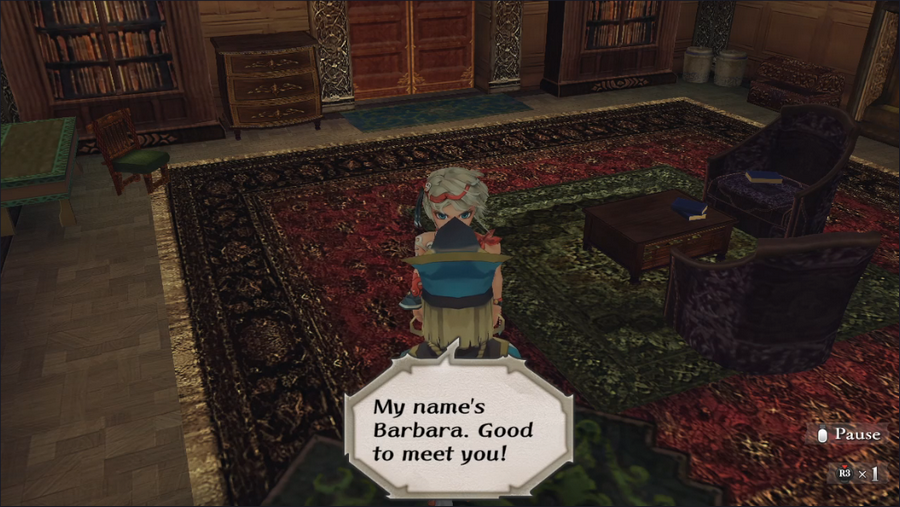 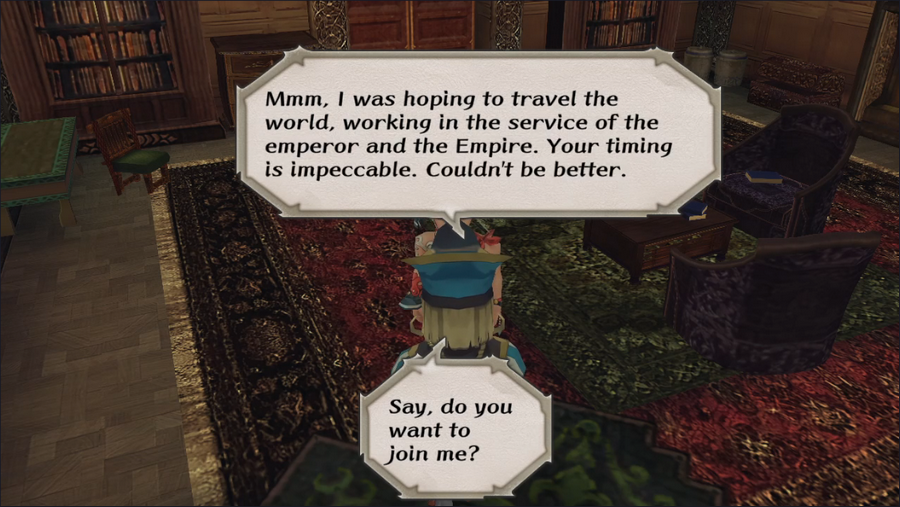 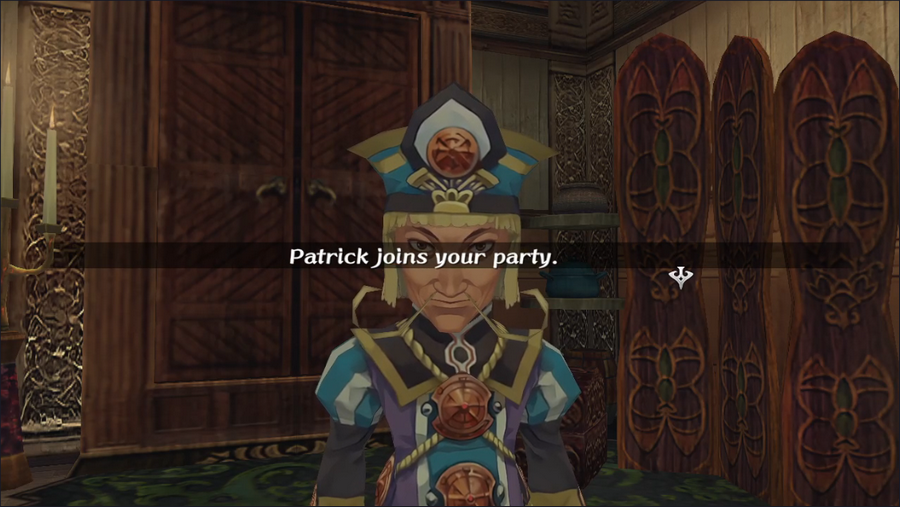 Apparently "house arrest" means something different in Bafal than it does in the modern world. 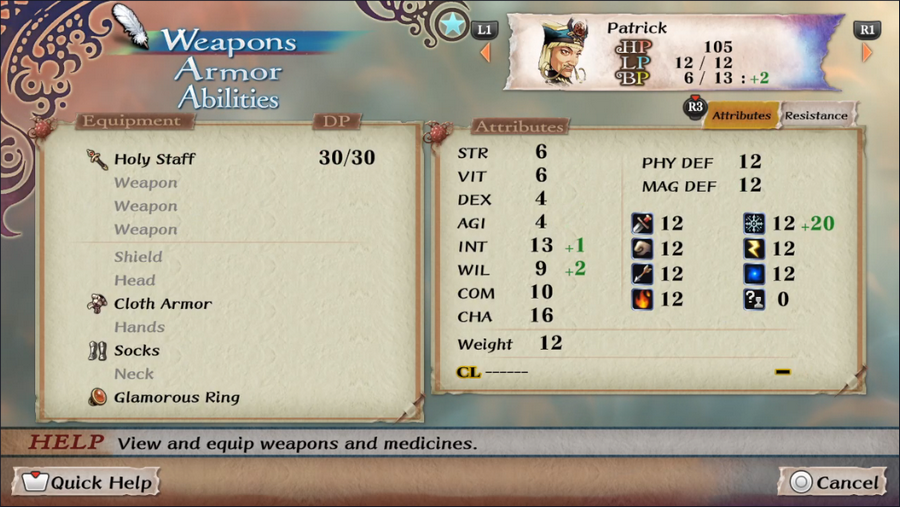 Patrick's starting gear and stats make him an obvious choice as a mage, though he has no default class. 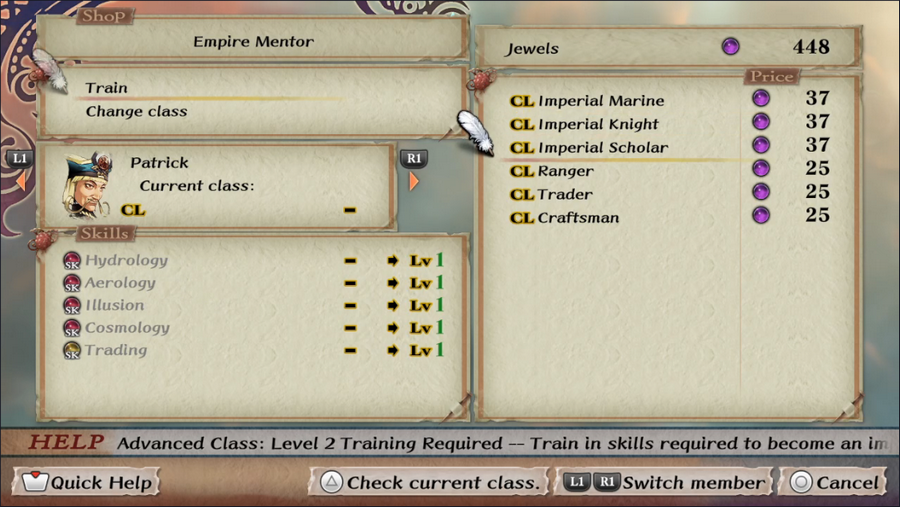 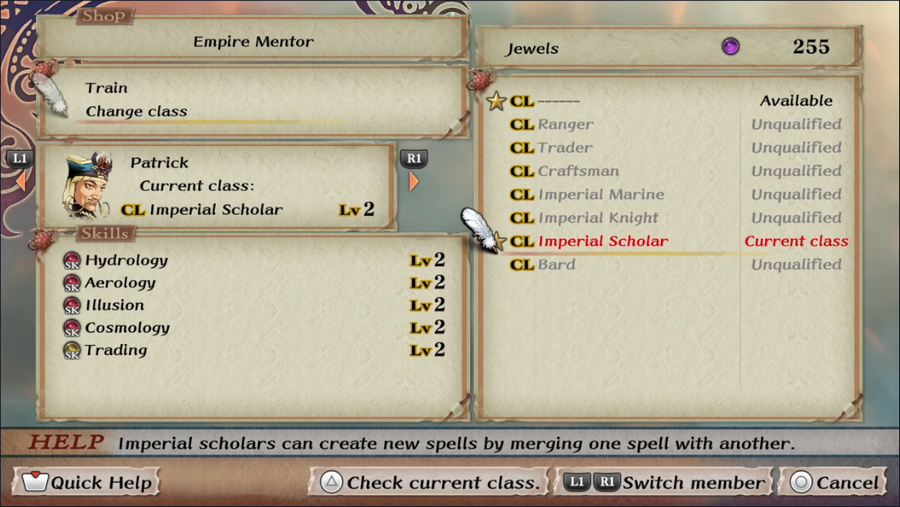 Obviously, our first order of business (after escaping the sewers) is to make him an Imperial Scholar. 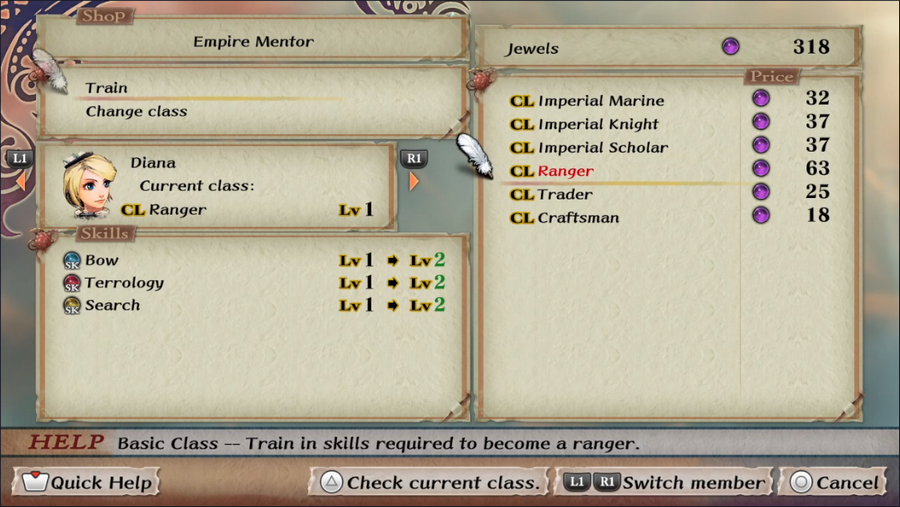 While we're here, we also get Diana to level 2 in Ranger. 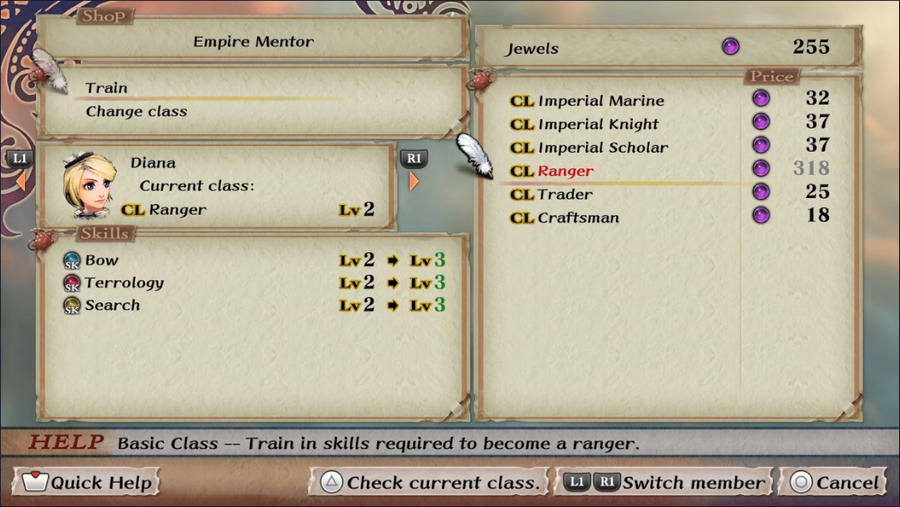 The cost to get to level 3 is substantially higher. We won't be doing that for a while. 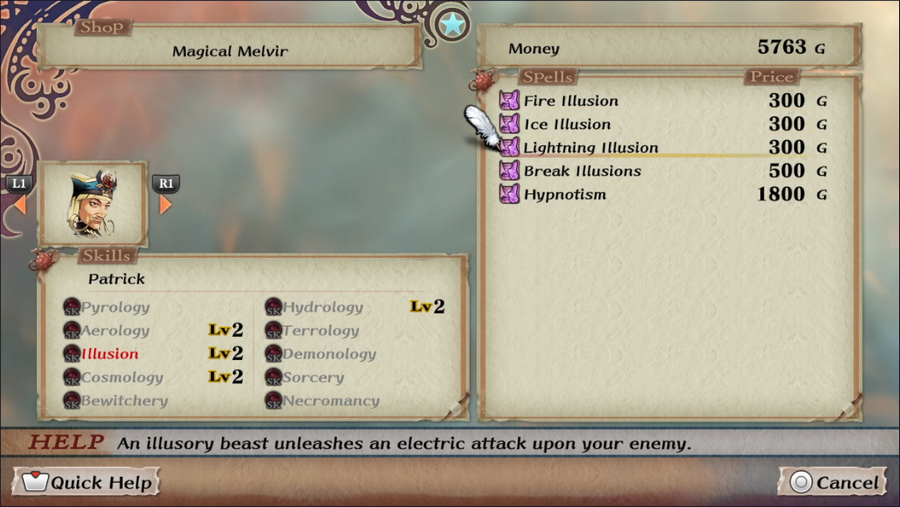 Next, we need to get Patrick some spells. His class has four schools - Illusion, Aerology, Hydrology, and Cosmology - and we can't afford everything, so we'll have to be choosy. From Illusion, we grab Lightning Illusion, an electrical attack spell. 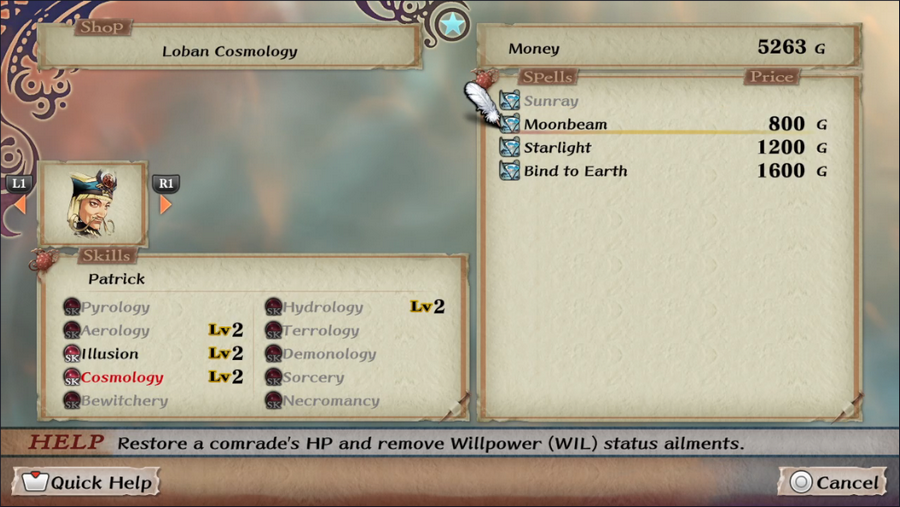 From Cosmology, we get Sunray (a basic damage spell that works especially well on the undead) and Moonbeam (a healing spell that cures mental status ailments).  From Hyrdology, we grab Healing Water (a cheap, efficient healing spell), Water Blast (a moderately powerful attack spell), and Holy Water (cures most status ailments).  And finally, from Aerology, we get Blades of Wind (a cheap attack spell that works well as a "go-to" combat option) and Blood Curdle (a powerful attack spell with a chance to render its target unconscious).  Now, if we look at Patrick's spell list, you might notice an option at the bottom of the screen: "Synthesize/Deconstruct Spells". This is the Imperial Scholar's unique mechanic I mentioned in the class selection post.  By choosing one spell as a base and a second to modify it, we can alter our spells - in this case by making Blades of Wind about 40% more powerful. Spell synthesis has some additional uses, but we don't have the capacity to show them off now. I promise I'll do so later in the LP. For now, we'll keep our enhanced Blades of Wind. The Rosalian Mage class can also use this mechanic, though it's much more complex, as that class fuses three spells instead of two. That additional complexity does open up some extremely powerful options though. 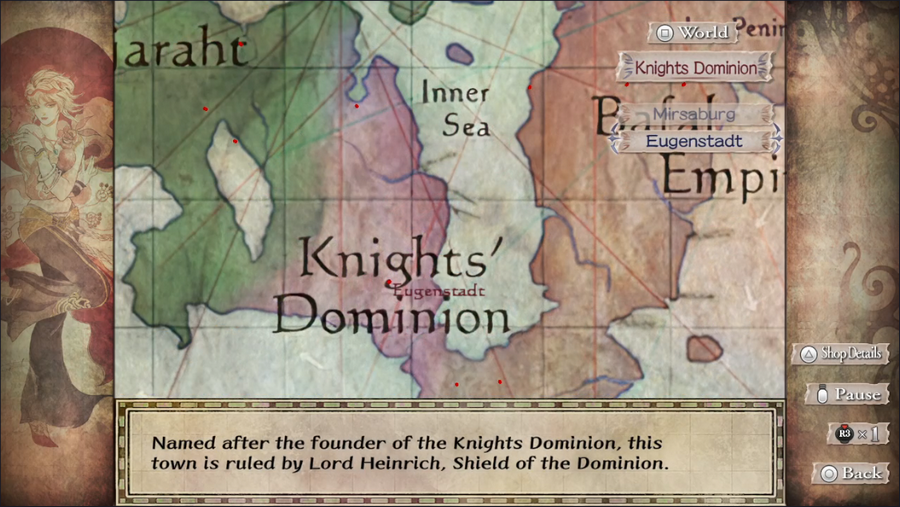 Next, we're headed back to Eugenstadt to speak with Lord Heinrich again. 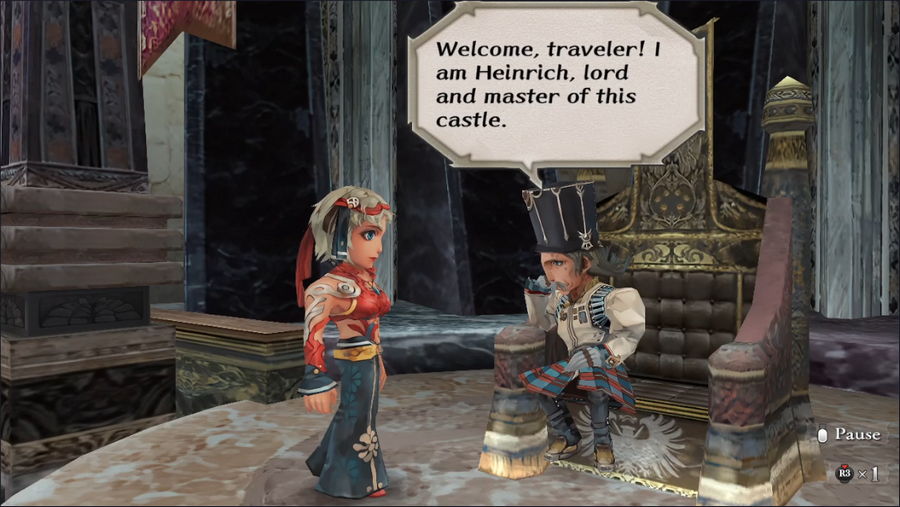 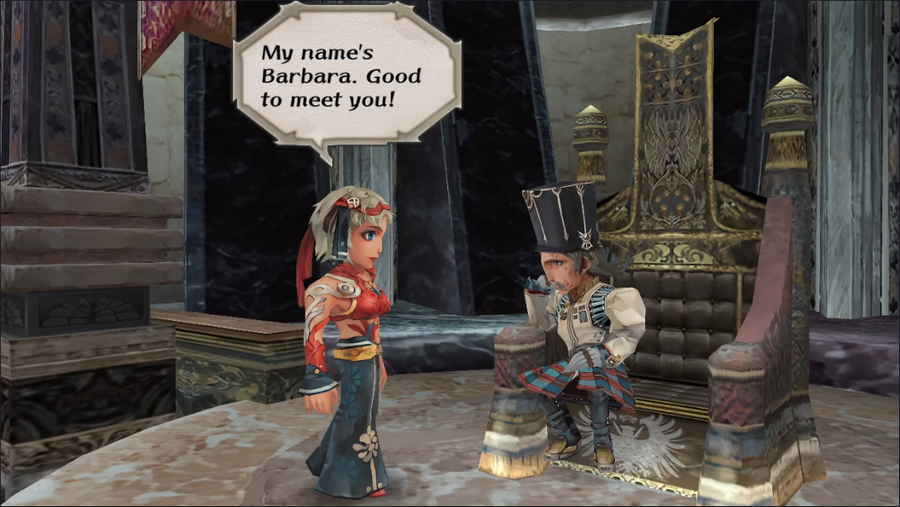 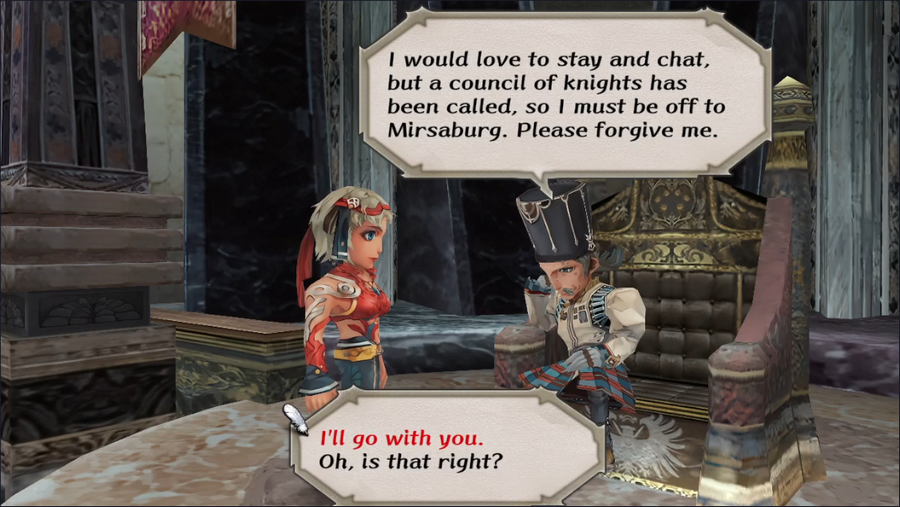 An interesting offer. And so it comes time once again to vote on our next course of action. The game has progressed enough that one of our quests has expired, which I've noted with a Current Event Rank: 3 Things to Do Retrieve the Aquamarine from Crystal Lake - We lack the means to do this Climb Mt. Scurve and steal a feather from the nest of the lord of the birds - We lack the means to do this Kill the bugs in the Altours orchard Find Captain Silver's treasure Get the ancient scroll from Hawke Attend the council of knights Places to Explore Estamir sewers The remainder of the Geckling cave - We lack the means to do this Melvir sewers Bayre Plateau Isthmus Keep, or what's left of it The Walon Isle jungle The Ligau caves - We lack the means to do this, at least to completion Mt. Scurve - We lack the means to do this, at least to completion Crystal Lake - We likely lack the means to do this Treasure Maps We lack the means to do any of these[/b] Jungle, Level 1 5-Headed Snake God fucked around with this message at 05:13 on Nov 6, 2023 |
|
#
?
Nov 6, 2023 05:04
|
|
|
Find Captain Silver's treasure Get the ancient scroll from Hawke Attend the council of knights
|
|
#
?
Nov 6, 2023 13:55
|
|
|
Diana would probably like to Explore Isthmus Keep, or what's left of it. Do your part and Kill the bugs. And Attend the council of knights because it sounds like a job fair at this point.
|
|
#
?
Nov 6, 2023 15:35
|
|

|
Can't say I was expecting a quest to expire so soon, but ah well, that do be Minstrel Song. For what to do next, well: - Kill the bugs in the Altours orchard - Attend the council of knights - Estamir sewers That should do nicely
|
|
#
?
Nov 6, 2023 22:54
|
|
|
-kill bugs -find treasure -get scroll from piratebro That worldwide clock is kind of rough.
|
|
#
?
Nov 7, 2023 06:29
|
|


|
-Get the ancient scroll from Hawke -Attend the council of knights -Explore Isthmus Keep, or what's left of it Hahaha, I figured getting the Aquamarine would be impossible this early, but I was still pleased to see it attempted
|
|
#
?
Nov 7, 2023 07:11
|
|

|
Seraphic Neoman posted:That worldwide clock is kind of rough. Early Event Ranks go bymore quickly than later ones, but still, it certainly can be. Now imagine if I'd kept it at normal speed; we'd probably be at ER5 by now.
|
|
#
?
Nov 7, 2023 13:24
|
|
|
Voting is now closed.
|
|
#
?
Nov 10, 2023 02:02
|
|
|
Welcome back, everyone. This round of votes had a pretty unambiguous winner: we're going to attend the council of knights with Lord Heinrich. 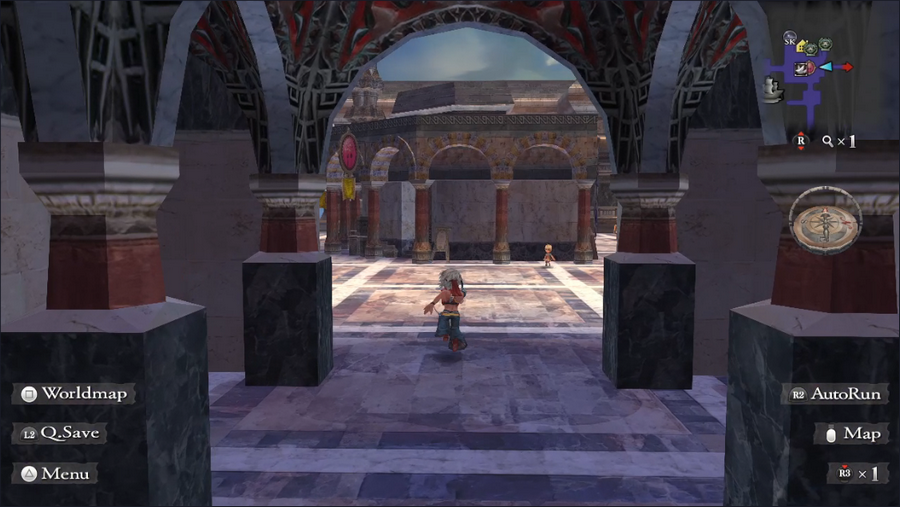 But first we're taking a detour to Yeoville.  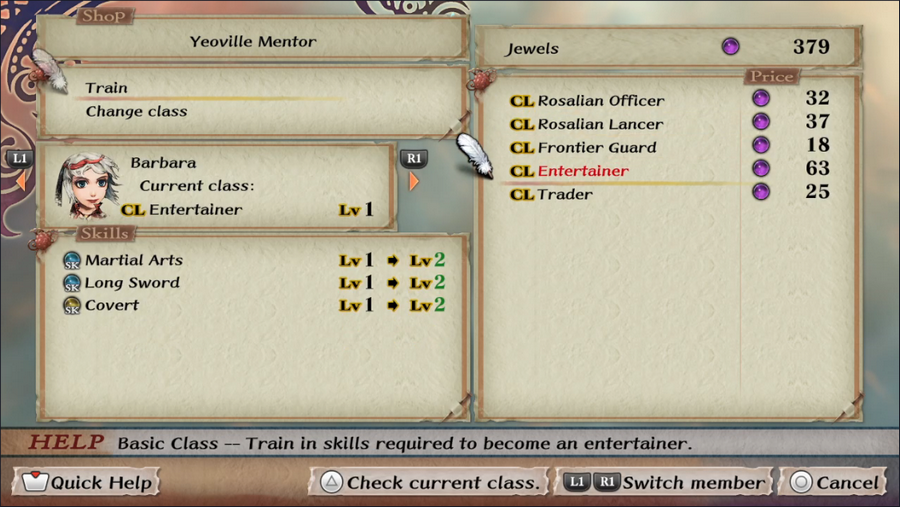 We really should get Barbara to level 2 in Entertainer before move on. 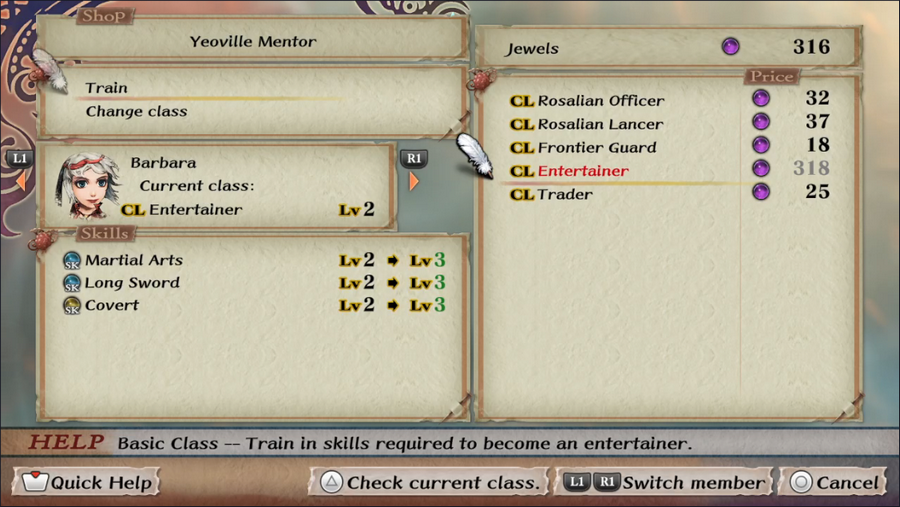 This leaves us 2 jewels shy of being able to reach level 3. Annoying, but it's not a big deal. It just means we can make that leap after the next quest.  We're also going to buy Open Locks and Disarm Traps for Barbara, and Climb and Jump for Diana. Their skill levels are still 0, but that will change before the end of this update, and I wanted to make sure I spent the money on them while I had it.  We're also going to finally assign some proficiencies to our slots. I'm cheating a little here because I know what the next quest is going to require, but I figure that's better than going into every area unprepared. In this case we're including Trade, which is part of Patrick's class, because we've got it and I may as well show it off.   We're also heading to Tarmitta, which has an excellent bow shop, to buy an upgraded weapon for Diana. The Reinforced Bow is too pricey for us, but even the Longbow will be a big improvement over her Hunting Bow. 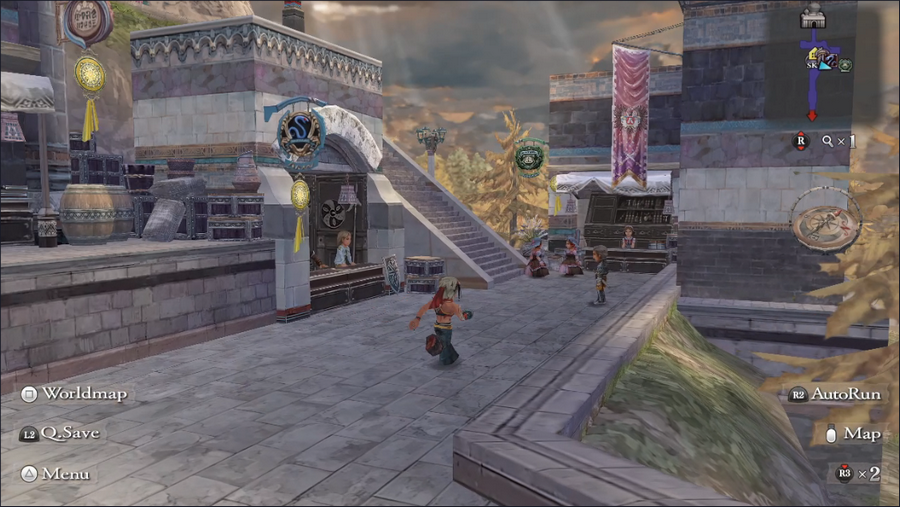 With that done, we can finally head back to Eugenstadt.  This time we'll see if we can go with Heinrich. 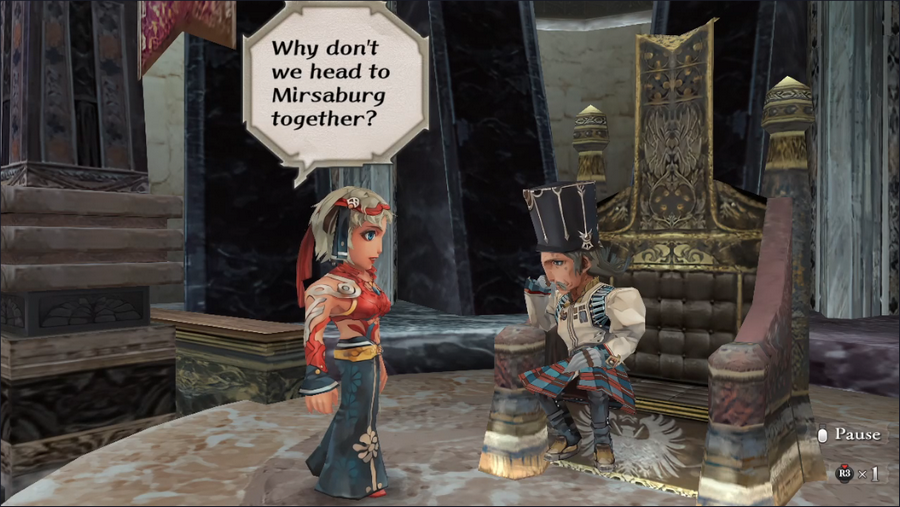 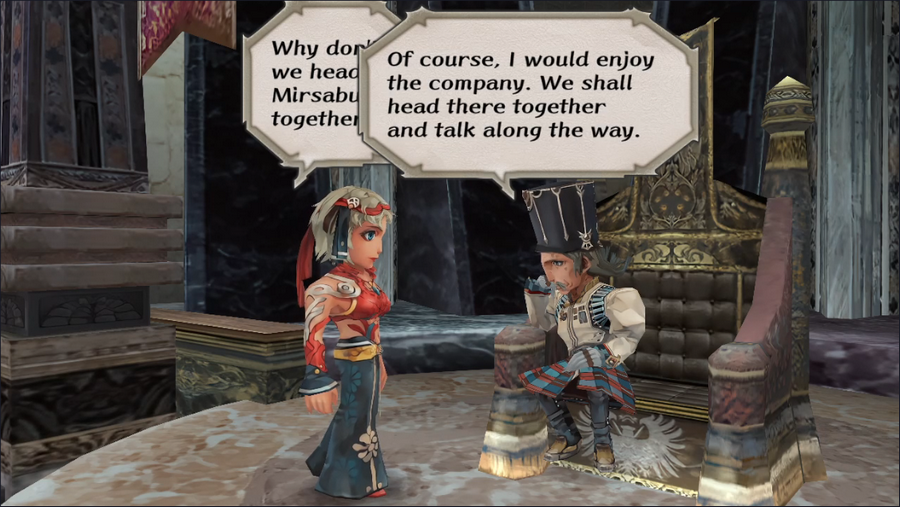 He accepts our request and offers pleasant conversation as a bonus. He's a cool guy. 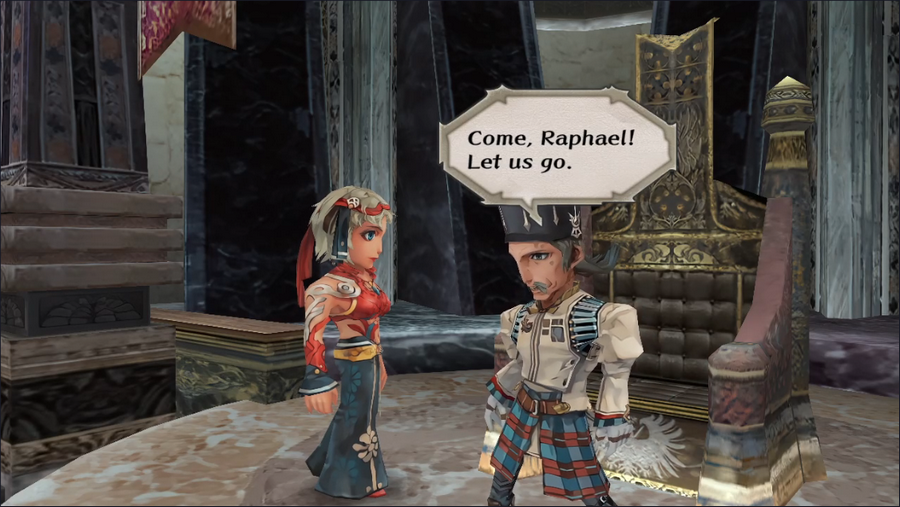 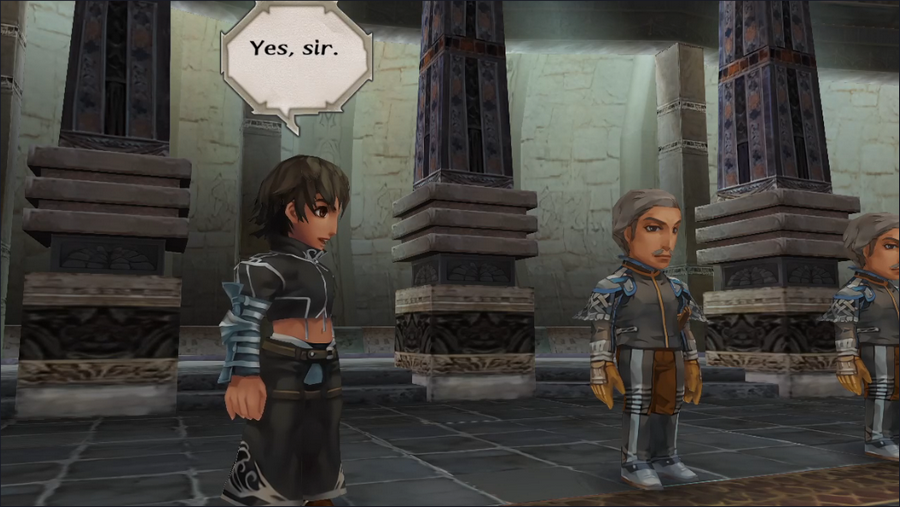 He also brings his squire, Raphael, whom we met previously. Yes, he's wearing a set of midriff-baring armor. It's a bit weird considering how good most of the character designs are. 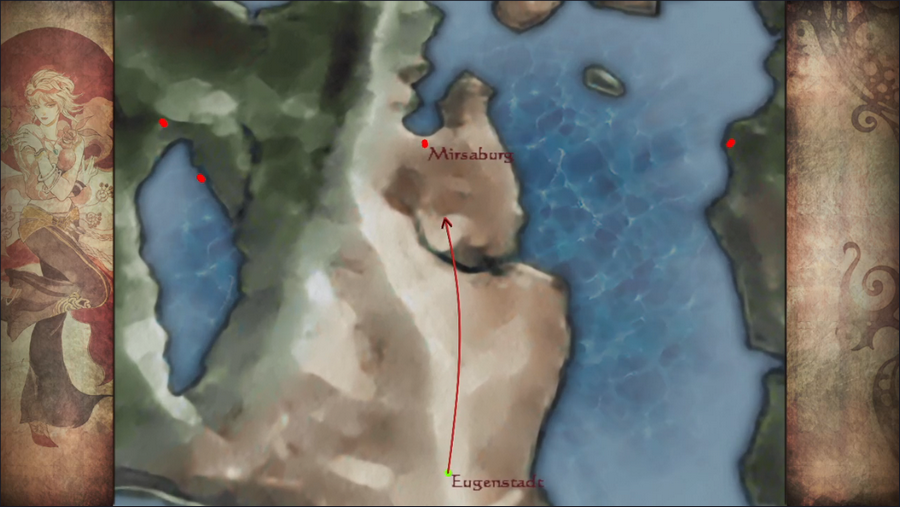 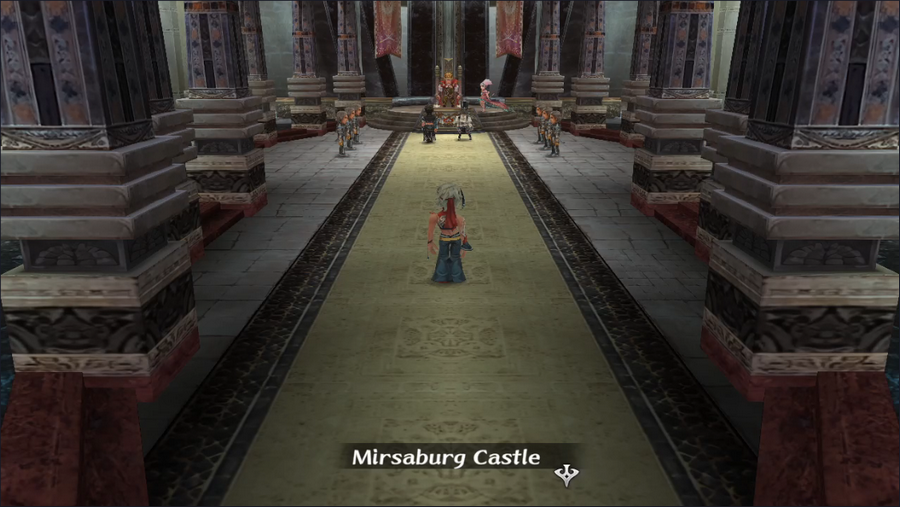 We hit the road and soon find ourselves in Mirsaburg's throne room. 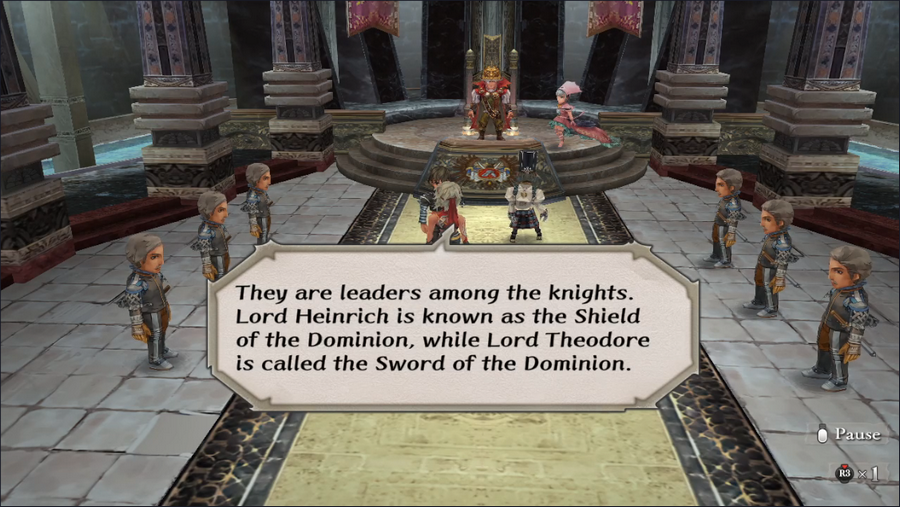 Raphael gives us a bit of flavor information. The Dominion is home to a lot of knights, as you'd expect, but Theodore and Heinrich are the two most important. 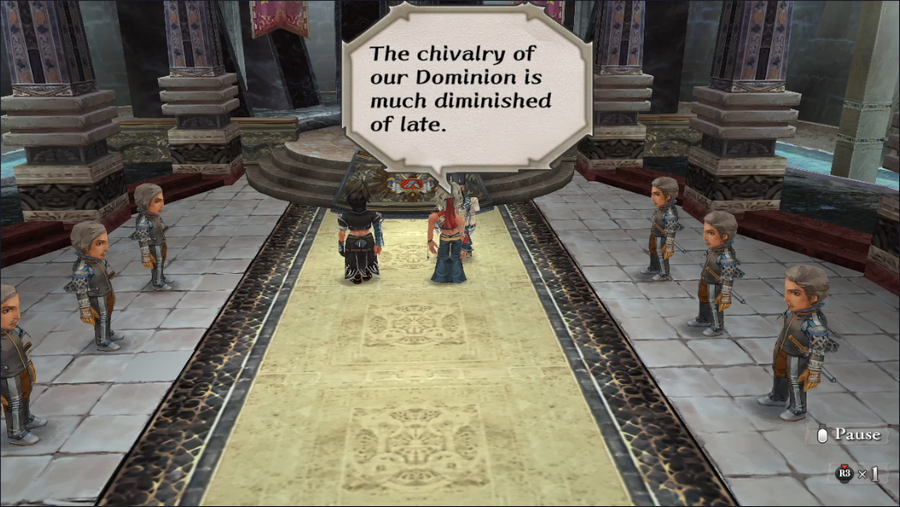 Heinrich, on the other hand, just gives us a frank assessment of his nation. 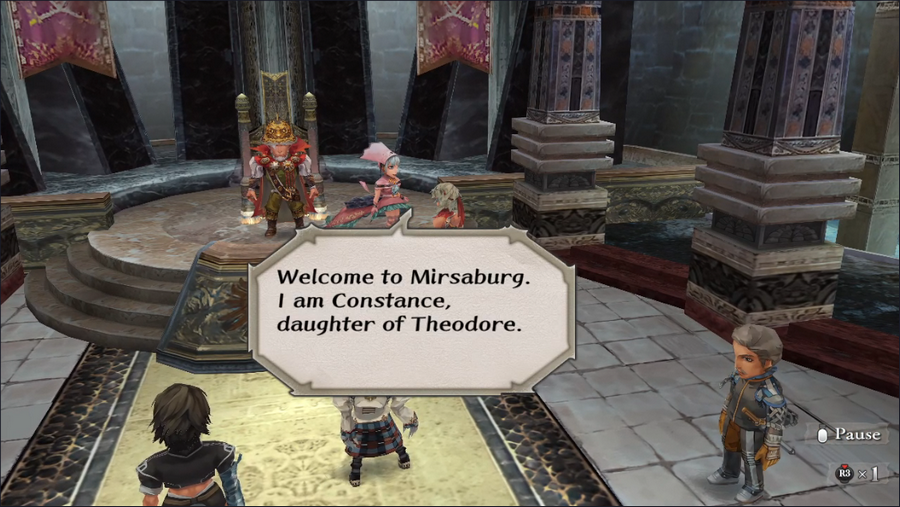 Next to Theodore is his daughter, Constance, who wears an amazing, physics-defying dress. 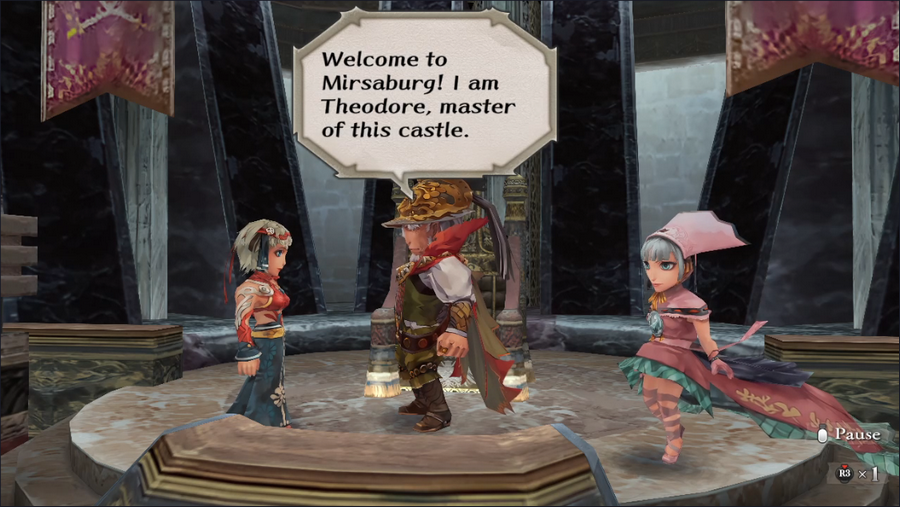 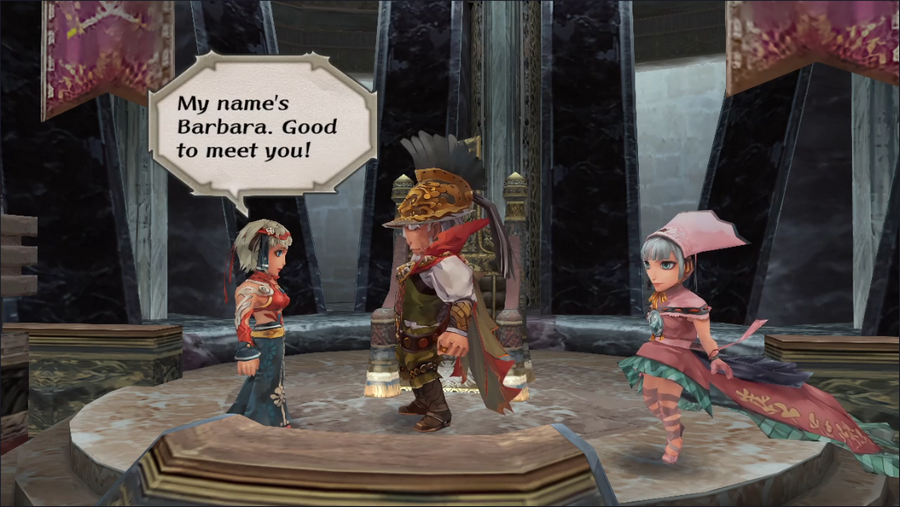 Barbara pretty much always offers the same greeting, even to heads of state. 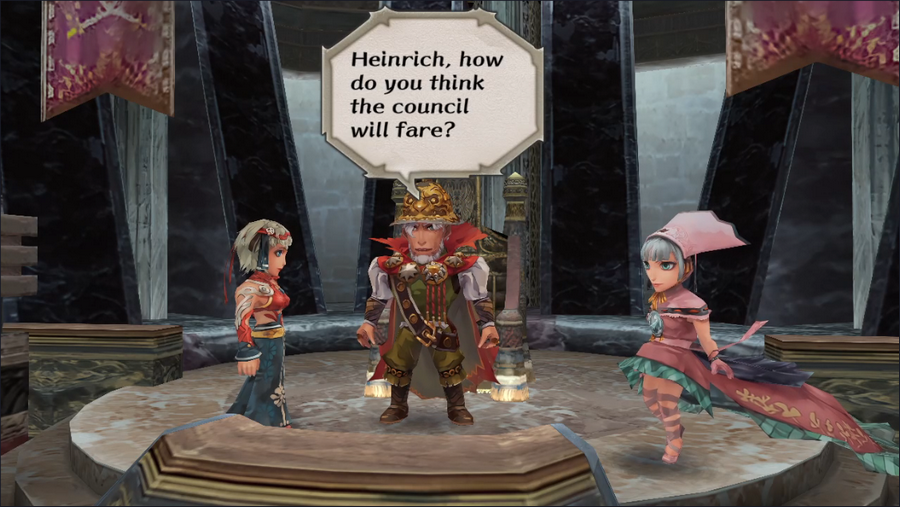  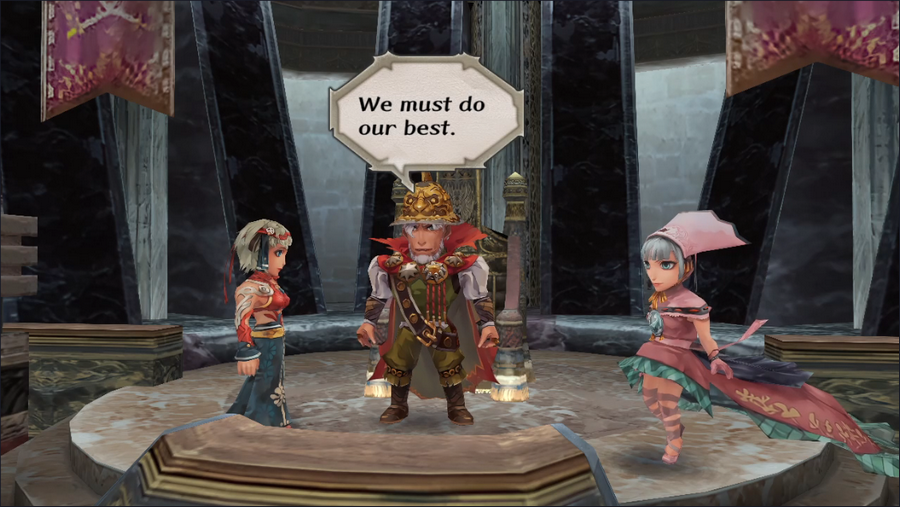 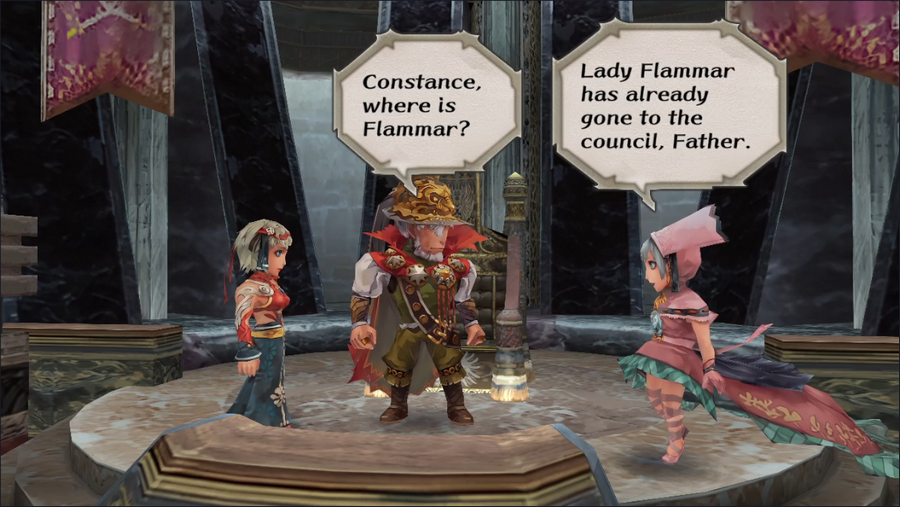 This is the first we've heard of Flammar, but it won't be the last. 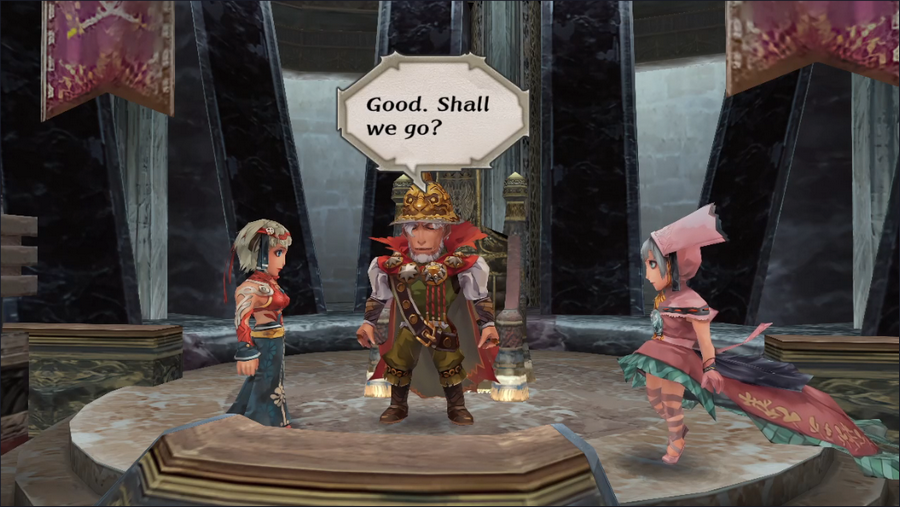 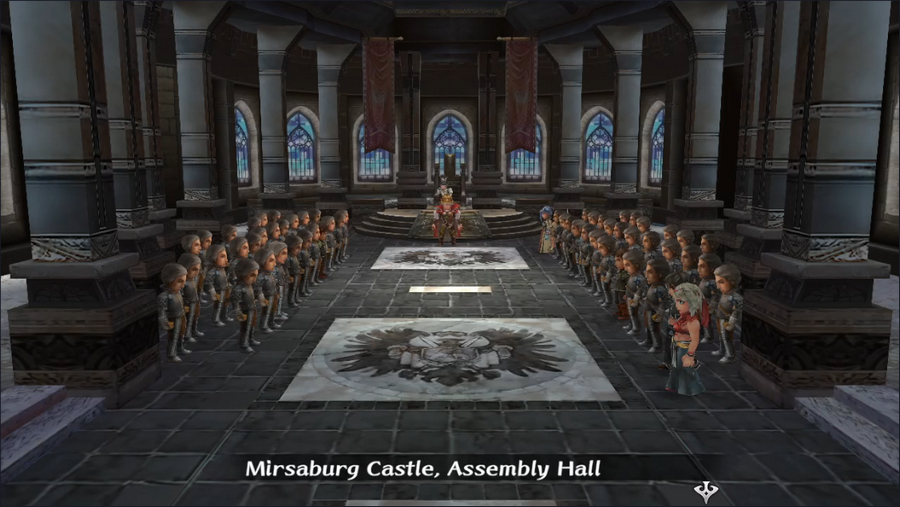 We adjourn to the Assembly Hall, where a host of knights have gathered. 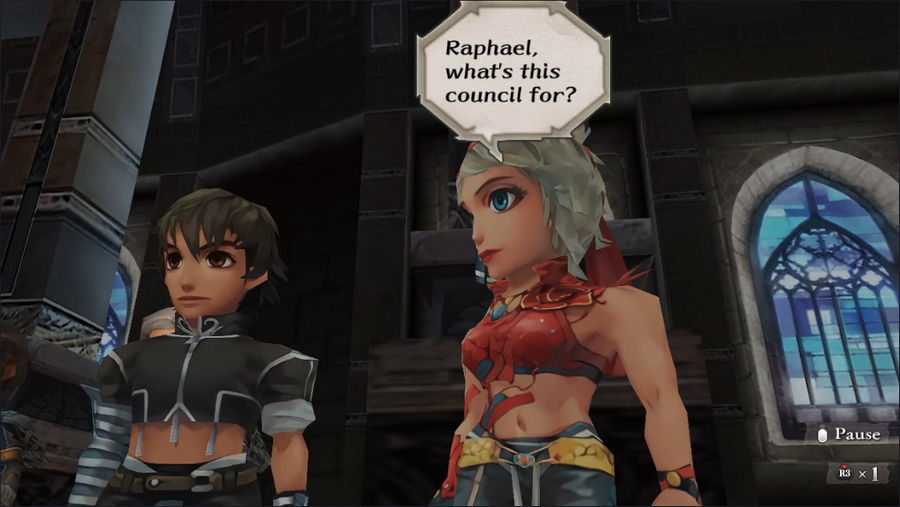 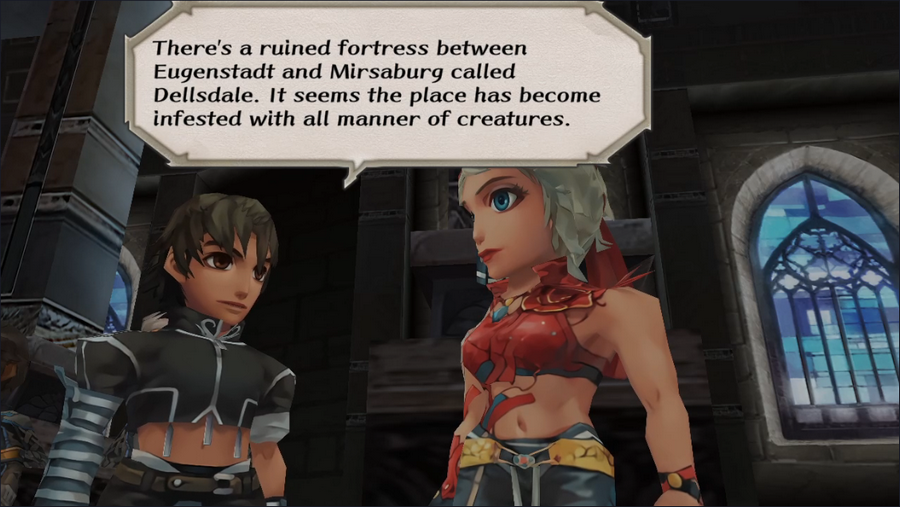  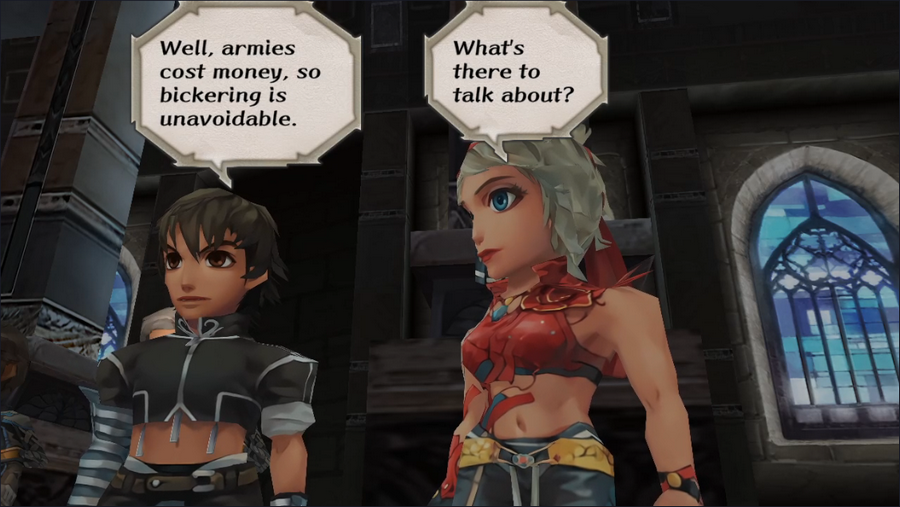 Chivalry is all well and good but it doesn't fund armies. 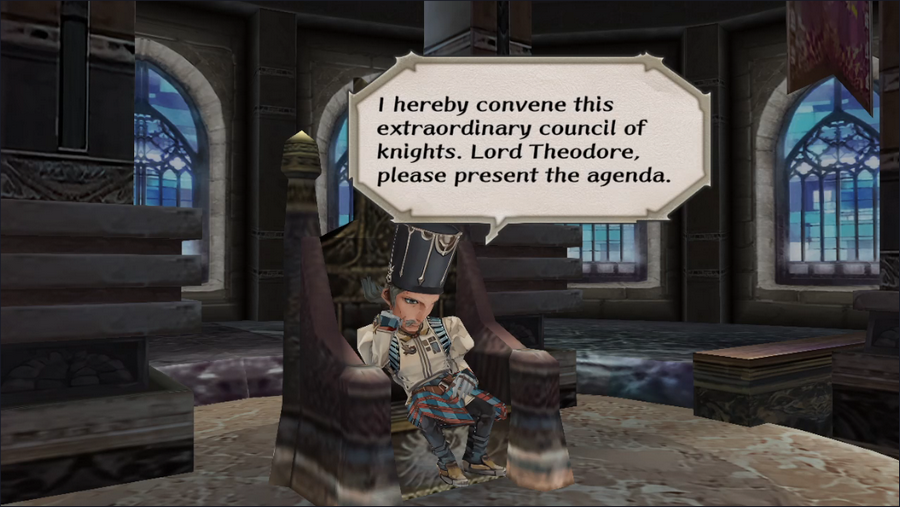 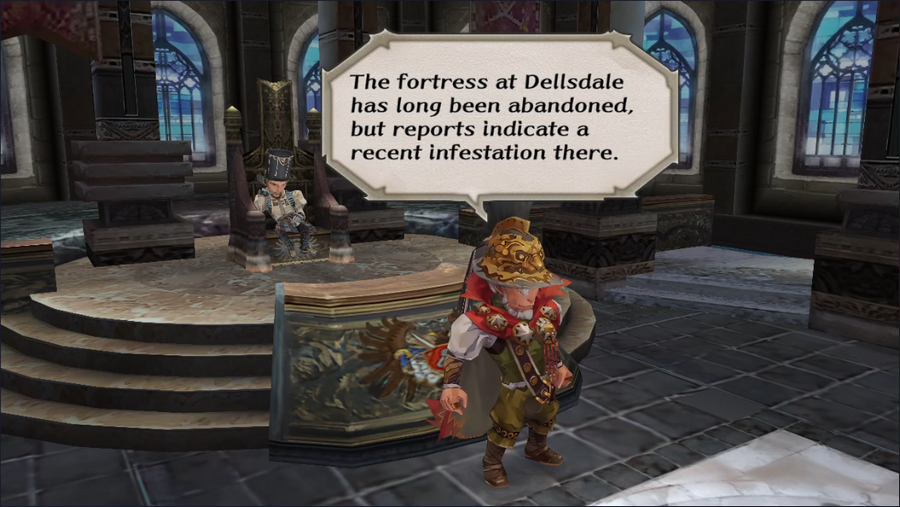 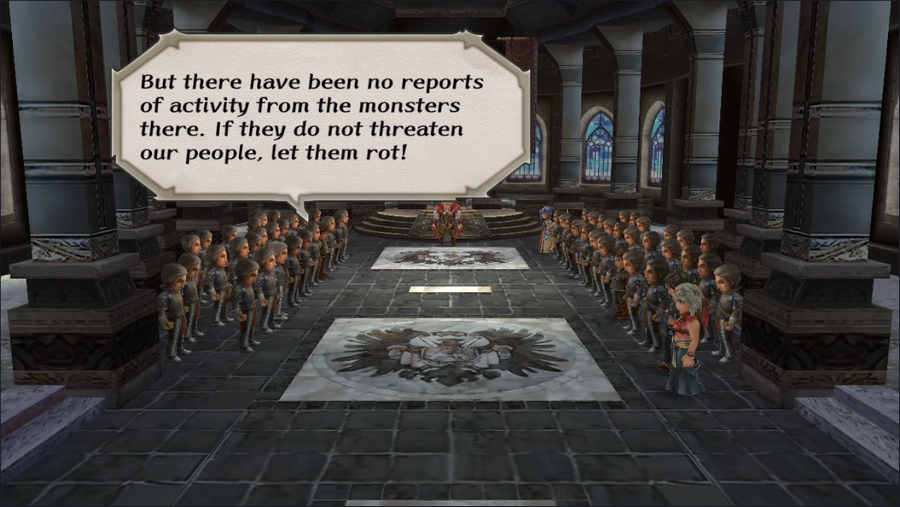 The nameless knights occasionally speak out during this scene. 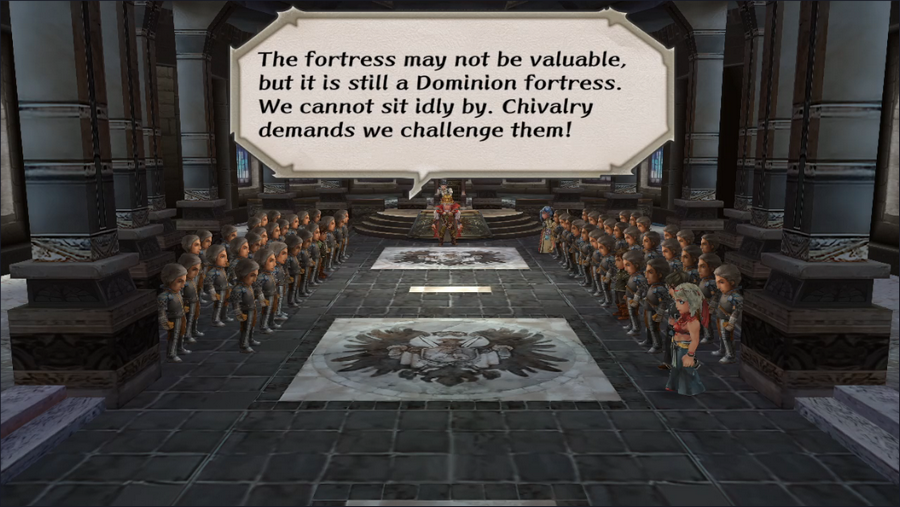 This is actually Theodore, though the speech bubble's tail doesn't quite show it properly. 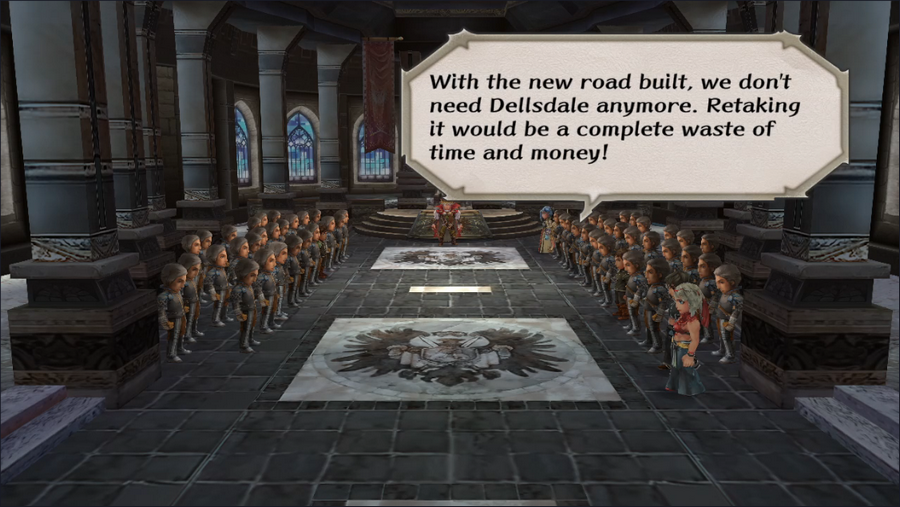 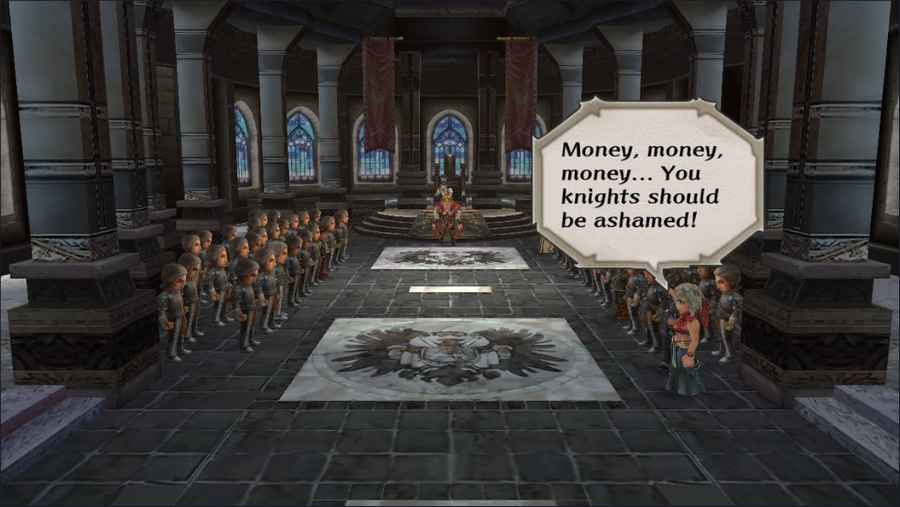 Raphael still holds to a certain youthful naivete.  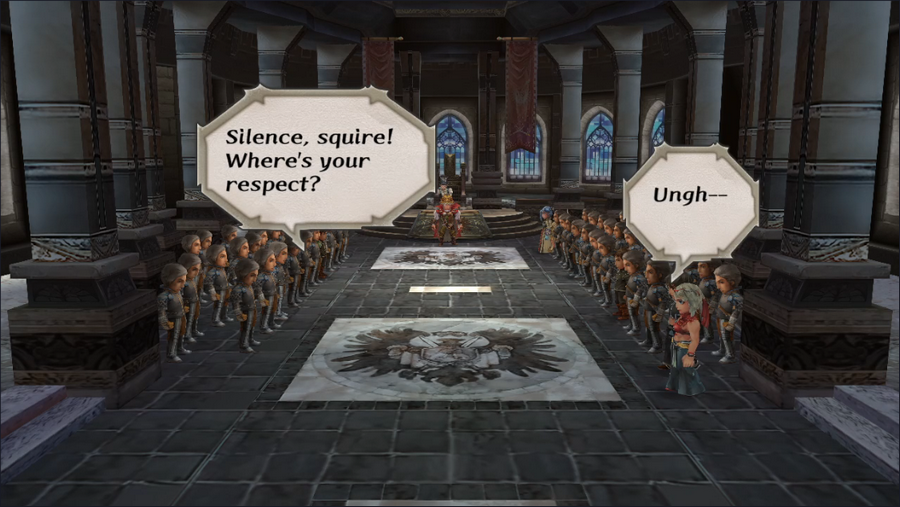 He is promptly shouted down by his superiors.  And then the "only knights may speak" rule is immediately thrown out. Flammar must be a person of importance. 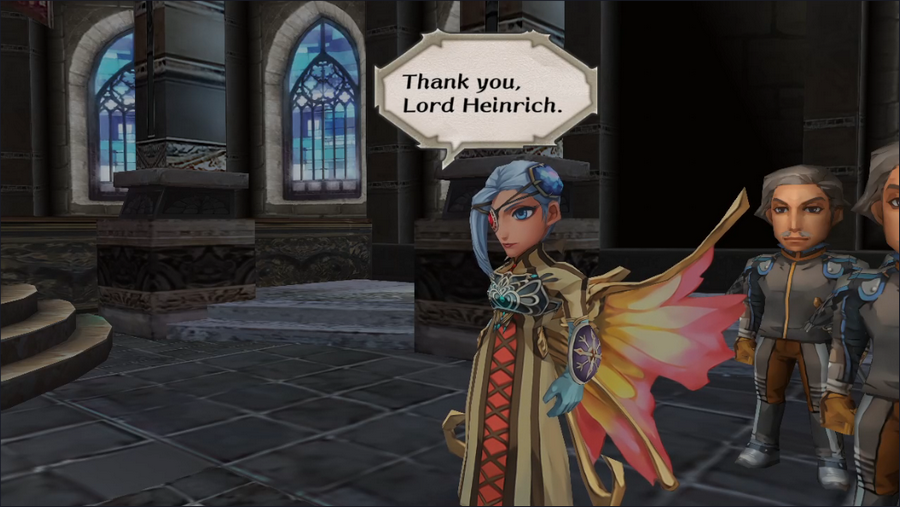 As if her appearance weren't a dead giveaway. 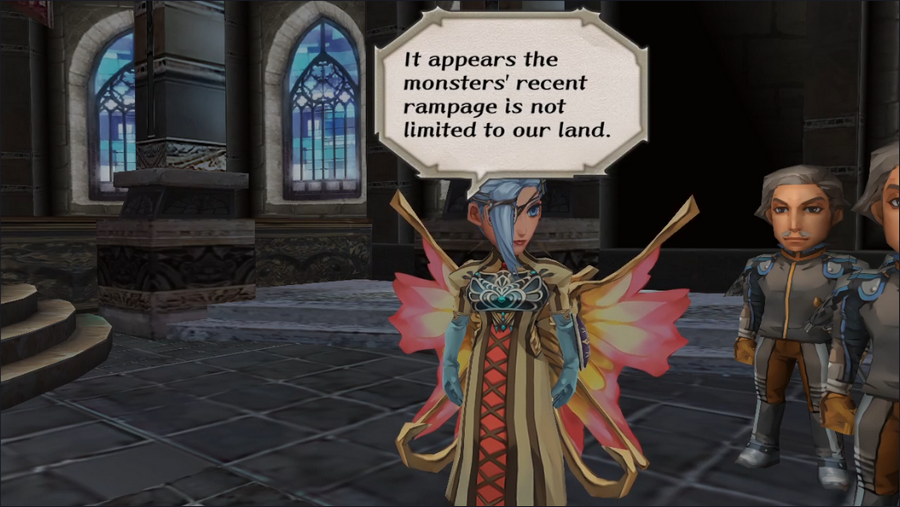 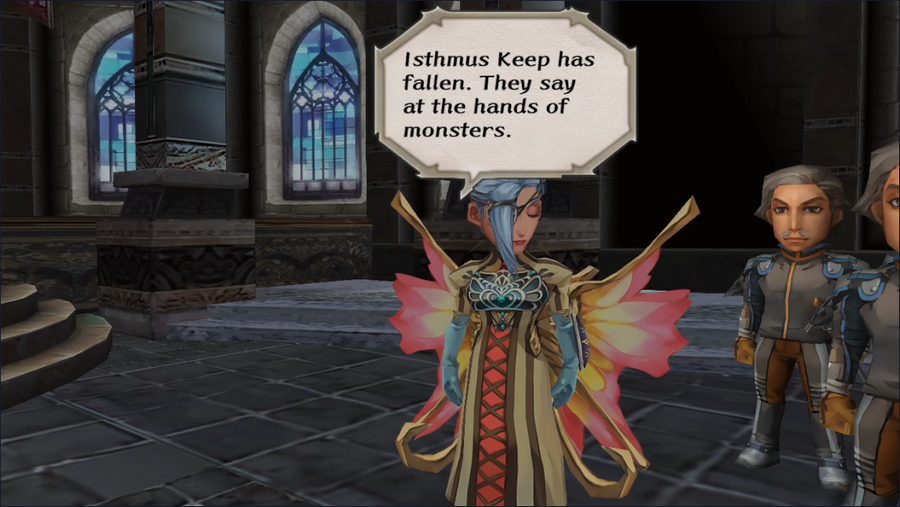 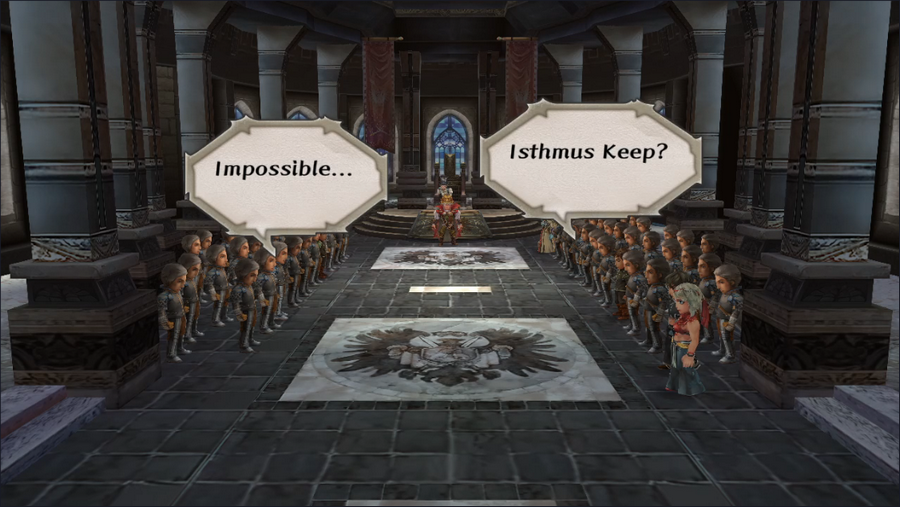 This might be shocking if we hadn't played Albert's intro. Although in that case we might well not know what Isthmus Keep was at all. 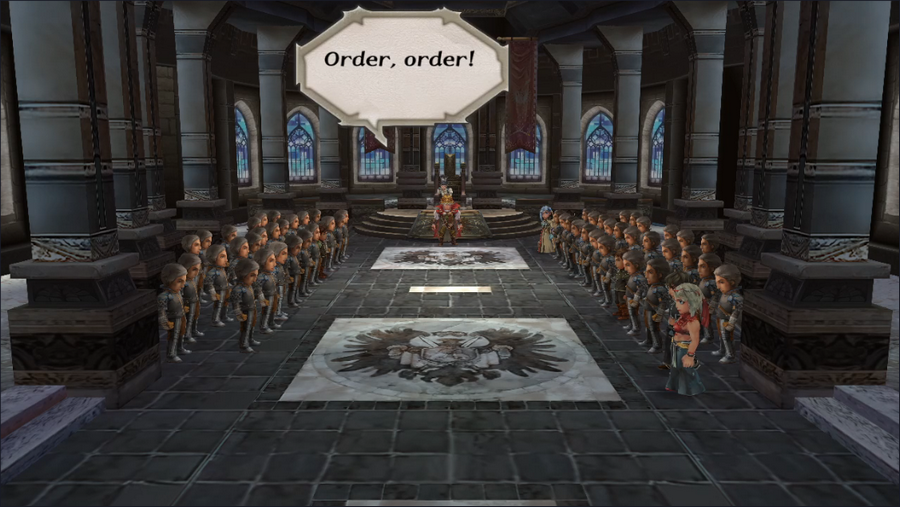 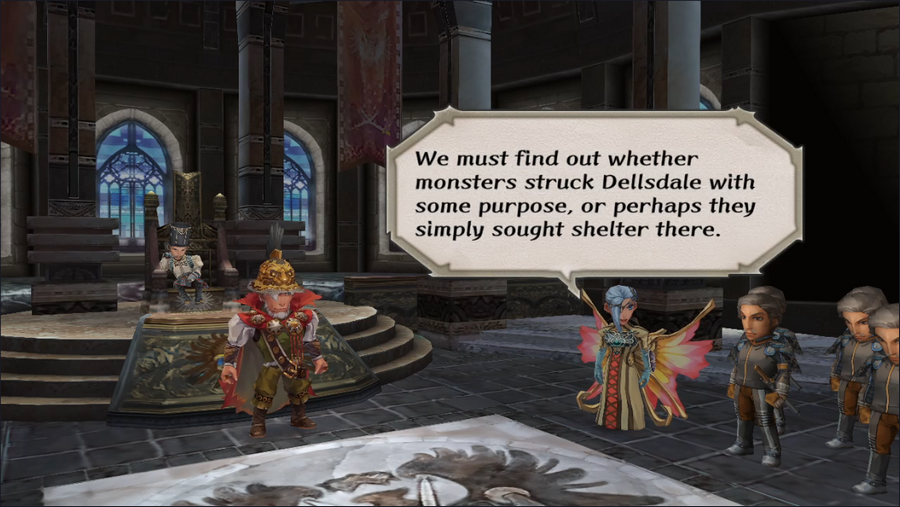 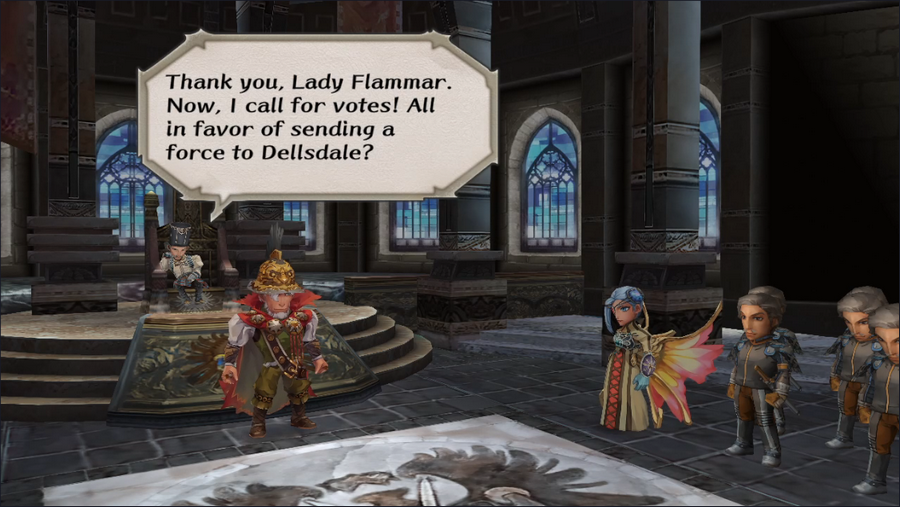 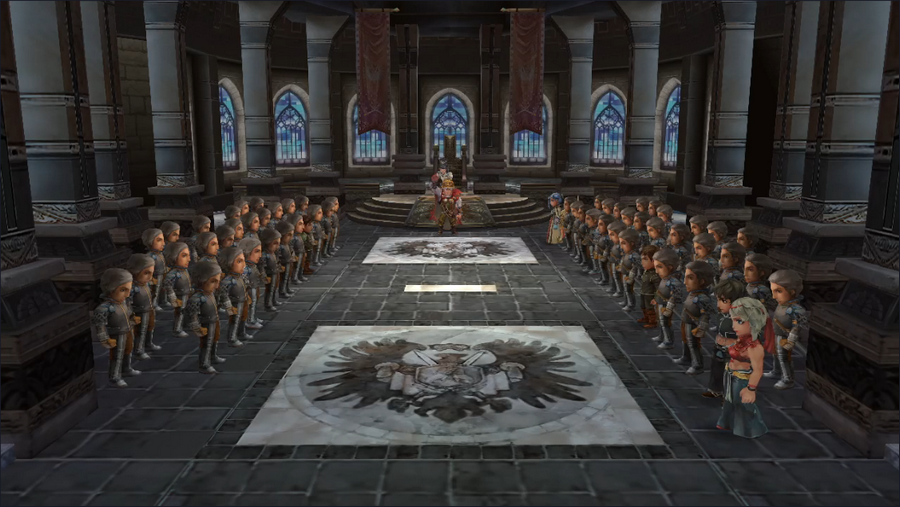 Despite Flammar's words, Theodore is the only vote in favor of purging Dellsdale.   He doesn't take it well.  Back in the throne room, we have another chance to speak to the assembled NPCs. Flammar makes a chilling claim. Given what we saw in Melvir, we have reason to believe her.     Raphael finally gets a chance to see real combat.   Naturally, we're also going to ask to go. Theodore clearly appreciates the offer. 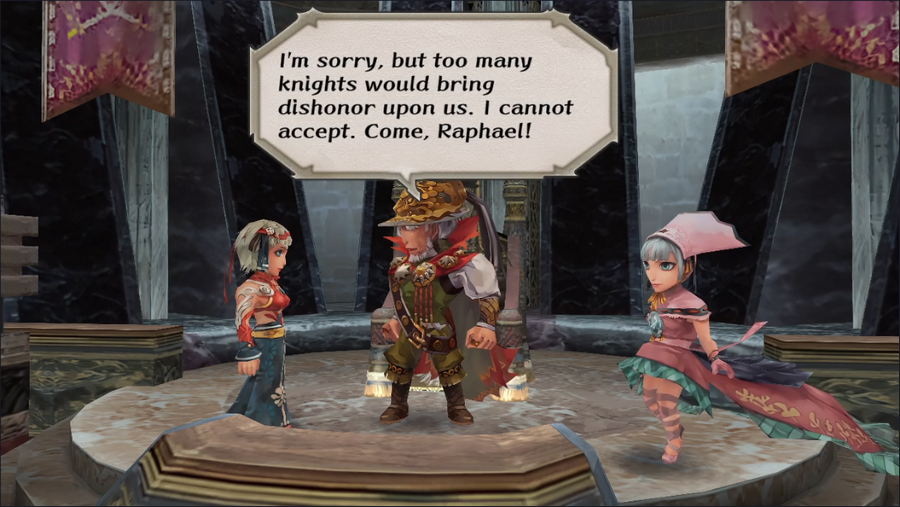 But that would put us over the five-character party limit, so despite having just tried to raise an entire army for this task, he decides that seven warriors would be too many. Had we come with only three party members, Theodore would have accepted our offer and joined our party with Raphael, but it's frankly not really worth it. Theodore is a decent fighter but Raphael is terrible. Better to continue developing our core characters. 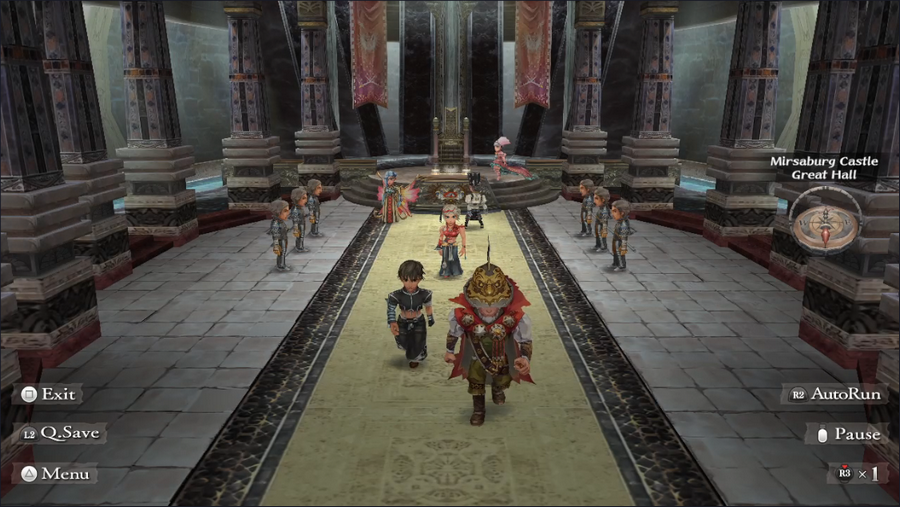 The lord and squire leave us behind, but don't worry: we're not shut out of this quest.  We leave the castle and wind up in Mirsaburg proper. 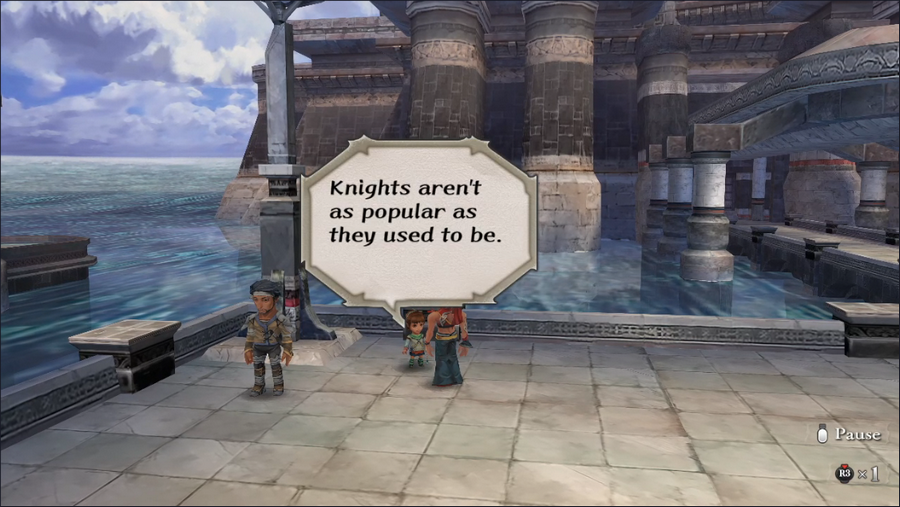 Given how the council went, this child's statement isn't surprising.   The guy next to the boy tells us about the Abandoned Keep, which also serves as directions to it.  There's not much for us to buy in Mirsaburg at the moment, though the spell shop is tempting. We'll save our cash for now, but since Barbara gets a free level in Demonology, a few buff spells might be worth getting for her down the line.   We make our way to the Abandoned Keep, where Theodore and Raphael appear to have been stymied right at the entrance. 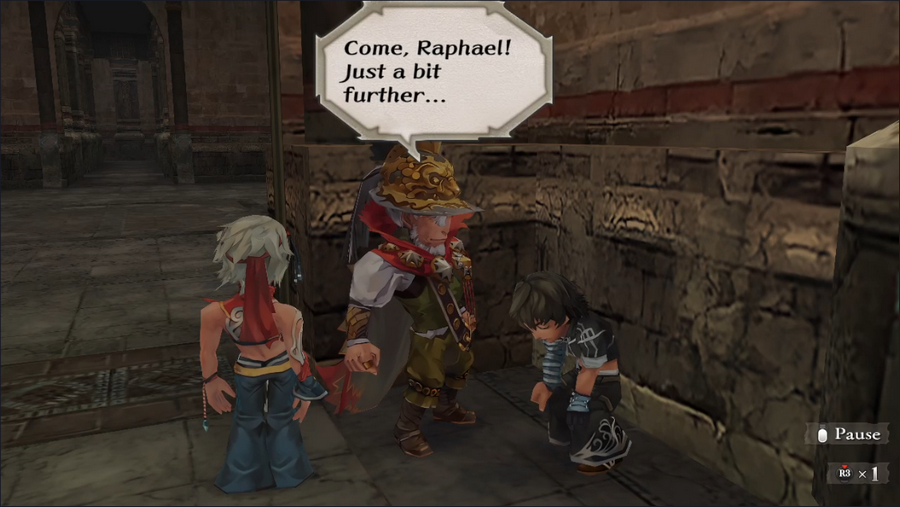 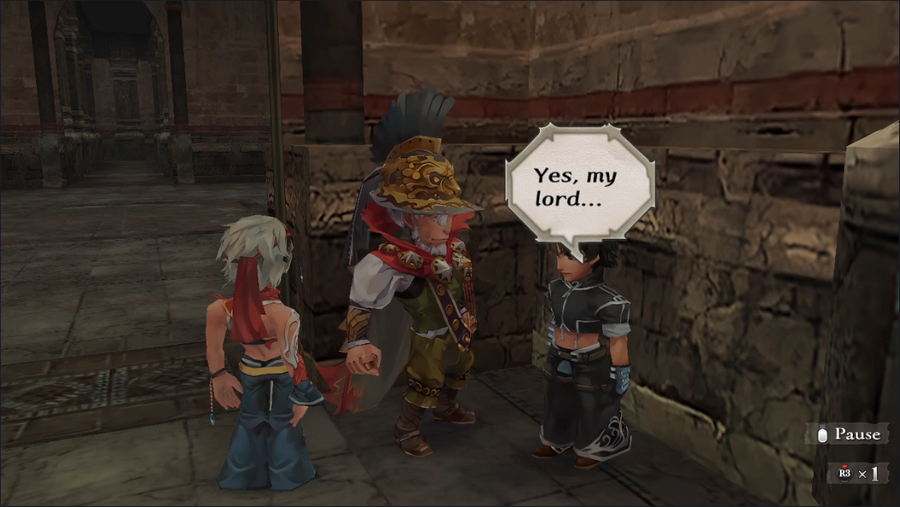 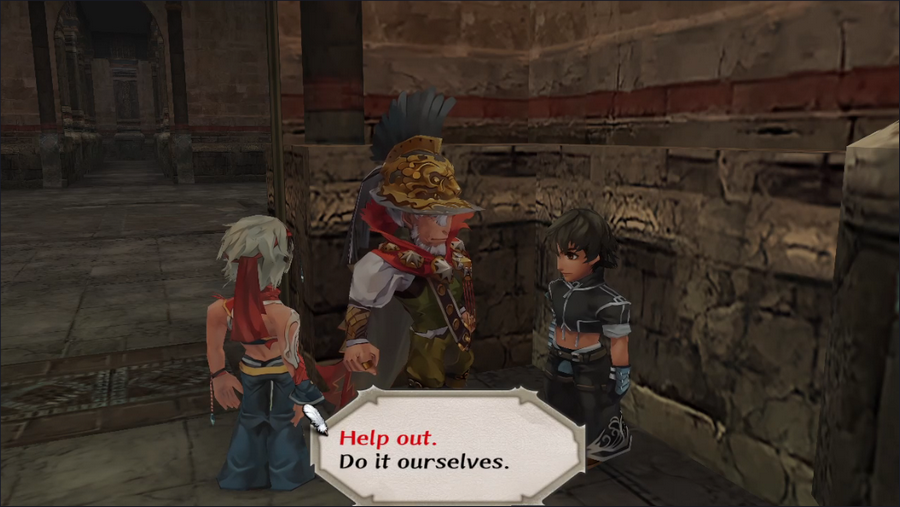 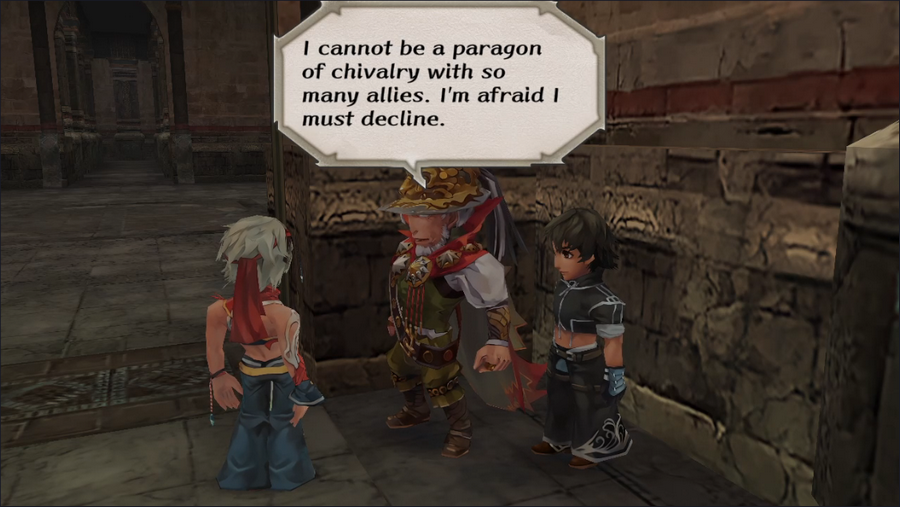 This serves as a second chance to recruit the pair, but we're still going to go without them. 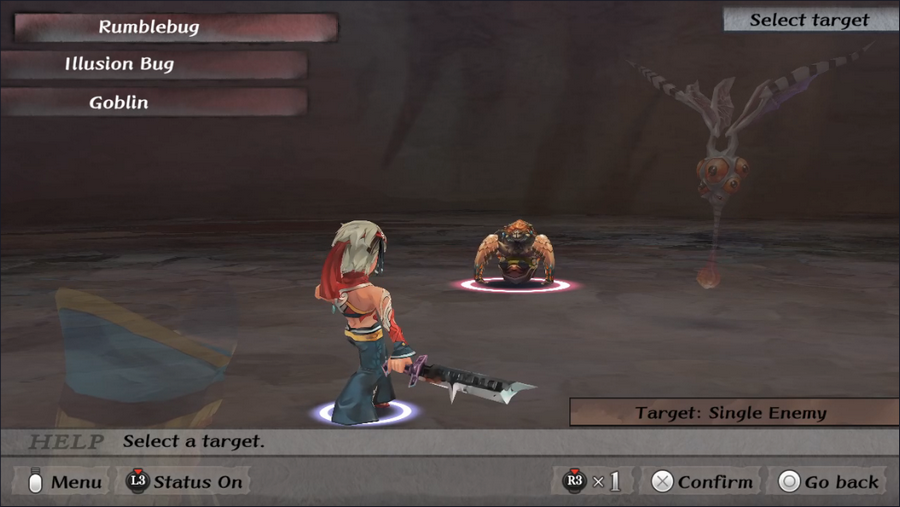 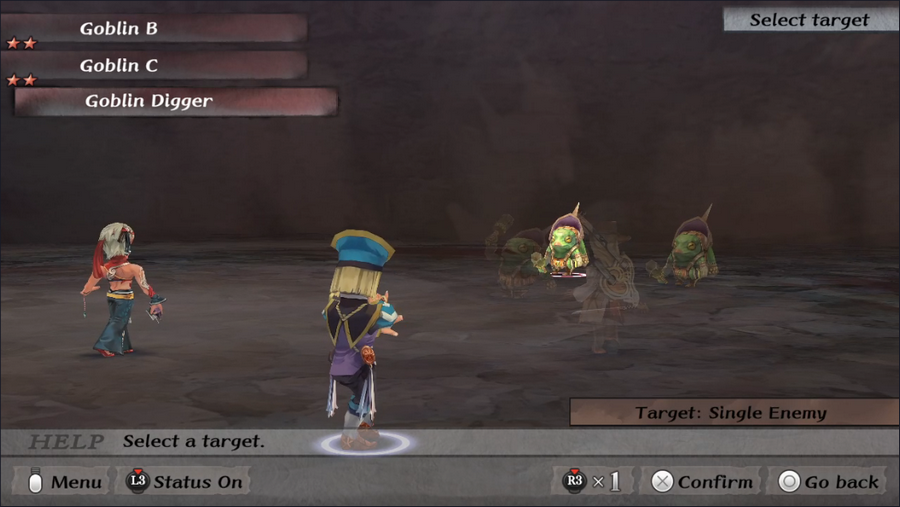 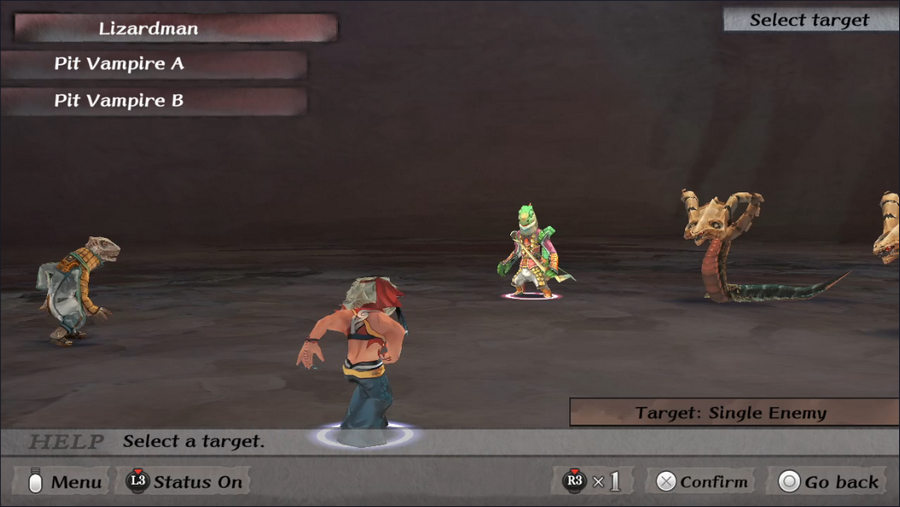 In the room ahead we meet a few new enemies. Rumblebugs are moderately armored bugs whose favored attack inflicts Stun, which is obnoxious. Goblin Diggers are basically tougher Goblins, but since they look identical they can be harder to pick out. Lizardmen are reptile enemies that use bows and, sometimes, their own tongues to attack. 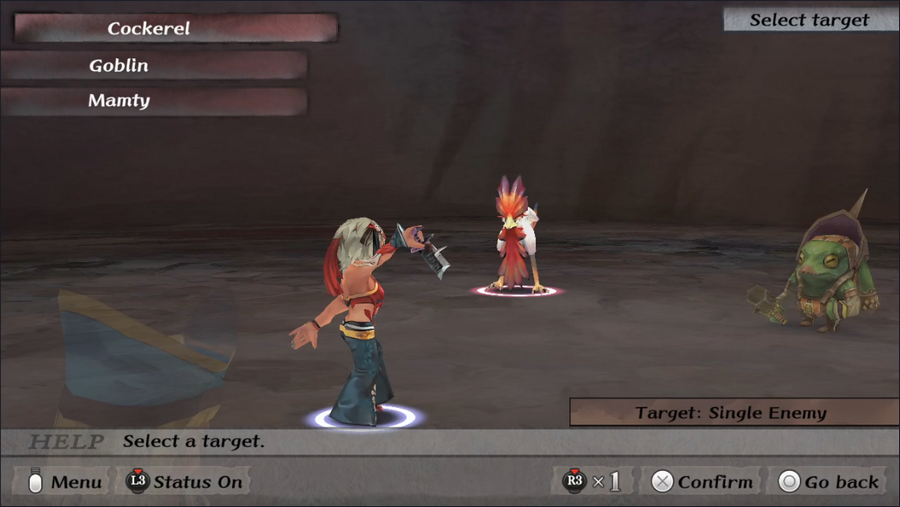 As we explore the dungeon, we also meet Cockerels, which have two single-target attacks (one of which can stun), as well as Rampage, which is rare but hits the whole party.  Although he has a measly +2 BP gain per round, Patrick does start each fight with half his maximum, which helps make him a competitive caster in the early game.   This allows me to show off Water Blast, which is probably my favorite spell animation in the game. You literally shoot a fish at someone!  East of the first room is a dead end.   But in the corner, we locate a chest containing the area map. These will get tougher to find as the game does on, but in these early dungeons they're usually located near the entrance.  A look at the map shows us two area exits apart from the main entrance. We can also see two short branches just north of the first room.  The one to the west is short and empty, but the longer one to the east is blocked. Curious.  To the northwest, we see that the room containing one of the area exits is blocked by a barred door. We also see a fiend, but it's oddly-colored. This indicates that we can trade with it. 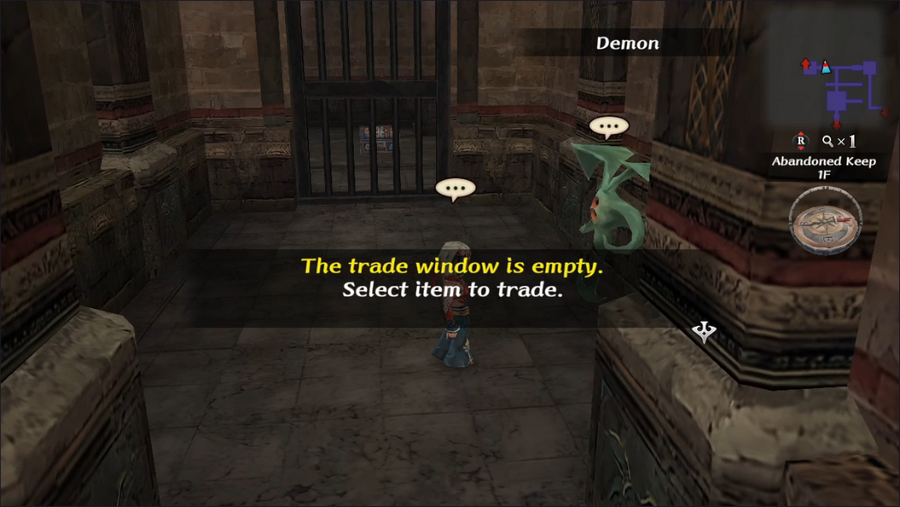 Of course, it would help if I had anything to give it. 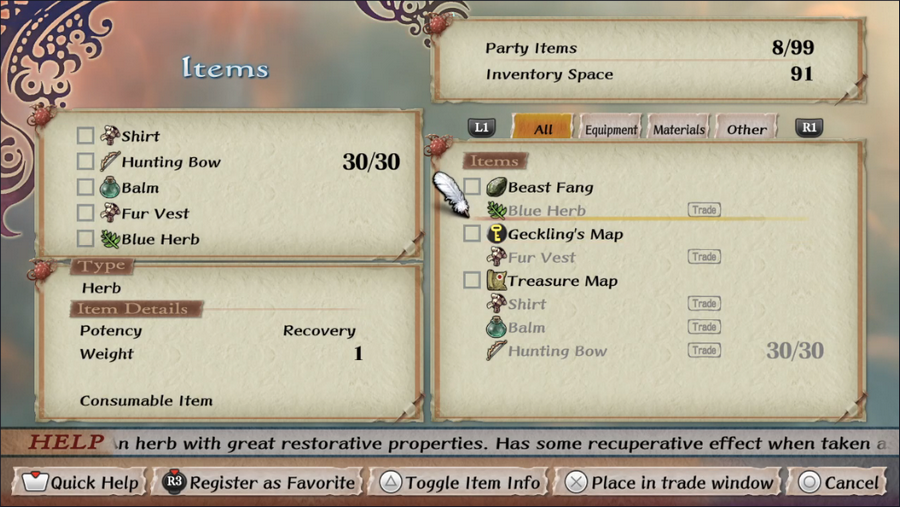 If we open our item menu, there's an option to designate up to five items as trade items. More valuable items can be used for more valuable trades, but this can result in a monster giving us junk in exchange for a powerful weapon or something, so temperance is encouraged. 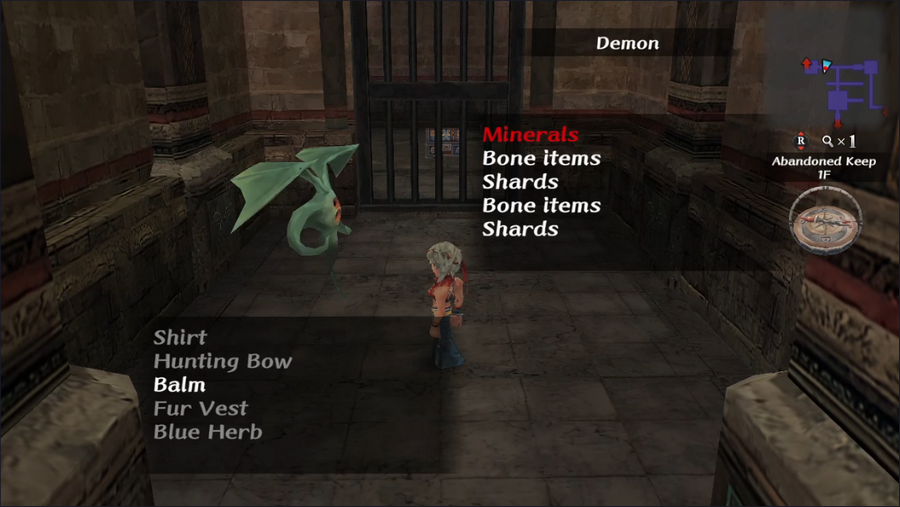 Once we return to the game, we can initiate another trade. On the right you can see what the monster has on offer, and on the left, you can see what it will accept for the highlighted item. Monsters will generally take the most expensive thing on offer in trade. You can also sometimes manage a trade without anything the monster considers fair compensation, but usually it just turns you down. 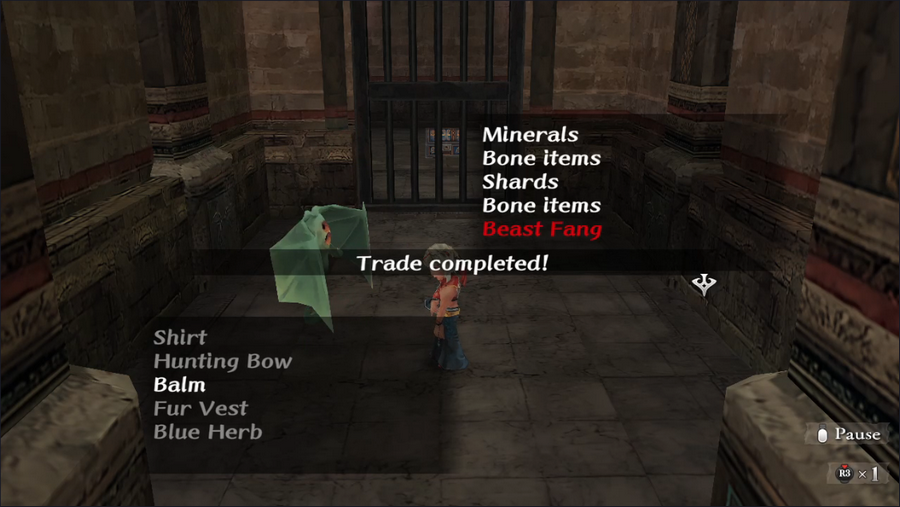 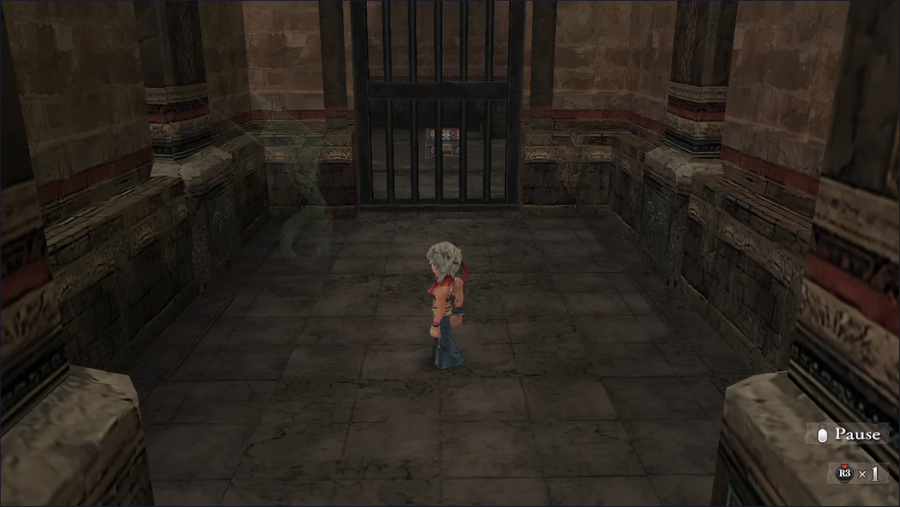 We complete our trade and the monster disappears. A Beast Fang is a pretty lame item, but this serves as a good example for how the system works. One nice thing about Trade as a proficiency is that, so long as it's our active skill, monsters that are willing to trade with us won't go hostile.  Once the trade is done, we had back to the east to check the other exit, and find ourselves on the second floor. There don't seem to be any exits from this floor, which raises the question of where that blocked exit on floor 1 led. 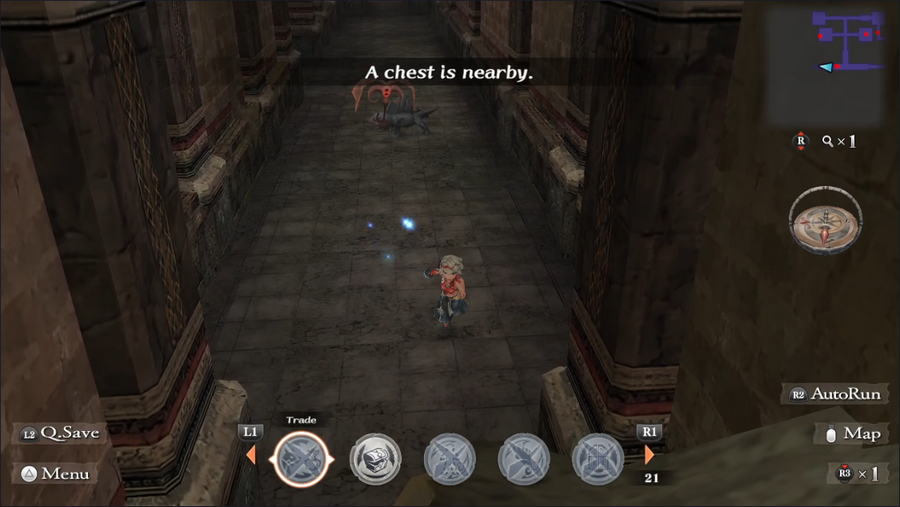 At the west end of the first hallway, we get a chance to use our proficiencies, as some blue sparkles indicate the presence of a hidden chest. 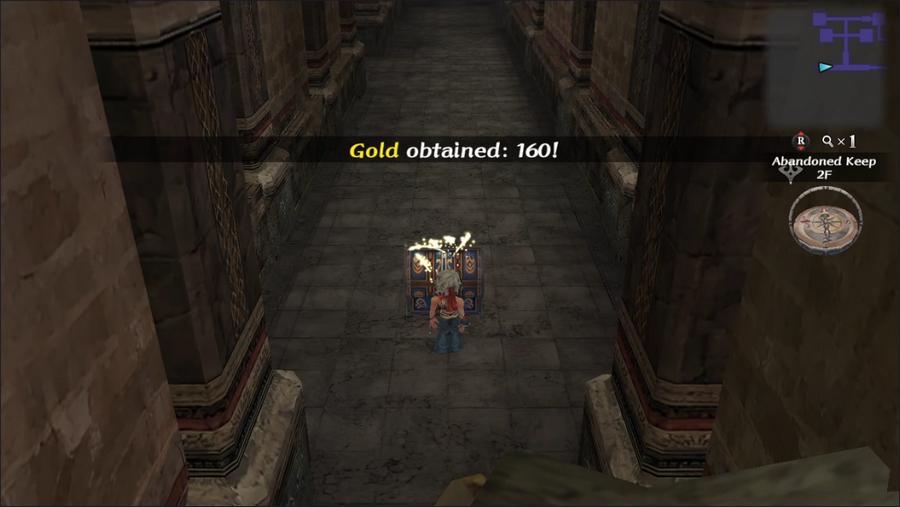 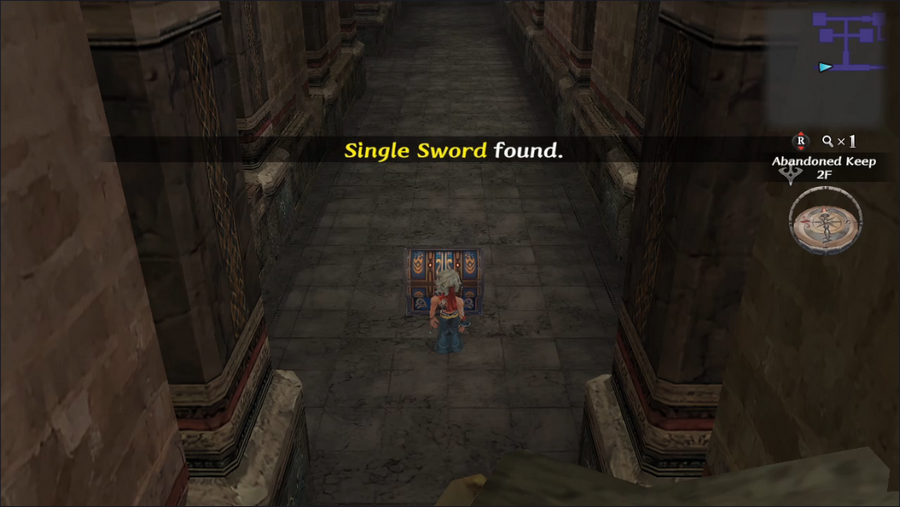 160 gold and a Single Sword aren't great prizes, but they're better than nothing. 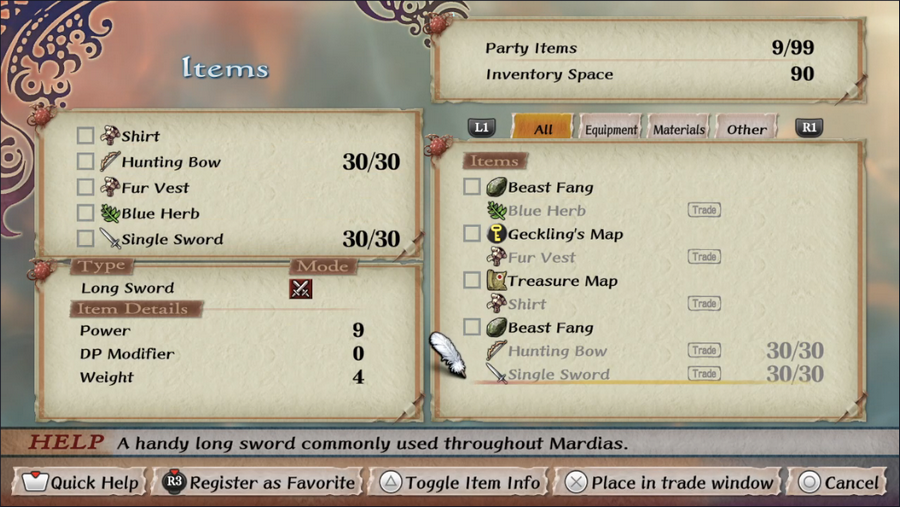 At least the sword is passable Trade fodder. 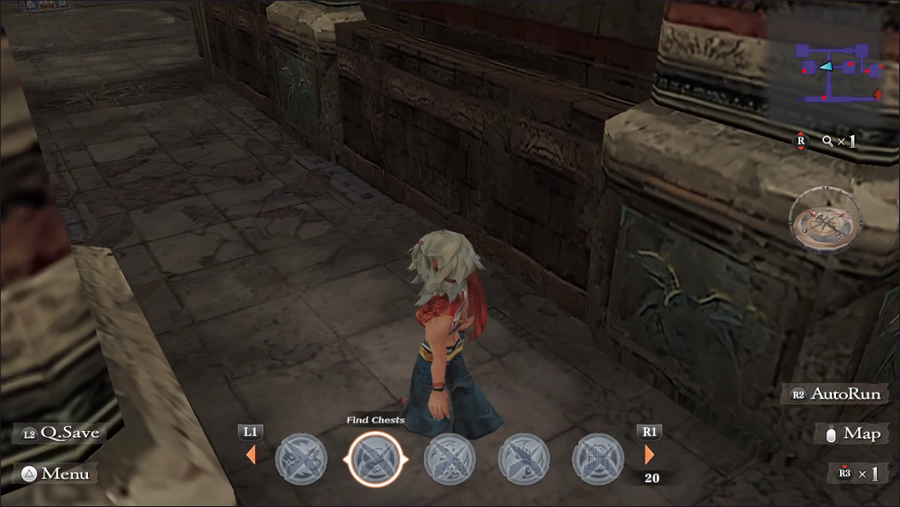 After claiming the sword, we head down the central hallway and turn left, where the floor looks just a little odd. Running across it causes the screen to rumble, and if we persist... 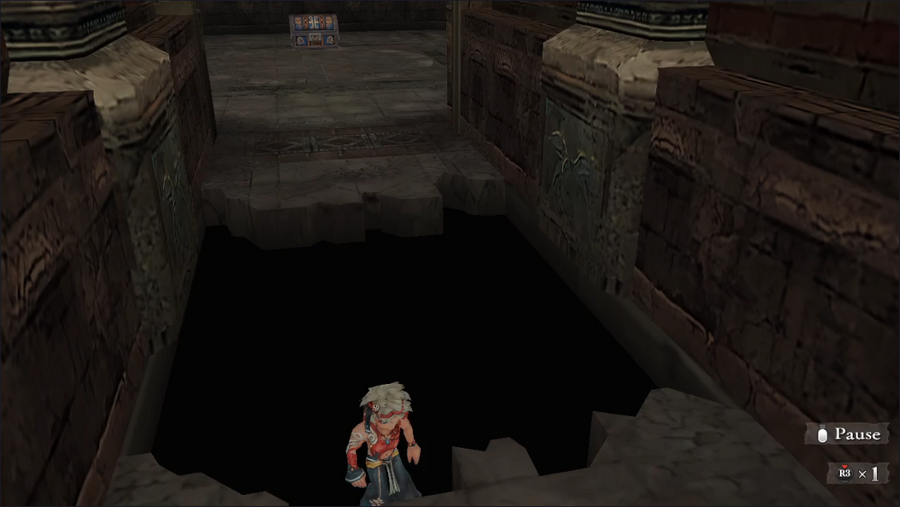 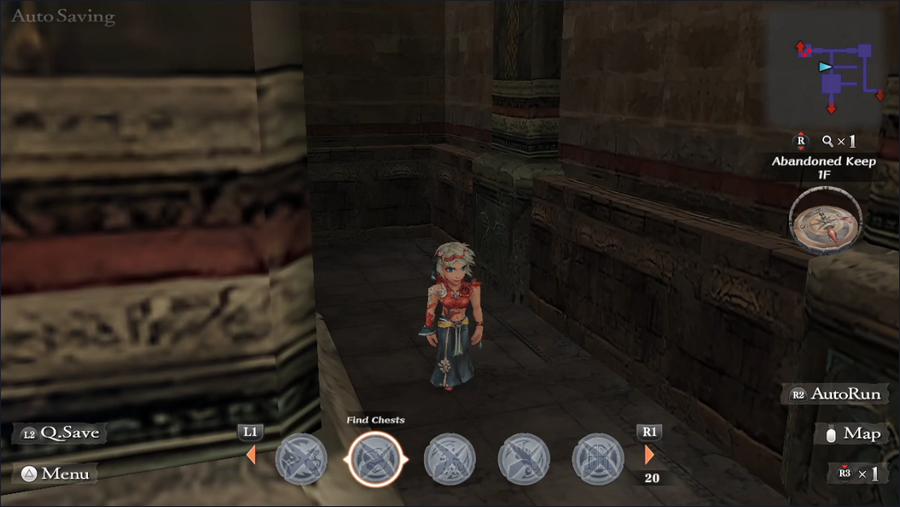 It collapses and dumps us back on the previous floor. 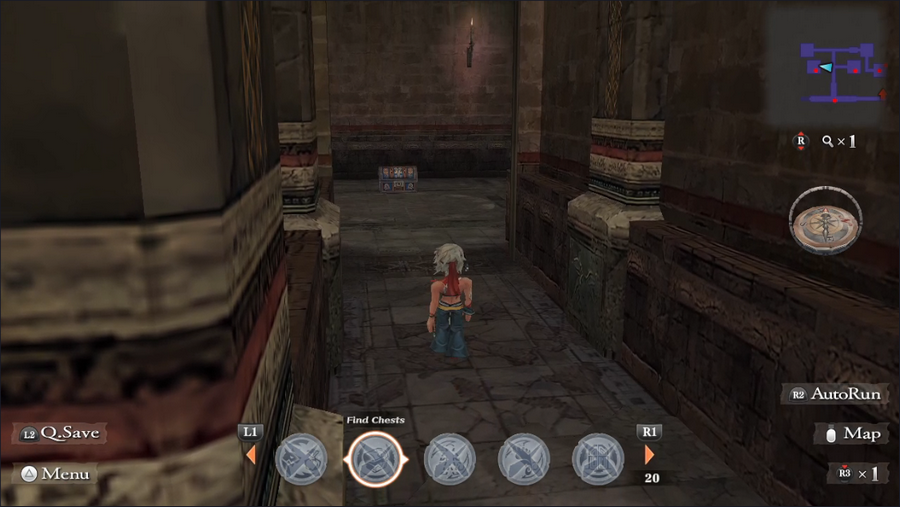 Instead, we'll use the D-pad to walk across the floor, which allows it to maintain its stability.  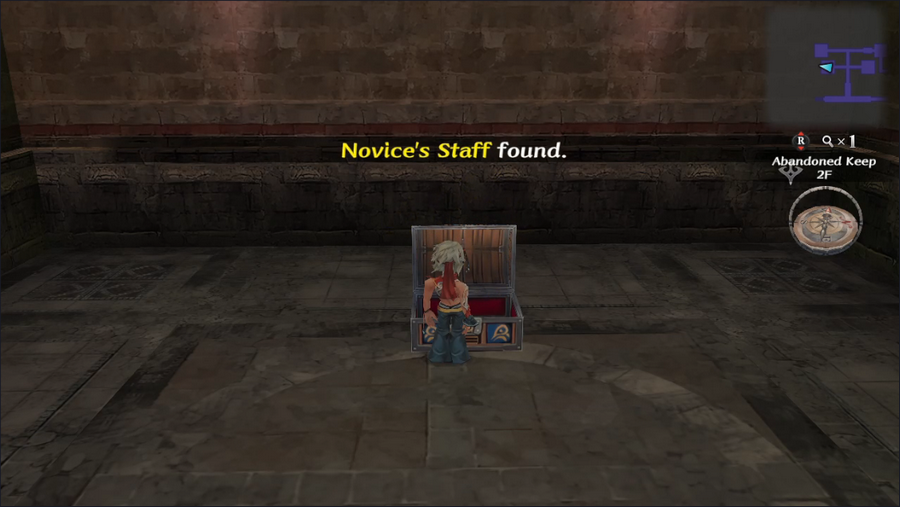 Our reward is some cash and a low-tier staff. 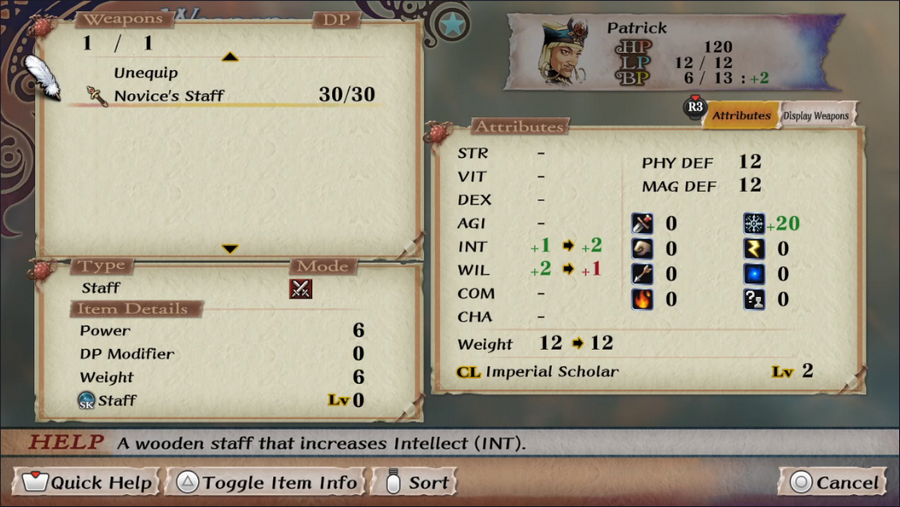 It boosts Intelligence, while Patrick's current Holy Staff boosts Willpower. Neither is bad, but as a mage Patrick is going to want to Intelligence more. (Of course, we could equip both, but adding weight for one measly point of Willpower isn't reall worth it.)   In the opposite hallway is another crumbling floor, but this one is stable enough not to collapse even if we run across at full speed.   The chest here contains come gold and jewels - nothing amazing. 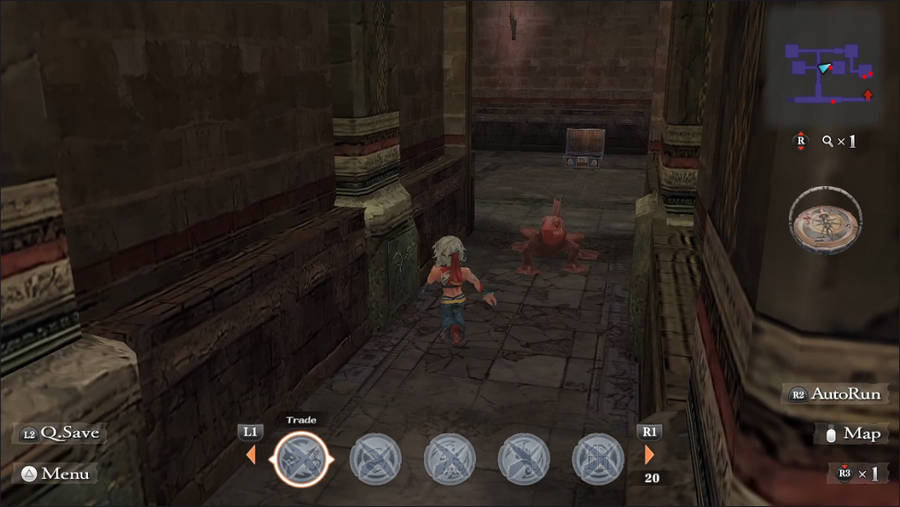 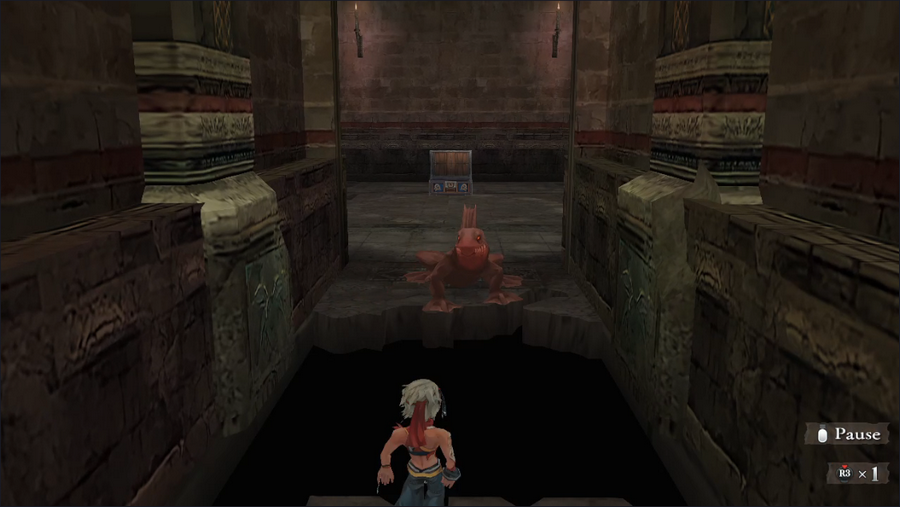 The fact that this floor doesn't collapse as quickly as the other is a clue. By running in circles on it, we can eventually break it down. 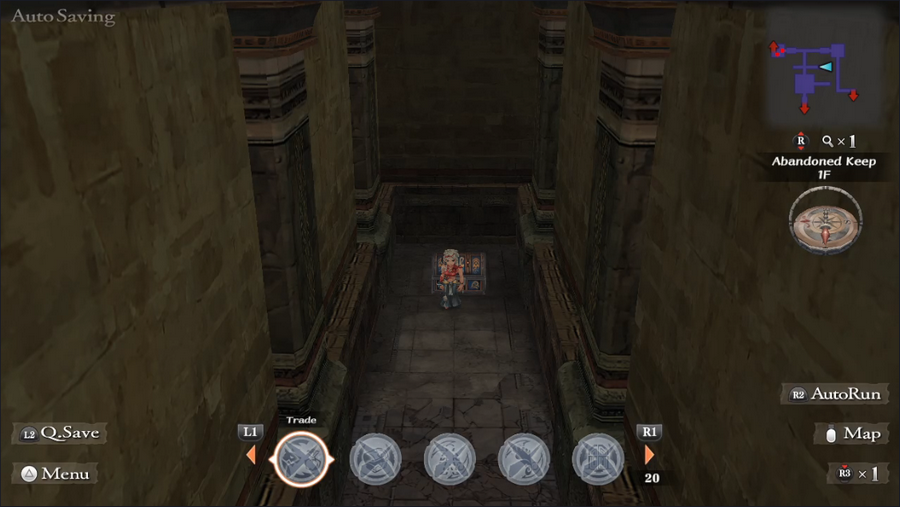 We land behind the rubble that blocked the hallway on the first floor. 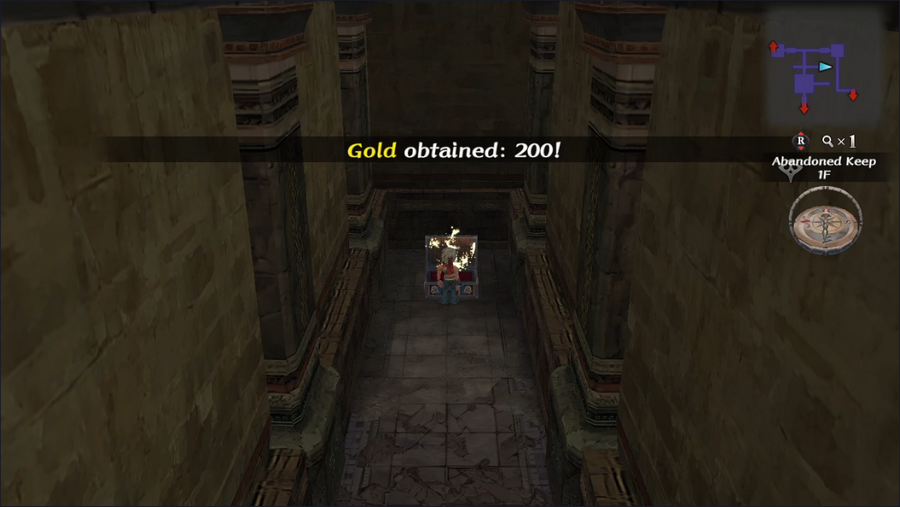  The chest here contains more gold and another starter weapon, but it's not why we're here.   We step on the crumbling floor, which collapses immediately and dumps us in the basement.  Man that's a lot of monsters. Even with stealth we can't avoid fighting them all. 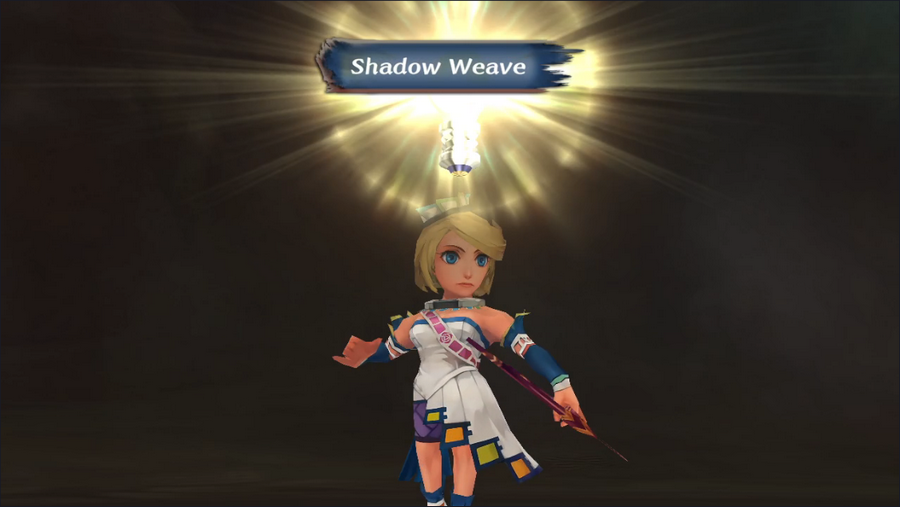 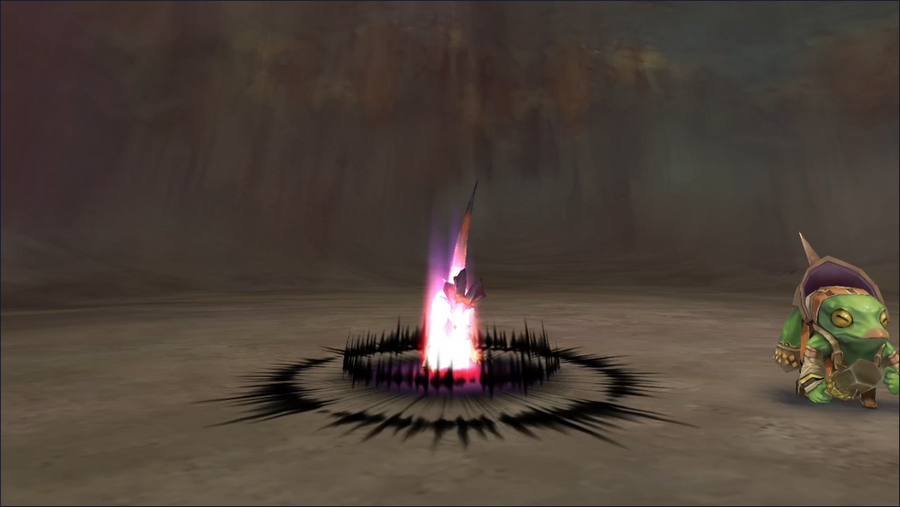 The fights here aren't all bad though. Diana ends up Glimmering Shadow Weave, which inflicts Snare. Snare is similar to Stun, but it only works on enemies whose planned action involves forward movement, like Impact Slash. It comes out quickly, but deals no damage, so it's worthless against stationary foes. 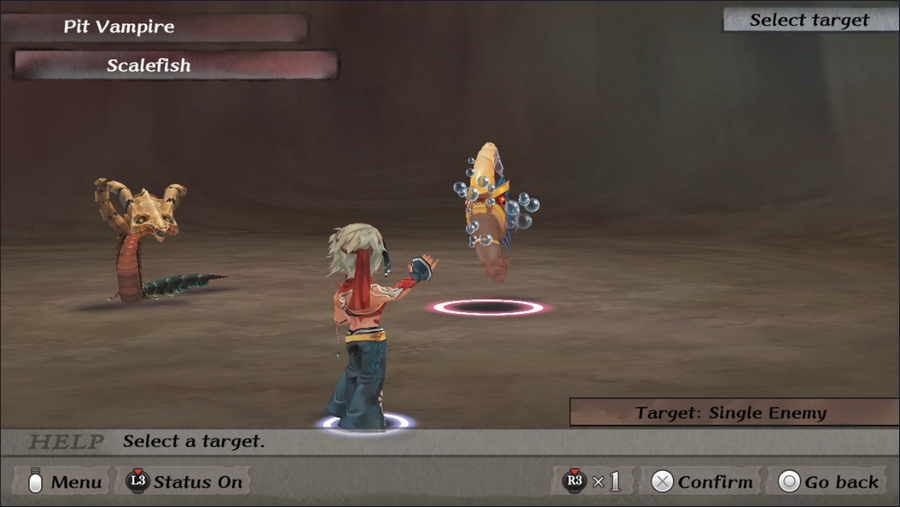 We also face a new enemy here, the Scalefish. They use basic attacks and mostly exist to make a tougher monster type less noticeable. 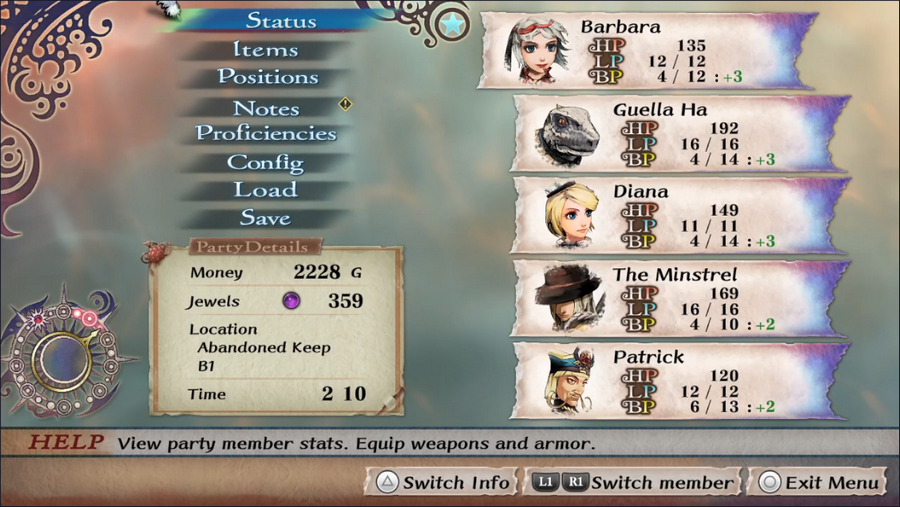 Following the battles in the hallway, Barbara's maximum BP has risen to 12, meaning she now gains 3 BP per round. Milestones like this are some of the most important in the game. 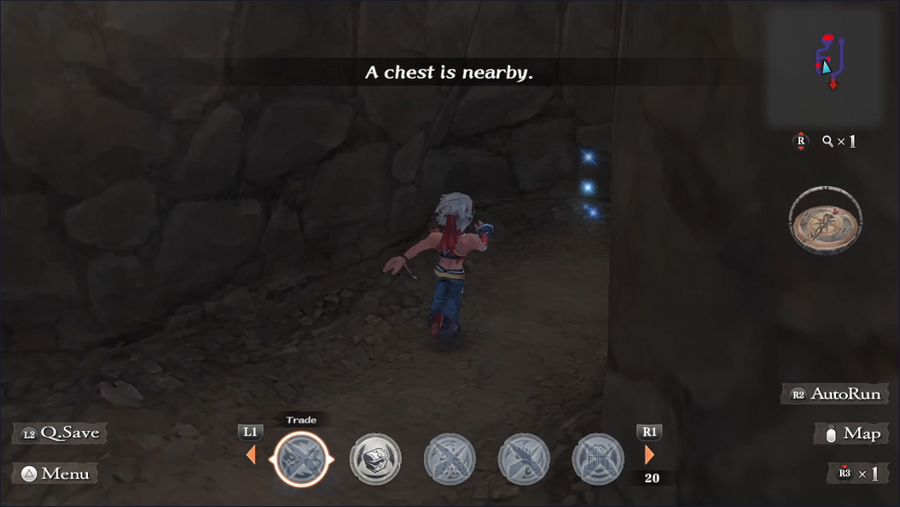 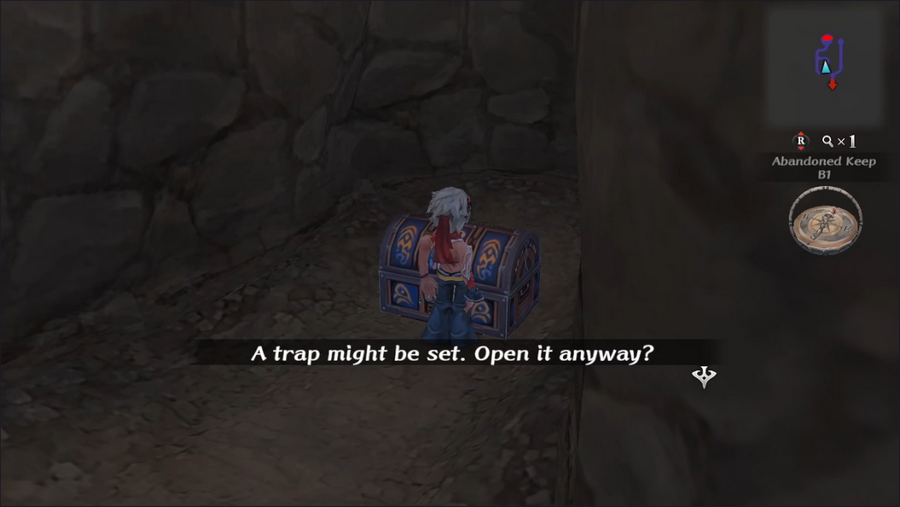 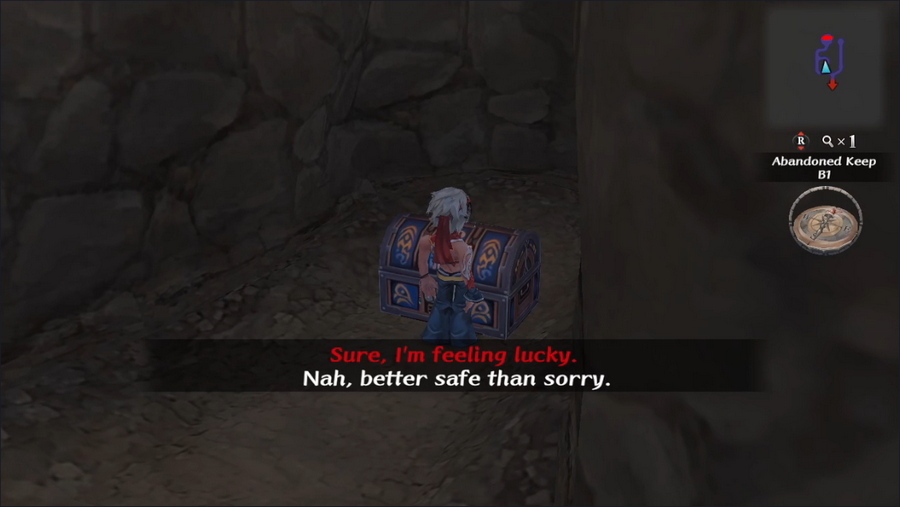 Up ahead, we find another hidden chest. The message about traps is the same one we've gotten on all the other chests, so there's no reason not to proceed. 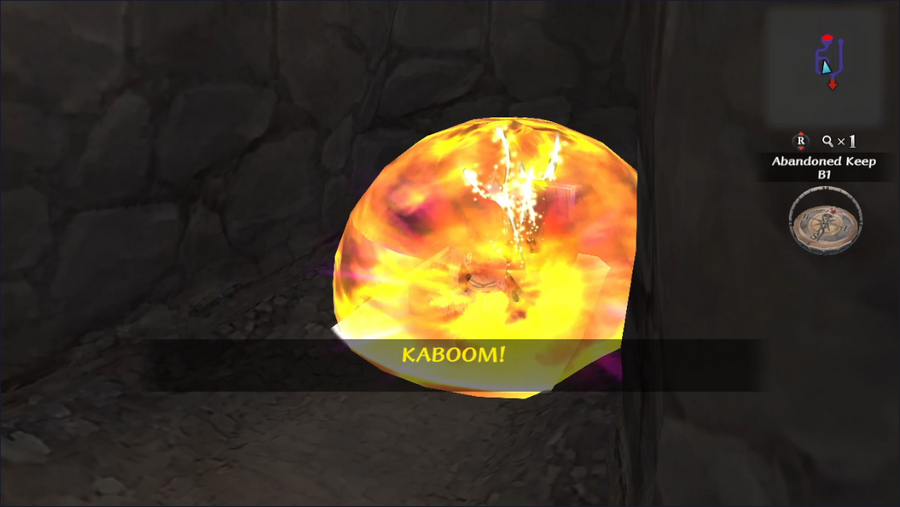 Unless, of course, a trap was actually set.    This super sucks. We'll reload and potentially come back when we can disarm traps. Or not. The loot is probably not much better than what we've found so far. We're almost to the end of the dungeon at this point, but the last fight before that turns out to be the most significant.  It's arguably the most important Glimmer Diana will get all game.  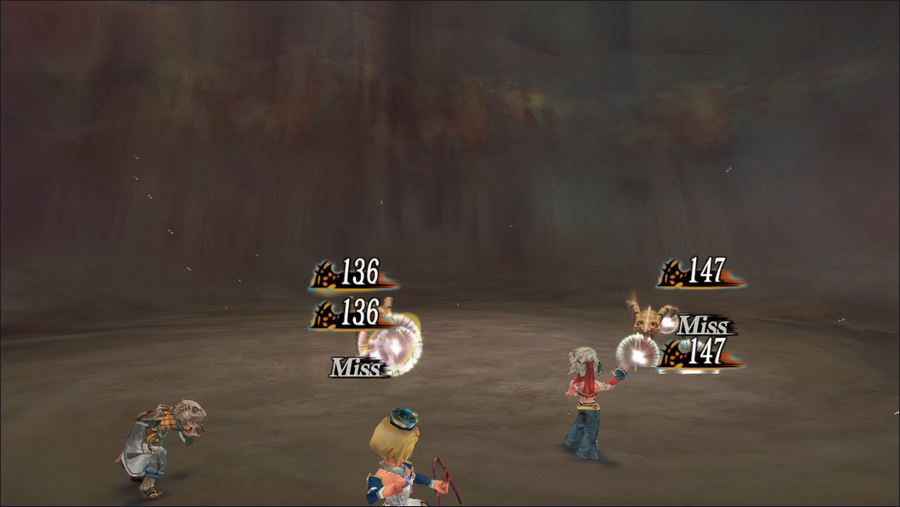  Rapid Volley hits every enemy with three attacks, though they're pretty inaccurate and typically only one or two will hit a given foe. This is still an incredibly powerful technique for dealing with large crowds. Rapid Volley hits every enemy with three attacks, though they're pretty inaccurate and typically only one or two will hit a given foe. This is still an incredibly powerful technique for dealing with large crowds.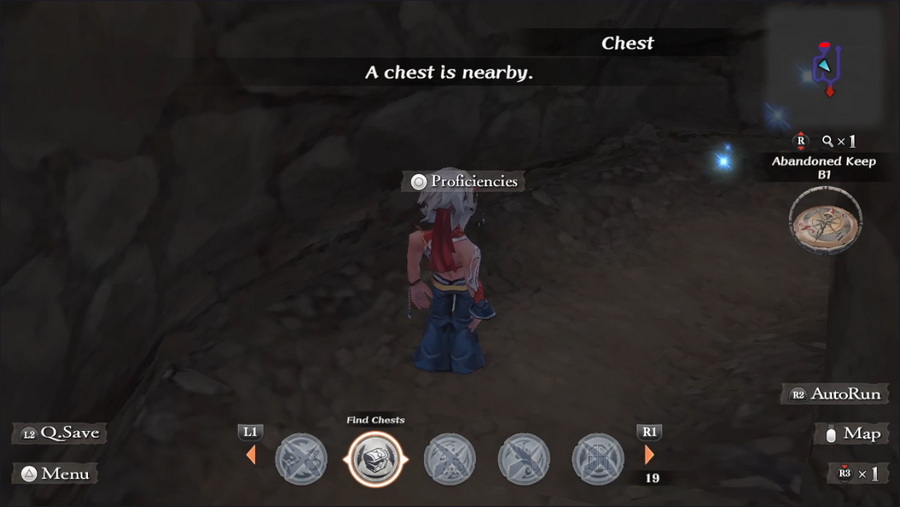 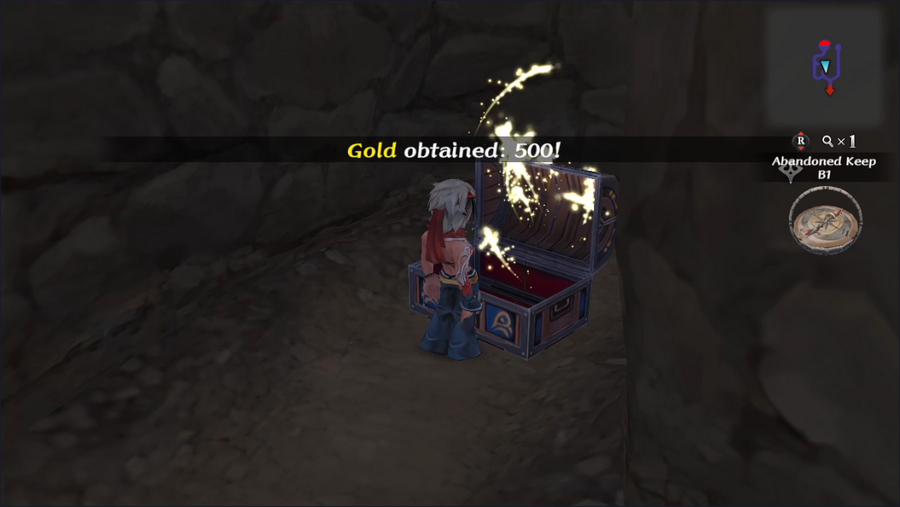 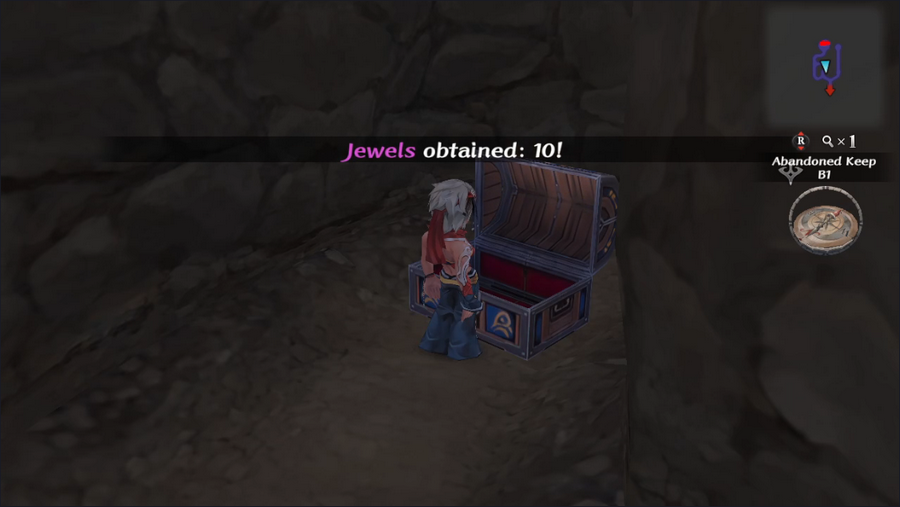  After finding one last hidden (and untrapped) chest, we round a corner to find ourselves face-to-face with a crowd of monsters.  Looks like we've found the heart of the infestation. Boss Battle: Lizardmen and Ptyrixes https://www.youtube.com/watch?v=sp3dc0fwEI8  This boss fight is, like many on the early game, fought against a group of standard enemies.  The Lizardman Scout is a tougher Lizardman, while the Ptyrixes are dinosaur-like creatures with bludgeoning heads. Bother are above our current Battle Rank, though not by a lot.  Irritatingly, Diana doesn't start with the BP to use Rapid Volley, so this will be a bit of a slog.  The plan is to use techniques and Patrick's spells to take out the Ptyrixes first, since they have some high damage output.   This mostly works out, though the Minstrel goes down.  Luckily, we have a fix for that. 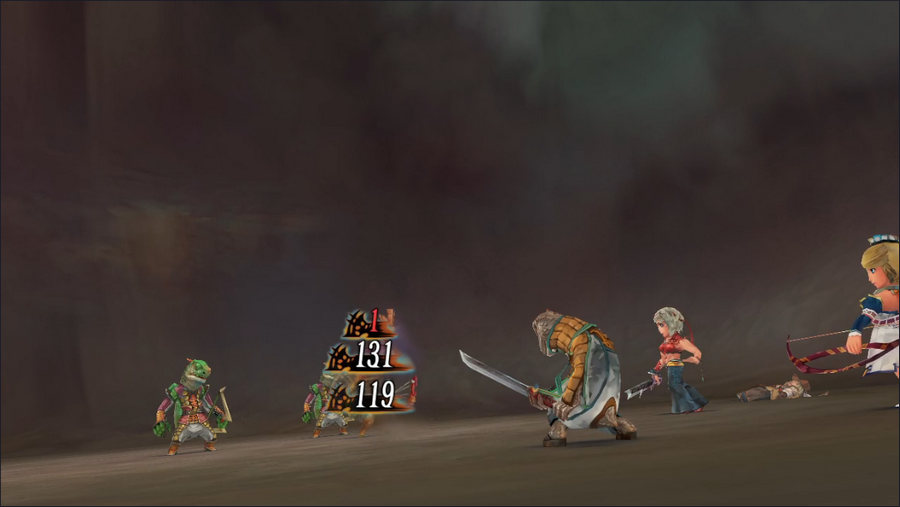 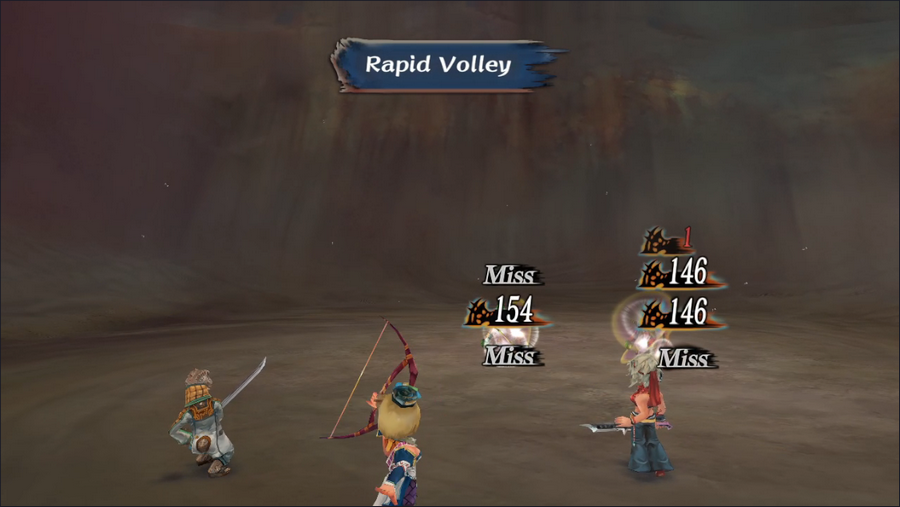 On round 2, Guella Ha and Diana kill the Scout and one of the basic Lizardmen, leaving only one weak foe left. 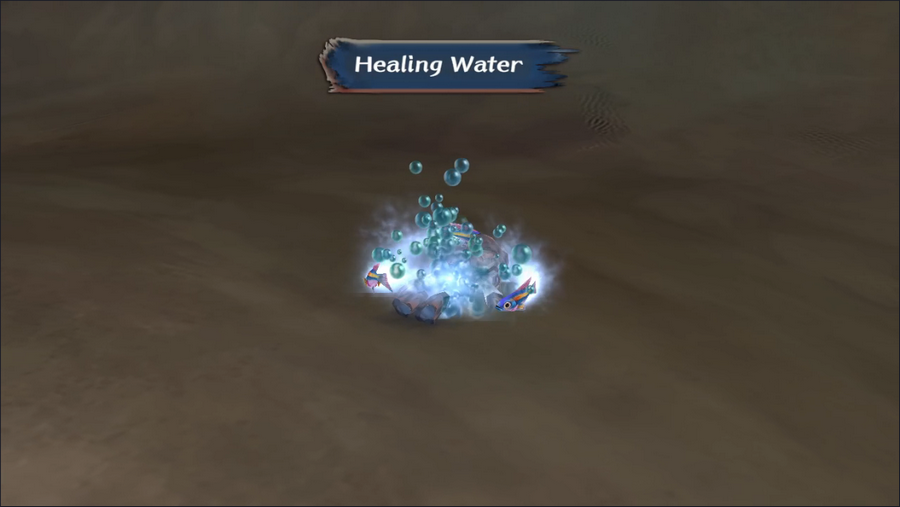 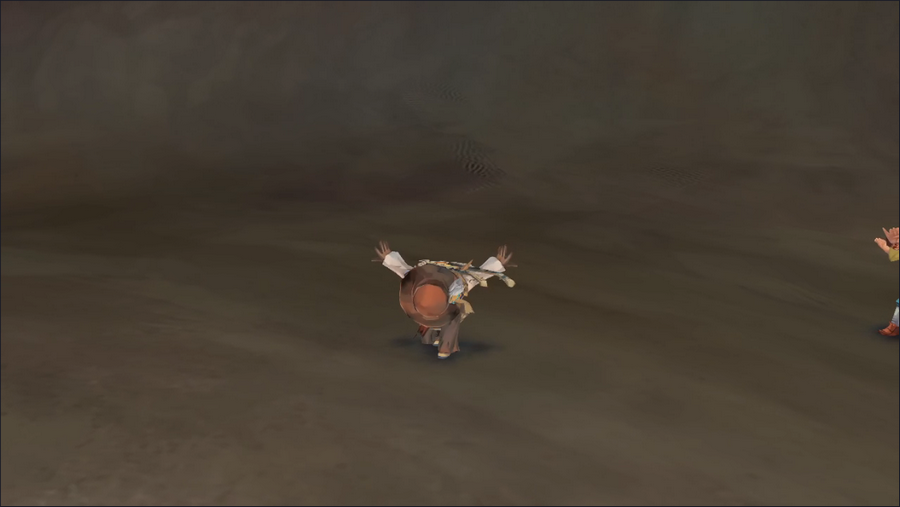 This gives Patrick a chance to infuse the Minstrel with fish power and get him back on his feet for stat-ups. 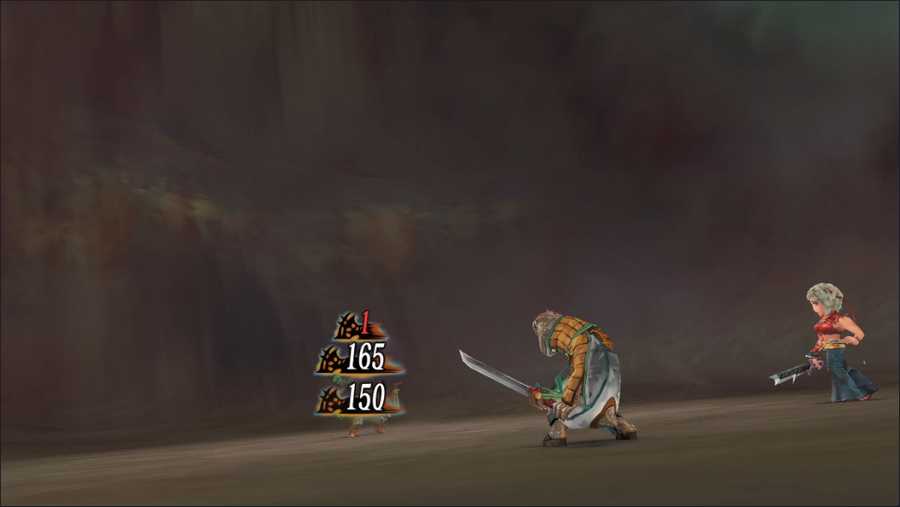 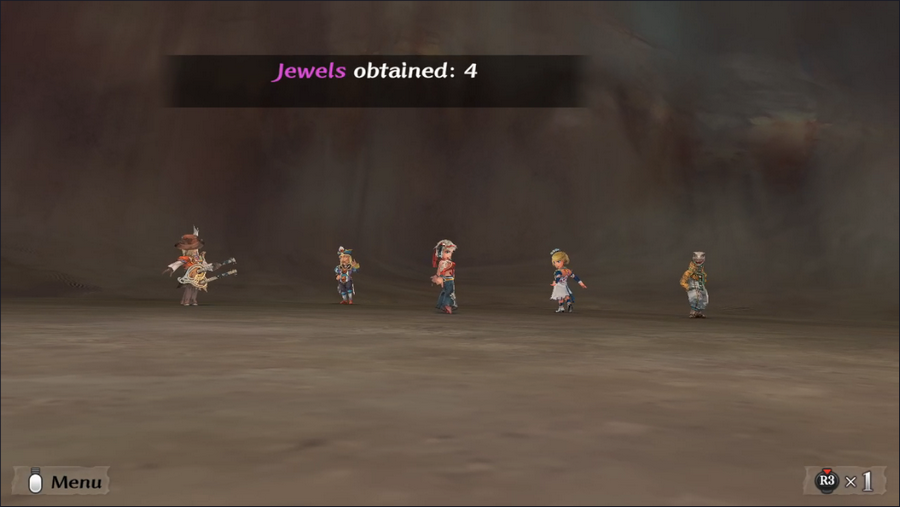 One more Double Vertical from Guella Ha ends the fight. A basic attack probably would have sufficed, but I wasn't taking chances. 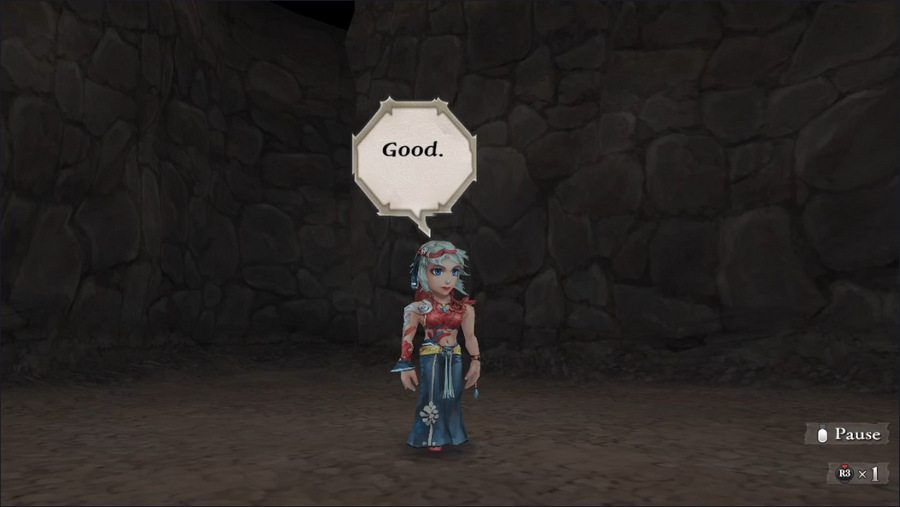 Barbara is clearly satisfied with what we've accomplished here. 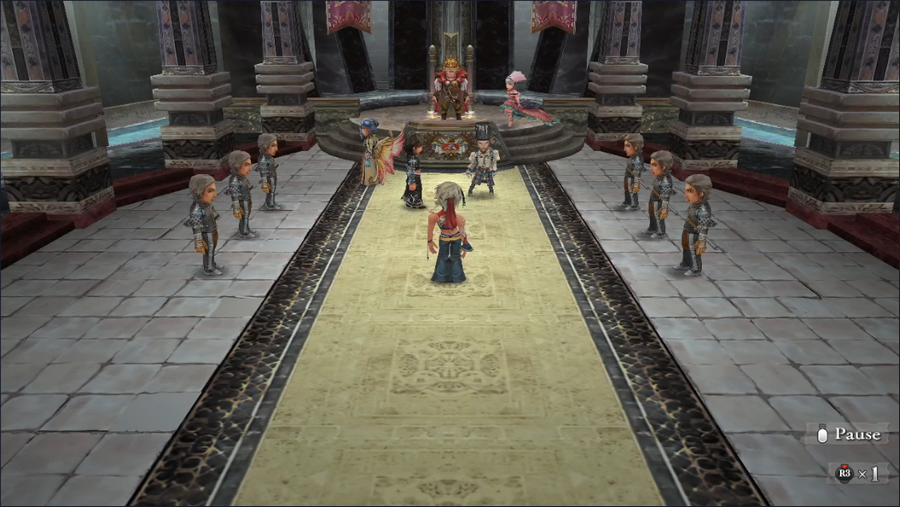 But back in Mirsaburg, everyone's head is hung and the music is somber. 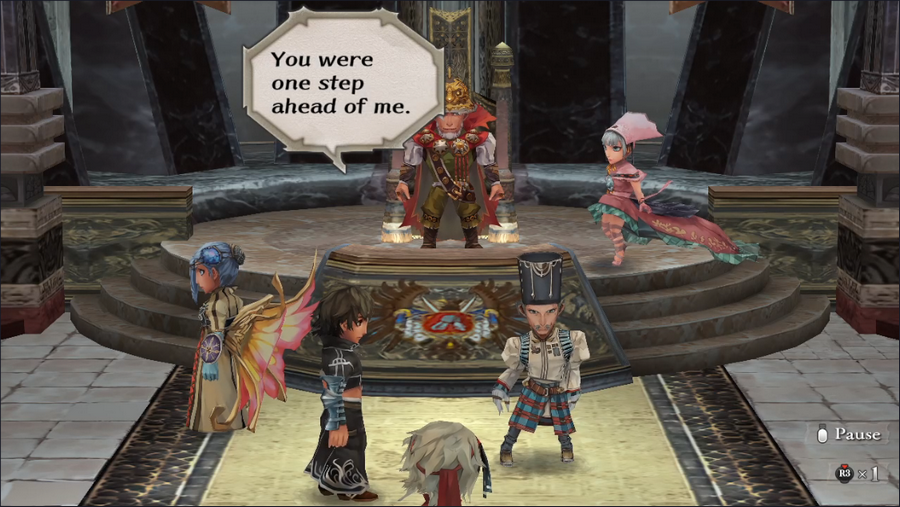 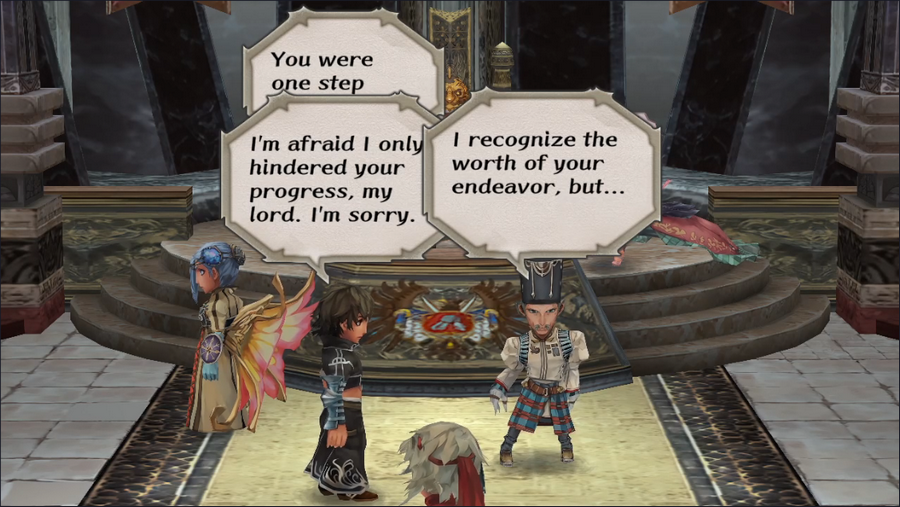 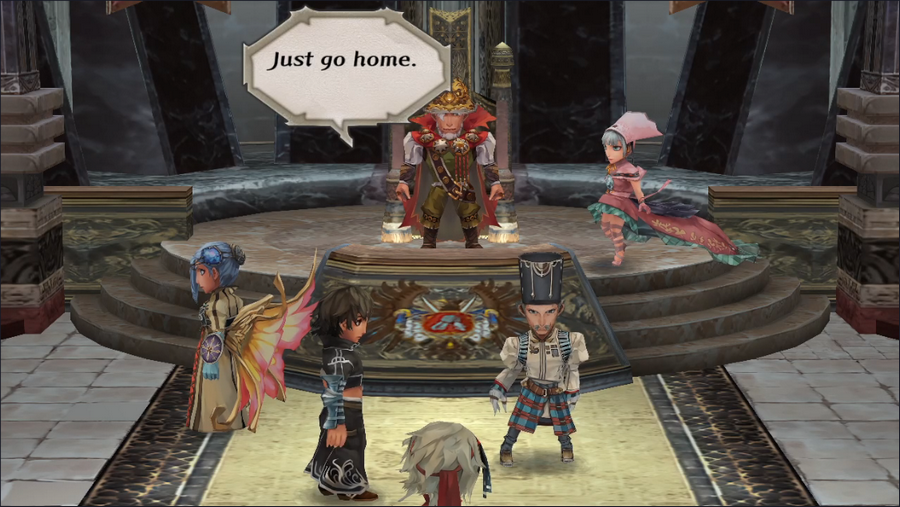 Doing this without Theodore and Raphael sours the mood, as we kind of made fools of them. 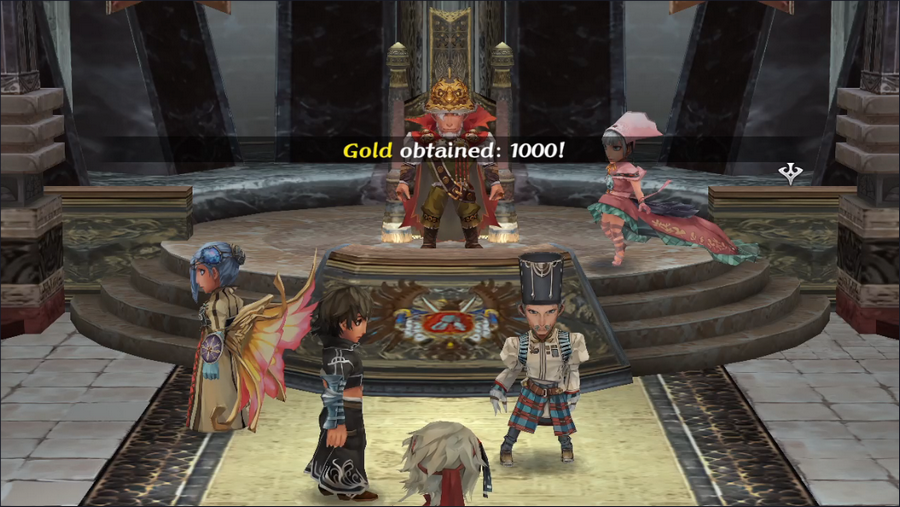  Luckily, we still get our reward, and this resolution won't affect our ability to interact with the Dominion in the future. 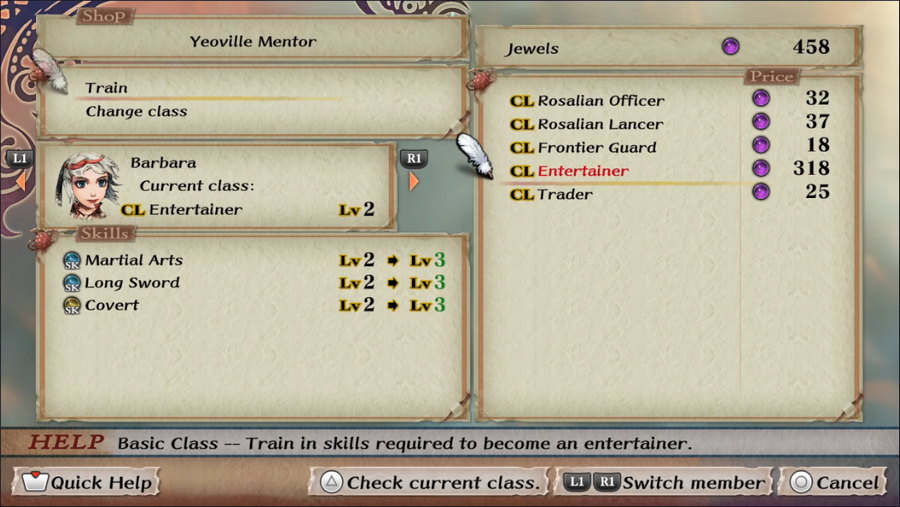 With the jewels we got from that quest, we can now upgrade Barbara to a level 3 Entertainer. This is an incredibly important upgrade, because:  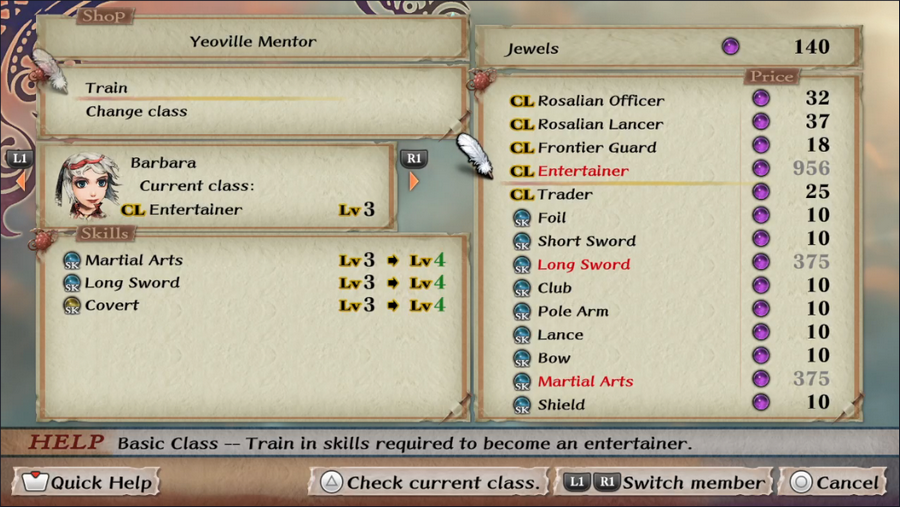 We're no longer restricted to buying skills as package deals. Doing do is more expensive than buying class levels whole cloth (notice that level 4 Entertainer is 956, while each skill is 375, which combines to 1125), but it's very useful for getting single skills that we need. (Also, note the cost to get to level 4 Entertainer. Don't expect to see that happen in this LP.) 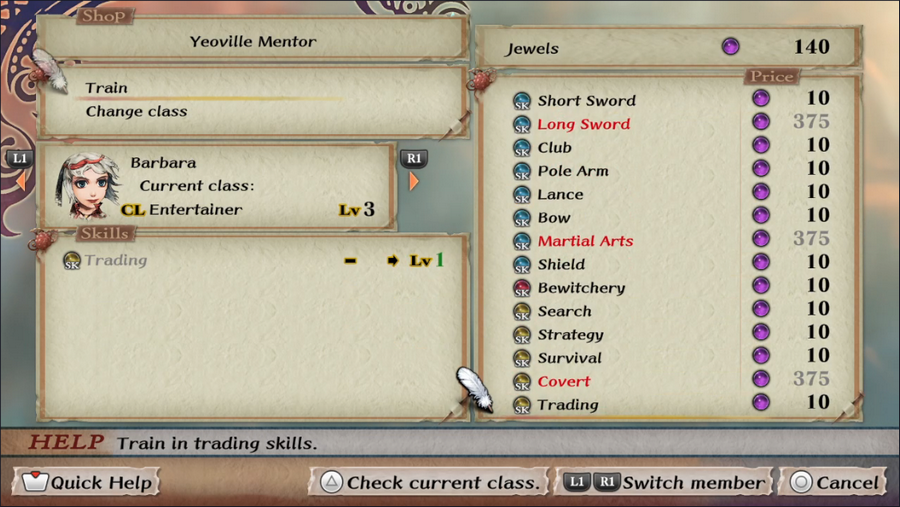 For example, Strategy and Survival. We can now make use of skills like Climb and Disarm Traps, so our activity options have opened up considerably. To keep our group rounded, Barbara focuses on Strategy while Diana will take levels in Survival. 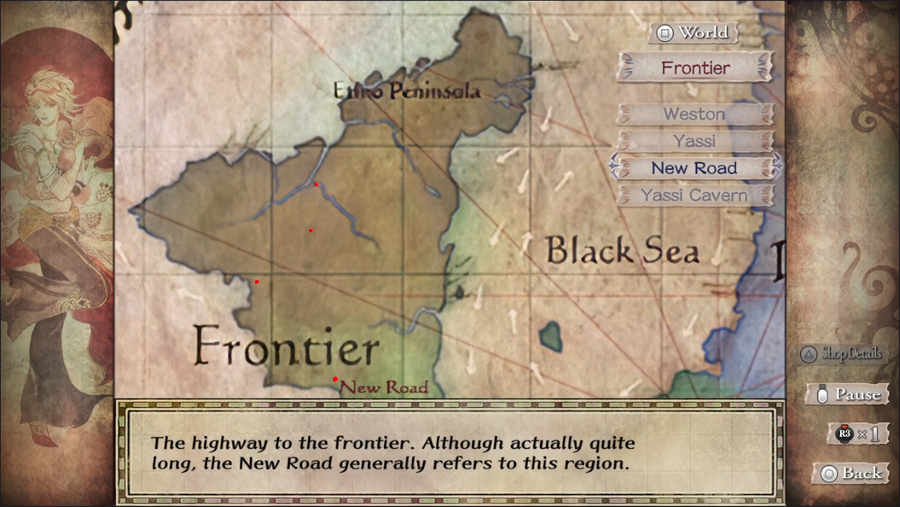 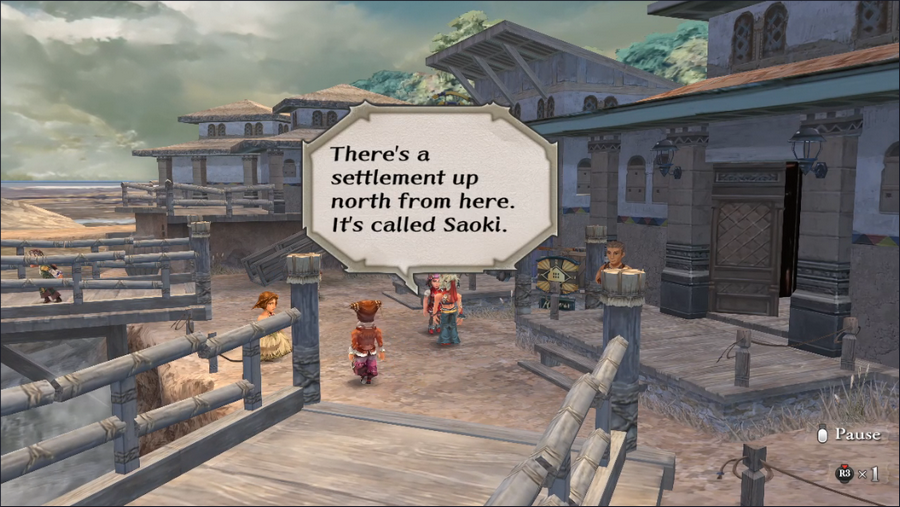 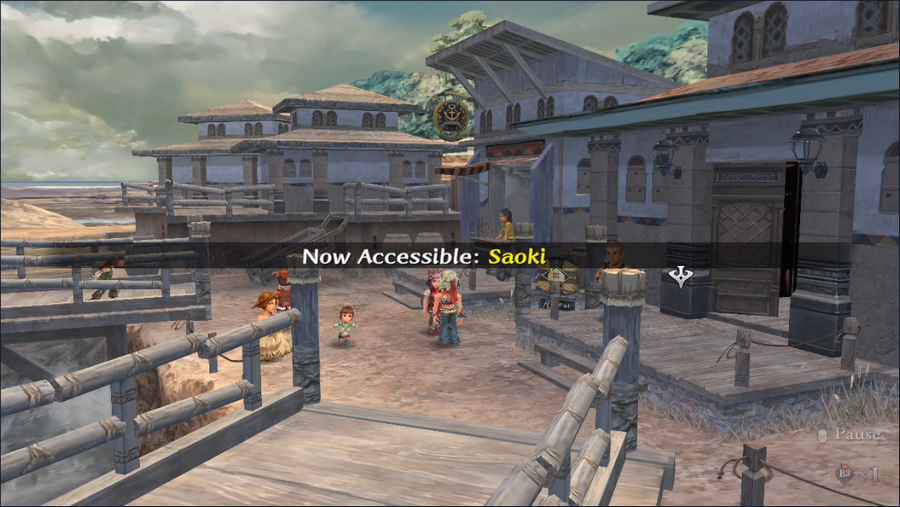 Besides buying skills, we're also going to take a quick trip to Weston, where a woman tells us about another settlement, Saoki. 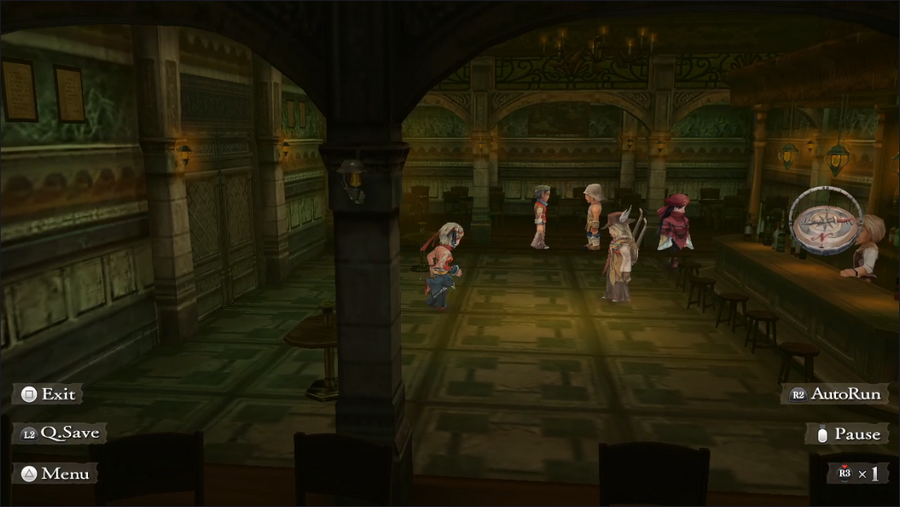 We also duck into the Weston pub, where we see a familiar face. 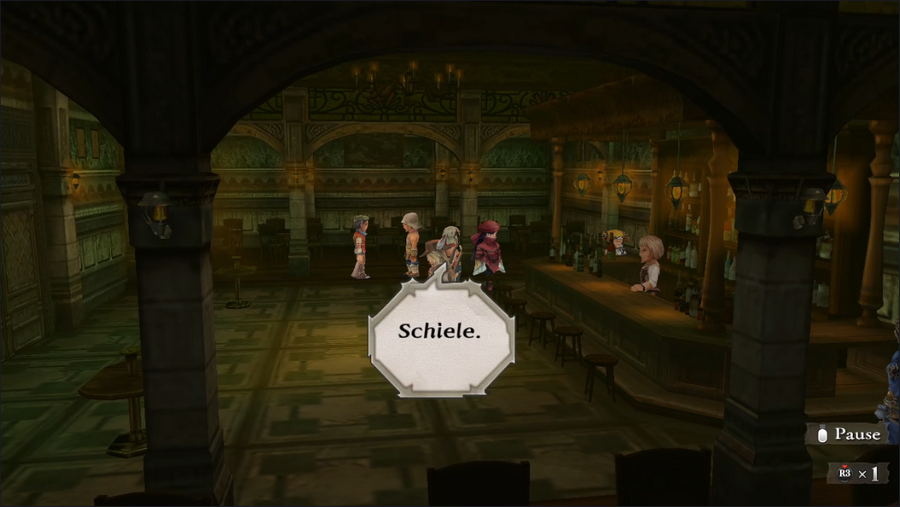 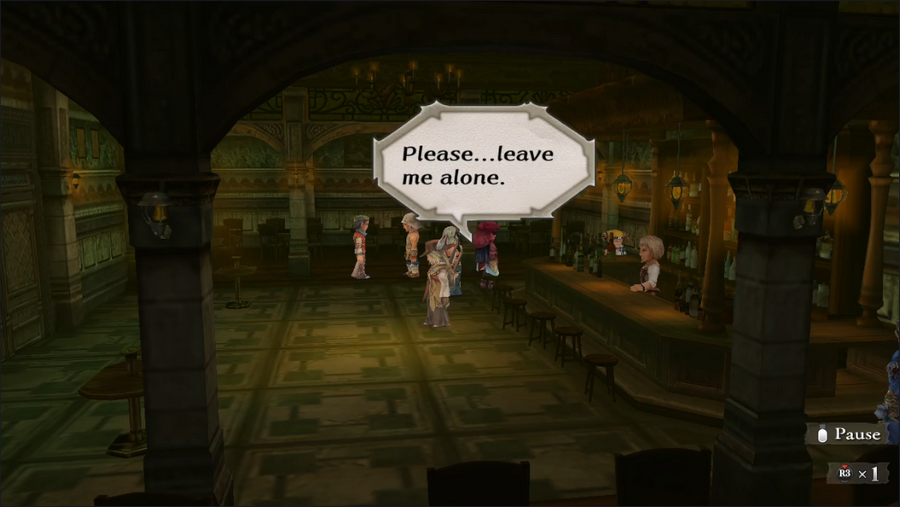 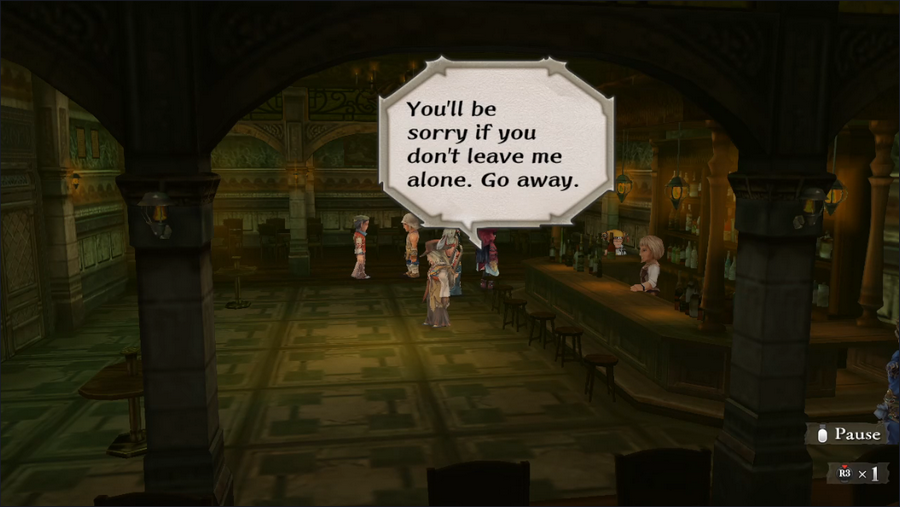 She still wants nothing to do with us. I wonder what her deal is? 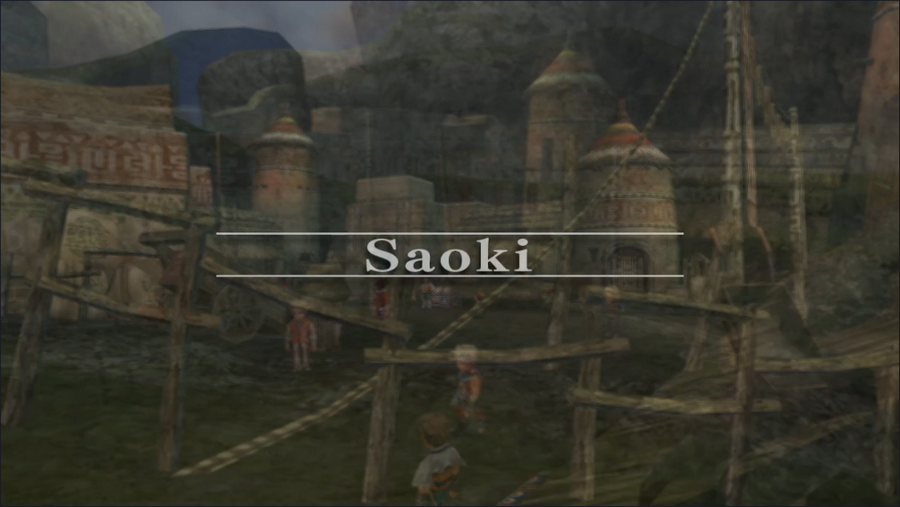 Leaving Weston, we head to Saoki, a tiny settlement without any shops or inns. It really just exists for one quest. 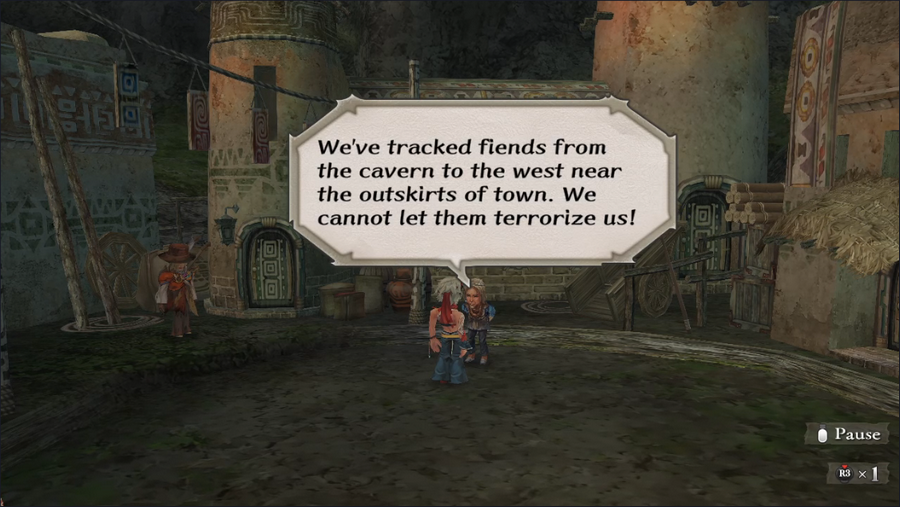 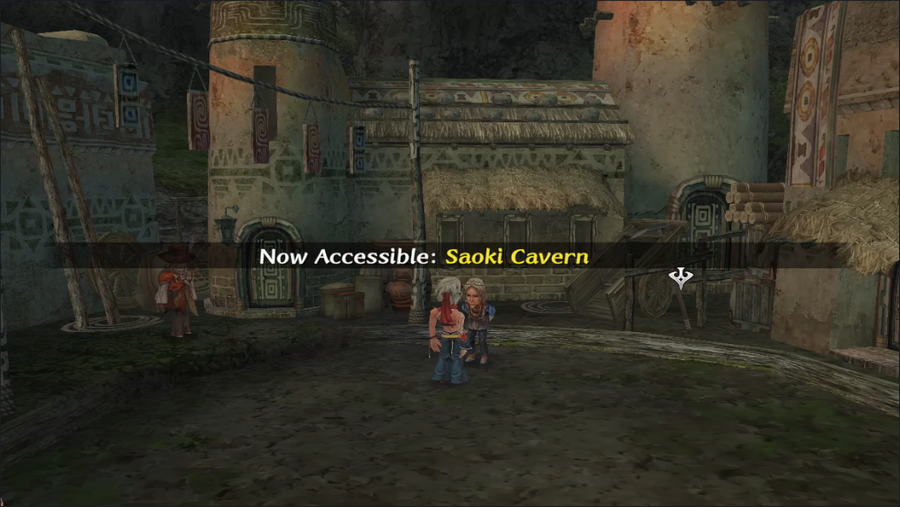 Specifically, this quest. 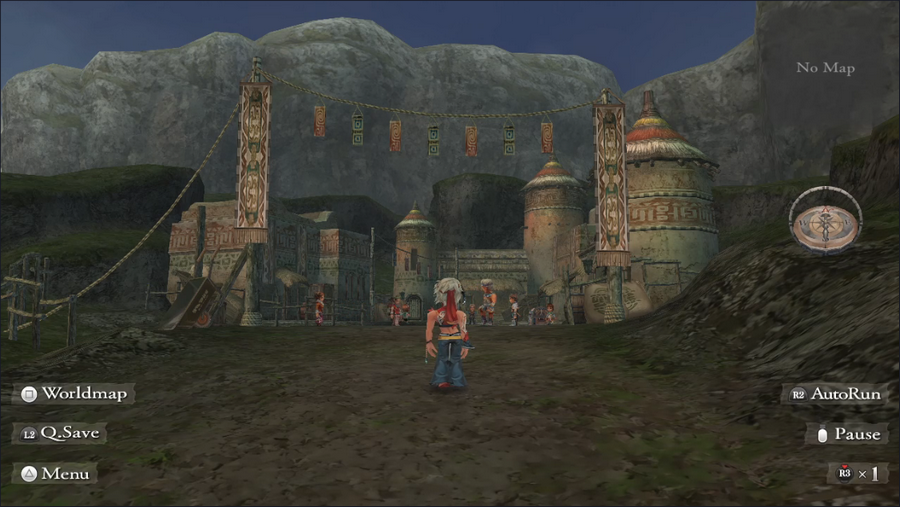 And that's it for today. As usual, feel free to vote on our next course of action, choosing up to three options. I've added Yassi Cavern to the list, since it's still available to be explored despite the associated quest expiring, as well as the Abandoned Keep, since we didn't explore it thoroughly. (This will be a trend in this LP - I'll typically beeline through quests as quickly as possibly to slow our ER increase, but you can always vote to revist them later for a more thorough search.) Current Event Rank: 4 Things to Do Retrieve the Aquamarine from Crystal Lake - We lack the means to do this Climb Mt. Scurve and steal a feather from the nest of the lord of the birds Kill the bugs in the Altours orchard Find Captain Silver's treasure Get the ancient scroll from Hawke Kill the fiends near Saoki Places to Explore Estamir sewers The remainder of the Geckling cave Melvir sewers Bayre Plateau Isthmus Keep, or what's left of it The Walon Isle jungle The Ligau caves - We lack the means to do this, at least to completion Mt. Scurve Crystal Lake - We likely lack the means to do this Yassi Cavern Abandoned Keep Treasure Maps Jungle, Level 1
|
|
#
?
Nov 13, 2023 05:11
|
|
|
Find Captain Silver's treasure Get the ancient scroll from Hawke Kill the fiends near Saoki
|
|
#
?
Nov 13, 2023 11:58
|
|
|
Kill the fiends near Saoki Isthmus Keep, or what's left of it Abandoned Keep
|
|
#
?
Nov 13, 2023 14:44
|
|
|
1. Climb Mt. Scurve and steal a feather from the nest of the lord of the birds 2. Kill the fiends near Saoki 3. Isthmus Keep, or what's left of it
|
|
#
?
Nov 14, 2023 07:54
|
|
|
Kill fiends steal feather Yo Hawke how about that treasure
|
|
#
?
Nov 14, 2023 21:33
|
|
|
Voting is now closed.
|
|
#
?
Nov 17, 2023 05:09
|
|
|
Welcome back, everyone. It seems that everyone's interested in seeing Saoki saved from its fiend problem, so we're headed off to Saoki Cavern.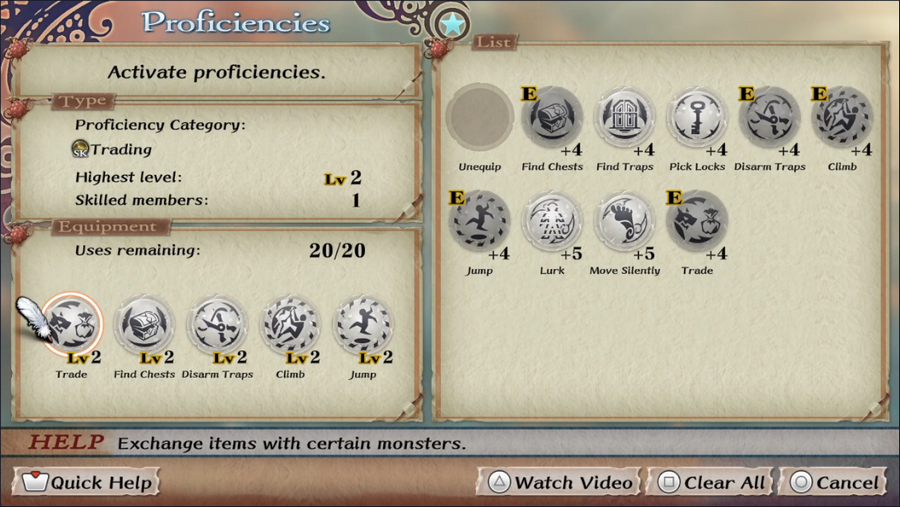 Before we go, we'll need to adjust our proficiencies a bit. This setup should work nicely. Knowing what a dungeon will require definitely helps, but even if you don't, Climb, Jump, and Disarm Traps are generally good picks. 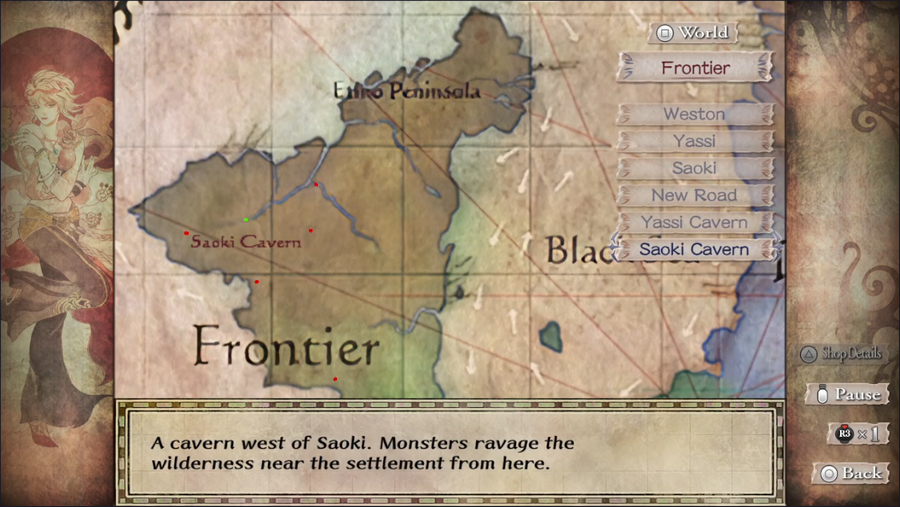 Since we're already in the Frontier, we can head right to Saoki Cavern.  It would admittedly be nice if the maroon font didn't blend in with the Frontier's brown land color, but we know where we're going. 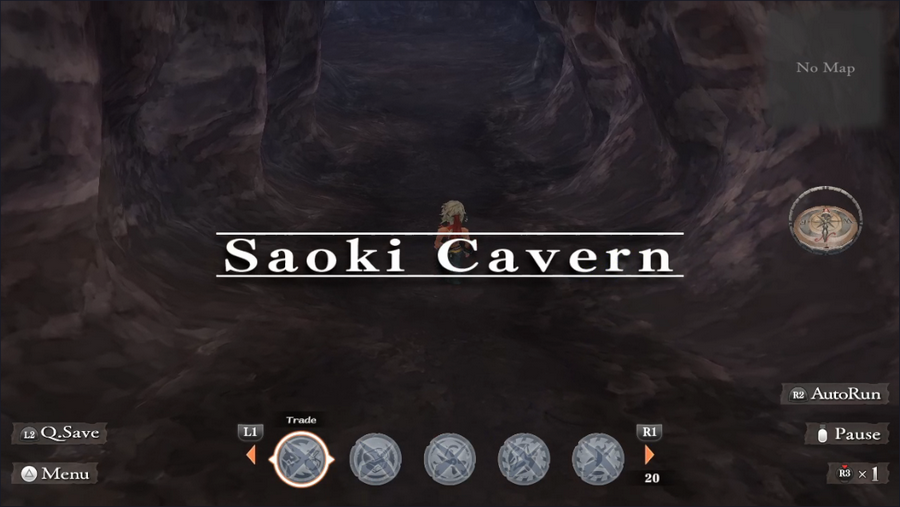 And so we're here. Saoki Cavern isn't an especially long dungeon, but it's well-designed and uses the game's mechanics to create interesting setups. 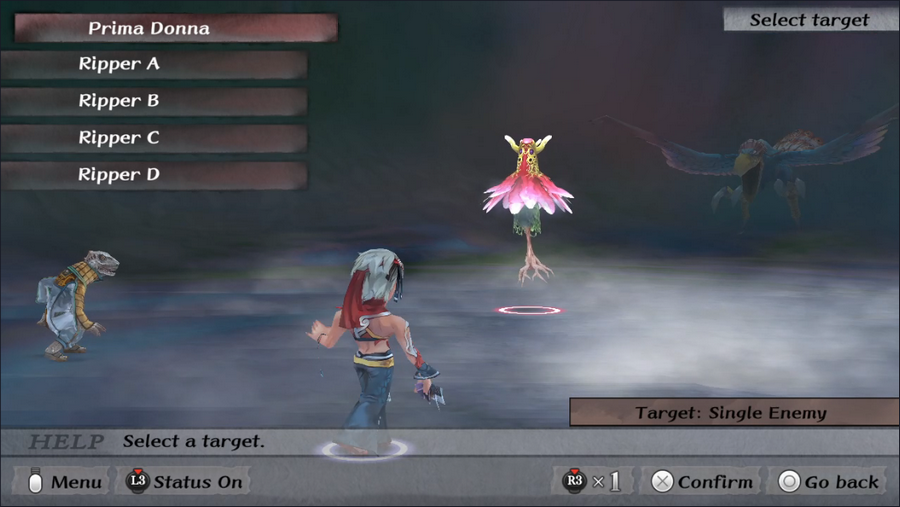 We encounter a handful of new monsters in this dungeon, so before we get into the cave itself, let's talk about the opposition. Prima Donnas are floating plants whose favorite attack inflicts Snare. They also have a non-damaging attack that inflicts Fear on the whole party. Fear has about a 50% chance to cause an afflicted character to not act during a combat round, which is super annoying. 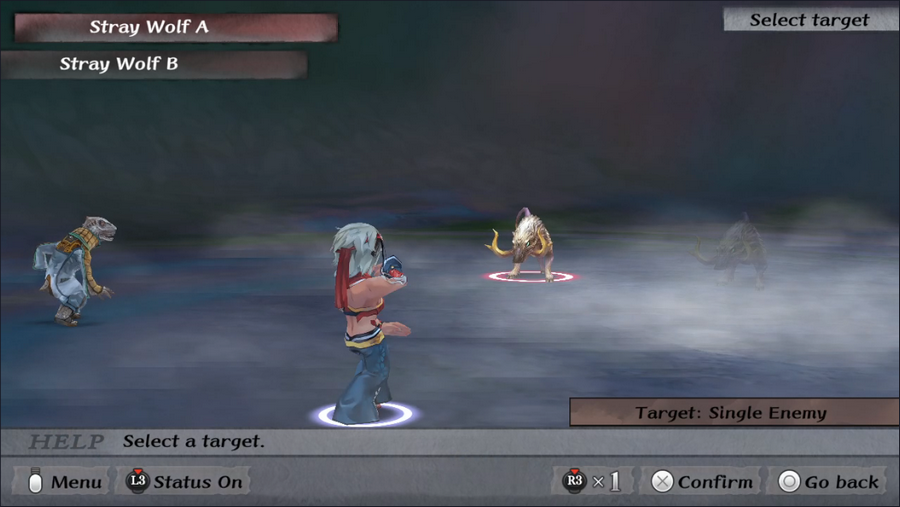 Stray Wolves we've seen before, but now they're showing up as regular enemies. They sometimes use an attack that lowers a character's Agility, but they're not too dangerous. 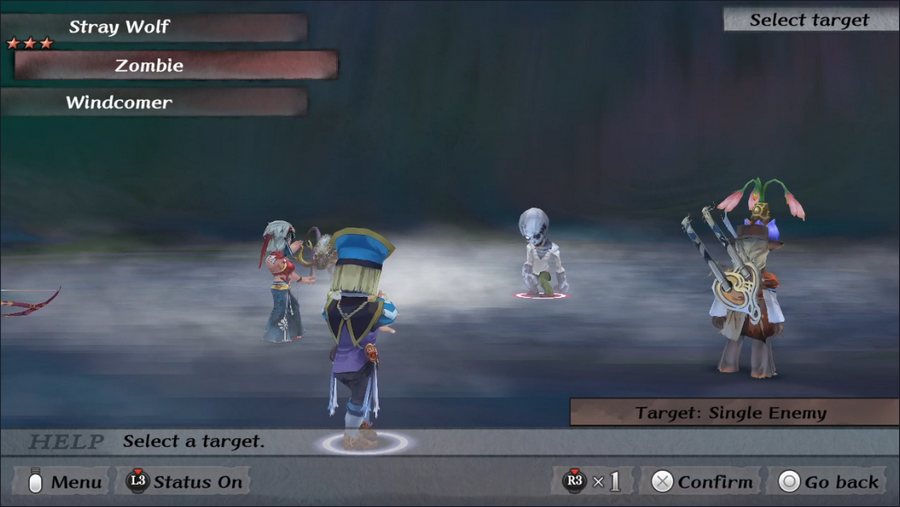 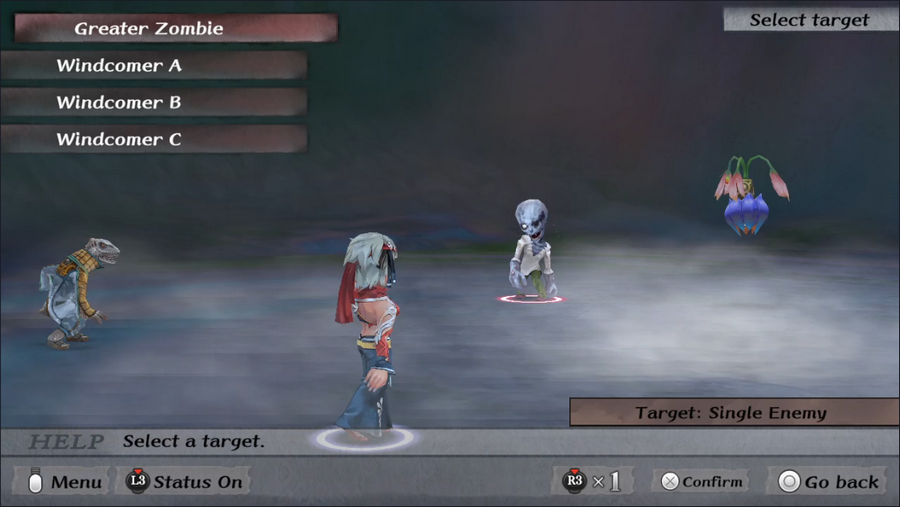 Zombies and their Greater counterparts look and act essentially the same. Greater Zombies have a bit more HP and attack power, but aren't a significantly greater threat.  Finally, near the end of the dungeon, we run into a Man-mushroom. (Please, no jokes.) I believe these critters are Battle Rank 3, which means we'll likely be seeing more new enemies in the next update.  As for the dungeon itself, it almost immediately shows us its gimmick, as the path splits past the first room.   Heading left, we come to a climbable wall, which we ascend. Had we headed right, we'd instead have ended up in a mini-boss fight. Having Survival proficiencies lets us take shortcuts through the dungeon and avoid encounters, as well as collect bonus treasures. 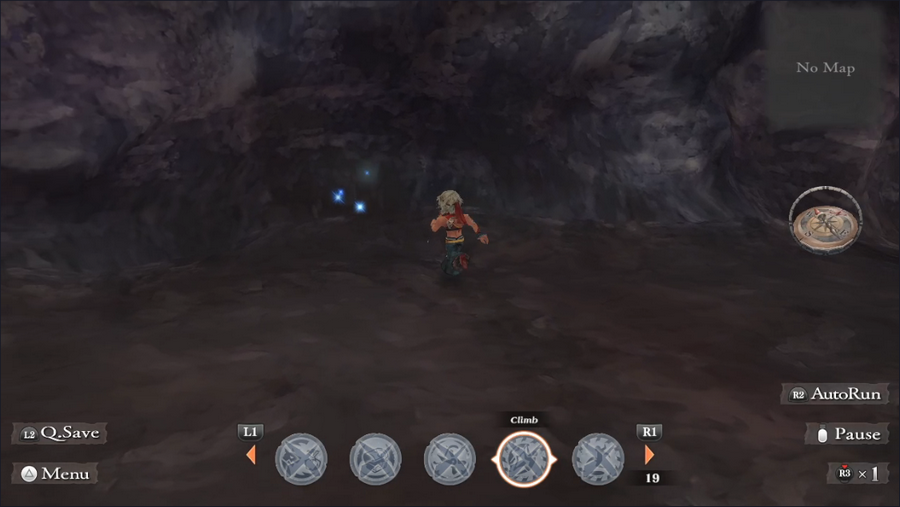 Just atop the climb point, we find some sparkles indicating a hidden object. Since we don't get a message, we can assume we don't have the necessary proficiency equipped to reveal them. (This being a cave, they're most likely mining points.) 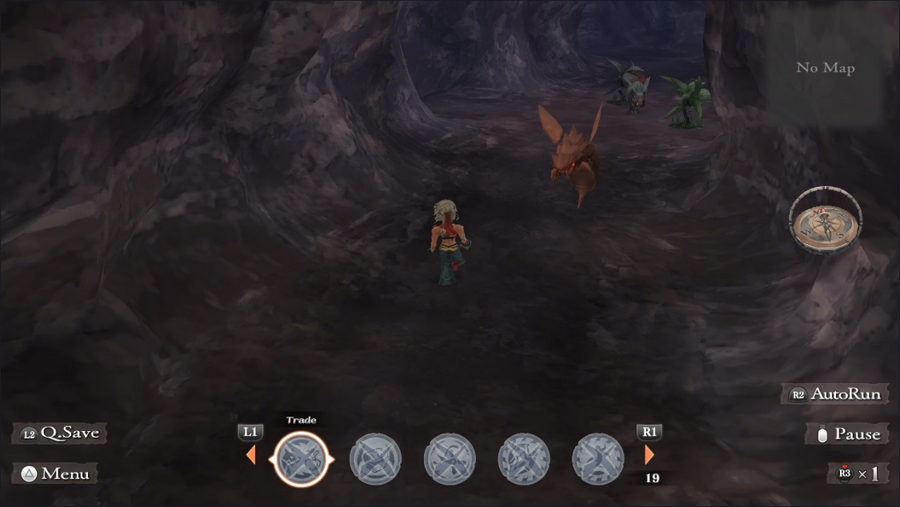 Past that is a four-way split. We could go straight for a bit of extra treasure, but we'll turn left instead.  That path leads us down to the next level. 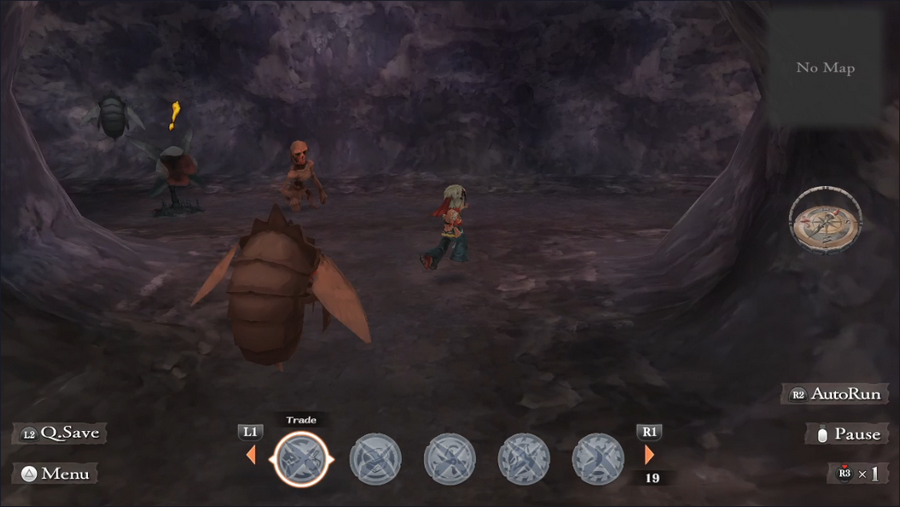 Another split path. We definitely can't avoid all these fights.   That's okay though, as one of them drops another treasure map! The Plains of Ligau are open and easy to reach, so we could knock this one out quickly if you all want to do it.   Past the monsters, we come to a giant hole in the ground. 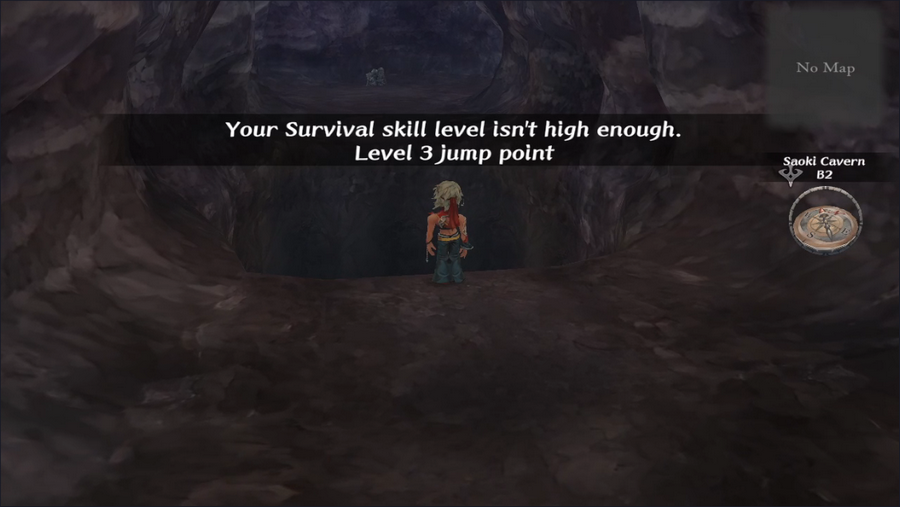 Unfortunately, we can't actually cross it, as our Survival is only level 2. It's impossible to tell the level of a Jump or Climb point visually, so this was our only way to find out. Looks like we'll have to fight the mini-boss on this floor. 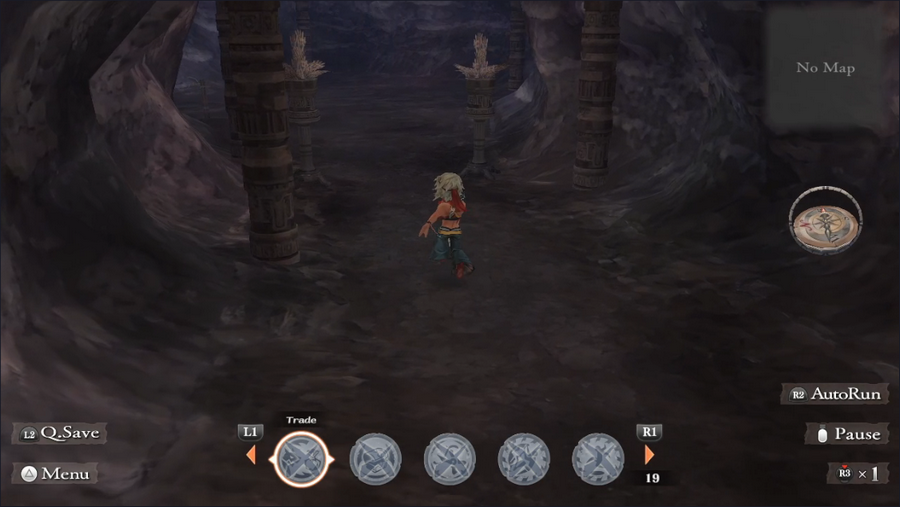 Sure enough, as we take the other path from the fork, we come to a very obvious encounter area. 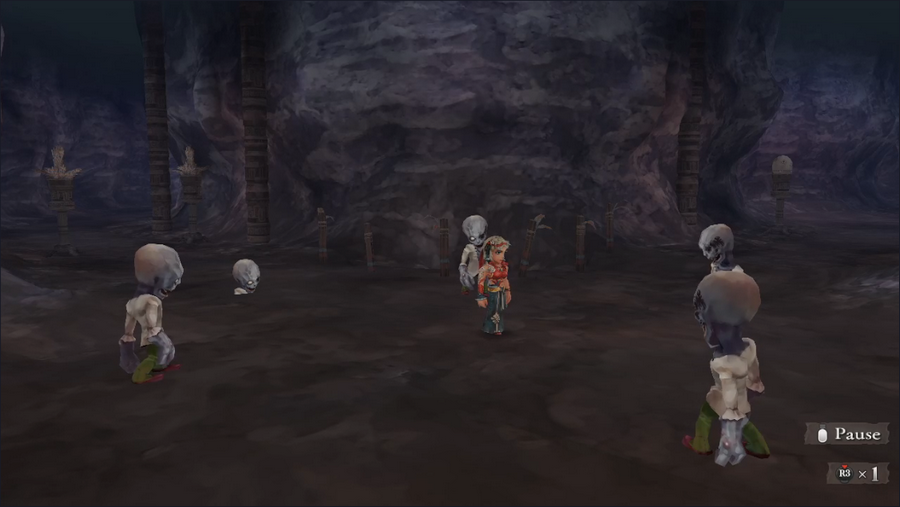 As we enter the chamber beyond, a quintet of zombies rises from the ground to fight us. 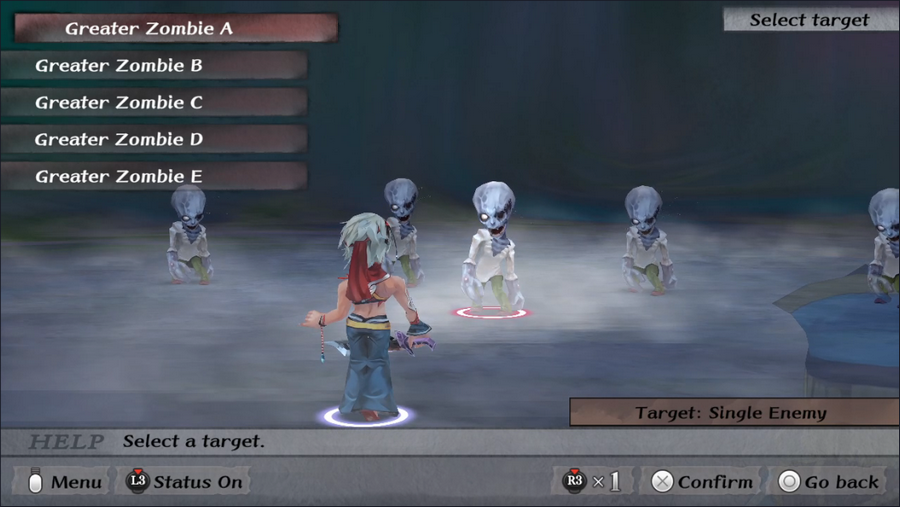 The game plays boss music for this, but I'm not inclined to provide a video. 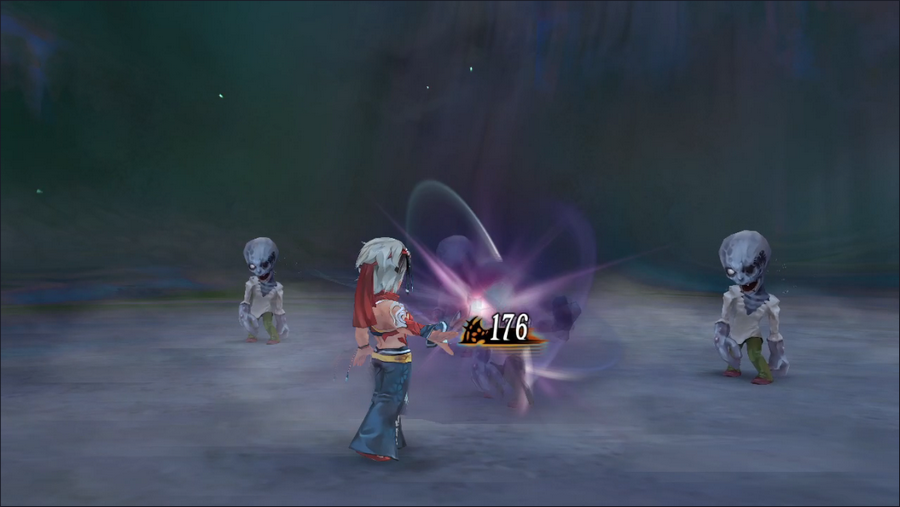 Greater zombies are still pretty weak and can be dropped in one or two hits each. 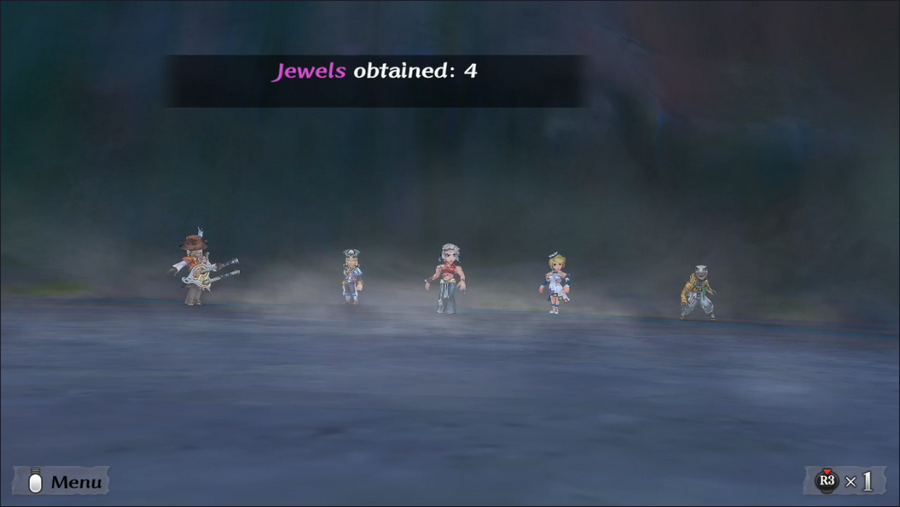 We were able to win in two rounds with no casualties. Moving on. 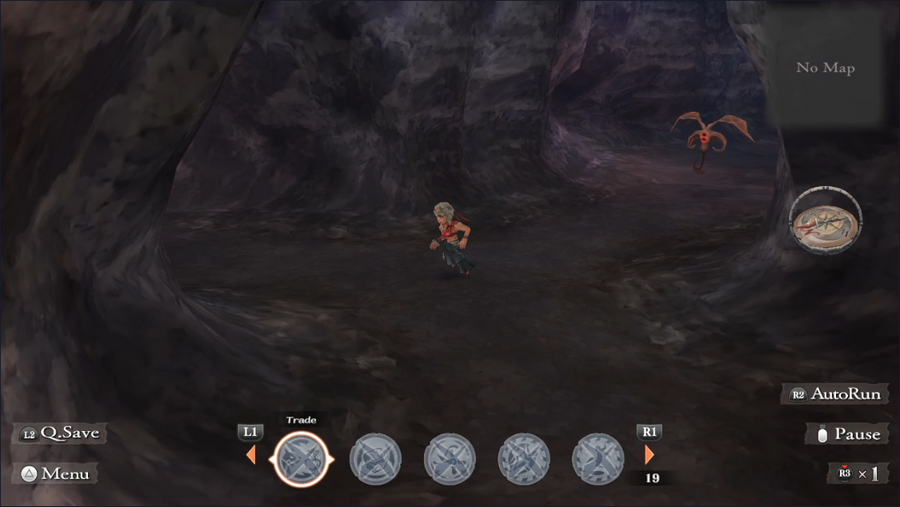 Past the zombie room is another split. 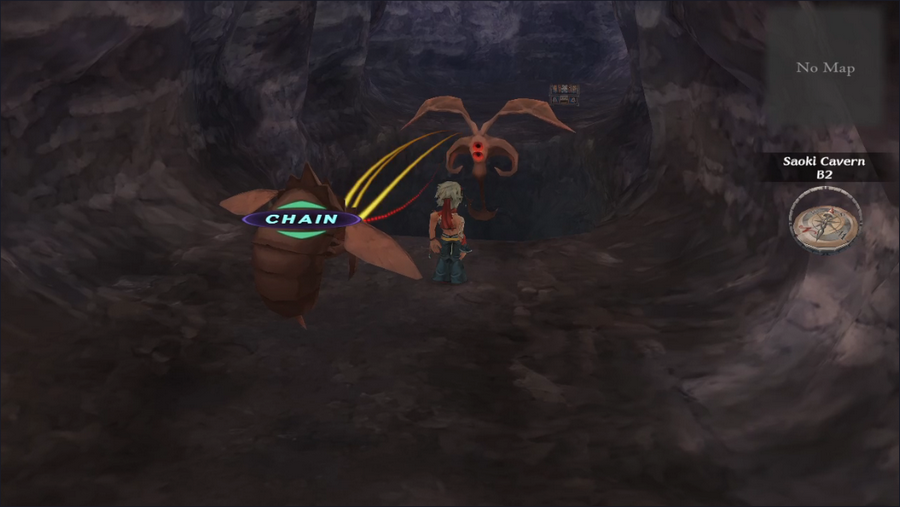 We approach a pit protected by monsters and get our first look at another of the game's mechanics: chain battles. These randomly occur when a battle starts against a monster group that is near other monster groups. 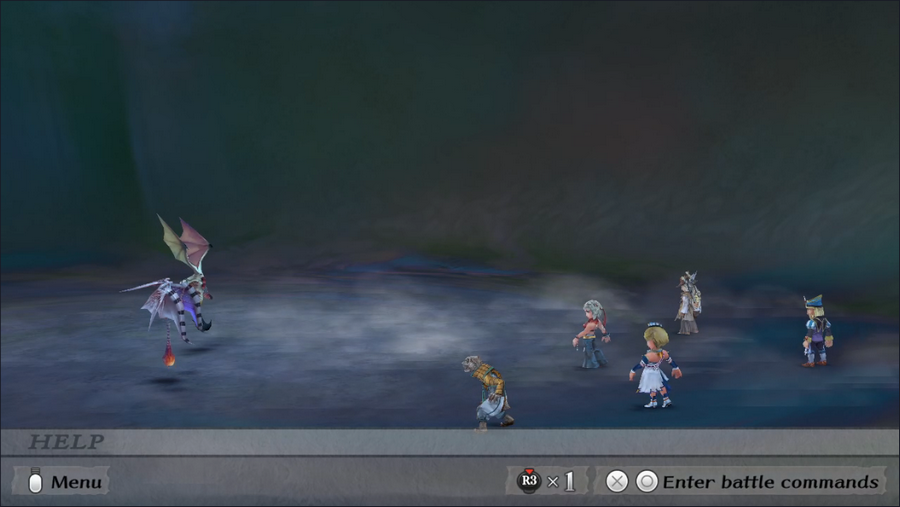 The fight starts normally against the demon's group.  However, upon winning, we don't get any victory fanfare, and the screen whites out. 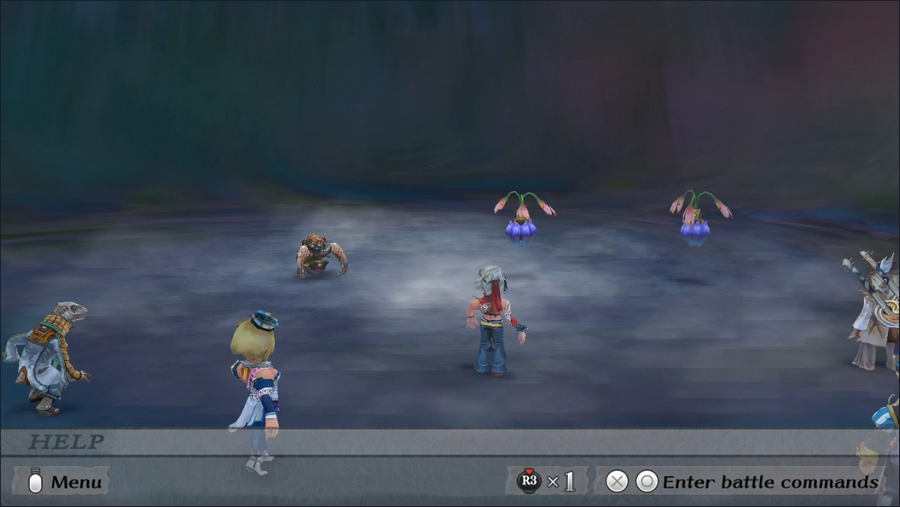 When it comes back, we've got a new group of monsters breathing down our necks. HP and BP carry over between chained battles, which can actually be a benefit if the early fight is easy and lets us save BP for the later battles. 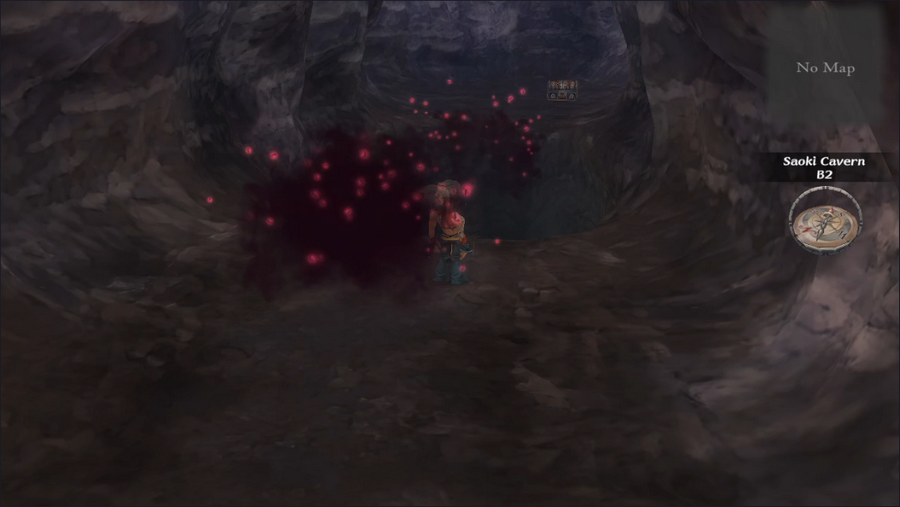 Afterward, both monster groups disappear as normal. 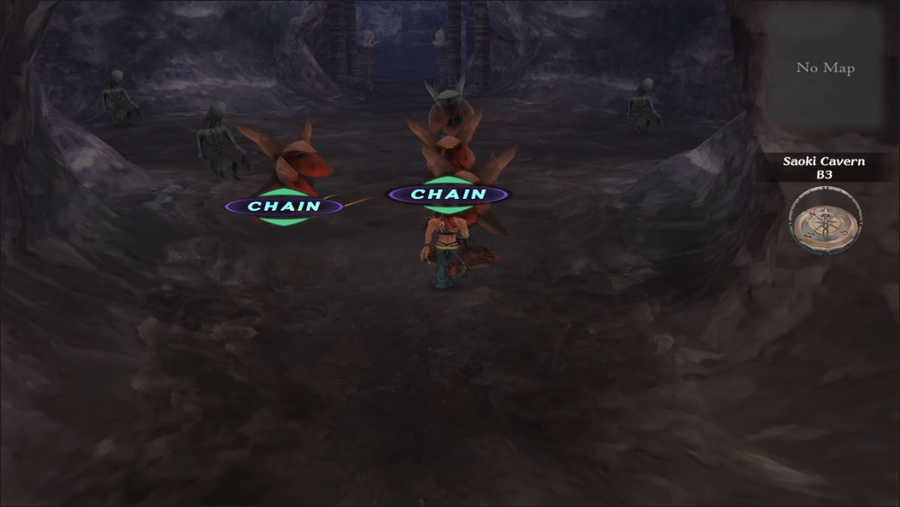 Chains aren't limited to two fights either: I believe they can go as high as five. 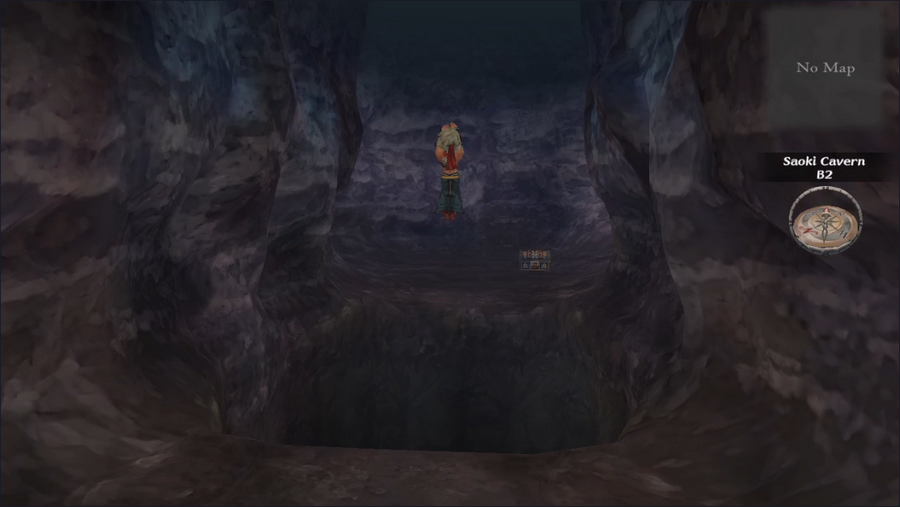 In any case, we jump the pit successfully and find a chest, plus a second one we have to reveal with Find Chests. 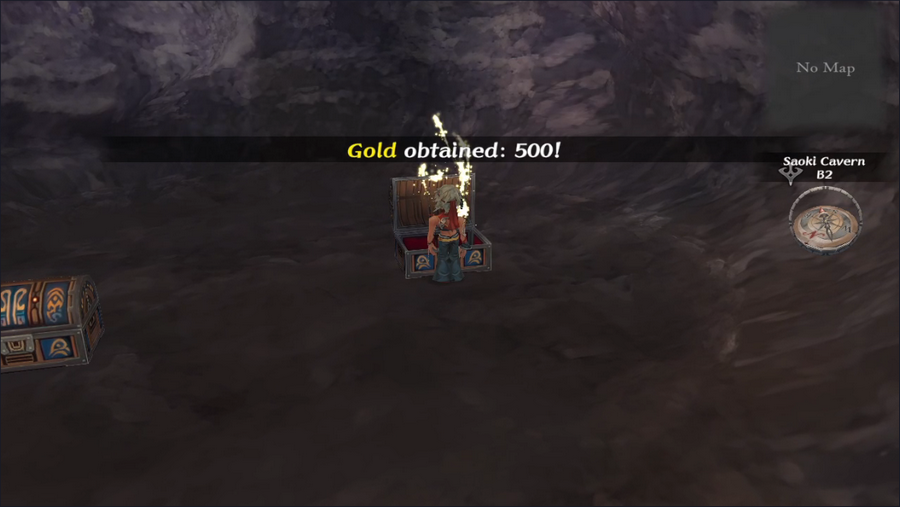 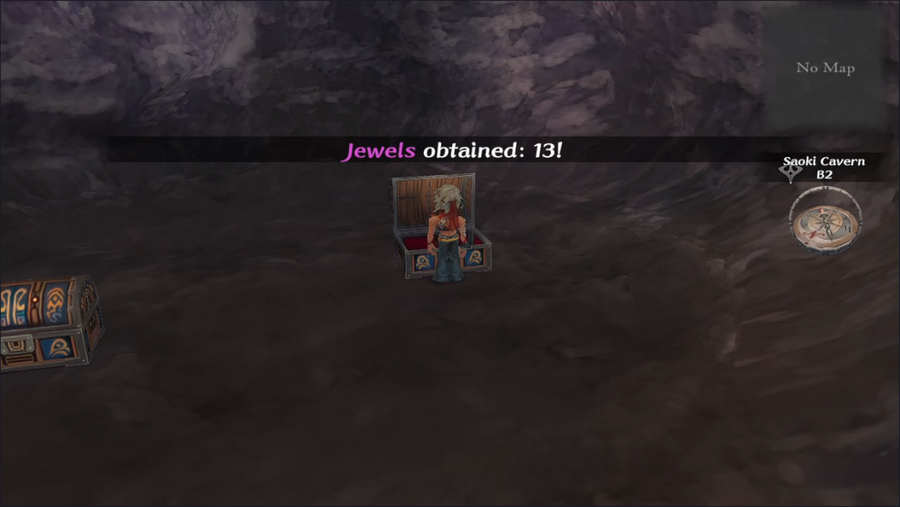 The first chest contains some gold and jewels. Not bad.  The second, we are warned, is trapped.  Not triggering Explosive traps is always good.  Ditto for Ambushes. Yes, chests can have multiple traps. For three proficiency uses, this one should have something good.      A little further on, we run into a demon that wants to trade. Unfortunately, we have nothing it wants, so it refuses our offer. It still disappears though, and without costing a proficiency use, so that was worthwhile.  We continue on and find the path leading further down.  We're greeted on the new floor by a room full of monsters. The room itself has path leading left and right, plus an obvious boss room straight ahead.  To the right is another Climb point we can't use. 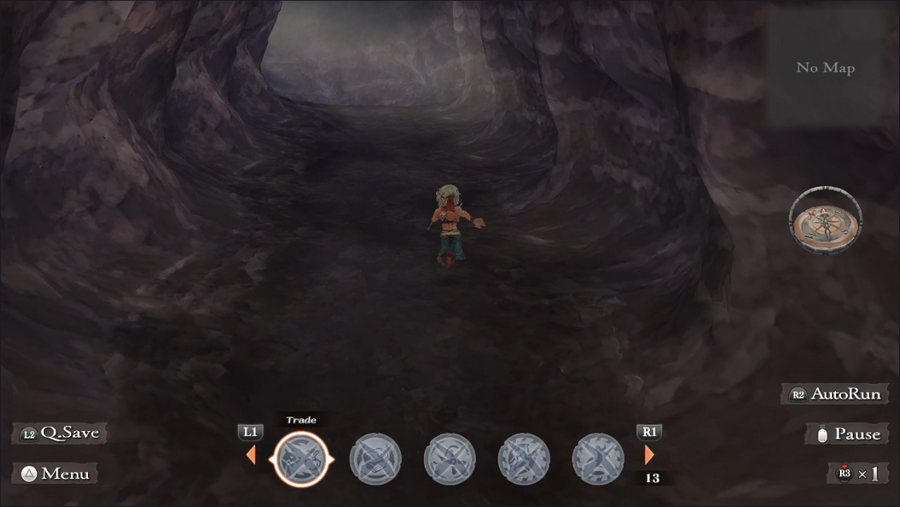 To the left, a ramp leading up into sunlight. This is obviously the exit, which we don't want to take yet. 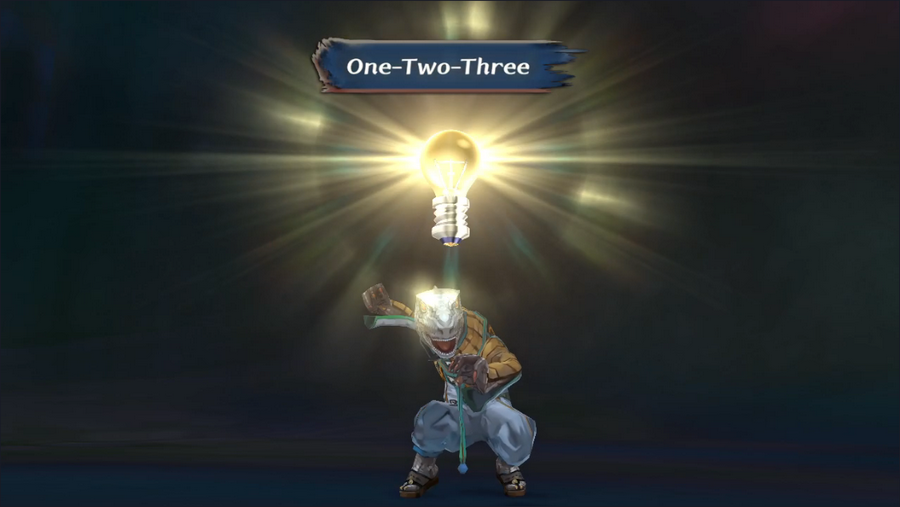 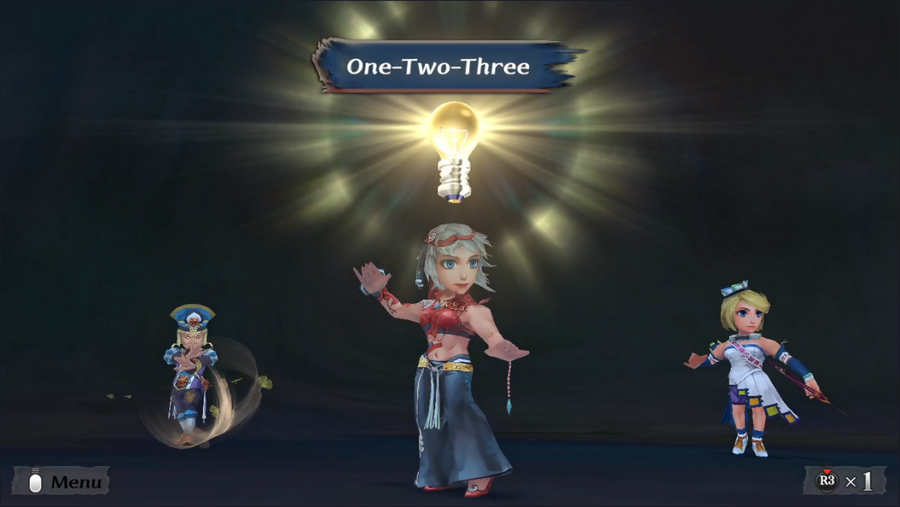 Before we talk about the boss, let's talk about Glimmers. We got a lot of them in this dungeon! For starters, we got One-Two-Three for both Barbara and Guella Ha. You might remember Dowd getting this back in Jamil's intro. This will make martial arts viable for everyday fights for both of them. 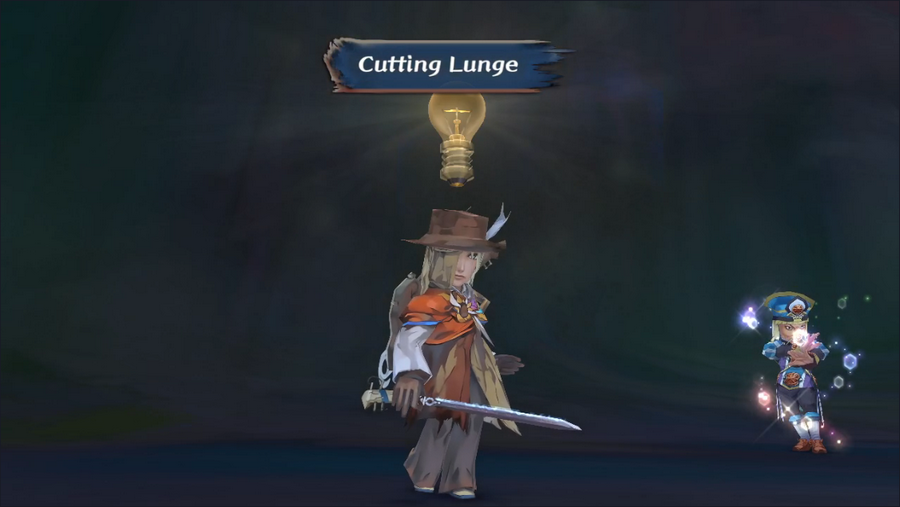 The Minstrel also Glimmers a technique we've seen before, Cutting Lunge. 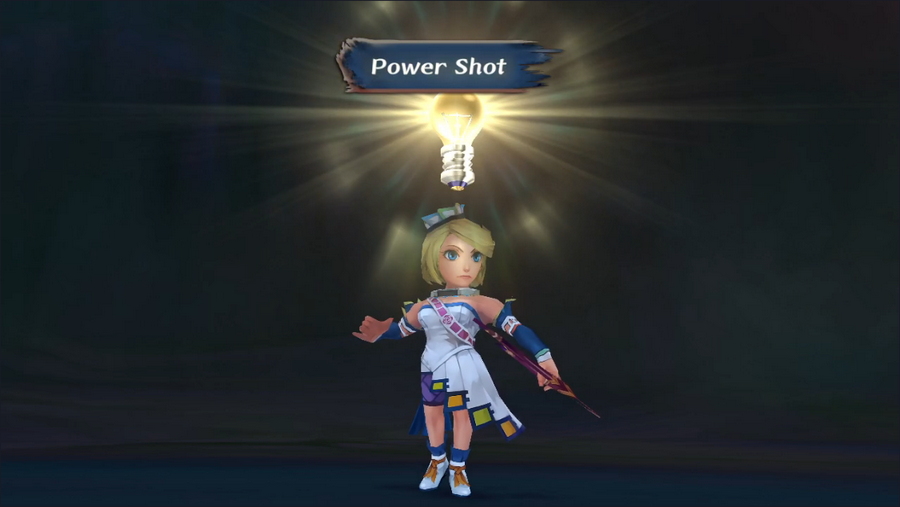 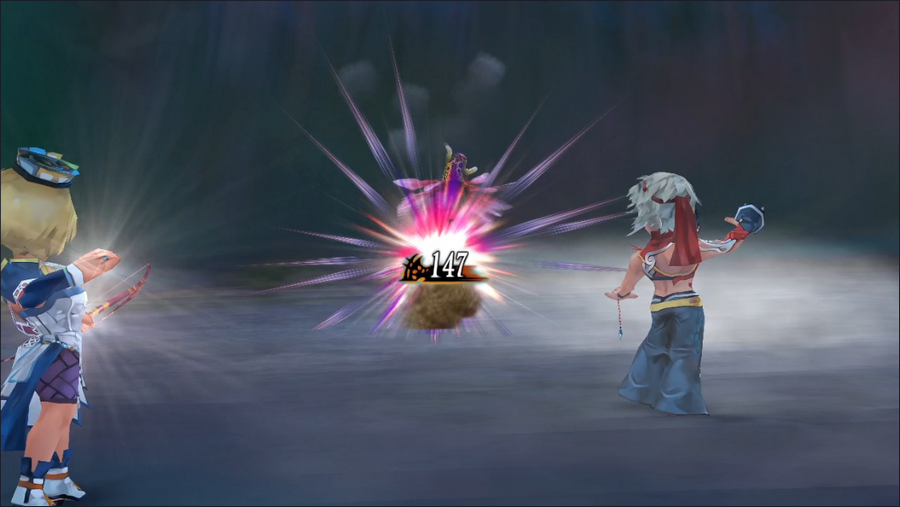 Diana gets Power Shot, a straightforward damage-dealing attack with no special traits. 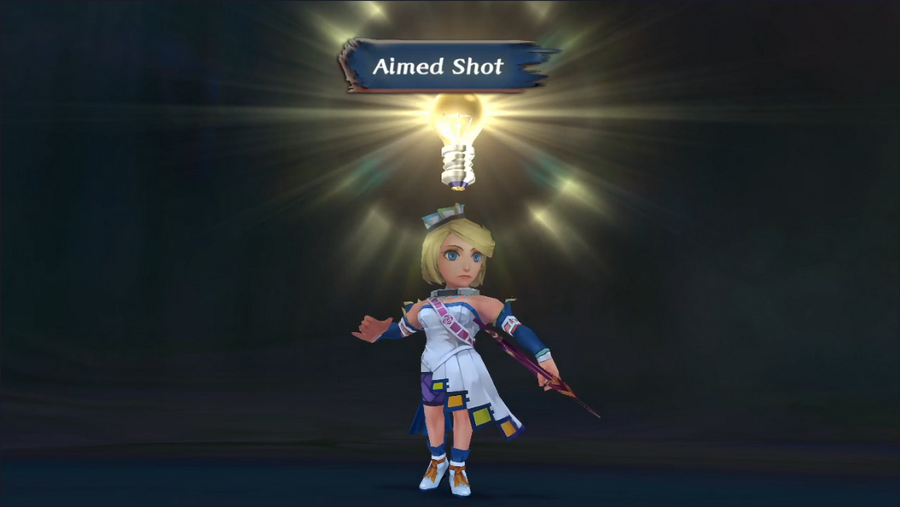 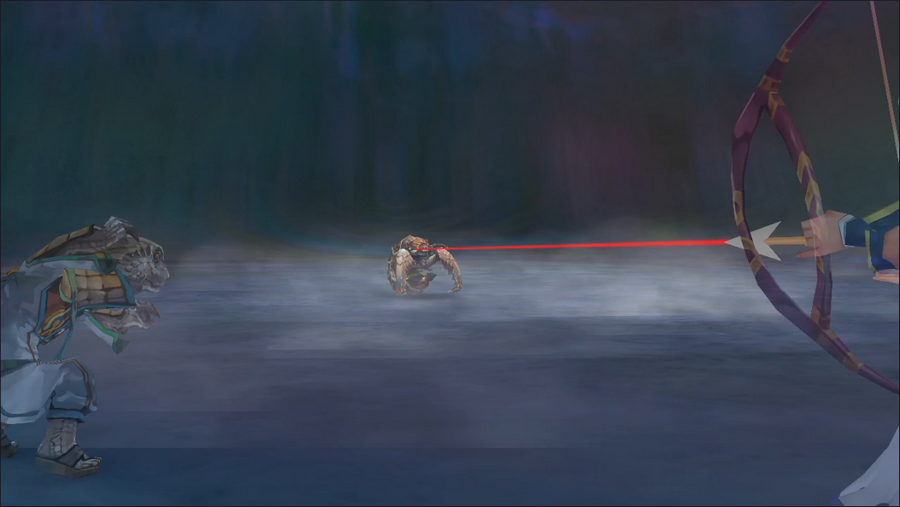 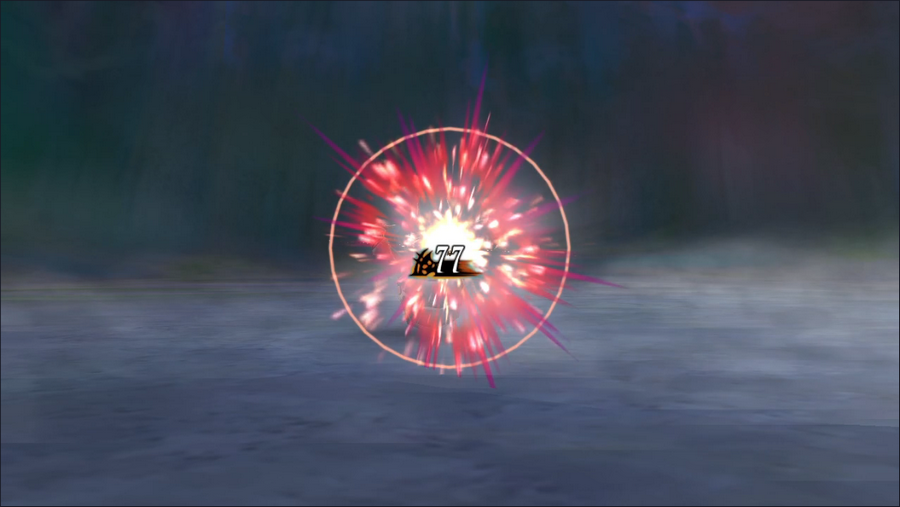 She also gets Aimed Shot, which gives her bow a laser sight. It's very silly. 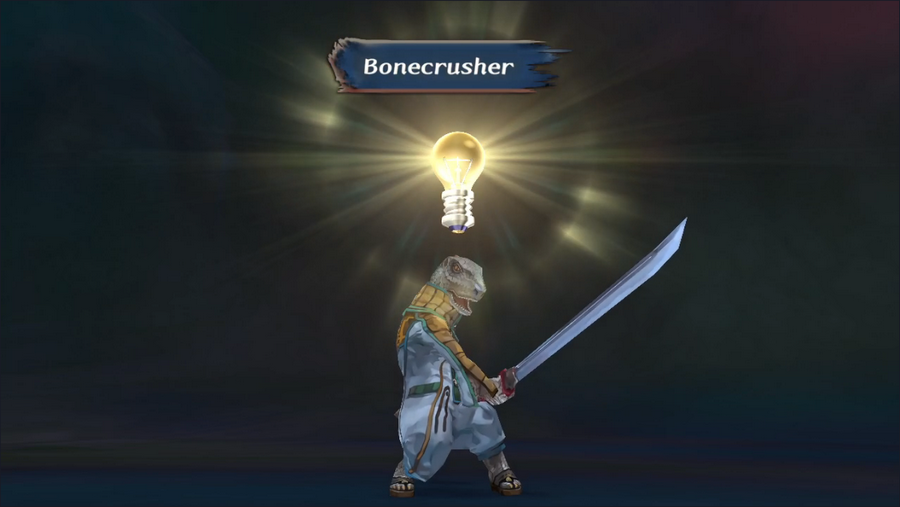 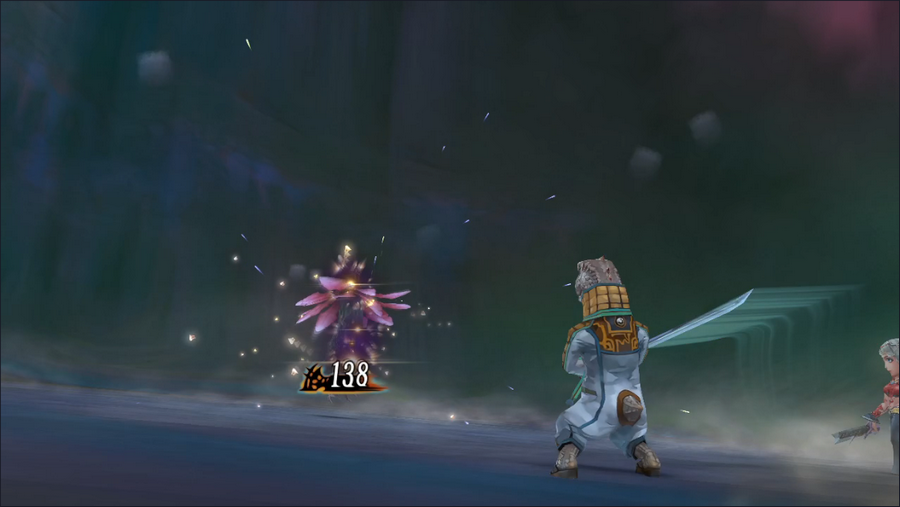 And finally, Guella Ha manages to Glimmer Bonecrusher, a decently powerful attack that has a chance to lower the target's Strength. This is potentially very useful for certain boss fights. 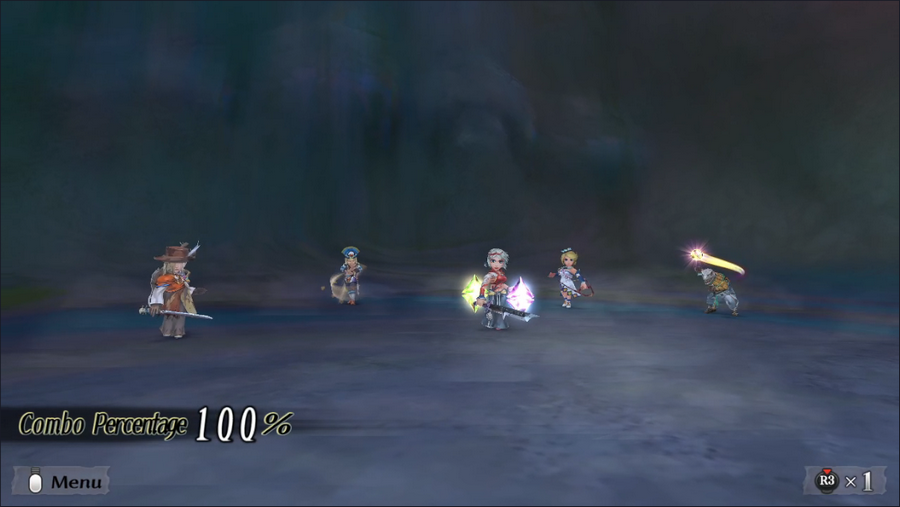 Just one more fight before the boss and... Hey, what are those weird lights?  SaGa Frontier players probably recognize this mechanic. Combinations appear at random, and only with techniques. (Basic attacks like Hew can't combo.)   They give us some fancy visual effects...  ...and a truckload of damage. Since this was a two-character combo that scored a kill, the poor Man-mushroom loses 2 LP. For monsters, this doesn't really make a difference (they're dead regardless), but party members taken out by combos also lose extra LP - and that's quite likely to happen thanks to all the damage they're taking. Luckily, the passive ability for Barbara's Entertainer class makes it harder for monsters to perform combos.  But enough talk about game mechanics, let's kill the boss.  As we enter the chamber, three winged creatures approach us.  We don't know who these "Minions" are, but the capital M suggests they're important.   Like the Greater Zombie fight, this battle against three Butterflies is technically a boss fight but not worth making a fuss over.  The Butterflies' main attack is Scale, which deals passable damage over an area, potentially hitting two or three characters. 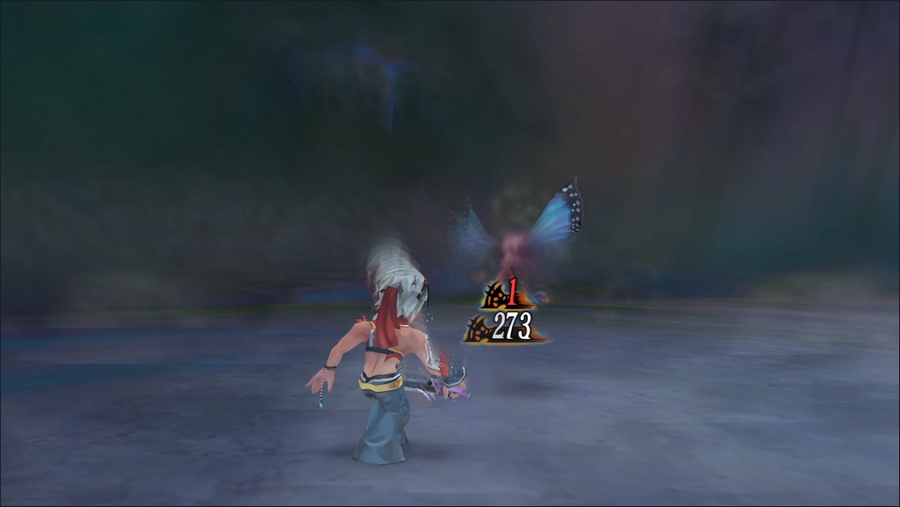 They're not very tough, however, and all three go down on round one. 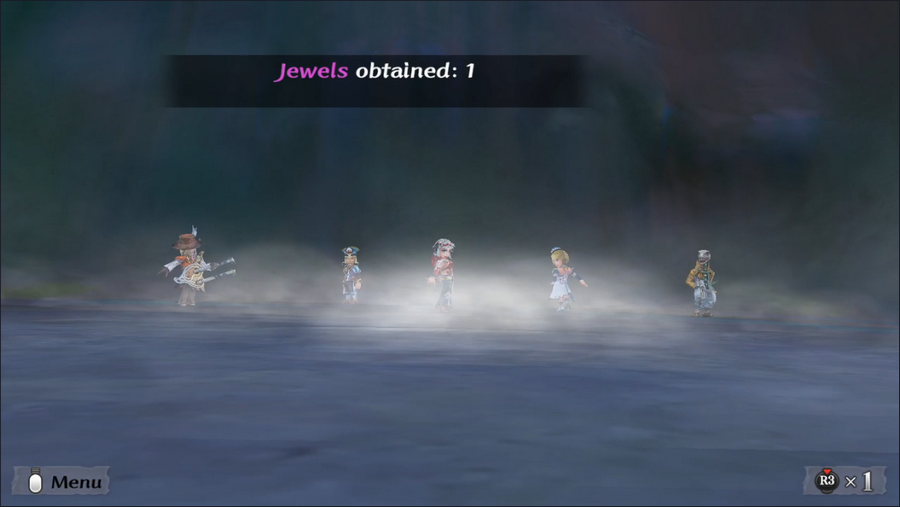 All in all, this was zero trouble. 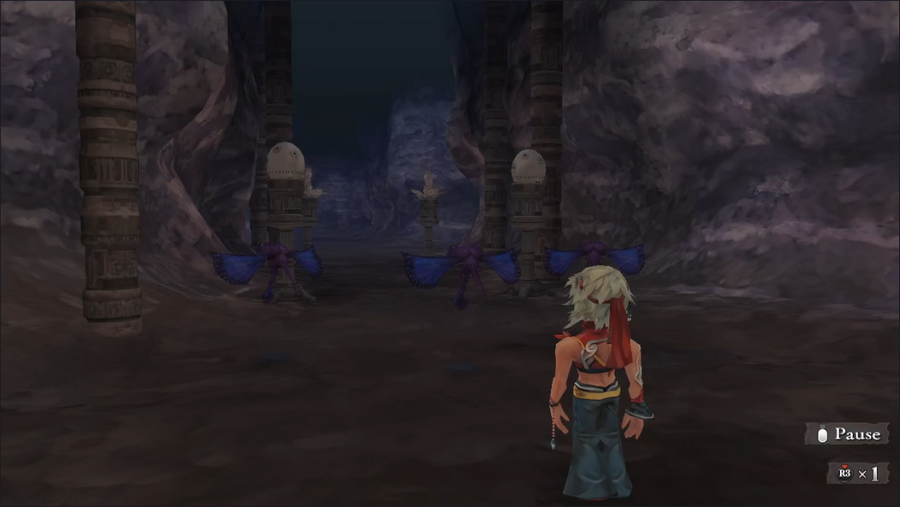 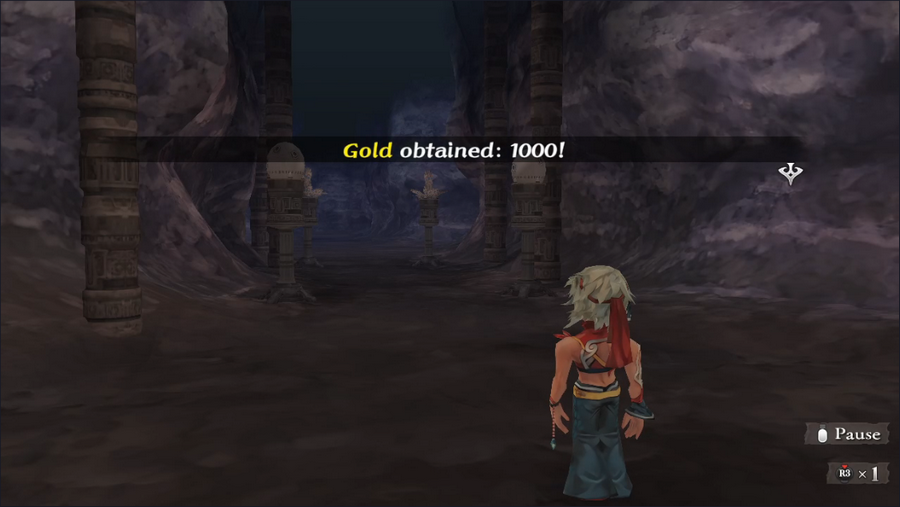  As the Butterflies fade away, the quest completes, giving us our coveted gold and jewel rewards.  Now we can leave.  Back in Saoki, the mayor has some new dialogue, but offers no further rewards.  Our Event Rank climbed significantly during that quest, so let's head back out from the Frontier and check out some new quest opportunities.  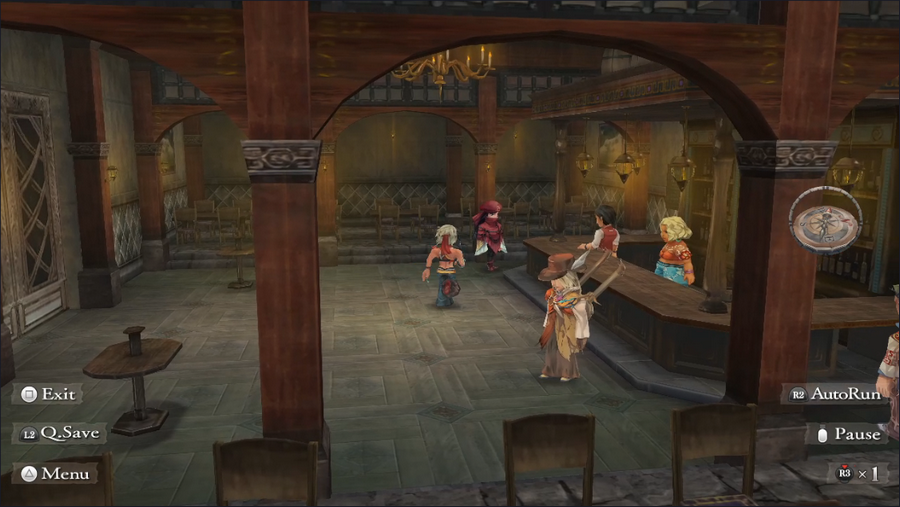 In the South Estamir pub, we find a familiar face. 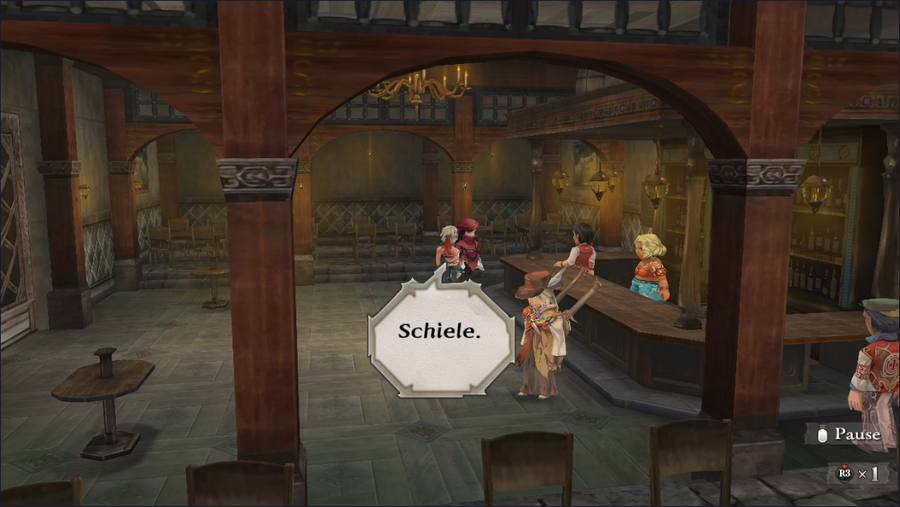 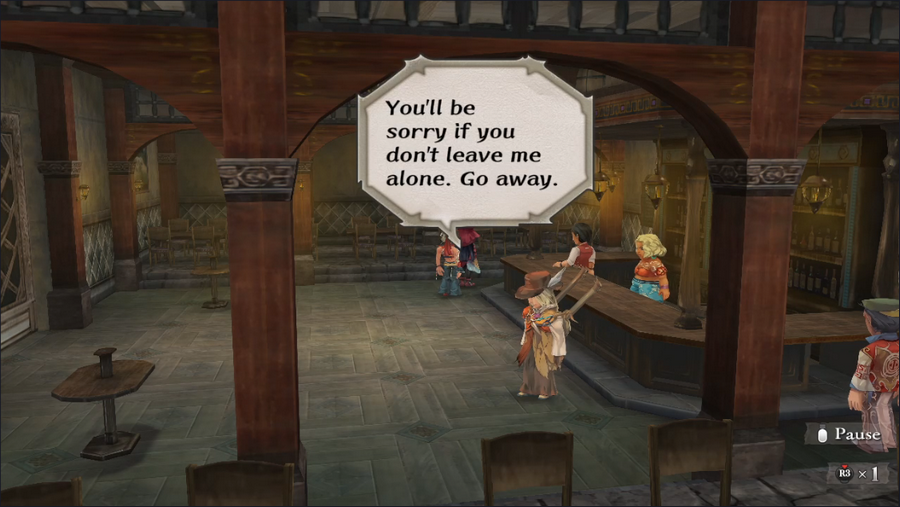 She still won't talk to us. 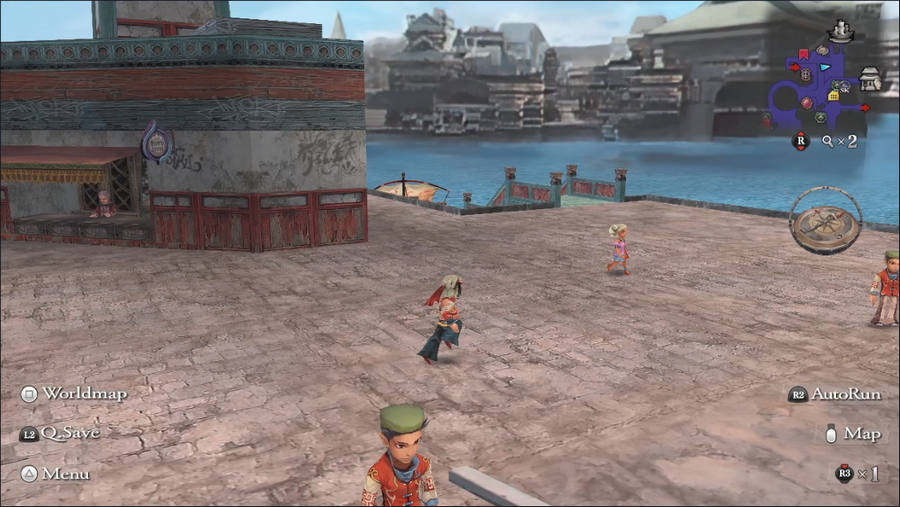 Down near the docks, a young girl is walking around. She actually appears in most port cities, and always stands out thanks to her bright hair and clothing.  This young lady is voiced by Stephanie Sheh, whose voice you probably know if you play dubbed video games or watch anime.  So... a mermaid?   Stealing relics from a temple in a world where the gods are definitely real seems like a terrible idea. 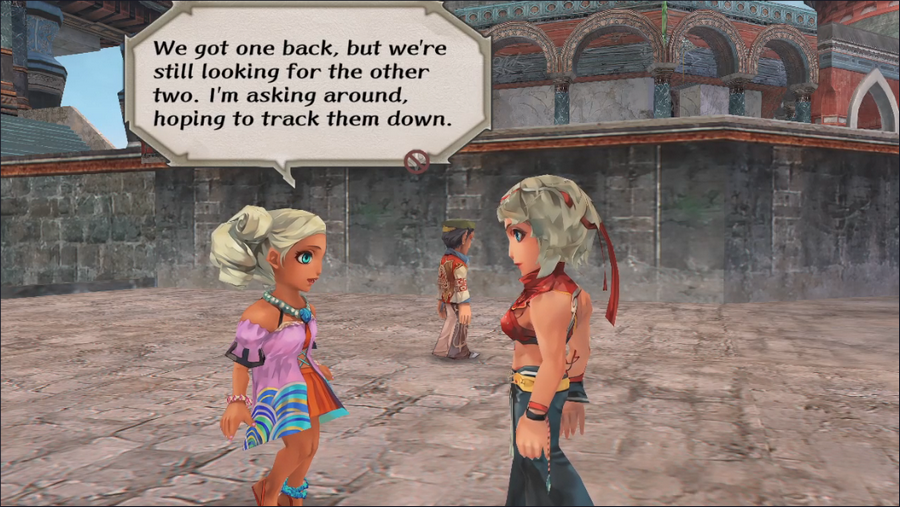 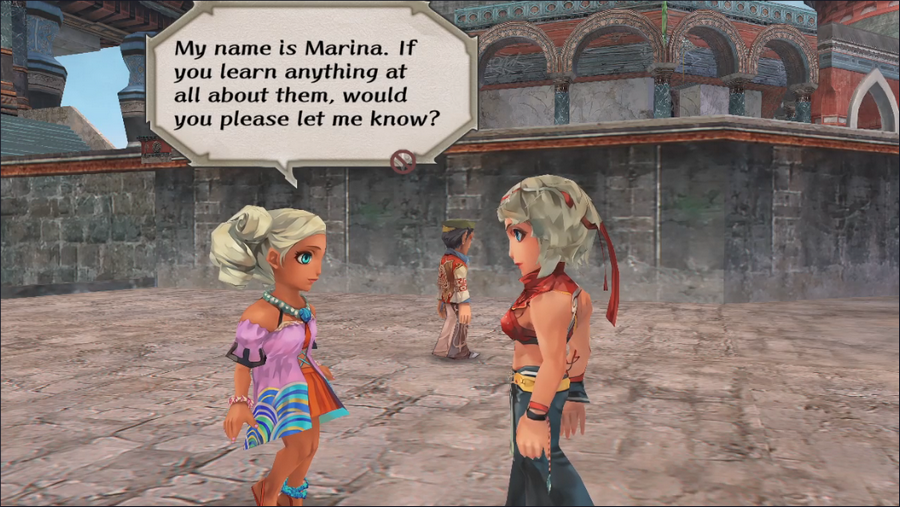 We can do that, but unfortunately, we have no further leads. We can't do anything for Marina now, but perhaps something will come along.  Next, we head off to Aurefont, where we find a guy standing around near the shops. 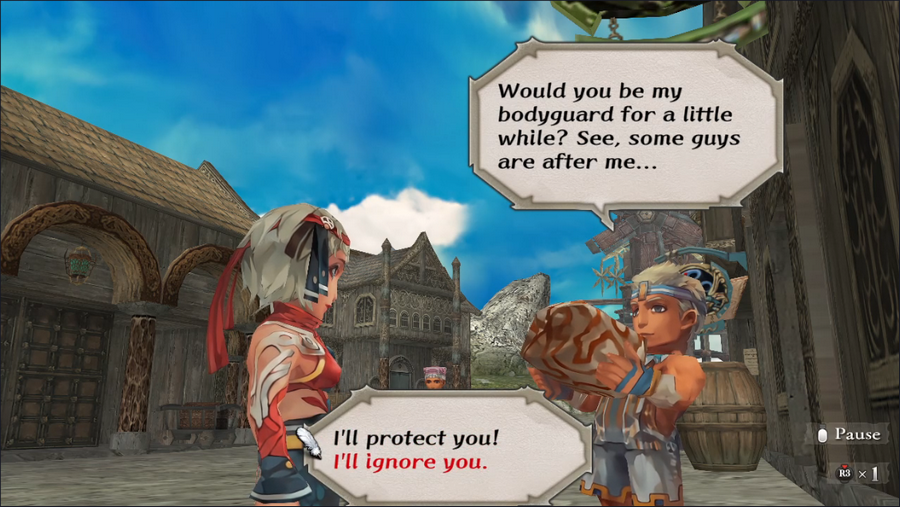 He seems suspicious, but we could still help him.  Finally, in Melvir, we learn that Neville is looking for us. This is a bit of a surprise since the only times we've met him were in the imperial throne room following the quests we did here. 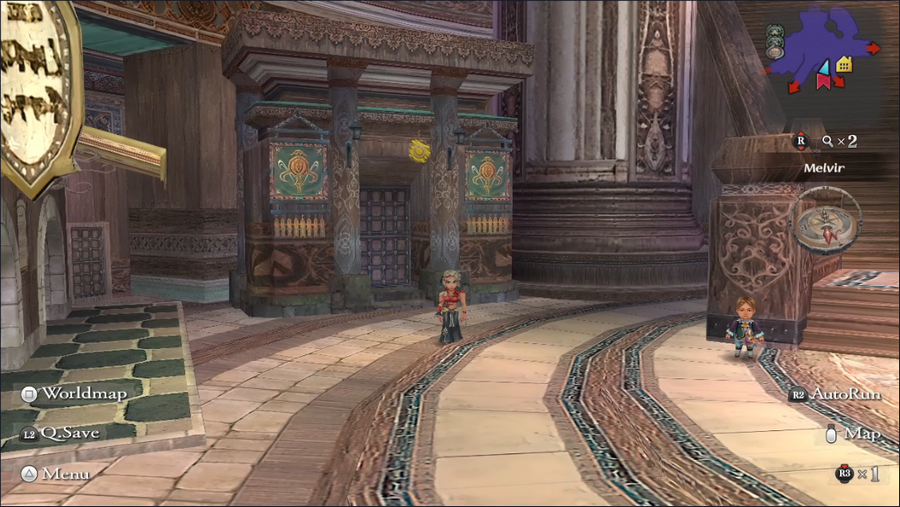 And that's it for today. Normally this is the part where I remind you to vote, but not this time: there is no vote on our next update's activities. The quest that unlocks our final party member is upon us and that will be our priority. I've still included the task list for the sake of completion. Current Event Rank: 6 Things to Do Retrieve the Aquamarine from Crystal Lake - We probably still aren't strong enough for this Climb Mt. Scurve and steal a feather from the nest of the lord of the birds Kill the bugs in the Altours orchard Find Captain Silver's treasure Get the ancient scroll from Hawke Bodyguard the guy in Aurefont Places to Explore Estamir sewers The remainder of the Geckling cave Melvir sewers Bayre Plateau Isthmus Keep, or what's left of it The Walon Isle jungle The Ligau caves - We need Survival level 3 to do this to completion Mt. Scurve Crystal Lake - We likely aren't strong enough for this Yassi Cavern Abandoned Keep Saoki Cavern - We need Survival level 3 to do this Treasure Maps Jungle, Level 1 Ligau Plains, Level 1
|
|
#
?
Nov 20, 2023 03:04
|
|
|
...Well gold is always nice, right? That wasn't a total bust I guess?
|
|
#
?
Nov 22, 2023 21:13
|
|
|
I'm enjoying this a lot! Grats! And seeing Barbara as the lead is great 
|
|
#
?
Nov 23, 2023 05:43
|
|

|
Seraphic Neoman posted:...Well gold is always nice, right? That wasn't a total bust I guess? Oh, absolutely. It kind of ends abruptly, but gold and jewels are always worthwhile. taichara posted:I'm enjoying this a lot! Grats! And seeing Barbara as the lead is great Aw, thanks!
|
|
#
?
Nov 23, 2023 11:13
|
|
|
5-Headed Snake God posted:Oh, absolutely. It kind of ends abruptly, but gold and jewels are always worthwhile. Is there a way to recover from jacking up the ER too high or is it better to just start over?
|
|
#
?
Nov 24, 2023 01:48
|
|
|
Seraphic Neoman posted:Is there a way to recover from jacking up the ER too high or is it better to just start over? It's pretty hard to get the ER so out of hand that you can't recover unless you go out and grind a bunch. Even on Normal progression speed, you kind of have to go out of your way to screw yourself that badly. My first time playing the game I missed most of the quests and didn't do much to avoid battles, and I still managed to finish the game. That said, if it does happen, you can make liberal use of Smoke Bombs to avoid the worst random encounters. You may not be able to beat some of the bosses you face, but you can still get to the endgame (at which point ER progression no longer matters), and run around collecting treasures to outfit your party. As long as your class levels are at 2-3 across the board, you should be able to beat the game, albeit not without difficulty.
|
|
#
?
Nov 24, 2023 01:53
|
|
|
Welcome back, everyone. Today we're going to take the steps necessary to recruit our final permanent party member.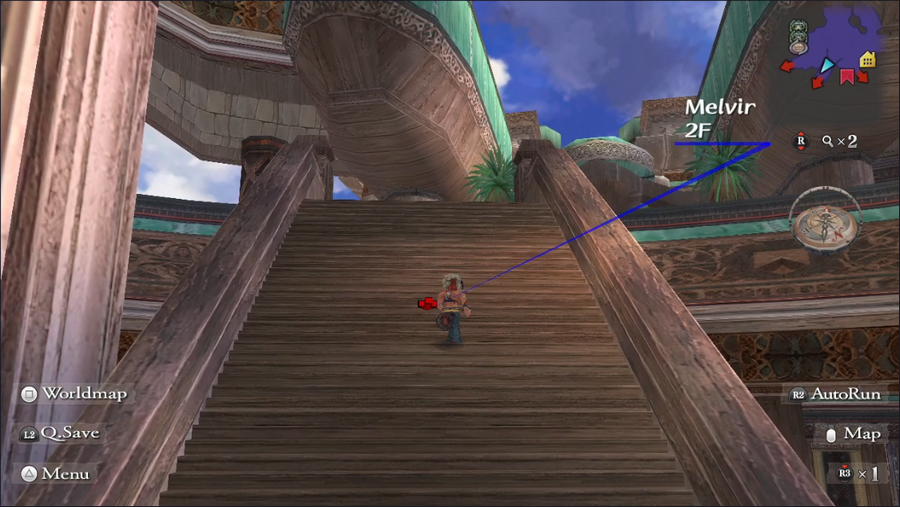 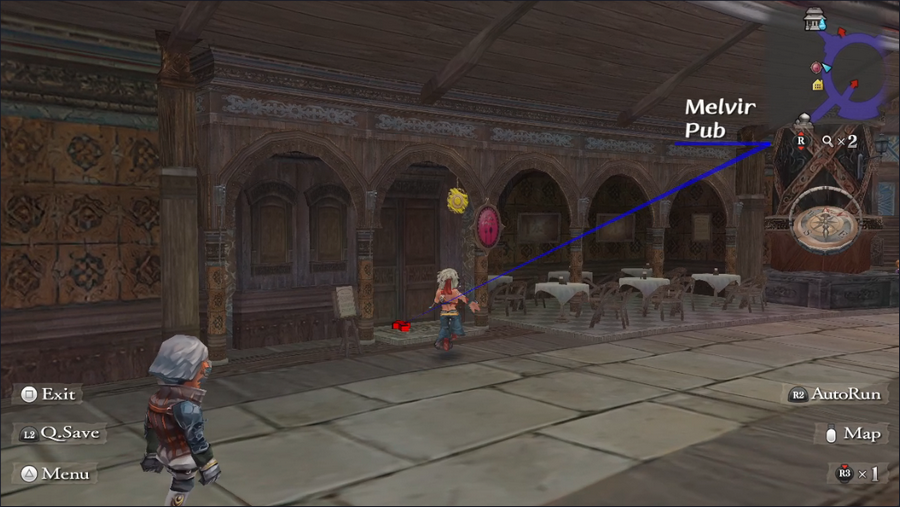 Our first stop is Melvir's pub, located on its second floor. 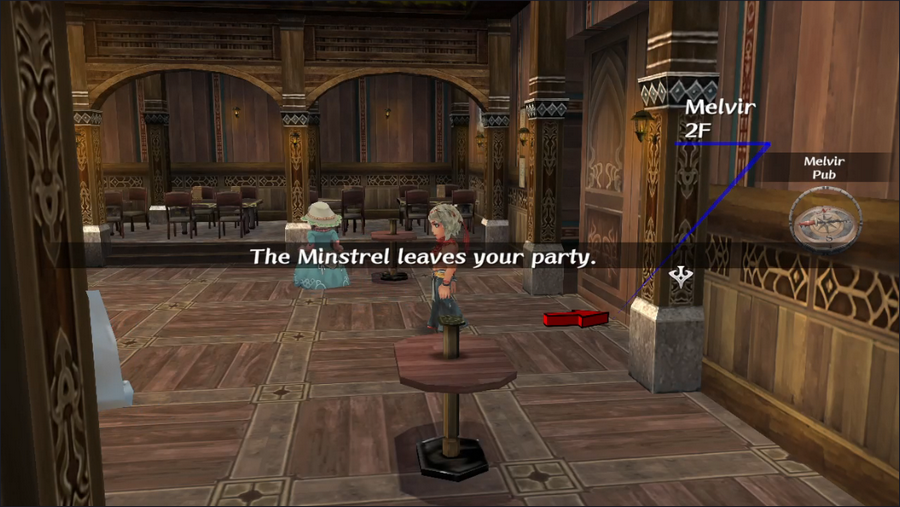 Sorry, Minstrel, but we won't need you for this quest. Thank you for all your help. 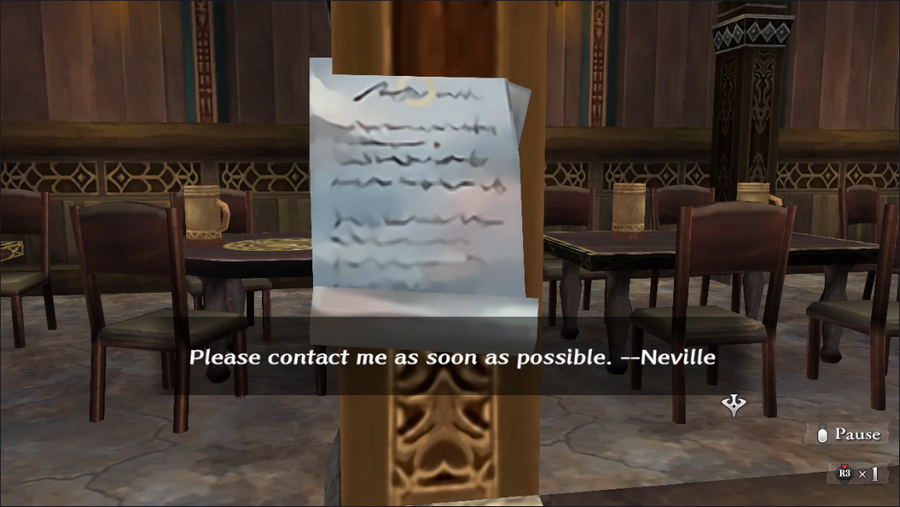 The pub also has a note on one of its pillars, a request from Neville. This is an alternate way to start the quest in case we hadn't spoken to the police. 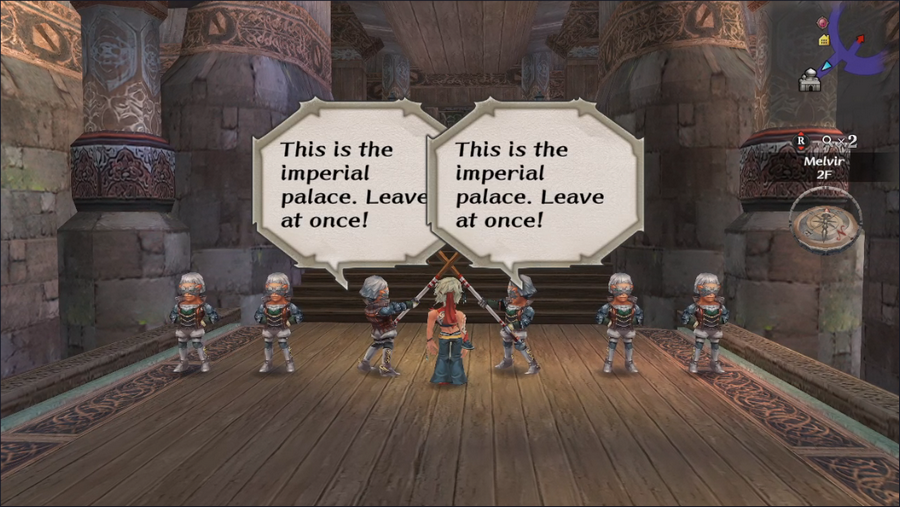 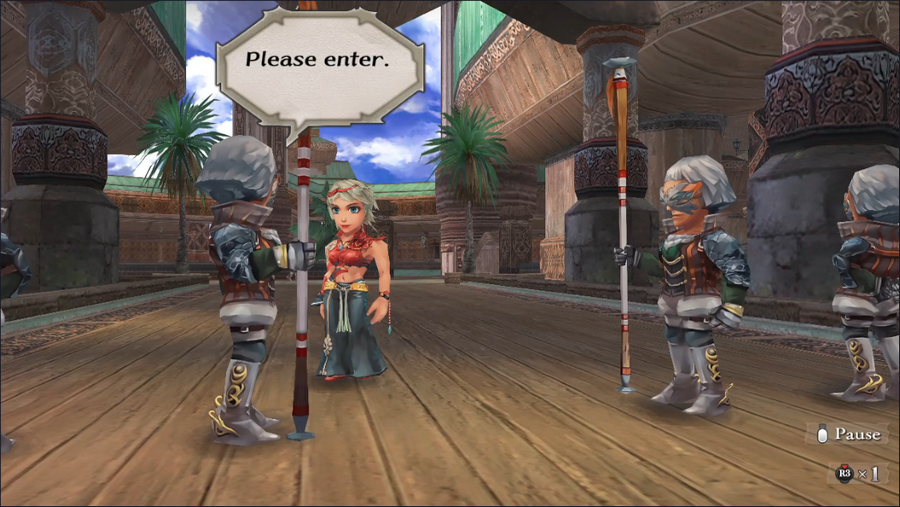 The guards initially ward us off, but once we interact with them, they recognize us and let us pass.  This is our first chance to wander freely around Elizabeth Palace, though there's not much point. The place doesn't have any treasures or anything lying around.  We'll just head directly to Neville's chambers. Luckily, we know where they are since we played Claudia's intro.   Barbara gives an affirmative nod. 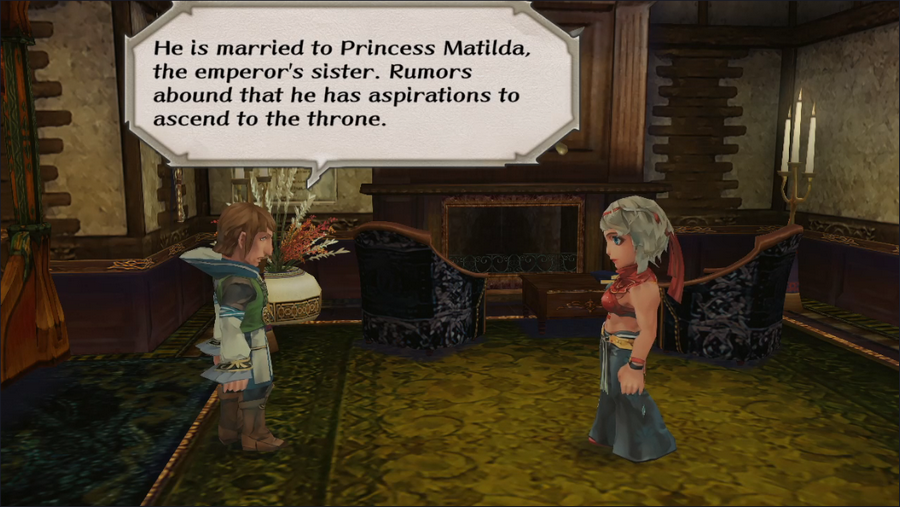 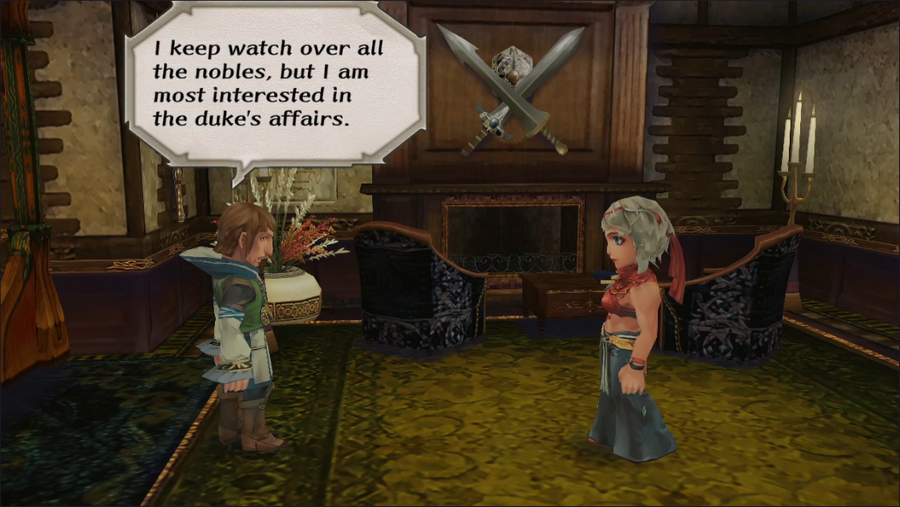 I know what you all were waiting for: convoluted political intrigue. I'm happy to deliver! 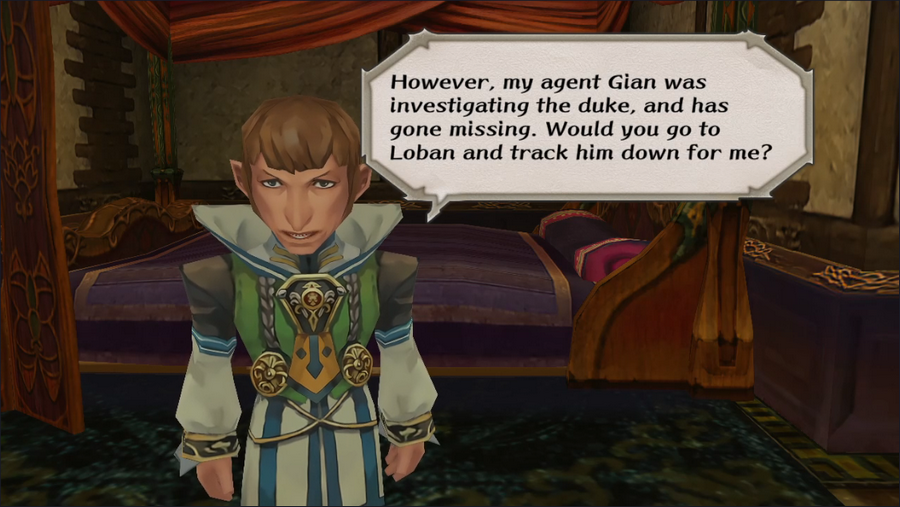 You may remember a bit in Claudia's intro when Neville said he had "other plans" for Gian. Turns out it was spying on the Duke of Loban. 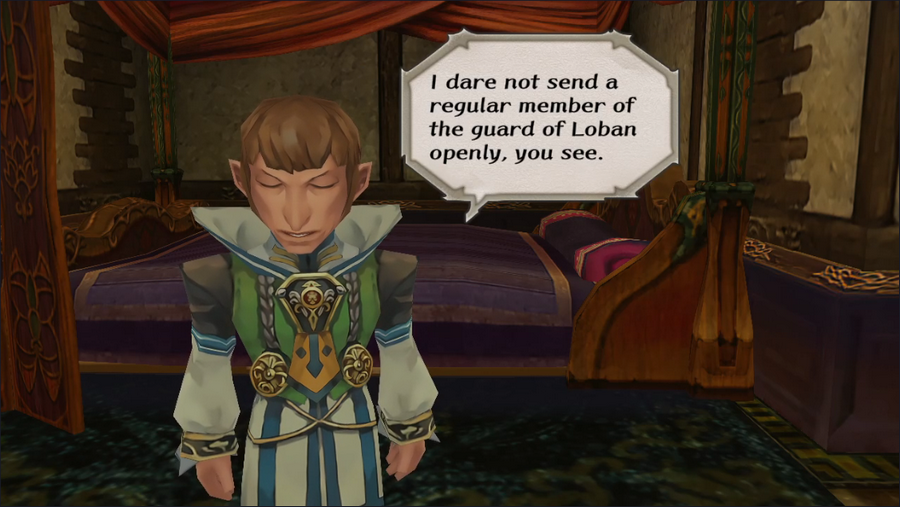  Obviously we're not gonna say no.   I'm sure we'll be fine.  With that, it's off to Loban. 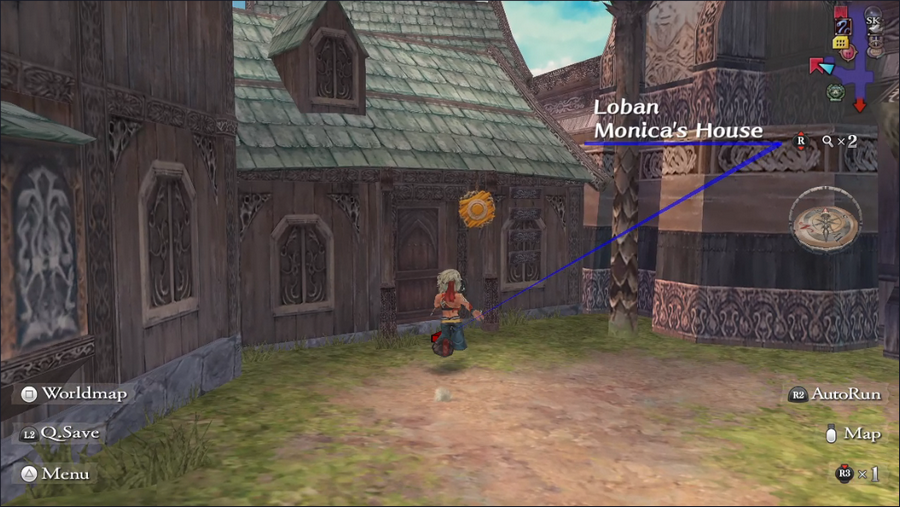 Naturally, we already know where Monica lives. 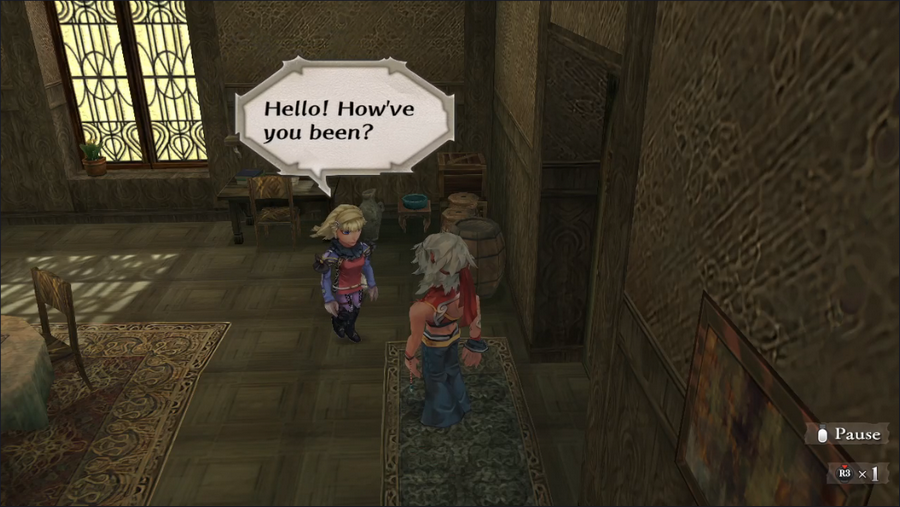 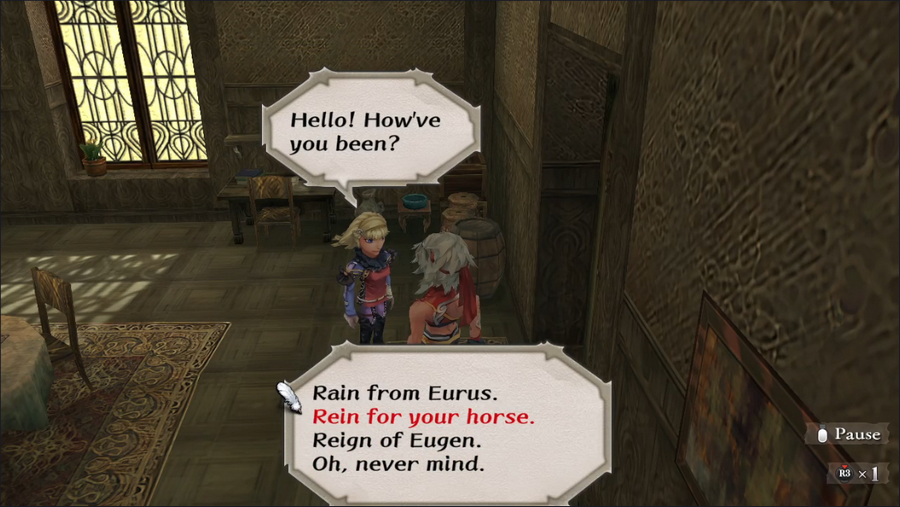 This is one of the rare times you need to actually pay attention to the password. 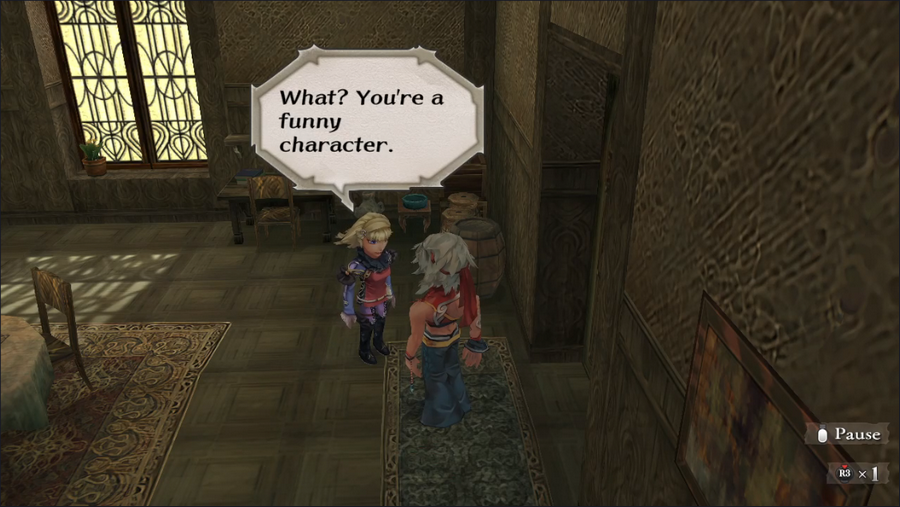 Luckily, if we get it wrong, Monica thinks we're just joking around. 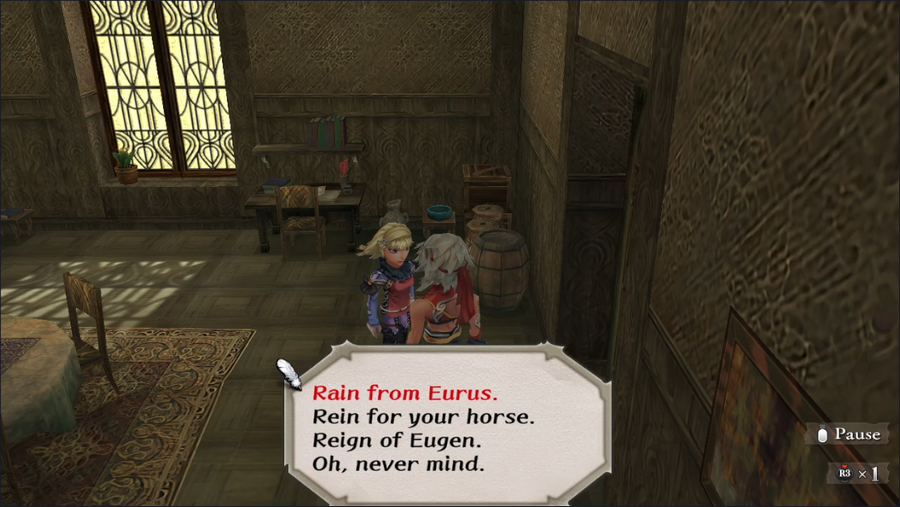 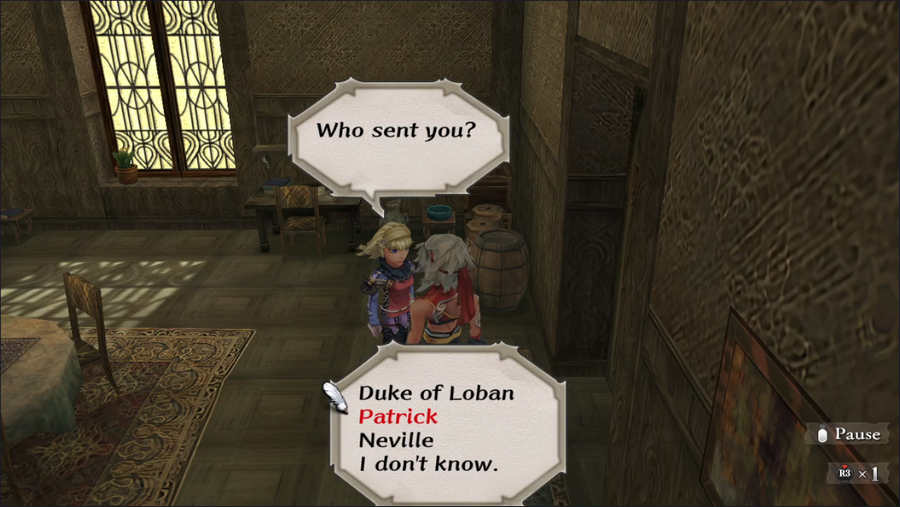 She seems to appreciate humor, so... 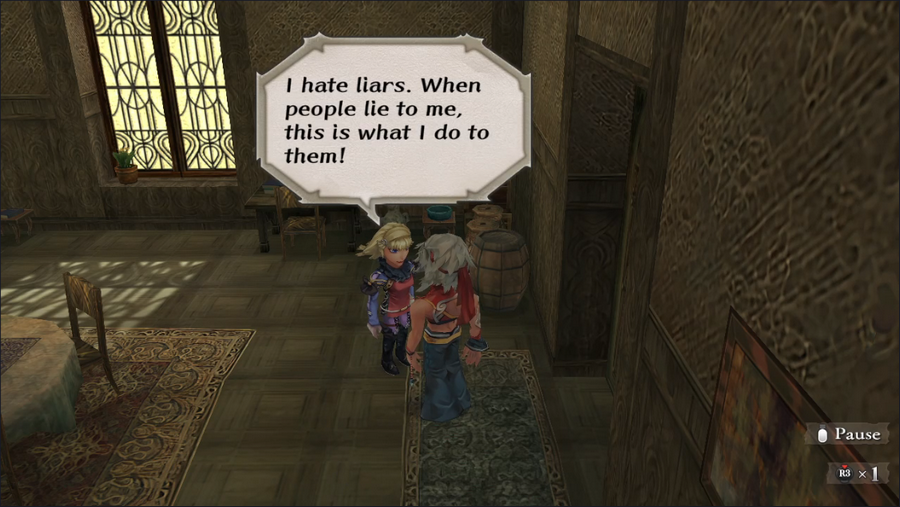  The screen fades to gray, then black, and plays the game over music.  She's such a jokester. Let's ignore her clear warning!   Give her the wrong name a second time, and the same thing happens, but we get kicked back to the title screen. She really does murder our entire party! So, uh... let's not do that.  All right, no more jokes.  I want you all to remember this line about her not being able to abandon her post.  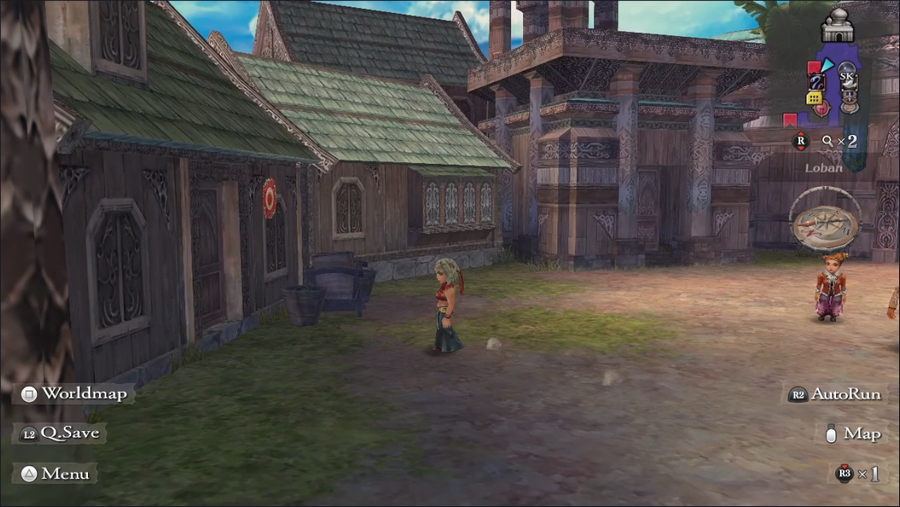 She gives us directions to a house within the city proper. It's not hard to find. 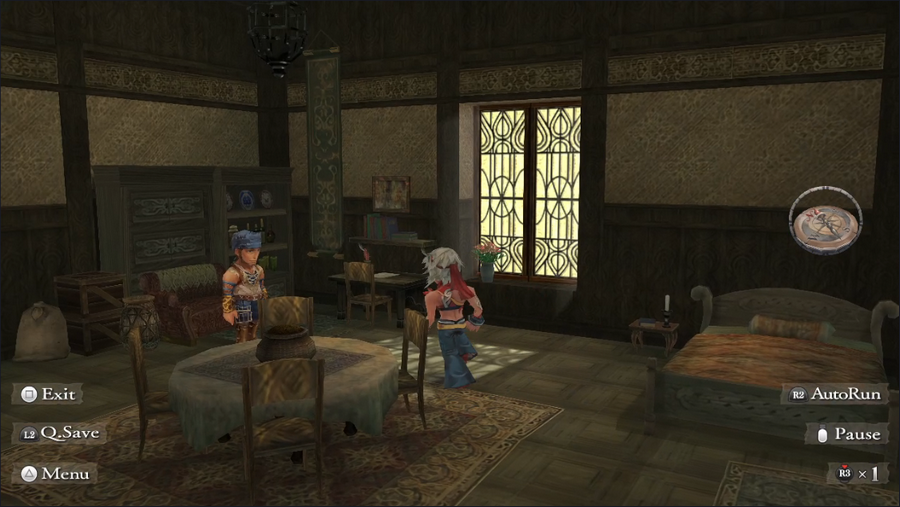 The interior is pretty much what you'd expect from a private residence. 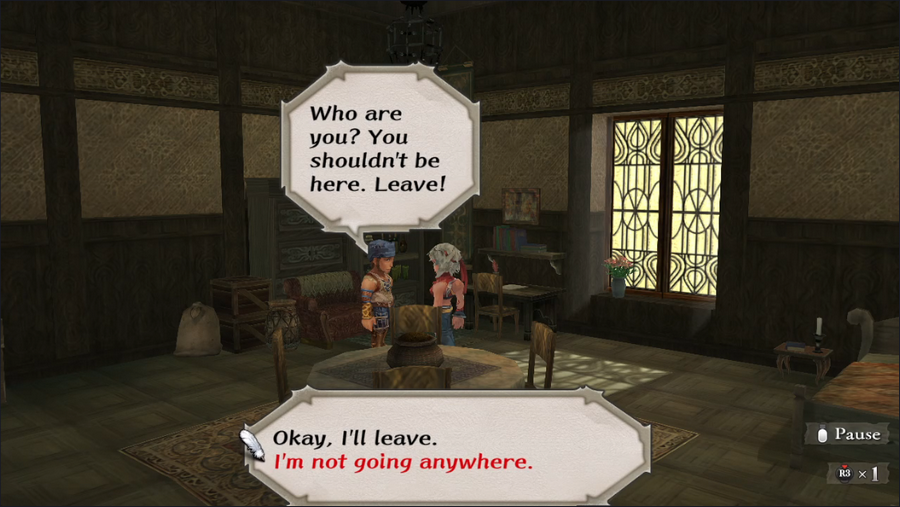 The guy inside likewise says exactly what you'd expect from a homeowner whose house has been invaded by strangers. We'd better home Monica knew what she was talking about.  This guys has a beard. He definitely doesn't look like a kid. Maybe it's just an insult? 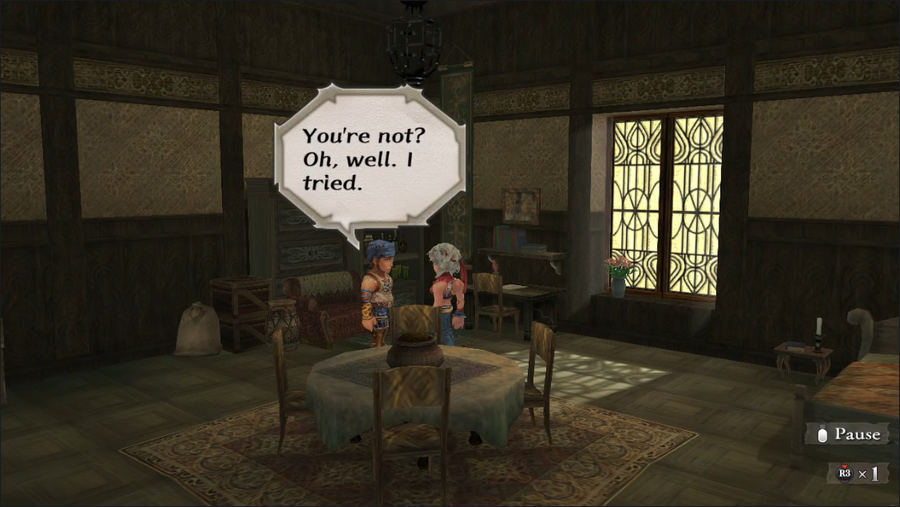 Well, that was easy. 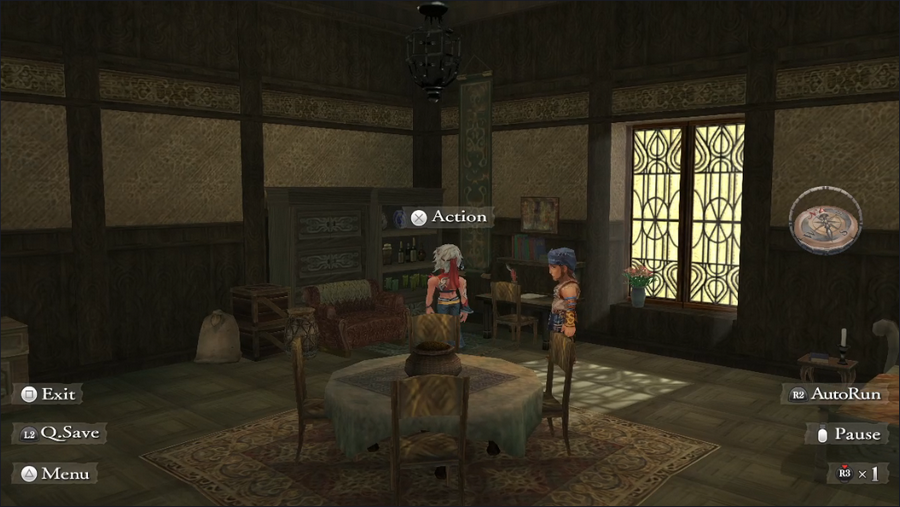 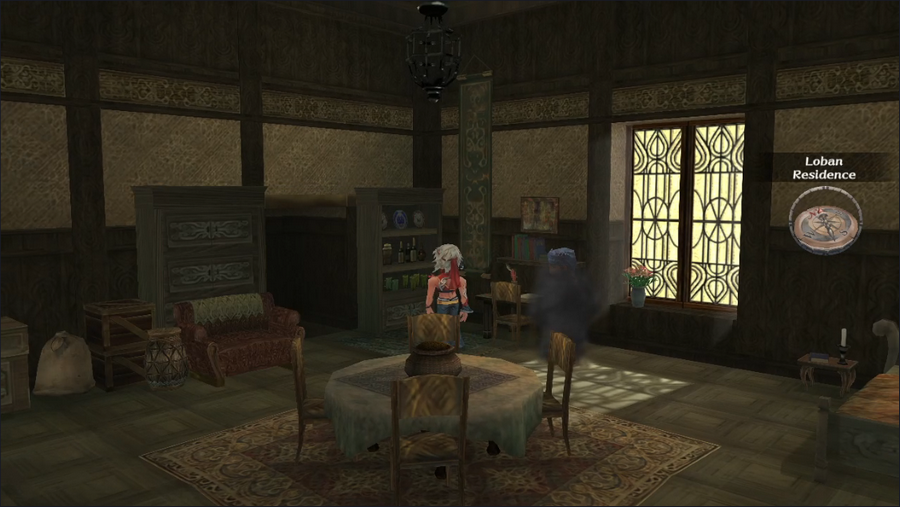 Examining the shelves behind the guy reveals a hidden passage. Monica was right! 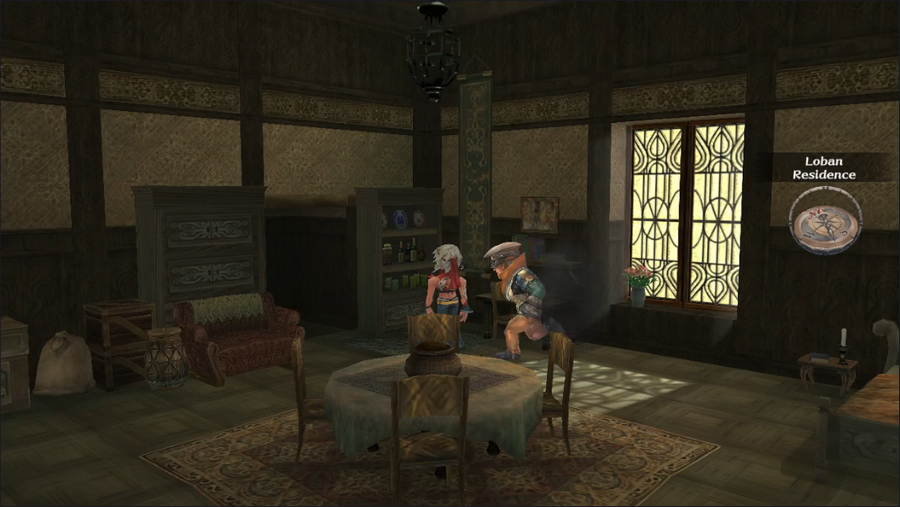 But the false homeowner is, of course, not just going to let us go in.  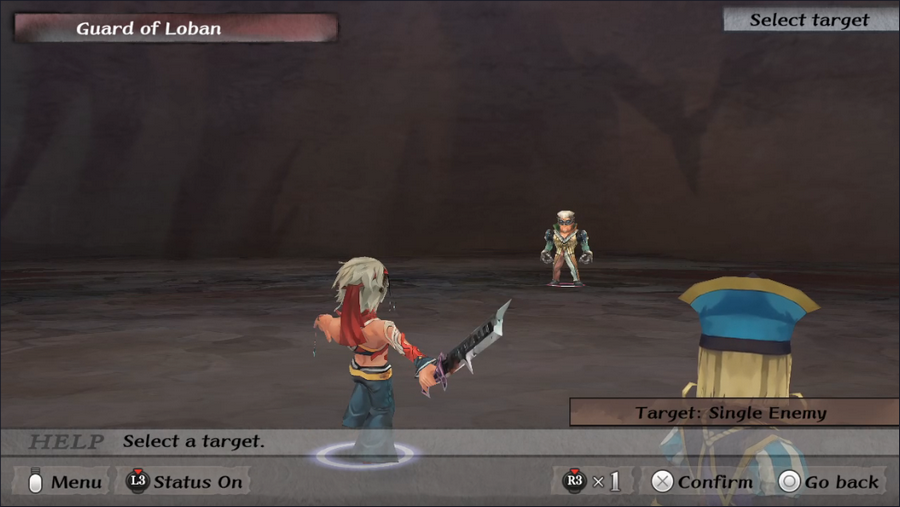 The guard's attack takes us by surprise, but it's nothing to worry about. 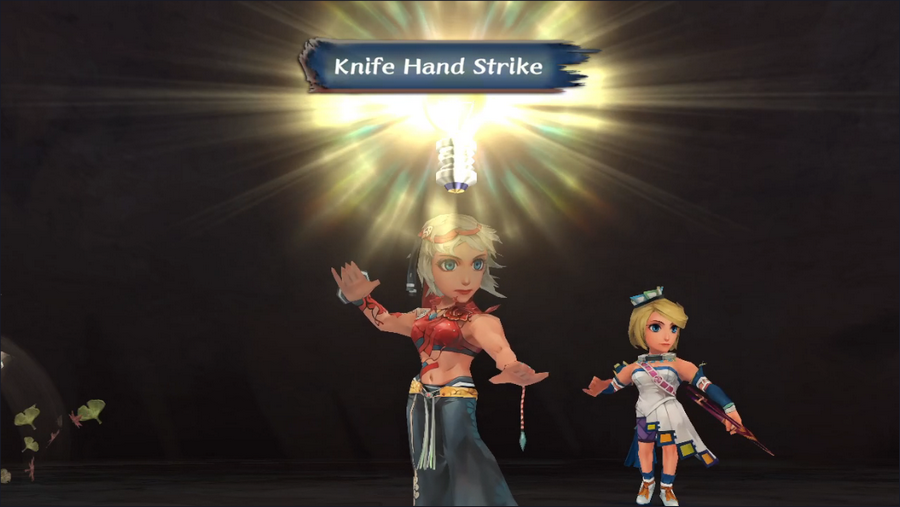 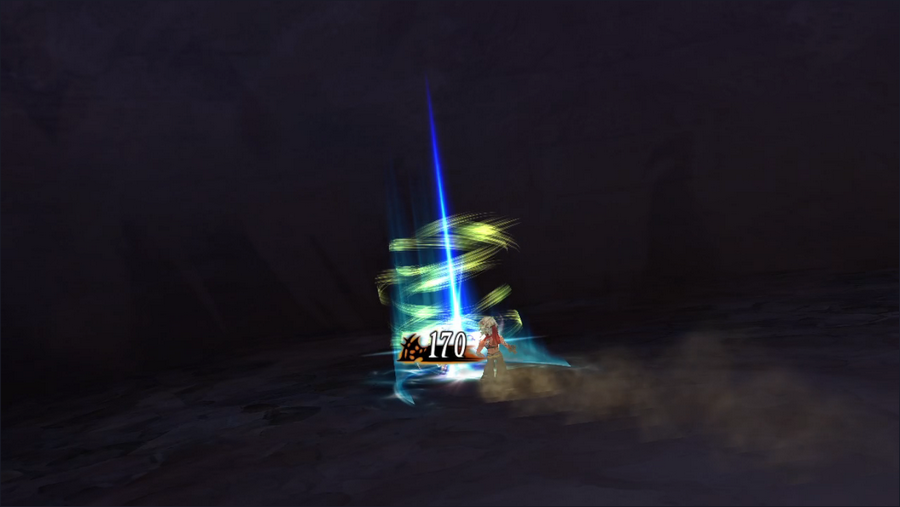 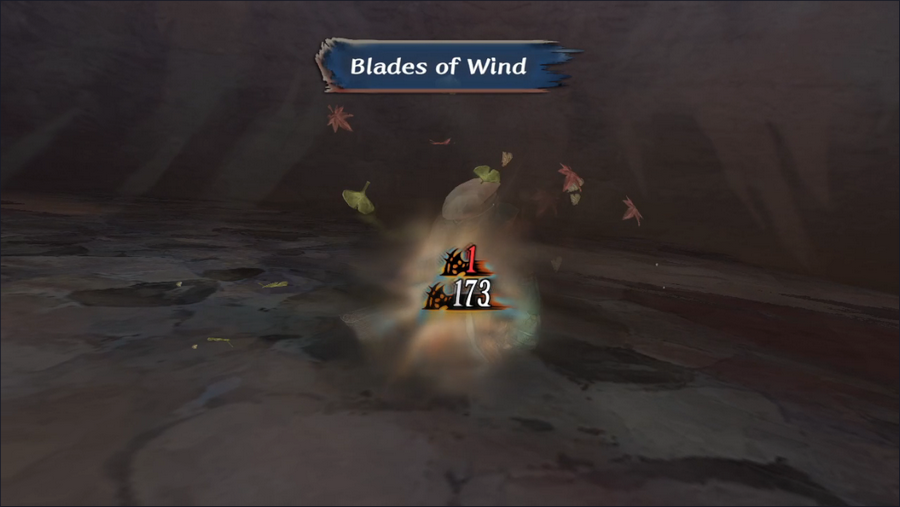 Between a Glimmered technique from Barbara and a Blades of Wind spell from Patrick, he goes down quickly. Knife Hand Strike is a basic, single-strike Martial Arts technique, somewhat less powerful overall than One-Two-Three. 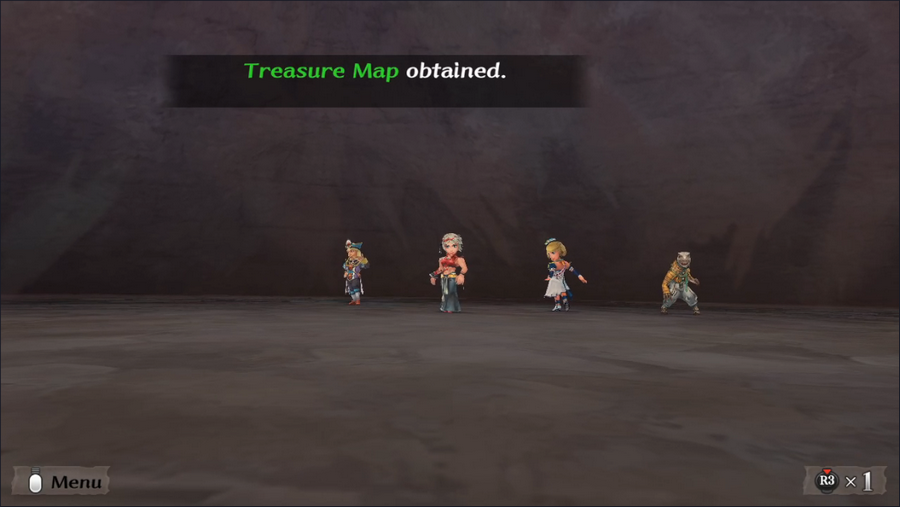  It turns out he has a treasure map, which we also take. Conveniently, it's tied to the same area as our last one: the Ligau Plains.  With the guard slain, we can enter the passage.  This certainly looks like a dungeon, especially since our proficiency list popped up.  At the end, we find a moving wall.   We've found Gian, but it seems we were expected. Neville warned us the duke was cunning.   Gian plummets head-over-heels into a pond. Barbara at least has the grace to do it in a static pose.   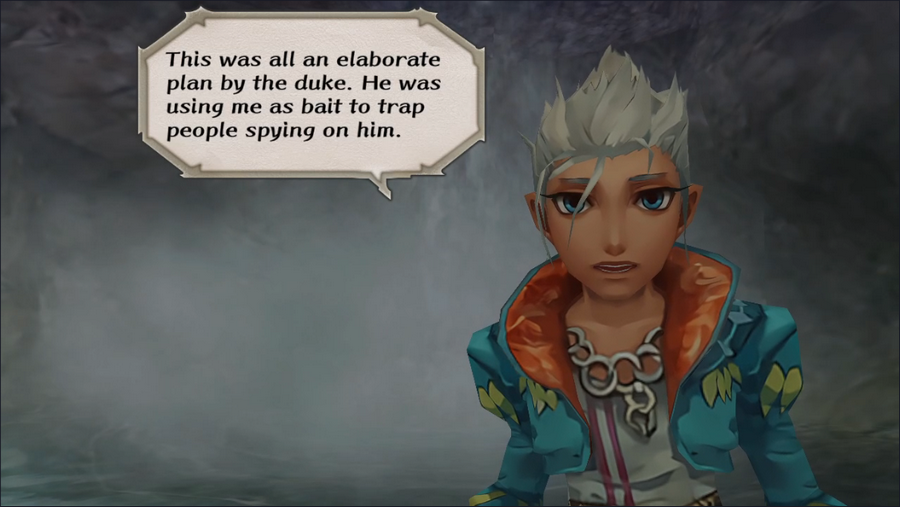 I think the most competent thing we've seen Gian do was hire Gray to keep an eye on Claudia. He's kind of a loser. 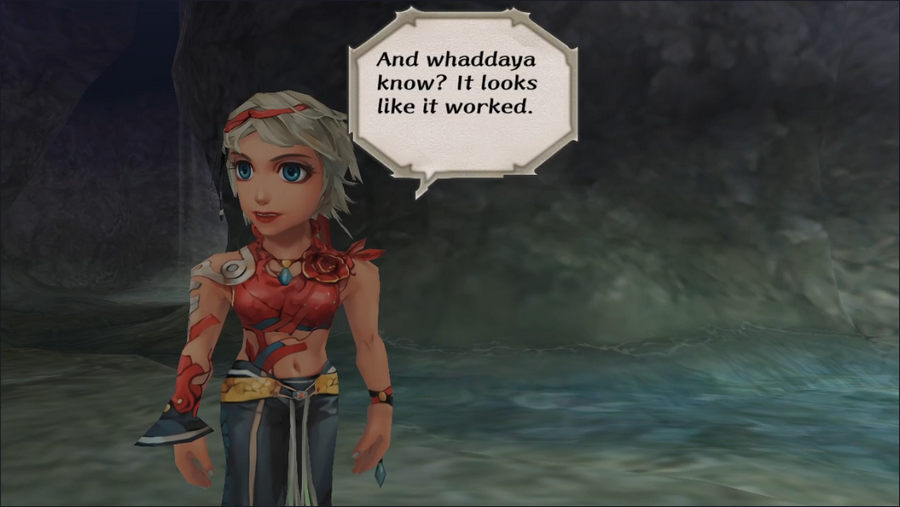  It makes me wonder why Neville even employs him. 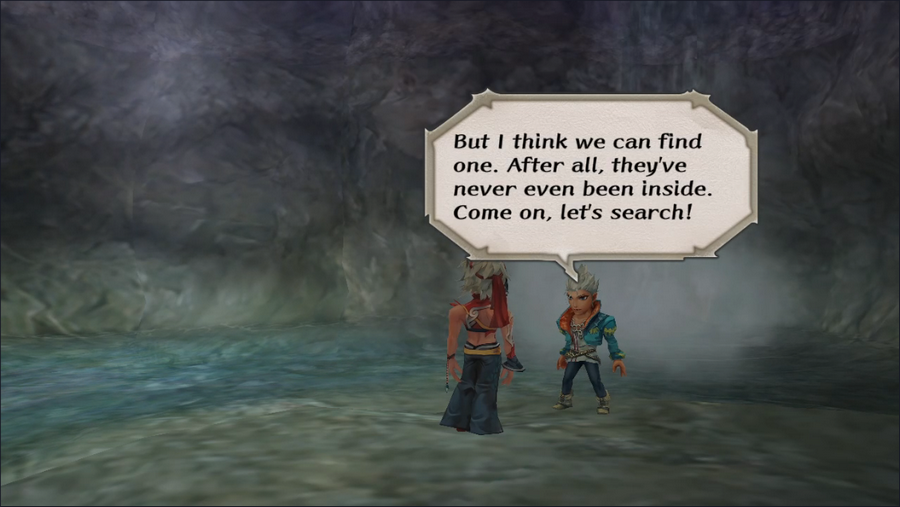 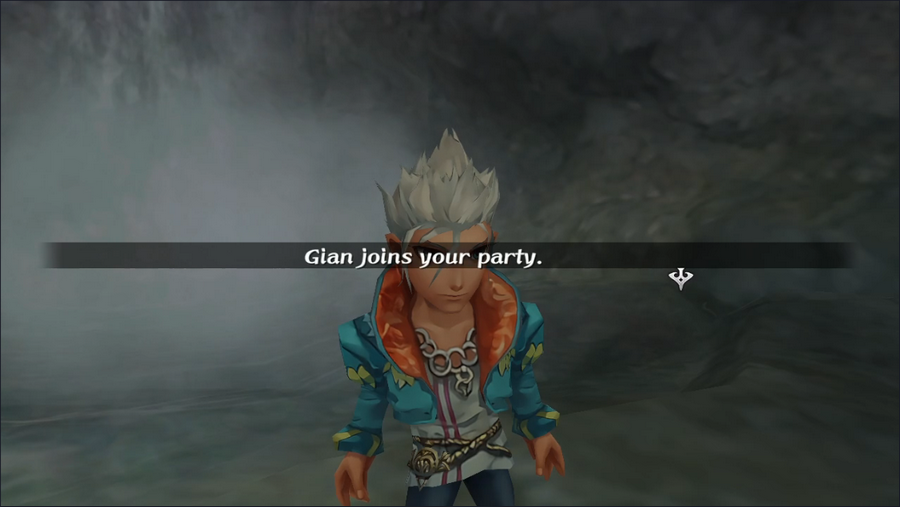 Gian joins our party, though only for the duration of the quest. Nothing changes in terms of writing if the party's already full, but I figure we may as well bring him along.  His gear is pretty minimal, but it'll do for one quest.  The cave dungeon is a fairly short, linear affair without many surprises, but it has a few twists and turns, so it's not impossible to get lost.  As we start getting into fights, we get a glimpse of Gian's technique set. It's unimpressive.  The monsters themselves are a bit more interesting, as we see a few new types in this dungeon. Sea Serpents are Aquatic monsters that stick to a single moderately-powerful attack.  They're not too threatening, especially since we can now pull off combos pretty often.  You might remember Ptyrixes from the Abandoned Keep quest a couple updates back. They've gone from boss adds to regular enemies.  Besides the new enemies, we also get tutorialized on a new mechanic, Surges. A Surge is a modified version of an existing technique (Cutting Lunge, in this case) that triggers randomly and can't be dodged. Not every technique has a Surge; in fact, most don't. Surges are generally an improvement on basic techniques, but there is one notable exception we'll probably see later in the LP.  We only get one more Glimmer down here, and it's the same one we got earlier, Knife Hand Strike, but for Guella Ha this time. 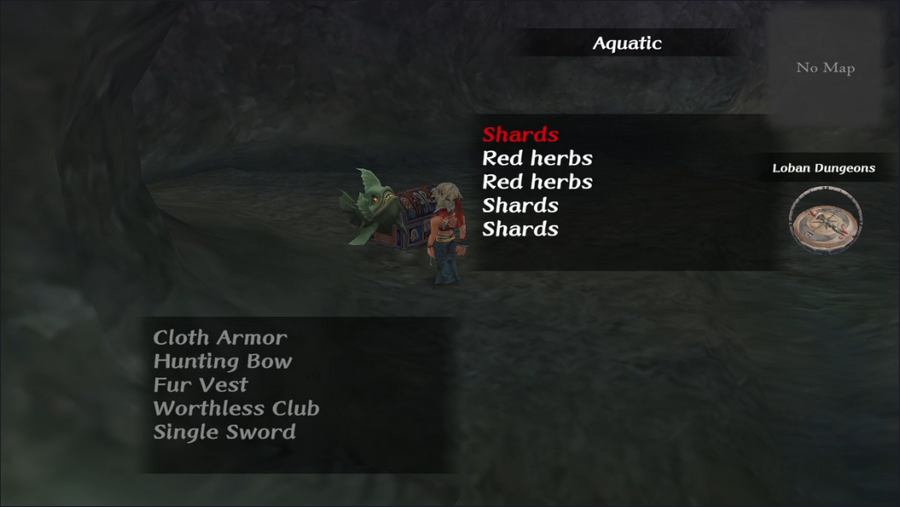 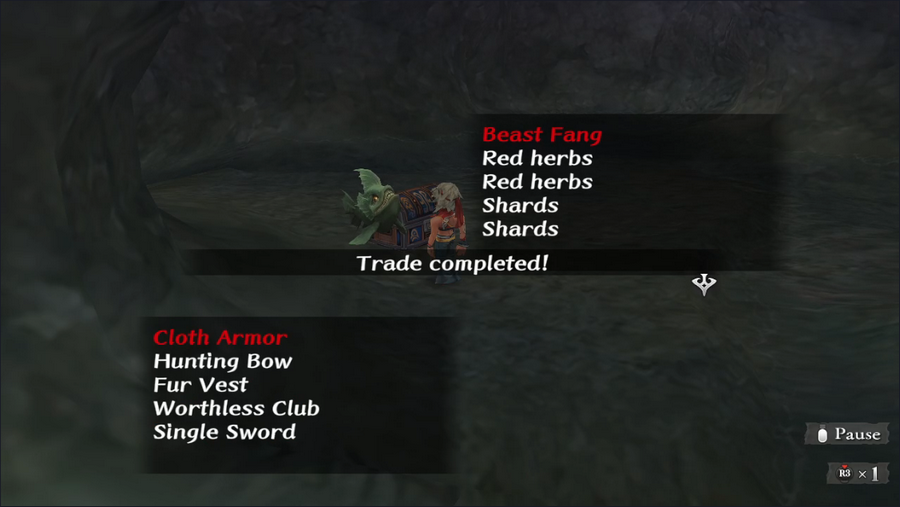 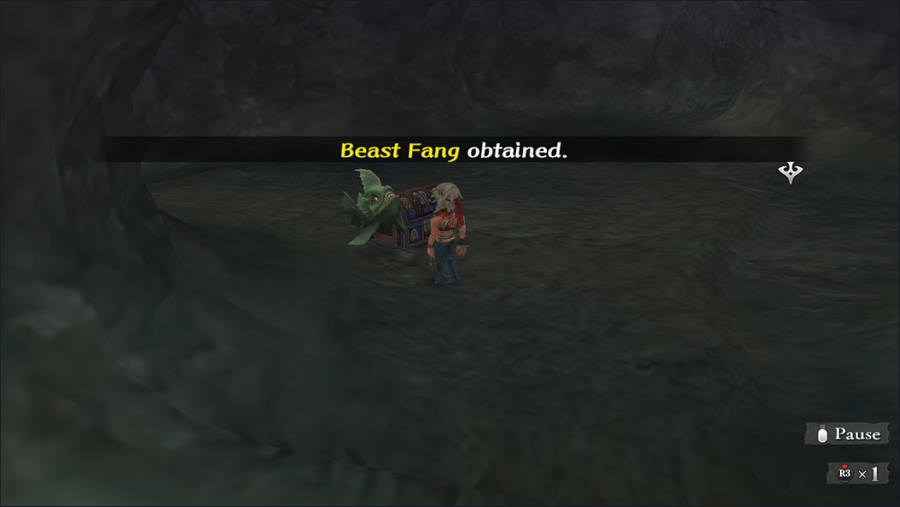 This isn't an especially interesting occurrence, but I wanted to show off that trades can sometimes be accepted even if we don't have anything the monster wants. We still got shafted here though, since Beast Fangs are common and mostly useless. 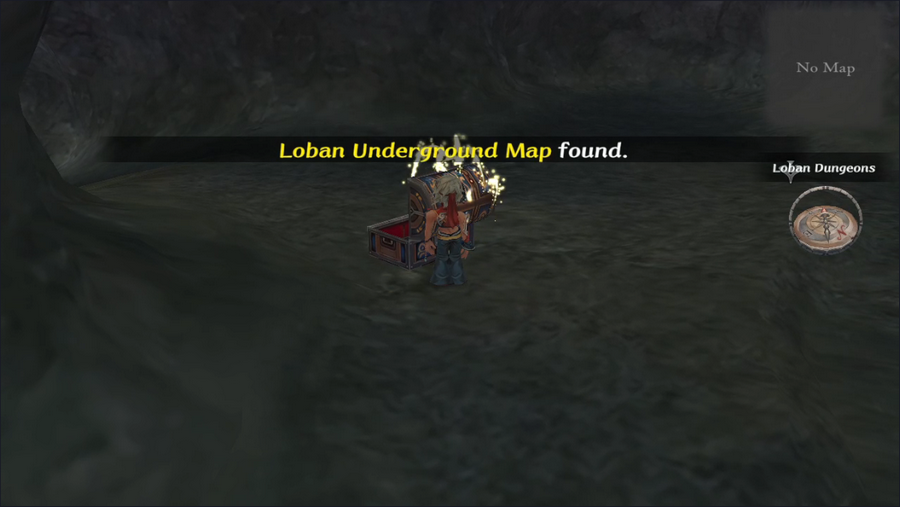  About a third of the way through we get the map from a random chest. We started on northeast of our position here, and our goal is that long passage in the southeast.   The other chests don't have much, just money and some Cloth Armor. 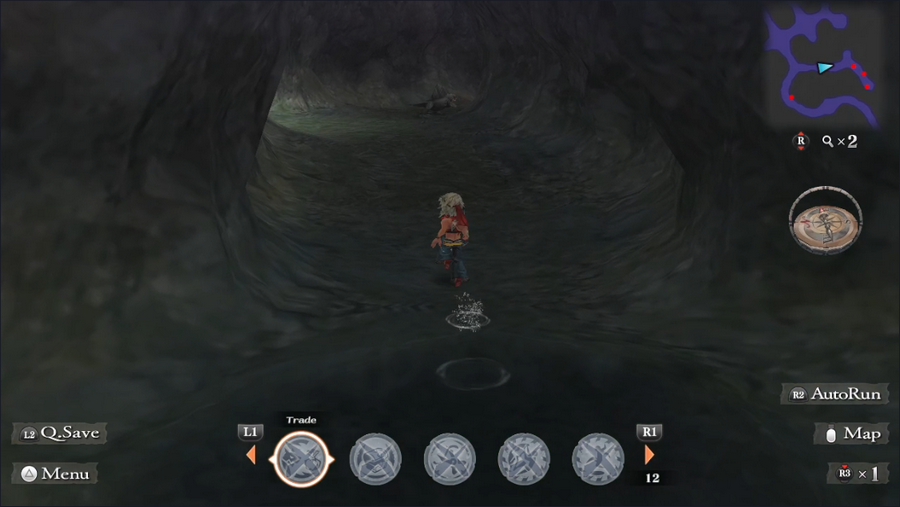 I'm pretty sure there's another chest up here, but it's not worth fighting three monster groups. 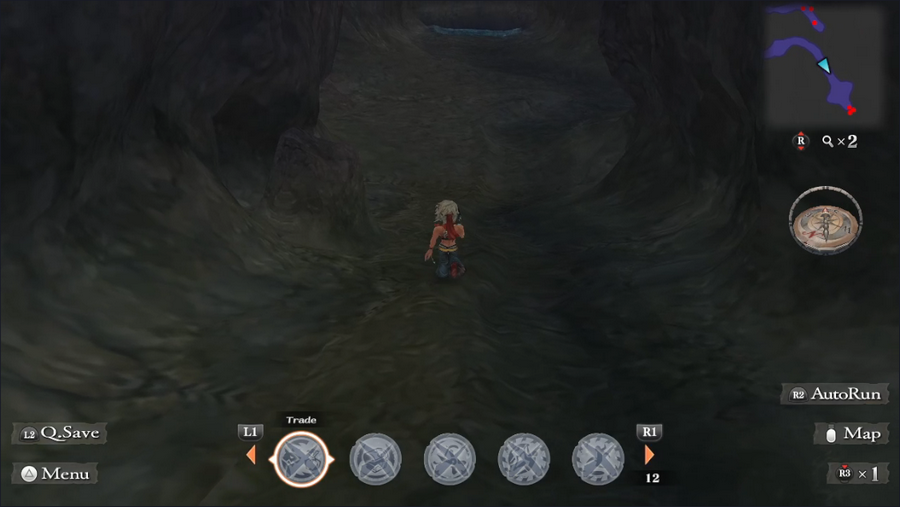 Finally, as we near the end, get get a surprise that's totally spoiled by the minimap. I like that the remaster put red dots on it to represent monsters, but in this case it ruins the ambush. 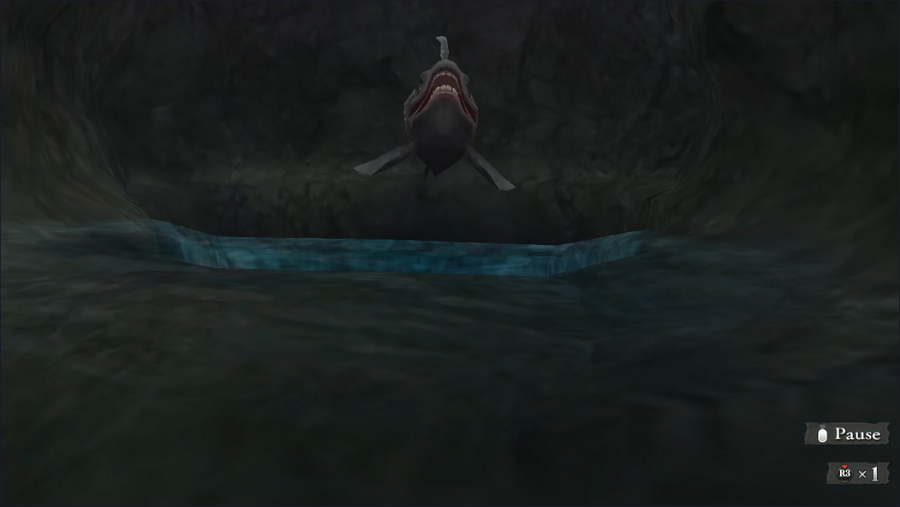 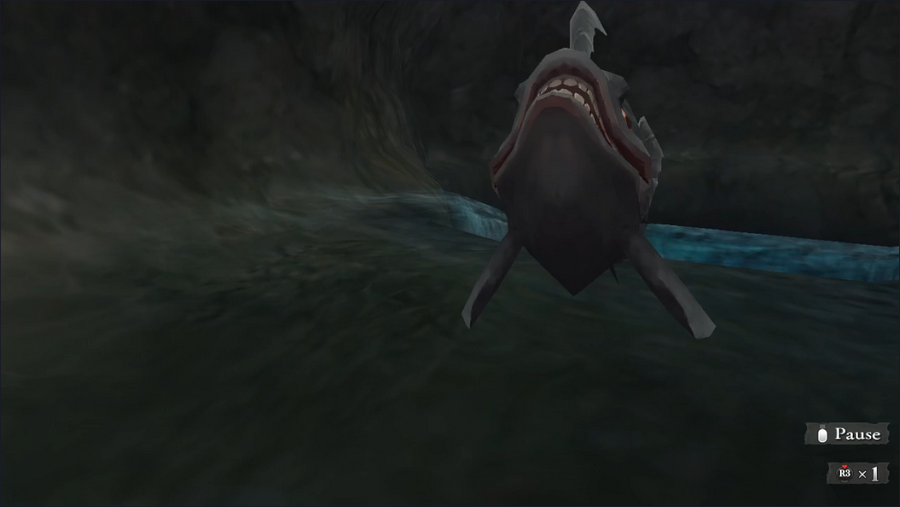 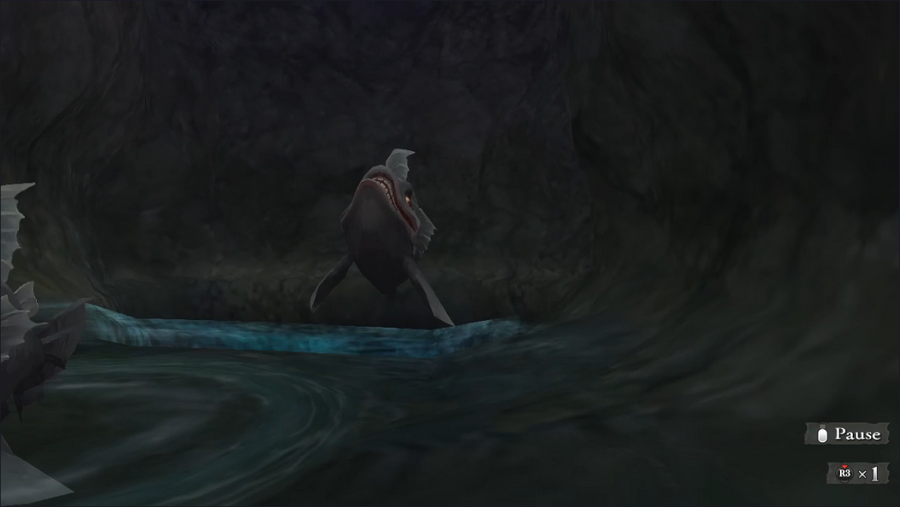 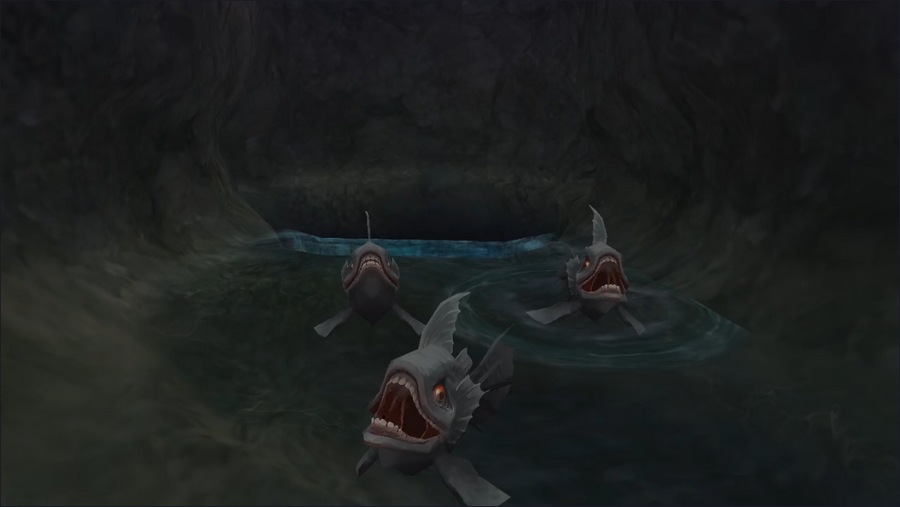 Three Aquatics pop out of the lake at the end, and we have a fight on our hands! (I'd also like to mention, offhand, that I find the human-like teeth on these fish very unsettling.) https://www.youtube.com/watch?v=zfgDi_v0oRY You might find this video worth watching if you want to see combos in action, as I managed to perform quite a few of them. 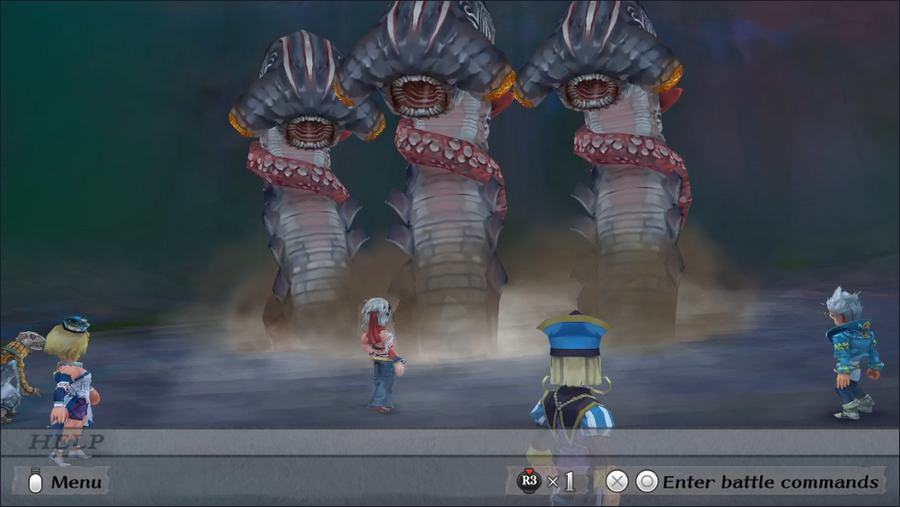 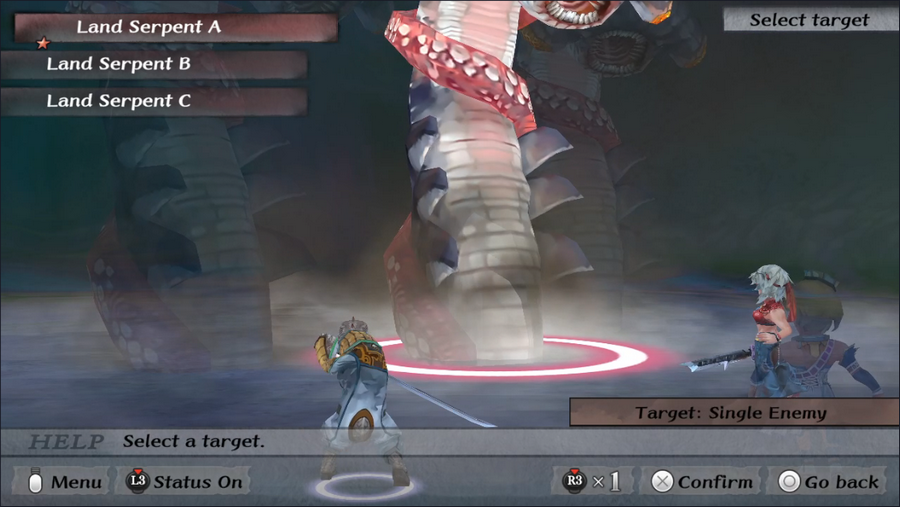 Our fight today is a trio of Land Serpents, a monster type that shows up at higher Battle Ranks. We have our work cut out for us, but we can handle it. 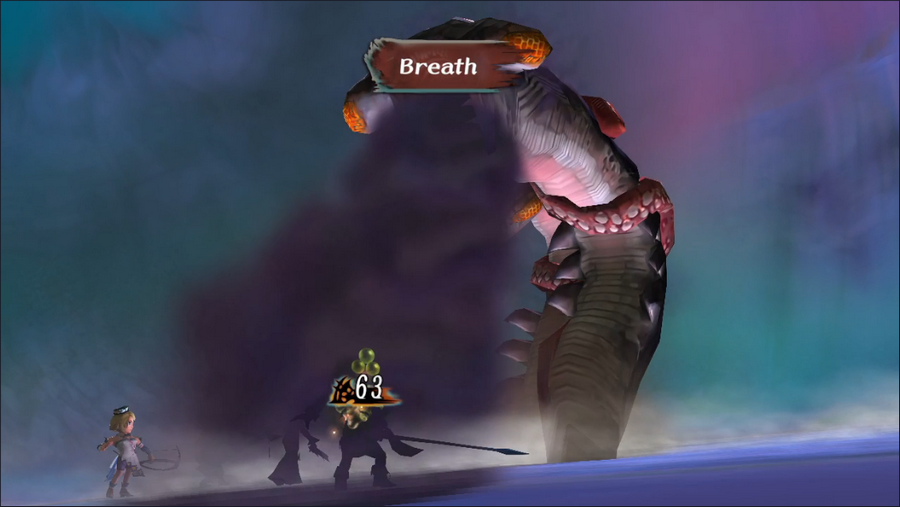 The Land Serpents have only one attack, Breath, which deals decent damage and inflicts Poison, a standard damage-over-time ailment. It also gets some dramatic lighting to make it look cool. Poison can be cured by a First Aid Kit or the Holy Water spell, but the Land Serpents inflict it so much that it isn't worth it. 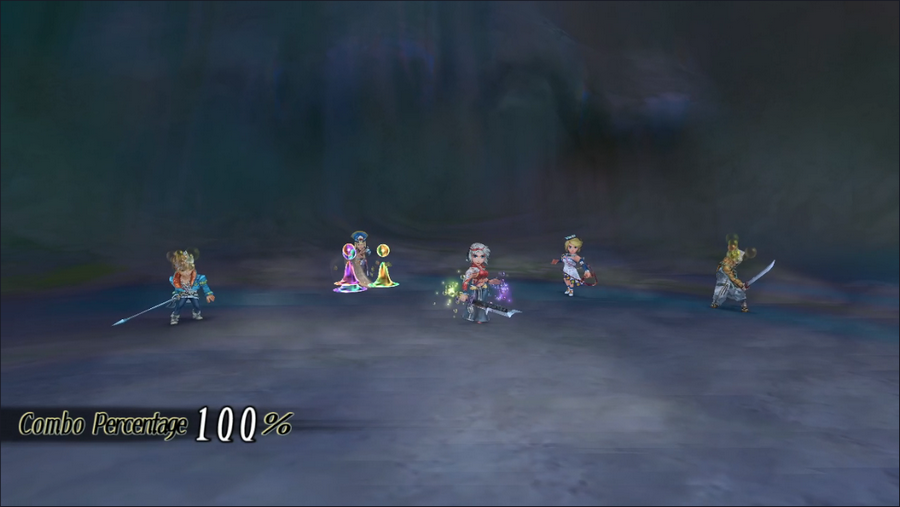 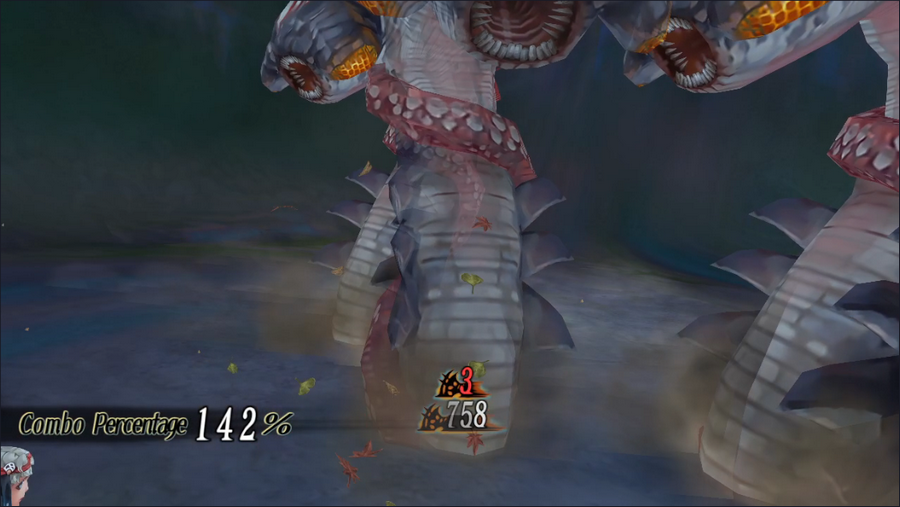 The first of the three goes down quickly to a three-person combo. A damage boost of nearly 50% will do that. 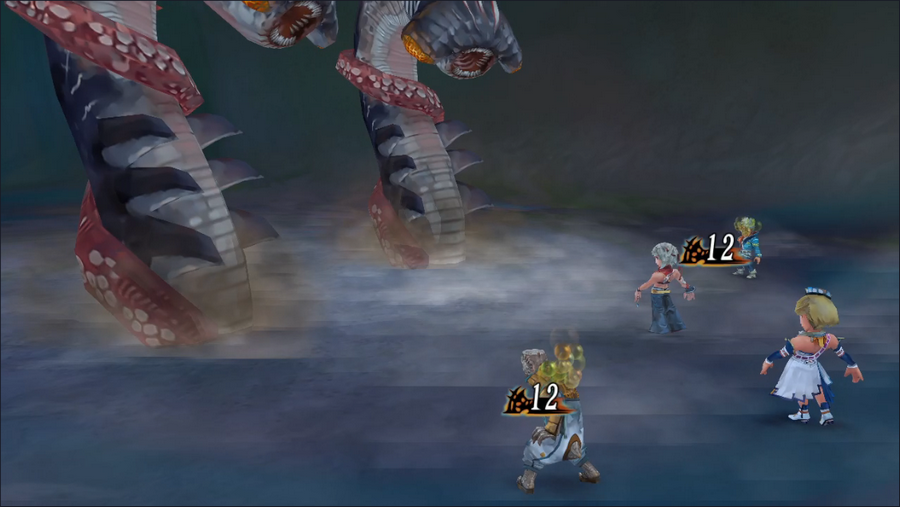 Here are our poison ticks at the end of round 1. The damage is pretty low, which is another compelling reason not to worry about curing it. 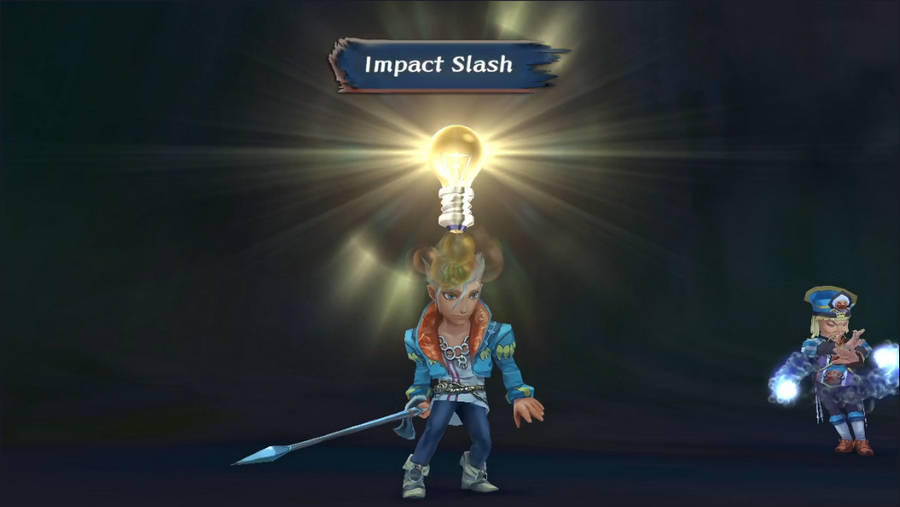 Gian Glimmers Impact Slash on round 2 but doesn't have the decency to stun his target. 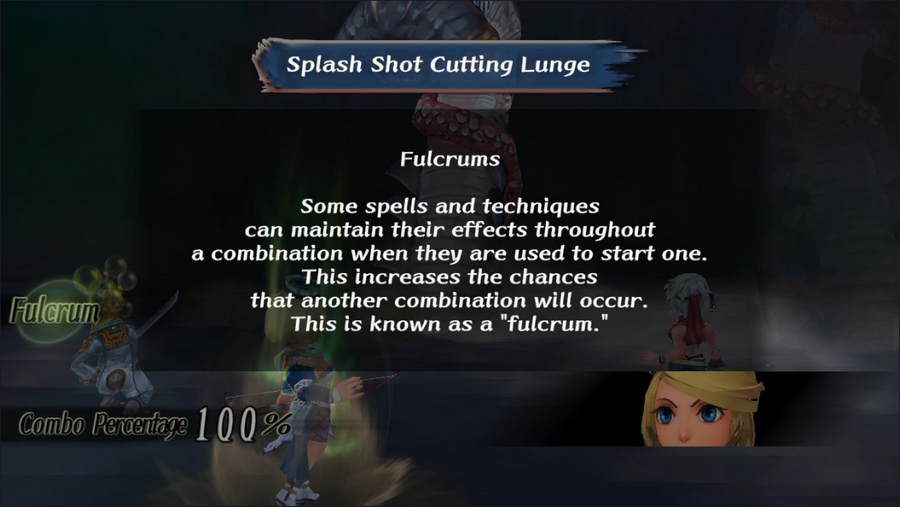 We do get a tutorial on a combo add-on mechanic, though. I'm not entirely sure how Fulcrums work, truth be told. Do they only affect the current round? The rest of the fight? Until the next combo is performed? Hell if I know. 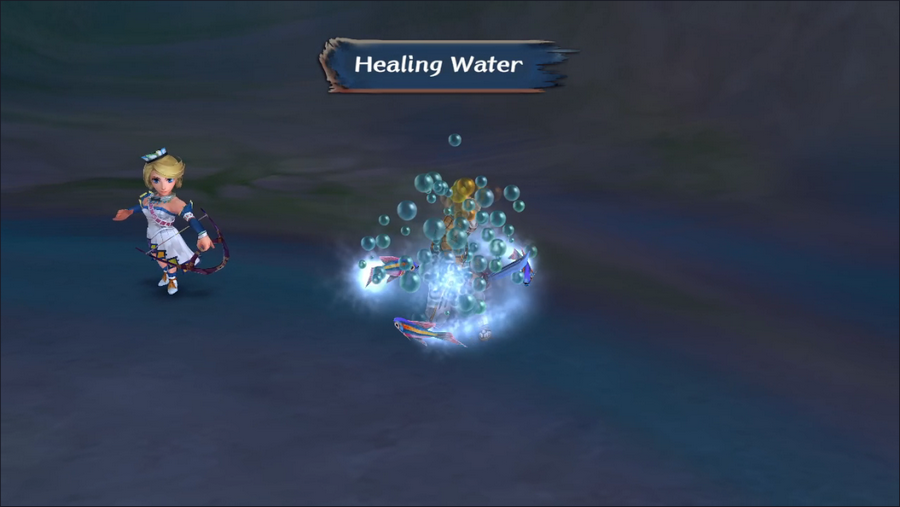 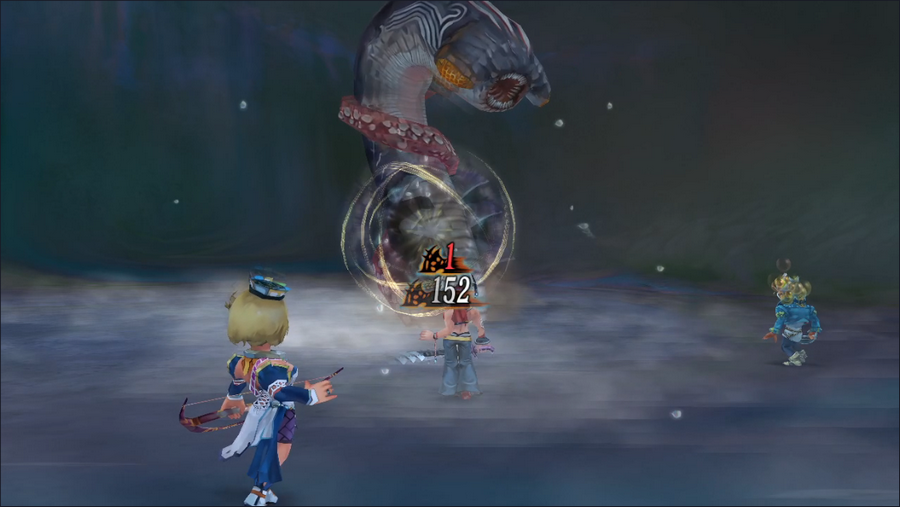 Our HP gets low in places, but Patrick uses Healing Water to keep our party members standing until the last Land Serpent finally goes down. 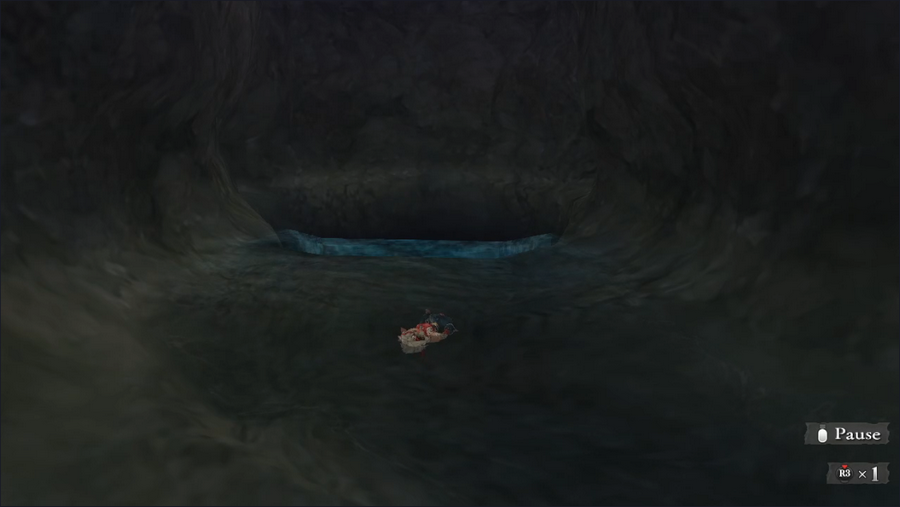 After that, we appear to pass out and float into the hole, but we don't drown.  Instead, we wind up on the outskirts of Loban.   Didn't Neville already cover this? I suppose he was a bit vague.  Now that's an interesting slip. I wonder what he was going to say.  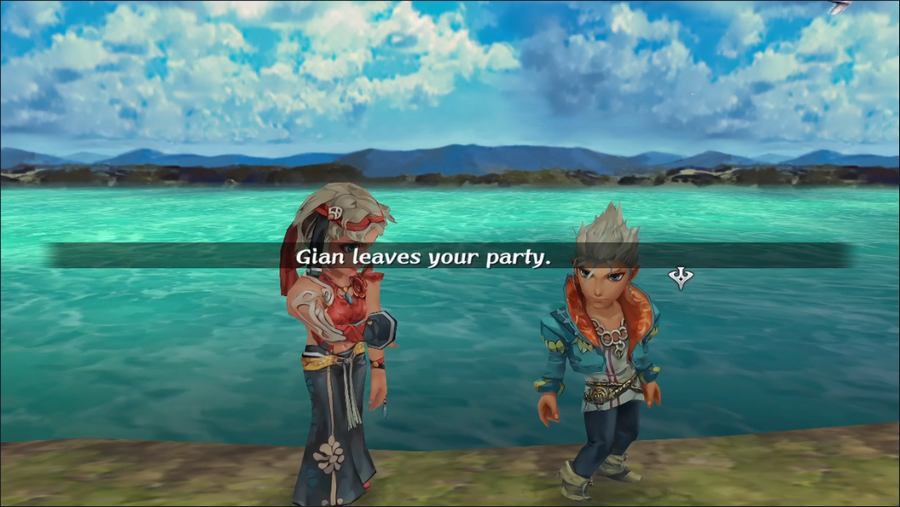 And so Gian departs. No great loss. 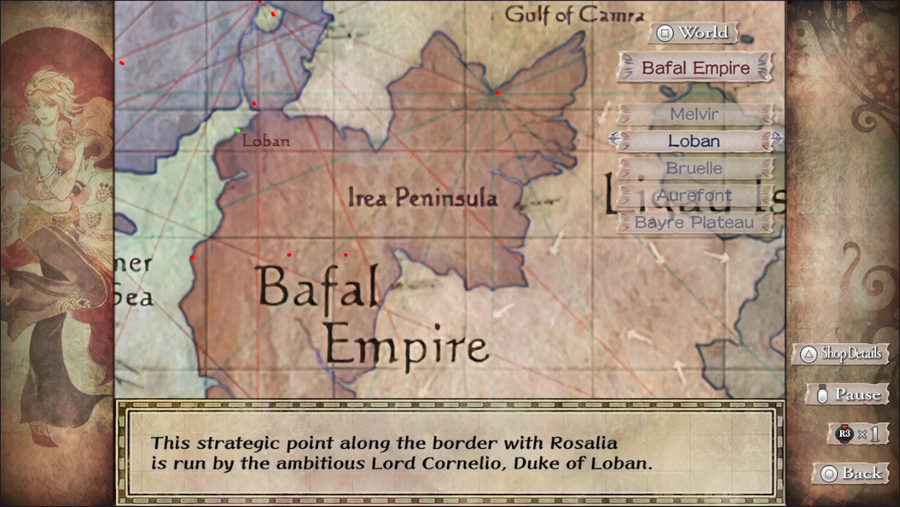 We're going to ignore his advice and go right back to Loban. 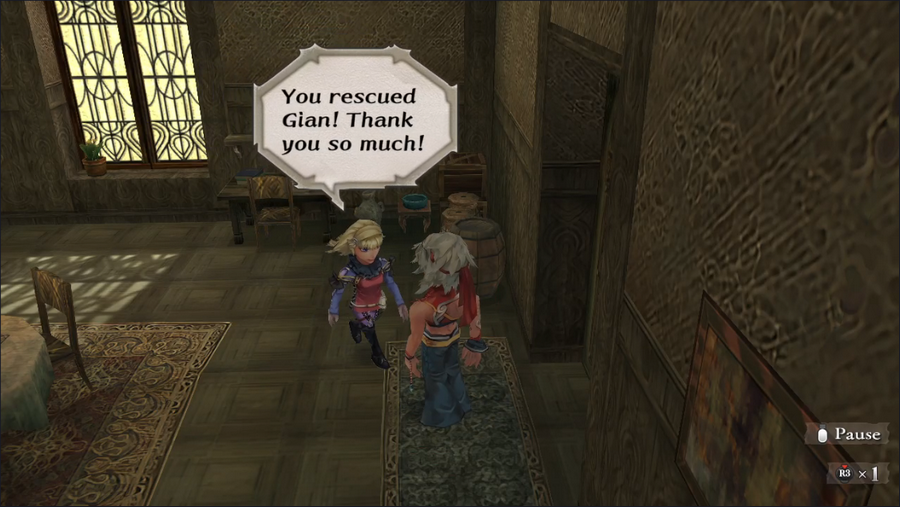 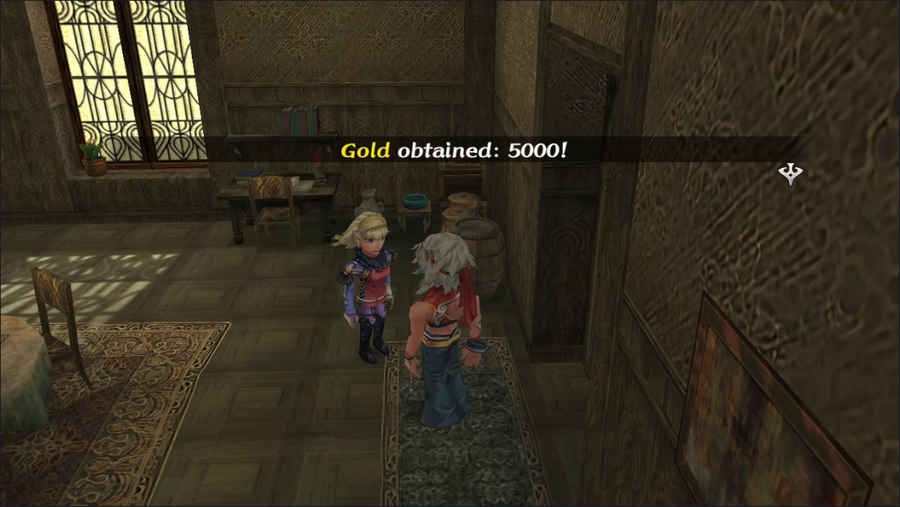  Monica is actually our reward-giver for this quest. Her dialogue makes me think that maybe she and Gian are an item, but it's just my personal suspicion.    But of course, the real prize is recruiting her as our fifth and final party member. So much for "I can't desert my post".  We immediately go into town to boost her to class level 2.  We also buy Diana up to class level 3. In retrospect I probably should have bought Survival level 3 instead, but that will have to wait. We should have the jewels soon regardless.  And that's it for today! Your options are once again open, so be sure to vote for up to three activities you'd like to see us do next time! Current Event Rank: 6 Things to Do Retrieve the Aquamarine from Crystal Lake - We probably still aren't strong enough for this Climb Mt. Scurve and steal a feather from the nest of the lord of the birds Kill the bugs in the Altours orchard Find Captain Silver's treasure Get the ancient scroll from Hawke Bodyguard the guy in Aurefont Places to Explore Estamir sewers The remainder of the Geckling cave Melvir sewers Bayre Plateau Isthmus Keep, or what's left of it The Walon Isle jungle The Ligau caves - We need Survival level 3 to do this to completion Mt. Scurve Crystal Lake - We probably still aren't strong enough for this Yassi Cavern Abandoned Keep Saoki Cavern - We need Survival level 3 to do this Treasure Maps Jungle, Level 1 Ligau Plains, Level 1 (2 Maps) Bonus! It's high time I showed off our group's techniques and spells in all their animated glory. https://www.youtube.com/watch?v=DZKDAR3ZzUM
|
|
#
?
Nov 26, 2023 16:13
|
|
|
Sheepshead fish have humanlike teeth so it's not just a fantasy setting being weird for weirdness sake.
|
|
#
?
Nov 26, 2023 18:19
|
|

|
FeyerbrandX posted:Sheepshead fish have humanlike teeth so it's not just a fantasy setting being weird for weirdness sake. Still unsettling!
|
|
#
?
Nov 26, 2023 20:42
|
|
|
Feather Hawke Silver's Treasure
|
|
#
?
Nov 26, 2023 20:42
|
|
|
Isthmus Keep, or what's left of it Abandoned Keep Bodyguard the guy in Aurefont
|
|
#
?
Nov 27, 2023 00:27
|
|
|

|
| # ? May 8, 2024 12:52 |
|
|
Find Captain Silver's treasure Get the ancient scroll from Hawke Isthmus Keep, or what's left of it
|
|
#
?
Nov 27, 2023 00:52
|
|