


|
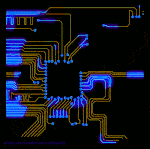
SoundMonkey posted:A thousand times this. I'd be real surprised if half the electrolytics weren't hosed. At first glance, all the electrolytic caps are fine, but there is this green non-electrolytic cap between the transformers that is covered in some white powder. It's the only one on the boards that looks like that. It's marked code:Also, that band selector switch is the most complicated switch I've even seen. I can't even count how many poles and throws it has. kid sinister fucked around with this message at 23:30 on Oct 4, 2014 |
 #
?
Oct 4, 2014 23:23
#
?
Oct 4, 2014 23:23
|
|

|

|
| # ? Jun 12, 2024 08:08 |
|
|
IratelyBlank posted:I'm a little confused about how to use an ADC. What I want to do is sample a signal and dump it into a text file on a computer in the form of time, voltage or just voltage if I am able to go back and approximate the time from the sample rate. How do I take one of these ~20 pin packages from Digikey and turn it into some kind of data I can process with MATLAB? This is the sort of problem that is usually better solved with an off-the-shelf solution. Picoscope makes some low-cost dataloggers with sufficient bandwidth and sample rate. I'm sure many others exist. If for some reason you want to build a solution: You'll want at least an ADC with at least 50MSPS - probably more like 100 MSPS for sufficient time resolution. At this point, everything needs to be engineered - lumped element models are going to be very questionable. You'll also need to poll the ADC fast enough to keep up, and clock sync may be an issue. Your low-speed microcontroller will probably not be sufficient. If it's a repeated signal, you may want to look into equivalent time sampling.
|
|
#
?
Oct 4, 2014 23:24
|
|

|
Motronic posted:Those are tuning coils. Don't mess with them unless you have access to the equipment you need and a diagram to tune the radio. It's probably (close to) fine. Interesting. Got a wiki page for them? Also, is there a reason for the different colors? Are they color coded like resistors?
|
|
#
?
Oct 5, 2014 00:20
|
|
|
kid sinister posted:Interesting. Got a wiki page for them? Also, is there a reason for the different colors? Are they color coded like resistors? It's very similar to what you spin to tune the radio, just smaller. It's a variable inductor. http://en.wikipedia.org/wiki/Inductor
|
|
#
?
Oct 5, 2014 01:05
|
|

|
kid sinister posted:At first glance, all the electrolytic caps are fine, but there is this green non-electrolytic cap between the transformers that is covered in some white powder. It's the only one on the boards that looks like that. It's marked That's 50 Working Volts. Speaking of working volts, does anyone have a preferred automotive power supply? I want to integrate a microcontroller into a vehicle without it exploding. I hear only bad things about those USB car chargers. In a similar vein, what's the accepted way to do ADC stuff above your rail voltage? The uC has a ADC Vref pin, but I'm not sure having that hang out at 12V is a good idea. Is this voltage divider or opamp time?
|
|
#
?
Oct 5, 2014 01:14
|
|


|
babyeatingpsychopath posted:That's 50 Working Volts. Aha! Thank you. For the 3 other smaller caps, they didn't even have the "V" after the W. I never tore one open, but somehow I bet the cheaper USB car chargers you buy at gas stations just have a resistor inside to knock 12V down to 5V. That being said, what's your draw? I know that there are all kinds of PSUs to run even a PC off a car.
|
|
#
?
Oct 5, 2014 03:15
|
|
|
kid sinister posted:Aha! Thank you. For the 3 other smaller caps, they didn't even have the "V" after the W. Nah, they have special noise-resistant regulators that don't explode when subjected to 100v spikes. I've got a similar problem I'm trying to solve, except instead of a noisy 12v line, I want to measure a noisy 80v line (but I also have a decent stable 5v). I really only need to be able to set a point and know whether the voltage is over or under that point. So I'm thinking: PIC PWM->optoisolator to 80V->big cap to smooth the PWM into an analog value->comparator-> optoisolator -> PIC?
|
|
#
?
Oct 5, 2014 03:30
|
|

|
kid sinister posted:Aha! Thank you. For the 3 other smaller caps, they didn't even have the "V" after the W. Draw shouldn't ever be over 100mA with EVERYTHING. On the order of 30mA. It really depends on my display, as everything else has power draws rated in dozens to hundreds of uA. edit: Is a big cap, a dc-dc converter, and a hefty crowbar circuit gonna be good enough? edit2: Look at this nifty thing! 3.3V regulated output and 3.6-36V input! :tenbux: babyeatingpsychopath fucked around with this message at 04:05 on Oct 5, 2014 |
|
#
?
Oct 5, 2014 03:53
|
|
|
babyeatingpsychopath posted:edit: Is a big cap, a dc-dc converter, and a hefty crowbar circuit gonna be good enough? Nah, you need a 1 farad subwoofer cap  https://www.youtube.com/watch?v=8iVtH152yg8 Motronic posted:It's very similar to what you spin to tune the radio, just smaller. It's a variable inductor. http://en.wikipedia.org/wiki/Inductor I followed some of those links on that page. I accidentally moved one of the windings on the loopstick antenna because the wax holding it in place got loose. Is that bad? Will I need to retune this thing? kid sinister fucked around with this message at 05:17 on Oct 5, 2014 |
|
#
?
Oct 5, 2014 05:01
|
|
|
kid sinister posted:I followed some of those links on that page. I accidentally moved one of the windings on the loopstick antenna because the wax holding it in place got loose. Is that bad? Will I need to retune this thing? In general, you need the service manual to know how to adjust each one. Also note that the presence of a metal screwdriver will affect the antenna; the right tool a plastic screwdriver. Look for "trimmer adjustment tool" or similar next time you make an electronics order.
|
|
#
?
Oct 5, 2014 05:42
|
|

|
babyeatingpsychopath posted:Speaking of working volts, does anyone have a preferred automotive power supply? I want to integrate a microcontroller into a vehicle without it exploding. I hear only bad things about those USB car chargers. The LM2940 is basically the automotive version of the LM78xx regulator, is designed to handle the abject horror that is automotive power, and is available in a range of output voltages. edit: You'd need a couple external components (filtering caps, etc) but nothing fancy. SoundMonkey fucked around with this message at 21:58 on Oct 5, 2014 |
|
#
?
Oct 5, 2014 21:54
|
|


|
SoundMonkey posted:The LM2940 is basically the automotive version of the LM78xx regulator, is designed to handle the abject horror that is automotive power, and is available in a range of output voltages. I'm thinking a linear regulator isn't the way to go for 12V -> 5V. I like that switcher module from Linear; I'm just not too sure about getting a PCB fabbed up for BGA just to test it.
|
|
#
?
Oct 5, 2014 22:33
|
|
|
At 100mA, you're using (12v-5v) * 0.1A = 700mW, which is an okay tradeoff, considering the added complexity of a switcher. Most regulators are good for a couple watts, with proper heatsinking (from what I remember). I guess it really depends on whether you want a "good" solution or a "good enough" solution.
|
|
#
?
Oct 5, 2014 22:40
|
|
|
babyeatingpsychopath posted:I like that switcher module from Linear; I'm just not too sure about getting a PCB fabbed up for BGA just to test it. You might have already seen this but you can get a demo board for 65 bucks.
|
|
#
?
Oct 5, 2014 22:45
|
|
|
babyeatingpsychopath posted:I'm thinking a linear regulator isn't the way to go for 12V -> 5V. I like that switcher module from Linear; I'm just not too sure about getting a PCB fabbed up for BGA just to test it. Ah, I was assuming you were using relatively little current. Although at like 100-150mA you should still be fine.
|
|
#
?
Oct 5, 2014 22:56
|
|
|
Boy With Stick posted:Trust me, this happens to everyone at some point when learning electronics! A definite rite of passage. Thanks again for this link. I finally have USB data transfer working and can use my FPGA as a N channel digital oscilloscope and have been plotting the signal curves, and definitely do see the hysteresis. Haven't had a chance to do anything about it though. Just to show off what I do have working, here's the comparator output for two different motor speeds. 
Ika fucked around with this message at 23:31 on Oct 5, 2014 |
|
#
?
Oct 5, 2014 23:28
|
|


|
Separate question from the quad copter thing -- I'm out of my depth on another project. Without going into tons of background, I basically want to pass a 100 MHz signal through a crosspoint switch, like this AD75019: http://www.analog.com/static/imported-files/data_sheets/AD75019.pdf The signal uses differential voltage (+/- ~2 V). I've read the datasheet maximums, but there's a few things I'm unclear on. Can it handle 100MHz without all that crazy RF moon magic ruining everything?
|
|
#
?
Oct 6, 2014 19:29
|
|

|
Motronic posted:Well, if it kinda works I'd start with cleaning all of the switches with DeOxit to make sure they are actually making contact. And inspect all of the electrolytic caps in there for bulging/leaking. Replace as necessary. That will likely make it work. Yeah, about that... I planned on replacing all the electrolytic caps and that film (I think) one that looks damaged. Well, a few of the caps are weird values. I would need 2 at 200 uF, 1 at 3uF and 3 at 30uF. I couldn't find those at my local hobby shop, the closest I found were 220 uF, 3.3 uF and 33 uF, respectively. Is that going to cause a problem? Will I need to retune it? kid sinister fucked around with this message at 00:19 on Oct 7, 2014 |
|
#
?
Oct 6, 2014 22:25
|
|
|
Stabby McDamage posted:Separate question from the quad copter thing -- I'm out of my depth on another project. Without going into tons of background, I basically want to pass a 100 MHz signal through a crosspoint switch, like this AD75019: Probably not. 25 pF input capacitance, the -3dB point is 20 MHz, and isolation is already somewhat marginal at 1 MHz. edit: This thing has the lowest frequency rating of Analog's offerings. Try something better from their lineup. sixide fucked around with this message at 22:44 on Oct 6, 2014 |
|
#
?
Oct 6, 2014 22:41
|
|
|
Ok, so this is sort embarrassing since I do sound for a living, but class-D wasn't really a thing yet when I was in school  I grabbed some TPA3125s thinking they were just the regular class-D type things I'd been using, but hey, these ones want a filter on the output and hot drat do I ever not want to have to order inductors. http://www.ti.com/lit/ds/symlink/tpa3125d2.pdf Can anyone guess how badly I'd be screwing myself just leaving that out entirely? Not looking for like audiophile quality or anything, and I have like no appropriate inductors lying around (although I guess I could order some if I really had to.) e: I was thinking of just using a TPA1517 but I'm not sure I can attach the heatsink pins to enough copper for them to be effective. SoundMonkey fucked around with this message at 07:49 on Oct 7, 2014 |
|
#
?
Oct 7, 2014 07:45
|
|
|
SoundMonkey posted:Ok, so this is sort embarrassing since I do sound for a living, but class-D wasn't really a thing yet when I was in school A class D amp is basically a high bandwidth switching DC-DC converter designed for audio applications. And like the a DC-DC the inductor is more than a filter, it's an integral lossless element of the circuit. L and R out are switching hard between the rails so you absolutely need filtering but simultaneously all the amplifier power/current is transferring across the L as well. A value of R that provides adequate filtering there would destroy your output power. So there really isn't a choice. asdf32 fucked around with this message at 02:13 on Oct 8, 2014 |
|
#
?
Oct 8, 2014 02:10
|
|

|
Can anybody help with my cap question? Will my next-highest-value caps work, or will that screw with the tuning on my half century old radio? I got the closest matches I could find at my local hobby shop, but I still managed to find matches for those weird valued ones over at Newark. Is that my best bet?
|
|
#
?
Oct 8, 2014 02:42
|
|
|
kid sinister posted:Can anybody help with my cap question? Will my next-highest-value caps work, or will that screw with the tuning on my half century old radio? I got the closest matches I could find at my local hobby shop, but I still managed to find matches for those weird valued ones over at Newark. Is that my best bet? Sorry dude. No one but the engineer that designed it will be able to answer that question probably. See if you can find a closer match on Digikey, or if that isn't good for some reason, just try what you have. Worst case scenario, you can desolder them again.
|
|
#
?
Oct 8, 2014 04:03
|
|
|
Forgive my ignorance, but couldn't you just solder a few equivalent type caps in parallel to sum up to the required capacitance? It would be ugly, granted.
|
|
#
?
Oct 8, 2014 04:47
|
|
|
Old capacitors (and some new ones) have a tolerance of something like 20%. If you replace a 200uF cap with a 220uF you will be within the original tolerance (technically the new cap should be 10% tolerance but whatever). If its an electrolytic capacitor its probably used for power bypassing, DC blocking between stages or rolling off low frequencies in an audio amp. None of these uses are sensitive to the precise value. The caps that are picky about value will be in tuned LC circuits, and if you replace those even with an exact value, it won't be a very good match and that's why the L in those circuits are those little square adjustable thingies. eta: what i'm saying is don't worry, replace electrolytics with what you got edit more: make sure you get the right polarization and don't replace a nonpolarized cap with a polarized one. if you can't tell which way the original goes, its probably not polarized. Base Emitter fucked around with this message at 05:13 on Oct 8, 2014 |
|
#
?
Oct 8, 2014 05:07
|
|


|
asdf32 posted:A class D amp is basically a high bandwidth switching DC-DC converter designed for audio applications. And like the a DC-DC the inductor is more than a filter, it's an integral lossless element of the circuit. I only ask because a bunch of other class-D ICs seem to use the speaker coil as an inductor and don't require anything more than a capacitor on the outputs.
|
|
#
?
Oct 8, 2014 06:07
|
|
|
SoundMonkey posted:I only ask because a bunch of other class-D ICs seem to use the speaker coil as an inductor and don't require anything more than a capacitor on the outputs. Depends on the speaker and the frequency. For very high switching frequency and headphone speakers it probably works fine, but I'd assume that for large speakers the ripple current will cause significantly higher dissipation in the speaker.
|
|
#
?
Oct 8, 2014 12:40
|
|


|
SoundMonkey posted:I only ask because a bunch of other class-D ICs seem to use the speaker coil as an inductor and don't require anything more than a capacitor on the outputs. Ah, didn't realize that was sometimes the plan. The large filter caps have to go too though If this works like I assume. Can't have large C on switching V. The class D's you speak of have a small C on the output right? The LC in the application note isn't exactly small so it seems removing it would be pretty adverse. asdf32 fucked around with this message at 15:37 on Oct 8, 2014 |
|
#
?
Oct 8, 2014 15:34
|
|
|
asdf32 posted:Ah, didn't realize that was sometimes the plan. The large filter caps have to go too though If this works like I assume. Can't have large C on switching V. Most of the ones I've seen have a decent sized output cap, the TPA1517 uses 470uF on the outputs (no inductors or anything, just IC -> cap -> speaker). I'm thinking maybe the one I linked uses some way different design or something?
|
|
#
?
Oct 8, 2014 22:51
|
|
|
I think this would be the best thread to ask as you guys presumably do a decent amount of heat shrinking: I work at an injection molding facility and we have to use a heat gun to reheat corners of a certain part where there is flash and then it can be hand trimmed. Flash is a flat piece of plastic which gets out of the cavity and between the two sides of the mold -- random example photo I pulled from internet:  The issue is that the operator is using the heat gun to get the plastic warm, setting down (and thus turning off) the heat gun, cutting, then putting the part in a box. The time between parts is ~90 seconds so as you can imagine this means the heat gun takes time to reheat up to max temp to melt for the next part. Somewhat inefficient and unnecessary touches. The solutions are: 1) Keep doing what we're doing. 2) Mount heat gun taping trigger down and let it use a ton of energy as well as making the job worse because the station will be warm as gently caress. 3) Find a heat gun which comes up to temp quickly, mount it, tape down trigger, set power to foot pedal (my preferred solution). 4) Your answer here. I can't seem to find the right terms to search to get a heat gun which heats quickly.
|
|
#
?
Oct 8, 2014 23:22
|
|

|
c0ldfuse posted:I think this would be the best thread to ask as you guys presumably do a decent amount of heat shrinking: A hot air rework station would work, mine gets to heat almost instantly (1-2 seconds) when i lift it off the cradle, and cools down to 100C in 2-3 seconds after putting it back (the fan switches off at 100C, and it's allowed to naturally cool to ambient).
|
|
#
?
Oct 8, 2014 23:33
|
|
|
c0ldfuse posted:I think this would be the best thread to ask as you guys presumably do a decent amount of heat shrinking: While it's not ENTIRELY the same thing, I used to work at a cable manufacturing place and we used heat guns to reflow solder on enormous Socapex connectors, and since sometimes it took a couple tries to get it right, briefly inspecting after each try, we had sort of a similar issue. We also had no established protocol on how to do this - a lot of the guys just left their heatgun on but pointing in the vague direction of their ventilation intake (since they were soldering, they had one), but a couple people had dual-temperature heat guns (full and half power, with a switch), and would just switch down the temperature to half power when they weren't using it (with the trigger ziptied down). I don't know if your heat guns have this feature, but they came back up to full temperature a LOT faster than from being off, and the waste heat from the low temperature setting was less annoying even in a small shop. You're right of course, a heat gun that comes up to temperature near-instantly would be a much better solution, but I also don't know where you'd get such a thing. SoundMonkey fucked around with this message at 23:42 on Oct 8, 2014 |
|
#
?
Oct 8, 2014 23:37
|
|
|
When we do heat shrink, we leave the heat guns running on the bench and go through the entire lot. Granted, we are not taking 90 seconds to do the operation, more like... 10 seconds. When I read your description, I read a few other process inefficiencies that seem more significant than heat gun warmup time. Can you avoid the flash? (probably not) If no, why do you have such a long cycle time? - Why is your flash-trimmer responsible for packaging the part? - Why does it need to be hand-trimmed? If it's a common part, tooling should be developed. I know the realities of a job shop may preclude any real time investment, but it sounds like you're already trying to optimize this process.
|
|
#
?
Oct 9, 2014 00:53
|
|
|
sixide posted:When we do heat shrink, we leave the heat guns running on the bench and go through the entire lot. Granted, we are not taking 90 seconds to do the operation, more like... 10 seconds. These are all good ideas, but also have you considered using the footswitch to turn the heatguns OFF? The worker could then kinda decide for themselves how warm they could deal with their station being, and work out when to turn it on to have it up to temperature at the right time. I mean obviously you'd also want a way to ACTUALLY turn them off, and a default-on heatgun is probably some kind of safety violation (although we also did that all the time when heatshrinking or melting the ends of tie lines.) edit: i'm assuming these guys are just fixing flash and aren't doing any other task (seriously this) edit2: or why not just use a hot-wire trimmer (which heat up almost instantly) to both heat and cut the flash at the same time? SoundMonkey fucked around with this message at 05:46 on Oct 9, 2014 |
|
#
?
Oct 9, 2014 01:12
|
|
|
SybilVimes posted:A hot air rework station would work, mine gets to heat almost instantly (1-2 seconds) when i lift it off the cradle, and cools down to 100C in 2-3 seconds after putting it back (the fan switches off at 100C, and it's allowed to naturally cool to ambient). This looks pretty good and they are running ~$120ish each. It'd be nice to have more settings which these allow. I found a Milwaukee heat gun which is supposed to come up to temp fast as well for ~$80 (http://www.amazon.com/Milwaukee-8975-6-1000-Degree-Fahrenheit-Temperature/dp/B00004TI25) but I would not have the same control as with the hot rework station. My only concern would be if I integrated a foot switch how hard the power cycling would be on the hot rework station vs a heat gun. SoundMonkey posted:While it's not ENTIRELY the same thing, I used to work at a cable manufacturing place and we used heat guns to reflow solder on enormous Socapex connectors, and since sometimes it took a couple tries to get it right, briefly inspecting after each try, we had sort of a similar issue. I wonder how the switch operates and if I could get it connected to a foot pedal. Going to look into it. sixide posted:When we do heat shrink, we leave the heat guns running on the bench and go through the entire lot. Granted, we are not taking 90 seconds to do the operation, more like... 10 seconds. You're 100% right in many ways but this is one of those situations where nothing you said will work: 1) Avoid flash? --While I haven't reviewed this specific tool, many times due to processing parameters and the tools design and or current state minimal flash is unavoidable. For processing parameters if you inject less plastic or use less pressure you have other undesirable things happen to the part. For tool design, how the plastic flows can contribute to this issue and the cost of building a new tool is astronomically higher than the operator hand trimming over lifetime of tool. 2) Why long cycle time? --Everything is automated except for the packaging and hand trimming. Furthermore cycle time is usually dictated by the tool and part itself and can only be optimized so far. You have the injection, packing, and holding steps (typically 8-20 seconds depending on size), then cooling time. Cycle times can be up to multiple minutes on very very large parts primarily due to cooling. If you want a more detailed explanation I can type up. 3)Because they're standing at the press. It's the most efficient process due to having the time between cycles to perform the operation. Furthermore we're talking a massive warehouse full of 50 presses all running different parts. They need to be finish-boxed and labeled at the press or it would be a logistical nightmare. We do all secondary operations on parts in a separate area or building. Secondary operations are rarely preferred. 4) Why no fixture? --Because of the shape of the part. It's not something we can just put a good fence up on a router table and zip them along. Curved surfaces, etc. SoundMonkey posted:These are all good ideas, but also have you considered using the footswitch to turn the heatguns OFF? The worker could then kinda decide for themselves how warm they could deal with their station being, and work out when to turn it on to have it up to temperature at the right time. Job is the following tasks: 1) Open door to press, remove part by hand. 2) Close door to press, machine automatically starts next part. 3) Turn on heat gun, let come up to temp, warm flash, set down heat gun, cut flash, put part down to continue cooling, turn off heat gun, wait for next part to be completed. Periodically stack parts in box once cooled. The gun being on all the time isn't a problem outside of making the job hot and miserable. I don't think a hot wire trimmer will work due to the plastic density. Will look into it though. Edit--checking around online no way I can get a hot wire trimmer which will cut plastic of this density and functionally work for the part shape. c0ldfuse fucked around with this message at 15:45 on Oct 9, 2014 |
|
#
?
Oct 9, 2014 15:42
|
|
|
How'd you get out of DVT/PVT with an issue like this? ") Every part needs some amount of trimming? Otherwise you could bin the faulty ones and trim them in a batch while the good parts move on. If the hot air rework doesn't work, something meant for IML trimming might do the trick.
|
|
#
?
Oct 9, 2014 15:57
|
|

|
Probably because we didn't build the tool and signed up for running it. I know it's completely missing the wood for the trees to an extent but as you're readily aware sometimes patching is the best functional option given the constraints. I've been at this job for like 12 weeks and there are enough low hanging fruit projects to pick off to last a lifetime of employment. It's actually a great job in that respect. I'm probably going to pull the trigger on a hot rework station today. Will let you all know how it goes.
|
|
#
?
Oct 9, 2014 16:21
|
|
|
Check out thermocutters.com. I'm using one on a knot tying machine to trim nylon with good results.
|
|
#
?
Oct 9, 2014 19:36
|
|
|
If attaching a decoupling capacitor to a board between the power and ground pins of an IC (as per the manufacturer's suggestion) causes it to stop working, would that be indicative of needing a polarized capacitor? I rigged up an NXP PCA9685 to an Arduino on a shield I etched, and when I don't have the decoupling cap (a 0.1 uF ceramic 1206) the circuit seems to work well enough, but with it attached I either seem to get all 0s or all 255s when I poll it for register values (even after sending out values that should be between the two) which leads me to believe it's either being pulled high or pulled low depending on...who knows? Desoldering the cap was a suitable solution for this project, but I've used similar capacitors for other ICs in similar applications and I've never had this sort of problem before. If anyone has any insight, I'd love to know for future projects. Unrelated: If anyone has any interest in a KiCad footprint file for an Arduino shield that has wide pads (to accommodate sloppy drilling), let me know.
|
|
#
?
Oct 9, 2014 23:43
|
|
|

|
| # ? Jun 12, 2024 08:08 |
|
|
You shouldn't ever need a polarized decoupling cap. There isn't really any reason I can think of to prefer a polarized cap to an nonpolarized one, its just that if you want lots of microfarads in a small package you're stuck using a polarized cap because that's the best way to get very thin dielectrics. You might have inadvertently shorted a signal soldering the cap? Maybe a chip select or enable signal of some sort?
|
|
#
?
Oct 10, 2014 02:32
|
|