


|
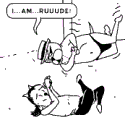
My first Grey Hunter. There's a lot of areas I could neaten up but I need a break from this guy, I already spent hours on him. This genuinely got me to wonder if I understand how to use the Citadel layer paints - getting a somewhat smooth and even coat of Russ Grey over a base of The Fang was miserable.  1 1
|
 #
?
Jan 28, 2017 00:24
#
?
Jan 28, 2017 00:24
|
|


|

|
| # ? May 27, 2024 21:12 |
|
|
big_g posted:Please excuse me while I spam this thread with pictures of military scale aricraft. (1:48 scale) I love this stuff. Do we have a scale modeling thread? I want to see more. If not, just keep posting here. It's really inspiring.
|
|
#
?
Jan 28, 2017 01:53
|
|

|
Cat Face Joe posted:What line is this? It's from Mierce Miniatures! Here's the specific model, Caitr�n
|
|
#
?
Jan 28, 2017 02:08
|
|

|
ExtraNoise posted:I love this stuff. Do we have a scale modeling thread? I want to see more. https://forums.somethingawful.com/showthread.php?threadid=3148869
|
|
#
?
Jan 28, 2017 02:08
|
|
|
Mierce makes good minis, I wouldn't give them money because their owner is huge scumbag thief, but the minis are nice.
|
|
#
?
Jan 28, 2017 05:01
|
|

|
Ayn Marx posted:My first Grey Hunter. There's a lot of areas I could neaten up but I need a break from this guy, I already spent hours on him. He looks great. The bones are especially good, and that's something I struggle with even after nearly a decade in the hobby.
|
|
#
?
Jan 28, 2017 05:16
|
|

|
I painted my first mini yesterday and thought it was passable as a first attempt. Then I found this thread and realized that it isn't even in the same zip code as what gets posted here. I will try not to be discouraged. Some things I can take solace in is that a) the mini I used was not made of material meant to be painted and b) my local craft store sent me off with Testors enamel paints, which seem to be pretty terrible. I picked up a few Reaper Bones minis, boiled them straight and primed them. What can you guys recommend for a newbie like me? I don't think I'll ever get nearly as good as some of the stuff posted in here, but even halfway would be great. Is something like this a good starting point? https://www.amazon.com/Reaper-Minia...ture+paint+kits
|
|
#
?
Jan 28, 2017 09:00
|
|


|
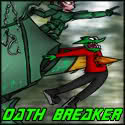
darkwolf220 posted:I painted my first mini yesterday and thought it was passable as a first attempt. Then I found this thread and realized that it isn't even in the same zip code as what gets posted here. I will try not to be discouraged. Some things I can take solace in is that a) the mini I used was not made of material meant to be painted and b) my local craft store sent me off with Testors enamel paints, which seem to be pretty terrible. Oh yeah, enamels paints are mostly designed for a) advanced-level painters, and b) old grognards who stick with them because that's all they've ever used. Water-based acrylics are a lot easier on you, your brushes, and your general sanity. Also, don't be discouraged! Everybody had to start somewhere and everyone's first minis look freaking awful. No matter how much you watch videos and read tutorials, the 'painter's eye' sense you develop for thigns like shading, color combinations and such is something that just will develop with time. In fact, I went rooting: Have my first ever minis from.. seven years back. Man, time flies.  Assault on Black Reach dread. I pretty much had no washes at that point so most my minis were just blocked out base colors over black primer.  AoBR terminators plus a five-man tac terminator box. It doesn't help that mostly what I had available to me were the 'basic' colors in the Hobby Starter Kit, most of which were Foundation colors.  AoBR tactical squad and captain. The primary color scheme is actually black and dark Angels Green quartered but with my lovely camera and a lack of any and all highlights, it's almost impossible to tell. For contrast, the last mini I've finished just a week or so ago:  Anyone else have embarrassing first minis from years back they'd like to share?
|
|
#
?
Jan 28, 2017 10:44
|
|
|
Your first still looks a whole lot better than what I came up with, but I am hoping a better figure and better paints will help a little bit.  Yeah. That texture that you see on the shield, the whole thing is that. It was like painting a piece of sandpaper. I put a black wash on after this that muted the colors a bit and looks great in some places, but in others things just got a bit blurry. Chalk it up to the learn bank and do better with the next one I guess.
|
|
#
?
Jan 28, 2017 11:38
|
|
|
Wolf Lord Krom incoming:   I never really liked the 40k spacewolf look with the baby blue armour and bright cartoony colours, so he's done more 30k which i find way more appealing. Tried to keep the colours deliberately muted which was a bit of a challenge as its not quite my style (not entirely sure I succeeded there)
|
|
#
?
Jan 28, 2017 13:03
|
|


|
Lol that puts my poor Grey Hunter in perspective :v Great work, I may try copy this
|
|
#
?
Jan 28, 2017 13:34
|
|
|
Here are the second mini I ever painted, and one I did as a gift for a friend about three years later (I'd accidentally wrecked my first mini's feet, which is why it's not in this picture): Note the unblended flesh tones, Sunburst Yellow hair, and unpainted base flock on the left mini. At the time, I thought this was a massive improvement of my skills. Then I took a weekend painting seminar at my FLGS, and started reading this thread. The encouragement everyone here offers each other prompted me to try new techniques, and eventually join the Oath Thread (which doubles as a "try a new method every month" masterclass). There are still many things I could improve on the mini on the right, but the difference between the two is huge; for one thing, I spent a few days on it, rather than about 25 minutes as on the earlier mini. You'll get there! Don't be afraid to ask around for suggestions.
|
|
#
?
Jan 28, 2017 13:40
|
|


|
Eat the Rich posted:Good lord, there are so many amazing models on this page I'm embarrassed to even share mine. Nice. What colour are you using beneath the Ironearth? Saint Duncan suggests Khorne Red but yours looks better.
|
|
#
?
Jan 28, 2017 13:43
|
|

|
Good gravy, Skarsnik, that's a fantastic wolf dude you have.Hobospider posted:Hey- mini painting crew: I am looking to paint some armor for a cloud giant that has this bluish platinum look. Can anyone give a suggestion on where to start? Hobospider, did anyone get back to you on your armor question? It looks like the studio paint job is a non-metallic metal effect, which you can probably duplicate with a dark grey base, dark ink wash, midtones in dark- to medium-blues, and then what looks like an off-white. Decent matches for those would include Vallejo Black Grey, GW Nuln Oil or Army Painter Dark Wash, Privateer Press Coal Black (actually a very dark turquoise), and Vallejo Pale Sand. If you're wanting an actual metallic look, you can start with Vallejo Air paints; their metallic line is amazing, and their Arctic Blue metallic with a heavy dark wash would be a good base to build on. Anyone else want to jump in on this?
|
|
#
?
Jan 28, 2017 15:30
|
|

|
Ridiculous Turtle Spaceship motherfuckers. Spot the kits and found objects!       It's still a little smooth, I might go back and add some panel lines to the flippers, or I might try to paint some in, but mostly, it's done. Probably going with a green and brown scheme that I've seen in the google image search. Crossposted from the wangs thread, babby's first kitbash/scratchbuild
|
|
#
?
Jan 28, 2017 17:23
|
|

|
Ghtroc turtleship best dumb ship in Star Wars. That version looks good as hell.
|
|
#
?
Jan 28, 2017 17:46
|
|

|
For being your first mini AND using enamel those look surprisingly good. Don't be too hard on yourself.
|
|
#
?
Jan 28, 2017 18:14
|
|
|
darkwolf220 posted:I painted my first mini yesterday and thought it was passable as a first attempt. Then I found this thread and realized that it isn't even in the same zip code as what gets posted here. I will try not to be discouraged. Some things I can take solace in is that a) the mini I used was not made of material meant to be painted and b) my local craft store sent me off with Testors enamel paints, which seem to be pretty terrible. I have that set, its pretty great for beginners because it gives you a good variety of colors, three nice minis (and by reaper standards very lean on mold lines), and with an accessible tutorial for drybrushing, washes, and base coats. Buy a bottle of red paint alongside it and you'll have every primary color to work with. Drake_263 posted:Oh yeah, enamels paints are mostly designed for a) advanced-level painters, and b) old grognards who stick with them because that's all they've ever used. Water-based acrylics are a lot easier on you, your brushes, and your general sanity. This isn't entirely fair to enamel paints. Since this would be a good time to give a crash course on paints for a beginner: Oil Paints: Least invasive of the paints (but oddly enough can eat uncured enamel paint very easily), dries very slowly which, alongside easily achieved very smooth blending, makes it ideal for "gunk washing" larger units with smooth surfaces (armored giants, imperial knights, tanks, planes, gundams) Acrylic: second-least invasive and toxic, unique of all the paints in that it's water-soluble (aka you dont need special thinner to thin it out), very cheap and widely available. Great for general mini-painting, but the nature of the paint means that it can be difficult to achieve smooth flat surfaces in large areas (because of how fast it dries and the lack of solvents to flatten pigment clumps). Leading to... Enamel: Very pungent inhalant, unthinned its basically impossible to hand paint, and even thinned can require multiple coats due to the paint shrinking as it cures. It sees huge use in the model vehicle community because 1) Its solvents thin out the pigment and its degas period means that it stays 'wet' long enough that the paint will often even itself out over the course of a day, and 2) outside of Lacquer it achieves the best metallic sheen of the paints.it's totally worth learning if you plan on painting vehicles eventually. Lacquer: expensive and Incredibly dangerous paint, can only really be airbrushed (which makes it even more deadly, as it then not only can burn skin but enter lungs and eyes). In exchange its virtually impossible to overspray, is the absolute thinnest of the paints, has the absolute most realistic metallic sheen (because its meltingmetal flakes into the target), and is the most durable of the paints. You'll never use this on miniatures, and even mini vehicles it wouldn't be worthwhile unless you already have a paint booth due to other hobbies. Testors gets a bad rap, but thats less the quality of the paint (which is generally pretty good) and more the QA; any testors bottle you buy theres a 99% chance that most of the pigment has become jelly at the bottom of tbe pot. You can fix this by using the OK paint, mixing enamel thinner into the gunk with a popsicle stick or metal stirrer, closing and shaking the pot, and coming back to it the next day.
|
|
#
?
Jan 28, 2017 18:55
|
|

|
thespaceinvader posted:Crossposted from the wangs thread, babby's first kitbash/scratchbuild Neat! My Star Wars RPG crew had that ship briefly, got some use of the map for it.
|
|
#
?
Jan 28, 2017 20:07
|
|


|
darkwolf220 posted:I painted my first mini yesterday and thought it was passable as a first attempt. Then I found this thread and realized that it isn't even in the same zip code as what gets posted here. I will try not to be discouraged. Some things I can take solace in is that a) the mini I used was not made of material meant to be painted and b) my local craft store sent me off with Testors enamel paints, which seem to be pretty terrible. That's a great kit. It has a nice, decent selection of paints. It's also made to complement their other Learn to Paint Kit (Layer Up) to give you a good, well rounded set of paints going forward. For the record, here's one of my first minis, done with one of their old Learn to Paint Kits:  Here's one I did just a week or so ago:  I'm still not as good as most of the people in this thread, but you know what? That's okay. I'm a lot better than what I used to be. And I started posting to this thread not long after that first mini, even though I still sucked pretty bad. People gave me advice, and it's helped a lot.
|
|
#
?
Jan 28, 2017 20:12
|
|

|
I decided to put together a WH40K army to finally try some tabletop gaming. Here are some pictures of my first minis. Some of them are still WIP, and I haven't gotten the chapter emblems painted on the shoulders yet. I've never painted anything prior to getting these models last month, so the idea of free-handing is a bit intimidating. Overall, I'm pretty pleased with how they are turning out considering my inexperience. I'd love any suggestions you have for improvement!   
|
|
#
?
Jan 29, 2017 03:27
|
|

|
Is that an actual LED light in the Rhino's searchlight? Kickass. I tried doing that with a Monolith but it sadly didn't turn out as well as I hoped. Also, for actual suggestions: -Your reds are kind of flat, especially for targeting lenses and such. I'd consider giving them a little dab of a wash - I'd recommend Carroburg Crimson from the GW line, or whatever equivalents are for others - and a couple of highlights to go for a 'jeweling' look. It's not hard and makes the eyes and targeting lenses look so much more alive. For things like purity seals, just give the seal a careful wash, then highlight the top section of the raised rim with a slightly brighter red (I'd go for Evil Sunz Scarlet). -For the green armor and black sections, I'd consider a fine edge highlight - a thin brush and a line of brighter green drawn along the edges of armor plates and such will make the shapes 'pop' a little more. Right now your models kind of tend to blur into indistinct shapes at distance (or so the zoomed out images look). -I might consider giving your metal sections (like the treads on the vehicles, the silver parts on your guns) a black or brown wash, followed by a careful drybrush of a brighter metal. That should, again, make the shapes pop a little more, give more of a sense of depth to the shapes. Washes in general are awesome stuff and can easily make your minis look more 'complete' when used right. All that said, these look very nice for first minis! Keep at it, keep experimenting in tactics, and you'll have awesome little soldiermans in no time 
|
|
#
?
Jan 29, 2017 11:10
|
|
|
Drake_263 posted:Is that an actual LED light in the Rhino's searchlight? Kickass. I tried doing that with a Monolith but it sadly didn't turn out as well as I hoped. Thanks for the tips, I will start doing some of that as I put finishing touches on them. The Raptor Chapter is known for ambush tactics so the dry brush highlights were sort of intentionally mimicking a subtle camouflage pattern. I will add some edge highlights for sure, though. I agree that the reds are flat. For the eyes I did white with a red glaze over them. I will certainly take your advice on the purity seals and look into the gem technique. The razorback has LEDs courtesy of its previous owner. Someone told me it was probably at least a decade old, as it was a lighter grey plastic than my knew models. Thanks!
|
|
#
?
Jan 29, 2017 13:37
|
|
|
Raptors? I thought the olive green looked familiar. Big plus for going for one of the less common chapters.
|
|
#
?
Jan 29, 2017 15:09
|
|
|
Lovely Joe Stalin posted:Nice. What colour are you using beneath the Ironearth? Saint Duncan suggests Khorne Red but yours looks better. Thanks! I just use Mephiston Red under the Martian Ironearth. It's a bit brighter than Khorne. The edges are Temple Guard Blue with a wash of Biel-Tan green. I was going for that aqua - rust look.
|
|
#
?
Jan 29, 2017 19:22
|
|

|
 Painting faces is hard :v
|
|
#
?
Jan 29, 2017 19:51
|
|
|
Cross Posting from the sigmar thread: Horace-Noah posted:Well one hour before bed turned into two and I finished up a test skeleton for my new Tomb Kings.
|
|
#
?
Jan 30, 2017 04:44
|
|


|
Is there an option to get a QD set with a 1/8" coupler for the hose and 5mm plugs for the airbrush (Badger)? Seems like you can only ever get sets with one of the two and I'm not sure if they are universal. The compressor is a TC-910 with the standard 1/8" connection and I'm getting a 1/8" hose.
|
|
#
?
Jan 30, 2017 06:20
|
|


|
Chill la Chill posted:Is there an option to get a QD set with a 1/8" coupler for the hose and 5mm plugs for the airbrush (Badger)? Seems like you can only ever get sets with one of the two and I'm not sure if they are universal. The compressor is a TC-910 with the standard 1/8" connection and I'm getting a 1/8" hose. You could get the Badger QD kit and just use one of their hose adapters. I have the same (re-badged) compressor and the Badger airbrush hose, so I use their QD kit that goes with it. I installed an inline regulator with a 30psi gauge so I can have finer pressure control; they're standard with 1/4" connectors. A connector size conversion had to happen somewhere, so I made the most of it.
|
|
#
?
Jan 30, 2017 07:08
|
|

|
Danoss posted:You could get the Badger QD kit and just use one of their hose adapters. Oooh that sounds neat. I don't actually have the hose yet so I could just get this setup instead. Was the hose this thing? Link to the inline regulator? I saw those and they looked intriguing.
|
|
#
?
Jan 30, 2017 07:34
|
|
|
Chill la Chill posted:Oooh that sounds neat. I don't actually have the hose yet so I could just get this setup instead. Was the hose this thing? Link to the inline regulator? I saw those and they looked intriguing. That's the hose! I bought the regulator and pressure gauge on eBay and the link to the regulator is no longer valid. Luckily, there are plenty of other listings that show the exact one that I have. This is the regulator that I'm currently using. The pressure gauge I installed was bought from here. It's a multi-listing, which doesn't help much. However, mine is the "0-30 psi 0-2 bar 1/8 bsp rear entry (centre)".
|
|
#
?
Jan 30, 2017 12:34
|
|
|
Horace-Noah posted:Really need a better sand recipe. I want a more warm yellowish tone to it. Any constructive criticism would be very appreciated! I would suggest using some finer sand, what you're using looks like loose rocks. Find a playground near you for an infinite source.
|
|
#
?
Jan 30, 2017 13:57
|
|


|
Electric Hobo posted:I would suggest using some finer sand, what you're using looks like loose rocks. Find a playground near you for an infinite source. This, but cook your sand in the oven for a bit and let it cool off before using it. You don't want creepy-crawlies* from the playground living on your miniatures. Same principle applies with certain other basing materials; for instance, if you use tea leaves for jungle/leafy type terrain, bake them to dry them out and prevent mold from forming later. If you're looking for terrain effects in a jar, Vallejo makes a product called Sandy Paste. That's got very fine grains in a gooey suspension, which dries surprisingly hard, looks much more like sand at the proper scale, and holds paint quite well. It's got a sort of meringue-like consistency while wet, so it's easy to sculpt into dunes, add footprints, etc. while you're putting it on the base. * highly technical term
|
|
#
?
Jan 30, 2017 16:31
|
|
|
You could go to a home improvement store and get a bag of play sand that's not contaminated with toddler piss and god knows what else too. $3-4 and you will never run out.
|
|
#
?
Jan 30, 2017 16:57
|
|

|
Anyone have recommendations for plastics glue? I've been using superglue, and I hate that my miniatures break when i drop them (which isn't often, but still.) I really liked GW Plastics Glue, but i haven't been able to find any near me. Anyone know of a similar type glue?
|
|
#
?
Jan 30, 2017 17:42
|
|
|
Eat the Rich posted:Anyone have recommendations for plastics glue? I've been using superglue, and I hate that my miniatures break when i drop them (which isn't often, but still.)  Get this stuff. It worked really well back when I was doing 40k stuff.
|
|
#
?
Jan 30, 2017 17:44
|
|
|
I use Tamiya Extra Thin Cement with one of these: I love those things and introduced them at work too. (work is building architectural scale models)
|
|
#
?
Jan 30, 2017 17:53
|
|
|
I was watching the Tabletop Minions youtube channel and he uses baking soda (or powder? I forgot) for sand because it has to-scale grain sizes relative to actual sand (which looks like gravel)
|
|
#
?
Jan 30, 2017 18:48
|
|
|
Fyrbrand posted:
Bistromatic posted:I use Tamiya Extra Thin Cement with one of these: I'll check both of these out. Thanks guys. In other news, I finished up my Ironstrider Ballistarii, mostly. He's like 99% done. I missed some edge highlighting and need to drill the barrels, but I'm happy with how he turned out.  General Olloth posted:Looking good. I think you could use a bit of dry brushing highlight on the ground for a bit more popping? I also took this advice and applied it to this miniature and the others I already finished. Dry brushed Karak Stone across the base to give it a little depth. I'm wondering if I should try applying a red wash over the Ironearth then dry brushing it? Fun fact: I put the drat legs on the wrong sides, so the wires connect to nothing. Zuul the Cat fucked around with this message at 19:06 on Jan 30, 2017 |
|
#
?
Jan 30, 2017 19:03
|
|
|

|
| # ? May 27, 2024 21:12 |
|
|
Dr. Gargunza posted:This, but cook your sand in the oven for a bit and let it cool off before using it. You don't want creepy-crawlies* from the playground living on your miniatures. Same principle applies with certain other basing materials; for instance, if you use tea leaves for jungle/leafy type terrain, bake them to dry them out and prevent mold from forming later. I was wondering if that stuff was worth it's salt. I'm going to buy some based on your recommendation. Thanks!
|
|
#
?
Jan 30, 2017 20:13
|
|