|
porkfactor posted:This is going back a few pages, but that's just how long it's taken me to get chance to try this out. Just finished doing the main decals with Microset/Microsol, and it's like some kind of wonder juice. Thanks so much for the advice. What did you end up doing for the seam lines on the tail decals?
|
 #
?
Oct 10, 2014 01:53
#
?
Oct 10, 2014 01:53
|
|


|

|
| # ? Jun 6, 2024 00:05 |
|
|
A hair dryer and microsol can make just about every decal job a work. The hair dryer especially. Really helps the decal conform to complex curves.
George Zimmer fucked around with this message at 02:18 on Oct 10, 2014 |
|
#
?
Oct 10, 2014 02:12
|
|
|
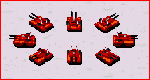
Picked up this guy for a tenner. I'm not really into Chinese tanks, but for that price why not. This technically passes as motorized, but really? There's a slot for a second motor, even!  I'm dusting off my soldering equipment and getting this sucker to drive properly! Also I have a spare microcontroller lying around, might as well make it remote controlled.
|
|
#
?
Oct 10, 2014 02:55
|
|

|
Ensign Expendable posted:I'm dusting off my soldering equipment and getting this sucker to drive properly! Also I have a spare microcontroller lying around, might as well make it remote controlled. Nice! It's Trumpeter, so I assume the details are good?
|
|
#
?
Oct 10, 2014 04:12
|
|


|
The Locator posted:Nice! Yup, aside from the crew figures, which for some reason are not very detailed and have very soft edges.
|
|
#
?
Oct 10, 2014 04:58
|
|
|
SkunkDuster posted:What did you end up doing for the seam lines on the tail decals? The tail was done in Tamiya semi-gloss black before the decals were applied. It turns out, however, that I was worrying over nothing because there is no seam on the front and rear. The decals are an absolutely perfect fit (should really have given Tamiya more credit), and at the top of the tail there's no visible transition as the black is a perfect match (again, should have trusted Tamiya more). The fact that the decals are now melted on is a massive bonus.
|
|
#
?
Oct 10, 2014 10:26
|
|

|
So I finished the waterways and got them glued onto the sub-deck. I then moved back to the stern, which is what I've been working on ever since. It's been quite a challenge, in several different ways. Started by planking the counter with basswood, then planked the transom and cut out the window openings. Used some cool stuff called Micro Kristal Klear which is really a form of white glue that dries very clear, to make the glass for the windows.   Put the windows in and added the walnut planking layer.  The transom and counter get edged with walnut pieces called fashion pieces. The curved one has to be hand carved to shape on both sides.  I then added another fashion piece at the top of the counter (bottom of the transom). This piece isn't part of the kit plans, but is something I decided to do for a slightly different look. The kit has the transom painted, but I want to leave it natural walnut, and 'box' it with the fashion pieces and taffrail (which isn't installed at this point) which will be an extension off of the 'black strake' which runs the length of the ship on each side. Bending this piece to fit was pretty interesting (and not in a good way). I soaked it in water for an hour and then wrapped it in a wet wash cloth and put it in the microwave for 60 seconds to steam it, and it was still a pain in the rear end to bend, but I got it in place eventually. Painting has never been a strong skill for me, and it apparently still isn't. I'm not happy at all with the paint, so at some point in the future I'll sand down all the black and re-prep and repaint it. I only laid down a single coat of primer and painted over it. I should have sanded the primer, and repeated with several coats of primer I think. I also hosed up things when I tried to clean up some overpainting and instead managed to remove some of the paint on the fashion pieces and expose some of the primer (which is white).    Overall I'm ok with the results so far, but I need to address the gaps around the windows, and redo the black paint in the future at some point. The stern has taken a ridiculous number of hours of tweaking to get where it is, and there is still room for major improvements. I guess this is why the guys who turn out the museum quality stuff take so long to build them!
|
|
#
?
Oct 12, 2014 04:31
|
|
|
I just finished a 1:48 Tamiya F-16. My second ever aircraft model.   
|
|
#
?
Oct 12, 2014 15:29
|
|

|
Question: I've been slowing painting away on my plane model but I'm wondering if I'm doing it wrong. I'm using a paint brush and enamel paint, I bought the testors basic military colours paint and they come in little bottles with solidish paint surrounded by what I assume is oil or water to prevent it from drying out. Now what I've been doing is just dipping my brush straight into the jar, but it tends to pull the liquidy stuff out with it which then runs on the model. So I'm wondering if I should be scooping out the paint bit and using a palette to hold it and then paint from that, so exactly what I should be doing here.
|
|
#
?
Oct 13, 2014 20:43
|
|


|
Almost all paints require a very thorough mixing before using. In the case of enamels, that oil is part of the paint and needs to be well mixed prior to using. You can use the end of a paintbrush, a toothpick, whatever, but it needs to be stirred until you have a smooth consistency with no visible swirls etc. Make sure to hit the bottom of the container, as much of the pigments on some paints will settle, and you need to get all that thick gunk off the bottom of the container mixed in well also.
|
|
#
?
Oct 13, 2014 20:51
|
|
|
Chillyrabbit posted:Question: I've been slowing painting away on my plane model but I'm wondering if I'm doing it wrong. Enamels are horrible painted on with a brush unless you work on very small details. Best to use them with airbrush. And as mentioned below, mix it well, and when you are sure it's mixed, mixed some more until it's 100% smooth and consistent
|
|
#
?
Oct 13, 2014 21:05
|
|

|
The Locator posted:Almost all paints require a very thorough mixing before using. In the case of enamels, that oil is part of the paint and needs to be well mixed prior to using. You can use the end of a paintbrush, a toothpick, whatever, but it needs to be stirred until you have a smooth consistency with no visible swirls etc. Make sure to hit the bottom of the container, as much of the pigments on some paints will settle, and you need to get all that thick gunk off the bottom of the container mixed in well also. Okay that makes a bit more sense now since it felt wrong how I was doing it. adary posted:Enamels are horrible painted on with a brush unless you work on very small details. Best to use them with airbrush. And as mentioned below, mix it well, and when you are sure it's mixed, mixed some more until it's 100% smooth and consistent and well that's good to know too about enamels but I already bought that basic colour set so might as well use it and I'm not buying an airbrush set just yet since I move around too much as a student to set up a compressor setup. And will start looking at acrylic paint to slowly replace what I have as I expect to be using a brush for a while.
|
|
#
?
Oct 13, 2014 22:50
|
|
|
Chillyrabbit posted:Okay that makes a bit more sense now since it felt wrong how I was doing it. Acrylics will definitely go on better with a brush, but since you've got the paints already, go hog wild. If you ever do want to spring for an airbrush, there are several great small compressors that fit nicely in a larger toolbox for easy transportation.
|
|
#
?
Oct 13, 2014 22:54
|
|
|
I know not everybody has a drill press next to their model bench, but if you do, this is a pretty handy thing I use. It is just a piece of stripped solid core copper wire with some bends in it. I put it in the chuck, set the drill to the lowest speed, lower the mixer wire into the paint bottle, then lock the spindle in place and let it mix for a few minutes. It does a fantastic job of mixing the paint and, since the wire is pretty thin, there is very little waste. It is also flexible enough that if I'm moving the bottle to get in the corners while it is mixing and the wire hits the side of the bottle, it doesn't send it flinging out of my hand.
|
|
#
?
Oct 14, 2014 01:48
|
|
|
I wish I saw this post years ago. My  is paying for itself is paying for itself
|
|
#
?
Oct 14, 2014 11:26
|
|
|
SkunkDuster posted:I know not everybody has a drill press next to their model bench, but if you do, this is a pretty handy thing I use. It is just a piece of stripped solid core copper wire with some bends in it. I put it in the chuck, set the drill to the lowest speed, lower the mixer wire into the paint bottle, then lock the spindle in place and let it mix for a few minutes. It does a fantastic job of mixing the paint and, since the wire is pretty thin, there is very little waste. It is also flexible enough that if I'm moving the bottle to get in the corners while it is mixing and the wire hits the side of the bottle, it doesn't send it flinging out of my hand. Confirmed best paint mixer. You can also fake it with an extremely low speed Dremel.
|
|
#
?
Oct 14, 2014 18:10
|
|


|
Edit: double post, thanks vpn.
Midjack fucked around with this message at 18:31 on Oct 14, 2014 |
|
#
?
Oct 14, 2014 18:10
|
|
|
I always had acceptable results with a toothpick, even with really old and completely separated paint.
|
|
#
?
Oct 14, 2014 18:32
|
|
|
SkunkDuster posted:It does a fantastic job of mixing the paint and, since the wire is pretty thin, there is very little waste. It is also flexible enough that if I'm moving the bottle to get in the corners while it is mixing and the wire hits the side of the bottle, it doesn't send it flinging out of my hand. How many bottles of paint ended up on your shirt and the wall before you discovered the appropriate wire thickness 
|
|
#
?
Oct 14, 2014 18:36
|
|


|
I've found that thinning enamel out really helps it self-level for brush painting. I do about 4:1 paint to thinner. I'm working on a KITT right now, 1:25 scale. I brush painted the dash and interior trim with the aforementioned mix in Testors Gloss Black, really came out well compared to straight enamel which looked like glops of tar. I'm breaking out the airbrush for the first time in about 10 years, which is hugely entertaining. I'm spraying enamel to get a really good gloss on it, hopefully. I've already wiped it all off twice now, third time's a charm. Yay.
|
|
#
?
Oct 14, 2014 19:51
|
|
|
SkunkDuster posted:I know not everybody has a drill press next to their model bench, but if you do, this is a pretty handy thing I use. It is just a piece of stripped solid core copper wire with some bends in it. I put it in the chuck, set the drill to the lowest speed, lower the mixer wire into the paint bottle, then lock the spindle in place and let it mix for a few minutes. It does a fantastic job of mixing the paint and, since the wire is pretty thin, there is very little waste. It is also flexible enough that if I'm moving the bottle to get in the corners while it is mixing and the wire hits the side of the bottle, it doesn't send it flinging out of my hand. This is a great idea. I had one of those electric stirrers, and they're terrible. They spin so fast that it's virtually impossible to mix paint without losing half the bottle in the process.
|
|
#
?
Oct 14, 2014 20:55
|
|

|
NTRabbit posted:How many bottles of paint ended up on your shirt and the wall before you discovered the appropriate wire thickness I got lucky on the first try. My dad, however, has a white spatter line around the circumference of his shop from when the drill press (same drill press, actually) grabbed a quart can he was mixing at high speed and took it for a ride.
|
|
#
?
Oct 15, 2014 00:54
|
|
|
Dielectric posted:I've found that thinning enamel out really helps it self-level for brush painting. I do about 4:1 paint to thinner. Speaking of which I'm very, very disappointed that this hasn't been edited into the OP. It's the greatest advice of all time and I actually watch it every time before painting as motivation to not be a lazy paint scrub. https://www.youtube.com/watch?v=m3p_VuPIS2c
|
|
#
?
Oct 15, 2014 09:40
|
|
|
What is no warship (even a small sloop) complete without? Gunports!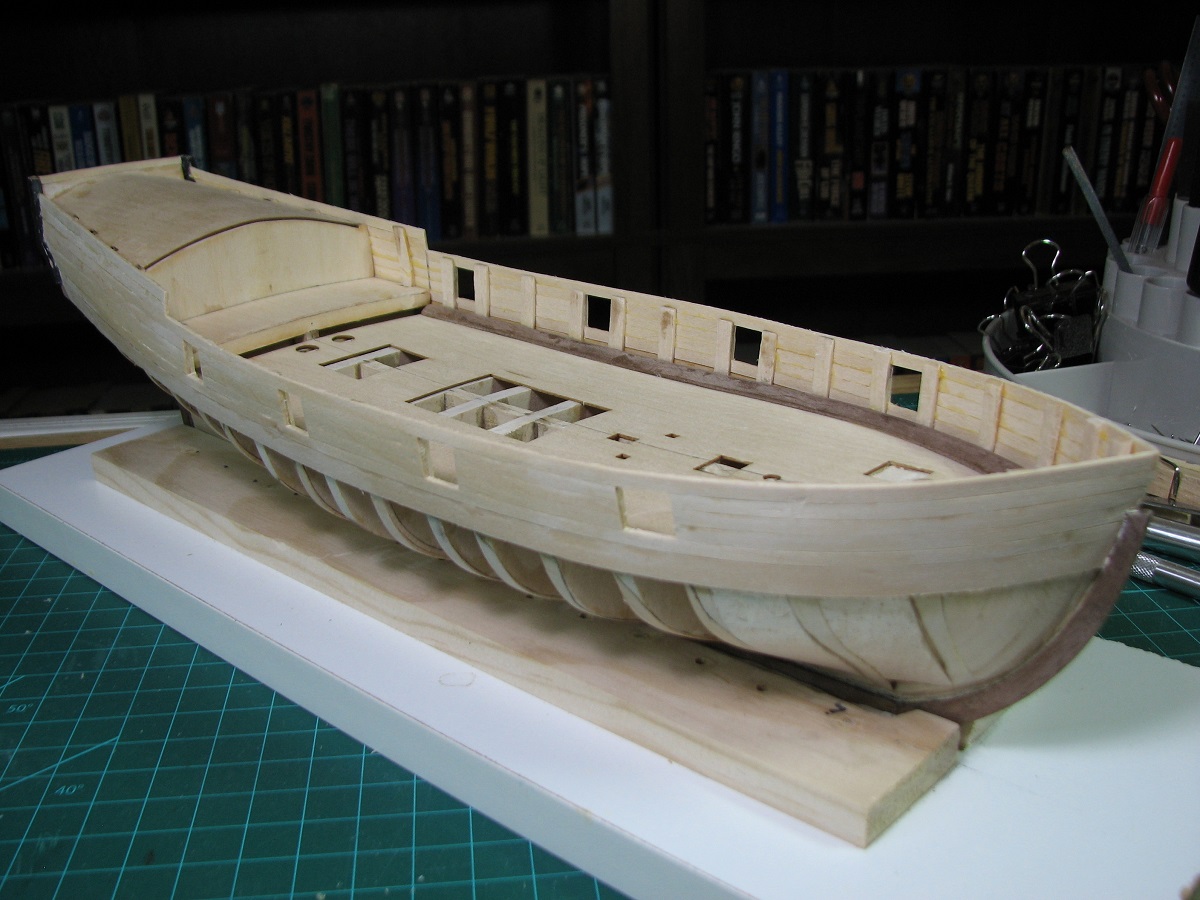 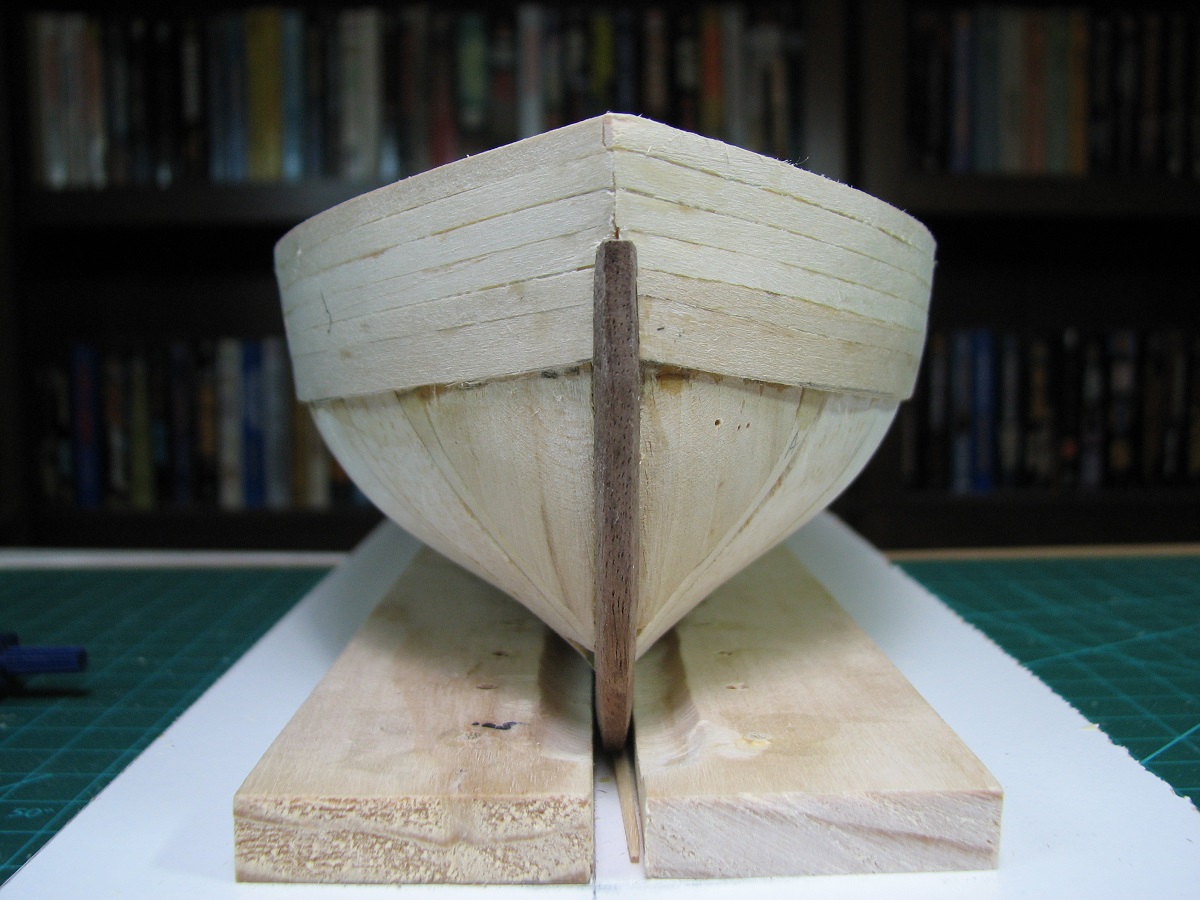 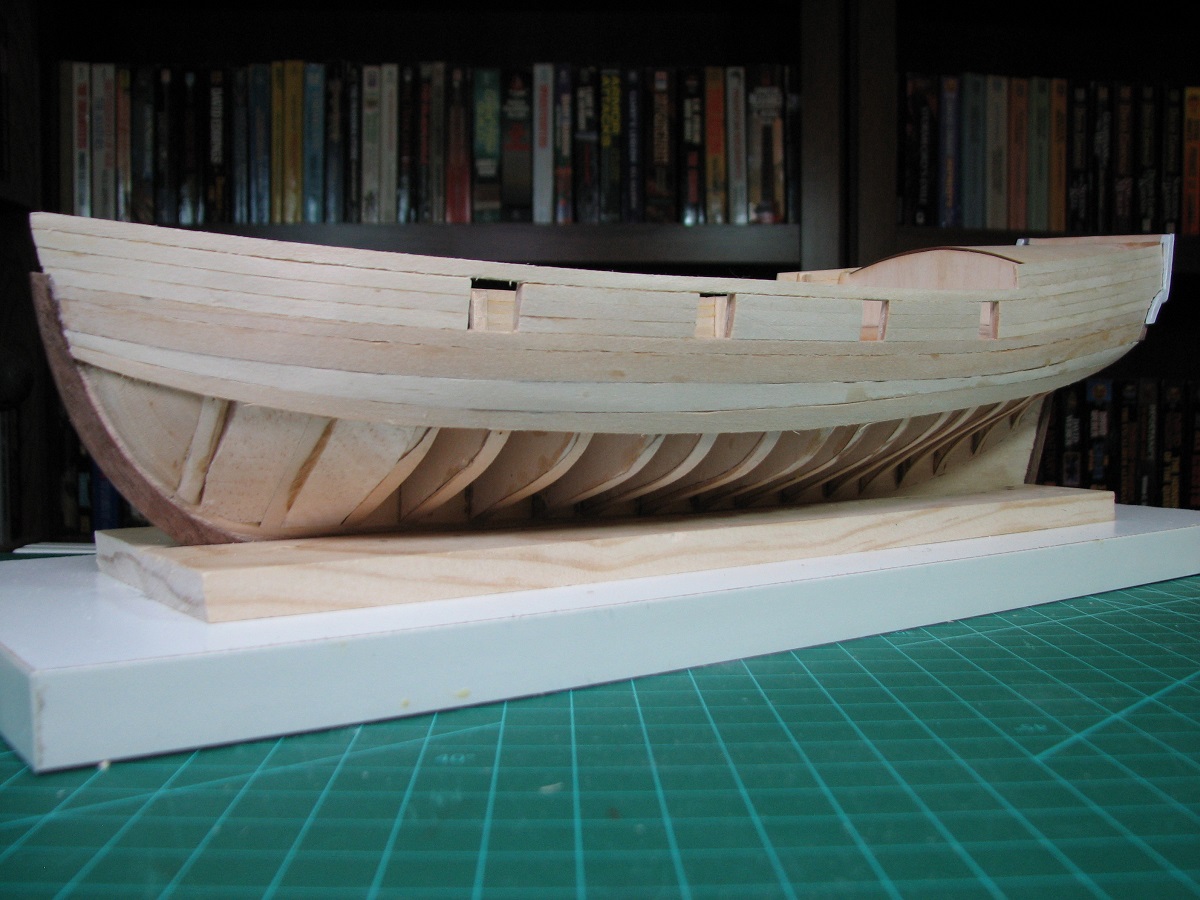
|
|
#
?
Oct 16, 2014 05:50
|
|
|
The Locator posted:What is no warship (even a small sloop) complete without? Gunports! https://www.youtube.com/watch?v=49FWp7WLYKw
|
|
#
?
Oct 16, 2014 13:58
|
|

|
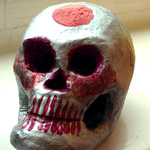
Got bored, so I dove into my stash and put together my Mars Attacks kit. A nice simple build, something to do while watching TV or listening to podcasts. I was actually really surprised at the quality of the moulding. Most of the seams were almost invisible to begin with, and a tiny amount of puttying and sanding will completely get rid of them. I wish the helmet didn't have a seam down the sides of it, but there's not much can be done because of the fit with the body and the head inside it. I might hit it with some Novus on the outside as the final step, it might help hide it a little. Then it just needs a paint job.
|
|
#
?
Oct 17, 2014 15:14
|
|
|
In honour (not really) of the Fury movie, I've put together the most beloved American tank! No, sadly it's not the haunted M3 from G.I. Combat, but the humble M4A1(76)W, depicted in the Italeri "Sherman M4A1" kit. I used Academy tracks (presumably, I got them in an unmarked plastic bag for five bucks), and accessories left over from my Stuart. Good thing it had a spare .50 cal, since the one that came with this kit was abysmal.      The inside of the turret is rather bare. I added the .30 cal (the kit only comes with one for the hull), but otherwise all there is is the gun breech and guard. I was going to built a full interior, but this task proved too daunting (also I couldn't find any good blueprints).  This kit comes with a hidden flaw: the turret ring is too small compared to the real Sherman. As a result, the gun can only fully traverse when in this exact position (a little right of center). Otherwise, it is limited staying above or below the turret ring. Of course, no tank is complete without some men! I used the tanker from the kit (it just came with one) and some Tamiya American infantrymen. Hello there!  Let's take a picture to remember this moment!  drat, you're some surly fuckers. See you later I guess!  Someone a while ago asked what the difference was between 1:35th and 1:32nd. Not much. Here's my new addition next to the Revell M4.   When put together, the 1:32nd is slightly bigger, but even some distance between the two in a diorama will obscure the size difference. 
|
|
#
?
Oct 21, 2014 01:06
|
|
|
Ensign Expendable posted:
 Very nice. I really enjoy your paintwork, probably because it's something that I'm terrible at. 
|
|
#
?
Oct 21, 2014 01:23
|
|
 and tank pictures.
|
What name is Future going by now in the US?
|
|
#
?
Oct 21, 2014 17:53
|
|
|
Pledge floor care.
|
|
#
?
Oct 22, 2014 01:48
|
|


|
Ensign Expendable posted:
In their defense, I would be surly if I was about to crawl into a BBQ and head into battle.
|
|
#
?
Oct 22, 2014 03:29
|
|


|
I just got an airbrush and compressor setup and holy hell it beats the crap out of painting with brushes. There is one thing that worries me a little, based on my experience with metallic paints in the past. Are they ok to use with an airbrush or am I back to brushes for them?
|
|
#
?
Oct 22, 2014 23:50
|
|

|
langurmonkey posted:I just got an airbrush and compressor setup and holy hell it beats the crap out of painting with brushes. There is one thing that worries me a little, based on my experience with metallic paints in the past. Are they ok to use with an airbrush or am I back to brushes for them? Depends. Alot of Tamiya's metallics do not spray well at all. If you're having trouble, like sputtering or clogs, go up a nozzle size. As a rule, any really vibrant metallic will need a larger nozzle. The more subtle ones, such as ones that replicate actual metals, are usually ok
|
|
#
?
Oct 23, 2014 00:11
|
|
|
Yeah, technically any paints are safe for airbrushes. You just need to make sure they're thinned properly, and you have the proper cleaners and solvents to make sure nothing dries permanently inside the airbrush. Saying that, a lot of the pros tend to buy real cheap quality airbrushes when they're spraying overly harsh paints. Hell, the original Predator was painted with the airbrush below, a Paasche-H. Cheap, simple, basic, fifty bucks, but you can spray latex paints through it an not worry about it.
|
|
#
?
Oct 23, 2014 00:48
|
|
|
I've finished the first planking - This is a double-planked model, and another layer of walnut planking will be placed on top of this layer. This is about 5 days of progress (I was on the road for a couple days) with 3-5 hours on each of those days to get the lower planking done. Each plank has to be measured and cut/trimmed to fit individually. So each plank is unique, and takes anywhere from 20 minutes to an hour to get done depending on how well I get it on the first try, and how much trimming or bending is required for that plank. Started by placing two planks below the previously placed planks and working down. 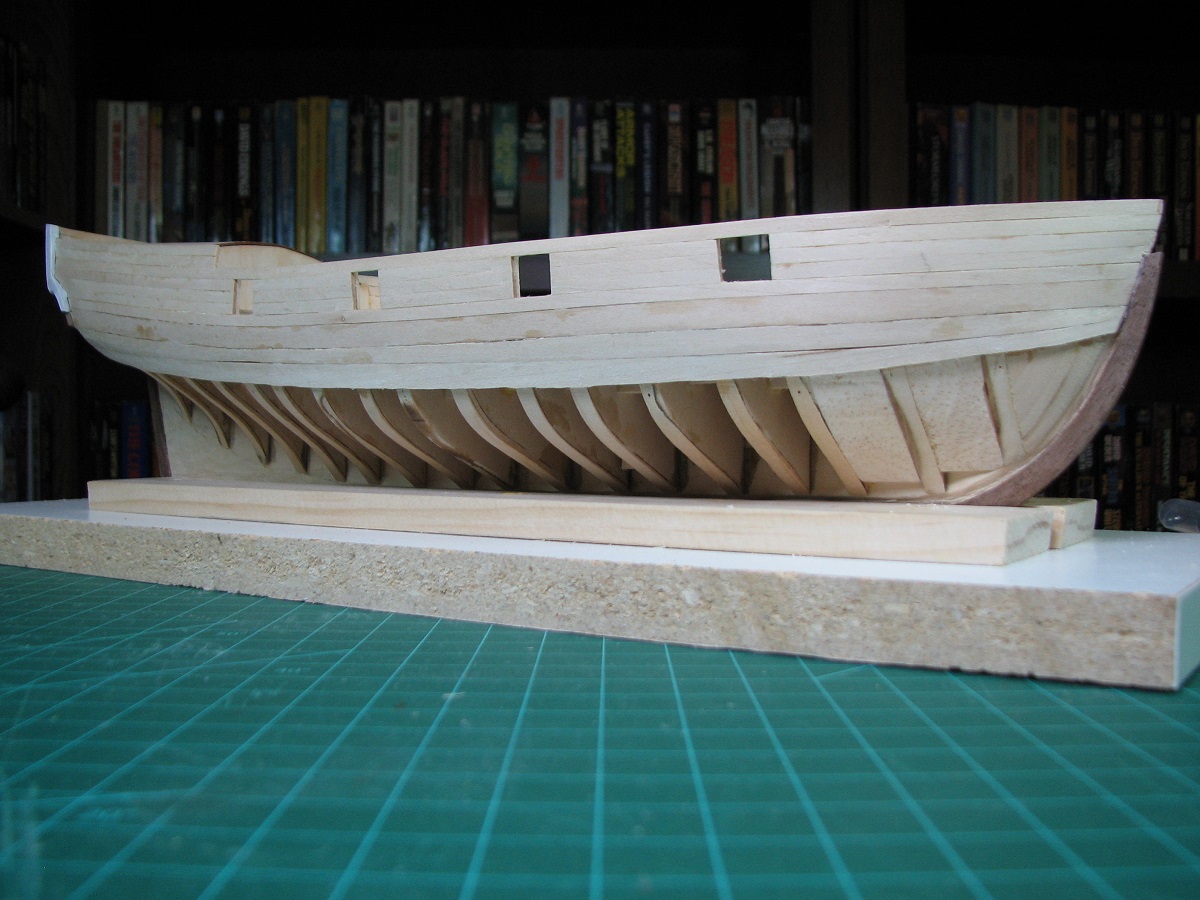 After 5 planks are placed and the stern is almost complete from those, a switch is made to the bottom, where I placed what is called the Garboard plank (it's just the bottom plank, no idea why it's named that), and then working up for 4 planks. 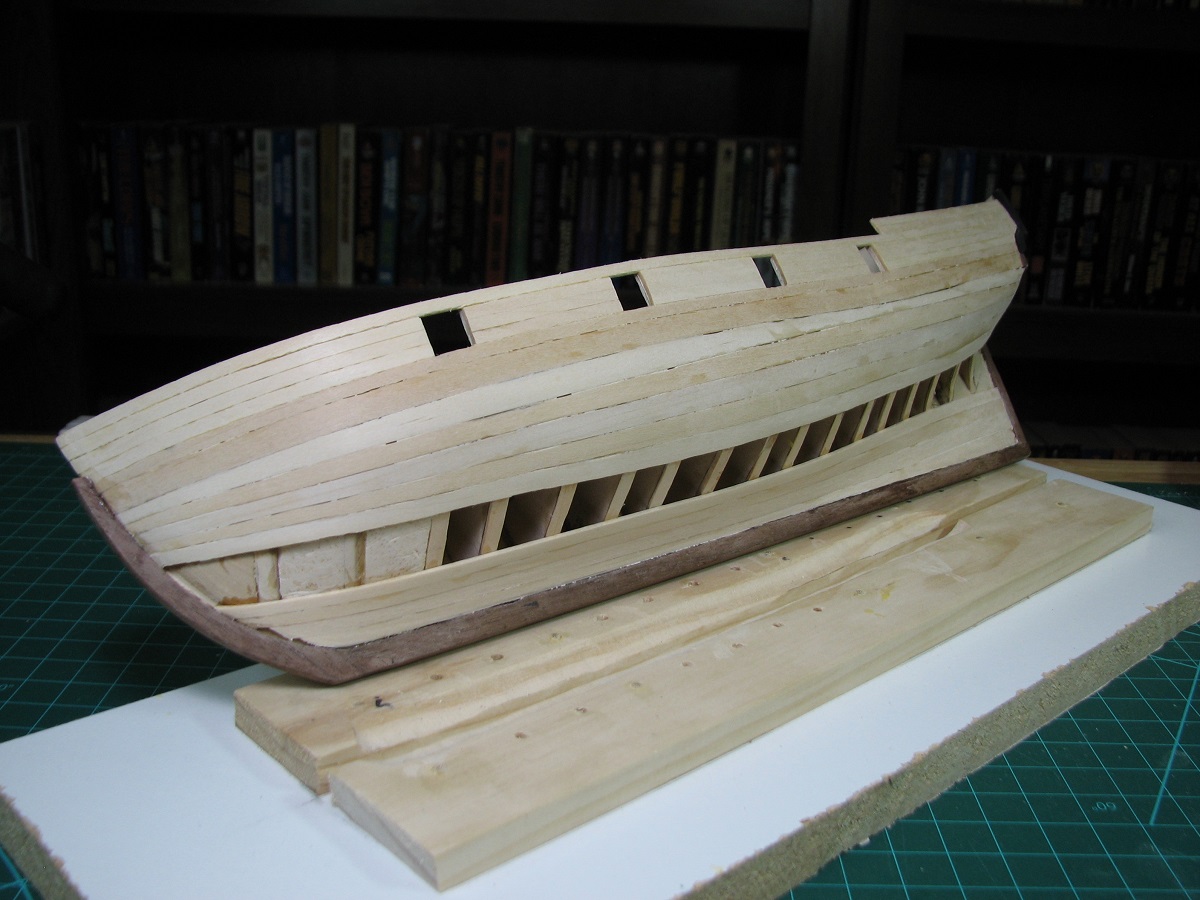 Now with only the gap left to fill, I try to work out how many planks, of what size are needed, and how they have to be trimmed to fill the gap. On one side I screwed this up, and 'kinked' one of the planks. Instead of tearing the entire thing off, I trimmed it back to the next bulkhead and cut it at an angle.  I then created a piece of plank out of wider stock to continue to the bow, and trimmed it to accept another plank - this is what is called a 'drop plank', where two planks reduce to one plank. 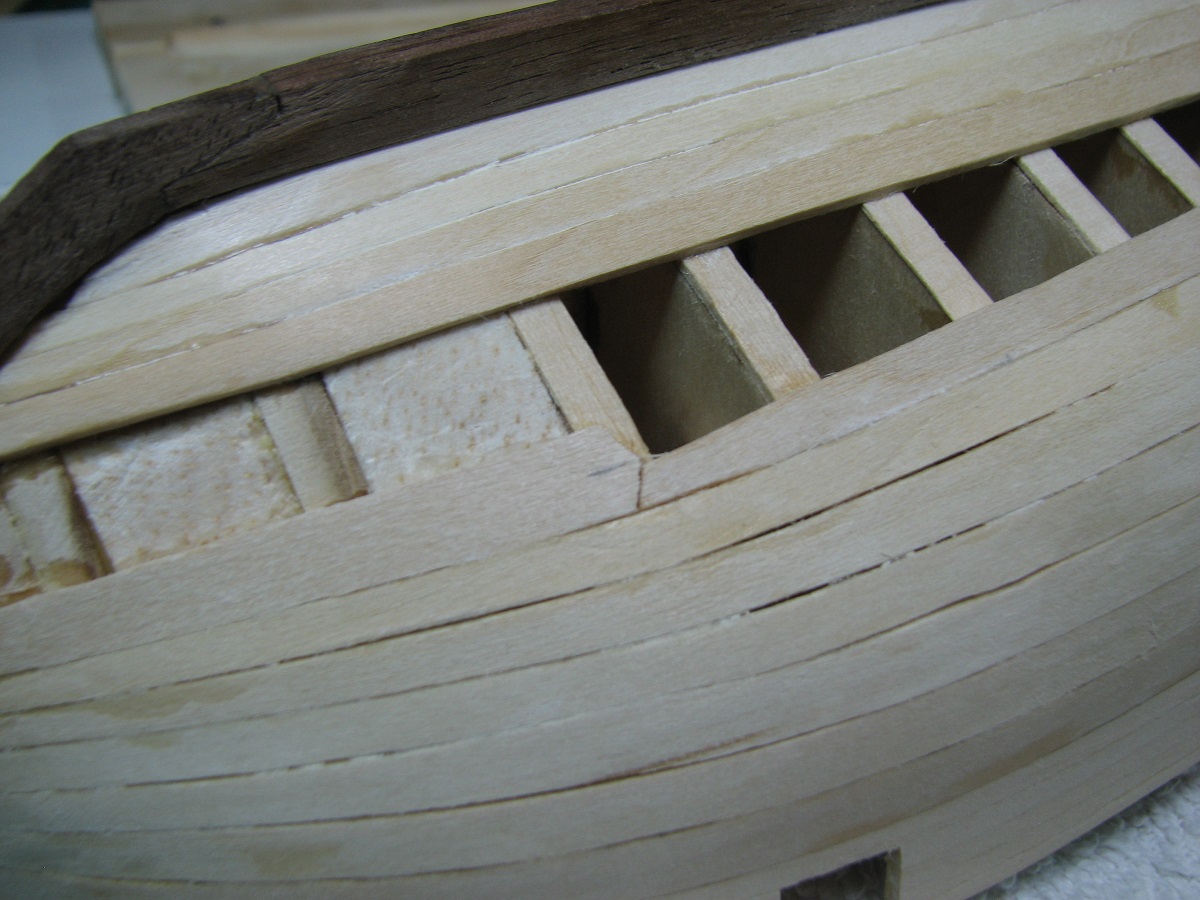 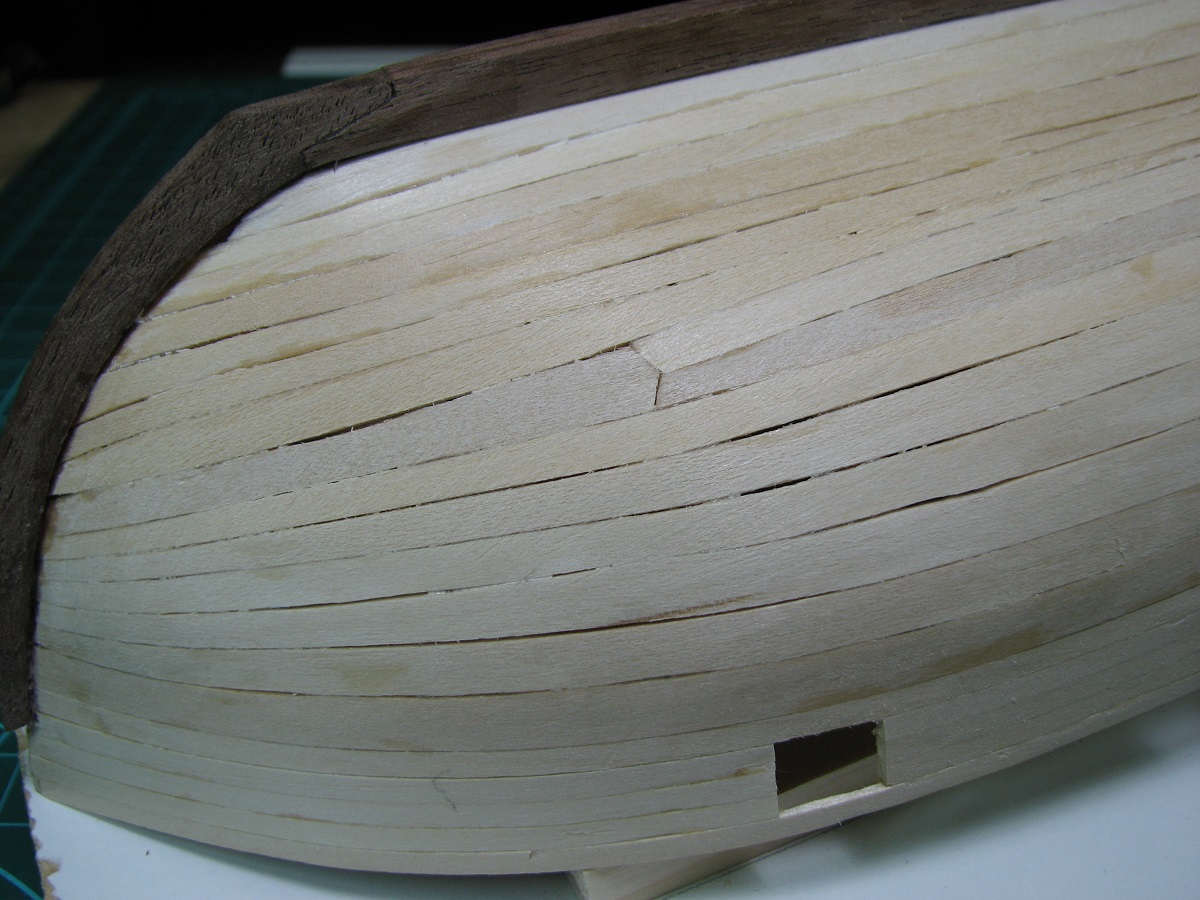 The other side I managed to not screw up, and did not need to use any drop planks. Here is the gap left to fill with the final plank. I managed to get it right, and the width of the gap is almost exactly the same for the entire length. 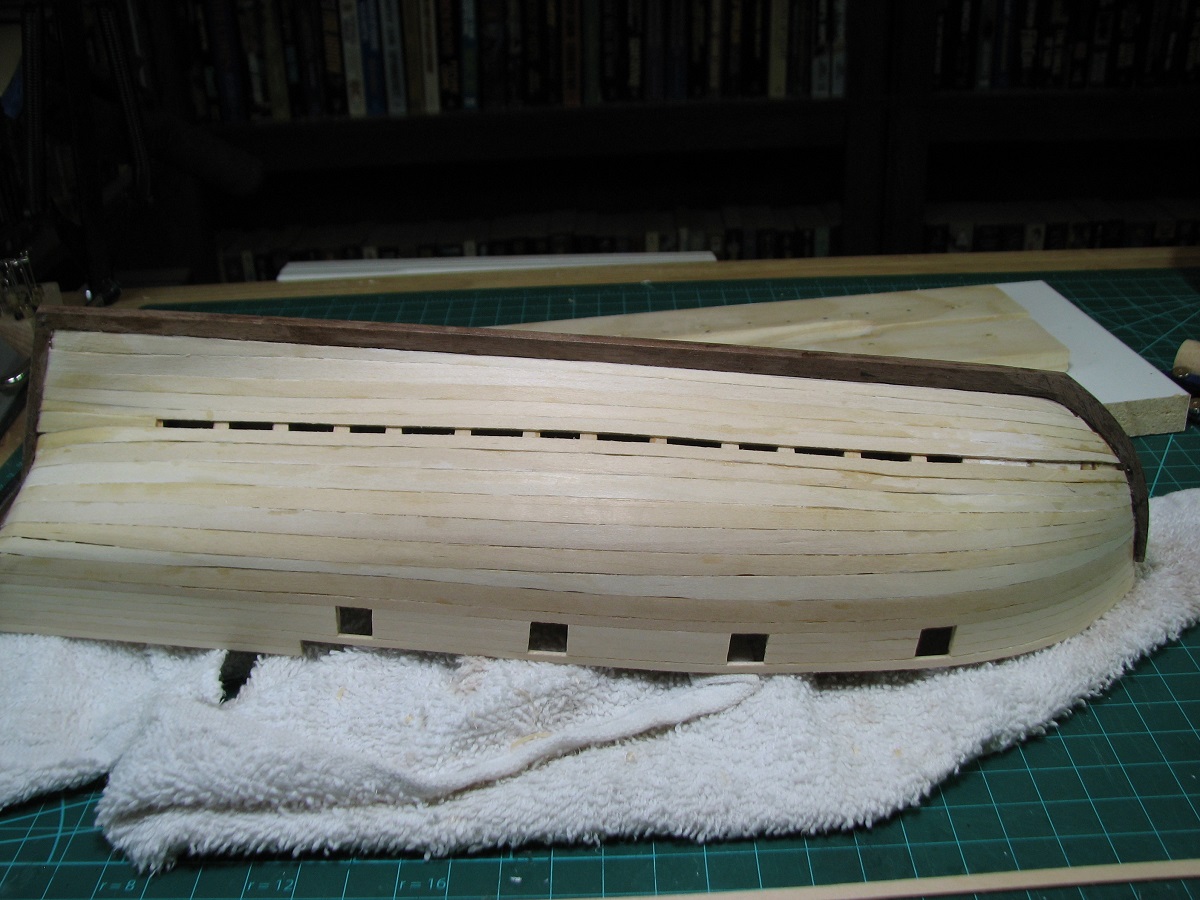 And both sides are complete. 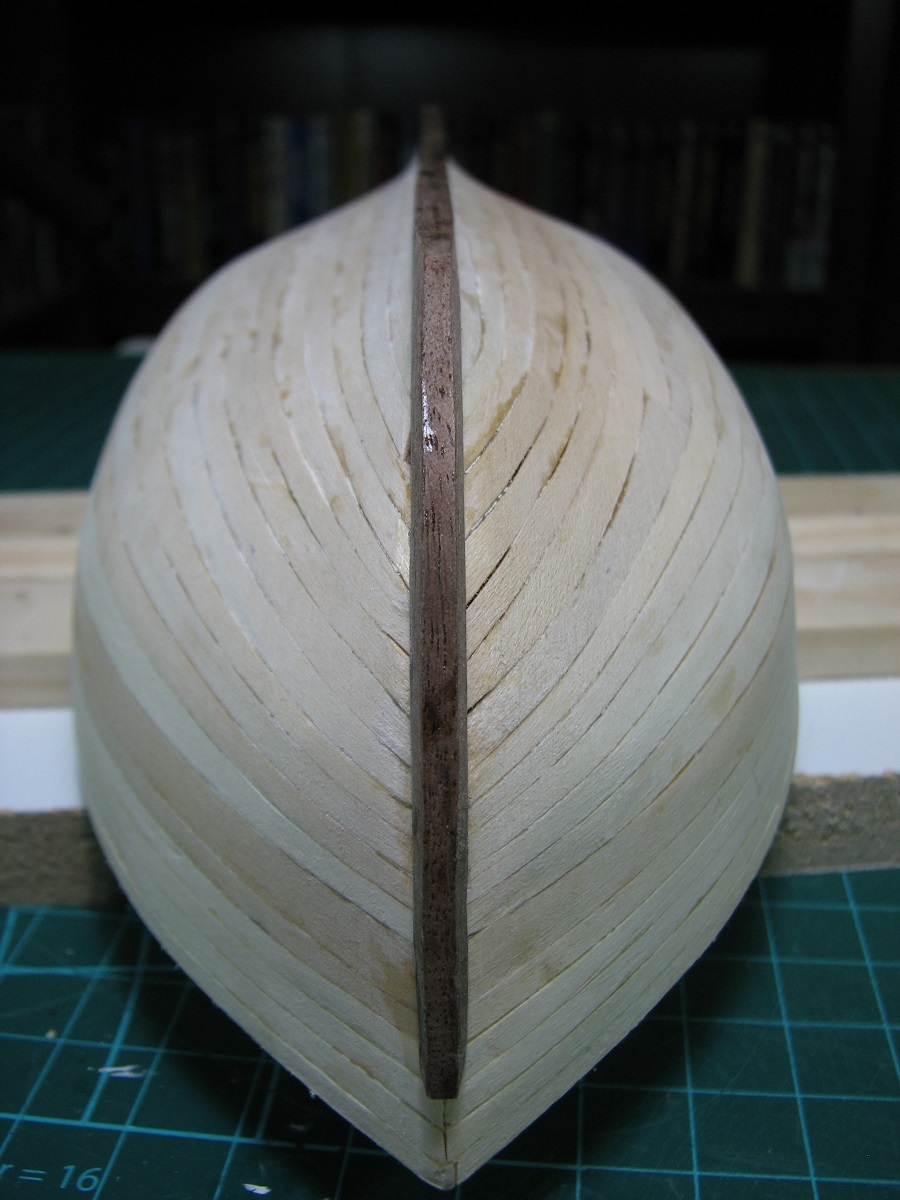 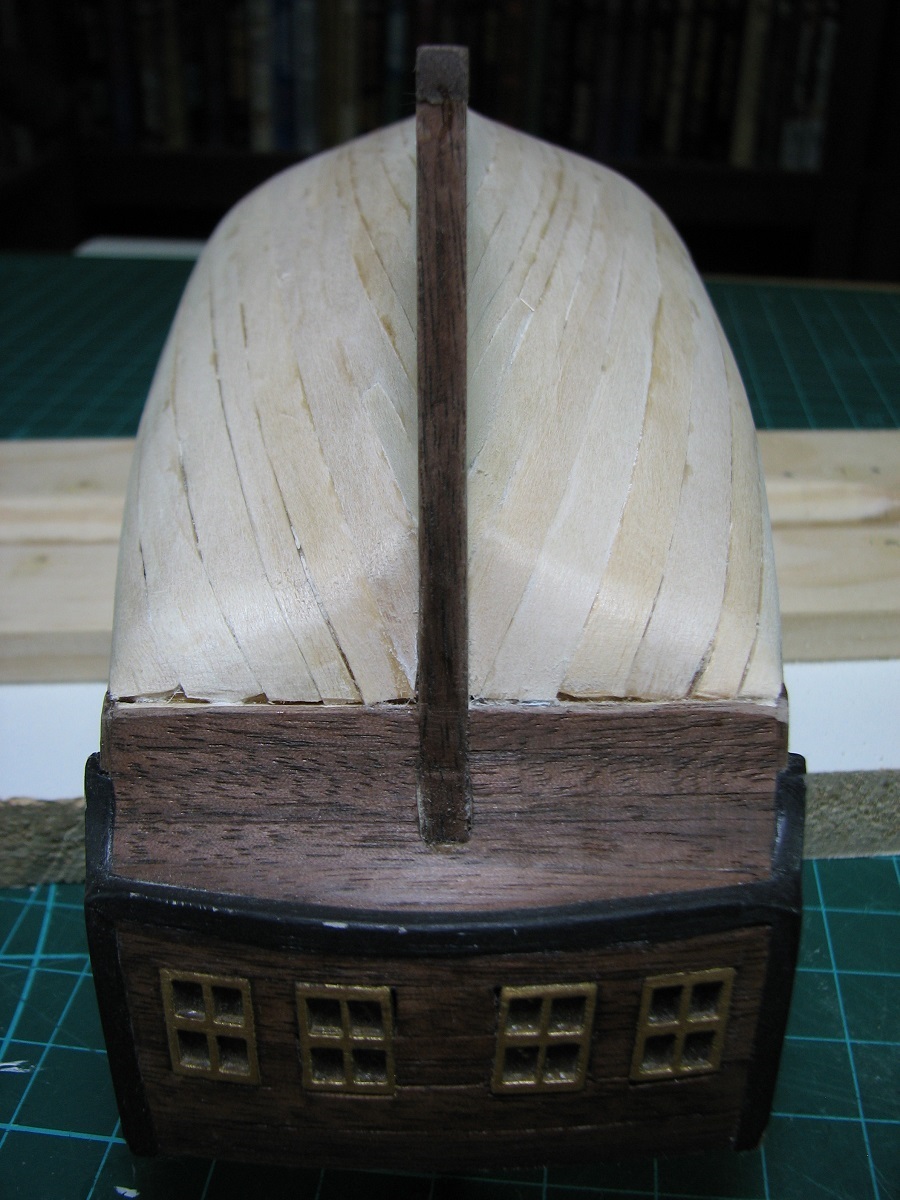 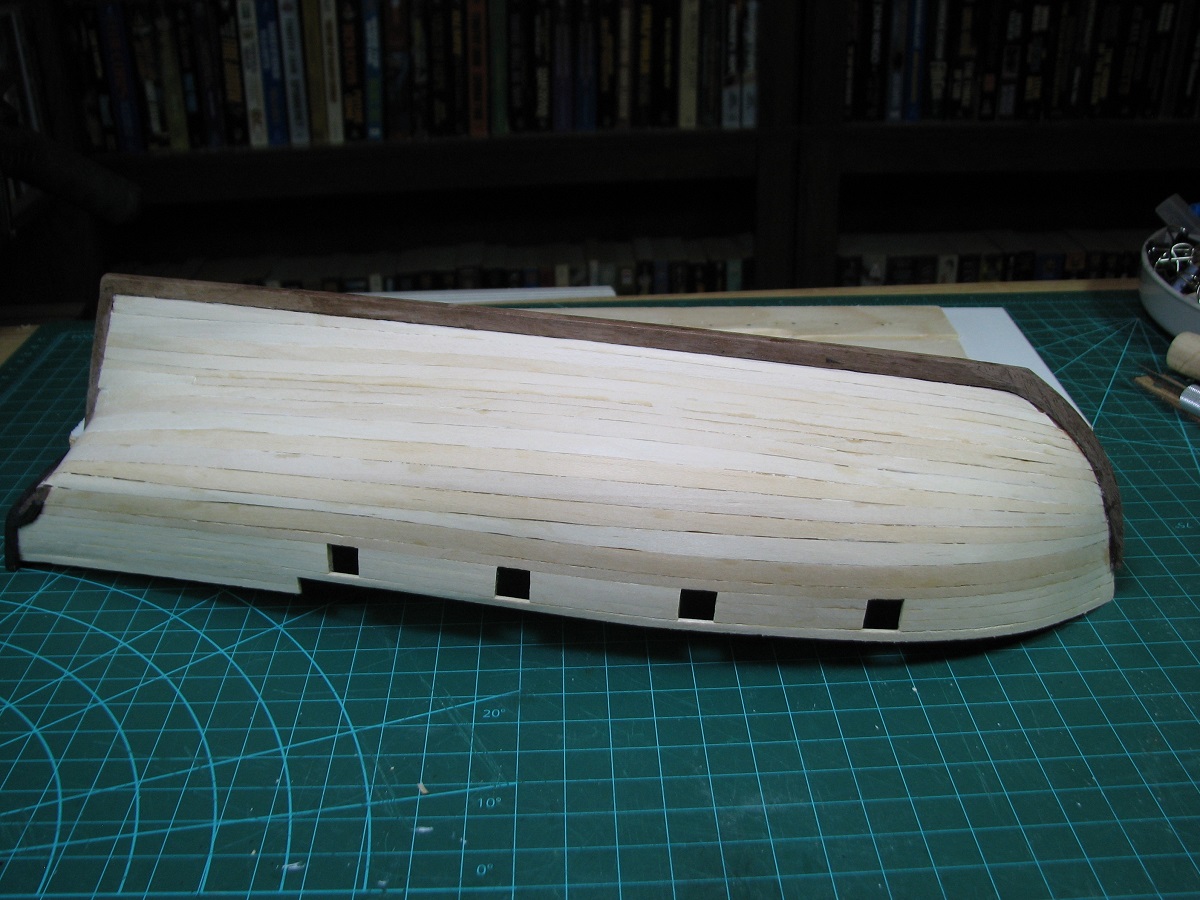 Next I will move back up to the bulwarks (the area where the gunports are) and place some of the outer planking called the Wale, and the black strake, and then do the inner bulkhead planking before starting the 2nd outer planking layer.
|
|
#
?
Oct 23, 2014 07:44
|
|
|
Crossposting from the stupid questions thread for maybe getting more answers Can someone give me a quick breakdown comparing Montana Gold to Montana Black to Montana White spraypaints? I'm painting plastic models with them. I have tried Gold so far and it's been pretty cool, doesn't hide too much detail, but Black is cheaper. I want to make sure I am not obscuring detail, and Black's description says it puts out more paint over the same amount of time. Do I need to just keep using Gold? Can I use white? Yes I own an airbrush but I want to use spraypaint because airbrushing 100 parts is going to be a pain in the rear end
|
|
#
?
Oct 23, 2014 16:16
|
|

|
Another ask of advice: I'd like to get a model Chinook Helicopter (seeing as my wife won't buy me a real one). I have plenty various model cars ranging from Aoshima, Tamiya, ERTL, Lindberg, Revell etc, Who does the best 1/72 Helicopters?
|
|
#
?
Oct 24, 2014 00:00
|
|
|
The Locator posted:I've finished the first planking - This is a double-planked model, and another layer of walnut planking will be placed on top of this layer. This is really a great job at a first planking. Dont know if you've done a double planking before, but absolutely make sure you've got that first planking sanded smooth before moving to the second. It makes it so much easier.
|
|
#
?
Oct 24, 2014 18:03
|
|

|
jerkstore77 posted:This is really a great job at a first planking. Dont know if you've done a double planking before, but absolutely make sure you've got that first planking sanded smooth before moving to the second. It makes it so much easier. Thanks - I plan on hitting the first planking with an ugly stick (i.e. carpenters putty/filler) and then sanding it multiple times before applying the 2nd planking layer. I should be able to catch and correct any minor variations and dips that aren't easily visible that way, prior to putting the final layer of walnut on.
|
|
#
?
Oct 24, 2014 23:37
|
|
|

|
| # ? Jun 6, 2024 00:05 |
|
|
Jesus Christ that ship is amazing! I mean, gently caress! I'm not really sure if it belongs here, but I make/sell more mundane miniatures, like tiny food, fake terrariums, and other household objects:    I've been lurking around here on and off for a bit to pick up new tricks and tips. I mostly work in 1:6 scale and use polymer clay, wood, and maybe a little paint but recently I've been branching out into felting. Its been fun but my fingers are literally full of holes. Blackish Sheep fucked around with this message at 18:35 on Oct 29, 2014 |
|
#
?
Oct 29, 2014 18:31
|
|