


|
I don't have a project (yet!), but this is dangerously close to archival and it's one of my favorite threads.
|
 #
?
Apr 13, 2008 14:54
#
?
Apr 13, 2008 14:54
|
|

|

|
| # ? Apr 23, 2024 16:25 |
|
|
zeus juice posted:I don't have a project (yet!), but this is dangerously close to archival and it's one of my favorite threads. Those jerks down in the "Post stuff you've made. (That isn't really a project.)" thread have been stealing my traffic. I think it might be the "Sex" thread tag, though.  drat YOU RealKyleH drat YOU RealKyleH Anyhow, I hope it can hang on for a couple of months for when I move and need to make a new coffee table and end tables. I haven't decided on a design, but I think I'll make the base from tubing or round stock (probably round stock since its stronger). Probably something like this:  Minus the open flame of course.
|
|
#
?
Apr 13, 2008 20:52
|
|
|
Fun one-day project: Add inexpensive Chinese touchscreen to an old "All-in-One" computer+LCD to make it a true kiosk machine:  http://picasaweb.google.com/quadpus/NetvistaTouchscreenInstall
|
|
#
?
Apr 15, 2008 02:42
|
|

|
One of my favorite projects was the MAME table I built a few years ago: I ended up gutting it about a year ago when my laptop died and I needed a computer, but it was pretty great to have around. Total assembly costs were well under $100, though I scavenged most of the computer parts and really only paid for lumber, the buttons, and the keyboard controller. The interface was totally controllable through the joysticks and buttons, so there was never a need to open it up unless you really wanted to, which was good, since it was a jury-rigged mess inside. 
|
|
#
?
Apr 15, 2008 07:10
|
|

|
Speaking of MAME Cabs, heres one I converted from an old Sarge cab for someone else. Never did get around to building my own. Notice the fake coin door, built from plywood and stickers, looks good from a distance.
|
|
#
?
Apr 15, 2008 21:54
|
|

|
Angiportus posted:One of my favorite projects was the MAME table I built a few years ago: Wasn't someone on this forum selling something like this? You maybe?
|
|
#
?
Apr 15, 2008 22:18
|
|
|
This is a loft apartment I'm working on which I'll be moving into at the end of the month. A lot's been done since these pictures and I'll take more soon. Sorry about the image quality my girlfriend took them with her phone. This is after laying the tile and beginning to stain the walls. The stain is fresh so it's a bit darker than the finished product.  Cabinets and sink. A stove will go on the left. The top left cabinet doesn't match but I was trying to get it even with the stove so I made a cabinet and just used a door from another one I had.  The main draw of this place is the view. Here's a shot from the deck overlooking the lake. I'll post more once it's in better shape.
|
|
#
?
Apr 16, 2008 01:39
|
|

|
Update on my fireplace project:  hearth stones laid.. Just some trim and it'll be done.
|
|
#
?
Apr 16, 2008 03:58
|
|

|
EigenKet posted:Wasn't someone on this forum selling something like this? You maybe? Nope, wasn't me. I'd build one for someone if they wanted it, though. It was tons of fun to make. wormil posted:Speaking of MAME Cabs, heres one I converted from an old Sarge cab for someone else. Never did get around to building my own. Notice the fake coin door, built from plywood and stickers, looks good from a distance. Nice. I wish I had a full-size cab to work with. Maybe one day. I wouldn't be able to stand that joystick configuration, though. Real controls or bust. 
all american fucked around with this message at 07:53 on Apr 16, 2008 |
|
#
?
Apr 16, 2008 07:45
|
|
|
threetee posted:Your walls are incredibly amazing. My husband and I are planning on building a house and would love to have paneling like yours with chair rail, high baseboards, etc. Would you care to let us in on how you installed the paneling?
|
|
#
?
Apr 22, 2008 17:59
|
|


|
jennyinstereo posted:Your walls are incredibly amazing. My husband and I are planning on building a house and would love to have paneling like yours with chair rail, high baseboards, etc. Would you care to let us in on how you installed the paneling? I will give you a hint, nowadays it isn't paneling! In a lot of homes we build now you just choose the height you want the paneling, mask it off and paint the top half your color and the bottom half white. The rest of the "paneling" is just mitered mdf trimboard nailed and adhered onto the wall to form the shadowboxing and some more moulding for the chair rail. It looks great and is pretty easy to install. Mantels are the same way. Block it out with MDF and add trimboard.
|
|
#
?
Apr 23, 2008 11:11
|
|

|
Juriko posted:I will give you a hint, nowadays it isn't paneling! In a lot of homes we build now you just choose the height you want the paneling, mask it off and paint the top half your color and the bottom half white. The rest of the "paneling" is just mitered mdf trimboard nailed and adhered onto the wall to form the shadowboxing and some more moulding for the chair rail. It looks great and is pretty easy to install. Yes, but some people actually still install rails, stiles, panels, etc. I would prefer to use actual panels rather than just stick some ogee moulding/mdf trim to the wall. It appears that threetee used actual panels, and this is the look my husband and I would like to achieve.
|
|
#
?
Apr 23, 2008 19:04
|
|
|
okay, finished the LED flowers I was making (and posted in the other thread - this one's still alive, I guess..) All the programming's done, and you can see a video of what they actually do here: http://youtube.com/watch?v=a5QJQNojK_0 I love LEDs + Microcontrollers. 
|
|
#
?
Apr 26, 2008 02:26
|
|

|
TwystNeko posted:okay, finished the LED flowers I was making (and posted in the other thread - this one's still alive, I guess..) That's pretty neat man. The vase you had them in, did it have LEDs in it as well, or was the red glow in the beads leaking out from the bottom of one of the flowers? Either way, cool effect.
|
|
#
?
Apr 26, 2008 08:05
|
|


|
yea, the microprocessor is in a loose socket, wrapped around the base of the flowers, and there's 5 more LEDs in the vase.
|
|
#
?
Apr 26, 2008 09:56
|
|
|
I love simplicity. Next project is probably gonna be a platform bed.
|
|
#
?
Apr 28, 2008 10:06
|
|

 the Mods, they knew!
|
An earlier project of mine was replacing a BBC Master innards with a Compaq Ipaq machine to run linux. Insides: Removal: Ipaq parts The main issue was rewiring the keyboard to work with a PS2 keyboard controller (which I took from an old keyboard). Once it was wired up, and all the keys gave an output, a keymap file had to be made. Once that was sorted I can now use the keyboard full time! Recent Project:  LED Display. I recently got an LED display as I saw one at a great price. Primarily for displays RSS feeds, etc. The display came with some windows software to display messages, and after sorting out the syntax that it used I wrote a little php app that writes to the serial port, allowing whatever message to be displayed. Although at the moment, it just currently sits on the internet accepting messages: https://www.easyjo.com/led.php 
|
|
#
?
May 2, 2008 14:05
|
|

|
Where'd you find that LED display at a good price? Most everywhere I've looked online has wanted an arm and a leg for them.
|
|
#
?
May 3, 2008 02:38
|
|
|
easyjo posted:LED Care to share the app pleeease? It's really the coolest idea ever and my living room needs more cool.
|
|
#
?
May 3, 2008 14:01
|
|

|
Here's my subwoofer.  I'm still bulding the rear panel for it but I already tested it with a software crossover and an external amp and it's really good for its price.
|
|
#
?
May 3, 2008 21:36
|
|

|
As some of you may know, I'm into blacksmithing. I have an anvil, but I lack a forge... mostly because all the loving gas/ceramic places close before I get off work and I can't buy the parts I need to make a proper gas forge. So, I built a super cheap charcoal forge. Take one stainless steel tub, add a 6 dollar surplus exhaust tip, some gravel, one cement brick, and some effort in cutting/filing a hole for the pipe, and a screw hole to mount it, plus a super cheap 12volt fan, and bingo, instant forge. I used it to make a long fire poker, because our firepit is a long distance from the benches we have out there.    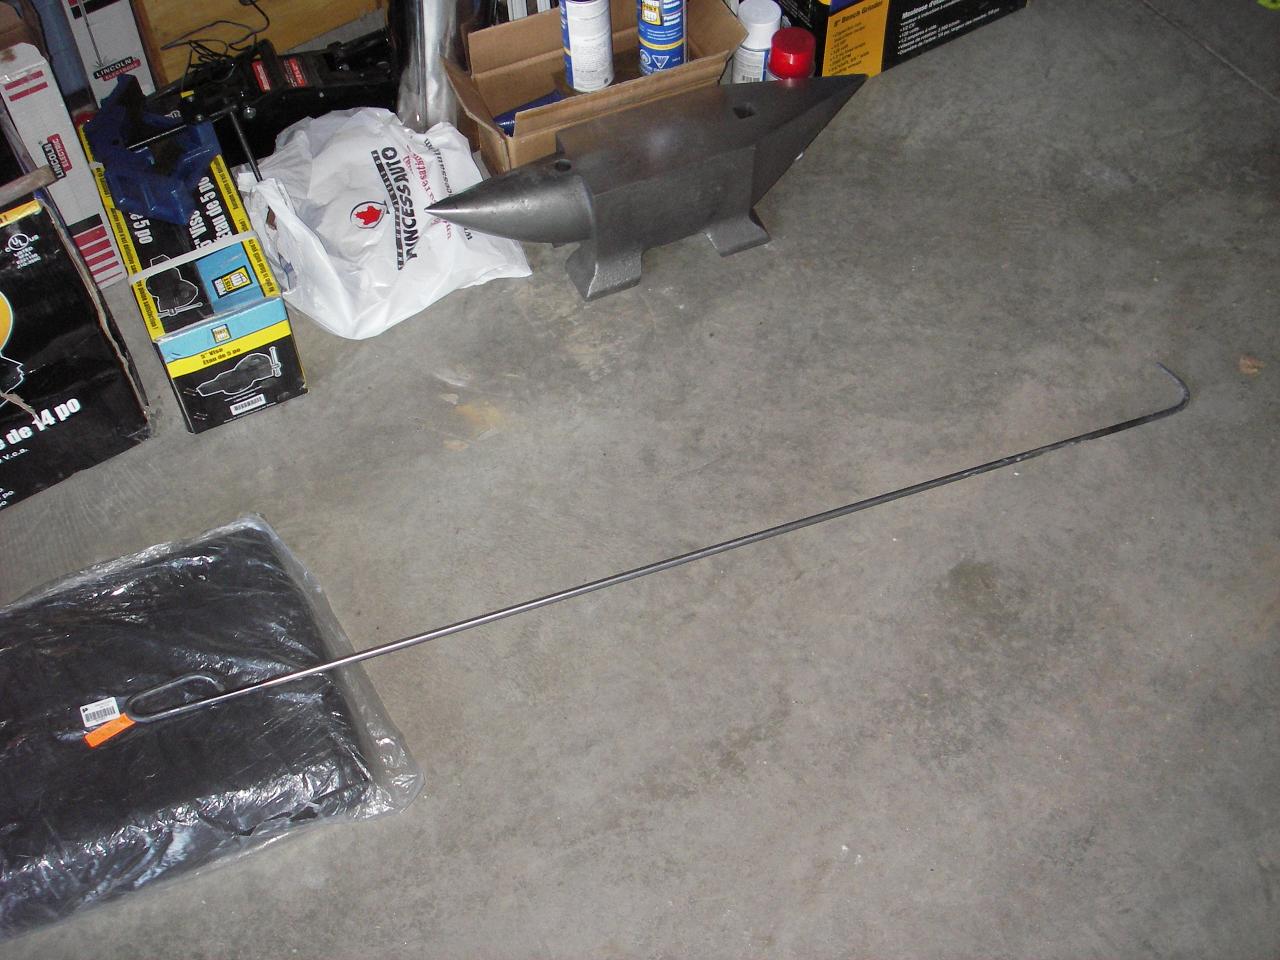  
|
|
#
?
May 4, 2008 06:23
|
|
|
easyjo posted:Recent Project: This is awesome. Can you please post a howto? PLEEEEEEEEEEEAAAAAASSSSSSEEEEEEE?
|
|
#
?
May 4, 2008 06:32
|
|

|
Company Mime posted:Where'd you find that LED display at a good price? Most everywhere I've looked online has wanted an arm and a leg for them. mine was from https://www.bluearan.co.uk unfortunately they've were getting rid of them and have none left  Although there's usually ones around �100 for a similar size one (1 colour) from ebay. kyacker posted:This is awesome. Can you please post a howto? PLEEEEEEEEEEEAAAAAASSSSSSEEEEEEE? Sure, I've been meaning to write a full writeup so here goes.... The LED display is an RS232 controlled device, with 120*8 pixels (3 colours)... Software came with the screen which can send it messages, graphics and also play music (no idea why). The first stage of the project was to work out the syntax used by the software so I could replicate it within my own program... This is the syntax sent to the device for a message of "MESSAGE" <ID00><BE>05<E><ID00><L1><PA><FE><MA><WC><FE>MESSAGE3F<E><ID00><BF>06<E> As you can see, it contains various tags, which are for font size, scroll speed, intro effect, out effect etc.. and also, importantly a form of hash/checksum after the message, in this case "3F". This turns out to be calculated by $hh = 0x74; for ($i = 0; $i < strlen($text); $i++) { $hh ^= ord($text[$i]); }$hh = dechex($hh); So now, the message can be sent like follows: <ID00><BE>05<E><ID00><L1><PA><FE><MA><WC><FE>$text$hh<E><ID00><BF>06<E> Various keycodes can also be used within the message text such as <CR> etc to display various colours. All the webpage does is adds a message to a MySQL database and adds it to a queue. Another local app running on my pc, connected to the display using USB->RS232 checks the database every 5 seconds or so and displays the message as required. Then obviously the webcam captures this image, and uploads it to the site... Also it seems that most LED devices have very similar syntax to this, some with different tags etc, so I guess there is some form of standard method of programming these displays. Any more info required, just ask. Edit also bonus mario and pacman:  
|
|
#
?
May 4, 2008 12:34
|
|
|
I bought 2 of these Eames Herman Miller fiberglass chairs from my neighbors for 2 bux this weekend. After some sanding and painting and lots of little fiberglass slivers in my arms, they turned out pretty well.  I need to get some new glides but I might just do the put tennis balls on the feet trick.
|
|
#
?
May 5, 2008 08:54
|
|
|
quadpus posted:Fun one-day project: Add inexpensive Chinese touchscreen to an old "All-in-One" computer+LCD to make it a true kiosk machine: You wouldn't happen to have a link for that inexpensive chinese touchscreen, would you? I think this is awesome and would like to build one like this, but I'd be worried about picking up the wrong touchscreen...
|
|
#
?
May 6, 2008 05:04
|
|
|
I made this leather lens-case for my 135mm 2.8  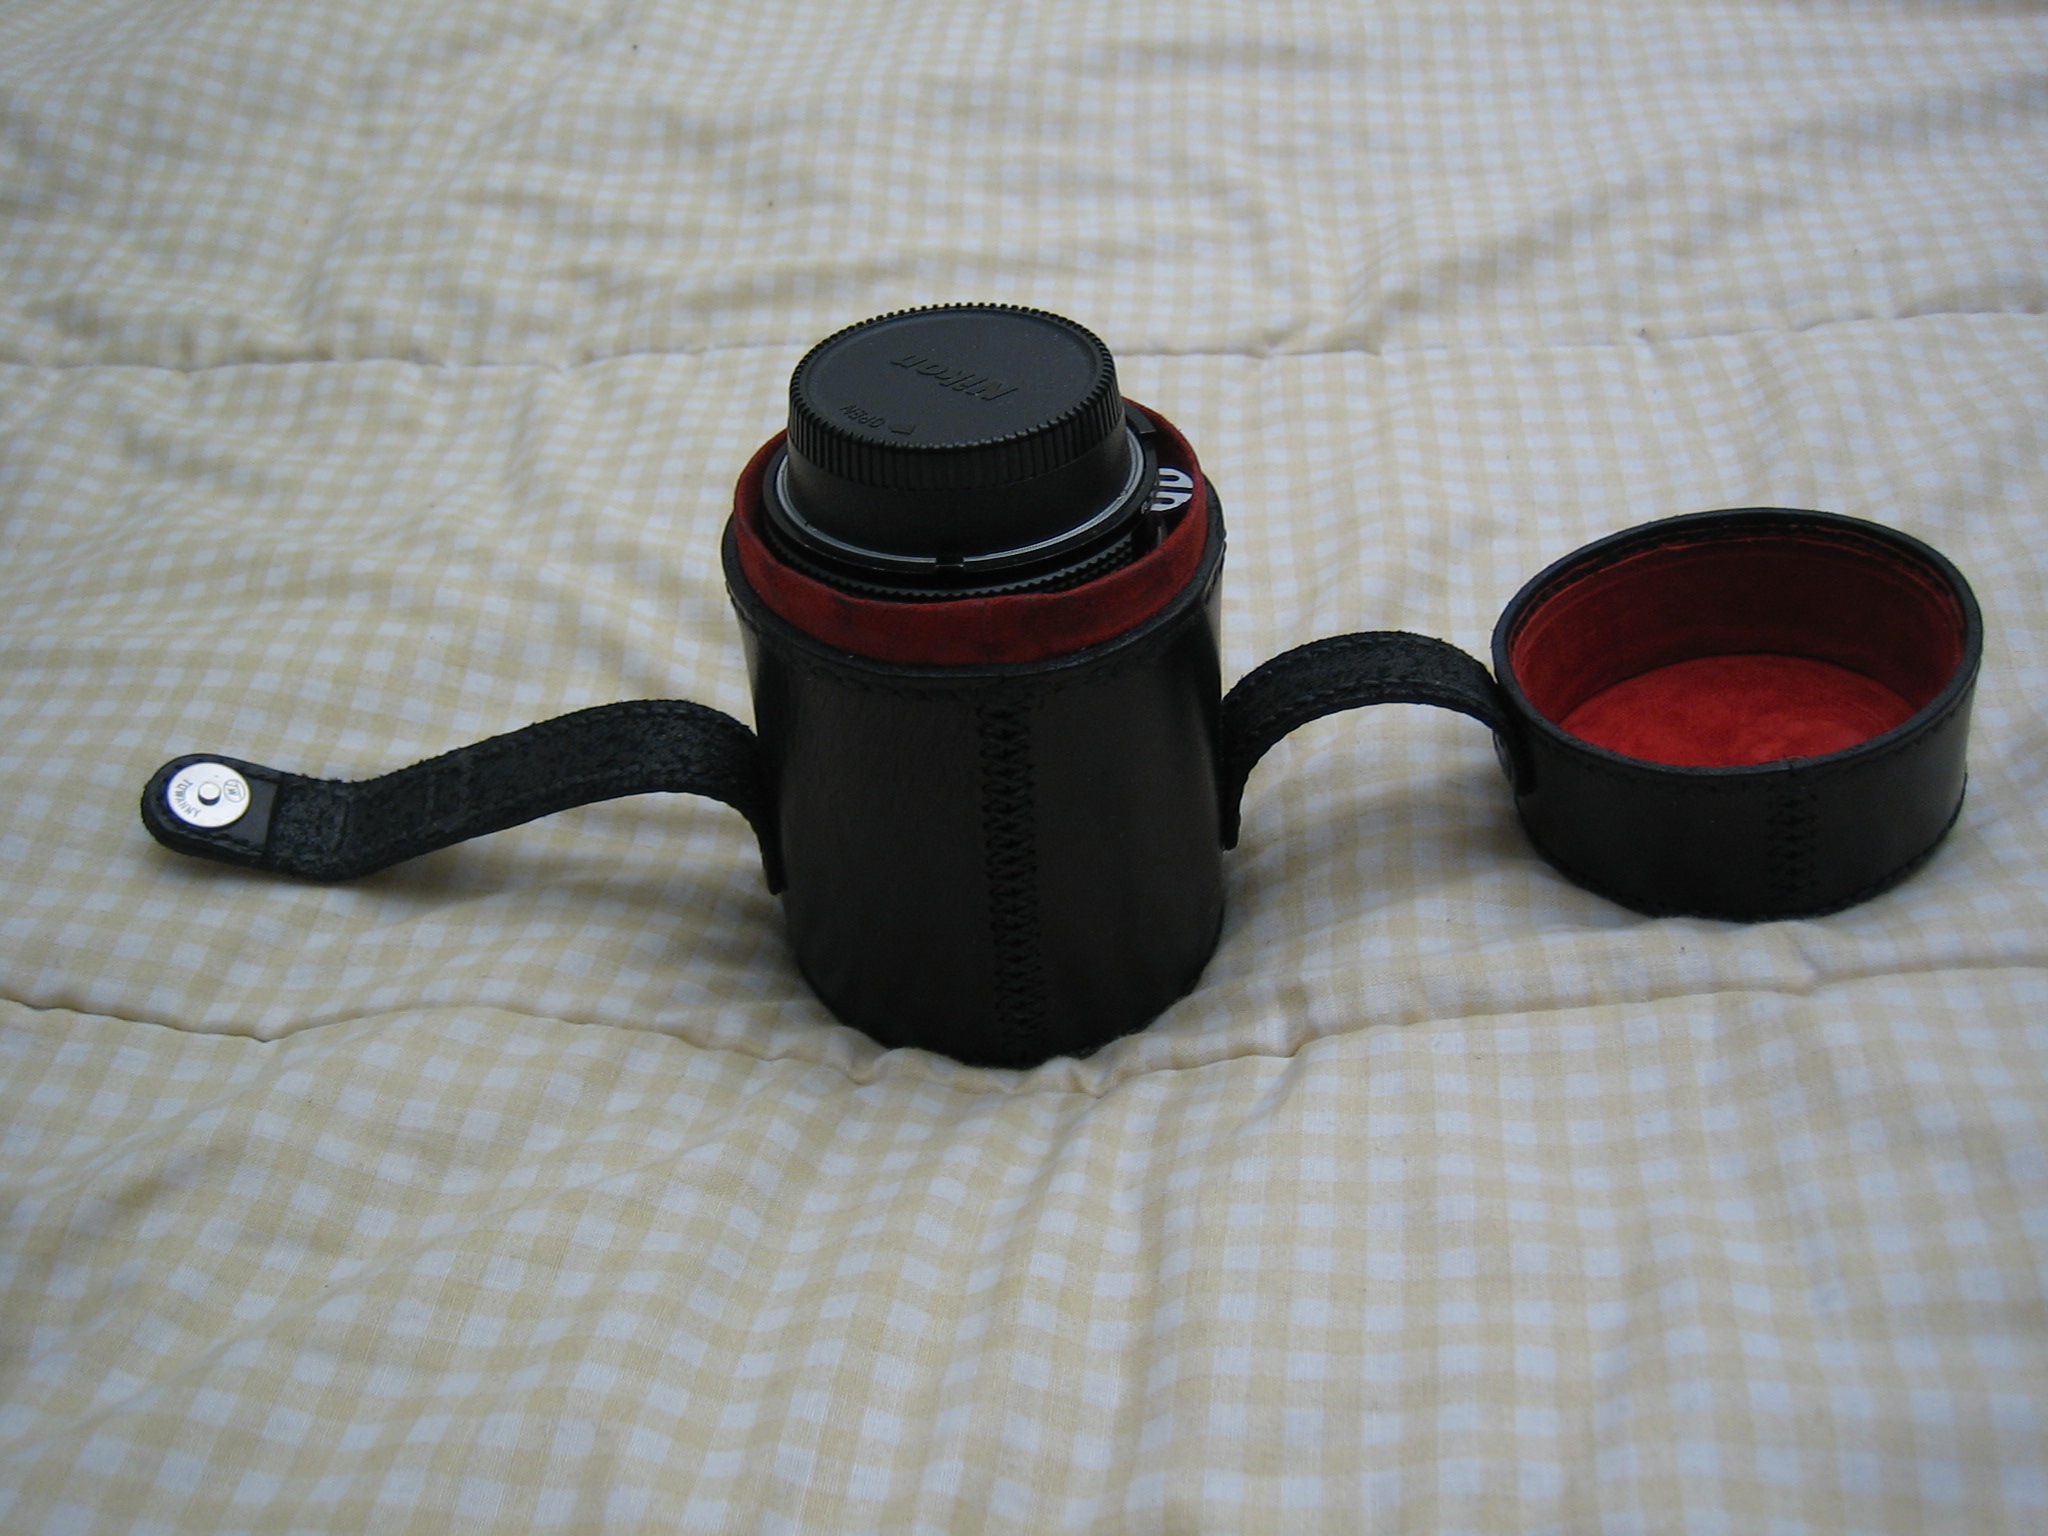 Took twice as long as it should have because I didn't plan it out before starting. Photo-box, made from mounting-board and bookbinding-fabric.  
|
|
#
?
May 6, 2008 15:06
|
|

|
I made a new wall on my mothers beach. I had the help of my girlfriend and her father. Unfortunately I only have before and after pictures, but none in progress. There are numerous plans to improve/expand on the wall, which I will go into more. The wall was actually done last summer/fall, I'm just now finding this thread. The old wall was constructed of one very large beam sitting on rocks, and a makeshift beam made out of two pieces of wood. I don't know/remember the dimensions of each.. but you can see them in the pictures. It has been in place for 20+ years, but age was starting to take its toll as the ground under the beam started to erode. The major floods of last May are what finally killed it. Here's what it looked like prior to the rebuild   View from the top..    We dug the sand out behind the large beam ( The beam with the wet footprint was light enough to just pick up and move), rolled it down the beach a few feet (To act as wave barriers in case one of the guys with a boat that's much to large for the lake came out while we were working) My brother used a chainsaw (and ruined a chain in the process) to cut up the beam to smaller more manageable sizes. The new wall was put in two feet farther back against the water line, to give us more of a beach. We also put in a small campfire pit. The wall ended up being 30 feet.  Where the green chairs are used to be brush, which we cut to be able to push back the seating area. I plan on building one sided picnic tables so you can sit and still see the lake.  Where the wall ends (where the sailboat is) there is another 20~feet of natural wall. This fall we plan on digging that out and adding the same stone somewhat close to the property line, and adding capstones to the first section. The fire pit  View from the general area the tables/chairs I'm making are going to be   The total cost of everything above came to about $550 $500 of it alone was the stone, the rest was beer and a few shovels, and a masonry wedge. This fall the lake is being drained so the dam can be rebuilt. We will be adding more beach sand and getting rid of the leaves/crud in the water you can see in the last pictures. We also plan on digging up the one large rock in front of the wall. All the major work of this section is done, so during this summer we can just do the smaller details and enjoy it. An idea for next year is to clear out the other side of the beach which I have no pictures of, add a lower wall ( 2-3 stone high) and make supports for a hammock. You can see down to the end of the lake from that spot, unlike from behind the fire pit. I'll have way more pictures of work while we do it next time around, and I'll keep this thread updated with them.
|
|
#
?
May 6, 2008 19:32
|
|
|
I like to build flyrods. It's a hobby of mine that has been profitable in the past. I helped me relax throughout college when I had tests and whatnot. So, I built, here recently, a rod turning station so that I can apply the thread to the rod/eyelets properly. It's adjustable for rod length and eyelet spacing and is built from clear poplar. This doesn't show the drying mechanism at the end that turns the rod so the poly thread epoxy dries evenly. I'm currently in the process of building a jig so that I can add customer's names and initials in thread to the rod. It's a pretty nasty process and takes a lot of patience and skill but people are really floored when they see their name in the thread of the rod.  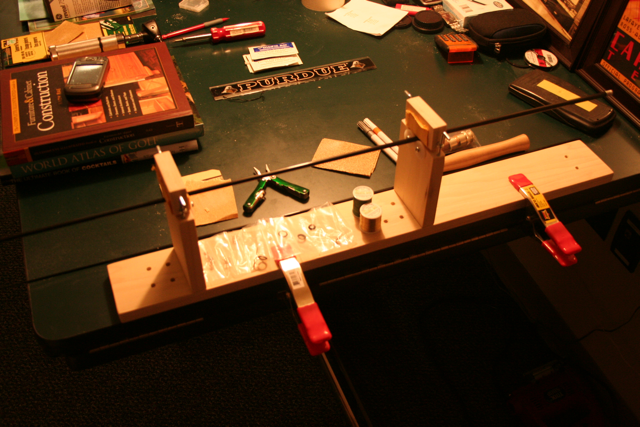 The rod on there right now is before anything has been attached. I was getting an idea for the action on the turner. This one is a two-piece 7' rod that I built for my dad. If anyone is interested, I build rods that are reasonable, especially compared to the prices that other custom rod builders charge. I can acquire all of the major company's blanks and build what you need but most of my experience is in low weight rods for freshwater. kyacker fucked around with this message at 05:00 on May 7, 2008 |
|
#
?
May 7, 2008 04:55
|
|
|
Im making a box out of a hollow nintendo and an old crappy humidor. Top with the unwanted bits taken out  Bottom  Humidor in pieces   Getting things roughed out. 
Ignoramus fucked around with this message at 17:08 on May 11, 2008 |
|
#
?
May 7, 2008 16:41
|
|

|
Ignoramus posted:Im making a box out of a hollow nintendo and an old crappy humidor. Try and always host your images on waffleimages.com when posting!
|
|
#
?
May 8, 2008 00:28
|
|

|
Horray, image editing is now working on the LED display: http://easyjo.com/led.php
|
|
#
?
May 14, 2008 22:03
|
|
|
Another DIY speaker maker chiming in... So far I have built 4, including a sub. The first two sound great but I wasn't too happy with the woodworking. I had never really worked with MDF before.  Then I built a sub:  Then I built the center channel speaker. This time the woodworking came out much better:  These were all slightly modified versions of the plans from this site: http://www.rjbaudio.com/
|
|
#
?
May 15, 2008 17:14
|
|

|
I did my patriotic duty the other day, and spent part of my Economic Stimulus money on a new Dremel (I've had one for ages, but the switch was getting flaky so I left it to my brother when I moved out). Then I couldn't think of anything to do with it. So I looked around my desk, found a USB stick and a toy that came free with a pack of batteries, and combined the two.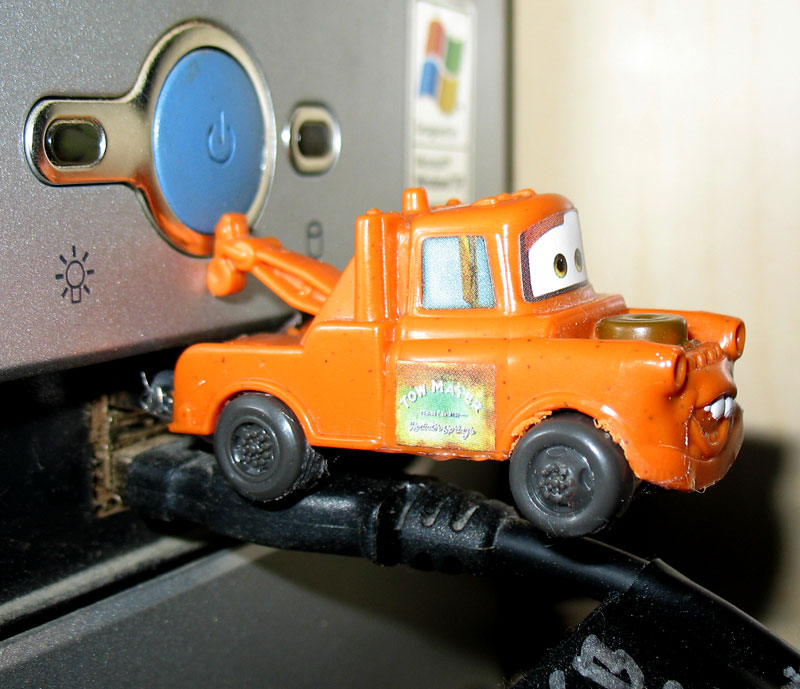
|
|
#
?
May 16, 2008 14:47
|
|
 Bad Angus! Bad!
|
Scottw330 posted:These were all slightly modified versions of the plans from this site: I like the non round cover on the sub and the center looks really nice. What did you wrap the center with? Is that a woodgrain vinyl or something? Most importantly, how does it sound?
|
|
#
?
May 17, 2008 19:52
|
|
|
Scottw330 posted:Another DIY speaker maker chiming in... This is good stuff. Do you have any recommendations for where I can get good crossovers?
|
|
#
?
May 18, 2008 02:44
|
|
|
If I can offer some advice on ScottW330's speakers - although looking at the pictures he's worked this out - the uneven levels of sheen in the top speakers are caused by different rates of paint absorption in the wood. The slightly duller bits are the edges, and worked surfaces of the MDF, which don't have the same treatment as the normal faces. To prevent this sort of difference, your best bet is to give the whole thing a coat or two of primer before painting or spraying the topcoat. This will seal the wood evenly, and mean you get a uniform finish.
|
|
#
?
May 18, 2008 04:21
|
|

|
I built a simple coffee table. 
|
|
#
?
May 18, 2008 04:55
|
|

|
I really like that table. Simple and elegant. What sort of joinery did you use? I've been playing around with some types i don't normally use, like mortice and tenon joins recently, so I'd be interested to know how you did it.
|
|
#
?
May 18, 2008 05:00
|
|
|
After I saw iron man, I immediately decided to tear some poo poo apart and mod it, and I just happened to have a broken power screwdriver that Mom gave me three days prior to tear up or fix. The rechargeable battery and the wiring/switch were good, so I figured the motor was burnt out. Solution: rewire the motor coils! Original shaft, stator, wiring, etc:  Whoops, no .5mm electromagnet wire lying around, guess I'll use my .4mm (26ga?) wire and give it a few more turns around the stator...  I put it back together and tried it out, but the power was really crappy -- more resistance in the coils, I'd reckon. The obvious solution was to hook it up to a power supply with twice the voltage of the factory NiCad cell. Rough math says about 3 amps through the motor at 6v.  And the final product: 
|
|
#
?
May 18, 2008 09:37
|
|
|

|
| # ? Apr 23, 2024 16:25 |
|
|
Here's a couple custom electronics projects that basically worked, but didn't end up being usable: The IR Remote Repeater I have my stereo wired up with speakers in two rooms of my apartment, and since I moved in two years ago, I've been wanting to be able to use the stereo remote from my computer, which has no direct line of sight. I tried mirrors but couldn't get them reliably positioned, so my next thought was to make a repeater for the remote. TV/stereo/etc remotes operate by sending bursts of IR. Only IR modulated on a 10 kHz or whatever carrier pulse is recognized by the devices. The basic idea of the repeater is to grab the remote's signal with a demodulator chip, amplify it, and send the amped signal through a 555 timer to modulate it to the carrier frequency. I was building it on a breadboard a while back, but had to shelve it uncompleted to make space on my living room floor for other stuff. Some of the wires may be bent out of shape, but here it is:  And with a remote button being held down:  You can see the IR LED (grey) lighting up because digital cameras see invisible things. According to the oscilloscope I borrowed from the Engineering Department at school, everything was working perfectly. According to my TV and stereo, it didn't do poo poo. I suspect the power output to the IR LED isn't high enough, but I honestly don't know why it doesn't work. Oh well, it's still a snazzy little over-engineered IR-transmission detector. The clear (green) LED lights up when anyone uses a remote in the room. The Alarm Clock Stereo I am bad at waking up in the morning. I consistently turn the alarms off in my sleep. It usually takes me two or three alarms to become conscious enough to realize that turning them off is a poor decision. Yes, I have a "Clocky" alarm clock too (the one that rolls off your nightstand when it goes off). Here's my normal clock. Step 1 of the project was permanently disabling the snooze button, which has long been my nemesis.  I opted for a ridiculously overcomplicated solution to my morning issue: wire my alarm clock to the power switch on my stereo. I went into this one with no plan whatsoever. I ended up using the voltage drop between the ground/power traces on the clock's PCB as an indicator of when the alarm was going off. Apparently running the speaker pushes the internal power supply pretty hard. That voltage gets compared to a reference from a 9v and the comparator chip turns on a transistor which activates a relay, which is attached to wires soldered across the stereo's power button pcb mount.  It worked perfectly for about a week. As it turns out, the comparator's drain current is enough to bleed a 9v battery dry in about a month, and that changes the reference voltage for the comparator. It needs a fresh 9v battery to function and those get expensive. In retrospect, I should have figured out a way to get a stable reference voltage from the clock's circuits. Plus, this happened:  It's been a year and I've never gotten around to fixing/upgrading it. I'll see if I can find the pictures of the inside if anyone cares, but it's nothing too fancy. I'll post a couple projects that actually worked in a day or two.
|
|
#
?
May 18, 2008 10:09
|
|