


|
Two layers of "white oak" stain later. Going to start laying on clear tomorrow.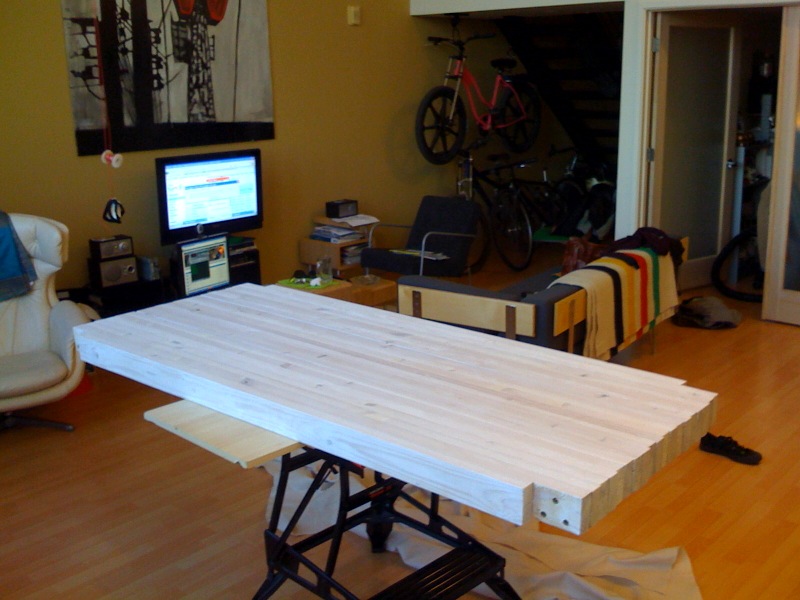 Obligatory Batmobile angle 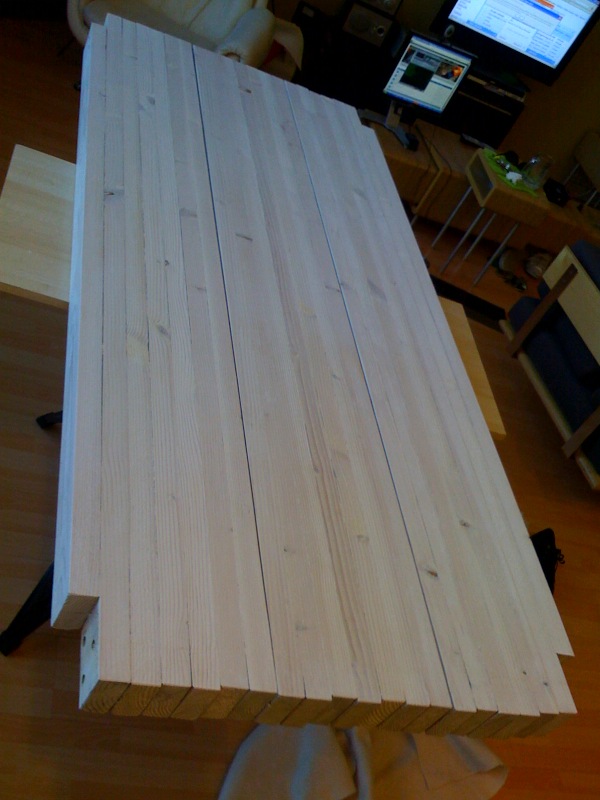
|
 #
?
Aug 29, 2008 04:34
#
?
Aug 29, 2008 04:34
|
|


|

|
| # ? Apr 18, 2024 14:59 |
|
|
Gnomad posted:Any of you woodworking guys familiar with the Shopsmith? Shopsmith makes quality equipment but it won't be for everyone. Its basically for people who lack the room for traditional equipment. I've spoken to quite a few people who loved theirs and a few who didn't. Used they are cheap for the same reason used exercise equipment is cheap, its not a reflection on the quality.
|
|
#
?
Aug 29, 2008 21:50
|
|

|
Didn't see the canoe thread but if you live near the water you can try building one of these. They send you the plans and instructions (not materials) to make a small sailing boat. Never built one before but I saw it in a boating magazine here and thought it looked interesting.
|
|
#
?
Sep 2, 2008 11:14
|
|
|
Speaking of boats, there are a few groups around the net dedicated to building small boats from one or two sheets of plywood. I always wanted to build one and try it out. http://groups.yahoo.com/group/mouseboats/?yguid=116437271
|
|
#
?
Sep 2, 2008 18:37
|
|
|
Wow, those mouseboats are pretty wild. Cool, though. Perhaps I shall attempt one someday. Also, I'm putting a router table together and, despite my resistance to wanting to use biscuits, I picked-up a biscuit bit set for my router from Woodcraft ($15.99, thanks to a special "Overstock" deal). Of course, the thing won't only be held together by biscuits, I just wanted to practice with the bit, since I like the idea of using them to sort of keep things in shape. Anyway, after spending a weekend with that bit, I've got to say, I now know why they have a dedicated tool for cutting biscuit slots. I used one in my class at a nearby community college when building an end table and thought, eh, I don't really need to shell-out for one of these, let's try the bit. Maybe it's just because it was my first few times using the bit, but setting-up stop blocks and coming up with way to orient the boards and what not was much more time consuming than I had expected. Ironically, it would occasionally occur to me that the whole affair might be easier, were I using a router table instead of handheld, heh.
|
|
#
?
Sep 2, 2008 19:00
|
|

|
PMan_ posted:Maybe it's just because it was my first few times using the bit, but setting-up stop blocks and coming up with way to orient the boards and what not was much more time consuming than I had expected. My take on that would be that if it were easier to cut biscuit slots on a router table, you'd never see Norm Abram using a plate joiner.
|
|
#
?
Sep 2, 2008 19:35
|
|

|
Boogeyman posted:My take on that would be that if it were easier to cut biscuit slots on a router table, you'd never see Norm Abram using a plate joiner. This is an excellent point. Still, if one doesn't plan on using biscuits very often, or doesn't have the budget for a plate joiner, it seems to get the job done.
|
|
#
?
Sep 2, 2008 20:15
|
|
|
maplecheese posted:
use drywall screws with MDF as well (and drill pilot holes).
|
|
#
?
Sep 5, 2008 03:50
|
|
|
Anyone know a relatively easy setup for making wood CD racks? I need to hold hundreds of CDs and will just line them up on a wall. Lots of weight so I'll use wall studs which is fine.
|
|
#
?
Sep 15, 2008 02:49
|
|

|
Not an Anthem posted:Anyone know a relatively easy setup for making wood CD racks? I need to hold hundreds of CDs and will just line them up on a wall. Lots of weight so I'll use wall studs which is fine. Wall studs would probably be cheaper but they will also be crooked and way overkill for a CD shelf. I have a DVD shelf with hundreds of DVDs that I built from spruce (your basic cheap white wood at Lowes) 1x6's (and held together solely with biscuits) and it doesn't even think of sagging. CDs are a little heavier but if you keep your spans within four feet there should be no problems. For additional strength you could use southern yellow pine. You can extend the span out to about six feet by putting a thin plywood back on the shelf and screwing it into the shelves, this will add incredible rigidity and I prefer this method over edge strips. http://www.woodbin.com/calcs/sagulator.htm As for putting the whole thing together, unless you have a lot of power tools or a woodshop handy, you'll probably just have to use screws. Another option, you could buy CD holder strips from Rockler and build this: 
|
|
#
?
Sep 15, 2008 22:14
|
|
|
Hey wood experts: Let's say I live in a NYC apartment and have no tools, but I've always been interested in woodworking. Is there anything I could do that's interesting, and would build useful skills for later when I move to the suburbs and can get power tools and space to use them? I'm happy to buy a few things, especially if I could make cool stuff. It would be really cool if I could learn useful skills in my limited space that I could apply to bigger projects later. But I'm not sure where to start, or if this is just a bad idea. Any thoughts?
|
|
#
?
Sep 20, 2008 05:11
|
|
|
Do you have a balcony that you could work on? You will find that you won't want all the sawdust from cutting and sanding inside your apartment, so keep that in mind. You can start working on some projects with a few hand tools and patience, you don't need a shop full of power tools to do fine work. Suggested tools to start with: Combination square and tape measure Rip saw and cross cut saw coping saw for making delicate round cuts plane power drill, center punch, and bits hammer and a few screwdrivers nail punch for setting finishing nails 2 folding saw horses or one of those work tables that can also act like a vise putty knife / wood filler sandpaper
|
|
#
?
Sep 20, 2008 13:30
|
|

|
dv6speed posted:list Good list. Might could get away with a sliding, compound miter saw. The bigger they are, the more useful they are but also more effort to lug around. Jigsaws don't make much noise and are very handy for 3/4" lumber but don't buy a cheap one. I recommend Bosch. Chisels are a must and you don't need to spend much money if you buy a set of Marples blue handles. The sizes I use most are 3/8" & 3/4". Biscuit joiner or a Kreg jig. Both make putting things together much easier and faster when you don't have a lot of power tools. A Kreg jig is much cheaper, doesn't require clamps although you get better results if you use clamps, but leaves screw holes behind which can be filled. A biscuit joiner leaves no external sign but generally requires clamps to hold pieces together while they dry. Clamps, you'll never have too many but you can get away with just a few and I usually just buy them as I need them. Bessey are one of the top brands but you can get away with less expensive clamps. Look for clamps that are beefy. Inexpensive clamps tend to distort under load and will provide uneven pressure on your project. It's worth having a few Quick-Grip clamps. Glue. A lot is written about glue but for indoor projects it doesn't really matter. Even white Elmer's glue is stronger than lignin, the glue nature uses to hold fibers together. So white glue or yellow glue is fine; don't waste a lot of money on brand names. Maybe a good beginner's book, I list a few I like here.
|
|
#
?
Sep 20, 2008 18:28
|
|
|
does anyone have any tips for staining and sealing a large desk? I'm more worried about being able to polyurethane a large surface and have it come out even and without brush strokes. I've made 2 desks before and using a little brush takes forever Also, I have 2" rails on each edge, any tips on sealing these? Since they're mostly vertical, I'm worried about the polyurethane dripping.
|
|
#
?
Sep 20, 2008 21:32
|
|
|
PMan_ posted:Wow, those mouseboats are pretty wild. Cool, though. Perhaps I shall attempt one someday. ") Cobalt60 posted:Hey wood experts: Let's say I live in a NYC apartment and have no tools, but I've always been interested in woodworking. Is there anything I could do that's interesting, and would build useful skills for later when I move to the suburbs and can get power tools and space to use them? I made several projects in the living room of my old apartment, using my coffee table as a workbench. You just have to think small and within the limits of your shop.Don't just start buying tools, conceive of a project first, and THEN buy what you need. Tools that work fine indoors: * Power drill * Circular saw (small trim saw with a 4" saw will be quieter than an 8" saw, but works best with 1x lumber; 2x will take two passes) * jigsaw * All hand tools are fine- plane, coping saw, screwdrivers, hammer, etc * hand-saw miter box is great for trim and furring strips. Not so great for 2x4s. * speed-square, framer's square & level - Avoid power sanders, table saws, routers, etc, until you get a proper workshop. grover fucked around with this message at 22:45 on Sep 20, 2008 |
|
#
?
Sep 20, 2008 22:37
|
|


|
grover posted:I made several projects in the living room of my old apartment, using my coffee table as a workbench. That's hardcore. I used to just go out in the parking lot or on my back deck.
|
|
#
?
Sep 21, 2008 01:19
|
|
|
dyne posted:does anyone have any tips for staining and sealing a large desk? I'm more worried about being able to polyurethane a large surface and have it come out even and without brush strokes. I've made 2 desks before and using a little brush takes forever I don't think there is any shortcut with poly which is why I avoid it except for tabletops. Both lacquer and shellac will melt into previous layers but poly doesn't so each layer must be smooth before applying the next otherwise surface irregularities compound. Unless you can get it to flow smoothly, you'll have to sand at some point then gradually thin the poly putting on thinner and thinner layers. Its the only way I know of to get a nice smooth finish with poly. Lacquer is nearly as durable as poly but much more forgiving to apply. Lacquer is usually sprayed but you can brush it.
|
|
#
?
Sep 21, 2008 06:44
|
|
|
wormil posted:I don't think there is any shortcut with poly which is why I avoid it except for tabletops. Both lacquer and shellac will melt into previous layers but poly doesn't so each layer must be smooth before applying the next otherwise surface irregularities compound. Unless you can get it to flow smoothly, you'll have to sand at some point then gradually thin the poly putting on thinner and thinner layers. Its the only way I know of to get a nice smooth finish with poly. Thanks for the tip, I've done a bit of reading and I think I'm going to try and some aerosol lacquers
|
|
#
?
Sep 21, 2008 16:49
|
|
|
Wormil thanks for the Rockler cd rack tip but I am going to try to build a shelf system. My girlfriend has about 750 CDs and I have a few hundred, I'm shooting for 1000 CD capacity. Its going to be ~ 60" wide, 84" tall and ~5.5-6" deep. The shelves are going to occupy the top part, I'm estimating .5" wood for the shelves and 5" spacing between them, with 7 shelves I can get over 1000 CDs (~147 CDs per shelf). Now, this is all assuming I designed something that will actually hold a load and all that jazz. This is where I need advice.  Each shelf's load is going to be ~32.407lbs total, evenly, so 2 or 3 lbs/foot? I can secure it to the wall I just need advice as how to best go about doing that. Also.. what kind of wood should I use? Trying to be super frugal. We're going to put some sort of low table under it against that wall too, hence why the shelves dont go all the way down. edit- if it helps here are a cd's dimensions/weight .4" x 4.9" x 5.5" and 100g Not an Anthem fucked around with this message at 18:24 on Sep 29, 2008 |
|
#
?
Sep 29, 2008 18:17
|
|
|
Not an Anthem posted:Each shelf's load is going to be ~32.407lbs total, evenly, so 2 or 3 lbs/foot? Too much load for 1/2" wooden shelf. Even the most rigid woods like hickory, locust and SYP will sag nearly an inch under that load without some additional support. Even if you increase the shelf thickness to 1", you'll still probably have visible sag. If you attach a 1/4+" backer to the unit and run screws 6-8" apart through the back into the shelves, it should be plenty sturdy. That is in addition to attaching the ends of the shelves of course. The screws aren't an elegant solution but they are workable and simple if you don't have a shop full of power tools. There are other options (cleats, edge strips, brackets) but they take up more space; or dadoes which require more tools and experience. I attached my shelf to the wall with flat metal L brackets screwed to the sides and the wall. I put them inside and they take up a negligible amount of space. However, my shelf is supported by the floor and only attached to the wall for stability. Pocket screws wouldn't be a bad solution for attaching it to the wall.
|
|
#
?
Sep 29, 2008 19:32
|
|
|
Thank you! How big does the backer have to be, can it be small strips or are you saying to make one big ol sheet to go behind the entire shelf area? If I do the backer, can I stick with 1/2" or should I go bigger? Out of curiosity what is the dado solution, as I really like learning about real woodworking and have access to a real woodshop and some home tools. Lastly- what kind of wood do you recommend?
|
|
#
?
Sep 29, 2008 19:49
|
|
|
You can use strips or one large sheet depending upon the look you want. I had to go look to remember exactly how I built mine. I used edge strips but placed them in the back.  If you wanted to use dadoes, what you would do is cut dadoes into the back sheet to accept the shelves, that way they would be supported on three sides for a very strong and attractive shelving unit. The other methods accomplish the same thing with less elegance. You can use any wood you want but if you want 1/2" thickness you'll need either a planer to get the wood down to size or a manufactured product (plywood, mdf, etc). If you plan on running screws into the shelves edgewise you need a solid wood. If you use dadoes or edge strips, you can use any wood product. If you use MDF, don't rely on screws; use wood glue and/or biscuits. I used 1x6 (actually .75x5.5) white pine from Lowes for mine.
|
|
#
?
Sep 29, 2008 21:07
|
|
|
Ah you rule, thanks. Curious about your shelf- did you use screws or how did you set it up? I'll probably run to the local lumber yard tomorrow and see what prices are but I won't be able to work on it til this weekend. Looks nice!
|
|
#
?
Sep 30, 2008 01:36
|
|
|
Dadoes are much stronger, but you don't really need to do any fancy dadoes or anything for a first project, just screws through the side will be plenty strong enough. As for the backer, Get a sheet of 1/4" thick luan cut to the dimensions of your shelf (lowes/home depot will do this for free, btw), and nail it to the back using brads. It will stiffen the shelf up considerably. It's not an option, you really do need to put a back on to keep the shelf from racking and collapsing. Also, it makes it a lot easier to hang it, as you can screw through the luan into a stud I'd use 1x6 pine for the shelves and sides, and 1/4" luan for the back. I made a shelf just like this for my first apartment project 10 years ago, just as described. I put dowel rods through the middle of the shelfs, too, to hold the books upright. Simple and strong, and has been a great shelf.  Protip: Making your shelf 48" wide instead of 60" will let you use a single continuous sheet of luan as a backer and will save you a LOT of work in the long run. Don't forget to account for the thickness of the wood, either ")
grover fucked around with this message at 02:36 on Sep 30, 2008 |
|
#
?
Sep 30, 2008 02:29
|
|
|
grover posted:As for the backer, Get a sheet of 1/4" thick luan cut to the dimensions of your shelf (lowes/home depot will do this for free, btw), and nail it to the back using brads. ... Also, it makes it a lot easier to hang it, as you can screw through the luan into a stud I hate to disagree but with 33 pounds per shelf X 7 shelves = 231 lbs + the weight of the wood and hardware. Brad nails aren't going to hold and the backer will not be secure enough to support the weight. The shelves could fall forward leaving the backer screwed to the wall. I don't believe the brads will even be strong enough to prevent the shelf from sagging. He's safer using screws through the backer into the shelves and attaching the shelf to the studs using the case sides. Nothing wrong with running screws through the backer into the wall studs but I wouldn't depend on it. Not an Anthem posted:Ah you rule, thanks. Curious about your shelf- did you use screws or how did you set it up? I'll probably run to the local lumber yard tomorrow and see what prices are but I won't be able to work on it til this weekend. Looks nice! I used biscuits and wood glue.  Pocket screws are also pretty sweet. 
|
|
#
?
Sep 30, 2008 03:46
|
|
|
My brother builds guitars, both classical and electric. Here are some of his creations He builds all of these from scratch with his own jigs and exotic woods he gets at a lumber yard about an hour away.  Click here for the full 600x799 image.  Click here for the full 600x799 image.    Click here for the full 600x799 image. 
Chauncey fucked around with this message at 04:26 on Sep 30, 2008 |
|
#
?
Sep 30, 2008 04:21
|
|
|
wormil posted:I hate to disagree but with 33 pounds per shelf X 7 shelves = 231 lbs + the weight of the wood and hardware. Brad nails aren't going to hold and the backer will not be secure enough to support the weight. The shelves could fall forward leaving the backer screwed to the wall. I don't believe the brads will even be strong enough to prevent the shelf from sagging. He's safer using screws through the backer into the shelves and attaching the shelf to the studs using the case sides. Nothing wrong with running screws through the backer into the wall studs but I wouldn't depend on it.
|
|
#
?
Sep 30, 2008 22:58
|
|
|
Chauncey posted:My brother builds guitars, both classical and electric. Here are some of his creations I'd love to see tons of porn pictures starring the classicals. I should have clarified in my post above, but my only interest in woodworking is to build acoustic guitars, mostly classical. I'd even love to see your brothers rigs, if he doesn't mind them being shown off!
|
|
#
?
Oct 1, 2008 00:01
|
|
|
Next time I'm home I will go down to his workshop and take pics of his works in progress as well as his setup. I do have pics of a classical on this computer but I'm not sure if it's one he built or if it's the one he bought. Here it is:  EDIT: This must be a guitar that he built, as it is being sold at the music store he used to work at. Chauncey fucked around with this message at 00:29 on Oct 1, 2008 |
|
#
?
Oct 1, 2008 00:27
|
|
|
dyne posted:does anyone have any tips for staining and sealing a large desk? I'm more worried about being able to polyurethane a large surface and have it come out even and without brush strokes. I've made 2 desks before and using a little brush takes forever For staining use a rag and some rubber gloves rather than any sort of brushes. Always test on scraps first to make sure you have the right shade obviously. Brushed on shellac is fairly durable and easy to apply, when you get 2-3 coats on you level it out with some 0000 steel wool and then french polish several more coats on (this goes quickly)for a kick rear end finish. If you want to spend a week or more and get something spectacular you can put a weak shellac wash on first (dilute the shellac with rubbing alcohol and brush on) and then french polish all the way into a mirror like surface. The only drawback to this is you'll never want to put a martini on it without a serving tray for a coaster- alcohol will damage the finish. The spray on lacquer is a good choice but make sure you have a respirator, even if you're outdoors. If you're in the garage open the door, switch off the water heater first and make sure noone's smoking.
|
|
#
?
Oct 2, 2008 04:08
|
|

|
Chauncey posted:I do have pics of a classical on this computer but I'm not sure if it's one he built or if it's the one he bought. I'd guess he built it, just from a couple non-traditional points like no 19th (split) fret and the curve of the fingerboard. Nice, and would always love to see more. He looks to be talented!
|
|
#
?
Oct 9, 2008 16:43
|
|
|
So are there any chain lumbeyards (in Florida) that sell hardwood I should know about? I'm having a hell of a time finding anywhere around here that sells any non-construction type lumber, and I really don't like the idea of ordering it online and having it delivered. I have a feeling that i would get nothing but the knottiest, most warped boards possible that way. The Home Depot near me has small red oak boards, but that's it.
|
|
#
?
Oct 11, 2008 03:44
|
|
|
Can't help with Florida but if you are forced to mail order lumber, you can feel confident ordering from Wall Lumber. http://www.walllumber.com/
|
|
#
?
Oct 11, 2008 04:35
|
|
|
For a sculpture project a year ago I built up a large roughly 4'x4'x2' curvy frame with the same method used to glue up guitars and holy poo poo is it fun. Mine was of course very crappy as it takes insane amounts of time but guitar building is very, very cool.
|
|
#
?
Oct 12, 2008 17:37
|
|
|
I [i]finally[/img] have time to get in the shop again. I decided to do an endgrain cutting board. I'll probably end up making lots of these for Christmas gifts, it'll be fun to try different designs and woods. Thing is though, these things are a BITCH to sand. Also picked up a cabinet saw to take advantage of the live.com+Ebay thing. I love it, even if it did end up costing me almost as much as I saved. When I was aligning the blade and miter slot, I forgot to remove my dial indicator and slammed the fence into it. Snapped the interchangeable tip right off in the arm of the indicator. $130 bucks down the drain. 
|
|
#
?
Oct 14, 2008 20:50
|
|

|
Ooh, a Grizzly cabinet saw, awesome!! How do you like it so far?
|
|
#
?
Oct 16, 2008 01:27
|
|
|
Woodworking wooo! Alright. So I want to make a foldable beer pong table for my friends and I to use. I know the dimensions of the table, but I have a few questions... 1. What's the best kind of wood to use? I'm going to put some kind of liquid-proofing on it as well as paint it, so keep that in mind. 2. On the subject of liquid proofing: what's the best stuff to use? My friend used schilack(sp?) on a table at his place and it worked out really well, is that a good option? 3. What kind of hinges should I get? I'm looking for it to fold into either one or two sections, so either in half or in thirds. 4. Any special trick to making it not suck, folding wise? I've had experience with some basic woodworking in the past so I'm not a totally noobie to all of this, but any tips would be appreciated! Anyway thanks in advance!
|
|
#
?
Oct 17, 2008 00:41
|
|


|
Johnny Truant posted:Woodworking wooo! 1. Plywood 2. Shellac is alcohol soluble, not a good choice for a beer pong table. Recommend water based polyurethane. 3. table hinges, they sit flush with the tabletop 4. use table hinges
|
|
#
?
Oct 17, 2008 04:02
|
|
|
wormil posted:1. Plywood I figured that just door hinges would be good. Do you think it folding into thirds would be less stable than just the halves, or is that really a big issue? And thanks again.
|
|
#
?
Oct 17, 2008 06:05
|
|
|

|
| # ? Apr 18, 2024 14:59 |
|
|
Johnny Truant posted:I figured that just door hinges would be good. Do you think it folding into thirds would be less stable than just the halves, or is that really a big issue? It would depend on how it was designed. We had a few posts about designing a stable table earlier in this thread. Really considering the low price of commercial beer pong tables, I would just buy one.
|
|
#
?
Oct 17, 2008 06:18
|
|