


|
Is that even sensible to try and do that with an IK solver? The solver will literally throw a poo poo and not know what the hell to do. (Seriously I think it would be very unstable, if possible.) You should be using a much simpler IK chain that drives nulls driving the parts of the mechanical mesh to do what you want. Direction and orientation constraints for the parts that rotate on an axis not aligned with a bone.
|
 #
¿
Oct 8, 2009 05:36
#
¿
Oct 8, 2009 05:36
|
|


|

|
| # ¿ May 14, 2024 23:49 |
|
|
Great rendering, EoinCannon. Love it when a character is all polished like that. Have to agree that the lighting on the lower half of the beard makes it look like a tail, but otherwise it's a drat fine piece, well done! Well this is the same goddamn character I've been posting in these threads for about 15 years now, but things took a hit when I got a job, then got laid off, picked up progress on it, then got another job (at Blur, woop!) and things died down again for a while.. Until recently.  Slightly older version Slightly racist version. Next up I really have to some shading and minor weighting tweaks and a face rig, develop the short film, etc. (you know the drill)
|
|
#
¿
Oct 9, 2009 08:31
|
|
|
sigma 6 posted:tuna: I really want to see that with materials. You do not understand how loving angry I am right now at trying to get the simplest of shaders and displacement working in XSI. (I gave up entirely on normal mapping. Jesus gently caress). It all started from the time I made a test pose, rendered it, then did some testing in the FXtree. Found out I couldn't save the FX tree in any sort of external form at ALL. However, somehow, selecting it all of the nodes and copying them let me somehow paste them into another instance of XSI. Okay, that's cool, albeit loving poo poo as gently caress. Now let's switch to the render tree: I painted a Vertex color map on an object to multiply a displacement in the RT, this didn't work, but what it did do was explode my scene once, and then gently caress the gently caress out of it. Basically my specular is now WHITE no matter what I do unless I load the old scene. I was about to load in the old RT setup into the new one but copy and paste doesn't work between XSI instances (I loving love inconsistent methods of transferring data), I am now at this point in time wondering how the gently caress this gently caress is gently caress. Basically, gently caress you.
|
|
#
¿
Oct 18, 2009 11:58
|
|
|
[fixed]Okay my mistake was using vertex maps in XSI. This hugely dysfunctional workflow is hosed. Rather than selecting the map property from the selection list and being able to paint, (as is consistent workflow in XSI for weightmaps) I had to dig into the object properties and change the "vertex color display properties" drop down in order to pain on a specific color at vert map. gently caress I just love inconsistent workflows where for each different property you have to dig into the manual to find out what arbitrary loving setting you need to change in order to paint on the correct map.
tuna fucked around with this message at 12:56 on Oct 18, 2009 |
|
#
¿
Oct 18, 2009 12:46
|
|
|
John Lithgow? Awesome stuff. I think it was his slightly bigger eyes that stopped me from instantly recognizing him, though.
|
|
#
¿
Oct 23, 2009 21:44
|
|
|
Travakian posted:I'm working on a new project, and I'm wondering if there's any sort of way to make what I'm trying to do more procedural. As an experiment I just built something that basically does this (although to points instead of objects for simplicity) in ICE in XSI in about 5 minutes. I don't have much ICE experience other than simple expressions and such. All I did was get the distance between the locator/null and the points themselves, put it through an If comparison so it's only affecting objects closer than 6 SI units. You then get the distance between the locator and the point at its original state, and add that value to the point's Y direction. You could probably do it several other ways too. All without writing a line of code. In Maya you could probably do this exact same thing using expressions.
|
|
#
¿
Nov 1, 2009 00:06
|
|
|
A5H posted:Anyone using maxwell 2.0? It's pretty rad. Waaaaaaay faster than before! I saw it was used for rendering Alma, short film by Rodrigo Blaas. Would like to see how feasible it is for general purpose rendering and effects nowadays.
|
|
#
¿
Nov 10, 2009 23:36
|
|
|
Eh, why not. Mid texture WIP: 
|
|
#
¿
Nov 23, 2009 16:07
|
|
|
Working on snow effects. I'm still completely green to particles, although I've been getting some good results with emfluid2, and ICE is generally intuitive. Snow contact effect test  Almost every shot is going to be snowy so I need to work out a bunch of ways to speed snow effects up, like collecting on the suit, clumping, etc.
|
|
#
¿
Dec 18, 2009 01:17
|
|
|
cubicle gangster posted:This is excellent, i'd love to see more of your tests Thanks man, I really don't know much about particles here but after seeing a few examples and messing with a few systems it can be easy to get good results for your own personal needs. Here's a small step I did today for raycasting snow and frost collection on the suit. The good thing about using raycasting in ICE instead of baking a texture, is that I can get realtime feedback and use the generated weightmap to not only drive texture mixing, but also generate particles for effects. It's also nice and easy to keep consistent between shots, which is a problem I've been trying to think around. I basically raycast from any sort of geometry, here I've just used a grid, its nice because it can cast "shadows" as if the snow is blowing from a certain angle:  I then generate a weightmap on each object from these raycasted points:  This weightmap is used to mix frost texture onto the suit here, turned low on left and high on right:   And I then emit particles on the suit (well, a matched suit mesh, driven by ICE as well) based off the weightmap, to get rid of the uniform dots per vertex the raycasting was giving:  Next step will be to get those emitted particles simulated to fall off for effects like if he shakes his arm, snow flies off. This is simple but there's a lot of cleanup and organizing to do first ") I'm looking forward to getting all of these individual tests and systems all compiled into one animated scene for my first full shot test, but that's maybe a few weeks off yet.
|
|
#
¿
Dec 22, 2009 08:59
|
|
|
Moist von Lipwig posted:Also, I just switched from Blender to Blender x64 and it's one of the first times I've seen a 64 bit program that actually significantly outperforms and is more stable than it's 32 bit version. Is 3DS Max like that as well? Most 3d apps are pretty much the same when it comes to 32/64bit speeds, but some (such as Cinema4D) saw big speed increases when going to 64bit because they could strip out a whole load of legacy junk for older CPUs.
|
|
#
¿
Dec 23, 2009 03:50
|
|
|
We upgraded XSI a few months ago (on ME2) from 6.5 to 2010 in one fell swoop, it went well and the benefits were fantastic for us animators, fixing bugs and improving performance dramatically. However I think we also tested Max 2010 and stuck with 2009 because Max 2010 is pretty terrible. Cubicle, you should speak up about it if it's having a detrimental effect on day to day work, IE bugs and performance. Nothing your boss wants to hear less than that he's spent money on upgrades not being used because some pillock is forcing everyone to work worse for whatever personal agenda he has going on.
|
|
#
¿
Dec 24, 2009 12:30
|
|
|
Congrats, Eoin. Even if it does mean bearded Blender users emailing you to help them on their fantastic game projects that simply need one more modeler before they can earn millions on Steam. That's the price of fame I'm afraid. [e] Since I don't really respond much to this thread as much as I jerk off about my own stuff: I really congratulate all of you regular posters, improving and keeping up with constant works and helping others. Especially as most of you hold regular jobs both in and out of the industry. It takes a lot of effort to do this sort of thing outside of work, and that's what I'm really congratulating you on. I know as time goes on in people's careers, you find you don't have as much time or desire to put in the effort as you settle down with life. However, to those who do, I really feel like you're putting in such a great effort, you distinguish yourself from those who simply do this 9 to 5 and walk away with a "shared pat on the back" on behalf of their company. They don't know what they're missing. tuna fucked around with this message at 15:07 on Dec 29, 2009 |
|
#
¿
Dec 29, 2009 14:40
|
|
|
Try stripping materials out and deleting certain objects to narrow down the problem area. That screenshot tells us nothing about the scene or your memory at all so it's a bit hard for us to just guess.
|
|
#
¿
Dec 30, 2009 21:22
|
|
|
People keep linking me that thing and I've not sat through it once because it's just a big boring showreel on how to light concrete walls. I'm sure lots of effort and care was spent in the making but gently caress if I give a poo poo.
|
|
#
¿
Jan 8, 2010 05:22
|
|
|
Check out Vray's depth of field *makes 4 hour movie of concrete walls being out of focus*
|
|
#
¿
Jan 8, 2010 05:29
|
|
|
Listerine posted:Can anyone recommend some up to date tutorials for working with displacement maps using the latest versions of XSI and Zbrush? I'm killing myself trying to figure out to get this stuff working- it took me half an hour to find out I was supposed to store the base mesh as a morph target before doing any sculpting. And I have no idea where I'm supposed to be adjusting settings in XSI to get a map to actually drive displacement- I followed the example in the help files to use alpha to create displacement but instead of applying my map it just seems to be applying a uniform intensity of displacement over my entire model. Argh, don't get me started on how hosed up the process is to get displacement working from zb onto an XSI mesh. You will save a lot of time simply using Mudbox. I'm going to strongly suggest you do that now, however: http://www.youtube.com/watch?v=Tz3mojb61uw That's a great tutorial (parts one and two) on a TON of the small things you need to gently caress with just to get it working. It goes over re-exporting your (now different) base mesh from ZB back to XSI, and which direction to flip displacement and normal images, where in ZB to read a displacement value to set your change range node in XSI, etc. Even after all of this I couldn't get it working well at all, and with the move to Mudbox, there was no flipping of images or changing morph targets or re-exporting meshes (wtf? seriously that's a massive step back in workflow), or any of that stupid crap.
|
|
#
¿
Jan 10, 2010 15:40
|
|
|
Yeah this is the purpose of plugging the displacement map into a change range node in the RT. The change range node will essentially re-scale the values of that map so they go in and out at the correct amounts. You don't really need to "build" anything in the RT as material nodes have inputs for displacement/bump(normal). If other apps deal with ZB better they just have better default values. Another method you have (which I tried, but it didnt give good results), is to export the full highrez mesh from ZB into XSI (XSI handles them like a dream  ), then, once positioned over the top of your original low-rez base mesh, use ultimapper to build a difference (displace) map or a normal map. This method is actually pretty cool depending on how complex your objects are. ), then, once positioned over the top of your original low-rez base mesh, use ultimapper to build a difference (displace) map or a normal map. This method is actually pretty cool depending on how complex your objects are.
|
|
#
¿
Jan 11, 2010 00:16
|
|
|
Listerine posted:How does Mudbox compare to Zbrush in terms of texture painting? I thought it was fun using stencils and such in mudbox but I don't texture very often and when I do, it's usually a mix of procedural and photoshop as I can't get any sort of detail with 3d type paint apps. Sorry I can't help you in this area. One thought though is that you could still texture in ZB as long as you're using the same UVs (heh good luck with that in ZB though).
|
|
#
¿
Jan 13, 2010 07:32
|
|
|
Aliginge posted:
TaDaa! an 841 polygon low poly cube!
|
|
#
¿
Feb 8, 2010 11:19
|
|

|
brian encino man posted:Also, observe how a man stands, this isn't not just left up to rigging, even the mesh should have weight to it. Can't say I agree with this, your modeling should aid the rigging primarily if it's to be rigged. Which does mean slightly bent limbs in neutral positions (not hyper-extended or extremely abducted/contracted). What I suppose you're referring to is this, but just to be clear, don't model the character in a "pose" to begin with, it will bias the rigging/other poses towards it substantially. From his model, I'd say bend the legs so they're not dead straight, and bend the arms a bit more, relax the fingers to be slightly curled and not so dead straight. The arms at 45 degrees is good, but make sure the legs are straight from the front, otherwise he'll be bow-legged when he's rigged and standing in another pose. He is wearing a jacket so the curve of the spine would be hidden anyway, but it does usually follow more of an S-curve to it, which I tend to follow with the spine rig.
|
|
#
¿
Feb 23, 2010 04:37
|
|
|
Odddzy posted:Zbrush just turned into the program EVERY company will need to be taken seriously... But every other application already has pelt mapping 
|
|
#
¿
Feb 24, 2010 05:22
|
|
|
Unexpected EOF posted:But every other application does it in a way that is kind of a pain in the rear end to use compared to this? They've essentially built what we've all been using for years, except it is different because of the limitations of ZB itself (no component selecting). You're losing direct control of the UVs over "map painted" areas where you want ZB to decide seams, stretching, etc. all for you. This might speed up the initial steps, however you're going to struggle when the computer doesn't recognize that you need something a certain way and you just cant get in and change it. All in all, it isn't anywhere near as groundbreaking as Odddzy said. And UVs can still be a pain in the arse no matter what magical hyped solution there is.
|
|
#
¿
Feb 24, 2010 23:24
|
|
|
sigma 6 posted:tuna: You are right in that the limitations of zbrush are obvious here. Not being able to move or add edges or even pick them becomes a problem when making UV seams. Sure, I just wanted to point out that the hype surrounding this isn't so warranted. ZB now has UV tools, and that's great, but this from CGTalk: quote:I feel so mother$%&* ing powerful! I feel like modeling is finally catching up to my imagination. Unlimited Power! And Odddzy's.. odd.. comment was all adding up to be very 
|
|
#
¿
Feb 25, 2010 00:03
|
|
|
So THIS is how those amazing 3D commercials are made on TV! Apparently this is a preview of the new MayaQT interface, a big improvement, I must say!
|
|
#
¿
Mar 2, 2010 10:56
|
|
|
BigKOfJustice posted:Good times. There are some pretty ridiculous internal soft body tests floating around at work that no sane person should be subjected to. Imagine gay Spiderman dance and... Giblets.. Large giblets..
|
|
#
¿
Mar 8, 2010 02:12
|
|
|
Looks like someone didn't use reference, or a quicktime. If people who've been animating for 30 years still use references and quicktime then I'm pretty sure it's in the realm of a new animator to do so. I'm just half-joking, but seriously: use reference, use quicktime. Every time an animation is posted in youtube or vimeo, is an animation that is too hard to critique.
|
|
#
¿
Mar 16, 2010 10:09
|
|
|
EoinCannon posted:That gun is pretty out there Aliginge, I'm assuming it's your concept? Looks cool Is he sad because his mum forced him to join the Hitler Youth?  Good job so far, should be a fun model.
|
|
#
¿
Mar 23, 2010 08:20
|
|
|
cubicle gangster posted:Seems they're only a couple of months behind the max one. Horrible site though. This is cool, and personally I think you should do your own Banksy-esque graffiti on the wall. Make it (more?*) photoreal and people will ask where you took this "photo" because they love the graffiti. *things that hit me were the massive random glare on the tiling, the trees (as if there'd be an underpass like this with such lush vegetation nearby - or at least it'd be more believable if it wasn't there) and then something about those railings. Not enough specular? p.s. Sorry if I'm missing the point.
|
|
#
¿
Apr 3, 2010 08:45
|
|

|
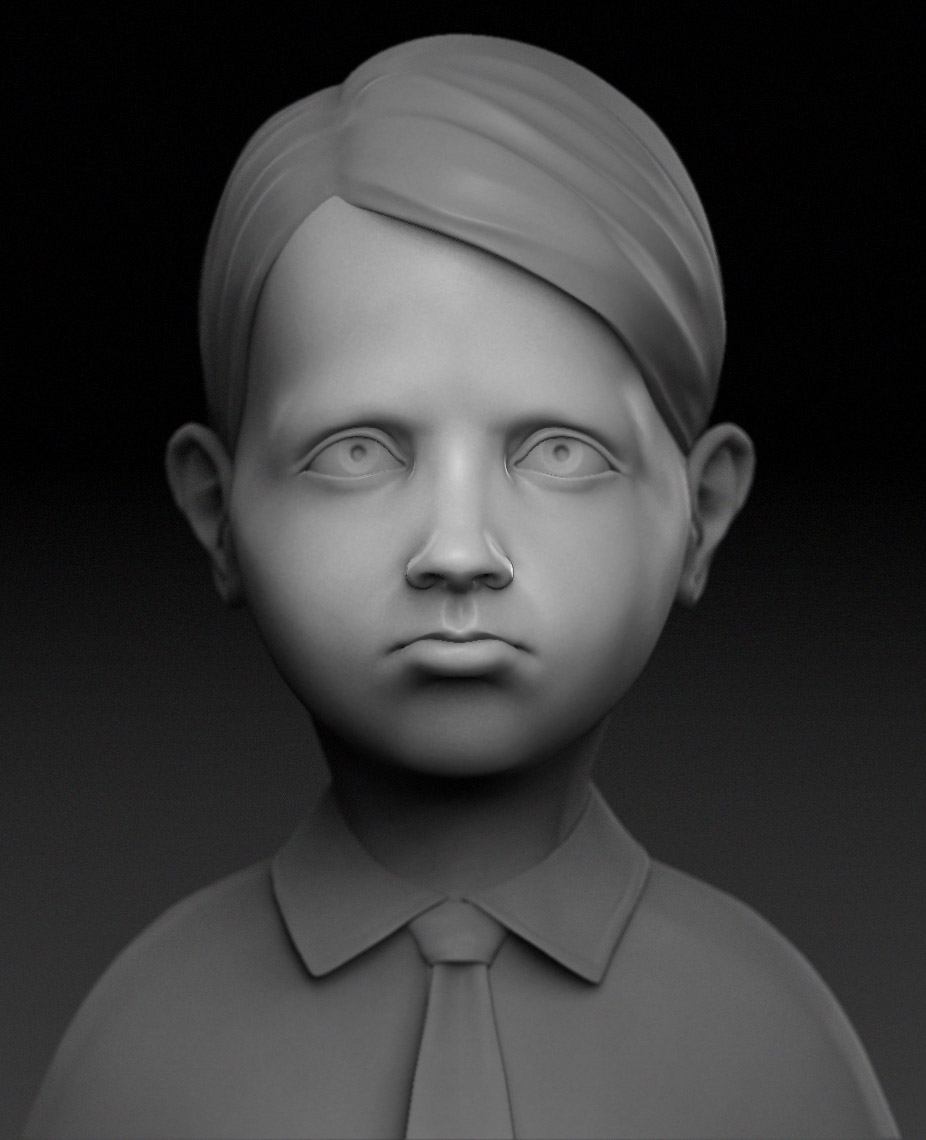
This old chessnut again. Now with hair and fully rigged. I can finally start animating him and learning how to do some proper rendering. I really know nothing about the whole exposure/colour correcting type aspects of it yet, so lots to learn.
|
|
#
¿
May 17, 2010 02:41
|
|
|
DefMech posted:Octane is awesome, but it's got a lot of features missing(proxies, displacement, etc) before it'll compete with more established renderers. Yeah I'm excited & interested in Octane, but can't really use it right now because of what it's missing. Therefore I live my rendering fantasies vicariously via people like Keyframe.
|
|
#
¿
May 19, 2010 18:57
|
|
|
Two boring videos of my Spaceman rig, facial is still in progress of course. http://www.puppetstring.com/rig_videos/body_rig_1.swf http://www.puppetstring.com/rig_videos/facial_rig_1.swf
|
|
#
¿
May 22, 2010 11:33
|
|
|
Starting to combine a bunch of effects for the environment. I have a few more sets of particles to work out still. (mainly a bunch of softer horizon snow dust clouds and also character floor interaction particle systems) And a not-tweaked-well video of particles and tree blowing in the wind: https://www.puppetstring.com/environment_test_1.mov Actually here's another tree, closer up. Materials not final or anything, but trees are a pain and I might as well show it. 
|
|
#
¿
May 24, 2010 01:31
|
|
|
Hackuma posted:Can anyone direct me to a good MoCap tutorial and possibly some data that I can use with it? Animate something badly, bake all of it to keys, then try to make it look good by deleting all of the keyframes again and re-animating it. Seriously though it depends a lot on how good the mocap quality is. If it's good, you should just go with the flow and let it do its thing without trying to reanimate it all. Sometimes though you do have to just blow away large chunks of keys and re-animate. Also get used to dealing with animation layers.
|
|
#
¿
May 24, 2010 01:44
|
|
|
EoinCannon posted:but you look at the work that people create with MR and it's certainly top quality. I think vray might be quicker and easier to get the same results though. I think this is down to how prolific MR is across AD applications than anything else, with people forcing themselves to learn how to deal with its bullshit because it's right there. I'm having massive problems with MR and literally can not get the gently caress away from it with Softimage. I'd wait for 3delight to be updated for 2011, but it may be 2012 by the time it is. Our studio is supposed to be on the Arnold beta, but it's actually up to one guy, and he doesn't see it fit that I should be allowed to actually get hold of it. Basically, the rendering world is a loving closed door to me right now. What is it like on the other side? [edit] Oh nice, 3delight for 2011 should be in a few days. gently caress off, I got work to do. tuna fucked around with this message at 11:55 on Jun 20, 2010 |
|
#
¿
Jun 20, 2010 10:54
|
|
|
Veretas posted:Hey 3D thread, I just finished my run at Full Sail(I swear it isn't as terrible as most people say, but it's no CalArts) and I finished my demo reel. I just wanted to see what you guys thought. http://vimeo.com/12864490 Hey buddy, good work! I'll give to you what I got from it, if you're interested in fixing any of it. piece #1: Watch out for IK arms and stiff, crappy hand poses on the guy screen left (also his arm passes through his body on the arc). Also watch out for his first major key pose as it seems very "forced" for the camera which reduces its appeal as it isn't very natural. Also watch out for his eyeline, which seems to look below the other character's head for a while. If that was intentional it doesn't read quite right yet, so really dial in the expression you're going for. Guy screen right is better. I would improve his arc on his right arm for that gesture, but again he's suffering from really bad hand poses throughout. The way he holds the bottle, the pose his hand has when it hits his main key pose, the way when it drops down it goes into a completely default norman rig default pose, etc. Also watch out for the characters when they're not delivering lines, as you tend to make them go completely dead. It's okay that you might not want to draw attention to them, and sorry to use this maxim, but: acting is reacting. Those deadpan "waiting for the other actor to deliver their line" pauses is just plain bad acting, by forcing the guy delivering the line to be the concentration of the shot. It's a lot more interesting when that is reversed. In fact, a lot of things are more interesting when you take the obvious, then reverse it. On the acting front, you could do with a lot more work. There's no dimension or subtext or subtlety to the acting, they literally deliver their lines one at a time and it's like a crappy soap opera. Piece #2: Again watch out for the eyes. It's obvious you're using a look-at target that doesn't do much moving. Again with the lazy hands! Again with the acting? It comes across as a bit vaudeville. Try not to do things twice in a row, especially if they're exact impressions of what he's saying. (the hang gliding impressions). walk cycle: Agreed you should take it out, or replace it with a walk that isn't a cycle. Make each step individual, add some acting or some really interesting show of weight to it. Show off your skills, don't just explain how you can do basic cycles. piece 4#: Main complaint would be the suck up the tube, have a ton more offsetting and overlap. It looks like his cog just zooms up, but his head would be sucked up first, then his shoulders/upper torso, then waist, cog, then legs would literally be pulled by the rest. If you're looking for a job in making things move, make sure the most simple of (character) movements isn't just a linear translate. The main message I want to get across on your reel is that you need to show off yourself, show how awesome you are at complex or interesting weight transfer. Show how interesting your acting can be, don't rely on boring, cliche, dull acting choices. Otherwise you're not selling yourself and it comes off as any other student reel. I have no problem believing that you'd do fine working under the right supervisor, however. But you've got to give them a reason to think that.
|
|
#
¿
Jun 26, 2010 08:46
|
|
|
Lots of awesome industry mentors in AM, so that's great. Only real downside is probably that its very cookie-cutter these days. I'm so sick of AM reels and that loving AM rig doing the same goddamn "opening a locked door" test.
|
|
#
¿
Jul 2, 2010 08:11
|
|
|
I just wanted to say how impressed I am at how far Houdini has come in just a few releases in terms of usability. Every single release I'd download Apprentice, play for 5 minutes and uninstall. But this time instead of uninstalling, I upgraded to Apprentice HD. I love how unlimited the application really is. There are a ton of options to get things working the way you want them to in the interface. The node workflow is a staple now for most 3d applications, but Houdini is just much more comprehensive and pushes limits a lot further than anything else, which feels great. I also love the well implemented digital asset system that makes versioning/locking/interfaces of assets really smooth. Also impressed with systems like Takes, VEX, compositing, built-in support for Amazon ec2, etc. Not simply just the particles/dynamics system that the program is famous for. The only area I haven't tested yet is actual computation speed of rigs. From some small tests the speed seems okay, but hopefully the experimental multithreaded cooking option variable is some insight into the future of the program. Reading the character section of Odforce isn't really hugely inspiring either, with professionals there referring to the terrible autorig and poo poo done on "The Wild" 4 years ago. I think I'm done gushing now, I'll get back to learning what these nodes do.
|
|
#
¿
Aug 15, 2010 12:03
|
|
|
Listerine posted:Is modeling still kind of crappy? Yeah of course it's still poo poo as a modeler. It does have a lot of very powerful "modeling" tools that you can use in a ton of ways to achieve certain effects, procedurally, especially with its fantastic procedural selection tools. But regular modeling is still best done in any other application.
|
|
#
¿
Aug 16, 2010 06:26
|
|
|

|
| # ¿ May 14, 2024 23:49 |
|
|
Cool, thanks for the info.Geared Hub posted:Autorig is pretty horrible [speaking as a rigger] Yeah its a piece of poo poo. Which is why I'm boggled at the continual mentioning of it over at Odforce. Geared Hub posted:As for the The Wild, those are some of the most advanced creature rigs ever done in Houdini, and they stand up to what's been done at other big studios [The Wild creature supervisors came from ILM, Disney, Pixar and a few other studios]. None of The Wild houdini stuff ever made it public in any form, it's proprietary, but the rigs followed ILM's rigging standard for the most part. That's interesting. I'm not really clued up on ILM's rigging standard, but for my own rigs I follow a few rules: My animation and deformation layers are separate rigs (with simple, fast connections to the animation layer, easily replaceable and sort of modular), they're built as procedurally as possible so resizing and re-purposing the rig is easy, I'm also an animator so the animation side of the rig sees quite a lot of time making it really smooth and nice and fully featured as possible since this is where I'll be touching it the most. (something I'm going to try, performance pending, is this little setup I banged out last night as a test. So I have an option for an invisible ctrl rig, where bones are displayed as deformed mesh groups. Apparently it isn't as new and groundbreaking as I'd thought it would be, and some studios already do this in Maya) Can you go give an outline of some of the ILM rigging standard/methodologies? I've mainly been brainwashed by our own Blur rigs and concepts, which are getting on a bit now. Geared Hub posted:Deformation wise in houdini, you are best off optimizing speed whenever possible. Even to the point of evaluating deformation capture data in the spreadsheet and seeing how much data Houdini is chewing through to deform a surface. After you have your inital cpature, be sure to lock off or cache your data, before dropping down a deform sop, you don't want to have a huge string of data being cooked. Yeah I'm used to optimizing already. I keep object counts down to a minimum, and simplify wherever possible. I'm still green to Hdn, so the caching is alien to me, but sounds really interesting. I'll definitely look into what I can cache at any point, but caching is a new concept to me in rigs, as Softimage doesn't give you access to that sort of stuff. I'd also like to hear more, or see examples if you know of any on the exchange/threads/websites? Geared Hub posted:When the rigs were packed up in an OTL/Digital asset, we saved out only the skeleton plus the models [cans, volume model, cage, xlo, lo, hi, etc] and a cached version with all the weight attributes to disk. Saved on disk space, although I have flashbacks of committing a character and having it take a half hour to chew through everything. Yeah our assets usually have different resolutions (segmented and full skin) so I'll be looking into doing this as well for my own stuff if I need to. My own personal characters tend to be quite light, low/medium density meshes and rigs optimized to all gently caress, so I've not needed lower resolutions in the past. Performance pending I will have to look into this, but I'm hoping it isn't that bad. I'll be snapping on the deformer components to my rig this week sometime so I should get a good idea of performance then.
|
|
#
¿
Aug 18, 2010 18:57
|
|