


|
I'm the "boob lovin' dude" who did the girl+flaming background render in Kirby's gallery post on the first page.. Here's a new render, still work in progress:  Click here for the full 1920x1080 image. I'll have new renders with lots 'o CG boobies to show you guys soon. I have a reputation to live up to now!
|
 #
¿
Jul 29, 2008 05:51
#
¿
Jul 29, 2008 05:51
|
|


|

|
| # ¿ Apr 29, 2024 02:25 |
|
|
Bioware has finally released part of our CG trailer for Dragonage! We finished it back in January '08, so it's great to finally see it posted for all to see.  Dragonage - "The Grey Wardens" http://dragonage.bioware.com/gallery.html#videos Since the video is heavily compressed, I've included a few high-res stills from our master: 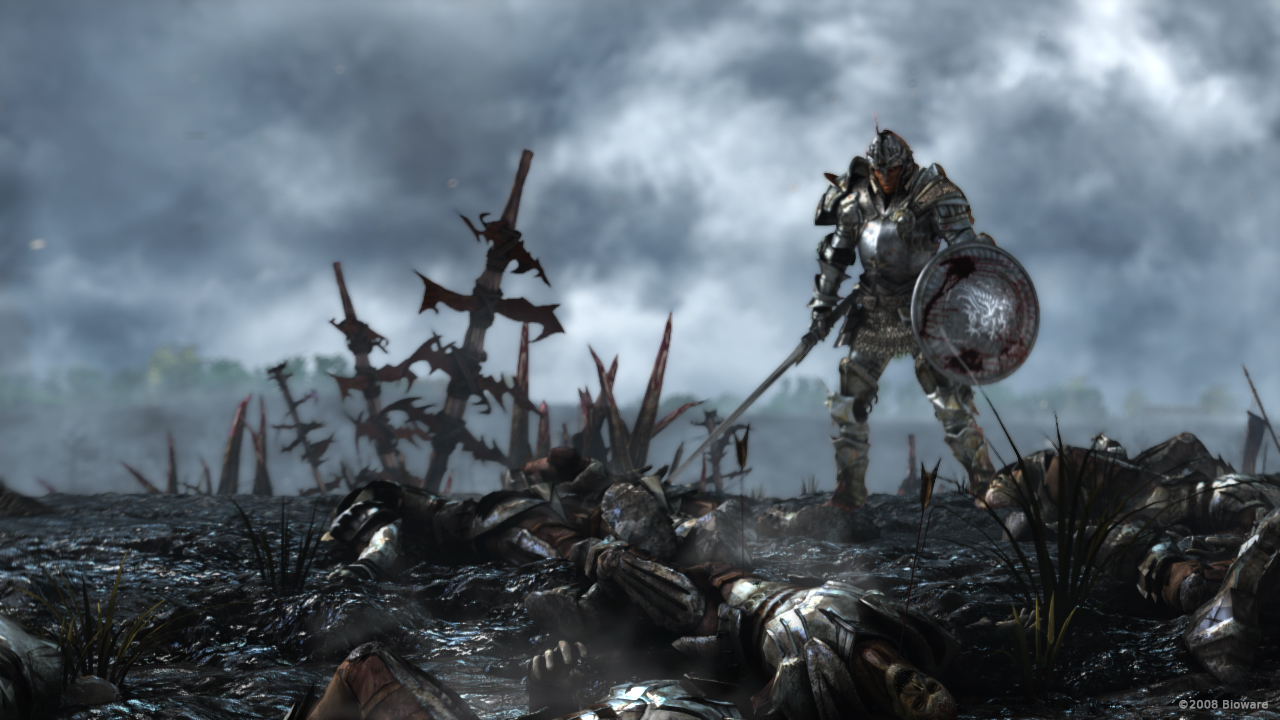 Click here for the full 1280x720 image.  Click here for the full 1280x720 image.  Click here for the full 1280x720 image. 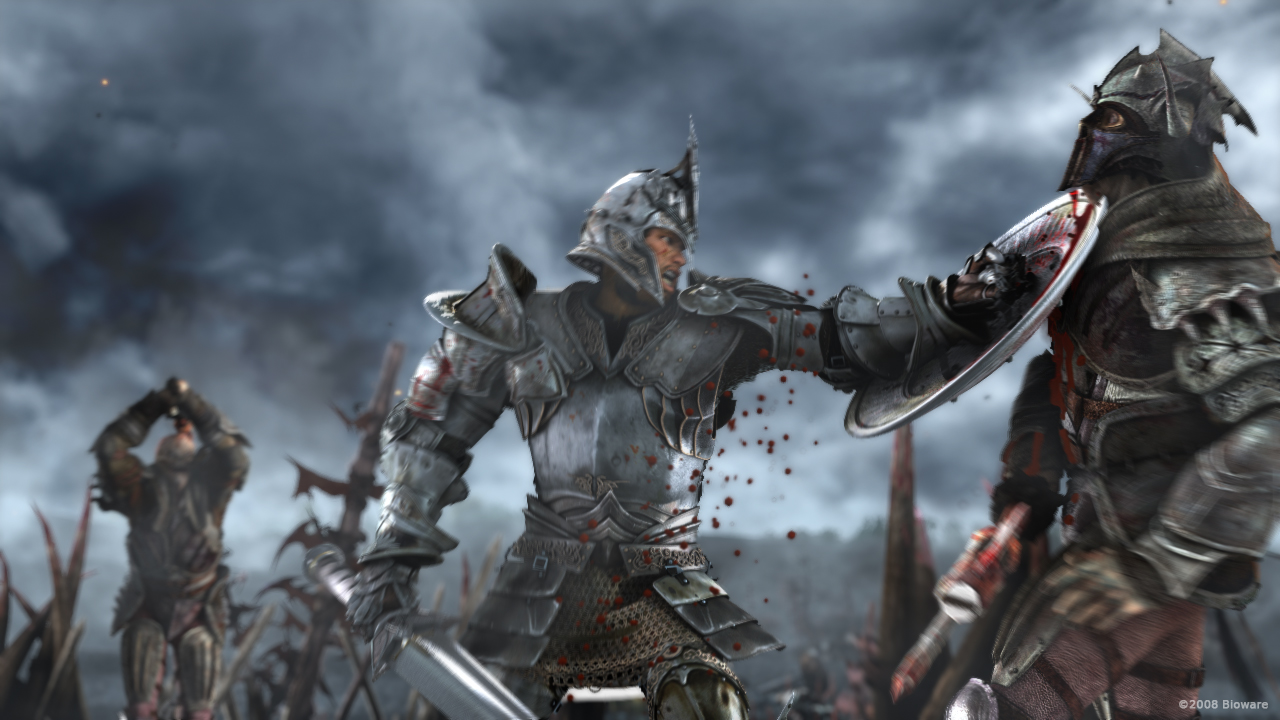 Click here for the full 1280x720 image. I was the Lead TD on this one, so I did lighting, rendering, shaders, FX, crowd setup, compositing and pipeline. As part of my role, I also consumed more beer than any other person at the studio during the course of the project... If anyone has questions for me about the project, please feel free to ask and I'll answer them tomorrow. (I'm off to sleep now)
|
|
#
¿
Dec 13, 2008 13:09
|
|
|
Odddzy's questions answered! How big was your team? The core team consisted of about 10 people- 3 leads, 4 experienced all-rounders and 3 juniors. Sometimes we'd get some additional help in- For example, a couple extra people dropped in during the modeling phase to help create all the character models. How did you plan the whole thing? The animation was broken into 11 scenes, each containing anywhere between one to twelve shots. Each scene was assigned to a person based on difficulty and complexity of the scene. That person was then responsible for rendering all the passes for that scene, spotting glitches and fixing them, etc. Animation was a mix of mocap and keyframe. The director storyboarded everything, and choreographed the fights after the boards were approved. For the mocap we typically hire gymnasts or professional fighters depending on the character we're capturing for. My favourite mocap performer on this project was the 'fall-down' guy- basically he came in for a day to do all the death and impact moves, which involved him throwing himself to the ground over and over for a full day in many creative ways! He could really sell the way a moving body crumples after a death blow, it was like watching a half-life 2 ragdoll. What was the biggest difficulty your team had to face? Scene number one was a monster- it was the first scene worked on and one of the last finished. In the video I linked, scene one is the tracking shot over a battlefield littered with bodies. In that video the shot cuts away, but it is actually one 1200-frame long continuous shot- all the way from the severed head on a pike to zooming into the hero's eye. There's so much geometry in the scene that some passes would need 16gig of ram to render, and if memory serves there ended up being about 70-75 passes in total. Scene one was assigned to me to render, but everyone on the team worked on some part of it and we're all really happy with how it turned out ") How long did one frame take to render? Accounting for all the various passes, I think the average frame time worked out around 20-40minutes a frame. Shots with lots of FX would be higher, maybe around 60minutes once you factor in various Afterburn and FumeFX passes. What programs did your team use for the whole animation? 3ds max 9 64bit and Vray for rendering, and the usual assortment of FX plugins such as Afterburn, FumeFx, Particle Flow tools box 1, and HairFX for hair / eyebrows / eyelashes. Keyframe animation was done in biped, and mocap data goes through MotionBuilder before it can be dumped onto biped. Comping was done in AfterEffects. I'm slowly trying to convince the powers that be to move to Fusion. One day I'll have node-based comping again! One day... (I learned comping in Shake) Any interesting anecdotes that might be fun to share with us? I guess one of the more unusual aspects of the project was how violent the clients wanted it. This lead to some funny feedback, such as "Can we get another severed arm in the foreground there?" and "Can we have the severed head on a stump ooze blood from the eyeballs?" The goriest scene we did isn't in the edit they released, either! I can't describe what it is until Bioware include it in a public trailer, suffice to say it's fun to watch people's reaction to it
|
|
#
¿
Dec 14, 2008 15:02
|
|
|
High-res copy found! http://www.gametrailers.com/player/43598.html DefMech posted:Is that 70-75 passes for one scene or one shot? Either way, I'd love to know how that breaks down. I use Vray every day, but not anywhere close to this scale. The complexity of a project like this is fascinating in how it diverges from our own workflow. All those passes were for one very long shot. I pulled the archive for the project this morning, and it looks like I over-estimated the number of layers in the shot- the total was actually around 61 Here's a list of all the passes. This shot was rendered with 'fake' GI, where you render a Diffuse Filter pass (no light/shadow), a Diffuse Pass (Key light and shadows), and an Ambient Occlusion pass then comp them together. This saves render time in cases where you don't need true GI but want a similar look. S01_BG_Ambient_Occlusion S01_BG_BasicLayers_Precomp S01_BG_Bodies_Ambient_Occlusion S01_BG_Bodies_Diff S01_BG_Bodies_Shadow S01_BG_Diffuse S01_BG_Diffuse_Filter S01_BG_Haze S01_BG_Haze_NoMatte S01_BG_Normals S01_BG_PreComp S01_BG_Reflection_Filter S01_BG_Specular S01_BG_Velocity S01_BG_WireColour S01_BG_Zdepth S01_BG-Carnage_Pass_AmbientOcclusion S01_BG-Carnage_Pass_Diffuse S01_BG-Carnage_Pass_DiffuseFilter S01_BG-Carnage_Pass_ReflectionFilter S01_BG-Carnage_Pass_WireColour S01_BG-Carnage_Pass_Zdepth S01_Carnage S01_DynamicLighting_FireA S01_DynamicLighting_FireB S01_FG_Head+Flowers_AmbientOcclusion S01_FG_Head+Flowers_Diffuse S01_FG_Head+Flowers_DiffuseFilter S01_FG_Head+Flowers_ReflectionFilter S01_FG_Head+Flowers_Velocity S01_FG_Head+Flowers_WireColour S01_FG_Head+Flowers_Zdepth S01_FlagFix S01_FlowerPreComp_Input S01_FlowerPreComp_Output S01_FX_BloodDrip_Flower S01_FX_Embers S01_FX_Fog_CameraPath S01_FX_Fog_CloseUp S01_FX_Fog_Midground S01_FX_Fog_Distant S01_FX_Fog_Distant_NoMatte S01_FX_Fire_A S01_FX_Fire_B S01_FX_Smoke S01_FX_Sparks_A S01_FX_Sparks_B S01_FX_Steam S01_Hero_AmbientOcclusion S01_Hero_Diffuse S01_Hero_Diffuse_Filter S01_Hero_Reflection_Filter S01_Hero_Shadow S01_Hero_Velocity S01_Hero_WireColour S01_Hero_Zdepth S01_Horizon S01_Horizon_Zdepth S01_Mountains S01_Mountains_Zdepth S01_Skydome I found something else that might be of interest to you as well- here's a GIF I made a while back that shows the compositing progression for a shot from Sacred 2:  Sacred 2 was much less complex than DragonAge, (the core team was only 4 people), but I hope it gives you an idea of how the various passes are layered up.
|
|
#
¿
Dec 15, 2008 00:53
|
|
|
You guess correctly! The velocity pass is fed into the Reelsmart MotionBlur plugin for After Effects, which blurs the various parts of the image in the correct direction. One or two shots used Vray's 3D motion blur when the post-blur looked wack, but the render hit is too much to use it on all shots 
|
|
#
¿
Dec 15, 2008 04:02
|
|
|

|
| # ¿ Apr 29, 2024 02:25 |
|
|
For shots with mostly side-to-side movement (XZ, Z being up), we use the vrayWireColour render element and a wire colour randomiser script created by a friend of mine: http://www.scriptspot.com/3ds-max/random-wire-color Reelsmart has an easy time keeping track of the nice big solid blocks of colour you get with a WireColour pass. For example, this works well on characters when their arm passes in front of their body. If the colour is the same for the whole character, Reelsmart would lose track of the arm in the above example. Here's an example, again from Sacred 2:  Click here for the full 1280x720 image. For shots with mostly depth-based movement (XY,Y being depth), we usually have to fall back to using the VrayVelocity render element. We usually try the wirecolour method first, as it takes alot longer to setup and use velocity passes. This rockin' tutorial for max8 explains the process, and is applicable to the latest versions of max: http://www.revisionfx.com/support/faqs/motion_vector_FAQs/motion_vectors/#3d%20Max%208 Just use Vray's Velocity element instead of Max's, and the 'Max velocity in last frame' Vray element value is the same thing as 'Maximum velocity' when the tutorial refers to it. Good luck! If you have trouble following the tute, let me know and I'll try and dig up some examples of velocity passes we've done from our archive.
|
|
#
¿
Dec 15, 2008 06:47
|
|