


|
I love it when a railway rehabilitates a level crossing near me. They always leave such a nice little pile of bent spikes and assorted steel bit lying around 
|
 #
?
Aug 29, 2008 02:45
#
?
Aug 29, 2008 02:45
|
|


|

|
| # ? Apr 26, 2024 00:54 |
|
|
Okay, so. Temperlines. The most important element is the steel you use, as if you pick something that's prone to hardening all the way through you naturally won't get this to work. Don suggested 1050, 1095, W1, and W2. 1080 usually contains too much manganese to work. He apparently mostly uses 1095, but that's just because he acquired a large amount of it all at once and has yet to run out. W1 is apparently easy to get, as it comes in nicely-sized round stock for making drill bits or something like that. The knife I made is W2. Don's suggestion was to pick one steel and play with it until you know exactly how it will react in order to get consistent results. While forging the knife into shape, you want it above 1375 degrees or so, but not beyond 1550 as the internal grain starts to grow. I don't know how relevant these measurements are, since high carbon steel will just go sparkly if it's too hot and crack if you forge it too cold, so you should probably already be within these temperatures anyway if you're not ruining your material. Normalize the knife blank before moving onto filing or grinding. Once you're ready to do the heat treat, you can apply your clay. Firstly, clean the blade off with a degreaser (Fantastic or something like that) to make sure the clay will actually stick to the blade. We used something called ATP-641, which is made by a company called Advanced Technical Products in Ohio, but clay made from satanite powder also works well - you can get this from pottery supply places as it's used in making kilns, I think. Don't use an air-setting cement. Anyway, apply a thin clay undercoat to protect the blade from scale. Then you can apply ashi lines, which run perpendicular to the blade, and a layer of clay along the back to try to convince the blade to stop hardening there. The ashi lines are what effect the final shape of the hamon, apparently - the clay you put on the back doesn't do much, if anything, to the shape. The hardening process simply involved bringing your clay-coated blade up to about 1400-1500 degrees (don't go over 1550, and make sure the entire thing up to the tang has been brought up to temperature), then quenching it. For the W2 we quenched in water for one second, then immediately moved the blade to canola oil. Whether you need to use water, or can just go straight into oil, or whatever, will depend on the steel you're using, your furnace, and a million other factors - you have to play around to see what works best in your setup. Incidentally, Don suggested first hardening the blade with only a coat of clay to protect against scale, and without the ashi lines or back-coating. Then you can clean up the blade an etch it to see where the hamon falls naturally before you try to influence it - you can re-heat-treat the same blade pretty much over and over until you're happy with it, as long as you're careful. Mine was done twice, and the first time using only the oil quench - we added the water because only a tiny line along the very edge actually hardened in the oil. Once the heat treat is done and you're happy with where the hamon formed, the blade should be tempered at about 400 degrees - we stuck ours in an oven for an hour, let them cool off, then put them back in the oven for another hour. This would be the easiest step. ") Once tempered, the blade can be sharpened (but take the edge back of a bit before polishing!), and sanded to at least 500 grit (you can go higher if you prefer a shiner surface). Then you apply your etchant of choice for about twenty seconds (depending on its strength, but don't just let it sit for a long time), neutralize it thoroughly, sand with continually higher grits, buff with whatever you please (we used pumice powder and iron oxide powder, with cotton pads as even paper towels can effect the polish at this stage), re-etch, etc. until you get the appearance you want. This last stage requires a bit of messing around until you get the hamon to be clearly visible, and once you like the way it looks, for the love of God stop before you rub it away again! Oh, and the very last step is to oil the blade obviously. Don brought some "Japanese sword oil" that came in a bottle with moontongue on it, and he claimed not to even know what it was made from - he uses it because he likes the smell. You can use whatever the heck you want of course. This is all just fired off while flipping through my notes, so let me know if it looks like I missed anything. Medenmath fucked around with this message at 03:15 on Aug 29, 2008 |
|
#
?
Aug 29, 2008 03:13
|
|
|
Third Murderer posted:Oh man, that's great, thanks for sharing. How about the initial grinding, how did you do that? Just on a normal wheel?
|
|
#
?
Aug 29, 2008 03:49
|
|

|
Slung Blade posted:Oh man, that's great, thanks for sharing. How about the initial grinding, how did you do that? Just on a normal wheel? The knife was forged to shape, then filed by hand. This is slow as poo poo and teaches you that you suck and need to learn better hammer control.  edit: But to clarify, you can grind it however you want, as long as you get out any hammer-marks and get the thing to the shape you want. You can even make the entire blade purely by stock removal if you prefer (but why would you God grinding is so boring). The edge shouldn't be too thick at this point, or the hamon won't travel very far up the blade. Before moving to the heat treat, use a file to make sure the marks are running lengthwise down the blade - I don't know how important this is but I suppose it might effect the hamon in some way. Medenmath fucked around with this message at 04:22 on Aug 29, 2008 |
|
#
?
Aug 29, 2008 04:00
|
|
|
My woodstove, hopefully to become my forge. Or maybe raw material for a forge...
|
|
#
?
Aug 29, 2008 04:15
|
|

|
jovial_cynic posted:My woodstove, hopefully to become my forge. Or maybe raw material for a forge... Hmm, it's awfully large inside. What kind of fuel are you wanting to use? Gas would probably be your best bet with something like that, but you'll need to insulate it pretty well, cut some holes in the top, and it will consume a whole lot of gas. You could cut it up and make a smaller forge, that might work better for you.
|
|
#
?
Aug 29, 2008 05:55
|
|
|
Slung Blade posted:Hmm, it's awfully large inside. Yeah, after I opened it up, I remembered how big it is. A couple of years back, I cut my christmas tree in half and stuffed the entire thing inside. Maybe cutting it up and welding together a smaller chamber (and making better use of the firebricks; I just now realized that the floor and ceiling are lined with the bricks, but not the walls) would be a better option.
|
|
#
?
Aug 29, 2008 18:53
|
|
|
jovial_cynic posted:Maybe cutting it up and welding together Cast iron is prone to cracking, and usually needs preheating before welding. If it is cast iron, and you still want to use it, I would suggest braze welding. (I mean braze welding as opposed to just brazing.) Preheating for braze welding is also a good idea to minimize stress cracks. AbsentMindedWelder fucked around with this message at 20:56 on Aug 29, 2008 |
|
#
?
Aug 29, 2008 20:53
|
|

|
dv6speed posted:Is that steel or cast iron? Cast iron IS weldable, but unless your a pro, you probably don't want to attempt it. Even pro's have a hard time with cast iron. Oh, it's not cast iron. It's plate-steel. In fact, the previous owner actually built the woodstove by welding it up. The doors might be cast iron, but the body isn't.
|
|
#
?
Aug 29, 2008 21:09
|
|
|
SmokeyXIII posted:I don't know if we care about this in this thread but today I went to Syncrude, which is a different plant than the one I work at, and we checked out all the old mining equipment. I stood in the shovel. It's huge but compared to the new ones its so tiny. They've got all kinds of huge equipment up there, it was just so amazing to see the gigantic metal monsters up so close. Pretty neato! You work at Syncrude? I go to Keyano College in Fort McMisery. I hate it up there, but it is the only place in canada for my program.
|
|
#
?
Aug 29, 2008 21:21
|
|
|
SmokeyXIII posted:If you need any advice with any of your manipulations, procedures, theory, how-to's of the trade just lemme know.
|
|
#
?
Aug 31, 2008 13:35
|
|
|
dv6speed posted:Hey SmokeyXIII, any chance you could send me an email or AIM message? My AIM is moya034... email is the same thing at gmail dot com. I tried contacting you but you don't receive PM's, emails or anything like that. Stefan.hee at gmail, I don't have an aim account however. SmokeyXIII fucked around with this message at 17:21 on Aug 31, 2008 |
|
#
?
Aug 31, 2008 16:45
|
|
|
After loving around for days trying to weld a half decent bead, I caved and signed up for a 5 week continuing education SMAW course. Hopefully they'll offer a TIG course in the spring because I really wanted to do that one this fall, but both courses occupy the same nights and hours, so no go 
|
|
#
?
Aug 31, 2008 19:44
|
|
|
Slung Blade posted:After loving around for days trying to weld a half decent bead, I caved and signed up for a 5 week continuing education SMAW course. That's cool! Welding courses are always fun and at the same time very very frustrating. What's going on with your beads? What kind of rod are you using? Amperage? Base metal?
|
|
#
?
Aug 31, 2008 20:51
|
|
|
Oookay. I wish I had seen this thread two days ago, but something tells me all hope is not lost. Basically my dad has a lampworking studio set up in his basement. This means that I have access to a propane/oxygen torch, safety equipment, and tools. After browsing around the internets for awhile and watching some youtube videos, I figured I'd be able to make a ring rather easily. I obviously figured wrong. Now my goal is to try to salvage 450 bucks worth of casting grade 14k gold pellets. I first tried to use some pyrex glass for a crucible, but the gold turned black so I stopped. Then I found a steel block and just torched the hell out of the gold until it melted. While I was able to fuse all the pellets into a solid piece, it's very brittle and completely black. After dremmeling the surface, I'm relieved to see that the black crap is only at the surface. So I apparently need an actual crucible for this that will stand up to 1300c or so. After perusing this thread (and being mystified) I noticed a link to http://www.lmine.com/Merchant2/merchant.mvc?Store_Code=LMS&Screen=PROD&Category_Code=&Product_Code=17366&Offset=&DEN_TINYCART_Ship=1. Would these work for me? Also, from what I gather, I picked up a ton of impurities from my barbaric methods. Will I be able to remove them by melting the hunk in one of these crucibles, adding some type of flux, and skimming the crap from the top? If so, what would be the preferred flux? I have a box of borax, but something tells me that may not be what I want.
|
|
#
?
Aug 31, 2008 20:57
|
|
|
Gimpalimpa, Casting precious metals is a WHOLE different ballgame. What I do know about it is that it requires specialized crucibles to keep contamination and losses to a minimum. I don't know if the clay-graphite that lmine.com sells will do the job or not. I don't know if the gold you have is salvageable or not. If it can be salvaged, I guarantee you'll loose some in the dross and as oxides. I'm willing to bet you have some iron and carbon from the steel in the gold right now. That may or may not be impossible to separate. Before you proceed further, you need to do some serious research on the right equipment and techniques. Perhaps Tantric Penguin can give you some advice, she's done jewelry investment casting if I remember correctly. Slung Blade, Good luck, and have fun!
|
|
#
?
Aug 31, 2008 21:07
|
|
|
SmokeyXIII posted:That's cool! Welding courses are always fun and at the same time very very frustrating. I'm using ~90 amps DC, 3/32 6011, T-type joint, the main part is 2 inch wide, 3/4" thick bar, I'm attaching it to some inch wide, 1/8th" strap iron. I'm having real trouble getting the bead to fuse to the strap iron, which is odd because the ground clamp is on the strap, not the 2" bar.
|
|
#
?
Sep 1, 2008 04:56
|
|
|
Slung Blade posted:What's wrong? It's too bad you don't have an AC welding machine, that would eliminate the arc blow. Without an AC machine there are 3 things you can do to combat arc blow: 1. Change ground clamp position 2. Shorten arc length 3. Change the angle of the electrode Just for kicks, try taking a compass to the steel and see if it deflects the needle. You could try demagnetizing the steel by wrapping some wire around it to make an electromagnet, and hook it up to a step down transformer and run some AC through it. Another thing you could try, is get some 6013 or something, and try using DCEN polarity. That might deflect the arc in the opposite direction getting fusion to the smaller piece. DCEN wont work with 6011.
|
|
#
?
Sep 1, 2008 11:56
|
|
|
I've got some 6013, I'll try that next time I trot out the welder. Thanks for the advice Dv6.
|
|
#
?
Sep 1, 2008 18:07
|
|
|
Another thing you can do for the electromagnet is wrap your ground cable around the work piece a few times, it will have the same effect as copper wire. Try wrapping it both ways, clockwise and counter clockwise. How is your fit up? How are your pieces prepped? Make sure they are tight together and make sure you have cleaned all the mill scale off. Also make sure you are running on the right polarity like dv6 stated. It would have to be some incredibly bad arc blow or you to be incapable of fusing the top side at all.
|
|
#
?
Sep 1, 2008 19:01
|
|
|
The fit's good, they're both flat surfaces. And they're totally clean of any scale, rust, dirt or anything else, they're shining bright surfaces freshly ground clean. The wrapping with the ground clamp wire is an awesome idea, thanks Smokey.
|
|
#
?
Sep 1, 2008 19:55
|
|
|
I made a stick electrode and stub holder today. The base is the bottom of an old 20# propane tank that was left over from another project years ago. All I did was weld a piece of pipe to it. 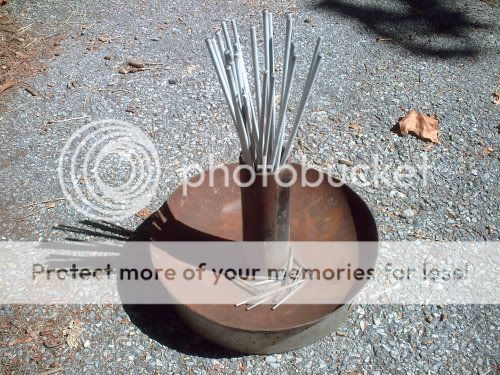 I was planning on doing some whipped stringer bead practice with 6011 today, but that didn't happen, cuz a buddy stopped by just as I finished making the above holder. We stopped by a gentleman's house where he bought some blacksmith tongs. This dude had a fuckton of all types of equipment in his basement... needless to say I got his card. He wants to come over the next time I do some casting. We also drove thru an industrial park to do some dumpster diving and found a couple old propane tanks, and I also got the perfect sized log to make an anvil stand out of! We took a walk along the railroad tracks, picked up some more railroad spikes. We also got a bunch of tie plates, and I even found a couple pieces of larger plate steel. One of the plates will make a great mini welding table. The other one is likely to be the base for my new crucible furnace. Man, I am tired as all hell from lugging those plates around. I haven't done that much physical labor in a LONG time.
|
|
#
?
Sep 1, 2008 22:23
|
|
|
Im so jealous of all your guys workspaces. It's propbably time I get myself a place with a garage. Maybe a nice 220v miller inverter. Ooooh mama.
|
|
#
?
Sep 1, 2008 23:45
|
|
|
SmokeyXIII posted:It's propbably time I get myself a place with a garage. SmokeyXIII posted:Maybe a nice 220v miller inverter. Ooooh mama. Now I just need a job so I can afford it!
|
|
#
?
Sep 2, 2008 01:07
|
|
|
I used one of those on a job one time. And honestly I did not like it one bit. I was using it in it's 110v configuration and I was working under 90 amps and I kept blowing breakers. I can see it being useful for light guage stuff, or if you used it in it's 220 configuration. Granted I was using it for smaw and not tig also. If I was to get one I'd get either a Diesel Pipepro 304 or if I go in line i'd get one of the 350 xmt. I've been having desires to get myself a welding rig going and getting a job on this pipeli e running from the arctic ocean to northern Alberta. It's called the Mackenzie pipeline and it's 1200km long and it is interested in making me about a million bucks over 3 years....
|
|
#
?
Sep 2, 2008 02:55
|
|
|
I didn't weld anything yesterday, or today. I was still frustrated. But I did do a little forging. Finished my new tongs, set them up for round stock. The reins are a little wonky, but it works fine, and the hinge is good and tight with no wobble.  Click here for the full 1280x960 image. My forge makes glass. I have no idea where the silica is coming from. I'm only putting lump charcoal in the drat thing. Maybe the factory is increasing the weight of the bags with sand mixed in. Fuckers.  Click here for the full 1280x960 image. Broken in half:  Click here for the full 1280x960 image. Started work on a knife from a rail spike. I'll be using it to cut open charcoal bags in the future, so I'm not worried about sharpness or hardness or anything right now, this is purely a learning piece.  Click here for the full 1280x960 image.
|
|
#
?
Sep 2, 2008 03:07
|
|
|
Slung Blade posted:I didn't weld anything yesterday, or today. I was still frustrated. But I did do a little forging. Ah, looks fun. Sucks about the glass. Do you have neighbors? I live in a neighborhood, and I'm concerned that the ringing of the anvil is going to cause some trouble.
|
|
#
?
Sep 2, 2008 03:14
|
|
|
Well to me the fact the 200DX machine even runs on 110v seems like more of a sales gimmick then anything. I'm sure it'd kick rear end on a 220v or 440v. 220 for me at home is no problem. From what I can gather the 350XMT doesn't do high frequency TIG. One of my main purposes for my next machine, besides general stick/TIG work will be aluminum welding. Since I'm casting aluminum parts, I want to be able to do a good job welding that funky metal. 1 million in 3 years sounds good... where do I sign up? Something tells me they wont let us Americans up there however. Who knows, maybe I'll be doing good welds by the time Alaska builds a natural gas pipeline. So you'd have to supply your own equipment for that job? Would it be on a contractor type basis?
|
|
#
?
Sep 2, 2008 03:19
|
|
|
Slung Blade, Nice tongs! As far as that glass goes... What did you use for a refractory lining? It probably contains silica (most refractory does), and if it wasn't properly fired all the way it could be releasing some of it out. All castable refractories, commercial or homemade, have firing schedules that if not followed properly may lead to their failure. OK, so maybe not all. I don't think adobe has a firing schedule. There may be a couple other exceptions. jovial_cynic, From my experience, when you start beating hot steel on top of the anvil it doesn't ring much. It does ring if you were to just hit it with a hammer. The sound of the hammer strikes should be your only issue. Perhaps a couple handmade "gifts" to your neighbors may ease their pain and keep them happy. AbsentMindedWelder fucked around with this message at 03:28 on Sep 2, 2008 |
|
#
?
Sep 2, 2008 03:25
|
|
|
dv6speed posted:Slung Blade, I don't recall the exact name of the cement I used, I got it from a local industrial insulation supply company, they told me to let it sit for a few days until it was totally dry and then go to town on it. They didn't mention anything about firing it. It could be wearing down though, I'm running an iron scraper across it all the time to move the coal into place. Next time I go out to use it, I'll clean some of the ash out and check the surface. Thanks, I'm quite happy with the tongs ") Regarding a ringing anvil, I'm about 600 feet away from the neighbours, so it doesn't seem to bother anyone. But I've heard many tricks to quiet the ringing. A small sheet of heavy heavy rubber underneath the feet works, a large magnet on the side of the anvil works too. Using a wood stump as a stand helps too, having a metal stand makes it ring even more.
|
|
#
?
Sep 2, 2008 04:17
|
|
|
dv6speed posted:Well to me the fact the 200DX machine even runs on 110v seems like more of a sales gimmick then anything. I'm sure it'd kick rear end on a 220v or 440v. 220 for me at home is no problem. The nice part of that machine is that you can get some nice wirefeeds so you could just mig your aluminum. Which would be all I need, maybe make a few trailers or Boats or whatever. I wouldn't need to tig my aluminum is basically what I'm sayin yep it would be on a contract basis and yep it would be with my supply of equipment. I would charge them around $150 an hour for my services and equipment. So if I invest $80-$100,000 on a truck and machine and tools I'll make about $300,000 per year... But it can be a crappy crappy lifestyle and I like my job now, that's why it's just thoughts for now. And there is work for Yankees up here you'd have to get a work visa and all that jazz but if you could weld a pipe then it would probably be easy enough.
|
|
#
?
Sep 2, 2008 05:28
|
|
|
Regarding making a forge... I've seen some open-top forges and some enclosed forges. Any thoughts to the pros/cons of either? My initial assumption is that an enclosed forge will be more efficient, since it'll keep the heat contained a bit better -- you'll use less fuel, whether it's coal or propane. Thoughts? I ran across this link: http://cr4.globalspec.com/blogentry/6502/DIY-Blacksmith-Forge It seems like a pretty good design for the open-top forge, but again... all I can think about is the loss of heat. Is that not an issue?
|
|
#
?
Sep 2, 2008 19:12
|
|
|
Well, it depends on a couple of things. If you're going to be working outdoors, and using solid fuel, just build an open top forge. A lid or something like that would be a good idea to keep rain and snow (and small animals) off of the heating surface. If you're going to work inside, you need a chimney to vent the smoke, coal smoke can be quite hazardous. It doesn't have to be enclosed, but something like a side-vent chimney works well and gives a large overhead space to work with. Gas forges should always be enclosed regardless of location, since usually the gas burner is coming in from the top of the forge itself, I can't say I've ever seen a burner that works from the bottom. That link certainly shows an elaborate setup, I'd like a forge like that.
|
|
#
?
Sep 2, 2008 19:42
|
|
|
Slung Blade posted:Gas forges should always be enclosed regardless of location, since usually the gas burner is coming in from the top of the forge itself, I can't say I've ever seen a burner that works from the bottom. Oh, interesting. I always assumed (since I haven't looked very closely) that a gas forge *did* work from the bottom, and looked just like a solid-fuel burner, minus the solid fuel. I looked around and found these two, which are enclosed: http://www.zoellerforge.com/squareforge.html http://www.zoellerforge.com/miniforge.html So what's the benefit of gas fuel verses solid fuel?
|
|
#
?
Sep 2, 2008 21:08
|
|
|
Gas is a lot cleaner, easier to get ahold of (provided there's a gas station near you that can refill propane bbq tanks), and provides good heat. The forges, as you've seen, are a little bit more complicated, expensive to build and require a little more maintenance. Solid fuel forges are much easier to build and maintain, but produce smoke and ash and need to be cleaned out periodically. There are no fittings to worry about, and no gas hoses to melt and explode in your face. (this will never happen if you're careful and follow basic safety precautions) Gas forges can be aspirated through a venturi setup, where the gas mixes with air on the way to the forge, or forced with a fan. Solid fuel forges need some kind of air supply such as a fan blowing air from the bottom, hand cranked or electric work fine. One of the books I have describe a forge made out of a large coffee can with a hole in the side, and a 10 foot piece of drainage pipe for a chimney, the draft provided enough air to the fire to effectively work iron. Gas forges can heat a very large piece, depending on the forge, which can be handy. If you're welding up laminated billets for damascus steel or something it's very useful. If you're just making small things for around the house and some tools for yourself, you probably don't need a very large one. Solid forges can usually only heat a small area. Larger pieces require an enormous forge to heat in one go and burn a lot of fuel. You can build specialized shapes, like a washtub forge, for long skinny objects that are more efficient. I can do about a 4" x 2" piece which is plenty big enough for my needs right now. I chose charcoal for 2 reasons: I have a smoker, so I buy it all the time anyway, and I have it around the house. It's renewable and mostly carbon-neutral, all you have do is plant more trees. Though I intend to build a gas forge in the near future so I can make fancier things.
|
|
#
?
Sep 2, 2008 21:31
|
|
|
Well, I thought about spending a bunch of time building up a forge, but I found one on craigslist for $100, and I'm picking it up tonight. I'll take some pictures when I get it home, if it's still light out.
|
|
#
?
Sep 3, 2008 01:16
|
|
|
Slung Blade posted:One of the books I have describe a forge made out of a large coffee can with a hole in the side, and a 10 foot piece of drainage pipe for a chimney, the draft provided enough air to the fire to effectively work iron.
|
|
#
?
Sep 3, 2008 04:10
|
|


|
FORGE! Craigslist for $100. The hand-crank blower is in perfect condition, too. Fun.
|
|
#
?
Sep 3, 2008 04:39
|
|
|
jovial_cynic posted:FORGE!
|
|
#
?
Sep 3, 2008 04:41
|
|
|

|
| # ? Apr 26, 2024 00:54 |
|
|
Dongsmith posted:Nice find! A hand-crank blower is a great thing to have, and next on my list after a post vice. It's got that rack on it. Do the coals/charcoal go on top of the rack, or under it?
|
|
#
?
Sep 3, 2008 04:43
|
|