


|
I found a pretty big anvil near my place at this artist/ workshop thingy. It's outside and rusted and... cut perfectly in halves. I asked about it and was told it was a sculpture by some artist that he left behind when he moved, many many years ago. I was thinking of asking to buy it but I was told by another guy that a cast anvil cannot be welded together again, but a forged one can. How does one tell the difference?
|
 #
¿
Jan 19, 2016 22:27
#
¿
Jan 19, 2016 22:27
|
|


|

|
| # ¿ May 12, 2024 09:33 |
|
|
Ambrose Burnside posted:Welding a bisected anvil back together sounds like a sufficiently-insanely-difficult project to undertake that I can't imagine it ever being worth it. An anvil of that size would be worth 500-1000 euros here. Welding an anvil sounds pretty easy as far as welding goes to me? Put the pieces together, cut grooves where the ends meet, clean faces and go to town with a stick welder. Hypnolobster posted:Cut in half vertically or horizontally? If it's just had the feet lopped off, I'd personally go for it. If it's been sliced vertically, the v-groove needed to weld it back together would be so goddamned large it'd be very much not worth it in time or money. It's cut down the middle, a front and back section. His Divine Shadow fucked around with this message at 09:07 on Jan 20, 2016 |
|
#
¿
Jan 20, 2016 09:03
|
|
|
So more effort than I figured on then. I had been thinking a shallow welding groove and basically just weld it together on the outside. Guess it's not durable enough then to do it that way. I don't really do much metalwork, just figured something to hit once in a while might be good to have.
|
|
#
¿
Jan 21, 2016 23:43
|
|
|
I'm considering tackling a cylcone build (bill pentz) given how much effort I've put into this DC system already I might as well not scrimp on the separator. ideally i'd make it from 22ga sheet metal but I'm not sure I can handle soldering that he recommends. I don't know what he uses, and the terms are confusing and mean little to me in another continent I have a stick welder and I've read of this method where you make an improvised spot weld by drilling a hole in one of the sheets and clamping them together, then a quick tack with the electrode in the hole and you got a kinda spotweld. Sound doable with sheet metal this thin? I think TIG welding would be really good here too, but I don't have that (my stick welder has an expansion slot for a TIG module however). My dad has a MIG though.
|
|
#
¿
Feb 4, 2016 12:35
|
|
|
Ambrose Burnside posted:If you're trying to collect fine dust (as you seem to be), spot welds won't be sufficient to create a vessel that will actually hold anything. Stick is basically the worst possible welding method for thin sheet and I've seen people ruin things trying to make it work before. MIG is more workable but still not stellar ime. TIG, oxy-acetylene or- yeah- soldering/brazing really is what you want for this kind of thing, I think. I just need the welds to keep it together, sealing is done with caulking. Holes & pop rivets could also work
|
|
#
¿
Feb 4, 2016 18:28
|
|
|
Yeah, I kinda wanted some excuse to use my welder more. I've not realized you could do TIG with a stick welder without some kinda add-on stuff like on my welder. I guess what the addon module is for then is the foot pedal and stuff.
|
|
#
¿
Feb 4, 2016 21:11
|
|
|
Ah well they stopped making my welder in the late 80s so finding a module like that would be very hard. Read up on this scratch start TIG stuff and it looks like it could be a useful addition. But money money...
|
|
#
¿
Feb 4, 2016 21:51
|
|
|
I decided to take out my welder again and just try and make strings, I've had this welder since august but no real time to use it or even learn stick welding, since I've been thinking about all kinds of weird welding poo poo recently I better get some experience under my belt.... Stick welding must be harder than I thought or I am doing something wrong. I loaned the welder to my dad who is an actual welder by trade and he said it worked fine for him. I tested on this piece of 12mm (almost half inch) by 1m long (3ft) steel I bought for future projects and I had lots of sticking and trouble to get the welder to start an arch. When I did get one started it didn't last long. I maxed up the amps (150A) to see if that helped but not really, less sticking perhaps. Is this just a matter of technique, or am I getting a bad electrical connection on the steel? I didn't clean it very well, there was mill scale on it I think. I've also had my pack of electrodes in my shop for over a month, I wonder if they could have absorbed a lot of moisture. Or it's just my technique...
|
|
#
¿
Feb 6, 2016 19:13
|
|
|
I'm using electrodes called Elga P48s, 2.5mm. I'm not sure we have the same electrodes here that you guys do. It's an all purpose DC electrode anyway. said to be very easy to weld with and produce good welds. I'm guessing I had electrical problems too because the surface was kinda dirty and I could drag the electrode all over the surface and not get an arc. EDIT: On the welding rods, the Elga P48S is an analogue to the ESAB OK48 (most popular rod) and apparently in america those are known as 7018s. His Divine Shadow fucked around with this message at 12:31 on Feb 7, 2016 |
|
#
¿
Feb 7, 2016 09:20
|
|
|
It's a Kemppi which is a finnish brand and considered good quality here. It's an old style rectifier so it gives DC. Pretty nifty machine, it uses two phases out of a 3-phase outlet to produce what is best described as 400V single-phase, or so I was told.
|
|
#
¿
Feb 7, 2016 14:21
|
|
|
Been looking and found some sources that help me convert AWS to local equivalents but I can't find anything for 6011 in particular, 6010 and 6012 but no 6011. One of the local cheap-skate made in china stores has some electrodes made to 6013 specs, 5 bucks for 2lbs of 2mm sticks, worth a try perhaps. His Divine Shadow fucked around with this message at 20:50 on Feb 7, 2016 |
|
#
¿
Feb 7, 2016 19:47
|
|
|
gently caress this winter weather for that though. And it wasn't a good idea doing it indoors either, in a woodworking shop. Still if I atleast had a roof and a bench... I think that�s a future project for me, some kind of outdoor workbench I can fold down or up against the wall under the carport.
|
|
#
¿
Feb 8, 2016 17:19
|
|
|
Asked around about 6010/11 rods on a swedish forum and most people told me not to bother, stick to OK 48.00, all the time, every time, best all--round rod in the universe, worth learning to use it properly in long rum, cheap and super durable etc etc. Just relaying this because I find the differences in attitudes interesting/humorous.
|
|
#
¿
Feb 9, 2016 06:55
|
|
|
I've been googling around for some more input on locally available electrodes and I read that OK 43.32 is a good electrode for thinner stuff and is easy to use, or perhaps OK 46.16 (E7014). Someone was raving about Selectarc 7016 as a 7018 alternative too and recommended everyone to try it. Seems pricey what little I found, 10 bucks for a 10-pack.... The 7018 stuff I got in ~3/32" size was 34 euros for a pack of 178pcs. Also looked at the two packs I got with my welder (it was 100 bucks with them included) and they're Strong Line XK4832, or another 7018 electrode, except 1/8" size. I am loaded for 7018 for years. EDIT: I found the big electrode handbook by ESAB, 500 pages of stuff and every electrode had an american AWS code. The only 60xx electrodes in the whole book were three 6013 variants... His Divine Shadow fucked around with this message at 17:00 on Feb 9, 2016 |
|
#
¿
Feb 9, 2016 16:51
|
|
|
Good to know, I have the cartridges on my 7500 mask and it doesn't fit under the hood. The P100s should though. EDIT: Seems the preferred electrode for thin steel welding and repair is a 6013 based electrode here (OK 43.32). His Divine Shadow fucked around with this message at 14:25 on Feb 10, 2016 |
|
#
¿
Feb 10, 2016 07:52
|
|
|
The impression I've gotten is that it's acceptable if you are careful and take precautions (outdoor in wind or have an extractor + mask)
|
|
#
¿
Feb 10, 2016 19:01
|
|
|
I wonder what this junk and surplus roof sheet metal I got is made of... Modern stuff with a plastic coating on one side. I don't think it's galvanized. figured I'd use it as training material and see what I can do with sheet metal.
|
|
#
¿
Feb 11, 2016 10:22
|
|
|
kastein posted:Stop, do not pass go, go directly to scrapyard. I wouldn't be heating anything that has plastic on one side, the fumes are going to be nothing short of toxic. Unless you have a way to remove the plastic, I'd consider that scrapmetal at best. I figured it was going to be toxic, but outside, gasmask, extractor (box fan). Not 100% sure it's plastic though. It is pure scrap metal I have no use for other than training on.
|
|
#
¿
Feb 12, 2016 09:35
|
|
|
Sorry, meant to post in the woodworking thread.
His Divine Shadow fucked around with this message at 20:51 on Feb 27, 2016 |
|
#
¿
Feb 27, 2016 20:40
|
|
|
Tried to do some welding last night, got a project (belt sander) that would really be helped if I did some parts in metal. I want to weld an M12 nut to an M10 (metric 3/8" equivalent) and having one nut rotated 90 degrees to the other. I'm seeing a lot of welding of nuts and threaded rods and stuff in my future, it's just the kind of thing I do and will have a use for. Basically all nuts and rods are galvanized. I took an angle grinder last night to the two pieces I was gonna test on. Small things like this isn't the easiest to grind. So now I am soaking a few in vinegar since last night, some muriatic acid would be better. What kind of size welding rod would be suitable for small things like this? I tried with a 5/64th last night but had too much current so it spattered a lot and melted the threads a bit on one side, enough that it wasn't usable. Perhaps a 1/16th would be better for small things like these. Really just need to tack them together.
|
|
#
¿
Mar 2, 2016 07:53
|
|
|
Also I hate my welding helmet, it's an auto helmet and that function works fine but what I hate is that every time I pull it down and then up, I need to remember to tighten it back up, it loosens up every single time. It fell back down on me like a dozen times last night, I wanted to throw the thing into the wall. My dads old non auto helmet is way more comfortable to use despite being really primitive.
|
|
#
¿
Mar 2, 2016 08:34
|
|
|
Yeah those 6010s... still haven't found any 6010s here, I think if I want to try some I'll have to import from abroad. I'll try my 3/32" 7018s then I guess. I'll have to try some 6013s though, just to see what it's about. EDIT: My dads MIG, it's a good welder, though the brand isn't as well liked as say Kemppi or ESAB.  Way easier than a stick welder, but I am convinced it's worth "sticking" to for the simplicity and versatility. His Divine Shadow fucked around with this message at 14:09 on Mar 2, 2016 |
|
#
¿
Mar 2, 2016 12:20
|
|
|
Welding two small nuts together isn't easy! Whenever I manage it I seem to have ruined the threads as well.
|
|
#
¿
Mar 2, 2016 19:54
|
|
|
I'm working on a belt grinder (link below) and this would be for the tensioning mechanism. It's a hard to explain, but I want to adjust the tension via a threaded rod rather than a spring as I have now. That's where the nuts would go, and there would be a long rod attached to the base that would have a crank, by turning this rod I could force the whole upper assembly to pivot one way or the other, thus tightening or loosening the belt. I dunno if that makes sense... I also tried to weld two short pieces of rod with a nut in the center like this ===<>=== but that also messed up the threads. http://forums.somethingawful.com/showthread.php?threadid=2819334&userid=0&perpage=40&pagenumber=307#post456859550 Don't have any pics and its too late in the evening here to go take any now. Time for sleep. Pretty sure it's a skill problem for me. Perhaps too high amperage (70A with 3/32nds 7018, also tried 50A or so with a cheap 6013 1/16th)
|
|
#
¿
Mar 2, 2016 20:58
|
|
|
AbsentMindedWelder posted:If you have to couple two rods, I would use a coupling nut with jam nuts and forgo the welding. I'm still not sure what physical configuration you are trying to weld nuts, but perhaps it may be best to get a small piece of steel and just tap the holes you need into it. Like I said, hard to explain, I have a model in my head. I can't use a coupling due to how I want it... Well I could, if i rotated the coupling 90 degrees to the rod and then welded them together.... Hmmm that could work as the coupling nut should be bigger, longer and have more mass. Also good idea, DreadLlama, to screw a rod in to act as a heat sink. Jailbait I'm afraid I don't have any brazing equipment at all, only a soldering iron.
|
|
#
¿
Mar 3, 2016 07:22
|
|
|
I can take a picture since I managed to make it this night. Not pretty, but it works as I planned. I used several nuts and a threaded rod to protect the threads and act as heat sink. I also welded all the nuts to a flat piece of scrap beforehand.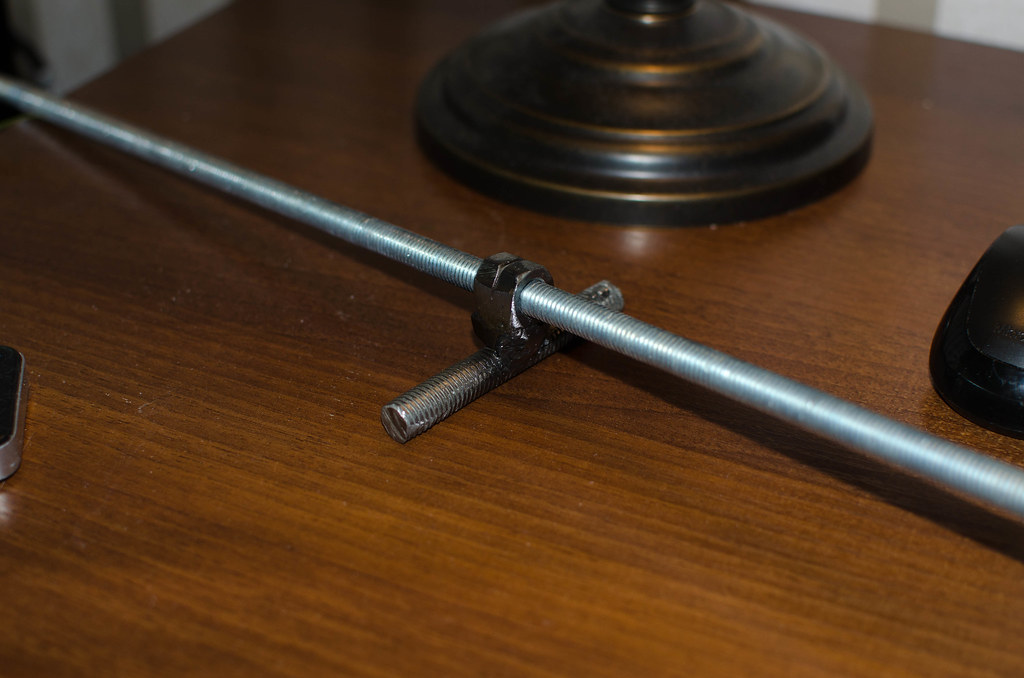 So the short rod just hooks onto the back end of the pivoting upper portion and the long threaded will be attached to the base, turning the long threaded rod will force the upper portion of the belt sander to pivot up or down depending on direction. That way I can apply tension to the belt. It's probably not the strongest joint, probably pretty crappy and ugly by all accounts. But it won't be under a lot of stress, it'll just keep a sanding belt taught. If this still doesn't make sense to anyone, you'll have to wait until I have actually completed it 
|
|
#
¿
Mar 3, 2016 20:09
|
|
|
I don't have a coupling nut (and I don't live in a city so there's no nearby store open this late I can just walk to, it'd be a 25 mile round trip in that case), and I don't have any taps and I don't have any steel blocks I can drill, my drill press is pretty lovely and barely copes with woodworking. Also, want to learn to weld.
|
|
#
¿
Mar 3, 2016 20:42
|
|
|
AbsentMindedWelder posted:That makes sense now. A coupling nut would have been easier to work with for sure. The cleanest option would be take a piece of 3/8" flat bar or something similar and cut it to size and tap a hole. Good work tho working with what you had on hand Thanks, but yeah any excuse to weld and get experience. I finally felt like I was getting somewhere now. weldingtipsandtricks.com had a good article on 7018 and how it's meant to be used, after that I had much more success with it.
|
|
#
¿
Mar 4, 2016 14:12
|
|
")
|
I've been disappointed with my Lidl ultrasonic cleaner myself, mostly I've run it with water and dishsoap. We don't got purple stuff here and I dunno what a cheap equivalent is though, so it might just be that. I got a can of gasoline for cleaning stuff.
|
|
#
¿
Mar 5, 2016 08:30
|
|
|
His Divine Shadow posted:I can take a picture since I managed to make it this night. Not pretty, but it works as I planned. I used several nuts and a threaded rod to protect the threads and act as heat sink. I also welded all the nuts to a flat piece of scrap beforehand. And here's what the tensioning mechanism turned out like: http://forums.somethingawful.com/showthread.php?threadid=2819334&pagenumber=308#post457079212
|
|
#
¿
Mar 5, 2016 23:44
|
|
|
Echoing the sentiment by Rotten Cookies, I love seeing people restore old things. Also doing more welding today, making a new table for the sander. I never really thought the old design through, just wanted something to slap onto it and call it a day. Giving more consideration to this one: 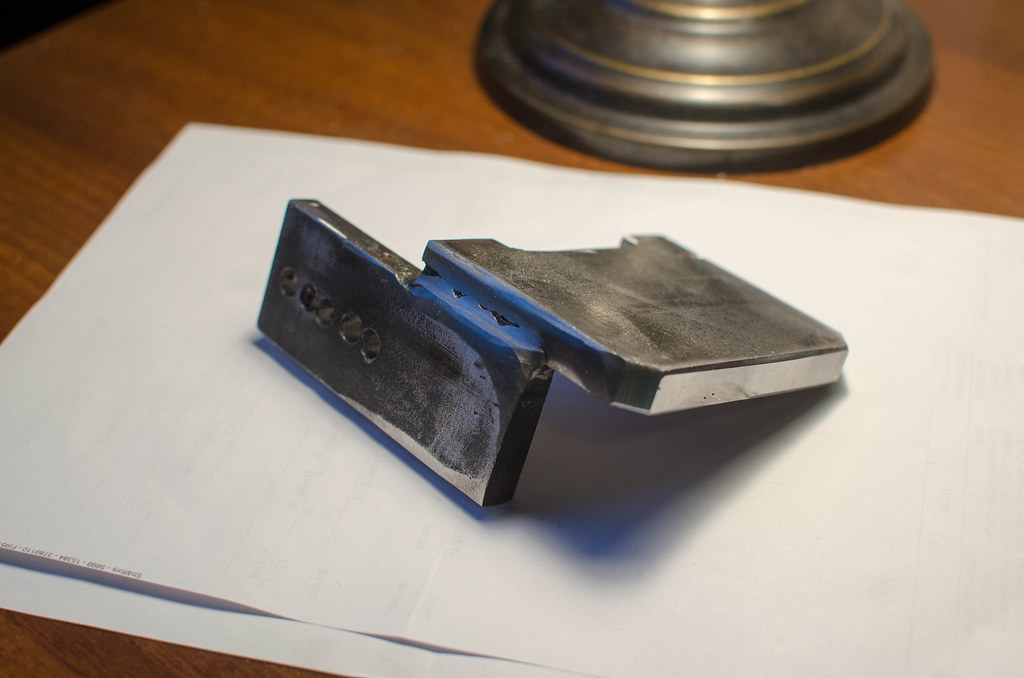 Welding's becoming easier and more productive now, ran into problems with the squareness of the thing, started bending on me after I welded the inside and I had to use a hammer to beat it back into shape. I guess the heating and cooling warps the thing.
|
|
#
¿
Mar 6, 2016 17:24
|
|
|
Hey I've welded like 10 rods in my life so far.
|
|
#
¿
Mar 6, 2016 18:47
|
|
|
Looking to buy some taps. I think a better way to make the table is to use thinner (such as 5mm or a bit less than 1/4") plate steel and make it from three pieces that I drill and tap together. By spacing the two pieces that come on top apart, I will get the proper sized track in the table. I was thinking welding but was told it'd warp too much. I need to drill and tap stuff, something that's been coming for a while anyway. A kit with M4-M12 coarse threads is probably the most useful, then I could get additional stuff like fine thread taps later. But I am not sure if I need a hand tap or machine tap set. I think I need the hand ones since I don't have a mill to tap on, and I don't think tapping in a drill press works except for starting a tap. Some german stuff that looks good: http://www.walter-hermes-kg.de/navid.2.pid.1233/voelkel-gewindeschneider-47605.htm His Divine Shadow fucked around with this message at 11:12 on Mar 7, 2016 |
|
#
¿
Mar 7, 2016 11:03
|
|
|
shame on an IGA posted:Always hand tap, you should look for a good handle first and buy the taps separately. "Tap set" can be a misleading term, quality products will be a set of three taps for a single size and pitch thread. Each of the three is different and cuts more of the thread than the previous, you use all three in each hole in order. Cutting fluid made specifically for tap cutting will make life indescribably easier, I'm in love with cimtap paste but tap magic or local equivalent is ok. Well I bought a similar set from the same manufacturer after getting several recommendations elsewhere by this time, oh well. Reason for tapping is basically that's what I came up with that made sense to me to attach the pieces together, I guess bolting through the table also works, , though it seems it could allow the components to slip around easier as the holes must be a tiny bit oversize so the threads clear. My first preference would be welding but that's too likely to warp, I was told.
|
|
#
¿
Mar 7, 2016 18:55
|
|
|
shame on an IGA posted:You're still going to drill clearance sized holes in the top two plates though. If you're planning to cut threads all the way through all three layers that is not going to work. If the assembly positioning has to be that precise you need to look into dowel pins. It will only be two layers thick at any one place. There will be a bottom plate, then two plates screwed to the top, the top plates will be spaced a set distance apart (using a suitable piece of metal to act as spacer) and that will create a slot in the table. I was thinking I'd achieve this by clamping everything together as good as I can then drill the holes through both pieces, then I take the pieces apart and tap the holes in the bottom and top plates and screw it together. Well in my head it seems it should work out... I was originally thinking I'd do the same procedure, but just weld it once everything is clamped together. Here's a rough sketch of how I had it planned out in my head: 
His Divine Shadow fucked around with this message at 19:49 on Mar 7, 2016 |
|
#
¿
Mar 7, 2016 19:44
|
|
|
The spacer can be in place for as long as is needed, as long as it can be removed when the thing is finished that's fine, I just figured I had no need to keep everything jigged up anymore after the holes where drilled. Basically this is what I am trying to make: http://www.machinistblog.com/wp-content/uploads/2011/05/Belt-Sander-Table_4.jpg
|
|
#
¿
Mar 7, 2016 20:21
|
|
|
shame on an IGA posted:Go find a block of steel and pay someone to cut a slot in it for you. No
|
|
#
¿
Mar 8, 2016 05:18
|
|
|
kastein posted:The other problem is that you can't just bore the hole through and tap one of them - the through-drill size for sliding a bolt through is slightly over the major diameter of the bolt, while the tap drill size for appropriate thread engagement after tapping is usually slightly larger than the minor diameter of the threads. So you'll need to spot/center drill the two pieces clamped together, then drill each one separately to the larger size they need to be for the bolts, and will still end up with a sorta sloppy joint. It's just a slot I am trying to make, the whole point is to try and make things myself. At first it seemed like the simplest possible solution to me to just screw things together. But I am not sure I shouldn�t just clamp everything down hard as gently caress and weld really slowly with a tiny stick. Or JB weld as you say.. Also going to try and make a slot myself in the earlier piece, since I got nothing to loose.
|
|
#
¿
Mar 8, 2016 05:34
|
|
|
I think there is a language confusion, when I talk about a slot I mean the groove in the top of the table, what is this called? A groove? I am pretty sure I've heard them called slots on table saws and such. Have we been talking past each other completely?
|
|
#
¿
Mar 8, 2016 12:24
|
|
|

|
| # ¿ May 12, 2024 09:33 |
|
|
Slung Blade posted:Have you got a table saw? Yeah, most my stuff is woodworking related. There'd be no problems at all for me to make a wooden or plywood table with a slot or groove in it, but I want to work in metal more. Pretty likely I'm going the jb weld path I think.
|
|
#
¿
Mar 8, 2016 17:28
|
|