


|
dv6speed posted:Yes. gently caress. This is going to take awhile.
|
 #
¿
Aug 16, 2008 15:54
#
¿
Aug 16, 2008 15:54
|
|


|

|
| # ¿ May 10, 2024 18:55 |
|
|
I ended up using a flapdisk, way faster than my wire cup. Plus it didn't wear me out like the wire cup does (that thing is heavy). Painting it today and tomorrow, images to follow.
|
|
#
¿
Aug 17, 2008 07:59
|
|
|
Cleaned and painted, ready to load onto my truck to take to my buddy's place. Click here for the full 1268x951 image.  Click here for the full 1280x960 image. This is easily the biggest thing I've made yet. I'm quite happy with it.
|
|
#
¿
Aug 17, 2008 22:09
|
|
|
I hate to triple post (god dammit you guys post some project images, I don't care if they're not done < > ) but I took the cage over and installed it. > ) but I took the cage over and installed it. Click here for the full 1280x960 image.  Click here for the full 1280x960 image.
|
|
#
¿
Aug 18, 2008 02:45
|
|
|
The basement is unfinished and will remain so, it's his gym area. There's another window on the other side about 15 feet away that has no security bar that's better suited to escape, as the fence is farther away from it, and it's closer to the gate to get out of the yard. If he went out this window he would have to run all the way around the house to get to safety so it would never be his prefered escape route. I hope that's good enough for the insurance company. I know they're keeping the keys to the locks fairly close to the window, but there's no quick and easy way to remove the bars. Do you think they would accept that explanation? Thanks for the warning Jovial, and the compliment ")
|
|
#
¿
Aug 18, 2008 03:55
|
|
|
Get a light duty Oxy/Acetylene welding torch, and rent some tanks for the season. The torch will cost about 150 dollars, give or take, and will contain everything you need to cut, weld, and braze. No helmet required, just welding goggles, which usually come with the kit. The torch kits are usually fairly small, about the size of a large briefcase. So you can keep it as it is easy to store, or you can sell it when you're done if you so choose. Take a welding course at your local tech school or community college, it'll take about a week of evenings, but you will learn how to safely operate the torch, the cutter, and how to handle the tanks. Get some files, punches, drill bits, a few c-clamps, hacksaw, and a small machinist's (aka ball-pein) hammer. These tools, if you already have the drill (what garage has no drill?), will only cost about 20-40 dollars. A vice is handy if you have space for it, but there are alternatives if you don't want to buy one. Get a basic adjustable crescent wrench and a screwdriver body with exchangeable heads for basic assembly / disassembly work. These are things you should have in your car anyway (if you have one), just in case. This will at least give you a good starting point so you can start playing around with stuff in the garage. Remember to always have good ventilation.
|
|
#
¿
Aug 19, 2008 06:45
|
|
|
Dongsmith posted:I really like your knife, and the tomahawk is good as well. Did you make the knife handle yourself too? Can you post pictures of that nail header you made? I've never seen one outside of an illustration. Hell, post more pictures of everything. That anvil certainly looks well used 
|
|
#
¿
Aug 19, 2008 22:52
|
|


|
Dongsmith posted:Are you forging those rivets, or buying them? If the former, what kind of tips can you offer? I'm not so good at the upsetting of material yet, so I buy them from here: http://www.blacksmithbolt.com/ I'll make an upsetting heading tool someday.
|
|
#
¿
Aug 20, 2008 07:14
|
|
|
There are a couple of ways to make a hafting hole in a tool from what I've read. The first way is just to drill a giant hole in some iron, wasteful, and it takes for loving ever. Another way is to drill or punch a very small hole, then use something called a drift to increase the size of the hole. Drifts are usually better because they allow you to easily make an eliptical shaped hole which is better for hafting (your handle won't spin in a elipse) instead of a clyindrical. Drifts have a double taper, a long slender one at the business end, and a hemispherical end at the other (where you hit it) so it doesn't get stuck halfway through the hole. I'll be making a diagonal pein hammer for myself eventually, and I will be using a drift to make the hafting hole, I'll be sure to document the whole thing with pictures.
|
|
#
¿
Aug 21, 2008 16:35
|
|
|
SmokeyXIII posted:
 Well, I have a huge boner. Anyone else? Slung Blade fucked around with this message at 04:35 on Aug 22, 2008 |
|
#
¿
Aug 22, 2008 04:30
|
|
|
I would love to have a power hammer, maybe not quite that big, but I'm sure I could use it...
|
|
#
¿
Aug 22, 2008 04:41
|
|
|
Dongsmith posted:man, you can churn poo poo out with a little giant and a propane forge. I've never tried, but I am pretty sure it would be ridiculously easy (which is why people should start with hand hammers and coal) I used a gigantic air hammer made, poo poo, probably 80 years ago, when I did my course at a local pro's place. It was awesome, pure awesome. But I know what you mean, good to learn control and build the strength you need.   
|
|
#
¿
Aug 22, 2008 04:51
|
|
|
Yeah I'll be building one as soon as I get a shop built. Or buy one, if I can find a decent one that I can repair in fairly close proximity.
|
|
#
¿
Aug 22, 2008 06:49
|
|
|
Would it help if you used a hair dryer for a few minutes before pouring? I was out pounding for a bit tonight, got done my other half of the pair of tongs I've been procrastinating over. I'll bend them tomorrow, prep the jaws, and rivet them together.
|
|
#
¿
Aug 23, 2008 04:49
|
|
|
That looks like a pretty cool casting there Dv6, way to go man
|
|
#
¿
Aug 26, 2008 03:38
|
|
|
Third Murderer posted:I just finished a five-day class on Japanese-style temperlines - taught by Don Fogg. You son of a bitch GIVE ME YOUR SECRETS!  But seriously, that's awesome man, it looks absolutely beautiful. Was it a clay temper?
|
|
#
¿
Aug 27, 2008 03:59
|
|


|
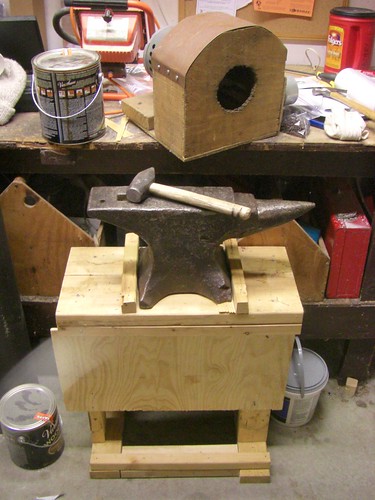
SmokeyXIII posted:I don't know if we care about this in this thread but today I went to Syncrude, which is a different plant than the one I work at, and we checked out all the old mining equipment. I stood in the shovel. It's huge but compared to the new ones its so tiny. They've got all kinds of huge equipment up there, it was just so amazing to see the gigantic metal monsters up so close. Pretty neato! Did you see any ravens big enough to carry off a small child? Nice picture, I'd like to visit Ft Mac someday, it's not that far. jovial_cynic posted:Now that I've got a little anvil, I'm thinking about building a forge. I have an old oversized woodstove that I picked up for free that included woodstove firebricks. Any words of advice or caution regarding converting it into a forge? The bricks should be fine. Are you going to use any kind of mortar to join them together or just dry fit them? If you use mortar, make sure it's fire-rated. Can you post a picture of it? I can't say what kind of a forge it would make without seeing it first. Slung Blade fucked around with this message at 04:42 on Aug 28, 2008 |
|
#
¿
Aug 28, 2008 04:39
|
|
|
I love it when a railway rehabilitates a level crossing near me. They always leave such a nice little pile of bent spikes and assorted steel bit lying around
|
|
#
¿
Aug 29, 2008 02:45
|
|
|
Third Murderer posted:Oh man, that's great, thanks for sharing. How about the initial grinding, how did you do that? Just on a normal wheel?
|
|
#
¿
Aug 29, 2008 03:49
|
|
|
jovial_cynic posted:My woodstove, hopefully to become my forge. Or maybe raw material for a forge... Hmm, it's awfully large inside. What kind of fuel are you wanting to use? Gas would probably be your best bet with something like that, but you'll need to insulate it pretty well, cut some holes in the top, and it will consume a whole lot of gas. You could cut it up and make a smaller forge, that might work better for you.
|
|
#
¿
Aug 29, 2008 05:55
|
|

|
After loving around for days trying to weld a half decent bead, I caved and signed up for a 5 week continuing education SMAW course. Hopefully they'll offer a TIG course in the spring because I really wanted to do that one this fall, but both courses occupy the same nights and hours, so no go 
|
|
#
¿
Aug 31, 2008 19:44
|
|
|
SmokeyXIII posted:That's cool! Welding courses are always fun and at the same time very very frustrating. I'm using ~90 amps DC, 3/32 6011, T-type joint, the main part is 2 inch wide, 3/4" thick bar, I'm attaching it to some inch wide, 1/8th" strap iron. I'm having real trouble getting the bead to fuse to the strap iron, which is odd because the ground clamp is on the strap, not the 2" bar.
|
|
#
¿
Sep 1, 2008 04:56
|
|
|
I've got some 6013, I'll try that next time I trot out the welder. Thanks for the advice Dv6.
|
|
#
¿
Sep 1, 2008 18:07
|
|
|
The fit's good, they're both flat surfaces. And they're totally clean of any scale, rust, dirt or anything else, they're shining bright surfaces freshly ground clean. The wrapping with the ground clamp wire is an awesome idea, thanks Smokey.
|
|
#
¿
Sep 1, 2008 19:55
|
|
|
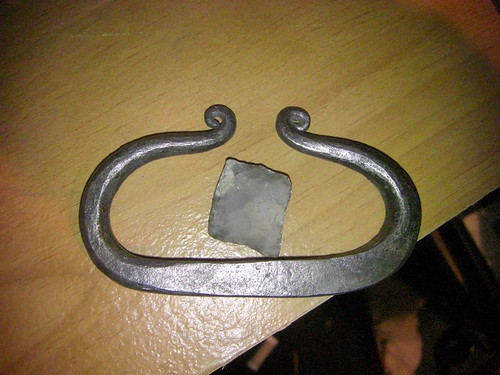
I didn't weld anything yesterday, or today. I was still frustrated. But I did do a little forging. Finished my new tongs, set them up for round stock. The reins are a little wonky, but it works fine, and the hinge is good and tight with no wobble. 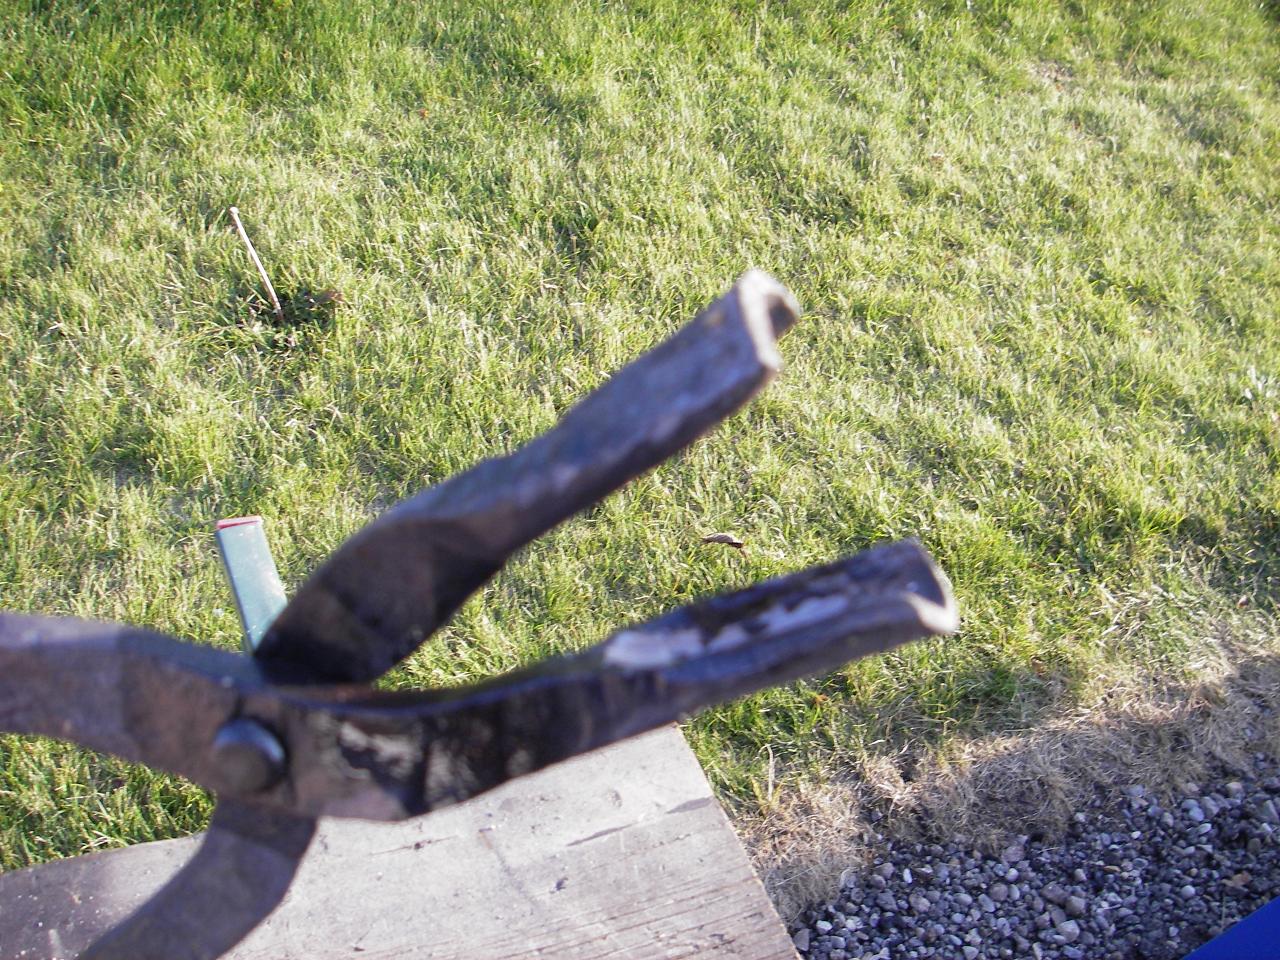 Click here for the full 1280x960 image. My forge makes glass. I have no idea where the silica is coming from. I'm only putting lump charcoal in the drat thing. Maybe the factory is increasing the weight of the bags with sand mixed in. Fuckers.  Click here for the full 1280x960 image. Broken in half:  Click here for the full 1280x960 image. Started work on a knife from a rail spike. I'll be using it to cut open charcoal bags in the future, so I'm not worried about sharpness or hardness or anything right now, this is purely a learning piece.  Click here for the full 1280x960 image.
|
|
#
¿
Sep 2, 2008 03:07
|
|
|
dv6speed posted:Slung Blade, I don't recall the exact name of the cement I used, I got it from a local industrial insulation supply company, they told me to let it sit for a few days until it was totally dry and then go to town on it. They didn't mention anything about firing it. It could be wearing down though, I'm running an iron scraper across it all the time to move the coal into place. Next time I go out to use it, I'll clean some of the ash out and check the surface. Thanks, I'm quite happy with the tongs Regarding a ringing anvil, I'm about 600 feet away from the neighbours, so it doesn't seem to bother anyone. But I've heard many tricks to quiet the ringing. A small sheet of heavy heavy rubber underneath the feet works, a large magnet on the side of the anvil works too. Using a wood stump as a stand helps too, having a metal stand makes it ring even more.
|
|
#
¿
Sep 2, 2008 04:17
|
|
|
Well, it depends on a couple of things. If you're going to be working outdoors, and using solid fuel, just build an open top forge. A lid or something like that would be a good idea to keep rain and snow (and small animals) off of the heating surface. If you're going to work inside, you need a chimney to vent the smoke, coal smoke can be quite hazardous. It doesn't have to be enclosed, but something like a side-vent chimney works well and gives a large overhead space to work with. Gas forges should always be enclosed regardless of location, since usually the gas burner is coming in from the top of the forge itself, I can't say I've ever seen a burner that works from the bottom. That link certainly shows an elaborate setup, I'd like a forge like that.
|
|
#
¿
Sep 2, 2008 19:42
|
|
|
Gas is a lot cleaner, easier to get ahold of (provided there's a gas station near you that can refill propane bbq tanks), and provides good heat. The forges, as you've seen, are a little bit more complicated, expensive to build and require a little more maintenance. Solid fuel forges are much easier to build and maintain, but produce smoke and ash and need to be cleaned out periodically. There are no fittings to worry about, and no gas hoses to melt and explode in your face. (this will never happen if you're careful and follow basic safety precautions) Gas forges can be aspirated through a venturi setup, where the gas mixes with air on the way to the forge, or forced with a fan. Solid fuel forges need some kind of air supply such as a fan blowing air from the bottom, hand cranked or electric work fine. One of the books I have describe a forge made out of a large coffee can with a hole in the side, and a 10 foot piece of drainage pipe for a chimney, the draft provided enough air to the fire to effectively work iron. Gas forges can heat a very large piece, depending on the forge, which can be handy. If you're welding up laminated billets for damascus steel or something it's very useful. If you're just making small things for around the house and some tools for yourself, you probably don't need a very large one. Solid forges can usually only heat a small area. Larger pieces require an enormous forge to heat in one go and burn a lot of fuel. You can build specialized shapes, like a washtub forge, for long skinny objects that are more efficient. I can do about a 4" x 2" piece which is plenty big enough for my needs right now. I chose charcoal for 2 reasons: I have a smoker, so I buy it all the time anyway, and I have it around the house. It's renewable and mostly carbon-neutral, all you have do is plant more trees. Though I intend to build a gas forge in the near future so I can make fancier things.
|
|
#
¿
Sep 2, 2008 21:31
|
|
|
Dongsmith posted:I think you put the rack away until it is time for burgers Yeah, I agree. Looks like Jovial got himself a dual purpose forge (besides, the heat would probably warp the grill to the point of uselessness)
|
|
#
¿
Sep 3, 2008 16:28
|
|
|
jovial_cynic posted:Also, where does one get charcoal for their forge? I just threw on some quick-light BBQ briquettes, just to see what would happen... haha. Usually, but not always, the places that sell charcoal briquettes sell charcoal lump. It's slightly more expensive, and usually the bags are bigger. Places like walmart or maybe sears. Any large store with a self respecting BBQ section should sell it, ask the clerks, it's not always on the floor. Up here in Canada I get it at Canadian Tire, it's a combination housewares, automotive, lawncare and outdoor activity store. Maybe one of those giant fishing outfitters you have in the US carries it? Restaurant supply stores usually sell it in fairly large quantities as well. Making a little firebrick house... hmm, might work, just make sure you don't try to make it air tight or anything. Usually just a bowl shape is sufficient to work. Keep an eye on the underside of the forge too, how thick is that steel? Not sure if this is what you were doing or not, but from the pictures it looks like you're putting your workpiece on top of the fire. I would suggest putting the iron into the middle of the fire. There's way more heat, and it self-insulates. Congrats Jovial, I hope you enjoy it as much as I do
|
|
#
¿
Sep 3, 2008 20:29
|
|
|
I think propane bottle threads are all reverse thread, did you try turning them the other way?
|
|
#
¿
Sep 5, 2008 21:53
|
|
|
Going camping for a week in BC, hopefully I can watch the town blacksmith in Fort Steele for a while and pick up some pointers. Of if I'm really lucky work with them for a few hours, that would be grand. Keep up the good work folks, and please don't let this thread die, keep posting those awesome projects.
|
|
#
¿
Sep 7, 2008 09:16
|
|
|
I have returned from my vacation. The blacksmith on duty at Fort Steele was just a summer student who started learning 3 months ago. She was good, but she didn't really know much more than me. Though she did have experience with forge welding and such. Thanks for that video Jovial, that's a good explanation of your figurines. Have you considered just using gas welding rod for the necks and such instead of coat hangers? Probably a little easier to get a hold of.
|
|
#
¿
Sep 15, 2008 03:27
|
|
|
Finally got some work, and some learning done. I made a chiseling saddle, which is just a piece of 5" plate that I bent the ends down so it straddles the anvil face. It's just to protect the anvil when I'm chiseling or even punching holes. Worked some more on my RR spike knife, I didn't bring it in (it got loving dark at 7:30) so I don't have a picture, but it's pretty ugly anyway. However, I did try to forge weld. Amazingly enough, it worked.  Click here for the full 1280x960 image.  Click here for the full 1280x960 image.  Click here for the full 1280x960 image. No flux used, I just cleaned the surfaces and wired them together. It didn't work completely, I was trying to join 4 pieces at the same time, and 2 didn't take. Next time I will do it two at a time and then join the result. Hopefully I can do a basket twist this weekend sometime. I need to buy some borax... Edit:  Click here for the full 1280x960 image. It's stronger than I thought it was
Slung Blade fucked around with this message at 05:12 on Sep 19, 2008 |
|
#
¿
Sep 19, 2008 05:06
|
|
|
I found a buffalo forge bellows at an antique place this morning. 48 bucks and works fine. I'll make a mounting stand for it tomorrow and post some pictures. I'm still planning to use my electric fan for most work, as it works really well. I want the manual one for finer work, the electric one puts too much air into the fire and oxide forms too quickly. I want to be able to control the fire so I can forge weld with it easier. Dv6, was that chipping hammer forge welded or did you arc that? Looks nice either way man.
|
|
#
¿
Sep 21, 2008 07:12
|
|
|
I'm planning to cross post this to GWS, so expect images of meat. I wanted to do a bunch of work today, but first up, I had to smoke a (very cheap) eye of round beef roast.  Click here for the full 1200x900 image. All spiced up.  Click here for the full 1200x900 image. The coal isn't lighting fast enough.  Click here for the full 1200x900 image. Guess I'd better turn on the forge blower and turbo that poo poo   Click here for the full 1200x900 image. Here's the buffalo forge bellows I bought yesterday, works quite smoothly, but I didn't have enough time to make a mounting bracket for it before the rain started.  Click here for the full 1200x900 image. Meat's on the grill.  Click here for the full 1200x900 image. Before I went on vacation, I took my trailer in to get the roof checked for warranty work, it's developed a small leak. When I got it back, I noticed that a rivet underneath the bench seat in the main cross member had popped. So, instead of doing something boring like drilling out the hole and putting in a bolt, I made this the night before we left to go camping. I cleaned and painted it today, hopefully it didn't get ruined in the rain, wasn't able to get it from the painting area before I went inside.  Click here for the full 1200x900 image. Here's the railroad spike knife I'm working on. I wanted to grind it and clean it up today, but again the rain got in my way.  Click here for the full 1200x900 image. I bought a cheap 20 dollar pocket watch while at Fort Steele, which was nice while I wasn't carrying my cell phone. But now that I'm back at work, I don't really need to carry the watch with me. So I built a little stand to keep on my desk at work for decoration.  Click here for the full 1200x900 image. Sanded and clear-coated.  Click here for the full 768x1024 image. Doesn't look too bad.  Click here for the full 768x1024 image. Also baked a loaf of beer bread.  Click here for the full 1200x900 image. Meat's done   Click here for the full 1200x900 image. All in all a good day. Didn't get everything that I wanted accomplished, but I'm still happy.
|
|
#
¿
Sep 22, 2008 02:45
|
|
|
Holy poo poo the quality of your figurines just gets better and better. Nice stuff man. Also, I really like your new avatar, where did you get it? Draw it yourself?
|
|
#
¿
Sep 22, 2008 05:13
|
|
|
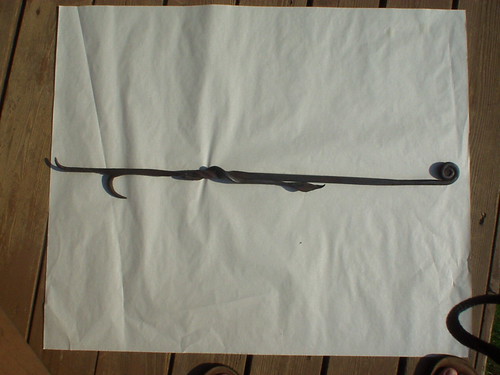
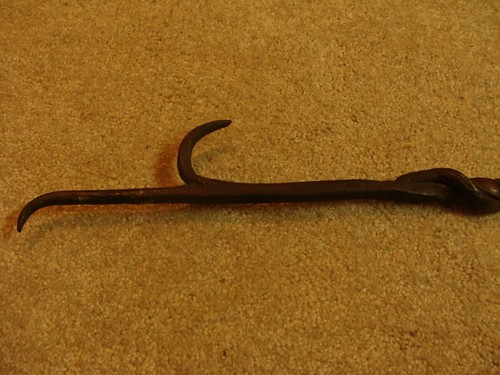
Dongsmith posted:Finally got some pictures of the fire poker I made last year. It took me 3 days. The poker end is forge-welded loop that was cut and drawn out, and the leaf accent is something I'd made months before, it's riveted on by a tenon. That's gorgeous man. How did you make the tenon? My (crappy) tenon former was posted earlier in the thread, I'd like to see yours (if you used one). Did you use a monkey tool to form the shoulder?
|
|
#
¿
Sep 22, 2008 20:22
|
|
|
dv6speed posted:Neat stuff Slung Blade, jovial_cynic, and Dongsmith! Thanks Dv6, and congrats on your test, that's awesome!
|
|
#
¿
Sep 22, 2008 21:45
|
|
|
|
| # ¿ May 10, 2024 18:55 |
|
|
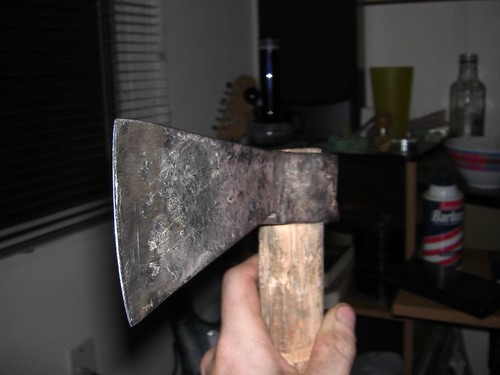
Did a little work today. The wind really picked up later on and was blowing so hard the charcoal kept flying out of the forge and into my face. Started on a plant hanger for a friend.  Click here for the full 1024x768 image. Did some upsetting for the hanger, not done yet.  Click here for the full 1024x768 image. Cleaned up and clearcoated my "knife" which is less a blade and more a charcoal bag opener. I didn't heat treat it or anything but it still cut an aluminium can in half (I know, that's not saying much). It's adequate, and very very shiny.  Click here for the full 1024x768 image. "Round" ground edge, like an axe.  Click here for the full 1024x768 image.
|
|
#
¿
Sep 28, 2008 03:54
|
|