


|
Question from a metalworking thread poster who's out of his element: What are some of the strongest available feedstocks for FDA printers, specifically in terms of compressive strength? What about other processes aside from laser sintering? IRT laser sintering, is there any published data on the compressive strength of sintered metal objects made by print-to-order heavy hitters like Shapeways? context: I'm experimenting with rapid prototyping sheet metal embossing processes; it involves using a hydraulic press to force sheet metal against various forming dies through a polyurethane elastomer pad, with the rubbery material forming a sort of universal second forming die that automatically conforms to the primary die. It's an extremely flexible technique that can produce near-finished goods very quickly and consistently, but the bottleneck is always tooling. Right now I exclusively use laser-cut acrylic dies, and they're fine for certain types of simple tooling, but acrylic sheet is too soft for detailed dies (the fine edges become crushed within a few parts) and anything 3d-contoured is impossible to make from slices of sheet. I have 3d printer access at work and could supply my own fancy boutique Engineering Plastic filament, if I could print tooling that can withstand at least a dozen or so press cycles. If printing my own tooling isn't viable I'm open to ordering sth from a third party, if it's economical vs straight-up machined steel tooling. IDK much about that sort of higher-end additive manufacturing, though.
|
 #
¿
Oct 19, 2019 02:48
#
¿
Oct 19, 2019 02:48
|
|


|

|
| # ¿ May 3, 2024 10:22 |
|
|
The Eyes Have It posted:It kind of sounds like harder & more rigid materials would work better for your dies, but it also sounds like tougher with a bit of give would help it survive more. For reference, acrylic is definitely too far towards the soft:tough end of things; dies never shatter under the press, but they do permanently deform and lose their ability to do crisp well-defined forming in a way I've never seen acrylic behave otherwise (80 tons does funny things to a polymer i otherwise think of as "brittle" like you mentioned). If I were to 3D print anything, I'd definitely want sth with greater compressive strength and elastic modulus than extruded acrylic sheet, especially given the greater expense + run-time for 3d printed parts vs. "very cheap and run-times of less than 5 minutes" for my laser-cut stuff.
|
|
#
¿
Oct 19, 2019 19:19
|
|
|
The dies don't significantly heat up, the urethane pads do but that makes sense given that they're being compressed by like 250%+ their thickness across the entire pad. The acrylic isn't moving much so I guess there's much less internal heating energy being transferred over. Thermoplastics can act plastically even when in their "frozen" state, it's just weird to see acrylic effectively 'flow' while cold. I figure it's a compression vs flexural strain difference. Also maybe a "steady constantly-applied force" thing vs a "sudden impact, or a quick twist/torque/bending force" thing. For acrylic in a shop press that's permanently deforming, tensile elastic modulus is the culprit- it's a given material's point at which a material is permanently deformed under load (pulling or pushing) vs. being able to spring back. Well, it's really the proportion of various traits to one another, tensile elastic modulus as well as compressive strength, hardness etc, which make it act differently from other materials and also from itself depending on the type of strain being applied. so far as I understand it anyways, physical mechanics is not my strong suit. anyways, acrylic is rarely ever used mechanically in roles where just steady compressive forces matter, it always seems to be flexural, so I figure I'm just badly-acquainted with acrylic's compressive behaviour.
|
|
#
¿
Oct 19, 2019 20:04
|
|
|
Anybody work with either 1) rigid/ceramic-reinforced or 2) ashless casting resins who can speak to them? cost, ease of use, working properties, suitability if my needs involve a min ~3x3x1" work envelope, etc? this is a follow-up to this post Ambrose Burnside posted:Question from a metalworking thread poster who's out of his element: wherein I'm looking for printer feedstocks suitable for short-run sheet metal embossing dies/tooling, specifically stuff comparable to/better than acrylic irt compressive strength and elasticity when subjected to non-impact compressive strains from ~20-75 ton hydraulic presses. laser-cut acrylic sheet can only make simple '2d' silhouette dies; I'm looking for a material that can make significantly more detailed 3D tooling without having to straight-up CNC mill it from metal billets. FDM feedstocks seem like a dead end, but I looked into stereolithography and found datasheets for rigid resins with tensile strength comparable to acrylic. Haven't found more detailed data inc. compressive strength, but I'm pretty hopeful. An alternate workflow is printing casting positives from a burnout material, investing and firing a plaster mold, and casting the final tool from aluminum/a copper alloy/maybe a lower-melting zinc/tin based alloy. It's slower and more involved, but makes for more durable tooling. If I could print resin positives + metal cast dies faster and cheaper than I could directly machine the same dies, I'm interested, but I don't know much about this beyond "it's a real good way to cast small jewellery items while taking advantage of digital designs and CNC positive production"
|
|
#
¿
Oct 25, 2019 04:15
|
|
|
I can't find any commercial glass-filled PLA with a published datasheet that is more than, like, 75% as stiff and strong as acrylic; I'd love to make a cheap PLA-based medium work, but acrylic is barely satisfactory as it is, so I'm dubious. I actually work in a prototyping-geared lab and have access to all sorts of 3D printers inc. a ludicrously expensive commercial-quality resin printer that we barely use because the feedstock costs so much; I appreciate the offer but I'm focused on datasheets b/c it'll take that sort of evidence to justify cracking open one of those resin pouches. and once it's open, you really do have to use it all up ASAP before it goes off... 
|
|
#
¿
Oct 25, 2019 19:26
|
|
|
Rapulum_Dei posted:Another option is to use the 3d print (or make a negative) as a mould and use a resin like polyeurathane or epoxy. Minus the 3D printing, this is the classic way dies were made for this type of fabrication, albeit using more specialized steel-filled tooling resins. It's on the table, but even with positives being handled by a printer, it's a finicky process and the resin itself is too expensive to really gently caress around/experiment with. It's definitely still probably the cheapest way to produce very durable, thousands-of-press-cycle quality tooling if you don't have a CNC mill knocking around in your garage. However, right now I'm not trying to tool up for production runs, I'm experimenting and explicitly want to produce lots of tooling with slight geometric variances so I can develop techniques for deliberately encouraging specific types of deformation/failure. for example, in an embossed form, sharp corners and hard edges encourages the sheet to shear instead of deform- you can use this tendency to produce custom/irregularly-shaped vents and louvers in sheet metal that I've never seen anyone produce before, but to get consistent results I need to nail down some upper/lower limits and requirements irt the die design. In any case, If I were to go in on casting dies based on printed positives, I'd want a technique with a significantly cheaper feedstock so I can run a dozen slightly-different dies and not blink. That'd either be a cheaper + less durable non-steel-filled resin, or straight-up casting aluminium dies from burnt-out positives the old-fashioned way, which feels like my best option except for the fact that I don't have a shop I can do substantial hot-casting in right now. That kiln-fired sinterable filament also looks promising, but it's expensive as all hell, isn't really suited to relatively-large dies, esp b/c I can't be making tooling with any sort of filament-saving internal voids, and you still need a high-temperature kiln to fire printed items in for extended periods (at which point I'd just build the thing as a smelter or burnout oven and cut out the middleman).
|
|
#
¿
Oct 27, 2019 17:33
|
|
|
that company does ludicrously-expensive tungsten filament intended to serve as a 3d-printable radiation shielding material, which is sufficiently cool to carry water for everything else they make that i cant afford to futz around with. also they should def just make a lead filament for that purpose b/c itd be cheap as sin and super easy to sinter at v low like ~toaster oven temps, shame about the whole "no minimum lifetime safe lead exposure level / your entire printer will contaminate everything it makes w lead for years after you use this filament" thing
Ambrose Burnside fucked around with this message at 17:37 on Oct 27, 2019 |
|
#
¿
Oct 27, 2019 17:35
|
|
|
mekilljoydammit posted:What about zinc castings instead of aluminum? You can (and I have) melted the zinc in a thrift store stainless pot on an electric stove. And for that matter I still am burning pla out in an electric oven. That�s also an option, yeah. Aluminum is appealing because scrap is everywhere and fairly easy to differentiate by alloy based on the scrap type (extrusions, pop cans etc get made with specific n predictable alloys), zinc is a lot harder to accurately sort and almost all scrap will be at best decorative zamak metals alloyed for surface finish and not mechanical strength (and horrid pot metal when you�re less lucky). but I�ve got other options, too; If I were to do that I�d maybe try to go even lower-melting for convenience/safety, either a hard-wearing lead-based �tooling alloy� like linotype metal (ideally w the die face sealed /plated over to limit lead contamination), or go really low-melting with a fusible alloy like Woods metal. being able to melt worn dies down in boiling water for recasting as fresh tooling over and over again is a v attractive selling point, but fusible alloys have real lovely mechanical properties for dies compared to other metals, though. poo poo, i forgot about kirksite, a zinc-copper alloy formulated for maximum strength for tooling purposes. � Zamak 2 is also known as Kirksite when gravity cast for use as a die. It was originally designed for low volume sheet metal dies.� YOU DONT SAY Ambrose Burnside fucked around with this message at 15:41 on Oct 30, 2019 |
|
#
¿
Oct 30, 2019 15:32
|
|
|
mekilljoydammit posted:That sounds like a bingo to me. yep, i think ive got my experimental workflow down. all the tooling I want to make is basically single-faced castings with a flat back, real simple stuff that investment casting is overkill for. this feels like a really good application for the "delft clay technique", basically sand-casting adapted for jewellery purposes (the particles are fine-grained clay so surface finish is excellent, two-part dies are less prone to crumbling, and you can re-use the sand afterwards). it's the only easy way to get excellent surface finish with a reusable process that doesn't require permanent dies. - use resin printer with a normal non-burnout medium to produce just the detailed 3d components of a given tool; if i were making a bas-relief medallion, for example, id get just the to-be-embossed surface down to a depth of like 0.1" or so, ignoring the rest of the medallion + overall die geometry - build up rest of the die positive with cheaper materials, prolly stuff like plywood/hardboard blocks for the die plate the design risese from, or using laser-cut slices for "2.5d" features consisting of flat planes parallel to the die base. finished positive is a composite assembly, reflecting the cheapest/fastest ways to make eash component - create the lower sand die half by pressing the positive into delft clay-packed cope until it's fully "buried"; the upper die half is just a flat surface w the casting channels/vents added - melt kirksite alloy (i'd probably need a ~1kg jeweller's melting furnace or 1000W+ induction heater w crucible-sized work coil for doing the bigger dies i'd want to make, I don't have either of those but isn't hard to DIY a resistance wire furnace for low-temp stuff like zinc) - pour metal, let it cool, remove and finish cast die, with trimmed sprues et al going back into the melt - sift small amount of blackened mould sand out of the die cavity face and discard, the rest is perfectly reusable trying to produce press tooling directly w a printer just doesn't seem like a great fit; almost all material options are too soft to keep well-defined forms n detail under many tons of force, and most of them would just permanently deform or crumble. the few resins/filaments that might "work, poorly" are prohibitively expensive. instead I focus on making/buying high-detail high-finish-quality models as cheaply and quickly as possible w additive manufacturing, and then wedding it to an industry-proven rapid tooling process like Kirksite casting that's well-suited to my specific needs. Ambrose Burnside fucked around with this message at 22:22 on Oct 31, 2019 |
|
#
¿
Oct 31, 2019 19:40
|
|
|
Big K of Justice posted:My eye kinda twitched here... I've done a fair bit of small zinc casting into two-part oilsand molds before, and the tempering oven I'd likely prototype with has electronic temp control. I've also gotten metal fume fever repeatedly from welding, so yeah, I'm acquainted. That said, I've never done the melt with an electric oven, with its different atmosphere and slower heat than I'm used to, and I'd likely want to eventually cast larger parts than I have previously (maybe 150% as large so not a tremendous scaling up), so I'll have to be more rigorous with my process as well as workspace setup/PPE, but I'd be starting with small castings until I can reliably get defect-free tooling surfaces on my parts. Most Zamak alloys should be done with a bottom-tapping casting machine, which I don't have, but Zamak 2/Kirksite is luckily the only Zamak-series alloy that's regarded as suitable for gravity casting. So yeah, I have my reservations and uncertainties, but I know enough to not turn a pound of zinc into The Bad Fever Smoke by accident. Ambrose Burnside fucked around with this message at 21:49 on Nov 3, 2019 |
|
#
¿
Nov 3, 2019 21:05
|
|
|
re: the vibratory polishing talk earlier- 1) run times for parts don't have to be on the order of days if you use the right equipment and technique for the part material + geometries. don't use brass screws as media, you don't want to burnish your prints, you want some cutting action to smooth surfaces effectively. brass is not a typical media for plastics, so far as I know. if you run parts w actual purpose-selected polishing media + a polishing/lubricating fluid + the appropriate polishing machine you can get cycle times down to "a couple hours"- faster than 3d printing, at any rate here's some media guidelines for FDM process materials from stratasys: quote:Ceramic 2) look at jeweller's tools for small/affordable ways to get set up. take a look-see https://www.riogrande.com/category/...categoryfilter=[Tools%20%26%20Equipment,Polishing%20%26%20Finishing,Tumbling,Equipment] altho i wouldn't buy from Rio if you're on a budget, make use of Rio's documentation and reviews and then go find your desired machine for half the price on aliexpress or w/e rotary tumblers are slow and noisy, cheap, and well-suited to deburring of the edges of parts b/c their motion creates an aggressive cutting action on the workpieces. im pretty sure this is not what you want for prints. vibratory tumblers have faster cycle times, are more expensive, can excel at multiple operations (deburring, polishing, burnishing etc) with the right media, and have a comparatively-low-impact method of agitation, which makes them less effective at raw material removal cutting action (this is not something you will prioritize very often if youre not polishing metal parts) magnetic tumblers i don't know a ton about, but afaik they are The Most Expensive, are very limited irt breadth of operation because they can only operate w hard-burnishing magnetic stainless steel media, but polish in a unique way ( rotated + polarity-switched magnets in the base disc rapidly shimmy the media all over the tumbler interior, in flagrant defiance of gravity and God) that make them extremely good at working deep inside crevices/voids/otherwise-unpolishable spaces you'd otherwise not be able to reach w tumbling. also they work v fast b/c of unnatural magnetic forces. i also don't think these are really appropriate for 3d printed parts Ambrose Burnside fucked around with this message at 21:44 on Nov 13, 2019 |
|
#
¿
Nov 13, 2019 21:35
|
|
|
Fire Storm posted:I know this is a month old, but... I'm trying to stay away from anything involving subtractive manufacturing b/c its always going to be the most expensive, slow and design-constraining way to produce my tooling no matter the material. that said, I did not know you could buy metal-filled resin as dimensional stock but am glad I do now b/c sometimes you can't avoid machining a tool but don't actually need the performance of a solid aluminum/steel part, this stuff would make that a lot easier.
|
|
#
¿
Nov 14, 2019 06:32
|
|
|
What sort of fixtures are you designing, in terms of complexity/detail/size/etc? I'd highly recommend considering a laser cutter, if you can adapt your designs to the "2.5D" design paradigm of building things from slices, and if your fixtures are gonna end up with bigger footprints than, idk, ~15x15cm or so. design and manufacture will be greatly expedited compared to printer run times, Masonite/acrylic tooling is mechanically-superior to any of the cheap filament feedstocks, and sheet stock is far, far cheaper than filament by mass my approach is to build everything up on a base plate with locating holes/keying designed into it, with matching holes in all upper slices to index everything properly until you solvent weld/glue everything into a single part. i mostly make short-run sheet metal embossing dies this way, for which acrylic is barely adequate, but it's fantastic for fixtures b/c the forces and wear involved are generally more forgiving Ambrose Burnside fucked around with this message at 21:40 on Nov 14, 2019 |
|
#
¿
Nov 14, 2019 21:38
|
|
|
shovelbum posted:Moving your custom moderately precise delrin fixturing in house is the exact use case for something like a Tormach right? yeah, actually, if you need that precision approaching one thou i don�t think lower-end 3d printing OR my darling laser cutter approach will suffice you could even do it with a cheaper machine like a Taig if you go with a good turnkey setup like from soigeneris, assuming the fixtures fit within its small work envelope anyways. they�ll hold +\- .001� no problem if trammed correctly. but that�s getting into hobby machines again, and yeah, don�t use that for a business need unless you�re fine with spending a week getting it to cut properly
|
|
#
¿
Nov 15, 2019 04:33
|
|
|
If I wanted to get my own supplied .stl designs printed in castable wax resin and then shipped to me in Canada/made available for pickup in Toronto, what are my options? Shapeways doesn't seem to offer castable resins and idk about anybody else. Ambrose Burnside fucked around with this message at 03:49 on Nov 21, 2019 |
|
#
¿
Nov 21, 2019 03:37
|
|
|
Ambrose Burnside posted:yep, i think ive got my experimental workflow down. all the tooling I want to make is basically single-faced castings with a flat back, real simple stuff that investment casting is overkill for. this feels like a really good application for the "delft clay technique", basically sand-casting adapted for jewellery purposes (the particles are fine-grained clay so surface finish is excellent, two-part dies are less prone to crumbling, and you can re-use the sand afterwards). it's the only easy way to get excellent surface finish with a reusable process that doesn't require permanent dies. project check-in, skip down to the actual 3d printer-relevant stuff: in trying to avoid the spectacle and hassle of cast zinc tooling i did more research about rapid tooling methods and have landed on a way to avoid metal-casting while still having metal tooling based on resin-printed models: electroformed composite tooling. basically a slightly different way of electroplating where you paint a negative/inverted part model with a conductive glaze/wash and then plate metal onto it, forming a very high-detail impression in the form of a thin metal shell. that shell is then turned into a useful tool by carefully removing the model and filling the shell with a cheap, incompressible mineral-filled cast epoxy resin. The metal shell creates a hard-wearing and detail-retaining face to the tool, while the cheap mineral epoxy, poorly-suited for tooling by itself, is used to support the working toolface. normally amateurs only use it for decorative purposes like organically-'grown- copper ring bezels or improbable gilded plants/bugs:  but in industry it is still used decades after its inception to make unusual-use types of tooling, particularly short-run designs or very large and very high-detail moulds that are impractical to make any other way; for example, textured vinyl car interiors are still made this way, because capturing the surface texture of real leather with a plating is easier than replicating it in agonizing detail in a CNC-machined tool. no really, it preserves surface detail really, really well:  the toolmaking actually scales down to the 'near-hobbyist' level but is almost never experimented with- I want to work with it. worth noting that I'm using copper because it's more amateur-friendly and simpler to do well, although nickel is a superior shell material for tooling and is typically used in industry. Here's a good documentation of an amateur attempt to produce electroformed tooling in this manner using simple equipment: https://file.scirp.org/Html/1-1840082_45883.htm SO 3D PRINTING: i still want to use resin printing to produce the models I'll produce copper shells from. this (random googled) is the sort of thing I'd be making: 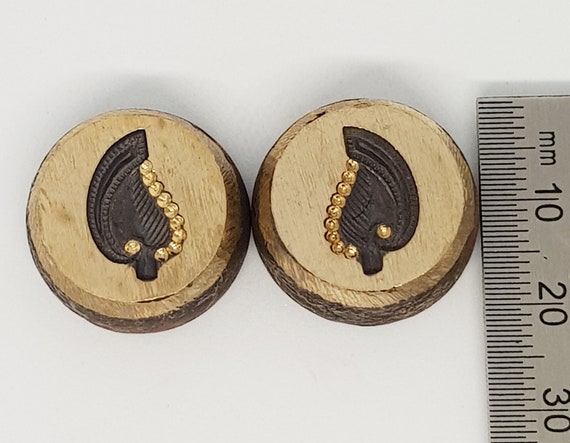 fairly wide (LXW) but short (H) decorative designs with no undercuts, although probably up to ~2.5 - 3" square in base width instead of 20mm. UV resin printing is the obvious go-to, but i'm not sure about 1) resin selection and 2) part envelope/printer suitability. 1) I figure I can use both castable and flexible resins for this purpose, because both will release easily from the thin shell without warping it- is my hope, anyways. my impression is that I want to make flexible resins work if possible- the consensus on castable resins, from my googling, says they're very finicky in use, more expensive, and ofc are single-shot parts destroyed during the toolmaking process. because I'm making embossing dies there are no undercuts so a solid model won't be 'trapped' by the shell. can anybody speak to flexible resins in terms of the fine detail they'll hold, how stable/dimensionally-accurate the material is, etc? also to castable resin I guess? 2) elegoo mars or anycubic proton are what i'm looking at right now, but them being useful to me is dependent on me being able to print tool models on their sides and not flat, which necessarily requires undercuts. I could proooobably make that 2.56" entry-level machine width work, assuming you actually get 2.56" of usable space, but it'd be a lot more useful to me if my real work envelope is closer to 4.5x6". 2a) i know DLP printers compromise on surface finish with big prints compared to SLA (or so they say); how bad would that get for big parts using most of the available work envelope, either in terms of height/length for sideways setups or width for flat part orientation? I'm really not keen to be doing a lot of manual finishing on intricate die models, but SLA printers are firmly out of my "very ambitious christmas present to myself" budget. Ambrose Burnside fucked around with this message at 04:28 on Dec 10, 2019 |
|
#
¿
Dec 10, 2019 04:18
|
|
|
Martytoof posted:Is there a go-to method or software for splitting larger models down to fit a smaller build platform? It's not 3D printing but I've done a few large art pieces with the laser cutter by sectioning the digital model into slices the thickness of the wood/acrylic/foamboard sheet I'm using, cutting the slices, and then assembling. Probably a lot more involved and difficult than what you want to do, but the lessons learned probably still transfer over: - use registration or locating features if the part design doesn't already offer those to you. Locating features are strongly preferable to purely-visual registration marks. try to use them even when you don't need them- it takes very little extra work on your part but hugely simplifies assembly. Even when it's impossible to get mixed up about what goes where and in what orientation, locating features add strength and guarantee alignment while the glue sets. You can model them into the print or just model in the sockets for non-printed locating features like dowels. You can also use locators thoughtfully to constrain any potential variation during assembly in a specific, controlled way- for example, if assembling with no play in any direction is vital (when you want a wheel on an axle to turn concentrically, for example), use a dowel; if parts must line up horizontally but vertical alignment is to taste, use popsicle sticks added into slots that are wider than they have to be, so you get that small amount of single-axis play. If you want something that's self-centering and tolerant of a lot of initial misalignment, model mating cone/sockets into the parts. For 3d printed parts I would try to use steel dowel pins or keys made from flat bar/wire; they'll do double-duty in reinforcing the assembly at the joints. - irt the actual modelling, that's down to the CAD/CAM software you use (if any). I'm a designer by trade so I work with Solidworks and Inventor; my workflow with either is to scale the model to IRL size, add locating features like slots/holes into the model, create a geometry plane at one side of the model, and pattern as many planes at regular 1/8" or 3/16" intervals as are needed to reach the end. Then I pull the intersection curves between the model and each individual plane to generate each slice's outline, which I then nest into a final cut-file (with part numbers laser-marked into the hidden parts of each slice because seriously there can be like 50 slices that all look the same). For you it can be a lot simpler, and you'll be splitting the model into a sectioned version of the original instead of designing entirely new ones based on some intersection paths, but if you want proper-invisible seams you will probably not use flat slices but instead irregular ones that follow a convenient crease/groove/modelled seam in the design. This is one of those things you just gotta have a basic handle of your chosen CAD platform to do properly because every part will be approached differently.
|
|
#
¿
Dec 20, 2019 07:42
|
|
|
Was gonna say 'are nozzles with carbide/ruby/etc liner inserts not a thing?'- apparently they are, but are also, like, $50+ a pop. Still seems like something that'll inevitably get picked up if some big printer manufacturer starts offering them as stock to help drive prices down, they're the natural go-to for any other application where wear on a dimension-critical orifice is a concern. e: on that note, other industries have carbide-orifice nozzles available for a lot cheaper than the 3d printing specific ones; i did a cursory google and found a possible workable fit, a 1/4 NPT threaded nozzle from a waterjet fitting company that comes with a 0.069" orifice (so almost exactly 1.75mm): https://advancedpressuresystems.com/collections/sale-items/products/nozzle-tungsten-carbide-1-4-npt-hard-hitter?variant=31632933847145 apparently on sale for less than $25 right now, not accounting for shipping et al. Even if that specific nozzle isn't adaptable for filament, they're sourcing their carbide liners from someone, and i bet those liners would braze into a conventional soft steel or brass nozzle just fine. Ambrose Burnside fucked around with this message at 23:19 on Dec 20, 2019 |
|
#
¿
Dec 20, 2019 22:57
|
|
|
Are copper nozzles a thing? Solid copper like a welding torch tip, not copper-plated (reduces corrosion at heat but doesn't really do poo poo for conductivity overall with just a thin plating). Brass is a downright lovely thermal conductor next to copper, iirc brass has a conductivity k-factor of maybe 1/4 copper's at any given temperature- for reference, steel has something like 1/4 to 1/6 of brass' k-factor, depending on alloy, so I'd think the performance difference would be noticeable if the brass-steel difference is impacting performance. Copper's even softer than brass, with inferior wear resistance to match, but it might be worth it in some situations if the nozzle's heat conduction specifically is hobbling your achievable print speeds. Alternately, copper is an ideal + forgiving substrate to solder/braze other metals to, so adding a thin wear-resistant liner would be trivial, and the resulting composite tool should significantly outperform brass in terms of both thermal conduction and wear resistance. The ruby nozzles seem to be doing a similar thing, but in theory you should be able to get well-rounded performance from a composite design without having to escalate to Gemstone-Tier Prices Ambrose Burnside fucked around with this message at 03:24 on Dec 21, 2019 |
|
#
¿
Dec 21, 2019 03:19
|
|
|
Martytoof posted:Hopefully not too dumb a question: 100% conjecture here: that wee work envelope may create headaches for you here because those printed printer parts (I don�t have a specific build in mind but I�ve run into a few FDM �auto printer� builds irl) generally weren�t designed with that ~2.5� bed width in mind. tool around grabcad for printer builds (sort by popularity/downloads to get an idea of adoption and potential support) as well as 3d printed aluminum extrusion connector sets, printable fixturing/fastening solutions and the like, imo- if you find something you like but can�t tackle all the parts, there�s a good chance you can mix and match more suitable parts from different designs with (hopefully) no issue all this being said, the prognosis for any of those AE super economy �machine tools� is dire and they often have issues that can�t be handily fixed with home brewed replacement parts. i haven�t done this dance with a printer before, but i absolutely have with a gantry engraving machine with a p similar design to cheap FDM printers, and yeah, it did not pan out like I hoped. if it�s something you�ll have fun with and don�t mind paying for all that resin even if it doesn�t improve the machine�s performance to your expectations, go buck wild, if not i�d focus on resin printing and only move back to the upgrade if you�re actively hitting frustrating part size limits e: i missed that you want the FDM to make parts for a CNC machine. I would... not do that, honestly, unless you just want to do art engraving or cut wood/foam or other tasks with low cutting forces and gentle tolerances. printing structural components for a real machine tool where machine rigidity and robust construction are important is a fool�s errand, imo, it�s a whole lot of work to end up with a machine that�s fundamentally hobbled from the ground up. good learning experience, fun, sure, but it�s eztremely unlikely to produce a cnc mill that won�t make you tear your hair out I own a taig micro mill that�s been upgraded to CNC + an extended Y-axis and it�s excellent by the standards of desktop hobby mills- it cuts aluminum and steel without issue and to a good surface finish, which is quite rare for anything in the �desktop hobby� tier. it�s probably the only game in town for doing CNC machining to fairly tight tolerances (holding +/- .001� is realistic) in hard metals for less than idk ~$5000ish. the basic milling machine in a manual configuration can be bought for something like $500-750 and you can gradually CNC it piecemeal in the future when you can afford it Ambrose Burnside fucked around with this message at 06:26 on Dec 24, 2019 |
|
#
¿
Dec 24, 2019 06:12
|
|
|
Acid Reflux posted:The "Mostly Printed CNC" (MPCNC) is an extremely popular build that shitloads of people have made, and wood/foam/plastic is exactly what it's meant for. Most hobbyists stepping up to CNC from/via 3D printing aren't trying to mill O1 at 100ipm as their first project. i know a bit about MPCNC builds, but yeah my calibration here is all hosed up from doing this professionally  i do think that, if you're still dropping hundreds of dollars and a lot of labour on making a cnc milling machine of any description, it's worth looking at exactly what you want to do with it to see if upgrading and getting a lot more mill for your dollar is worth it. if you wanted to mill big foam sheets or sth a taig would be a horrendous misfit (backbone you don't need, totally lacking the X x Y envelope you actually do need) but if you're looking to do much with metal or want to do monster hogging router cuts or w/e, spending a little more on the machine might save you a lot of pain down the road i do think that, if you're still dropping hundreds of dollars and a lot of labour on making a cnc milling machine of any description, it's worth looking at exactly what you want to do with it to see if upgrading and getting a lot more mill for your dollar is worth it. if you wanted to mill big foam sheets or sth a taig would be a horrendous misfit (backbone you don't need, totally lacking the X x Y envelope you actually do need) but if you're looking to do much with metal or want to do monster hogging router cuts or w/e, spending a little more on the machine might save you a lot of pain down the road
|
|
#
¿
Dec 24, 2019 20:44
|
|
|
ImplicitAssembler posted:MPCNC was interesting until I saw this: lol  developing an open-access freely-distributed design and then attempting to exert tight control over all implementations of said design strikes me as, uh, rather confused. i�m also p sure that he�s just fundamentally misunderstanding design rights and/or copyright law and what�s actually applicable + what he�s entitled to in the first place. like, idk for instance [standard not-a-lawyer / �also im a moron� etc caveats apply] : the functional-use and must-fit exceptions would assumably apply to anything like the MPCNC concept in the EU and make it ineligible for both registered and unregistered design protection. or does he think he invented the desktop aluminum extrusion frame gantry mill concept itself, or something Ambrose Burnside fucked around with this message at 21:38 on Dec 25, 2019 |
|
#
¿
Dec 25, 2019 20:59
|
|
|
Combat Pretzel posted:I heard through the grapevines that Sanladerer was being a dick towards the MPCNC guy for whatever reason, which I forgot, and that tainted his remaining MPCNC video(s?) accordingly. yeah i don�t know poo poo about youtube content creator interpolitik or these particular dudes and am taking that uncharitable second-hand recollection at face value, pair w salt as needed that said, it still scans as extremely plausible, mostly because time and experience has taught me that almost nobody actually understands how laws or institutional principles actually work and just operate off the assumption that things work in a way that they like and that is advantageous & just to them personally. motherfuckers out there every day believing with all their hearts that the un universal declaration of human rights guarantees them a full cash refund on the remaining one-third of a kroegers economy-grade birthday cake Ambrose Burnside fucked around with this message at 21:59 on Dec 25, 2019 |
|
#
¿
Dec 25, 2019 21:56
|
|
|
armorer posted:I intend to use the prints as positives, and use pourable two part silicone to make molds from them, so I would need the physical parts. Then I can backfill the molds with either wax (to make new positives for lost wax casting), or silver clay (Silver PMC+ - to fire on their own). I've done this with prints from my Ender 3, and the process works reasonably well. What I'm not sure about is whether the margins of error in the process itself are large enough that the end result won't be any better if I start with a higher res positive in the first place. Are these coins/tokens/medallions or sth that isn't Jewellery Proper? If you're alright with non-precious metals for the parts, I would highly recommend grabbing a temp-resistant silicone like Mold-Max 60 and directly casting the parts from pewter, one of the lower-melting zinc alloys or even one of the cheaper eutectic low-melt alloys depending on end application; being able to totally skip investment casting makes your life so goddamn easy and you'll be turning parts out literally like 5-10x as fast Alternately, is directly making printed moulds workable for the metal clay process? Silicone is clearly superior for this in most regards, but a coin/medallion-type part is forgiving enough that you might be able to swing impressions from a resin mold w some mold release dusted in there. Cutting out the model reproduction step means less loss of fidelity + less introduction of new problems, not that that will help with prints that are lacklustre to begin with.
|
|
#
¿
Dec 29, 2019 01:09
|
|
|
armorer posted:They'll be soldered to earring posts, so silver is a must for me here. I tried making negative forms using tpu and then filling them with PMC, and it works to some extent but not as well as a silicone mold from a printed positive. Welp, yeah, investment casting definitely sounds like the best fit here if you're looking to run sth like "more than a half-dozen, fewer than a couple thousand" parts. At least that sounds like an ideal part to stack like sprued-up cordwood in the investing flask, if you can run a couple dozen at a time it's not so bad. Don't forget that, as long as someone else is doing the printing, there are castable ash-free SLA resins out there now that could also let you skip the silicone mold step, although they're expensive enough that you'd probably only make use of it for prototyping/iterating before committing to doing a proper production run. Ambrose Burnside fucked around with this message at 03:47 on Dec 29, 2019 |
|
#
¿
Dec 29, 2019 03:41
|
|
|
I'm looking at SLA printers but, given the above posts n similar ones, I can't really get a hold on how big a part I can actually expect to print and/or what geometric constraints I'll be limited by, not beyond "you won't actually be maxing out that work envelope" anyways. There will also be a critical 'tooling face' where support-related blemishes or subpar surface finish could be a straight-up dealbreaker, and without setting up + running parts I've got no sense of how big a problem that would be. Dimensional accuracy isn't a huge deal but geometric precision (squareness of perpendicular sides, parallelness of parallel faces, etc) will sometimes be important. Any recs for a guide on SLA-specific part setup with an eye towards the best possible finish + dimensional accuracy, and/or examples of varied parts with particular finish requirements, and their requisite print layout strategies? If I find a couple examples of similar parts to mine I'll probably immediately have a better handle on what I can realistically expect.
|
|
#
¿
Dec 29, 2019 06:36
|
|
|
The Eyes Have It posted:One thing that might interest you is to download and install Formlabs' preform software which allows you to load models and generate jobs for a "phantom" printer. Other software allows this too (PrusaSlicer for their SLA printer for example) but Formlabs' software is kind of nice in that it will highlight (in red) areas it feels are insufficiently supported. Which is nice feedback. oh excellent, thanks- I dunno why i didn�t think of CAM simulation, i lean on it all the time for crash-proofing conventionally-machined parts. i�d think that actually simulating an additive process is way more difficult-... but they aren�t even doing that here, just a streamlined FEA simulation . which is all you�d need for a support check, yeah. it�s clever. anyways yeah cheers, this�ll force me to actually 100% model n properly convert a couple of tools as .stls from one of several proprietary CAD formats. looking forward to the conversion bit in particular
|
|
#
¿
Dec 29, 2019 08:27
|
|


|
If you�re improvising an enclosure/the existing enclosure has no temperature control, you ought to be able to add your own dedicated small heater-blower w thermostat control for, like, ~$20 shipped from aliexpress or similar. Look for �incubator heaters�, the ubiquitous cheap fan type provides iirc 100W of hot air on demand, with the blower also helping to mix the air in the enclosure and prevent stratifying, and they usually come in both 12VDC and 110/220VAC to suit your setup. Just make sure the thermostat has the range you need, the incubator ones are intended for much lower operating temperatures than a printer enclosure so i have no idea if you might need to opt for a more general-purpose thermostat component. Ambrose Burnside fucked around with this message at 03:28 on Jan 2, 2020 |
|
#
¿
Jan 2, 2020 03:25
|
|
|
How do castable UV resins and elastic/rubbery resins stack up against each other, in terms of cost/mechanical performance/ease of use/achievable resolution/surface finish/etc? Is one or the other notably-difficult to work with or get good results from? The application I have in mind prioritizes high part detail and the best possible surface finish, and I'd probably be using a cheaper LCD UV printer. One specific end use I have for any potential resin printer is making models that will have copper electroplated onto them as part of a toolmaking process; because the model has to release from a very thin copper shell without distorting or tearing it, you need to use as little physical force as possible. Ergo, I'm going to need to use either castable resins or elastomeric resins, and either melt/burn the models out, or rely on a rubbery model that should release under fairly gentle force (I hope) from the shell. My hope is that elastic resins are viable, because retaining the original tooling models is strongly preferable to destroying them through a burnout cycle. They also seem cheaper than castables across the board. If both seem viable I'll test electroforming onto both/additional types of resin to see how they stack up, once I get that far, anyways. e: Related question: how do conventional hard resins behave when heated to a couple hundred C? I know they're not thermoplastics but if they break down/burn in a way that liberates them easily from the electroformed shell, that would also be viable. Castable stuff burns out ash-free which is overkill, I'm not making investment molds, it's not a huge problem to ahve something to clean off the shell. I'm not doing burnoff indoors so the gnarly smoke can be avoided. Aaaand finally, if any cheap resins are decently-soluble in some consumer-accessible solvent that won't also dissolve copper (i.e. no acids), that's also a potential option. Ambrose Burnside fucked around with this message at 05:56 on Jan 5, 2020 |
|
#
¿
Jan 5, 2020 05:29
|
|
|
mobby_6kl posted:My oven goes up to maybe 300 tops when pre heating, and that did nothing to a print I tried it on. Maybe made it a bit softer at best. As I mentioned before, a soldering iron at 350 didn't really burn it either. Googled posts say that general-purpose UV resins soften somewhat if immersed in boiling water, which may or may not be enough to get me the results I'm hoping for. Gotta try it out, I guess. "Heating until pyrolysis" will definitely work for destroying the model but I'd like to avoid that, technical sheets on breaking UV epoxy resin adhesive bonds don't give me hope that any accessible solvent is particularly good at removing even remnants of cured resin parts.
|
|
#
¿
Jan 5, 2020 18:13
|
|
|
Martytoof posted:I�m curing in daylight right now, still looking for a good curing turntable. Said part has been exposed to light for like a week now. Even given winter lack of light I would have expected that to be enough Are the parts sitting in open air or are they submerged in water? Uncured UV resin is subject to oxygen inhibition, where absorbed oxygen from the atmosphere screws with the polymerization process. Good for the shelf life of the resin in your print tank, bad for your uncured parts. My guess is that, because of how little correct-wavelength UV light is present in dim winter sun compared to the light from a dedicated UV lamp, oxygen inhibition might be enough to indefinitely prevent a proper cure if the parts aren't shielded from the atmosphere. Ambrose Burnside fucked around with this message at 03:25 on Jan 6, 2020 |
|
#
¿
Jan 6, 2020 03:15
|
|

|
e: whoops, this was supposed to go in my last post, it's from a formlabs experiment on resin curing parameters "In general, stick as close to the recommended post-print cure cycle as you can. Even little differences, like doing everything right but using the wrong UV source wavelength for your particular product, can make a surprisingly-big difference. " can't say if an extended "stalled cure" will permanently jank up the part, tho Ambrose Burnside fucked around with this message at 03:27 on Jan 6, 2020 |
|
#
¿
Jan 6, 2020 03:24
|
|
|
here's the actual report that's from, btw https://archive-media.formlabs.com/upload/How-Mechanical-Properties-of-SLA-3D-Prints-Are-Affected-by-UV-Curing.pdf Temperature seems like a bigger factor than UV wavelength, fwiw: "The effect of temperature on the post-cured modulus and ultimate tensile stress of printed Formlabs Clear V2 Resin are presented in Figures 10 and 11 respectively. With increasing post-cure temperature, there is a shorter time to achieve a fully post-cured state in which the material has reached the maximum mechanical properties possible at that temperature. In addition to an increased cure rate, the maximum obtainable modulus and tensile strength increase with temperature. A higher post-cure temperature not only yields a fully cured state more quickly, but it also yields a fully cured state with higher mechanical properties." Also don't miss the graph about UV radiance, where too dim a UV source as well as too intense a source both significantly impact permanent mechanical performance. You'd never intuit in a million years that you can cure resin worse with brighter UV. Also i think this basically guarantees that your sun-cured parts will be significantly-inferior to properly-cured parts, even if you address your surface smudge issue. This is all concerning one manufacturer's specific SLA resin, of course, but it ought to apply broadly to any similar standard/economy resin with a similar formulation. Ambrose Burnside fucked around with this message at 03:55 on Jan 6, 2020 |
|
#
¿
Jan 6, 2020 03:50
|
|
|
One thing to remember is that the photochemical reaction we call "curing" continues for basically the entire lifetime of the part, to one degree or another. To illustrate the point, technically we essentially refer to the final stage of part curing as "UV degradation" because it's generally unwanted and uncontrolled and does not benefit the part. Another point (already mentioned) is that the degree of curing you actually need varies hugely depending on your end application. The surface layer of a print being cured reacts quickly because of the high UV exposure, and for thin sections the entire part can act as a "surface layer" if illuminated evenly on all sides, but most parts will have a fast-curing "shell" over a "core" that responds much slower to post-print UV treatments on account of being buried. A thick resin section's deepest sections will, so far as I know, often still be slowly changing weeks or months after a quick post-treatment is "complete". If you are making actual functional components or anything that must meet specific mechanical/physical specifications, having a homogenous and consistently-cured part is absolutely critical- but you're not doing that. If you're making a delicate tabletop model, you definitely want the best cure possible so it survives tumbles off the table n rough handling, but ultimately you can always repair it or print another. And if you're just making a paperweight or art piece a tightly-controlled post-treatment is basically irrelevant and your time is better spent elsewhere. Those curing experiments are daunting as hell but they're really not all that important for where you're at, that was more to highlight how post-print UV treatment is surprisingly complicated and has significant bearing on the quality of the parts you're printing- basically, you shouldn't treat is as an afterthought. Which you're not, so hey. Ambrose Burnside fucked around with this message at 03:14 on Jan 7, 2020 |
|
#
¿
Jan 7, 2020 03:10
|
|
|
TKIY posted:So in the SLA world is there something in the pro-sumer side that is somewhere better and more reliable than the Photon/Mars that isn't the staggering price point of the Form 3? I was thinking about the Prusa SL1 but I can't find a Canadian place to order it. what are your specific issues with the budget models/is there anything particularly frustrating or limiting with em beyond obvious stuff like the small build envelope? considering a Mars rn myself as my first machine.
|
|
#
¿
Jan 11, 2020 08:26
|
|
|
irt fire safety setups: if you're handy w electronics consider grabbing one of those UV flame sensors and a bigass piezo buzzer/siren and putting something basic together, smoke detectors and those Suppressant Orbs don't work until the fire is probably already established and threatening your home, but a properly-implemented flame sensor can be triggered the moment an open flame is within direct line of sight. When I was doing welding/soldering/forging in a garage I set one up post-work as an extra layer of Fire Watch peace of mind, built entirely from the gently caress-around components of an arduino starter kit.
|
|
#
¿
Jan 13, 2020 21:23
|
|
|
That's the smart way to do it, yeah. Do what you can to avoid getting to the extinguisher stage, because once the relief of putting a fire out wears off you get to spend the next several days at bare minimum cleaning that ABC dry extinguisher poo poo off absolutely everything you own, it's a nightmare indoors especially. IIRC it's also very bad for electronics or precision anything because any remaining traces are corrosive in the long term, even if it isn't the printer that catches fire I'd assume it's a write-off if you have to use ABC extinguisher in the same room. I helped with one dry extinguisher clean-up and then resolved to supplement my own shop's ABC extinguisher with an old-fashioned refillable water extinguisher, just so I have a non-nuclear option for the smaller A-class fires you get a lot anywhere you do hot-work, after the fire blanket has failed anyways.
|
|
#
¿
Jan 13, 2020 22:03
|
|
|
Hobby-level 3D printing processes aren't notably fire-prone in the way that sth like laser cutting is, so far as I'm aware, but you've still got the baseline risks of any user-built and user-serviced electronic device carrying non-negligible current. They're also prone to being operated unattended because of the perceived safety, which means successful intervention is much less likely than with something people are fire-mindful of and supervise closely. I wouldn't see much need to go nuts with fire prevention specifically for a printer, but I also think it's sensible in the way it's sensible applied to any non-ESA/UL/etc-certified electronics you're running unattended.
|
|
#
¿
Jan 14, 2020 00:58
|
|
|
one will note that fire precautions are also taken irt phones and laptops in some circumstances + people have died as a result of these fires in particularly critical circumstances like during flights. arguing over which is more likely to occur seems to be missing the more salient point of "the design and use of this device involves an inherent small but non-negligible risk of fire, ergo it's never a bad idea to plan for it, because you probably prefer your house being not on fire"
|
|
#
¿
Jan 14, 2020 01:40
|
|
|
|
| # ¿ May 3, 2024 10:22 |
|
|
Motronic posted:Gonna have to pull a former fire marshal, went to school for this poo poo: smoke happens way before open flame in the overwhelming majority of cases. And lots of it. Whoops, yeah i'm not thinking- I worry about this stuff in the context of a hot-work shop, conventional smoke detectors can't be installed close to the forge/workbench because smoke is both normal and unavoidable, so they're installed a little farther afield than I'd prefer once I'm done working. Used to cover/uncover a closely-located detector before/after working, but I don't trust an approach that relies on me never getting lazy. A flame detector is a lot easier to situate such that one or two already-fireproofed small areas (forge mouth, firebrick hotwork station, etc) are screened from the sensor while everything else is in optoelectric eye-shot whether I'm working or not.
|
|
#
¿
Jan 15, 2020 01:00
|
|