


|
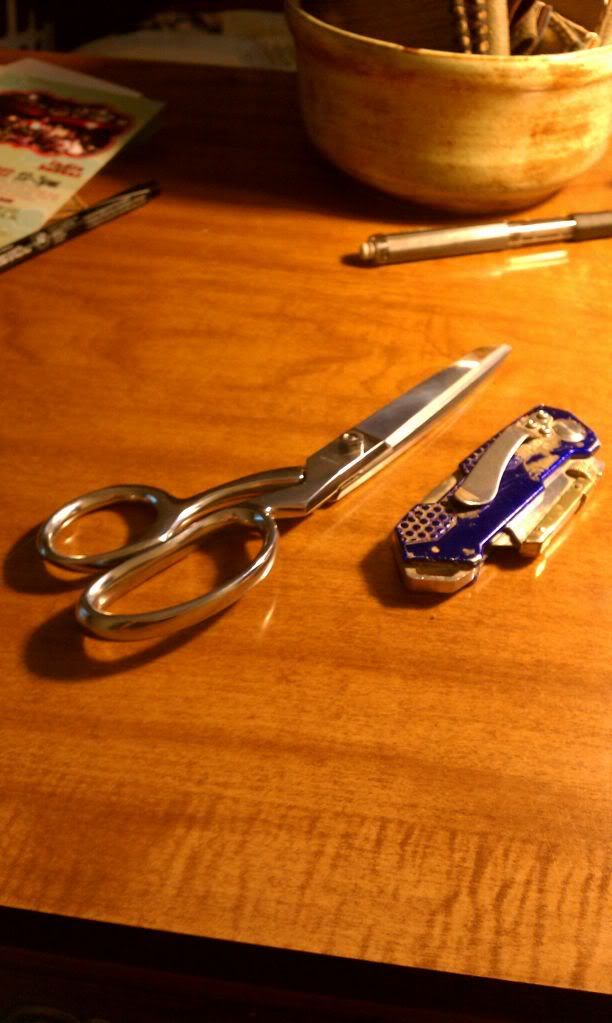
Leatherworking 101 My posts in the Projects megathread have attracted some interest, so I figured it might be worth making an entire thread about leather and leatherwork. I also know, from when I started, that there aren't many good resources online for beginners, so hopefully this will be helpful. Leather Leather comes primarily in two types. There is vegetable tanned leather, commonly referred to as veg tan, and mineral tanned, also referred to as chrome tan. Veg Tan This is leather that has been tanned using tanning, a chemical that occurs naturally in many plants. I won't go into the details of how it's tanned; the important part is the effect. Veg tanned leather can be tooled, carved, and dyed by the end user. Chrome Tan The other type of leather you're likely to find in a shop is Chrome Tan, which is processed with chemical salts to preserve it. Chrome tan is water resistant, and cannot be dyed. It's a little stretchy, and generally has been dyed during the tanning process. Most leather that you see used in fashion has been chrome tanned. If you've got a leather jacket or purse that is made of real leather, not synthetic stuff, it's probably chrome tan. It's lighter and more flexible, which makes it easier to sew in a standard sewing machine. Buying Leather I do my shopping at Tandy Leather. They're a nationwide franchise in the US, and they'll ship to you if you're not close to one. They have a large variety of leather and tools, and most stores try to stock everything that is in the catalog. The one near me also has incredibly helpful staff. They don't mind showing me how something is done, even if it takes 20 minutes. The level of customer service I've gotten from my local shop is incredible, and I would recommend them to anyone. Leather isn't sold by the yard, like fabric; it's normally sold by the cut, and priced based on the square footage. The smallest is a single shoulder, about 6 square feet each, then double shoulders, all the way up to a side, which is half of a full hide, up to a full hide which could be 60 square feet. Leather is also priced by weight and quality. The thickness is measured in ounces. Very thin veg tan might be only 3 or 4 ounces, and the heaviest you're likely to find is 16 oz, which is almost an inch thick. Higher quality leather is going to be more even, and have less thin spots, marks, scars, or brands. Keep in mind, you're purchasing the skin of an animal that lived outside, so it's quite possible to have marks and such that you don't want. Depending on what you're making, those marks might not be a big deal. If all you need is a bunch of small pieces; say your'e making little pouches or satchels, then a scar in the middle doesn't matter. However, if you need pig pieces of leather, for a garment, or a large bag, then a piece might be worthless if there's a hole in the middle. This is one reason I am reluctant to purchase leather itself via mail order. At my local shop, I can roll out the individual pieces and see what they look like. There's a lot of variation in grain and color, too. What to do once you've bought this giant hunk of animal skin? The primary advantage to veg tan leather is it's truly a raw material. You can shape it and color it into anything you might want. It will retain marks you put into it, too. This is where carving and tooling come in. The basic steps are : Cut out the leather pieces you need, get the leather wet, then put a pattern onto the surface. Cut into that pattern with a special tool called a swivel knife, then use a hammer and marking tools to decorate it. Once that's done, let the leather dry and dye it. Cutting the leather can be done in many ways. Previously, I'd been using a utility knife and big, high end fabric scissors.  That was working pretty well, but last week I picked up a round knife It's a little tricky to get the hand of it, but I've already noticed a huger difference. It makes cutting curves much, much easier. It's incredibly sharp, though, and very easy to catch a stray finger. I've even nicked myself under a fingernail. Feels awesome! Wetting the leather is called "Casing." You can do it with a wet sponge, or you can just run the leather under running water. I personally prefer running water, but it's definitely a preference thing. Next, wait for the leather to dry out a little. The rule of thumb is, wait until it lightens back up to its original color, and is cool to the touch. You don't want to mess with it while it's soaking wet. There are all sorts of ways you can transfer a pattern to the leather. One common thing is by tracing over a paper pattern with a tool that has a rounded point. The tool will leave a small impression in the leather. The downside to this method is it's a little tedious and time consuming, and it's very easy to tear through your paper, especially if it gets damp from the leather. The upside is, you can create, copy, and edit patterns on your computer. The next most popular method is what Tandy calls a craft aid. These are pieces of clear plastic that have ridges on the back. You press the ridged side into the surface of the leather, and rub the other side with a spoon. This leaves very crisp, clean marks in the leather. The upside is, it's very easy. The downside is, you're stuck using the sizes and patterns they have for sale. You can't really resize them, and if you're working on anything unusual or different, then you might not get the shapes you want. Once you've got a pattern on your leather, it's time to cut it with a swivel knife. This is a special type of knife that you hold almost like a pencil, and it has a triangular blade. This was probably the hardest part for me to learn, and one of the first things the helpful staff showed me. You really have to press the knife into the leather pretty hard, and you want to leave a pronounced, v shaped groove. Just simply scratching the surface isn't enough. The knife does swivel, as the name suggests, so you can cut curves and flowing lines easily. Of course, it takes practice, but using a swivel knife properly is a valuable skill. After you've cut the pattern with the swivel knife, it's hammer time! Tandy sells tools of all sorts that leave impressions in the leather. You can get plain ones, lines, crosshatching, curved stuff, round stuff, letters, etc. By combining different shapes and textures, you can make things stand out and look fantastic. You can also skip the swivel knife step and just do patterns, too, like the basketweave pattern on this holster.  After tooling the leather, I do any holes or grooves needed for sewing. First, you use a tool called a "gouger."  This cuts a tiny little round tube out of the leather. Then you run this little spiked wheel along the groove, and it leaves marks where you'll put the holes for your needle.  In theory, the way you're supposed to sew is by using a handheld awl to punch those holes as you go. In reality, I've discovered that is an amazing way to stab the unholy poo poo out of your fingers. So, I cheat : I drill my hole with a 3/32" drill bit on a dremel. Here's an example :  Once you've got the pattern and tooling done, the next step is to dye the leather. Tandy sells many differen brands and types of dye, but the ones I've used the most are either water based or alcohol based. I prefer alcohol based dyes, as I've found that they produce brighter, more vivid colors. There is a staggering array of different products that can produce all sorts of amazing results. You can get things that sink darker colors into the crevices, or produce different finishes, whatever you want, you can probably find a product that does it. After dyeing, it's time to seal the leather, both front and back. I use a leather wax, and then burnish the back with a piece of wood. This gives some water proofing, and also flattens out the rough back side (often referred to as the flesh side). The front I condition a little differently. These days I use a combination of saddle soap, neatsfoot oil, and a waterproofing compound. A big part of leather working is waiting for leather to dry. You certainly don't want to sew with wet leather, it will tear and warp. Once I'm done dyeing the leather, I give it overnight before I start sewing. Sewing is done with two needles, at each end of the thread. The needles work in opposition; each hole gets a needle pushed through from both sides. This interlocks the thread, and makes it so that even if some stitches break, the whole thing won't unravel. Tandy sells a few different types of thread, all of which is much thicker than traditional sewing thread. My favorite is an artificial sinew made of nylon; it's strong and doesn't break during sewing. Here are some other things I've made and photographed so far. Here's a little pouch I made out of scraps, I'm pretty happy with this one.  Another holster I made for a goon, this shows off a more traditional western floral pattern.  This is my attempt at a faux snakeskin pattern, which I think came out pretty well.  I've got a few other things I'm working on, including some leather fetish gear, and some more costume / cosplay type things. I'll post pictures as I make more progress. I am happy to answer any questions here, and hopefully some other leather working goons will come out of the woodwork and add to the discussion. Note : all images on my hosting
|
 #
¿
Mar 28, 2012 02:31
#
¿
Mar 28, 2012 02:31
|
|


|

|
| # ¿ Apr 28, 2024 09:57 |
|
|
MaakHatt posted:I don't have a local place to buy any leather from (the nearest Tandy leather is like 30 miles away). My nearest Tandy shop is 90 miles away, and I go there once or twice a month. Unless that's a typo and it's 300 miles, you should just go in person. MaakHatt posted:If I were to measure all the strap material and arrange them in a way that they could be cut from a large piece of leather, would replacing all of the straps be easy work for a newbie? The saddle shop lady said I could bring it in and have her replace all of the straps... But at the prices she charged I am better off just buying a brand new pack! The canvas is in good condition, and has a rubber liner at the bottom, so I'd rather just re-do it myself and save my cash. I have the old pieces to use as a pattern. If price is your biggest concern, you're better off buying another pack. You could easily spend $50 or $60 just on the supplies you need, and that's assuming you do everything perfectly the first time. For leather, you'd want some thick, heavy duty veg tan, like in the 8 to 10 oz range. A single cheap shoulder will set you back about $50. That's probably enough to cut the straps you need, but it may not be long enough for you to get the longest straps you need. Your next option would be buying belt blanks and strips. The cheapest strips start at $10 a piece, and a 2" wide, 42" long belt blank is $16. Assuming you've got a knife to cut things with, you won't need to buy that. Rivets can be purchased in a set with a tool for $10.00 Buckles, you could probably use the existing ones. Oh, and you'll need a hole punch, also $10 each. For buckles I use a large oblong punch, those start at $20 each. That's not counting any finish treatment or anything like that. You could easily spend another $10 on oil and waterproofing. At a minimum, if you did this yourself, you're looking at $40 or $50. The only other cheaper way would be to find some heavy duty leather somewhere cheap; I've had some luck looking at Salvation Army / Savers and buying old clothes and things there. I'll be the first to admit that this hobby can get expensive, fast. I think every time I cross the Tandy threshold, I spend at least $100. The good thing about tools is you only have to buy them once, but the leather itself isn't cheap.
|
|
#
¿
Mar 28, 2012 14:41
|
|
|
Iskariot posted:Question for you lot that know "stuff": If I set out to create what I write earlier, belts, armbands and stuff like that; I expect to use regular untreated leather that I'll tan myself later. Will it be flexible enough for something like a belt and not crack over time? It worked for the knife holsters I made ages ago, but "ages ago". I remember close to nothing of the coloring process. I have never tried tanning my own. Well, I did once, and it was such an abysmal disgusting stinking failure that I will never try it again. (Start small, kids. A rabbit hide. Not an entire bull's hide for your first project.) "Untanned" leather is basically raw meat, so I think you may have your terms confused. You may be thinking of veg tanned leather, which has a blonde, raw color to it, but it's been tanned. It stays flexible, and can be oiled if it ever dries out. The dyes are permanent. Once you dye your leather properly, there should be no worry that the color will rub off. I have not had that as a problem.
|
|
#
¿
Mar 29, 2012 14:20
|
|
|
philkop posted:You have some really crazy stuff man. Will be checking out the thread often. I got a round blade on sale a few weeks ago. I'm still getting the hang of things, but it's pretty useful so far. The most recent project I've finished : A mask! This girl wanted a cat mask for some pictures, and who am I to say no? May be  due to skimpy clothing due to skimpy clothing  That's my first attempt at making a mask, and I'm quite happy with the results. I bought a mask at a ren faire last year, and although I paid $70 for it, it's cheap crap in comparison to what I made. I designed a pattern in photoshop, printed it out on paper, and test fitted the paper a few times on me. I soaked the leather an extra long time before carving and tooling, and then shaped it as it dried.
|
|
#
¿
Apr 20, 2012 03:22
|
|
|
Atticus_1354 posted:I think I found my summer hobby. First thing is that I have a small patch knife that needs a sheath and a larger knife that could use a new sheath. What thickness of leather would I want to do this with? Anything above 5 ounces would work. I tend to buy 8 to 12 ounce stuff most of the time. Atticus_1354 posted:Also, is there a difference between working cow leather and deer leather or something like alligator hide? The only difference is going to be in the thickness and the way it's tanned. Veg tan, you can carve and tool. Chrome tan you can't. I imagine most alligator and snake will be chrome tanned, but I haven't looked at exotic leathers much. Atticus_1354 posted:Have you ever worked with hides that still have the hair on? I have an idea in my head for fancy matching sheathes for one of my knives and my tomahawk. I have done a little work with rabbit hide that still had the hair. It's tedious and annoying work; the hair gets EVERYWHERE, and it makes it harder to see and to sew. My thread kept snagging the hair and pulling it through the stitching, making it look very messy. Atticus_1354 posted:This is the small knife. I figure if I mess it up then I am not out as much leather and work as for a larger knife. I would take a look through the scrap bin at Tandy for the leather, but you'll end up spending more on tools then on leather to make a sheath for it.
|
|
#
¿
Apr 20, 2012 23:22
|
|
|
Atticus_1354 posted:One more question. How do I get the sheath to form fit to the knife handle like in this picture? Get it wet, and put the knife in the sheath while the leather is still wet. If you really want to get fancy, press the leather against the knife handle, or tap it with a hammer.
|
|
#
¿
Apr 21, 2012 00:28
|
|

|
I apologize in advance that all three of my answers seem to be "I dunno, it depends." Lief posted:What's the general cost of a pro repair? What should my expectations be? I'm open to just saying "gently caress it" and leaving the couch as-is. You're probably better off just saying gently caress it. I have a really nice reclining leather couch, and the cushions are starting to go. I called around, it would cost more than the couch was, brand new, to fix the cushions, because there's no easy way to remove the leather. You MIGHT be able to find someone who can replace just the one section that's damaged, but I would imagine you're looking at, at a minimum, $100 to $200. If the leather repair kits are less than that, they might be worth a shot. I've never used one, so I can't say one way or the outher. Ambrose Burnside posted:1) Can I make cuir bouilli scales out of old belts? Are they veg tan? Probably not. I've never tried boiling other types of leather, so I don't know. Try boiling a piece, and if it hardens up after it dries, then you're good to go! I've made cuir bouilli out of veg tan and it works great, you only have to boil the leather for a few seconds, though. Maybe 30 seconds at the most. I don't know how chrome tan (which is what most commercially bought belts are made of) reacts to being boiled. Ambrose Burnside posted:2) I've been wanting to make an armoured -something- out of beer caps that have been flattened and domed slightly roundish for strength. I was thinking of riveting them all overlapping-like to a leather backing. What would I need to rivet metal scales to leather? I'd only be doing a vest or something else very simple, but would it be worth buying the raw leather and making a cuirass-esque thing from it or just mangling an old leather jacket? The same rivets I use from Tandy would work fine. I'd get two punches, though; a metal one for the metal so you're not messing up the leather punch. I'd look for a cheap leather vest, like what bikers wear, and start with that. It wouldn't be worth trying to build your own cuirass; the hide and tools alone would be enough that you could buy a pre made piece of armor from a commercial site. Plus, fabricating things from scratch has a lot of trial and error. Anything more complicated than the simplest arm bracer is going to take a few tries to get right. If you think you'll be getting into this as a hobby, I'd say make things from scratch, because all the tools you'll end up buying, you'll use for other things. If not, then get a used vest or jacket from Goodwill, two punches, a hammer, and some good sharp fabric shears. Sapphaholic posted:I figure this is the best place to ask: Is it all leather? If so, dunking it in water then putting it on your head should work without damaging it. Even if it's made of leather that won't wet mould easily (Chrome Tan instead of Veg Tan), you won't hurt anything. However, if there are fabrics or paint on the hat, those might get damaged. Is there a tag or indication of who made the hat? Most Ren Faire stuff is hand made by individuals who love talking about their craft; could you look them up and ask what it's made out of? If it is made by a leather craftsman, they'll be able to give you the best advice.
|
|
#
¿
May 4, 2012 03:57
|
|
|
Sapphaholic posted:It is all leather, no paint or anything. I'll give this a shot, thank you! Just dunk it, for a second or two, then dump all the water out of the bowl. Jam it onto your head, and try not to mess with the actual corners; the goal here is to just mould the bowl / hatband to your skull, so it fits just right. You don't want the hat soaked or drenched, as it will lose all it's shape. Once you've had the hat on for a few minutes and it feels like it fits, take it off, set it somewhere level and safe, and let it dry for at least two days.
|
|
#
¿
May 4, 2012 04:54
|
|
|
Congrats on getting into the hobby! I don't think I did a single project out of the basic kit, I just used it to experiment. So don't feel bad about that. A few pieces of advice, in no particular order : Practice a LOT with the swivel knife, and learn to press hard. I'd say you should try actually cutting through a piece of leather with it, just so you can see how much pressure it takes. You don't use the swivel knife to make a shallow scratch; you need a deep, v-shaped gouge. If you're going to be dyeing, invest in a few things. Latex or Vinyl exam gloves, first and foremost, but there are little applicators sold by tandy that are worth their weight in gold. The little metal ones with poofs of wool at the end are awesome, and they also sell small roundshaped ones that are good for polishing, too. Figure out which stamping tools you use the most, and buy better ones. The aftermarket ones Tandy sells are good, but you can find great ones from other leather retailers. Prices vary, but if it's a tool you use all the time, it's worth spending $35 or so. Sign up for Tandy's mailing list, if not their higher level accounts. I get coupons in the mail all the time, and a lot of them are really worth it. Fiebings Saddle Soap is awesome. Finally,experiment with how wet you get the leather before carving it (this is called "casing.") The starter set tells you to wet it with a sponge. That's one way, but you almost can't get it too wet. For a belt, I might soak it in the sink overnight, then in the morning move the wet belt to a ziplock bag which I seal, then that night, I take it out of the bag and let it dry for an hour or two. Then I start carving. Feel free to try different methods, times, etc.
|
|
#
¿
Jul 8, 2012 16:46
|
|
|
Martytoof posted:As someone with only an outsider understanding of leatherworking, I'm curious how someone would stitch something like this: If you really want step by step, detailed instructions, buy this book : http://www.amazon.com/Art-Hand-Sewing-Leather/dp/1892214911/ref=sr_1_1?s=books&ie=UTF8&qid=1341939875&sr=1-1&keywords=leather+sewing For $13.00, it's probably cheaper than any other leather tool. For now, though : Cases like that are sewn after a rough assembly. The edges come together with a 45 degree bevel on the inside, so they fit flush. Like this : |//_ instead of like this : |_|____ Does that make sense? Then, the edges are glued, rubber cement is the favorite choice. Once they are held together, you sew through them at an angle, so each stitch grabs both pieces. You push the awl through at an angle, so it pierces both sides, then sew. Depending on the piece, some people use curved needles and curved awls. It's not super complicated, just time consuming. The finished product makes it worth it, obviously. I haven't done any new big projects. I've made a few belts, but that's not anything worth posting. I spend a lot of time outdoors in the summer; most of my indoor hobbies get picked up again as it gets colder and the days get shorter. Edit : After a closer look, it appears that for that case, they did have square edges and overlap, but still used the 45 degree sewing method. I imagine it would be very tricky to get a bevel around all those curves. Pagan fucked around with this message at 18:16 on Jul 10, 2012 |
|
#
¿
Jul 10, 2012 18:09
|
|
|
ndmain1977 posted:I'm glad I bought a bunch of scrap leather for practice. I made a little video to help you out : https://www.youtube.com/watch?v=qrZ7Wc4D3wY I realize I'm covering the knife with my hand in some of the strokes, but this video should help. What craft-aid are you using? Some are a lot tougher than others.
|
|
#
¿
Jul 14, 2012 23:06
|
|
|
ndmain1977 posted:By the way. Nice dog. Love the name you picked for him also. I'm guessing you're a Beowulf fan. Thanks. One other thing I forgot : Your swivel knife (and any other tools which have an edge) should be kept RAZOR sharp. Crazy sharp. As in, strop them several times during use. Your swivel knife should move through the leather smoothly, without any resistance. Just glide. Practice sharpening and stropping, and see if that makes a difference.
|
|
#
¿
Jul 15, 2012 14:22
|
|
|
ndmain1977 posted:Quick question for you Pagan. I have a strop from a failed experiment in using a straight razor to shave... and I know you push the blade forward. What is the "Jewelers Rouge" stuff for. It looks like a stick of chalk, but is harder. I'm not really sure how to use it. Do you just rub it over the leather on your strop and then sharpen? Yep. Just rub the rouge on the strop, then strop. If you don't have leather to strop (which you SHOULD if this is your hobby) you can also strop on heavy paper like cardstock. I've used a straight razor before. Tricky, but sometimes it's worth it. However, when you strop, you actually pull backwards across the strop... https://www.youtube.com/watch?v=une4Zp75gWU The 1 minute mark is where he shows the actual stropping; that's a decent video. ndmain1977 posted:Finished the tooling on the wallet project tonight. I'm getting better at it. Also getting better at putting the pattern in with the swivel knife. Your tutorial helped a lot. You've figured it out, but it bears repeating. Ideally, you soak the leather, then let it dry until it appears on the surface that it's dry, back to it's original color, but it feels cool or even cold to the touch. It takes a while to get to that point, so it's quite easy to rush it.
|
|
#
¿
Jul 18, 2012 03:48
|
|
|
Rime posted:For someone who came across this thread and thought "Wow, this looks really kind of nifty, I might enjoy this as a hobby and could make a little scratch with some practice!" would it be worth picking up the starter kit from Tandy? I see it's on huge discount right now ($50 shipped compared to over $130 normally). That's how I started. I think it's a worthwhile purchase, just be aware that if you do end up enjoying it as a hobby, you're going to be investing a lot more. But to start with, it's a great kit.
|
|
#
¿
Jul 18, 2012 19:43
|
|
|
Martytoof posted:How well does DIY-dyed and sealed leather hold up against moisture like sweat? I'm converting a brown camera neck strap into a (hopefully) black wrist strap and I'd like to dye it black to match my camera's finish. The rough side of the leather will be in contact with my skin for hours on end in what I imagine will be all manner of weather. I'd like to not have to worry about taking the strap off and finding my wrist dyed black. A permanent leather dye is exactly that, permanent. Dye the strap, then rinse it thoroughly and let it dry, and you'll be all set. If you were starting from scratch, though, I'd recommend a garment quality leather, simply because they are softer. That brings up another caveat : Only VEG TAN leather can by dyed! The strap you're thinking of using might be tanned via different methods, and the dye won't hold at all.
|
|
#
¿
Jul 22, 2012 15:24
|
|
|
Amykinz posted:I have a question for you guys: You're looking for the right weight. I think you're stuck using veg tan for heavier weights, but I say that only because I've never seen heavier weight chrome tan for sale. It exists (it's what my motorcycle jacket is made out of) but I don't know where to get it. So, 8 to 10 oz is where I'd recommend you look. 12 to 14 oz is what you'd make armor out of; it's incredibly thick and sturdy. Also, once you make the corset, you can do a little boiling. You'll have to be careful, since you can shrink your leather by overdoing it, but I've made some LARP style armor pieces this way. Once it dries, it's almost as solid as wood or plastic. Even makes a hollow **thunk** when you tap it. You might also try just laminating two pieces of softer leather over proper boning. Just like a fabric corset; leave spaces in between the pieces and slide the boning in. In fact, the biggest drawback you'll find to veg tan is that your sewing machine won't even scratch it, so you're looking at doing all your sewing by hand. I guess you could just cut out pieces and use eyelets to connect them, but sewing heavy leather by hand is quite a task. I know it's a drive, but you'd learn a LOT by swinging by your leather shop. If you can't, then maybe order some small pieces? I bet if you called them and told them what you're looking for, they'd be happy to mail you a small sampler pack with everything labeled.
|
|
#
¿
Aug 17, 2012 00:26
|
|
|
Amykinz posted:I'm not worried about the sewing by hand. My last bodice I hand-sewed all the eyelets. For leather, where I could get the structure from the material itself, I would rather not deal with the issues of trying to put boning in. We may be in the area next weekend, so if they are open we'll have to swing by. Just be aware that you need special stuff to sew leather. It's both technically challenging and physically difficult; nothing at all like sewing fabric.
|
|
#
¿
Aug 17, 2012 00:39
|
|
|
angrytech posted:So once I burn through the starter kit, how would I actually go about ordering more leather? I see that the Tandy website has an entire "Leather" section, but it looks like they're selling whole cows in there, and I'd only be looking for something a few square feet. You can buy an entire hide, but there are smaller pieces. If you just need a few square feet, you're looking for either a single or double shoulder. angrytech posted:Also, from reading Pagan's excellent intro, it looks like at a bare minimum I'd need a fabric scissors, swivel knife, gouger, pricking wheel, awl, needles, and thread; am I missing anything important? Well, what are you trying to do... just sew, no tooling / carving? If you're just looking to sew, then you've got the list, and you can skip the swivel knife. The swivel knife is used when carving or tooling, but you'd need to combine it with stamping tools. also, for sewing, you'll need some sort of sewing palm. It takes so much force to push a needle through the leather (even after using an awl to punch a hole) that it'll tear your skin. You can buy a palm, but I made my own out of some scraps and some spare buckles.
|
|
#
¿
Aug 21, 2012 05:41
|
|
|
angrytech posted:Carving/tooling is the process of making decorative marks on the leather right? I'm not really interested in that immediately. I just want to make things. Correct, and since that is the case, you won't need a swivel knife. For starters, you can cut with an X-acto knife or a utility knife. But, once you're ready to spend some money, a "round" knife is expensive but really, really useful. It allows you to cut curves, which is almost impossible with a knife that you pull towards you.
|
|
#
¿
Aug 21, 2012 14:47
|
|
|
azzenco posted:I bought a starter kit from Tandy last week. I want to make a belt and hell if I'm going to spend 95 on a belt from Tanner Goods I might as well spend it on a kit and DIY it even if it won't be as nice. I can live with that. Any belt making tips or should I just follow the kit directions? I hate to assume it's easy enough but well...it's just a belt. Belts are pretty easy; I've found that the directions in the kits are pretty thorough. If there's anything in particular you're worried about, feel free to ask here.
|
|
#
¿
Sep 27, 2012 03:29
|
|
|
Prathm posted:Is leather generally safe to wear against your skin? For the most part, you've got nothing to worry about. I'm sure there are leathers out there that are bad for you, but most of them are fine.
|
|
#
¿
Sep 30, 2012 00:15
|
|
|
leg bones posted:I've been testing out leatherworking for a little while now, and I want to move up to something more..useful. I want to make a bag like what Spy Blimp puts out , but i have no idea what sort of hardware i need to complete this mission. Start with these books; Volumes 1 and 2 are great, Volume 3 becomes slightly less useful, but I'm glad I have it. You're going to need sewing stuff (needles, thread, hole punchers, etc), hardware for buckles and snaps, and probably some sort of lining material. If you want rigidity to your case, you'll probably need some material that goes between the leather and the lining. I don't know what you'd pick for that, although it's possible that really thick leather would obviate the need for other stuff.
|
|
#
¿
Dec 6, 2012 17:22
|
|
|
Glad to see more people posting! I figure I'll add my 2 cents. first, for thread : This is by far the best choice. Linen Thread. The Barbour's stuff is good, and a single 1 lb spool will last you forever. Neatsfoot oil does a bunch of things; it helps leather stay soft and supple, it preserves it, and it also gives you a more even dye if applied before you dye. That woodgrain look is nice, but if you wanted the opposite; a solid, even coat, applying a little bit of neatsfoot beforehand the way to go. A little goes a long way, and it IS possible to over-oil leather, so start off slow. Daubers have some use, but for dyeing big sections, the round things are the best by far.
|
|
#
¿
Dec 30, 2012 07:41
|
|
|
Linear Ouroboros posted:Oh yay! A leather working thread! Not at all, and feel free to contribute. I consider myself to be a complete newbie to all this, and I'm always trying to learn more.
|
|
#
¿
Dec 31, 2012 18:18
|
|
|
Linear Ouroboros posted:The major problem you run into with leatherworking is that much of it is geared towards the same style. If you're not interested in Western carving, holsters, and saddles, you can run into a brick wall for information. It makes things difficult, but not impossible. I can't help you with website design, but I agree completely about the Western thing. Tons of great resources for that, but I want to make leather armor, something fantasy styled, and there's nothing.
|
|
#
¿
Dec 31, 2012 21:30
|
|
|
I use these... http://www.xacto.com/products/cutting-solutions/tools-accessories/tools-accessories/Self-Healing-Mats.aspx Works pretty good, although you can punch through them with too much enthusiasm.
|
|
#
¿
Mar 1, 2013 01:22
|
|
|
My best money saving tip : Go to a landscaper for your marble stone. What Tandy charges over $40 for, you can get for a few bucks. I got a huge marble slap, polished on one side. It's bigger and thicker than what Tandy sells. I never thought of poly cutting boards, that is a drat good idea.
|
|
#
¿
Mar 1, 2013 15:11
|
|
|
handbandit posted:I'd really like to see more detail on this one. Particularly the edges and sides. It looks like you did some extra finishing work. I'm really thinking about getting back into leatherworking, and would really like to scale something like that up into a satchel. Most of my edge finishing is pretty simple. I have a little slicker wheel (google it, you'll see what I'm talking about) and a few other things. I just rub those tools on the edge to round them off. I normally dye the edges black first, then slick them into a round profile. Sometimes I use other things, like the rounded handles of other tools, but that's pretty much it. Add in a little beeswax or gum arabic, and you've got a really finished looking edge. Same with the seams, they're just rubbed down so they kind of mush together.
|
|
#
¿
Jun 25, 2013 00:37
|
|
|
Stitching is hard work, but it only takes a few tools to help you out a lot. I have tried using an awl, and all I've found is that it's just an excellent way to give yourself deep, copiously bleeding finger wounds. So here's my technique. First, run a groove where you want the stitching to go. Second, using a stitching wheel to mark where you want the holes. I use a dremel with a very fine drill bit to drill the holes. The old leather grognards consider this to be heresy, but I can only stab my fingers so many times. I've looked and looked for good thread, and this is the best I've found : BARBOURS LINEN: 5 CORD, LEFT TWIST, NATURAL Yes, it's expensive. But one spool is all you'll ever need. It comes unwaxed, but waxing it is easy to do, plus you can dye the thread whatever color you want. Then I use two needles to stitch; you start stitching with the middle of the thread at one end of the project and then you work your way to the other, passing the needles back and forth over each other. A stitching palm is very useful; you can make one yourself or you can by one, but the force it takes to push the needle through the leather is such that you will need it. I also keep a pair of pliers handy because sometimes you need the help. The only part I haven't figured out is how to treat the ends of the thread; the part that goes through the eye of the needle. I've seen a few techniques but I can't get any of them to work; any tips or discussion on that part is welcome. I've tried tapering it, I've tried knots, nothing works reliably and I always end up pulling the thread out of the needle and having to re-thread it. End your stitching with a few back-stitches and you won't need any knots. I then run the stitching marker wheel over the stitches and it presses them all down into the groove and it looks very sharp. With all that said, I find stitching to be the hardest and most unpleasant part of any project. If I was doing this on any sort of scale, a big professional sewing machine (the $1,600 clutch driven saddlemaking kind, not a Singer) would be one of my first purchases. However, using the dremel makes life a lot easier; not only do you avoid the risk of finger injuries, you also don't need a stitching pony; your project can just sit in your lap while you watch TV and stitch.
|
|
#
¿
Jul 28, 2013 17:32
|
|
|
dodatron posted:Question - when you guys are making patterns how much space will you leave around an object (say, a computer) to accommodate stitching and the bending required to get up and around the object? I eyeballed it with my macbook and it fits, but is SUPER tight. Is there any convention for this? Start with paper. Anything from posterboard to shopping bags, maybe with a tiny bit of extra room. You don't want anything too loose, either. Also, with veg tan, if you get the leather wet and keep it wet for a while, it becomes almost like clay. Very malleable. So even if that macbook is a tight fit, if you wrap it in a plastic bag and put it in the leather case after you've soaked the case for a day, then let everything dry, it'll fit like a glove.
|
|
#
¿
Jul 30, 2013 00:58
|
|
|
I'd like to see how you guys have your workspace set up. I just moved into a new house and I can dedicate an entire room to this sort of hobby. I just finished building a table and setting things up. I need more shelves, but otherwise, I think it's generally ready to go. I'm also considering adding more lighting, maybe a bank of fluorescents hanging from the ceiling. You can't have too much lighting.   All my hosting. The table has a 6 foot by 3 foot work surface and is sturdy enough to withstand any hammering. The stone in the third shot is a from a landscape supplier and cost me $8; it's polished on one side so it's perfect for tooling and carving. The sewing area in the back... I suck at sewing, but since I eventually want to do some sort of cosplay, I figure I should learn one day.
|
|
#
¿
Aug 4, 2013 15:45
|
|
|
Baron Fuzzlewhack posted:Leather tools from Tandy are so expensive. Are there decent alternatives for, say, stitching groovers or overstitching wheels, even "homebrew" alternatives? Actually, Tandy's tools are cheap. And unfortunately, you get what you pay for. A good solid beveler from some small manufacturers is $25 for ONE tool. http://www.barrykingtools.com/page5.htm Worth it, though. The thing about your stitching groover and wheel, you only need to buy them once, and they last forever.
|
|
#
¿
Aug 6, 2013 15:14
|
|
|
TopherCStone posted:Can you recommend a bare minimum beginner's setup that doesn't cost a lot? Imagine I just want to start making some basic patterns, no carving and whatnot Well, what kind of basic patterns do you want to make? Tandy has a ton of pre-made kits, where you just start assembling stuff. I'd do at least one of those so you get the hang of it. After that, you'd need a few things. First, a knife or good scissors. If you're just cutting straight lines, a utility knife is a good investment. If you want to cut curves, a round knife is essential, but expensive. Next, you'll need a sewing setup. Needle, thread, groover, stitching wheel. You could skip the awl if you have a dremel and don't mind cheating like I do, but the other stuff is pretty important. You'll also need a hole punch and some rivets, along with a rivet setter. That isn't too expensive. Buckles and dye to finish off the project, and not counting the leather, I bet you could get all of this stuff for between $50 and $100.
|
|
#
¿
Aug 7, 2013 01:18
|
|
|
TopherCStone posted:I'm mostly interested in bags, wallets, and maybe maybe when I'm good trying some loafers or something. A hole punch is separate, and I have them in different sizes. For example, the post on a rivet is really small, so when I'm using rivets, I use a hole punch to match. But if I'm putting other hardware in, I'll use a bigger hole punch. That's not something you can substitute with the dremel. The awl, you can. And when I use a dremel, it makes round holes, so angle doesn't matter. You'll also need a good metal rule and / or T-square. I've found a drywall square to be useful when cutting big pieces; a 12" ruler won't be all that helpful when you're trying to make a messenger bag. However, you can skip a lot of these purchases if you start with some of the Tandy kits. I've built up my collection of tools over the course of a year or two, and I don't think I ever spent more than $50 or $60 on tools at any one time. Also, if you know you're going to be doing a lot, Tandy has a membership club that saves you money. If you know you'll be going back often, it's worth it.
|
|
#
¿
Aug 7, 2013 14:10
|
|
|
Mr. Mailman posted:Closeup of holster Great work all around. The holster looks very good. Your stitching need a little work, but I only say that because everything else looks so good. I'm currently working on an Assassin's Creed 4 setup; I'll post some pictures tomorrow once I've made more progress. Glad to see more people sharing their work!
|
|
#
¿
Aug 18, 2013 00:13
|
|


|
I've been working on this for about a week or so. First, for reference...  Here is the back of the shoulder bandolier and what I'm calling the money belt; the two pouches he has on his back.  I may re-dye one of those pouches; I can't decide if I want a rugged, natty looking finish like it has now, or something more polished and finished. Here is the front of those  A detail of the back of the bandolier.  I'm using a saddle cinch D ring since it's big and bulky. Then, finally, the big main belt.  The character in the game has a different, simpler buckle, but I figured I'd go with something a little more extravagant. I'm working on sculpting the skull shaped buckle that will fit on the shoulder. Everything is pretty adjustable, as I'm sure what fits over a t-shirt will need a little more room when it's put on over a tunic or two. I've found the oval shaped buckles that hold the pistols, but until I get some pistols to fit everything to, I'm not going to try attaching them.  I've also made the simple little belt that goes across the chest in the opposite directions. Next up is going to be the bigger sword belt, although in some pictures, it looks like that is the same belt as the money pouch belt. I've gotten REALLY good at making straps and fitting buckles on this project so far. After that, I'll tackle the forearm bracers. The vest is going to be the hardest part, as that is closer to fashion sewing than traditional leatherwork, and I'm not a tailor by any stretch. All hosting mine.
|
|
#
¿
Aug 18, 2013 22:20
|
|
|
Mr. Mailman posted:Looking great. what kind of leather did you use for the softer pouch, and is it just hand stitched inside out and then flipped? The softer pouch is made out of a 4-6 oz veg tan and stitched in a normal sewing machine, then flipped. My sewing machine can barely handle 4-6 oz, so I just take it carefully. I used that thinner stuff for a lot of this project, in part because I bought a huge hide of it a long time ago, and I have a ton of it left. The only place I've ever found that has a decent selection of anything is Tandy  When I was in there last week, they had their big buckles on sale for $5.00 each, so I picked up 3 or 4 different ones. From looking at pix of Angelica Teach, hers are just over the top big. If you know anyone in the cosplay scene, they might be able to help you sculpt something? That's what I'll be doing for the skull buckle for this costume. When I was in there last week, they had their big buckles on sale for $5.00 each, so I picked up 3 or 4 different ones. From looking at pix of Angelica Teach, hers are just over the top big. If you know anyone in the cosplay scene, they might be able to help you sculpt something? That's what I'll be doing for the skull buckle for this costume.
Pagan fucked around with this message at 14:39 on Aug 19, 2013 |
|
#
¿
Aug 19, 2013 14:30
|
|
|
Baron Fuzzlewhack posted:I'm going to keep making dumb posts in this thread until I get things through my thick skull. Can you post a picture or two of what you're talking about? Is it this : http://www.tandyleatherfactory.com/en-usd/3209-00.aspx ? Sharpening knives is kind of a universal skill; do you know how to sharpen a kitchen knife or a pocketknife?
|
|
#
¿
Aug 23, 2013 20:24
|
|
|
Baron Fuzzlewhack posted:Yes, that's the one. I picked it up from Springfield Leather but it's the same thing. The only real difference I can tell from any of the pictures I've seen is that, with the exception of the scratch awl piece, all the blades were (painted?) black. Well, depending on the blade you picked, you want to sharpen the awl like it was a 4 sided kitchen knife, or a wee little babby sword. The best tip I can give for sharpening.... Use a sharpie on the blade, draw a line just on the cutting edge. Then when you stroke the blade across the stone, you can see exactly where you're sharpening. This video explains it. http://www.youtube.com/watch?v=8kzGvtX-h8g A gentle touch is what's important. You really shouldn't be taking much material off the blade, but I think you realize that at this point. Also, the tip is the most important part.  Yes, having sharp edges is nice, but if the tip is sharp, you're in good shape. So don't worry too much about the sides, just get the tip even and sharp. Yes, having sharp edges is nice, but if the tip is sharp, you're in good shape. So don't worry too much about the sides, just get the tip even and sharp.
|
|
#
¿
Aug 24, 2013 04:11
|
|
|

|
| # ¿ Apr 28, 2024 09:57 |
|
|
I've been watching Spartacus on Starz recently, and one thing that's impressed me is the Roman armor. I feel confident I could make everything except the cuirass. It looks metal, but there was one scene where you saw a guy take it off, and it was flexible. So I'm thinking it's made of leather, too. My question is, how would you do any kind of carving or tooling to replicate the muscles? It looks like most of it has soft edges, not the hard edges you get from normal tooling. Plus, a lot of the impressions are pretty big, several inches across. Any ideas or suggestions? It's not just paint (although I'm sure there's shading in the recesses.)
|
|
#
¿
Sep 10, 2013 21:54
|
|