|
Update time again.... having a really productive time lately. I've been working on the back bedroom every second evening and so far really enjoying it, despite a few setbacks. However, being positive, here's where I am. The room has been completely stripped of all ceiling tiles as the photos above. Under that was a layer of lining paper which also had to come off. Next the walls and there was a vinyl type wallpaper on top of lining paper. On the external walls there was wallpaper and lining paper and then there was polystyrene insulation and more lining paper. So far that is one weeks work. Next up washing the walls and filling all the dents and holes. I think this may have been one of the boys rooms because; A) There are a large number of holes consistent with darts and dartboards. B) There's damage to one of the walls which has been repaired but needs further attention. Edit: Once all had been removed the colours of the Victorian efforts were revealed. The floor was painted Brown. The door surrounds and the double height baseboards in a light pastel green and the coving in a mustardy yellow/ochre. The window surrounds and sills were also light green, charming eh. So onto the pics. Hard to see but this is pretty flat now. 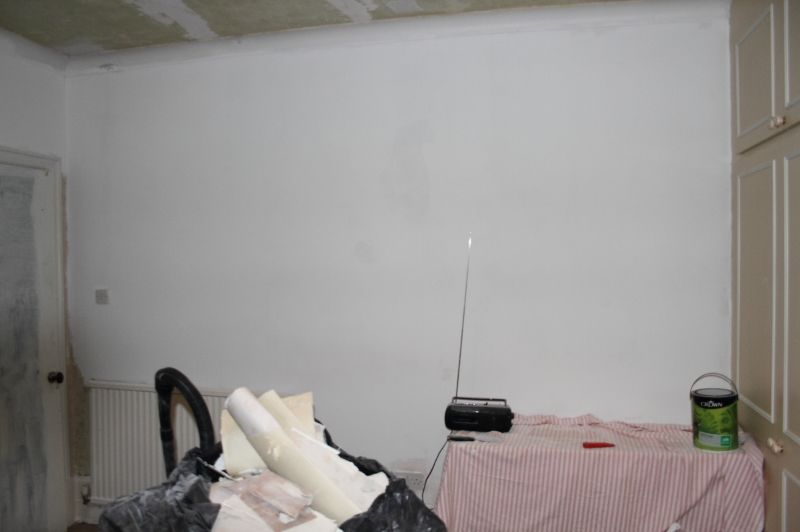 The door also had Wallpaper on it, really weird, but obviously the style at the time (70's) 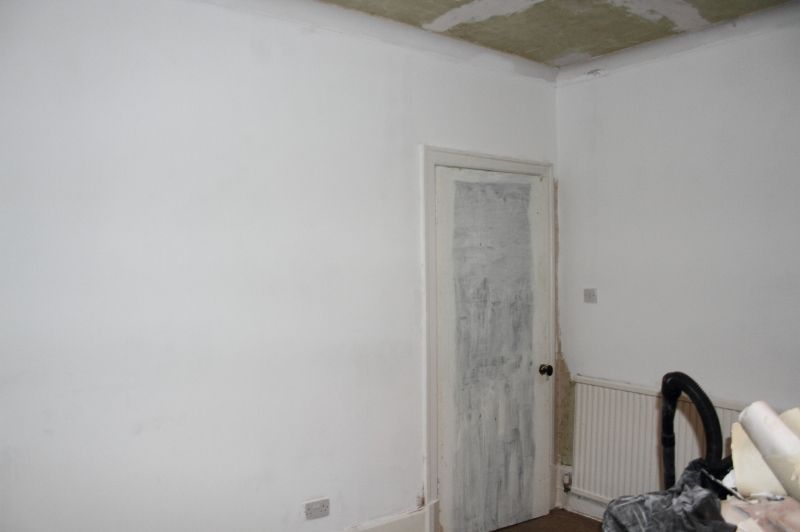 Windows looking more like they should, the panels below also had wallpaper on them, dammit. All this woodwork will be painted satin white this weekend. 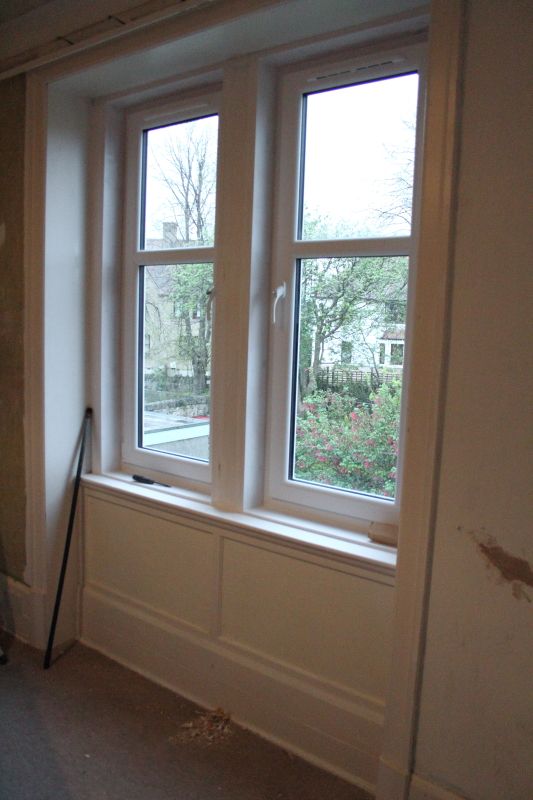 Now then, this happened whilst I was painting, the top layer of old filler gave way and I have chipped away all of the loose material around it. I may need some advice on how to sort this the traditional way but it's not as bad as it looks. 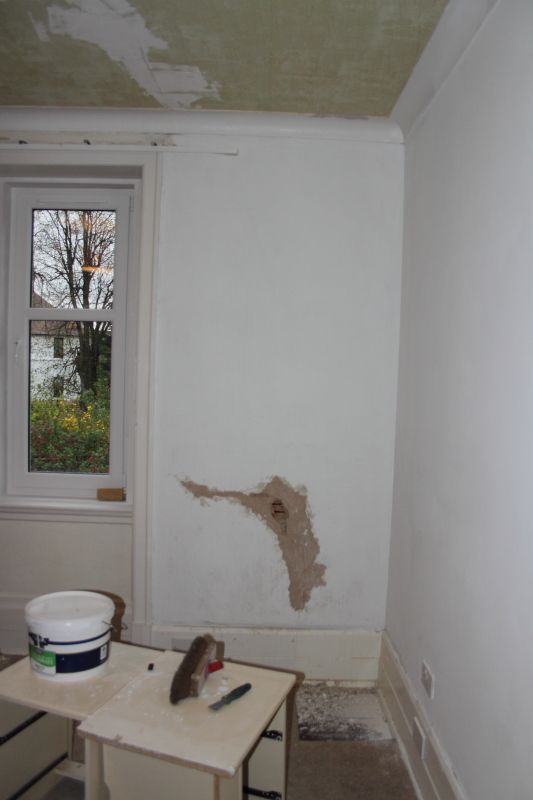 Closer up. I will take back the rough coat back to the lath and fill properly. I think this has been an injury from the inside rather than a structural issue as the lath is fine, no cracks/breaks or sign of leaks etc. Any advice will be welcomed.  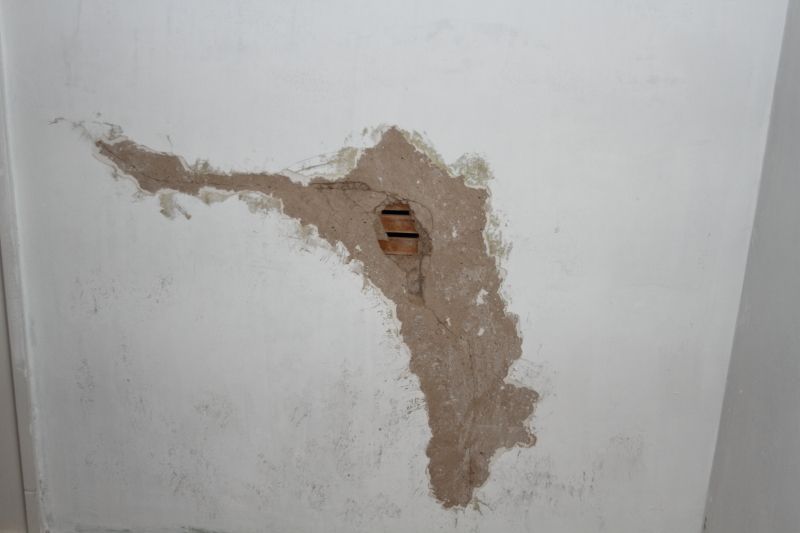 This weekend, More emulsion paint for the morning room. 
Tiglath III fucked around with this message at 20:54 on May 9, 2013 |
|
|
|

|
| # ? May 5, 2024 14:39 |
|
I'm living vicariously through you on this, great work!
|
|
|
|
You could strip back tidily to the studs, screw in some plaster board, fill the edges, and put a skim on top? That's probably what I'd do — less chance of a deep fill sagging, drying unevenly, or cracking — or worse, coming off unexpectedly. But then, I find plastering pretty maddening, especially when my Dad seems to have so little trouble with it.
|
|
|
|
I was thinking of the plasterboard fix but it would have meant creating a bigger hole, finding studs and stripping back the lath. In the end I have removed all of the loose bonding layer added some lattice tape for strength and then did it the old fashioned way, bonding coat then top coat. It's now smooth to the touch and I'll get it painted as soon as I can get back in the room. I say that because, the joist repairs are underway, the ends had suffered badly from rot and woodworm and it was hard to gt a good photo. However here are how the repairs are done.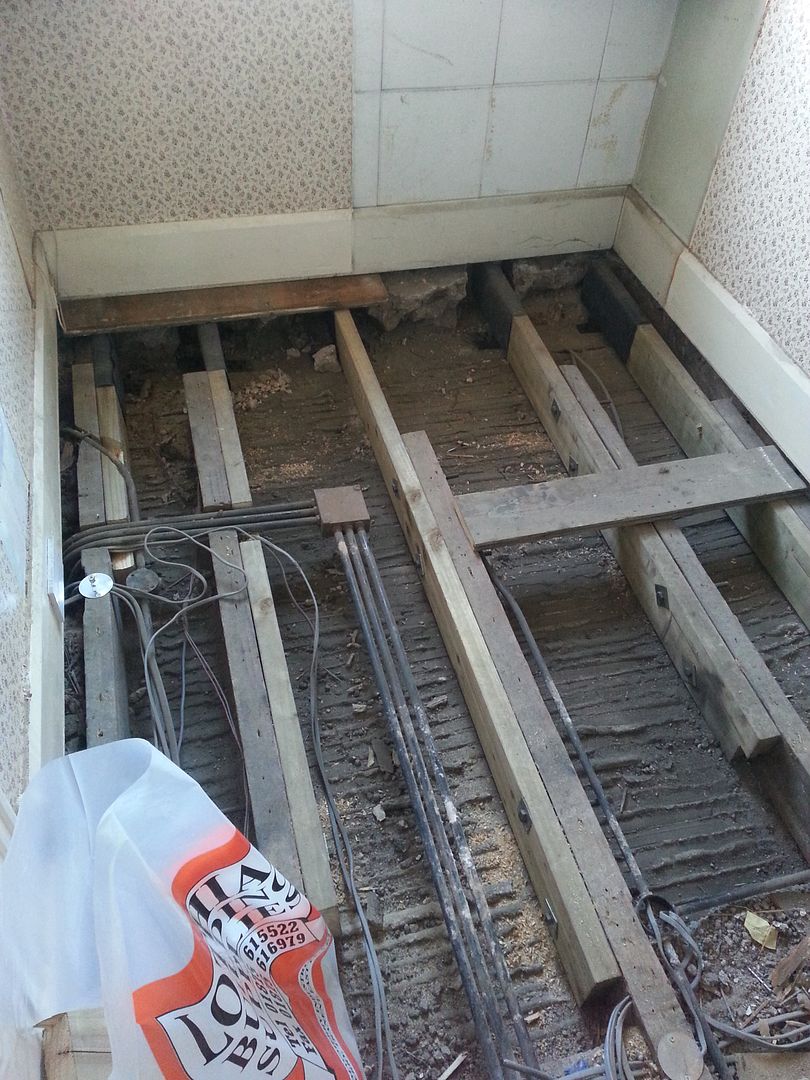 This area is about just under six feet wide, the joists have been cut back to the extent of the rot and new wood bolted and plated in to support the floor. The ends are wrapped in DPC material to prevent moisture soaking into the wood. The is a close up of the way the bolts are spaced, there are two at the front and two at the back. The stuff below is the plaster ceiling below poking through the lath 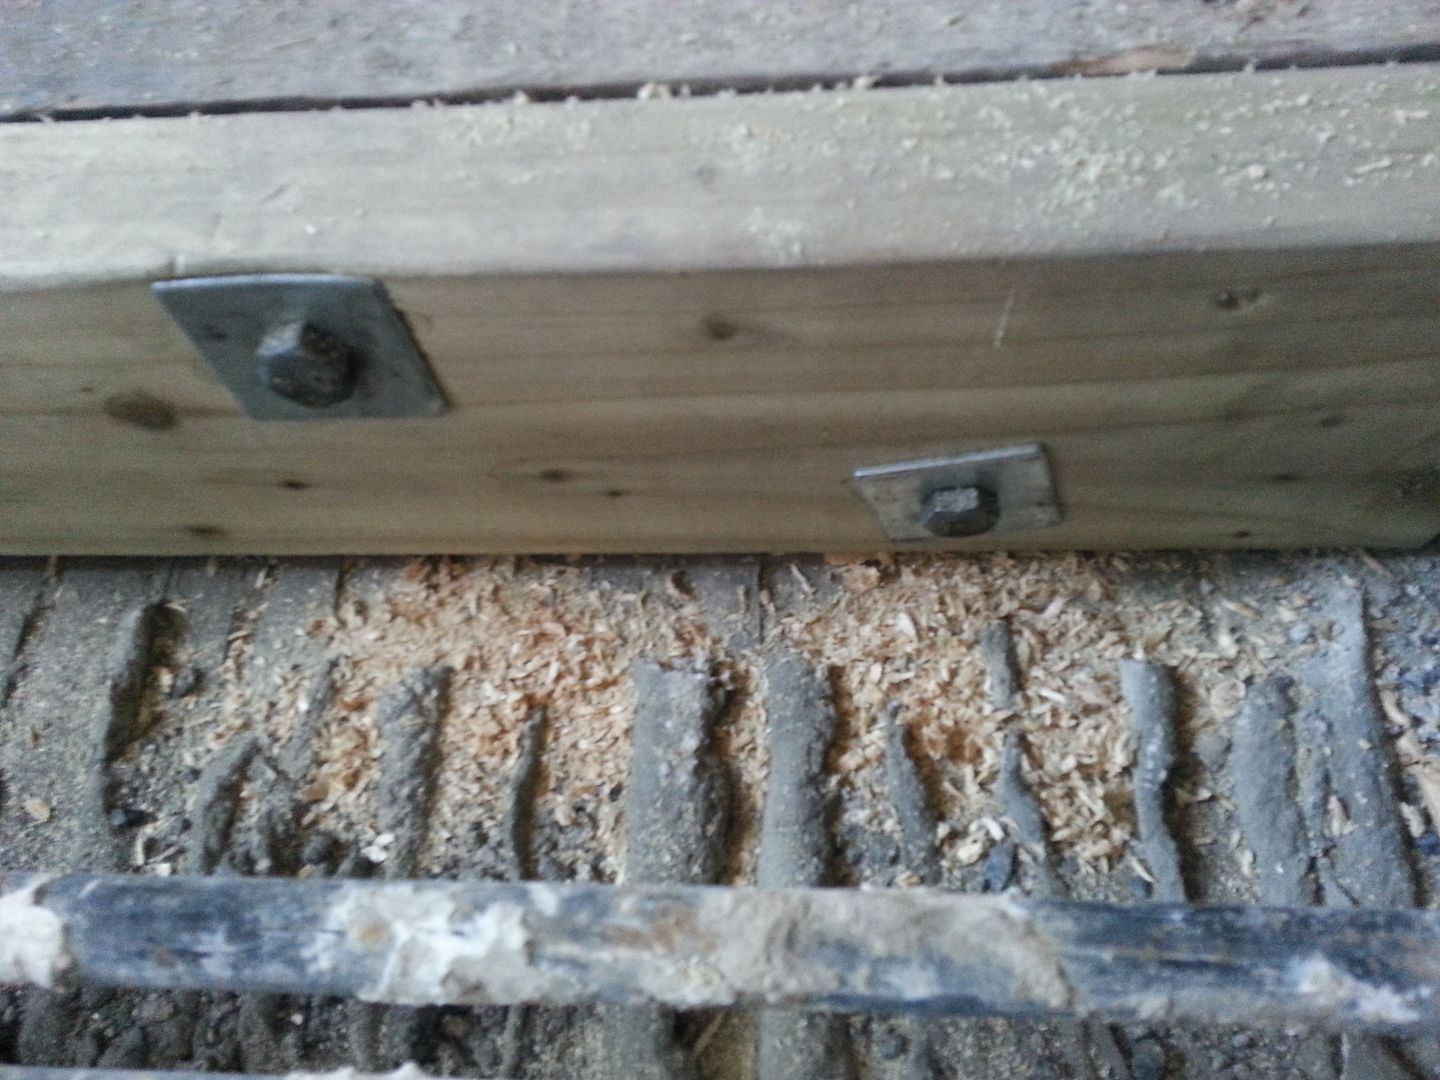
|
|
|
|
I love this old house. Is there a point where the money you'll be pouring into the restoration exceed the property values around the home? Personally I'd love to fix an old place up and we're at that age where I could see us spending our remaining days there. My wife however is of the mind that you don't want to put into a home more than you could get back out of it when it is sold down the line.
|
|
|
|
Fog Tripper posted:I love this old house. Is there a point where the money you'll be pouring into the restoration exceed the property values around the home? Personally I'd love to fix an old place up and we're at that age where I could see us spending our remaining days there. My wife however is of the mind that you don't want to put into a home more than you could get back out of it when it is sold down the line. Depends. If you know you're going to sell in the next 15-20 years, do what needs to be done and whatever necessary upgrades, within reason. If you're going to stay in it for the rest of your life, go hog wild. That being said, you don't need gold leaf wallpaper and white rhino leather-upholstered sofas...
|
|
|
|
Fog Tripper posted:I love this old house. Is there a point where the money you'll be pouring into the restoration exceed the property values around the home? Personally I'd love to fix an old place up and we're at that age where I could see us spending our remaining days there. My wife however is of the mind that you don't want to put into a home more than you could get back out of it when it is sold down the line. This house really needs the essentials doing, these are kitchen, bathroom, heating, wiring, windows. So far we have the wiring and upper floor windows in, the rot problem above was a minor inconvenience but not a huge issue. Have had one rough quote for the heating at around 5k. We bought the house at a huge mark down so there is a long way to go before we reach the value of the property at the time it was marketed without any of the work being done. A conservative assessment of the value after a lot of work is complete was around the 400K mark so there is still a lot of cash in the property. I will put a lot of effort in myself and I have a great new builder friend who is helping big time. Another little update on the joist work, all complete and finished now. One complete joist has been replaced, the rest were as in the photos above. Next job heating and finishing the painting. Cheers
|
|
|
|
Repair to the wall complete and repainted. It looks good too, I'm surprised by how well the repair looks, I imagine most people wouldn't even notice it. I even cleaned the room afterwards.  Only the ceiling to go now. Only the ceiling to go now.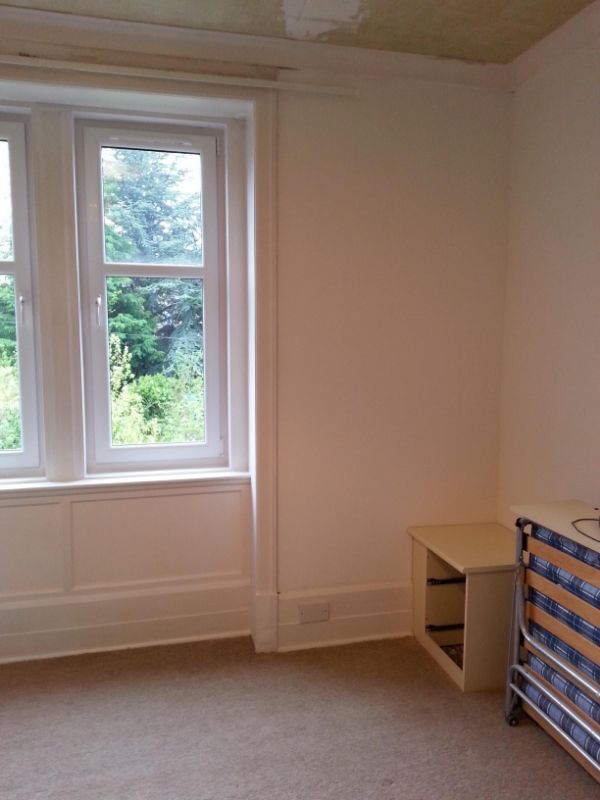 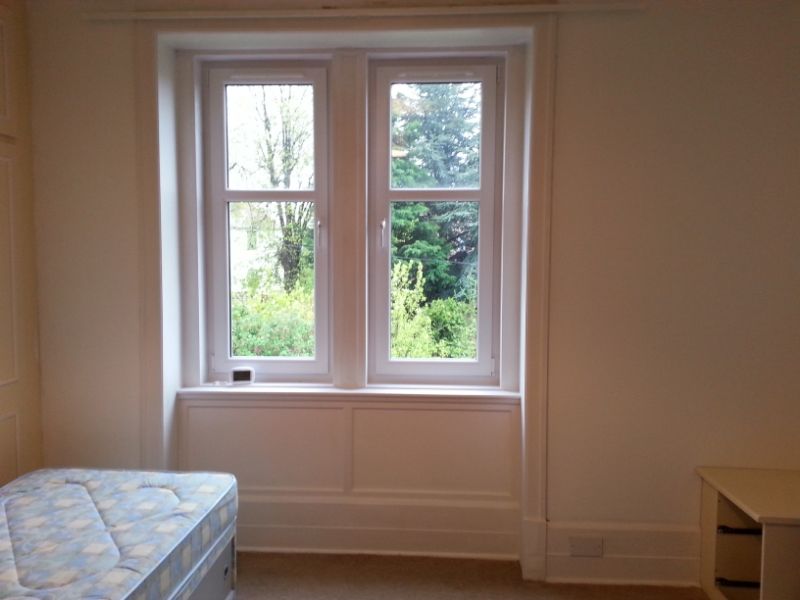
|
|
|
|
Looking really nice there
|
|
|
|
Looking excellent! It's also reminding me of the vast amount of panelling I have to strip round the windows in my flat, too..!
|
|
|
|
Its totally worth doing, the down side is lack of time and then burnout. This weekend I have done lots of fiddly stuff but it's still quite tiring. The comments are making it worthwhile, thanks guys.
|
|
|
|
What size is that bed? It looks smaller than a twin.
|
|
|
|
fork bomb posted:What size is that bed? It looks smaller than a twin. Standard single, I think.
|
|
|
|
Jeherrin posted:Standard single, I think. Don't really get those in the US, which is what may be confusing fork bomb there.
|
|
|
|
There are two beds in the photo one is a fold-away double. the other is the single. The room size is 14'x 12' not large but big enough to be a good sized bedroom.
|
|
|
|
So, here is a first look at the newly revamped bedroom colour. My wife and I went back and forth over a colour and then finally agreed on something almost period. What do you think, it looks quite a bit brighter in the photos but I actually love it. It's a very calming sage green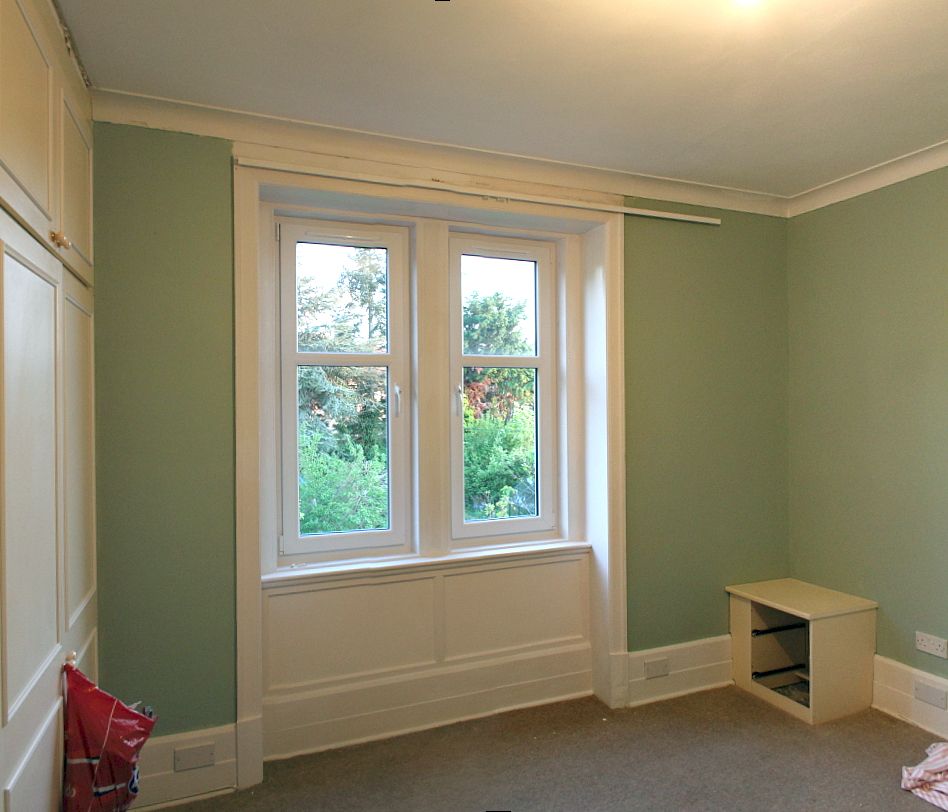
|
|
|
|
Looks drat good man- Great shade of green to contrast the white.
|
|
|
|
The sage color makes for a strikingly handsome room.
|
|
|
|
It's lovely, and a very appropriate colour. I love it.
|
|
|
|
Fog Tripper posted:I love this old house. Is there a point where the money you'll be pouring into the restoration exceed the property values around the home? Personally I'd love to fix an old place up and we're at that age where I could see us spending our remaining days there. My wife however is of the mind that you don't want to put into a home more than you could get back out of it when it is sold down the line. It depends on how much you pay for the house initially. We bought a house for $45k that needs to be redone from top to bottom, but most of the work is cosmetic. Surrounding houses in the neighborhood have sold for $70-$120k, so if we get it functional and looking reasonably good we should expect to get double what we paid, and if we make it look really nice without blowing a bunch of money, we could see more. When you do all the work yourself you save an incredible amount of money. So far we have put in less than $2k, and that is including insulating the attic and basement. That number will rise when we get a new furnace and redo the kitchen and bath, but we're hoping to keep it at or below $5k total. We'll see if that's possible or not. Tiglath, that room looks very nice! You've been doing an amazing job on the house so far. Do yo plan on taking up the carpet eventually? Not to nit-pick, but have you been using painter's tape to protect the edges of the woodwork? Koivunen fucked around with this message at 16:17 on Jun 2, 2013 |
|
|
|
Koivunen posted:Tiglath, that room looks very nice! You've been doing an amazing job on the house so far. Do yo plan on taking up the carpet eventually? Not to nit-pick, but have you been using painter's tape to protect the edges of the woodwork? I must admit to not having carried out the final painting to the woodwork yet, but as the wall is a silk paint I will use a low tack tape to protect the green. The carpet will be coming up, however, a new one will be going down. I'm not a huge fan of wooden floors. cheers
|
|
|
|
Tiglath III posted:I must admit to not having carried out the final painting to the woodwork yet, but as the wall is a silk paint I will use a low tack tape to protect the green. The carpet will be coming up, however, a new one will be going down. I'm not a huge fan of wooden floors. I found that it's prudent to unroll the tape you are going to be using and stick it to a flat surface (like a kitchen floor, or trim you havn't painted yet, then stick it to the wall to protect it. That way you don't have to worry about tearing off some of the paint that you have already done. Sticking it before sticking it causes the tape to be less sticky, but still fine to protect. I was helping a friend paint his place and told him this, and he said it would be fine since it wasn't very sticky tape to begin with. Took the better part of an hour to repair all the paint that it lifted when pulling it off. Keep up the great work, and keep posting pics.
|
|
|
|
Any updates for us? I love this house!
|
|
|
|
Updates will be resuming, its been a hot sticky summer over here and I've not been feeling like doing work. On the plus side I've had the heating system done and I've been filtering the contents down in the house, getting rid of some of the surplus furniture. I've been across the pond on holiday too so that knocked a couple of weeks out. Normal service resumes tomorrow. Cheers.
|
|
|
|
This is fantastic. You're Grade-A insane for taking on such a huge task, but it's great to follow along. Give us more updates
|
|
|
|
Ok here we go. The bulk of the last week has been getting the new heating in. The old system was a jumble of pipes, none of them noted on a plan so who knows what it was doing. It was a conventional boiler that utilises motorised vales to control the flow of water and heating, again one of two was found early when we moved in. We had taken the decision that new heating would be needed so a local chap and his son came out and gave a good estimate for a complete Combi system with storage tank, work started last Monday and was done by Thursday. So remember this room? 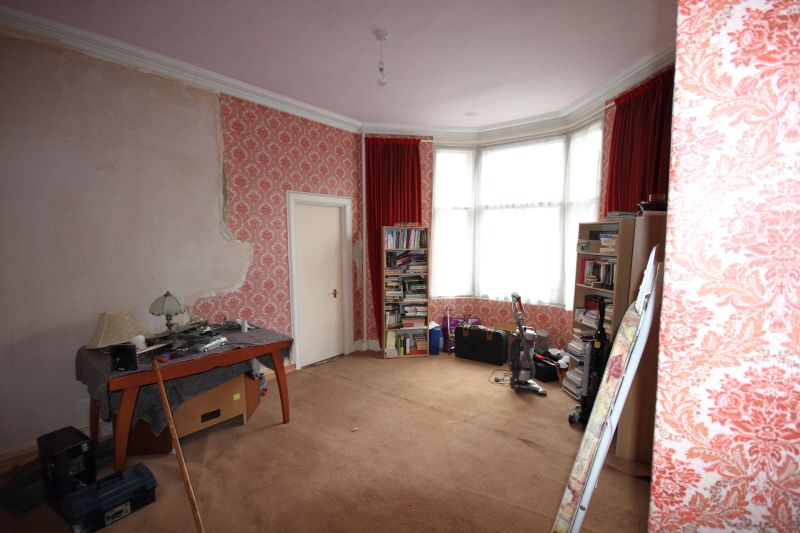 Its been cleared a bit more, it was heavy going, so through the narrow door below (will be changing the width of this one). 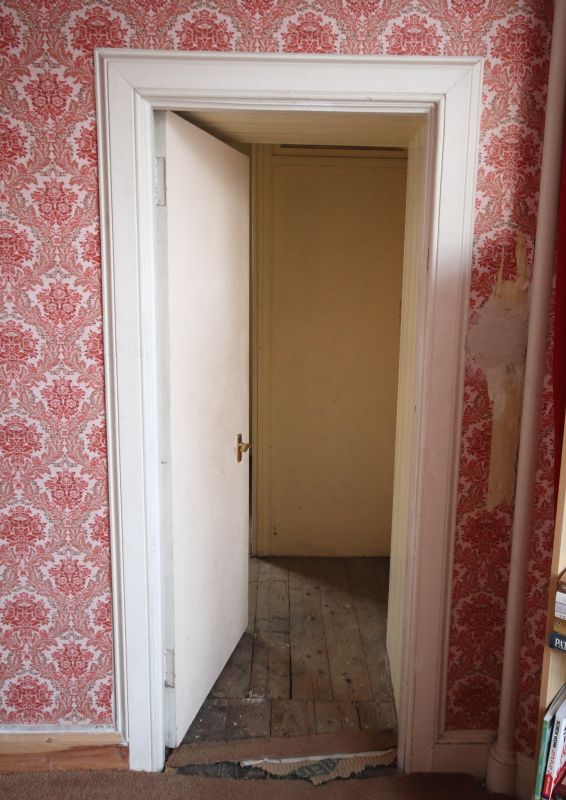 Which leads to a room you've not seen yet. The Surgery. 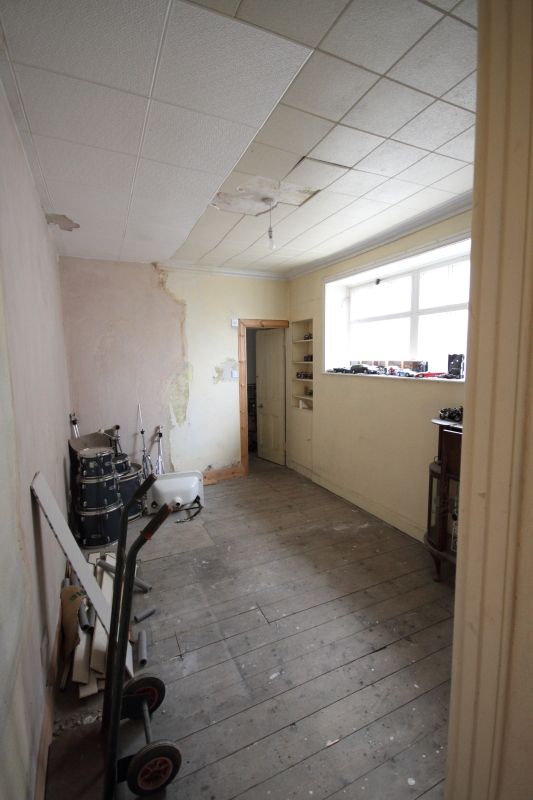 And through the door at the back of the surgery. A small WC room. 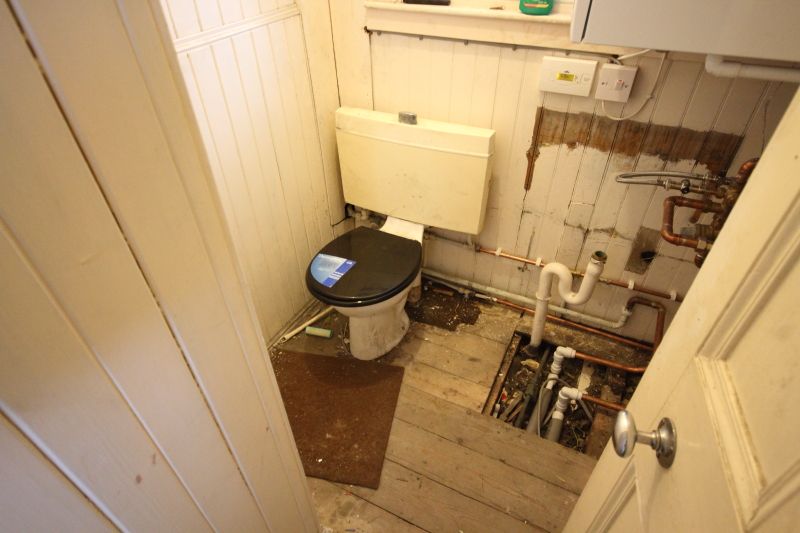 And that closet is now home too this monster.  These make whooshing and gurgling noises,thats all I know about them.  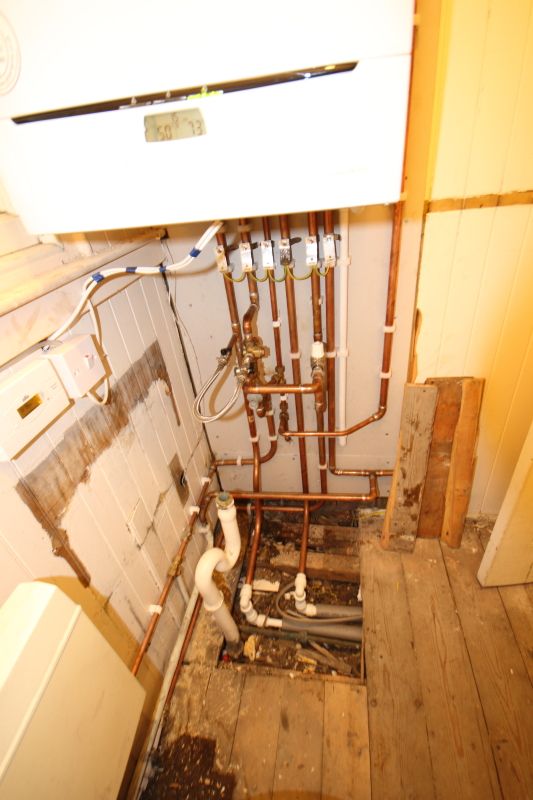 All of that piping and big metal box meant that the big hideous radiators could be removed and these stylish new ones put in place. We did think of getting cast radiators, but I want the modern victorian look, these will do for now. 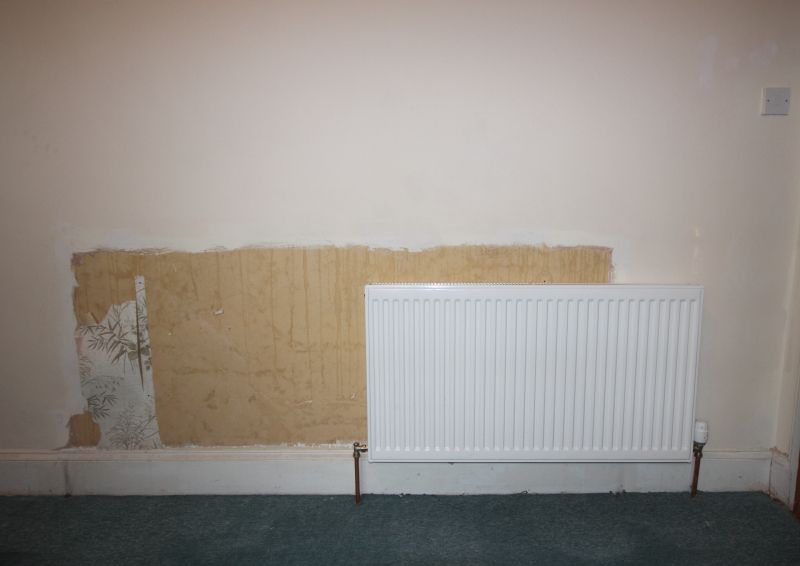 Of course now that all the electrics and watery jobs are done, that means Bathroom and kitchen planning can begin, I'll let the builder come up with ideas, we will say yes or no. Onwards and upwards with the decorating. Ciao for now.
|
|
|
|
Two updates in one day, this one just to show what i'm up against. This small room was a bedroom, it was Gordon Kennedys room. I know it was his because he wrote Gordon was here 1972 on the wall, I've kept the scrap for posterity. There's so much going on in here, check it out. Looking towards the window. 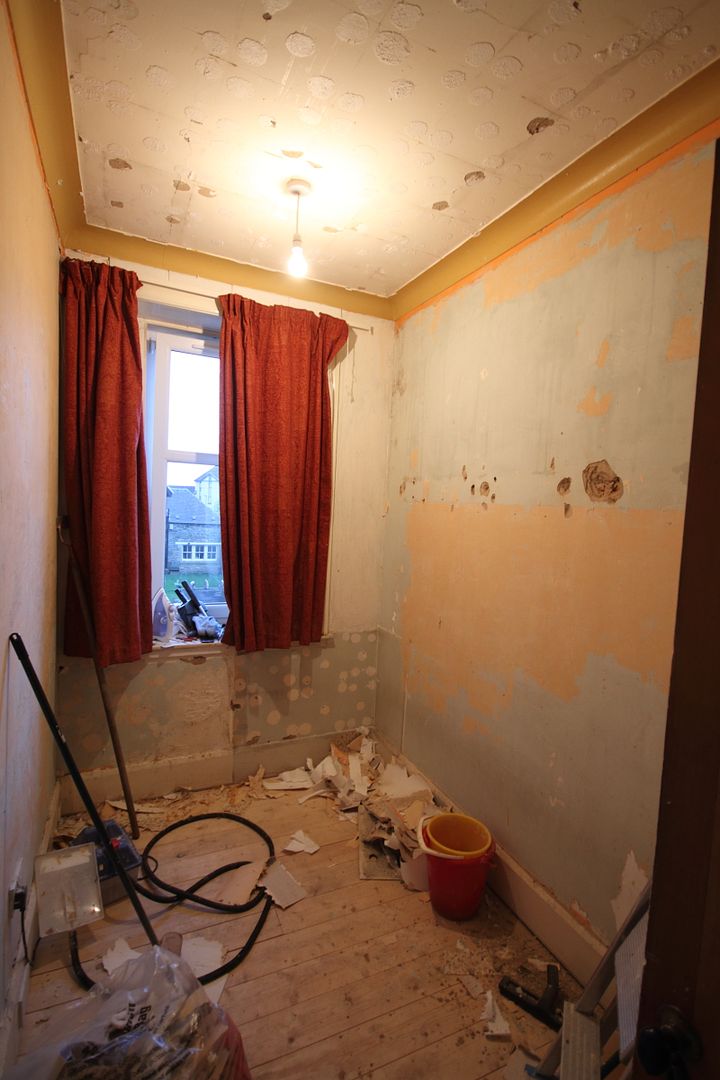 Looking back into the house at the staircase. 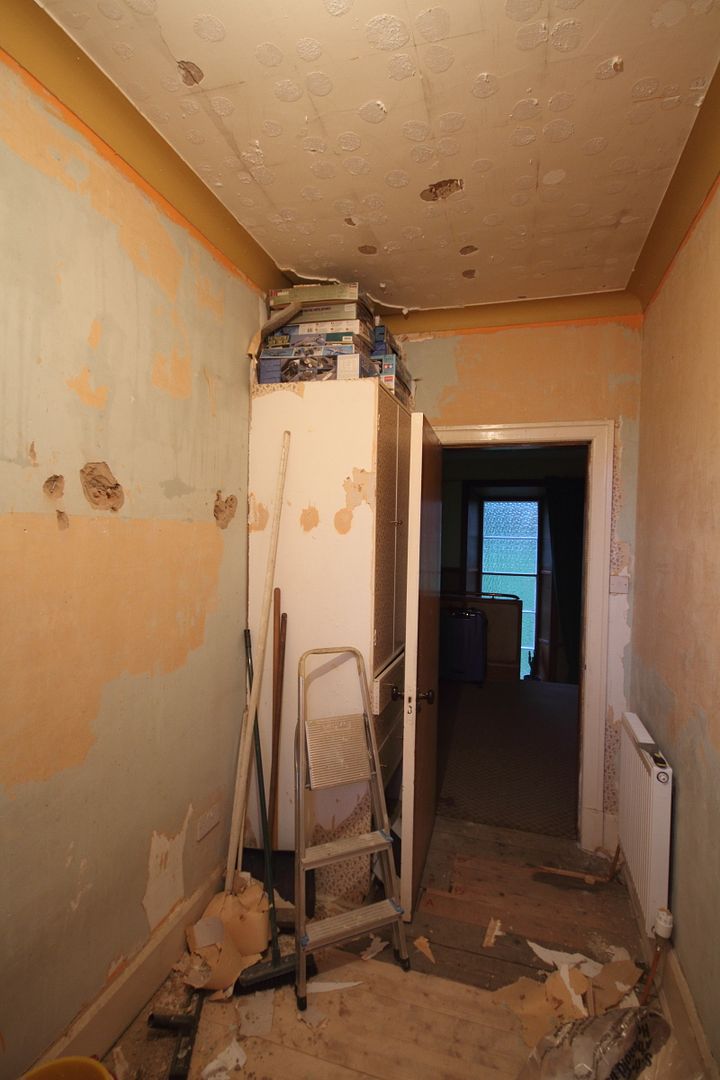 There used to be a shelf on this wall, standard arrangement using angle brackets, but with a 4x0.5" strap to hold the brackets to the wall. trying to gt it off was hard work, this is the resulting damage. 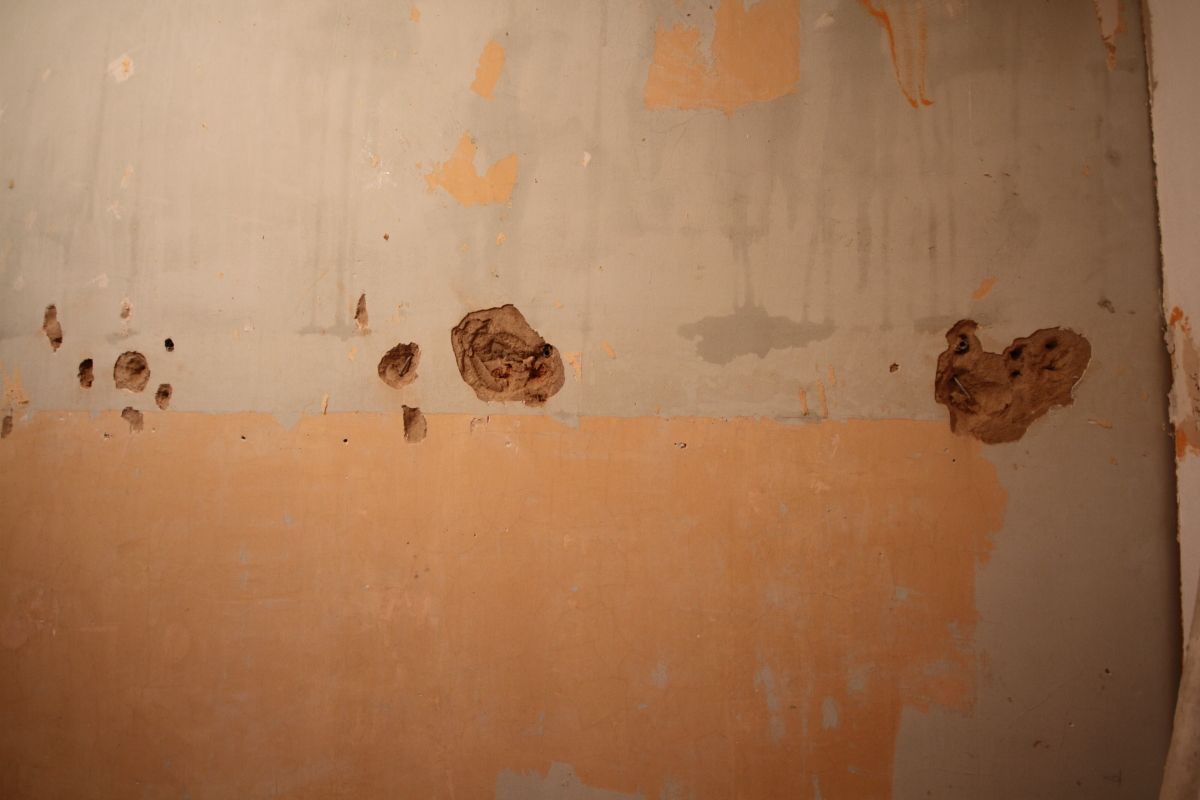 Not bad eh, here's my S3 against the hole. Jeezy peeps more plastering.  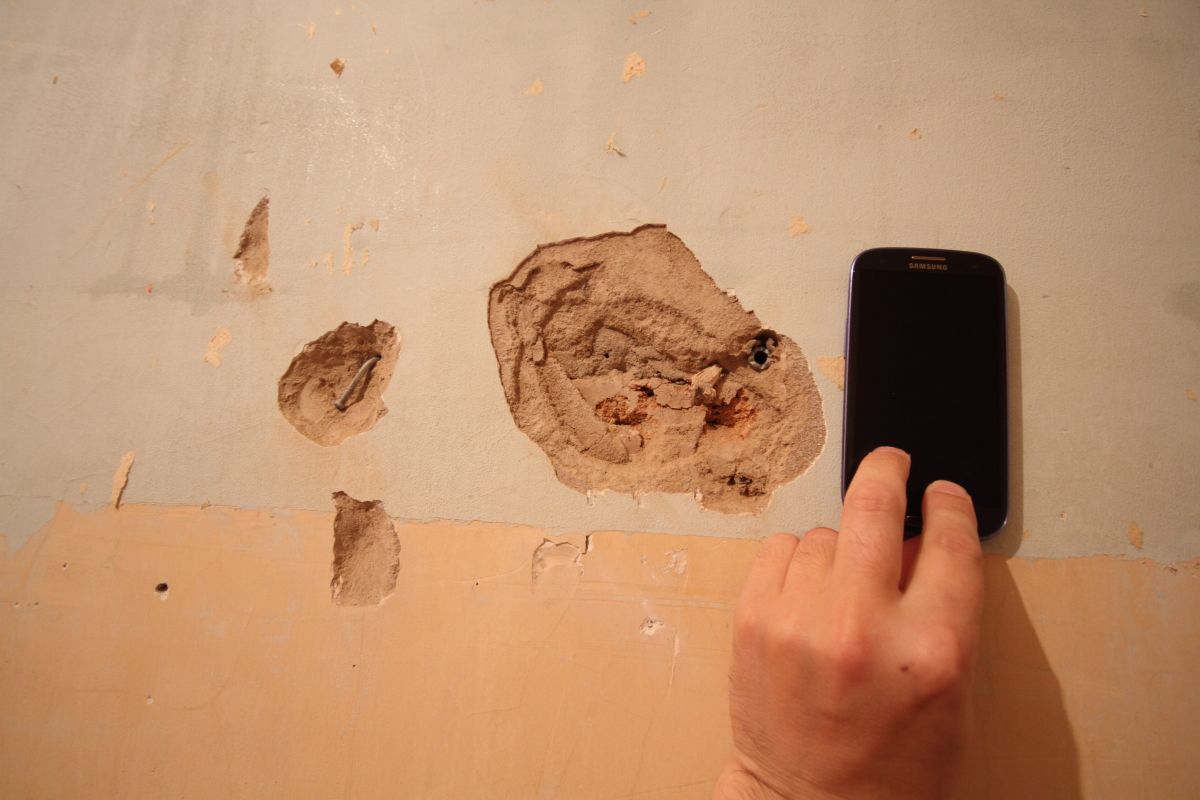 Still that's fairly easy compared to this. The ceiling........"holey" crap. 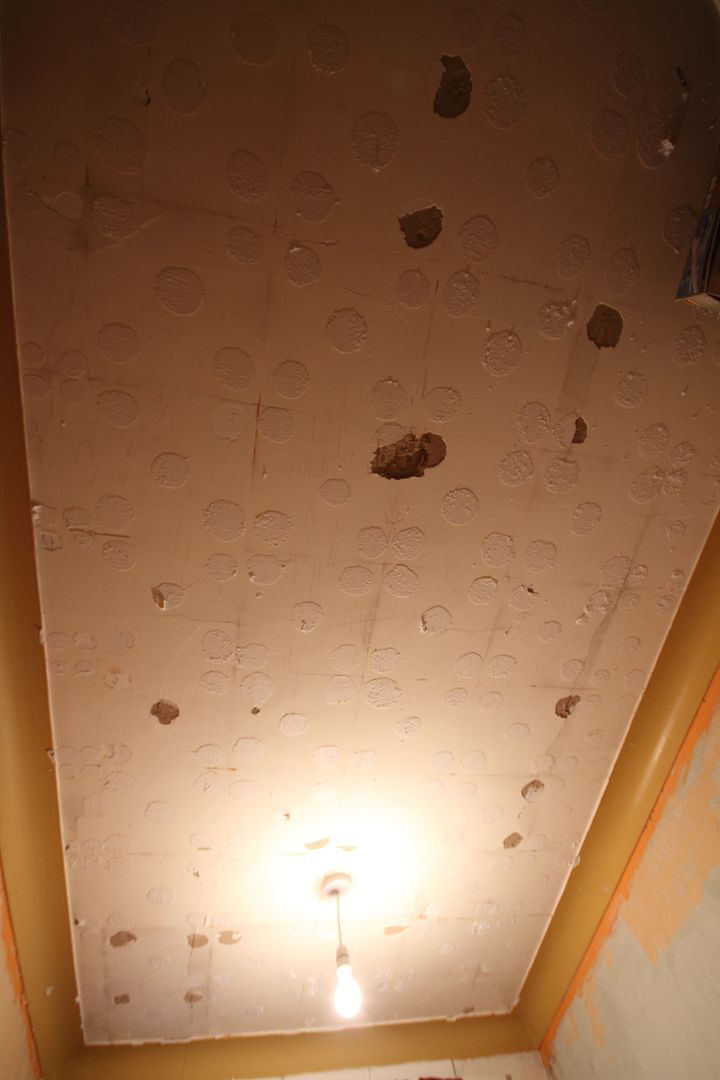 Still smiling........ 
|
|
|
|
A little update on the small room, I've pretty much removed all of the green coloured distemper from the walls. This room has been green, orange, white and three different wallpapers. All of which were still intact. I'm now at a place where I can start to redo the decoration. Before that though, I had to deal with the front wall and that badly filled hole as seen above. I hit it with a hammer and a big lump of filler and plaster fell off, five minutes later I had this. 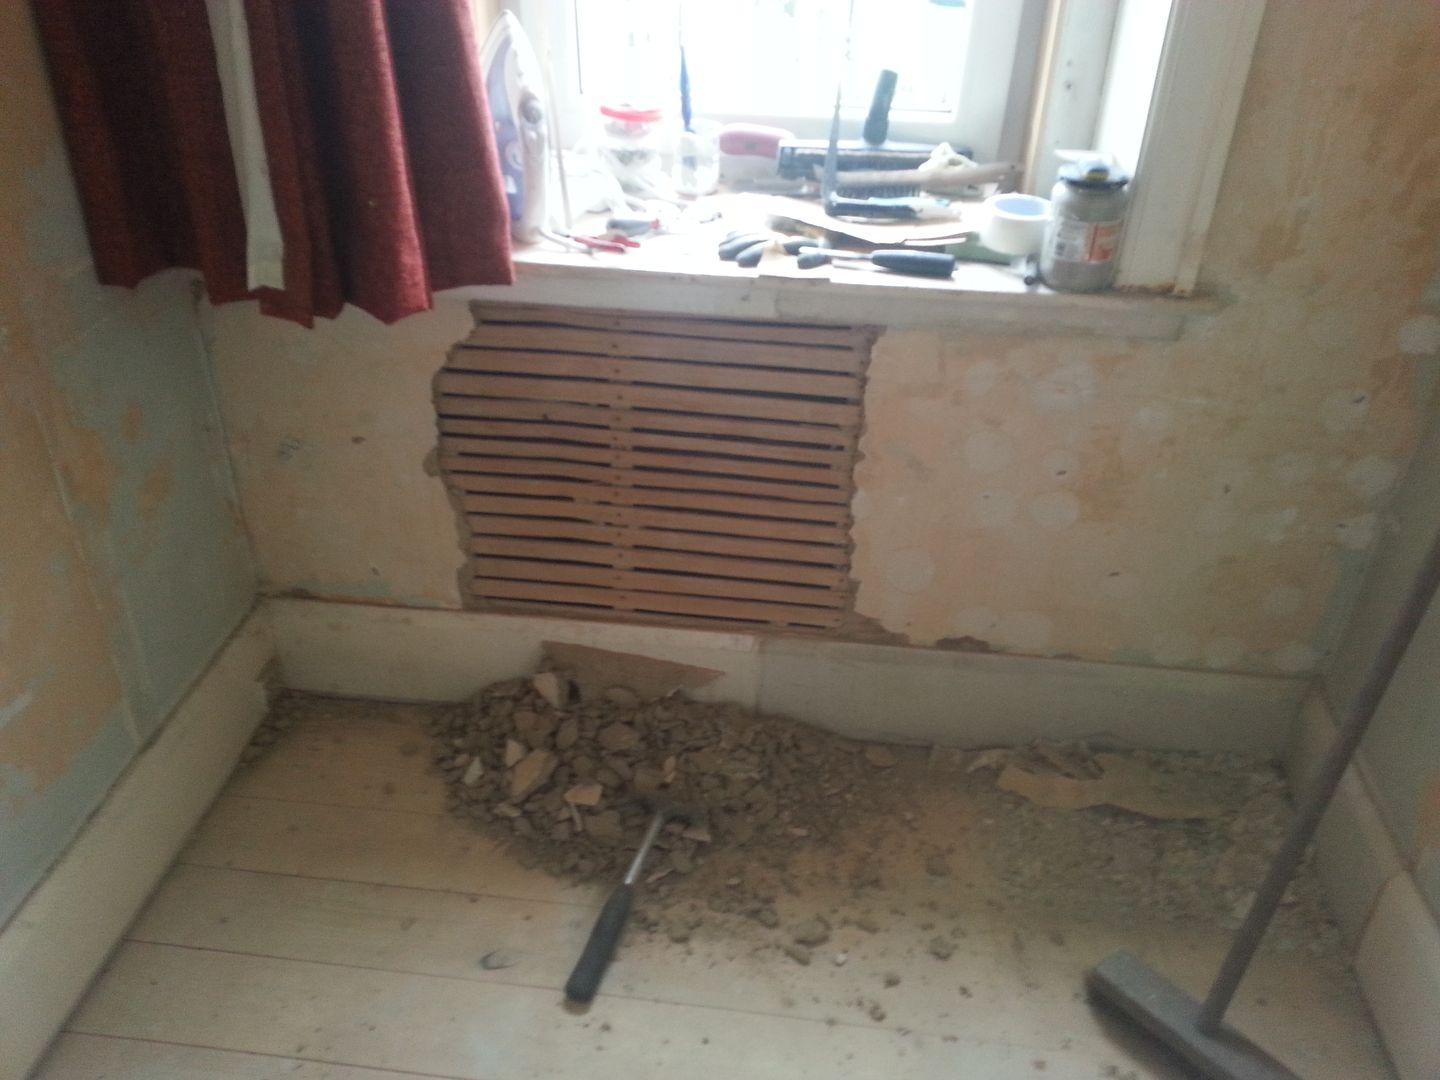 Added some tape to the lath for extra support and have built up a rough coat which is setting as we speak. It's already hardened to a point where there is no flex in the lath, so a good job done. Top plaster coat to be done this weekend along with new paint on the walls. Wish me luck. This is what i'm going for in this room. Comments and suggestions welcome. http://www.houzz.com/photos/2271312/Woollahra-contemporary-home-office-sydney Tiglath III fucked around with this message at 22:53 on Aug 1, 2013 |
|
|
|
Tiglath III posted:This is what i'm going for in this room. Comments and suggestions welcome. That's a good plan. I really like the bench seating under the window. The storage underneath will be handy to have, no doubt. Keeping it all white (or very light) will help that small room seem larger.
|
|
|
|
So how's the house coming, Tiglath?
|
|
|
|
All of that work... the house is looking better and I can't wait to see the finished office! I am inspired to go finish sanding and mudding the wall behind me, which I've been ignoring for the last three months. Thank you.
|
|
|
|
I would also like to see any new work or finds from this house.
|
|
|
|
Thanks guys, there has been a bit of progress. Not a huge amount but still I've not been sitting idle. Firstly the back bedroom is complete, just needs new carpet and that will be done at a later date. Here is how it looks now. The bed is a standard double for size comparison. 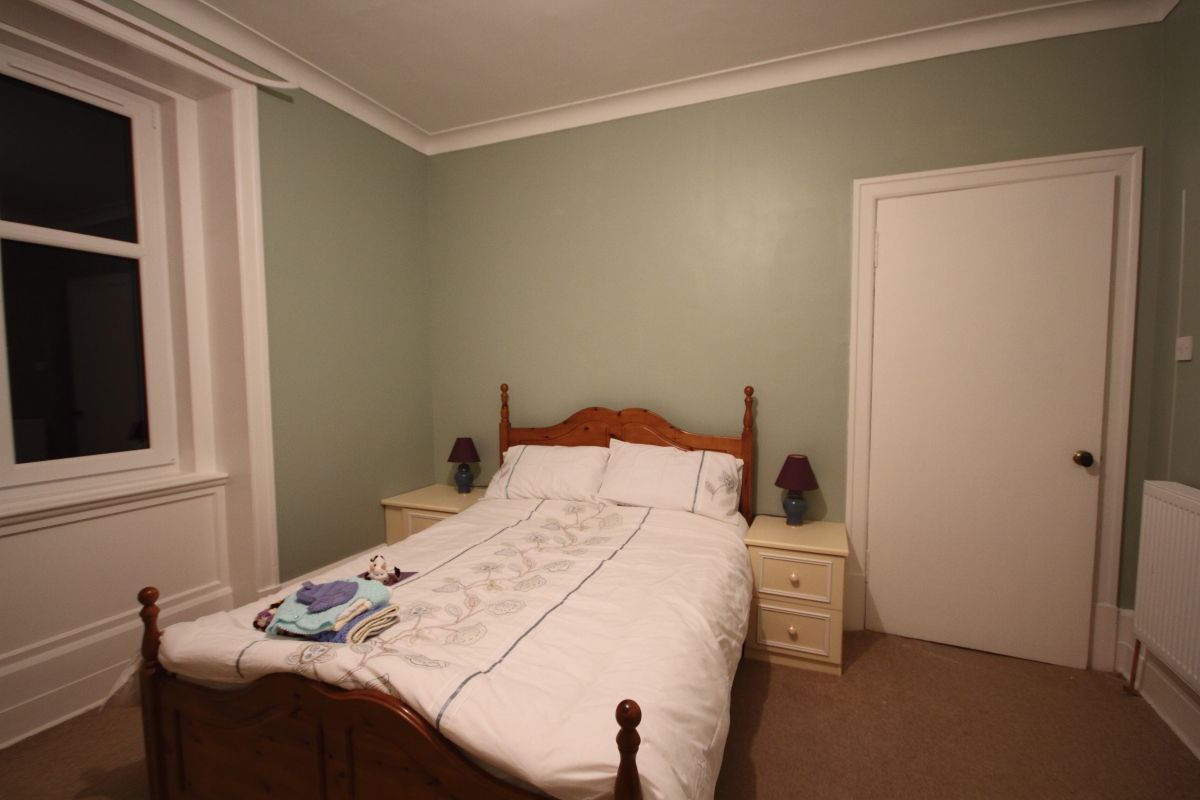 The small room is looking better, I don't think I've shown before shots so here goes. Sorry about the audio. https://www.youtube.com/watch?v=O67Wh8WpmP8 Heres how it looks now. 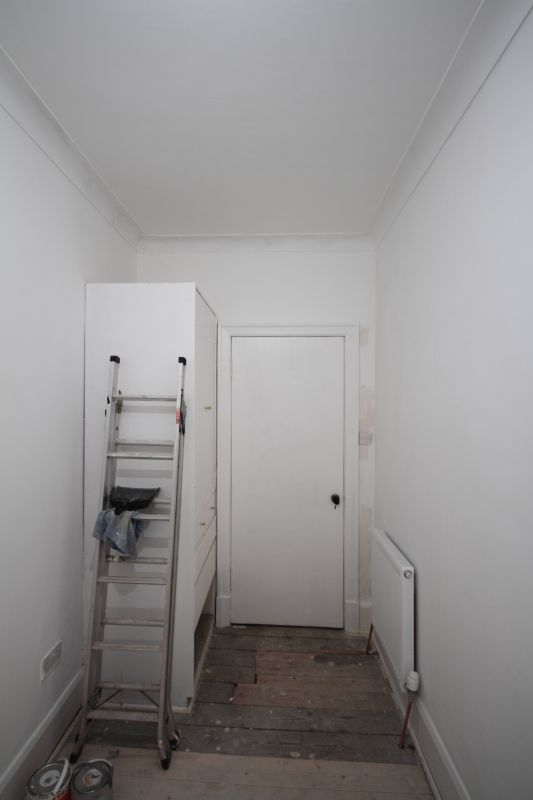 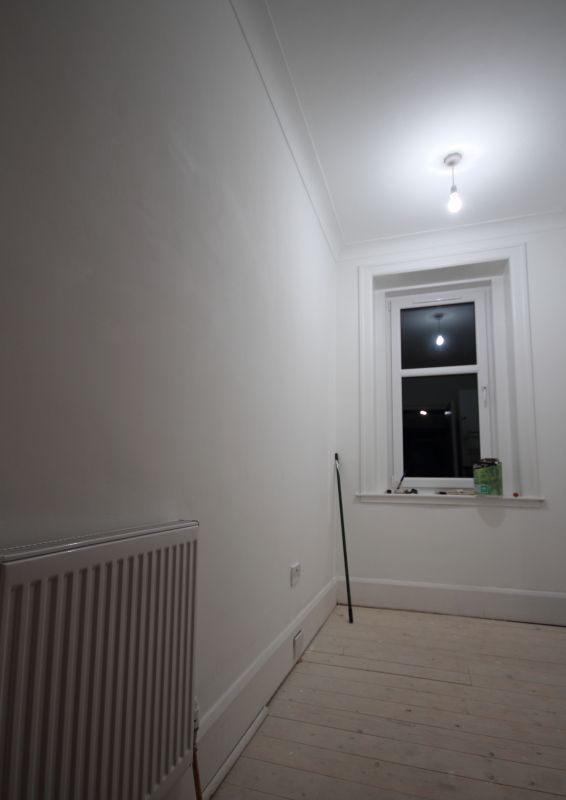 Its a long slog but its getting there. Awaiting the builder coming back with details of the bathroom, this will be done in the next few weeks so it will be a big update. Cheers
|
|
|
|
White paint, while boring, can do amazing things to a room. Especially in an old house. I remember working on my parents house and painting old dirty rooms that looked horrible and stepping back and looking at them all clean and white and thinking
|
|
|
|
Astroman posted:White paint, while boring, can do amazing things to a room. Especially in an old house. This room has taken quite a bit of effort as it has been the worst so far. I'm sure there will be many more surprises lurking behind the wallpaper in other rooms. For now, I'm just glad I've broken the back of this small room and yep, drat it looks much better.
|
|
|
|
Your project house is pretty dang amazing, and you've made a ton of progress! Keep it up and keep the pictures coming, they are neat to see such old architecture/building methods.
|
|
|
|
Looking good! Thanks for the updates! Edit: I'm dumb. You already said that tiny room was a bedroom. I just can't fathom how even a twin bed could fit in there!
|
|
|
|
Its that time again and there has been some progress to report. I've pretty much finished with the two rooms on the upper floor for the moment and have come back to the room at the front of the house. If you go back through the photos you'll see that I had some plastering to do around where the old radiator was removed. That is now done and I'm now making sure all the surfaces are flat and are being primed. The coving in this room has a few little pieces that need fixed but it's nothing huge or bothersome. I will finish the walls completely in white, I promise  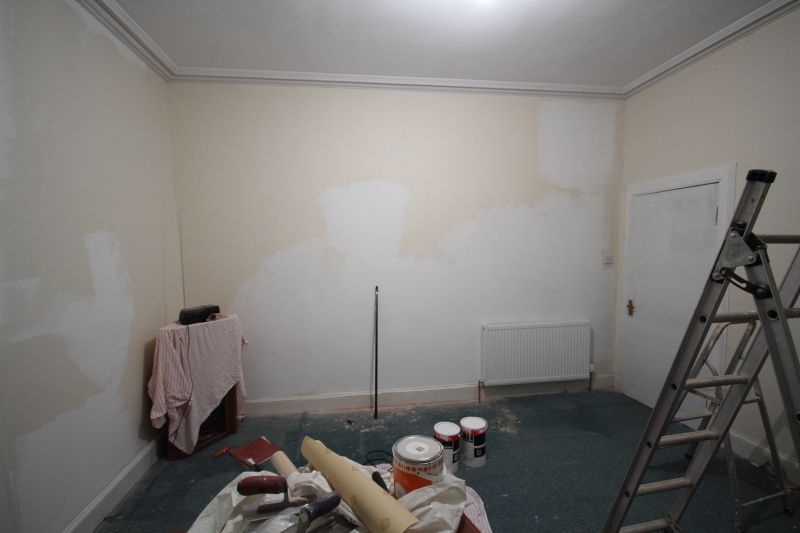 The doors need a few coats of primer, this is coat two!! The paint on the wood panelling will also be done, it looks pretty yellowed in this photo. 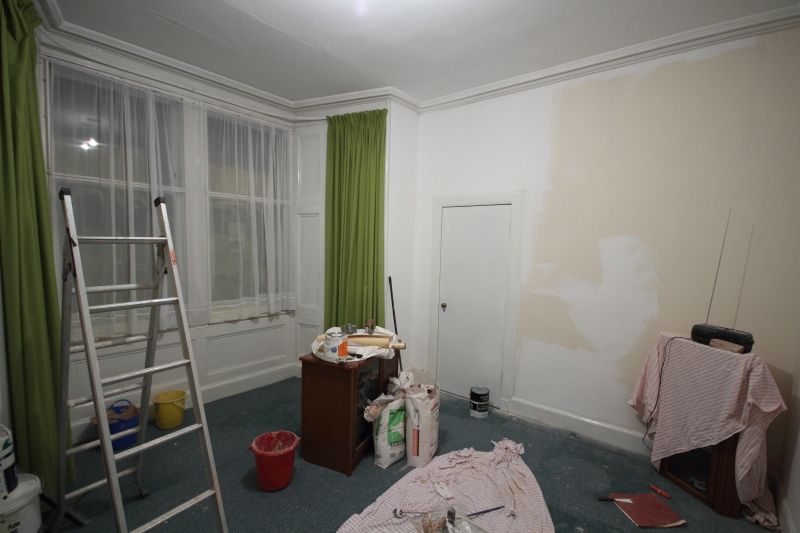 When the walls are painted and the coving sorted, the wallpapering can begin. I discovered this paper in bags from the last house, we never got to use it and there is more than enough for here. Laura Ashley's finest heavy grade paper, the colour is neutral beige/oatmeal and the pattern is gold(but not shiny). I think it should rather nice. 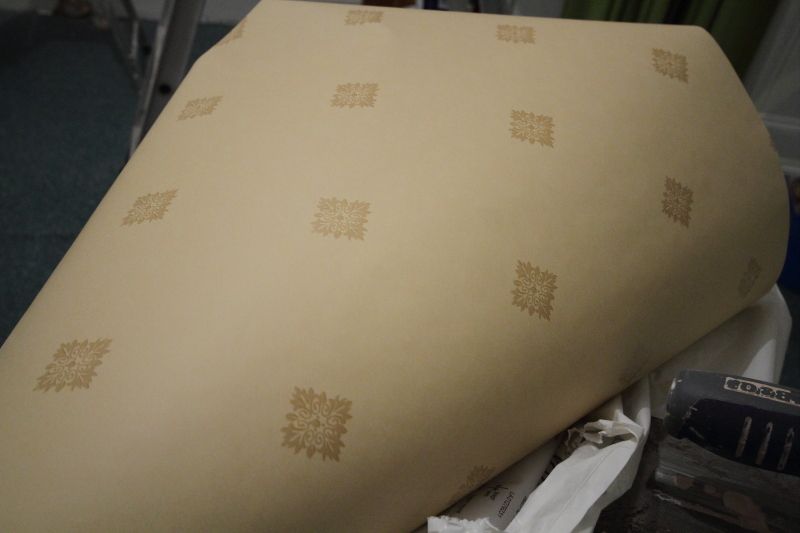
|
|
|
|
Another little update on the front room. The walls are more or less done and I've gotten onto the bay window. AAARRGGGGHHH. The shutters on either side have been joined from behind to create 1 large panel from the upper and lower halfs. At the moment I'm not really concerned that they are in working condition, it's just good to know they still look in good condition. To get to the edges of the panels I had to chisel away a huge amount of filling material, some looked like putty, the other was crumbly white pollyfilla from eons ago. I ended up with the view below. I got rid of most of the filler and sanded back the bead until it was fairly smooth, hard work indeed. Who uses putty as a filler? 1) 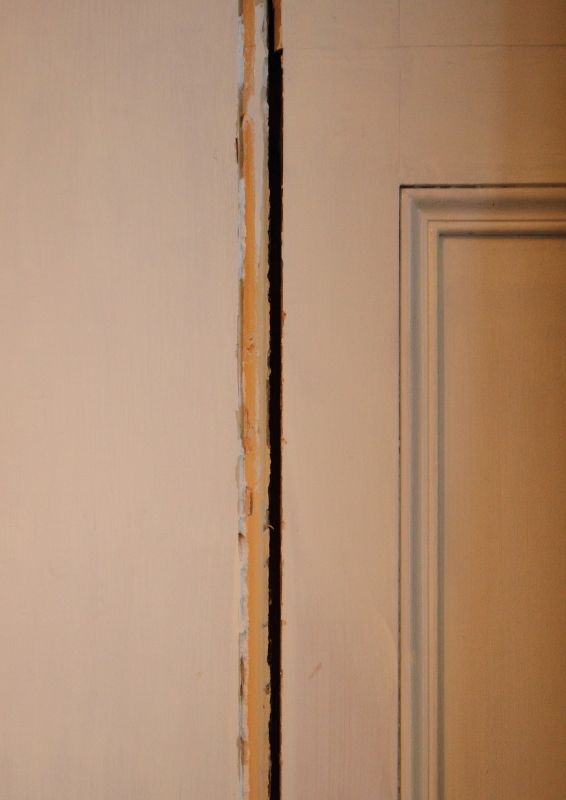 I then set about cleaning up all the reveals so I could temporarily add a bead to the edge of the panel to neaten it up a bit. I also revealed another two rounded bead details at the top of the panel, which you can see below. 2) 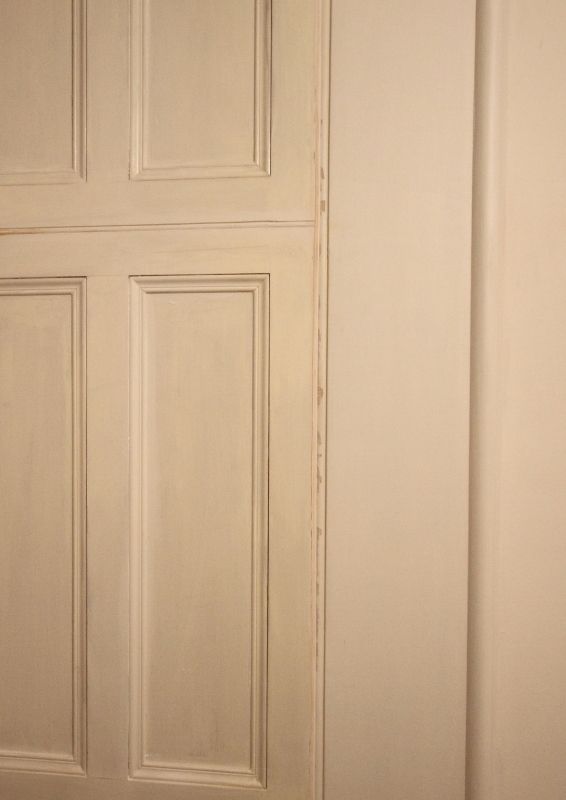 The final detail with all the reveals finished and a small amount of frame sealant to fill the gaps and it looks presentable. Once I get more time I'll try to get working shutters. I need a working room that we can use as a matter of priority, this one will do nicely. 3) 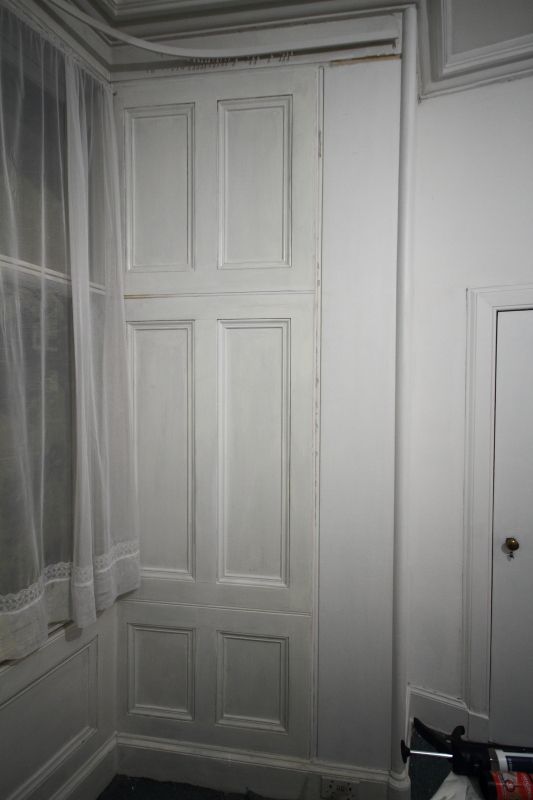
|
|
|
|

|
| # ? May 5, 2024 14:39 |
|
It's lovely to read that you're going to do it properly, and that there would be shutters on there! I don't know if I can think of one house I've been in that has shutters!
|
|
|


