


|
Speckled Jim posted:What method do you use to cut that stuff? I have a hard time getting anything close to a good edge when I try The excell razor blades (usually a #11 double honed or #2 straight edge blades). Carefully measure and pencil my cut lines onto the plastic. Use a metal straight edge to CAREFULLY score the plastic along the pencil lines, lightly 3-5 times. It's about scoring gently, especially on the first pass before you make a mark, if you use too much pressure your blade has a tendency to wander, and subsequent passes want to follow that wrong line. (score in the opposite direction to negate this) I mean it's kind of by feel, if it's thin (like 0.5mm to 1mm), you can score it 2-3 times, and bend/snap it along that line. But if you have more intricate stuff, you have to carefully cut through by constantly scoring the plastic, or it might break/tear at stress points. Thicker stuff (1.5mm and above) is awful to cut and I've lost track of how many times a blade has skipped out of the material and into a finger. For a cleaner line you can keep scoring until you cut through. Any exposed edges will take a light sanding anyways though, but the cleaner you are on the earlier steps, the less work later on. Hopefully that helps?
|
 #
¿
Oct 18, 2018 04:51
#
¿
Oct 18, 2018 04:51
|
|

|

|
| # ¿ May 9, 2024 17:04 |
|
|
Looks like it got a blast from a clogged airbrush and he said "good enough".
|
|
#
¿
Oct 19, 2018 00:41
|
|
|
That steel legion dude, I just realized - it reminds me of a cross of romanticism/barbizon/realism type painting, like a grim dark Delacroix, /David/Millet, and that's very cool. Bucnasti posted:Vallejo Game Air and Model Air paints are the same as the Color lines, they're just pre-thinned, so you get less paint overall than the unthinned Color line. Yeah, if possible I'd suggest regular over airbrush paints - same stuff, but you have a bit of flexibility (use straight for drybrushing, thin/brush on normally, thin with a matte medium/flow improver to airbrush). I think you get "more" paint; I mean for airbrushing all those tanks and other things I haven't posted, I'm only just now replacing a couple bottles.
|
|
#
¿
Oct 22, 2018 08:37
|
|
|
Safety Factor posted:I have a painting question this thread might be able to help with. I think I've finally decided on a titan legion for Adeptus Titanicus and they've got an interesting scheme. They're primarily a mottled green with red accents. My basic idea for the green is to start with a dark base and sponge on coats of progressively lighter greens, particularly towards the center of each panel. Once the greens are in place, I'd do a thinned green glaze to tie everything together. Would my proposed method work? This was my first real attempt at a mottled colour scheme from craftworld whatever. I only used two colours over the dark blue base. It.... Looks better in person? Used just a sea sponge to dab it on lightly, and while I'm actually happy with the effect in person, I kind of cringe at the photos (or maybe it's just the poo poo compression photobucket uses, I don't know where the original files are) it's not the easiest to make it look balanced, and needs some touching up by brush. 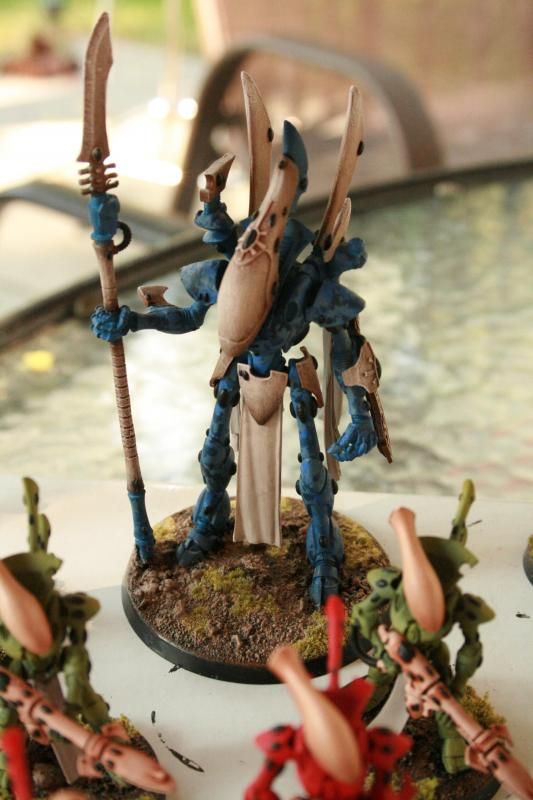 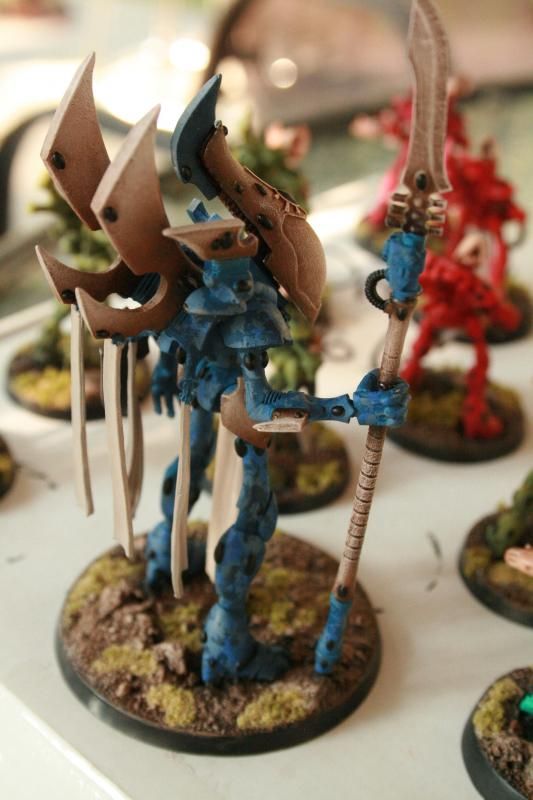 I did similar to how retinue of 5 wraith guard and they turned out well.
|
|
#
¿
Oct 27, 2018 02:44
|
|
|
crazystray posted:Something like this? God I want that. A more modern equivalent would be the Artists Taboret. Think of it like a miniature, rolling kitchen island that's made of various drawers and little cabinets, and usually seem to have a built-in light table, and some sort of folding or extending-out surface area for more drawing and painting.
|
|
#
¿
Mar 8, 2019 04:43
|
|
:max_bytes(150000):strip_icc()/William-S.-Wooton-Desk-56a017fb5f9b58eba4aee816.jpg)
|
Anyone have experience with the Vallejo black primer via airbrush? I'm out of black spray paint, though I was thinking to try Rust-Oleum Painter's Touch Multi-Purpose Paint - Flat Black. I did their 2x last time and that was.... Almost a disaster.
|
|
#
¿
Jul 27, 2019 20:27
|
|
|
Haven't painted in a while, been fairly caught up in assembling/building (and haven't been able to find any primers which I like, thinking I should just ebay some vallejo primer I can airbrush on). But I'll hope modelling progress is worth posting! First, the SoB Rhinos.      I made it so the accessories are nearly all interchangeable (those immolator canopies only fit on their corresponding rhino, some bits are in the way otherwise). Two ECM/com arrays, 2 immolator canopies, 2 turrets (with interchangeable guns), and several standard rhino top hatches. 7 Rhinos in total, so there's plenty of options to use.  During this I thought I would make a fun little side project and make a few small tow vehicles. Initially I thought I would make earthshaker artillery trailers, but that idea fell through and I'll probably just make these guys some little ammo and fuel trailers to haul around.  Decided my inquisitor would want a fancy ride for the hive city, so I based it off the...kfz231? Probably should have gone with the 8rad (but thought I was short on wheels until I found ANOTHER box with more after I was done building it). I just really like the profile of these things, and not too regretful since it still looks like a limo on steroids to me, though I need to "40k it" a bit more I think?  After the limo, I switched my idea from artillery trailers to just going fully mobile artillery. I might have hosed up on the profile of the chimeras (which are magnetised so the artillery top comes off and gets replaced with a standard top hatch), but I don't actually have "real" chimeras for reference so...whatever. I have plans for "AA" quad guns as an alternative top, but those are still sitting in pieces. My latest project has been to salvage this piece of junk.  About a decade ago I thought I would make an ork tank. I quickly burnt out and gave up - I was also very bad at scratch building. But what I had left was this comically huge thing made of 2mm thick sheeting (mostly I use 0.5mm sheet now), and it's solid enough to survive intact after half a dozen moves stuffed in a box. (weeks of adding junk and leftover bits later) I now have a...cargo jet...thing. My idea is an orbital lander meant to resupply ground forces, not really fight. Objective/scenic uses basically.    There's a bit of gap filling left, and I still need to fix/detail the back/tail/engines and underside. Very much still in progress, adding more junk to bulk it out. Magnetised the fuel tanks just to make painting easier. I haven't nailed down an exact colour scheme on stuff yet anyways, so having them sitting around unprimed isn't stressing me out too badly. While yes it is insane to build your own vehicles, I happen to like the fabrication of it - it's certainly not for everyone. But I like the process, I'm not concerned about having things done as fast as possible. I figure I've spent about $75 in material for all this, so that makes me feel better about the time it takes.
|
|
#
¿
Nov 7, 2019 01:05
|
|
|
For that marine, thin the ink with water on a small pallet, and optionally get a tiny bit of dish soap on your brush to help break surface tension. If your ink is pooling, you're probably just applying too much/loading your brush with too much. Try lessening how much you load your brush with so it applies more to just recessed areas. You could slather it on, but be prepared to sit there for several minutes with a brush to wick away excess that pools on the underside or too much in one area. Zuul the Cat posted:This is insanely cool, man. Making your own models rules. I wish I had the skill to do it. can't wait to see it all finished! Thanks! I would say don't let the complexity discourage you from trying though - it's more about being able to just measure and cut things fairly square. I think the best starting point is to make small boxes, they're surprisingly useful (ammo boxes for bases, missile pods, etc), and after making several you get the feel for how to get them even and reliably reproduce shapes in a size you want. Another Bill posted:This has certainly been asked before but does anyone have experience with the Testors Snap and Spray Airbrush? I'm thinking of dipping my toe in the airbrush side of things and the 30 dollar price at Michaels seems about right but if it's a total waste the I won't bother. I think you'll have issues with that style of syphon feed airbrush for anything beyond doing the basecoat and main colour, it's probably going to be too wide of a spray to really do fine details or highlighting on anything smaller than a vehicle sized model. I haven't used that particular type before, but even watching their promo material, it...is not a fine spray, and seems to have issues with spotting (I noticed how they don't zoom in on the test sheet, and it's noticeable from quite a distance away). I would pass on it/put that money in a jar for a gravity fed dual action airbrush, you can always "skimp" on the air compressor and find a used shop compressor if you can deal with the noise. Or just wait until you can find a used hobby setup. VolatileSky fucked around with this message at 23:10 on Nov 7, 2019 |
|
#
¿
Nov 7, 2019 22:59
|
|
|
I said come in! posted:I have a pretty good size citadel paint collection that hasn't been touched in months. Is there anything I need to know about maintaining these paints so they don't get ruined from not being used? It would really suck if they did, because this is a pretty expensive collection. About once a year I go through every pot and check them, and use sure droppers to add either distilled water or acrylic medium. I paint on canvas too so I have matte medium in liquid and gel. Usually I start with a couple drops water, and add medium to try keeping it roughly a decent consistency, though it's definitely a bit of trial and error until you get a feel for it. Make sure to clean off the lids of really dried on crud so it's a good seal (next time I'm going to see if brushing on a thin layer medium on the lid prior to sealing makes a difference). I've kept some paint pots alive for... Well, ten to fifteen years now, with about one out of 40 being dried solid per year. Edit: I've never noticed any difference between storing them upside down, right side up, or in a sealed ziplock - tried everything, the only thing that made a difference is cleaning out the lids as well as possible before long term storage. VolatileSky fucked around with this message at 10:40 on Nov 14, 2019 |
|
#
¿
Nov 14, 2019 10:36
|
|
|
As I near the actual painting portion of building my SoB army, I really want some decent "icons" to add. I'm not hugely into the available water transfers however. Short of drawing everything on by hand, what other options would there be for using some of the available art? Specifically if I used icons from: https://www.warhammer-community.com/2019/02/18/18th-feb-battle-sister-bulletin-part-1-adepta-sororitas-iconographygw-homepage-post-1/ I've looked into printing my own water transfers but blank sheets are stupidly expensive, unless I'm unaware of a cheap-ish source. That and trying to come up with ideas - I think leaning more into tarot type of imagery might be interesting?
|
|
#
¿
Nov 16, 2019 00:16
|
|
|
I usually suggest finding some pewter models to paint, mainly because you can soak them in a solvent, and do it again with pretty much no worry about it melting or being soft like plastics, or simply being brittle like resin. Whatever appeals really.
|
|
#
¿
Nov 19, 2019 10:20
|
|
|
Those are some regal lookin skellies. I've been tempted to try marble but I've been saving my first attempt for terrain rather than a finished model, like on an obelisk would suit it. And this is the most wholesome 40k thing I've found in a while: 
|
|
#
¿
Nov 21, 2019 07:08
|
|
|

|
| # ¿ May 9, 2024 17:04 |
|
|
Lemniscate Blue posted:I had a miniature 3d printed from a free .stl I found - fairly obscure combination of characteristics for this PC, total serendipity I stumbled across the file - and I'm commissioning a friend to paint it. But before I do, I'd like to know about customizing it a bit. I'd like to add a wrench or some other sci-fi looking tool to the hand, maybe a toolkit looking thing somewhere. I don't exactly understand the question but I think you want either 28mm fantasy weapons, or go to eBay and search for similar "28mm whatever the thing is", or whatever appropriate scale your figure is. 1/35 scale for accessories might work and give you more options with ww2 tank/aircraft/farm equipment or mechanics crew sets. Or fashion your parts out of paper clips and sheet styrene (plastic).
|
|
#
¿
Nov 28, 2019 11:07
|
|