

|
You were most likely getting gibbed by the Assassins' patented "Stop Bracelet" ability. They just touch you and you die, unless you have instant death protection. Also, Ramza can only learn Ultima when he's in his Squire job. You have to be in the proper job to learn anything blue-mage style in FFT.
|
 #
?
Nov 4, 2015 03:41
#
?
Nov 4, 2015 03:41
|
|

|

|
| # ? May 15, 2024 02:17 |
|
|
I don't think I'm alone in hating you so very much for seeing Ultima in at least 4 instances. It's so utterly, stupidly pointless, but still you had the chance.
|
|
#
?
Nov 4, 2015 04:03
|
|

|
And Ramza can't be in the right class til Chapter 4. People like to try learning it at Riovanes for some reason 
|
|
#
?
Nov 4, 2015 04:04
|
|

|
Paging OFS. (spoilers if we're supposed to worry about that in this thread) So yeah, you got drat lucky even failing to get it.
|
|
#
?
Nov 4, 2015 04:08
|
|


|
And yeah, Ultima is for all practical purposes a bad copy of Bolt 3.
|
|
#
?
Nov 4, 2015 04:25
|
|
|
dis astranagant posted:And Ramza can't be in the right class til Chapter 4. People like to try learning it at Riovanes for some reason Luso can learn it here in the remake IIRC. It's actually a good time to do so since it's their least threatening move
|
|
#
?
Nov 4, 2015 05:02
|
|

|
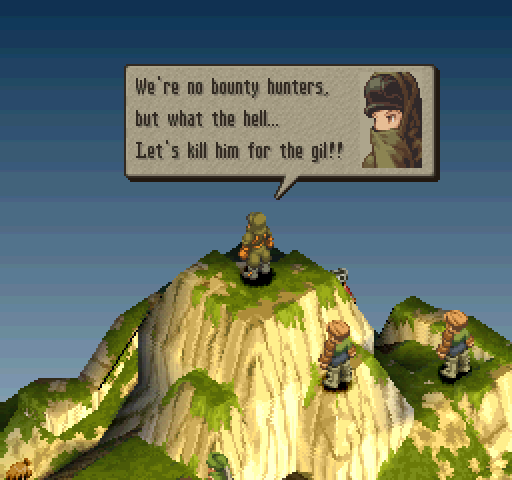
Update Seven: Finath River to Germinas Peak I don't feel the need to change Jobs, so I just re-equip the party and make sure everyone has the right Reaction ability I want for the next battle. Finath River Map Overview Replayable as Random Encounter: Yes. Allies: Squad 1 (Ramza + 2 Generics) start on the North-West corner of the river, and Ramza's placement doesn't matter as he starts on the piece of land in the middle of the two squads; Squad 2 start on the North-East side. Enemies: Some combination of Chocobo/Red Chocobo/Black Chocobo and rarely a Pig-family enemy for a total of 6 Monsters. They are placed all along the river to the South of both squads. Objective: Defeat all enemies. Battle Strategy Overview
 I don't want to get anyone swarmed by Chocobos, so I stay put. It's the Monsters who get the first strike, putting themselves in harms way.  I was hoping to see Hamedo go off against this Choco Meteor, but alas, it was not to be.  One of the side effects of Charge working with all weapon types is that squatting in place somehow makes bullets shoot harder. (Meanwhile, on the other side of the map, Squad 2 makes short work of one of the Chocobos.)    Turns out I hadn't quite re-equipped the Squad the way I thought I did. Turns out I hadn't quite re-equipped the Squad the way I thought I did. The Uribo tries his darndest to do some damage, but Lenna dodges expertly. (The second attempt is more successful, but does piddling damage.)  At this point I no longer need to obsessively pick up item drops for cash, but I still do it anyway out of curiosity.  One of the downsides of giving Ninja the Support Ability Martial Arts is that they can miss; here, Lenna embarrasses herself by whiffing twice.  And then she eats a fatal Choco Metor a few turns later (I probably should've healed her, but I got reckless).  It's always nice to see a random critical hit come out of a squad member.  Earth Slash's "incantation".  I finish off the battle without any additional casualties. Church Outside of Zeltennia Castle Map Overview Replayable as Random Encounter: No. Allies: The Squad starts at the South, on the ground level, Delita starts to the East of the Squad; Ramza's placement doesn't matter since he always starts one square East of Delita. Enemies: Zalmo (Holy Priest), two Oracles, three Knights, all male. Zalmo and the Oracles are on the roof of the church, while the Knights are on the ground level. Objective: Defeat Zalmo. Battle Strategy Overview
 I don't think I could've reached Zalmo on my first turn even if I equipped all of my Jump-boosting equipment, so I end up killing almost all of the generic enemies as well.  The Oracles will use Doubt Faith and/or Silence Song when not dealing damage; this is a useless gesture against my party, but this'll shut down casters.  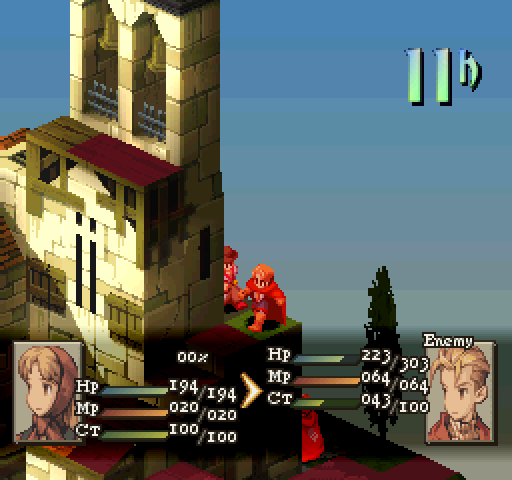 Me being bad at figuring out whether I can actually hit people with ranged attacks is a recurring theme of this particular run. If I screencapped this every time it happened, I'd drag out updates to a ridiculous level.  On the first turn that he comes into range, Delita killsteals. (But we're no slouch either and kill one of the Knights on the ground level.)  I had very mixed feelings when I saw that one of the Knights was packing Item in his secondary slot. 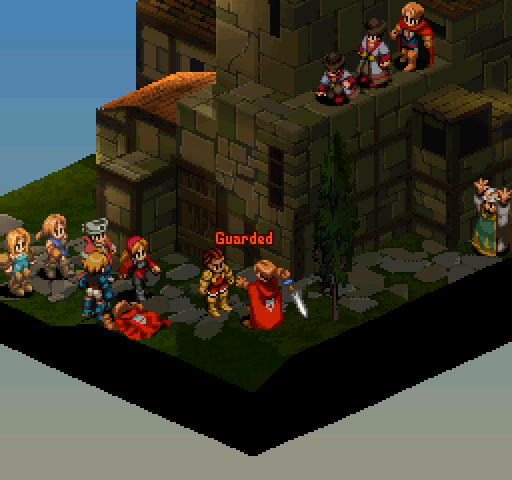 Shields can block anything, including Break skills. Here, Delita protects himself from getting his armor destroyed.  However, shields can only block once, so this Knight still gets punched after successfully guarding Lenna.  Very cleverly, the Oracle who was brought to life casts Pray Faith on himself so that he'll be healed to max health once Zalmo is done casting Cure 3. (Eventually, Lenna catches up to him and puts him facedown in the dirt again.)  Cure3's incantantion.  Delita killsteals again, but this time I don't mind too much.  Zalmo is surprisingly spry for a man his age! Once again, the recording has glitched for whatever reason, but the battle ends without issue. Bed Desert Map Overview Replayable as Random Encounter: Yes. Allies: The squad starts at the South end of the map; Ramza's placement doesn't matter as he starts one square North of the center column. Enemies: Balk (Engineer), two Archers, two Knights, and a Wizard, all male, all holed up in the ruins of the fort to the North-East. Objective: Defeat Balk. Battle Strategy Overview
 On most runs, this battle is a massive pain in the rear end since Balk shoots spells that can cripple, if not outright drop, a character each turn. He still hurts this time, but not nearly as much.  As mentioned above, the Poison that got thrown on the squad during the pre-battle cutscene persists into the battle and, like all cases of Poison, lasts for three turns.  I finish the battle before the poison wears off and suffer zero casualties.  (See the turn by turn replay here.) North Wall of Bethla Garrison/South Wall of Bethla Garrison Map Overview Replayable as Random Encounter: No. Allies: In both battles, the squad starts out on the South side of the map and Ramza's placement doesn't matter, as he will always start out on the space left empty in the squad setup screen. Enemies: In the North Wall battle, Archers (one on each wall), Knights (North end), a Ninja (South-East corner), and a Thief (South-West corner), all male; in the South Wall battle, two Archers (one on the West wall and one on top of the garrison), two Lancers (on the East wall), a Monk (on the outside fo the garrison on the South-East), and a Summoner (inside of the garrison), all male. Objective: Defeat all enemies. Battle Strategy Overview
Since everyone's nearly bottomed out on Faith, I'm tackling the North wall.  I decide to semi-split the party--half of them will go after the enemies inside the fort, while the other half stay on the outside to deal with the Monk before supporting the party.  The incantation for Shiva.  The (offscreen) Archer targeted Bartz, but because Lenna is in the way of projectile's path, she "intercepted" the arrow instead (and then promptly dodged it for no damage).  Bartz's 5% dodge chance goes off.   Earth Clothes are good for neutralizing enemy Monks, but since three of my party members are still using PA-boosting equipment I'm probably going to sell this. Once again, the video glitched, but I finish the battle without casualties. (Krile picks up Counter from the Monk's crystallized corpse and then I have Lenna finish off the Archer.) Bethla Garrison's Sluice Map Overview Replayable as Random Encounter: No. Allies: Squad 1 (Ramza +2 Genedirs) starts on the South-West corner, and Squad 2 on the North-West Enemies: Two Archers, four Knights, and two Wizards, all male. One Archer is in range to menace each squad, one Wizard is on top of the sluice right in the middle, another Wizard is on the North end and two of the Knights are on the South. Two of the Knights are on the sluice, atop switches that serve to control the sluice. Objective: Stand Ramza on each switch. Battle Strategy Overview
First try is a failure because I got overconfident and pushed too far forward. (No screencaps this time, just a video for the failure reel.) On retry, I give everyone except Lenna (who is my Ninja) Item as a secondary.  I wish we got more creative objectives like this--it would've been especially nice if we could've ended a battle in Deep Dungeon the moment an ally stepped on the exit tile, but let's leave the complaining about Deep Dungeon to when I get there.  Blocked by my horrible camera angle is Krile dodging a sword to the face.  Lenna drops one of the Wizards on her first turn and then fails to dodge an arrow.  And instead of healing her, I have her throw a Shuriken at the Wizard for not enough damage, so she eats a somewhat unnecessary death. When Galuf brings her back to life, she takes revenge and kills one of the Knights standing on the switch; Bartz slowly makes his way up to the top of the sluice since he's the only one who can trigger the switches.  While this Hamedo does no damage to the Archer because of elevation issues, it still protects Galuf from being shot.   This time Krile's not so lucky. Faris raises her from the dead, then runs away to dry land on the other side of the sluice.  Proof that the Knight standing on the switch will run away at Critical health. (This surprised me when I saw it for the first time on the failed attempt--I thought they were all but impossible to move.) 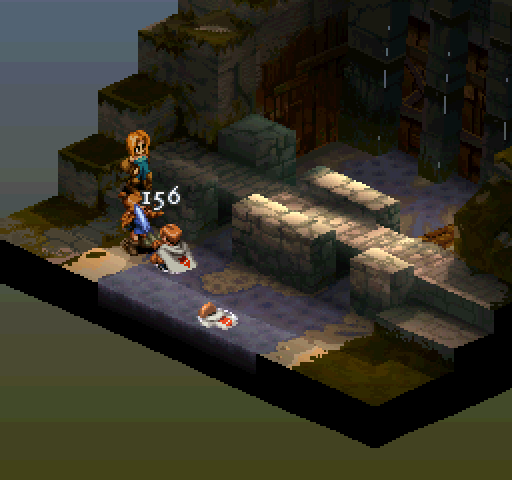 Krile couldn't run away far enough or heal back enough HP to survive this sword to the face, so she drops again.  But in the meantime, Bartz has made it to the other switch. I add T.G. Cid to the party for his stuff, kick him out, and then head towards the next battle. Germinas Peak Map Overview Replayable as Random Encounter: Yes. Allies: Squad 1 (Ramza + 2 Generics) starts at the North-West corner; Squad 2 (2 Generics) starts at the North-East corner. Enemies: Three Archers, one Ninja, and two Thieves, all male. The Ninja begins at the top of the peak and has an Archer to the South of him, one Thief is on the plateau in the West, the other Thief is at the South end of the map, one archer is in the South-East corner, and the last Archer is on the plateau on the East. Objective: Defeat all enemies. Battle Strategy Overview
   Lenna stares death in the face and dodges it like a boss.  Krile was so impressed that she got hit by a 23% arrow. (I make sure to drop one of the Thieves, since he had Meatbone Slash as a Reaction ability and he was charging a hit on Krile.)   The AI will choose low damage, high accuracy abilities over high damage, low accuracy abilities if they have them, resulting in silliness such as this Archer using Dash and Throw Stone. (Both Archers are killed soon after this.) 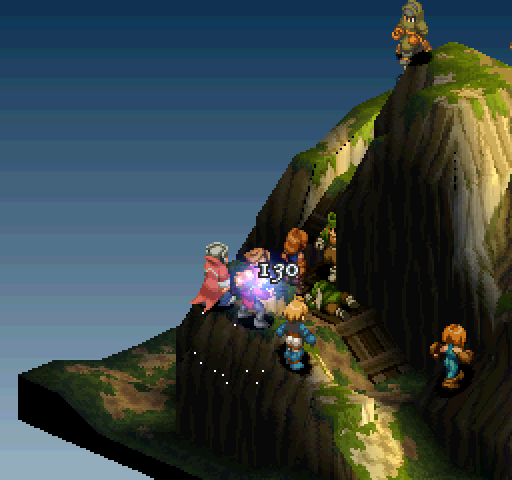 Alas, Lenna's luck doesn't last. (Bartz tosses a Phoenix Down her way and she heals herself back to health.)  The Ninja targets Krile this time, dropping her face down in the dirt. (Faris brings her back to life, and then Lenna heals her. Galuf shoots the Ninja into critical, causing him to run away, and then Krile climbs to the top of the peak to finish him off.)  With most of the enemy dead, I'm more or less at cleanup stage. Imagine Bartz and Galuf giving each other pep talks for the next twenty turns or so while I wait for corpses to turn into chests or crystals.  I was almost looking forward to Lenna getting shot, as this means she gets to gain JP by healing herself.   Nice! This is a better bow than is currently sold in any stores. It's going on Krile as soon as the battle is over. Nice! This is a better bow than is currently sold in any stores. It's going on Krile as soon as the battle is over.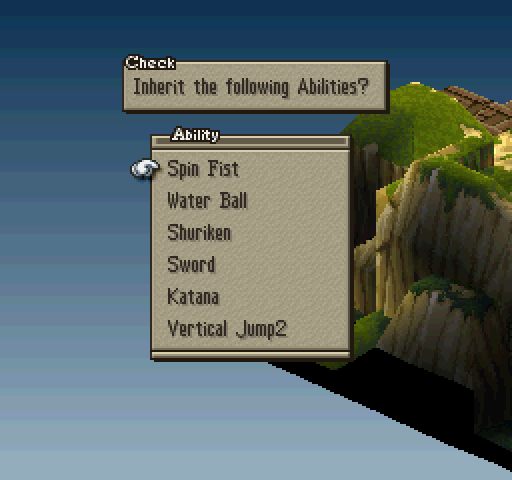 I was hoping that Faris would pick up Two Swords from the crystallized Ninja, but being able to throw more things isn't too bad, either.  Soon after Faris picked up the crystal, the last Archer commits suicide via Bartz, ending the battle. Next time: Progressing ever closer to the endgame. dotchan fucked around with this message at 14:47 on Nov 9, 2015 |
|
#
?
Nov 9, 2015 05:05
|
|

|
By smack I think you meant , or perhaps  . Also that woot should be either or . Also that woot should be either or  . . ")
|
|
#
?
Nov 9, 2015 05:24
|
|
|
dotchan posted:
So Hamedo only activates against a literal "attack" command (and maybe charge; I forget). So it won't go off against special abilities, and pretty much cannot go off against monsters at all. Normal monsters do not have an "attack" command- they all have stuff like "Choco Beak" or whatever. There are a few exceptions: some special monsters like Ultima Demons do have an attack command, but none of the monsters you can find in the wild do. Also, if you inflict Berserk on something, it overrides the AI and forces it to use "attack". So Berserked monsters can potentially activate Hamedo.
|
|
#
?
Nov 9, 2015 06:35
|
|
|
Good news: I beat Elmdor's human form! Bad news: It took me four tries that I really don't want to upload to the Failure Reel.  I think I'm just going to do a Greatest Hits Edition from said failures and then turn-by-turn commentate the success. I think I'm just going to do a Greatest Hits Edition from said failures and then turn-by-turn commentate the success.
|
|
#
?
Nov 10, 2015 03:21
|
|
|
 Update 08
|
|
#
?
Nov 12, 2015 00:57
|
|


|
dotchan posted:However, shields can only block once, so this Knight still gets punched after successfully guarding Lenna. It's actually Blade Grasp that can only activate once per dual wield attack. Shields can block all day. Schwartzcough posted:So Hamedo only activates against a literal "attack" command (and maybe charge; I forget). So it won't go off against special abilities, and pretty much cannot go off against monsters at all. Normal monsters do not have an "attack" command- they all have stuff like "Choco Beak" or whatever. There are a few exceptions: some special monsters like Ultima Demons do have an attack command, but none of the monsters you can find in the wild do. Also, if you inflict Berserk on something, it overrides the AI and forces it to use "attack". So Berserked monsters can potentially activate Hamedo. Basically everything that is a weapon based attack, so Attack, Charge, Battle Skill and Throw (Throw is the odd one for some reason I can't remember).
|
|
#
?
Nov 12, 2015 08:34
|
|

|
This seemed interesting, so I started a new game even though I'm far, far behind. Got Knight for the chapter 1 job. Ended up having to grind for money to actually equip them. Decided to roll the chapter 2 job while I was at it so I'd have an idea what to build for... came up Mystic (aka Oracle). That's... interesting. Potentially I can manipulate my party's Brave & Faith values if I'm willing to spend a very long time at it. No clue how I'll beat Wiegraf though. 'course I'm also playing on iOS so no renaming people for me. Thus begin the adventures of Bartz,
|
|
#
?
Nov 13, 2015 07:42
|
|
|
Rangpur posted:'course I'm also playing on iOS so no renaming people for me. If you have a Mac, you can connect yor iPhone/iPad to it, and use Quicktime to record video directly from it, then take your screens from there. I'm not sure if Quicktime will also do that on a PC.
|
|
#
?
Nov 13, 2015 15:55
|
|
|
This thread has inspired me to complete several runs, albeit with a somewhat modified schedule for adding new classes. Playing on iOS, so far I've completed: Archer, Mystic (Oracle), Geomancer, Ninja, Squire Knight, Monk, Dragoon, Samurai, Squire (trying a pure "Might" tree run, still selected randomly) Black Mage, Time Mage, Orator (Mediator), Arithmetician (Calculator), Summoner (trying a pure "Magic tree" run, still selected randomly) White Mage, Thief, Bard, Dancer, Chemist (the leftovers). It definitely gives you a new appreciation for the various classes that might fall to the side in a "regular" run, especially oddballs like Dancer and Bard, but it seems every class really can hold it own (exception of Arith/Calcs, though I was lucky getting Black and Time magic, and possibly Mimes). Some skills you might not normally add to certain classes, such as Concentrate on a Mystic/Oracle, or Arcane Defense and Regeneration on a Thief, actually work quite well. I'm trying to figure a way to add WotL classes and items in without completely breaking the game or losing interest (ugh, Dark Knights and their requirements), but at this point I may jus do a normal play through, which seems novel at this point. That, or a thematic run based on earlier FFs.
|
|
#
?
Nov 13, 2015 16:20
|
|
|
Underground Book Storage Rofel is a dick. Breaking my gear. And teamed up with 2 Summoners. I hate this battle. Also, I'm, like 10-15 levels below everyone, so that doesn't help any...
|
|
#
?
Nov 13, 2015 21:36
|
|
|
Update Eight: Lake Poeskas to Igros Castle Lenna got enough JP to learn Two Swords, so she switches to Monk (and gets the Barette) and Faris switches to Ninja, but everyone else stays where they are. Poeskas Lake Map Overview Replayable as Random Encounter: Yes. Allies: The Squad starts out on the South end of the map. Enemies: Two male Archers, a male Oracle, two Revnants, and a female Summoner. The two Revenants start on the South side of the map along with the squad, one on each side, whereas the rest of the enemies are on top of the pier. Objective: Defeat all enemies. Battle Strategy Overview
 "As Bartz and co. tried to cross a dried up lake, they were held up by a bunch of zombies who wanted to take the Zodiac Stones for themselves" totally sounds like the kind of random encounter an adventuring party would run into. 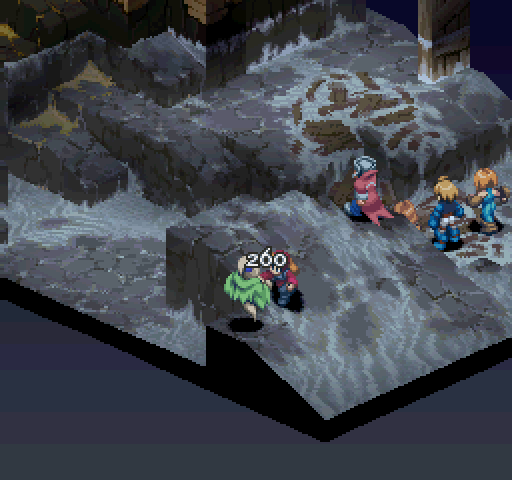 Turn 1, Faris double-fists a ghost to death.  The other ghost needs a bit more damage applied, but Krile finishes it off with a well-placed Charge.  While marching the squad forward to deal with the other enemies (and dropping the Oracle along the way), Lenna dodges an arrow without the assistance of the usual Reaction ability. (She's packing Speed Save because I'm testing out the viability of that as an end game Reaction ability.)   I take so long dealing with the fight that one of the ghosts pops back up. (Galuf shoots it dead again.)    Nothing of note happens beyond finishing the battle without casualties. At the Gate of Limberry Castle Map Overview Replayable as Random Encounter: No. Allies: The Squad starts out at the South end of the map; Ramza's placement doesn't matter as he always begins South of the doors. Enemies: Celia and Lede (Assassins) and four Apandas. Celia and two of the Apandas are on top of the North castle walls, while Lede and the other two are on the South castle walls (but still to the North of the Squad). Objective: Stated as Defeat all Enemies; it suffices to drop Celia or Lede to Critical HP. Battle Strategy Overview
 I'm only going to be detailed-ish for this battle and only mention events of note on other attempts.  Bartz is wearing equipment to block Stop and Death, so he gets Charmed. He shoots Faris on his turn, then Lede moves to engage the rest of the squad by charging Ultima.  The squad moves forward to attack Lede; one of the Apandas gets a turn in the meantime, but Faris dodges the attack.  Krile puts Lede into critical before she can finish casting. Inside of Limberry Map Overview (The chairs do not exist in the battle proper.) Replayable as Random Encounter: No. Allies: The Squad starts at the South end of the map. Enemies: Elmdor (Arc Knight), Celia, and Lede (Assassins), all at the North end of the map. Objective: Defeat Elmdor. Battle Strategy Overview
This is another one of FFT's infamous battles, especially because in regular playthroughs a player feels the need to steal Elmdor's unique equipment. In a 5JF, the pain mostly comes from being underleveled and not in the right classes to end the battle quickly. In my case, all I have to my name are physical attacks that Elmdor can negate with Blade Grasp.  Elmdor has pretty much the entire Draw Out skill list learned. Here he unleashes his favorite, Muramasa, as it has the chance to add Confusion and Death Sentence.  The Assassins, to add insult to injury, have Throw as one of their abilities, and they move in to finish off anybody who is still alive after Elmdor's initial barrage.  Being at worst Zodiac compatibility for this fight means that Galuf has to work twice as hard as anyone else to get things done.  Muramasa's incantation.  The AI, like us, can randomly destroy Samurai swords by using Draw Out; however, unlike us, they have infinite inventory.  Because Krile is wearing equipment that is blocking the instant Death ability, Krile gets double-stabbed instead.  Everybody else is dead and can't be brought back to life in time to accomplish anything, so I have Galuf blow his last turn slinging ineffectual threats.  He dies to another Draw Out. (Reset!) Try two, I switch Galuf to Ninja with Martial Arts--Blade Grasp only works once, so I have a reasonable chance of hitting Elmdor after that.  I suspected Hamedo would work against Throw, since Counter worked against it, so it was a great feeling to see my instincts proved correct.  The Double-Punching Ninja strategy pays off on Galuf's very first turn.  Unfortunately, a confused Faris drops Galuf on her turn.  One sandbag attempt later, only Galuf and Bartz are left alive, except Bartz gets Blood Sucked, then Galuf gets a knife thrown at him. (Reset!) I would've gone to grind immediately, but I decided to fight the battle one more time to see what sort of levels/stats I needed to be aiming for and try my luck again.  Faris dodges a Thrown weapon.  Me learning the hard way that Ninja's only have huge evasion numbers when being attacked from the front, even with Abandon as a Reaction ability.    Enemy stats for this battle.  Faris manages to punch Elmdor twice, but that's about as lucky as I get in this run--Lenna had an 89% chance of Revive succeeding on Galuf, but she misses, and then Faris dies to Ultima.  Ultima's incantation.  I try to sandbag, only to discover to my dismay that Elmdor is a giant showboating jerk--he could've just used Teleport 2 to finish us off, but he uses Kikuijimoji instead. (Reset!) I fight three additional grind battles to gain some levels and JP for Bartz (who still hasn't unlocked Ninja yet). Highlights from the rebattle:  Lede came with Summon in her Secondary--I think this may be randomly generated, since she didn't do this in the last battle, but then again I did position myself slightly differently.   The Apandas triggered incantations for Bio2 and Bio3. (Lede didn't come into convenient melee range this time, so I threw stuff at her until she ran away.)   In try #4, Elmdor moves forward and Draws Out as usual--this time, he kills Krile immediately because of my poor unit placement--and then it's time to try my luck at the Blade Grasp roulette...except I lose squad members way too quickly and everybody dies in record time. (Reset!)  I decide to re-kit my units in their damage-boosting gear rather than ones that protect against status ailments. Celia and Lede haven't bothered using their instant Charm/Stop/Death abilities on me, since they can usually kill me outright anyway. 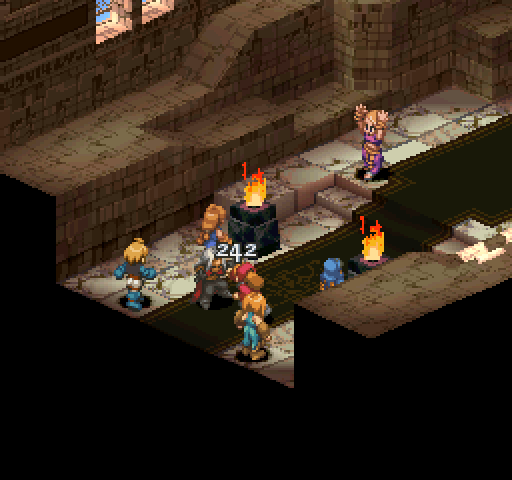 With the extra HP cushion, everybody (even Krile) survives the Muramasa and Faris succeeds in punching Elmdor once.  Lede, instead of throwing something, casts Ultima on Krile instead, but Celia still chucks a shuriken at Faris. 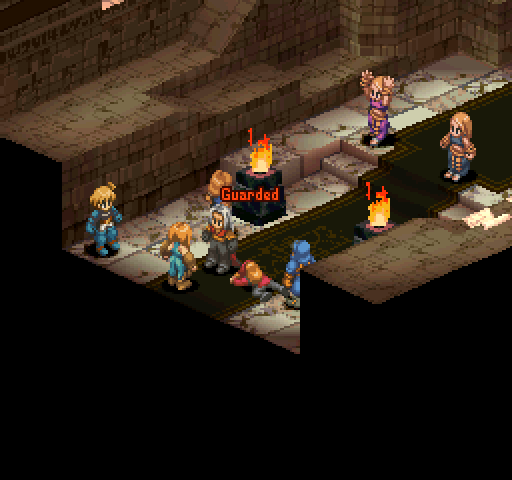 On his turn, Bartz threatens Elmdor and then runs away, and Lenna tries to hit Elmdor, only to get stuffed with both a Shield block and a Blade Grasp.  On her turn, Krile uses Wave Fist on Elmdor (and I immediately regret not doing this sooner, as this is when I finally realize that Martial Arts is one of the abilities that Elmdor can't bullshit away) and stands next to him... 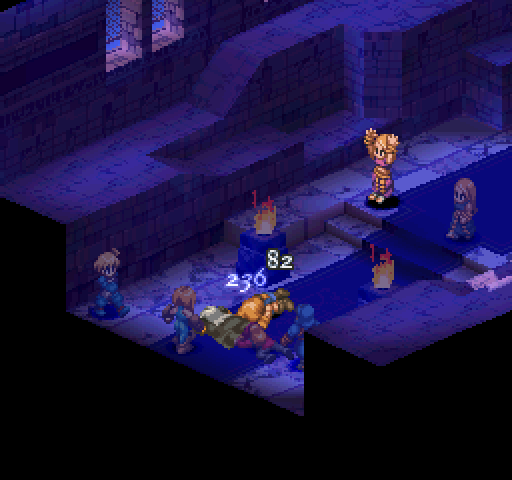 ...causing Ultima to hit him as well when it goes off, finishing the battle. A win is a a win. I'll take it! Underground Cemetary of Limberry Castle Map Overview Replayable as Random Encounter: No. Allies: The squad starts in the middle on the bridge; Ramza's placement doesn't matter as he always starts one row North of the squad; Meliadoul will enter from the South end of the map. Enemies: Zalera (Zodiac Monster), two male Knights, a Skeleton, a Bone Snatch, and a Living Bone. Zalera and the Knights are on the North end of the map, while the Skeleton family enemies are on the South end, on top of the gravestones. Objective: Defeat Zalera. Battle Strategy Overview
 Though it's a major step down in difficulty compared to the previous battle, it's still quite difficult, as Zalera has the usual gamut of bullshit status effects at his disposal, something that I'd forgotten about.  Until, of course, it happened to me on the very first turn. (It missed Bartz because he just so happened to be wearing the right hat to block the status effect.) Bartz shoots him and retreats.  Unable to dodge anything while stopped, Faris got attacked by both a Skeleton and Zalera, killing her.  One of the Knights breaks Galuf's Twist Headband.  The other Knight doesn't suceed in doing the same to Lenna's Barrette--if he had, I definitely would've reset. Since he missed, he becomes a priority target, and Lenna kills him as soon as the Stop wears off. (Meanwhile, I'm finishing off the Skeletons with no issue.)  Things I've learned about this game by playing the Five Job Fiesta #Whatever: Knife Hand (the Skeleton family's melee attack) can knock back the target.  I went into the Unit List to see if Zalera was going kill Faris before she got a chance to act again if I tried to revive her, only to discover that Zodiac monsters only show up on the AT list, so I gambled and gave her a Phoenix Down.  Zalera drops Faris with a Flare 2. At this point, the video glitched again--I may have accidentally lost focus on the emulator while playing, but I'm pretty sure I've done that in other recording sessions without issue. Anyway, even with one of my damage dealers dead, I've got enough double-punching action to deal with Zalera without any additional casualties. As usual, the new party member is kept on the roster long enough only for her gear, and then I make a beeline to Igros Castle. Inside of Igros Castle Map Overview Replayable as Random Encounter: No. Allies: The Squad starts in the North-West corner of the map, while Zalbag starts on the bridge facing Dycedarg; Ramza's placement doesn't matter as he always starts one row South of the squad's starting squares. Enemies: Dycedarg (Lune Knight) and five male Knights who have the bridge surrounded on both sides (Dycedarg and three Knights on one side, two Knights on the other). Objective: Defeat Dycedarg's Elder Brother--this is a mistranslation, as your target is Dycedarg himself. Then, once Dycedarg is defeated, he tranforms into Adramelk, removes all enemy Knights (alive and dead) from the field, disappears Zalbag (even if Zalbag is dead), and the objective changes to Defeat Adramelk. Battle Strategy Overview
 At least the game is nice enough to highlight the assassination target for these types of missions and you don't have to keep Zalbag alive, otherwise this battle would be a lot more infamous than it already is.  On his turn, Dycedarg  Aiming at Dycedarg reveals that he has Catch as a Reaction ability (son of a bitch!  ). ).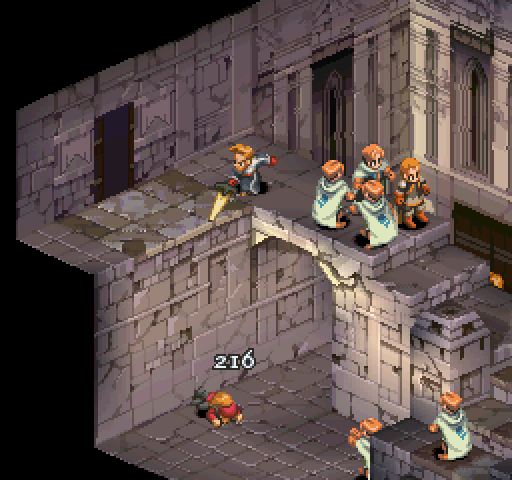 Dycedarg scores his only kill of the battle, dropping Faris with another Lightning Stab.  Zalbag lasts a lot longer than I expect him to, blocking several attacks with his shield, and on one of his Counter Tackles he even bodychecks an enemy Knight off the bridge.  But eventually his luck doesn't last and he gets swarmed.  From what I remember of the battle against Dycedarg in human form, I drop almost all of the enemy Knights in between keeping my squad topped up in health, and eventually decide that I don't want to drag things out trying to get more Speed Saves to go off, so Galuf puts in the finishing blow.  Adramelk is quickly surrounded on two sides, but he manages to dodge a punch from Faris.  And then he uses Loss on the two Ninjas, confusing them. (Lenna fixes that with Stigma Magic.)  Then Bartz shoots off his brother's last sliver of health, putting an end to the Beoulve line with his own hands. Next time: Job #5 and the beginning of the chain of sidequests that'll vault me into exponential levels of power. dotchan fucked around with this message at 17:31 on Nov 22, 2015 |
|
#
?
Nov 16, 2015 02:31
|
|
|
Update Eight: Murond Holy Place to Underground Colliery Krile has mastered Archer, so she switches to Monk and Lenna goes to Archer. Galuf and Faris have enough JP to learn the Reaction ability Sunken State (turn invisible upon taking damage), so I put that on them and give Bartz Guts as a secondary ability so he can trigger their invisibility at the beginning of the battle. St. Murond Temple Map Overview Replayable as Random Encounter: No. Allies: Squad 1 (Ramza + 2 Generics) starts at the South end of the map, in front of the temple doors; Squad 2 (2 Generics) starts at the North end. Enemies: Two Mediators, two Geomancers, a Summoner and a White Mage, all male; the Geomancers and Summoner face Squad 1 and the Mediators face Squad 2. Objective: Defeat all enemies. Battle Strategy Overview
This is one of the few iterations of a 5JF where I'm more worried about the Geomancers than the casters. Being stabbed for potentially triple digit damage is nothing to sneeze at, even with my current loadout. 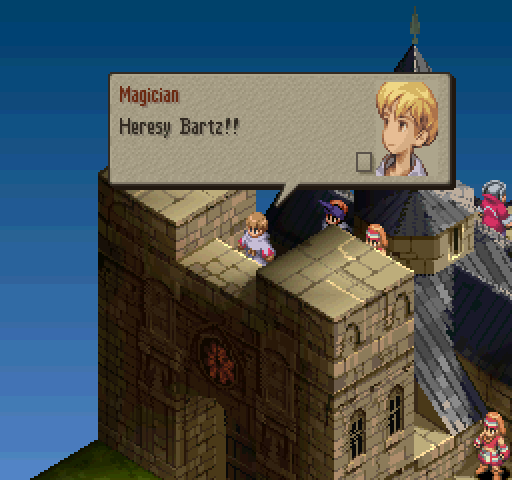 Thanks to a mistranslation, Bartz has offended the church so badly that they've declared his very existence to be heretical.  Bartz decides to defend his right to live by denying that to his enemies.  I try to be clever and have Bartz chuck a rock at Galuf to see if I can trigger Sunken State and have him run around being all invisible, but nothing happens.  Both Galuf and Faris take more damage without triggering Sunken State, so I check its description again to make sure what the trigger condition is. Huh. So either I've been unlucky or Sunken State is picky about what kind of HP damage counts. (Meanwhile, I kill the Summoner and Geomancers before they can do too much harm.)  Faris finally triggers invisibility after getting whacked in the head by the Priest.  On the other side of the battle, I make the mistake of standing my party members together and Lenna falls asleep.  Mimic Daravon is the only Talk Skill that has an additional message after you use it successfully. Seeing this: "Boring story: you're sleepy!" notification made me feel like the game itself was taunting me. Lenna spends the rest of the battle taking a nap.  As I suspected, the Transparency wears off at the end of a turn where I've acted, which means its use in this run is largely restricted to either crossing large swaths of territory undetected, or keeping slower units from further harm until they have a turn.  Joke's on them: Krile is wearing the Barette, so she's not going to die, but the AI will now ignore her because of the status ailment!  Galuf overkills a Mediator by critting for a whopping 546 damage.  One of the Geomancers crystalize, but they don't leave any abilities I can use.  I finish off the last Mediator and end the battle. Hall of St. Murond Temple Map Overview Replayable as Random Encounter: No. Allies: The Squad starts at the South end of the map; Ramza's placement doesn't matter because he always starts one square North of the middle column. Enemies: Vormav (Divine Knight), Rofel (Divine Knight), and Kletian (Sorcerer), standing in a triangular formation at the North end of the map. Objective: Defeat Vormav. Battle Strategy Overview
Since Sunken State proved to be not all that useful, the Ninjas get Hamedo as a Reaction ability instead. Then I enter the next battle with everyone equipped, ready to reset in case I lost something unique. 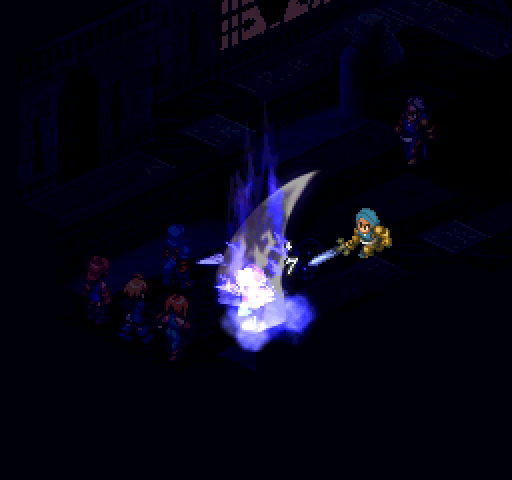 Bartz had a bunch of speed-boosting equipment on, so he got to go first, but he wasn't able to do anything. On Rofel's turn, he kills Faris and breaks her Twist Headband (not a unique helmet and I have one extra in my inventory).  That's the only turn the enemies get, now that my squad has something to aim at. Chapel of St. Murond Map Overview Replayable as Random Encounter: No. Allies: Enemies: Zalbag (Arc Knight), an Ultima Demon, and two Archaic Demons. Objective: Defeat Zalbag. Battle Strategy Overview
In my first (failed) battle, I make the mistake of trying to go after Zalbag exclusively and more or less ignoring the demons.  Blood Suck only works on the same elevation, so I'm careful to stay out of Faris' way, but she's now rendered to standing around uselessly.  Huh, so Giga Flare does not distinguish friend from foe. Too bad I'm awful at strategic positioning and this friendly fire incident happens completely by accident.  Instead of doing anything fancy, the Ultima Demon simply punches Lenna to death.  The vaguarities of the RNG strikes again, as Galuf fails what the game claimed to be a 95% chance success. 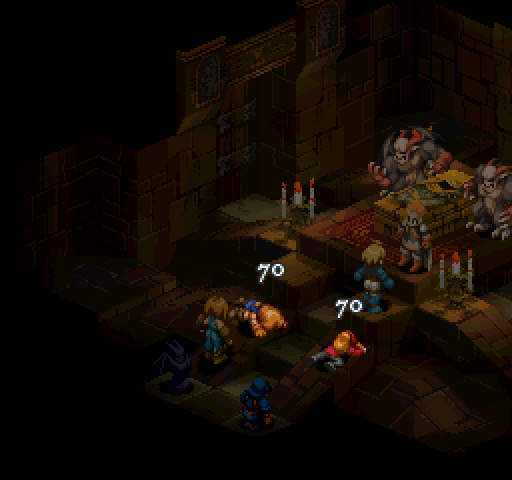 I can't help but wonder if Galuf succeeded on his first try on reviving Lenna, I could've kept her and Faris alive.  Then Galuf drops.  Soon after Bartz is turned into a vampire, one of the other Demons finishes off Krile. (Reset!)  On this try, I change tactics to go for a total enemy kill.  The two Ninjas combine forces to take out the Ultima Demon on their first turns.  One of the Archaic Demons picks the wrong target to attack physically and suicides himself on Faris.  While having a fast cursor is good in other stages, on this one I kept getting hung up on the roof, which for one reason or another still exists along the walls as map tiles in this battle.   Zalbag blocks one of Galuf's punches and one of Faris' punches.  Krile ends the last battle that counts as Chapter Four content, putting me into the Endgame. I'm plenty powerful already, so instead of relying on the RNG to determine my fate, I'm going to decide that my fifth Job will be Calculator. Detailed Calculator Breakdown: Ability: Math Skill. Instant, MP-free cast of just about every non-Summon spell in the game makes it THE go-two secondary skill for all casters, but not so great as a primary skill since it takes so long to get a turn. In this run, it'll be completely useless since I haven't learned any spells at all and even if I did, my Faith is super low. Reaction: Distribute, which shares a small percentage of healing with neighboring allies, and Damage Split, which is like Counter, except it does 1/2 of damage taken and also heals the self for the same amount. Both are not bad for staying alive, but there are better Reaction abilities even in a 5JF. Support: Gained Exp Up, exactly what it says on the tin. Not very useful since levels are not nearly as important as JP or gear. Move: Move-Get Exp and Move-Get Jp, neither of them very useful. As usual, here's the brief breakdown for other Jobs:
In past 5JFs, I tried to see if it was possible to play the sidequests out of order, and it turns out that only Deep Dungeon can be accessed at any point. The rest of them have me running all over the map to fight battles and trigger cutscenes. I decide to tackle the sidequest chains first, going to Lesalia Imperial Capital to trigger the cutscene and pick up Beowulf. Lenna gets switched to Calculator, and Faris to Archer. Colliery Underground Third Floor Map Overview Replayable as Random Encounter: No. Allies: Squad 1 (Ramza + 2 Generics) starts anywhere from the South-West to the South-East corners, Squad 2 (2 Generics) and Beowulf (if you agreed to let him join you) starts at the South-West corner. Enemies: Five male Chemists, one in each of the three cubby-holes, one under the overpass near Squad 2 and one on the top South-West corner. Objective: Defeat all enemies. Battle Strategy Overview
Remember that lovely game of whack-a-mole we played in Grog Hill?  One of the Chemists starts out in a place that you can't see at any angle, so it was nice that Beowulf attacked him first (even though the attempt to Don't Act whiffed). I kill the other floor-level Chemist on my turn.  And the whack-a-mole begins again, or so I thought. This is the only time Phoenix Down sees use in this battle.  This time, Beowulf succeeds in shutting down one of the Chemists.  Galuf drops one of the other Chemists and eventually chases down the one in the South-West corner.  Faris finishes off the Don't Acted Chemist before the status ailment times out.  Beowulf turns the tide in my favor by Don't Acting this Chemist. With the only Chemist that can act left in Critical HP, I even if I can't finish him off, all he'll do is heal himself.  Lenna's turn finally come up, and I don't have a facepalm emoticon big enough to express the annoyance at myself that I have once again forgotten to properly equip an ally.   The last bit of cleanup happens without issue. Before I head into battle, I make sure to have Lenna actually equip a gun so she can do something besides stand around or feed people potions when her turn comes up. Colliery Underground Second Floor Map Overview Replayable as Random Encounter: No. Allies: The Squad starts at the South end of the map, with Beowulf at the East end. Enemies: A male Chemist and two male Thieves, a Behemoth, and a King Behemoth. One Thief is in the upper level cubby hole, the Chemist is in the middle cubby, and the other Thief and King Behemoth is in the mineshaft near the squad. The Behemoth is in the North-West end of the map. Objective: Defeat all enemies. Battle Strategy Overview
  Beowulf and the Thief on the ground level trade attempts to swing at each other.  Galuf kills the Thief on the ground level before he tries anything funny. (The other Thief runs away and does not engage the squad at all.) 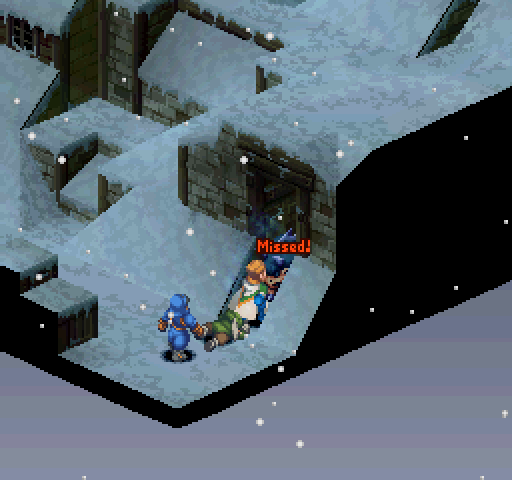 The King Behemoth attacks Beowulf but whiff. (The other Behemoth then also runs away and does not engage. This behavior takes me off guard because I'm used to enemy AI being stupidly aggressive and I don't remember if this is something that always happens in this particular battle.) 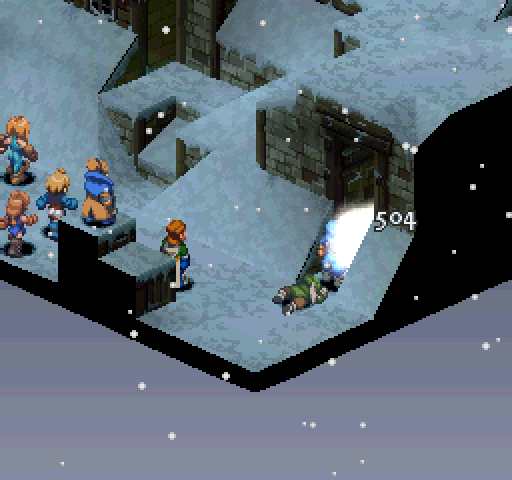 More lucky crits from Galuf.  The Chemist was the only enemy who got to do any damage to the squad at all, and he gets punched facedown into the snow for the annoyance he caused me.  Showing how Earth Clothes absorb Earth Slash. (I probably could've thrown something at him instead, but eh, whatever.)  The Thief unwisely tries to attack Galuf from the front and fails.  Galuf double-punches him to death in retaliation on his turn.  I finish the battle with zero casualties. Underground Colliery First Floor Map Overview Replayable as Random Encounter: No. Allies: Squad 1 (Ramza + 2 Generics) start with Beowulf in the South-East corner, while Squad 2 (2 Generics) start in the South. Enemies: Two male Chemists, two Blue Dragons, and an Uribo. Objective: Defeat all enemies. Battle Strategy Overview
 The presence of snow in these "underground" levels suggests that each floor is not directly stacked on top of one another. It's hard to believe that, with all of the other attention to detail in this game, somebody wouldn't bring up the question of "why is snow falling here?"  Beowulf continues to be awesome at not being useless.  I'd tacked Hamedo on Faris, hoping to see her negate some damage, but this Chemist was standing outside of her attack range when he shot her.  Galuf chases down the other Chemist and drops him.  The Don't Act wore out on the Blue Dragon that Beowulf had disabled earlier, so Beowulf reapplies it.  While whittling down the Blue Dragon's health, Bartz's Train Support ability (that I'd all but forgotten that he's got) triggers. I'm not about to say no to a free Blue Dragon, even if I never use him in battle. The video is (sigh) once again glitched beyond this point, but I do clear it--not casualty free, however, as I lose Faris twice.  Underground Passage in Goland Map Overview Replayable as Random Encounter: No. Allies: The Squad starts at the South end with Beowulf (who forces himself into the battle even if you didn't take him with you), and Reis, who is in the North end. Enemies: An Archaic Demon, two Ochus, and three Plagues, all in the North end. The Archaic Demon is directly menacing Reis, while the other Monsters can go either way. Objective: Save Reis Battle Strategy Overview
Reis can hold her own a little bit at the beginning, but always keep an eye out on her position and health.  Galuf one turn KOs one of the Plagues.  Reis fatally freezes one of the Ochus.  One of the other Plagues gives Faris the Darkness ailment, but this is useless since she has Concentrate in her Support slot.  It takes a while for Beowulf to get into range, but when he does, he disables one of the Ochus.  Reis finishes off the second Plague.  Lenna finishes off the disabled Ochu.  The last Plague petrifies Galuf.  Beowulf seals off the Plague's ability to annoy me. 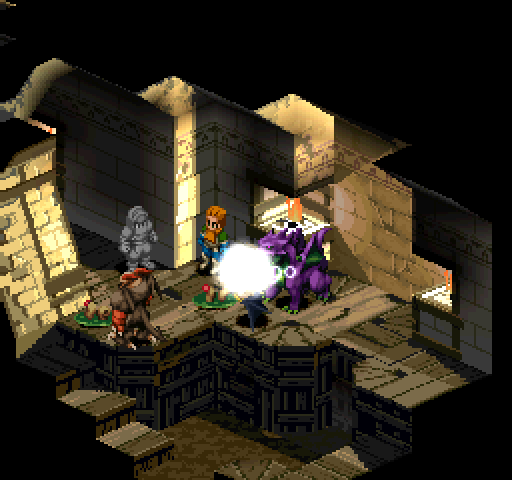 Then Reis kills it before it has a chance to run away. On Lenna's turn, she uses Stima Magic to cure Galuf, and then he goes over to Reis to top off her health.  I slam damage into the last enemy, but it's Reis who once again gets the last hit. Next time: More subquests. dotchan fucked around with this message at 02:20 on Jan 4, 2016 |
|
#
?
Nov 29, 2015 21:46
|
|
|
Wow, ballsy to give yourself Calculator, easily the worst job in the game without magic access. Still, I guess Equip Guns means you can put speed boosting gear in every equipment slot so they might actually get a turn or two, and the guns should keep them safe and allow them to hit some stuff even as everyone else gets more turns. Also, I don't think I've ever seen AI Beowulf be so helpful. He usually starts with only Blind or something, and he will invariably miss every attack anyway. That was an impressive run.
|
|
#
?
Nov 30, 2015 01:15
|
|
|
I don't know what the original Japanese was, but I'm guessing "Underground" is a sideways translation of "buried", as in under snow.
|
|
#
?
Nov 30, 2015 13:39
|
|

|
In lieu of a litany of lame excuses, here's the update that I've been procrastinating on and an assurance that I'm not giving up on this run so close to the finish line. Update Nine: Nelveska Temple to Deep Dungeon Bartz has mastered Mediator and Archer, so I fight an extra grind battle to unlock Ninja for him (and discover, to my pleasant surprise, that he's been picking up a ton of spillover JP from everyone else despite not having Ninja unlocked until now); he becomes the double-punching Ninja while Galuf becomes the Mediator. Nelvaska Temple Map Overview Replayable as Random Encounter: No. Allies: The Squad starts at the South end. Enemies: Worker 7 (Construct), three Cocatorises, and two Tiamats. Worker 7 starts at the temple entrance, the Cocatorises on top of the temple, and the Tiamats on top of the pillars. Objective: Defeat Worker 7. Battle Strategy Overview
 I didn't realize that the monsters in this battle scaled to the party level until I saved it for last in my Knight/Oracle/Mediator/Bard+Dancer/Mime run, after I'd finished Deep Dungeon. Cue me getting murdered several times in rapid succession by Level 99 Cocatorises and Tiamats.  Galuf doesn't quite have enough Move to double-punch Worker 7, so I have him throw a Wave Fist instead, triggering its "incancation". (Bartz got to move first, so I had him shoot the Tiamat closest to him.)  On Worker 7's turn, he tries to punch Galuf, but gets preemptively attacked instead.  Worker 7 turns on Cheat Mode to pointlessly drag out the battle.  Alas, the Monsters still got one turn each; Galuf gets pecked once, but dodges the second time.  Krile Counters one of the other Cocatorises to death.  And then dodges one of the Tiamats and counters it for good measure. (She couldn't dodge the other one, but she lives to Counter it to death as well.) 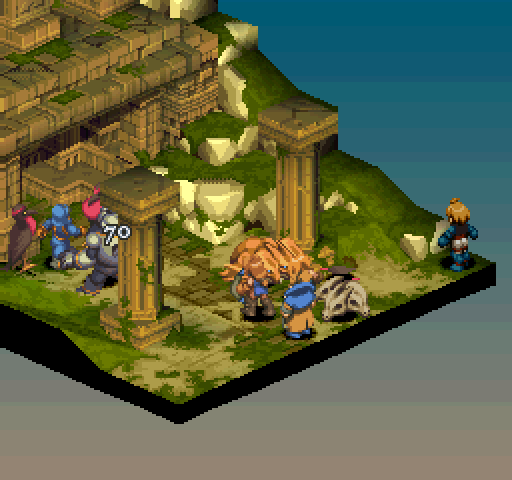 I decide not to gently caress around and have Faris finish off the battle. Their quest chain complete, Beowulf and Reis are sent off to live out their lives peacefully, and I take the long trek back to Goug Machine City, trigger the cutscene where Cloud gets summoned to Ivalice, then go all the way back to Zarghidas Fort City. By magic of save states, I manage to only trigger one random battle between cities. (The game rolls for whether or not you hit a random battle every 7 frames or so, which means that you actually run into fewer total random battles if you make for your destination city in one go. Ergo, when grinding for random battles, it's more optimal to go back and forth between two random battle points.)  ...and this is why I don't want to be in a random battle. There's three more enemies currently hidden by the camera angle, all of them deadlier than most story battles at this point. (I eventually make it, though I also have to sandbag a couple of times.) Slums of Zarghidas Map Overview Replayable as Random Encounter: No. Allies: The Squad starts at the South end; Cloud starts slightly North of the middle, behind the enemies. Enemies: A Monk, two Squires, and three Thieves, all male, all in the middle of the map, though one Squire is hidden by the initial camera angle. Objective: Save Cloud. Battle Strategy Overview
 This is a battle that generally isn't a challenge no matter what Jobs I end up with. Cloud is smart enough to keep himself alive (most of the time), and I've dealt with tougher enemy configurations in Chapter Two.   One of the enemy Thieves tries to attack Bartz, triggers his Hamedo, and manages to dodge once, but still gets dropped by Bartz's second punch.  The Squire that I hadn't noticed until the camera angle shifted moves forward and casts Fire (complete with incantation), doing piddling damage. Mid spell-charge, Bartz uses Wave Fist to put him into Critical HP.  In the middle of taking out the enemy this Thief cheekily dodges one of Bartz's fists, but not the other.  Bartz (obscured by the camera angle) gets sliced because the difference in Height means Hamedo doesn't have a chance to proc.     I finish off the rest of the battle without any casualties or events of note. (I fight another random battle on the way to Deep Dungeon, but I lost the recording and nothing really particular of note happened anyway.) Now, I'm finally ready to tackle Deep Dungeon. As far as I can tell, it's automatically accessible as soon as you unlock the location of the last battle, but in most of my playthroughs I usually get at least Adventurer Level 1 and Treasure Hunter Level 1 in the process of unlocking Jobs, so I haven't tested whether or not those are prerequisites. Nogias Map Overview Replayable as Random Encounter: Yes. Allies: The Squad starts at the North end. Enemies: Eight enemies (see link below for details) who start at the South end of the map, six at the lowest possible elevation, and two at the "step" up. Objective: Defeat all enemies (and find the exit). Battle Strategy Overview
I decided not to screencap Deep Dungeon battles (except the boss battle in END) since there's usually not much to look at. Instead, you get walls of words. Battle report: The enemies were all Red Goblins, several of which stumbled into one of the traps near their starting location and got Death Sentenced, but I eventually killed them anyway for the exp/JP. Bartz, who has the highest Speed and Movement, went exit hunting and found it on the square closest to the Squad's starting location. Faris, as my Archer, could hit just about everyone from her starting location, so she moved very little. Krile got surrounded and killed because I overestimated her ability to survive being swarmed, but she was eventually brought back to life without problems and she ended up being my only casualty. Eventually I have my lower leveled squard members do mop-up and finish the battle. Galuf has also mastered Mediator, so I have him and Faris (previously at Archer) switch Jobs, equipment, and Secondary/Reaction/Support/Movement abilities. Terminate Map Overview Replayable as Random Encounter: Yes. Allies: The Squad starts at the East end of the map. Enemies: Eight enemies along the portion of the map that is approximately 5-7 units high. Objective: Defeat all enemies (and find the exit). Battle Strategy Overview
Battle log: The enemy consisted of an Ahriman, three Archers (one male, two female), a Floatiball, and two Skeletons. Bartz and Krile went exit hunting, while the other ranged party members mostly stayed put and rained death on everything. Bartz ate two deaths trying to stay alive while he was being peppered with arrows, so I sent Krile over to finish off that particular archer. Krile also found the exit in the 5 height potential exit square, under the corpse of a Floatiball after he became a chest. Faris, meanwhile, was all but immune to the Archers thanks to Hamedo (though it did fail once), but with the Monsters also targeting her eventually Galuf had to go over and play heal bot for several turns. Lenna shot things and fed/ate potions like a boss. Delta Map Overview Replayable as Random Encounter: Yes. Allies: The Squad starts on the West end, at the square "island". Enemies: Eight enemies in two squads, Objective: Defeat all enemies (and find the exit). Battle Strategy Overview
Battle report: The enemies consisted of two Cuars, a Grenade, a Mindflayer, two Panthers, a Squidlarkin, and a female Wizard. Bartz found the exit square on the 6 height plateau, then got Berserked by the Mindflayer and Poisoned by the Wizard. He eventually died with only one enemy kill to his name, so Krile had to go over and resurrect him. Meanwhile, Galuf and Faris slowly made their way off the island because they couldn't hit very many enemies from their starting location, but Bartz and Krile ended up doing most of the heavy hitting, with Lenna and Faris occasionally being able to pick off stragglers with their guns. I finished the battle with no other casualties. Faris has mastered Mediator (and so has Lenna via spillover JP), so she and Krile (currently at Monk) switch. Valkyries Map Overview Replayable as Random Encounter: Yes. Allies: The Squad starts at the South-East corner. Enemies: Four to eight enemies; if four, they start at the North-West corner, and if eight, then there's a second squad in the middle of the map. Objective: Defeat all enemies (and find the exit). Battle Strategy Overview
Battle report: The enemies consisted of a male Archer, a Gobledygak, a Mindflayer, and a Sacred. While exit hunting, Bartz got tag-teamed by the Mindflayer, Gobledygak, and Sacred, killing him. With support from the rest of the team, Krile was then able to put the Sacred into Critical HP, which made the remainder of the battle much safer, but it's still a while before Bartz can get brought back to life (and he still gets dropped one more time before the battle ends). Bartz finds the exit square somewhere near the bottom of the map (it's been a while and the recording unfortunately glitched out), then I finish the battle with no other casualties. Mlapan Map Overview Replayable as Random Encounter: Yes. Allies: The allies begin at the top of the tower. Enemies: Up to eight enemies in the South-West corner. Objective: Defeat all enemies (and find the exit). Battle Strategy Overview
Battle report: I had to redo this battle (all Treant family enemies who could only attack enemies on the same elevation as they were) courtesy of my idiot self forgetting to save (see below for details). On the second try, the enemies were Ahriman, a female Monk, a female Summoner (with Time Magic), a Trent, and 4 Woodmen. One of the Woodmen (who, to my irritation, get healed by Earth Slash, so I couldn't use that for crowd control) was blocking a possible exit tile, so Bartz punches him to death and then the rest of the team takes out the Summoner. Krile drops to a single Wing Attack; after avenging her with Faris, Lenna brings her back to life on her turn and stays on Potion duty while Krile talks up Galuf's Brave (Galuf himself can rain arrows on pretty much any tile the enemies are standing so he stays put). I have Bartz stay where he is to wait for the Woodmen's corpse to disappear and throw Fire Balls (if he is able), so Faris goes exit hunting instead. Eventually Bartz can't hit anything from where he's standing, so he goes to join Faris. And once Galuf hits 100 Brave, Krile starts giving herself pep talks. The enemy Monk gives me quite a bit of trouble as she has Elf Mantle as an accessory, giving her 25% frontal evasion, but eventually Galuf finishes her off. Bartz dies to a Leaf Dance while I'm exit-hunting, but he happens to do so in a place where Lenna can drop a Phoenix Down on him, so I have her sandbag while Faris continues to try potential exit tiles, succeeding in the South-East corner. Galuf and Bartz finish the battle, which drags a little bit longer than I'd liked because I couldn't kill the last enemy before he collected a Crystal. Tiger Map Overview Replayable as Random Encounter: Yes. Allies: The squad starts out in the North-East corner. Enemies: Up two 8 enemies starting in the middle two "rows" of the map. Objective: Defeat all enemies (and find the exit). Battle Strategy Overview
Battle report: I wiped on my first try because the enemies were Behemoths, a Cuar, King Behemoths, and Vampires and I could not win the damage race--I left too many enemies in Critical HP and they decided to all rush me in one suicide charge that ended up dropping everyone except Lenna (who was in Calculator) and I decided to reset at that point, only to discover that I'd forgotten to save after beating Mlapan. On my second try (being sure to save beforhand this time), the enemies were a Dark Behemoth, an Explosive, a Plague, and a Red Panther, but I couldn't finish it on account of Krile turning into a chest before I could bring her back to life. On my third try, the enemies were 4 female Archers, a Black Goblin, two Bull Demons, and a Sacred. The Monsters spawned closer to me, so I had the squad take care of them first, though I also temporarily lose Bartz in the process. The Archers are taken care of via a combination of direct firepower and Damage Split. Bartz and Lenna die while they are exit hunting, but I manage to tame the Sacred and then a Bull Demon to my side, turning them into a distraction for the other enemies (they don't live long enough to do anything else and then they crystallize). I still have to sandbag to keep Lenna around, though, because Bartz doesn't find the path further on until he reaches the potential exit tile in the second to last row on the other end of the map. Eventually Galuf and Krile combine forces to finish off the last archer before Lenna, once again face down in the dirt, disappears forever. Galuf has mastered Archer, so he and Lenna (formerly at Calculator) switch roles. Krile has also mastered Mediator--and Mediator becomes the first mastered Job of this run, but I still have her switch with Faris so Bartz has an easier time getting his stats boosted. Everyone except Bartz (who still has to unlock Calculator) gets Damage Split as a reaction ability. Bridge Map Overview Replayable as Random Encounter: Yes. Allies: The Squad starts out on the South-East side of the map. Enemies: Up to eight enemies in two squads, one on the West side of the map, the other on the North-East side. Objective: Defeat all enemies (and find the exit). Battle Strategy Overview Battle Report: The enemies were a male Archer, Bull Demon, a female Priest, and a Squidlarkin. Krile found the exit by standing on the 7 height tile, and then the battle was finished without any casualties, though Bartz came close (he dodged an arrow that would've otherwise killed him). Voyage Map Overview Replayable as Random Encounter: Yes. Allies: The squad starts at the North-West elevated portion of the map. Enemies: Up to eight enemies on the "staircase" in the South-East corner. Objective: Defeat all enemies (and find the exit). Battle Strategy Overview
Battle report: The enemies were a male and female Calculator and two female Summoners. I had Faris lower everyone's faith to 0 and laughed my way to victory. (One of the Summoners managed to drop a Titan on the party, but it did piddling damage and she died soon afterward.) Bartz found the exit tile in the North-West corner of the map, then the last enemy (the male Calculator) suicided himself on Faris. Horror Map Overview Replayable as Random Encounter: Yes. Allies: The squad starts at the height point of the map. Enemies: Up to eight enemies on the lower elevation surrounding the squad. Objective: Defeat all enemies (and find the exit). Battle Strategy Overview
Battle report: The enemies were 3 male archers, 3 male Knights, and 4 female Wizards, but I had to reset because I stranded Bartz and Krile on the four tile island and they would've Crystallized before I could reach them. On my second attempt, I got the exact same party, so instead of sending Bartz and Krile away immediately, I left them where they were until the enemy was crowded on the East end of the map, then had Bartz jump to the South. Galuf still dies to arrows, but since he's surrounded by his teammates it's not a problem this time. Bartz finds the exit tile in the South-West corner of the map, then starts heading back up toward the rest of the squad, who heals each other and gets out what attacks they can while the Archers suicide themselves on Damage Split (the Knights, not being able to reach the squad at all, stand around uselessly). Dropping everyone's Faith to 0 eventually renders the Wizards a complete non-issue (though by the time Faris succeeds in doing so, there's only one Wizard left standing and eventually Lenna drops that Wizard). Bartz rejoins the action in time to finish off the last Archer, and since the Knight who attacks him manages to block both of his fists when Hamedo goes off, he gets to double punch that Knight from behind; the last Knight expires to Death Sentence because he stupidly jumped on the trap on the four-tile island. End Map Overview Replayable as Random Encounter: Yes. Allies: The squad, along with the guest Byblos starts at the very bottom of the map. Enemies: 6 Apandas along the crescent-shaped map, with Elidibs (Zodiac Boss) at the very top. Objective: Defeat Elidibs. Battle Strategy Overview
(No Youtube version of the video, because it turned out extremely jittery.)  In most runs, this is probably the toughest battle of the entire game, as the Apandas rain damage and status ailments on the party--and then Elidibs moves into range and really starts laying the beatdown. Thanks to Mediator, it's much less painful.  I decided against dropping my Faith all the way down to zero, as the Apandas would forgo trying to use ranged attacks completely and use melee attacks instead, something that I don't want to happen.  Galuf takes first blood, killing one of the Apandas before it can even finish casting its spell.  Krile drops the next Apanda after it unsuccessfully tries to poison the squad.   Bartz would've been the one to make the next kill, but he wiffs on the second hit, necessating Krile to mop up for him.   As if to make up for his previous failure, Bartz succeeds in preemtively stopping two Apandas from hitting him.  As soon as Elidibs moves into range to be attacked, I start going at him, though the Apanda proves to be in the way.  I only manage to attack him one more time before he moves forward to charge an attack, but that means I can hit him while he's charging for more damage.  So Elidibs isn't reduced to melee attacks on a low Faith party, he has Midgar Swarm, a spell whose damage is solely dependent on his MA (and at 400+ HP in damage, I couldn't survive this even if I min-maxed my stat gains); I now only have a few turns before I lose over half the party.  That's 588 damage per fist. In a game where it's rare to see damge in the hundreds, Bartz can now potentially hit for thousands. That's 588 damage per fist. In a game where it's rare to see damge in the hundreds, Bartz can now potentially hit for thousands. Krile's numbers are not nearly as impressive, but still nothing to sneeze at.  To compare, Lenna's probably not going to crack 200 HP worth of damage unless she critical hits an enemy with perfect zodiac compatibility, and the best I've seen out of my two gun weilders is in the 100+ range. At this point, the video's glitched out again, but I've pretty much won. Midgar Swarm goes off, killing Lenna, Faris, and Galuf; next, Bartz gets another turn, this time "only" hitting for about ~800 HP; then Byblos surprises me with a kill steal, getting the last hit with an attack does damage based on the difference between Max and current HP, capped to 999. I'm as ready as I'm going to be. Monk + Ninja alone has carried me through the endgame, but I've gained a gigantic pile of Exp, JP, and money on top of that. Even "gimping" myself with Calculator hasn't been as big of a handicap as I expected, since I can turn them into a second gun user and give them Speed-boosting equipment. Gentlemen: next time, I'm going to show you how to kill a god.
|
|
#
?
Dec 26, 2015 06:26
|
|
|
IIRC, OFS said in his LP (OMG, WTF) that the crossdressing Time Mage is female and can unlock Dancer, though she'll use Bard sprites. 
|
|
#
?
Dec 26, 2015 12:31
|
|
|
Those are Hyudras, not Tiamats.
|
|
#
?
Dec 26, 2015 13:27
|
|
|
FeyerbrandX posted:Those are Hyudras, not Tiamats. The lowest tier yellow ones are Hyudras and can only Triple Attack. The black ones are Hydras (one letter difference, but what difference it is!) and can Triple Flame.
|
|
#
?
Dec 26, 2015 14:35
|
|
|
AlphaKretin posted:IIRC, OFS said in his LP (OMG, WTF) that the crossdressing Time Mage is female and can unlock Dancer, though she'll use Bard sprites. Yup, I think that's right. It's a fun quirk if you want a unit with female stats but prefer the male sprites (like for Black Mage). Of course, most people aren't interested in raising a new generic unit literally right before the final battles, but eh.
|
|
#
?
Dec 26, 2015 23:16
|
|
|
Update Ten: Back to Where it All Began (Orbonne Monastery battle gauntlet) There's basically nothing else I need to spend money on, so I drop all of my dosh on the best Axe in the game (as throw's damage formula scales with the weapon's attack power); Bartz will learn the ability to throw Axes as soon as he has the JP for it.  As a matter of curiosity, I check the Brave Story entries for characters I'd dismissed from the party. All of them say some variant of "because of your circumstances, deserted from the frontline during battle" at the end. Thanks to Kheldarn, I also think to look at the description for Orbonne City: "Monastery built 12 centuries ago. Has an underground library with many books." (And what books! Many of them are almost human-sized!) Underground Book Storage Fourth Floor Map Overview Replayable as Random Encounter: No. Allies: The Squad starts out in the North-East cubby-hole. Enemies: An Archer, three Knights, and two Monks, all male. Two of the Knights are on either side of the bridge to the West, the third Knight is on the West end of the ground level, and the other enemies are along the ground level to the South-East. Objective: Defeat all enemies. Battle Strategy Overview
 It's a little bit disappointing how many of these endgame battles consist of very basic enemies, but Knights generally do have the highest HP of all Jobs and the game can only display so many unique sprites on screen. Even if I wasn't playing a 5JF, the developers had to assume that the squad is in five completely different Jobs and plan accordingly.  As his opening move, Bartz overkills the Archer mid-charge.   Then he dodges the first Monk and Hamedos the other to death.   Poor Zodiac compatibility means Bartz only had a 48% chance to hit the Monk who is still alive, so he uses Earth Slash instead; on the Monk's turn, Bartz misses both attempts to Hamedo, so Lenna (who has Concentrate to avoid Evade shenanigans)  I should've just had Galuf wait things out or moved him closer to the front, but I was kind of on auto-pilot and wasted a turn instead.  Bartz kills the Knight who was slowly making his way towards the Squad.  Then the last remaining Knight suicides himself on Krile. I don't have any backup equipment, so my melee fighters go into the next battle nude because I'm not sure I can finish Rofel off before he breaks something. Bartz learns the ability to throw Axes. Underground Storage Fifth Floor Map Overview Replayable as Random Encounter: No. Allies: The Squad starts on the North end of the map. Enemies: Rofel (Divine Knight), Summoners, Time Mages, and Wizards, all male. Rofel is in the middle, with the casters surrounding him on all sides. Objective: Defeat Rofel. Battle Strategy Overview
Bartz and Krile are reequipped and I head into the next battle. Murond Death City Map Overview Replayable as Random Encounter: No. Allies: Squad 1 starts on the South-West side of the map while Squad 2 starts on the North-West side. Enemies: Kletian (Sorcerer), two Ninjas, two Samurai, and two Time Mages, all male. Kletian takes point, the Ninjas and Time Mages are one row behind him, and the Samurai are another row behind them. Objective: Defeat Kletian. Battle Strategy Overview
 I did toy with the idea of dragging out the battle, but I eventually decided against it.  It always feel good to see "Miss" or "Blocked" come up for the squad. (Conversely, it always feels bad to see the same happen when I try to hit something.)  And this is one of the reasons why I didn't want to try to kill everything--I didn't want to run my face into Blade Grasp over and over again, even if I had other tools to deal with the Samurai.   Flare is usually the most powerful black magic in the game, whose huge damage is (almost) worth the charge time should I allow it to go off.  I don't.  Lost Sacred Precints Map Overview Replayable as Random Encounter: No. Allies: Squad 1 (Ramza + 2 Generics) starts on the North-East corner of the map, and Squad 2 (2 Generics) starts on the middle North side fo the map. Enemies: Balk (Engineer), a male Chemist, a Dark Behemoth, a Hyudra, a Hydra, and a Tiamat. Objective: Defeat Balk. Battle Strategy Overview
 I have to grudgingly admit that this battle is very well designed. The geography of the map and the enemy selection makes it so that either jumping the gap or taking the long way around is incredibly dangerous.   Balk fails to disable my squad twice.  Lenna kills the Hyudra, ending her contribution to the battle, as Balk puts Don't Act on her soon afterwards.  The ability to automatically tame monsters as soon as my Mediator (Faris in this case) shoots them into Critical HP has never not been an awesome Support ability when it is relevant.  My new friend immediately kills the annoying Chemist with Triple Flame; Bartz still can't hit Balk from where he is, so he goes over to do some healing.  Galuf gets Triple Thundered to death by the Tiamat that I'd neglected to keep track of until this point. (Faris also gets hurt, retaliates with Damage Split, then feeds herself a potion.)  The Tiamat tries to Triple Thunder Krile, but miss on all three attempts.  Faris gets stabbed for more than her max HP. 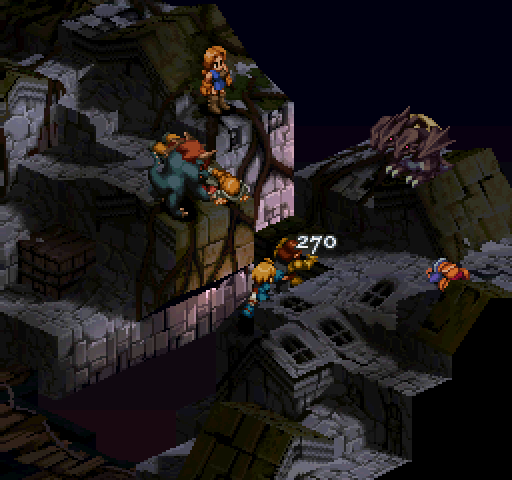 Instead of dragging the battle out any longer, I have Bartz double punch Balk to death. Everybody (except Krile) equips Black Costume to block being Stopped before I head into the next battle. Graveyard of Airships (first battle) Map Overview Replayable as Random Encounter: No. Allies: The Squad starts out on the East end of the map; Ramza's placement doesn't matter as he always starts out in the middle of the squad where the gap in the squad placement screen is. Enemies: Hashmalum (Zodiac boss). Objective: Defeat Hashmalum. Battle Strategy Overview
 You'd think Hashmalum would have more HP for an endgame boss. Still, he hits like a truck. It's certainly possible to damage race him depending on your Job, but it'll be a nailbighter all the way to the finish line, which hits Bartz, Faris, and Krile. (He also gains enough JP to go up a Job level.)  The incantation for Death Cold, Hashmalun's area of effect Slow-causing ability.  Faris gets first blood.  Bartz chucks and axe for the only time in this run, as it turns out that Throw, though it has a better attack range, doesn't inflict as much damage as Wave Fist (if I'm not double-punching them to death first).  Lenna, not having enough time to charge anything, just shoots for 100 HP.  Galuf moves forward and shoots as well.  Hashmalum charges Meteor; only Faris has a chance to attack him while charging before the spell goes off.  Even with such low Faith, Meteor still hurts quite a bit, though some of the pain gets mitigated with Damage Split and then Lenna, who can't hit Hashmalum from where she is, heals Faris on her turn.  Hashmalum punches Krile to death (nuts, I knew I should've given her Hamedo instead!).  Galuf shoots Hashmalum again, but since it does the same damage I don't grab the screenshot. Then Hashmalum moves forward and punches Galuf for huge damage, triggering Damage Split (again, not pictured). Without his best equipment, Bartz "only" punches for 650 HP, but by this point I've hurt Hashmalum enough to kill him. Let's take a closer look at our lovelies before heading into the last battle (I forget to re-equip best gear, but oh well):  Bartz mastered Monk and Mediator, and is very close to mastering Archer, but I never bothered to unlock Calculator for him because I didn't really need to. Since he has good compatibility with the last boss, he's in the highest DPS Job. (And he, Lenna, and Krile would've have another +2 PA if they had Power Costume equipped.)  Galuf has mastered Archer and Mediator.  Lenna has mastered Mediator and is very close to mastering Archer.  Faris has mastered Archer, Mediator, and Monk.  Krile has mastered Archer and Mediator, and is very close to mastering Monk. Since she also has a good compatibility Zodiac sign, she's in the next highest DPS Job. Graveyard of Airships (battle two)--this battle uses the same map as the previous battle, except with all blocked tiles cleared of obstruction Replayable as Random Encounter: No. Allies: The Squad starts out on the East end of the map; Ramza's placement doesn't matter as he always starts out in the middle of the squad where the gap in the squad placement screen is and then moves one square forward; Alma always starts out to the South of Altima. Enemies: Altima (Holy Angel) and four Ultima demons; Altima is in the middle of the map while 2 are directly behind her, while two more are further back, making a wedge-shaped formation. Objective: Defeat Altima (both f`orms). Battle Strategy Overview
 In most runs, the AOE damage is the biggest threat; here, it's less so but I still decide to go for the minions a few times instead of focus firing on the boss.  Once again, Faris gets first strike.  I think I could've gotten closer to, if not reached, 4-digit damage again if I was in the right equipment, but alas, it was not to be.  Altima chops Alma to death before she can accomplish anything worthwhile.  Lenna tries to Revive Alma so she can play distraction, but she misses because I tried going for the lower percentage success move because it would've given her a bit more HP. This tactics turns out to be pointless when Galuf succeeds via applying Phoenix Downs, because Altima promptly chops her down again.   Being hit with Hurricane (a Wind-elemental AOE attack) still hurts quite a bit because it's purely based on the monster's Magic Attack.  Because of the above, I decide to have Bartz kill one of the minions in case the battle drags on longer than expected, and Lenna uses a Phoenix Down on Alma.  One of the other minions is so eager to drop Alma back onto the ground that he friendly fires Altima with his cast of Nanoflare. 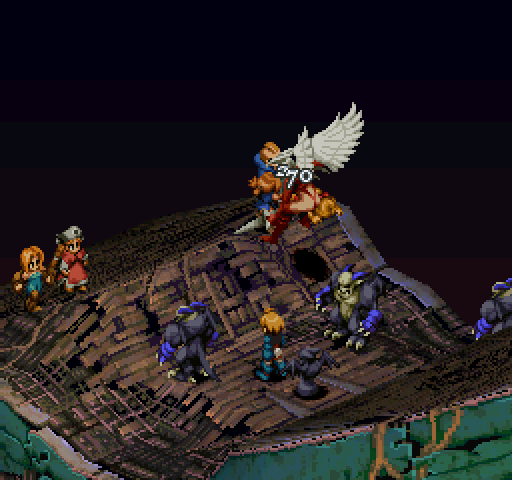 And then Altima finishes off Lenna. 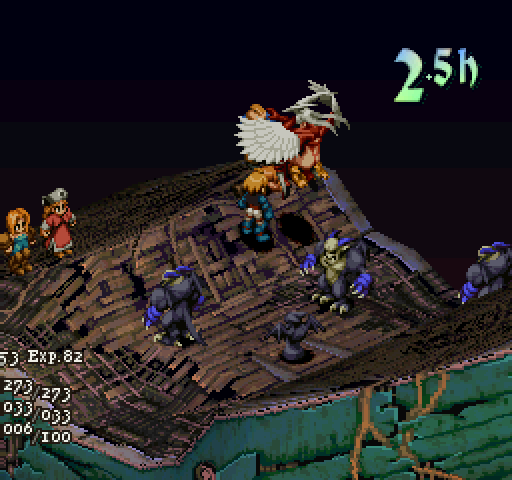 After a bit of deliberation, I send Bartz to punch some damage into Altima, and I'm a little bit surprise when she drops to a single punch (as I hadn't been keeping track of how much damage I'd been doing up to this point.)  Faris wastes no time in starting to chip away at the second form.  Bartz alone hits for about 1/4 of Altima's max HP. Keeping him alive is top priority, but I still screw around with trying to sandbag with the other characters as well, having Galuf raise Lenna and then Lenna healing both of them.  Except then I make an elementary movement error that eventually costs me big time--Revive can only work on tiles of the same elevation, and Alma's on a slope that puts her 0.5 height lower than Bartz's current position.  Meanwhile, Krile can't quite reach melee range yet, but she's helping.  The last time Altima cast Grand Cross, she didn't do anything particularly crippling; this time, she puts Lenna to sleep, confuses Galuf, and turns Bartz into a frog.   Then she punches Bartz and Lenna to death. (Galuf wastes a potion on Krile, who was still at full health, before he's shot back into sanity.)  Krile punches Altima back.  It takes a couple of turns worth of sandbagging (taking potshots at Altima when possible) before everyone is in fighting shape again, at which point Altima suicides herself on Bartz by triggering his Hamedo.  I don't stay around to watch the rest of the ending cutscene or the credits, but I do send off this run with a heartfelt "Farlem". I'm going to take a short break while I decide what to do next. Here's the options I'm considering:
dotchan fucked around with this message at 18:27 on Jan 9, 2016 |
|
#
?
Jan 6, 2016 00:57
|
|
|
vilkacis posted:did someone mention my name Kheldarn and Vilkacis, we must see the world burn before this gets locked up.
|
|
#
?
Jan 6, 2016 01:15
|
|
|
FeyerbrandX posted:Kheldarn and Vilkacis, we must see the world burn before this gets locked up. This final gauntlet has been kicking my rear end so hard, I've had to take a break before I end up breaking something...
|
|
#
?
Jan 6, 2016 02:32
|
|
|
Congrats on beating your first run, with a spell-less calculator and all. I think something got messed up here, though:dotchan posted:Flare is usually the most powerful black magic in the game, whose huge damage is (almost) worth the The 4 Monster+ Ramza challenge always seemed like it'd be pretty hard. They're just so limited in what they can do.
|
|
#
?
Jan 6, 2016 03:36
|
|
|
I thought the 4 monster + Ramza challenge was incredibly front loaded in difficulty until you get things like hydras and behemoths, at which point it becomes incredibly easy.
|
|
#
?
Jan 6, 2016 06:39
|
|

|
Skyridge posted:I thought the 4 monster + Ramza challenge was incredibly front loaded in difficulty until you get things like hydras and behemoths, at which point it becomes incredibly easy. My impression from playing the game is that the front-loaded difficulty feels like a feature of the game itself. Early game you're almost always behind in levels, Jobs, and equipment (unless you stop to grind), all of which stop being an issue by the end of Chapter Three or so, and then the game just hands you T. G. Cid for free soon enough. dotchan fucked around with this message at 14:59 on Jan 7, 2016 |
|
#
?
Jan 7, 2016 01:23
|
|
|
dotchan posted:My impression from playing the game is that the front-loaded difficulty feels like a feature of the game itself. Early game you're almost always behind in levels, Jobs, and equipment (unless you stop to grown), all of which stop being an issue by the end of Chapter Three or so, and then the game just hands you T. G. Cid for free soon enough. Yeah, but I meant that in comparison to other challenge runs, which generally stay pretty consistent in difficulty.
|
|
#
?
Jan 7, 2016 05:14
|
|
|
Update Eleven: On the Fast Track to Success (#random, Sweegy Woods to Fort Zeakden) The #random variant is like a regular Five Job Fiesta, except each time I select a new Job, I get to pull from the pool of all previously legal Jobs in addition to any new Jobs that have become legal up to that point. This makes #random easier than a regular run (in theory) since each "tier" of Jobs have multiple good to great options available and you can get another chance to get them in your party each time you roll for a new Job. As it was pointed out that having only one Job per Chapter of plot might be too slow of a progression for some players, I'll also showcase the "Faster Job Track" option that I added to the challenge as a result of those suggestions. So in this run, my second Job will be legal at Lenalia Plateau, my third at Bariaus Hill, and my fourth at Orbonne Underground Monastery 2F (though obviously I will have to roll and unlock the Job earlier). The fifth Job, being optional, is still not legal until the sidequest/endgame content. Since vilkacis and Kheldarn have already shown off Wizard and Knight in their runs, I'm going to forgo rolling for my first Job and choose Priest. Detailed Priest Breakdown: Ability: White Magic, giving access to almost all of the healing/buffing/resurrection spells and Holy, a high MP cost, high charging time attacking spell. While having Holy makes short work of assassination missions throughout the game, it's usually not very useful in early game regular story battles, as you won't have enough Magic Attack to one-shot human enemies and you only have enough MP to cast it once per character at that point. Reaction: Regenerator (Brave% of adding Regen after taking damage). It's not completely useless, but it'll probably become obsolete as other Jobs are unlocked. Support: Magic DefendUp (lowers damage received from magical spells and attacks by 33% and lowers success rate of status attack magic); indispensable when facing enemies who has attacks that depend on Magic Attack--in addition to casters, this means Jobs such as Geomancer and Samurai--and Zodiac bosses, especially since it also stacks with Shell. Move: None. Since the game's pre-generated generics tend to have better stats than what I can hire out of the soldier office (and the save I left behind from my first run ended up not having enough money to hire a full party), I replay the beginning of the game again. None of my generics spawned with Rock Throw, so I decided not to get it for anybody except my guests. I've already covered everything there is to say about the Gariland Magic City and Mandalia Plains battles in my previous run, so I decided not to screencap them. (But I did upload the videos for those of you who still want to see my turn-by-turn decisions.) Here's how the party looks as it's (almost) ready to officially begin another run of the 5JF (Delita is a Knight to help tank and do damage and Algus will switch as soon as he has Knight available):  This time, the main character is named Butz after the PSX version of FFV. As usual, he is a Capricorn for good endgame boss compatibility.  Galuf is a Taurus, giving him good compatibility with Butz.  Faris is a Gemini, giving her bad compatibility with endgame bosses but otherwise has no effect on the party.  Reina is a Cancer, giving her best compatibility with Butz.  Cara is a Scorpio, giving her best compatibility with Galuf and good compatibility with Reina. (By the way, I didn't plan any of this--I just started up the game and picked characters with good Brave and Faith values. It was only afterward that I thought to double check Zodiac compatibility and was pleasantly surprised by how well things worked out.) I sell everything I don't need to load up on the best equipment and Battle Boots for the main Squad (except Cara for now since she's on bench duty for the most part) and armor for Delita and Algus. Sweegy Woods - With Delita and Algus dealing so much damage, I leave most of the monster hunting to them and finish the battle with no casualties. Highlight(s):  Reina dodges a Poison Nail. Delita has enough JP to learn Weapon Guard and Throw Rock, and I barrel headlong to the next battle. Slums in Dorter - The enemy can't hurt the squad faster than they can heal back any damage they take. Algus and Delita spend a while getting to the front lines (they usually go for the rooftop archer, but since Lenna and Faris beat them to it they end up spending a few turns standing around waiting for the other enemies to get into range), but by the time they do the enemies fall to their swords one by one. Highlight(s):  Cure's incantation.  The rooftop archer aims for Galuf, but Faris is in the way and takes the hit instead (the camera is focused on Galuf when this happens, but you can just barely see it in the video). Now Algus has also enough JP to learn Throw Rock and unlock Knight, but I don't switch him yet because I don't feel like going to Igros to pick up gear for him. The main squad all learn Raise just in case. Cellar of Sand Mouse - Attempt #1 ends in abject failure because I forgot to give anybody Phoenix Down and I ran out of MP while trying to stay alive and Galuf crystallizes, necessitating a reset. Attempt #2 ends similarly, proving that I need some more levels (and play much less recklessly) before I can tackle this battle. Highlight(s):  On the first attempt, Delita parries a punch with his sword.  And Algus (who runs away from my Priests for some reason--on the retry he heads toward them instead) eats a critical hit and then dies on the next attack.  Having taken care of the Monk that had been menacing Squad 1, I have Galuf recklessly charge into the fort--in retrospect, this is probably the mistake that costs me the battle, as he immediately becomes a priority target and eventually dies.  Mistake number two: not checking the AT menu to see if this Cure goes off in time to save Galuf, wasting MP.  On the retry, I get careless again and Galuf is swarmed; the rest of the battle is spent pointlessly sandbagging, as Galuf can't get a turn to run away before he is dropped again and I also lose everyone else to more of the same. I switch Algus to Knight, run back to Igros to buy him gear, grind the squad to at least level 4 and have them learn Protect, give Delita the Iron Sword that I'd gotten from the Dorter battle that I'd forgotten about and Butz the Linen Robe for extra MP. Attempt #3 succeeds at last. I still can't believe this battle, of all places, was my first failure. Highlight(s):  The incantation for Protect. It succeeds, and with Algus taking less damage, he coordinates with Squad 2 to keep the enemy from surrounding it.  Only one of the Monks heads for Squad 1, so I send Butz over to support the other squad. Meanwhile, that Monk tries to Spin Fist Delita and Faris, but only hits the latter. They eventually work together to finish him off. 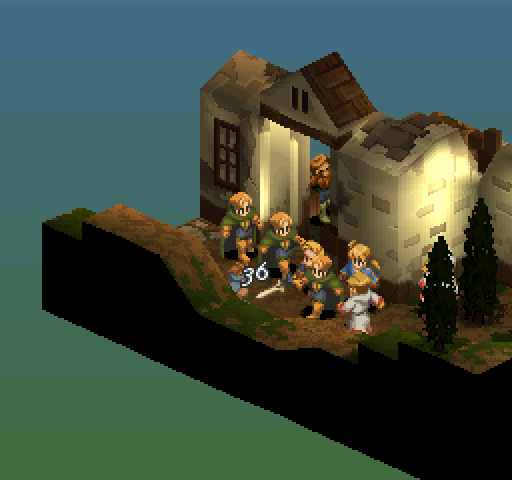 While taking whacks at the enemy, Algus succeeds in a critical hit that also knocks back the other Monk.  Once again I forget to check the AT menu and get Butz killed before he can finish casting a Cure (though it is possible he would've died anyway), but this time it doesn't end up disastrous for my party because I'm smarter about sandbagging. Algus takes vengance for Butz on his turn. 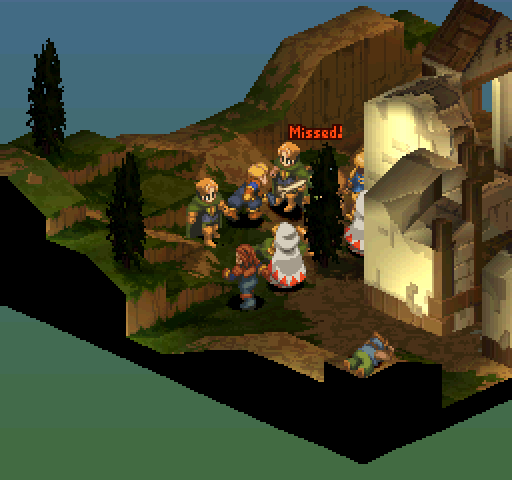 I still have no idea how the AI picks its targets; here, Algus whiffs on an attempt to stab one of the Knights from the front.   Lenna tries twice to help do damage, but gets blocked the first time and whiffs the second. (Butz, having been brought back to life and eventually full health, succeeds in hitting him when his turn comes up and then Delita finishes him off.)  I was very tempted to pick up this Throw Stone, but eventually decided against it as I don't ever expect to take Item off my secondary slot. Since choosing to learn from a Crystal picks up all listed abilities, I selected the option to heal HP/MP instead. I went back to Igros to watch plot and get new gear for Algus and Delita, then fought a battle to grind money and levels so the squad is decked out in new gear as well and has Magic Defense Up as their Support ability. Thieves Fort - I spend quite a few turns knocking the ladies back to their senses after they get their hearts stolen by enemy Thieves and Miluda causes a few close calls, but in the end I kill everyone but one Thief, who runs away into deep water to avoid death without any casualties of my own. Highlight(s):  (Image capped from Youtube because I missed it like a dumbass and deleted the original video.) Late in the battle, Algus stupidly chases one of the Thieves (already at Critical HP) into deep water, wasting a turn. Thieves Fort done, Delita has enough JP for Magic Defense Up as well so I tack it on him for a bit of damage mitigation in future battles, go to Igros for plot, and then roll Job #2.  Though weak in direct damage, Thieves are a pretty good utility class, and their evade is second only to Ninjas. Detailed Thief Breakdown: Steal: Denying the enemy gear--and thus lowering their max HP--while getting gear/sell fodder for my party is great (if it succeeds) and Charm is great for temporarily gaining allies and/or giving the enemy a different target to whale on. Interestingly, Charm's success rate is based on MA, so it might be worth it to pack Steal as a Secondary while one of the squad is in Priest (or any other Caster class that I might end up getting). Reaction: Caution (Brave% chance of going into Defend status when taking damage, further mitigating damage) is one of those "better than nothing" Reaction abilities, but I have no idea if it'll ever see use in this run; Gilgame Heart (Brave% chance of gaining money equal to damage taken) is pretty much useless for making money, as I really don't want to put my units into unnecessary danger and the money gained is such a piddling amount that it's not worth getting; Catch (Brave% chance of adding an item Thrown at the unit targeted to the inventory) will help negate the threat of enemy Ninjas, even if that's only at a distance, and is definitely worth getting to help me survive the Yardow Fort City battle and I might even try for getting rare items in Deep Dungeon. Support: Secret Hunt (automatically vanishes Monster corpses from the field and adds rare items for sale in the Fur Shop) is definitely a very good Support ability to have while fighting against Monsters, especially Undead enemies whose corpses would otherwise have a chance to come back to life. Paired with a Mediator, this means the chance to breed monsters for super rare items. Movement: Move +2 (an upgrade from Squire's Movement ability) and Jump +2 (an upgrade from Archer's). I'll probably get both of them and equip one or the other depending on which battle I'm going to fight next. I buy an extra pair of Battle Boots that'll go on Cara for the Lenalia Plateau battle and then lent to Delita for the remainder of Chapter 1. Next, it's time to grind for Thief and kit out the Squad with the best gear. Galuf and Faris are going as Thieves and every one else (who picks up Shell) will stay as Priests. Lenalia Plateau - I luck out and my Thieves have good to best compatibility with several of the enemies, shutting them down to managable levels. Delita is my heaviest hitter to begin with, then wanders off to eliminate minions that were no longer a threat to me. I eat a few deaths, but it's nothing three Priests can't fix. Highlight(s): 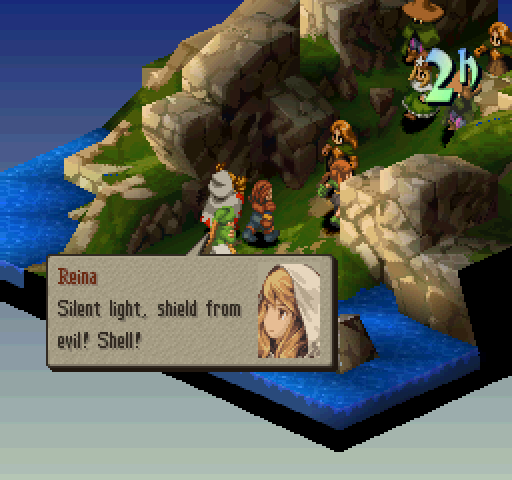 The incantation for Shell.  The incantation for Bolt 2.  Proof that Shell stacks with Magic Defense Up, something that I didn't know (or that I'd forgotten about) before I tried this run--that Bolt 2 would've hit for much harder had I not buffed Delita and Faris.   One of the reasons having Steal Heart is even more awesome than advertised: it interrupts charged abilities. Here, being Charmed stops the Wizard from finishing his spell.  I usually whack my party members back to their senses as soon as they get Charmed, so I was a little surprised to see it wear off on its own for the enemy. 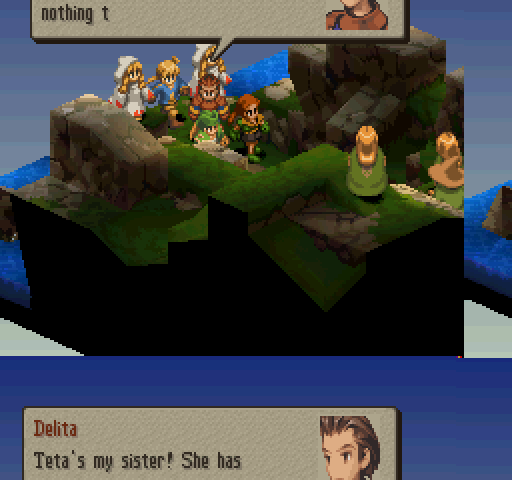 Once again this mysterious glitch rears its ugly head, but uploading to Youtube has proven that the footage wasn't actually lost. In subsequent updates, if the screenshots suddenly drop in quality, it's because this happened again and I had to grab screencaps from Youtube.  For whatever reason (higher accuracy, I'm guessing), the Knight that was Charmed goes for a Shield Break on the other Knight instead of attacking. 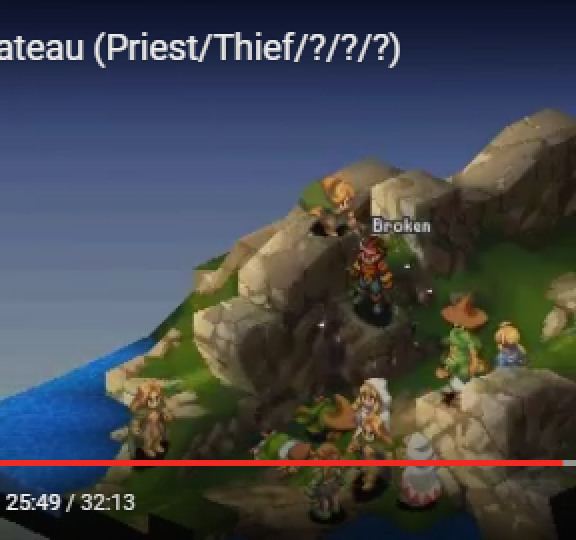 On Delita's turn, he puts that Knight into Critical, and she retaliates by breaking his shield as well. (Then Delita chases her down and finishes her off.)  Faris demonstrates the Thief's high evade.  When hitting Butz with his rod, the last Wizard procs a spell. Too bad Butz can shrug it off. I go to Igros and Gariland to update gear, and those with enough JP learn Regenerator as a Reaction ability do so and put that on. For the next battle, I also decide to experiment with giving Butz the ability to steal hearts while staying as a Priest. (Eventual verdict: right now it only gives a couple extra percentage points of success, but until I get better abilities it's worth having if there are enemies I can Charm.) Windmill Shed - Run #1 fails because Faris crystalizes before I can revive her. Since it turns out that Boco is immune to Steal Heart, I switch Faris back into Priest on the second try, which succeeds. During both battles, Wiegraf favored using Crush Punch, probably for the chance to instantly kill a party member. Highlight(s): (from the failure)  I'd forgotten that Guests are immune to being Charmed since that doesn't come up very often.  Faris getting unlucky and dying to a Crush Punch is the beginning of the end of this battle, as there's not enough healing to bring her back to life and keep everyone else topped off at the same time. (from the success)  Delita picks up a Phoenix Down because he spawned with Move-Find Item as his Movement ability and I never bothered to change it.  One of the Monks, in Critical and blinded by Galuf's previous attack, choses to fix the poison instead of anything else. (I'm guessing it's because that was the only 100% guaranteed ability.)  Delita gets his armor sliced off. This is irritating, but not reset-worthy as he's not wearing anything unique.  Wiegraf gets a lucky critical hit on Butz.  The other Monk, who was charmed by Galuf, finishes off the critical Monk that I left alone. I grind enough JP to learn Holy (and enough levels to have the MP to cast it) because I don't want to drag out the battle versus Algus, and Delita is switched to Monk with Equip Armor as his Support ability. Fort Zeakden (no video because the battle ended on Butz's first turn) - I was worried for nothing. Butz alone can cast Holy on Algus for more than his max HP. I nuke him twice anyway, just to be sure. Highlight(s):  Look at those numbers! Next time: I may look into a different recording setup. dotchan fucked around with this message at 18:16 on Jan 23, 2016 |
|
#
?
Jan 23, 2016 02:57
|
|
|
Hmm, White Mage and Thief. Luckily you get offense-oriented guests for a while, but that might be tricky when you need to produce your own damage output. Then again, Holy. But yeah, Thief special runs are basically entirely dependent on Charm landing. dotchan posted:
So do you mean you decided to take the HP/MP restore instead, or that you took Antidote? I don't remember if it's been brought up in the thread yet, but you get ALL the abilities listed from a crystal, not just the one your pointer is on when you hit "confirm".
|
|
#
?
Jan 23, 2016 05:39
|
|
|
Schwartzcough posted:Hmm, White Mage and Thief. Luckily you get offense-oriented guests for a while, but that might be tricky when you need to produce your own damage output. Then again, Holy. But yeah, Thief special runs are basically entirely dependent on Charm landing. Fortunately, this time Job #3 will be legal just as I'm about to tackle Bariaus Hill, so the pain won't be as much. quote:So do you mean you decided to take the HP/MP restore instead, or that you took Antidote? I don't remember if it's been brought up in the thread yet, but you get ALL the abilities listed from a crystal, not just the one your pointer is on when you hit "confirm". I took the HP/MP restore. I'll fix that in a moment.
|
|
#
?
Jan 23, 2016 18:15
|
|
|
Not an update: I'm trying my hand at streaming (no mic because I hate the sound of my voice). My channel is at http://www.twitch.tv/dotwarner17 and I'll be live for the next hour or so.
|
|
#
?
Jan 29, 2016 01:50
|
|
|
Update Twelve: Dorter Trade City to Inside of Lionel Castle Faris puts on Steal as her Secondary ability. Dorter Trade City - The presence of opposite gendered Thieves always makes any powerful member of the squad a double-edged sword, but this is the only battle in which I lose someone because of Charm. Beyond that, however, Gafgarion and Agrias carried me to victory. Highlight(s):  Faris (while Charmed) triggers the incantation for Holy when she nukes Lenna; Lenna could've survived this if she were at full health, but she got shot by an Archer before the spell went off.  Agrias procs Stop three times in a row. After the battle, Galuf learns Move +2 and puts that on. Agrias spawned with Hi-Potion, so I pick up a couple just in case and re-gear the squad. Araguay Woods - Yawwwwwn. Unless the RNG is spiteful, there's almost zero challenge to this battle. Gafgarion is switched to Archer (with no learned Abilities and no equipment) before heading to the next location as usual--I'm saving my JP for Move +2 and Jump +2 first, so it'll be a while before I can steal anything. Zirekile Falls - Delita is the MVP of the battle this time, as the squad sweeps away the Knights directly meanacing Ovelia too quickly for Agrias to be very useful. Highlight(s):   Delita doesn't take much damage, making it safe to leave him to his own devices.  Agrias takes "Protect Ovelia" a little too seriously, spends several turns moving next to her without doing much damage, and then spectates the remainder of the battle. 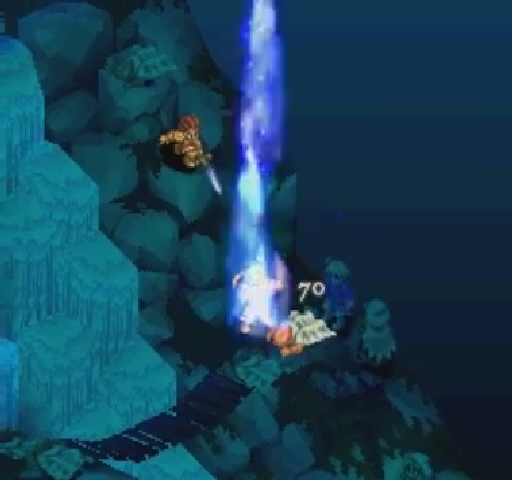 Delita, on the other hand, proves to be extremely trigger happy, inflicting friendly fire on Galuf to end the battle faster. (This even procs Stop!) Agrias is given Jump-boosting boots before I head into the next location, select the option to save Mustadio, and hope the AI cooperates with me. Zaland Fort City (video is successful run) - My first attempt fails to Mustadio getting separated from the majority of the squad and eating too much damage while I am distracted by trying to kill off the enemy. On the second attempt, Mustadio sticks closer to the squad and takes less hits, while at the same time the squad is more successful in shutting down the enemy. Highlight(s) from the successful run:  One of the enemies whose heart has been stolen tries to commit murder-suicide.   Proof that Priests can Steal Hearts better than Thieves, all else being equal. This advantage will only get bigger as Priests gain more MA. That battle done, I roll for my next Job, and it's...  I was very tempted to call a mulligan on this result, but a roll is a roll. Getting multiple instances of a Job is definitely a (rare) possibility in both #random and #chaos. Bariaus Hill - I forgot to record this through the emulator, so I uploaded the recording through Twitch. Hopefully it's not too awful. Highlight(s):  One of the Charmed Summoners drops a Shiva on her own teammates.  Agrias (unnecessarily) procs Stop on said Summoner (who was out of MP at this point) on her turn. I forgot that from the next battle on, I get to field a full squad (certain infamous exceptions aside), so I barge straight into it without changing up anything. Zigolis Swamp - Cara spends most of her turns using her teammates to farm Exp and JP while everyone else does the work of fighting the enemies. (No highlights because nothing particularly interesting happened.) Cara is switched to Thief (and given gear) and the other two ladies are given Steal as their Secondary ability before I go to Goug. Slums of Goug - Highlight(s):  Faris gets the Wizard Robe she "inherited" from Princess Ovelia stolen.  Butz overkills a Thief with a critical hit. I pick up Move +2 for anyone who's got the JP to learn it before moving on. Bariaus Valley (video is successful run) - The first run fails because Agrias takes too much damage too many turns in a row. The second run, I don't play that much more conservatively, but I still manage a win because the RNG lands more in my favor. Highlight(s) from the failed attempt:  Agrias gets her helmet broken. Highlight(s) from the successful attempt:  One of the Knights had Elemental, and petrifies an enemy Archer while under the influence of Charm. (Though I have Esuna on my side, if Agrias had been petrified I would've lost the game and I wasn't sure if Guests have petrify immunity, so I was very nervous when playing this battle.) I go into Golgorand, bracing myself for several total party kills. Golgorand Execution Site - Gafgarion is convinced to leave via tactical nuclear strike, but it takes much, much longer to take care of everything else. Highlight(s):  Reina intercepts an arrow for Cara.  Later in the battle, Reina eats an unlucky crit mid-charge (she could've just barely survived a regular attack).  Picked up a Small Mantle from a chest; I'll probably never use it so it'll be sell fodder eventually. I equip Rubber Boots on the party and go into the next battle as is. (In retrospect, I probably should've changed Butz to a Priest to take care of Gafgarion faster.) At the Gate of Lionel Castle - I could not believe my eyes. Except for Gafgarion and the Summoner, the enemies didn't use the Attack command at all. It still took forever to finish the battle, though, because the Knights had a bunch of health to chew through and they could block with their shields. Highlight(s):  Galuf steals Gafgarion's sword on his first try, finally making it possible for me to whittle down his health. I switch everyone except Galuf into Thief and re-equip as best I can to make sure that everyone who is a Priest can cast Holy at least once. Inside of Lionel Castle (no video because the battle was trivial) - Three casts of Holy was all I needed to send Queklain back to hell. Next time: When all I have is a Tactical Nuclear Strike, Ivalice is reduced to a radioactive wasteland. dotchan fucked around with this message at 01:52 on Feb 3, 2016 |
|
#
?
Feb 2, 2016 22:24
|
|
|
dotchan posted:[url=]At the Gate of Lionel Castle[/url] forgot the link.
|
|
#
?
Feb 2, 2016 22:38
|
|
|
The streamed bits were something to watch. A heart-stealing priestess was fun to see in action. 
|
|
#
?
Feb 2, 2016 23:59
|
|
|
|
| # ? May 15, 2024 02:17 |
|
|
dotchan posted:I equip Rubber Boots on the party and go into the next battle as is. Heh, well that IS kinda the point of wearing rubber boots to that battle. Everyone in that battle is equipped with a lightning-elemental weapon, so the AI will not use any weapon-based damage commands like Attack or Charge. The jerks usually come equipped with Punch Art or Elemental or something, and the Knights still have their Break abilities, so they're not usually totally helpless, but it makes the battle SO much easier.
|
|
#
?
Feb 3, 2016 00:18
|
|