

|
Welcome back. The altered plantlife is kind of neat, and I hope we'll actually get to meet another living person this late in the series.
|
 #
?
Oct 17, 2016 05:41
#
?
Oct 17, 2016 05:41
|
|


|

|
| # ? May 16, 2024 16:25 |
|
|
Part 19 Submachine 7: The Core ♫ Thumpmonks - Submachine 7 - Heavenly We have opened up the other gates to the Garden, so let's take a look.  If you remember, we went through the third gate because it was already open. We'll explore the others from left to right now.  Through the leftmost gate is a dead end. Everything seems to have fallen apart here. Let's return and try door #2.   Liz posted:So when things started to collapse, why certain bits and pieces got left behind?  According to the map on the stand, we're now way up north.   RTL We're coming from the bottom right here. The top right part ends in nothingness so we can't go there. Only place to go is further left. By the way, as a neat touch, those hovering tiles bob up and down a bit when you touch them with your mouse.   To the left, we find a new hint, and some machine.  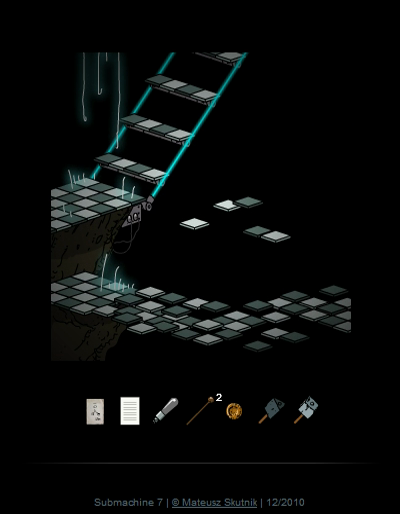 Cranking that thing down with the wheel turns the broken path two screens ago into stairs. Another little touch that you might not even notice if you're casually playing through this game is that while clicking on the top right and bottom right exits of the screen on the left takes you to the same screen with the stairs, if you went through the top right exit, you can only take the stairs up, while the bottom exit only lets you return to the gate. In other words, the right screen has two states depending on where you clicked to enter it.   Up here, pushing the switch down activates the pulley, then locks it into place. The gif also shows the tiles bobbing.   The pulley lowered a ladder into the little crossroads area. Up here is another gate, and something on the wall.  Hm. A strange symbol. Might be a hint for later. Too bad it's stuck to the wall, I can't put it into my stack of pictures.   Through the gate we find a new part of the Garden, this one all the way to the left on the map. The gate in the back is the one we just came through.   To the left, it might be hard to notice at first, but the post has another of those weird symbols on it.   And to the right, almost hidden behind another post, is this clue which is actually very important. If you miss this one... good luck. Can anyone decipher the text on this? It looks like more than random scribbles. It might be partially Polish though, because that's where Mateusz is from. And did you notice the other thing in this place?  Yep, those radial cracks indicate the location of a Karma Portal. And despite Liz's worries, we do need to travel through them.   This new part of the Garden has a secret Token in it. Where is it? Well, there's a second clickable area in the crack just a few pixels from where the Karma Portal is. They aren't easy to find in this game.   Moving on, this area has a nice fluorescent tree.   Over in the next screen, in case you were wondering why we've been carrying around that Gong Stick all this time (and why the game didn't automatically remove it from the inventory after using it, like usual), we can use it here to pull the broken lever, which makes the ladder fall down and let us go right.   Yet another strange symbol on the wall.  And the ladder takes us back to the dead end behind the leftmost gate. We've created a little shortcut.  We've seen door #3 already, so let's go straight to the rightmost gate.  Which, conveniently, takes us to the right side of the Garden.   To the right, we're blocked off by a huge tree. But we can pick up the Stone Key from between the roots here. And this gives us all we need to solve the puzzle of the closed door in the Palace. Let's see if you can figure it out. Here's the screen with the puzzle and the four hints that have to do with it. This does give you people a bit of an advantage over first-time players, because they first have to figure out that this is where these hints come in handy.    . . . . . . . . . . . . . . . . . .  The first thing to realize is that you need to put the Stone Keys in the order shown in the last hint.  Secondly, the holes in the wall can be divided into three 3x3 grids. That's what each of the other hint pictures refer to. Top middle for the triangle, bottom left for the square, and mid right for the circle. Congratulations, we've now solved what I consider to be the second hardest puzzle in Submachine 7.   We're now entering what seems to be the actual interior of the Winter Palace. ♫ Thumpmonks - Submachine 7 - Purge This area has a bunch of doors in the back with small rooms behind each. 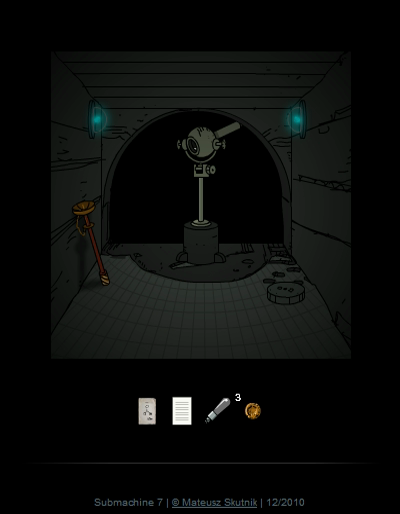  This first one has a telescope, and a Transmitter which we can grab. 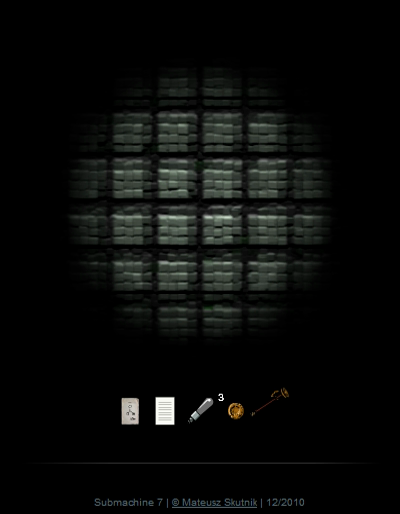 The view through the telescope is a bit weird. Bricks of some kind?   There's quite a bit of stuff in the second side room.  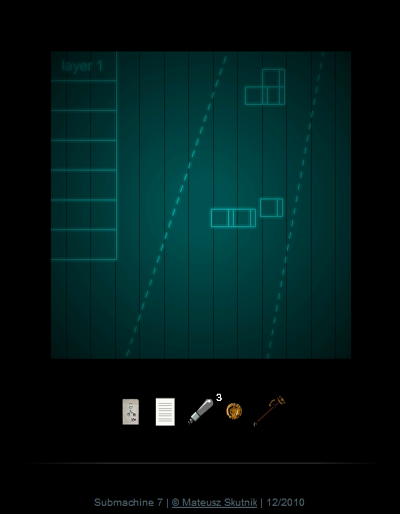 The Picture is one of the main hints for the big puzzle we'll have to solve soon. Let me tell you, it's much easier to decipher it once you know what it's trying to say. To the top right you see the underside of a ship. That's Liz's laboratory, and that's what's docked to the outside of the castle. To get there, we need to call a capsule. I'll explain the rest of the picture in a bit. The image to the right is on the blue screen. It doesn't seem to make much sense. Layer 1 of what?   In the crack to the right we find the Glowing Box, which we'll take with us. Upstairs we find nothing but a locked box, so let's go back to the main hall and go further right.   Here we find another important part of the puzzle, a control panel that is also shown in the Picture we just got. Basically, to call the capsule we need to use this box to send a signal. To do so, we need to set 5 symbols. These are similar to the ones we've seen in the Garden. On top of that, we have to turn the lower four lights green. Luckily one of them is already green.   To the back, we find more stuff. quote:If subnet is universe, then the loops are black holes. I suppose it's talking about The Loop we found ourselves in. I guess it's similar to a black hole in that you normally can't escape from one, no matter how far or how fast you go.   Looking at the set of transparent screens, we now see multiple layers on top of each other. The view through the telescope is... distorted.   Moving on... Book page posted:[...] The Fourth Dynasty at the peak of it's cultural and technological development was able to create first man-made submachine structure. That was around the beginning of twentieth century and is now considered the birthdate of the outer rim. Those first structures were merely flawed copies of the original structures, but in time they grew into something completely autonomous. Attempts to chart new territories failed miserably leaving the vast submachine wilderness to it's own. [...] 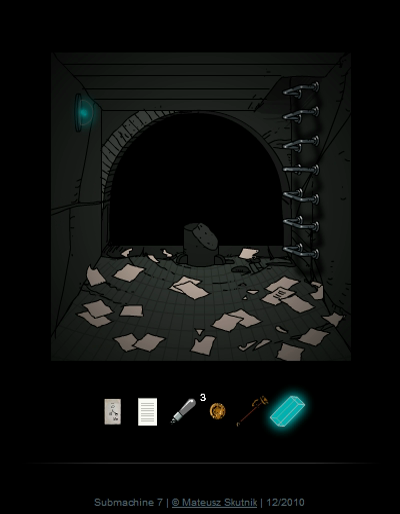  In the back, only one piece of paper has text on it. quote:Once the great scheme of things was clearly visible through the layers of seven main dimensions.  There's also a small clickable area behind the broken pillar. It hides the fourth Token.  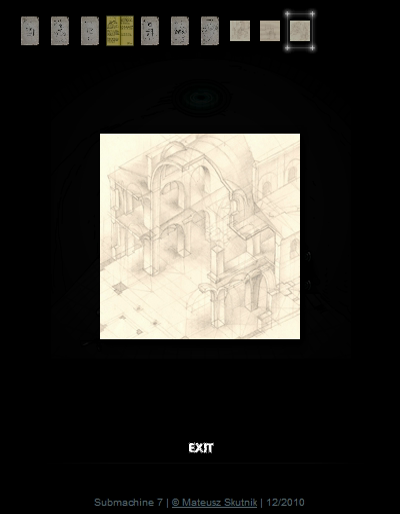   Up on top we find some architectural drawings. These don't actually have any relevance to the plot or puzzles, they're old drawings by the developer Mateusz, and he decided to put them into this game. But it's easy to believe they show parts of the Winter Palace. 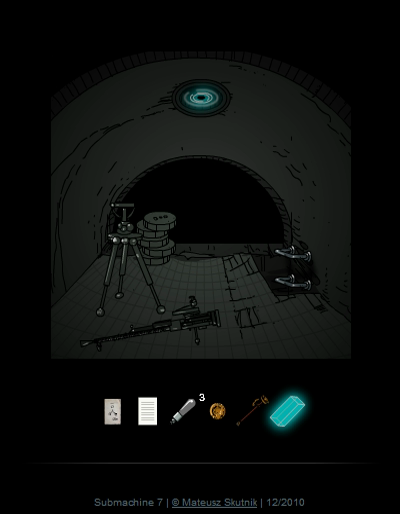 There's also a well hidden Karma Portal here. Ugh. Still makes me woozy.   It takes us to some outdoors area. We pick up the Solenoid sitting here. It looks quite similar to the Light Bulb we picked up way earlier, but it has a rather different purpose.   To the left we find a large tree with yet another symbol on it. Are you taking notes? 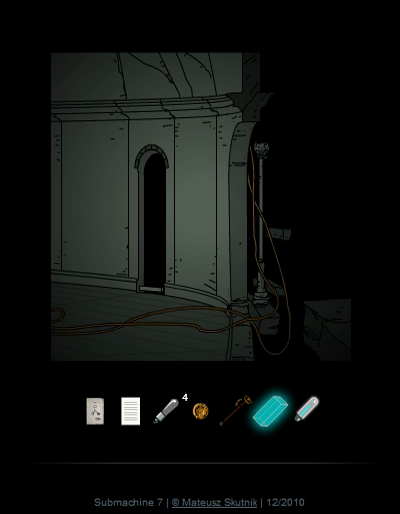  Back in the main room of the inner Palace, all the way to the right, we can either go right through the broken wall to an outside area or into the door in the back. Going outside first, we pick up the Key from the floating block.   The back door actually takes us to a different outdoors ledge. Nice view of the void from here. Anyway, the Picture here is another important hint.   The ladder takes us to this transmitter dish. It already has one solenoid. We connect the Transmitter we found and plug in our own Solenoid.  And this causes two more lights of the control panel to turn green.   The Key we found on the floating block is used to open the locked box in the upstairs room we saw earlier. It contains another Solenoid.   Plug it in, and the transmitter is operational again. Now all we need is the code... 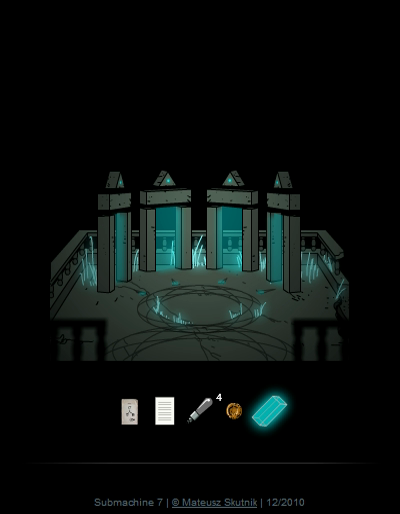  There's one more thing to do before we solve that puzzle. Remember the third door, the one we visited first but didn't have much to do?   The Glowing Box fits into the hole in the wall to the right, and it makes something appear.   Yet another symbol.  Now, if we want to get into Elizabeth's ship and hopefully find her, we're going to need to solve this puzzle, put in the correct code. I've explored everything as thoroughly as possible. So, thread, and especially those who have never finished this game, see if you can solve this one. Carbon dioxide fucked around with this message at 15:32 on Apr 9, 2017 |
|
#
?
Oct 23, 2016 22:02
|
|

|
From what I can tell, that paper with the numbers labels the different areas we can teleport to. The numbers are the order of the areas that matter. And I believe we found one symbol in each of those areas, so that should be the order we need to put them in the console.
|
|
#
?
Oct 24, 2016 15:13
|
|

|
It's around this point in the series that I felt the need to really start taking notes when playing. This puzzle is somewhat difficult to decipher, but not particularly hard once you know what you're doing.
|
|
#
?
Oct 24, 2016 20:54
|
|

|
So according to the notes in this updates, the outer rim was created by humans in the early 20th century/1900s, which we've seen an example of as being the pipes-and-bricks section from the earlier games. And apparently that section gained sentience and abandoned humans. And apparently humanity in the 20th century had a fourth dynasty? What the hell is up with this universe? Is there even a "surface world" that's outside of these submachines to look forward to, or has humanity been constantly adrift in this strange, uncaring place?
|
|
#
?
Oct 25, 2016 18:25
|
|

|
Yeah, this is a pretty good summation puzzle. I'm a little curious what relationship the solenoids have to the actual number of lights that go on.
|
|
#
?
Oct 26, 2016 02:11
|
|
|
One of each of the three grouped lights per solenoid, and the antenna turns on the fourth.
|
|
#
?
Oct 26, 2016 02:41
|
|


|
EagerSleeper posted:So according to the notes in this updates, the outer rim was created by humans in the early 20th century/1900s, which we've seen an example of as being the pipes-and-bricks section from the earlier games. And apparently that section gained sentience and abandoned humans. And apparently humanity in the 20th century had a fourth dynasty? What the hell is up with this universe? Is there even a "surface world" that's outside of these submachines to look forward to, or has humanity been constantly adrift in this strange, uncaring place? LogicalFallacy posted:One of each of the three grouped lights per solenoid, and the antenna turns on the fourth. I'm guessing the down arrow means "the control panel turns this box on".
|
|
#
?
Oct 26, 2016 06:42
|
|
|
EagerSleeper posted:So according to the notes in this updates, the outer rim was created by humans in the early 20th century/1900s, which we've seen an example of as being the pipes-and-bricks section from the earlier games. And apparently that section gained sentience and abandoned humans. And apparently humanity in the 20th century had a fourth dynasty? What the hell is up with this universe? Is there even a "surface world" that's outside of these submachines to look forward to, or has humanity been constantly adrift in this strange, uncaring place? Pipes and Bricks? Sounds like humanity invented the Windows 95 screensavers. Which... turned against them? Hmm, my screensaver theory still needs work, it seems.
|
|
#
?
Oct 27, 2016 00:54
|
|


|
Part 20 Submachine 7: The Core So, this puzzle. We turned on all the green lights by fixing the transmitter dish. All that's left is finding the correct symbols. Glaive17 had the right idea, we'll just need to execute it. Let's run through the hints we found. This picture refers to the map and shows the order of the symbols. The center point is the place we started at, the Palace entrance. Point 1 is here. Doesn't seem far from the entrance on the map, but we needed to make our way through two gateways to get there. The symbol was hidden on a pillar to the left. The second point is to the bottom right, we found it by going through the rightmost gate in the hub. We didn't actually find a symbol there, just a large tree blocking our path. However, one of the karma portals took us to the other side of the large tree. I put the two parts together here to show they do line up. The second symbol should be this. The third symbol is way north, or through the second door. It looks like this. We've actually not found a map stand that shows the location of the fourth symbol, so let's skip that for a second and go to the last one. It's through the third door. We visited this area first, but found the symbol last because we needed the Glowing Box. And now we can deduce the final symbol. Because we found one more in the completely broken up area behind the first door. You can see there's a broken map stand lying on the ground here so it all fits together. So, let's enter the code and see if it works.   We turn the knob... there's a sound of rattling gears and the knob stays locked in place. We got it! There's several factors that I think make this puzzle so tricky. First of all, it's easy to think the maps are just a neat thing and aren't part of the puzzle, until you find the symbol order hint. That means you have to run back, find all the maps again, and take notes. That's a bit annoying. Secondly, some of the symbols you can select in the control box are very similar to the correct ones. You have to make sure you copy them correctly. And more importantly, you need to find all symbols. Some of them are well hidden and some of them are in spots where you don't have any other reason to go to. You need to explore, and not just a small newly opened area, but the entire game. Lots of ground to cover and you need to study each screen carefully. And if you miss even one symbol you'll probably won't guess the solution because of symbol 4, which doesn't have a map. The only way to deduce the complete order is if you found all others. Luckily, the symbols aren't random, so if you figured it out once, things go way smoother during a second playthrough, for instance for a LP recording.   With all that out of the way, let's leave the beautiful Garden behind and go to Liz's ship. If you remember, it's docked to the walkway in front of the Palace.   Everything we've done since we arrived through the large gateway was to call this Capsule.   Pulling the lever takes us up to the Ship. ♫ Thumpmonks - Submachine 7 - Broken Gravity   Inside the Ship... well, this area looks different. Did you miss the old mechanical-looking areas? Anyway, we have to flip the switch on the wall here to turn something on in the next room. 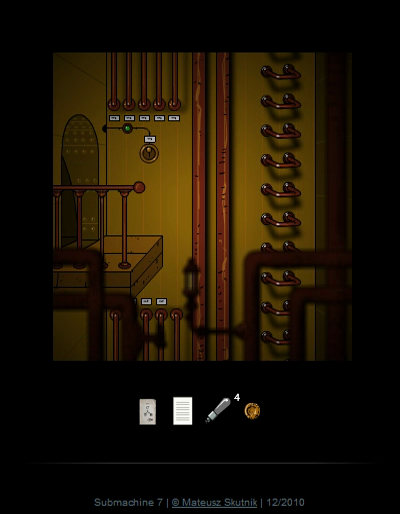  Namely, the switch in this room. The little green light on the top left indicates we flipped the switch on the left, and the switch here extends the walkway to the ladder.   Let's go down real quick first. The lamp fell out of the socket here, but the energy barrier Light Bulb we brought with us all the way from the Sanctuary area fits here.   RTL It opens the grate, but inside the wide pipe we're immediately blocked again. We'll need to come back in a bit.   RTL Up the ladder, we find some sort of cabin area. To the left, there's a Note.  Liz posted:It's no wonder they wanted to bury this whole lighthouse with him still inside.   To the right, two more Notes. The first one is quite long, so make sure to read the transcript. Mur posted:Hi Elizabeth.  Liz posted:Dear Murtaugh.   In the next room we find another light barrier, but this time the switch is on our side and there's already a card in there, so we just turn it off. This causes the light bulb to blow, though. So we can't use this one for opening the downstairs pipe. The only one that works for that is the one all the way back at the start.   Going up towards the next deck, we find... are those bullet holes? What happened here? Anyway, the cover on top is closed tight.  Let's take one more Karma detour then. 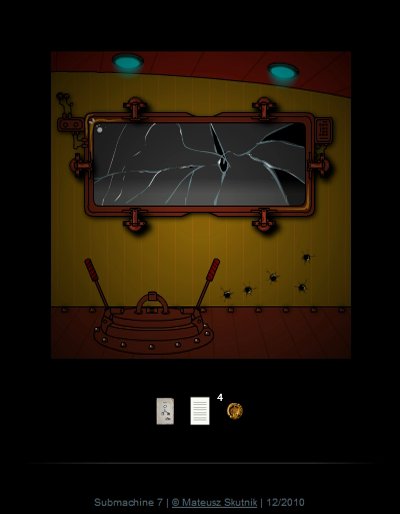  It teleports us only a single room up. The Portal back is in the central hole in the window, but from this side we can just open the lid and climb back if we like.   To the right, another note. To go with it, there's another Garden map sitting on the ground you can look at. Obviously, this one doesn't have a "you are here" marker. Liz posted:I finally understood how they could mimic the structure of the subnet within a garden...  The final secret Token is in this room, hidden behind a table leg. I actually explored several more rooms before I remembered it was here, but I'll show it now so we don't have to come back here.   To the left of the Karma Portal, another note by Liz. Liz posted:I can hear Murtaugh breaching the defenses of my ship. It is the high time for me to leave this dimension. 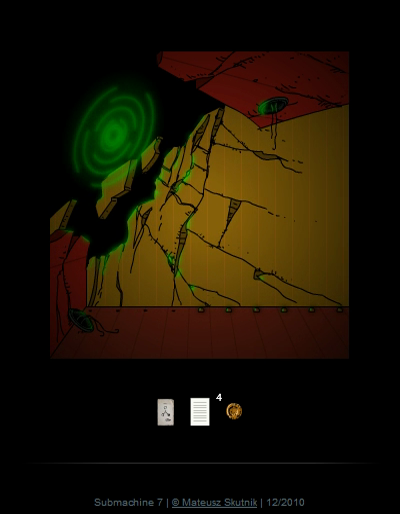 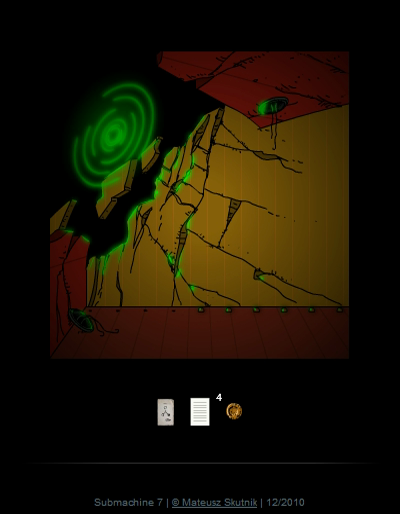 Further to the left, in a shattered part of the Ship, there's a huge green Karma Portal. I'm afraid we'll need to take it to escape this place. But before we do so, let's see what collecting all the Tokens does for us. We need to do a few things for that. First of all, in the room we were just in, we need to pull the big lever. There's a sound in the distance of metal sliding against metal. Secondly, we need to put the Light Bulb into the socket downstairs to open the grate. We already did that, so let's move on.  The lever moves the second grate a bit to the left, exposing a Karma Portal. This takes us to the secret area of this game. If you didn't realize you could bring that Light Bulb with you, you could end up collecting all secret Tokens and never finding this place. 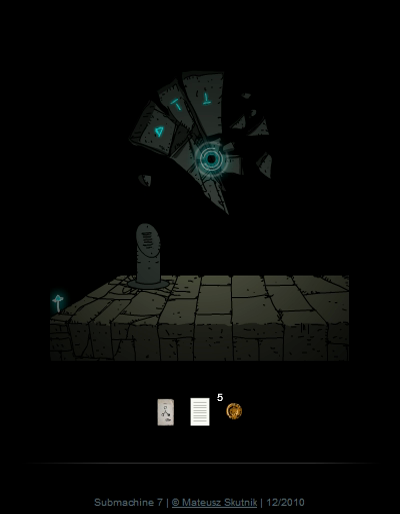 ♫ Thumpmonks - Submachine 7 - Rector What happened to the happy song for the secret areas? Anyway, welcome to the Super Secret Bonus Section.  Yes, no need to repeat me, game.   This area has five machines that each take a token and then show a picture and a note by Mateusz.  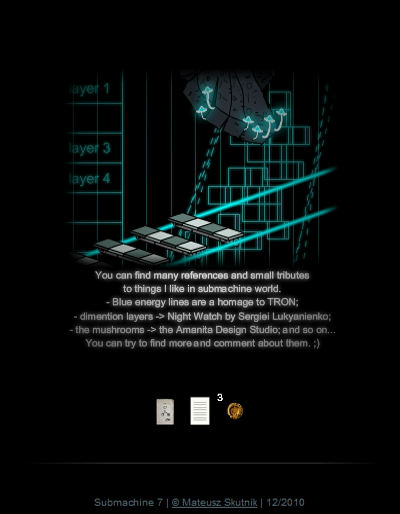 It's always interesting to hear about developer stuff like that. Have you folks noticed any more references to other media?   I like that even in these images there are 'physics'. The plants move when you touch them with the mouse cursor.  Interesting, I hadn't realized that. And it's cool to see the complete map here. And here it is in the flesh.   And things will certainly be interesting in the remaining games. Anyway, that was it for the secrets of this game. Let's finish it up.   BZZZT  AAAAAAAAAAAAAAAAAH  A final zoom and fade out...   We're apparently travelling to a part of the Subnet that's in another dimension altogether. Next time, we will find out more about the multidimensional Plan behind the entire Subnet, Submachine 8: The Plan. Carbon dioxide fucked around with this message at 15:31 on Apr 9, 2017 |
|
#
?
Oct 30, 2016 13:00
|
|
|
I am pumped for the next episode.
|
|
#
?
Oct 30, 2016 19:27
|
|
|
Huh. So this guy is planning to somehow collapse the universe? Yeah, that's not good.
|
|
#
?
Oct 30, 2016 21:25
|
|
|
Looking forward to seeing Submachine 8 and 9, those were probably my two favorites in the whole series.
|
|
#
?
Oct 31, 2016 05:29
|
|
|
I missed this update a week ago. I'm definitely looking forward to Sub8 because it has one of the most interesting central mechanics in the entire series. It's really well-designed and causes the game to go into full "what the gently caress is this series" mode from here on out. Also, this note is interesting: It's a copy of a note we found all the way back in Sub2:  Looks like Liz got the note after all.
|
|
#
?
Nov 6, 2016 16:37
|
|
|
Part 21 Submachine 8: The Plan  Click here to play the game yourself. Welcome back everyone. Last time we learned that Murtaugh's karma portals destroyed large parts of the Subnet. We also learned that the Subnet consists of multiple dimensions called Layers, which make up some kind of larger Plan. Murtaugh attacked Liz for some reason that's not entirely clear to me, and Liz fled to the fifth Layer. By the time we arrived, all we could do was take some interdimensional Karma Portal.   So, let's see where we ended up.   This conversation plays out at the start. quote:Liz: You can create dimensional portals while being inside such a portal? ♫ Thumpmonks - Submachine 8 - The Bay  We end up on some wooden walkway. The wiki calls this area the Dock. I'll be using the wiki names as I usually do, but for some reason the names of the songs in this game tend to be slightly different. Let's start by going left.  Perhaps this green beam is related to the green Karma Portal we took. Whatever happened, the exit of that Portal is nowhere in sight. By the way, I'm going to number this screen 'screen 1', because it's the top-left area of the Dock. The screen we started in is number 2. I have a good reason for numbering the screens in this game, which you will see soon. 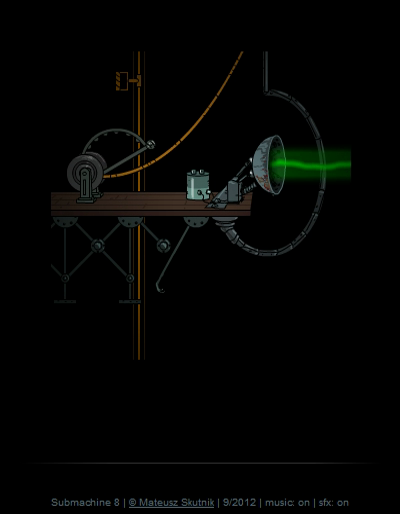 Right of the starting screen is screen 3. Here we can grab the Broken Beam from under the catwalk. We can also pull the yellow pole so it ends up on screen 2.   RTL Like so. The Broken Beam is needed to grab the Rusty Key on the left.   Which is then used to get rid of the padlock. 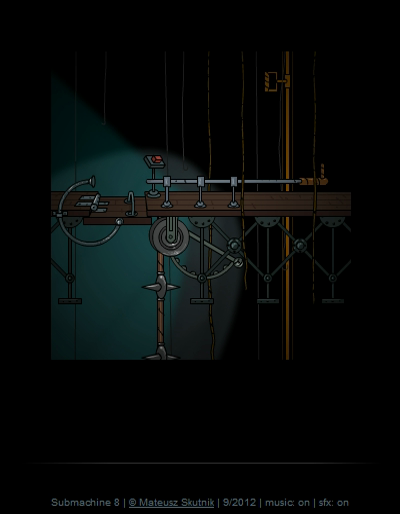  Then we pull the horizontal bar to the right and finally we can press the button to open the hatch, so we can climb down. Not too difficult, just requires a little bit of trial and error. 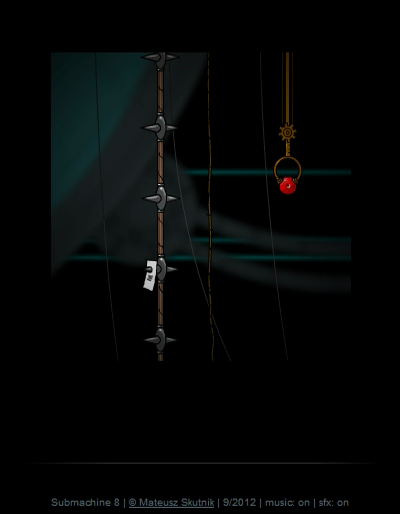 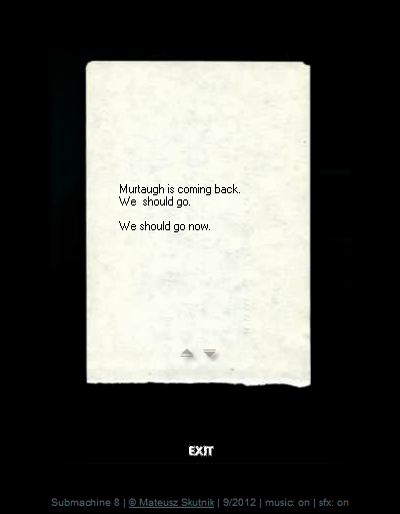 Down here in screen 4, we find a red Stone Sphere (hanging from the vertical pole we moved earlier - that's why we had to move it) and a note with bad news. quote:Murtaugh is coming back. We should go.   Further down, we skip the 5th screen for a second and go right to screen 6 for an important item first. I see why this area is called the Dock. There is something docked here, but I have no idea what it is.   We grab the Navigator, as it's officially known, although right now the description just shows OIIIIII. When we try to use it this message about electrodes pops up. If we say no we can't use the Navigator so let's do it.  Currently only one button is activated. The six other buttons are dark, and there's just some loose wires in place of any eighth button. Pressing the button causes a sound of... something shifting, like after solving a stone puzzle or something in earlier games. But nothing actually seems to happen. 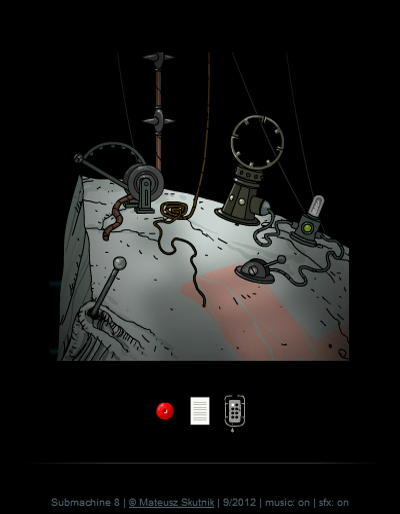   Back to the left, there's a few things we can do. First of all, this sort of lever on the left can be pushed into the ground halfway or all the way in. We can pull it back out too. But it doesn't seem to do much yet. There's also the small lever on the right.   Bzzt!  We can try to follow the beam of light to the top right but it goes nowhere we can reach. Instead, let's return to screen 5 where we just activated the device and try pressing the second button on the Navigator. ♫ Thumpmonks - Submachine 8 - The Church  Welcome to the Cardinal Mosque. The Navigator is now called IOIIIII. Let me explain what's going on. We're now in Layer 2, while we started off in Layer 1, as indicated by the 'name' of the Navigator. In fact, as far as I know we've been in Layer 1 since the beginning of the entire series. Now, don't make the mistake I did when I first played this game and wasn't paying attention to the clues. I thought the Navigator worked like any earlier Portal and I was in a completely different area. If you do that you might get lost. We're in the "same" area, just in a different dimension. Most importantly, this means the map layout is the same. We're in screen 5 of the Mosque. And we can switch between Layers 1 and 2 at will now. That's why I've been numbering the screens - to keep track of where we really are. Anyway, in this screen is some sort of plunger device we can try and activate. Once again, it doesn't seem to do anything. We'll have to come back once we know what to do with it. Let's go up to screen 4.  Alright, a compass and not much else. We can't go up to screen 2 in this layer, so instead let's explore down and to the right, screen 6.   We found a cabinet with some stuff in it. We can also go further right into the area equivalent to the docked ship or whatever it is in Layer 1. Let's pick up the stuff first.   Another note that doesn't quite fit on the screen: quote:I clearly remember the day it all ended. It was not long after the computer processing power exceeded that of the human brain. Many thought that this was the turning point, but not so. The moment came a bit later. I remember, because I was there, when we asked the biggest question. The one we've been struggling with for millennia.   In the new screen 7 we find this thing, which turns. You guessed it... it doesn't do anything yet.   And over to the right, in screen 8, we find some kind of electronic screen that seems out of place.   Turning on the first knob shows us an area we haven't been yet - it's actually this place in Layer 1. The second knob shows our current location but without this electronic screen.  We can also put them on both at once and the screens will just overlap. I'm glad I can't see in multiple parallel dimensions at once, it looks confusing.   Going up to screen 9, we find another large compass. This one has a hole in the middle and two arrows that can be turned. There's also a hint picture on the ground. Anyway, we've explored this part of Layer 2, so let's go to a part of Layer 1 we haven't seen yet - the ship. I decided to climb down to screen 8 before hitting the button on the Navigator.  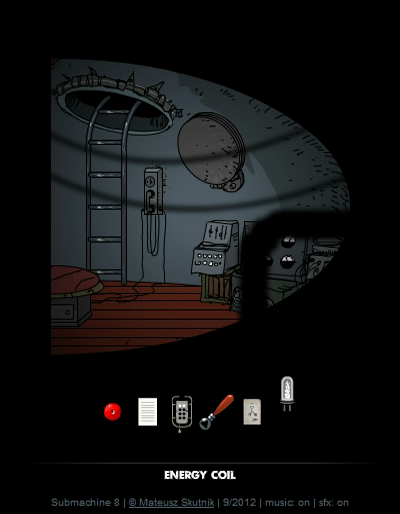 Screen 1-8 here has an Energy Coil lying around that I'm sure will be useful somewhere.   To the left, in 1-7, we find another picture with a hint similar to the one we found before. There's also a small chest.  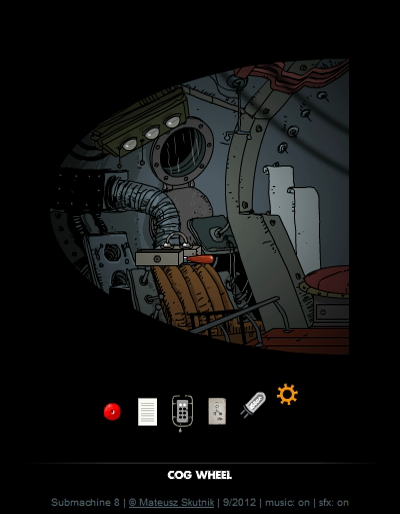 Which contains a Cog Wheel. There's a place we missed, the Layer 1 version of screen 9. We can get there by climbing up from the room with the Energy Coil.  The top of the ship has another Stone Sphere. There's just one part we haven't explored yet. The Layer 2 version of the catwalk. To get there we need to switch to Layer 2, go left to get out of the ship area, go back to Layer 1, climb up to the catwalks, and then go to Layer 2 again. If you understand how the screens of the different Layers match up, it's not complicated.   Screen 2-1 has some kind of device. Let's explore before doing anything with it.   Screen 2 has a third Stone Sphere which we grab, while the final screen has a device similar to the one that shot out a beam in Layer 1.   The lever doesn't work until we put the Energy Coil in the device to the left that apparently powers it. But once we got it, the third button on our Navigator lights up. ♫ Thumpmonks - Submachine 8 - The Ruin  Welcome to 3-3. The wiki calls this Layer 3 area the Cog Trees. It also points out that the music here is a rare instance of a Submachine ambient which actually has a definite rhythm. Let's go left.   RTL This area is somewhat similar to Layer 1 in that screens 1 - 3 are a sort of catwalks, in this case high up in a tree. 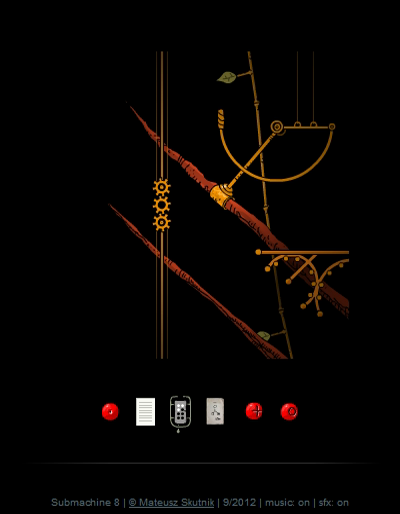  We can immediately use the Cog Wheel from Layer 1 to fix this contraption. When we pull the lever, the metal cover in screen 3 is lifted up to reveal a Cube.   Down in screen 3-4, there's a Beamer Arm sitting on a tree trunk. It's part of one of those green beam devices, so we take it with us.  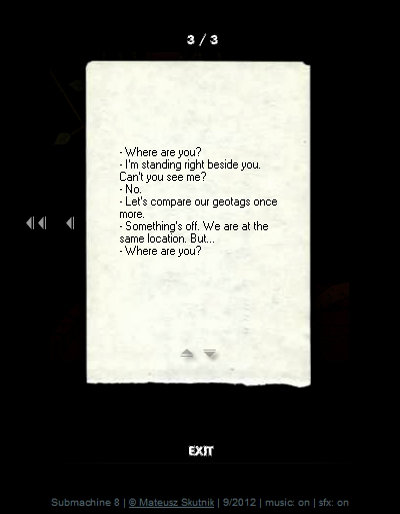 quote:- Where are you?  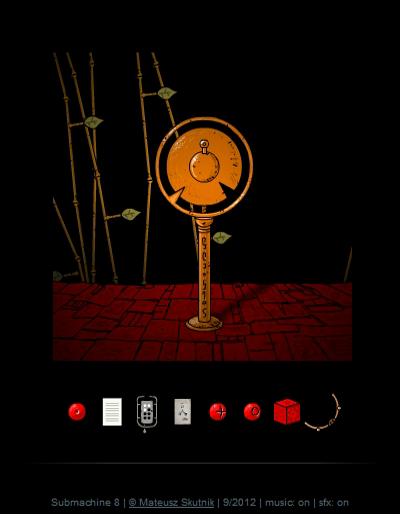 The big tree in 3-6 has another of those levers like in Layer 1. Let's leave it alone until we figure out what it does. In 3-7, we find something that looks a bit familiar, but that doesn't do anything by itself... let's quickly jump back to Layer 2.    Aha! Apparently changes in one layer can affect things in another layer. We pick up the fourth Stone Sphere.   We're now in screen 8, that's the room with the electronic screen in Layer 2. Pressing the red button here makes steps come out so we can climb to 3-9.  There's a device up here. Kinda looks like a Beamer... now how to activate it?  The answer is in the holes down here. Now, funnily enough the game doesn't check what you're trying to put into the holes. You can put in a beamer arm. Or you can even put the square peg into the round hole. But, obviously, this is where the red Stone Spheres go. We got hints showing their order:  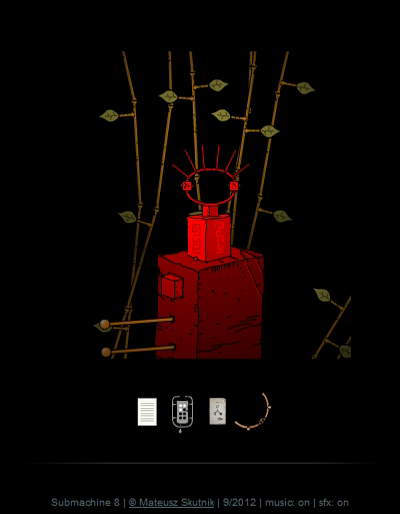 There we go. Now we use the Cube we found on the square hole here and push it all the way in to activate the Beamer.  Let's see what Layer 4 looks like. ♫ Thumpmonks - Submachine 8 - The Sewer   It's the Large Sewers. The devices up top in 4-9 don't do anything yet. Climbing down, we find another plunger like in Layer 2. It doesn't work. It doesn't look like it but we can actually crawl through the small pipe to the top left to get into 4-7. This is indicated by the lid sliding open when your mouse gets close. I'll have a screenshot of that later on.   We find a Drawer Handle here. I think I know where that goes. But let's go a bit further left first. 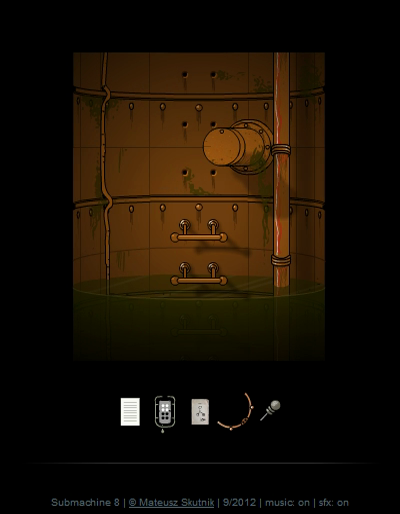  There seem to be stairs leading down here, but it's flooded with dirty water. This is what the Navigator looks like now, by the way. We can't go further left from here so let's go get our price in Layer 2.   Upon closer inspection, this disc turns out to be a Small Mirror. We haven't been in the leftmost part of the Large Sewers yet because it was cut off from the rest, so let's take a step left here and shift back to Layer 4.  Pulling the handle at the bottom causes a flushing sound. We'll investigate that later, let's climb to 4-4 first.  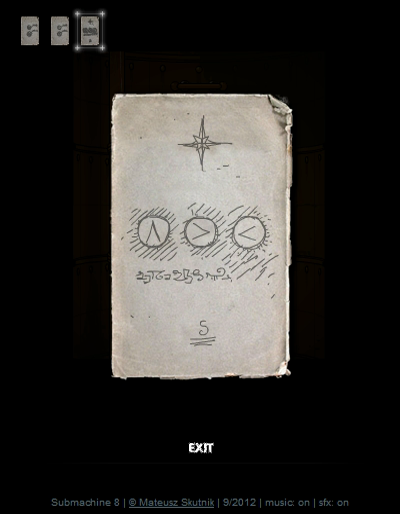 Another hint. You may be able to guess what this is related to. We've seen it already. But there's still a part missing.   RTL Up here, to the left we find another useless lever and a note.   quote:- But why the boundaries. Why this particular shape? To the right you see what it looks like when exiting through one of the small pipes.   We grab the Wire (a power cord) from 4-3. Now let's see what that flushing sound was about. 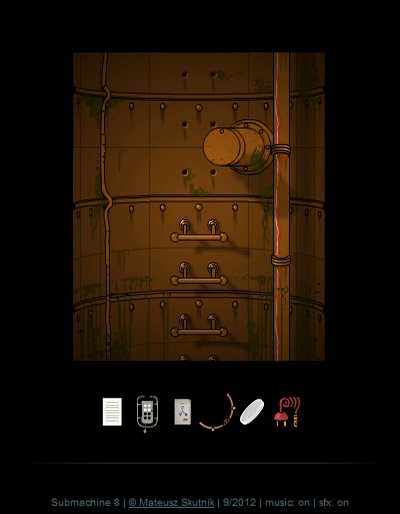  We can now go down from the previously flooded 4-6 into a completely new screen, let's call it 4-10. There's nothing we can do here right away, but this does mean we can shift to the three other versions of screen 10 from here.  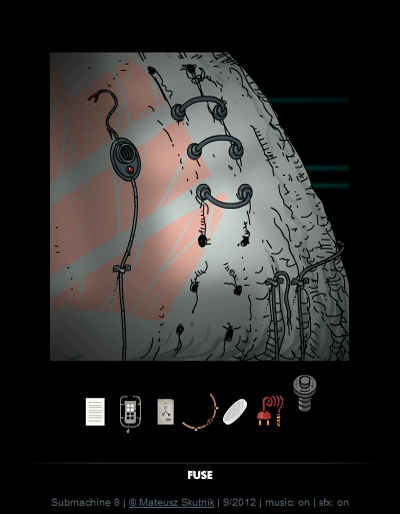 In Layer 1, we pick up the Fuse.  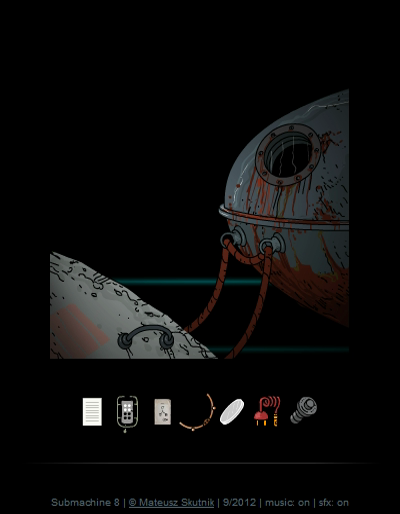 We can also optionally grab the lowest Ladder Step, climb up from here, and attach it to the Dock in 1-6. This creates a shortcut, we can now climb down to 1-10 from here.   2-10 is a hidden basement of the Cardinal Mosque. Here's the Layer 2 useless lever, and a Stone Pyramid to grab.  And 3-10 is under the large tree. We can't do anything here yet but this screen holds a Secret. Submachine 8 has five secrets, but because of the nature of the game it's more convenient to collect them all just before we finish, so that'll have to wait for now. 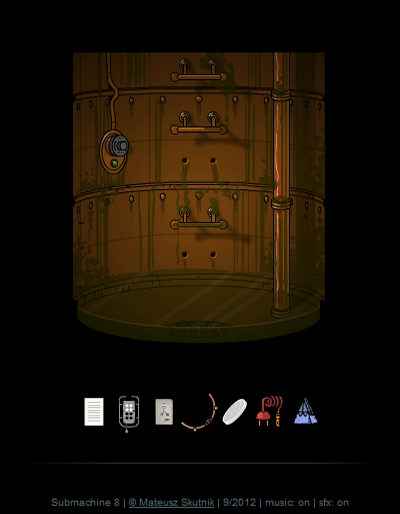 The Fuse from 1-10 goes into the hole in 4-10.  This brings power to the thing that can be turned in the top left corner of 4-9, the top-right room.  Which powers up the Beamer that unlocks Layer 5. And that seems like a good point to end this update. But before I do that, one last thing. I always check the Submachine wiki for neat trivia. And some fan found this picture on an old Livejournal (yes that site still exists) about urban exploring. I think it was taken in some abandoned factory.  I don't think this requires any further comment from me, so I'll see you next time when we explore some more Layers. Carbon dioxide fucked around with this message at 15:29 on Apr 9, 2017 |
|
#
?
Nov 20, 2016 21:43
|
|
|
I absolutely loved this particular installment of the series. It's got such a simple concept of changing Layers but it's so mind-bending at the same time. The whole thing is really well done and messes around with your expectations just enough to keep driving you forward. Oh and the Navigator? For whatever reason, the zoomed in graphic for it ingame just completely creeps me out. It's just really unsettling to me for some unexplained reason. I guess he just did a good job of making what looks like a weird, rusty, potentially unreliable object that you're forced to put on your body and something about that combination just makes me go "Nope" about it more than anything else in this series. Still didn't stop me from finishing the game, but I definitely did say No to putting the electrodes on my temples. 
|
|
#
?
Nov 20, 2016 22:16
|
|
|
I think that it only takes a couple of electrodes on your head to zap you to another dimension is cool and subtlety chilling. Being to interact with other worlds is as simple as changing your perspective. Good old urban exploring. Lol at the fact that the navigator is literally the photo from the urbex livejournal, but it does seem to give some insight into the submachine series creator's aesthetics. I myself have always thought that old, abandoned, and decrepit industrial zones would make a great set piece for a game.
|
|
#
?
Nov 20, 2016 23:30
|
|
|
I like having a game that's so explicitly inspired by urbex. Especially one where that's basically what you're doing anyway.
|
|
#
?
Nov 21, 2016 02:56
|
|
|
EagerSleeper posted:I think that it only takes a couple of electrodes on your head to zap you to another dimension is cool and subtlety chilling. Being to interact with other worlds is as simple as changing your perspective. If you like this kind of thing - or stories about parallel worlds in general, I can recommend the Long Earth series of novels by Terry Pratchett and Stephen Baxter.
|
|
#
?
Nov 21, 2016 06:53
|
|
|
Is it possible that the Singularity bit is a reference to the creation of the AI that now runs the Submachine? Maybe that note wasn't made by humans, as it references how "for once the question wasn't directed at us". To me, that implies that whoever wrote it, whatever civilization they come from, there's other groups or species below them who look at them as the Creator figure. So that note was written by whatever aliens created the AI that created the Submachine, and continues to administer it to this day. The reason the Submachine is so mind-boggling in pretty much every respect is that it was built by something that just plane thinks and has evolved far past us and what we comprehend. That's what I took away from that one note. Also thanks for LPing this series, I remember back when I was in high school playing the first 3 or so of these on the school computer and really enjoying (and being frustrated by) them.
|
|
#
?
Nov 24, 2016 17:37
|
|

|
Carbon dioxide posted:If you like this kind of thing - or stories about parallel worlds in general, I can recommend the Long Earth series of novels by Terry Pratchett and Stephen Baxter. You know, I was about to mention just how much this reminded me of that, and then I catch up to the LP and it's just been said. The series isn't quite up to Discworld levels, mostly because Pratchett had severe degenerative alzheimers through the entire writing process, but it's still pretty cool. Anyway, this game is actually rather awesome, something that surprises me given how generally lackluster the previous games were.
|
|
#
?
Nov 25, 2016 18:15
|
|

|
Hey everyone, I'm working on an update, I'll try to get it out later today. But before I do so, a small warning. Some rear end in a top hat has been posting spam comments to some of my tindeck audio uploads and there doesn't seem to be any way to remove or report comments or users, other than removing the audio files from tindeck entirely. It's not bad enough yet to consider doing that, but just as a FYI, please ignore the comments on there.
|
|
#
?
Nov 27, 2016 12:25
|
|
|
Part 22 Submachine 8: The Plan Welcome back! If you recall, last time we explored the first four Layers of the area we ended up in, and ended up unlocking Layer 5. This layer might be important because it is where Elizabeth ended up going. ♫ Thumpmonks - Submachine 8 - The Temple  This area is known as the Water Pantheon. Here, in 5-9, there's a statue of Krishna and yet another one of those useless levers.  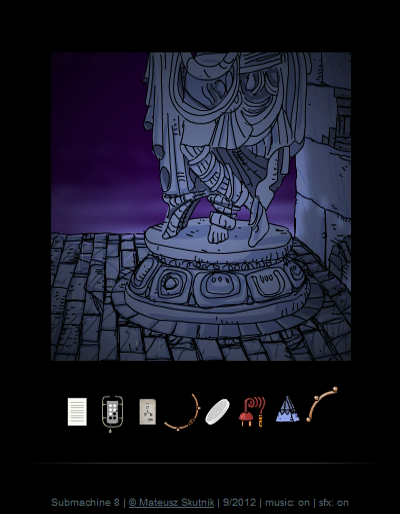 At the foot (feet?) of the statue we find a second Beamer Arm. 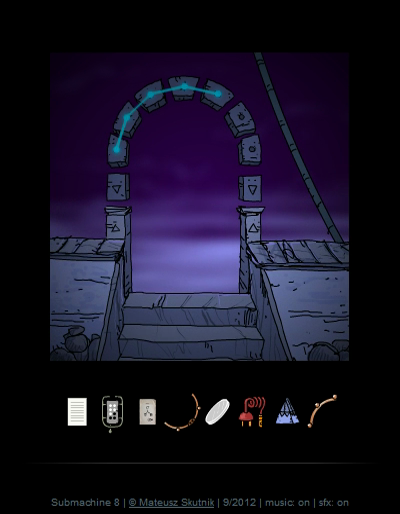 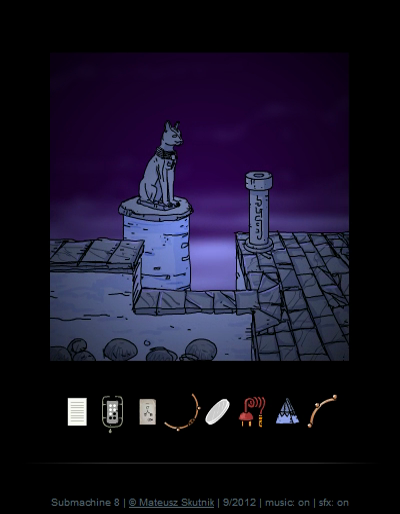 RTL Going left from here, we first find a pillar and cat statue that don't seem to do anything, and then a strange gate. From here, we can go down to 5-10.   Where we find a short note. quote:- I never knew beam of light could bend like that. 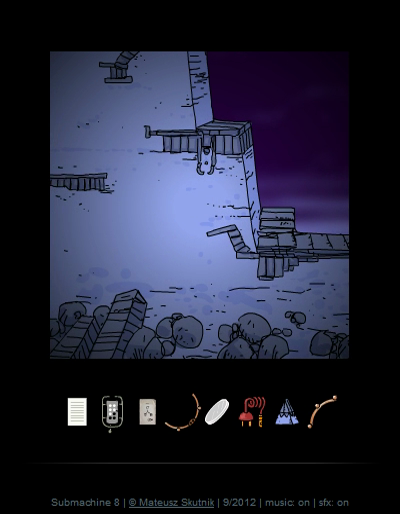 Up and to the left, in 5-5, there's nothing to do but climb up.   quote:- This is just a toy. Just a toy. 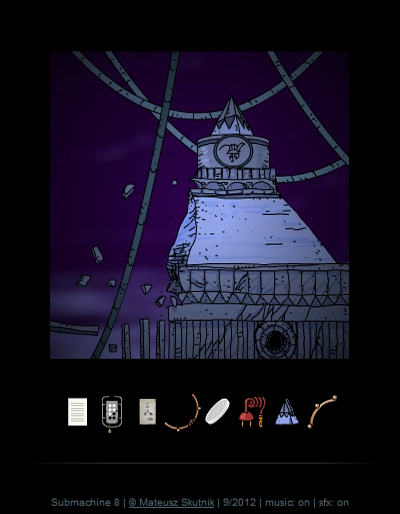  RTL Up on top, we can only go left. There's nothing we can do here right now, but interestingly there's floating broken rocks here. And is that hole at the bottom the remains of a Karma Portal? It doesn't seem to be active, though. We've been everywhere in Layer 5 except for 5-3, to the right. How to get there?  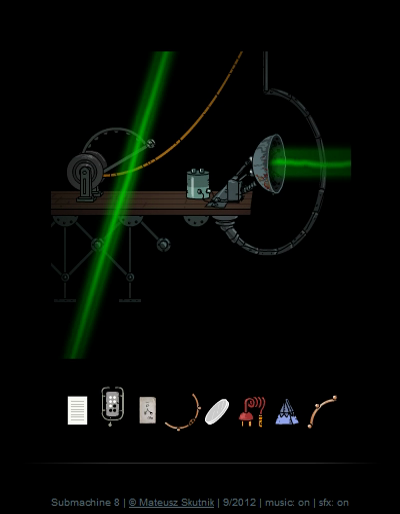 Well, we take a quick interdimensional detour.   A floating island. Our Stone Pyramid fits neatly on top of the left structure, and once it's placed, we can turn it 90 degrees by clicking on it. But that doesn't seem to have any effect.   What we need to do is place the Small Mirror in the holder. Now, when we turn the left pyramid, the right structure opens up and activates the Navigator button to Layer 6, or IIIIIOI as the Navigator calls it. It's a bit confusing that the right structure doesn't even move without the mirror. The solution would be more obvious if turning the pyramid would move the empty holder into the correct position already. ♫ Thumpmonks - Submachine 8 - The Fort  Anyway, welcome to the Armory in Layer 6. Room 6-3 here has another one of those plungers that don't do anything yet. Let's explore. 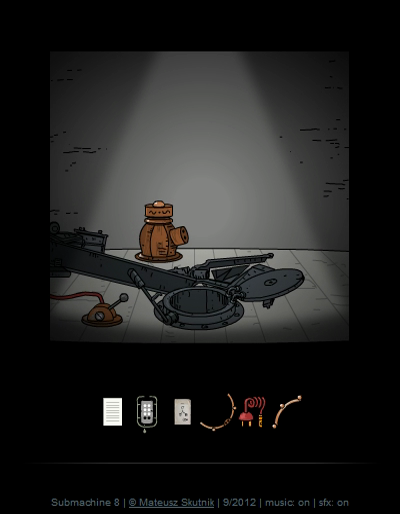 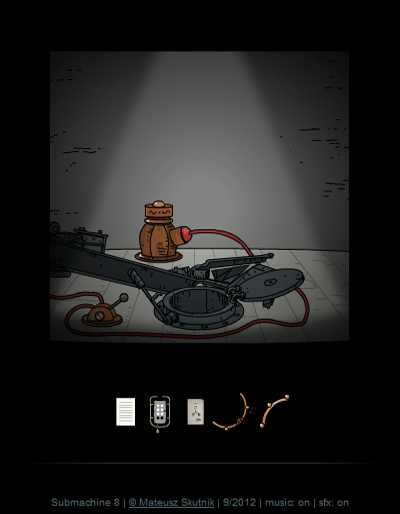 To the left, we can connect the device to the switch with our Wire. The switch doesn't do anything yet, though.  That is not very surprising, as the other cable from the switch ends in a pair of loose wires. What does keep surprising me is the eerie, strange music in these games. The music for the Armory doesn't really seem to fit with these rooms full of guns and cannons. But I'll take it.   Going down into 6-4, we find a note tucked behind a pipe. quote:- Do you see it now?  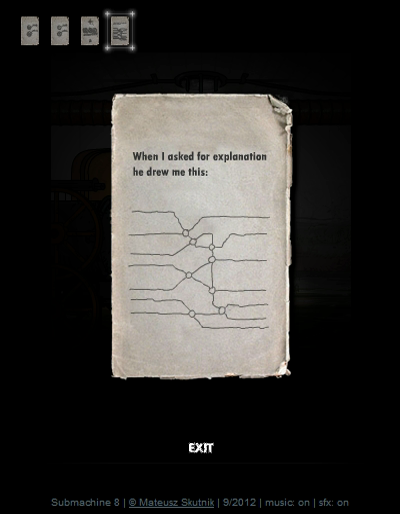 Down on 'ground level', this cannon has a picture that supposedly explains how the Layers are interlinked.   Going to the right, in 6-6 we find a big lever that closes a wall on the right side of the room.  I opened up the wall again, but before going further right, we do a quick dimension hop to take us into the 'underground' room 6-10. Here, there's another of those three-way switches. We'll keep that in mind.  To the right of the wall, there's a device. If we move the handle to the II, IV, or VI positions, the corresponding light goes green. We'll solve that puzzle later, let's explore the rest of this Layer first.   In 6-8, we find a Wheel Button on top of the door. And in the room above, there's a third Beamer Arm. We have access to enough items and information now to solve some earlier puzzles, so let's do so.   First stop, the Cardinal Mosque back in Layer 2. The Wheel Button we just got goes in the hole here. Now, what's the right combination?  Well, we found a hint for that in Layer 4. The trick is that the hint picture has South at the bottom, while the actual compass has North there. So we need to look at the picture upside-down. 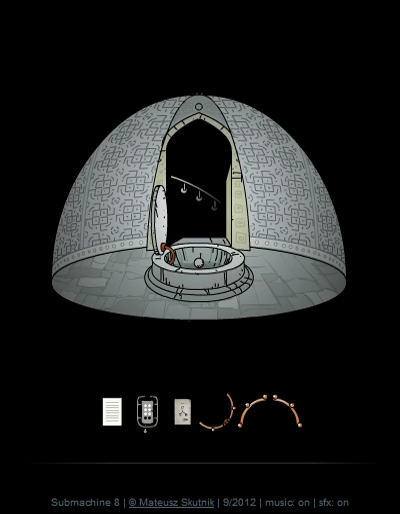  This opens the lid of the other compass in the mirrored room 2-4. We grab a Catalyst Stone from there. Also, on the way I stop to look at the screen that shows all Layers. Doesn't look like much of a plan to me yet...  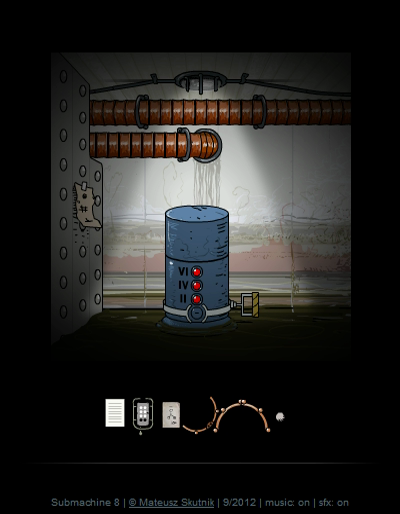 Next, back to Layer 6, where we close the wall and use dimension hopping to get to the other side and find a hidden picture.  You really don't want to miss this one. It has the solution to the "useless" three way levers puzzle. The diagram on the bottom shows that Q is all the way out, slashed O is in the middle, and the two half spheres mean all the way in. So the order of the levers should be in, in, middle, out and so on. But we can't solve this puzzle until we've found the 7th lever.  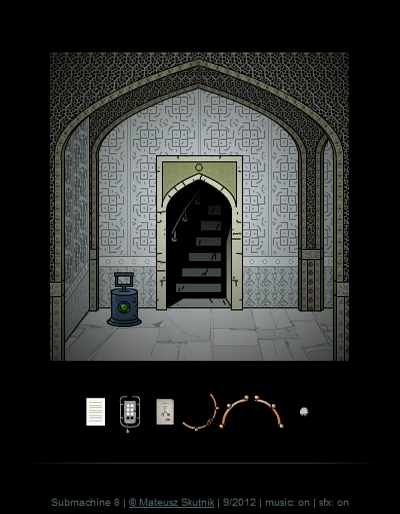 Instead, let's focus on this device. It might take quite a bit of exploring before you find out how this works. When we put the handle on II, the plunger in Layer 2, room 5 gets a green light. And when we pull that plunger, it stays locked in that new position.   On the way back, I open the wall again for easier travel. Anyway, as you can see, the plunger causes the corresponding light on the device to be permanently green. Next up is the Layer 4 plunger, located in 4-8. 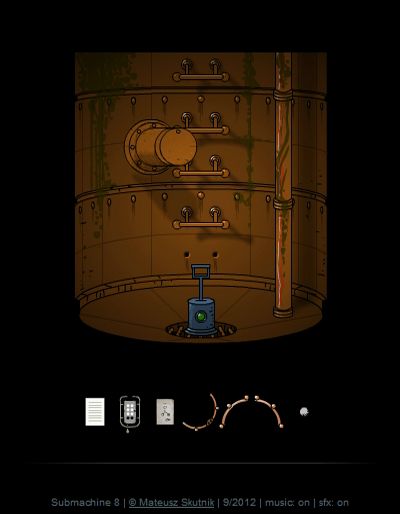  We pull it and move on to the last plunger, which is actually right here in Layer 6. We saw it in 6-3. 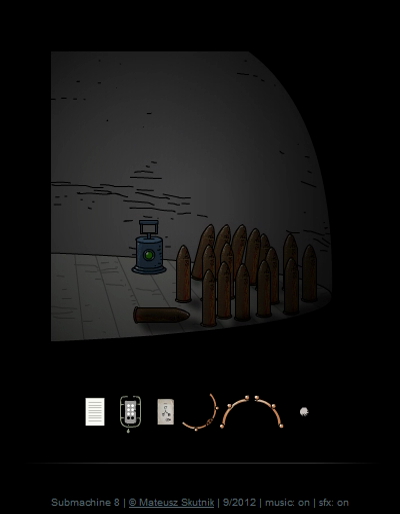 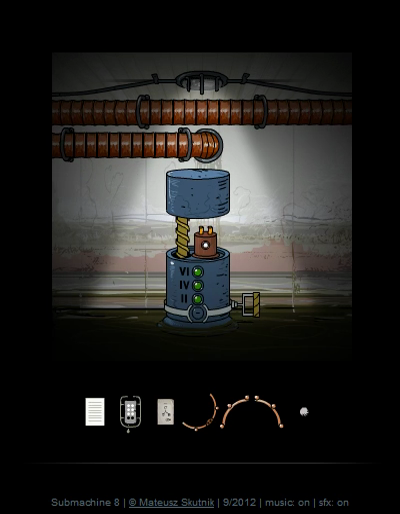 Activating all three plungers opens the device, which holds a Power Storage Cell.   We connect that battery cell to the loose wires here, but the switch still doesn't work.   We need to use the three Beamer Arms here to assemble the Beamer, and THEN we can switch it on to open the way to the final Layer, Layer 7. There are quite a few steps to get this Beamer to work: you need the power cord, you need the three Beamer Arms, you need to solve the puzzle for the Power Storage Cell - if you haven't found everything by the time you got here, you'll really need to know your way around all the Layers to get the missing stuff. ♫ Thumpmonks - Submachine 8 - The Solitude   And here we are in Layer 7, in the area known as the Bamboo Town. These are screens 7-2 and 7-3. We can't do anything in either yet, so let's go left.   There is a ...note here? It looks like this was written on some sort of leather. quote:A woman came to our village. No one knows exactly how she entered, since the gate was closed at the time. She went straight to the [term not translational], and one minute later a beam of bright light shot from it straight up to the sky. When she disappeared we knew we were blessed with the presence of the goddess. That was 742 years ago, and we worship her to this day.  The rope ladder in 7-4 just ends in mid-air, so once again we need to jump to another dimension, climb down, and jump back. 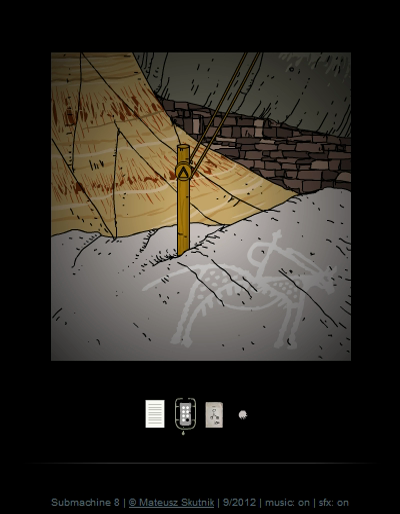  Rock paintings? This area looks absolutely ancient.  Down in 7-10 we find the final three-way lever just sticking from the sand. I wonder how long that's been here.   In 7-7, we drop the Catalyst Stone into this unusual little hole. It activates another green beam and makes the Navigator light up as if a new Layer was unlocked. However, we're already in the last Layer and the Navigator only has seven buttons, so nothing actually happens. The reason we need to do this is because every beam of light adds to the light show on the gate in Layer 5. We'll return there in a bit.   To the right, we pick up a Valve made from bamboo. I think something like that would break rather easily, but whatever.   And up in 7-9, we find some modern equipment and a Stone Button. It seems like there was some kind of archaeological dig going on. But who built the bamboo structures and how long have they been here exactly? 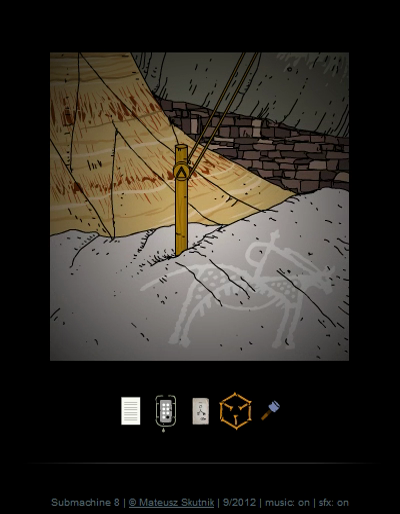 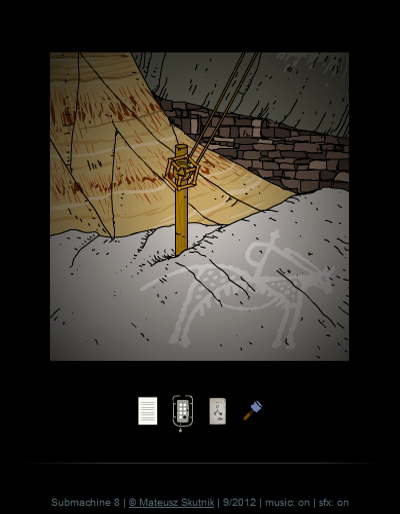 Anyway, the Valve is used to turn this thing to the left, which in turn pulls on a wire.  This opens up the box up in 7-3, getting us the Hammer. The Hammer is actually an optional item, used to get to some Secrets. Activating the beam of light was the only thing we actually needed to do in Layer 7. Now that we've seen all Layers, it's time to do some rounding up and solve the final puzzles. First stop, Layer 2.  With all 7 Layers turned on, this text appears on the screen here. I'm guessing this means this area is part of the Plan, and we're in Sector 9, wherever that might be.  The seven green beams cause this door to appear. We can bang the knocker, but I don't think anyone's home.  So let's go solve this puzzle. It's not too hard with this hint, and if you remember the location of the levers.   Layers 1 and 2, both completely pushed in.   Layer 3 middle. Layer 4 can stay all the way out and we never touched it so no need to go back. The Layer 5 lever has to go all the way in again.   We skip Layer 6 as it also has to stay out. The final lever goes to the middle, though this screenshot was taken before I set it right. And before I forget, have a picture of what the Navigator looks like now that all buttons are active. 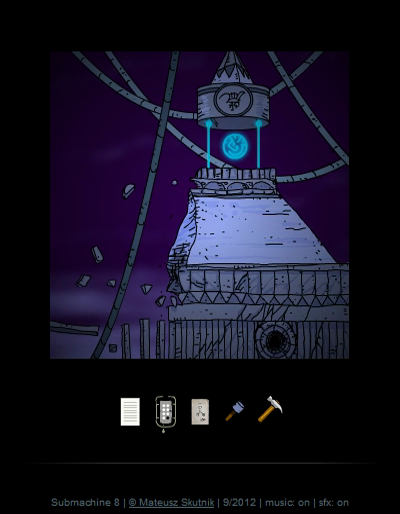  After solving the puzzle, something has changed in screen 5-1. The pyramid has risen so we can grab the Energy Trail. I keep thinking this item is called the Energy Seal but it really says Trail. Now, as you might guess, the Energy Trail goes with the energy doorway. We could finish the game right now. But I promised you Secrets, so Secrets you'll get.   There are 5 Secrets in this game. For the first one, we need to go all the way back to Layer 1 and move the pole back from 1-2 to its original position in 1-3.   This makes the first Secret appear in Layer 3, room 1, hanging from a pole here. Note that in this game, Secrets don't go in your inventory like in earlier games. There's a sound indicating you found something special, a message appears on screen, and the Secret just disappears. But we still need to find all five to unlock some things.   The second Secret is also in Layer 3. It's rather deviously hidden under floor tile that comes loose when you click it.   And we still aren't done, the third secret is in the hidden underground room in Layer 3, room 3-10. To get it, we need to smash the cracked cover with our Hammer. According to the wiki, this capsule is actually from a game called Daymare Town 3, from another series also by Mateusz Skutnik. I never played the Daymare Town series so I can't really tell you anything more about it.   The fourth Secret is in Layer 5, and extremely devious to get. The first thing you need to do is make the writing on this pillar light up with the Energy Trail. The thing is, the Energy Trail disappears from your inventory once you use it on the doorway, so once you do you can't get this Secret any more. Furthermore, while this game autosaves, so you can always go back into a game to get any remaining Secrets, there's no way to load an old save or to get an used item back. If you miss this Secret you have to start the entire game over again to get it. And this won't be the last time Mateusz does something like this.   And using the Energy Trail is just one step in getting this Secret. We also need to put the Stone Button into the pillar, and we need to do the very unobvious thing of smashing the cat statue with our Hammer. The only nice thing is that the order in which you do all of this doesn't seem to matter.  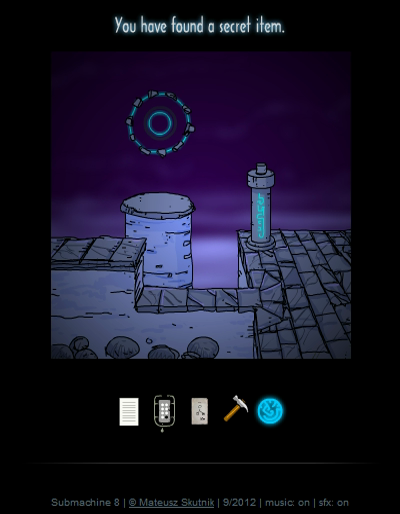 Finally, when we press the button, the energy forms a circle out of the cat statue rubble, with a well-earned Secret in the center.  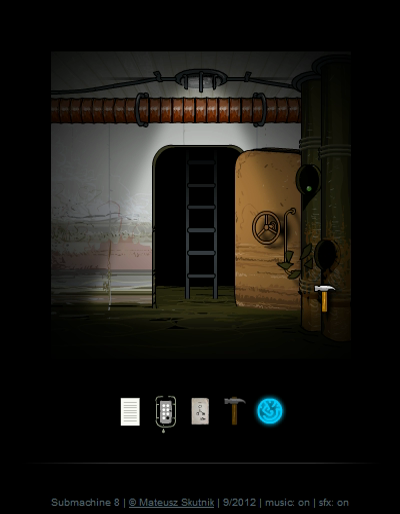 There's one more Secret, and this one is slightly less difficult to find. We're in Layer 6, in room 6-8. The lids on the pipes to the right can be smashed with the Hammer. Behind one of them is the fifth and last Secret. By the way, the game doesn't indicate how many Secrets you've found so far. In another change compared to the previous games, the reward for finding the Secrets only appears after finishing the game, so let's go ahead and do that.  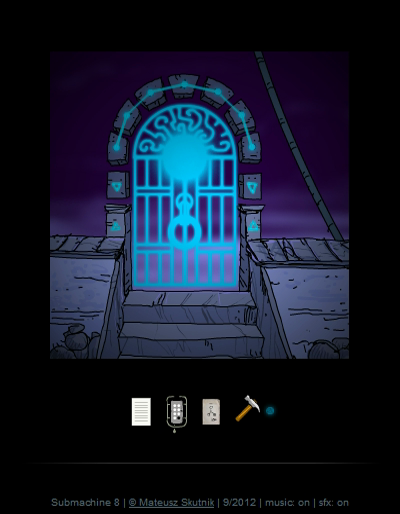 We place the Energy Trail in the doorway and use the knocker to open it.    And the surroundings... changed, somehow? Entering this door finishes the game. Alternatively you could use the Navigator to jump to another Layer and keep exploring, but we already found everything so let's go through.  A final, very strange conversation between Liz and Murtaugh. quote:Liz: So... Did you ever catch me after all?...   Normally this would be a great place for my final words... but we haven't gotten our reward for finding the Secrets yet.  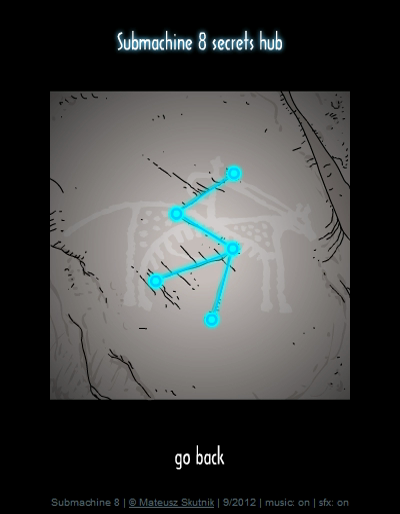 Once we get back to the title menu, a Secrets Hub option has been unlocked. This takes us to a single screen with 5 dots, one for each Secret we found.   Each of the dots contain a special secret note. Let's go through them one by one. Secret posted:Murtaugh: "If there's one thing I regret - it's the fact that of all people I sent to the edge no one ever came back. Not a single soul. That will haunt me for the rest of my life..." Secret posted:- "Have you ever been to the place called the loop?"   Secret posted:- "Why does this sociopath only talk to Elizabeth?" Secret posted:- "But that's impossible! He can't be in different dimensions at the same time!"  Secret posted:- "Doesn't he understand that his karma portals are shattering this dimension?" And with that, Submachine 8 comes to an end, in only two updates. When you know what you're doing, the relatively small number of rooms makes this game rather short. But it's still quite interesting as it introduces the new mechanic of the Navigator, and we are ever so slowly starting to get answers to old questions. I'm rather glad this game isn't too long, it's a nice breather before the marathon to the end that's coming up. Believe me, the final two games are a doozy. So I will meet you again, for Submachine 9: The Temple. Carbon dioxide fucked around with this message at 15:26 on Apr 9, 2017 |
|
#
?
Nov 27, 2016 22:03
|
|
|
As I mentioned before, Sub8 is really well put together. There's a lot of obtuse thinking introduced with the layers mechanic and I think the series benefited from it. Not only do you have to use normal puzzle logic, but you also have to use some spatial reasoning to solve these puzzles. It's a really good entry and sets us up for the next game really well. Looking forward to it.
|
|
#
?
Nov 27, 2016 23:32
|
|
|
I hope Liz is still alive...  Thank you for the dimension hopping story recommendations! I have one of my own called "The City, and the City" by China Mieville. In that story, there are two cities occupying the same space, but its citizens are trained from birth to subconsciously block out the residents and architecture of the other city. People from both cities could be walking right next to each other, and not even know it. However, there's rumors of a fabled third city unknown to everyone that could change the way the city is thought to work. EagerSleeper fucked around with this message at 10:32 on Nov 28, 2016 |
|
#
?
Nov 28, 2016 01:44
|
|
|
7 Submachine games, 7 layers. Is it as simple as that? I really like the visual variety we got here.
|
|
#
?
Nov 28, 2016 04:14
|
|
|
Yeah, I'll once again state that this series has gotten really cool, really fast.
|
|
#
?
Nov 28, 2016 08:23
|
|
|
I only ever made it to Submachine 7, so this and what comes ahead are brand new territory. You can tell things are really coming to a head though. Also, you should check out the Daymare games. It's been years since I played any of them, but I recall them being an interesting blend of sinister and whimsical.
|
|
#
?
Nov 28, 2016 14:21
|
|
|
The next game is probably my favorite of the whole series. Looking forward to seeing it covered by someone more competent than me.
|
|
#
?
Nov 28, 2016 15:01
|
|
|
Hey folks, Sorry, no update today. I've had a busy december and no time to spend on the LP. But it's 2017 now and I've started work on Submachine 9. I've got the raw screenshots for the game now, what's left is actually writing the updates. I'll try to get the first of those out next week. Just for a sense of scale: before editing, the number of raw screenshots for the previous games was around 300 per game for the largest games, less for the shorter ones. For Submachine 9 I got over 400. And that's after cutting out the time I spent wandering around trying to find my way again. Carbon dioxide fucked around with this message at 12:10 on Jan 7, 2017 |
|
#
?
Jan 7, 2017 12:08
|
|
|
9 and 10 only get bigger than the rest so that's not surprising. They're both pretty good overall so take your time!
|
|
#
?
Jan 8, 2017 18:54
|
|
|
Part 23 Submachine 9: The Temple  Click here to play the game yourself. Welcome back! Last time, in Submachine 8, we picked up the Navigator and used it to jump to parallel dimensions. In the end, we unlocked a strange gate and walked through. Let's see where we ended up, shall we?  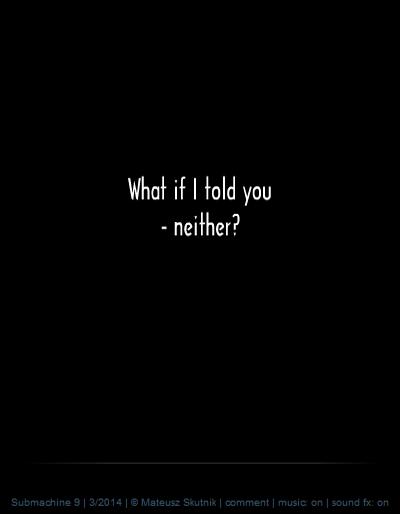 ... That's a bit strange. Wonder what it means. ♫ Thumpmonks - Submachine 9 - Garden 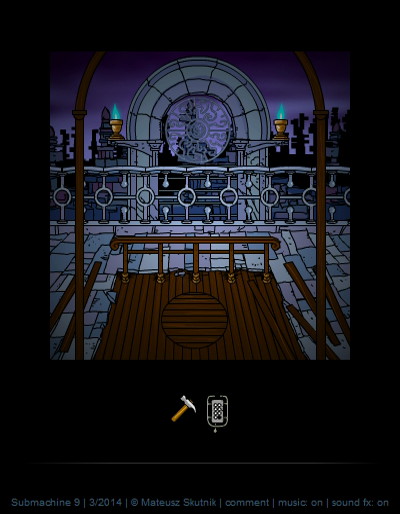  We find ourselves in an area called the Garden, not to be confused with the South Garden from Submachine 7. We kept two items from the last game: the Hammer (even though it was optional to get) and the Navigator. The Navigator seems to be fully functional... but jumping from Layer to Layer doesn't seem to do anything. That's actually because in this area of the Subnet, all seven layers are (nearly) identical. You'll see what I mean soon enough. The wiki says that this entire area is known as the Knot, I'm guessing that's because this is the place in the Subnet where all Layers are tied together so we can easily jump between them. It's not clear if the area we explored last game also belongs to the Knot or not. I honestly don't even know where they got the name "the Knot" from, I don't think I've seen that name in any of the main games. Possibly something the author said. Anyway, let's get going. 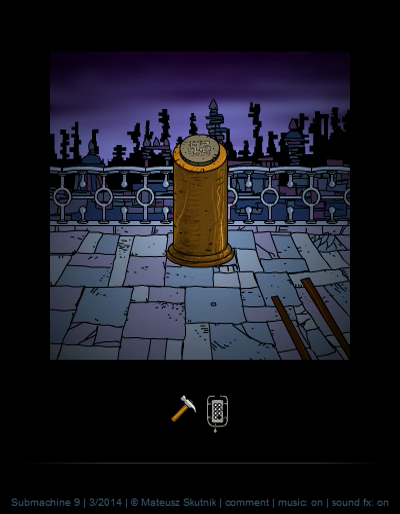  To the left of the garden gate is the first Note, which seem to be on stone slabs in this game. quote:The light of Shiva drawn Murtaugh to live in the lighthouse.  Further to the left is our first dead end, with some stone 'steps' we can't climb. Time to backtrack and go right.   quote:The light of Shiva drawn Elizabeth to leave the lighthouse. 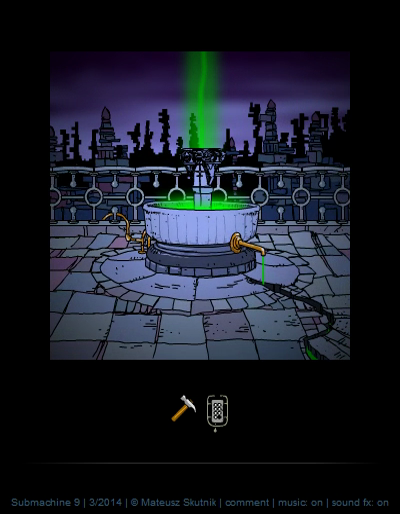  Further on to the right, we find this fountain with a weird glowing green liquid, and a locked door.   Near the right wall, we pick up the Brass Rod. It goes in the device on the ground.  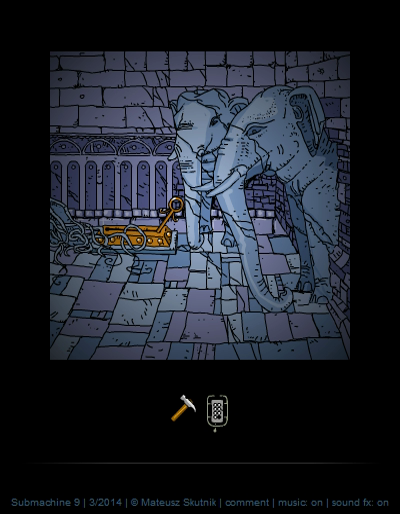 And we flip it like so to open the door to the left.     A little ways into this building we see a side passage in front of us which is too dark to see much. There's a brass bowl barely visible. Let's go further into the main hallway.   Yet another bowl, and at the end... a Brass Jug, which we're gonna need. Let's fill it up with the liquid from the green fountain outside.  Glup glup glup. And that gives us a jar of Karmic Water.  Water goes into a bowl.   And we get... a Cog Wheel? Don't ask me how it works, but through the power of Karma, this liquid can create solid-enough objects. We saw another bowl in the side passage. Let's go fill it with Karma Water as well. 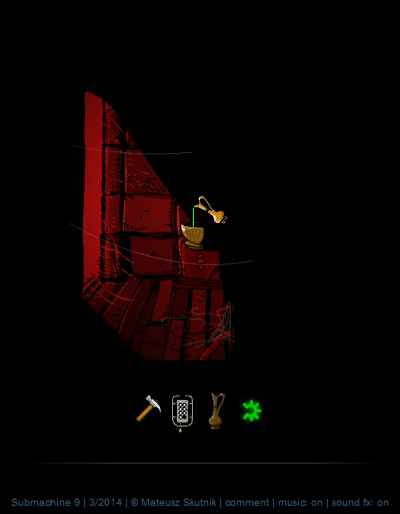  Cog wheels, branches, and leaves. It's not really organic, but it's not really technology either. Karma is funny stuff.   Inserting the Cog Wheel makes a lever appear, and pushing it up seems to cause some electrical(?) lines to appear to the top right, but more importantly, it moves the middle block down. We've seen that symbol before, to the far left of the Gate.   RTL Yep, the block is gone now, and we can crawl into this structure.   RTL We crawl out of the hole to reach a new area. ♫ Thumpmonks - Submachine 9 - Pyramid  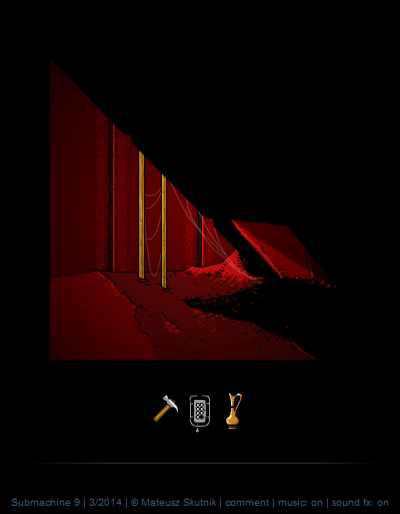 This place is a Pyramid, if you hadn't guessed yet. It's large, complicated and labyrinthine. I'm going to try and take a straightforward path, to not make it too confusing for you all. You know what, I'm going to number the floors. This entrance floor is the 1st floor. We can't do anything with that thing on the left yet, so let's go further in.   There's a wall on the left here, but pulling the rod makes ladder steps fold out.     Here on the 2nd floor we find a Brass Scarab to the right. There's also an 'air shaft' that seems to lead to nowhere. At least it's historically accurate, the Great Pyramid of Giza has mysterious 'air shafts' as well.   The Scarab beetle fits into the device back near the entrance. It makes Part of a Stone Key appear.   Going back to the 2nd floor and then taking a left, we find another seemingly dead end. But there's a bowl so we use our Karma Water. The good news is that it never runs out - we won't have to go all the way back to the fountain to refill it. 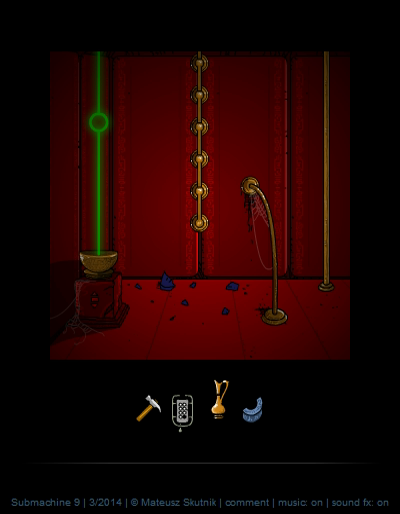  Anyway, through the power of Karma, a rod appears which folds out the ladder to the 3rd floor.   Which looks blue. As a bit of a help against getting lost, every pair of floors is colour coded. It also helps that as we go higher up, each floor becomes smaller. That's how pyramids work. We can't do anything with the box on the right yet, so let's go left.   On the ground is another Part of a Stone Key. We pick it up, and combine it with the other part in our inventory to a whole Stone Key.  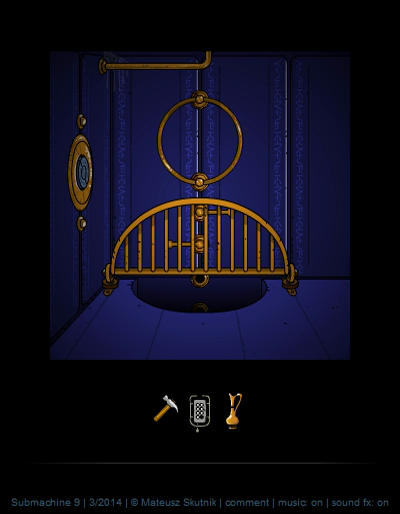 Luckily, the lock is right here, and we can climb down to a part of the 2nd floor that's behind the wall we saw earlier. 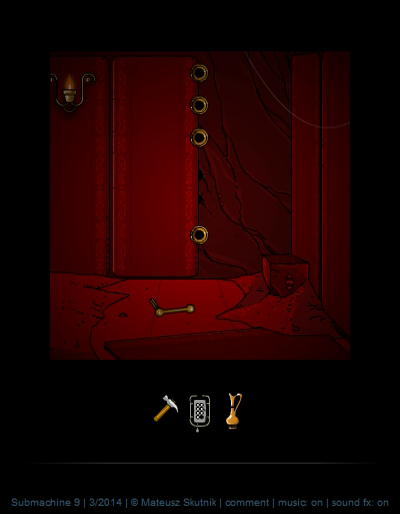  Looks like there used to be one of those ladders here. This Ladder Rung... is a bit of a dick move. We need it to find a Secret later (yes, this game has secrets - who'd have figured), but the game allows you to put it into one of the slots in the wall here... in which case it becomes stuck and you can't get it back out. The game doesn't tell you that the Rung has another use beyond getting stuck. The game autosaves and allows you to continue at any time, even after winning. However, there's no way to get the Ladder Rung back out without starting a completely new game. You have to know about this ahead of time if you want all Secrets. In any case, let's hold on to it for now and continue to the left. We don't have much of a choice, there's no way to climb back up. 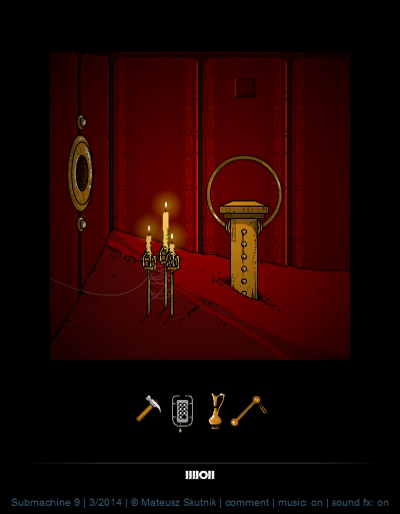 This place is full of 'dead ends'. We don't even have a key for the lock this time. What we do have is the little tile on the back wall that says IIIIOII. That's similar to the Navigator's notation! Tiles like this one indicate that the room has differences among the Layers. In this case there's something important in Layer 5. But this room in specific is different for each Layer, so let's quickly show all versions. We start out in Layer 1, which is what the above screenshot shows. Here's all seven versions:  What? Oh, you're saying you aren't Murtaugh and you have trouble seeing all Layers at once? Well, in that case, let me help you a bit.  The number on the bottom is the Navigator's output, that way you can tell where you are.   As indicated by the wall tile, the fifth Layer pillar has a Brass Key on top of it.   Putting it in the lock makes the entire wall slide up into the ceiling. To the left!   RTL Three things of note here: yet another air shaft going nowhere, a Brass Bowl to pick up, and a hole in a floor we can climb down through.   We can use the Brass Bowl immediately - the Ladder Rung room a little bit to the right had one of those cubical pedestals on which we found each of the other Karma Water bowls. This one creates a ladder so we can backtrack when we need to. And yeah, this pedestal is easy to miss, so it can be quite annoying when you inevitably need to go back and can't find where to go.   Down through the hole on the left, we find ourselves on the far side of the 1st floor. The boxes allow us to climb back up if we need to. To the right, you can see a ladder in the back going further down. But let's explore the rest of this floor first. ...Who put those curtains there, anyway? And who lighted the candles?   This flat bowl thing holds the next item we'll need, a brass sphere. And if you're like me, you'd think "okay, found the item in this room, let's go on". Nope. It's a different bowl but it's still a bowl.   After grabbing the Brass Sphere, we water the bowl to create yet another item.   We pocket the Karmic Seal and go further right. We're now just to the left of the very first wall we ran into in the Pyramid. There's a very strange wall tile here - it says IIIIIII - so there's Layer stuff going on here, but an O denotes a layer worth visiting, and there's none of those. And it turns out this room looks the same in all Layers. There's a suspicious wall in the back though - I guess we'll figure it out later. There is an item on the ground: the Chest Key. We'll take it and climb down the ladder we saw in the background.  We're now 'underground', as far as that makes sense in the Subnet, on floor -1. And a new colour, a grey floor. Let's go left first.   RTL Things we can't yet interact with. But it looks like there's something even further down. Told you this place was huge.   RTL All the way to the left, it's a good thing we're checking those air shafts, because there's some kind of Brass Tile hidden in this one. Oh - and the wall here is still diagonal, so this floor is larger than the 'surface' floors.   To the right of the ladder, we find..... a roof coming up through the floor? With some kind of statues that look like they belong to some Eastern religion? Not something you'd expect to find in an Egyptian pyramid. Was this part of the Plan? If so, I have no idea what the Plan might be. 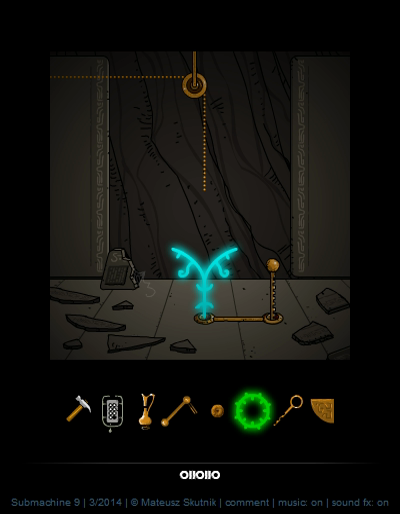  After climbing over the roof, we find this room with some blue Karma lines. To the right, we're blocked by a wall, but there's a statue here that doesn't belong in an Egyptian pyramid either. A second Brass Tile is sitting at its foot. I'll quickly grab that before looking at the Karma puzzle. The wall tile on the ground says there's something in Layer 1, 4 and 7. Let's start jumping. 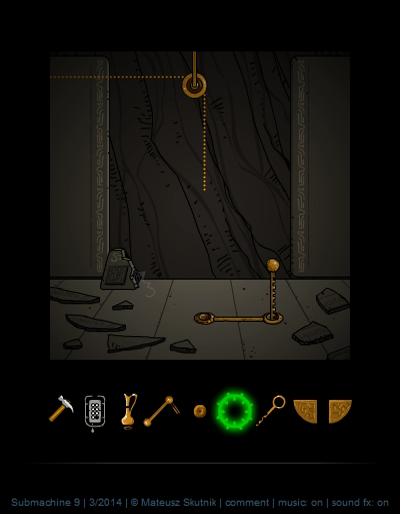 This is what Layers 2, 3, 5 and 6 look like. Nothing interesting.   Layer 4 has this... thing. Pouring Karma Water in the top bowl makes some Karma appear from the side.   Switching to another Layer shows that the Karma contraption exists in every dimension. I pour some Karma Water in the granite bowl in Layer 7.   This forms another part of the Karma structure, and jumping back to Layer 1 shows it's now complete. When we push the lever in Layer 1, the cable is pulled down by the gears.  And all the way on the other side of this floor, we can now make our way further down to floor -2. And this looks like a good place to end this update. As a bonus, have a map of the parts of the Pyramid we've seen up till now, made from a very helpful map on the wiki. 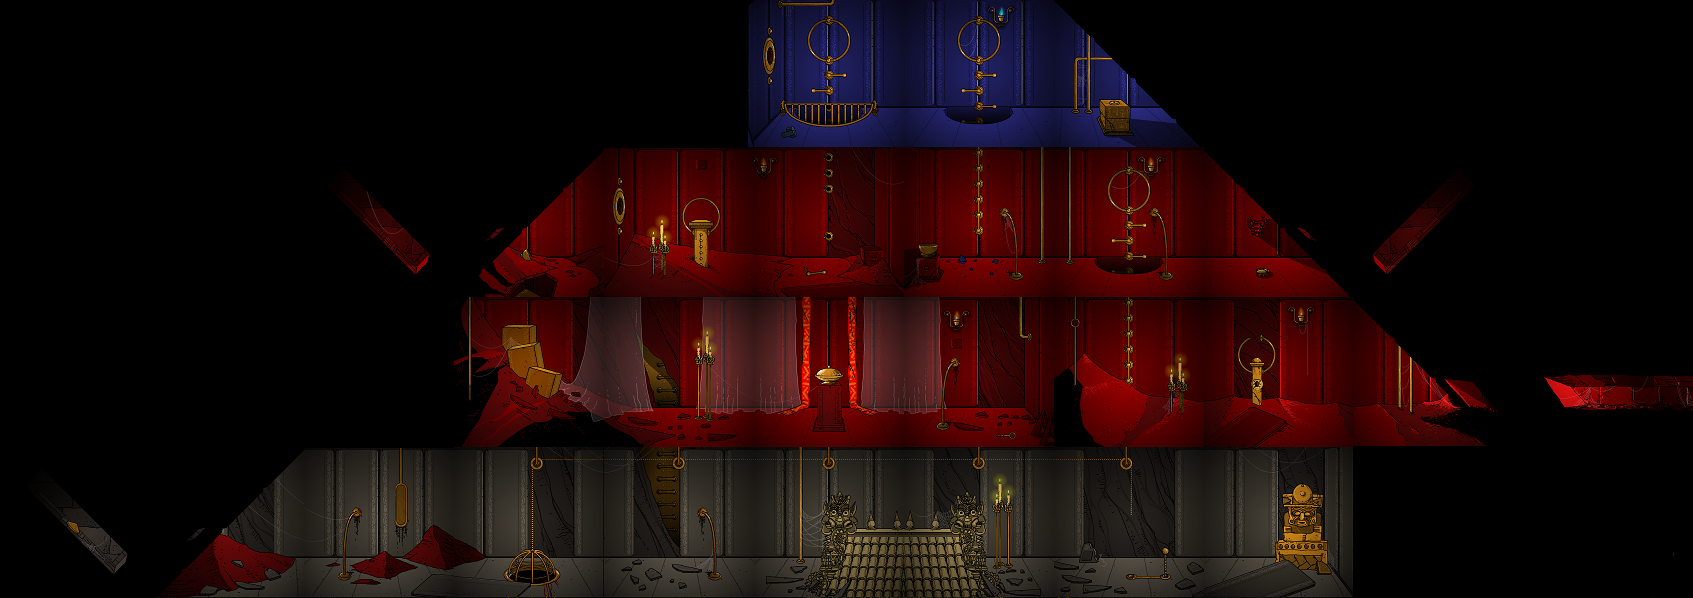 Click for large This way, it almost looks easy. It isn't when you can see only one room at a time. Anyway, next time, we'll go explore the further depths of the Pyramid. Carbon dioxide fucked around with this message at 15:22 on Apr 9, 2017 |
|
#
?
Jan 15, 2017 19:09
|
|
|
The design in this game feels very tight and compact since we're exploring this pyramid. Almost every room to this point has a purpose or a puzzle hidden within it, requiring the player to explore, find and remember. It's a really strong entry overall, and the unsettling feeling you get going deeper and deeper into this mysterious pyramid in a place where the layers are almost identical is unlike anything the past games conjured up. At least, that's how it was for me the first time I played.
|
|
#
?
Jan 15, 2017 23:19
|
|
|
Man, that dimensional rotator is a fast son of a bitch.
|
|
#
?
Jan 16, 2017 08:55
|
|
|
Part 24 Submachine 9: The Temple Welcome back! Last time we started exploring a huge, mysterious Pyramid. We stopped when we found and opened a hole leading down to a second basement level. I decided to stop here because going further down changes the music from the Pyramid theme to the Ruins theme. We're apparently reaching a separate, deeper section of the Pyramid. ♫ Thumpmonks - Submachine 9 - Ruins   RTL Another grey floor down here, but now a lot of those grey back wall panels are gone, revealing blue tiles in front of the raw stone. Let's follow old adventuring instincts and go left first.  In the next room, there's another small tile showing us there's something of interest in Layer 6.   It's a device on the wall in which we can apparently fit 4 Brass Tiles. We already got two. We put them in right away, because it's just annoying to hit the 10 items inventory limit, something that shouldn't really happen unless you hoard items.  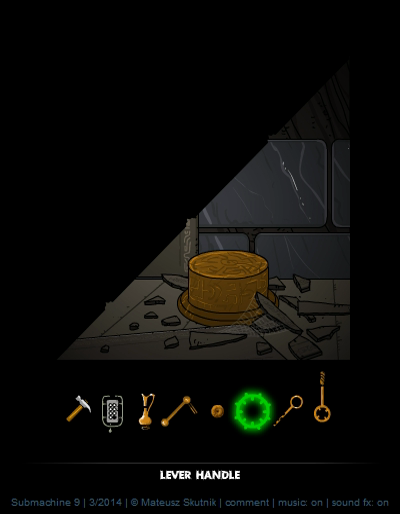 At the edge of the Pyramid we find this Lever Handle.  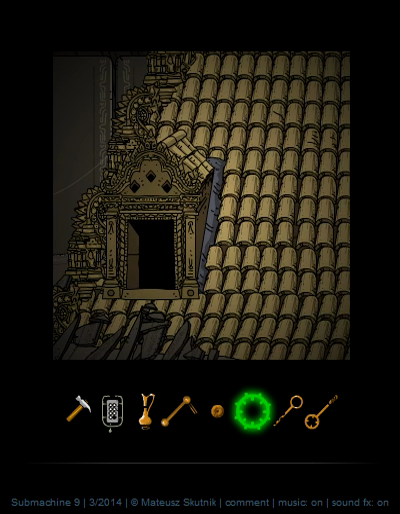 To the right from where we entered this floor, we find more parts of this strange roof of which we saw a glimpse before. In case you hadn't guessed yet, this is the roof of the Temple after which this game is named.  While the roof is blocking the Pyramid corridor entirely, we can climb in through the window... but there's nothing but a deep hole inside. At this point I found myself frantically running around the Pyramid trying to remember where the other Brass Tiles are. Even after a practice run it's quite hard to remember where everything is. I won't show you that part and will cut to the chase.   If you remember, all the way up on the 3rd floor, we found this box. We also picked up a Chest Key somewhere last update. Putting two and two together, we get another Brass Tile.   Next, we just passed it on floor -2, but it's really easy to miss - there's a Stone Tablet standing against the little tower here.   This cartouche fits into the thing on the wall here on the left side of the first basement floor, making a ladder drop down.  This takes us to the very edge of the 1st floor, which we couldn't get to before because of all the red sand. The final Brass Tile is just sitting here.   Back in this room, inserting the remaining Brass Tiles opens up a way further down into Pyramid floor -3.   RTL We're still near the left edge of the Pyramid so let's go left first. The strange statue on the left has a hard-to-see item on it.  It's a Stone Eye, and it's good to pick it up now because like nearly all items in Submachine, we will be needing it.  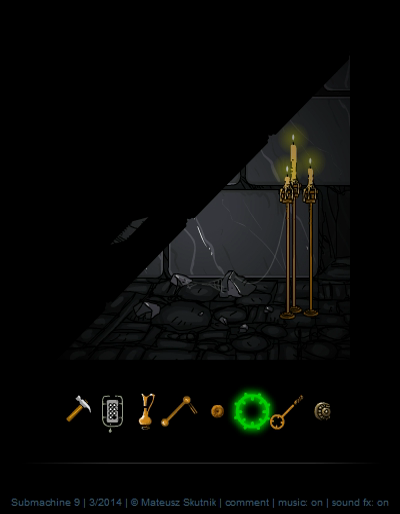 RTL Here's the end of this floor, and surprisingly there doesn't seem to be anything of interest here. 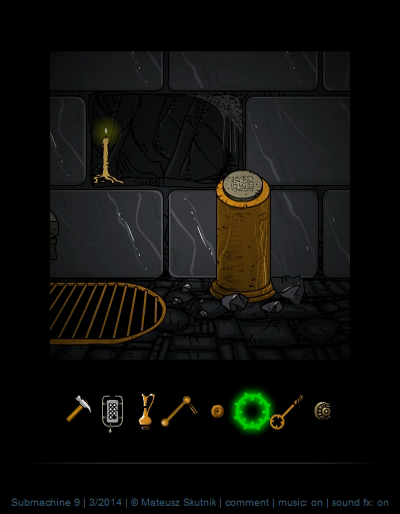  To the right of the stairs, an interesting bit of the story. quote:When Murtaugh put his arm into the waterfall, he noticed that he no longer had an arm, but seven of them. That was not something unexpectable.  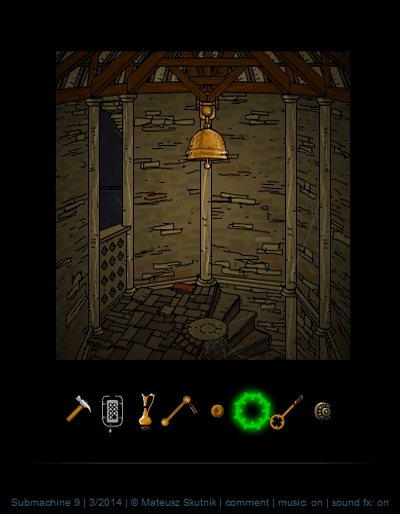 A bit further to the right, we find the top window of the Temple's tower of which we've seen the tip. But this time, there are stairs. 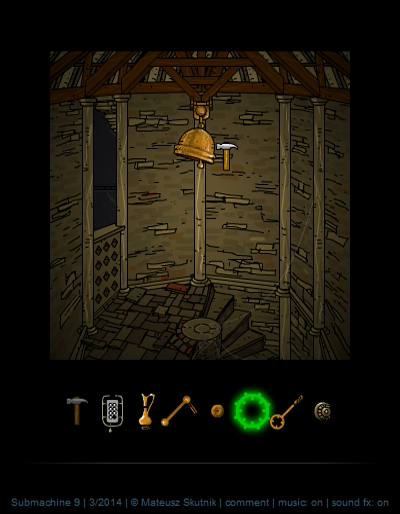 And this is where we finally get to use the Hammer we started the game with. It's to ring a bell. Obviously.   Down the stairs, we're stopped by another red sand flood quite soon. There's a brass bowl here which we'll grab.  We can crawl through the hole to the left here but it's just a dead end. Time to backtrack. 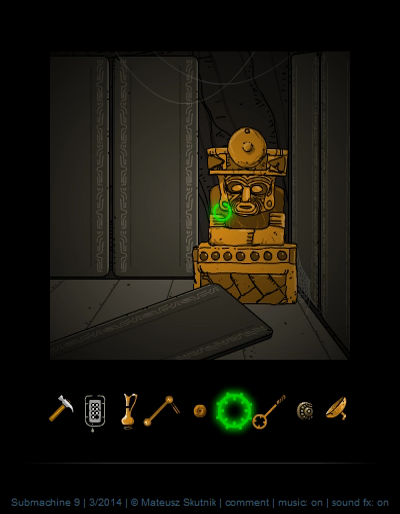 First of all, ringing that bell somehow made this statue, which we saw on the first basement floor of the Pyramid, gain a Karma earring.   Secondly, the Brass Bowl we found has a hook and the Temple roof window has a handy place to put it.  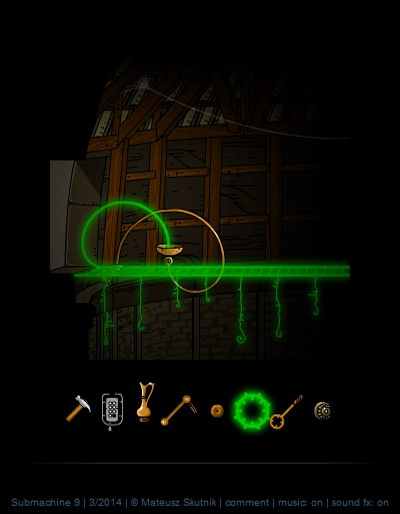 Pour some Karma Water in... and we got an entire Karma bridge this time.   On the other side, climbing out of the window, we find stable ground on the other side of floor -2 of the Pyramid.   Another tower top, and then a room that looks like it used to have a tile with Layers on the wall, but the actual tile is broken or gone. So let's jump to all Layers quickly, see what we can find.  Bingo, we found something in Layer 4. There doesn't seem to be anything in any of the other Layers.  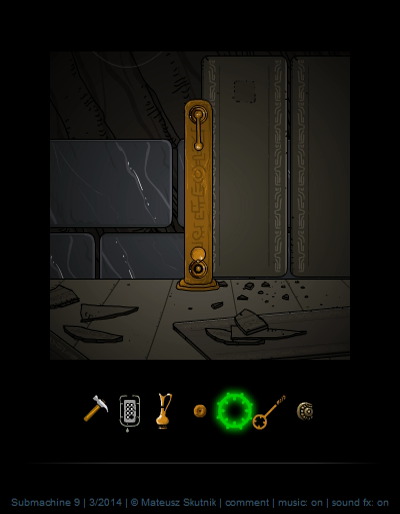 This is where the permanently missable Secret is. The Ladder Rung goes into the top of the pillar, and after giving it a turn, we get the first Secret out of five from the bottom.   Going further right, we could go down the ladder but let's explore the rest of this floor first.  Aaaand another strange device that doesn't react to any of our current items. Let's go explore downstairs, then.   We'll go to the right first, this time. The Layers tile is apparently broken beyond readability. The other broken tile didn't have such a message, by the way, but that one was only needed for a Secret. Let's see what's up in the different Layers.   In Layer 2, we find a device that is activated by the Karmic Seal.   This is in Layers 5 and 6. As you can see, the Karma object exists in all dimensions. There's more devices here, looks like we don't have all pieces of the puzzle yet. Let's continue for now. 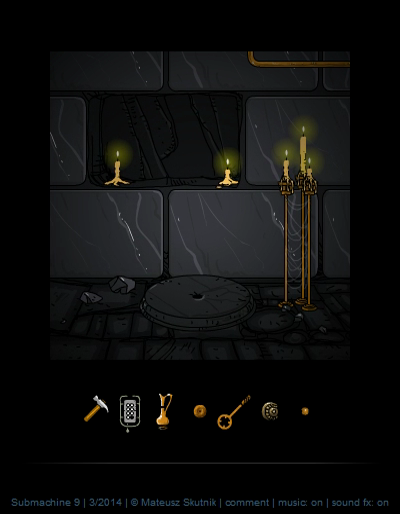  A stone slab with a hole and some device with a rope.  Which seems to continue to beyond our sight. Time to go left from the ladder.   RTL Another entrance into the Temple and another bell to ring with our hammer. Let's do that first and then quickly run back to the statue.   Activating both earrings moved a part of its headwear, revealing the second Secret. Like in the last game, the Hammer is still only used for Secrets. Back to the Temple!  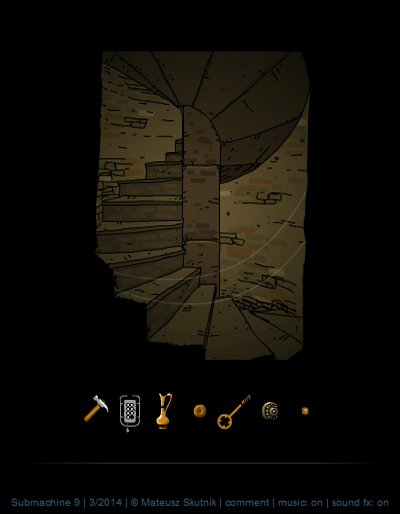 These stairs go a ways down. By the way, we've done it, we've explored the entire main section of the Pyramid now, it's time to go into the actual Temple. So, take a look at an updated version of the map while we climb down.  Click for large 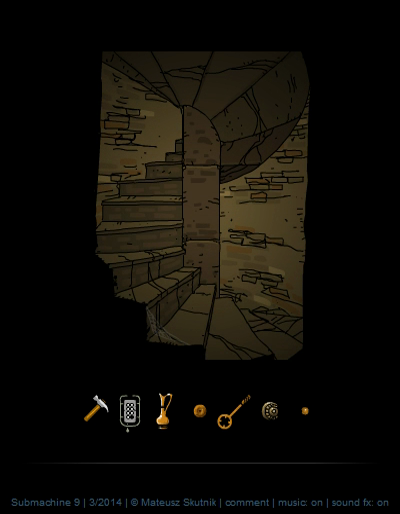 The Temple isn't actually nearly as big as the Pyramid. I won't be needing a map. But we haven't solved all Pyramid puzzles yet - running back and forth and remembering where everything is, that's the difficult part here. ♫ Thumpmonks - Submachine 9 - Temple  And we made it into the actual Temple. This change of music is actually much more noticeable than the one between the top and bottom levels of the Pyramid. Once you hear this, you'll realize you've made progress. We can go two ways again, let's go to the right first.   With this kind of background it certainly looks huge. But it's just a background, we can't actually go there. Anyway, the device doesn't do anything yet and the grate is locked.  And there's a dead end. Looks like we have to go to the left.   RTL There's something behind that statue on the right...   RTL This must be the other stairwell, the one that was blocked off by sand. Anyway, another Note.  quote:When Murtaugh saw the cat changing the layer of reality he falsely connected that event with Einstein's theory of relativity. 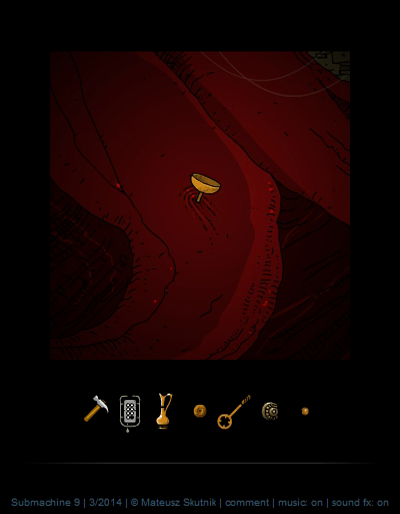  RTL Ah, we can climb down this hole. But there's something stuck in the sand further to the left.  Turns out to be a bowl on a long stick, called the Ritual Brass Bowl. We can actually use this right away, up in the Pyramid.  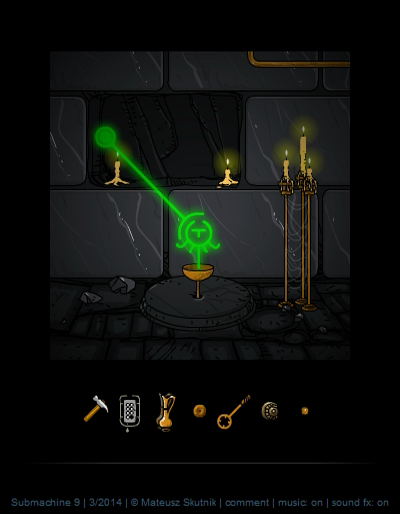 It goes into the stone slab on the bottom right of the Pyramid, so not too far from where we are. Together with the Karma Water, it creates a lever. It's a bit of set-up for something we'll finish later.   Back in the Temple, we can't pass the sand to the left of where we found the Ritual Bowl, so it's time to climb down instead. 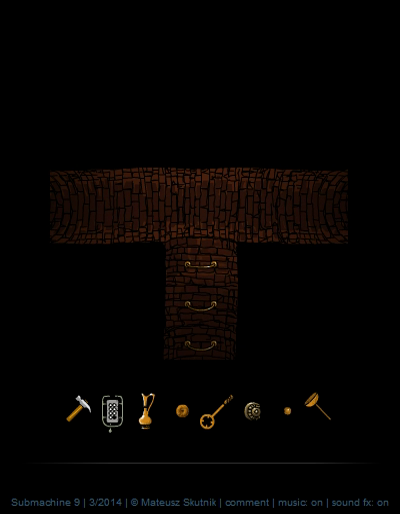  RTL Crawling along, we find a fork in our path.  But the way down doesn't go anywhere, so further left it is.   RTL You know, I'm starting to understand Leave My Wife's complaints about it being hard to think of commentary sometimes. I'm always trying to find a balance between being informative about these games and stating the obvious, and I just hope I'm doing okay.   Looks like we arrived somewhere. What does it say above the arch?  ...huh?   RTL Left of the arch, we find a statue of a cow for some reason.   And to the right, we find this thing. After the lid comes off, we can pour Karmic Water in.   Which gets us a Karmic Seal. I think I remember where that was needed. But let's continue exploring this place first. 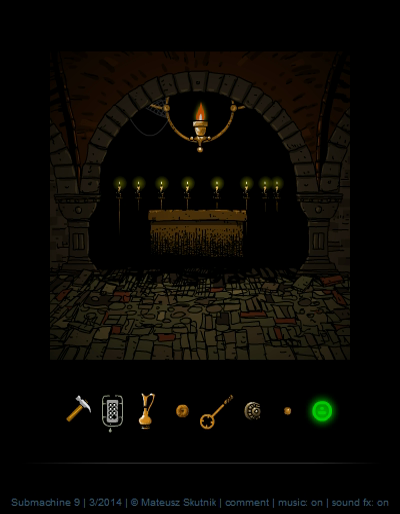 We can walk under the arch, to this place which also has siderooms to the left and right.   To the right we find this statue, I believe of Vinayaki, the Hindu elephant goddess. Pouring Karma Water in her bowl opens a Karma Portal, the first since Submachine 7.   Which takes us all the way to the blue section of the Pyramid, that missing corner on the third floor. That isn't really made clear anywhere but it's the only place where this could be. Anyway, the brass thingamajig on the ground easily opens up.  And we grab the Brass Key. One Portal trip later, the left side room of Murtaugh's Tomb has another Note for us.   quote:Nobody could predict that the enlightenment would cause such destruction. Even Murtaugh himself didn't know what happened. He was already looking at all layers at once. He was already removed from one-dimensionality.  The center part of the Tomb of Murtaugh seems to have a sarcophagus. The image is quite clear: one arm is missing and has been replaced by hieroglyphics. That's a depiction of Mur, alright.   We can read the hieroglyphics to the sides. MURTAUGH, THE POWERFUL THE CARETAKER, THE OVERSEER  And it looks like the Stone Eye we got from above fits here.  What... this can't be possible. 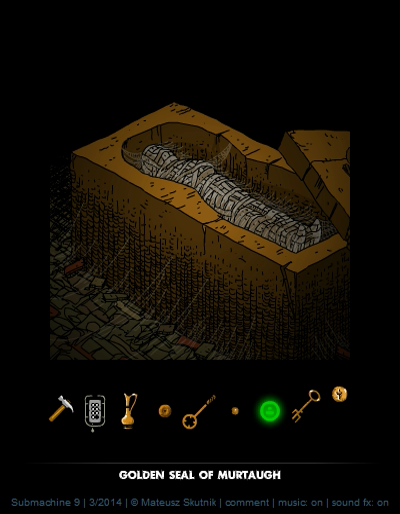 This Golden Seal... I don't know how I know, but I'm certain that this confirms that Murtaugh lies here. But that makes no sense. It's hard to keep track of time here in the Subnet but the last time I spoke with Murtaugh, during my mission at the Edge... that can't have been more than a few days, perhaps two weeks ago. And how old is this body? Hundreds of years? Thousands? I need to sit down and think about this... Until next time, when things get even more mysterious. Carbon dioxide fucked around with this message at 15:20 on Apr 9, 2017 |
|
#
?
Jan 22, 2017 22:36
|
|
|
I certainly wasn't expecting to uncover Murtaugh's tomb when I played this for the first time. The music down in the Temple really sells the spookiness too.
|
|
#
?
Jan 23, 2017 00:24
|
|
|
I want to know what's up with the red sand. The walls are a dull grey color and we haven't seen anything that could break down into red stuff, so where is it from? Also, this is super fascinating to read and you need a new page.
|
|
#
?
Jan 23, 2017 01:11
|
|

|
The red sand and the green "water" are some neat-looking environmental elements.
|
|
#
?
Jan 23, 2017 03:54
|
|
|
bbcisdabomb posted:I want to know what's up with the red sand. The walls are a dull grey color and we haven't seen anything that could break down into red stuff, so where is it from? I'm glad you're enjoying it. And yes we do, but there's only a few more posts to go, so that shouldn't be a problem.
|
|
#
?
Jan 23, 2017 06:56
|
|
|

|
| # ? May 16, 2024 16:25 |
|
|
Carbon dioxide posted:I'm glad you're enjoying it. And yes we do, but there's only a few more posts to go, so that shouldn't be a problem. Boom, let me help you with that!
|
|
#
?
Jan 23, 2017 07:18
|
|