

|
Huh. All these Dwarf buffs. How many dwarf units do you have access to by now?
|
 #
?
Oct 21, 2017 22:50
#
?
Oct 21, 2017 22:50
|
|


|

|
| # ? May 9, 2024 12:14 |
|
|
Glazius posted:Huh. All these Dwarf buffs. How many dwarf units do you have access to by now? All of them! The Dwarf faction is the smallest in the game, and has only 5 troop choices. I haven't covered their last 2 units yet, the Miner and the Dwarf, who are Level 2 and Level 3 melee warriors respectively. But we have seen them for sale here and there. I think I will go over the faction as a whole once I do review those last two troops.
|
|
#
?
Oct 22, 2017 11:20
|
|

|
This game can be so hilariously sexist at times.quote:Funny thing, isn't it? It's a new invention from our engineers; we call it "Leakproof Streamlined Boat for Demersal Moving by Propeller Traction"! Looking forward to your finishing Hadar! What's your next objective for levelling up skills?
|
|
#
?
Oct 22, 2017 12:40
|
|
|
I'd just like to say that I'm very much enjoying this LP. I never quite had the patience for this game myself and stalled out around the Islands of Freedom, and I'm really appreciating the opportunity to see the rest of what I missed out on!
|
|
#
?
Oct 22, 2017 19:49
|
|


|
Yes this game can easily turn into a dull slog as you have no real options but to grind through a few incredible boring armies with crap units which you have to run/sail back to replace. Hoping for enough leadership boosts to make the other boring armies possible or less painful to deal with.meristem posted:This game series can be so
|
|
#
?
Oct 22, 2017 19:59
|
|

|
meristem posted:This game can be so hilariously sexist at times. Yeah, the sexism is pretty painful sometimes, and it's unfortunate. For leveling: 1) Tactics - requires a boat load of Might Runes, but I want to get this before too long. This has been the big pain to save up for, and has meant putting off buying other skills that cost any Might runes. 2) Tolerance 1 - will let me use Undead units without penalty 3) After that, the focus will be on a number of Magic skills once I can get the runes - in no particular order Distortion 3, Destroyer 2/3, Higher Magic 3, Alchemy 2 Olesh posted:I'd just like to say that I'm very much enjoying this LP. I never quite had the patience for this game myself and stalled out around the Islands of Freedom, and I'm really appreciating the opportunity to see the rest of what I missed out on! Glad you are enjoying it! I can understand the difficulty getting into the game - there's not quite enough good units in good numbers in the early game, so it can get pretty samey. I usually play this game/its sequels in short bursts, just a few battles or whatever, usually while listening to a podcast. Poil posted:Yes this game can easily turn into a dull slog as you have no real options but to grind through a few incredible boring armies with crap units which you have to run/sail back to replace. Hoping for enough leadership boosts to make the other boring armies possible or less painful to deal with. Agreed. The early game is a bit of a bore. The second game improves greatly on the formula from that stand point, in my opinion - the units are generally more complicated/interactive, you can hire quite a few different troop types almost immediately, and the game is less linear. meristem posted:Ah. Glad to the Terry Pratchett jokes continue. Oh yeah, and there are many more to go.
|
|
#
?
Oct 23, 2017 00:59
|
|
|
Update 40 - The Final Boss Last time, we rescued a dwarven damsel and spurned her advances. We need to finish exploring the region of Lower Hadar before we head to the Taron Mines. Ok, we don't need to, but you know what I mean... 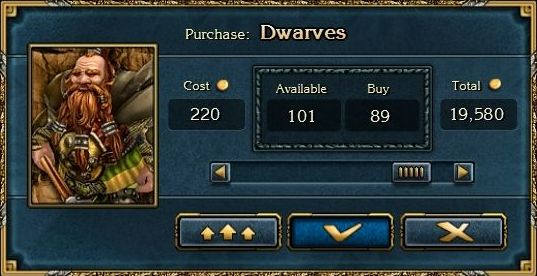 First things, we are dropping off the Alchemists at Castle Horwest here, and hiring some Dwarves to replace them. The Alchemists have been doing pretty well, but I have a small amount of foreknowledge that they may be poor performers for what is coming up. 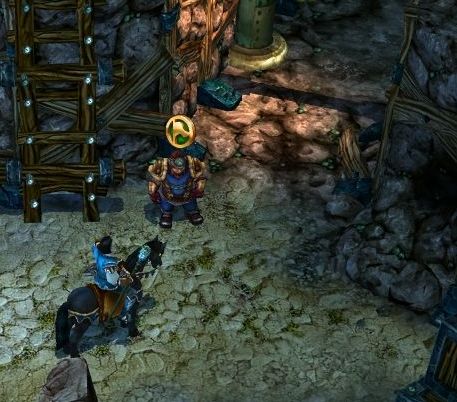 Last time, we bypassed this dwarf shouting for help by a side passage on the path between the Pick Village and Castle Horwest. He is still there, calling out, when we return.   : What? : What? : Help me, Ok?: Ok, tell me what's happened.: Listen, the light in our mine has gone out. Do you see these pipes? The gas that burns in the lamps goes through these pipes. But now the gas isn't feeding through them, which is why the lights are out. All you got to do is turn a valve. I could do it myself, but there are lots of monsters inside, and I can't cope with them alone. Would you go and turn on the valve? Be a friend. The valve is a round thing which looks like a ship's steering wheel.: Absolutely, my good dwarf. I'll take care of it! : Help me, Ok?: Ok, tell me what's happened.: Listen, the light in our mine has gone out. Do you see these pipes? The gas that burns in the lamps goes through these pipes. But now the gas isn't feeding through them, which is why the lights are out. All you got to do is turn a valve. I could do it myself, but there are lots of monsters inside, and I can't cope with them alone. Would you go and turn on the valve? Be a friend. The valve is a round thing which looks like a ship's steering wheel.: Absolutely, my good dwarf. I'll take care of it!No, I don't know why he is called Dragon - I guess it's just a dwarven first name? Or maybe its a rank/job description? 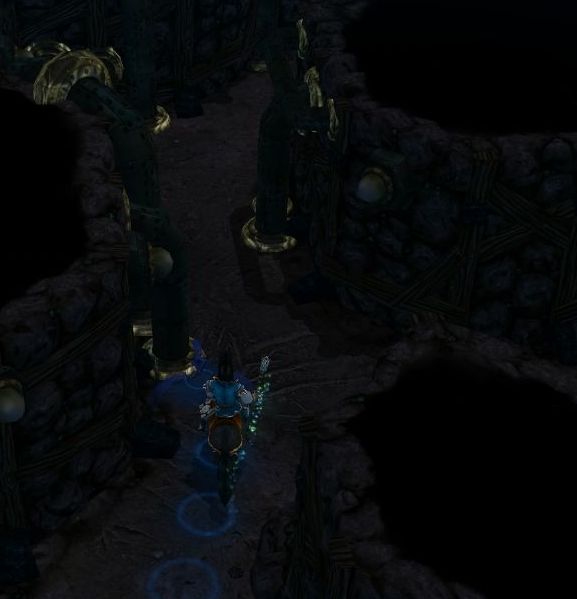 The mine is indeed unlit, and it's hard to see anything here. Definitely not good mining conditions. 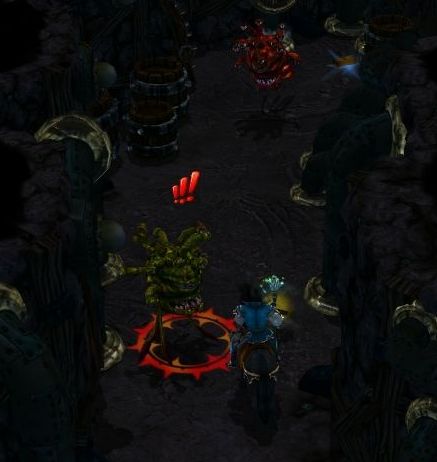 Out of the darkness, a group of Beholders come screaming out towards us. 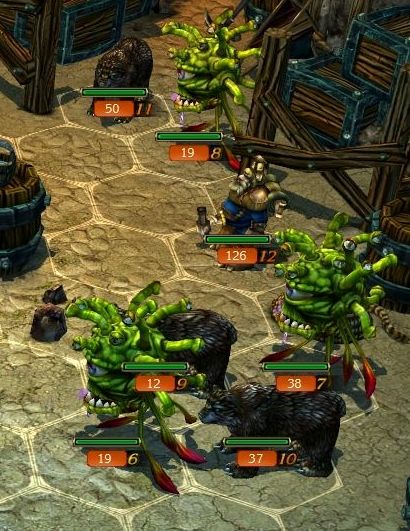 More bears and Beholders, accompanied by some Miners who must have lost their way in the darkness and reverted to their animal nature. 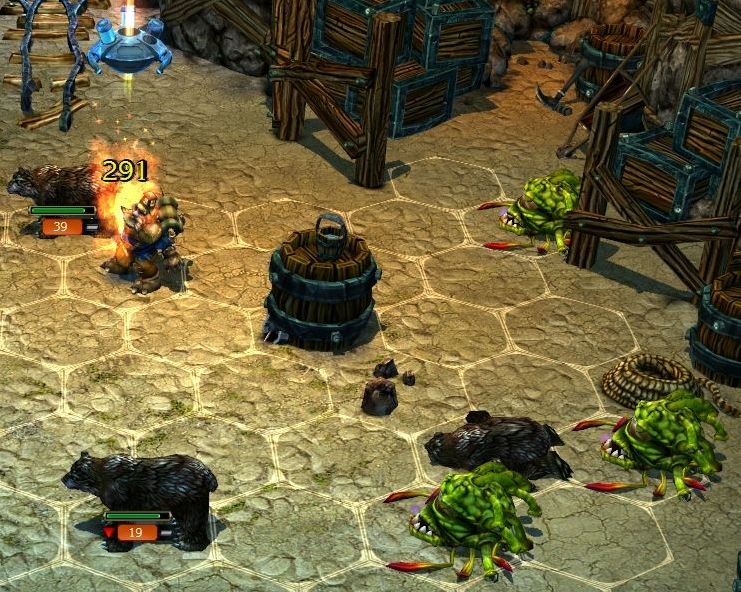 The spell/range phase does its work. 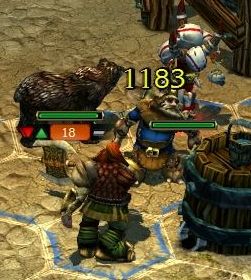 Dwarves (the unit) are a sturdy, slow melee troop with nothing special to them at all. Seriously, they are one of the most basic, boring units in the game. This doesn't make them bad - they deal good damage, have great Health, and decent Attack/Defense. They are essentially like the Ancient Bear - same Speed, same Leadership, about the same toughness/damage. In exchange for losing some of the abilities, they get the Dwarf tag. 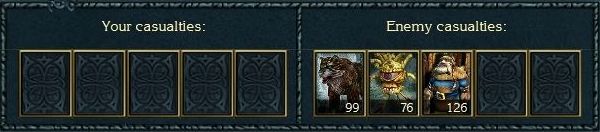 The Dwarves do pack a decent punch though.  Immediately after getting free from the last battle, the second army rushes in. 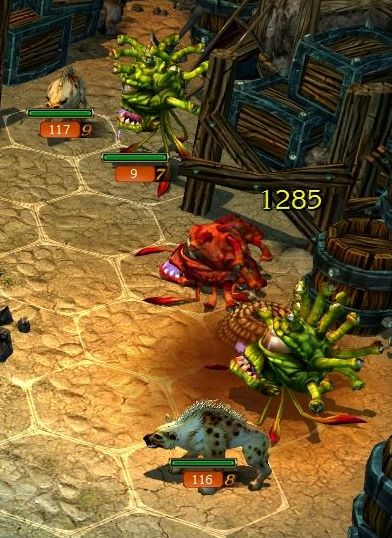 This is another of those super-weak armies associated with the Miner's badge quest, so even Flaming Arrows are good enough to kill the Beholders. 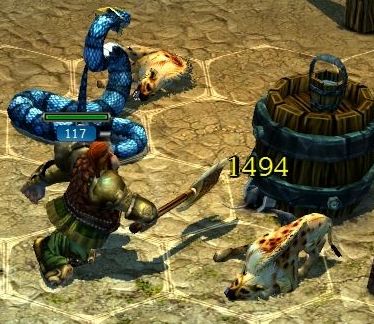 The remaining Hyenas can't withstand the combination of fang and battleaxe. 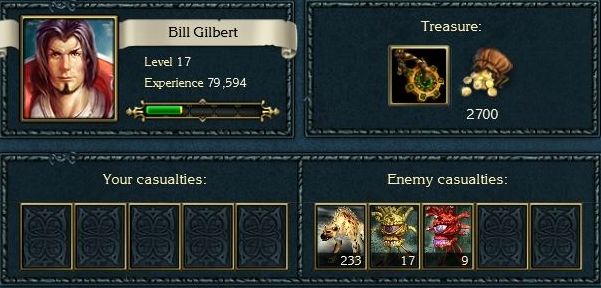 Badge number 8... 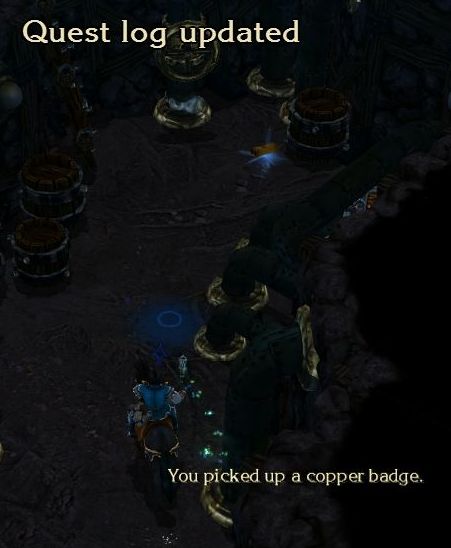 And badge number 9! 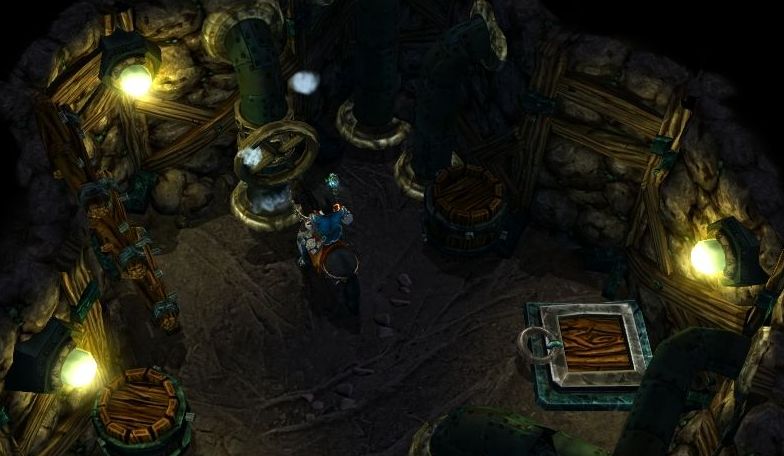 At the end of the tunnel, we find the large brass valve and open it, bringing the gas lights back to their glowing state. : Let be light! And now we can continue our work... Thank you, human! (Reward: 5400 Gold, 275 Experience): You're welcome. Wasn't so hard, after all.Not hard indeed, and we had to go in there anyway to find those badges. 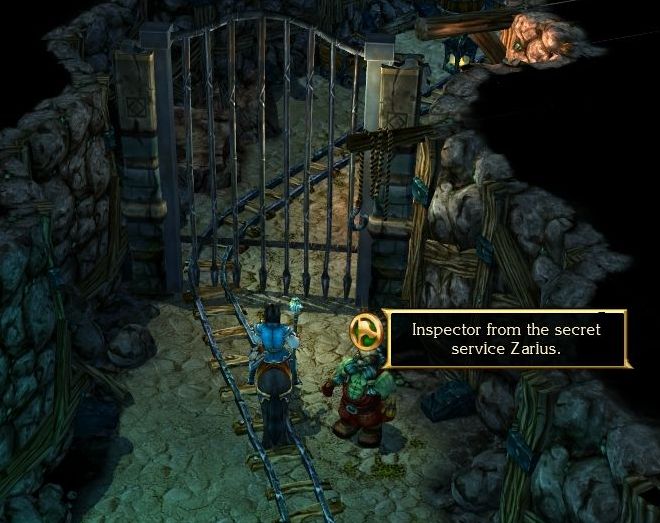 Just west of Castle Horwest, another tunnel leads to a locked gate. A dwarven secret (although apparently not that secret) agent is standing around looking worried. 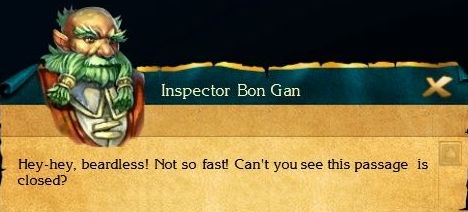 : No need to get angry. Why is it closed? : No need to get angry. Why is it closed? : That's no business of yours! It's a secret area!: I heard that dwarves are not too good at magic. If you persist, I will probably decide to try it on you! How about a couple of bolts of lighting? : That's no business of yours! It's a secret area!: I heard that dwarves are not too good at magic. If you persist, I will probably decide to try it on you! How about a couple of bolts of lighting?Oh, come on Bill... you know you haven't found the Lightning spell yet! : Look at this! What a fearsome human! If I shoot at you with a dozen of cannons, will you remain just as brave?: Ok, dwarf. I see you have a quick tongue!: We dwarves have another phrase. But the meaning is the same. You'd better go.: From this place, and from you, dwarf, too, I detect the smell of double-trouble. I'd just like to say that you have some serious problems. And I just wanted to offer you my help.: So what? Want to make something of it? Why are you asking about a dwarf's trouble?: You look like a good guy... I mean... dwarf. I just figured I could give you a hand, and earn myself a little coin at the same time.: Gold! I see human... You're all alike. You can sell your own mother and call your enemy a friend - for gold. However, you are right. I do need help. If you can deal with the situation, I'll give you a reward. If not - there will be one less greedy and arrogant human in the world. I think you'll keep silent about what you hear, anyway - the gold or death will shut you up, that's why I feel I can trust you.: Well. You've frightened me. What's happened?: Ok, I'll tell you, but I must warn you - you must keep everything you hear and see in the strictest confidence! There is a Laboratory #44 in this mine. The best specialists in biosynthesis were engaged in breeding animals which are insensitive to extreme temperatures, and are capable of replacing workers on the surface. As you know, we dwarves don't like to work on the surface. At the same time, scientists by military order were creating elixirs which make our warriors stronger. One day, an experiment failed: one of the monsters escaped, and several guards and scientists were killed. Now this is a restricted area, and the entrance is closed. (Reward: 3 Mind Runes, 200 Experience): It's strange. But it sounds very interesting! I've always dreamed of visiting a secret laboratory!: Excellent! I'll open the entrance. But be careful there - don't damage the valuable equipment.: Open it, quickly!Well, it's not the gold as promised... but that reward is much better.  The agent keeps his word and unlocks the gate for us. 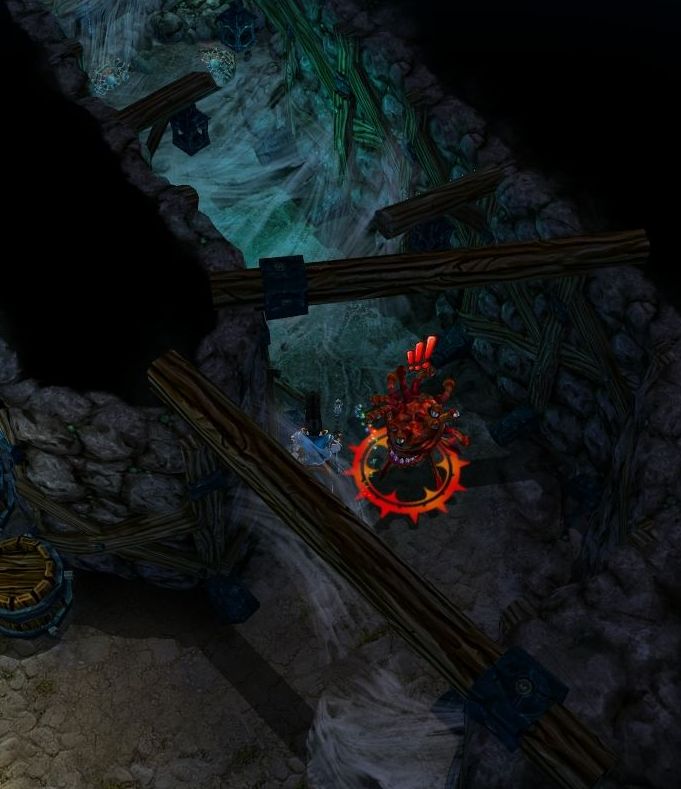 The path to the lab branches off into these web-covered dens, full of... Beholders? Do they spin webs? 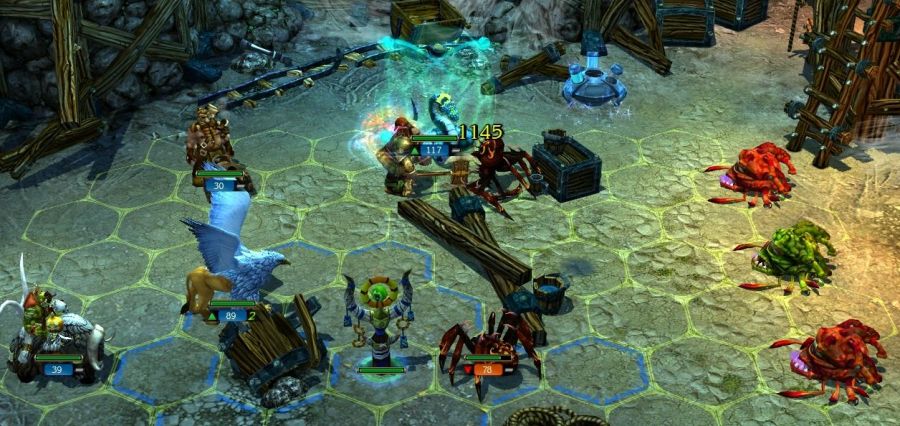 Ah, never mind, there are the spiders. As usual, the ranged units and spells are able to deal with the Beholders, while my melee units confront the Fire Spiders. A mistake lands my Griffins in the path of one of the Spiders on the bottom (used the wrong Totem by accident). 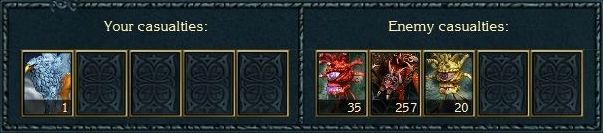 It costs one Griffin and a lossless victory. 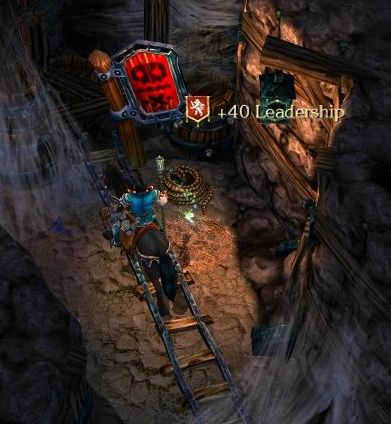 Hmmm... I'm not sure what this sign is trying to say here... 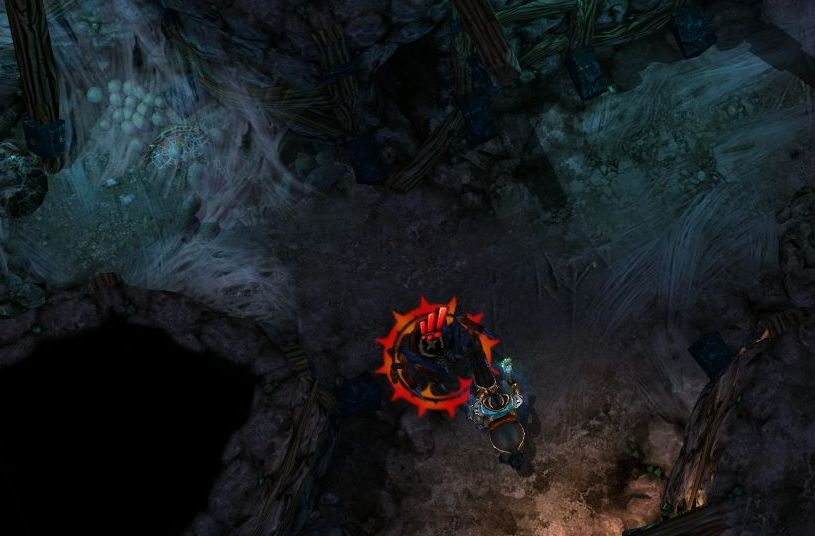 I mean, these Spider groups are not that dangerous. 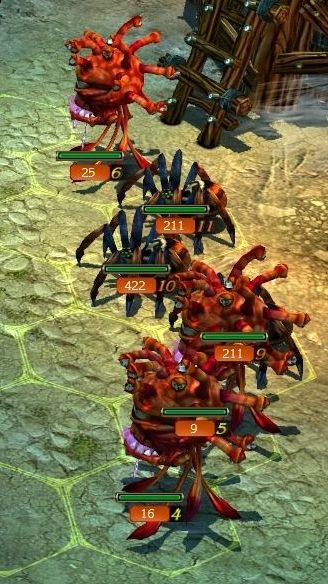 Although they have started to gather in some pretty decent numbers. 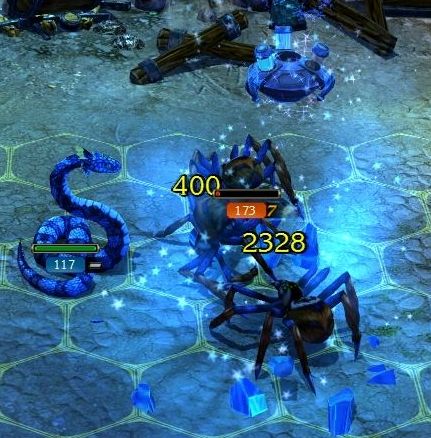 The Cave Spiders stay in their grouped formation as they advance, leaving them open to more AoE spells. 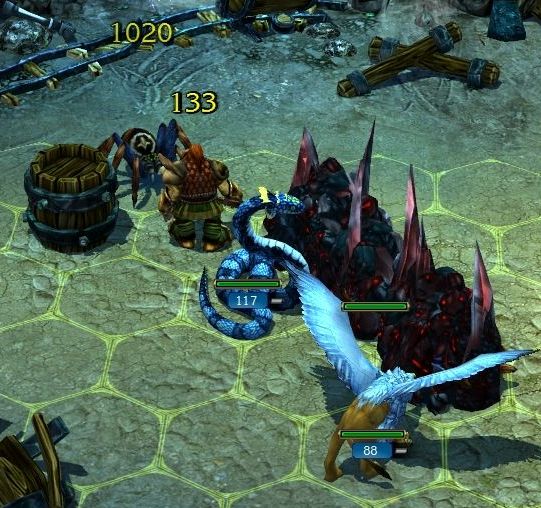 I use a Rock Wall to prevent the remaining stack from hitting the frontline troops. It works, but the Spiders try to go past my melee troops and towards the Cannoneers. The Dwarves confront them and pay one of their own lives in exchange. 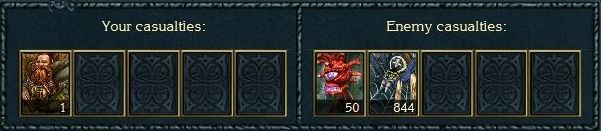 After the fight, we can proceed along the tunnel. No sign of this so-called experimental monste... 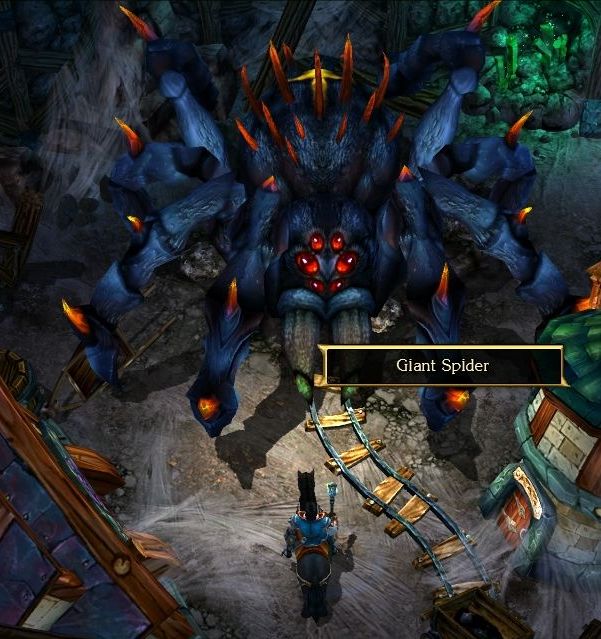 Ok, I believe we found it. A very helpful label there.  Did the Giant Spider go back underground as we approached? Dude, we saw you there, the trapdoor trick won't work.  The trick failed, the Giant Spider rushes forward to the fight. 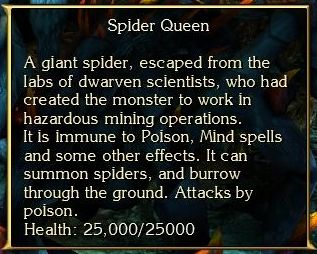 Hey, you just told me it was a Giant Spider, not a Spider Queen! Anyways, the Spider Queen is the final boss of the game! That is, it is the last fight against a unique giant monster. The Spider Queen has a whole ton of Health, so we won't be able to easily spell it down super quickly. The Spider Queen is pretty tough, with 30 Defense, 30% Resistance to Magic/Physical damage, and a whopping 80% Resistance to Poison. Only Fire damage does the full amount. 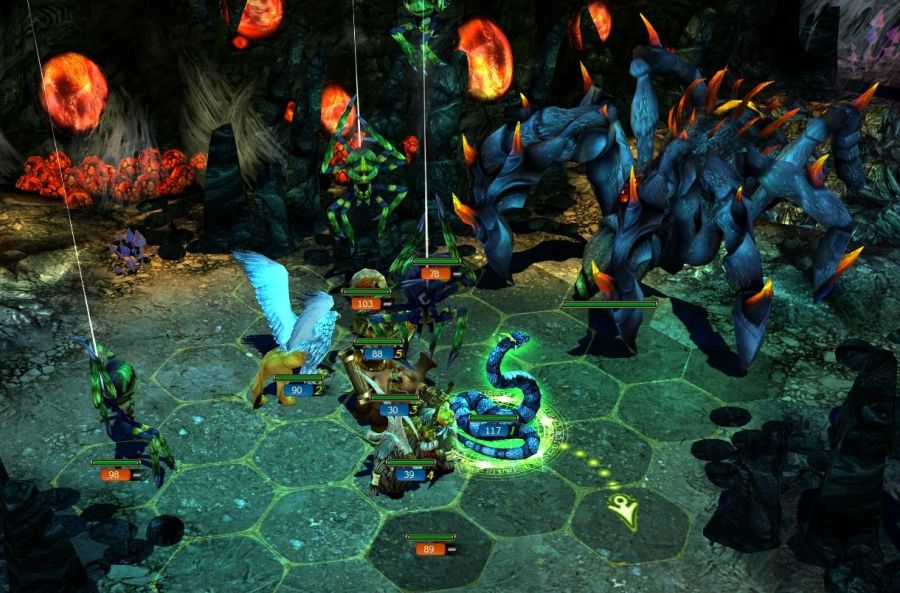 Oh, and it's not like we are fighting the Spider Queen alone. She summons her children to fight us, dropping hundreds of Venomous Spiders into the field. 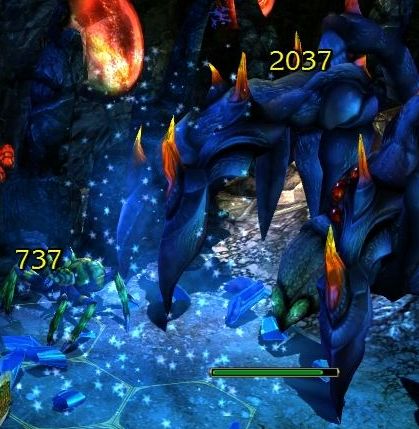 Time to get started! We can do a decent amount with Ice Snake, but we don't have the mana to keep casting them indefinitely. 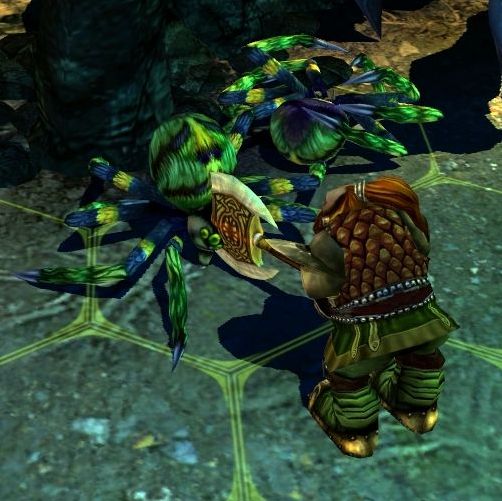 While other troops engage the Spider Queen, we need to use some units to clean the babies up. You have one turn of grace, since the summoned spiders can't attack in the turn they appear. This is why I brought the Dwarves over the Alchemists. Since everything has 80% Poison Resistance in this fight, the Alchemist is pretty bad here. These Dwarves are great at smacking down spiders. 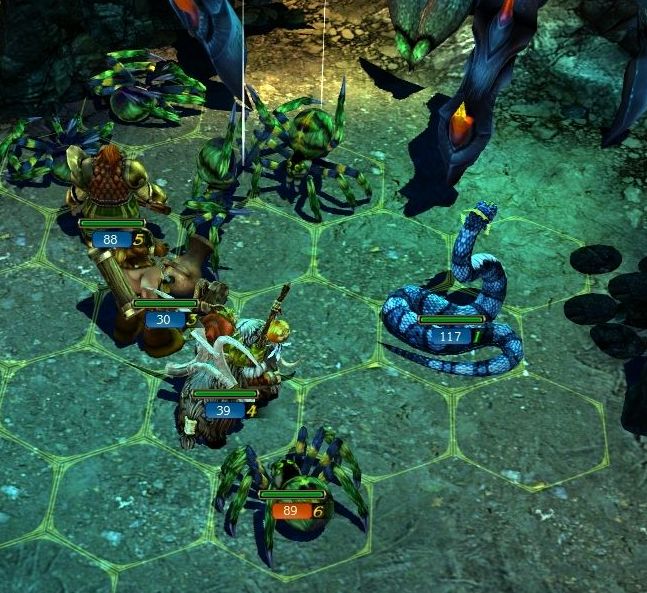 The Spider Queen will continue summoning more spiders to the field over time. 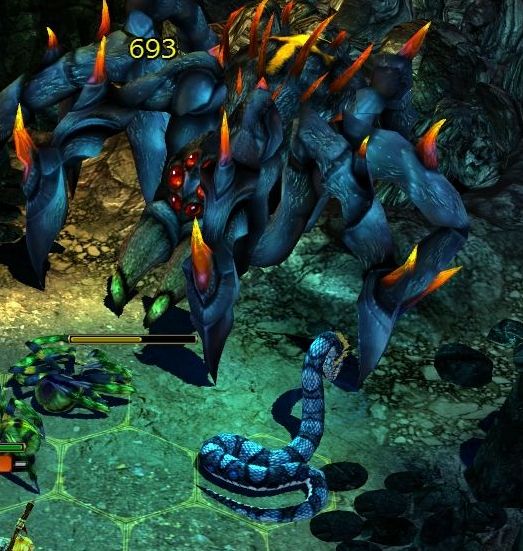 The Royal Snakes are great, No Retaliation is just as good on bosses as elsewhere.  I'll use the Shaman's Ghost Axes on the Queen, but in-between reloads, the Shamans are great at taking out the summons. 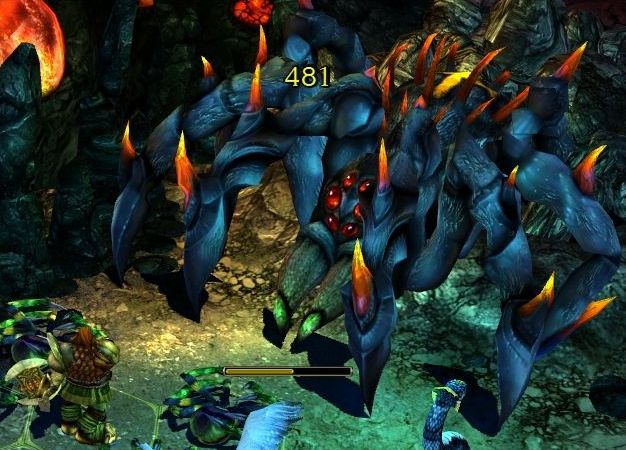 With no more small spiders to attack, the Dwarves go in to strike the mother. 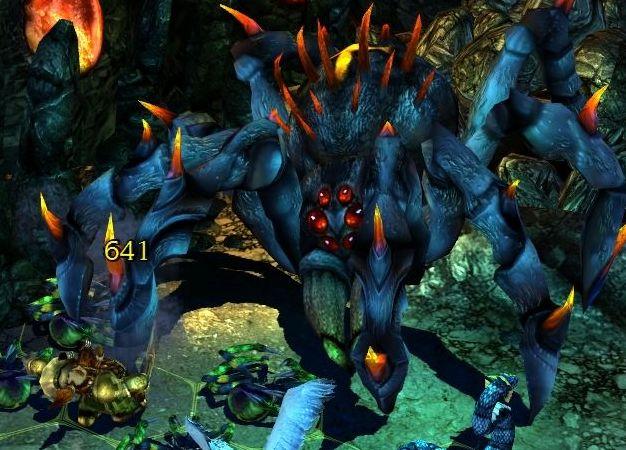 The Spider Queen does not appreciate a battle-axe to the legs, no matter how many she has. She slams two talons down, crushing a handful of Dwarves. The Spider Queen has three retaliation zones - one on both sides, and one for her head. For instance, since the Dwarves hit the right-side legs here, she will retaliate into both hexes on that side. 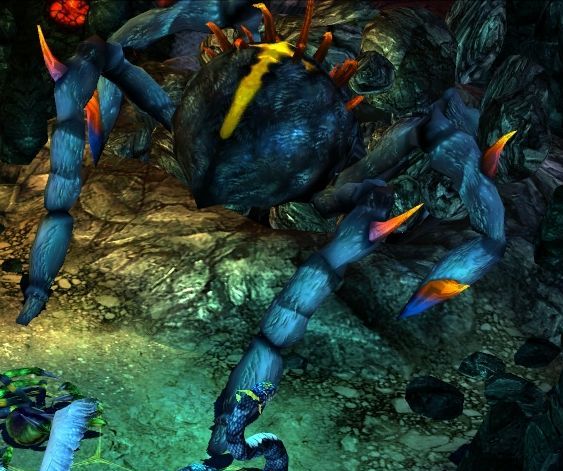 Hey! Where are you going, you eight-legged monstrosity? 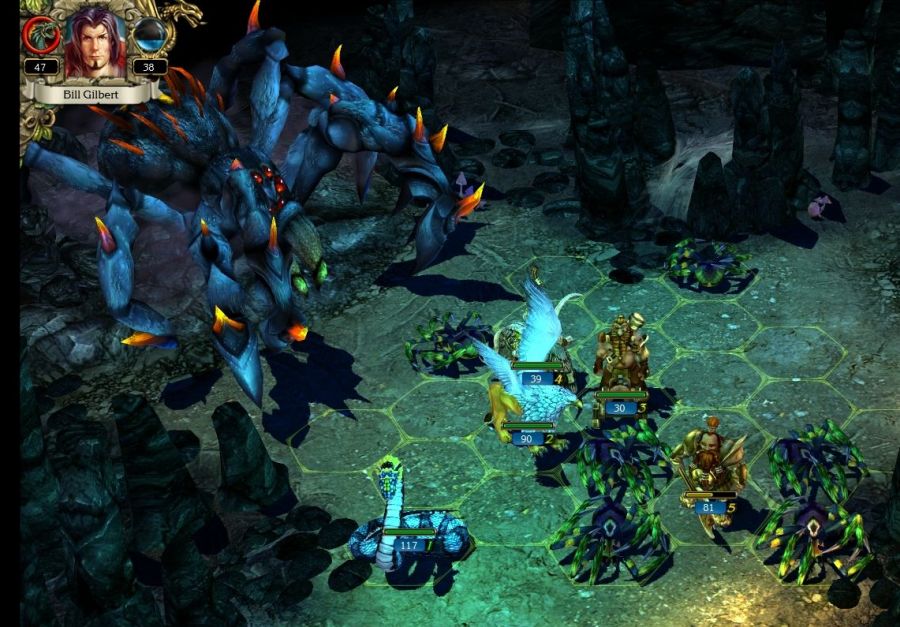 Ah, there she is. Every couple of turn the Spider Queen will exit the field and re-enter from a different side. Depending on your placement and composition, this can leave your troops out of position. 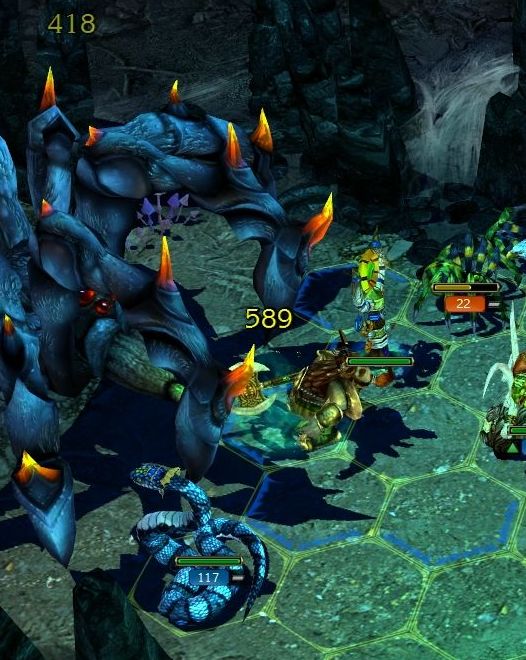 The Dwarves go right for the head of the Queen. If you attack the head, it only retaliates into that single hex. However, the venomous fangs deal Poison rather than Physical damage, and poisons the target naturally. 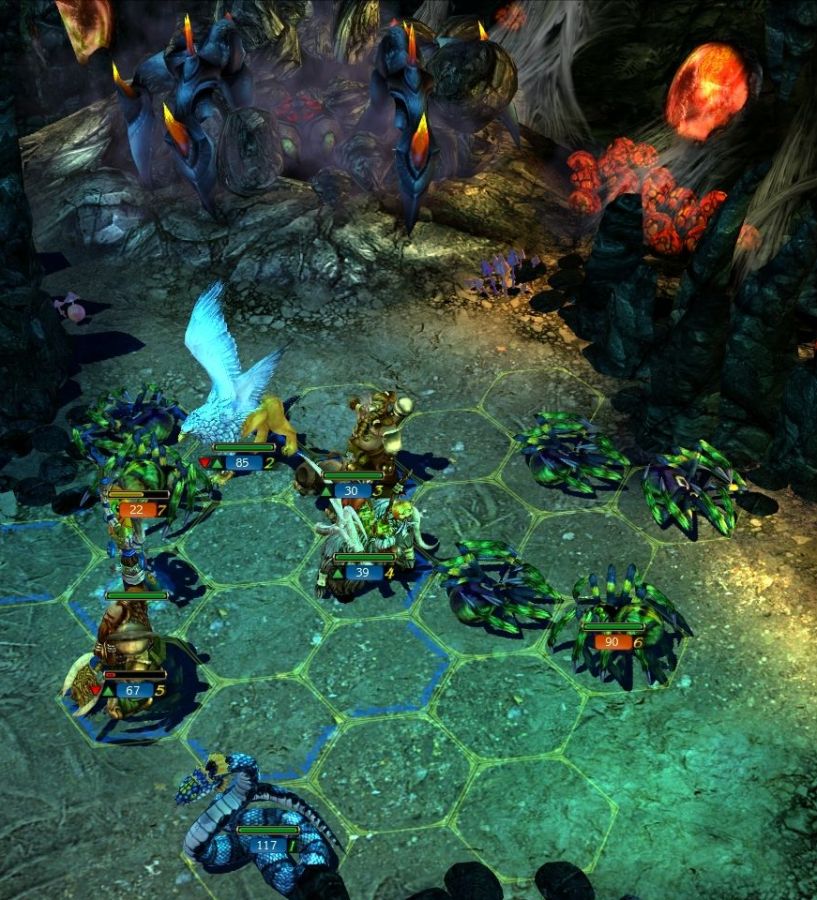 Miss Spider, go ahead and re-position as much as you want - it doesn't stop me from slowly whittling you down. 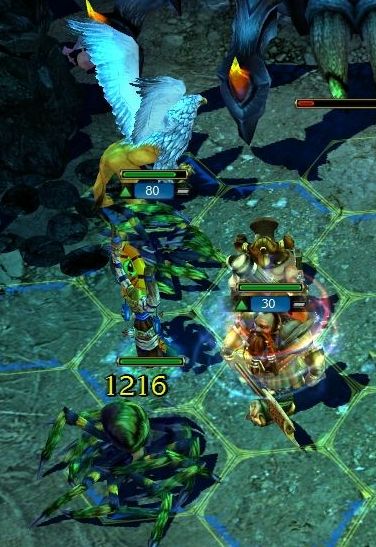 The Dwarves often have trouble reaching the Queen after she emerges, since their Speed is too low. Luckily, there's almost always some summoned spiders for them to deal with. 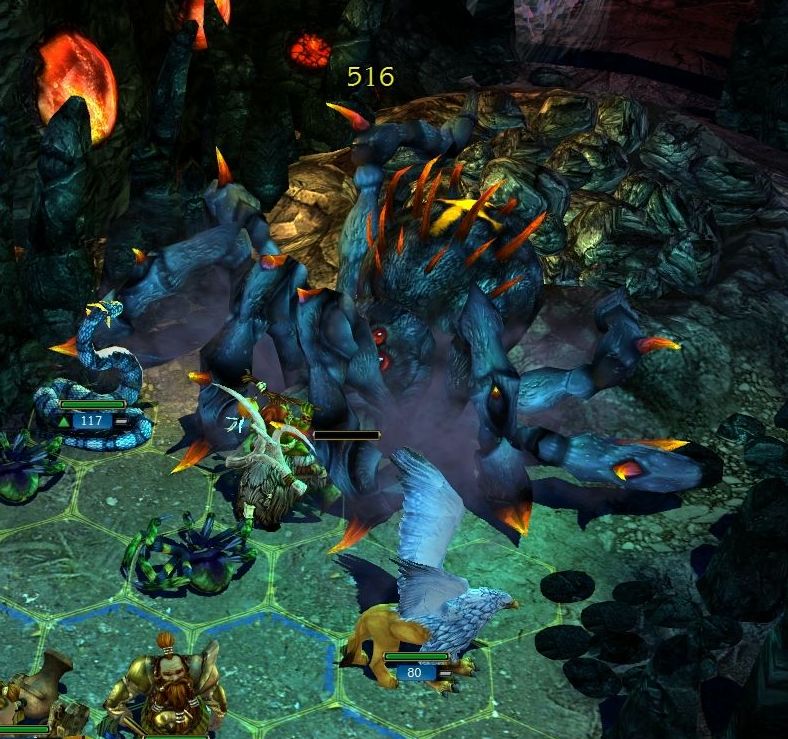 Eventually, the Queen's massive body is mauled and savaged by a thousand spells, cuts, cannonballs, and more. One last headbutt from the Shamans, and the Queen is done in. 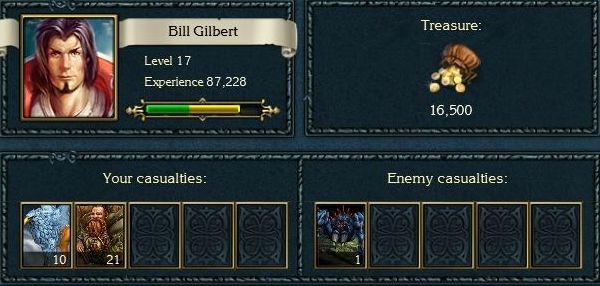 Wowza, that's a nice amount of experience! 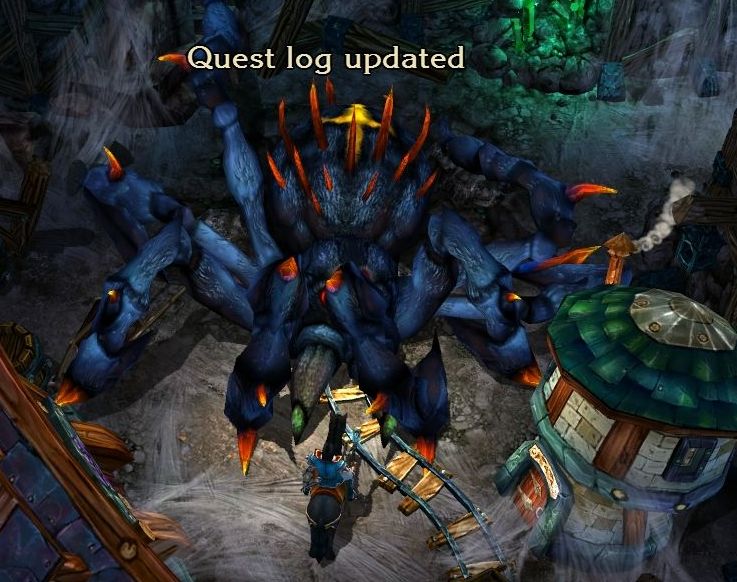 The Spider Queen's body collapses and slowly disappears. 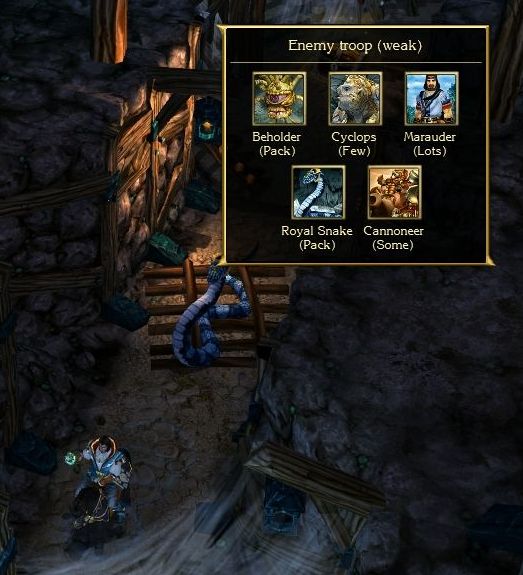 Despite the climactic fight we just had, there is still a small bit of the lab to explore. The remaining escaped test subjects, presumably pre-experiment, have escaped and are wandering around in a tunnel past where the Queen fell.  There's got to be a story how all these units came to work together - like where did those Marauders come from? 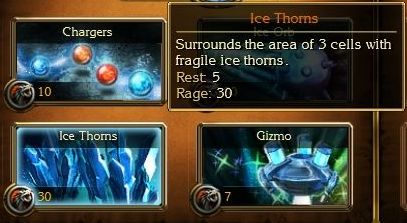 Since we weren't able to use Rage in the boss fight, we have a full bar of it available to use. Let's take a look at the last ability of Lina that have yet to see. 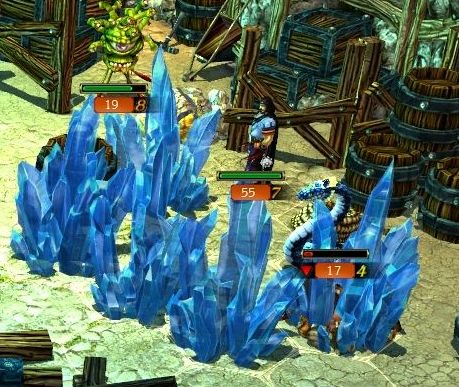 Ice Thorns is another barrier ability, used for blocking off or protecting units. It places a ring of these icicles down. You can use it to enclose enemy units inside, or to protect your own units from being approached (usually to protect ranged units). 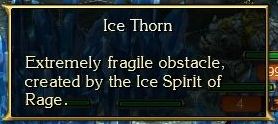  As the label indicates, the thorns will break after a single hit. Unlike the Rock Wall, though, each hex is a separate object and needs to be broken individually. All in all, Ice Thorns is an interesting ability than can be used to create a ton of new obstacles, restrict movement, and protect your troops. The fragility of the Thorns isn't really an issue - it just means you don't have to worry about enemies outscaling it. The big problem is that Rage cost - 30 Rage is a lot for a base price. The only upgrades for it are shorter Rest and lower Rage. so it can be leveled into a more useful form. I just find myself using the Rage on other abilities instead.  With the help of the Ice Thorns (though not really), the escapees are put out of their misery. 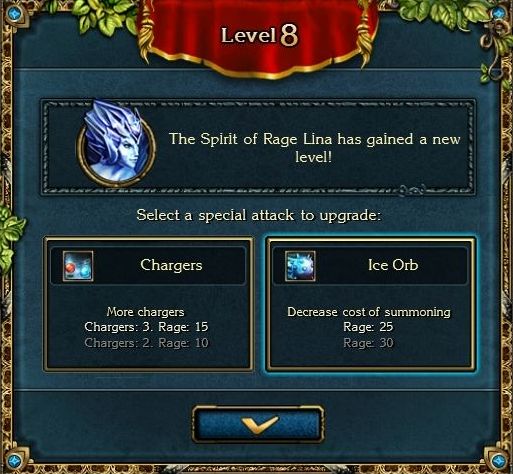 Speaking of Lina, she levels up at the end of this fight. We get a great option here to lower the cost of the Ice Ball by 5 Rage, which I gladly take. Even 5 Rage can make a pretty big difference, especially as a Mage. Anyways, the Lab has been cleared, and we can report back to the agent at the entrance. : Have you managed to find out what happened in the lab?: Yes. A huge spider escaped from the laboratory. To be precise, it was a female-spider, and she laid her eggs. I had to kill her.: Well, this explains everything. Nobody returned, everyone was eaten. Unlucky business... Well done! If you weren't a human, I'd recommend you to be taken on in the Zarious service. Now remember. You are to tell no one of what you've seen in the mine. I hope money will convince you to keep silent - and we'll not use any other methods. Do I make myself clear? Take the money. (Reward: 3 Mind Runes, 200 Experience): Everything is clear! I don't know you, and you don't know me! Someday I may see you for the first time. Good bye, unknown dwarf!Again, does this look like money to him? Is the dwarven currency runes? Either way, not going to complain! We have now cleared the entire Hadar region, Upper and Lower (not counting on more mirror fight we can eventually do, and that frozen brook quest). On the way back out of the mines, we stop in to drop off the Miner's badges we have picked up.  : Have you found the badges?: I've collected all of them. If you only knew where I got some of them...: Better not tell me! I just ate, and I don't want to be sick. Give them to me. From all miners, and their families I thank you! You deserve not only our sincerest appreciation, but a reward as well. (Reward: 5000 Gold, 3 Magic Crystals): Thank you! I hope maybe you'll change your mind about humans. : Have you found the badges?: I've collected all of them. If you only knew where I got some of them...: Better not tell me! I just ate, and I don't want to be sick. Give them to me. From all miners, and their families I thank you! You deserve not only our sincerest appreciation, but a reward as well. (Reward: 5000 Gold, 3 Magic Crystals): Thank you! I hope maybe you'll change your mind about humans.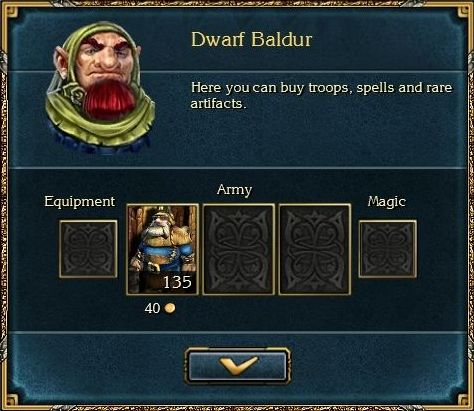 Baldur opens his small store of Miners for hire. Now that you have seen Dwarves in action, you have basically seen Miners, which are just a cheaper version.  The first area of the kingdom of Kordar has been cleared. We could continue on... but there are a couple of things we need to do. It's been a while since we last fought in one of Iron Richard's tournaments, and I really want that Might Rune prize package. 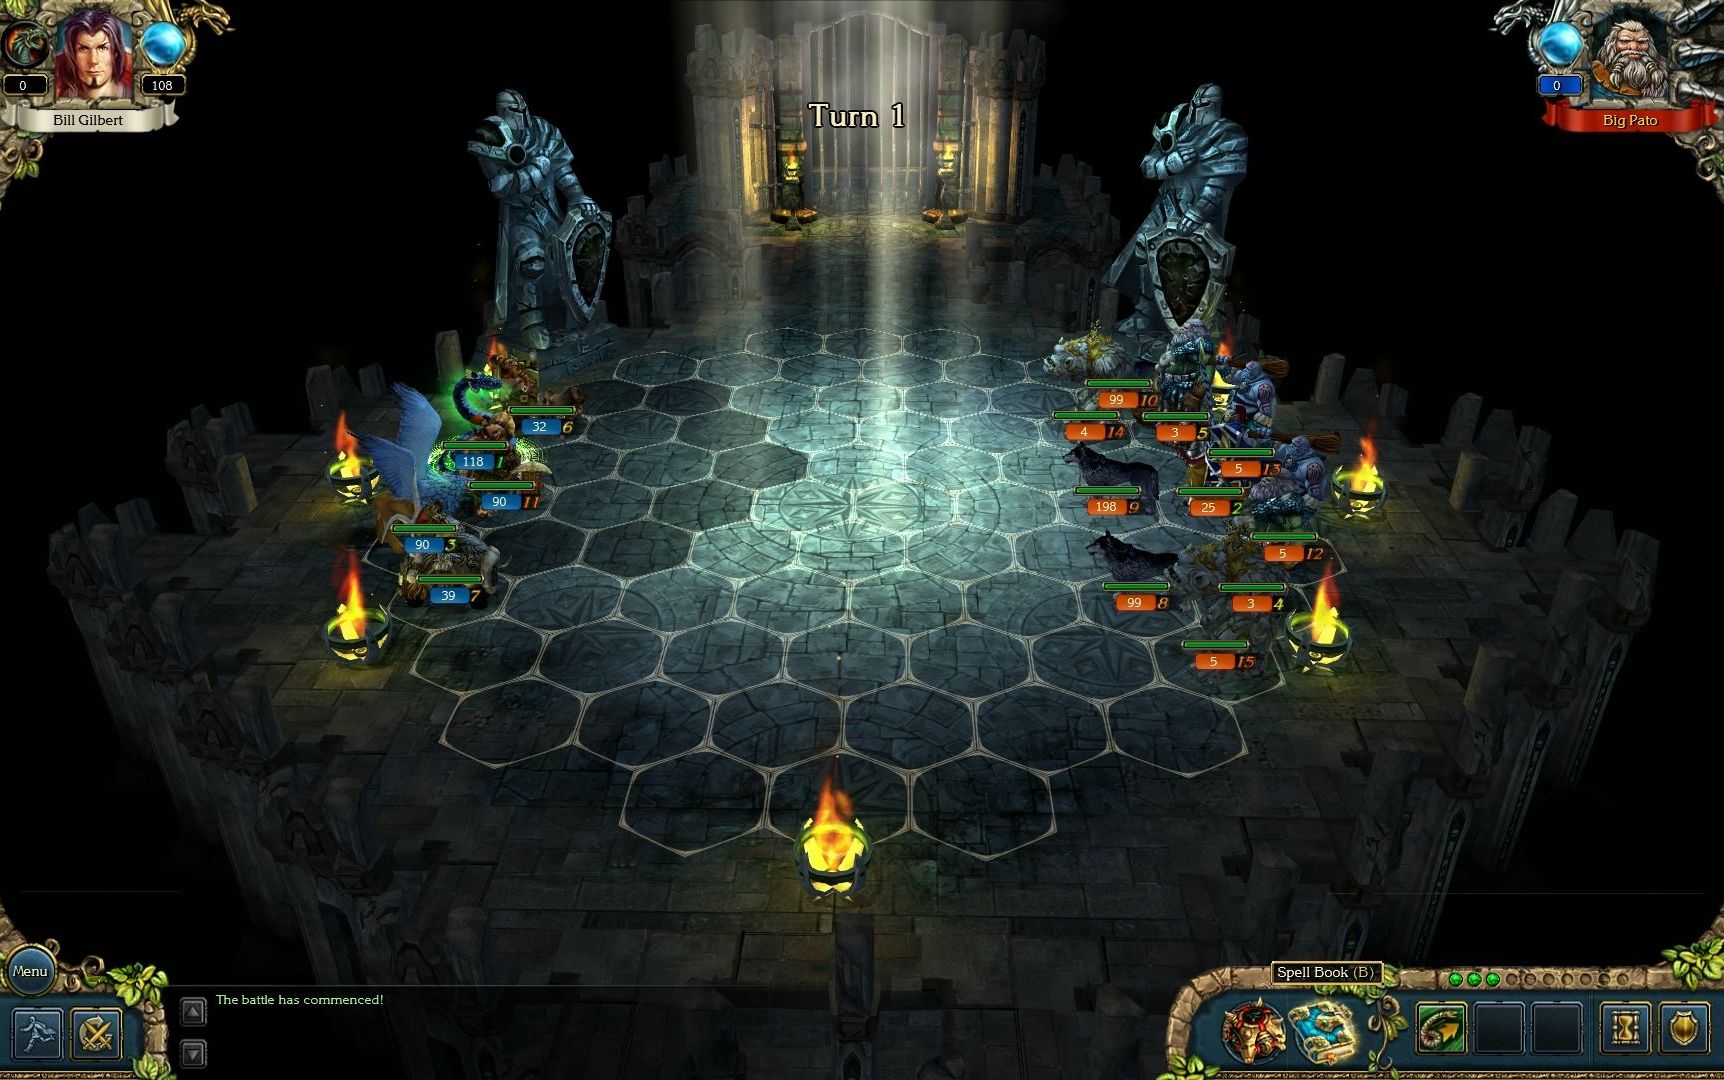 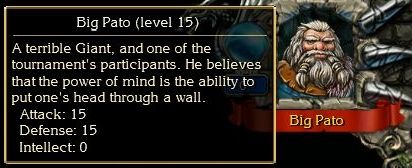 Big Pato is the penultimate tournament challenge. He has a boatload of stats, and a boatload of big dudes, and no magic ability whatsoever - not even a single point of Mana. His army is full of Level 5 big guys, along with a large number of Wolves and a few Horsemen along for the ride. 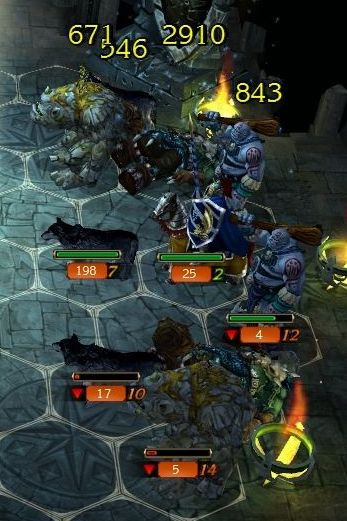 The Giants get taken out first. Not just because of the annoyance of the Earthquake talent, but also due to their central placement. 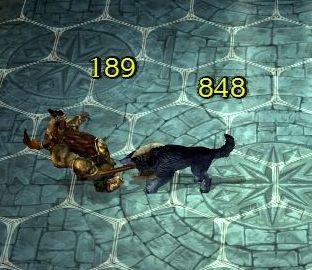 The large pack of Wolves comes forward, and gets engaged by the Dwarves. The Wolves don't bother using their Howl talent - none of my troops are low enough level to be affected. 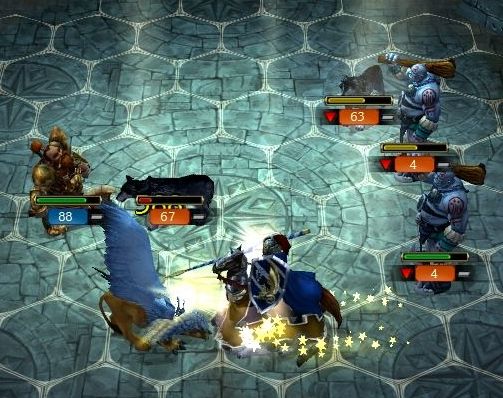 My Griffins come up to tear apart one stack of Wolves. This leaves them open to a charge by the Horsemen, who skewer a half-dozen of them. 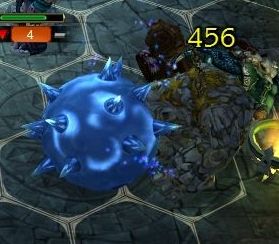 The now-cheaper Ice Ball comes out to play, crushing down a Cyclops and pinning him against the edge of the arena. 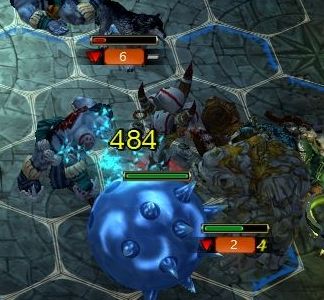 The Ogres get riled up by the orb's presence, delivering a mighty blow that nevertheless fails to crack the Ice Ball apart. 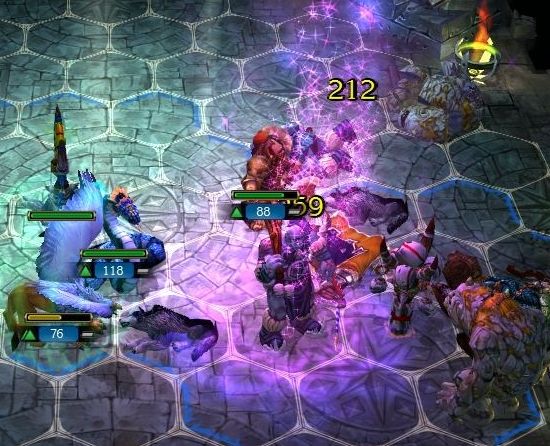 A Totem of Death does a great job, finishing off the Horsemen and damaging the remaining few big dudes. We just have to finish the job and...  Victory is ours! The Griffins got a pretty good beating from the Horsemen, and I think they took a few boulder shots from the Cyclops as well. 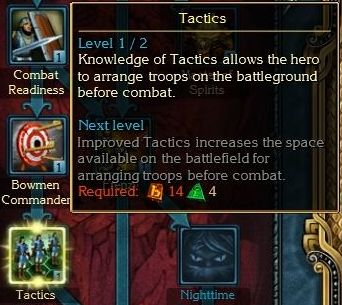 We get our prize of 2 Might Runes, which brings us to 10 total - just what I have been saving up for. I immediately purchase the Tactics skill in the Might tree. Now at the beginning of combat, we will get a chance to rearrange and position our troops in a small area close to the back line. I think this skill is vitally important for any character, and you will see it in use again and again. 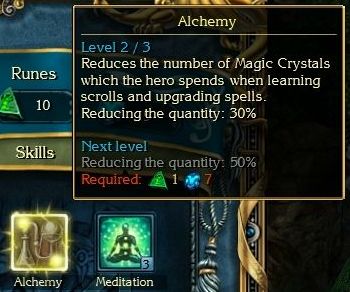 I also invest a few Magic Runes into the second level of the Alchemy skill. There are other Magic skills I would normally buy first, but they all require a small amount of Might Runes, and my supply is exhausted for the moment. This bonus will let me be more free with my spell upgrades. 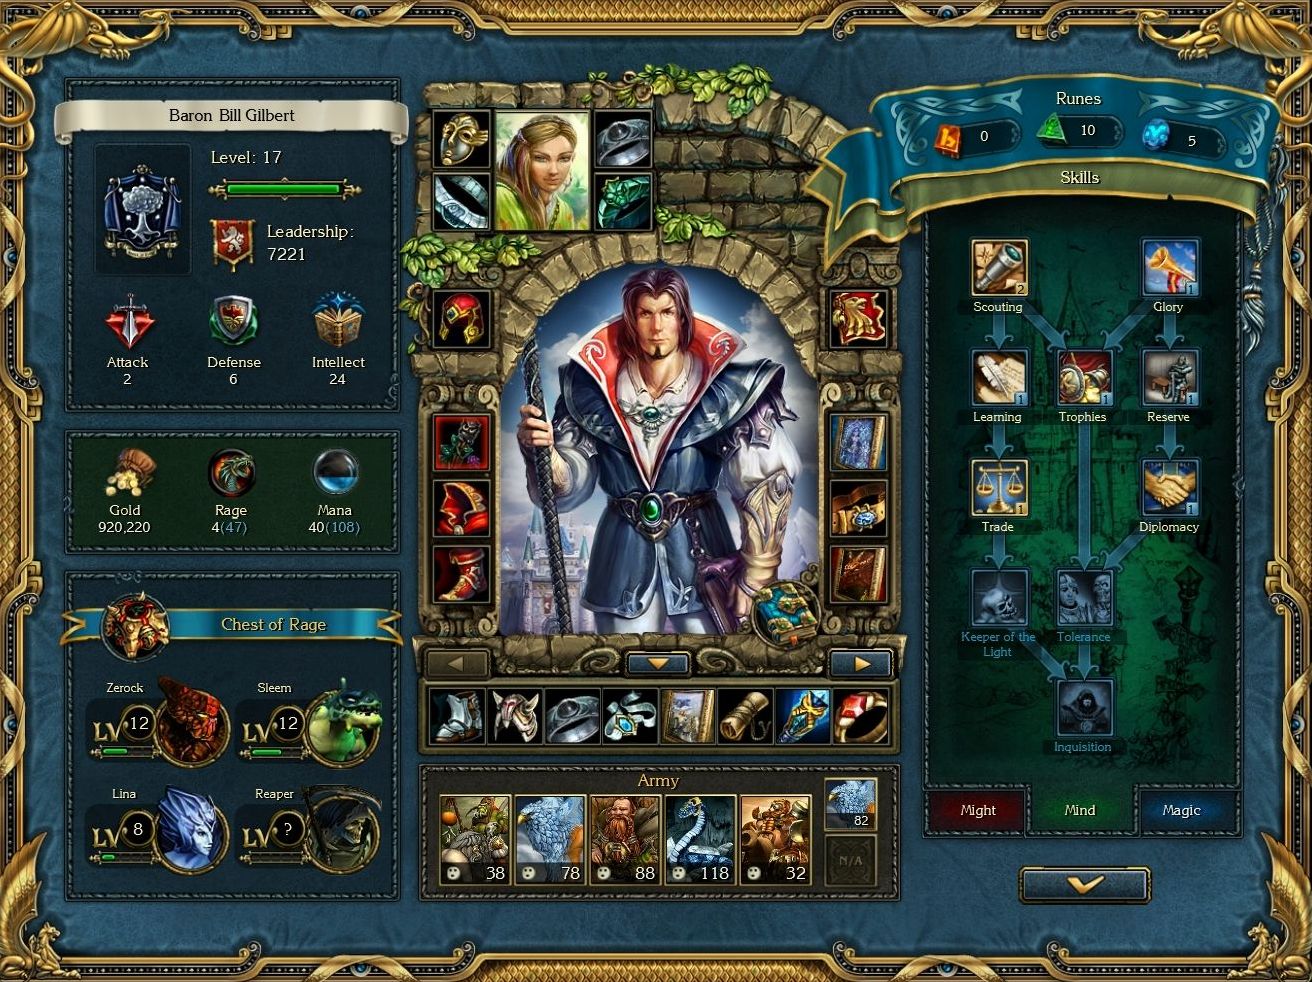 With the tournament over, we can now restock our troops and head back to the Taron Mines. Here's how our hero is looking these days - wait a minute... didn't we used to have 28 Intellect? 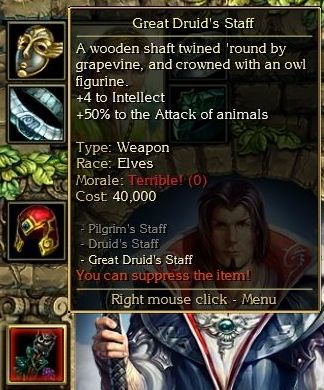 Uh oh, our Great Druid's Staff has become demoralized by our actions and has retreated into a useless state. If we read the info option carefully, we may notice this section: "Like its creators, this living staff abhors violence, and considers the life of every living creature invaluable." The Great Druid's Staff does not like it when we kill animals (or Elves). Unfortunately, this includes all of those Hyenas, Wolves, Bears, Spiders, and so on that we have been exterminating, and it's basically impossible to prevent this item from losing Morale over time. Next time, we will start by dealing with our unruly Staff... then we will head onwards to the Taron Mines. ---------------------------------- Bonus Material Marking the Map 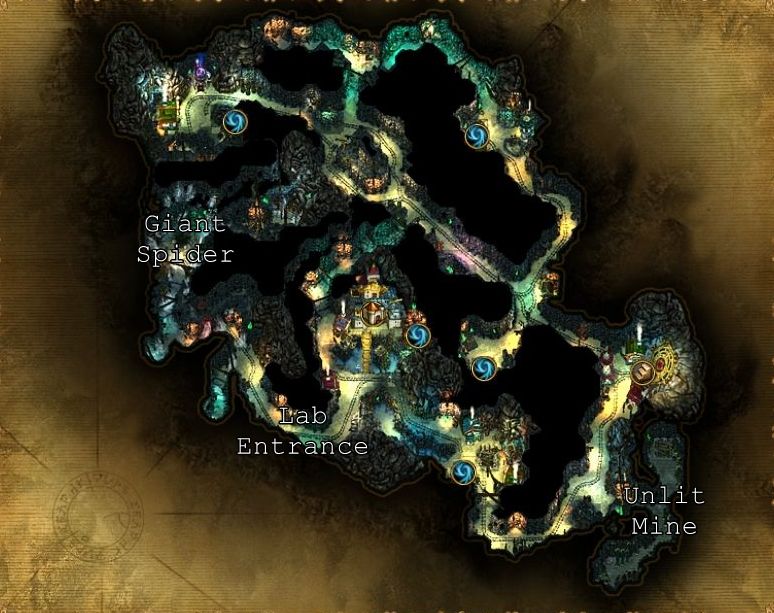 Talkin' 'bout Troops Dwarf 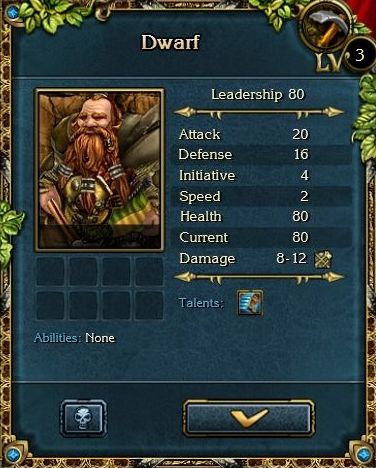 Resistances: None Critical Hit %: 14 Defense Bonus: 4 Talents Running Abilities: None Gully's opinion: The Dwarf is an extremely basic melee unit... possibly the most basic unit in the game. Their main selling point is their high Health, decent damage, and good all around Attack/Defense. Their main drawback is their mobility - 2 Speed is poor for melee, though helped a bit by the Running talent. However, they are just boring. Ancient Bears, for comparison, cost the same, have slightly lower Health, slightly higher damage, and the same Speed 2 + Running mobility. However, Ancient Bears get more than double the Critical Hit chance, and get their Attack doubled when they take damage, and have Physical resistance. You would always want to use Ancient Bears instead - except for when you can take advantage of the Dwarf tag. If you go for an all-Dwarf army, the potential +2/+3 Morale, along with other Dwarf-specific equipment, gives these guys a huge boost. In that case, these guys will be very solid fighters, especially if Hasted. Fighting them: Like any other slow melee units, use Slow/Freeze to immobilize them, and pick them apart at range. They are slightly less vulnerable to spells due to their high Health. Skills Shown Tactics Might, Tier 4 Knowledge of Tactics allows the hero to arrange troops on the battleground before combat. Prerequisites: Bowmen Commander  Level 1: A small number of hexes are made available for pre-battle troop placement. Cost: 10/2/0 Level 1: A small number of hexes are made available for pre-battle troop placement. Cost: 10/2/0 Level 2: A large number of hexes are made available for pre-battle troop placement. Cost: 14/4/0 Level 2: A large number of hexes are made available for pre-battle troop placement. Cost: 14/4/0Gully's opinion: This is one of the more essential skills in the game for any class. The Tactics skill lets you rearrange troops in a small area before battle begins, but after you have seen the enemy positioning. It may not sound like a huge benefit, but it really helps. You can move your stacks out of range of fast flyers (especially Dragons). You can separate your stacks to prevent AoE spells and other attacks from hitting multiple stacks. You can position ranged units in far corners or behind obstacles to protect them. You can arrange your melee units a bit further forward to be in position to strike the enemy after it moves up. All in all, very useful. Level 1 is usually enough - in a normal battle, you essentially get the back two rows of hexes to use. At Level 2, you get two more rows of Hexes, meaning you can move your units up quite far. This second level is appropriate for people who want to be aggressive with melee units. The second level is useful, I just think it is a little too expensive to afford usually.
|
|
#
?
Oct 24, 2017 17:10
|
|
|
Giant spider, bleeurgh. Can't stand the drat thing, and the devs apparently love it endlessly.  Nice job killing the awful thing though.
|
|
#
?
Oct 24, 2017 17:48
|
|
|
Our weapon is mad at us! That is some Disgaea stuff right there. 
|
|
#
?
Oct 24, 2017 21:03
|
|

|
Does every powerful item have its own hangups that way, or only the real heavy hitters?
|
|
#
?
Oct 25, 2017 04:32
|
|
|
Doesn't the Spider Queen web the ranged units from time to time, or am I misremembering things? Anyway, the most hilarious way to deal with her is, I think, to spam Fire Arrows + no retaliation/ranged attacks, and let the walker units just deal with the spiderettes. At 25,000 health points, it may take some 10-12 turns, but hey. And I really hope you're planning to go back and talk to that dwarf who very specifically told you never to come back and talk to him again. Heh.
|
|
#
?
Oct 25, 2017 07:23
|
|
|
Glazius posted:Does every powerful item have its own hangups that way, or only the real heavy hitters? Pretty much all of them have morale, some of them have more going on than others.
|
|
#
?
Oct 25, 2017 08:45
|
|


|
Glazius posted:Does every powerful item have its own hangups that way, or only the real heavy hitters? wiegieman posted:Pretty much all of them have morale, some of them have more going on than others. No, not necessarily. The Item Morale system is sprinkled through a handful of items, but there are some powerful ones that don't. It is true that most of the high-level Weapons and Armors have the Morale than the other types of equipment, though. The annoying thing about the Great Druid's Staff is that it is really hard to avoid losing morale, outside of certain areas. It loses morale when you kill animals, and a lot of the armies you fight will have some in them. Other items are easier to satisfy - my Ring of the Snake King has not complained since I tend to use Royal Snakes always. meristem posted:Doesn't the Spider Queen web the ranged units from time to time, or am I misremembering things? I don't think the Spider Queen does that... I'm not sure what good webbing ranged units would be. If she does, she didn't in my recording. But your strategy there is definitely sound, and the way I'd normally go. The Dwarves aren't staying in my army for long, so I didn't really care that I lost a bunch in this case. As for the dwarf, I can't say I remember which dwarf you are referring to - unless you mean the submarine captain. If it's someone else, remind me when I miss it.
|
|
#
?
Oct 25, 2017 12:15
|
|
|
quote:As for the dwarf, I can't say I remember which dwarf you are referring to - unless you mean the submarine captain. If it's someone else, remind me when I miss it. I meant the one outside the spider lab. It's nothing important, just a small bit of somewhat funny dialogue.
|
|
#
?
Oct 27, 2017 01:54
|
|
|
meristem posted:Doesn't the Spider Queen web the ranged units from time to time, or am I misremembering things? If you kill her spawns fast enough, she'll mostly spawn more spiders or change position, I think the webbing is random because I had no problem one rounding the spawns and damaging her from range so my units didn't need to move anyway. Glazius posted:Does every powerful item have its own hangups that way, or only the real heavy hitters? There's no real rhythm to whether an item has morale or not. A fair few of the game-changing army buffing items don't have morale, some bad or mediocre items do. But the majority of good gear has multiple stages upgraded through Keeper fights. Cannoneers are positively wonderful to have for those fights, their characteristics are just what you need to punch above your weight and upgrade items, if you're willing to take losses (not a problem with a convenient source of human units hordes to soak up damage).
|
|
#
?
Oct 27, 2017 02:46
|
|


|
Update 41: Spooky Scary Skeleton Archers Last time, our Great Druid's Staff got mad and is refusing to fight for us. That just won't do, so we are going to dive right back in with a Keeper fight. Anytime an item with Morale gets down to 0, you can fight the Keepers again to restore it. Unfortunately, you have to wait until it actually hits 0. 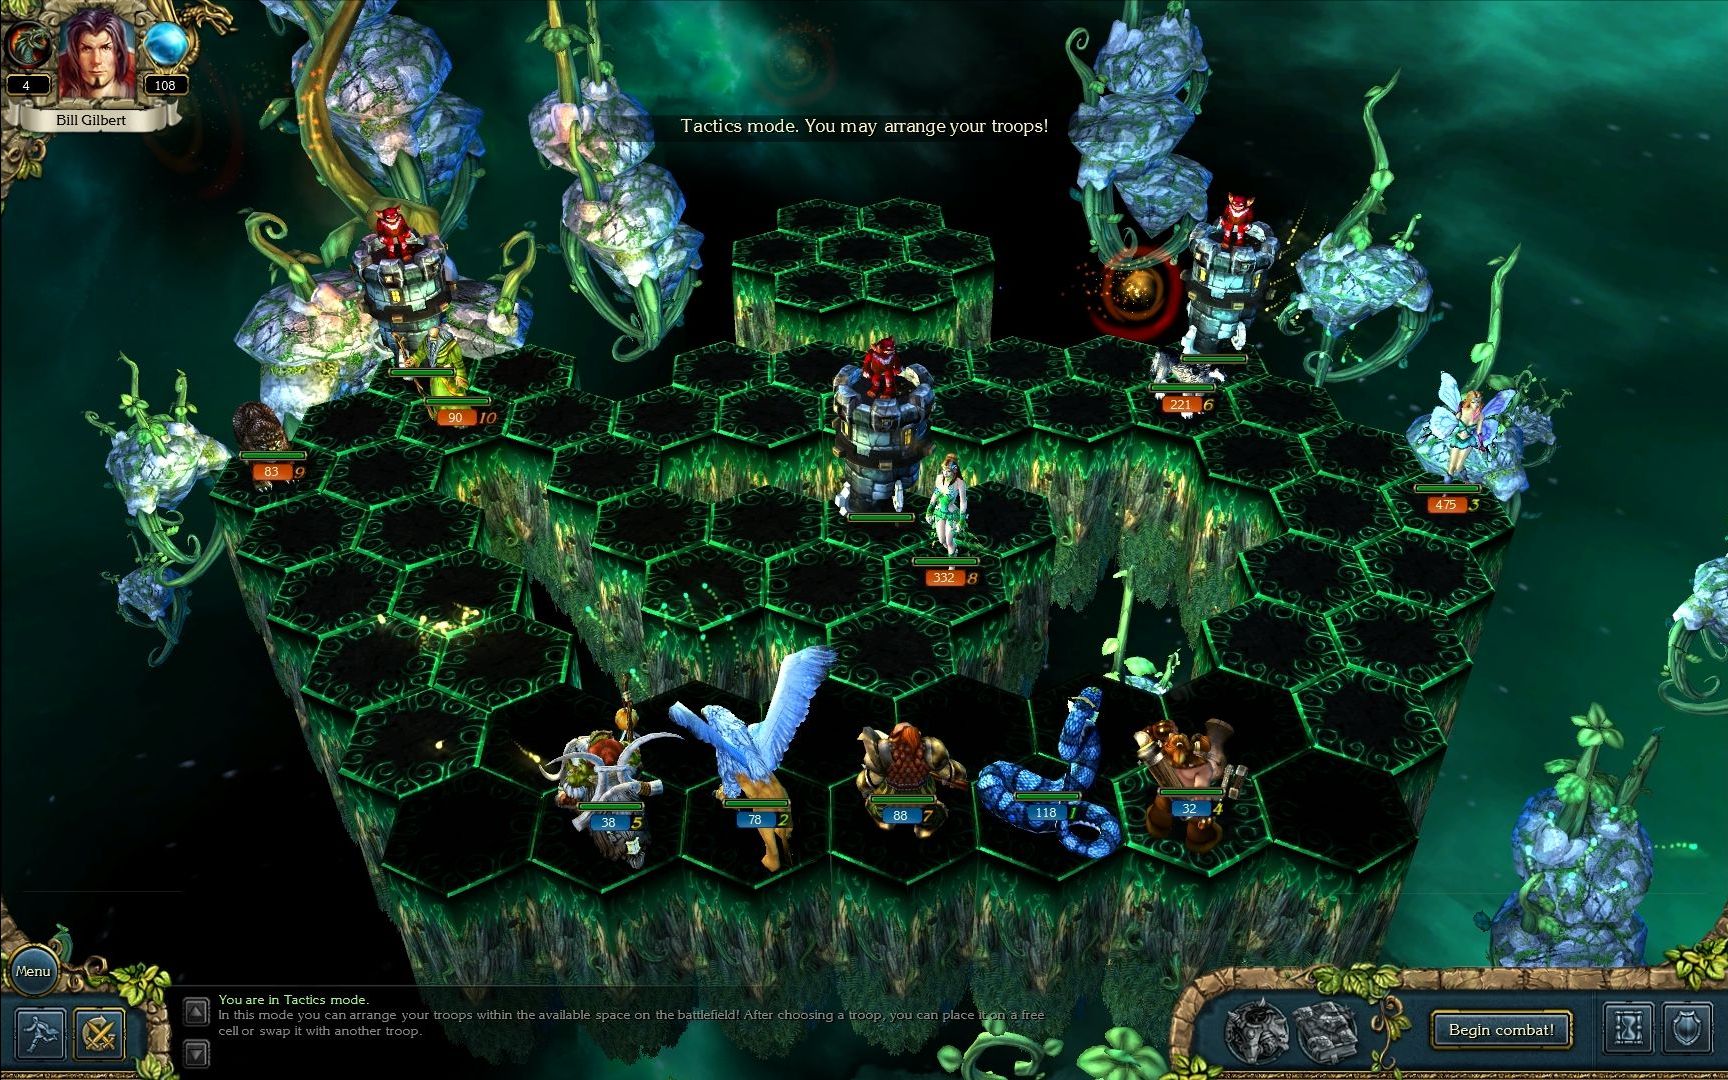 The layout of the Keeper fight is the same as before. However, you notice that we now have something new going on. With the purchase of the Tactics skill, we have a phase to rearrange our troops however we want before hand in the area shown by the dark hexes here. In this case, I separate units out a bit. Not much else we can do. 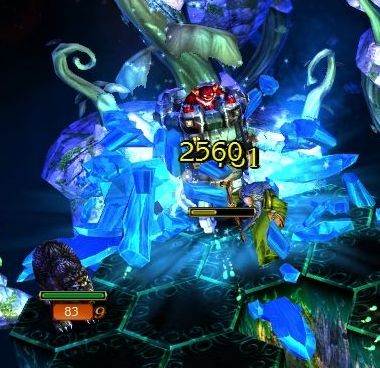 The layout is the same, but the fight is not. For items like this, battling to restore an item is usually harder than the upgrade to get the item. The towers here are now over 4K Health, almost impossible to easily destroy no matter what our Intellect was. 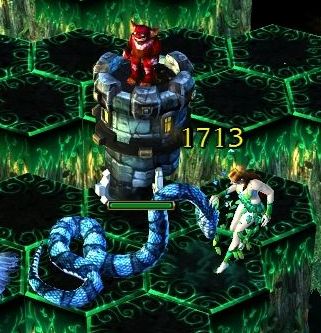 I know my Snakes would take a while to hammer the central tower, so instead I will focus on the troops like this large stack of Dryads. 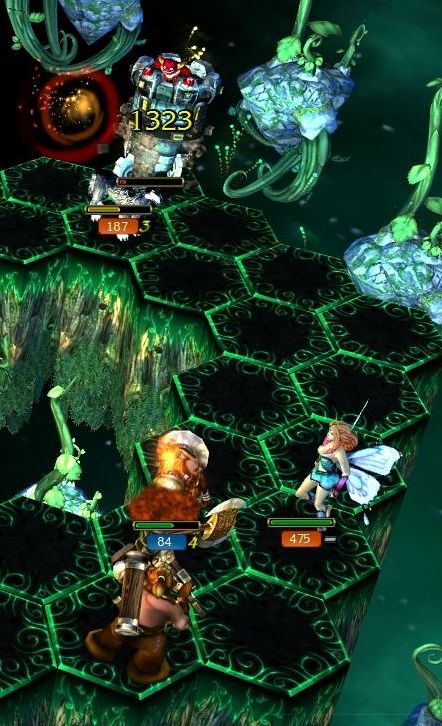 Meanwhile, we can try to take advantage of using the Cannoneers to shoot the towers. Things I learned in this recording: the Cannoneer's Salvo talent doesn't seem to get the bonus as the normal shot does. The tower remains standing even after triple cannon shot. As we are doing so, the Lake Fairies have come down to be really annoying here. Even if they aren't terribly dangerous, they can whittle away with no retaliation. 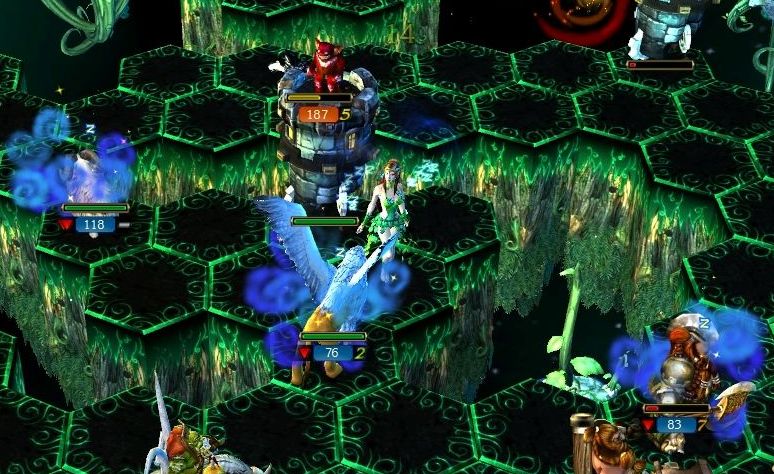 Ugh, Dryads. I hate Dryads. Their Lullaby talent is seriously annoying. This incapacitates all of my melee fighters. 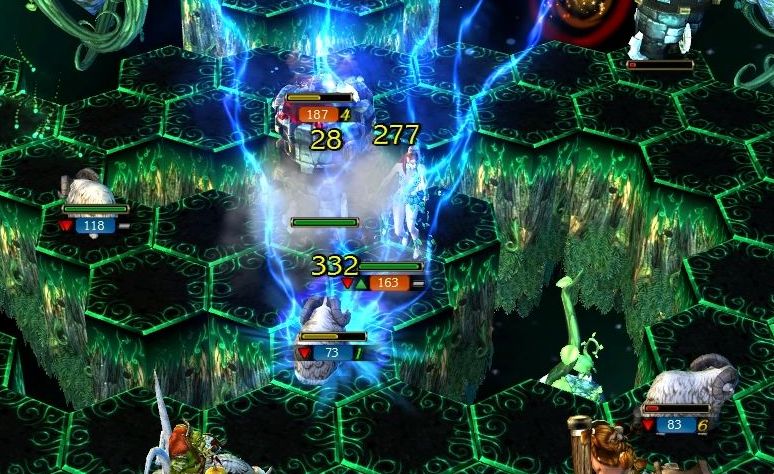 Good news, the Sleep effect won't matter! Bad news, all three stacks are Sheeped by the towers! Now I can't control them and can't fight with them until the spell wears off. 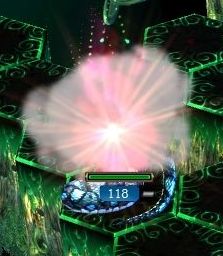 Dispel is a great friend to have in cases like this. I would have preferred using a spell to help destroy enemies, but I really need at least of these stacks to fight. I'll bring back my Royal Snakes, since they are by far my best unit. 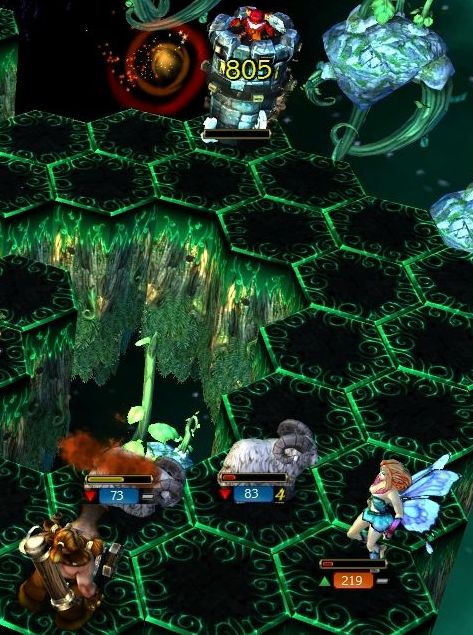 On the next shot, the Cannoneers do their job and destroy the tower. 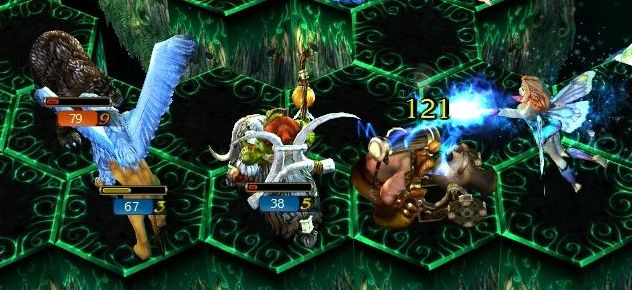 The enemy stacks have closed in on my troops from both lanes. This is getting a bit hairy. 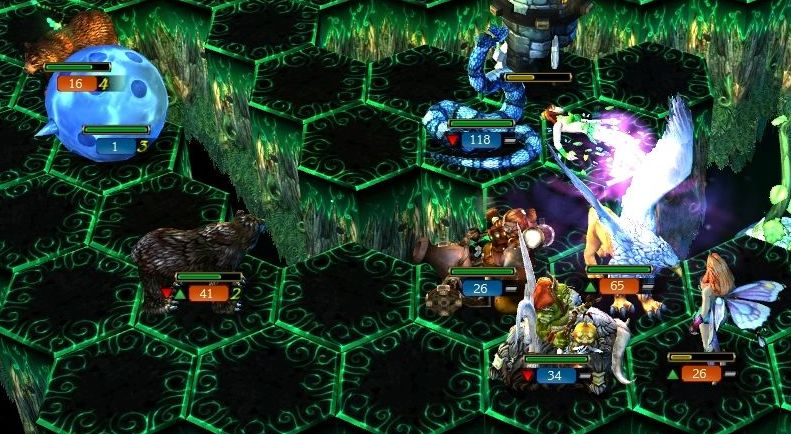 I manage to kill of most of the Lake Fairies, and an Ice Ball has been called in to hopefully distract the Bears. And my... wait... why do my Griffins have a red bar? What is that purple glow over them? 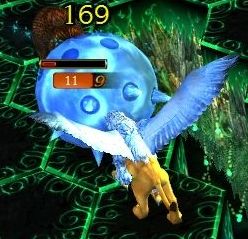 Yep, they've been charmed. This is a talent of the Druids, in which they can take control of an opposing stack of animals if their Leadership is low enough. I think they wouldn't have been able to do that if my Griffin stack had been healthier. Luckily, they just fly off to hit the Ice Ball rather than anything I care about. 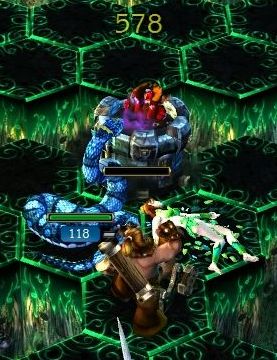 While the Griffins are misbehaving, we do manage to kill the last tower and the Dryads. 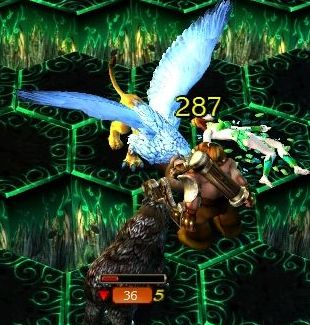 The charmed Griffins come back in from pecking at the Ice Ball to have a go at the Cannoneers. Luckily, the charm wears off, and we finish off the remaining creatures. 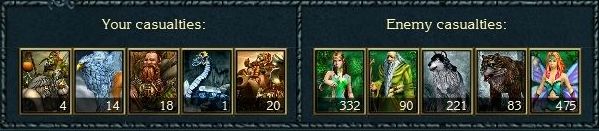 Ouch, that was a dirty fight. Most of the losses were on the dwarven units, which is good - they aren't staying with us. 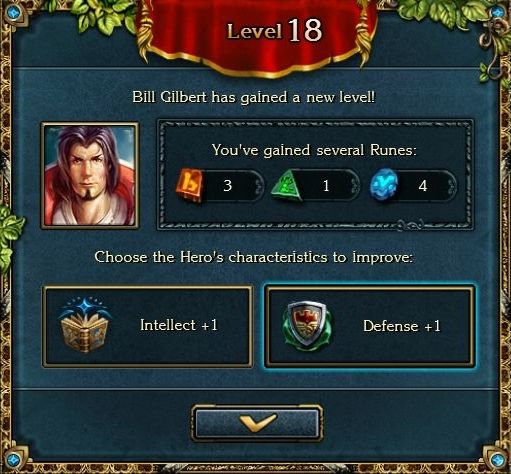 On the other hand, we level up! For the first time, I am going to pick a physical stat over Intellect. I've reached 28, which is an important breakpoint for damage. I could aim for 30, which will get us greater duration on certain buffs/debuffs. However, we could still get some better equipment for that, or find boosts on the map. I don't want my physical stats to be too pathetic as we get into the later parts of the game. 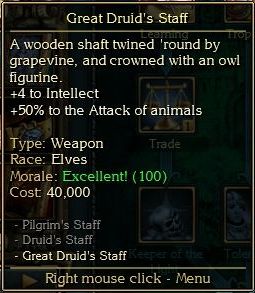 The Great Druid's Staff is back to behaving nicely. At least when we suppress the Keepers, it goes up to 100 Morale, instead of the 50 when it was merely upgraded - this should last us a good long time. We also know that we can suppress the staff again if necessary. 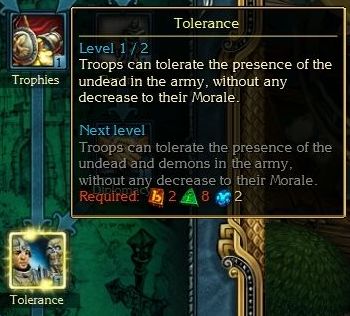 With the runes we got, we can go for another game-changing skill - though not one that is necessary. The Tolerance skill lets us recruit Undead (and Demons if we go for level 2) without impacting the morale of other units. The utility of this skill all depends on what you want to do. If you do eventually want to mix a couple of Undead units into your army, it can be great - certain Undead units are quite powerful. Beware of a couple things, though. First, Undead units are pretty scarce in the early game, so you might have trouble replacing losses or getting full stacks of troops you want. Second, if you want to use an all-Undead army later on, this skill is not needed, and you can save the runes.  I go scouring through the lands we have been for some Undead soldiers. The selection is not great - no Vampires anywhere, for instance. If we had not cleared out the one Undead castle in the Marshan Swamp cemetery, we could have bought them there. However, we do find enough for a full stack of Skeleton Archers and Cursed Ghosts. These will replace the mauled dwarven units in the line-up.  Heading all the way back through Creiston Mines, through Upper + Lower Hadar (the journey is getting seriously tedious), we finally get through the entrance to Taron Mines. Nothing much has changed - it looks pretty much like the other mine areas we have seen. Great statue though. 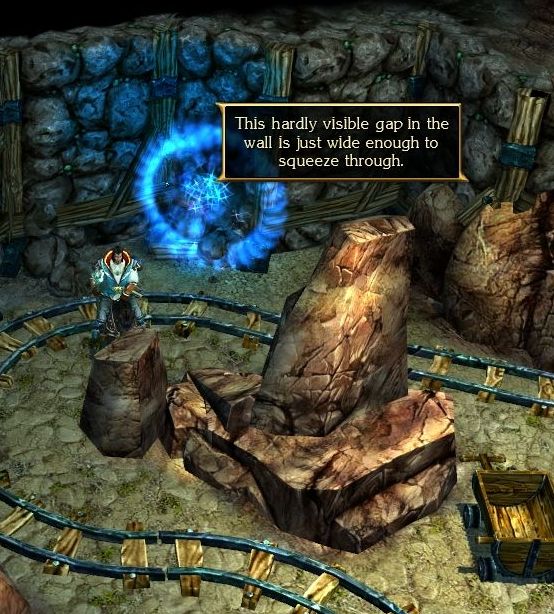 Past the first tunnel, we find a glowing portal - actually just a crack in the wall. We carefully squeeze our thousands-strong army through. 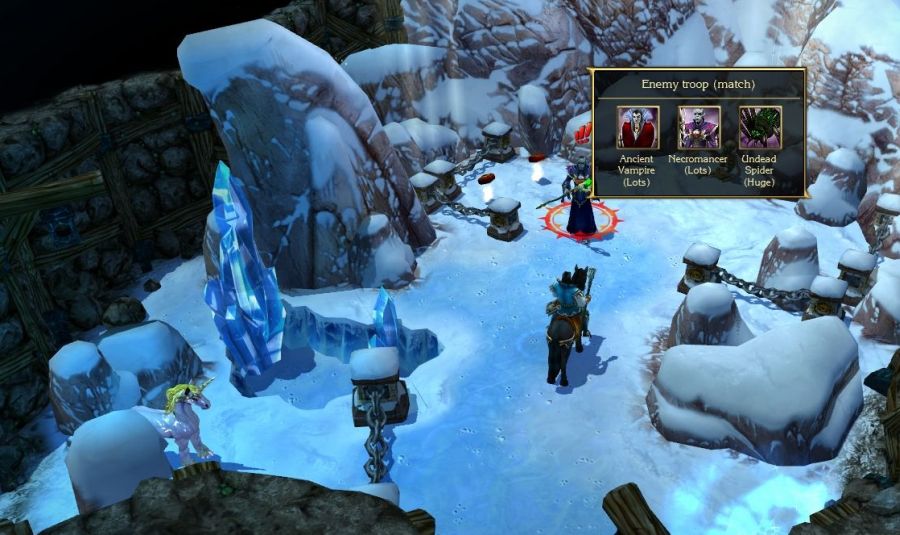 We emerge into a sort of frozen grotto. A Necromancer has taken up residence here, and has captured some Unicorns (how the hell he got those here, I do not know). We must rescue these poor beasts... and that sweet prize floating behind him. 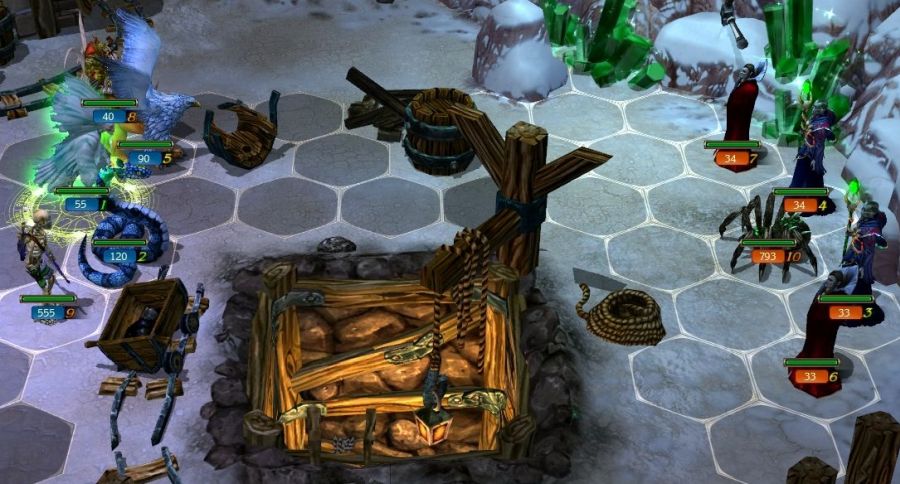 Where did that mine shaft come from? Anyways, this is one of the most cramped battlefields we will ever see. There is literally one hex passage between the two sides. 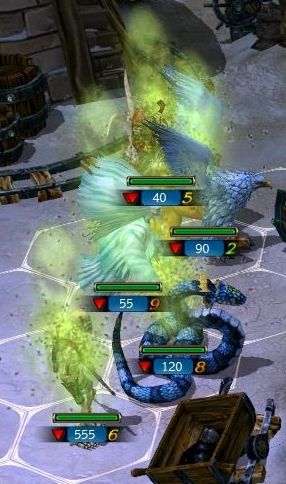 The Necromancers Plague our whole army, reducing Attack/Defense/Health - except our Undead units which are immune. 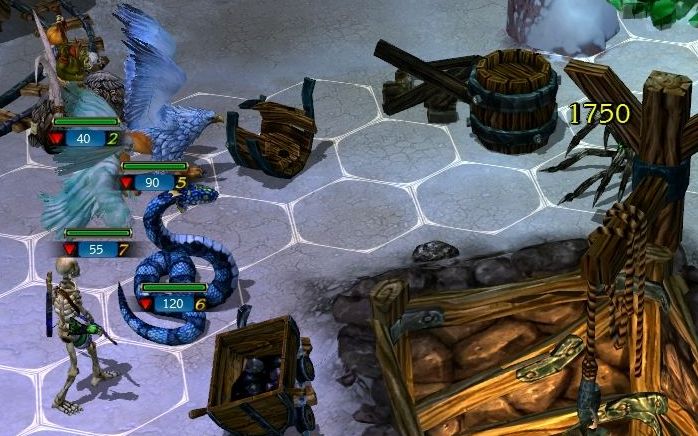 The Skeleton Archers line up their first shot, and deliver a massive blow. Seriously, Skeleton Archers are so good. They only cost 14 Leadership, but do 2-3 damage apiece. Bowmen cost about 3.5x as much, and do 3-4 damage. Cannoneers cost more than 15x as much, but do only 3x the damage - even their triple-shot does way less damage. On top of that, they have access to 2 special arrows. First, they have a Poison Arrow (same damage as base, but poison-type and causes Poison). Not that spectacular, but useful for getting around Physical Resistance. Second, they have a Black Arrow, which does 3-4 Magic damage, and removes a positive buff if the target has one. Having access to 3 damage types is awesome. Now, there are some factors not taken into account - the Skeleton Archers do have much lower Attack, have a shorter range (5 hexes for full damage), and are pretty fragile. And of course, being Undead has other downsides - weakness to Holy Attacks, can't be healed/resurrected, and so on. Still, if you can keep them alive (heh), they can do wonders. 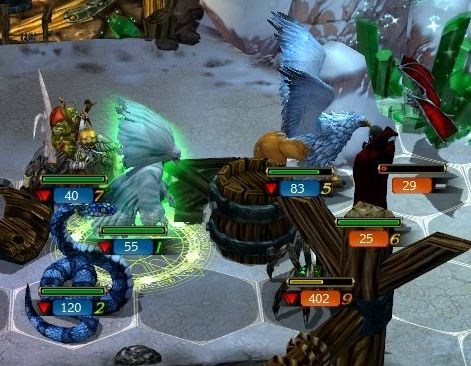 The Cursed Ghosts, on the other hand, are not having much impact here. The restricted field leaves them stuck mostly. Being incorporeal, they can pass through obstacles, but they can't pass through other units. 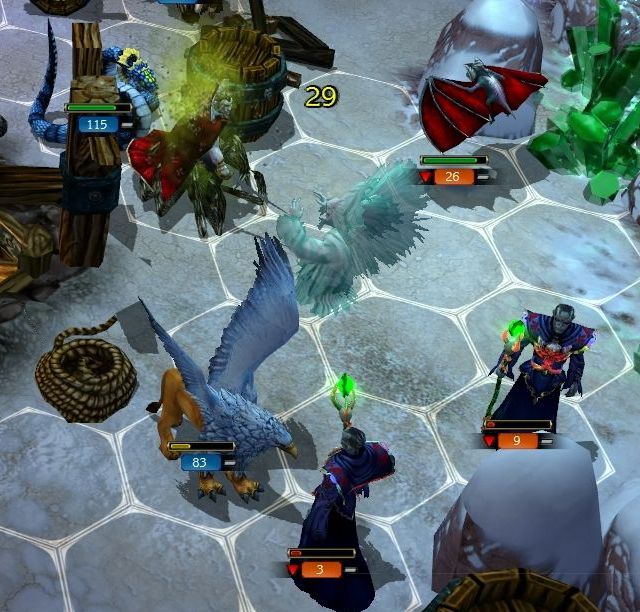 Eventually, we break through the wall of Spiders and Vampires, and the remaining Necromancers are destroyed. 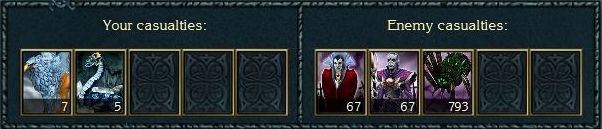 I lose a few extra Griffins from being a little too aggressive. 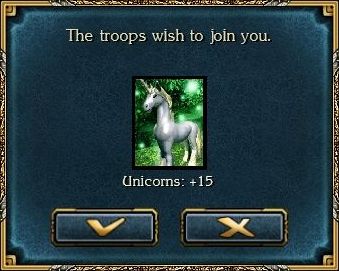 With the Necromancer gone, the chains holding the Unicorns release. 15 Unicorns isn't nearly enough for a stack, so we will leave them here. 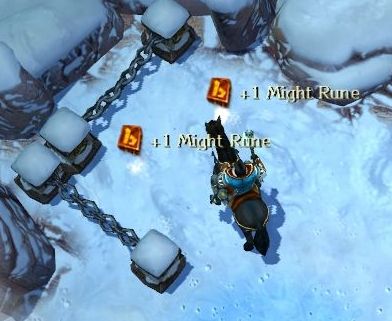 The real prize is back here - two Might Runes just floating around. With Tactics bought, I don't have any huge skills I need to save Might Runes for. However, a lot of the skills even in the Magic tree require a small number of these guys. 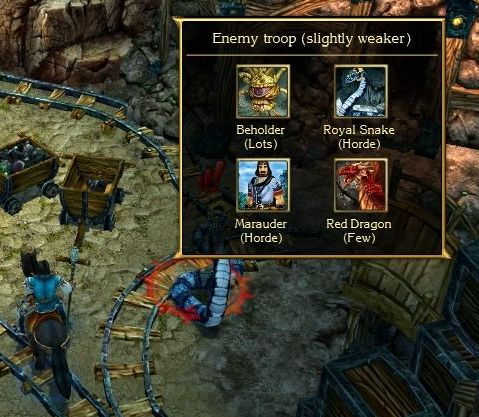 The tunnel past here is patrolled by a very mixed force. I'm glad for the Royal Snakes, though - the Diplomacy skill activates to refill the ones we lost in the previous fight. 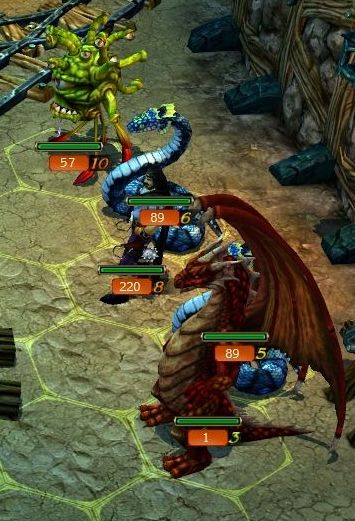 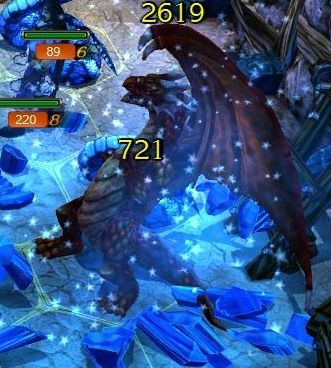 This is the second Red Dragon we have seen, and the second to die before any action. Don't worry, there will be plenty of dragons later on.  The Cursed Ghosts take on one of the stacks of enemy Royal Snakes. They suck the life force right out of them. Ghosts steal about 1/4 of the damage they inflict on living creatures, turning them into new Ghosts. This ability is... well, a mixed blessing. Sure, you can easily replenish losses, and you don't have to go back and buy new ones, and you can be more bold in your attacks, knowing that the retaliation likely won't kill more Ghosts than you've created, but...  This ability doesn't care about how many you started with or how much Leadership you have. If you come in to a fight with a full stack, any extra Ghosts made will immediately cause the stack to go out of your control. This happens very easily. 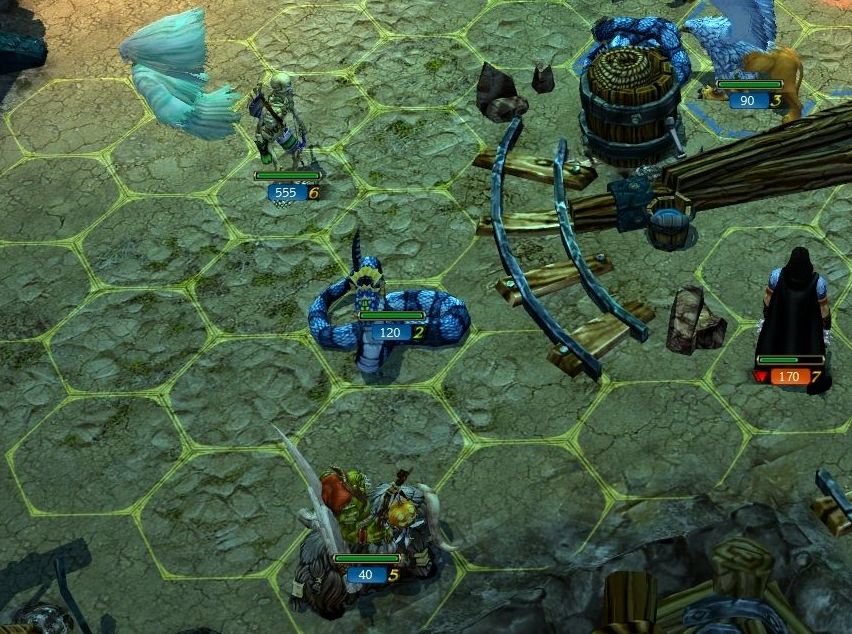 Out of control stacks like this act randomly. Here, the Cursed Ghosts decided to just sort of float off into a corner.  Despite that downside, we still win easily. 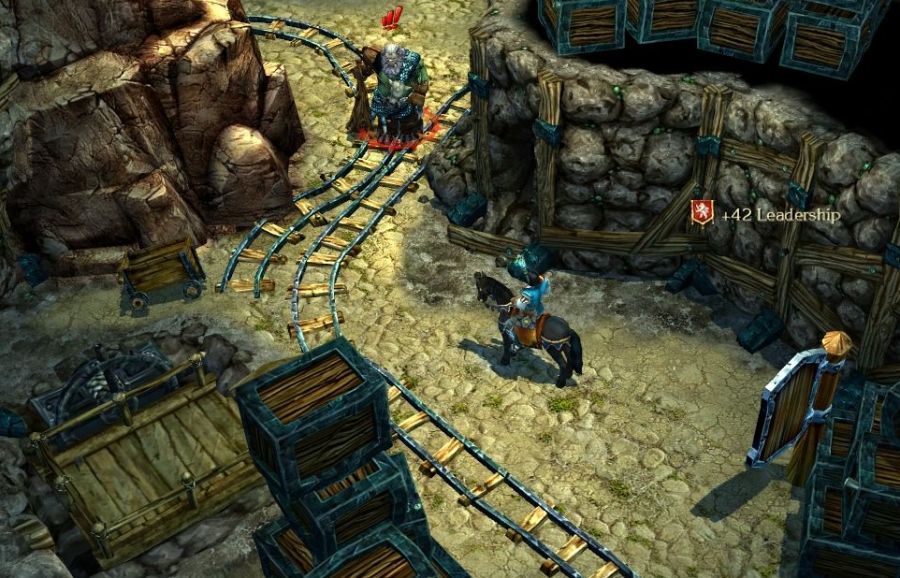 We pass by another elevator. More pressing concerns await us ahead, however. 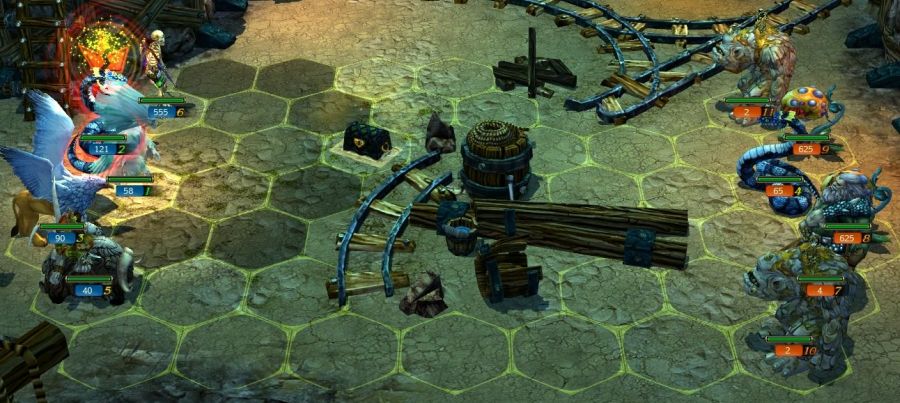 Oh boy, I really screwed up a bunch in this battle. Mistake #1: I left the Cursed Ghosts as they were after the last fight. That means they start out of control right away. I'm down a full stack of troops. 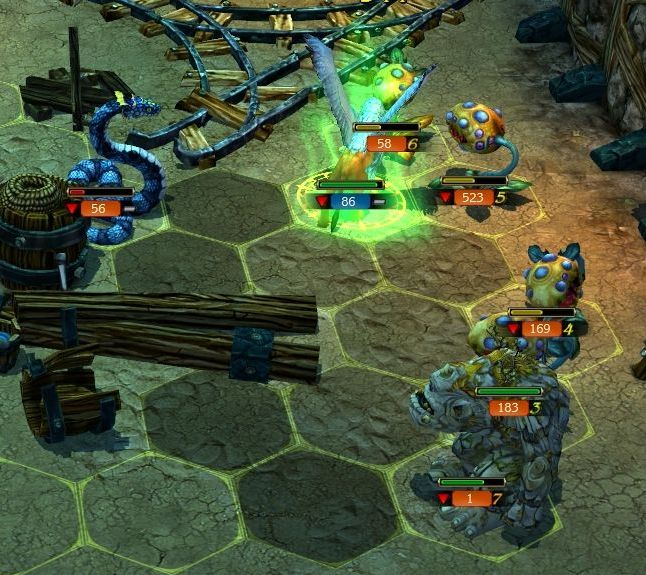 Mistake #2: Just look at the terrible spot I put my Griffins into. I had intended to fry the plants with a Fireball, but I forget before flying them in. I could use a Flaming Arrow, but I was worried about the Royal Snakes there, so I instead cast a Slow spell on them... 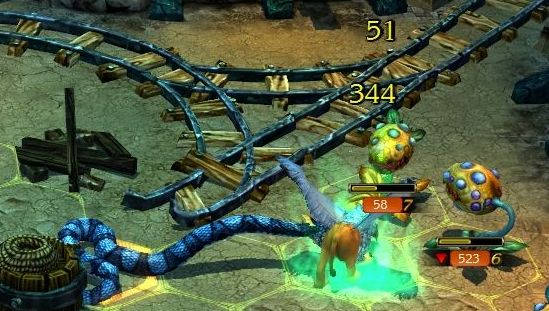 Which turns out to be Mistake #3: Royal Snakes can Lunge. I should know this, I use them all the time! 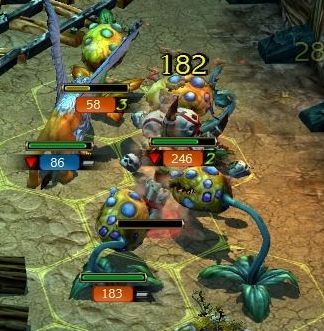 A Totem does distract half of the Thorns from attacking the Griffins. 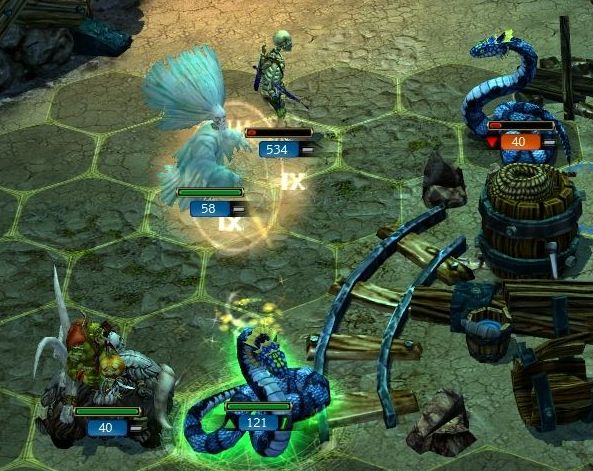 Mistake #4: A minor one here, but I had moved my Royal Snakes south for no good reason, and now I need to spend a spell casting Haste to send them back up to face off against their counterpart. 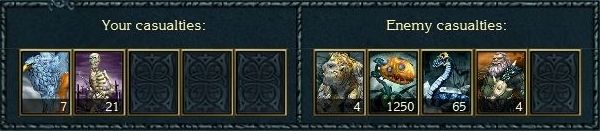 Luckily, I am not punished greatly for these errors, because the fight was not a hard one. The Griffin losses were entirely avoidable, though (the Skeleton Archer losses were not - a result of a couple of Cyclops boulder tosses). 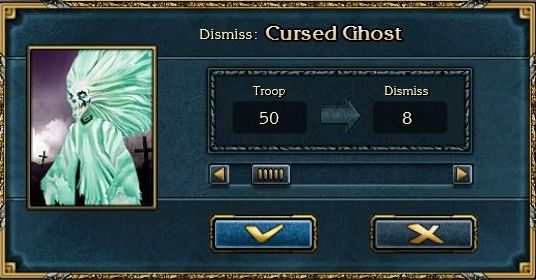 To try to prevent this in the future, we need to give our Cursed Ghosts some head room. I dismiss down to 50 (out of a max of 55). If you have a spare reserve slot, you can always place them there instead. If you do that, you will basically never run out of Ghosts, as your reserve stack will probably grow faster than the losses you might get here and there. 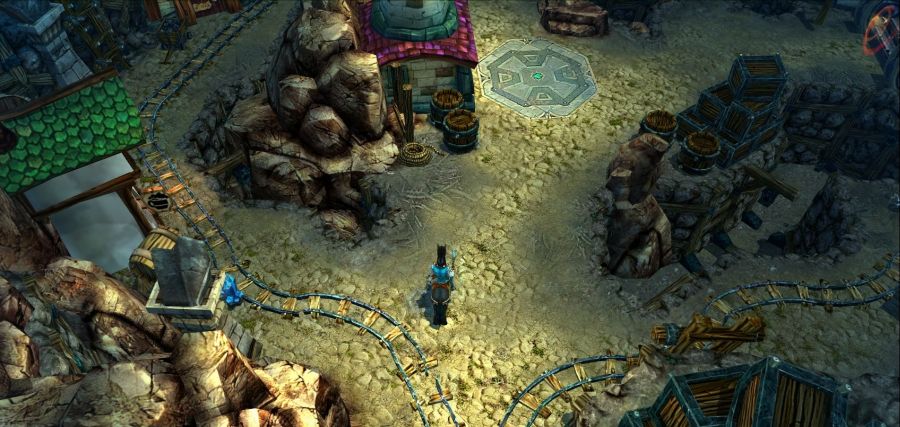 Past the last army, the tunnel opens up into a spacious cavern. Something tells me we have reached the main dwarven settlement. 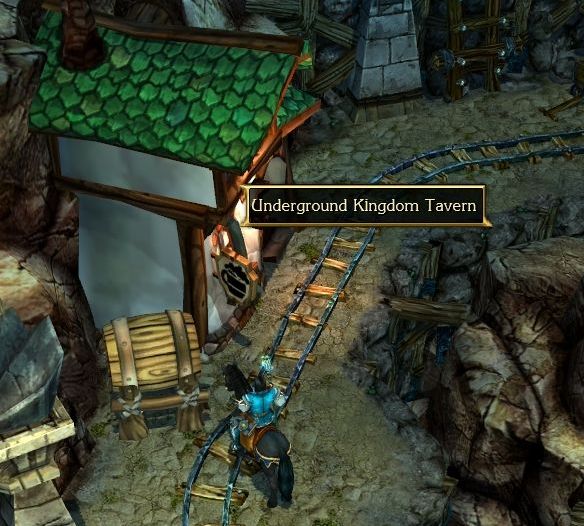 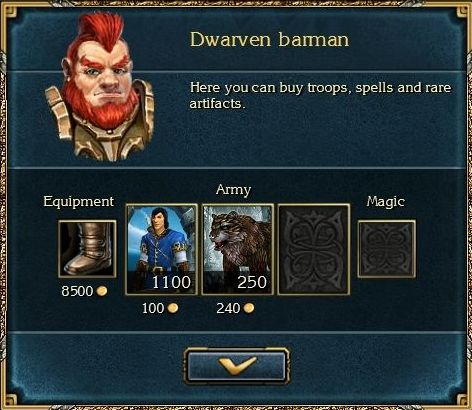 The local tavern has some non-dwarven troops if we wanted them. 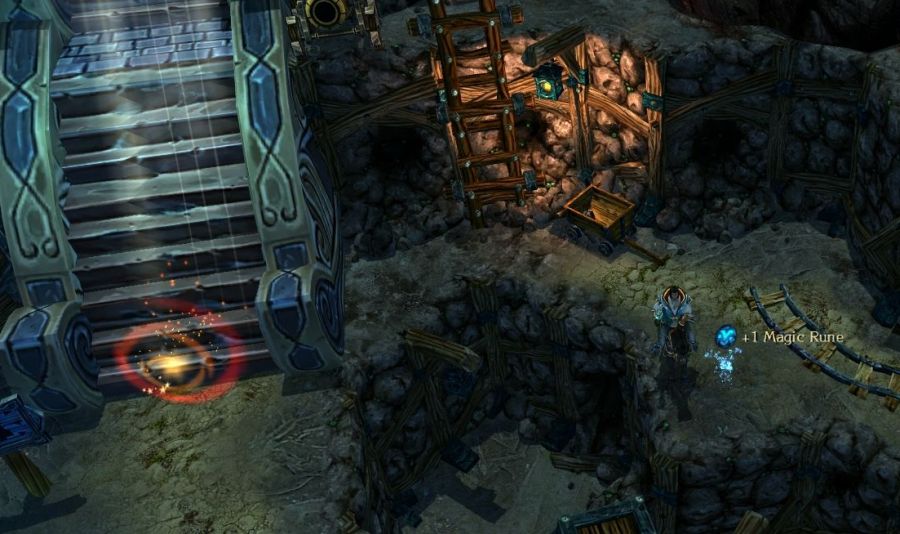 Along the wall opposite, we find a Magic Rune... and a very fancy staircase up and out. 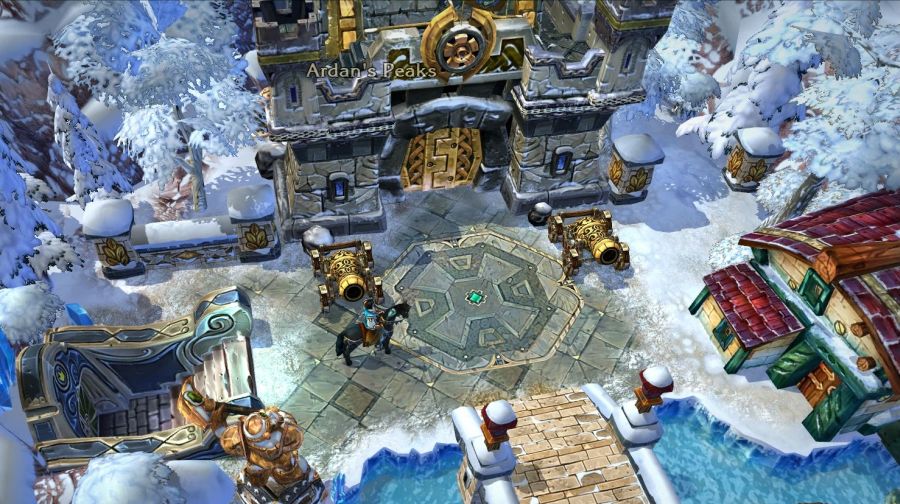 We emerge into the snow-bright Ardan's Peaks region, right by an enormous castle. 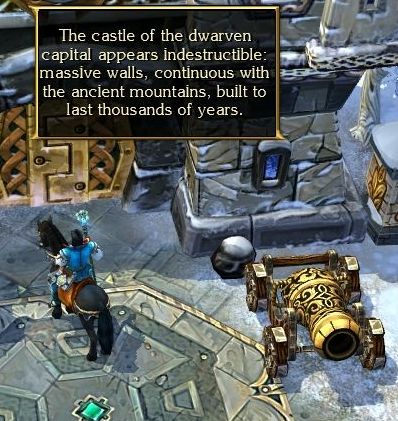 As we suspected, this is indeed the dwarven capital. 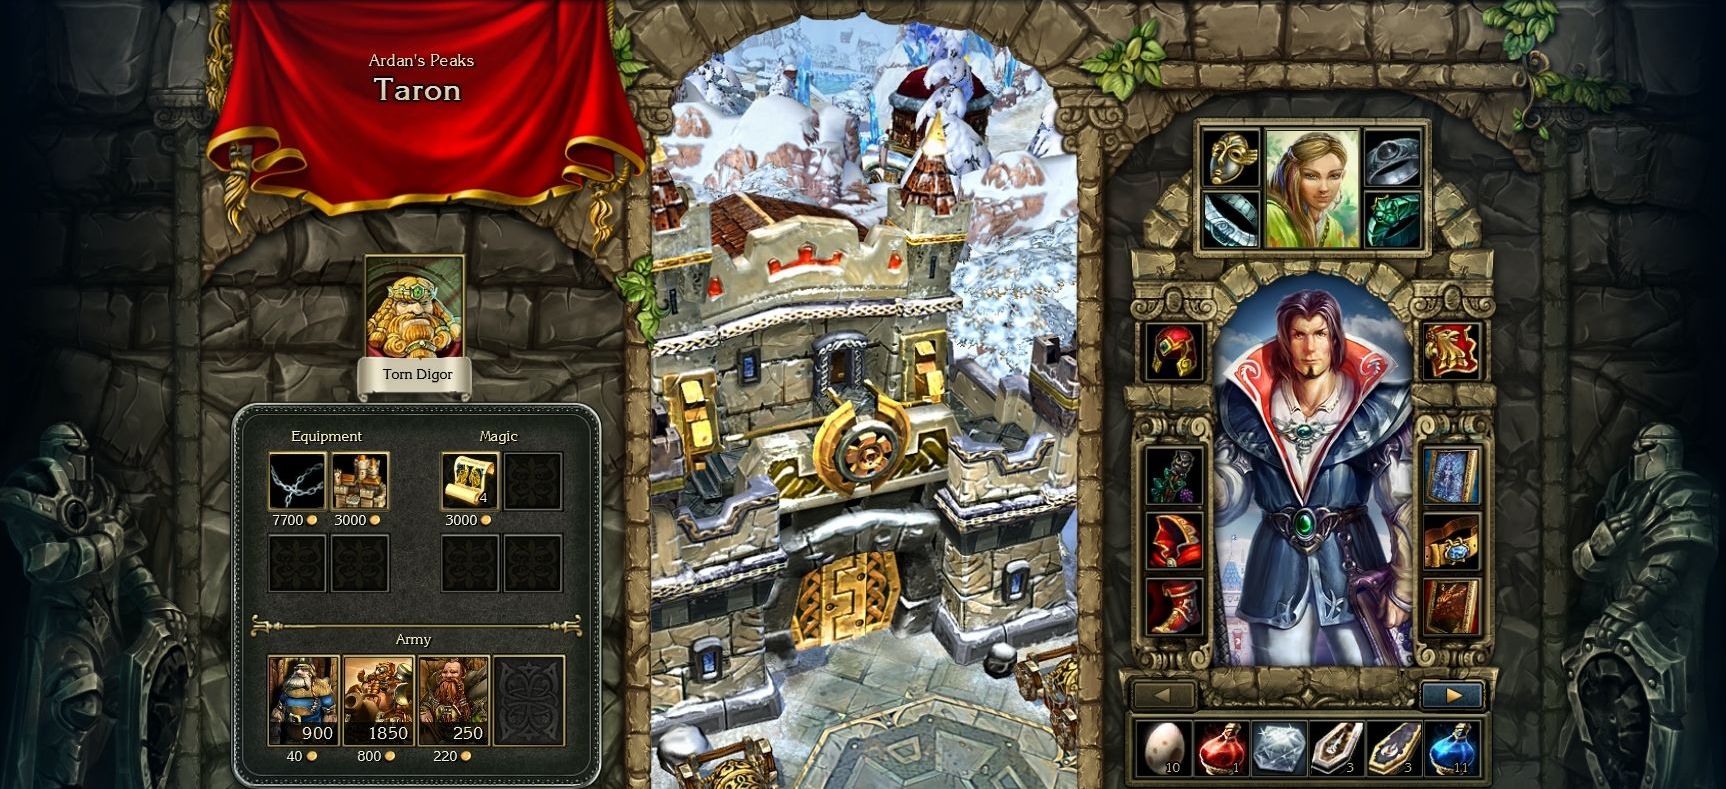 Taron here is the main source of dwarven units for the game. Already we can see that there are more Cannoneers than we could ever need, in addition to decent sized stacks of Miner and Dwarves. Taron also has a very unique item - the Gremlin Castle. We will get around to that in a few updates... meanwhile, let's start the peace negotiations. 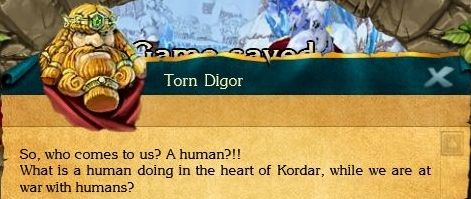 : Good day, Your Majesty. My name is Bill Gilbert, I'm an ambassador from King Mark... : Good day, Your Majesty. My name is Bill Gilbert, I'm an ambassador from King Mark... : Ambassador? Could King Mark have decided to discuss the terms of his surrender?: I've brought a peace treaty, which my king wants to conclude with Kordar... On behalf of His Majesty I apologize for everything that has happened, and promise that Darion will compensate...: Compensate? Human! How can you compensate the tears of those mothers who will never see their sons again? Human cruelty has nor borders! Kordar is now fighting with an army of demons who have invaded our world, and you king cruelly stabs us in the back! Why did your king take away the mines from us, and kill our people? Why did he start the war only now to ask for peace?: King Mark is not guilty. There was a conspiracy in Darion the purpose of which was the ownership of Creiston Mines... (tell about Ahey's conspiracy...): Hm... I knew humans were guileful and sly, but I didn't think that the shine of gold could obscure your mind so much... And they say that dwarves lose their will before gold! Ok, give me the papers... : Ambassador? Could King Mark have decided to discuss the terms of his surrender?: I've brought a peace treaty, which my king wants to conclude with Kordar... On behalf of His Majesty I apologize for everything that has happened, and promise that Darion will compensate...: Compensate? Human! How can you compensate the tears of those mothers who will never see their sons again? Human cruelty has nor borders! Kordar is now fighting with an army of demons who have invaded our world, and you king cruelly stabs us in the back! Why did your king take away the mines from us, and kill our people? Why did he start the war only now to ask for peace?: King Mark is not guilty. There was a conspiracy in Darion the purpose of which was the ownership of Creiston Mines... (tell about Ahey's conspiracy...): Hm... I knew humans were guileful and sly, but I didn't think that the shine of gold could obscure your mind so much... And they say that dwarves lose their will before gold! Ok, give me the papers...[Torn Digor takes the treaty and looks through it. He hums to himself and looks at you.] Well! It seems that the Mark really does want peace. Ok, I agree, but I myself have terms as well... I hope you have authority to settle a couple of questions? : Yes, I have authority in this matter.: First, the gold discovered by Ahey will be mined by the dwarves. Second, Darion will provide assistance in our war with demons. Third, the food and wood which we have bought from Darion in the past, are now needed in double amount!: I believe our king will agree to those terms...: I imagine so! He's not named "The Wise" for nothing... But there's one more condition! We now need military aid more than ever. Our war with demons exhausts Kordar. Hordes of bloodthirsty monsters continue to flow from the Portal, their resources seemingly limitless. Recently, the demons managed to capture my son, Tibold. They've take his castle Bogacho by storm. Go to the Taron Mines, Bill Gilbert, and deliver his freedom. Then our treaty will be completed.: Ok, as a sign of good will, I will free your son and the castle!This sounds urgent! For once, we will not just dick around ignoring the main quest. 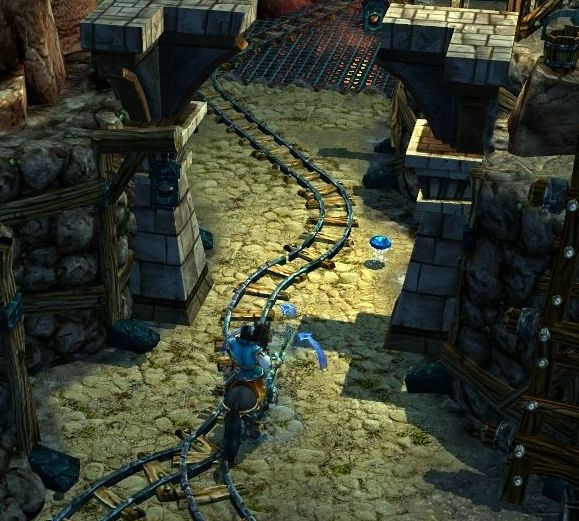 Back in the mines, we head south towards a stone gate. Waves of heat emanate from the opening, but we can't let that stop us now.  Well, it may not be a Balrog, and this may not be a bridge, but we have found our Level 5 Demons to fight. 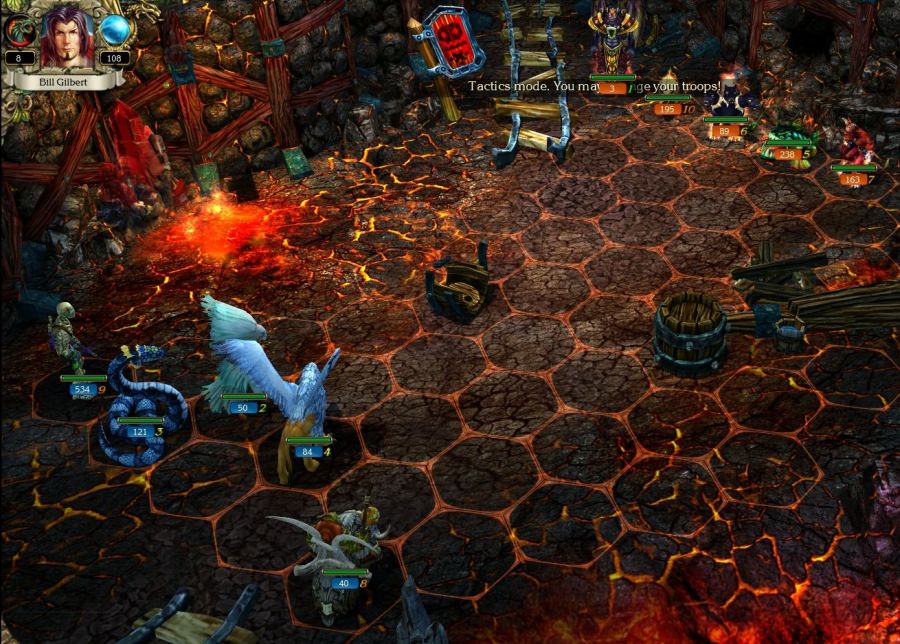 The mines here must have dug into a magma shaft, as the ground is superheated and glowing red. Lucky for us, those demons are very far away, so we should have plenty of time to use spells and range attacks...  Except we are fighting the fastest unit in the game. The Archdemon teleports right to the Griffins, tearing at them with sharpened claws. With a Speed of 9, the Archdemons basically have infinite move. And with an Initiative of 7, they will tend to go first - there's not much you can do to stop them from getting in your face. 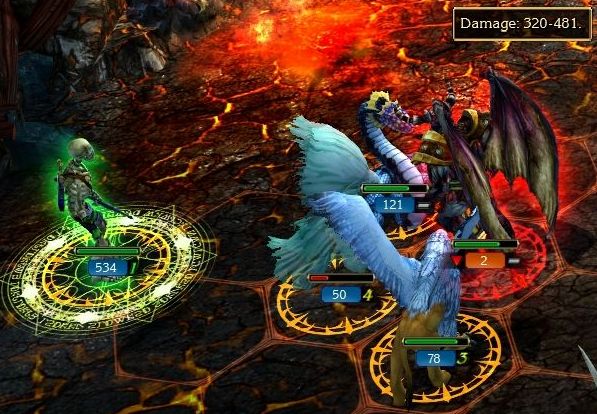 The Griffin retaliation and the Royal Snakes take care of one of the Archdemons. The Skeleton Archers could shoot them, but that damage is pretty bad. Why? Well, since we are going to be fighting them fairly often over the game, I'll introduce the Demon trait. "Demonic creatures from the other world have Fire Resistance (50%) and are immune to some spells. When combat takes place on volcanic terrain, their Defense is increased by 50%, but on frozen terrain, their Defense is decreased by 50%." Guess which terrain we will generally be fighting Demons on? Because of this trait, Demons are often remarkably tough, capping off with the Archdemons here. On this terrain, they have something like 78 Defense. This easily reduces the damage of most of my units to the minimum one-third. 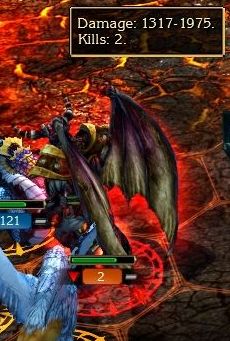 However, one simple spell can really help out here. I've shown off the Dragon Arrow spell before, but it will become increasingly important, and one of the reasons I will almost always take a bow-user over any other archer unit. The Dragon Arrows ignore Defense, resistances, and range penalties. In this case, it multiplies the damage my Skeleton Archers can do by over 3x. 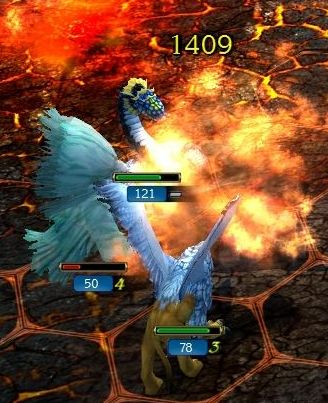 The Archdemons disappear back to their own dimension in a roar of flame. 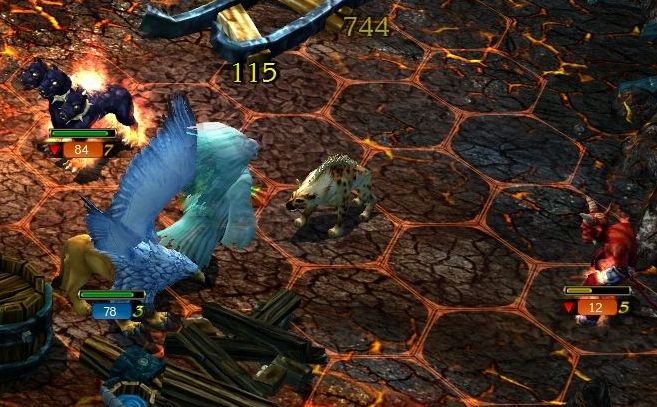 With the Archdemons gone, the rest of the battle proceeds more like normal. We move up to fight the enemy animals in the midfield, and use Slow to keep the Cerberuses still while we shoot them to pieces. 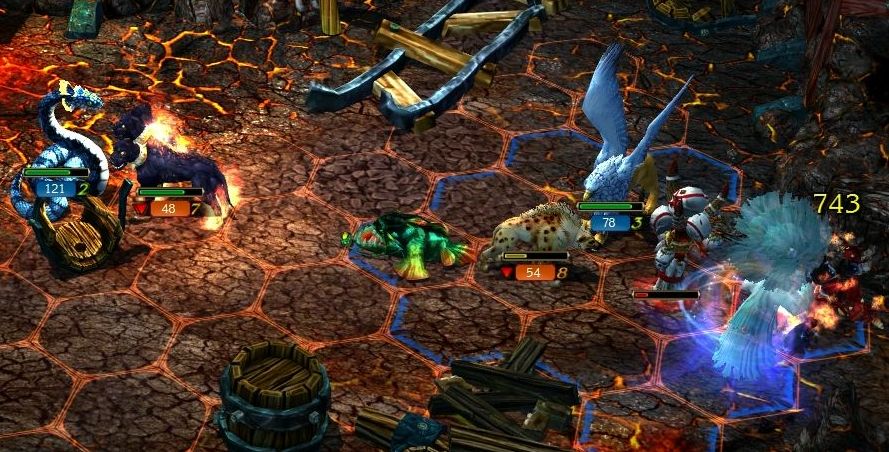 Eliminating the last few Imps, the Cursed Ghosts once again lose control, having regained enough to surpass the buffer I gave them. 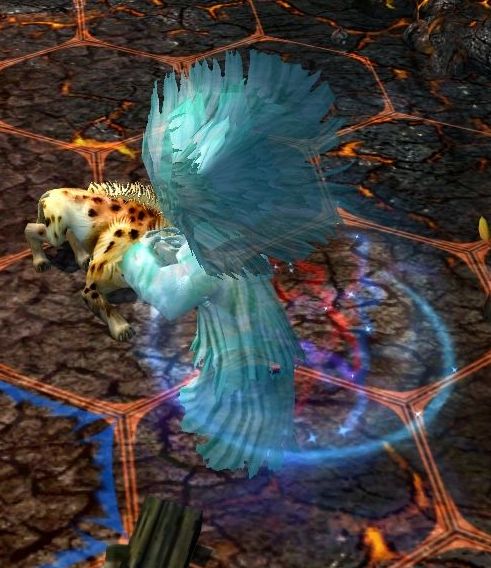 Out of control units can still attack enemies - it's just random as to whether they decide to do so. They will also still retaliate as normal. Here, the wild Cursed Ghosts destroy the last few Hyenas. 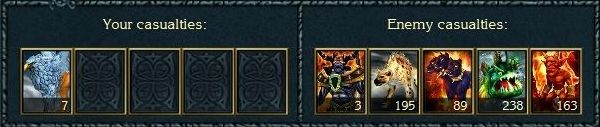 Nothing we can do about losing these Griffins, the Archdemons did not give us a chance. 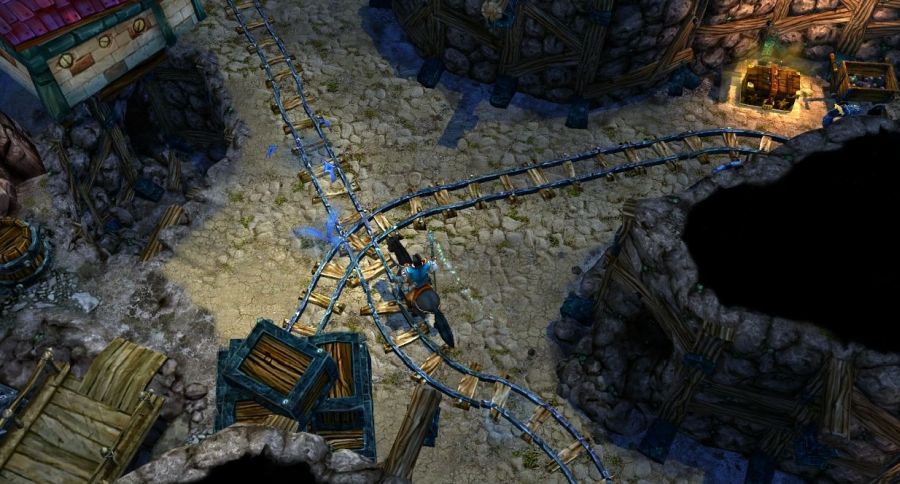 Past the metal grated floor, the tunnel cools down again. We are going to head straight for the castle, sneaking past enemies (you can barely see a Royal Snake in the upper right).  Bogacho Castle sits perched on a ridge above the mine floor. The castle has been overrun with demons, but at least there is no enemy commander here to rally them to defend their prize. 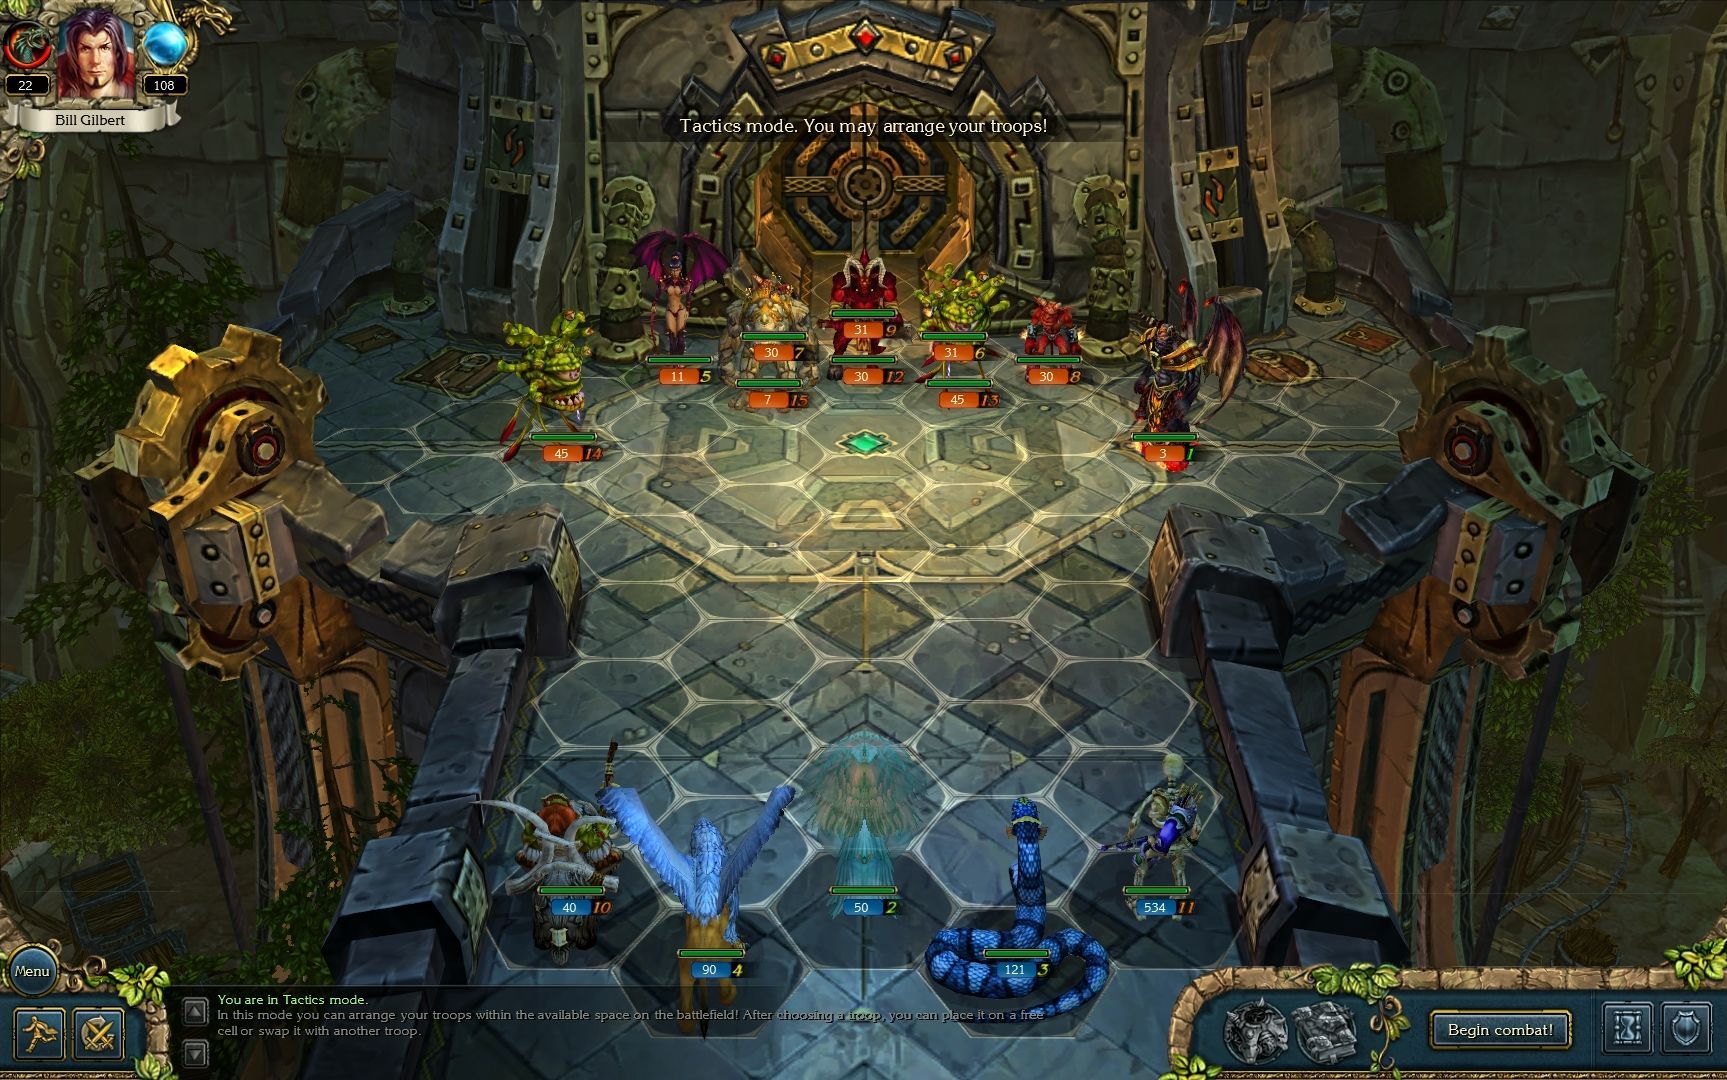 The demons have brought in a number of cave-dwellers to support their army.  Once again the Archdemons teleport into our lines, striking down more than 60 Skeleton Archers in one blow. 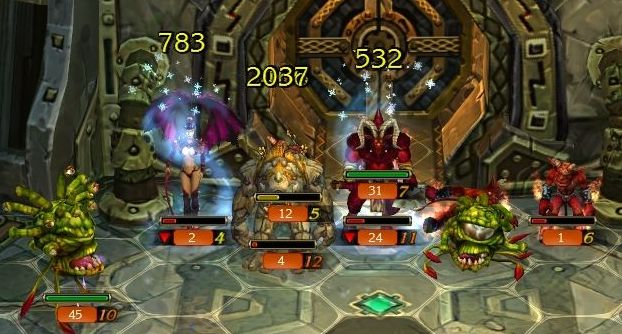 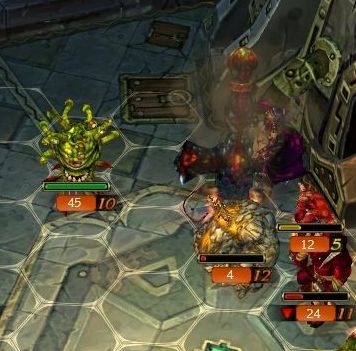 Once we can act, Ice Snakes rip through the enemy troops. I follow it up with a Smashing Sword to finish off the Demoness stack. In the future, we will see why you don't want to leave them alive if possible. 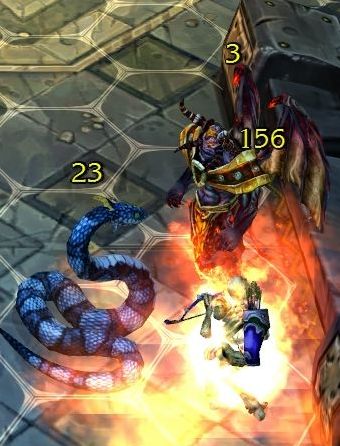 The Skeleton Archers continue to suffer blow after blow, as each Imp stack unleashes a fireball at them. The Imp (and it's slightly more powerful cousin, the Scoffer Imp) is the lowest-tier demon, but still very dangerous. Both varieties have the ability to hurl small globes of fire that explode on contact, and they can do this up to three times during combat. They aren't helpless when out of ammo, though. Both types have good speed and initiative, and have the unique ability of Strike and Return. When an Imp attack in melee, it will hit with no retaliation allowed, and then return immediately to where it began. 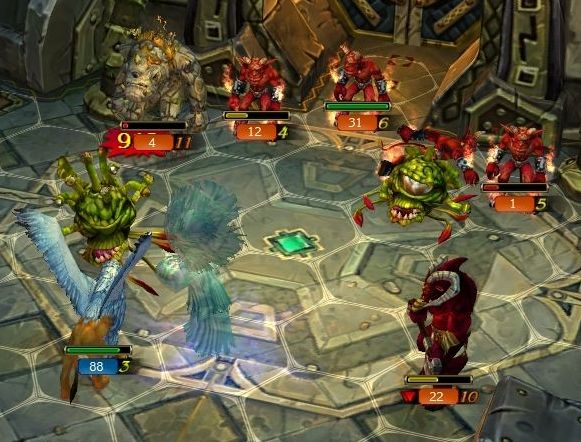 The Imp numbers aren't very large here, at least. My fast units move up through the midfield and deal with these Beholders before moving on to the back. 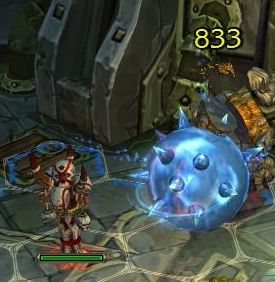 An Ice Ball rolls in all the way across the field to crumble the Cyclops, 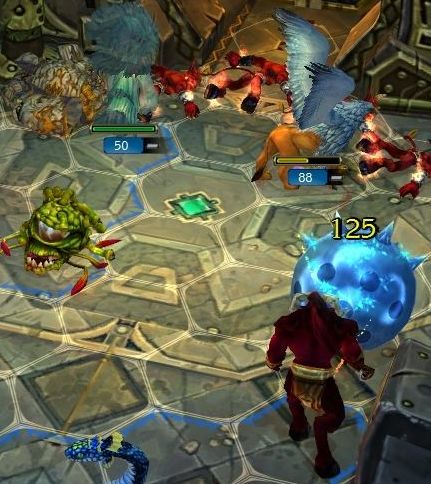 The Imps don't last long against actual melee fighters, and the Ice Ball even manages to roll down to distract the last stack of Demons. 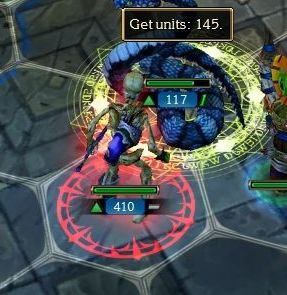 Before the battle ends, we want to replenish these Skeleton Archers. The stack I am using represents most of the available Skeleton Archers in the entire world so far. We can't use Resurrect on them, but Sacrifice still works just fine. Unfortunately, we can't Sacrifice my endless Cursed Ghosts, since they have no life-force to transfer. Once again the Griffins serve as the sacrificial offering. 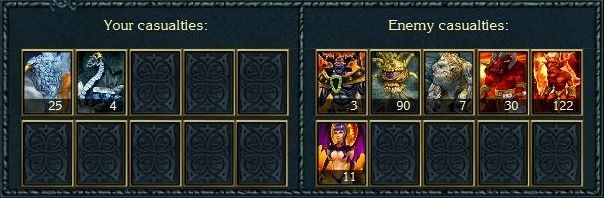 Bogacho Castle is cleared of the remaining demonic presence. 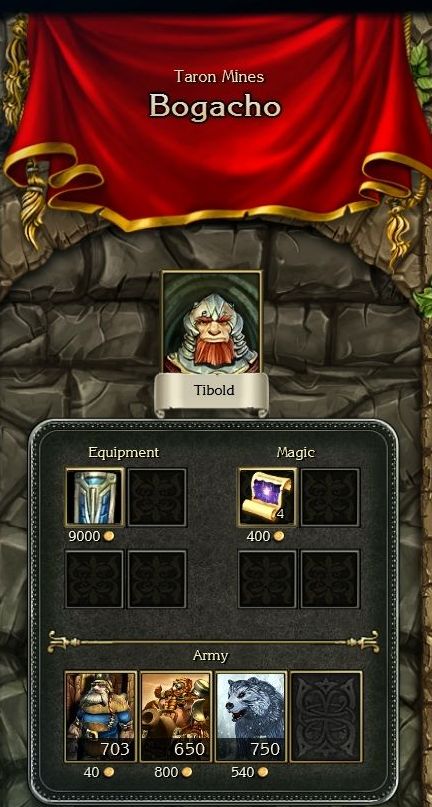 Torn's son seems to be alive and well, at least. He has even more Cannoneers for sale, if the 1800+ from Taron wasn't enough. He does have a nice shield for sale - the Large Shield provides +3 Defense. I go ahead and pick it up, just in case I want to use it later. 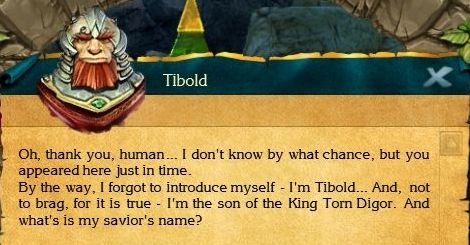 : My name is Bill Gilbert. I'm here on your father's orders, to save you from captivity! : My name is Bill Gilbert. I'm here on your father's orders, to save you from captivity! : You say, my father has sent you? Well, he chose the right person! I've seen how your troops fought the demons! It was great! Eh, the castle has withstood two storms... How much time and energy it will take to put it back in order!: I wish you success in repairing the castle. Good luck!: Hey human, wait a minute! I'd like to repay your kindness. But I really don't know what can I offer you. You know, our gold will be spent on castle repairs. However, wait here! [The dwarf went out but returned at once, holding in his hands a strange sand glass, which twinkles with a spectral light.] Here, take it! I don't know what this thing is, but it is no ordinary trinket, that's for sure. We found it in Demons Land during one of our assaults into their world.: Thanks! : You say, my father has sent you? Well, he chose the right person! I've seen how your troops fought the demons! It was great! Eh, the castle has withstood two storms... How much time and energy it will take to put it back in order!: I wish you success in repairing the castle. Good luck!: Hey human, wait a minute! I'd like to repay your kindness. But I really don't know what can I offer you. You know, our gold will be spent on castle repairs. However, wait here! [The dwarf went out but returned at once, holding in his hands a strange sand glass, which twinkles with a spectral light.] Here, take it! I don't know what this thing is, but it is no ordinary trinket, that's for sure. We found it in Demons Land during one of our assaults into their world.: Thanks!Suddenly, a voice like the slamming of a coffin's lid booms out... 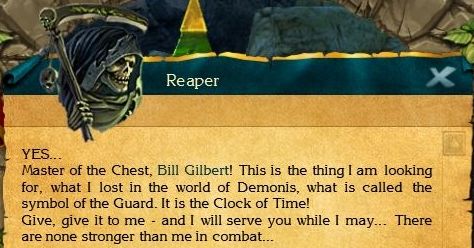 : Ok, Guard. I give this Clock to you! Remember your words and serve me faithfully. : Ok, Guard. I give this Clock to you! Remember your words and serve me faithfully.Even Death itself is now under our control. This is why I bee-lined for Bogacho. We now have all the Spirits unlocked and ready to go, but we will have to wait a bit before we see the Reaper in action. Before we report back to the king, we can talk with Tibold again. : Hello friend. I could use your help.: What's happened?: Just look at the castle, how the Demons have damaged it. The castle needs serious repair, but I have no money. Could you help me? Of course, I'd find some way to reward you! I'll tell you a secret. Our engineers in Mehgard invented this thing recently - you'll fall off your horse when you hear about it. It is called "The First Cold Pseudomagical Substance Synthesizer"!: Can you say it in plain language?: They wanted to create a Philosophers' Stone, to transform common metals into gold. However, everything went the wrong way. Basically, if you put gold into this thing, it huffs and puffs and turns the gold into Magic Crystals or Talent Runes. I could create something for you with this thing. And a part of the gold I'll take for the castle repair.: And how much gold do you need?: Well let's look, everything is written here: "Cold synthesis of a magic substance of precious metals. The percent of transformation is variable, material consumption increasing with every use. The current synthesis parameters:"- 1 Magic Crystal: 100,000 gold. - 1 Might Rune: 1000,000 gold. - 1 Mind Rune: 100,000 gold. - 1 Magic Rune: 100,000 gold. We've found the money sink for the game. Tibold will use his machine to transform our gold into whatever Runes/Crystals we want. The best use for the machine is to grab that last rune or two for a skill when you don't want to wait for the next level or to find out in the field. Each category increases in price separately after purchasing. For now, I grab 1 Magic Rune for 100K (for reasons shown next time). The price for the next Magic Rune increases to 200K. Before we head back, let's talk to Tibold one last time. : Good day to you, my savior. What leads you to my castle, do you wish to test our Synthesizer in practice, or have you just come to take a rest?: I wanted to know how were you captured by demons.: One of the guards, in his stupidity, became acquainted with a nice girl in the tavern. She asked him to show her how night sentries change the guard! It turns out she was a demoness, of course. She enchanted all the guards at once and opened the gates wide to the other demons! They fell upon the rest of the guards immediately, and seized control of the castle. I didn't even have time to get out of my bed before I was captured.: Smart move!Alright, that exhausts everything here. Back in Taron Castle... : So, Bill Gilbert, do you have any news about my son?: Yes, I have, and very good news! I've managed to knock demons out of the castle and liberate your son.: Now I see that Mark is still a good judge of character, and he is served by the best of the best! I will certainly sign the agreement. I am grateful to you, Bill Gilbert, both as a king and as a father. I give you my personal hammer! But I must warn you. My spies have informed me that there is a commotion in King Mark's castle. Something precious seems to be missing. I would not be surprised if these are intrigues of guileful orcs!: A commotion in the castle? Something precious was missing?! I shall leave immediately!: I'll help you to get home. In the name of the alliance between Kordar and Darion I will resume air communication between our countries! Talk to our pilot, Lestag. He'll bring you to Mark's castle.: Thank you, Your Majesty!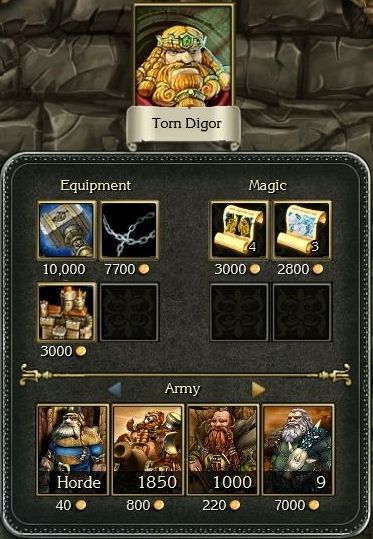 With the rescue and the alliance signed, many more dwarven troops are made available if we want them (there are 800 Alchemists in stock you can't see here as well), including that key Horde tag for Miners. If you want to do an all-Dwarf army, here's where you can truly get started. 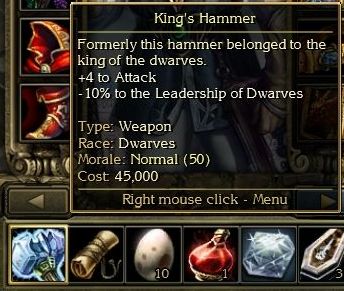 As the King said, he gives us his personal hammer as thanks for rescuing his son. The King's Hammer is a key weapon if you are going for that dwarf army. Great Attack bonus, and the -10% Leadership cost is huge. However, be careful of using it in this area. The item's Morale goes up when you use dwarven units (a small amount if you have a mixed force, or a greater amount if you go all-dwarf). However, it plummets like a rock if you are fighting against armies containing dwarven units - which is basically all of them in this region. 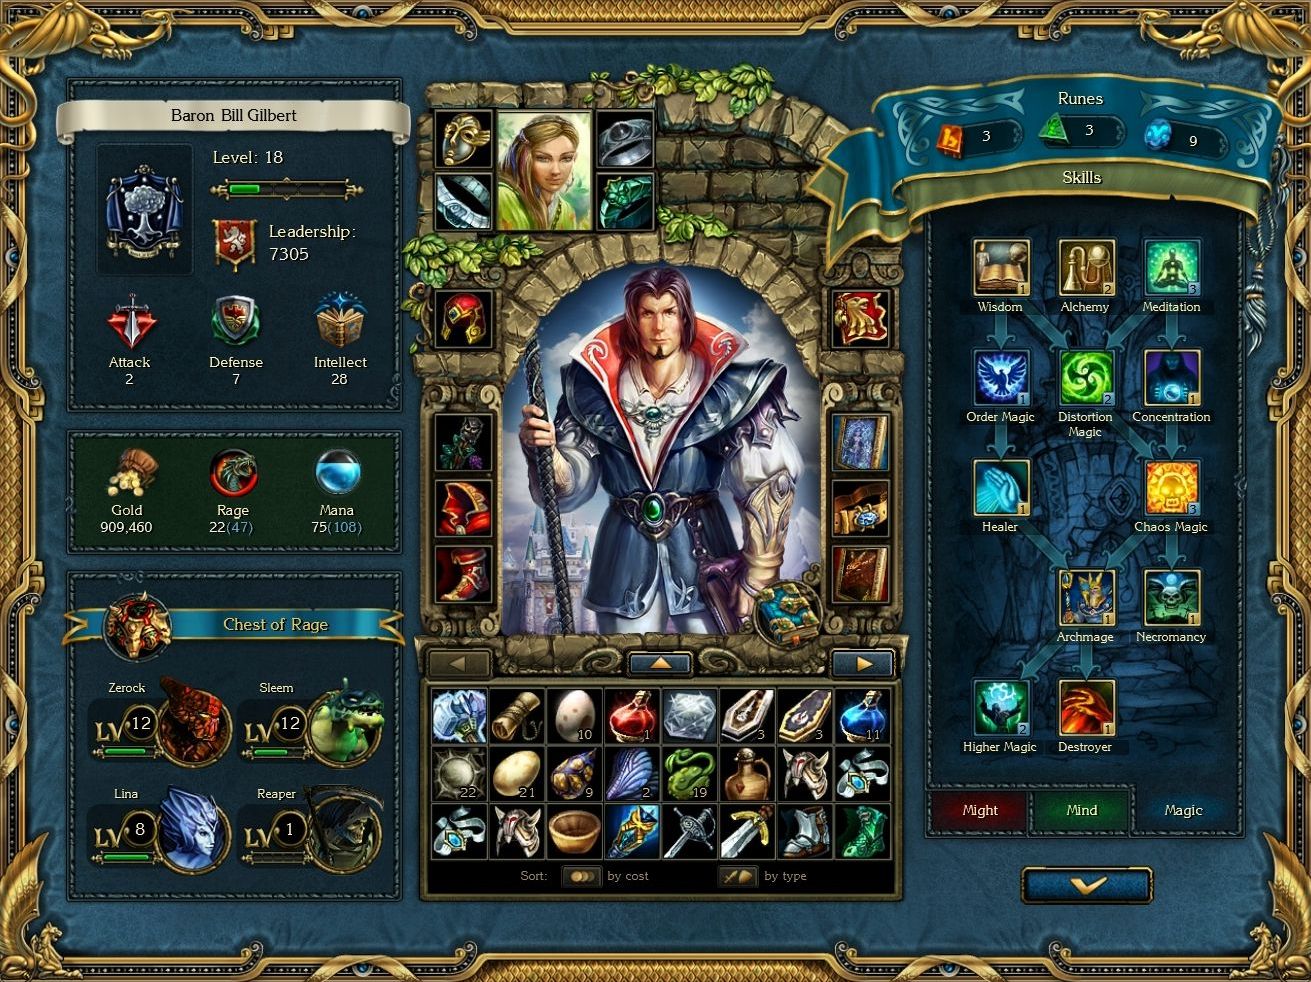 Next time, we will head back to Darion to deliver the signed peace treaty and see what's going on with that commotion. ---------------------------------- Bonus Material Learning Lore Let's find out from King Digor more about his kingdom and the war with the demons. : Good day, Bill Gilbert. What brings you to ancient Taron?: Creiston Mines. I'd like to know more about them.: Creiston Mines is a good and rich place... There's enough ore for hundreds of years of development. Christaline, iron, semurite, kelgorite, mithril... The mines have always belonged to Darion, but humans don't need anything except emeralds, a gemstone which we use but rarely. Thus my great grandfather arranged with your king that for rent and a half of all extracted emeralds, dwarves would be allowed to use Creiston Mines. Thereafter we pay to mine, and mine to pay. Everything was ok until your damned baron interfered...: I have some more questions, Your Majesty.: Yes, what else do you want to know, human>: I would like to know more about the war with the demons...: Demons came to Kordar from the Magic Portal, which was created by our mages... In the distant past we had mages, ah yes. That time we managed to stop the demons and lock the portal, but we paid a heavy price for it! For some centuries we looked at the locked portal with fear, but eventually we forgot about it for several thousands of years. We thought that we were perfectly free from the invaders from Demonis, but... Recently orcs came to us, and we haven't found a common language with them. They stole the key and got to the Portal, and opened it again.: Well, it's obvious. Demons again, war again... Why don't you just close the Portal again?: When damned orcs opened the portal, the demons killed a half of them at once, and took the Portal Key. That key can only be made once, together with the portal. Our engineers propose to make an identical matrix of our old portal, in order to make the new key - and that's not easy; it could take years, especially now that our drafts of the old portal have been stolen by orcs.: Tell me about the Portal that leads to Demonis...: As for the portal... That was created in those ancient times when dwarves primarily used magic, and technology and science were the pursuits of lonely dwarven experimenters... I hope my words are not too strange? So, our masters of magic created the first - and the last - Magic Portal. It was truly a great event! The best mages came for the opening, we had organized a festival... But that happy day turned into a day of mourning, and nearly heralded the extinction of our people... It turned out that this portal led to Demonis, the Land of the Demons... You must know what happened in Darion during the reign of King Kerus, right? The same happened here: demons poured out of the portal, and dwarven race was nearly destroyed...: So, as far as I understand, you were able to lock the Portal?: Of course, we tried to destroy it first, but... if a dwarf makes something, it's built for ever. Were it not for our engineers, who were able to lock the Portal with their intricate devices, Kordar would have become no more than burnt, lifeless caves. Demons easily disposed of our magic, but we found they could not resist our mechanical devices, and so we managed to lock the Portal. Long after that, we were still hunting demons in the caves, until the last one was killed. The capital was then moved into Taron, and the place where the Portal was situated was declared forbidden. And magic was forbidden as well. Many of our mages were killed by demons, and technics proved that it is stronger than spells...: So, how is it to live without magic?: Take a look around! Technics is the engine of progress... Steam hammers, dirigibles, elevators, self-shooting arbalests, cannons... And what about steam locomotives and lightning cans - have you seen them? And book-typing factories and weaving-mills? That is true power! When magic was prohibited, our king gathered all the technicians, alchemists and engineers in the castle and declared Kordar to be the world's greatest stronghold for scientific and mechanical progress! He gave the whole island of Mehgard to scientists and technicians, that they would carry out their research there, and beat the drum of dwarven progress. And they were given everything they needed - money, equipment, and rare elements necessary for their experiments... Our youth became especially enthusiastic about science, and young dwarves came to Mehgard from all the corners of the country for studying.: I have to go. See you!Marking the Map Taron Mines 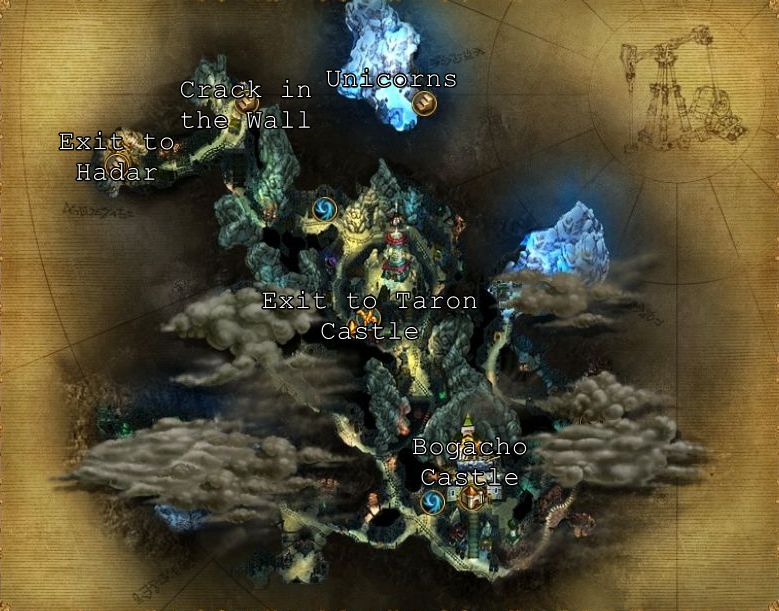 Ardan's Peaks 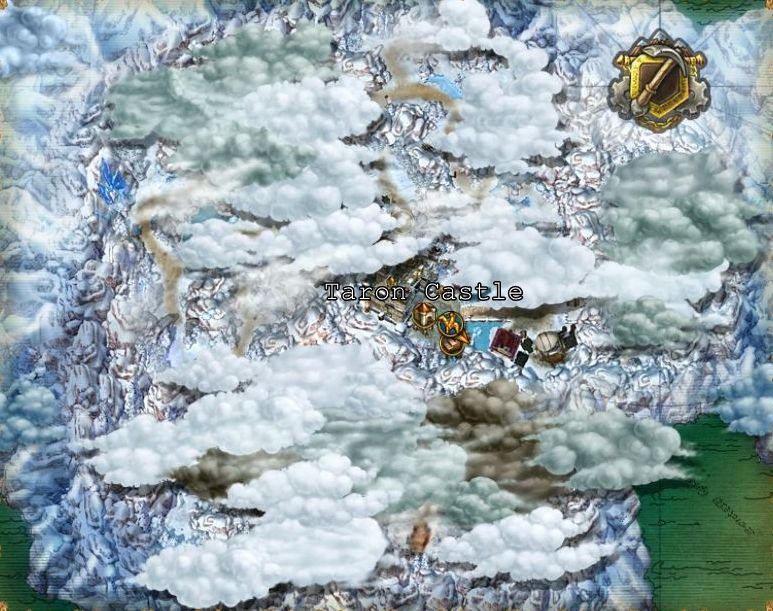 Talkin' 'bout Troops Imp 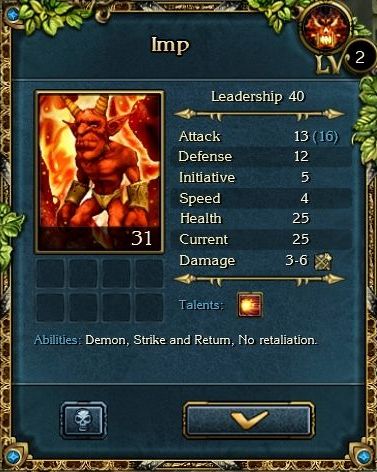 Resistances: 50% Fire Critical Hit %: 12 Defense Bonus: 3 Talents  Fireball: Throws a Fireball, which hits the target and all neighboring troops, inflicting 3-6 points of Fire Damage. Charges: 3. Fireball: Throws a Fireball, which hits the target and all neighboring troops, inflicting 3-6 points of Fire Damage. Charges: 3.Abilites: Demon Strike and Return: Allows this creature to return to its starting position after attacking, before the enemy has an opportunity to retaliate. No retaliation Gully's opinion: The Imp is quite the strong "archer". With 3 highly damaging Fireballs, it can do quite a bit of damage to any clumped-up troops. It is also fairly strong in melee, with the Strike and Return/No Retaliation combining to keep it out of danger. Their melee damage isn't fantastic, but it's decent enough to not be a weakness. The Imp also comes with good Initiative and Speed, so it is very mobile. The main downside is a slightly low amount of Health, but the ranged attacks and the other abilities make it tougher than it seems. Great troop all around - only issue is that you need Tolerance 2 to use with non-demons. Fighting them: Use the Tactics skill to keep your troops from being bunched, especially around your archer stacks. Spells do great damage, and they aren't that strong when a good melee unit gets in their face. Skills Shown Tolerance Mind, Tier 4 With this skill, troops can tolerate the presence of undead/demons in the army without any decrease to their Morale. Prerequisites: Trophies, Diplomacy  Level 1: Troops can tolerate the presence of undead. Cost: 2/8/2 Level 1: Troops can tolerate the presence of undead. Cost: 2/8/2 Level 2: Troops can tolerate the presence of undead and demons. Cost: 2/8/2 Level 2: Troops can tolerate the presence of undead and demons. Cost: 2/8/2Gully's opinion: Tolerance is an interesting skill that really opens the possible army combinations way up. Both Undead and Demons have a number of quite powerful troops in their ranks. Whether or not you want to use them is the obvious question when deciding to buy this skill. Personally, I normally don't bother. This is mostly because these troops are often fairly rare or have poor selection until the late game - especially Demons - and I can use the runes elsewhere. But Undead units can be powerful, particularly for Warriors who invest in the Dark Commander skill, while Demons with their Fire resistance are particularly good at fighting dragons in the late game. I'm not going to put a recommended level to buy, since it is entirely based on your own troop preferences. Items Identified Large Shield  Description: A large metal shield. Effects: +3 to Defense Type: Shield Race: Neutral Cost: 9000 Info: A large rectangular shield protects one from sword, arrow, and spear. Skilled warriors, expert in good defense, often use such shields. King's Hammer  Description: Formerly this hammer belonged to the king of the dwarves. Effects: +4 to Attack, -10% to the Leadership of Dwarves Type: Weapon Race: Dwarves Morale: Normal (50) Cost: 45000 Info: Formerly this hammer belonged to the king of the dwarves, Torn Digor. He presented this hammer to you as a gift, in token of his respect. All dwarves know this hammer well, and will readily join the troops of its owner. Having been forged by one of the dwarven kings, the Hammer despises all other races and prefers to go into combat alongside dwarves. Peace Treaty (Signed)  Description: The peace treaty with the Kordar, signed by King Mark and King Torn Digor. Type: Quest Info: The peace treaty between Kordar and Darion, signed by the kings of the humans and dwarves.
|
|
#
?
Oct 28, 2017 21:55
|
|
|
Level 2 tolerance as soon as possible please! The good and just treasure seeker needs his huge stacks of demons to more easily find gold and valuables. I had no idea skeleton archers were that good. Maybe I should have used them myself. Undead are a lot of fun too.
|
|
#
?
Oct 28, 2017 23:11
|
|
|
You need to bless cannoneers to make the most of salvo vs towers, I can't remember the number of times it bumped up a 0-1 tower prediction to a sure kill. it may not be an exciting skill (relegated to "that thing priests can cast!  ") but mass bless is decent, just not when the enemy can spam divine armour. I think inquisitors were buffed in the next game that their holy rage spell also bestows bless. ") but mass bless is decent, just not when the enemy can spam divine armour. I think inquisitors were buffed in the next game that their holy rage spell also bestows bless.I wonder if you'll have enough rage for Reaper's bigger skills. Poil posted:Level 2 tolerance as soon as possible please! The good and just treasure seeker needs his huge stacks of demons to more easily find gold and valuables. It's largely due to their large stack size, hordes have high damage output but lose effectiveness extremely quickly. For the AI the player is going to debuff or burst them down and for players you'll get proportionately more spells thrown at you. Having to replenish them (if not commonly available) can be a chore too.
|
|
#
?
Oct 29, 2017 01:00
|
|
|
Oof, backstabbed by human treachery at the worst time. Poor dwarves.
|
|
#
?
Oct 29, 2017 04:37
|
|
|
Poil posted:Level 2 tolerance as soon as possible please! The good and just treasure seeker needs his huge stacks of demons to more easily find gold and valuables. We shall see about Tolerance 2. It won't be very useful for a long time, though - we won't be seeing demons for hire much until later. Delacroix posted:You need to bless cannoneers to make the most of salvo vs towers, I can't remember the number of times it bumped up a 0-1 tower prediction to a sure kill. it may not be an exciting skill (relegated to "that thing priests can cast! That makes sense for non-Mage characters, they need the help during Keeper fights. But mages can usually do more damage by using direct spells on the towers themselves. Mass Bless is great, and one of the best spells for Level 3 Order. I don't think we will see it this run, though - I don't think I'll have the runes for it. The Inquisitors Holy Rage Talent does actually have the same property in this game as well - it adds Rage to your pool, blesses the target, and makes it do 1.5x damage to Undead. As for the Reaper's skills, I have enough Rage for them all currently, I will just need to be careful how I level him. We likely won't get to see him in full power mode due to Rage limitations. Poil posted:I had no idea skeleton archers were that good. Maybe I should have used them myself. Undead are a lot of fun too. Delacroix posted:It's largely due to their large stack size, hordes have high damage output but lose effectiveness extremely quickly. For the AI the player is going to debuff or burst them down and for players you'll get proportionately more spells thrown at you. Having to replenish them (if not commonly available) can be a chore too. Yeah, it was a surprise how effective they were to me the first time I used them. Delacroix is right that most horde units have great damage potential for their cost. However, melee types die so fast due to retaliation that I find very cheap melee units not that great (things like Peasants and so forth). But ranged units are a different story - though the AI does love to target them. The Sacrifice spell I find is key for maintaining their stocks. Right now I can kill 20 Griffins to resurrect 145 Skeleton Archers, and just carry loads of extra Griffins in my one Reserve slot. Glazius posted:Oof, backstabbed by human treachery at the worst time. Poor dwarves. At least they are getting a pretty good deal out of the treaty - compensation for the losses, free rent in Creiston Mines for 100 years, mining rights, military assistance against the demons, extra food/wood trade, and to top it off, liberation of his son's castle.
|
|
#
?
Oct 29, 2017 13:25
|
|
|
Especially considering the most likely candidate for who is going to be the "military assistance" and have to fight a ton of demons.
|
|
#
?
Oct 29, 2017 14:53
|
|
|
Update 42 - Earl's Escort Service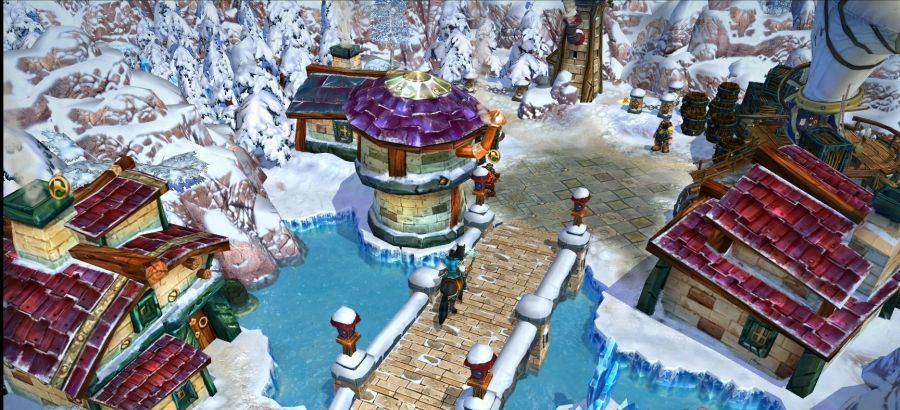 No time for episode introduction or for enjoying the views of the city here, there is an emergency supposedly happening back in Darion! 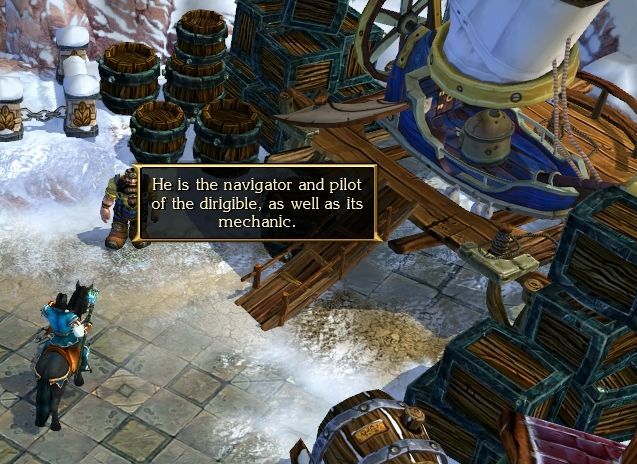 Lucky for us, there is another dirigible here in the dwarven capital. 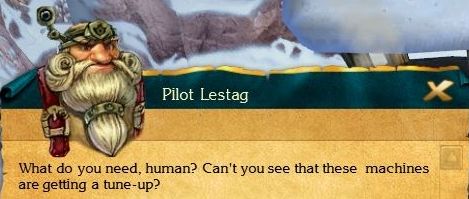 : I need to get to Darion! : I need to get to Darion! : I haven't flown to Kronberg in a long time... I'm glad that there is peace again between our states. I can visit my friend Tregum at last.: Come on, let's go! : I haven't flown to Kronberg in a long time... I'm glad that there is peace again between our states. I can visit my friend Tregum at last.: Come on, let's go!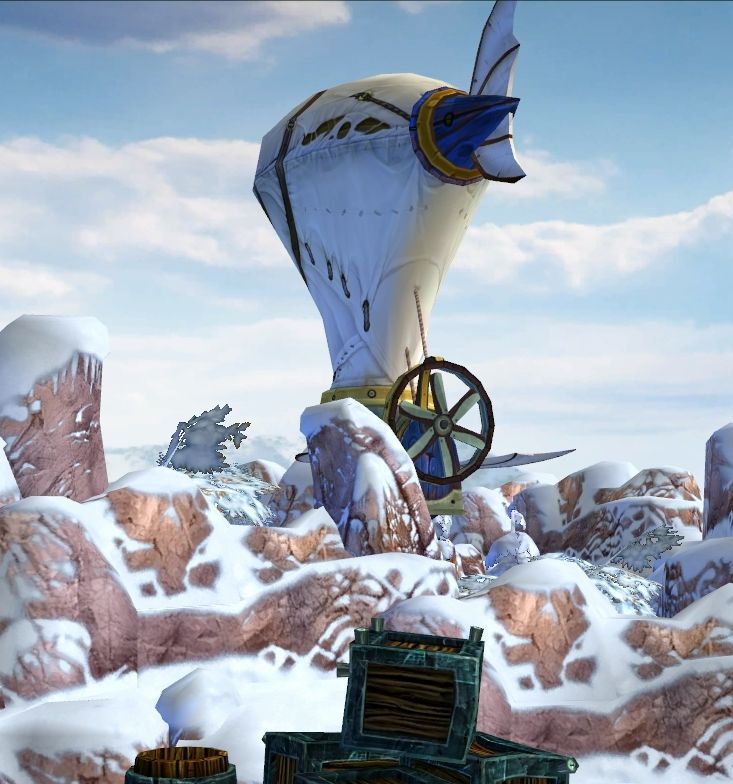 With that, we fly away through the icy air back towards Darion. 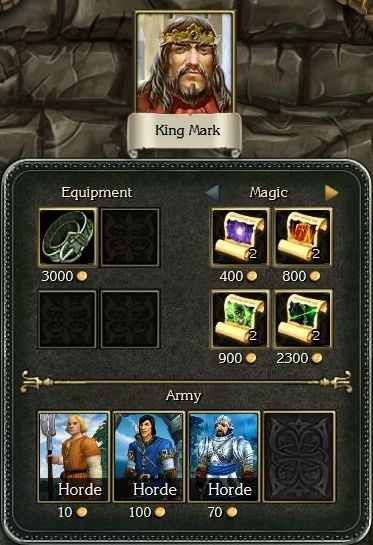 Landing in the capital, we rush into the King's castle. He is sitting forlorn and alone in the throne room.  : So, Bill Gilbert, did you bring the peace treaty? Or maybe you have more important concerns than concluding the alliance between our states?: Yes, I've brought the peace treaty, signed by Torn Digor.: Unfortunately, my friend, even such happy news cannot dispel my grief. Nevertheless, your service is of great importance and significance to the kingdom's destiny. And the reward shall be well worth the effort. Knight Bill Gilbert, kneel to your king. For your faithful service and invaluable help to the whole of Darion, I, King Mark Leonar the Second, confer upon you the title Earl. (Reward: 8000 Gold, 1100 Experience): Thank you, this is truly an honor, Your Majesty!: We shall issue an order about fulfilling all the dwarven claims immediately! An alliance with Torn Digor and his dwarves is of the utmost urgency, and indeed we must assist the mountain nation in overcoming the Demon invasion. But now I must give you an even more important errand. It's clearly impossible to find a better searcher than you, and there has been a loss more precious to me than all the treasures of the world! Nevertheless, I do not give you this as an order, as your king. Instead, I apply for your help as an inconsolable father... I ask you not as a faithful servant, but as a true friend...: I don't understand, Your Majesty...: My only daughter and heiress, little Amelie, given us by the grace of gods... She... she has been kidnapped! The elves, those rascals, sent us ambassadors with an alleged purpose of resolving some questions about Islands of Freedom, which had been a stumbling block in Darion-Ellinia relations for a long time... Three years ago, Governor Thompson sold the Eastern Islands to the elves, in order that he might not be entirely under the power of Darion. Of course we couldn't recognize this deal, because the islands are a part of our territory!: So why did the elven ambassadors come?: They Came under the pretenses of canceling the treaty with the governor, and by our consent to return those islands to Darion, to which they have always belonged and always will! But in reality they had a quite another purpose! Under cover of the night, these guileful "ambassadors" put our guards into hypnotic slumber, entered my daughter's room and kidnapped Amelie! While the guards still slept, they escaped, leaving upon their ship to none knows where.: I see. It's truly heartbreaking, Your Majesty...: I don't know what to think of it. I surely can't imagine that Queen Violetta could dare to blackmail us. The elves have always been noble allies. Go to Ellinia, to Daloer, and talk to Violetta. Find out the reason behind this cruel act. And, I beg you, Bill Gilbert, bring me back my daughter. I have commissioned a ship, the "Sea Swallow" - it awaits you in the port. : So, Bill Gilbert, did you bring the peace treaty? Or maybe you have more important concerns than concluding the alliance between our states?: Yes, I've brought the peace treaty, signed by Torn Digor.: Unfortunately, my friend, even such happy news cannot dispel my grief. Nevertheless, your service is of great importance and significance to the kingdom's destiny. And the reward shall be well worth the effort. Knight Bill Gilbert, kneel to your king. For your faithful service and invaluable help to the whole of Darion, I, King Mark Leonar the Second, confer upon you the title Earl. (Reward: 8000 Gold, 1100 Experience): Thank you, this is truly an honor, Your Majesty!: We shall issue an order about fulfilling all the dwarven claims immediately! An alliance with Torn Digor and his dwarves is of the utmost urgency, and indeed we must assist the mountain nation in overcoming the Demon invasion. But now I must give you an even more important errand. It's clearly impossible to find a better searcher than you, and there has been a loss more precious to me than all the treasures of the world! Nevertheless, I do not give you this as an order, as your king. Instead, I apply for your help as an inconsolable father... I ask you not as a faithful servant, but as a true friend...: I don't understand, Your Majesty...: My only daughter and heiress, little Amelie, given us by the grace of gods... She... she has been kidnapped! The elves, those rascals, sent us ambassadors with an alleged purpose of resolving some questions about Islands of Freedom, which had been a stumbling block in Darion-Ellinia relations for a long time... Three years ago, Governor Thompson sold the Eastern Islands to the elves, in order that he might not be entirely under the power of Darion. Of course we couldn't recognize this deal, because the islands are a part of our territory!: So why did the elven ambassadors come?: They Came under the pretenses of canceling the treaty with the governor, and by our consent to return those islands to Darion, to which they have always belonged and always will! But in reality they had a quite another purpose! Under cover of the night, these guileful "ambassadors" put our guards into hypnotic slumber, entered my daughter's room and kidnapped Amelie! While the guards still slept, they escaped, leaving upon their ship to none knows where.: I see. It's truly heartbreaking, Your Majesty...: I don't know what to think of it. I surely can't imagine that Queen Violetta could dare to blackmail us. The elves have always been noble allies. Go to Ellinia, to Daloer, and talk to Violetta. Find out the reason behind this cruel act. And, I beg you, Bill Gilbert, bring me back my daughter. I have commissioned a ship, the "Sea Swallow" - it awaits you in the port.It is hard to feel proud when a tragedy has struck, but our promotion to the rank of Earl is more than just a title. As before, the title comes with a large boost to our authority, this time to the tune of 1500 Leadership! 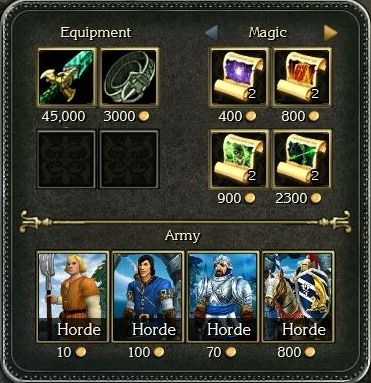 In addition, the King has given us leave to hire far more of the royal army if we want to. Of importance here is the addition of heavy cavalry in the form of the Horsemen. This unit combines a pretty sturdy frame with good speed, although it is a bit underwhelming for the price. Still, I enjoy using these guys, especially since we have access to infinite numbers of them. For now, they are going to replace the Cursed Ghosts. The Ghosts were fun, but the danger of going out of control makes them annoying to use. 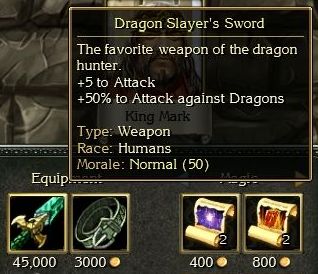 Finally, the royal armory is opened and we can buy this fairly incredible sword. Even though I am a Mage, I will buy this (though I won't be equipping it yet). If we run into dragon-centric armies that we have trouble with, this should go a long way towards helping out.  Last update, we bought one Magic Rune from Bogacho castle in exchange for 100K gold. This rune was the last one needed to upgrade Distortion Magic to Level 3. We've been picking up so many Crystals in the mineral-rich dwarven lands, I think it is time to go on a bit of a shopping spree. Therefore, I go ahead and buy the following spell upgrades (crystal cost in parentheses): Magic Shackles 1->2 (1) Slow 2->3 (8) Geyser 1->3 (30) Teleport 1->2 (3) Stone Skin 1->3 (4) Pain Mirror 1->3 (4) (haven't seen this in action yet) Fireball 2->3 (6) Poison Skull 2->3 (3) Total crystals spent: 59 I keep back about 25 Crystals in case we find one of the remaining really good spells that I might want to upgrade immediately. There are a number of really good Level 3 Distortion upgrades that are just too expensive for my blood right now as well (like Haste 3 and Magic Shackles 3). 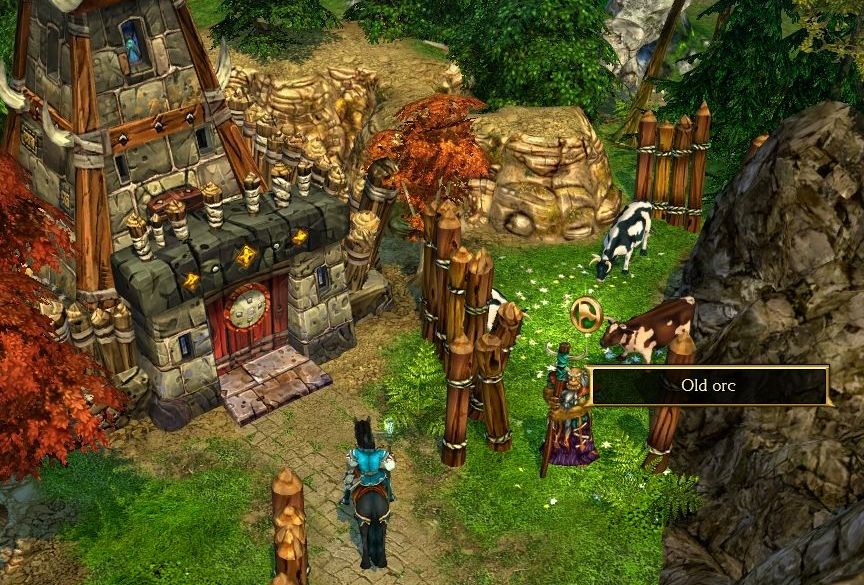 We had to head back to the Freedom Islands to restock on Shamans, but the old quest nose smells trouble. Until now, this old orc would refuse to talk to us. Now... 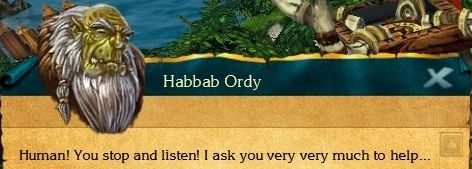 : What's the matter, old man? : What's the matter, old man? : I serve in embassy, become old not needed to nobody. All orcs go away fast, and me alone. Hands are weak - I cannot tear off heads to enemies. My teeth rotten - can't bite enemy on his leg. Who needs old orc like me? Stranger come and kick me out. I soon die at all, don't want to die on street. You help me bring back embassy! I want to die, where it's dry and warm.: And why did all the orcs suddenly leave?: Me not know. Nobody tell to old Habbab. Young orcs fast throw everything in boats and sail away. Look in embassy to me, in my home, kill bad people. I pay you.: Ok, I'll try to help you, old man. I hope there are not so many strangers in that embassy of yours. : I serve in embassy, become old not needed to nobody. All orcs go away fast, and me alone. Hands are weak - I cannot tear off heads to enemies. My teeth rotten - can't bite enemy on his leg. Who needs old orc like me? Stranger come and kick me out. I soon die at all, don't want to die on street. You help me bring back embassy! I want to die, where it's dry and warm.: And why did all the orcs suddenly leave?: Me not know. Nobody tell to old Habbab. Young orcs fast throw everything in boats and sail away. Look in embassy to me, in my home, kill bad people. I pay you.: Ok, I'll try to help you, old man. I hope there are not so many strangers in that embassy of yours.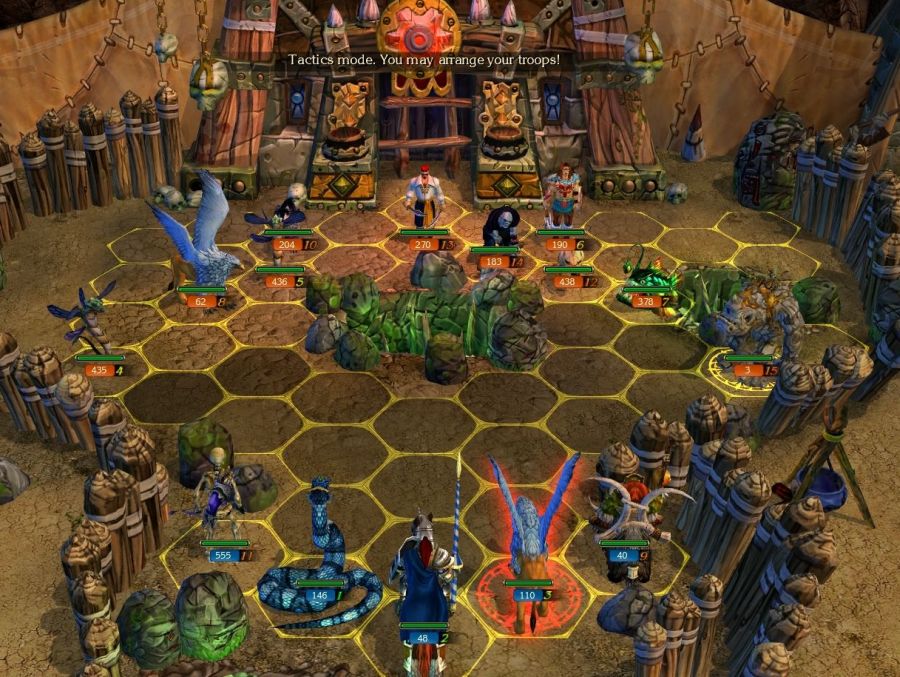 A ragtag band of pirates, undead, animals, insects, and even a few Cyclops is waiting for us in the embassy courtyard. They have no apparent leader, at least. 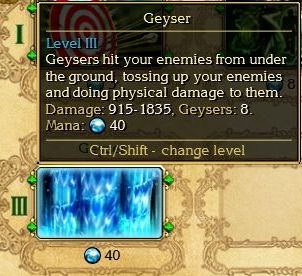 Half of the Crystals I spent in that spree was in getting Geyser to Level 3. This is one of the most expensive spells in the game, but that's for good reason. 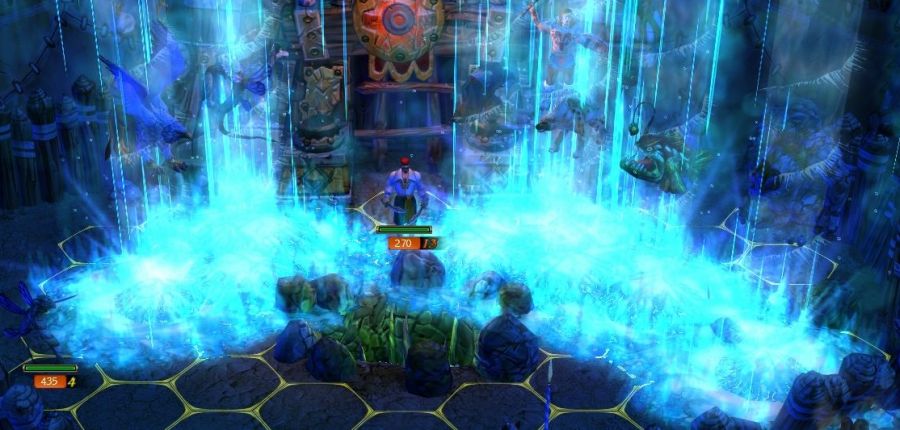 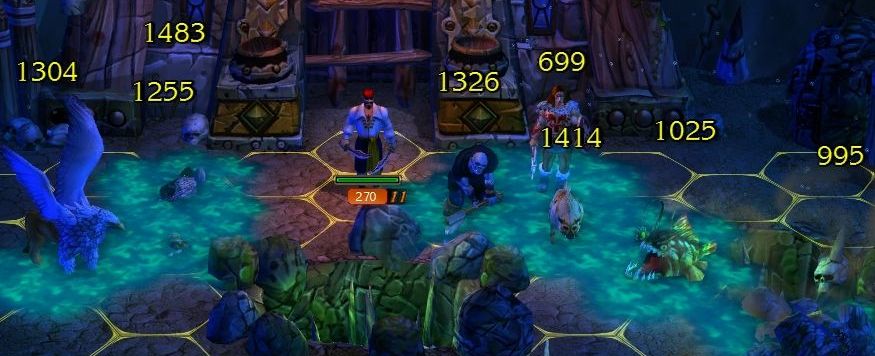 At Level 3, Geyser is an extremely destructive spell. Up until now, Ice Snake has been the most powerful spell I had, doing about 2900 to the central target, and about 600-1200 to adjacent targets. If it hits three enemies, we are talking about 4500ish total damage. For Geyser, it is doing upwards of 8x1400, or around 11000 damage (average). Even on a per-mana basis, that's better than the Ice Snake. It does have that downside of not being able to choose the targets. 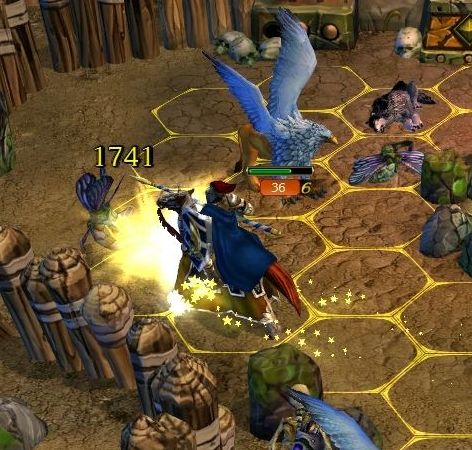 The Horsemen charge into action against the untouched Dragonflies here. The Horsemen do +10% damage for every empty hex they travel through on the way to their target (if in a straight line). 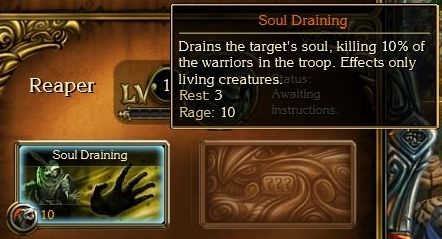 Wow, I nearly forgot... we have the services of the Reaper now! His starting ability, Soul Draining, is probably also the most iconic of his. 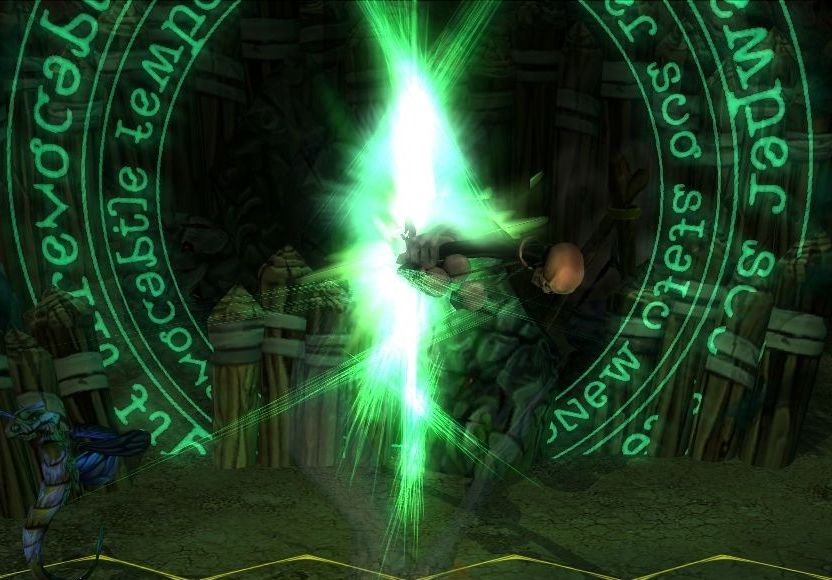 Reaper has by far the best entrance of any Spirit. He rips open an arcane portal in mid-air... 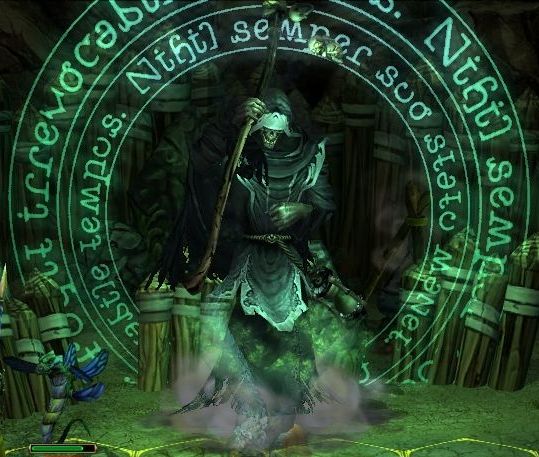 The Reaper steps into our reality, grinning as only a skeleton can. 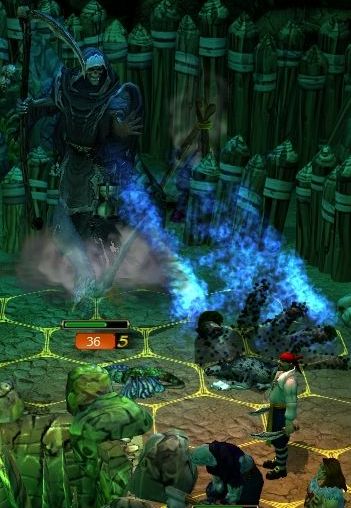 He stretches his hand forth, conjuring a phantasmic mirror image of it. (This attack always makes me think of the Wallmasters from Zelda) 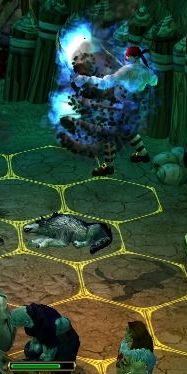 The astral fist closes on the target, lifting it into the air before dropping it back down, absent part of its lifeforce (10% for now). 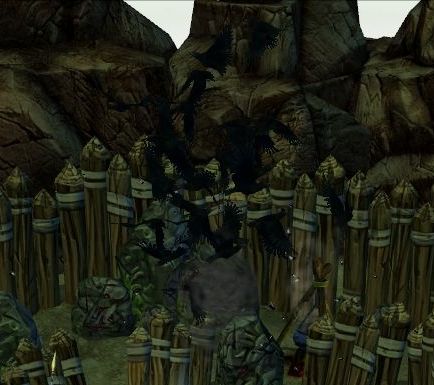 Sated, the Reaper transforms into a flock of ravens and disperses into nowhere. Theatrics aside, Draining Soul is an incredibly amazing Spirit ability, since it scales perfectly for the entire game. It starts out fairly cheap, but as you increase the power of it the price also rises very quickly. Still, you can easily get it to something like 30% killed for 30 Rage. The only restriction is that the target has to be living - no Undead, no Cyclops. Other than that, it cannot be resisted. 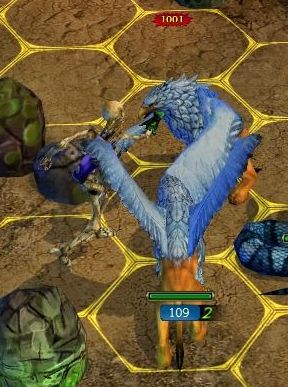 Meanwhile, my Skeleton Archers tell some Griffins to shove it using a mean right hook. 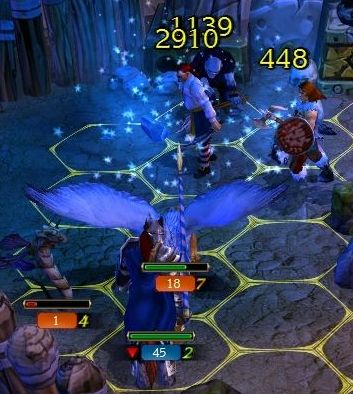 Despite the new power of the Geyser spell, Ice Snake will still likely be our main damage spell. We just can't afford to spend 40 Mana on a single spell very often, especially since I don't want to wait after every battle for my Mana to recharge. Geyser also loses its power as the number of enemy stacks falls below 8. 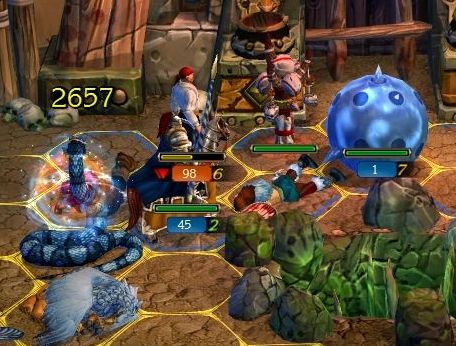 The Horsemen take a few losses moving through the enemy lines, but the Snakes follow them up for support. I like using the Horsemen and their infinite reinforcements to absorb enemy attention.  The enemy is cleared out from the Orc embassy. 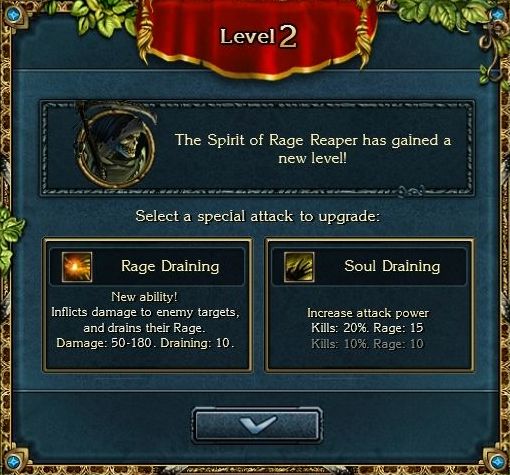 The Reaper's second ability is unlocked. Rage Draining is not as powerful, but will still be a staple in fights from here on out. 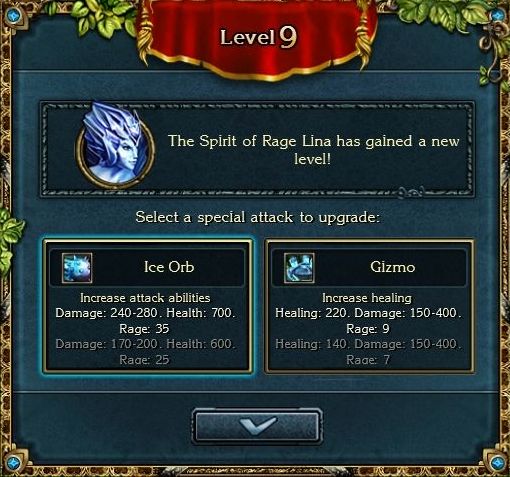 Lina also levels up in the fight. I would have preferred the next Ice Orb upgrade to be more defense-focused, but I will still take this boost over the useless additional Healing for Gizmo. 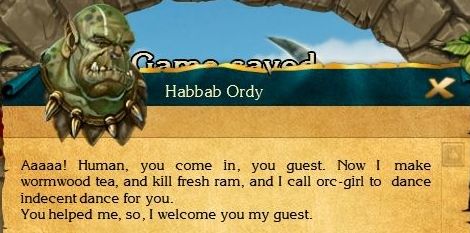 : Thank you, old orc. It's quite a nice life you have here. : Thank you, old orc. It's quite a nice life you have here.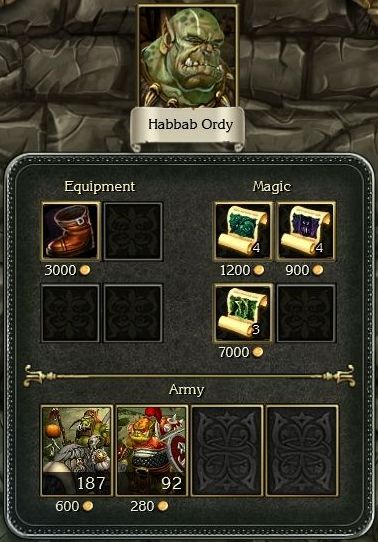 We regain access to the Shaman reserves, thankfully. A few extra spells and some Veteran Orcs are also available. For now, the Shamans are all we are going to take with us. Back in Darion, this is one of those points of the game in which we could bypass a lot of side content. We have access to the next continent, Ellinia, in order to continue the main quest. Of course, there is also a lot of content back in Kordar as well. Despite the apparent urgency of the princess' kidnapping, it's probably more natural for us to finish exploring the dwarven realm. We can talk to the dirigible pilot, Tregum, for a flight back to Kordar. This will also save a lot of time going back and forth if we need to restock. : I need to get to Kordar! : Easy. Now that we are at peace with the dwarves. Lestag brings me spare parts regularly. Get in and don't forget to fasten the seat belt...: Oh, I remember! Remember it's not the first time... : Easy. Now that we are at peace with the dwarves. Lestag brings me spare parts regularly. Get in and don't forget to fasten the seat belt...: Oh, I remember! Remember it's not the first time... We can take our time to explore the city now. First, this multi-story house sits right next to the castle of Taron.  : Nothing, dwarf, but maybe I can do something for you. Not for free, of course - gold is always useful. : Nothing, dwarf, but maybe I can do something for you. Not for free, of course - gold is always useful. : Help? Yes I do need some help. You've come just in time, human.: Tell me, how can I help you.: I had a wife, Fat Garmaha. And one sad day, she fell from the castle wall. She was a very strong, strong-willed woman - she was even known to strike me in anger. But what was really bad - she was greedy for money. She was always taking away every gold coin I earned and hiding it somewhere! Now she's dead, but I still don't know where she put my money. So, maybe you could go to the necromancer to invoke her spirit and ask where the money is.: Why don't you go there yourself?: I'm afraid of him. I was afraid of my wife, and I'm afraid of him as well. I'm a very... hesitant dwarf, because I drink little beer, I don't like it... The local necromancer's name is Baddyh. He lives to the west of Ardan's Peaks. So will you help me? Will you go to the seance?: Yes, it sounds interesting, I'll go! : Help? Yes I do need some help. You've come just in time, human.: Tell me, how can I help you.: I had a wife, Fat Garmaha. And one sad day, she fell from the castle wall. She was a very strong, strong-willed woman - she was even known to strike me in anger. But what was really bad - she was greedy for money. She was always taking away every gold coin I earned and hiding it somewhere! Now she's dead, but I still don't know where she put my money. So, maybe you could go to the necromancer to invoke her spirit and ask where the money is.: Why don't you go there yourself?: I'm afraid of him. I was afraid of my wife, and I'm afraid of him as well. I'm a very... hesitant dwarf, because I drink little beer, I don't like it... The local necromancer's name is Baddyh. He lives to the west of Ardan's Peaks. So will you help me? Will you go to the seance?: Yes, it sounds interesting, I'll go! Zhdack's quest for gold will have to wait, our own quest for gold is calling us to this important-seeming dwarf. 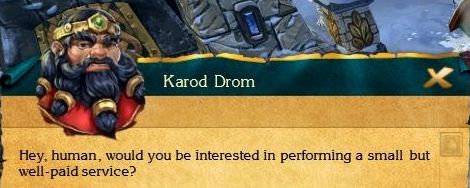 : Probably. I can listen to your offer at least. : Probably. I can listen to your offer at least. : I'm one of the eight most wealthy dwarves of Kordar. Everybody knows me here. I own a network of factories which specialize in producing three major components of the dwarven economy: bolts, buts and screws. No mechanism will work without them, a steam locomotive won't move, a boat won't sail, even a bore won't bore. You see?: So what do you want me for?: Are you kidding? I want you to work as my guard for a while. Oh, you thought that I needed you for your brains? Hah! Do you know my factory, "Three"? That's where I need to get. I see you are a skillful warrior and your troop looks very strong. I'm sure you can cope with robbers and thugs. Accompany me to the factory, but make sure not a single hair falls from my beard. And I'll pay you, have no fear. Then you won't have to wear those hand-me-down clothes anymore.: Yes, I'd like to get a nice outfit. I'll help you.: Fine! Don't worry, I always keep my word. I'll pay you off just as soon as we get to the factory!: Let's go then... : I'm one of the eight most wealthy dwarves of Kordar. Everybody knows me here. I own a network of factories which specialize in producing three major components of the dwarven economy: bolts, buts and screws. No mechanism will work without them, a steam locomotive won't move, a boat won't sail, even a bore won't bore. You see?: So what do you want me for?: Are you kidding? I want you to work as my guard for a while. Oh, you thought that I needed you for your brains? Hah! Do you know my factory, "Three"? That's where I need to get. I see you are a skillful warrior and your troop looks very strong. I'm sure you can cope with robbers and thugs. Accompany me to the factory, but make sure not a single hair falls from my beard. And I'll pay you, have no fear. Then you won't have to wear those hand-me-down clothes anymore.: Yes, I'd like to get a nice outfit. I'll help you.: Fine! Don't worry, I always keep my word. I'll pay you off just as soon as we get to the factory!: Let's go then...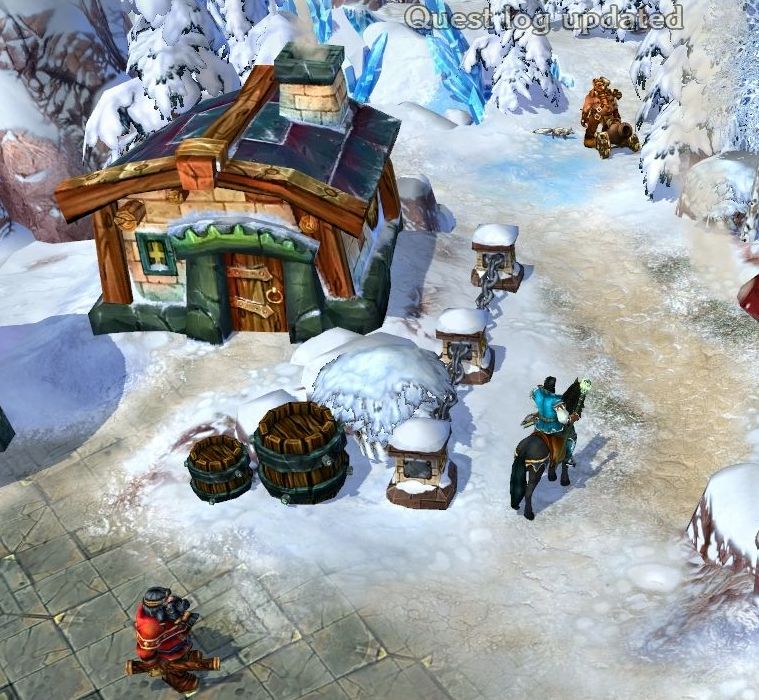 It's time for everybody's favorite quest archetype... the escort quest! Drom here will slowly (and I mean slowly) walk along the path toward his factory. Naturally, we have to prevent enemy forces from reaching him, or the quest fails entirely. 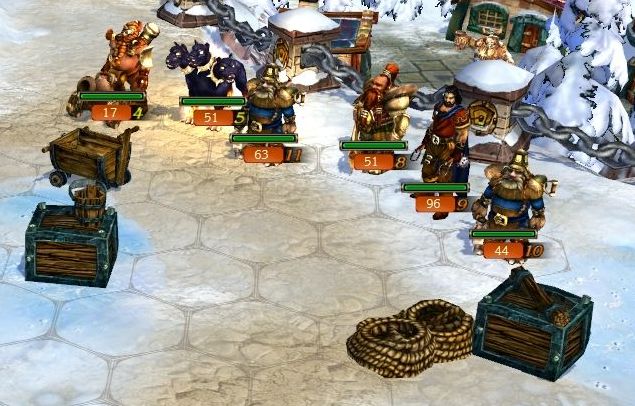 As we expect, the armies in this area are largely composed of dwarven units, but they often have a few demons, human mercenaries, or even dragons accompanying them. 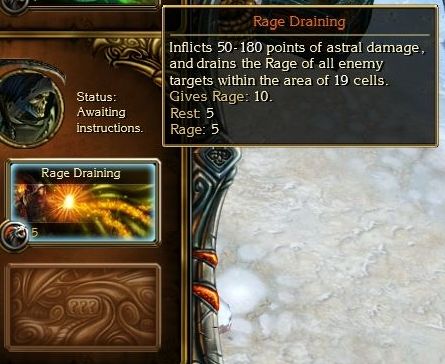 The Reaper's second ability, Rage Draining, is very useful. It only costs 5 Rage, and in exchange it does a small amount of damage to all enemies inside a huge area. Like Reaper's other skills, it does astral damage - a hidden damage type that cannot be resisted by almost anything in the game. The unique part of this ability is that it actually gives Rage back when we use it - currently for a net +5 Rage. 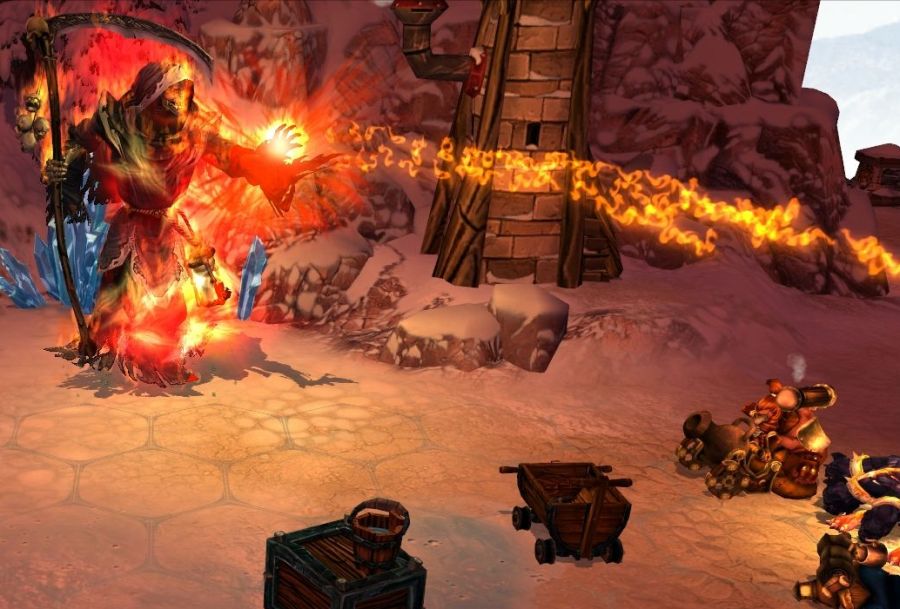 When used, the Reaper draws the glowing Rage from all enemy troops in the area of effect. 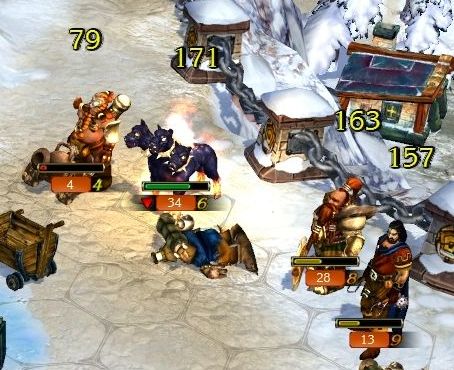 Rage Draining is great for opening ordinary battles - it is so cheap that you can almost always use it, it gives Rage for other Spirits to use, and the damage is not bad - you can usually get most if not all enemies in one hit. However, be aware that it has a very long rest period, so you won't be able to use the Reaper's other (and more powerful) abilities until he wakes up. 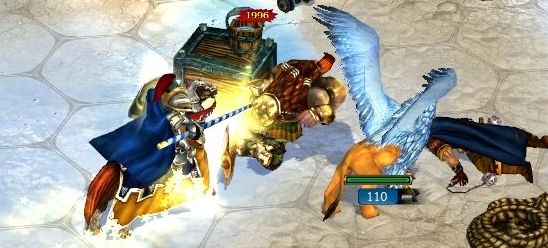 The Horsemen's speed is great for keeping up with the Griffins and for targeting vulnerable targets. 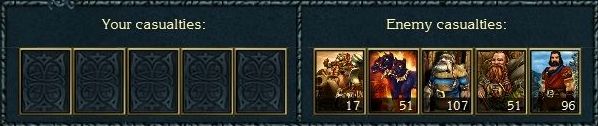  The path to the factory is packed with troops. I am doing this the hard way, though. The path normally has a few enemies, and the rest spawn when the escort quest is started. If you want to be safer, clear out the normal armies first before undertaking the quest. 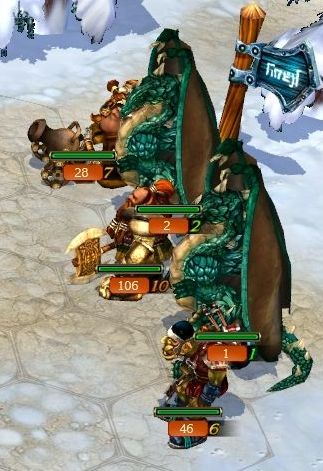 More Green Dragons are appearing, though still in numbers that don't worry me.  The Green Dragons are usually not quite fast enough to hit our lines first (as long as we use the Tactics skill to move our starting units away), so they are vulnerable to counter-attack. 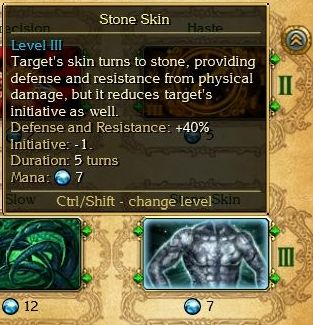 One of the other spells we upgraded was Stone Skin. This spell gets exponentially better with more levels. At Level 3, it adds a huge amount of Physical Resistance and Defense, and lasts a long time to boot, while still remaining pretty cheap to cast. 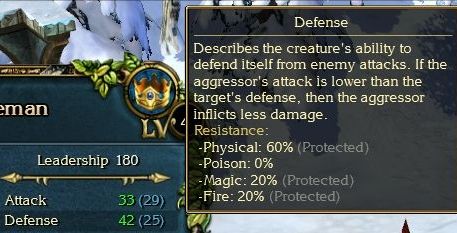 Even better, this boost stacks with any naturally occurring Resistance. These Horsemen and their steel armor come with 20% normally. Boosting that to 60% is great. 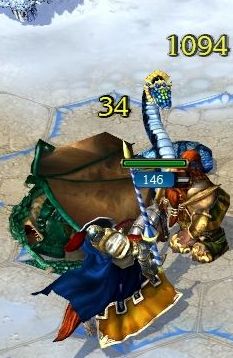 Between that and the +10 Defense the spell gives them, the Horsemen take very little damage from Physical attacks - probably only one-third of the damage they would have received without the spell. 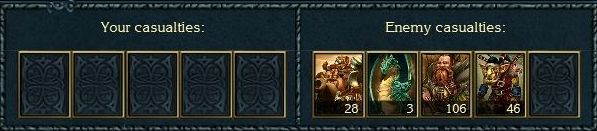 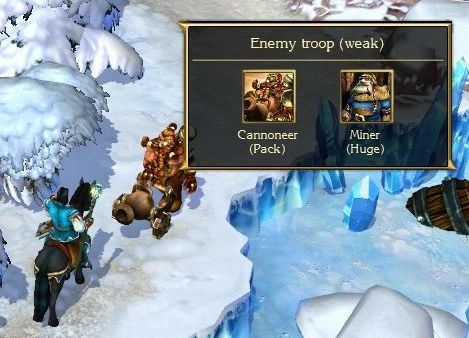 We are immediately confronted by the next army. Mana management is important in this quest, since we won't often get a chance to recharge. 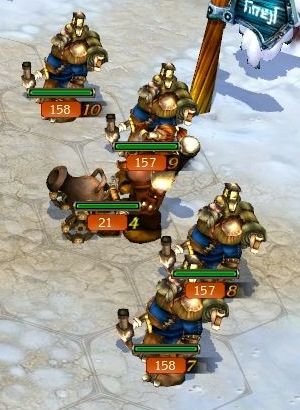 This army is just the slow-ish Miners, once we blast the Cannoneers with a spell. Miners are basically the same exact unit as Dwarfs, but cheaper. They have the same move, same Health per Leadership, and same lack of interesting talents or abilities. 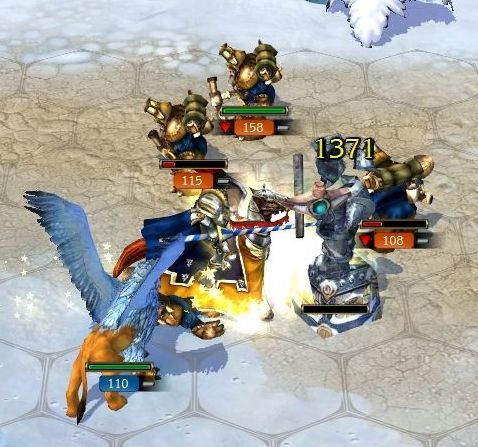 Facing dwarven units, we want to get rid of these Ice Statues immediately, or we are going to be taking damage from the spells they cast.  When you attack with Horsemen, the game very helpfully automatically maximizes the charging distance. Even if you attack an enemy standing in the neighboring hex, the Horsemen will back up to gain space for charging (if there is room to do so). 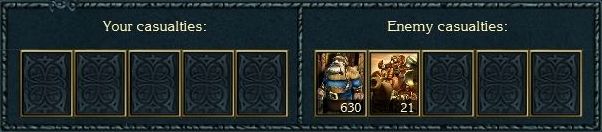 The Miners soon fall in droves, their slow speed makes them easy targets while not taking any losses. 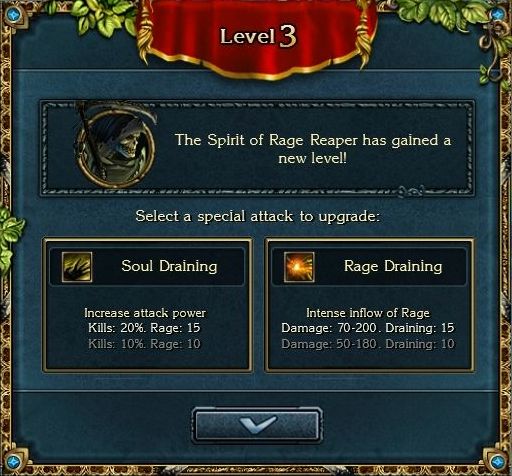 On the next level for Reaper, we get to improve the Soul Draining ability, doubling the effect for only a small increase in Rage cost. Very much worth it.  We can take advantage of Drom's slow walking speed to occasionally go off to pick up treasure. This buried chest is very lucrative indeed.  Not all of the armies we run into are weak. This enemy hero is also patrolling most of the path we are following, and we need to deal with him to get by. 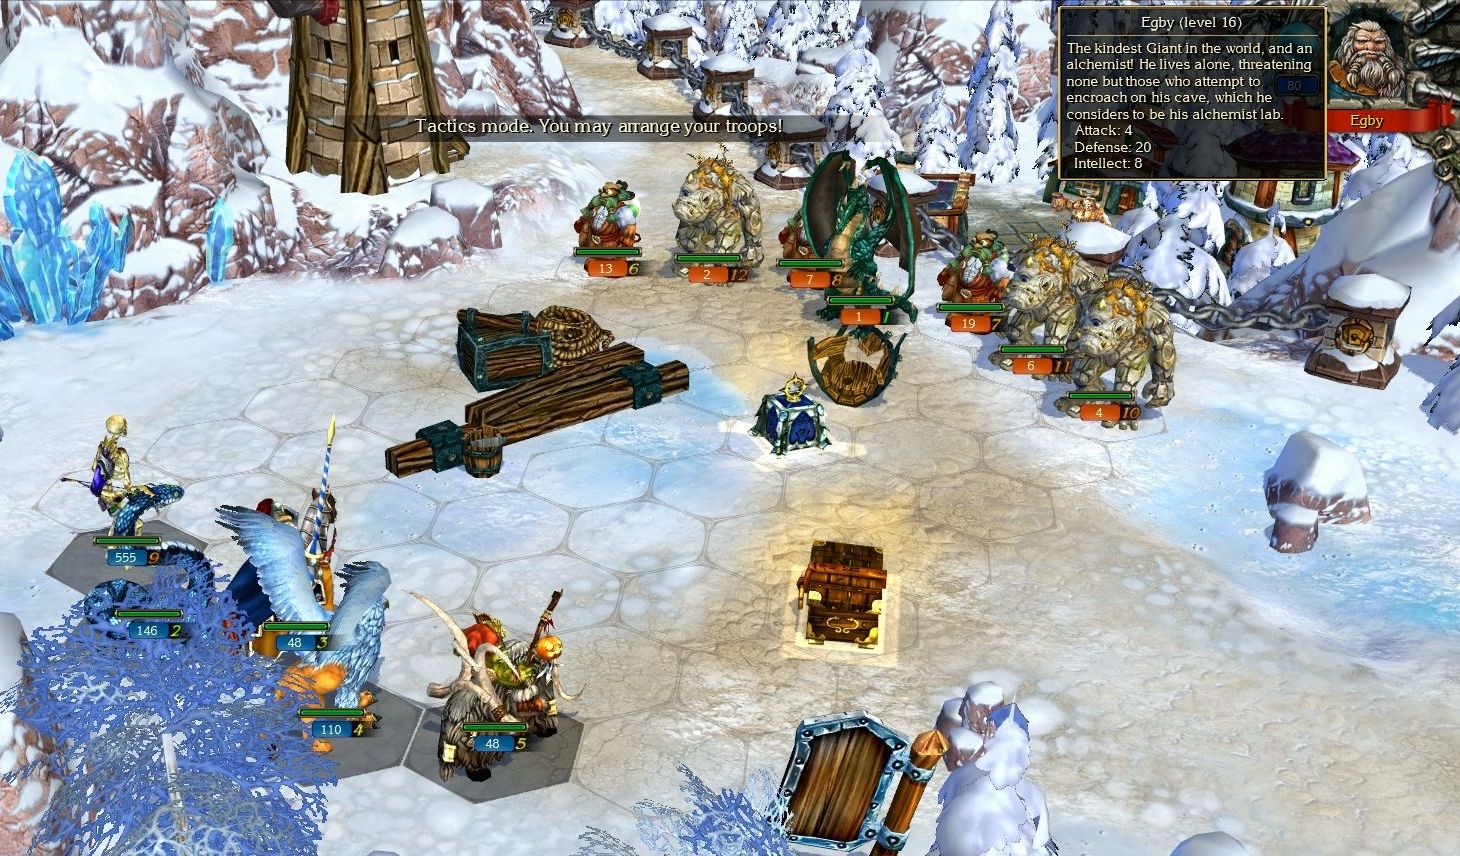 Kindest Giant in the world... I'm feeling guilty already. But Egby is not defenseless. In fact, his high Defense stat combines with his already tough units to make his small numbers far harder to kill than it seems. 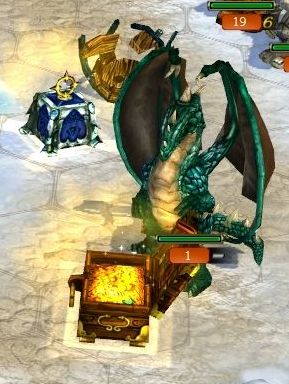 One of the chests gets immediately opened... stupid Green Dragons and their speed.  Spells start to take their toll on the enemy Cyclops units, while my own units work on the dragons. Egby has some spell-casting ability, usually applying debuffs like Pygmy here. 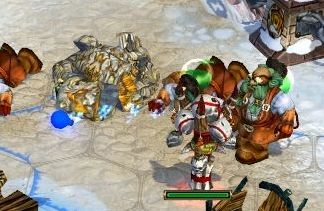 The enemy Alchemists helpfully show off the one Talent I didn't get to use, by throwing a vial of Holy Water at my Skeleton Archers. 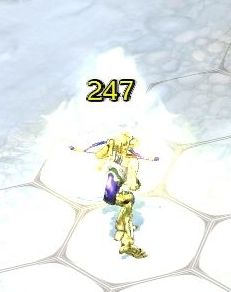 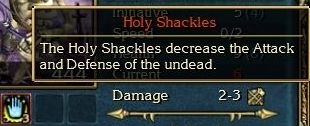 It does a decent amount of damage, and applies a small debuff to the target Undead. Too bad you only get one flask per battle. 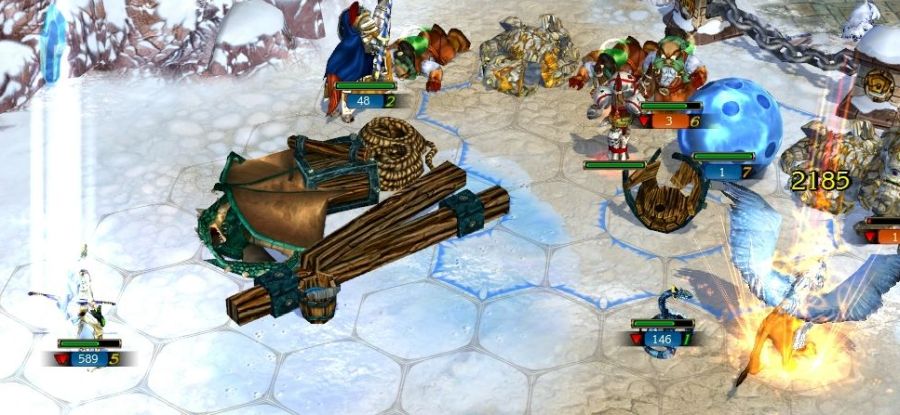 The back rank of Cyclops and Alchemists eventually falls despite their endurance. Meanwhile, I realize I forgot to reinforce my Skeleton Archers after the promotion. I don't want to go all the way around hunting down more natural sources, so I'll continue using Griffins as a blood reservoir for the Sacrifice spell. 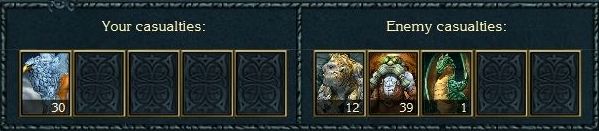 Almost all of this is from self-inflicted damage. 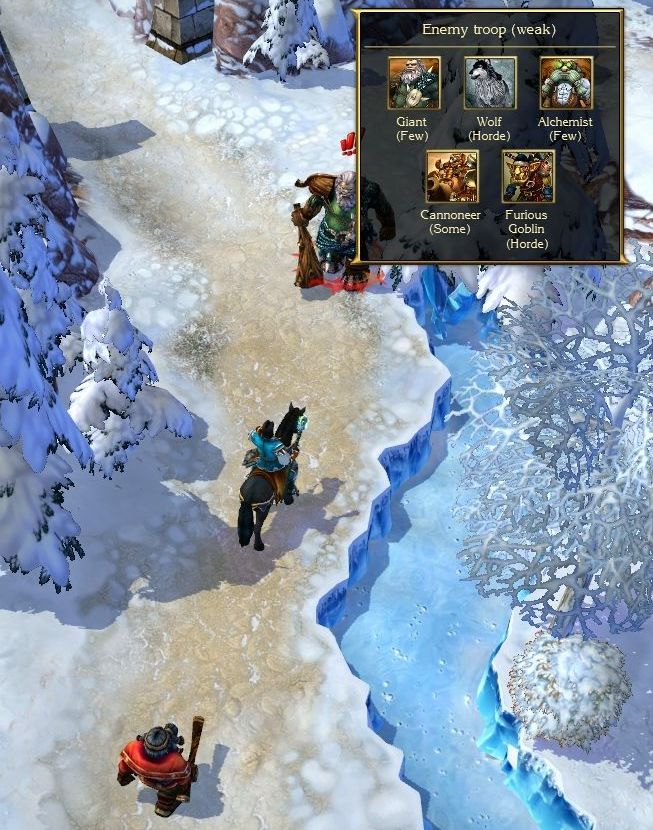 Even with Egby out of the way, we aren't even close to finished. Another army quickly charges in. 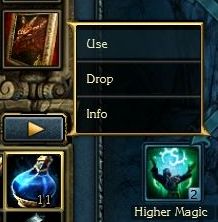 This endless stream of battles has drained our Mana pretty quickly. Before the army reaches us, we get into the hero menu to use a Mana potion. Luckily, time pauses while we are here. The Mana potions refresh 50 Mana each. 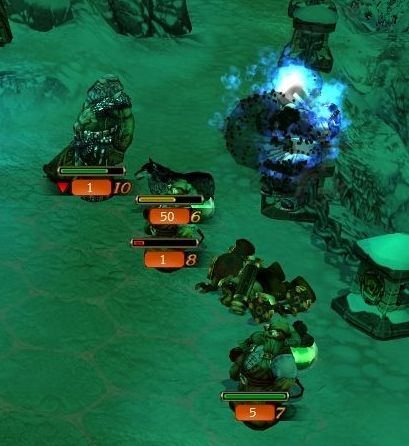  The Draining Soul ability is already one of the best single-target Rage abilities we have, and it will only improve as enemy stacks get bigger. 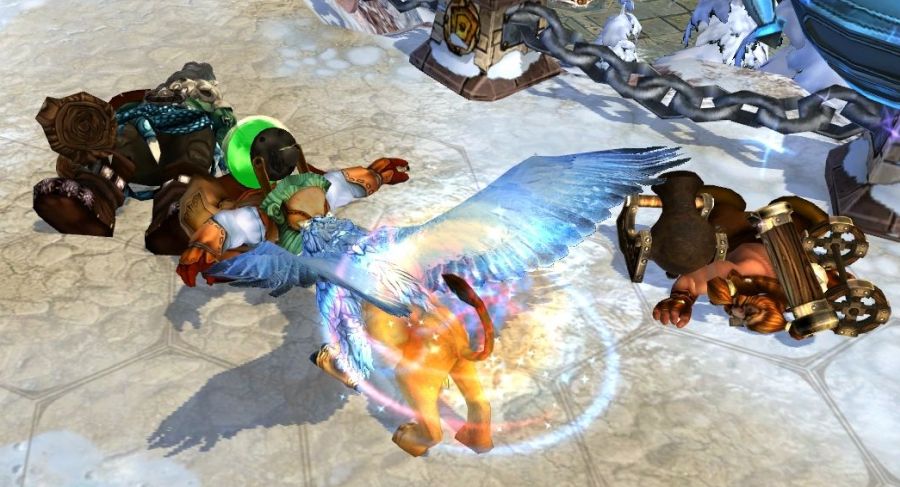 More dwarves fall beneath our blows. 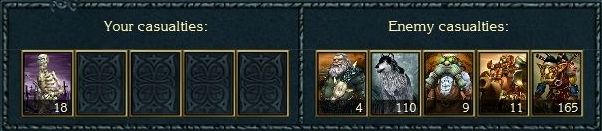 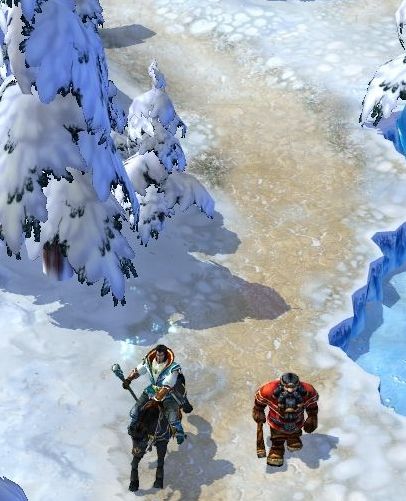 Hey, Drom.... where the hell are you going? Your factory is the other way! 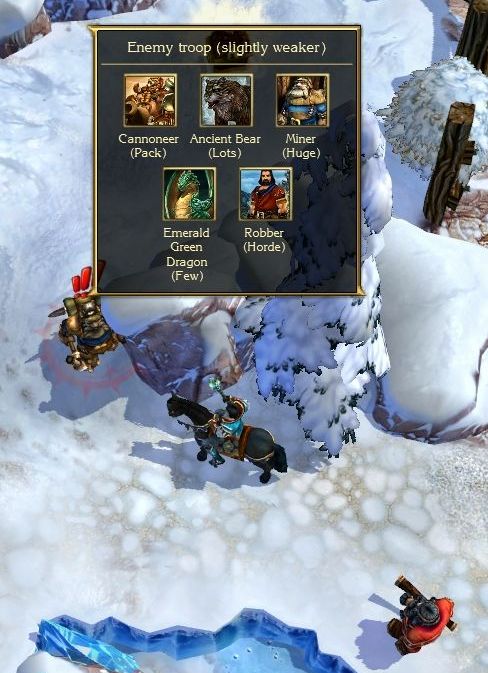 I think that since we blocked Drom's path briefly, his pathfinding decided to head the long way around towards a side path. This brings him right into yet another army that was otherwise just guarding a chest. 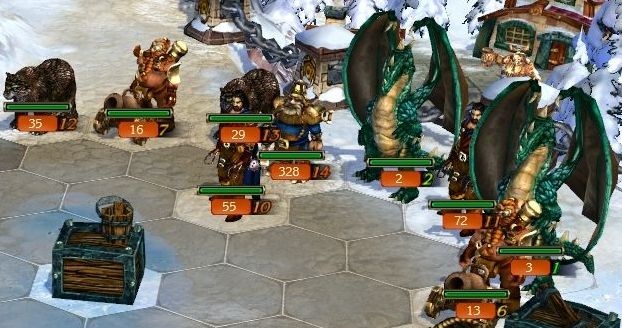 The dragons are increasing in number again. 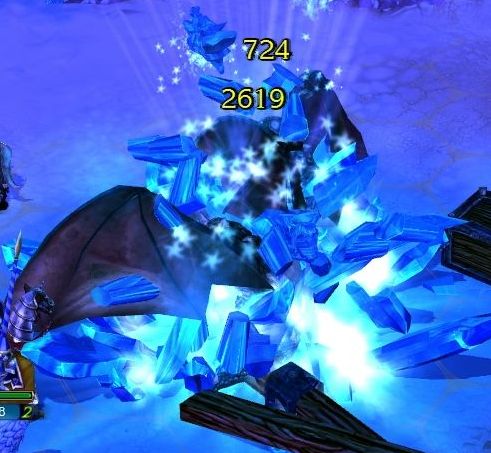 Ice Snake can still deal with them easily, though, especially when they decide to land next to each other. 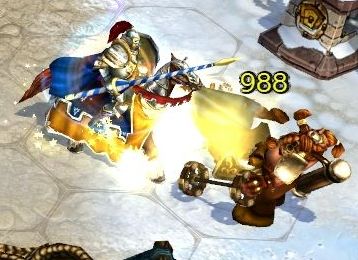 The Horsemen are put to work to head towards the ranged units as fast as possible, and eliminate this stack of Cannoneers.   Reaper's third, and potentially most interesting ability, is unlocked. 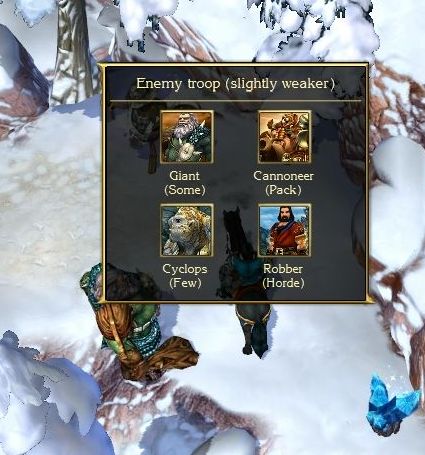 A small hill to the side holds a number of goodies for us to take, once we eliminate this army. 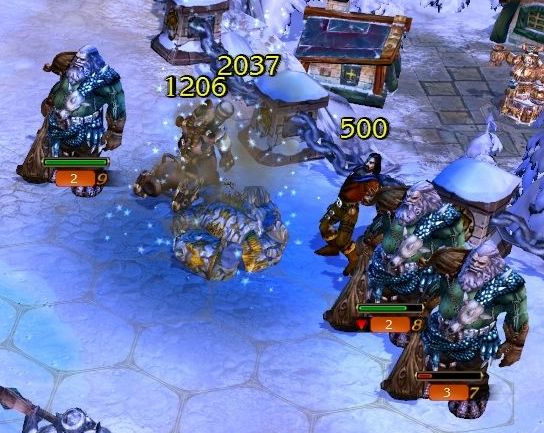 We can use spells to eliminate the Cylops, but this leaves a ton of Giants standing. 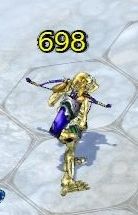  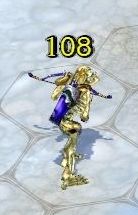 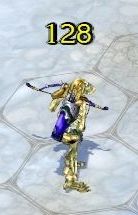 The Skeleton Archers take a real pounding - cannonballs and earthquakes rattle their bones to dust. That was a rough turn... what if it never happened? 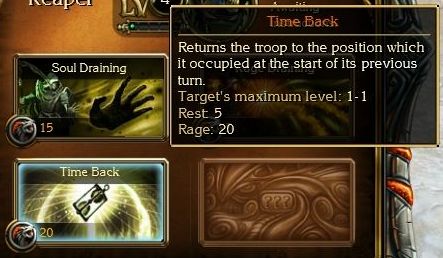 What if we could travel back in time? 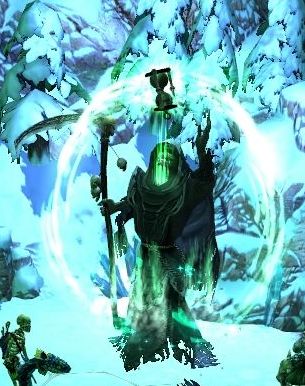  Time Back is a very different ability. When used, it returns the target unit to the beginning of it's previous turn - reversing any and all changes to the unit that happened in the mean time. This means any losses, gains, effects, movement, and so on. The most common way to use this is as a resurrection ability. If a unit has a very bad turn, this ability is perfect. Right now, we can only use it on Level 1 troops. As we level it, the target range will expand. This has a lot of combo potential with certain units (for instance, Griffins have unlimited retaliations... what if I don't have to care how many times they got attacked?). 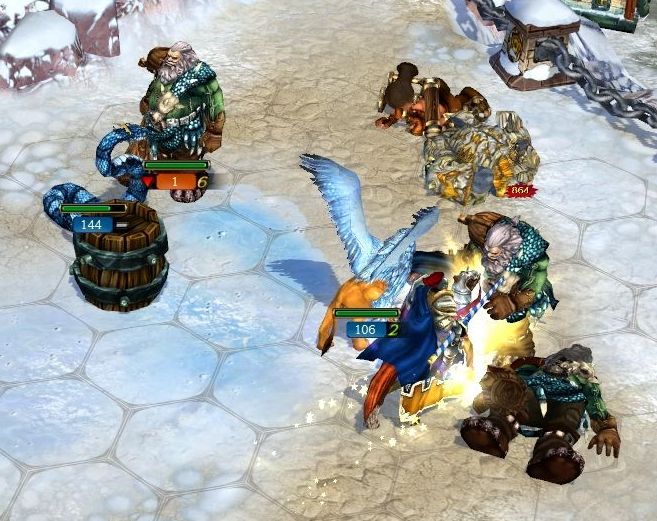 With the enemy attacks from the first turn largely neutralized by Time Back, we can use our speed and spells to quickly retaliate and take the enemy down. 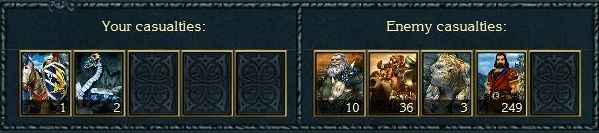 Using Time Back recovered 100+ Skeleton Archers from being casualties.  This little area has a nice trove for us. +5 Magic Crystals (2 from the chest) is nice now that we are running low, and the training dummy gives +1 Defense. 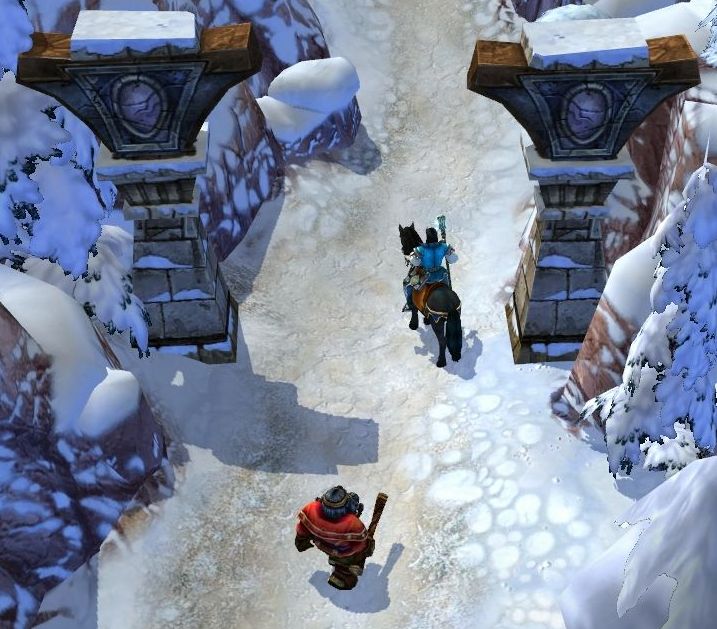 Finally, we lead Drom back to the main path through a stone arch. 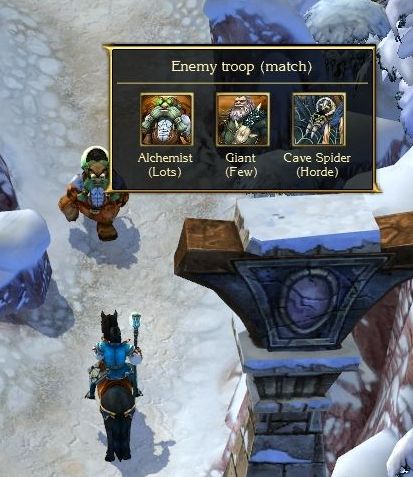 Two final armies guard the ramp past the arch. The first one looks tough from the outside. 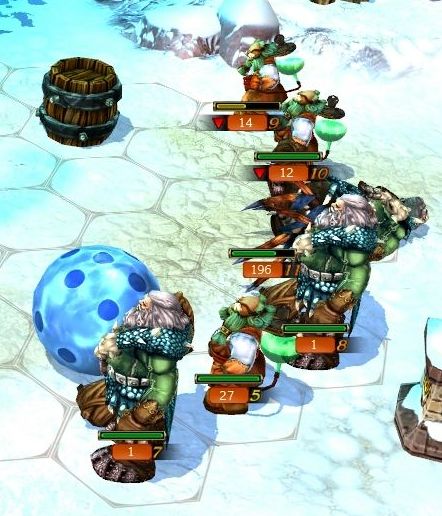 Indeed, the number of Alchemists is pretty significant. Rather than use the Reaper immediately, I try to distract the larger stack here by placing an Ice Ball right in front of it. They could still throw a potion into my real troops... 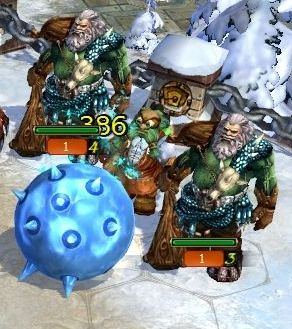 But this time it works, and the Ice Ball absorbs a few hundred damage from them. 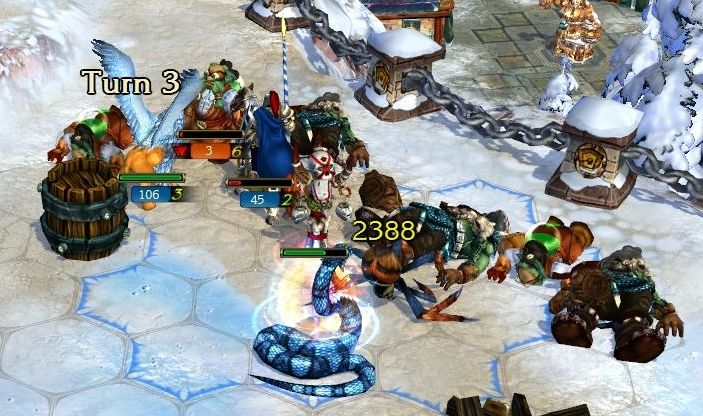 The distraction gives our troops time to move up for the kill. 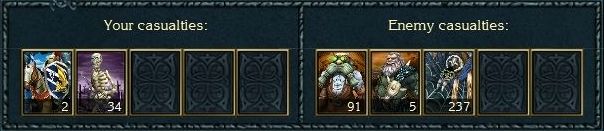 I usually lose a Horseman or two per battle once they are part of my forces - I tend to use them more aggressively than most units. 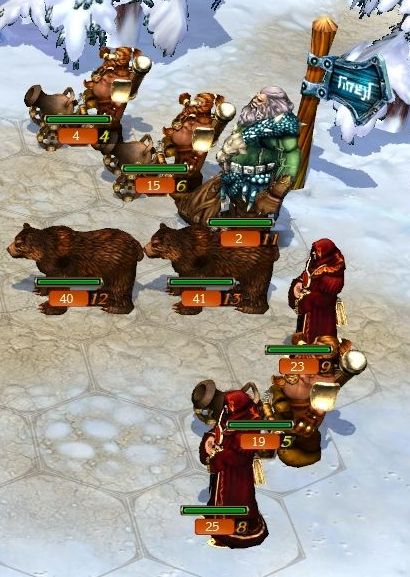 The last army standing between my forces and the factory has a whole lot of fairly weak stacks... we have just the tool to deal with this. 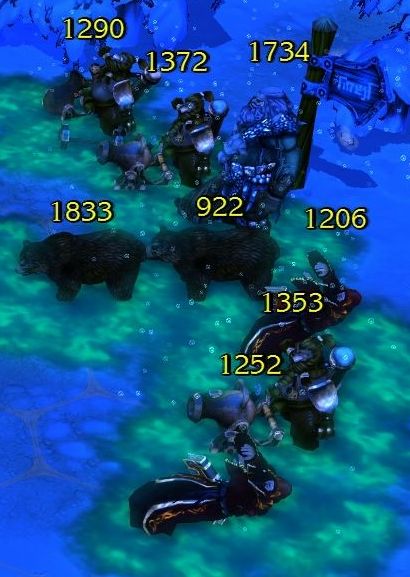 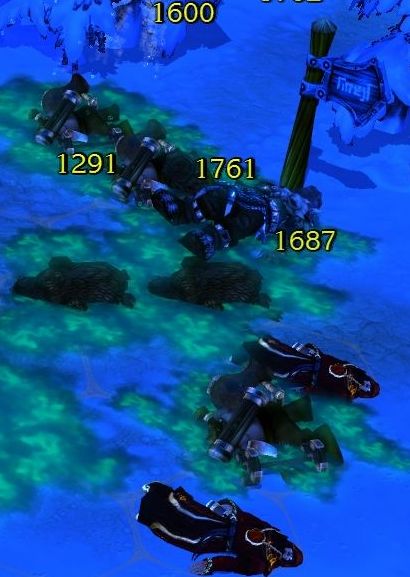 Two casts of Geyser and the battle is just over. I think this might be the first battle we've cleared purely by spell. 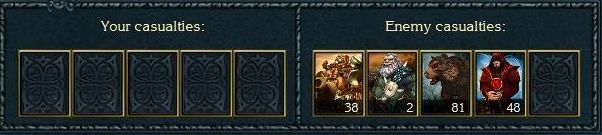 Naturally no losses, since neither side had a troop move a muscle. 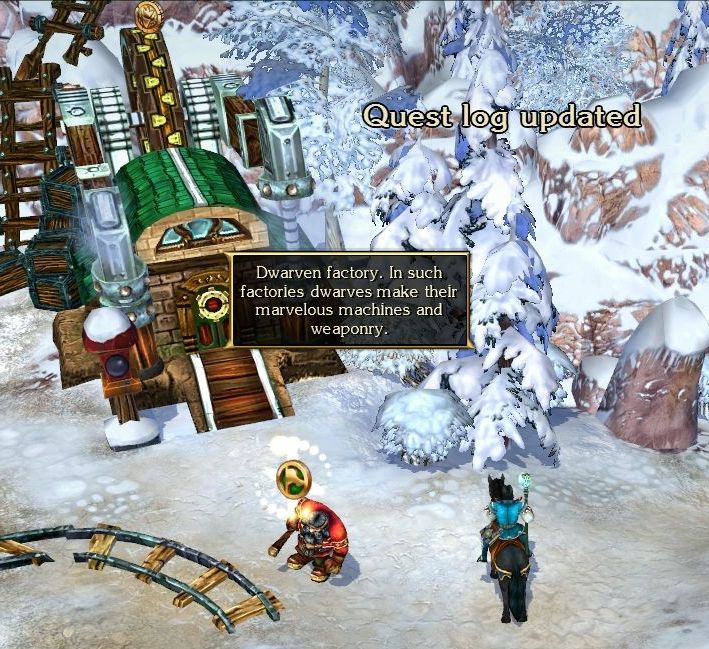 Finally, we have reached the factory, and Drom is in one piece. : Well done, Bill Gilbert, good job! I won't keep you any longer.: Hey, moneybags, where's my reward?: Reward? Maybe next time? Business is slack, and what with the war with demons, I'm taking steady losses right now.: Menacing glare: Aaaaah. Why are you looking at me like that? Well, ok, here's a special purse I've been keeping. It's full of ducats, ancient gold coins. You can't actually buy anything with this currency, but you can sell them! Do you have any skill with trading? No? Then learn. I can't help you any more than that. (Reward: Purse): Give me the purse, and stop talking garbage.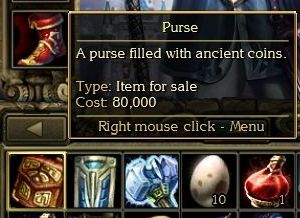 You know what, Drom? You're alright in my books. The Purse is worth 80K - we will only get 40K from selling it, but that's still way more than most rewards. 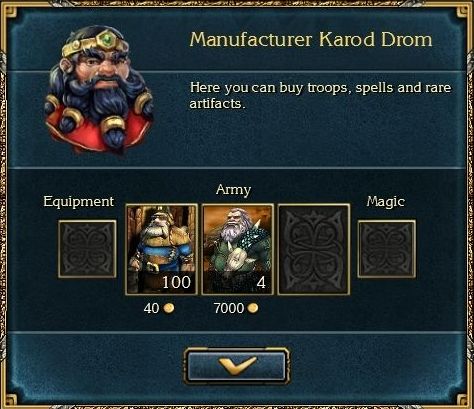 We can hire a few of the factory workers if so desired as well. 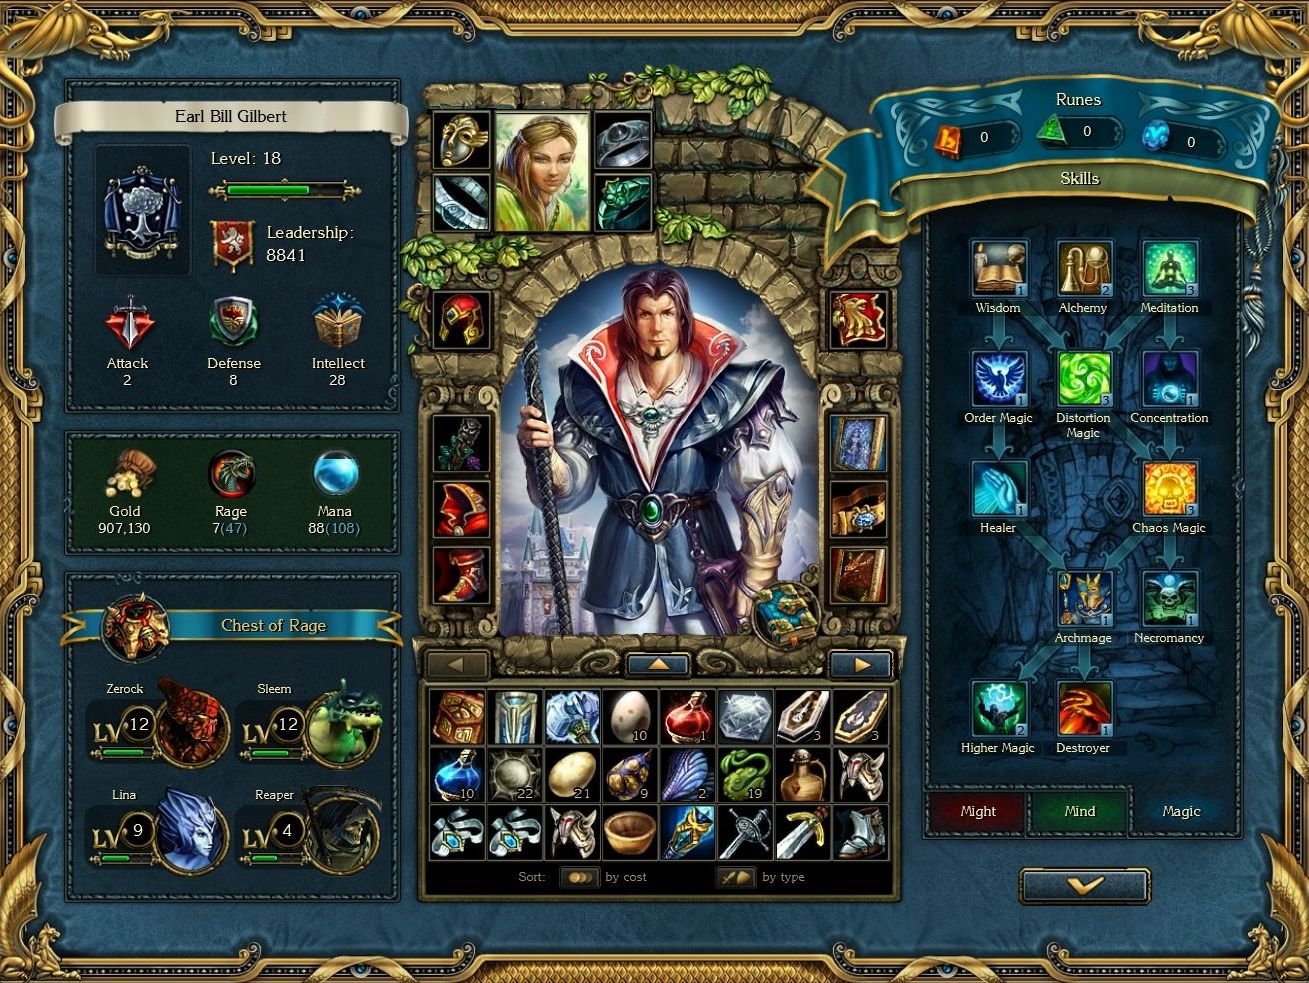 Our bank account is a bit richer, we've become an Earl, and we've gotten some good progress in leveling the Reaper. Our spell book is also much more appropriate for a Mage of our rank. Next time, we will continue exploring the Ardan's Peaks region, and chat with our Death-in-a-box. ---------------------------------- Bonus Material Marking the Map 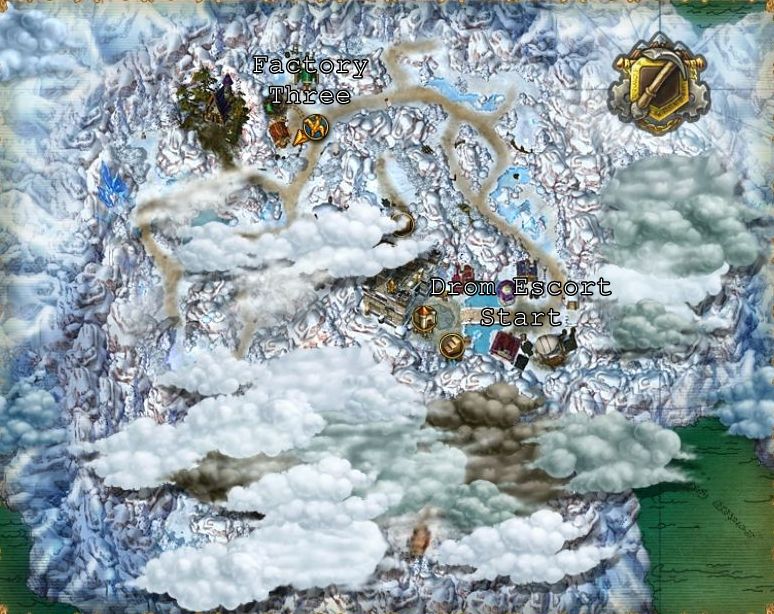 Talkin' 'bout Troops Horseman 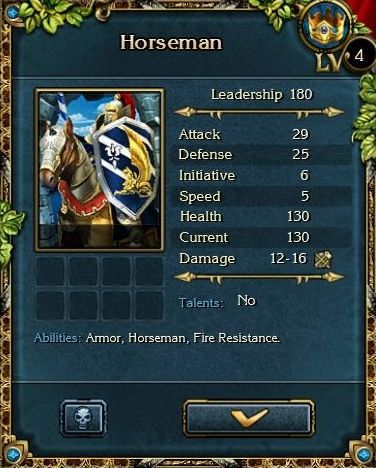 Resistances: 20% Physical, 20% Fire Critical Hit %: 12 Defense Bonus: 4 Talents: None Abilities Armor: Good Physical Damage Resistance Horseman: When moving in a straight line, horseman increases the damage by 10% for each cell Fire Resistance Gully's opinion: The Horsemen is a fun and fairly good unit that has the advantage of being available in infinite numbers. It combines both high speed and initiative with a pretty sturdy frame. The Health of the Horsemen isn't great, but it does resist the two most common damage types. The damage is a little underwhelming for the cost, but the number is a bit misleading, since you can get +20% or more due to the self-titled Horseman ability most of the time. Plus, the high speed and initiative mean that you can hit more vulnerable targets. Basically, the Horseman is an excellent all-rounder unit that loses some hitting power in exchange for excellent mobility. Fighting them: With 5 Speed, the usual Slow tactics may not work well (unless you have Level 3 Slow). Spells still do well, even if you have to use Fire or Physical damage, though Poison/Magic damage is your best bet. Other than that, most melee types can do well once you are in combat. Just be aware of its charging range and either stay out of it or move right up to it. Miner 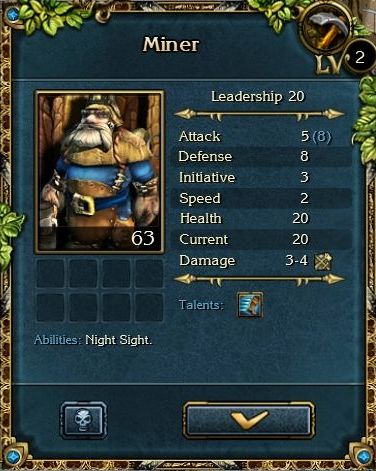 Resistances: None Critical Hit %: 10 Defense Bonus: 3 Talents Running Abilities Night Sight: During nighttime and underground combat, Attack is increased by 50% Gully's opinion: The Miner is the little brother of the Dwarf. It has decent damage, great Health, but relatively poor stats. Like the Dwarf, the lack of mobility and lack of any interesting ability is the real downside. The Night Sight ability is underwhelming on a unit with low Attack, and that's all it has. However, if you are using an all-Dwarf army, these guys are important - they are your meatshield. Since they are available in infinite numbers once you have the treaty signing quest done, you want to use them to absorb damage as much as you can. Fighting them: Slow them down and pick apart at range if the numbers are large. Otherwise, just crush them mercilessly. Items Identified Dragon Slayer's Sword  Description: The favorite weapon of the dragon hunter. Effects: +5 to Attack, +50% to Attack against Dragons Type: Weapon Race: Humans Morale: Normal (50) Cost: 45000 Info: The blade of this huge two-handled sword is slightly eroded by dragons blood. Even special spells could not perfectly protect this amazing weapon. This living weapon wants only one thing - to kill dragons, for it was created specially for this purpose! Purse  Description: A purse filled with ancient coins. Type: Item for Sale Cost: 80000 Info: This purse is full of coins. These coins are more than thousand years old - the dwarves don't use them anymore. However, you can exchange these coins for the usual golden coins, which are used all over Endoria.
|
|
#
?
Nov 6, 2017 13:54
|
|
|
The reaper has some really cool looking effects, and sweet abilities. Why even bother with the other junk now? Slow seems like it would be very good against knights, even if they can still reach you it will at least limit the charge. Oh and we could use an extra pair of hands to carry that sword *cough*hint*cough*.
|
|
#
?
Nov 6, 2017 16:32
|
|
|
I like that the game automatically sets up Horsemen to charge. Does it do that with the ice ball too, or does that only move in one direction a turn?
|
|
#
?
Nov 6, 2017 21:24
|
|
|
I guess he shaved off all his hair while he waited for us to clear the embassy! Good use of time, sir.
|
|
#
?
Nov 6, 2017 22:18
|
|
|
He also dyed and plucked his eyebrows, and got ear implants.
|
|
#
?
Nov 6, 2017 22:26
|
|

|
Poil posted:The reaper has some really cool looking effects, and sweet abilities. Why even bother with the other junk now? Well, the Spirits of Rage are all on different rest timers - when you use a Spirit, it can't be used again for a certain number of turns (as given by the 'Rest' line in each ability). So we will be using the other Spirits while the Reaper is sleeping. Plus, sometimes the other abilities are still more appropriate for the situation. Ice Ball, Glot's Armor, and Rock Wall are all very useful all the way to the end of the game. As for using Slow on Horsemen (Knights are actually a different unit), reducing a unit from 5 to 4 Speed is of marginal use. If it doesn't stop the unit from reaching you, the small decrease in damage is not worth using a spell. Of course, if you do have Level 3 Slow, reducing them down to 2 Speed is pretty drat effective. You can also try combining multiple slow effects (Slow spell, Freeze status, the Totem of Death, and so on). Glazius posted:I like that the game automatically sets up Horsemen to charge. Does it do that with the ice ball too, or does that only move in one direction a turn? The Ice Ball can only move in a straight line - once you set it rolling in a direction, it will keep going that way until it hits a unit, object, or boundary. Picayune posted:I guess he shaved off all his hair while he waited for us to clear the embassy! Good use of time, sir. TooMuchAbstraction posted:He also dyed and plucked his eyebrows, and got ear implants. Haha, yeah. Pretty sure this is just a case of the game using the wrong portrait, because they look completely different. Gully Foyle fucked around with this message at 13:29 on Nov 7, 2017 |
|
#
?
Nov 7, 2017 13:18
|
|
|
Gully Foyle posted:
|
|
#
?
Nov 7, 2017 15:27
|
|
|
Level three geyser.  Since you mentioned mana shortages, do you level down spells to save mana when doublecasting? Glazius posted:I like that the game automatically sets up Horsemen to charge. Does it do that with the ice ball too, or does that only move in one direction a turn? A nice touch is if horsemen are in melee contact with a enemy unit, they will do a run up attack if there's unoccupied hexes behind the horsemen.
|
|
#
?
Nov 7, 2017 22:25
|
|
|
Delacroix posted:Level three geyser. Depends on what I want out of the spell, and how I expect the battle to go. When using direct damage spells, the lower levels tend to be less mana-efficient than the max level spells, as long as you aren't overkilling stacks. For instance, my Level 1 Ice Snake does about 1300 damage (with one central target and 2 side targets) for 10 Mana. Level 3 does about 4500 total to the same targets for 20 Mana - about 3.5x the damage for only 2x the cost. So unless my max level spell just does way too much damage, I usually just go full power. For buffs/debuffs, I'll just use whatever level is necessary for the effect I want - Slow Level 3 on a Speed 2 unit is a bit of a waste (though you do get more duration out of it). The main factor, though, is how long I think the battle will last, and whether or not I want to save Mana for the next battle. If the next battle is likely a harder one, I'll save Mana so that I have to spend less time resting in between, and therefore I'll lose less Rage. If the current battle is likely to be a long, drawn out battle, I'll tend to start saving mana after the first turn or so. I think it is generally very effective to hammer the enemy as hard as possible on the first turn, reducing the damage they can do to your stacks, and then switch over to lower cost spells afterwards. Generally, I won't use the lower level version of a spell for this purpose. Rather than using a Level 1 Geyser, I'll instead use Ice Snake. If I think Ice Snake is too expensive, I'll switch to Poison Skull or Flaming Arrow, and so on. Gully Foyle fucked around with this message at 00:41 on Nov 8, 2017 |
|
#
?
Nov 8, 2017 00:37
|
|
|
Holy poo poo, that text when Reaper appears isn't just a random bunch of letters after all. I've always wondered about that.
|
|
#
?
Nov 9, 2017 00:46
|
|
|
Wow. It's no often that I can spot the exact stereotypical "minority speak" phrase that orc-speech is based upon.
|
|
#
?
Nov 9, 2017 14:29
|
|


|
Update 43 - Don't Fear the Reaper Last time, we escorted a factory foreman through his fairly perilous morning commute. I'll never complain about my own drive to work ever again. Before we continue the adventure, I want to get around to talking with our new companion, the Reaper.  : I feel the light of time. I feel the breath of the world. I see and hear you, mortal.: Who are you? What kind of creature?: I am the Guard of the Temple of Time. My name I have disowned. I have forgotten my past and my face, having become the Guard of the Temple of Time. I was called by the Temple to serve it forever. I am Guard and Keeper. I am Life and Death. I am Time and Space. You may call me the Reaper. The name seems appropriate.: The Temple of Time - what is that?: It is a Place. It is Power. It is the Concentration of Knowledge. It is something inexplicable. The Temple does not depend on Time. It exists beyond Space. It is the Essence... which is neither dead, nor alive. It is intelligent yet it is not. The Temple is great. The Temple is everlasting. The Temple is impartial.: What do you mean, you were "called by the Temple"?: The Temple is the fount of knowledge of many worlds. It draws the attention of those who seek strength and power. That is why the Guards are necessary. The Temple looks in other worlds for the creatures who might become Guards. The worthy ones are called. And so, thirteen immortals guard the Temple from those who would encroach upon its secrets.: What do these Guards of the Temple do?: We guard the secrets of the temple. We chase and eliminate those who manage to penetrate our world. We chase them through all the worlds and times and punish the thieves, returning what is lost to the Temple. We serve the Temple. The Temple needs us. The Temple talks to us.: You've lost your name and face. What did the Temple give you instead?: I received the body and the power of the Guards. I obtained all the knowledge and experience of the Guards. I obtained eternity, true immortality. Power over Time and Space. The Temple is always with me and its power is inside of me. I am indivisible with the Temple; I am a part of it.: I wanted to talk about one other thing...: Knowledge is the way to perfection. Ask. : I feel the light of time. I feel the breath of the world. I see and hear you, mortal.: Who are you? What kind of creature?: I am the Guard of the Temple of Time. My name I have disowned. I have forgotten my past and my face, having become the Guard of the Temple of Time. I was called by the Temple to serve it forever. I am Guard and Keeper. I am Life and Death. I am Time and Space. You may call me the Reaper. The name seems appropriate.: The Temple of Time - what is that?: It is a Place. It is Power. It is the Concentration of Knowledge. It is something inexplicable. The Temple does not depend on Time. It exists beyond Space. It is the Essence... which is neither dead, nor alive. It is intelligent yet it is not. The Temple is great. The Temple is everlasting. The Temple is impartial.: What do you mean, you were "called by the Temple"?: The Temple is the fount of knowledge of many worlds. It draws the attention of those who seek strength and power. That is why the Guards are necessary. The Temple looks in other worlds for the creatures who might become Guards. The worthy ones are called. And so, thirteen immortals guard the Temple from those who would encroach upon its secrets.: What do these Guards of the Temple do?: We guard the secrets of the temple. We chase and eliminate those who manage to penetrate our world. We chase them through all the worlds and times and punish the thieves, returning what is lost to the Temple. We serve the Temple. The Temple needs us. The Temple talks to us.: You've lost your name and face. What did the Temple give you instead?: I received the body and the power of the Guards. I obtained all the knowledge and experience of the Guards. I obtained eternity, true immortality. Power over Time and Space. The Temple is always with me and its power is inside of me. I am indivisible with the Temple; I am a part of it.: I wanted to talk about one other thing...: Knowledge is the way to perfection. Ask.Actually, we want to talk to him about quite a bit more. At length. Like with other spirits, let's ask him now what abilities he will provide (even thoug we already know three of them), and the rest of the conversation will be put into the bonus section. : What kind of help can you provide, Guard?: Great strength and power gives the Temple of Time to its Guards. Do not upset the Balance, for only a small part of my power can I give in serving you. : I am the Hangman. And I shall carry out the execution, taking life from the living and magic from the dead.: I am the Time Keeper, I have the power to turn back time, and return the past, mixing it with the present time.: I am the Law. And I use my knowledge to recharge this device which is my prison.: I am the Judge. And I will send your enemies' souls to the World of Despair, to the Abyss, where they shall wait for their turn eternally...Wow... not too descriptive, but way cooler than the other Spirits - sounds like someone is a Judge Dredd fan. One of the little details that I like is that he (it?) is just called the Reaper. The other Spirits are called things like Ice Spirit Lina, Swamp Spirit Sleem, Rock Spirit Zerock - but the Reaper is just the Reaper. Anyways, on with the adventure. 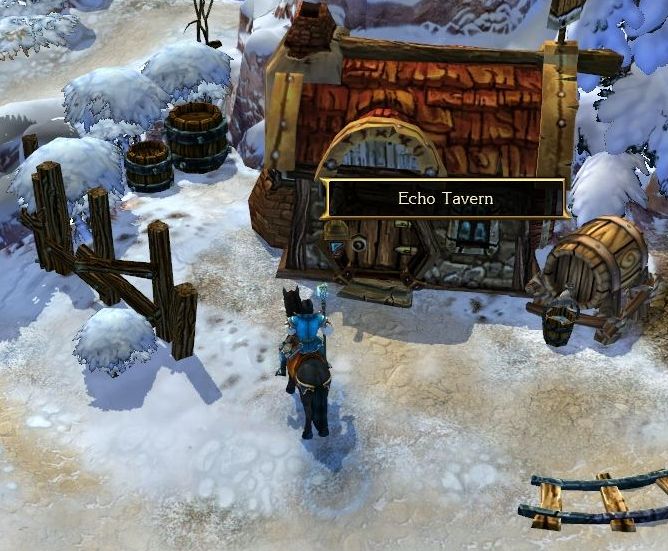 There's yet another dwarven tavern near Factory Three where we left off. That escort worked up a bit of a thirst, let's head inside. 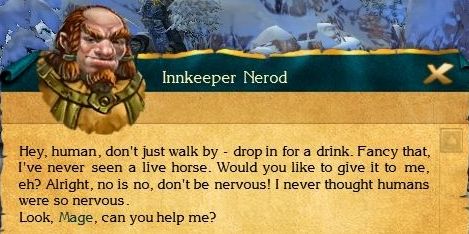 : Help? Probably I can, but I won't promise anything until I know what the matter is. : Help? Probably I can, but I won't promise anything until I know what the matter is. : You see, human... Well, do you know why dwarves are so strong and courageous? No? It's not because we're so strong with our body or intellect - it's our spirit! And where does our spirit come from? From beer! Beer is the divine beverage which gives our spirit strength. But now that there's this war with the Demons, beer is being sold in great amounts. But now I notice that the beer isn't like what it used to be. The taste, the color, and even the effect is different. And so I'm losing my customers. If it keeps going like this, I'll have to cut my prices. Would you go and speak to our brewer, Dalas? I can't do it myself because I hav to tend the bar. But I'll pay you. (Reward: 20K Gold, 3000 Experience): Beer is good, and good beer is even better. Sure, I'll help you. : You see, human... Well, do you know why dwarves are so strong and courageous? No? It's not because we're so strong with our body or intellect - it's our spirit! And where does our spirit come from? From beer! Beer is the divine beverage which gives our spirit strength. But now that there's this war with the Demons, beer is being sold in great amounts. But now I notice that the beer isn't like what it used to be. The taste, the color, and even the effect is different. And so I'm losing my customers. If it keeps going like this, I'll have to cut my prices. Would you go and speak to our brewer, Dalas? I can't do it myself because I hav to tend the bar. But I'll pay you. (Reward: 20K Gold, 3000 Experience): Beer is good, and good beer is even better. Sure, I'll help you.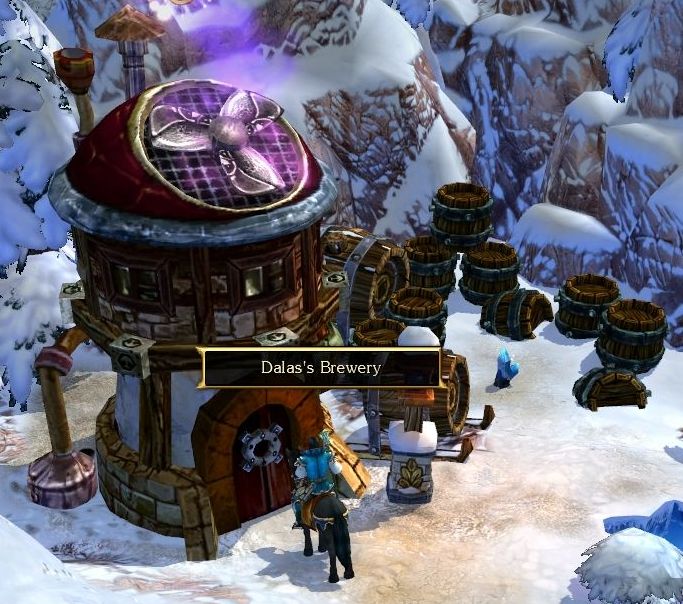 The brewer is really not far... literally just down the road. If we get 20K Gold just for that, that's not a bad way to make a living. 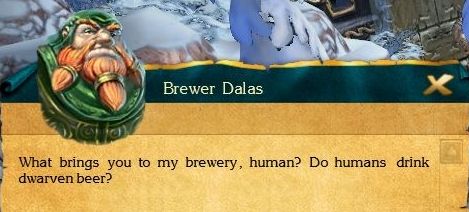 : I came to talk to you at the request of Innkeeper Nerod. He complains that your beer is not like what it used to be - the dwarves don't get tipsy, and they don't like your beer anymore. : I came to talk to you at the request of Innkeeper Nerod. He complains that your beer is not like what it used to be - the dwarves don't get tipsy, and they don't like your beer anymore. : And what did he expect? Of course the beer used to be better, he is right... True dwarves beer is brewed up gerzhack. But due to the war all the gerzhack crops were lost - what wasn't burnt by demons was trampled by our own troops. Now I have to brew the beer with malt and hops which were bought in Darion before the quarrel with your king. What kind of beer can be brewed from them?! Just this light slop, pooh, muck!!!: So what shall I tell the innkeeper? He's going to cut the prices.: Look, friend, maybe you can help me? Why should we disappoint poor Nerod, after all? Help me get some gerzhack, and we'll tell the innkeeper that there were just several barrels of bad beer which I sent him on accident. From my friend who works at the outpost by the Portal, I heard that gerzhack still grows on the shore of the Underground sea; the demons haven't burnt all the gerzhack.: Underground sea? Where is that?: Haven't you been there? A horrible place, especially after demons visited it. The Demons' Portal is located there! This place is lower than the Taron Mines. Be careful though - there're a lot of demons there. Our troops had to pull out of this place, and the enemy troops are strong.: Leave the demons to me, and brew your beer. How much gerzhack do you need?: Take this Gerzhack Bag. You should fill it up to the top. When you've filled it with gerzhack, you can return it. It'll be enough for many barrels.: Ok. I'll bring the gerzhack to you. : And what did he expect? Of course the beer used to be better, he is right... True dwarves beer is brewed up gerzhack. But due to the war all the gerzhack crops were lost - what wasn't burnt by demons was trampled by our own troops. Now I have to brew the beer with malt and hops which were bought in Darion before the quarrel with your king. What kind of beer can be brewed from them?! Just this light slop, pooh, muck!!!: So what shall I tell the innkeeper? He's going to cut the prices.: Look, friend, maybe you can help me? Why should we disappoint poor Nerod, after all? Help me get some gerzhack, and we'll tell the innkeeper that there were just several barrels of bad beer which I sent him on accident. From my friend who works at the outpost by the Portal, I heard that gerzhack still grows on the shore of the Underground sea; the demons haven't burnt all the gerzhack.: Underground sea? Where is that?: Haven't you been there? A horrible place, especially after demons visited it. The Demons' Portal is located there! This place is lower than the Taron Mines. Be careful though - there're a lot of demons there. Our troops had to pull out of this place, and the enemy troops are strong.: Leave the demons to me, and brew your beer. How much gerzhack do you need?: Take this Gerzhack Bag. You should fill it up to the top. When you've filled it with gerzhack, you can return it. It'll be enough for many barrels.: Ok. I'll bring the gerzhack to you.Of course the quest wouldn't be that simple. Our quick run to Bogacho castle didn't show this Underground Sea, so we will need to explore down there a bit more thoroughly. For now, we pick up the Magic Crystal sitting among the brewer's barrels, and continue on. 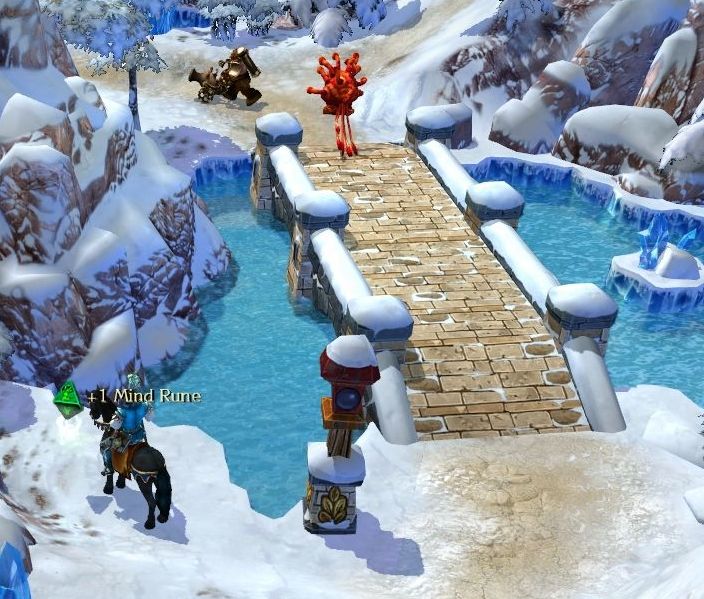 The path leads to a bridge over a frozen lake. 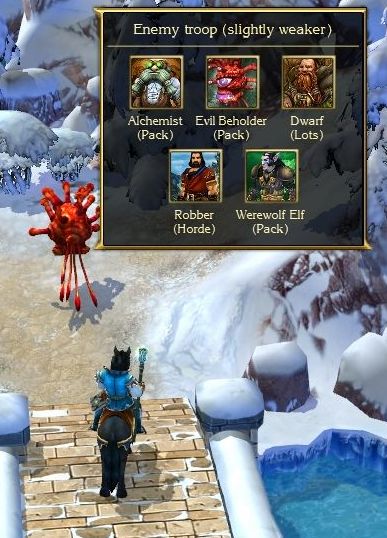 The first enemy encountered on the other side is quite the mix. Still not sure how or why elves are getting to the heart of the dwarven lands - you can't even sail here.  Although the frozen lake field is pretty cool, I was expecting that bridge to come in to play. Oh well. 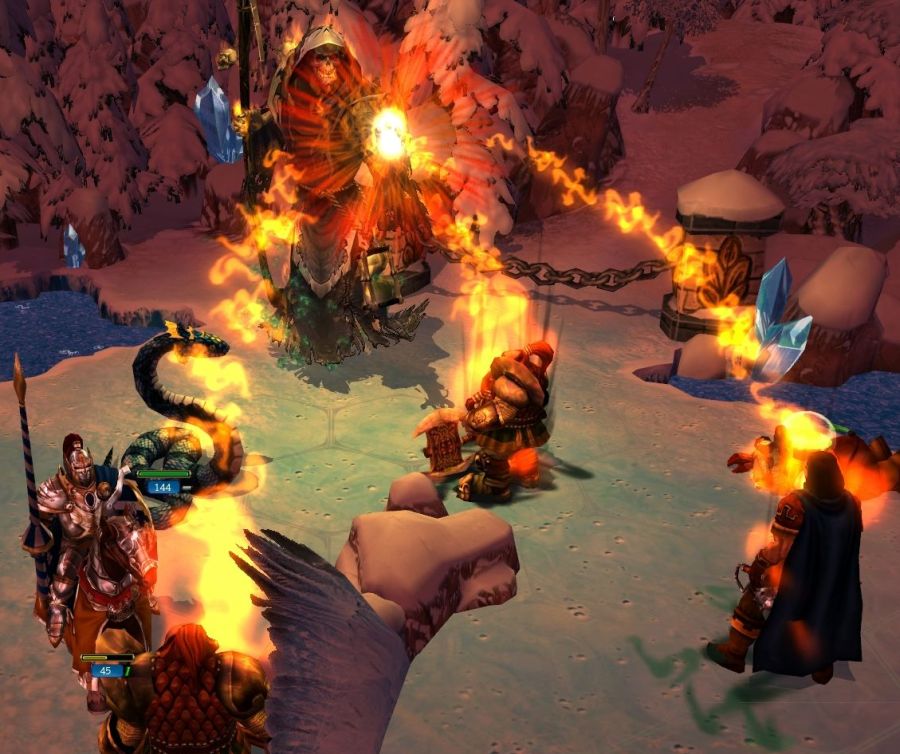 Rage Draining is going to be a staple - the damage is not great, but it's so easy to use, and we don't have great Rage income since we are a Mage. 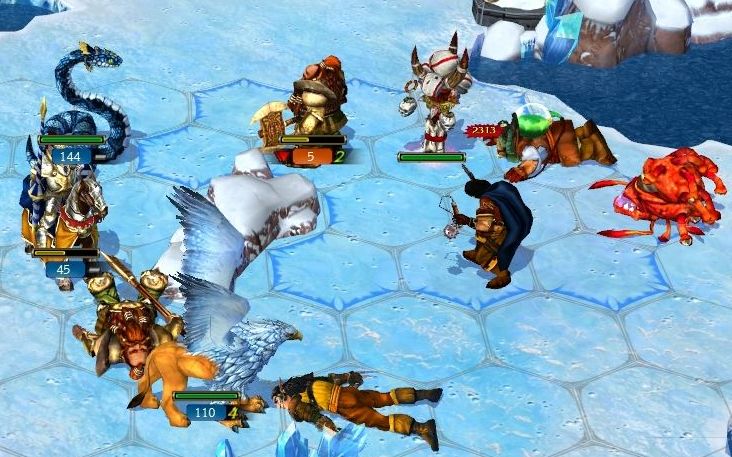 Our mobile core of melee troops are very good at isolating enemy units and fighting them where they are weak. I love faster units - the game feels more fluid to play with these kinds of troops. 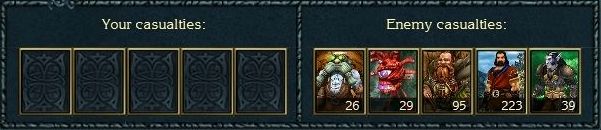 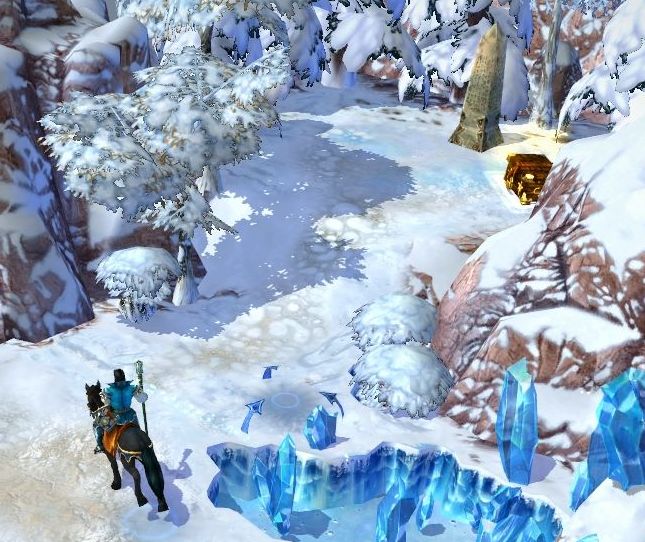 The main road leads to the left, but there's another path to the right. Heading into the snowy hills, we find a clearing with another obelisk. 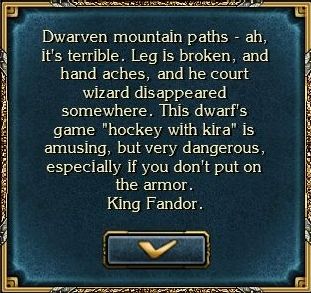 If anyone has any idea what "kira" means in this context, you are smarter than I am. Quick googling gets only Death Note references and other places where it is clearly a name. 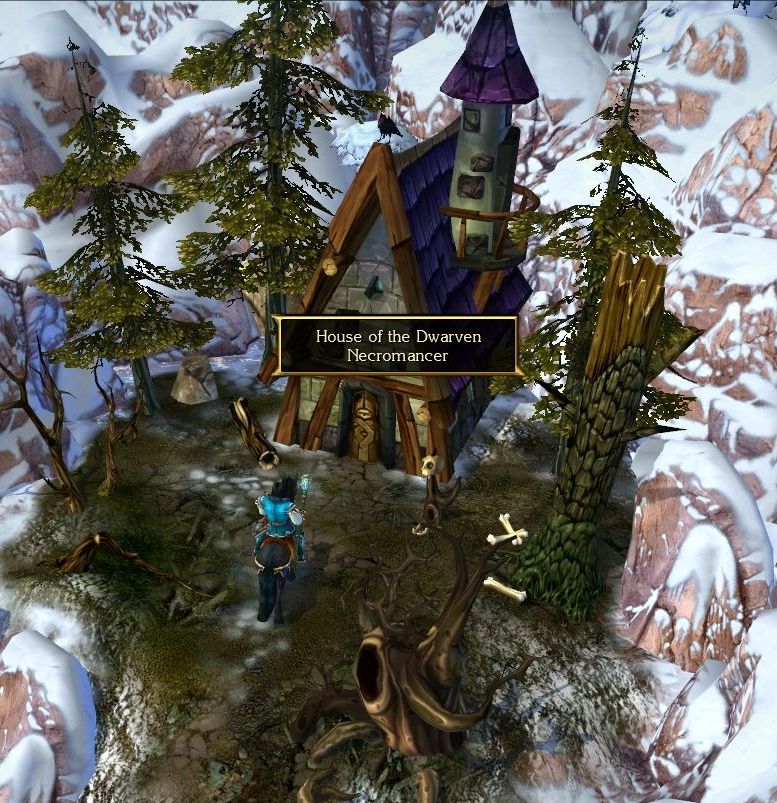 Beside the obelisk, the snow gives way to rotting soil and spooky trees - the hallmarks of the undead.  : Wow! A dwarven necromancer! After all the horrors of the plague? Well, it's none of my business. I'm here because Zhdack, who lives in Ohres village, wants to call up the spirit of his late wife. : Wow! A dwarven necromancer! After all the horrors of the plague? Well, it's none of my business. I'm here because Zhdack, who lives in Ohres village, wants to call up the spirit of his late wife. : Ah, so you want me to gather residual necrotic emanations to carry out a spiritualistic seance! Ok, I can do that, but it won't be free. I will need one magic crystal for the seance.: Ok. Here you go. You may begin. : Ah, so you want me to gather residual necrotic emanations to carry out a spiritualistic seance! Ok, I can do that, but it won't be free. I will need one magic crystal for the seance.: Ok. Here you go. You may begin. : It's... me... : It's... me... : Aha! A-ahchoo!! Who's here? Who dares to invoke me from the death world?: That place dwarf invoked you. And no, he's not pale from fright. It's uh... more like a professional feature. But I will be the one asking questions. Your husband has asked me...: Zhdack? There's no getting rid of him! He annoyed me while we lived together, and now even in death he won't leave me alone.: You can calm down. He wanted to know where you hide all the gold you took. You couldn't have spend it, right?: So, maybe I did? What then? Eh? Well, alright. Have you seen our house? It's near the royal castle. I've buried all the gold right behind the castle. So you can search there.: Was there a lot of gold?: Who knows! I didn't keep close records, just added gold there when I could. So what, do you have any other questions?: Tell me, what's it like after death?: I can't explain it in words. Fall from some high rock or die heroically in combat, and then you'll see. Or I can strangle you a little right now, what do you think of that?: Oh, no, no thank you. Hey, necromancer, you can send her back.: Hmm, have you finished with your questions?: Didn't you hear?: Of course not, I was in a spiritual trance.: That's ok, thank you for your help. Goodbye. : Aha! A-ahchoo!! Who's here? Who dares to invoke me from the death world?: That place dwarf invoked you. And no, he's not pale from fright. It's uh... more like a professional feature. But I will be the one asking questions. Your husband has asked me...: Zhdack? There's no getting rid of him! He annoyed me while we lived together, and now even in death he won't leave me alone.: You can calm down. He wanted to know where you hide all the gold you took. You couldn't have spend it, right?: So, maybe I did? What then? Eh? Well, alright. Have you seen our house? It's near the royal castle. I've buried all the gold right behind the castle. So you can search there.: Was there a lot of gold?: Who knows! I didn't keep close records, just added gold there when I could. So what, do you have any other questions?: Tell me, what's it like after death?: I can't explain it in words. Fall from some high rock or die heroically in combat, and then you'll see. Or I can strangle you a little right now, what do you think of that?: Oh, no, no thank you. Hey, necromancer, you can send her back.: Hmm, have you finished with your questions?: Didn't you hear?: Of course not, I was in a spiritual trance.: That's ok, thank you for your help. Goodbye.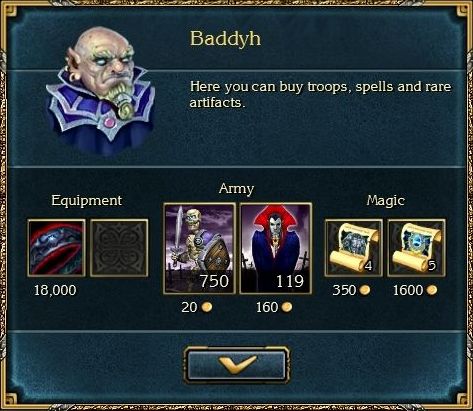 If we come back to Baddyh's after this, he has opened his necromantic wares for sale. Finally, we have a bit more flexibility in our Undead options. 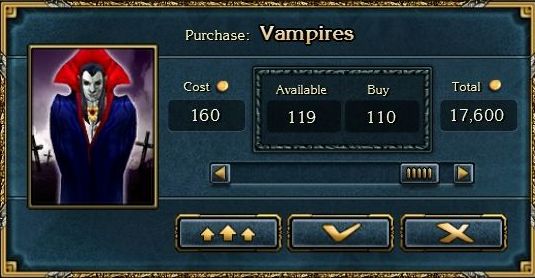 Let's try using some Vampires. These will take the spot of our Griffins for now. The Griffins have been loyal troops though, and I am sure we will be returning to them in the near future. 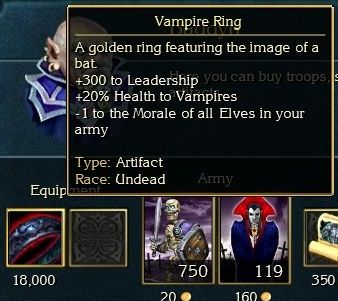 To go along with the Vampires, Baddyh will also sell us this aptly named Vampire Ring. This artifact is pretty great if you are using Vampires, and the downside is not relevant at all right now. It's also part of a set with an item called the Cloak of Shadows - when combined, the set gives an additional +5 Attack/Defense to Vampires. 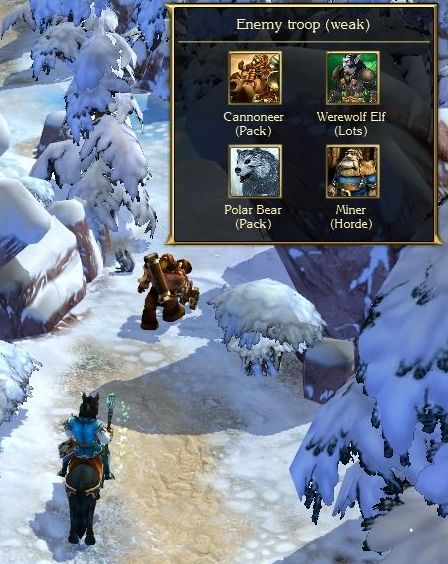 Our new army formation gets back on track down the main dwarven road in the mountains. 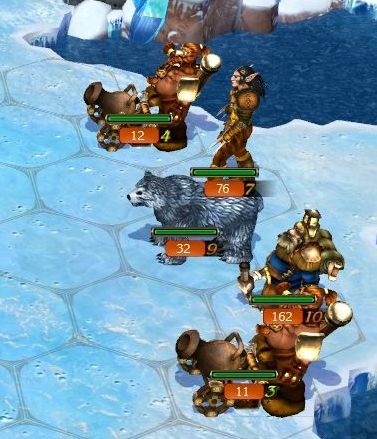 The next army in our way has more Werewolf Elves accompanying the dwarven bandits. 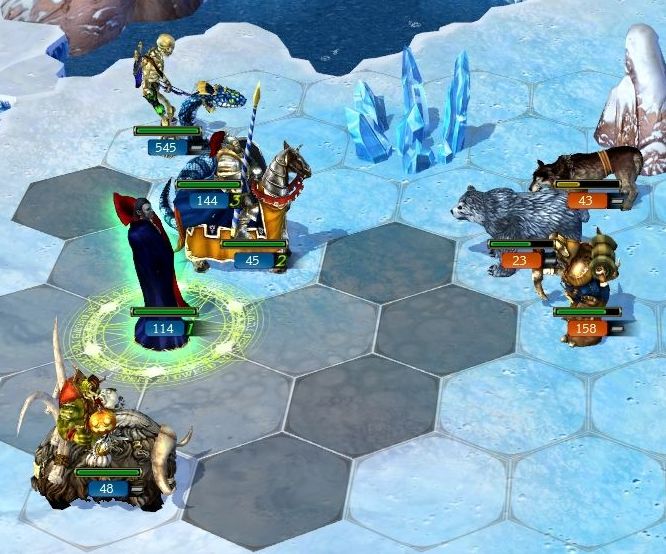 The base speed of the Vampires is just a little slow.  Luckily, we can always transform them into their bat form for +2 Speed. In both forms, they have the amazing No Retaliation ability. They are still poor attackers in comparison to the Royal Snakes, but they do have a bit more mobility in Bat form. 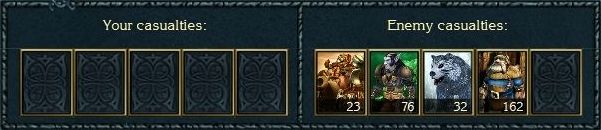 Under the blows of two melee units that they can't respond to, the enemy army falls apart quickly. 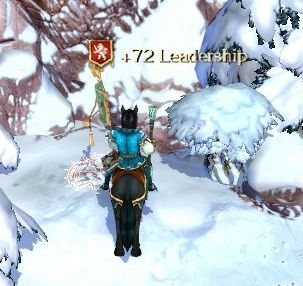 The woods in this region are full of banners, further boosting our Leadership. 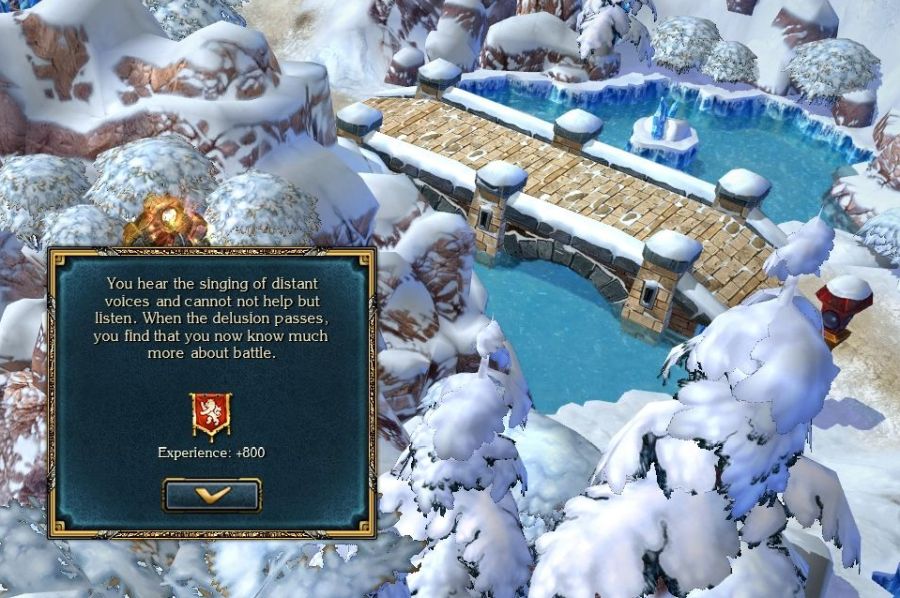 A side trail leads up a hill overlooking the bridge we just came over. An Altar of Experience can be found here. 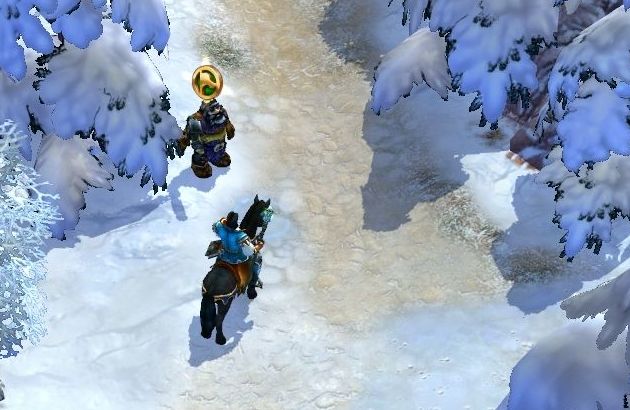 Back down the hill, a dwarven smith waves us over when we try to get by, 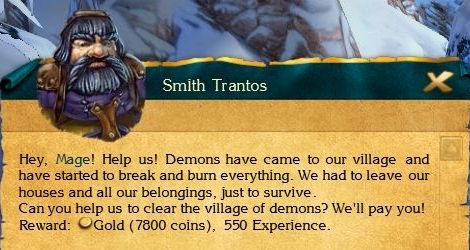 : What village? : What village? : "Ocular" village, straight along the road to the south. You can't miss it!: Ok, I'll try. : "Ocular" village, straight along the road to the south. You can't miss it!: Ok, I'll try.Well, it's not like we wouldn't have taken these Demons on anyways, so this is just pure bonus experience. 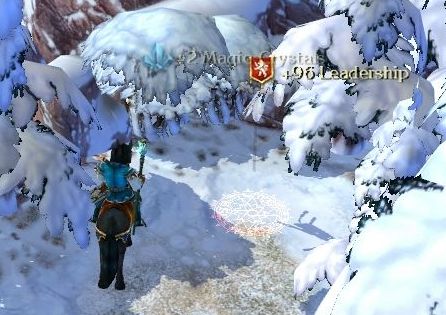 Before we head to the village, there is another way through the woods. We first find another banner, and a couple of Crystals. 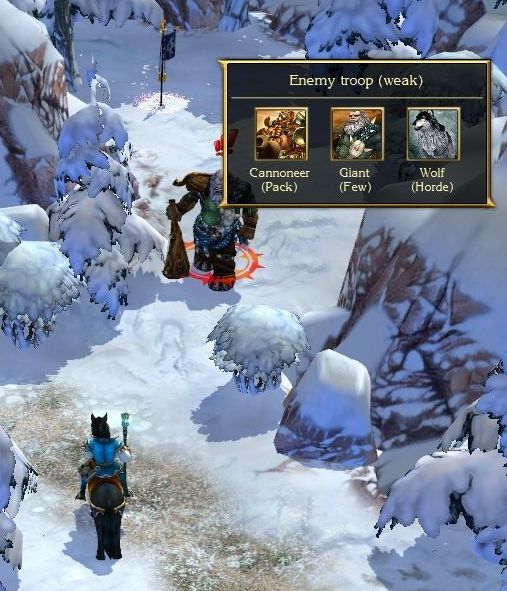 Deeper in the woods, yet another banner is guarded by a few Giants. 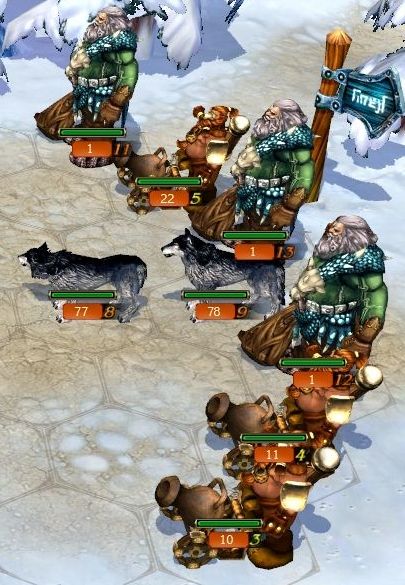 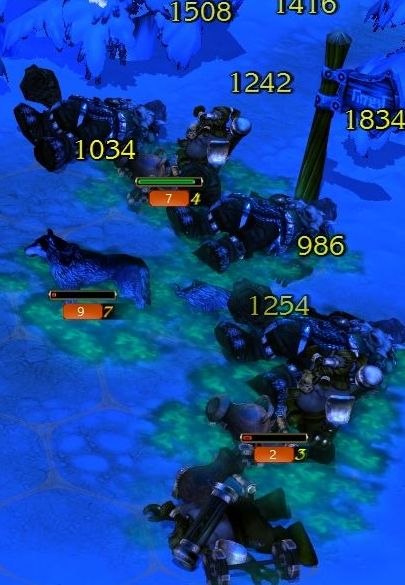 Once you have Geyser Level 3, you look for prime opportunities to use it. Any time you see an army with a ton of relatively weak stacks like this, you know it's a good target. One Geyser, and the army has just a few units left. 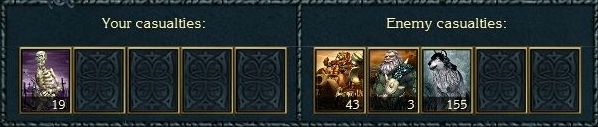 Even so, we still lose a good number of Skeleton Archers from the remaining Cannoneers (my fault - I should have easily fried the Cannoneers with another spell). 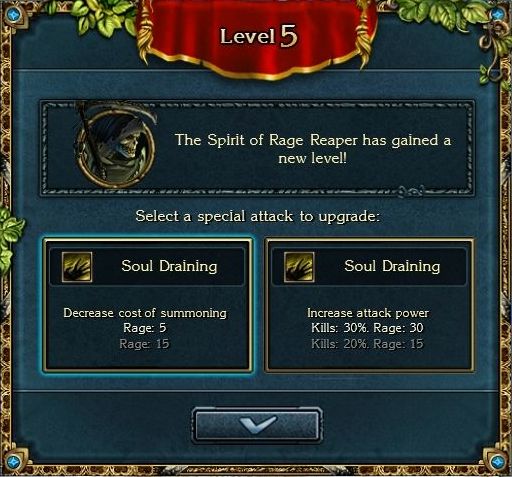 The next level of Reaper presents an interesting dilemma. Do we want more powerful Soul Draining, or a cheaper one? Since I am a Mage, I decide to pick the cheaper casting option. 5 Rage for this ability is ridiculously good. Hopefully we will get another opportunity to boost the power eventually. 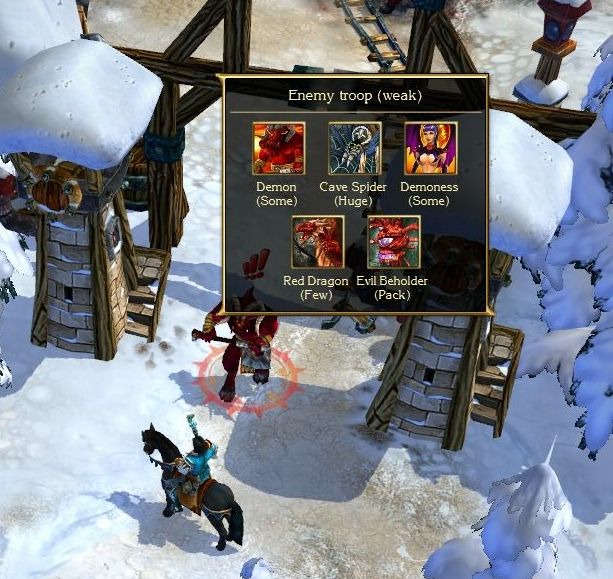 The gates to Ocular Village are blocked by the demonic hordes. 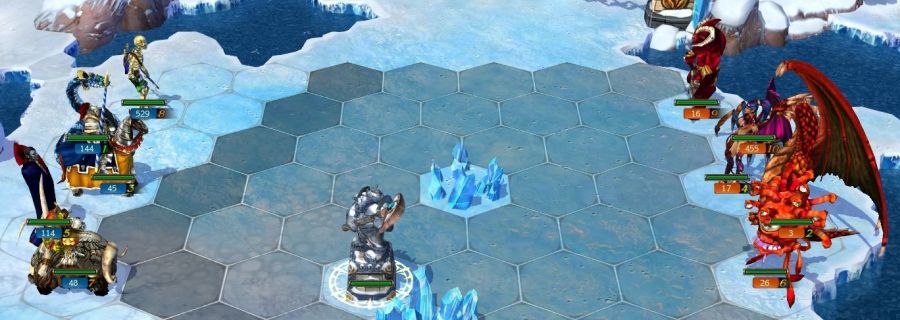 This time, however, the terrain counts as "Snowy", so the demons all have only 50% Defense. 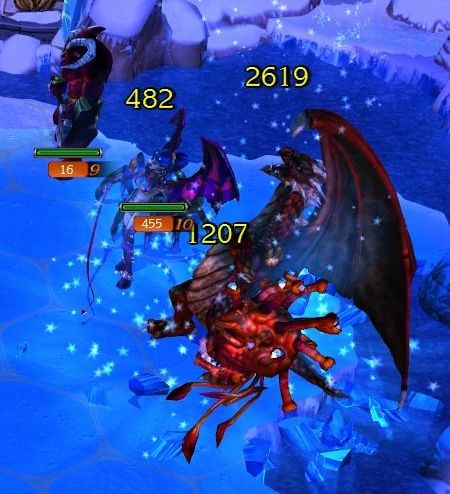 First, though, we want to eliminate the Red Dragons and Demonesses with spells. 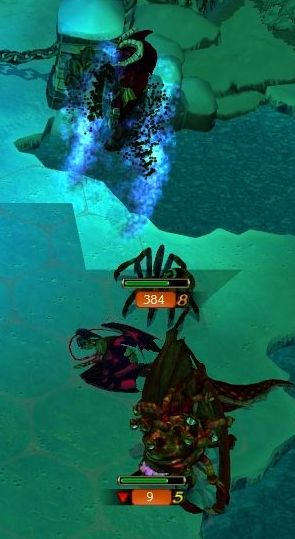 The untouched Demon stack is a prime target for the cheap Soul Draining, taking 20% of their number off to the void. 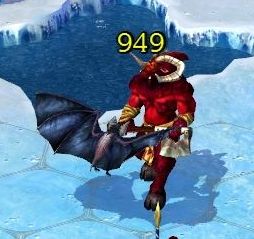 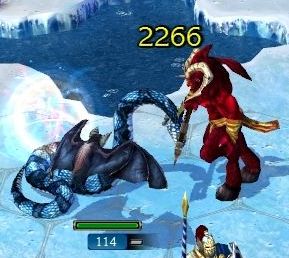 The remaining Demons approach our army, but get double-teamed by the Vampires and the Snakes. You can see the vast gulf in the damage done by our Royal Snakes over most other units. To be fair, we do have the Ring of the Snake King and the Great Druid's Staff both providing huge bonuses to the Royal Snakes. 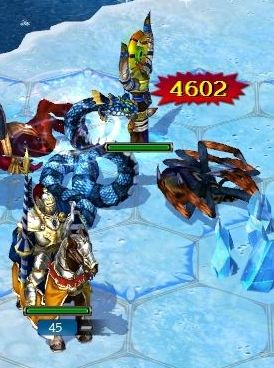 You can see why I'm so hesitant to ever rotate them out. 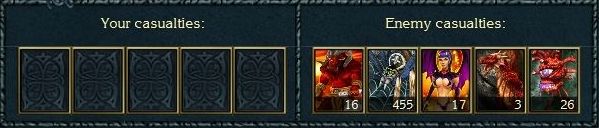 The first demon army is driven from the village. 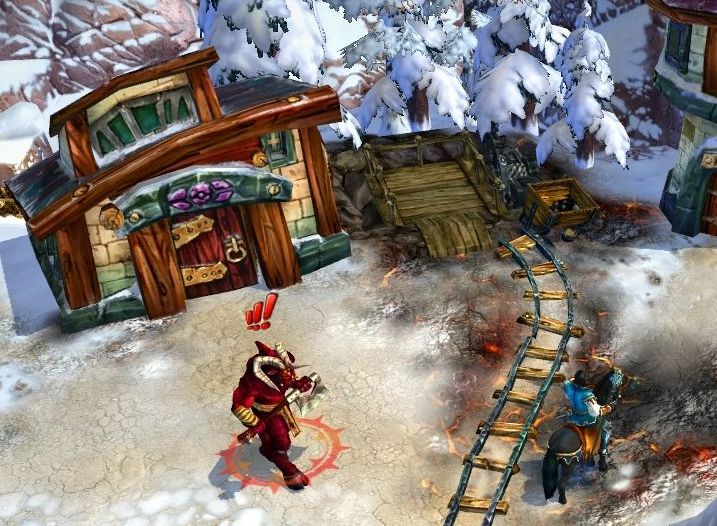 A second army is patrolling inside the village itself. 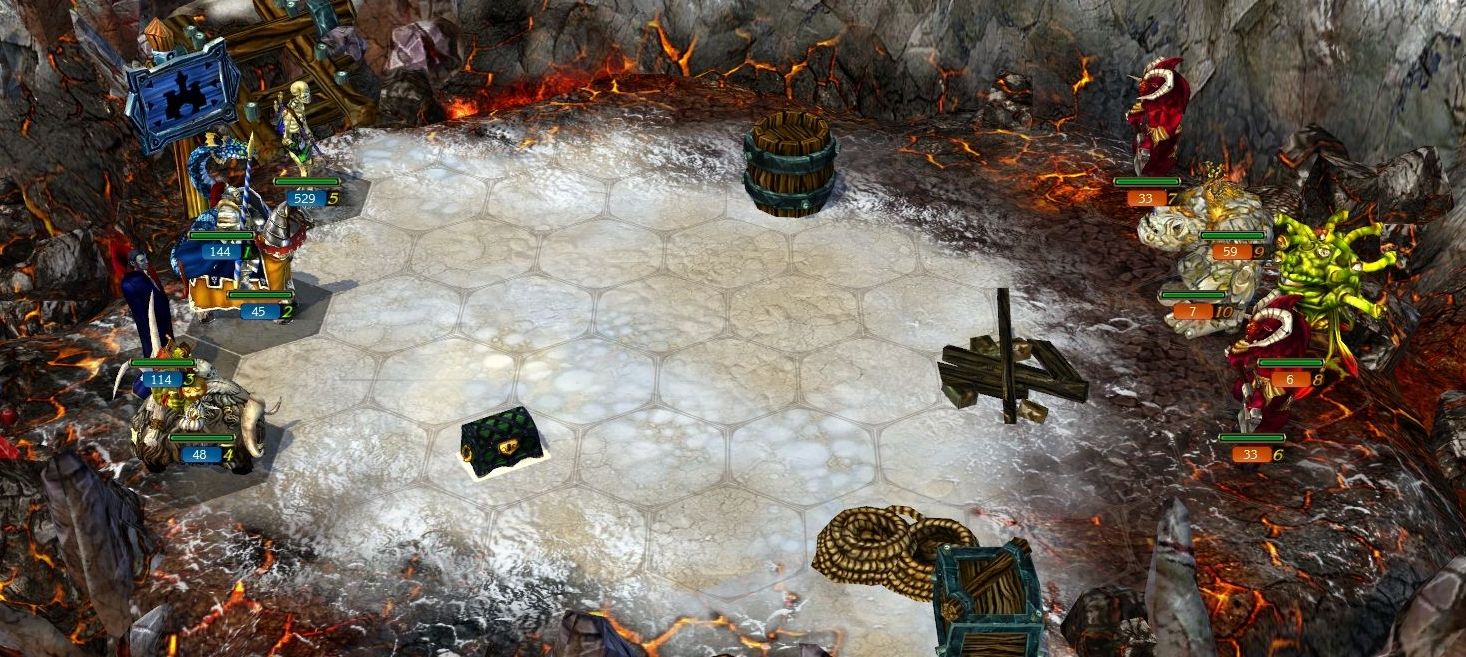 The demons have brought forth the fires of the underworld to counteract the snow and ice. This battlefield counts as neither snowy nor volcanic, so the demons have their ordinary Defense. 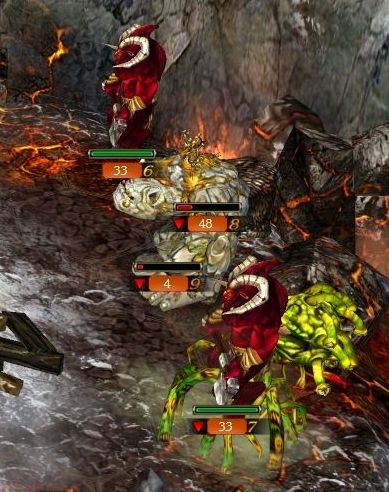 The army we are facing is quite strong. Demons (the unit, not the faction) are one of the biggest powerhouse units in the entire game. The number we are facing is a little high, and I really don't want both of these stacks hitting my lines simultaneously. So I put a Slow spell on one stack to separate them out, and then hammer the Cyclops with my remaining spell. 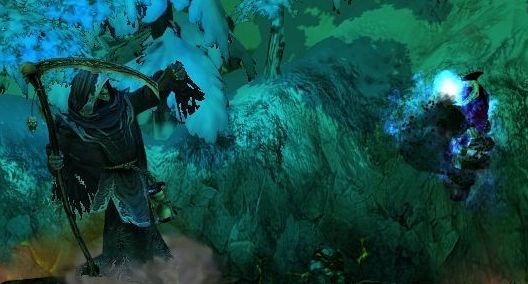 The un-Slowed stack loses 6 Demons to a Soul Drain. 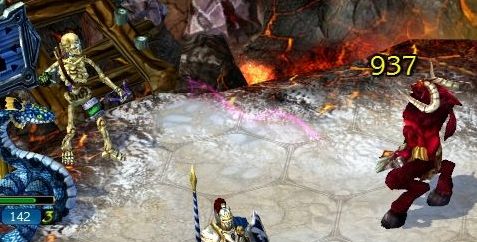 We can see one reason why the Demons are threatening units. They have the relatively rare combination of 3 Speed and the Running talent - by turn 2 they will be in your back line if you don't do something about it.  By using the Slow, we have kept these two strong stacks from getting to my side at the same time, so all of my melee units can gang up on one stack. Like Griffins, Demons have the Furious ability, giving them unlimited retaliations. Our Snakes and Vampires don't care about that, though. 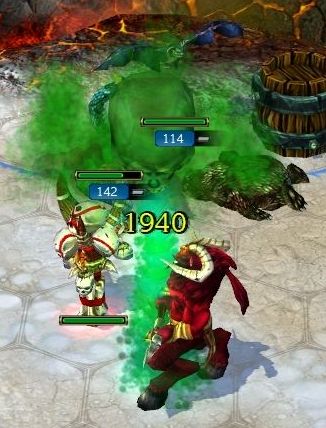 Their Fire Resistance means that Poison Skull becomes the single-target spell of choice when you don't want to use an AoE spell. 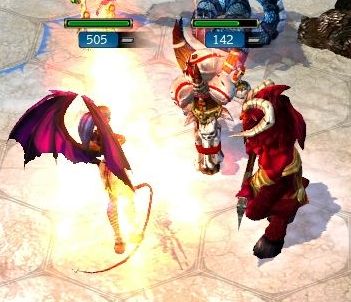 The last few Demons use one of their Talents - Summon Demons. As you might suspect, this ability lets Demons summon other demon units from their infernal realm to participate in the battle. The summon is not that strong, and brings out a stack with only 50-75 Leadership per Demon. Even so, this could be annoying. The AI isn't that smart though, and it doesn't tend to use this Talent until a few turns into the battle, so you can weaken the summoned stack by reducing the number of Demons first. 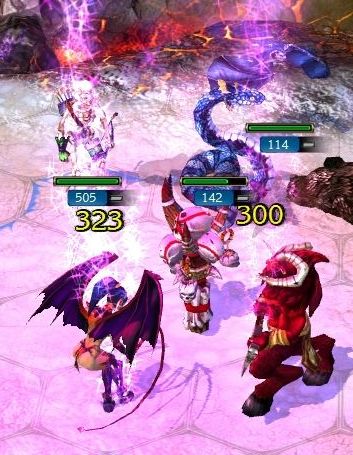 In this case, the AI is particularly incompetent. The summoned Demoness stack is immediately blasted by the totem before they can act. 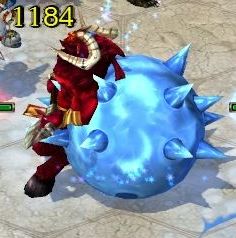 The last few Demons fall to an Ice Ball to the back. 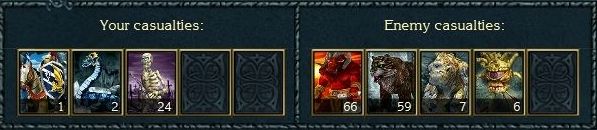 The village is cleared of the taint of evil. We head back to Trantos to let him know the good news. : Can we return to the village?: Yes, I've eliminated the demons. You can return.: I thank you on behalf of all our villagers. We will always be happy to see you in our village! (Reward: 7800 Gold, 550 Experience): Thank you. You'd better put a guard in your lookout tower, so you'll be ready for an invasion beforehand!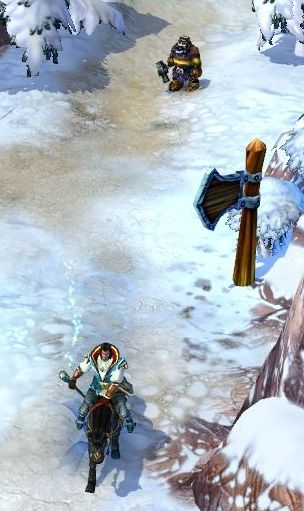 With that, Trantos heads for the village... slowly. Extremely slowly. 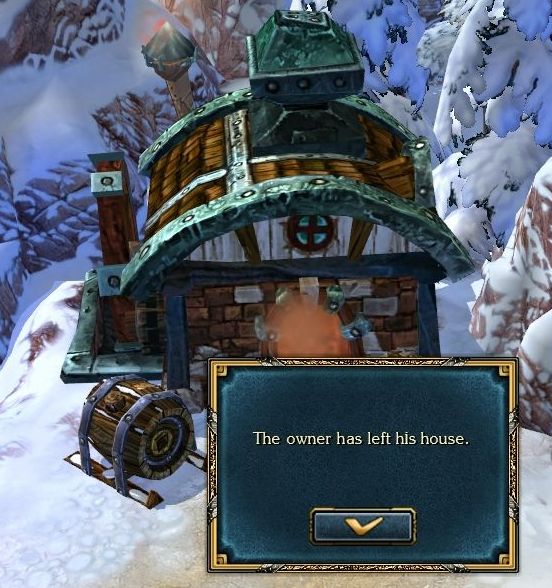 The local blacksmith appears to be away. Guess who we have to wait for if we want to visit this shop? 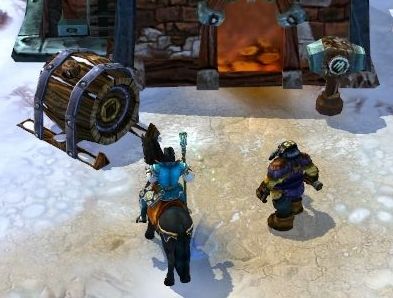 About three minutes of waiting later... 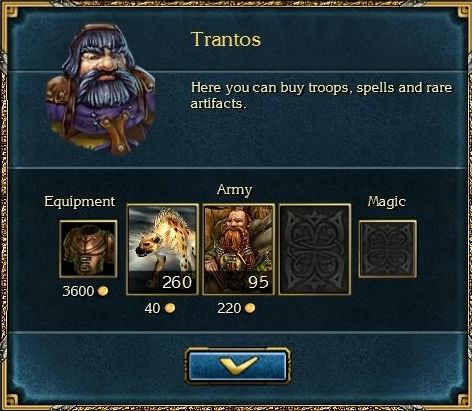 All that waiting, and the shop is essentially garbage. There is an elevator to the Taron Mines here in Ocular Village, but we will first take our news from the necromancer back to the dwarven capital to find that treasure. On our way, we check in with Zhdack. : So have you visited the necromancer?: What a wife you had! How did you live with her, dwarf? Well, it's none of my business. I've found out where the gold is, I just wanted to dig it out and bring it to you.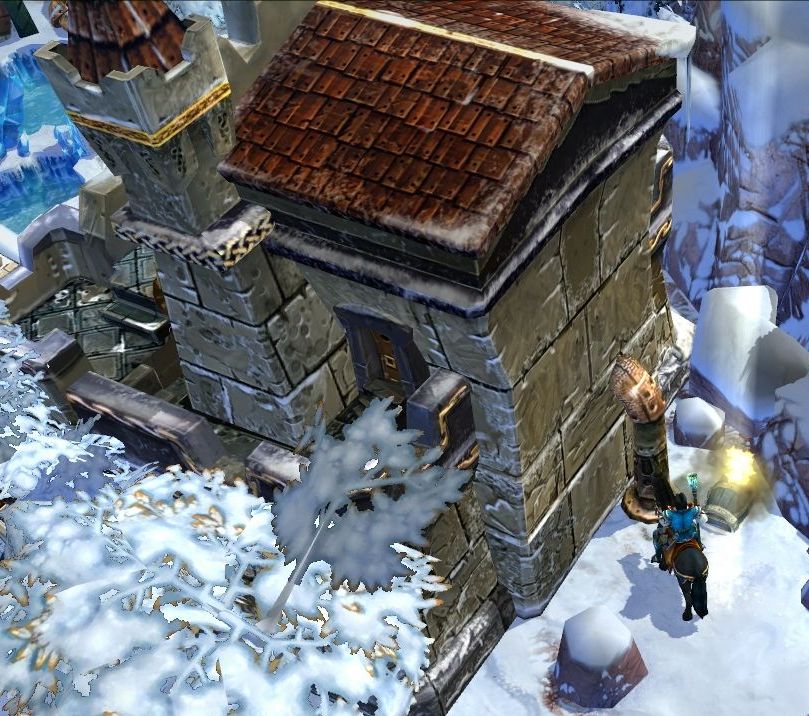 Zhdack's late wife directed us to look "behind the castle", and the chest is easy to find now.  Yes, that is indeed a Chest. : So have you visited the necromancer?: Uhhh, yes? Don't you remember our conversation about two minutes ago?: I've already spoken to your wife and even dug out the chest. Here, take it!: Ah, thank you so much! Here, take half the gold. DOn't worry, you can trust me! Zhdack never deceives others, ask anyone! (Reward: 7200 Gold, 550 Experience): Ok, ok, I believe you. See you later!Well, I don't believe him... but there's not much we can do about it. We take our money and go. 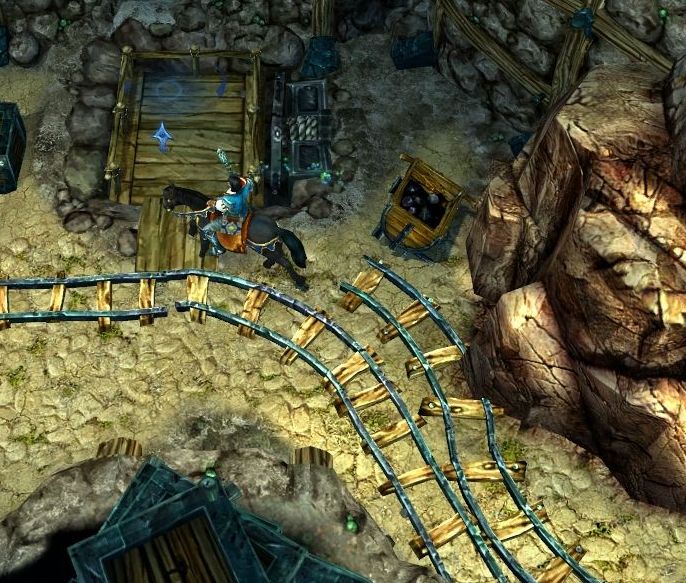 You may remember that on our first pass through the Taron Mines on the way to the capital, we passed by this elevator. 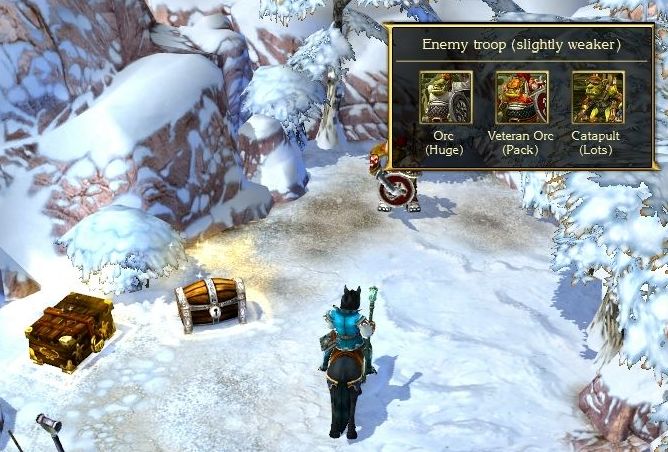 The lift takes us to a small isolated plateau. An Orc army has gathered some booty here - I don't think they came upon it legitimately, and neither would Bill care if they had. 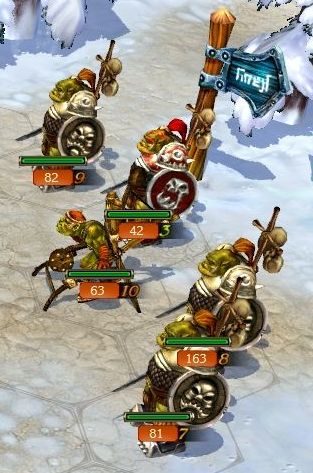 The Orc army is pretty strong - lots of Orc, a few of the stronger Veteran Orcs, and a large Catapult contingent. 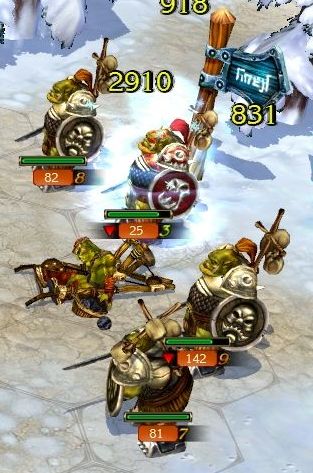 The Catapults fall to pieces under the Ice Snakes, and two of the Orc units get slowed. 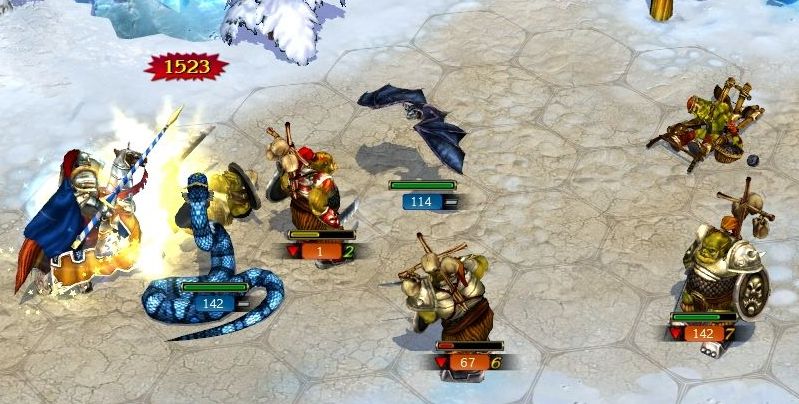 I focus my troops on the left flank, and the Veteran Orcs and one of the Orc stacks goes down under the combined assault. 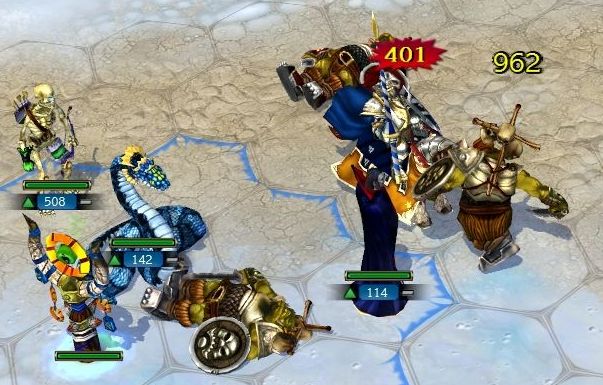 When we get to the other side, though, my Horsemen get a nasty critical hit done to them. Well, there is one tool I haven't used yet that is best when this sort of thing happens. 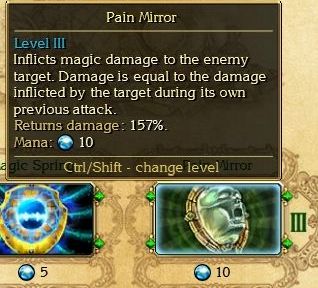 Pain Mirror is a Distortion spell that does damage based on the amount that unit did in its last attack. This mechanic means that the spell functions best when a strong enemy does a critical hit.  Intellect does affect the percentage returned, but it is still useful even at very low Intellect values, so Warriors and Paladins will probably like this spell as one of their better sources of direct damage. For a Mage, your direct damage spells will tend to be better unless the attack was absolutley massive. 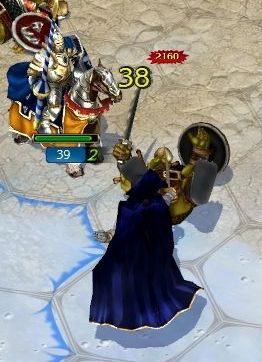 A final lunge of the rapier from the Vampires finishes off the Orcs. 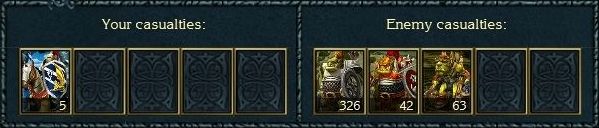 The Horsemen take a number of losses, mostly from that one critical. 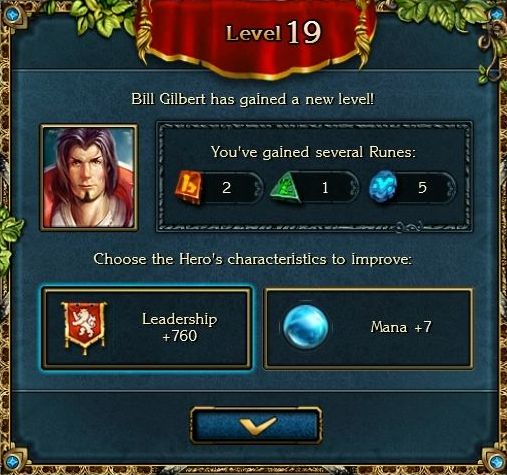 The fight brings us just over the line to the next level. As usual, Leadership is taken when available.   The booty that the Orcs had stolen is stolen back, not a bad haul. 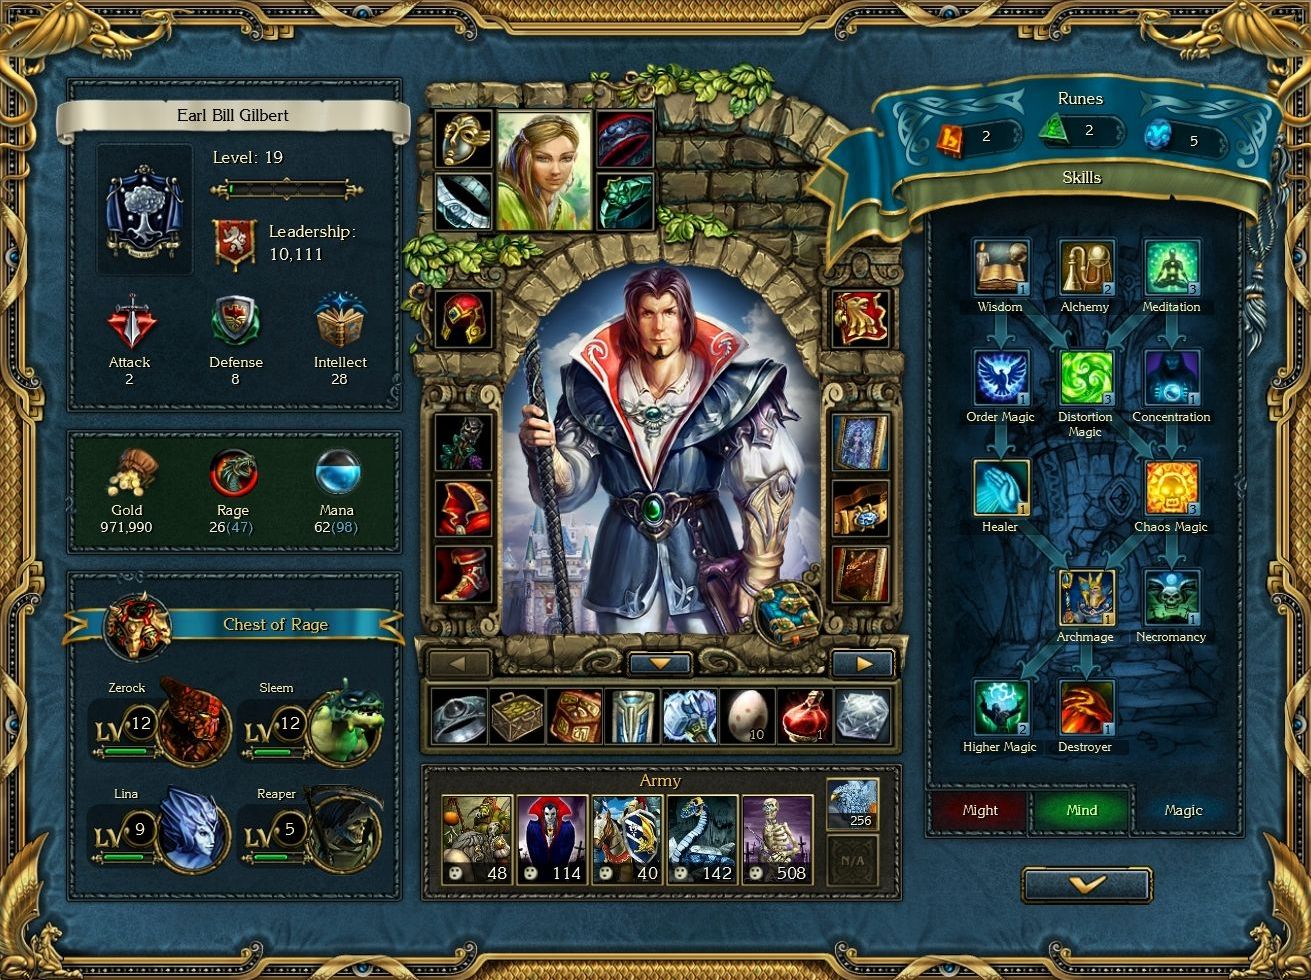 Between the promotions, the level, the banners, and the Vampire Ring, Bill breaks 10,000 Leadership! We are a force to be reckoned with, indeed! Next time, we will head back underground to deal with the remaining armies wandering the Taron Mines, and to see if we can find this Underground Sea. ---------------------------------- Bonus Material Learning Lore Let's continue chatting with the Reaper about the Chest and his world. : Do you know anything about this Chest?: I know. The knowledge of the Temple I share. It is one of the Greatest Things, the creation of which shakes the tissue of the universe.: Who created the Chest?: What will you learn from a name? What would the name of the world tell you? Pandora's Box is its name in the Temple's sources. It was created by a great master, and a high price was paid for it. Archdemon Azazel, the Pilgrim Garmah, Master Vayen, Archdemon Baal - the Chest has had many owners...: What was it created for?: It was created in one of the closed worlds, for the Eighth House of the Lord of Demonis, Azazel. This was a weapon that should have given victory to its master. He craved power; he wanted to be a Master of a more powerful House, having captured its Lord, or having won him in battle.: How does it work?: It was created for Demonis's demons. This is why it is controlled by emotions of Rage, as are all their artifacts. In your world, magic is performed with the help of an invisible substance called Mana, In Demonis, magic is performed with the help of the emotional aura of the world, which is called Rage. There is emotional background in every world which contains intelligent emotional background in every world which contains intelligent creatures. In some places it is weak, and in others it is strong... The Chest captures creatures that they may be controlled. It collects Rage, and if there is enough, you may release one of the captives for a short period of time.: What is this Chest actually?: It's a prison, a trap. The Chest captures those whose power is able to distort the tissue of the universe, to influence the fate of worlds. The stronger the captive, the stronger the bonds. Great sorcerers, envoys, and even ordinary deities can become the Chest's captives. Even a Guard of the Temple.: I have other questions to you...: The breath of eternity is on my face. Your questions will be heard.: How did you get into the Chest?: Thieves entered into the Temple of Time, from the world that is called Demonis. There they stole the Mirror of Fates, and so to chase them I was sent. But long was the way, and my power was exhausted. In Demonis, the thieves tricked the trail and waited fro the Guard, knowing the chase was coming to an end. By the artifact of great power was I trapped.: Tell me about your world.: My native world I do not remember. The one who is called to serve the Temple must say goodbye to his past. I only remember the Temple of Time, in which I had been Guard for many thousands of years. In this world, there is nothing but the Temple. In this world there is no one but the thirteen Guards. Beyond time and space this world is.: It must be quite an interesting place! : You cannot even imagine how right you are, young man! I have heard about this place, and about the Temple of Time. A receptacle of knowledge of millions of centuries and millions of worlds. It is said that concepts of time and space are really quite relative there, and Guards manipulate them at their will. I'd like to get in this world for a while, and to walk around the Temple. You can surely come across many interesting things there.: Hmmm... The knowledge of a million worlds? One can definitely find spells there, of which Endoria has no equal!: Many have tried to obtain the secrets of the Temple of Time. That is why the Temple chooses the Guards from among other worlds' inhabitants, so that from the encroachment of thieves they may protect the Temple's secrets. A punishment far worse than death awaits those who break into the Temple!: I would guess that possessing the knowledge collected in all the other worlds must enable the Guards to concoct a punishment worse than death!: Aha... But the fact of the matter is that the valuables from your Temple are stolen by whoever wants them. And the Guards are no hindrance to them. Even in my Litan there were a couple of things that were in your Temple previously. Of course the Guards managed to find both of them, and dealt with the thieves very quickly - but still, even you, the masters of Time and Space sometimes make mistakes... Take you, for instance. A stick in this damned Chest, while the Mirror of the Fates lies somewhere in Demonis. Assuming it hasn't already been returned to the Temple by someone more clever than you.: She's right... You are sitting there, while the stolen Mirror is in Demonis.: Even Time cannot be infallible. Yes, I know it to be true. But I feel the power of Guard in me, and so I am still Guard: the Temple believes in me and needs me...: (Close the Chest...) : You cannot even imagine how right you are, young man! I have heard about this place, and about the Temple of Time. A receptacle of knowledge of millions of centuries and millions of worlds. It is said that concepts of time and space are really quite relative there, and Guards manipulate them at their will. I'd like to get in this world for a while, and to walk around the Temple. You can surely come across many interesting things there.: Hmmm... The knowledge of a million worlds? One can definitely find spells there, of which Endoria has no equal!: Many have tried to obtain the secrets of the Temple of Time. That is why the Temple chooses the Guards from among other worlds' inhabitants, so that from the encroachment of thieves they may protect the Temple's secrets. A punishment far worse than death awaits those who break into the Temple!: I would guess that possessing the knowledge collected in all the other worlds must enable the Guards to concoct a punishment worse than death!: Aha... But the fact of the matter is that the valuables from your Temple are stolen by whoever wants them. And the Guards are no hindrance to them. Even in my Litan there were a couple of things that were in your Temple previously. Of course the Guards managed to find both of them, and dealt with the thieves very quickly - but still, even you, the masters of Time and Space sometimes make mistakes... Take you, for instance. A stick in this damned Chest, while the Mirror of the Fates lies somewhere in Demonis. Assuming it hasn't already been returned to the Temple by someone more clever than you.: She's right... You are sitting there, while the stolen Mirror is in Demonis.: Even Time cannot be infallible. Yes, I know it to be true. But I feel the power of Guard in me, and so I am still Guard: the Temple believes in me and needs me...: (Close the Chest...)Marking the Map 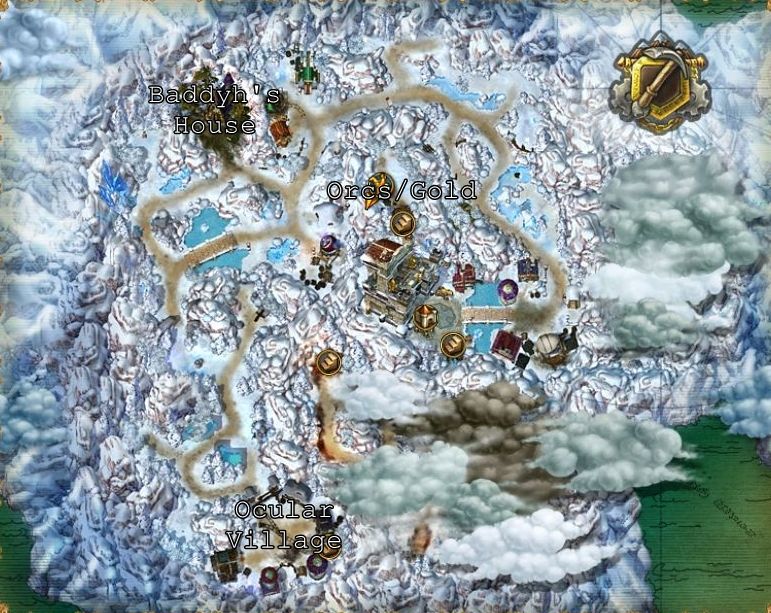 Talkin' 'bout Troops Demon 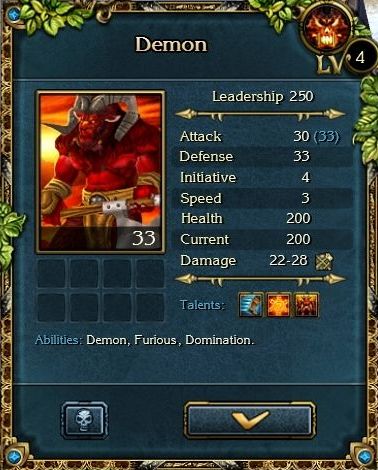 Resistances: 10% Physical, 50% Fire Critical Hit %: 15 Defense Bonus: 6 Talents  Running Running Bloody Pentagram: Creates a bloody pentagram, which gives 2 points of Initiative and Morale to all friendly troops of levels 1 through 4. The pentagram vanishes in 2 turns. Charges: 1. Bloody Pentagram: Creates a bloody pentagram, which gives 2 points of Initiative and Morale to all friendly troops of levels 1 through 4. The pentagram vanishes in 2 turns. Charges: 1. Summon Demons: Summons a troop of demons of level 1-4. Total Leadership of the summoned troop is 50-75. Charges: 1. Summon Demons: Summons a troop of demons of level 1-4. Total Leadership of the summoned troop is 50-75. Charges: 1.Abilities Demon Furious: Always retaliates against enemy attacks Domination: Inflicts additional 50% damage to creatures of level 1-3. Gully's opinion: It is hard to overstate how good Demons are. They are one of those units that have no weakness, yet they don't pay for that well-roundedness through mediocrity. Their offensive capability is great: high Attack, good Damage, and the unusual combination of 3 Speed with the Running talent. This means they have high mobility for a turn when you need it, but are still fast enough once it is used. Their damage range is already solid, but then they get +50% damage on top of that to all level 1-3 units (aka, the majority of units in the game). On the other side of the coin, they have high Defense, good Health, and resist the two most common damage types - oh, and they have unlimited retaliations. And to top it off, they get not one but two very good support Talents. The Bloody Pentagram creates an area that superbly boosts any of your units inside - remember that Morale boosts Attack, Defense, and Critical Hit chance. And summonable creatures are supremely useful to absorb enemy attacks and retaliations without taking losses. The only downside of their Talents is that you won't be attacking with them the turn you use them. Sure, the Demon is a pricey unit, but what you get more than makes up for it. Fighting them: Luckily, the AI doesn't use Demons well - it will usually waste the Running talent and it won't use the summon talent for a turn or two. If you go for the Slow debuff, try to cast it before their first move - otherwise they will be nearly in your face before you cast it. Other than that, try to use ranged attacks and spells. Be aware of the unlimited retaliations and the boost against Level 1-3 troops. Either use troops that can't be retaliated against or try to use Level 4/5 units against them. Spells Seen Pain Mirror  Inflicts magic damage to the enemy target. Damage is equal to the damage inflicted by the target during its own previous attack. Crystal Cost: 1 / 2 / 4 Mana Cost: 5 / 7 / 10 Level 1: Returns Damage: 75% Level 2: Returns Damage: 100% Level 3: Returns Damage: 125% Gully's opinion: Pain Mirror is a pretty excellent Distortion spell, though also quite niche in its uses. Since it works off of the damage done by an enemy, it is only good when one of your own troops has received a major attack. If you have a sacrificial unit (either a summoned unit, or one that you have large reserves of), it can be fun to deliberately leave them open to attack from a strong enemy stack. Keep in mind that the spell does magic damage, so don't use it if the enemy has good Magic Resistance. Intellect boosts the percentage returns, but the spell is still good for heroes with low Intellect. It is a very cheap spell to upgrade as well. Items Identified Gerzhack Bag  Description: Special bag for the gathering of Gerzhack. Gathered: 0/10 Type: Quest Info: You should gather Gerzhack only into a special bag, inside which the plant can retain its exceptional properties. Vampire Ring  Description: A golden ring featuring the image of a bat. Effects: +300 Leadership, +20% Health to Vampires, -1 to the Morale of all Elves in your army Type: Artifact Race: Undead Cost: 18000 Info: The emblem engraved on the ring, indicates that this ring belongs to one of the most ancient families of vampires. The ruby eyes of the bat flash brightly in the light, and seem to be filled with blood. The full set includes two items: the Cloak of Shadows and the Vampire Ring. In combination, this awards +5 to the Defense and Attack of Vampires.
|
|
#
?
Nov 13, 2017 15:43
|
|
|
...well, poo poo. I wonder if someone's going to try to tip Mr. Bill Gilbert into the chest?
|
|
#
?
Nov 14, 2017 05:47
|
|
|
Gully Foyle posted:If anyone has any idea what "kira" means in this context, you are smarter than I am. Quick googling gets only Death Note references and other places where it is clearly a name. I suspect this is a mistranslation of "кирка", pickaxe. With that, message becomes clear - pickaxes as hockey sticks and general brawliness on ice ring are indeed dangerous.
|
|
#
?
Nov 14, 2017 07:26
|
|

|
The levelup choices for rage skills is a little annoying because it will offer the choice of drastically lowering cost/rest time for a ability but future levelups will ignore those values. That soul draining ability for instance, you can choose the five rage option but future levels might set it back to 30 or 40 rage; rather than a increase of 10, the rage cost goes up by 25 or 30. A skill might gain an extra two turn cooldown. You can try skip around it by picking other abilities to level but the game will eventually force you to level every ability. It may be to prevent abuse but there are far worse shenanigans you can get away with, that were never 'fixed'.
|
|
#
?
Nov 16, 2017 03:06
|
|
|
Delacroix posted:The levelup choices for rage skills is a little annoying because it will offer the choice of drastically lowering cost/rest time for a ability but future levelups will ignore those values. That soul draining ability for instance, you can choose the five rage option but future levels might set it back to 30 or 40 rage; rather than a increase of 10, the rage cost goes up by 25 or 30. A skill might gain an extra two turn cooldown. Umm, I don't think this is true, as far as I can tell. The rage cost reductions do stick around through the next level up and beyond. Slight spoilers for the next update, but I do end up leveling Soul Drain again, this time for more power. The Rage cost will go to 20 for an increase of +15 - as expected, as you can see from this update. Without the level reducing it by 10, the cost would have been 30. Could be that there was a bug that was patched out or something. NHO posted:I suspect this is a mistranslation of "кирка", pickaxe. With that, message becomes clear - pickaxes as hockey sticks and general brawliness on ice ring are indeed dangerous. Ah, that's a great explanation, and one I would not have ever thought of. Glazius posted:...well, poo poo. I wonder if someone's going to try to tip Mr. Bill Gilbert into the chest? That'd be quite the trick, considering the thing is grafted to our arm.
|
|
#
?
Nov 16, 2017 12:27
|
|
|
Update 44 - Labour Disputes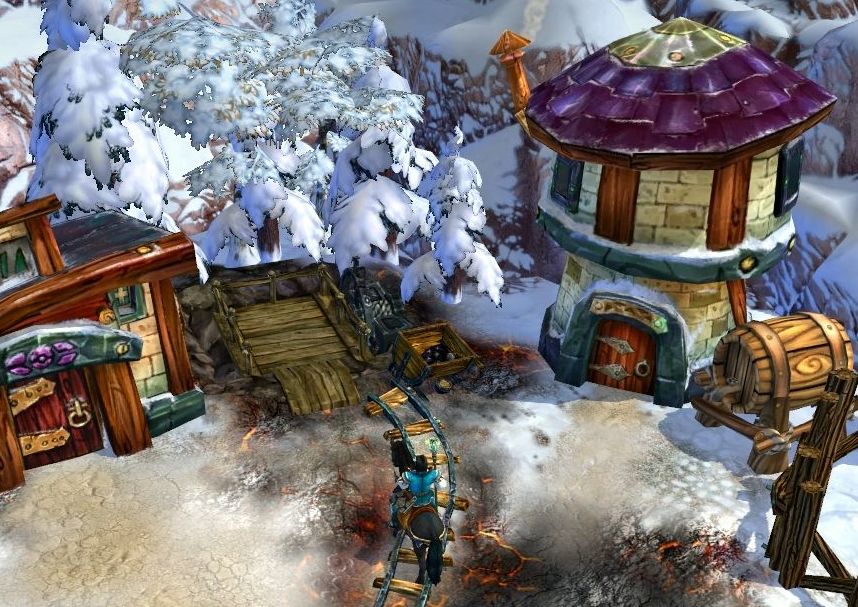 We begin in Ocular Village, which we freed from the occupying demon forces. The village has an elevator to take us down to the mines. 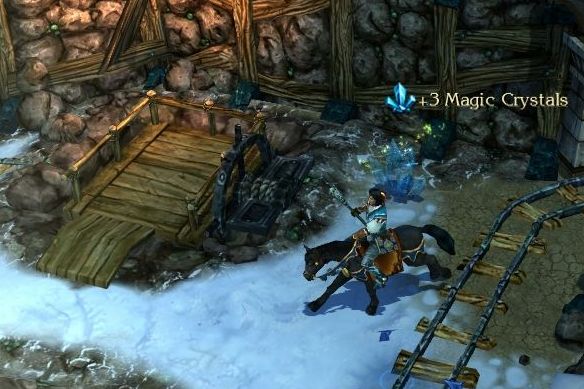 The mines here are full of snow drifts, presumably coming down from the elevator shafts. 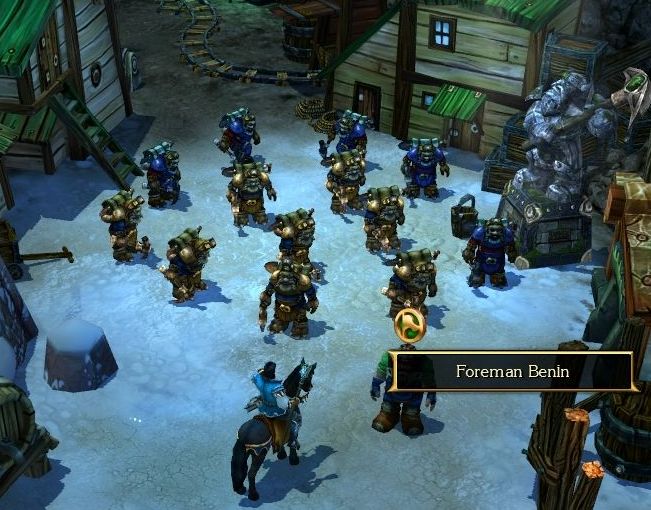 Right next to the lift, we run into a mob of angry dwarven miners. 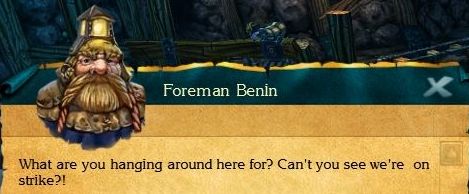 : Dwarves? On strike? I always thought you work all day, half the night, then dream of your smithy until morning. : Dwarves? On strike? I always thought you work all day, half the night, then dream of your smithy until morning. : Judge for yourself. Have you ever heard of anything like this: the dwarves who work above ground have a 50 hour workweek. Down below here we have a 60 hour week, on account of our comfortable conditions. Of course, that's fair and all, because at the surface it's not so comfortable as it is here in the mines. But now the situation has changed, since we have to fight the Demons. And I - I mean we - now claim workweek equalization with those on the surface! 50 hour workweek! 50 hour workweek!: What a problem you have here...: Look, human, maybe you'll help some simple underground workers? We've written a plea to the king, where we've stated all our demands. Maybe you'd, you know, take it to the capital, to Torn Digor? We're afraid of his anger, and you're a stranger, so he won't do anything to you. We'll even pay you for your courage. (Reward: 6600 Gold, 650 Experience).: To the King Torn Digor? Ok, I'll deliver your petition. : Judge for yourself. Have you ever heard of anything like this: the dwarves who work above ground have a 50 hour workweek. Down below here we have a 60 hour week, on account of our comfortable conditions. Of course, that's fair and all, because at the surface it's not so comfortable as it is here in the mines. But now the situation has changed, since we have to fight the Demons. And I - I mean we - now claim workweek equalization with those on the surface! 50 hour workweek! 50 hour workweek!: What a problem you have here...: Look, human, maybe you'll help some simple underground workers? We've written a plea to the king, where we've stated all our demands. Maybe you'd, you know, take it to the capital, to Torn Digor? We're afraid of his anger, and you're a stranger, so he won't do anything to you. We'll even pay you for your courage. (Reward: 6600 Gold, 650 Experience).: To the King Torn Digor? Ok, I'll deliver your petition.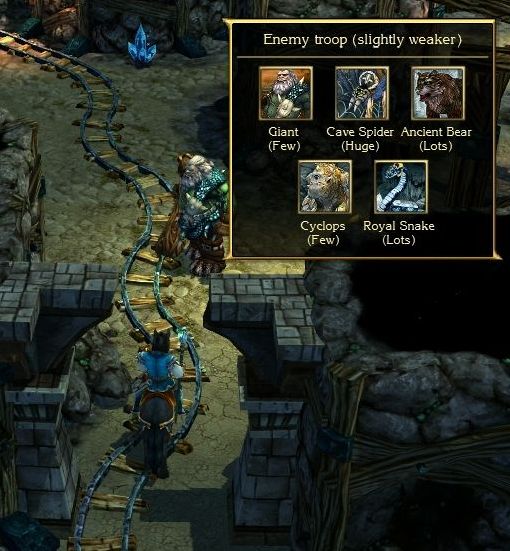 Well, we can't get pass the striking dwarves, so let's try the other way. Naturally there's an obstacle that way, but we know how to deal with this. 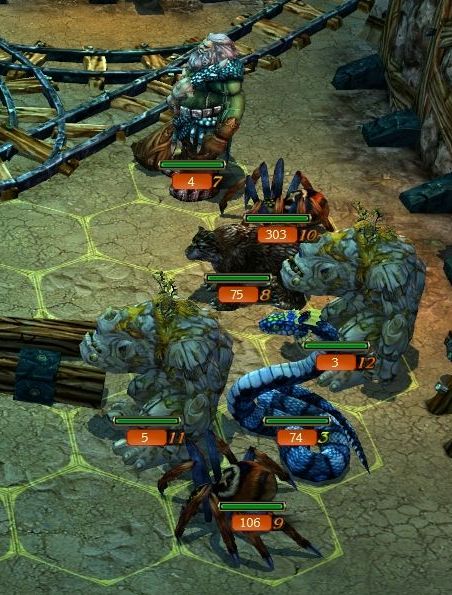 A few renegade Giants are leading this mob of various cave dwellers. 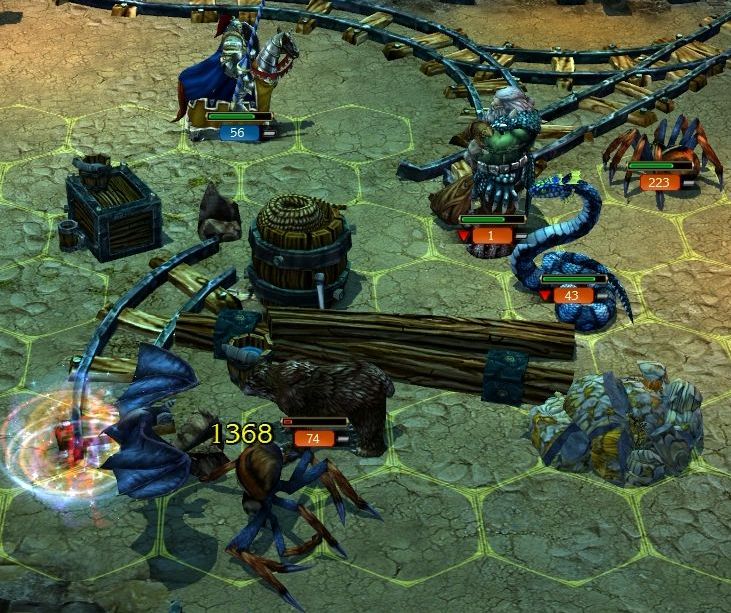 The Vampires, in bat form as usual, take on the lower path. Since they can suck out life and revive any lost numbers, they are much tougher than it would seem. 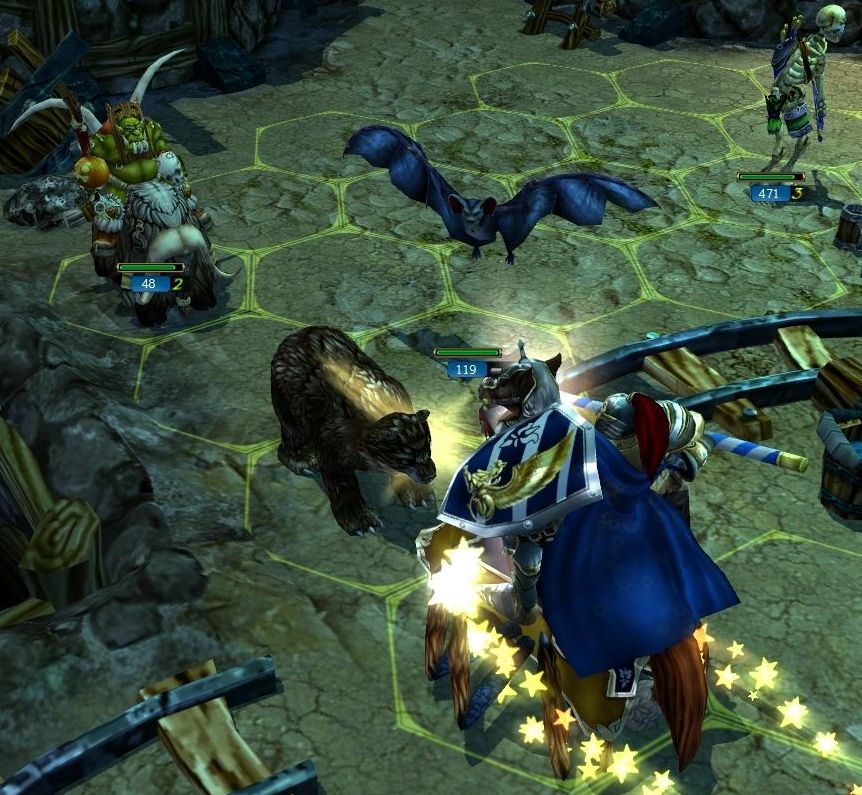 The large stack of Ancient Bears holds out for a while, but is eventually surrounded and destroyed. 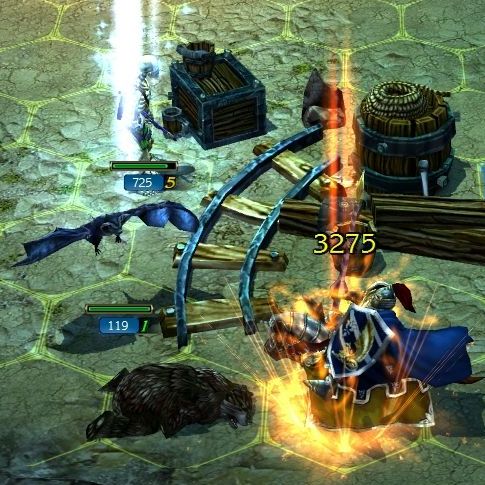 With the Griffins out of the army, the Horsemen are now my source of mobile Health for other troops. Combined with a Level 3 Sacrifice spell, I can bring back about 250 Skeleton archers at the cost of 25 Horsemen.  Since I can always get more Horsemen, this is a good trade. 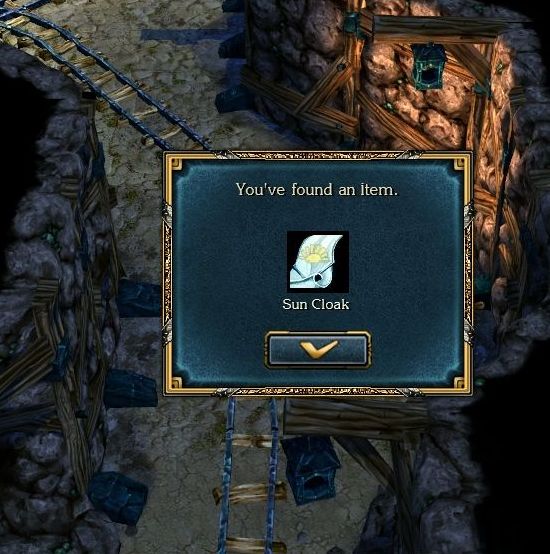 Past that force, the mining tunnels lead to a treasure chest with more than just gold. The Sun Cloak is a pretty good item, meant for Mages or Paladins. It gives a small boost to Intellect and Leadership. To wear it, we would have to give up our Cape of Wizardry, and I like the Mana boost that is giving me. 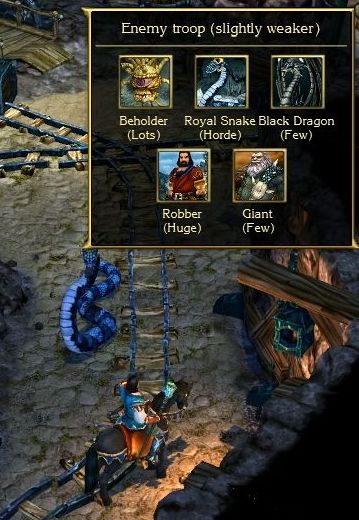 While admiring the shiny cloak, another enemy force finds us along its patrol route. 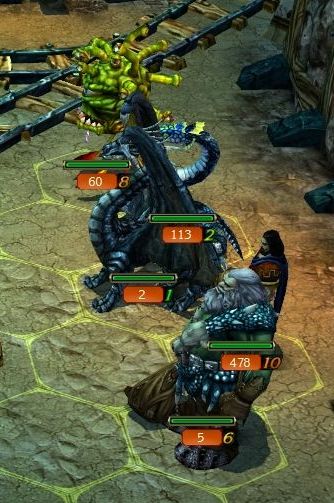 We finally get a look at the biggest, baddest unit in the game - the Black Dragon. At 2500 Leadership each, these guys are far and away the most expensive and most powerful troop we will face. As a Mage, these guys are your worst enemy. 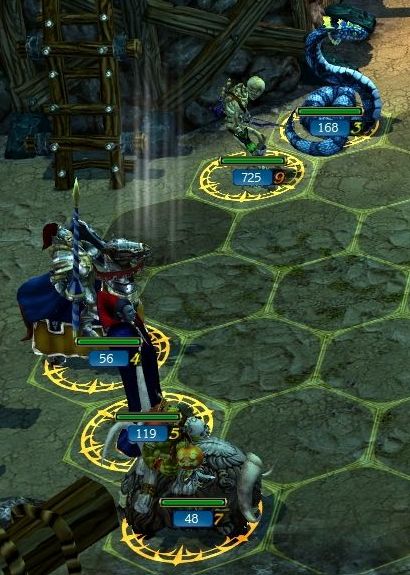 Using the tactics skill, I arrange my troops into the anti-dragon formation. We can't do anything about the dragon coming in to attack us, but this will minimize the casualties. 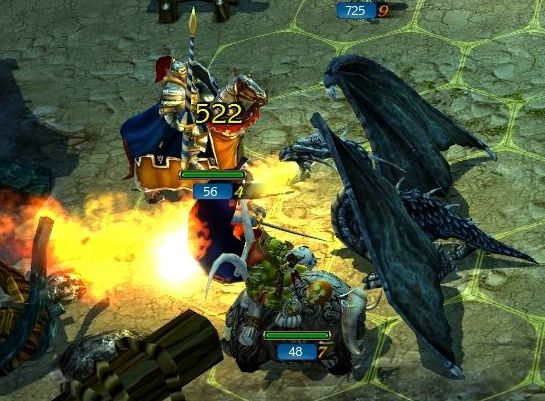 The Black Dragon (and the Red Dragon too) attacks with a flame breath that passes through the target and hits the unit behind it. Both of these units also have Talents that can hit multiple units in a line. The anti-dragon formation I use tries to avoid leaving any vulnerable targets to these attacks. 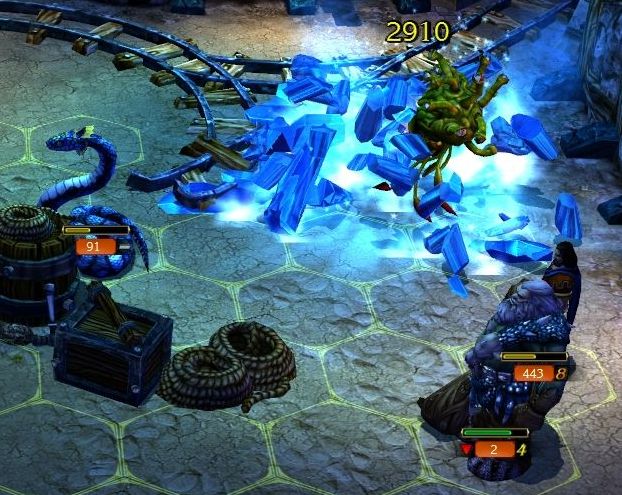 Even though the Black Dragons are in my lines, I focus my spells on the back row - not out of choice, though. The thing that makes Black Dragons the natural enemy of the Mage is that they are immune to any and all spells - no targeting, no buffs/debuffs, and not even AoE spells will touch them. 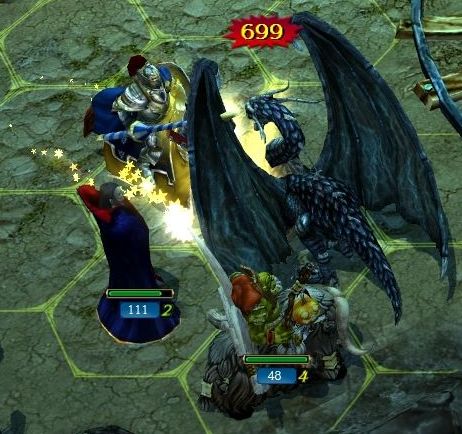 Even a critical hit from my charging Horsemen doesn't quite kill one of them. 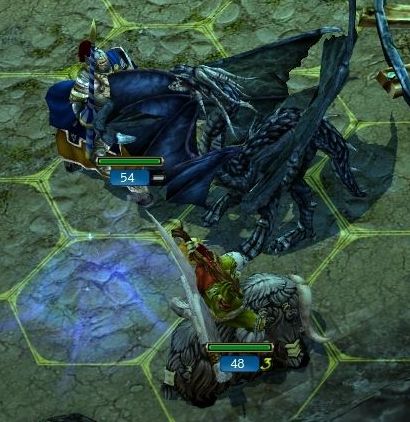 Still, only 2 of them means they fall under a combined attack fairly quickly.  The lost Vampires are resurrected by fresh blood from the enemy Royal Snakes, and the remaining units are mopped up. 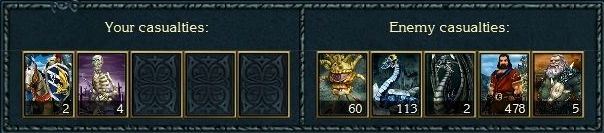 In the end, the Black Dragons only managed to kill a couple of Horsemen.  The Reaper gets his next level, unlocking the ultimate Rage ability - Black Hole. We will see it in action soon enough. 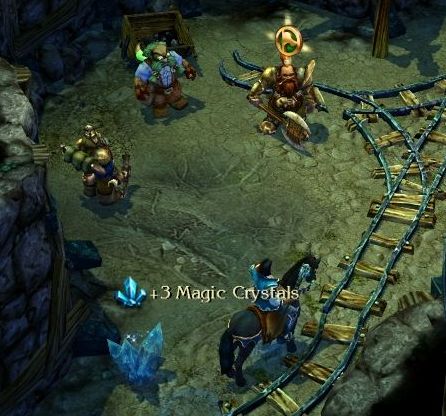 We continue exploring the tunnels in the area. A few worried dwarves look like they need some help. 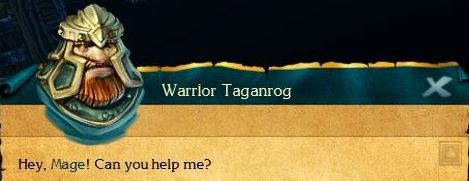 : What's the problem? : What's the problem? : Look, there, behind this door, the workers have barricaded themselves in, and refuse to open the door. You need to go through the upper pass, then come down the elevator and persuade them to unbarri... unbarrti... drat it... un-bar-ri-cade themselves! Whew! I did it. We've defeated all the demons here; so, the miners can get back to work without fear. But they won't want to listen to anyone except their foreman. That's the dwarf you need to talk to. Please help us, or we can't get any work done. (Reward: 8100 Gold, 600 Experience): Ok. What's the foreman's name? And how can I find the elevator?: Argah is his name. The elevator you need is the central one; it's in the south, near the castle.: Fine. I'm on my way. : Look, there, behind this door, the workers have barricaded themselves in, and refuse to open the door. You need to go through the upper pass, then come down the elevator and persuade them to unbarri... unbarrti... drat it... un-bar-ri-cade themselves! Whew! I did it. We've defeated all the demons here; so, the miners can get back to work without fear. But they won't want to listen to anyone except their foreman. That's the dwarf you need to talk to. Please help us, or we can't get any work done. (Reward: 8100 Gold, 600 Experience): Ok. What's the foreman's name? And how can I find the elevator?: Argah is his name. The elevator you need is the central one; it's in the south, near the castle.: Fine. I'm on my way.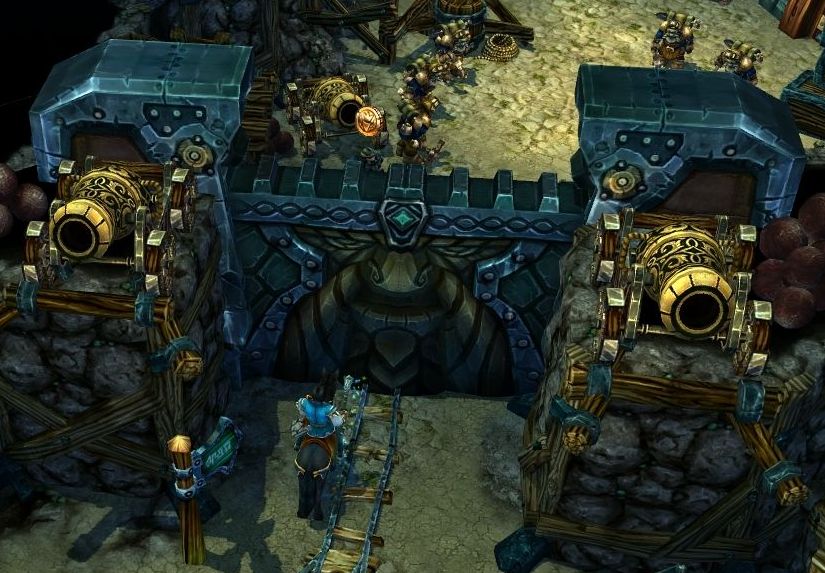 Those are quite the doors.  The "central" elevator is right next to Bogacho Castle, which you can see sitting on the upper ledge here. 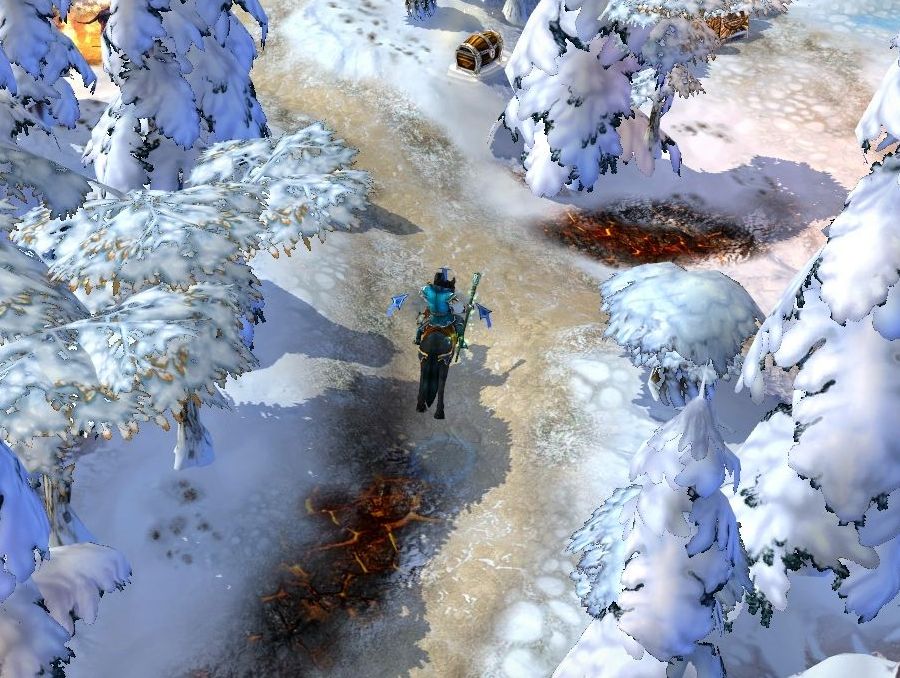 The upper pass is showing the typical demonic presence in the snow. 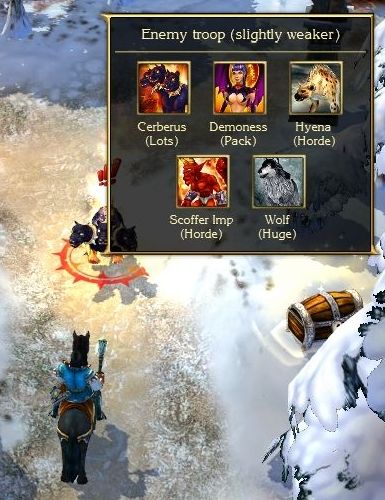 Several patrolling demon armies guard the pass.  These battlefields are treated as neutral terrain - neither snowy or volcanic - so demons get no Defense boost or malus. 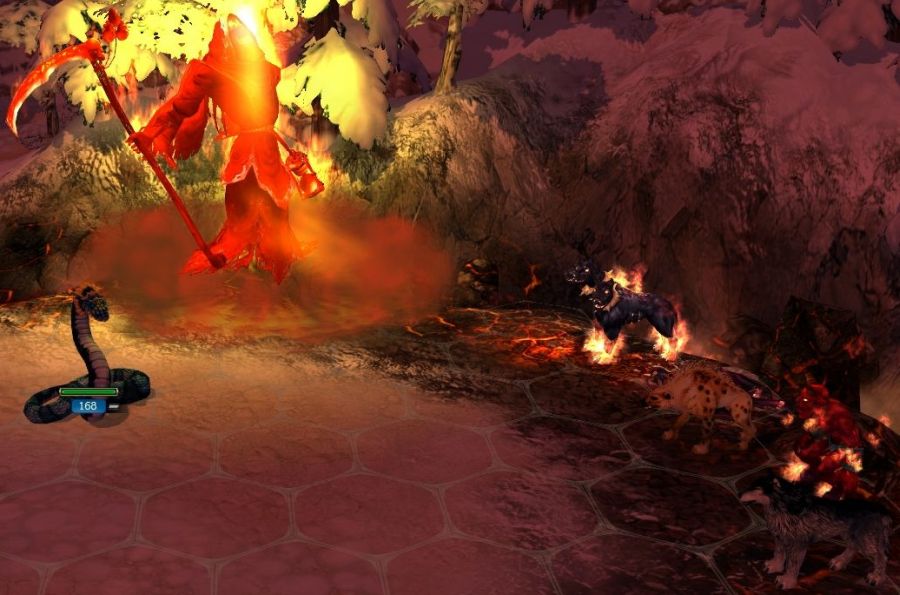 I want to build up Rage for the fight after this, so I steal a bunch from the enemy. 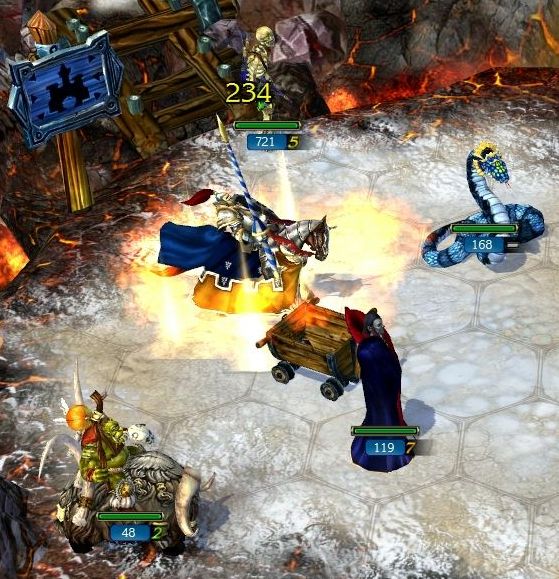 When facing Imps, I'll try to spread out to prevent their Fireballs from hitting multiple stacks. Tactics helps a lot with this.  Apart from the Fireballs, the rest of the army isn't much of a threat. 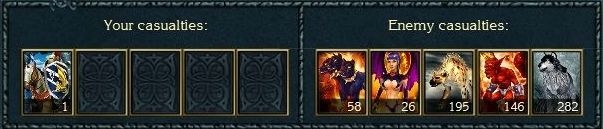 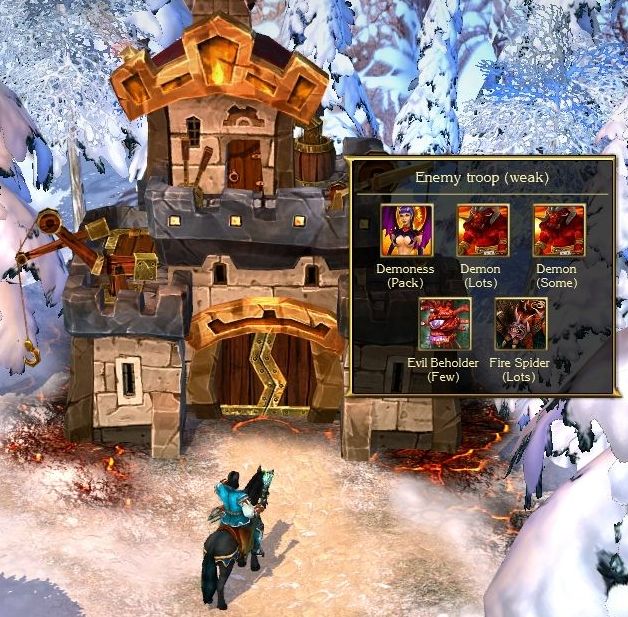 You may have noticed a sign in the previous battlefield for a castle. The upper pass has it's own fortress, Castle Magneto. Like Bogacho, it has been occupied by demons. We could bypass this entirely, but it's usually worth it to get access to new stores of units, spells, and items. 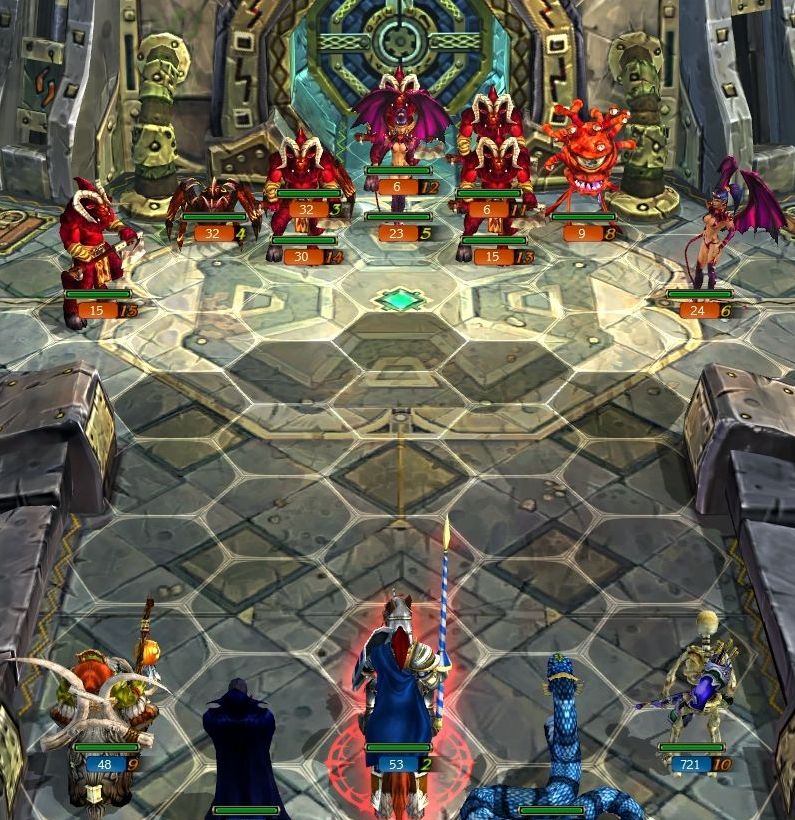 The occupying forces come out to face us as we storm the castle. 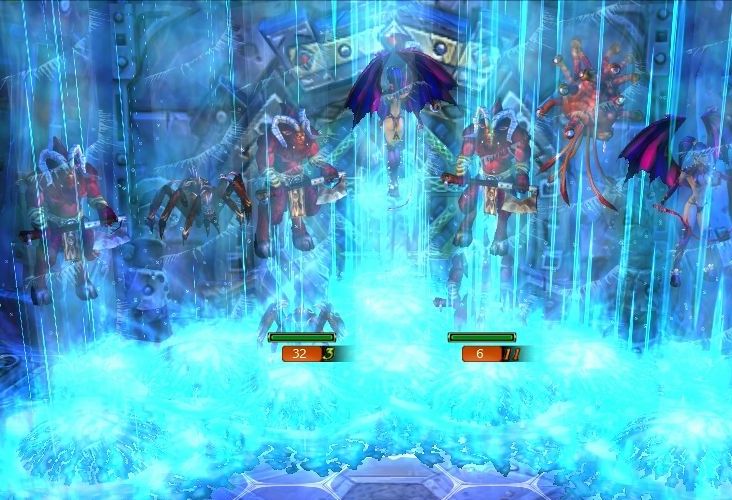 We start with a Geyser to weaken them. Besides being great for damage, Geyser is a great spell to gain Rage - each column seems to count as a separate attack for purposes of getting Rage. This cast gives me something like +12 Rage. 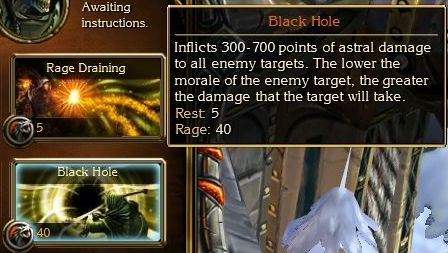 Just enough to be able to show off Black Hole. This is the most expensive Rage ability, and the most damaging - if you can afford it. This is the payoff, Rage-wise, for the Warrior class. It does a huge amount of AoE damage - like Geyser, it also acts solely on enemy stacks, and works no matter where they are. 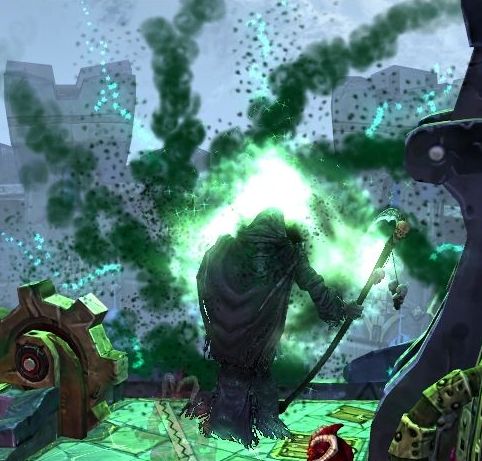 The Reaper rips a tear into the fabric of the universe. 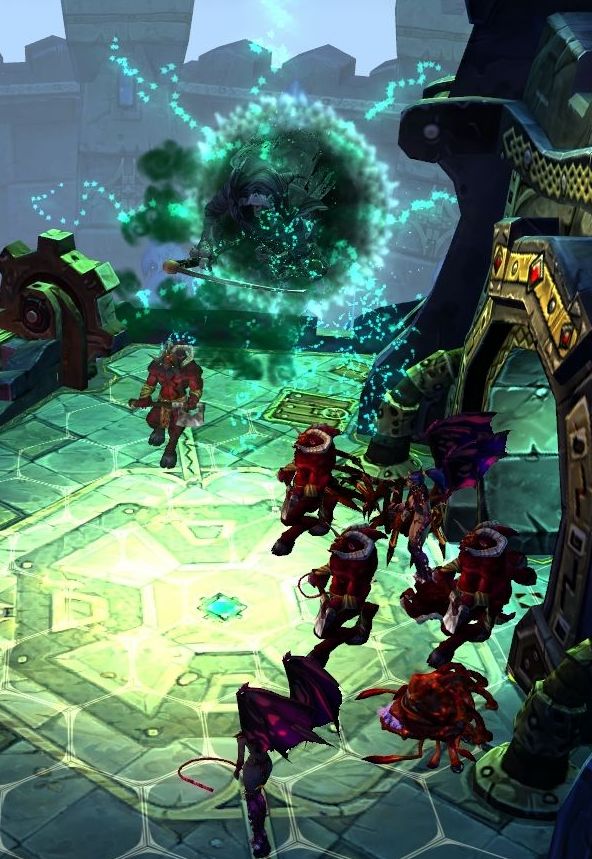 The Reaper himself is sucked into the void, along with the life of every enemy force in the field. 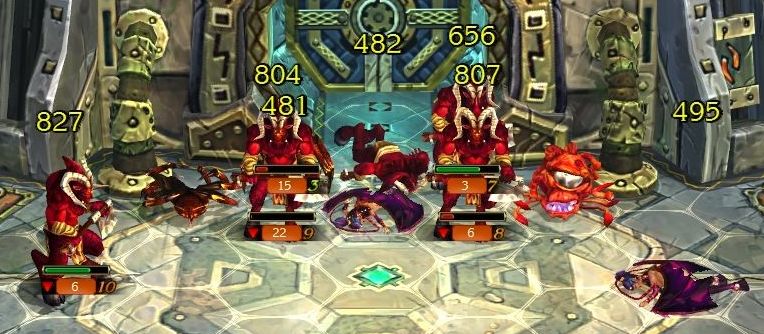 The Reaper's skills do a unique type of damage called Astral. This hidden type cannot be resisted - even Black Dragons take full damage from astral sources. 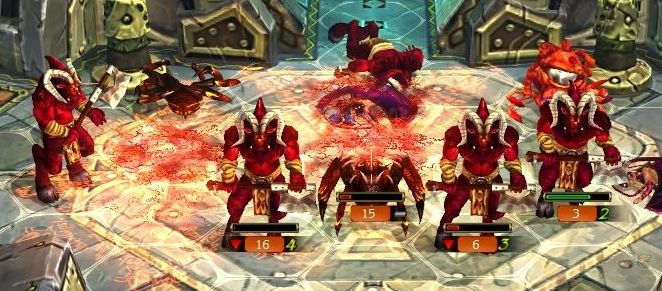 Each of the Demon stacks lays down a Bloody Pentagram - and then moves out of the area of effect. The AI is pretty dumb sometimes. 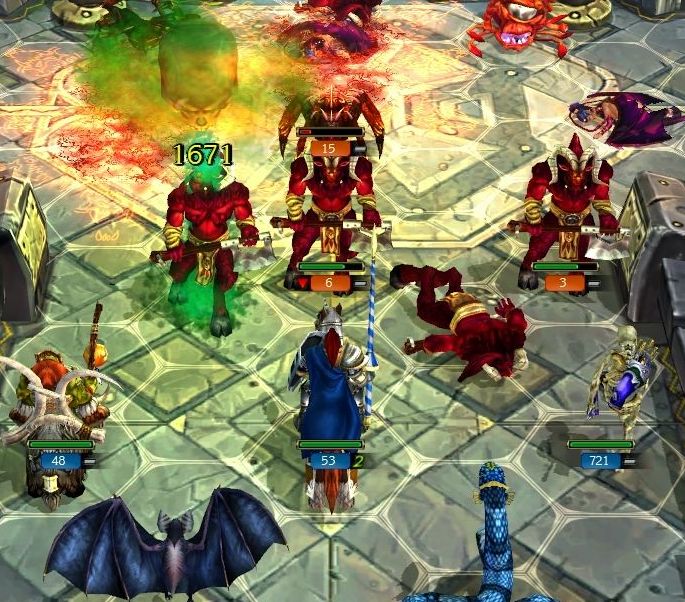 The few Demons left aren't too much of a threat to our full strength stacks. 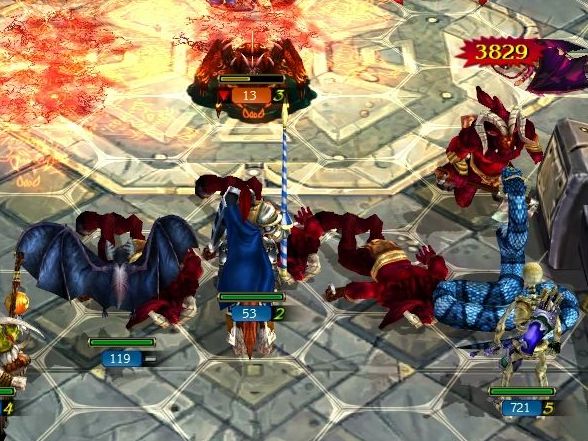 Each of my stacks chooses a target and wipes it out. 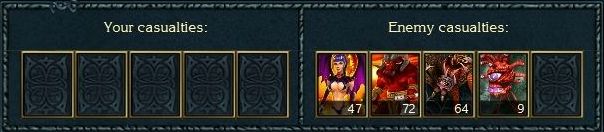 The defending forces are gone, and the castle is returned to the control of the dwarves. 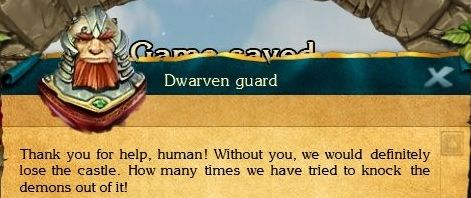 : But how did you give the castle up to the demons in the first place? : But how did you give the castle up to the demons in the first place? : Common treason. Demons bribed one of the guards, and he opened the gate at night. And he was the first to be torn to pieces.: I guess he deserved it. Ok, we'll talk later. Goodbye. : Common treason. Demons bribed one of the guards, and he opened the gate at night. And he was the first to be torn to pieces.: I guess he deserved it. Ok, we'll talk later. Goodbye.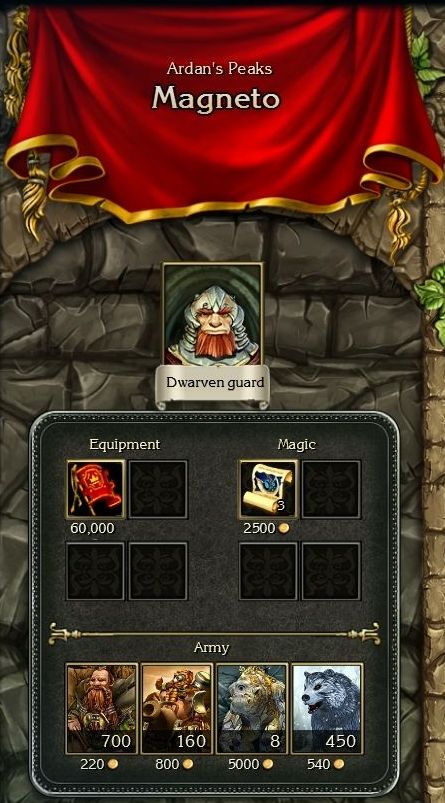 If you were running short on Dwarves somehow, this castle would be a good place to get them. But I am far more interested in that banner there.  Oooh, yes please. The Banner of True Faith gives a huge amount of Leadership, a huge Defense boost, and best of all, bonus Mind Runes. This regalia is one of three special equipment pieces, one for each skill tree that provides great bonuses and the relevant runes. In each case, you need to have the item equipped for 50 battles before you can access the runes. 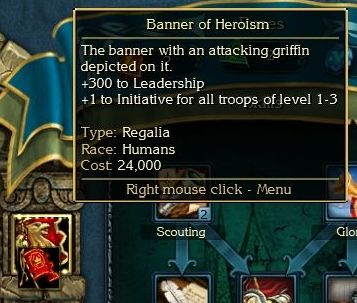 Sorry, Banner of Heroism, you were a good friend. I will miss the Initiative boost, though. 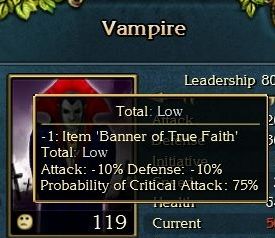 The Banner of True Faith does give negative morale to my Undead units, though. It's a small penalty - the negative to Defense, for instance, is far outweighed by the Defense boost the banner gives. The lower chance of critical hit is the larger problem. 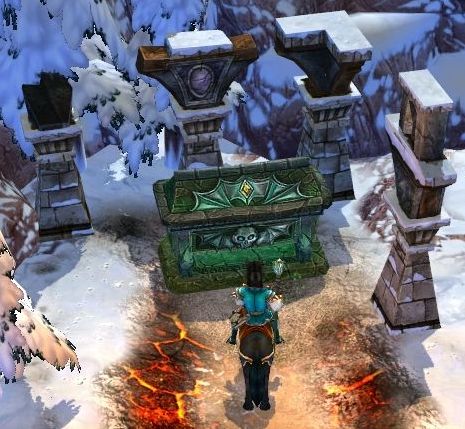 Continuing on, we find a sarcophagus that looks out of place when not in the graveyard environment. This one contains a Teleport scroll. 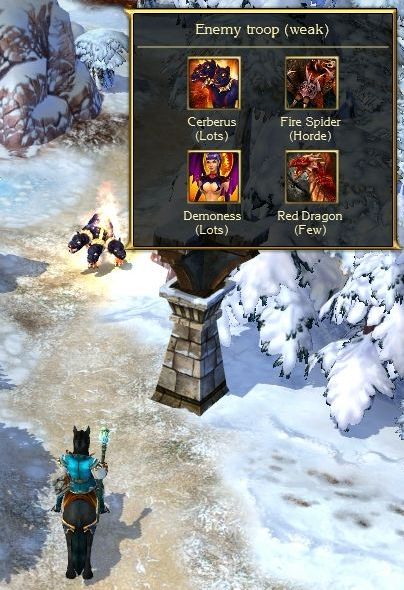 One last army is in our way through the pass. 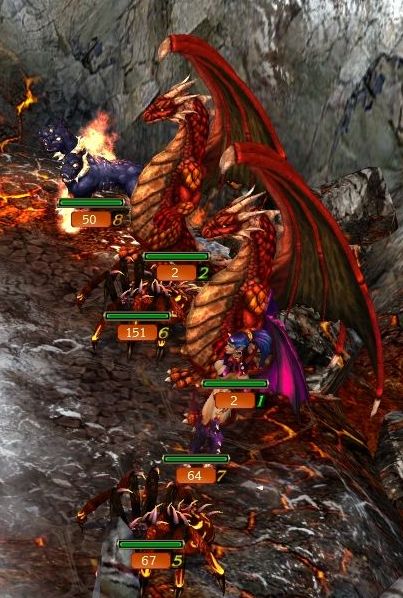 We can immediately see the impact of losing that bonus Initiative. Prior to that, we would have gone first ahead of these Red Dragons. 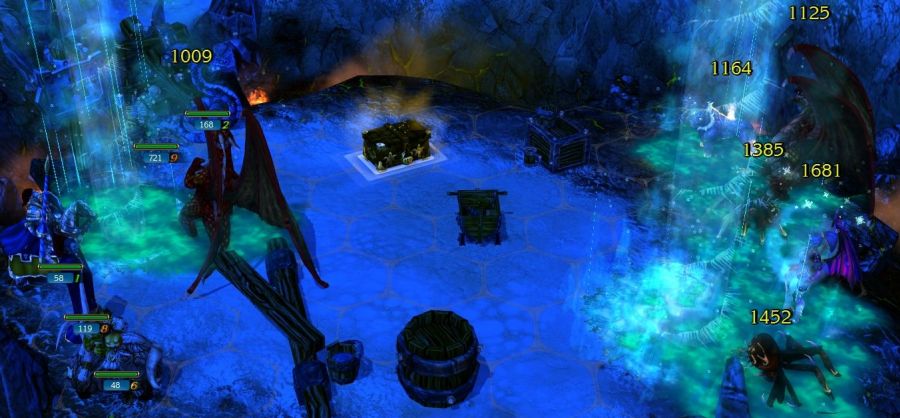 Lucky for me, the Dragons decide to not use their special attack, and die to spells once I can act. 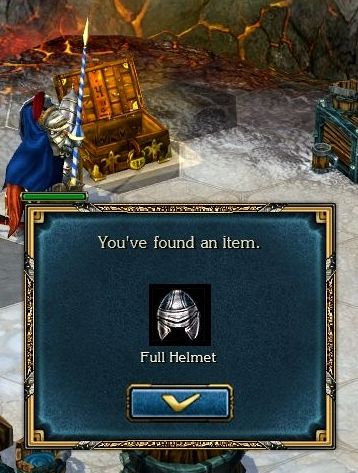 This shows off why you want to get every single battle chest if you can - sure, most of them contain worthless amounts of gold, but sometimes you will get very good items at random. 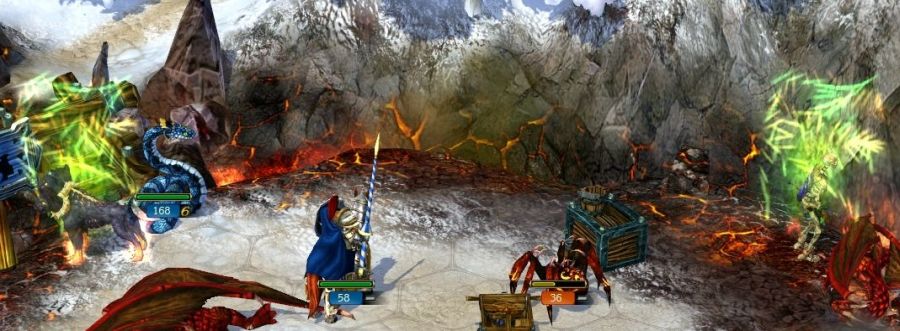 At last, a stack of Demoness is alive to act, and we see their most annoying Talent - Infernal Exchange. The Demoness can use this to swap the positions of any two stacks on the field. 99% of the time, the AI will use this to swap one of your ranged stacks with one of their melee stacks. 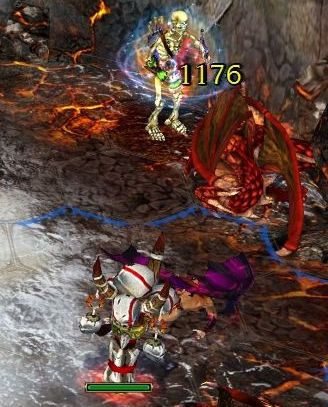 In this battle, the swap does nothing for them, and the Demonesses are taken down by the Skeleton Archers who are now conveniently in range for a full damage shot. 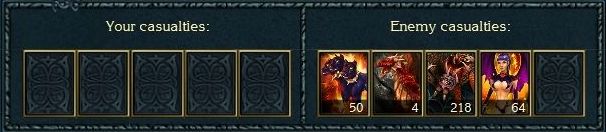 With that, the pass is clear of demons.  Another long-equipped item gets swapped out. +4 Defense is likely going to be better than the +7% Health the Mask of Youth is giving us. 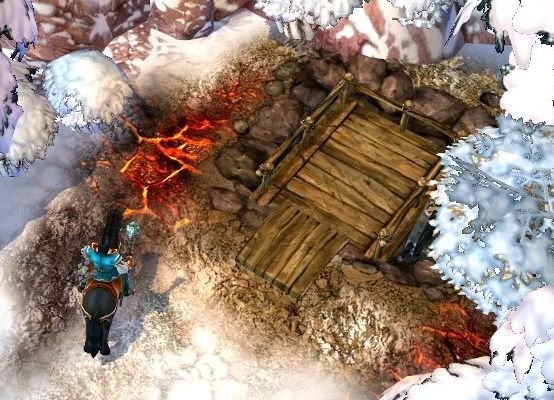 At the end of the path, another elevator is waiting to take us back down into the darkness. 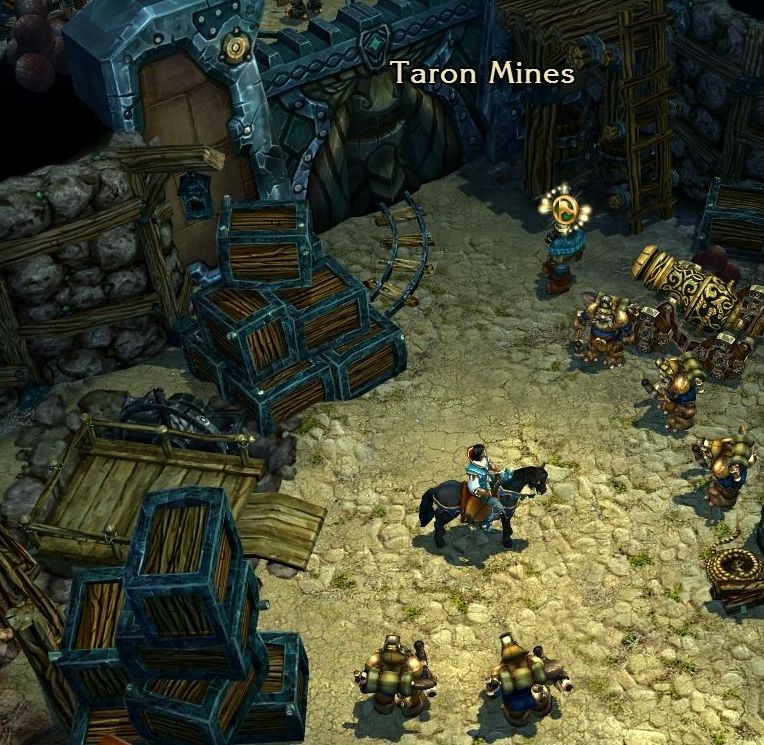 We find ourselves on the other side of that impressive door.  : Through Ardan's Peaks. You've locked yourselves away, even from your friends. : Through Ardan's Peaks. You've locked yourselves away, even from your friends. : From friends? The demons are everywhere.: Not at all. I went around the upper way, and cleared the demons these. And here, behind the door, there are reinforcements who have to secure you. So you can open the door and return to your work.: Work! That's great; we're so tired here, and without anything useful to do. Thank you, we will open the door now.: That's better, good luck. : From friends? The demons are everywhere.: Not at all. I went around the upper way, and cleared the demons these. And here, behind the door, there are reinforcements who have to secure you. So you can open the door and return to your work.: Work! That's great; we're so tired here, and without anything useful to do. Thank you, we will open the door now.: That's better, good luck.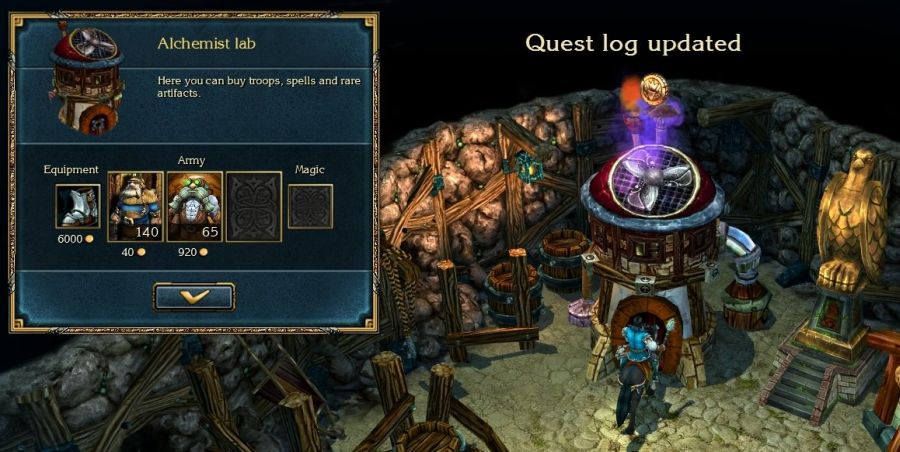 Before we leave the area, we can check out the local Alchemist's. Nothing special for sale here. 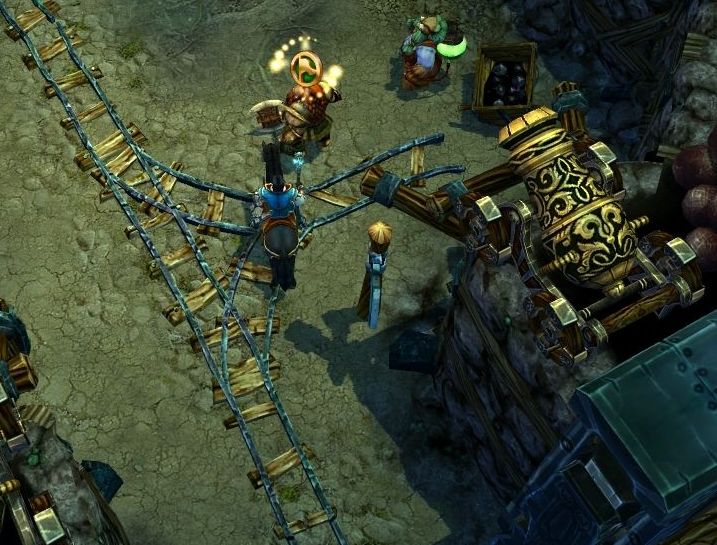 We report in to Taganrog for the reward. : The door is opened! Well done, human! Thanks to you, the ore will be supplied to the smithies again. Don't forget your reward, human...: Thank you.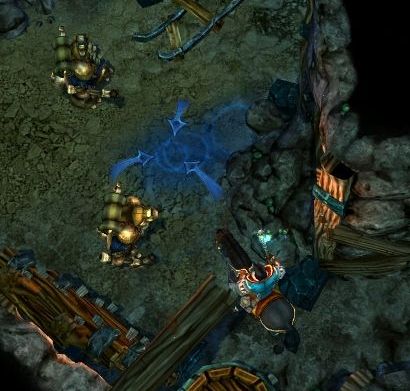 With the door open, all of the trapped dwarves start wandering through the mines to their work sites. Be careful when this happens. I got in front of this dwarf, and was stuck for several minutes while his pathfinding tried to continually walk into me. Really thought I was going to have to reload, but he eventually moved just enough to let me slip by. Anyways, we might as well take the opportunity to return to the king with the strike demands. : Good day, Bill Gilbert. What brings you to ancient Taron?: Good day, Your Majesty. I've brought you a petition from the miners.: Give it to me... Well-well, "50 hour work-week... 60 hour... changes... fight with demons... demand"... Aha, crossed out: "courteously ask to shorten the work-week to 50 hours"... Ok, I see. I understand them, and approve the new work rate as they request. But only during wartime. You may bring them my words.: Thank you, Your Majesty.We return to the strikers with news of the successful negotiations. : So, have you taken our demands to the king?: Yes, I talked to him. You can get back to work. The king agreed to shorten the workweek during wartime.: I knew it! I was sure that Our Majesty couldn't refuse our demands. Yea, he likes to wave a hammer in the smithy, our king. Not like yours. He understands what the workers need!: You're welcome! Goodbye.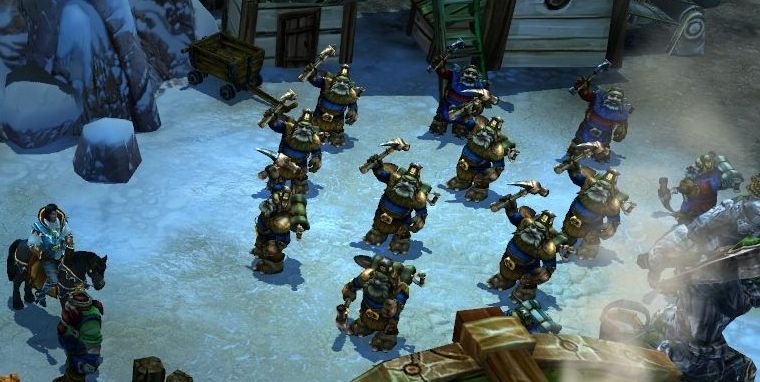 The miners give a hearty cheer, and then do the usual very slow wander away. Even though the end of the strike means we can access the area they were previously blocking, there's nothing hidden back there. 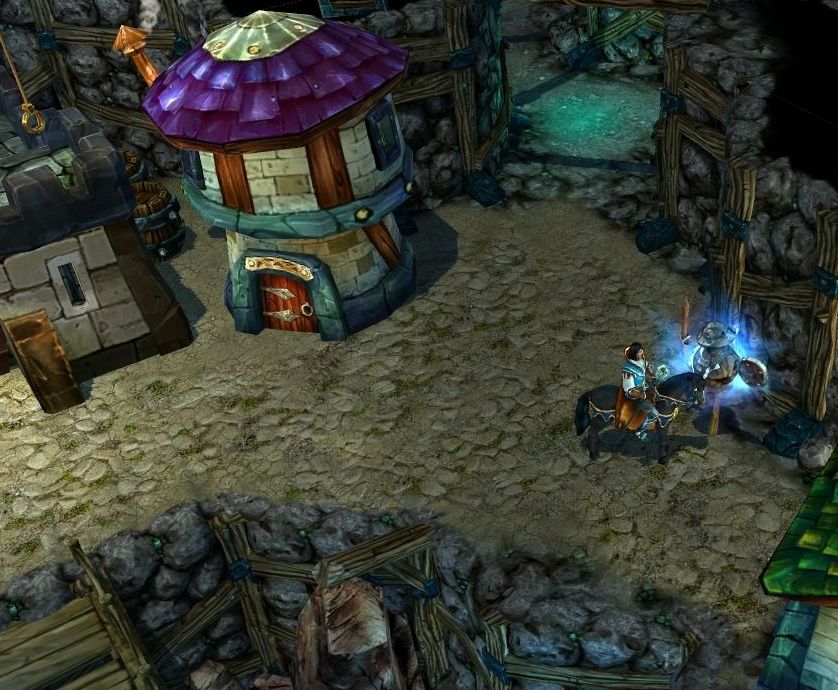 The last part of the mines we haven't explored are the tunnels past Bogacho Castle. Right next to the castle, we find another +1 Defense practice dummy. 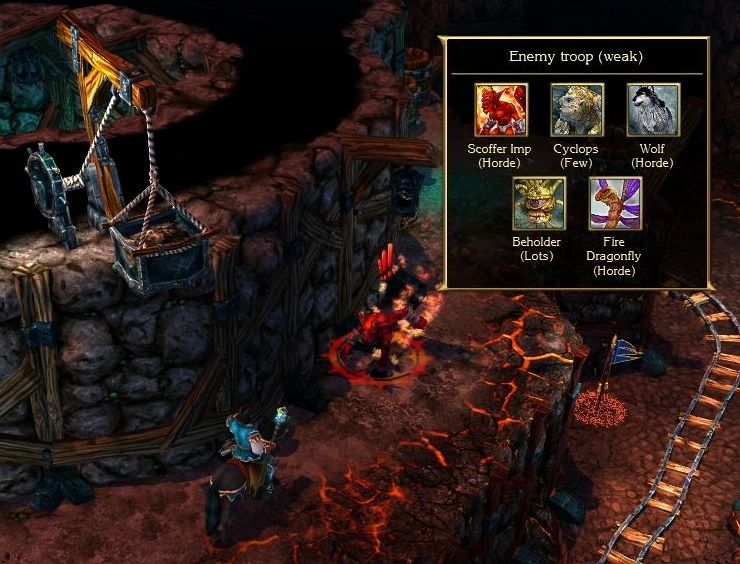 The upper ledge is patrolled by a running Imp. 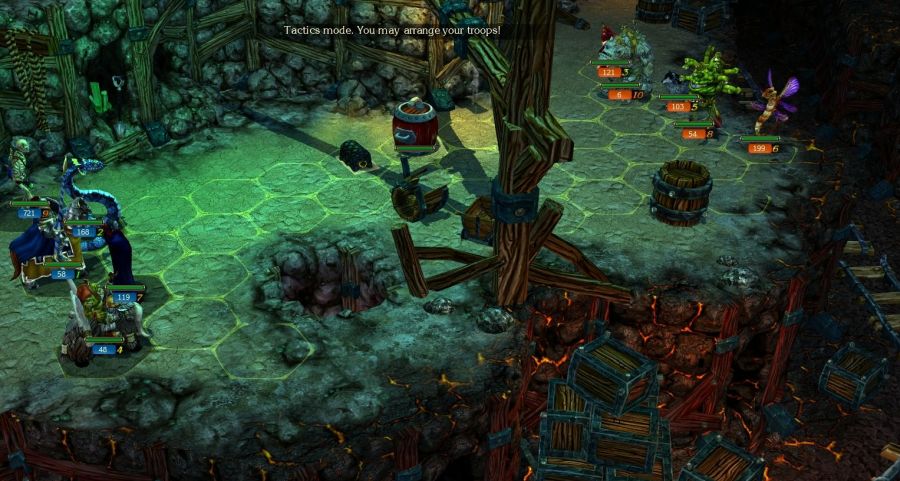 I love how the narrow ledge in the adventure mode is carried into the battlefield itself. This field is very narrow and extremely long. 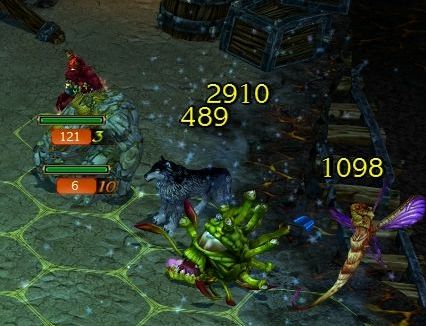 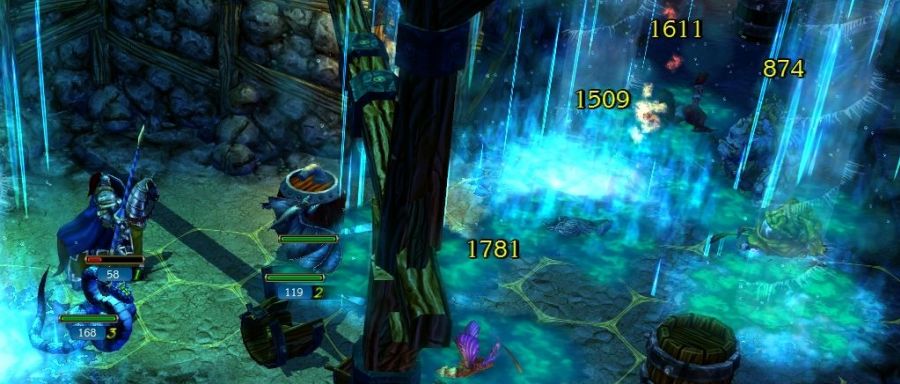 Our spells aren't affected by the long range, at least. 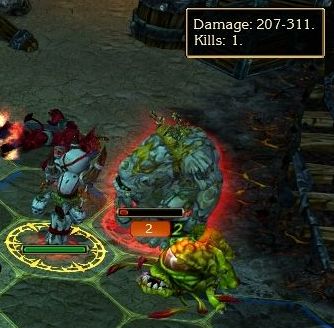 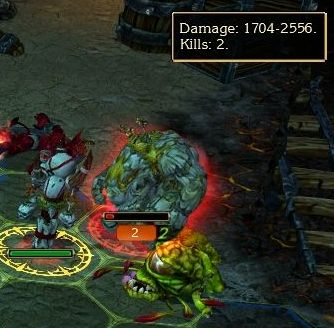 A nice before/after showing how good Dragon Arrows are - especially when using Skeleton Archers. 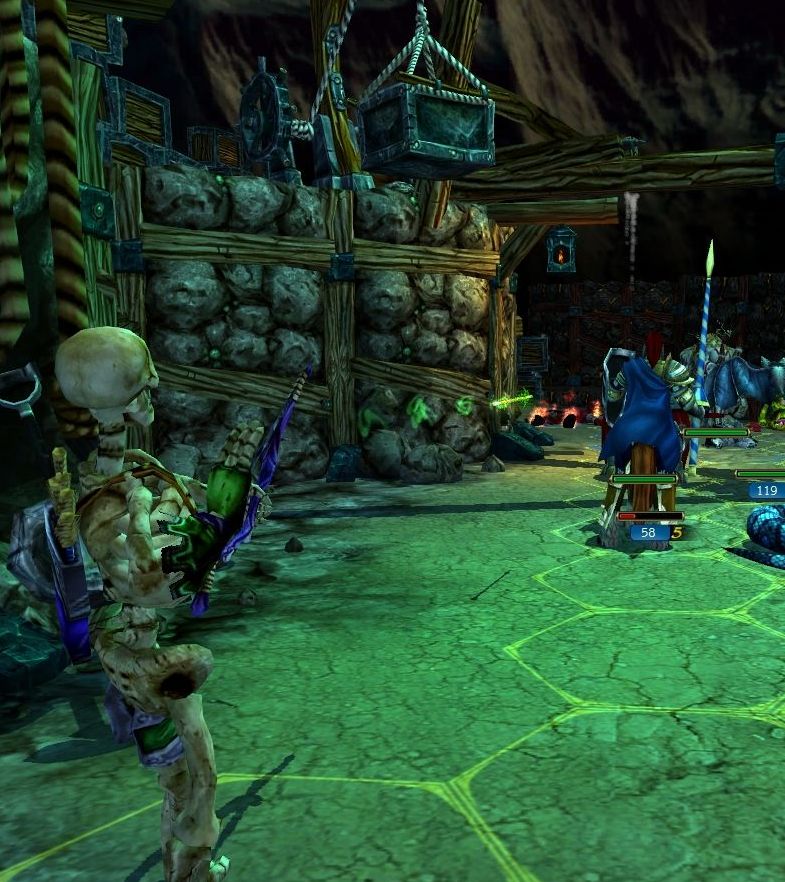 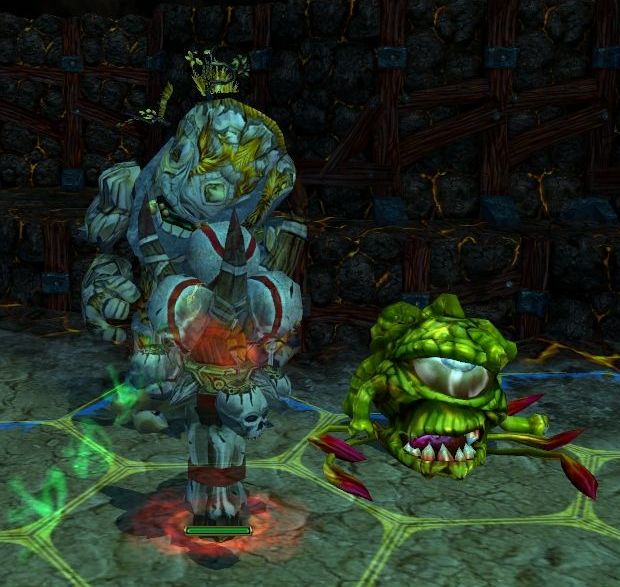 The Skeleton Archers unleash the Dragon Arrow, and impact explodes the Cyclops into just a pile of rubble. 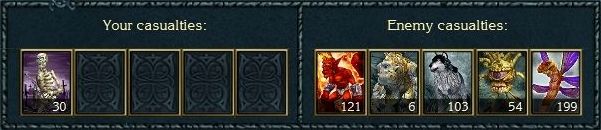 The Scoffer Imps get a fireball in, but otherwise the fight is a clean victory. 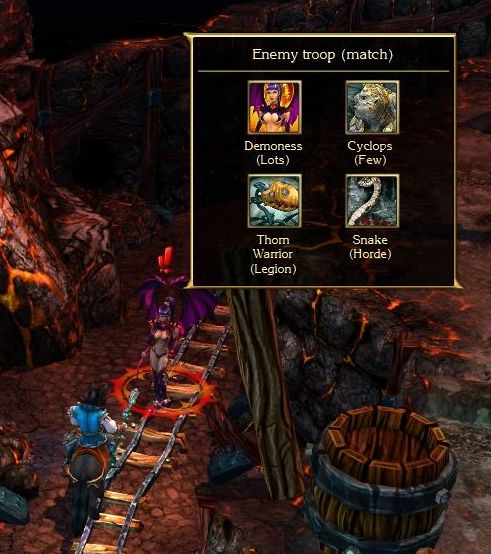 As we head down to the lower path, the last army engages us. 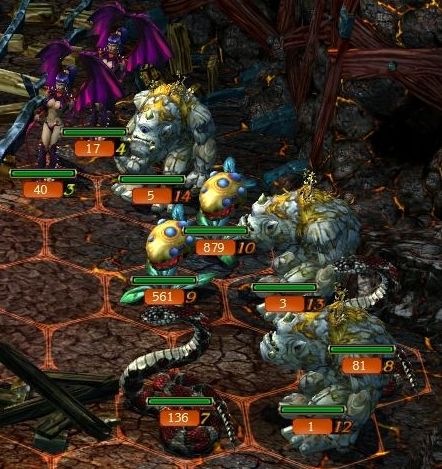 The enemy force is pretty strong, and I'm going in with low Mana. 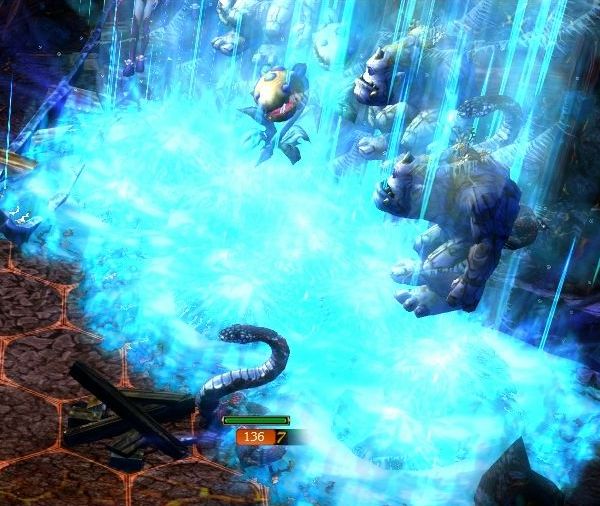 We do have just enough to Geyser them. 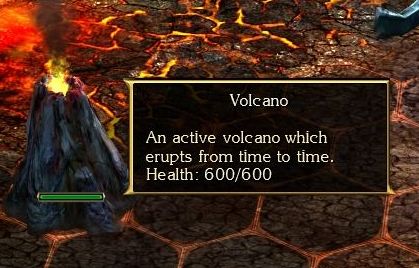 The battlefield here also has a new feature - the Volcano. You want to get rid of these as soon as you can, or they will erupt and damage your units with fiery attacks. 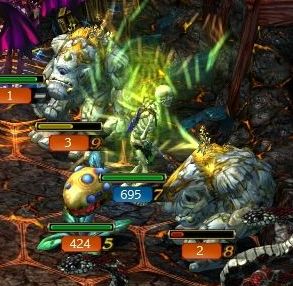 This time, Infernal Exchange is used to very good effect. Our Skeleton Archers are sent right into the hornet's nest, surrounded by enemies. 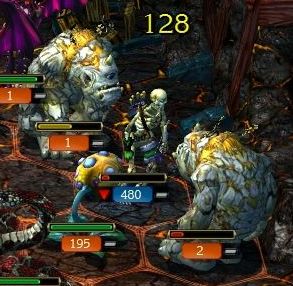 One turn of pounding kills over 200 of them. 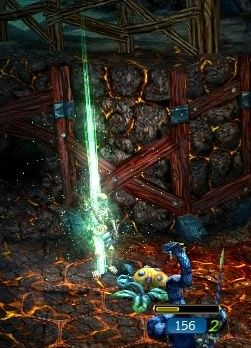 Well, that's why they invented the Turn Back ability - we bring the Archers back in time to before the exchange... 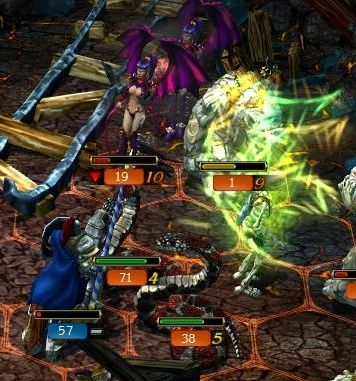 And then the second Demoness stack returns the Archers right back. At least now there are reinforcements on the way to help out. Alright, I've had enough of these Demonesses... send in the cavalry!  drat it! The Demoness is one of the few units in the game with a dodge ability. In this case, the Beauty ability means that any male humanoid has a 30% chance to miss their attack. The Demoness can still retaliate against missed attacks too.  On the enemies turn, they try to Charm my Horsemen. Luckily, the Leadership of the stack is too high for the Demonesses to turn my Horsemen against me. 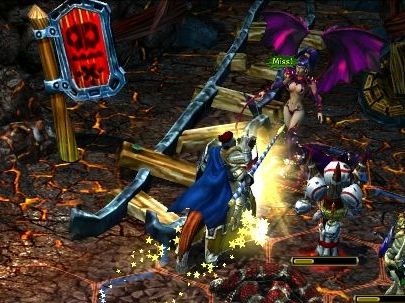 Second try... drat it! The game does seem to have a hidden mechanic to make dodging units slightly less annoying, though. From my experience, you will never miss a dodging unit 3 times in a row.  They also can't dodge spells or unit abilities that aren't attacks. 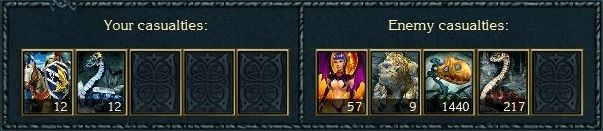 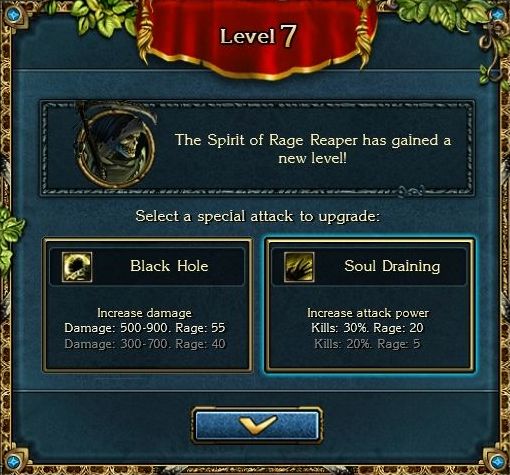 The next Reaper level is interesting, but not much of a choice. I just don't have the Rage to sustain any increases in the Black Hole cost - we only have 53 max Rage currently. I also don't mind the increase in power for Soul Draining. Sure, it is a lot less cost efficient, but I can only use the ability once every few turns anyways due to the rest period. 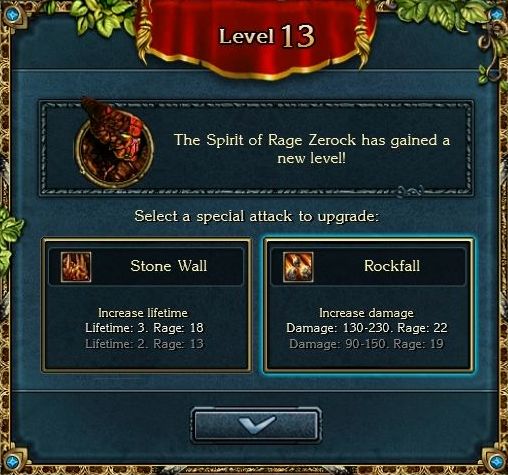 Zerock also gets a level in the same fight, and we boost up the Rockfall damage a bit. 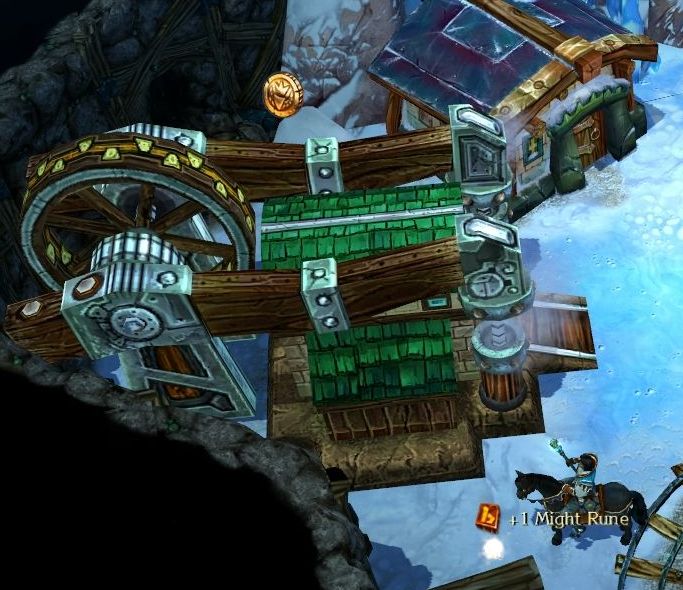 At the end of the tunnels, the mine opens up into another frosty cavern. 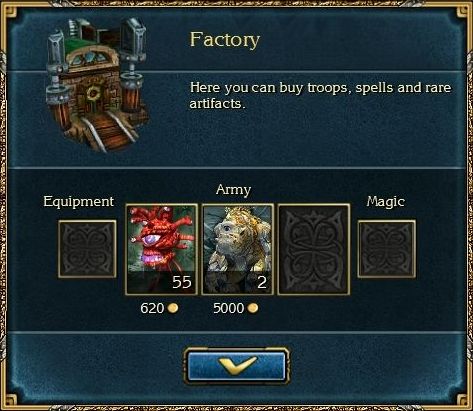 The local factory makes... Beholders? Or are those the employees? You know, this LP hasn't had much in the way of possible thread interaction for a long time now, so I thought I could open this up a bit. Therefore... Vote! Where should we explore first? Train Station 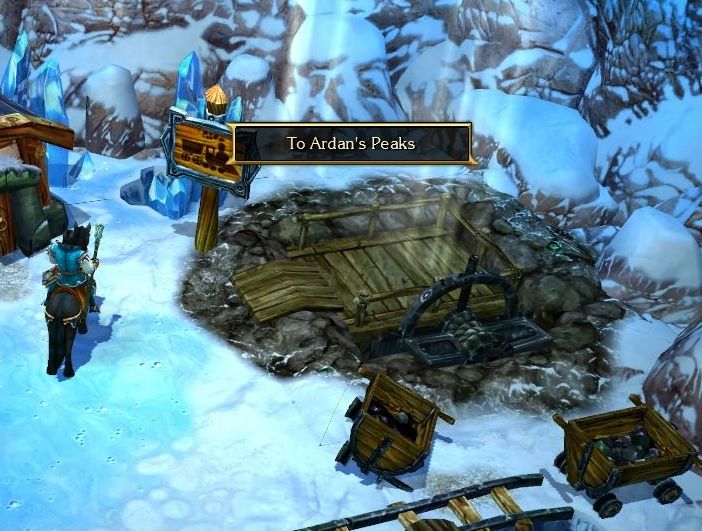 In the icy cavern next to the factory, there is a lift that has a icon of a train. Should we go here first, and see where this train goes? Underground Sea 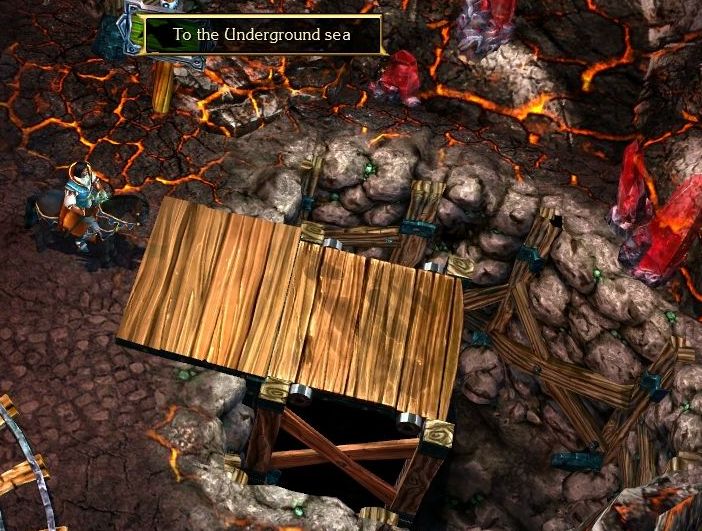 Near the last battle we fought, a crude lift will take us further down to the Underground Sea. Should we explore here? We do have that gerzhack to collect at least. 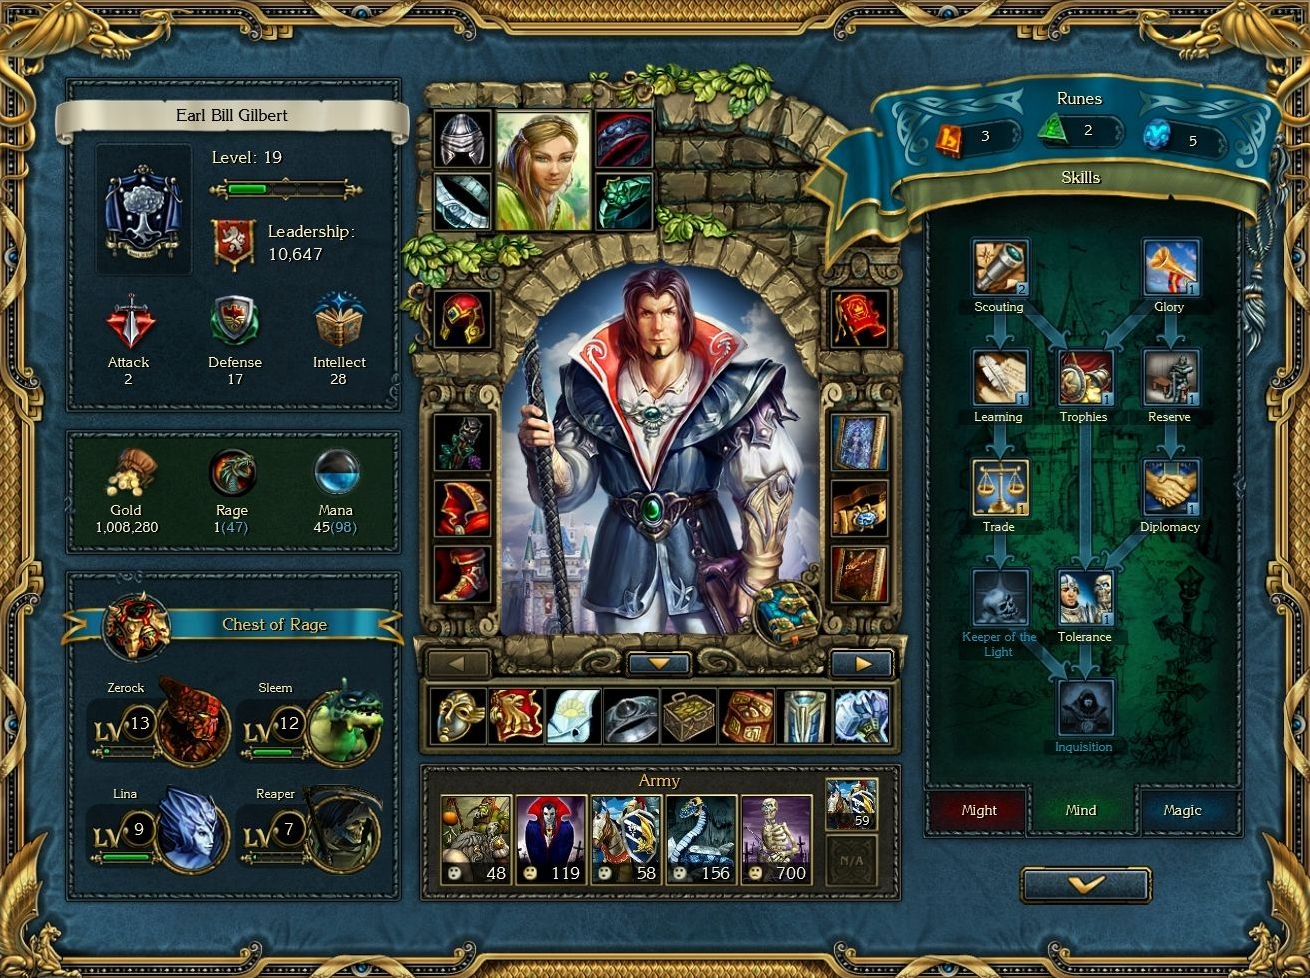 Due to the new equipment, our Defense has increased by a massive +9. Our Attack is still crap, but at least we have half the physical stats in good shape now. We have cleared out both the Taron Mines and Ardan's Peaks regions now. Next time, we will head to... well, where you guys decide for me to go. ---------------------------------- Bonus Material Marking the Map 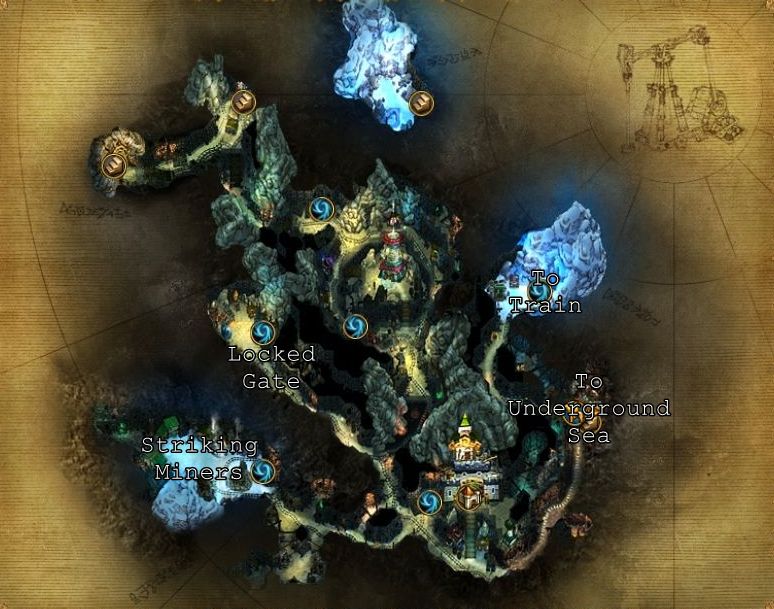 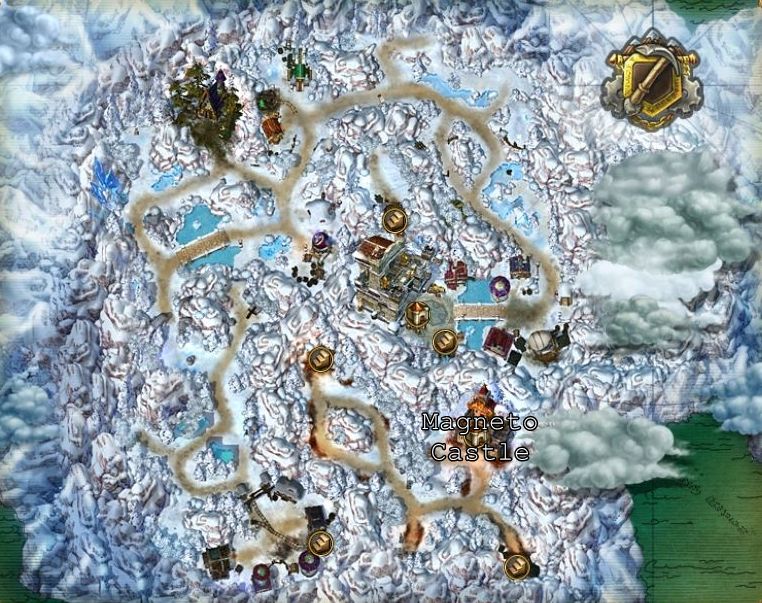 Talkin' 'bout Troops Demoness  Resistances: 50% Fire Critical Hit %: 15 Defense Bonus: 4 Talents  Distant Attack: Attacks with a whip across a free cell. Inflicts 10-18 points of damage. The enemy cannot retaliate. Reload: 1 Distant Attack: Attacks with a whip across a free cell. Inflicts 10-18 points of damage. The enemy cannot retaliate. Reload: 1 Charm: Attempts to charm the enemy targets within its attack. Can charm a troop of humanoids whose Leadership does not exceed 128. The charmed troop will fight on the side of the Demoness for 2 turns. If the Demoness fails to charm the troop, it inflicts 10-18 points of damage. Reload: 2 Charm: Attempts to charm the enemy targets within its attack. Can charm a troop of humanoids whose Leadership does not exceed 128. The charmed troop will fight on the side of the Demoness for 2 turns. If the Demoness fails to charm the troop, it inflicts 10-18 points of damage. Reload: 2 Infernal Exchange: Swaps any two troops with each other. Reload: 3 Infernal Exchange: Swaps any two troops with each other. Reload: 3Abilities Demon Beauty: Being confused by a beautiful girl, male humanoids can miss with a probability of 30%. Gully's opinion: The Demoness is a very flexible unit with multiple amazing talents. In terms of their normal offense, the Demoness is a little lacking - their damage isn't that great, and their Speed is bad. The Distant Attack talent does help there, and the lack of retaliation with that is nice for a fragile unit. The Charm talent is also amazing... when you can get it to work. It does only work in melee range. At least if it fails, you still get the attack (also with no retaliation). Infernal Exchange - well, this talent is a double-edged sword. It is good for getting a vulnerable enemy into range of your own units, but the troop you send over will also be in range. I like to use it after the enemy melee units have moved to avoid being surrounded. The big weakness of the Demoness is their Health - they are very fragile for a non-ranged unit. The Beauty ability does help out there against certain enemies. Fighting them: The Demoness is one of the most aggravating units to face. If you have a ranged unit, the Demoness will invariably be swapping them right into the enemy lines. The miss chance is frustrating as well. Use spells when you can - with their low Health, you can destroy good numbers of them easily. Above all, avoid sending vulnerable targets into their Charm range. Items Identified Full Helmet  Description: A strong steel helmet with a face guard. Effects: +4 to Defense Type: Helmet Race: Neutral Cost: 16000 Info: Such helmets provide excellent protection, though they reduce their owner's field of vision. Banner of True Faith  Description: The banner of the Order of Paladins. Effects: +4 to Defense, +800 Leadership, -1 to the Morale of Undead allies Use: Gives 10 Mind Runes after 50 victories Type: Regalia Race: Humans Cost: 60000 Info: Created and enchanted by priests of the Order of Paladins during the times of the Necromancers Revolt, this banner gives to warriors of Light the strength and a confidence of faith. Petition  Description: The petition of the dwarves from Taron Mines. Type: Quest Info: A competently composed document, which contains a great number of demands, which the striking dwarves submit to their chief.
|
|
#
?
Nov 21, 2017 16:48
|
|
|
Head to the Underground Sea, that sounds interesting.
|
|
#
?
Nov 21, 2017 17:38
|
|
|

|
| # ? May 9, 2024 12:14 |
|
|
Take the train
|
|
#
?
Nov 21, 2017 18:37
|
|
