|
Night10194 posted:The combat theme in the Darkest Dungeon is the best horror combat theme any game ever has had. It's the air-raid sirens that do it for me.
|
 #
?
Apr 8, 2017 06:18
#
?
Apr 8, 2017 06:18
|
|


|

|
| # ? May 7, 2024 14:38 |
|
|
Halser posted:the closer you are to Revelation, the more eyeballs and malformed flesh you get. You can feel the parallels to Bloodborne: "Grant us eyes, Grant us eyes!"
|
|
#
?
Apr 9, 2017 03:28
|
|


|
RedMagus posted:You can feel the parallels to Bloodborne: "Grant us eyes, Grant us eyes!" "Too many eyes, Too many eyes!"
|
|
#
?
Apr 9, 2017 20:26
|
|

|
The Warrens Our top-of-the-line sewage structure will ensure the cleanliness of this land Man, its been a long time since I did a proper info-post, so let's talk about the festering pile of disease and awful things known as the Warrens. The focus of this area is on Beast enemies, namely pig-men and carrion feeders, and both of them are rife with awful biological agents. Combat in this zone will mainly involve dealing with all the blight and disease these enemies throw at you, along with a little bit of bleed from the Pig Butcher, so a Plague Doctor is recommended in general but you can also bring a Graverobber to deal with the disease. Enemies here are also susceptible to bleed here; with all these beasts here a Houndmaster is highly recommended since he'll make short work of all the pigs, however classes like the Highwayman, the Hellion, the Jester, and the Bounty Hunter all have good bleeds for exploiting the weaknesses prevalent in this area. In terms of curio loadouts, I would recommend bringing more torches than normal for one specific curio, alongside a bunch of Medical Herbs & Bandages for the curios here, and maybe some Antivenoms if you are short a plague doctor and hate all the blight. 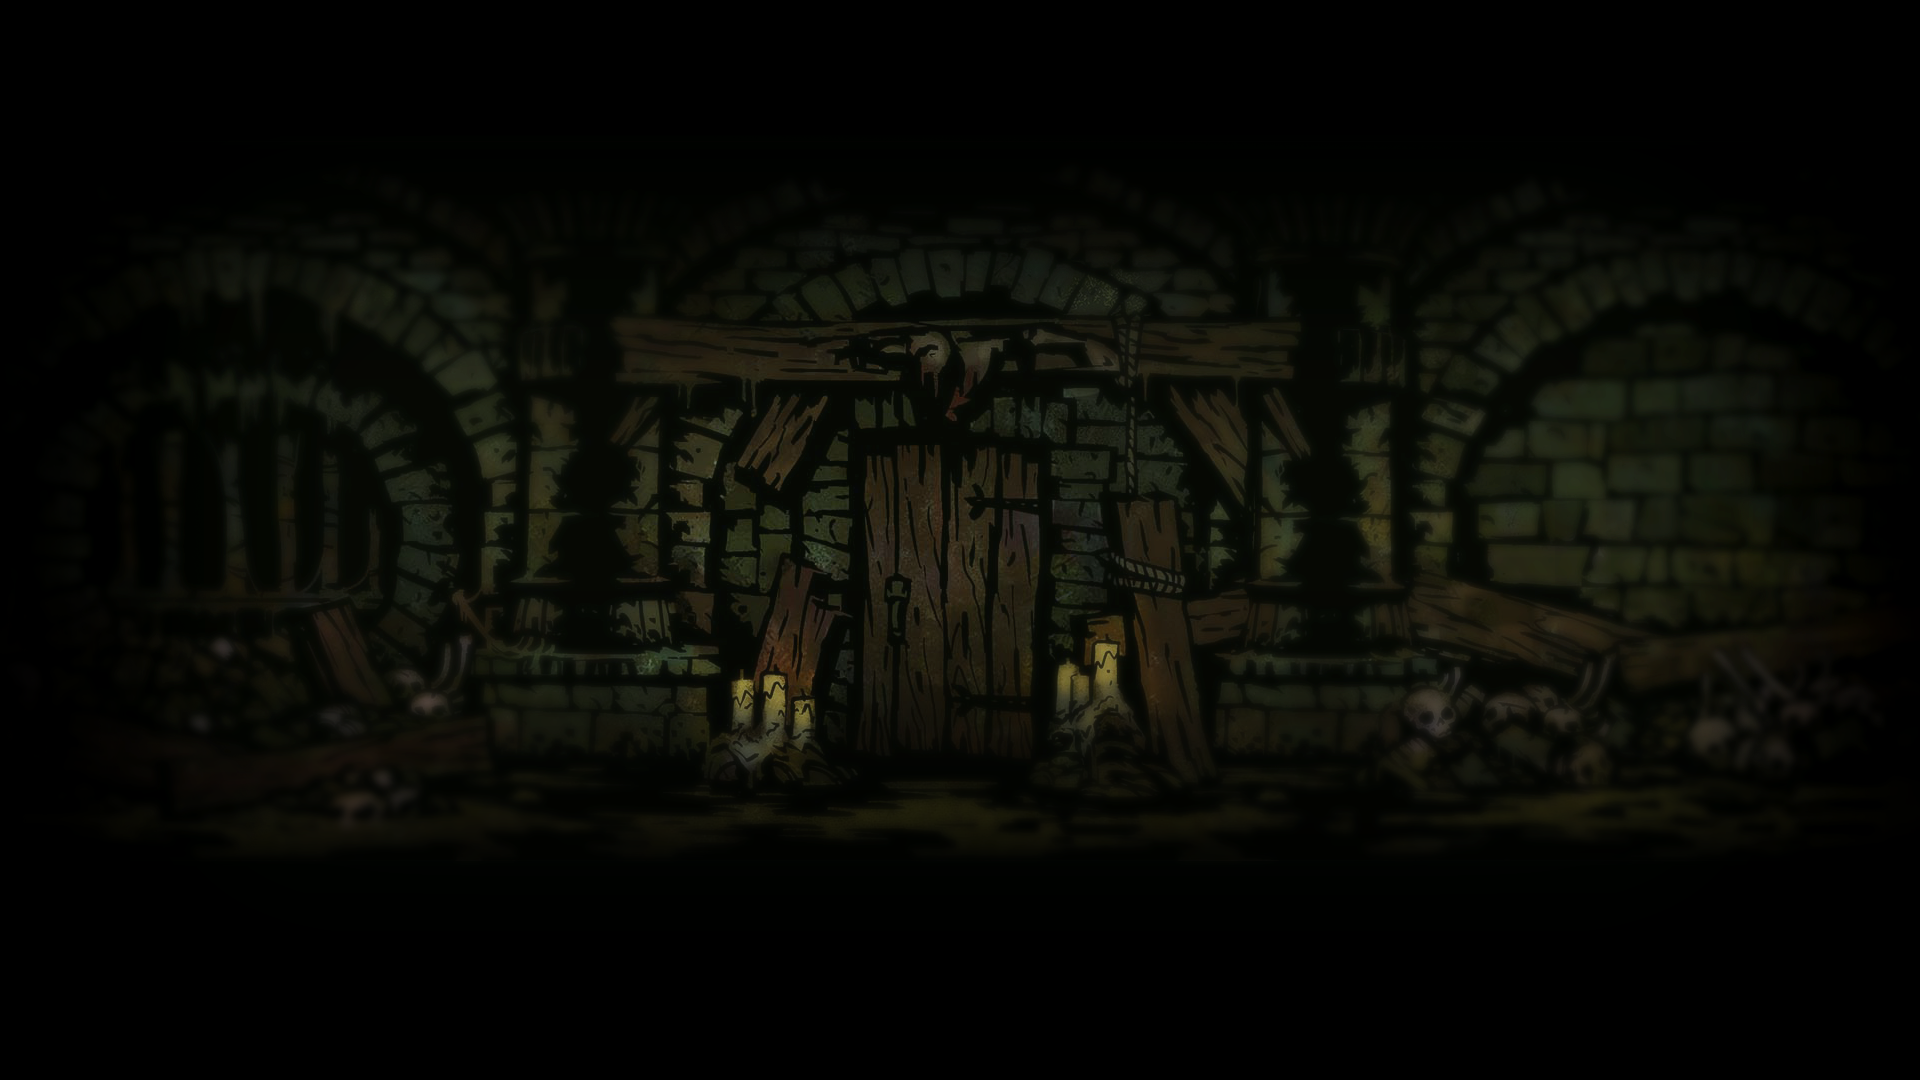 Exclusive Enemies:  Swine Chopper (Threat Level: Medium) Swine Chopper (Threat Level: Medium)-I have a hard time classifying threat levels in the Warrens, mainly because with recent updates the other areas feel way more threatening in general and it throws me off. The Swine Chopper is this area's common tanky unit, hogging the front lines with some medium prot levels and some hefty crowd control. His main attack is Butcher Chop, which does decent damage alongside some bleed damage to the front row. His other attack is Ball & Chain, which does light damage but is designed to stun and move the back rows around. The guy does a decent amount of damage and is rather durable, however he doesn't have any presence compared to some of the other enemies you fight in this game. I usually save him for last since there are more pressing matters in this area.  Swine Drummer (Threat Level: Low) Swine Drummer (Threat Level: Low)-A general rule in Darkest Dungeon is that the back rows are threats that should be addressed ASAP. The Swine Drummer is that exception. This is an enemy designed to compliment other enemies in this dungeon, however in execution it doesn't really work that well. He has two attacks: his first attack being Drums of Doom is a full-party stress attack that has a roughly 3/4th chance to do....pitiful stress damage to everyone. His other ability is Drums of Debilitation, which marks a party member and reduces their dodge level. Now naturally the last attack sounds threatening but there's only one enemy in the Warrens that does more damage with a mark and Drummers very rarely work with that specific enemy, they are often with the other pig-soldiers. Feel free to ignore him in general, he doesn't do much at all. A note: usually I get enemy name & attack info from the Darkest Dungeon wiki, however for this enemy specifically they either got the names mixed up or just haven't updated the names properly. I'm basing the attack names on episode 30 in my LP because the wiki listing makes no sense.  Swine Slasher (Threat Level: High) Swine Slasher (Threat Level: High)-A very simple enemy that is very threatening, the Swine Slasher has one job but man does he do it well. This guy not only comes with a high level of Dodge in general but he also comes with some light PROT, so killing him is somewhat of a trial in general. The beast only has one attack, Hook where it Hurts, but it does a high amount of damage alongside a high amount of crit chance, but it also moves him back one space so he often gets out of the range of most front-line damage dealers. This thing is a huge headache with how often it crits and I would highly recommend killing it first.  Swine Wretch (Threat Level: HATE) Swine Wretch (Threat Level: HATE)-The swine folk are very simple enemies that do what they do best. The Swine Wretch is the perfect example of this. He has high DODGE and is typically found in the back rows, so its a bit hard to address in general. His one attack is Vomit, which does moderate stress damage but also has a 33% chance to inflict any disease. This becomes a huge pain since the Wretch often comes in pairs so stress damage piles up and then you get some awful disease like The Black Plague or The Worries and everything just becomes awful. Kill these guys first, they are the absolute worst.  Carrion Eater (Threat Level: Medium) Carrion Eater (Threat Level: Medium)-This enemy feels weirdly out of place compared to all the PIG in the warrens, but it kinda makes sense in context of all the flesh down here. The Carrion Eater is another very simple enemy that does its one job well. He comes with average dodge chance and a high stun resist, so its hard to lock this thing down. His only attack is Munch, which does decent damage along with a light Blight DoT, however this is the one of two enemies in the Warrens that deals more damage on a marked target. The Carrion Eater sounds simple enough, however I list him as a medium threat just because he gets super mean in the late-game. Curios & Effects  Bone Altar Bone Altar-There's a lot of macabre curios in the Warrens, and a lot of them are somewhat unclear of what to do with them. The Bone Altar is one of those curios that always messes with me. You don't need to have any items to make this "safe," because interacting with it in general will give a hero a buff to Damage, Accuracy and Crit Rate until you camp. This curio's great, often time I either save it for bosses after I camp or use it in a mission and never camp at all.  Dinner Cart Dinner Cart-Well this thing's disgusting, its just a melted pile of human flesh in a cart for the pigs to enjoy. Interacting with it in general will give you an equal chance of getting food and loot, a blight proc, The Black Plague, or nothing at all. Rubbing Medicinal Herbs on it though will guarantee some treasure drops along with a stack of food. Which is probably human flesh. Enjoy your cannibalism you horrible monsters. Also a note: Anyone with the Tapeworm disease or Sitiomania will have a high chance of auto-examining this, along with a lot of other curios in this area.  Makeshift Dining Table Makeshift Dining Table-The Makeshift Dining Table is roughly the same as the Dinner Cart with a few minor tweaks: It offers less gold drops in general and gives more food, and rather than giving you The Black Plague by raw interacting with it, you instead can get Tapeworm here. Much like the Dinner Cart, you can rub Medicinal Herbs on them in order to guarantee the gold and food stack, so enjoy your human steaks with a side of rubies.  Moonshine Barrel Moonshine Barrel-The Moonshine Barrel is another curio that I often hope to find in a dungeon. Interacting with it raw gives you a low chance at treasure, and equal chance at nothing, and a high chance of either getting a blight proc or becoming a Tippler. Putting some Medicinal Herbs in it however will purify it and give you a 30% damage buff until you camp. Much like the Bone Altar, this is a curio that makes your life super easy down here.  Occult Scrawlings Occult Scrawlings-This disgusting little curio is one I almost never interact with. Doing a raw interaction will result in either a random positive or negative quirk, some stress damage, or absolutely nothing. You can pour some Holy Water on it, but this is a bad idea because its one of the few item interactions that is detrimental to you, actively reducing your dodge chance by a boatload. I never bother with these, there's no real incentive to it since you can get positive quirks rather easily in general.  Pile of Bones Pile of Bones-The Pile of Bones is a curio that I never prepare for, just because I rarely think its worth it. A normal interaction will result in an equal chance of cash, nothing, a random disease, or a negative quirk themed around the black arts. Pouring some Holy Water on it though will guarantee you a good amount of money. The thing about this curio is that I feel like it rarely spawns, so I almost never bring Holy Water with me down to the Warrens. I would recommend you do so though if you want to get some cash, I just always forget about this specific curio.  Pile of Scrolls Pile of Scrolls-Now this is the big reason why I ever go to the Warrens. The Pile of Scrolls can be a godsend depending on how you interact with it. Rubbing your face on it will either result, in descending chance: Scouting Chance, Nothing, Stress Damage, a random positive quirk or a random negative quirk. However, burning the scrolls with a Torch will purge a negative quirk from the hero that interacted with it. This is a great and cheap, albeit rare way to remove negative quirks, and honestly worth bringing more torches down here than usual to fix your idiots.  Rack of Blades Rack of Blades-The Rack of Blades is a weirdly out of place curio to me, mainly because of its interactions. Touching it unprotected with either give you gold and food (somehow), give you a nasty gash for a bleed proc, or nothing at all. However wrapping your hands in Bandages will protect you from the blades somehow and guarantee you a good stack of gold and food. I bring about 2-3 bandages down in the warrens just because this curio in particular is relatively common and worth the conversion.  Sacrificial Stone Sacrificial Stone-The Sacrificial Stone is a huge risk-reward gamble, and there's no way you can make it safe. There's a 50:50 chance of the interaction being bad; the bad interaction being +50 stress, while the good interactions are either a purged negative quirk or either the Explorer or Scrounger perk for the Warrens. I probably should use this curio more often because the positives are relatively powerful, however I don't like the huge hit to stress damage in this area where stress damage can get rather hefty. A note: I can't find any documentation on this, but once upon a time I swear you could throw your firewood on this to guarantee one of the three positive benefits. This would've been a better risk/reward choice for medium/long dungeons since you'd have to give up camping buffs for a more permanent choice. As I mentioned though, this got patched out at some time and I can't find any evidence to support this ever happening so maybe I'm just going crazy.
|
|
#
?
Apr 9, 2017 23:34
|
|

|
New Update - Episode 59: Lighting the Way The second of the Darkest Dungeon quests finds us in a rather odd scenario, and I honestly find it to be the hardest mission bar-none. To start off this write-up, I should mention that the game doesn't tell you one very important thing: This is the mission where you will probably want to use those Talismans of Light. They aren't mandated, but using them will save you a huge headache in general. This throws a huge wrench in the works, mainly because now you are effectively at 5/8ths capacity if you decide to use those trinkets. With that in mind, I would recommend gearing up for the defensive when loading up for this mission just because you still have an entire rest of the dungeon to deal with beyond the gimmick this dungeon prepares. The mission itself is a long-tier one where you need to activate three curios in order to progress. The map itself is three "circular" zones, each linked by the T-intersection at the start and two corner-hallways on the north-west and north-east parts of the dungeon. Your target objectives lie on paths in the south-east/west junctions of the area along with the absolute north of the map. There is no absolutely safe path in this area sadly since there are encounters at every fork in the road to wear you down. To note, the north-east corner hallway holds a treasure chest that would hold an Ancestor Trinket for anyone who hasn't gotten them all, however for me it would be just cash so I don't bother with it. There are a couple new enemies in this area alongside the Cultists: We saw it once in the past dungeons but Malignant Growths are in full swing here, hitting your heroes with either high damage with high bleed DoTs, or a medium-damage stun at anyone. We also begin to see Defensive Growths as regular encounters, and much like their debut in the Shuffling Horror fight, they will mainly protect a target whilst getting a +PROT buff along with stealing the Bolster skill from the MaA, having their own heal-skill, and a full-party stress attack. That being said, the encounters here are tame compared to what follows up. The three objectives are guarded by boss encounters of differing compositions; each one will either have a Templar Warlord or a Templar Impaler, alongside some new faces with the Flesh Hound and the Polyp. The big issue however is that the south-east objective has both the Warlord and the Impaler as its encounter, and its generally considered the hardest encounter in this map. I would generally recommend doing this fight first since you can either camp beforehand in order to buff up and hedge your bets, or camp afterward to cure all the injuries suffered in the fight. Either way, the Templars are the enemies that possess the skill Revelation, which is why you need the trinkets for this mission. Revelation will do heavy HP damage and Stress damage to anyone without a Talisman of Light, generally sending someone to half HP and halfway to a resolve test. Talismans of the Flame are also the only trinket that will protect against that skill at all, so any trinkets with -Stress or PROT will do nothing to that. Revelation also has the interesting quirk of (usually) being the first attack the Templars use, so stuns can be useful in manipulating the damage output of these guys. Outside of that awful skill, both templars have Torment which wears down your front row with high damage, the Warlord has Body Slam for a high damage move that stuns and sends people flying backward, and the Impaler has Stinger Shot for a full-party AoE with some blight damage to boot. MEANWHILE, the other two objective fights have a Warlord with two Polyps, or a Impaler with two Flesh Hounds. The Flesh Hounds have a basic attack with Gnash that does hefty damage at a threatening crit rate, alongside Fetch which acts as a stun that also pulls a target forward. Polyps are a bit more threatening imo, mainly because their primary attack Venomous Phlegm doing medium damage, high blight damage and also marking a target. Polyps also have Banish for decent damage and a two-space knockback, and also a pitiful move that they use at rank 1 called Violent Hack which is mainly used to get them in the back rows. These new ads are moderately powerful, but if you follow the RPG rule of killing minions first then they wont stick around to complicate things. In terms of the team composition in todays update, I feel like it was the best possible team but with some minor hitches. Since you only have three Talismans and a team of four, naturally you want people with the Guard ability to protect the poor sap without a trinket. A thing to note in general that is *very* important: while Man at Arms and Houndmasters both have a guard ability, the HM's guard only lasts until the next turn while the MaA's will last two turns, so you should be using the MaA's first and foremost and only use the HM's as a backup plan. That being said, a Houndmaster is very good here because the big encounters here are all beasts and they come with an innate favored-enemy trait against beasts. While there was an innate synergy with the Houndmaster and the Arbalest, I never had the opportunity to exploit this during a boss fight because each of the Templars get two actions which results in marks fading away much sooner. On a minor note however, I would not recommend using the spiked collar on a Houndmaster like I did because this is a long mission and the heal debuff is kind of a pain when you need to endure across two camps and three boss fights. Another thing to note: much like the last mission, everything here is susceptible to Bleed damage, however I couldn't quite figure out how to muscle in bleed damage onto this team so if you have an idea for that I would recommend going for it. In general though, this team was perfectly robust for the circumstances, however in the video itself I kept getting hit with crits which forced me into a more defensive mindset. Following this mission comes Belly of the Beast, which has the potential to be the longest mission in general. One final note: The wiki is rife with outdated info, and I don't know if this happens personally, but be absolutely sure to activate the shrines once you get to them. Supposedly if you leave a mission objective without activating it, you cannot interact with the curio at all which makes the mission unbeatable. Which also means one person on your team will die since you are forced to retreat. If this is patched out I'll edit this out, but this is a bullshit glitch of the highest degree and should be known about.
|
|
#
?
Apr 10, 2017 18:51
|
|
|
Goddamit,I am an incompetent Dogman.
|
|
#
?
Apr 10, 2017 20:36
|
|


|
Just to note, that description of Hands of Glory is not an invention of the game. But it is still bad rear end that they used it.
|
|
#
?
Apr 11, 2017 00:09
|
|
|
Eternal Darkness: Sanity's Requiem is a fantastic game, and I'm glad it got a mention this episode.  And yes, Hands of Glory are a real thing.
|
|
#
?
Apr 11, 2017 05:38
|
|

|
Well, real in that they were not invented for the game. Did they happen in reality? No, not very likely.
|
|
#
?
Apr 11, 2017 06:56
|
|
|
It is a very Guy de Maupassant type idea.
|
|
#
?
Apr 11, 2017 07:07
|
|


|
Woo-hoo! I finally made it in, and as a Hellion no less! Also, the timing of that town event and the voice-over was hilarious. Like, you can't make that poo poo up.
|
|
#
?
Apr 11, 2017 09:20
|
|

|
What on Earth is the Revelation skill doing. Like it's showing you it's eye and it somehow hurts you? I don't really understand, are you freaking out so hard that your heart hurts?
|
|
#
?
Apr 11, 2017 09:40
|
|


|
Spudd posted:What on Earth is the Revelation skill doing. Like it's showing you it's eye and it somehow hurts you? I don't really understand, are you freaking out so hard that your heart hurts? Its supposed to be conveying a glimpse of the true horror that lies below, however I don't think they wanted to spoil it so they didn't make it 100% accurate. Plus its a giant loving eyeball staring at you, that poo poo's kinda unnerving. Also warning for the thread: I recently re-did the OP to make things easier to find, and also plan to post a info blurb each day of the week in order to prep this LP for archiving. Don't mind the mess as I'm gussying this thing up for publishing.
|
|
#
?
Apr 11, 2017 10:06
|
|
|
On the topic of "How can these humans fight off these eldritch monsters?", in defense of Team Human you're taking on the Darkest Dungeon with a team of max level heroes. At this point, in-universe, they're probably the finest warriors and dogs that humanity has to offer. Equipped in the best armor and weapons possible, and decked out in all manner of powerful and magical/eldritch trinkets. And they're still almost dying at every turn. And even when they win, they're so traumatized they'll never go back there, ever.
|
|
#
?
Apr 11, 2017 10:22
|
|

|
Couldn't you use your PTSD'd heroes for the champion bosses? That way, it's not a huge loss if one of them dies, and it's not like they're useful for much else?
|
|
#
?
Apr 11, 2017 10:45
|
|

|
Eternal Darkness: Sanity's Requiem has, in fact been LPd to completion by Nine Wheels
|
|
#
?
Apr 11, 2017 10:45
|
|
|
Highwang posted:Its supposed to be conveying a glimpse of the true horror that lies below, however I don't think they wanted to spoil it so they didn't make it 100% accurate. Plus its a giant loving eyeball staring at you, that poo poo's kinda unnerving. Giant, indeed. It may be the scale of the revelation that's so disturbing, since the eye appears to have a bunch of stars surrounding its squirming tendrils. And now, Lighting The Way! On my very first run I stumbled into the worst boss fight first and promptly lost half my party members. After that painful experience, I plonked down my A team, which at the time consisted of an arbalest, a vestal and two hellions. They made gratifyingly short shrift of the horrors... leaving me with only b-list candidates for the third dungeon. Which you apparently had a short run in? ... that didn't involve your party's hideously torturous deaths?
|
|
#
?
Apr 11, 2017 11:24
|
|

|
If you have the majority of a mark party and a firm idea of where you are going and you can chump this next dungeon.
|
|
#
?
Apr 11, 2017 11:48
|
|

|
Aumanor posted:Eternal Darkness: Sanity's Requiem has, in fact been LPd to completion by Nine Wheels Never did a compilation of the sanity effects,sadly.
|
|
#
?
Apr 11, 2017 13:55
|
|
|
Scribbleykins posted:... that didn't involve your party's hideously torturous deaths? Now now, that would be spoilers. When you get heroes back from the grave, do they reduce your death count on Stygian mode? RIP Party Boys. They were too beautiful for this world. It would be nice if there was a cultist town raid or something like the bandit one. Maybe with Crimson Court. Before Highwang's Mosquito boss.
|
|
#
?
Apr 12, 2017 06:36
|
|


|
Spudd posted:What on Earth is the Revelation skill doing. Like it's showing you it's eye and it somehow hurts you? I don't really understand, are you freaking out so hard that your heart hurts? I like to think it's the final level of the cultist witch's ability. Stressful Incantion, then Fate's Reveal, then Revelation. You see poo poo you're definitely not prepared to comprehend and it just fucks with your mind I also like to think the Templars are a fusion of a brawler, a witch, and plenty of "blessings".
|
|
#
?
Apr 12, 2017 08:13
|
|

|
Does it ever explain where the cultists came from? Are they just random town citizens who went nuts? The Ancestor said he outsourced the bandits, right? But where the heck did these super ripped brawlers and fashionable as hell witches come from?
|
|
#
?
Apr 12, 2017 15:33
|
|

|
Dooky Dingo posted:Does it ever explain where the cultists came from? What do you think happens to all the heroes that get fired for having too much stress?
|
|
#
?
Apr 12, 2017 20:26
|
|
|
White Coke posted:What do you think happens to all the heroes that get fired for having too much stress? i usually dont fire for that anymore since stress heal is more effective now. i just fire all the ones that dont get good perks. i dont mind that cultists are the human garbage i fired though.
|
|
#
?
Apr 12, 2017 20:28
|
|
|
The Weald "Why not take some time off wandering our tranquil paths and lush forests..." Welcome to quite possibly the hardest zone in the game in general. The weald is a sprawling zone of unfettered growth and alien wildlife, and everything here will push your team in if you are not prepared. In terms of fights, you're going to be dealing with a bunch of blight damage at every angle, enemies with high PROT and high dodge, and a mish-mash of enemy types to make favored enemy choices tough. Disease is not prevalent, but the one disease you do see here is kind of awful so if you're paranoid a Graverobber or Plaguedoctor would be nice to have. A lot of enemies here have a susceptibility to bleed here so things like the Houndmaster, Hellion or Bountyhunter are also good. There's a lot of PROT here, however DODGE is actually a bigger hassle here so if you can load up on Occultists or Arbalests to get rid of the high dodge on enemies in this area. In terms of provisions to bring down here, Antivenom is very nice since there's both blight damage everywhere alongside curios that are neutralized via antivenom. Bandages are also good because curios here are also neutralized by them. There is use for Holy Water and Medical Herbs here, however I don't bring them because the curios are either too rare to consistently prep for, or the benefits are just not worth it.  Exclusive Enemies: 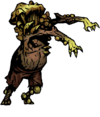 Fungal Scratcher (Threat Level: High) Fungal Scratcher (Threat Level: High)-Man. These things suck. Fungal scratchers are the perfect mix of tankiness and attack efficiency, possessing anywhere between 33-50% PROT depending on difficulty along with incredible synergies with other enemies. Their main attack is Groping Swipe, which does decent damage, however the big threat of this attack comes from it having a Blight attack-rider in veteran dungeons onward. That move gets ditched however for Rend the Marked if a target is marked, effectively doubling the damage output of the attack but lacks any attack-riders. Finally, if they are out of position, they have Harmless Swipe for the express purpose of getting out of rank 3-4. These guys, no matter the circumstance, do a great job at just tearing apart your front line with no mercy or remorse, and I generally hate fighting them. Luckily they have low stun resist so you can mitigate their action pool, along with wicked low bleed resist and debuff resist for whatever your black heart desires to kill them. 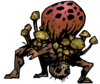 Fungal Artillery (Threat Level: Medium, High with a Scratcher) Fungal Artillery (Threat Level: Medium, High with a Scratcher)-Man, guess who else sucks? Fungal Artilleries are the compliment to the fungal scratchers, alongside some of the later enemies. They exist to harass the back row and enable other enemies to do way more damage. The attack you will see a lot of is Mark Prey, which marks a target typically in the first two ranks and reduce their DODGE, making dodge-tanking less effective. Their other attack is Rain of Blight, hitting your rank 3-4 units with light damage, a blight proc, and also a low disease chance for any disease. Finally, if you think you're clever and pull them forward to stop the bullshit, they have Escape Cloud to hit your first two ranks with a blight proc. These guys are just as awful as their biped counterparts, and even worse if both are teaming up to ruin your day. An amusing, albeit terrible note however, is that if you save them for last and get rid of corpses, two artilleries in the front row can chain Escape Cloud your front line for heavy blight buildup with how fast they are.  Ectoplasm (Threat level: Despair) Ectoplasm (Threat level: Despair)-Bullshit draws near, your command? Ectoplasms (I'm just gonna call them slimes from here out btw). are probably the reason I hate the Weald the most, for reasons you are probably already guessing. Slimes have generally low HP, average evasion, and low damage output, however their threat comes from their moveset. Their main attack is Slime, which just punches a dude. Their other attack, one of two I hate, is Cytokinesis, which punches a dude and clones himself at full health. You can see where this is going right? His third attack is the worst: Ectoplasmic Profusion hits the entire team for regular and stress damage, and produces the following... 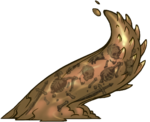 Large Ectoplasm (Threat Level: Agony) Large Ectoplasm (Threat Level: Agony)-Bullshit has drawn near now that this guy is on the scene. Inbetween Big Slimes and regular Slimes, I've had fights go on for 15-20 turns because of their ability to just mass-reproduce. The Big Slime is hardier with more HP and more PROT, but he also possess a little bit of crowd control. His main attack is Big Slime, which hits any rank for decent damage but also reduces speed on higher difficulties. His second attack is Slime-smack, which hits your front two units with decent damage and a hefty stun chance. His third skill however, which is absolute garbage, is Cytokinesis, and you all know what that does! These guys just exist to wear down your patience and make the Weald entirely unfun to deal with. God I hate slimes.  Gnashers (Threat Level: Medium) Gnashers (Threat Level: Medium)-Gnashers are rather frustrating in the weald. They're not as lethal as say the myconoids nor as persistent as the slimes, but they exist in their own little niche of annoying the player. Their only attack is Rabid Rush, which does damage, Bleed procs, and a low chance to inflict Rabies on a hero, which reduces accuracy until the disease is cured. Their high speed in tandem with their high evade makes them such an irritant too since you can't exactly intercept their actions with a stun or alpha-strikes since they will either go first or just dodge the attack. Dogs aren't as mean as literally everything else in the weald, but they are still a huge hassle. Distinct threats to follow in the harder difficulty writeup. Curios & Effects  Pristine Fountain Pristine Fountain-While everything enemy-wise in the Weald is awful, the curios are actually quite nice. The Pristine Fountain is a curio that is always good to use, it just depends on how good you want it to be. Just interacting with it alone heals 20 stress, however putting Holy Water in it sanctifies it and increases the heal to 30. I never really pack for this curio though since I often never deploy with stressed out heroes and this curio has a rare spawn rate, however it serves as a great way to remove stress for cheap if you either prep for it or had a holy water pop out of a curio.  Ancient Coffin Ancient Coffin-Another good curio, the Ancient Coffin is a simple but delightful curio. There's no item interactions with it, however a coffin will either have a decent chance for cash, a moderate chance at nothing, and apparently a super rare chance of the Weald-specific traits. Even if you can get nothing from this, the Coffin is nothing but positive so absolutely interact with them forever.  Beast Carcass Beast Carcass-The beast carcass is a curio that could help out a lot, but I don't bother dealing with them in general because of how I prepare for missions. A cursory examination will result in either some food, nothing, a random disease, the specific disease "Rabies", or the negative quirk "Zoophobia." If you rub Medical Herbs on it however you get two food stacks! This is basically a food curio, but you should be bringing food down here anyways so I don't usually bother bringing herbs to exploit this.  Eerie Spiderweb Eerie Spiderweb-Eerie Spiderwebs are a curio that can debilitate a hero if you aren't prepared for it. You absolutely want to rub Bandages on it so they protect your hands and allow you to get a bunch of money. You can still have a chance of getting money without a bandage, and an equal chance of getting gently caress-all, but there are two separate 10% chances of getting a -SPEED quirk from this curio. Speed is a wonderful trait that I would recommend you never have a deficit of, so don't interact with these spider-webs unless you have the bandaids.  Left Luggage Left Luggage-Left Luggage is a neat little curio imo. Just opening it normally gives you a 50-50 shot of either getting a light amount of loot or getting hit with a blight trap. However if you pour an Antivenom into the lock, or just use a Skeleton Key to open it, you get 3x the amount of loot drops from it. I know its a relatively simple thing that we see in other areas, but something about using antivenom to disable the poison trap makes me smile from a design standpoint.  Mummified Remains Mummified Remains-Mummified remains are the other reason you bring Bandages to the Weald. Rubbing them on the remains protects your hands from...stuff?... and gets you some gold drops. Normal interactions result in either a little bit of loot, a blight proc, or just nothing. A simple curio, but I'm wondering why bandages?  Old Tree Old Tree-Its an old tree trunk, it can't possibly be bad right? That's where you're wrong, because a normal interaction results in either minor loot drops, nothing, or a blight proc from the tree's poisonous sap. Luckily an Antivenom neutralizes said poisonous sap and lets you get way more gold drops. Bring maximum antivenom in the Weald, cause Blight is everywhere.  Shallow Grave Shallow Grave-Shallow Graves are why I usually bring max shovels to the Weald. Never do a normal interaction with this curio because it will result in either a blight proc or a disease proc. There's nothing good out of just digging graves via your bare hands. However if you're smart and brought a Shovel you can dig up the grave proper and get all the money drops. I usually bring max shovels to exploit these, but I'm also certain that the Weald has way more wall spawns than other places so I usually dont dig a grave unless I'm certain there's no more walls.  Traveler's Tent Traveler's Tent-The Traveler's Tent is an ominous curio that can be good or bad. There's no item interactions sadly, its just a tent. The results from examining in general can either be found loot, a map for scouting, nothing, or stress damage after seeing the ill fate of the travelers. Stress, while sticky, is easy to deal with after the fact so just go ahead and dive into the tent. The benefits outweigh the downsides honestly.  Troubling Effigy Troubling Effigy-The Troubling Effigy is something I should prepare for more often, since its a means of developing your heroes in unique ways. A cursory examination will either give you a Positive Quirk, a negative quirk, either blight or bleed damage, stress damage, or just nothing. However, sanctifying it with Holy Water will guarantee you a random positive quirk. This is nice since it can fill up your positive quirks faster and possibly roll something good like Warrior of Light or Quick Reflexes, but its so rare that I often forget it exists and rarely bring Holy Water down here. Highwang fucked around with this message at 22:21 on Apr 13, 2017 |
|
#
?
Apr 12, 2017 21:08
|
|
|
Honestly I much rather deal with a darkest dungeon level then late game Weald maps.
|
|
#
?
Apr 12, 2017 21:18
|
|
|
Hunt11 posted:Honestly I much rather deal with a darkest dungeon level then late game Weald maps. You can cheese the weald pretty hard with a certain party composition (Vestal Jester Houndmaster Hellion) but if you don't, then it's an absolute nightmare, yeah.
|
|
#
?
Apr 12, 2017 21:27
|
|
|
Difficulty & "Champion" Enemies One of the main things to note in Darkest Dungeon is the game's progression system. The game only has four "biomes," however each one will have a different degree of mission difficulty depending on the level distribution of all your heroes. These missions are color coded, with Green being Apprentice, Yellow being Veteran, and Red being Champion dungeons. Each difficulty indicates various things for the mission: The difficulty rank will determine how much progress you've made to the next boss, how much EXP your heroes will get, whether or not certain heroes will get stressed by going there or even bother going on the mission, and most importantly influence the enemy spawns of each area. One of the hardest juggling acts in Darkest Dungeon is managing your hero level in order to manage the mission difficulty pool. Veteran/Champion missions will start spawning the moment you get a lvl 3/5 hero, and it can affect where you would want to go if say a Long Champion mission is the only thing to appear in the cove when you're trying to kill the veteran Siren. The more common juggling act though is keeping enough rookies to actually kill all 8 bosses, and should your heroes advance to a certain level they will not go to any missions they deem "beneath their abilities." Alongside having to manage your team levels to match the tempo of the game, advancing difficulties also buff various stats such as HP, DODGE, PROT and many of the resistances, so heroes that haven't kept up with their skill leveling or gear upgrades will find themselves in a bad spot once they make that jump up to the next tier of dungeons. Enemy AI is also slightly changed for each tier of difficulty, tending to favor alpha strikes on a single target and favoring stress damage attacks due to their sticky nature. Every enemy you see in Apprentice mode also gets upgraded with new attack-riders for their attacks, such as Cultist Brawlers getting +Stress damage on their Rend, and Pig Butchers now wickedly reduce healing received on a target. The big change though is the addition of new monsters per difficulty, vastly changing the tactics players use as they progress through the game. Once upon a time this only happened once and it felt like a squandered opportunity, however mid-LP the devs added monsters that only appear in the Champion-tier of difficulty to keep the dungeons new and dangerous once you hit that final echelon. On the note of these enemy designs, the Veteran-tier of monsters were honestly considered godsends in dungeons since they would take up two spaces in a fight while only having one action, effectively tipping things in the players favor through less actions on the enemy side. Amusingly enough, Champion-tier enemies are much more threatening in this regard since they are all size-1 enemies but packed way more of a punch. With all that out of the way, let's look at all these new enemies. Common Elite Enemies:  The Gargoyle (Threat Level: Medium) The Gargoyle (Threat Level: Medium)-Gargoyles are kinda neat in my opinion, since they are crowd-control enemies that can replace anyone in a fight and are probably the best mix of PROT vs HP balancing. These enemies bring a mix of crowd control into the field: Their main attack is Flurry of Claws which just punches the first two rows with moderate damage; meanwhile Lash of the Tail can hit anyone for a stun and knockback chance. Both of these moves also possess a 11-12% chance to crit, so there's a chance it could throw you off-balance with their damage output. These guys aren't alarming by any means, but they are still a distinct threat compared to other enemies in the game.  The Ghoul (Threat Level: Medium) The Ghoul (Threat Level: Medium)-Ghouls are the other elite enemy that can appear in any biome, and while they're a bit more threatening than the Gargoyle through stress damage their size of two tends to ruin most encounter compositions. Ghouls have three attacks: Their primary attack is Rend which can hit the first two ranks for moderate damage alongside a sizable bleed proc; Their other, most threatening attack imo is Skull Toss , which can hit the back two ranks for moderate damage, heavy stress damage, and also comes with a heavy stun as well; Their last attack is Howl, which can hit everyone at a relatively low accuracy for stress damage and also reduces the torch level by 10. Ghouls are definitely more distinct of a threat to see in fights, mainly due to Skull Toss tending to lock up your support team and possibly triggering a resolve check. Being a size 2 enemy though, they don't pack enough of a punch to really merit the drop in enemy actions. Sadly there's no Champion-specific enemy that roams around in every biome. Oh well. Elite Ruins Enemies:  Bone Spearman (Threat Level: Medium; Veteran & Champion spawn) Bone Spearman (Threat Level: Medium; Veteran & Champion spawn)-The Bone Spearmen are basically Bone Arbalests on crack. They are exclusively an enemy that does damage, and they're pretty good at it. They only have two attacks: From any rank, they can use Spear Thrust on anyone for a decent amount of damage; If they are in rank 1-2 however they can hit everybody with Impale for less damage overall but with a wicked-high 15-16% crit rate. Being a bonehead though, they are really susceptible to stun and blind, but if they get a hit off it generally hurts.  Bone Captain (Threat Level: High; Veteran & Champion spawn) Bone Captain (Threat Level: High; Veteran & Champion spawn)-The Bone Captain is one of the few two-size elite enemies who's size actually contributes to their threat value. These guys always appear at the front, making it generally harder to access the back-row enemies. They come with a pretty large chunk of HP and PROT, so they've also got durability to match their chuft. Their attacks are fairly well-synergized: Their main attack is Crushing Blow, which does decent damage but also has an attack-rider that lowers stun-resist; their other attack is Ground Pound, which does light damage but can stun everyone it hits. Both skills also have a decent crit chance. I would generally consider these guys top priority to kill, however they often find themselves teamed up with even bigger threats so they often live to get a bunch of crushing blows off on me.  Bone Bearer (Threat Level: DIE; Champion exclusive) Bone Bearer (Threat Level: DIE; Champion exclusive)-Once upon a time, I thought the ruins were a joke of a level. Then Red Hook made this guy. The Bone Bearer is a great support unit for the enemies by means of bolstering the undead armies that infest the ruins. Simply by existing, these guys buff every enemy's damage by +25%, and when paired with arbalests or spearmen that damage is substantial. They can also actively buff any of their allies with Wicked Surge, buffing damage by +25% more. If ever caught in the front row, they can defend themselves with Defend the Icon, punching a guy in the mouth and moving back one. Their biggest threat however is if you leave these guys alive and kill anyone else, which will result in them having a free action at the end of the round to use Unholy Rally, resurrecting any corpse left behind to full health. You want these guys to die first, which is awful because while you're putting the boots to this guy, every other enemy will be punching you in the face for boosted damage. That is insidious. They also have max stun resist. This was something they had to buff on like day one of Radiant-Mode release since you could stun away his revival easily. Elite Warrens Enemies:  Large Carrion Eater (Threat Level: Low; Veteran & Champion spawn) Large Carrion Eater (Threat Level: Low; Veteran & Champion spawn)-Big Carrion Eaters are meant to synergize with the Pig Drummer and form a mark party, however the result is nothing worth noting. These guys come with average HP, no PROT at all, and low DODGE, so they don't really tank all that well. They can use Weaken Prey to both mark a target and reduce their damage via a debuff. They can also use Tentacle Devour to do hefty damage to a marked target, along with reducing their crit chance. Despite relying on the Mark mechanic and being able to easily get said mark, the payoff is not even threatening compared to the other elite enemy in the warrens. Hell, even the regular Carrion Eater is more of a threat due to Blight damage. I just ignore them for the other, more substantial threats.  The Swinetaur (Threat Level: High; Veteran & Champion spawn) The Swinetaur (Threat Level: High; Veteran & Champion spawn)-Ladies & Gentlemen, it pleases me to announce the five-time heavyweight champion of Darkest Dungeon and possibly the biggest pain bar-none. The Swinetaur is the other elite enemy to appear in veteran missions onward, and they bring the pain. In general, they have high HP, high PROT, decent DODGE, high resistances, and are quite mobile with their attacks with how often they change positions. When in the front row they will do one of two things: they will either hit 1-2 random targets with Crushing Backhand for light damage and a stun, or use Trot Retreat which actively does nothing but move the Swinetaur to the back row. Once in the back row they have two attacks that both propel him forward: Pig Spear does decent damage, has a light crit chance, and knocks a target two backward; meanwhile Boar Rush does heavy damage, has a heavy crit rate, comes with a huge stun proc and flings the target all the way to rank 4. One thing to note however, he cannot use any of his spear moves unless he's in "Rank 4," so if you manage to both kill every other enemy and also clear their corpses then all he has is the Backhand. The big issue though is surviving several rush-downs until then.  Swine Skiver (Threat Level: High; Champion exclusive spawn) Swine Skiver (Threat Level: High; Champion exclusive spawn)-Now for the contender for the heavyweight champion of this game, the Skiver is a new and exotic threat in the Warrens. This guy loves to both shuffle among his enemies and also do wicked AoE damage. The Skiver comes with a respectable amount of HP, high DODGE and light PROT as well so he can take a few hits. His big attack is Cripple Them, which targets rank 2-4 with high damage, a blight proc AND a debuff that reduces your dodge and speed. That move sucks royal with how much primary and DoT damage that stupid thing does, but the -Speed is also the worst if it actually connects. Their other big attack is Spit to Roast which does huge damage, has a 19% crit chance, and sends your target flying to rank 4 with a stun proc along with it, and moves the Skiver forward one space. If the Skiver finds himself too close to the front row, he will do Goring Flight for light damage but automatically resets him back to rank 4 so he can use his other skills. This guy is raw damage and does a massive amount of it, and he should probably die first and foremost since other Warrens enemies are not that threatening. Elite Weald Enemies:  The Crone (Threat Level: Medium; Veteran & Champion spawn) The Crone (Threat Level: Medium; Veteran & Champion spawn)-The Crone is basically the Cultist Witch 2.0, which sucks since they can spawn alongside Cultist Witches as well. They don't have much HP or resistances, but they have stupid-high DODGE rates so hitting them in general is a hassle unless you have a Graverobber or Arbalest. Their big annoyance is Curse of Vulnerability, which reduces the Accuracy and Dodge of 1-2 random targets alongside marking them for the mushroom enemies. Their other main attack is Embrace the Dark, which can hit 1-2 random heroes for stress damage alongside reducing the torch level by 10. If a Crone ever finds herself in the front row however, she resorts to Fetid Censer to do blight damage and also attempt to disease the front two heroes. These things are a big hassle, and their huge dodge rate makes them a priority target that often eludes everything you throw at it.  The Unclean Giant (Threat Level: Mighty Casey; Veteran & Champion spawn) The Unclean Giant (Threat Level: Mighty Casey; Veteran & Champion spawn)-This is an elite enemy that I don't know how to feel about, especially after several hours in this LP spent bull-rushing the Weald. The Giant is a creature that's just a sack of HP and crowd control, along with a big stick he's not afraid to use. Treebranch Smackdown is a move with relatively low accuracy, however it does a huge range of damage (13-26 on Veteran, 20-40 on Champion), heavy crit rate, and can send someone flying. Getting baseball swung sucks in general, but especially on Champion mode when it typically sends everyone barring the Leper & Man at Arms straight to Deaths Door without even batting an eye. His other moves are way less threatening: Poison Spores can hit one target with decent blight damage, and Confusion Spores shuffles your entire party alongside reducing Accuracy. This is an all-or-nothing enemy, but when he gives it his all then your team will get its poo poo stomped as a result.  The Hateful Virago (Threat Level: Maximum; Champion exclusive enemy) The Hateful Virago (Threat Level: Maximum; Champion exclusive enemy)-The Virago is an extremely dangerous enemy in so many aspects. She starts with a decent HP pool, 48 Dodge, and (for some weird reason) 7% prot so she's a tough nut to hit let alone crack. The attack she will be doing most often is Ruinous Hex which, while its listed as a random chance, will quite often hit 1-2 people with a decent amount of damage, a debuff that reduces ACC and Dodge heavily, and also marks each victim. This is such an irritant because -ACC in combination with nearly 50 dodge means this thing is so hard to touch. Her other, way less threatening attack, is Putrid Breath which hits for high damage, a bleed proc, and knockback 1. Her biggest threat however, and the main reason why I consider her the worst champion enemy EVER, is her free action if you leave any corpses on the field: From Death comes Life will convert a corpse into a mushroom enemy with the passive ability of locking any HP restoration skills. This is not just things like Divine Comfort or Wyrd Healing, this is also dumb poo poo like Judgement, Rallying Cry, Lick Wounds, Endure, Adrenaline Rush, the list goes on. Never leave a corpse around if a Virago is on the field, because you will regret it. The Virago also has max stun resist much like the Bone Bearer, so its gimmick is going off. Also for shits and giggles:  -It has 33 HP, and its existence blocks HP restoration. If you let this exist, you have a new priority target. Elite Cove Enemies:  Uca Crusher (Threat Level: Medium; Veteran & Champion spawns) Uca Crusher (Threat Level: Medium; Veteran & Champion spawns)-Oh no, my precious neck! Despite the Uca Crusher being the only enemy that can achieve double-digit bleed procs, he's actually quite tame compared to everything else in the cove. He comes with decent HP levels, high PROT and no evasion, and despite his high stun resist he actually doesn't have much in terms of resistances. His big attack that everyone hates is Arterial Pinch, which does pitiful base damage but does 8-10 bleed damage/turn and has a decent crit rate, which can make that 24-30 damage become 40-50 damage. His other attack is Tidal Slam, which does medium damage but also has a chance to stun and send the target flying to the 4th position. Now while this thing has high DoT output, packing bandages or just bringing a plague doctor completely neuters it.  Squiffy Ghast (Threat Level: High; Champion exclusive enemy) Squiffy Ghast (Threat Level: High; Champion exclusive enemy)-You know how I discovered that Finale Jesters are rad and started using them more? Well so did Red Hook. The Squiffy Ghast is the Cove's version of the Finale Jester, but with a totally different damage value. He has decent HP and high dodge, and has a relatively high stun resist but not maximum resist. The Ghast has two attacks that it does in a specific order. If it's not in position 1, it will use Maddening Shanty to do some mild stress damage, make a target more susceptable to stress damage, and moves him to position 1. Once he's at position 1 he will then use Offkilter Jig, which not only does 10 stress damage to everyone it applies an entirely new status effect: Horror. This new status effect is a Stress DoT, doing 5 Stress per turn across 4 turns, and being modified by +/-Stress damage. There's also one distinct thing about Horror: it is impossible to remove. Once you get hit with Offkilter Jig, you are guaranteed taking about 30 stress damage to everyone. Which is kinda dumb in terms of difficulty balance. A sidenote: There's an achievement for killing a Ghast with a Jester, called Mine goes to 11. I have said achievement because Finale rules. Its also apparently the rarest achievement as of this post.
|
|
#
?
Apr 14, 2017 02:03
|
|
|
New Update - Episode 60: Belly of the Beast The third Darkest Dungeon mission tasks us with a simple mission: Activate the Locus Beacon. However, there's a catch: This is the only mission that is labeled as Exhausting, giving us 4 campfires to work with. Preparing for this mission is simple enough, though odds are you will be maxing out your inventory simply by packing enough food and torches to fit this expedition. If you find yourself pressed for inventory space, I would recommend prioritizing Antivenoms and Holy Water once you get your basic provisions out of the way. In terms of team composition, there's actually no new enemies around here but we will be facing more of those polyps and flesh hounds; I would highly recommend a plague doctor for this area to counter all the DoTs you'll be facing, a Houndmaster to fight all the beasts in the area, and/or whatever bleed-mans you enjoy working with since everything here is weak to bleed. Finally, if you completely ignored things at this point, camping skills are pivotal for this mission: Make absolutely sure you have encourage for stress management, any skills that buff blight resist, any skills that buff accuracy, and if you can afford it any skills that buff damage vs Size 2+ enemies. The gimmick of this dungeon will readily make itself apparent no matter what path you take at the beginning since every possible path will lead you to the "Boss" of this zone: a fight with the Mammoth Cyst and his buddy the White Cell Stalk. The Mammoth Cyst gets 2 actions per turn so things such as debuffs and marks won't be as effective against him compared to say bleed or blight. His moveset however is pretty drat impressive. His main attack is Digest, which hits relatively hard but also has a hefty blight proc attached to it. This is probably the main reason why I recommend packing a stack of antivenoms and/or a plague doctor. His second attack is Bulging Gaze, which can hit 1-2 random people for decent damage alongside Stress damage. This is honestly the move you hope happens often, since with all the camping skills you can actually manage stress relatively well in this dungeon. His third attack is Revivify, which is not only a hefty self-heal but also buffs his damage by +25%. The Mammoth Cyst itself is relatively benign, however its the White Cell Stalk that's the big issue. The White Cell has a weird move kit that doesn't make it lethal but extremely threatening. The White Cell's main attack is Displace, which does light damage but also shuffles and displaces a target. The White Cell can also heal the main Cyst with Reconstitute, alongside buffing its speed and PROT. Its big kick-in-the-balls maneuver however is the skill Teleport, which removes you from the fight, sticks you in a random dead end in the dungeon, and odds are into another encounter. If you think killing the White Cell will stop the teleportation, the Mammoth Cyst's next action is guaranteed to be Summon, which revives the White Cell with its action. So you'd be merely delaying the inevitable. Now here's where the gimmick comes into play: Your objective isn't to kill the Mammoth Cyst, its merely to find the Locus Beacon, wherever it may be. In terms of Mammoth Cysts, you will be fighting at least two but you will only need to kill the one guarding the Locus Beacon. The dungeon itself however has these Mammoth Cysts scattered at random points in the map as well, with the most localized near the start of the dungeon. This is why the dungeon is labeled as "exhausting;" While the dungeon itself isn't as huge once you get a good look at it, odds are you will be re-treading paths and getting worn down by fights just from being constantly teleported. Now the kicker: Mammoth Cysts don't get their HP back if you get teleported, and White Cells absolutely cannot use Teleport on the first round and the odds of them doing it goes up incrementally each round. Depending on what you've explored and how worn down you are, it would be better to play defensively against Mammoth Cysts and just bait the teleport until you unwittingly find the actual Locus Beacon. Once you find it, you can just react to wherever you wind up getting teleported to and just headbutt the boss to death. The main difficulty of this dungeon lies in finding the Beacon, being able to endure long missions, and plain old RNG. The dungeon itself is rather unremarkable. The dungeon is packed with Flesh Hounds and Polyps, and there's really only three "new" enemies. Two of them are reskins of an old enemy: the Templar Gladiator and Templar Sniper are basically the boss fights of the second Darkest Dungeon mission, however they don't have Revelation at all and only have one action. They also guard very specific locations, so if you're lucky you will only fight them once. The actual new enemy is rather unimpressive: Antibodies are a rather simple creature that only has the attack Stunning Secretion in order to stun and deal moderate damage to a hero. The only treasure in this dungeon is in the top-right of this map if you didn't do every fight ever before this and not get all the ancestors accessories. The video itself is a testament to the dumb amount of luck I have. If you noticed, the video's less than 30 minutes long. If you look up these up on youtube, you will typically see that this mission is anywhere between 1.5-2 hours long. The reason why is two-fold: Not only did I know where the Locus Beacon is, I both get teleported to possibly the safest dead end among the ones you can get teleported to, and when the final Cyst teleported me it sent me to that very same dead end. That alone saved a boat-load of time since I wasn't bogged down by encounters. As for team composition, I honestly feel like the team I used was the best possible layout: Hellion, Houndmaster, Plague Doctor and Vestal. The Hellion was drafted mainly because of her high damage output and the capacity to do bleed damage, however you can use any tanky DPS in this slot such as the Leper or the Abomination. Houndmaster is an obvious choice since, much like the last mission, pretty much everything here has the Beast type and is also susceptible to bleed. Plague Doctor doesn't add much in terms of offense since everything has high blight resist, however with all the blight damage you can take here Battlefield Medicine is a godsend for making the long trek bearable. Finally, Vestal because Vestal. Unlike the last mission however, things go swimmingly here since I have access to all my accessories and this teamcomp is quite robust in general. I feel like I prepared incredibly well for this mission and could've endured a two hour run, but thankfully my luck kicked into overdrive here and we manage to have a quick romp through this trial of a mission. Next mission is Hell is in the Heart. It won't have a writeup since I don't want to spoil it. Also the LP ends technically.
|
|
#
?
Apr 14, 2017 19:10
|
|
|
The templars in this mission actually have different sprites: instead of a golden crown they just get a golden beanie.
|
|
#
?
Apr 14, 2017 20:40
|
|

|
probably the most binary mission in the entire game, in terms of difficulty. You can fight anywhere from 3 cysts + 1 templar to 6 cysts + 2 templars + assorted gnashers and polyps. My most straightforward run of this was Occultist + PD + Bounty Hunter + Leper. Lots of stuns, Leper can ruin Cysts, BH can stun and hit, PD can clear those nasty blights and stun both the white cell and the cyst, Occultist is naturally good against eldritch.
|
|
#
?
Apr 14, 2017 22:19
|
|
|
Well, this is it. Highwang, did you ever show off the insight into the town staff (innkeeper etc) after you start going into the dungeon?
|
|
#
?
Apr 14, 2017 22:58
|
|

|
double nine posted:Well, this is it. Vaguely. I was only able to force it on the mission map and the provisions page, everywhere else didn't have a means to spam it.
|
|
#
?
Apr 14, 2017 23:11
|
|
|
First off: you son of a bitch, Highwang. Belly of the Beast is a painful mission. My first time 'round, I decided to go for broke and brought a Man At Arms, Hound Master, Highwayman, Highwayman combo, thinking I could use the Guard actions to protect my main damage dealers with dodge/tank tomfoolery. Going in entirely blind, I encountered... difficulties with this approach, and although it actually kind of worked, I understocked on necessary consumables. Thanks to the abundance of firewood this mission gives you, I did, however, somehow manage to eventually stumble upon and almost kill the final cyst (emphasis due to utter frustration), before losing, to inevitable circumstance, the man at arms and a highwayman (by being teleported to the rear end end of nowhere and having to trek back). Forced to retreat, the hound master covered my last highwayman's escape, so at least not the trinkets were a loss. For my second try, I decided to go with a party that had actual healing, picking an Occultist, a Plague Doctor, a Grave Robber and a Bounty Hunter, and making sure my packs were actually fully loaded with the appropriate consumables. Although even more frustrated by enemy trash spawn composition than the previous run, and low on literally everything by the end, this was a good party for dealing with the cysts, the bounty hunter being a complete wrecking ball against them while marked, the occultist doing marks, w/fair damage and healing and the plague doc and grave robber helping with stuns that delayed the more dangerous and frustrating abilities. The true victory was in getting there past all of everything. At that point I had only 4 level 6 heroes left in my roster, the bare minimum needed to finish the game without a depressing amount of grinding. It is perhaps telling of what this game does to you that I had no compunctions about sending in 4 level 0 heroes to test the waters and give me some understanding of what final horror awaited my chosen few.
|
|
#
?
Apr 14, 2017 23:33
|
|
|
If you get teleported to a safe room, like you did you filthy lucker, could you camp or would that reset the fight?
|
|
#
?
Apr 15, 2017 02:05
|
|

|
Cassa posted:If you get teleported to a safe room, like you did you filthy lucker, could you camp or would that reset the fight? Oh you can totally camp. None of the Mammoth Cyst fights get reset, probably because the devs understood having a Teleport gimmick is really frustrating if it also reset a chufty boss like that.
|
|
#
?
Apr 15, 2017 03:04
|
|
|
Man, that cyst had a mean case of glacoma.
|
|
#
?
Apr 15, 2017 04:33
|
|
|
Well I wasn't expecting that background, although I do wish it was pulsing more.
|
|
#
?
Apr 15, 2017 13:36
|
|
|
 The Shambler The Shambler is a midboss that you can fight in any dungeon, provided you meet the appropriate circumstances. The most common one will be finding a curio called The Shambler's Altar, which does nothing on its own but summon's this boss instantly if you jam a torch in it. Another way you can fight the boss is at random whenever you run around with your torchlight at pitch black. Under either circumstance, this will possibly be the hardest boss bar-none in this game for reasons that will be detailed later. The shambler's attacks alone aren't all that threatening. Probably his most dangerous attack is Stentorious Lament, which does 10 stress damage augmented by light level and shuffles your party. This move can cause a lot of issues in most parties because characters like the Hellion and Leper love to be in front and have no real way to get there quickly. His other two attacks are variants with DoTs: Obdurous Advancement moves the Shambler forward 1 space, deals low damage and causes a bleed proc; meanwhile Undulating Withdrawal moves the Shambler back a space, does low damage and does a blight proc. However, Advance and Withdrawal are also the big gimmick of the shambler fight because both also summon two of these guys:  The Shambler Spawn are the actual attacks in this fight. They have low HP, high speed and high dodge, so initially hitting them is a bit of a trail. Their only attack is Clapperclaw, which does middling damage and 10 stress damage. Clapperclaw also has a ridiculous attack-rider: It buffs the shambler spawn by +20 ACC, +3 crit, +50% damage, +3 SPD, and +25% PROT. This is where the big issue comes in: unless you manage to kill them on their opening summon or stun them, they will eventually snowball into a gigantic threat with huge damage and speed, browbeating your entire team with ridiculous stress damage. One final note about the Shambler fight, and probably the big thing that makes it a trial: No matter what you do, you will be fighting him at 0 torch level, which means greatly increased physical/stress damage, and wicked high crits on both ends of the field. Also, the Shambler is guaranteed to get a surprise on you Its really hard to prepare for a Shambler fight, namely due to how the fight is insanely fixed against your favor. The only times I've actually beaten him are with a bog-standard party involving the Houndmaster's huge stun and the Jester on stress management, but this often struggles with the shuffle that frequently appears. To wit, if you plan to actively hunt a shambler, a shuffle party would give you a huge advantage in terms of fixing formation: Things like the HM's Duelist Advance, the MaA's Shield Bash and the GR's Lunge are good advancing skills that give either raw damage output or a stun to help deal with the ads. In terms of actual strategy, you want to prioritize locking down one shambler spawn with either a stun or just a lucky kill, then get some damage in on the shambler itself. Do *not* ignore the spawns since they are the main damage output, but you aren't going to clear them out completely since the Shambler has effectively a 66% chance of resummoning them. I usually emphasize stunning one since Stuns in general are highly accurate and the spawns have a low stun resist. Sadly this is a fight that is extremely hard to trivialize, and you will be leaving with a boatload of stress damage on your plate. If you manage to surmount the challenge of the Shambler, you are rewarded with 1 of 5 unique Ancestors Trinkets: Ancestor's Map: +25% Scouting/Trap Disarm, +10% Stress DMG (Hot Find!) Ancestor's Bottle: +25% Max HP, +10% Stress DMG Ancestor's Candle: +15% DMG/+2 SPD/+5 Dodge if torch is above 50, +10% Stress Damage (Hot Find!) Ancestor's Tentacle Idol: +25% Virtue Chance Ancestor's Scroll: +25% Healing/Stress Healing received, +10% Stress DMG I would highly recommend hunting him for the Candle and Map since those trinkets are really busted. Shamblers are super tough though, and are probably one of the big things that kills a new player's heroes, so be careful.
|
|
#
?
Apr 16, 2017 21:30
|
|
|
|
| # ? May 7, 2024 14:38 |
|
|
gently caress the Squiffy Ghast, and also gently caress this game. 
|
|
#
?
Apr 16, 2017 22:00
|
|