

|
Recruitment Data! (Last Updated: Mar 3rd) Really good crib-sheet provided by Double-Nine: https://www.dropbox.com/s/yaaiqqaqvv8y7if/Darkest.xlsm?dl=0  What is this game? Darkest Dungeon is a game developed by Red Hook studios after a successful kickstarter campaign in 2014. The game plays like a mix of XCOM and classic RPGs; you start up operations in a small hamlet hiring adventurers to clear out infested areas formerly owned by one of your elders, and from the treasures gained you put those resources back into the town in order to strengthen your heroes or relieve them of maladies that might plague them. Darkest Dungeon is a game that heavily stresses the importance of risk management and the costs of investment. The horrors that lie within these haunted grounds are merciless, and its important to know when to pick your battles, when to gear up your heroes, and when a battle is lost before actual losses occur. Your heroes are the backbone of your operations, and luckily they are always coming in so you technically cannot get a game-over. However, your heroes are still human, and the threat of death is ever present. Oddly enough, the loss of a life is no big deal compared to the time and money, and possibly lost gear, that leaves with that poor soul. This game is one that I've dumped well over 200 hours in, and that time might grow by another 100 thanks to this LP. There's a wonderful amount of customization, flexibility and randomness to this game where no new game felt mundane at all during development of this game. Everyone calls this game stressful and outright mean, but oddly enough I play it to unwind from stress nowadays. All that is probably why I've abruptly decided to LP it. The Dark Schemes for this LP This LP is going to be as comprehensive as I can make it, and is heavily inspired by Jade Star's XCOM series . I can't say 100% due to the conditions of NG+, but I I will cover a lot of tricks, templates, mindsets and strategies that will help those who are starting out to get a good grip on the game. Joining me on co-commentary is Iron Chitlin, and he is also a huge fan of this game. Much discussion will be had between us over preferred strategies, favorite heroes, and more than likely just us griping about certain...troublesome enemies. I will also be covering general strategies and trivia for each unit in forum posts as they appear. There's a big community out there filled with meta strategies that I have no idea about, so some of my thoughts may feel redundant, bizarre, or just plain wrong at times. Still, I breeze through this game without any unexpected trouble so I feel new players might appreciate that as well. You too can fight the Darkness! Since this game is all about having your own personal base and army to customize as you see fit and then promptly lose them, I figure its a great game to open up to the audience for some participation. SA will have two days to decide among themselves what we'll name our house (within reason). I will also be recruiting you guys to be soldiers in my antideluvian endeavors. If you wish to sign up, just post in this thread listing the top three classes you wish to be. All "sign me up as anything" recruits will be tossed in the garbage. Know your role cause I sure don't. I say top three since the carriage gives me a random pool of heroes to choose, so having three to choose from for each person makes things easier to do in general. Also keep in mind that the hero barracks range from 5-28 heroes maximum, so space is limited. If you don't make the cut, merely pray for the death of your fellow man~ Table of Contents A playlist for people like me that binge LPs on the side while doing other things. Boss Cut-scenes! Hopefully updated as the LP goes on! Opening Cinematic Episode 1: Homecoming Episode 2: Opening up Shop Episode 3: Welcome to Sunny Weald Episode 4: Innsmouth this is not Episode 5: Keep the Tip Episode 6: The Ancestor's Guide to pissing off Iron Chitlin Episode 7: Dead Rising.....Cutscene: Mastery over Life and Death Episode 8: Hylomania Episode 9: Politics Episode 10: Dogpile Episode 11: The Meatgrinder Episode 12: "No corpses make the game harder" Episode 13: Apply directly to Forehead Episode 14: The Night Hag.....Cutscene: Comfortable Study Episode 15: Rocky and Mugsy.....Cutscene: Ways & Rituals Episode 16: Siren (Not the PS2 Game).....Cutscene: Faithful as the Tide Episode 17: An actual Dark Run Episode 18: RNG Made Flesh.....Cutscene: A Troubling Surplus Episode 19: On the road to a Cannon Episode 20: Highwang's Dull, Long and Unfunderful Day Episode 21: Cannonball Run.....Cutscene: Awe & Ire Episode 22: Casualties Episode 23: Iron Chitlin as The Last Doohicker Episode 24: A bottle of Rum and a Yo-Ho-Ho.....Cutscene: Marine Shipments Episode 25: The most talkative Ghoul Episode 26: OSHA Hazard.....Cutscene: The Wandering Prophet Episode 27- Getting Offensive Episode 28: The Long Haul Episode 29: Comical Odds Episode 30: Leppy Granola's Mentorship Program Episode 31: Why I do what we do Episode 32: Leppy's Bizarre Adventure Episode 33: Eat the Rich.....Cutscene: Flesh of Man Episode 34: Bold Accusations Episode 35: Kaboom Dragoon's Explosive Personality Episode 36: A Broken Clock. Also, Siren fight I guess.....Cutscene: The Other Item Episode 37: Okay fine, Finale is awesome. Episode 38: Looking toward the future Episode 39: Nerd-cromancer.....Cutscene: The Visitors Episode 40: Lambs to the Slaughter Episode 41: The Swinetar Cometh Episode 42: An ominous star looms.....Cutscene: Professional Respect Episode 43: Let's get Exploded Episode 44: Cheating the Crew.....Cutscene: Alternative Payment Episode 45: Undulating Invasion of Personal Space.....Cutscene: The Sewer's Solution Episode 46: -196% Damage.....Cutscene: Time and Time Again Episode 47: Why are cannons so boring?.....Cutscene: The Application of Force Episode 48: Champion Difficulty Episode 49: The Beguiling Siren.....Cutscene: A Small Push Episode 50: Brigand (and co-commentator) Incursion.....Side B: Brigand Vulf Guide Episode 51: The #SwineGod.....Cutscene: The Great Thing Episode 52: Necromancer Lord.....Cutscene: The Dead Reviving the Dead Episode 53: The Gibbering Prophet.....Cutscene: Uncommon Corporeal Resilience Episode 54: The Wizened Hag.....Cutscene: Welcome in the Wild Episode 55: The Drowned Crew & The Horrid Shrieker.....Cutscene: Black Waters Episode 56: The Formless Flesh.....Cutscene: A Loathsome Pile Episode 57: Brigand 16-Pounder.....Cutscene: Compliance & Order Darkest Dungeon Missions: Episode 58: We are the Flame Episode 59: Lighting the Way Episode 60: Belly of the Beast Final Episode: Hell is in the Heart Bonus Videos: Radiant Mode testing & Kickstarter Accessories Shriekers, Shamblers, and Radiant Mode thoughts. Info Posts: Your Heroes The Tides of Battle The Darkplace Estate Team Composition & Preparation Overview: The Ruins Overview: The Warrens Overview: The Cove Overview: The Weald Difficulties & Champion Monsters Compound Guide: Necromancers, Secrets, and Common Enemies Boss Guide: The Hag Boss Guide: Swine King & Wilbur Boss Guide: The Siren Boss Guide: The Flesh Boss Guide: The Cannon Boss Guide: The Crew Boss Guide: The Prophet Miniboss Guide: The Shambler Miniboss Guide: The Collector Miniboss Guide: The Shrieker Darkest Dungeon: We Are the Flame Darkest Dungeon: Lighting the Way Darkest Dungeon: Belly of the Beast Journal Entries! Half of them courtesy of Double-Nine Journal of Daruis the Highwayman Page 1.....Page 2.....Page 3.....Page 4.....Page 5.....Page 6 The Blackest of Fates Page 1.....Page 2.....Page 3.....Page 4.....Page 5 A Trampled Journal Page 1.....Page 2.....Page 3.....Page 4 Blood-Soaked Pages from a Journal Page 1.....Page 2.....Page 3.....Page 4.....Page 5.....Page 6 Fan Content Gridlocked shows us the true heroes of Darkplace Estate  Gridlocked also provided us with some great house banners   FicusArt picks a side  Propaganda by JamieTheD  More art from Jamie showing off the late game partyboys. NSFW due to body horror http://i.imgur.com/L54jZWN.jpg IMJack shows us that Billy Jean is not our lover  Festivore shows us the benefits of getting a sponsorship for this LP   Political Comics! gbuchold  megane 
Highwang fucked around with this message at 07:25 on May 26, 2017 |
 #
¿
Jul 29, 2016 14:47
#
¿
Jul 29, 2016 14:47
|
|


|

|
| # ¿ Apr 29, 2024 08:52 |
|
|
Flow of Battle: Coming after a good morning's sleep. 2-22-2017 Update: Revised a boatload of info based on subtle balance changes. Hero Discussion -Crusader. Canon name: Reynauld Battle-Hardened and Stalwart, the Crusader has held the front lines in a hundred holy wars. He either attacks foes head-on with righteous fury, or embraces a melee support role by leveraging his powerful defensive buffs & off-heals The Crusader wears heavy plate mail and weilds a longsword. While affording him excellent protection and damage, his armor restricts movement, and his sword cannot be swung effectively in the back ranks Thoughts: The Crusader is the game's first tank/brawler, but is not really good at the former. The game doesn't really have traditional tanking mechanics, and the developers tried to handle that with one of his skills, however you cannot force targets to hit you 100% of the time so you can't make full use of the crusader's sack of HP. He is good at doing front-line damage, is specialized to fight undead, and has good support options when in a bind. You really can't go wrong with a Crusader on your team. Skills: Smite: The Crusader's bread and butter. Hits hard, and has anti-unholy properties. Keep this on your bar Zealous Accusation: The Crusader's AoE. -40% base damage, but hits the front two enemies. Not necessary, but its a great alternative for getting more value out of an attack if an enemy's about to fall over. Stunning Blow: Heavily reduced damage with stun modifier. Its the crusader's croud control, and pretty drat good. Not as good as other stuns, but you aren't hurting yourself for bringing it. Holy Lance: The Crusader's move ability. Moves one forward at slightly reduced damage. There's a fun gimmick build for this but I'm honestly not sold on it. Feels like a wasted slot to me. Bulwark: +Prot and Marks the crusader for enemies, and also adds +Torch. This was meant to make him the tank, but even being marked doesn't guarantee enemies to hit him. +prot is nice, but I don't use it often. Edit: Torch is okay I guess, not enough to promote using it though. Battle Heal: One of two of the Crusader's healing options. Straight heal at a low range. Nice to have, but the weaker of the two imo. Inspiring Cry: The crusader's other heal. One of the only two skills that heals anyone's stress mid-combat, along with torchlight and very slight HP. I used to ignore this, but it's rapidly feeling more and more like a must-have on a crusader. Great for overall maintenance and saving heroes from death. -Highwayman. Canon name: Dismas A rogue, a thug and a thief, the Highwayman has honed his skills with dirk and flintlock to devastating effect. Whether at range or in a melee, he is equally effective at dispatching his foes. Be it a grapeshot area-of-effect, or single target bleed, the Highwayman's skills focus soley on dealing damage in a variety of ways. The Highwayman's refinforced overcoat will dull a knife-strike, but he relies more on evasion than damage mitigation. His flintlock and short sword (sic: its a dagger guys. You just said that) afford him great versatility; he is never out of position, or caught unaware. Thoughts: Many people consider the Highwayman to be too much of an all-rounder to be useful, but I find him to be a good workhorse and a wonderfully fun character with a specific gimmick build. He brings the storm and thunder when I need it most, and has a camping kit that makes great use of the time allowance given. Sadly though he suffers against armor, with only a mediocre bleed ability to respond to it. Skills: Wicked Slice: Raw damage attack with a decent crit rate. I personally love this ability, but it does taper off against armored opponents. Pistol Shot: The Highwayman's trademark ability. Ranged ability from back rows at a slight damage penalty. Recently got a buff giving it more damage vs marked targets. You really can't go wrong with this with how easy it lets you hit back-row enemies. Point-blank shot: My personal favorite attack. One of the few attacks that always have an increased damage modifier. Throws you and the target backward, giving you great crowd control and fun synergies with other team-mates. A wonderful skill, but very niche. Grapeshot Blast: The Highwayman's aoe, dealing 50% less damage across the first three enemies. Technically has value, but I don't like it. The reduced damage makes it feel like fighting a tank with a water pistol. A wasted slot imo. Tracking Shot: Damage buff shot that does middling damage. Its a decent ability on paper but wasting the turn on a buff feels wasteful to me. Up to player discretion for use, but I never really use it. Duelists Advance: A once-mediocre ability that got an astounding buff. Moves the Highwayman forward one at somewhat reduced damage, and on release now puts him in a riposte state. This attack is now hilariously good since the riposte increases your action economy passively. I personally say must-have if you run point-blank shot, but hard to justify otherwise. Open Vein: The alternate knife slash, trading base damage for bleed. The only anti-armor option a Highwayman has, but honestly not very good. -Vestal. Canon name: Junia The Warrior nun channels her zeal for battle into healing abilities, holy judgements and dassling explosions of light. A strong backbone to any party, the Vestal can also hold her own on the frontline with a powerful mace bash and close-quarter condemnations. Blessed plate mail encases the vestal as she delivers terrible violence and healing comfort in equal measure. A mace in one hand, and holy book in the other - a study in contrasts, and all the more effective for it Thoughts: Your healer. You're going to be using her. If you don't, you'll curse the circumstances that force you away from her. Highest heal values, holder of the only aoe heal, and possessing many neat debuffs, she will save your heroes inummerable times across every mission. The only problem with vestals is that people, myself included, are so dependent on them that they rapidly rise up the rankings and lower-level teams lack a good healer. Skills: Mace Bash: Vestal's melee. Only useable in the first two ranks, putting your only healer in danger. If you're using this, you're either prepared for a bad circumstance or using a very specialized build. Judgement: Ranged damage attack from the back rows. Slightly reduced damage, but range versatility along with being a self-heal make it a wonderful skill. Highly recommended to make your healer an off-attacker. Dazzling Light: Vestal's crowd control, along with light restoration. Another must have imo, however some of the vestal's unique equipment reduces stun chance so act with discretion. Divine Grace: Your single-target heal. Use it. Divine Comfort: The AoE heal. Doesn't heal a lot, but its great for general maintenance and pulling several people back into the fight from near-death. Illumination: Ranged option, deals 50% less damage but reduces enemy dodge and increases torch levels. This skill looks nice, but the issue is to reduce evasion you have to not only hit an already evasive enemy but also pray the debuff proc hits. Not really recommended. Hand of Light: An...odd skill that I've come to greatly appreciate. A front line attack with slightly reduced damage, but reduces enemy accuracy and *heavily* reduces enemy attack damage. Required a specialized build, but its incredible when you get to use it. -Plague Doctor, Canon name: Paracelsus A doctor, researcher, and alchemist who prefers to hang back, eating away at her foes with stacking damage-over-time like toxic clouds & plague-filled grenades. She is equally effective in a support role, blinding and confusing foes while enhancing a party's survival with damage-increasing toxins, and remedies for bleed and blight effects. The Plague Doctor wears only light cloth- intent on remaining as far from melee combat as possible. From a distance she lobs toxic satchels that can blind, disorient, and eat away at her foes. Thoughts: The Plague Doctor has always had weird standing with me. Early in development I found it to be a niche support role that barely carried weight, but now with buffs on release day I often have a hard time finding the chance to use her. She is the queen of DoT, starting with a stackable 4 damage/turn against either rank 1/2 or 3&4 and increasing to 6/turn. She also possesses one of the strongest stuns that also acts in AoE, along with a powerful enemy shuffle. Her support role is goofy, but has uses. Her camping skills are also amazing at removing disease for free, which is a great way to save cash. Appreciate PD, she tries hard. Skills: Noxious Blast: PD's front-line DoT, hitting one target for middling damage but doing heavy poison DoT. Most armored enemies are in the front, so this is wonderful if they are plague-vulnerable. Plague Grenade: PD's back-row barrage, hitting both back-row targets for heavy poison DoT. This gives you high value, but I feel like another skill is better for dealing with back-row enemies. Still pretty drat good. Blinding Gas: The best stun in the game imo. High stun value against both back-row targets is a wonderful middle-finger to those meddlesome stress-casters. Incision: Melee attack from the first three positions. I believe its the only bleed attack in the game with 100% damage as well. Good alternative option, but i rarely see myself using it personally. Battlefield Medicine: Small heal that also removes bleed and blight. At first glance it feels weak, but its main purpose is removing potential damage from the dots across both the target and the PD herself. Hard to get full value out of it, but when you do its great. Emboldening Vapors: Back row buff that buffs damage and speed. Really good in general for making your damage dealers go ape-poo poo, but its a support role I'm not fond of since it wastes an action that could stop other enemies instead. Disorienting Blast: Enemy shuffle that removes corpses. -Man-At-Arms, Canon name: Barrista The Man-at-Arms is a seasoned veteran of combat, and has been rewarded for his toil with haunting guilt and stoic resilience in equal measure. Immovable, commanding, and focused, the Man-at-Arms breaks down enemy lines with his mace, buckler and furious battle cries. Clad in the heaviest plate, the Man-at-Arms is a mace-weilding wrecking ball! Quick to react and adapt, he is most effective leading the charge, protecting his companions with his unbreakable shield Thoughts: An incredible jack-of-all trades, probably one of the more powerful characters to the point that it's gotten several nerfs across early access development. I feel like I never use him properly. He has a great toolkit that forces enemies into his riposte, along with a great support kit that covers every team member. I just always feel like I never put him to his true potential since I operate well enough without him and not noticably better with him. Skills: Crush: Your Bonk-stick. Keep it, since its the only way Man-at-Arms can do 100% damage, and his damge range isn't impressive. Rampart: Stun, moves you forward and moves enemies back. Amazing utility that always keeps the big man on point. Wonderful skill Bellow: All-enemy debuff, reducing dodge and speed (Was this changed at all? Last edit said ACC/Dodge). Defender: Buffs the MoA's armor and makes him take a hit for an ally. Insanely versatile and powerful. The bread & butter for the MoA. Retribution: Low damage, sets Riposte on the MoA and marks him for focus. This would be a great skill if Marked meant you are 100% the focus, but it doesn't. Still can carry weight in combination with Defender at least. Command: Full team buff, increasing accuracy and crit rate. Great for those high-evasion targets. Bolster: Full team buff, increasing evasion and speed. The better buff imo by merit of keeping everyone alive by chance and letting you act faster. -Arbalest, Canon name: Missandei A runaway turned soldier, the Arbalest is the definitive backline fighter. Able to rain down suppressing fire down on the enemy, snipe high profile targets and apply powerfully effective first-aid, she is a rallying point, a turret, a beacon in the dark The Arbalest takes her name from the massive crossbow she carries into battle. Able to decimate enemies at range with a dizzying array of ammunition, she wears medium plate for increased protection against the volleys she knows are coming Thoughts: A character competing in my head for second-best support class with two other characters. She's the only character that can both heal well and increase the quality of heals, and her damage output is both comparable to the crusader and complimented by a staggering crit rate. My issue however is that she has no versatility, getting into hot water if she ever gets pulled from the back row. She also can rarely hit the front row, with one skill doing reduced damage and the other being a roulette. Skills: Sniper Shot: Her trademark skill, boasting staggering accuracy and crit rate along with bonuses against marked target. You'll be using this. Suppressing Fire: AoE Debuff, dealing mild damage while reducing enemy accuracy and crit. I feel like I should use this more, but quite frankly its choice of debuff targets is rather lame. Sniper's Mark: Infers mark and reduces dodge. Probably the worst mark since you'd use it to reduce evade but it needs to both hit and proc, making it heinously unrelaible. It also cannot mark row 1, further reducing its usefulness. Still keep it on hand just by merit of increased damage from the mark. Bola: The only guaranteed way the Arbalest can hit front-row targets, at 40% reduced damage. Also causes knockback, which is great for causing dischord. Not necessary, but pretty drat useful. Blindfire: Attack that hits randomly, but increases speed a lot. A good way to get a heal out faster, but not the best offensive option. EDIT: An update buffed this attack to not hit corpses anymore, and while its still not a reliable hit you can certainly hit Rank 1 targets now during the end of a fight. Battlefield Bandage: A Heal. You're using it. Its got a surprisingly good heal range, and also increases every subsequent heal from anyone so it ramps up as well. Rallying Flare: A skill that I thought was garbage until quite recently. Restores torch along with removing stun and marks as well. The skill will have a niche use in the game that will be revealed later on. Edit: I'm not sure when this was patched in, but Flare now also adds +Debuff resist to everyone. That's really good for a boss fight. Abomination, Canon name: Bigby Beaten, branded and imprisoned for untold decades, this furtive vagrant hides a terrible secret. The Eldritch poison coursing through his veins has given him unspeakable power, at a terrible cost. As his form changes, so too does his role in combat! Protected by cursed chains and a thick, leathery hide, the Abomination can withstand the pressures of frontline combat as well as any plated footman. His terrible claws are each the size of daggers, and his progressive mutation manifests in unspeakable strength, speed, and a profusion of bile. Thoughts: The Abomination is a very versatile class marred by the fact that religious units hate him. A good 90% of his skills can be used in row 2, which means you set him there and forget it. I love his risk-reward mechanic, trading away sanity for both him and your allies for an amazing damage dealer that's also a ticking time bomb. Even in his human form, his damage is enough to keep up with the needs of combat from his goofy chain swipe. However, as mentioned, he cannot team up with the Crusader, Leper, and most importantly the Vestal. Teaming up with him means you're losing a very powerful healer and relying on either off-healers or a straight-up gamble. I don't use him as much as I should because of this, he restricts team combinations too much for me to try and use often. Trivia: This was the kickstarter "Lord-tier" backer reward, i.e. a consumer designed this class. Well done imo. Skills: Note: All Abominations start with all skills unlocked. Your mode determines what your skillbar is Manacles(Human): This skill is useful and really weird. It says -60% damage base, which makes sense for the stun you get, but I feel like it does a boatload more damage than it should. Honestly makes human mode super-appealing to me and I forego morphing time just because Chain-spam is great. Beasts Bile(Human): Small AoE attack hitting rows 2 and 3 for small damage, bile proc and debuff proc making the victim more vulnerable to blight. Might be fun for a cutesy Blight-town build, but its uses are kind of middling imo when Plague Doctor and Graverobber have much more enticing blight skills. Absolution(Human): Self Stress heal. Basically a means to undo all the damage done by morphing into beast mode. I have a weird mindset about this skill: I understand its necessary and know I should use it, but I also feel like its a waste of a turn when I can chain-stun someone Transform -Human Mode: Turn into Beast Mode, gain extra Blight Resist and Damage at the cost of stressing out your allies and having a stress DoT on yourself until you turn back into a human. -Beast Mode: Turn into Human mode, lose some speed but gain health back -Once you Shift & Unshift in a battle, you can't do so the rest of the battle. The on-off button for making your Abomination go apeshit on enemies. Don't ever think you should hang onto this until a bigger fight; should you feel threatened in any way, hit that button and flip tables. The stress damage your allies receive is refunded by half when you go human, and you also heal some HP when going back, so there's an incentive to just generally use it. Activating it also doesn't consume your turn. Its his key mechanic, don't ration it. Rake(Beast): A snowball skill; it starts with -40% damage but you gain +15% with each subsequent use up to three times. This might seem goofy on paper with it peaking at 105% base damage, but this is a full damage frontal AoE attack once its revved up, and also complimented by the transform buff and any gear you may use. Well worth it for the smaller enemies. Edit: Damage scaling goes up with each skill level, peaking at +25%/Use up to 3 times. 130% damage across the front rows is pretty drat good. Rage(Beast): Beast Mode's basic attack. Good range and crit rate, with only rank 4 being safe from it. The better option for boss fights since Rake's AoE won't double-hit big targets. Slam(Beast): Your "go away" button. Two-space knockback and a debuff against an enemy's dodge and speed. I don't use this all that often. Granted its a useful skill, I just like raking the lawn. -Antiquarian, Canon name: Katharine A scholar, researcher, and keen archaeologist, The Antiquarian is not well suited for combat. She is, however, an expert in self-preservation - by making herself scarce in a fight, or demanding an ally protect her, she ensures her survival. If direct combat is unavoidable, The Antiquarian can use her fulminating censer to heal and invigorate allies...and to toxify attackers. The Antiquarian wears no armor to speak of, instead relying on the power of the innumerable ancient charms and relics she has collected in her travels. Her eye for rarities is enhanced by the unsettling properties of her censer's vapours, which can offer some utility to the party in...problematic encounters. Thoughts: mai waifu Seriously though, Antiquarian is a doll. Looking at numbers, she seems overall limited in her ability to contribute in any meaningful capacity. Her main gimmick is bringing you cash, increasing your gold/treasure stacks by 33% and also spawning her own treasure drops worth 275 and 1000 gold each. She also has a camping skill that just materializes a free piece of equipment, for use or selling for more cash. However, she has an actual purpose in combat that takes me back to the Guild Wars 1 days: She is a protection cleric. Between giving Anyone 20-30% protection, giving Everyone extra evasion, an off-heal that becomes serviceable with one accessory, and a high range knife stab, Antiquarian is a gal I take to get a payday and save my team's collective rear end. Trivia: Antiquarian was the "merchant class" teased through all of the game's early access development, and actualized about a month after release. Skills: Nervous Stab: Her melee, no damage mod but she's a bit of a noodle arm so its weak either way. She can use it from any position and can hit ranks 1-3, so its good for getting rid of any pesky monstrosities barely clinging to life. Festering Vapors: By far, the weakest blight skill available. Hits any one target, but 1 damage/turn makes me cry. Also makes enemies more vulnerable to blight I guess but that requires a debuff proc. Please don't make me use this skill. "Get Down!": Self buff, giving the Antiquarian extra dodge, speed, and in a more useful trick moving her back one space. A good replacement to the re-position button but I rarely do self-buffs mid-combat. Flashpowder: Debuff skill, reducing one enemies accuracy. Eh. Could be useful, but debuffs always feel dodgy to me. Fortifying Vapors: Tiny heal range. Heals anyone. Looks Doofy, actually is doofy even with the +50% heal accessory, but I find it great as a sort of general maintenance skill. When I've thrown all of Antiquarian's buffs up, I can just use this to patch up any pokes and scrapes so the healers can focus on actual work. Invigorating Vapors: Free dodge for the entire team? Why the hell not!? "Protect Me!": The best skill. Why bother carrying protection accessories when I can get a free STACKABLE damage reduction from her? Also gives dodge chance, as if it wasn't good enough. The tradeoff is that it forces allies to take a hit for her, but she rarely gets targeted anyway and your meat sack will take less damage anyway alongside potentially negating the attack. -Bounty Hunter, canon name: Tardif A brutally efficient single-target executioner and crowd control specialist. For the Bounty Hunter, planning is key - mark targets for bonus damage or look for opportunities to capitalize on a stunned foe. He can also wreak havoc on an enemy party's order using his grappling hook, flashbangs and powerful uppercut. The Bounty Hunter favors a hand-axe and grappling hook, a pairing that allows him to ensnare and execute his quarry with professional efficiency. His tough leather and scale armor grants decent protection(sic: bullshit), without sacrificing mobility. Thoughts: My general mindset with this game is that crowd control is king until you wear down the enemy enough to kill them. To wit, Bounty Hunter is a fantastic control class. His initial design was meant to make use of the mark mechanic in this game, however that's a small facet of his capacity. Possessing two high-yield stuns that also shuffle targets, a decent damage enemy pull, one of the strongest bleed skills, and quite recently the ability to rend armor, Bounty Hunter is a pro at manipulating the field. Keep him in front to be a damage engine, or in back to control the lay of the land. Skills: Collect Bounty: His trademark ability. An axe attack that gets stronger vs humans and marked targets, with a decent crit range. Under the right conditions, this attack will split anything in two like a piece of lumber. Marked for Death: A skill that got buffed soon after the game's release. Marks Target and reduces enemy protection. Not as great as the houndmasters, but its nice to not have to drag that old bloodhound everywhere. Keep this on your tab for both self synergy and other character synergy. Come Hither: I believe the first ever move skill during development. Pulls target two spaces forward and does some damage. I might be nuts, but much like the abomination's chain I feel like this does a surprising amount of damage despite having a -66% damage mod. Also can be used at any position. Its nice(tm) Uppercut: Ken Masters would be proud. -66% Damage mod, but a decent stun and knocks target 2 spaces back. I love this skill so much. Flashbang: Skill that does no damage, but is a high-yield stun and randomizes the target's position. I feel like I have so much bad luck with this skill though by merit of it missing whenever I need it to hit, which is all the time. Finish Him: Melee attack that deals more damage to stunned targets. Also the only way the Bounty Hunter can attack row 3 and the only row 3 attack worth a drat. It sounds good on paper, but with how initiative works in this game alongside how quickly stun is removed and prevented, you can very rarely get the golden setup for this move to work, and the payoff isn't even that great. Just collect bounties dude. Hook and Slice: The skill that entices me to make a backrow bounty hunter. Inflicts a pretty decent bleed stack on a target in row 3 or 4, but you must be in row 3 or 4. When teaming up with a plague doctor, the DoT stacks become comical. A fun skill. Grave Robber, canon name: Audrey The Grave Robber is a versatile and nimble combatant, moving back and forth through the ranks with ease. She strikes without warning and retreats to the shadows, continuing her assault at range. If her throwing daggers and poison darts aren't getting the job done, she can return to the melee, buffed and slinging her pickaxe! A light coat is all the Graverobber will wear, she favours mobility and dexterity over protection. Concealed within her garment are razor sharp throwing daggers, and buckled to her back - a pickaxe! Thoughts: If there's a person I can trust to clutch out the mission and kill enemies with ease, its the Grave Robber. She's a wonderful storm of critical hits and evasion and I basically never worry about her getting beat up with how reliable she is. Great in rank 2-3 for being a dagger-gun, but also has the capacity for a cutesy front row shuffle & stun. She possesses a camping skill also removes EVERY DISEASE on someone and herself for free, alongside one that procures a basic supply for use in a dungeon. The only problem I foresee with her is that you may use her so much she hits ranks faster than your team can keep up with and leave them in the dust. Skills: Pick to the Face: Decent skill that can be used from row 1-3 and hits row 1-3. "Low" crit rate compared to her other skills. This is mainly used for if you're caught in the front line and want to pick off someone Lunge: I actually was unaware, up until writing this line, that this skill has a damage mod that rivals Point-blank shot with a whopping +40% to damage in general. Only useable from row 3-4 and moves you forward two spaces. I still feel its too goofy to be practical, however many people swear up and down by this skill alongside her stun so I might be missing something. Flashing Daggers: I believe this is the strongest base-line AoE attack in the game, barring a fully revved up Rake from the Abomination. Only a -33% penalty to damage, hits rows 2 and 3, and also debuffs bleed resistance. I don't use it much, but its great for getting value from a weak target in those spots. Shadow Fade: Stun that is used from row 1-2. Moves you back one, stuns a target in the first 2 rows, and gives you a mind-blowing amount of dodge. You want an evasion tank? Graverobber will not get hit with the hilarious amount of evade this provides. Thrown Dagger: Oh this skill makes my heart aflutter and toys with my emotions. Full damage range. good accuracy. 10% crit rate. ADDS GENERAL ACCURACY WITH EVERY USE, even if you miss. Deals more damage to marked targets. This skill will make a dart board out of your enemy. Poison Dart: A decent blight skill that also reduces blight resist. A skill I rarely use, mainly because it requires being in row 3/4 and I like putting that gal on row 2. Also, with how much crits Graverobber outputs, I'd rather throw knives. Toxin Trickery Self-buff that adds decent dodge, crazy speed, and removes blight and bleed. I mainly use it for its curative purposes, but that extra speed makes everyone else seem like slugs. Hellion, canon name: Boudica Wild, unpredictable, and utterly ruthless, the Hellion thrills to the spilling of blood! Her massive glaive affords her impressive reach in combat, while its razor sharp edge leaves lasting wounds on enemies. Certain skills leave her exhausted, however, and she may occasionally need to take a turn to recharge her adrenaline before entering the fray once again. Crude leather and furs may offer little protection, but the Hellion lives to bear the scars of battle proudly. Her priority is wreaking havoc with her massive glaive and bathing in the blood of her adversaries. Thoughts: The Hellion is a gal I can rely on to look at anyone and cleave them en-twain. She has a slight gimmick to her that demands putting her in the first row, but when you do she can deal hellacious damage to anyone at any position. Many of her skills have the capacity to deal bleed in great amounts, allowing her to subvert armor quite efficiently. She also has a lot of good debuffs, but they also debuff her so I never really use those. Possibly the best front-line unit in the game bar none. Skills: Wicked Hack: Your workhorse. Hits the first two rows. Not much else to say. Iron Swan: One of her two front-row specialties. Must be in row 1, but hits row 4 with the same numbers as Wicked Hack. My personal little gently caress youuuuuuuuuuuuuuu to bandit gunners and cultist mages. Barbaric YAWP!: Stuns both the first two rows of enemies, but reduces the hellion's damage output and dodge. High-yield stun, If it Bleeds: This skill makes me sad. Once upon a time it did 100% damage to either row 2 or 3 along with a bleed proc, but now it got nerfed with a -35% damage reduction. Necessary in terms of game balance, but still. Granted its still good, but pour out a 40 for this wonderful skill. Breakthrough: Hits the first 3 rows of enemies for a -55% attack that reduces your subsequent attack damage and dodge rate. Why would *anyone* use this skill? The low damage output is bad enough, but the debuff factor after makes this a skill I never use at all. Sure it moves the hellion up 1, but I'd rather just use the move rank button rather than make her a sitting duck. Adrenaline Rush: Self buff, increasing damage and accuracy alongside curing bleed and blight. I use it for its curative effects, but hey its a good damage buff. Use it. Bleed Out: The other row 1 exclusive attack. +15% damage, moderately better bleed proc, but also possesses that dumb debuff against her damage and evasion. I used to use this a lot, but I've come to realize that the extra damage and bleed is not worth losing so much evasion, even as a finisher. Houndmaster, canon name: "Shag & Scoob" A tough and uncommonly compassionate ex-lawman, the Houndmaster and his faithful Wolfhound work in tandem to bring down their enemies and protect the innocent. Together they stalk the back ranks, bursting forth in a flurry of harrying bleeds, gnashing teeth, and stunning blows. Should the tide of battle turn, the pair can support an ailing party by protecting the weak, and rallying the stressed. Still clad in his worn Gendarme's uniform, the Houndmaster's focus is on evasion over mitigation. His cudgel is an effective stunning tool, but it is the Hound who delivers the pair's most crippling blows, especially when he's been fed an invigorating snack! Thoughts: I personally have the weirdest gripes with admittedly fantastic character. Wielder of the best stun in the game, once the only person capable of rending PROT, and also holding the only full-party stress heal, the houndmaster is a friend and a bud. I just really *hate* how he takes up an item slot for a buff. I also never really liked how he was the only one that could remove protection from an enemy, drat near necessitating him for every run in the late game and especially the Cove. Trivia: The Houndmaster was the focus of a kickstarter backer poll determining what dog he'd carry. The second place winner was a tiny-rear end pug. Skills: Hound's Rush: Hits any target, causes a tiny bleed effect, deals more damage to both marked targets and beasts. Your workhorse...dog. Hound's Harry: Hits everyone for -80% damage and a piddly bleed. I see no reason to use this barring one specific boss fight. Whistle: *The* armor rend. marks target, removes a boat load of protection. Sure its a debuff, but for what it removes you'll be adding a debuff-buffer on dog-boy Cry Havoc:: Targets everyone in the party with a 65% chance to heal stress. A bit of a gamble, but the value is there and its a great way to counter Madmen or Ghouls. Guard Dog: Guards an ally and ads evasion to the Houndmaster. A bit of a risky gamble imo, but ol'Scoob has unique gear that makes his evasion almost peerless. Lick Wounds: Self-heal. Feels a bit too slow to me, especially when the Houndmaster has better things he should be doing. Blackjack: This skill is incredible. High yield stun that can hit row 1-3. With the right gear, max level blackjack is the only stun capable of reaching 240% stun rate. Zoinks. Jester, canon name: Mr. Jingles Combat is a power ballad - a slow build up, and a grand finale! On the offense, the Jester leaps to and fro in a bloody cacophony, positioning himself for a glorious end in the front ranks! Alternatively, he can hang back, delivering chilling melodies and unsettling riffs that terrorize his foes, and give strength to his allies. Clad only in mildewed cloth, the Jester makes a mockery of battle. Only a fool would underestimate the vicious bloodletting power of his sharpened sickle, or the discordant throng of his lute. Thoughts: Jester and I have a history of me shoving him in a locker for incessantly disappointing me. During Early-access development, his skill-set was so erratic that you can never have all skills available no matter where you put him. His damage output for his Solo/Finale gimmick was also so bad that Red Hook had to buff it twice to make it worth a drat. It was only until either just before or on the day of release that the Jester's songs were made more flexible, finally making him into a solid row three offensive support. EDIT: Holy poo poo. Finale is really loving good now. When did this happen. Skills: Dirk Stab: Forward lunging stab with no penalties. I don't like having the Jester up there, but its part of his kit for his offensive build. Solo: Debuffs entire enemy team's accuracy, albeit at a somewhat low chance. Also moves you up to the front row no matter what and gives you a lot of extra speed. You're using this to setup for a Finale Finale: Slice Off: Hits either row 2 or 3 for a decent bleed DoT. -33% reduced damage, but honestly its the Jester's "best" attack to me. Harvest: Hits both row 2 and 3 for bleed DoT. Much like other AoEs, its mainly a way to get finisher value. Still a skill I keep slotted. Battle Ballad: Reason 1 why I use the Jester. Buffs everyone's speed, accuracy and crit rate. Sick of the game's dodgy initiative system? Bring a Jester and say "gently caress you I have +10 speed on everyone now." Inspiring Tune: Reason 2 why I use the Jester. The other single target stress remover, and also reduces subsequent incoming stress damage. Jester also has a unique item that buffs that stress restoration further. Use it. Leper, canon name: Baldwin A ruined man, a warrior, and a poet. The Leper is most effective when given a turn to focus himself before raising his massive blade. When he swings, it is all or nothing - crushing blows and massive damage or the empty whistling of a glancing blow. He is entirely self-sufficient, drawing strength from his life of trauma, and able to channel it into heals, protection, or unrelenting fury. Heavy and restricting, the Leper's bronzed cuirass can absorb all manner of punishing blow. His massive sword is slow to swing, but delivers crushing damage to anyone caught in its unstoppable arc. Thoughts: Big Edit: My old opinion of Leper spawned from hundreds of hours in Early Access where he had base damage comparable to the Crusader and Bounty Hunter. That's no longer the case. He now has a huge damage pool now, almost doubling the base damage of a BH. This feels way more appropriate for his visual and mechanical design, making the risk of missing actually worth it. I've also come to appreciate the self-buffs he has; The Heal offers up every status resist which can trivialize several bosses, and the nature of stress damage post-Radiant Update makes the stress heal a bit more valuable. The leper is Good(tm) now, but you still kinda need a +ACC accessory to make up for his built-in shortcomings. Skills: Chop: The Leper's basic attack that starts at a 75% chance to hit. To-Hit scales with level, but you need an accessory to fix and enjoy this. Hew: The Leper's AoE, hitting the first two rows with a 75% chance to hit. Same logic as Chop, needs +ACC Intimidate: Low damage AoE, but reduces the damage and accuracy of the first two enemy rows. Purge: Hits row 1, low damage, provides knockback 3 and clears corpses. Mainly used for the latter bit. Solemnity: Self Heal that also boosts all resist values. An actual good self heal imo, but I never use it. Too slow/situational Withstand: Self Stress heal and adds a wicked amount of prot. Another good skill I never use. Too slow, plus Antiquarian exists to give prot. Revenge: A BUFF I USE WHAT?! Boosts Damage, Accuracy and Crit at the cost of debuffing dodge and prot. Feels more mandatory than a supplement, but wow it makes the leper hit like a 747.  Occultist, canon name: Alhazred A lifetime of scholarly inquest into ancient and forbidden lore has opened the Occultist's mind to the powers of the void. Debilitating curses and maddeningly impossible support skills are his specialty. The void, however, is an unpredictable power, and consequently skills' effectiveness can vary dramatically, and usually come at a cost of light, or stress. Scholarly robes, better suited to the library than the harsh realities of adventuring, are all the Occultist has brought with him. His rituals and chants require deft movements of hand and finger, so better he be unencumbered that he may channel the power of his morbid fetish: the polished skull of a dead man. Thoughts: Oh man we're finally here, say hello to the man that is such a piece of poo poo that I actively pull my hair out irl from all the stress he causes me. The Occultist is an support class mainly focusing on debuffs that support your team and debilitate the enemy. However, this chucklefuck is also in possession of paradoxically the best and worst heal in the game, with a starting heal range of ZERO HP to 12 hp and can also BLEED YOUR TEAMMATES. He is also slightly bred to be anti-eldritch in nature. Pump enough +healing gear on him and his flaws are gone, but oh man, this guy is a walking gamble. He's also the only good healer you can bring if you use an abomination. He also has a fun alternate front-line build that focuses on crit rate and stuns. Hope you enjoy his company, if you're anything like me you'll have three of these guys along with your 3 vestals. Skills: Sacrificial Stab: The Occultists basic attack, holding a crazy crit rate and anti-eldritch properties. Despite his somewhat low damage range, I still use this skill from time to time since its a great finisher. Abyssal Artillery: Hits both of the back row for decent damage and also holds anti-eldritch properties. A skill I don't use much mainly because the damage always felt low even against eldritch enemies. Weakening Curse: Curse that debuffs an enemy's attack power. I've come to appreciate this skill when teamed up with a Vestal using her attack debuff too. Its funny to watch bosses only do 1 damage. Wyrd Reconstruction: The gambling man's heal. Can either swing a dire fight in your favor or make you do violent things with an iron pipe. Given its range though, almost any heal is a good heal so its mostly positive despite my ill temperament. Vulnerability Hex: Debuff that both marks target and removes their dodge. Has the same issues as Arbalests' mark however with you needing to jump through 2 hoops to get the effect going. Hands from the Abyss: This skill is neat and makes me wish front-line occultist wasn't so fragile. Decent stun with good damage and a wild crit rate, however it reduces your torch by 5. I like it a lot. Daemon's Pull: Decent long-range single target pull. Pulls enemies up two rows. I honestly just use this for damage and the move is just a fun bonus. Also kills corpses. Highwang fucked around with this message at 12:31 on Feb 22, 2017 |
|
#
¿
Jul 29, 2016 14:47
|
|
|
Skippy Granola posted:Oh 100% hell yes. I'm hot garbage at playing the game but I love that narrator. Thanks for doing this, bud. ARG, both you and SelNar make that joke and its so gross! Especially when at the brothel!
|
|
#
¿
Jul 30, 2016 00:17
|
|
|
The Tides of Battle "Send these vermin a message: The rightful owner has returned, and their kind is no longer welcome..." Combat is the big focus of this game, and you'll be spending a lot of your time participating in the acts of slaughter and bloodshed for the sake of coin, so let's cover the basics of it since I was a bit erratic in the video. Before we discuss actual combat, its important to know our characters front-to-back. You don't want to go into battle at the Ruins only to discover Reynauld not only fears unholy enemies but also takes more stress damage in the ruins (which is happening in my personal file). In order to look at your character's numbers, simply right click them on the roster or their character in-dungeon to get the details. Let's take a look at Reynauld real quick: 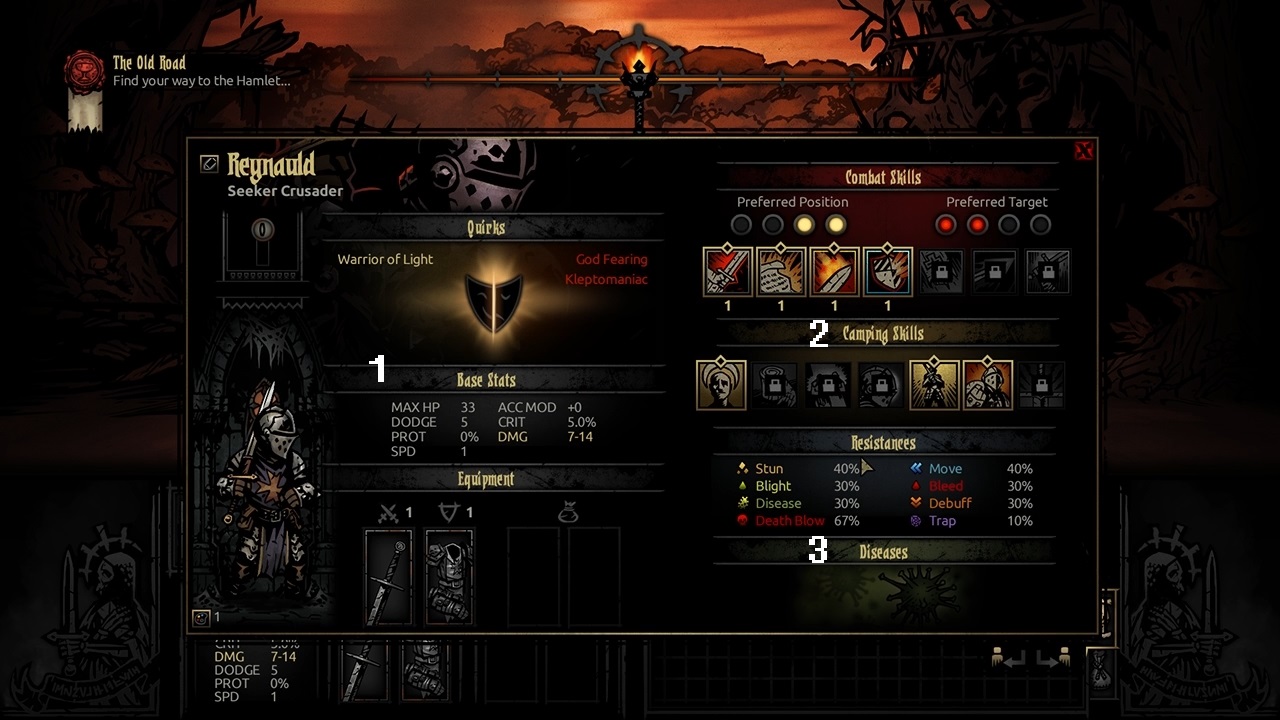 I've taken the liberty of highlighting some key points to make this discussion easier. If we look at [1] you'll see the two most important lists for your character: Quirks and Stats. Quirks are the game's big mechanic, actively defining what your character is good at, alongside all their bad habits and compulsions. Stats are the numbers that you compare to your enemies to see if things work. Any buffs and debuffs from quirks, diseases and equipment are reflected in your stats by a gold/red change in color. On the bottom of [1] you'll see the equipment screen, which isn't really complicated. Your Weapon and Armor are always equipped, and the two empty slots next to it are accessory slots that fine-tune your character's stats. If we take a look at [2], you'll see skill listings. These display the combat skills and camping skills you have unlocked and "equipped." You can have up to four combat and camping skills equipped at one time, and you can change your skills in-town and mid-dungeon so long as you aren't in a combat instance. The camping skills are used when you are in a medium or long dungeon, but we'll discuss that more in a later thing. If you look at [3], you'll see Resistances and Diseases. Resistances govern what your characters can shrug off, and its a linear conflict; Let's say a cultist brawler stabs Reynauld and has a bleed chance, If his chance is 100% chance it would be deducted by Reynauld's 30% resistance, giving the brawler a 70% chance to bleed. The math makes sense when its your status effects vs enemy resistances, however you don't ever see an enemy's status chance toward you so I just naturally assume they have something along the range of 150-200% chance to status since I'm a pessimist. Diseases are basically negative quirks again, however they are much cheaper to remove and subsequently easier to contract. All of this reflects in actual battle, where your traits and gear are put to practical use: 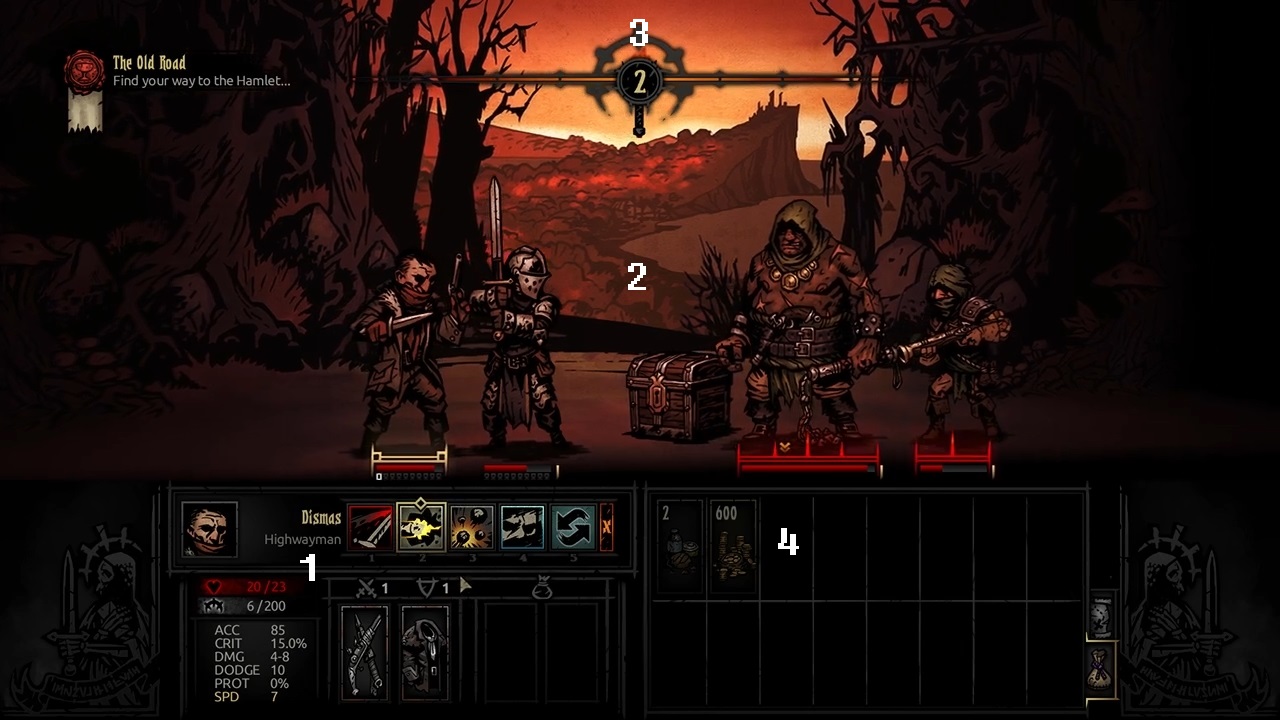 Combat flows in a turn-based instance, much like a classic RPG. Turn order is odd; I'm not 100% sure, but I'm pretty sure it is determined at the start of each turn by a roll of the dice with a character's speed modifier. Your base stats, gear and moves are shown at [1], and your attack modifiers are shown as you hover over an enemy. For example, if Dismas had the Rabies disease(+15% damage, -10 ACC), you'd see his damage changed to a gold tint to show its better and his ACC in the red to show its bad. Your damage range is also changed based on your attack; As shown in the image, Pistol Shot is 4-8 damage however if you use Grapeshot it would be changed to 2-6 due to the difference in damage modifiers. Keeping an eye on these numbers is vital in battle since you can guesstimate the chances of killing an enemy with your damage range and act appropriately to get either better value or heal damage. The main battlefield is shown on [2]; here you focus on positioning and targeting, though not much else happens here. On the top of the screen next to [3] is the Torch Meter. This applies to dungeon delving in general, but it also has a use in combat; The higher the torch, the higher chance you have of surprising the enemy and your heroes take less stress damage in general, however a dark torch gives you more loot in general and higher crit rates in combat. Torch level is pretty vital for survival in general, however if you're willing to take the risk you can manually snuff the torch and enjoy the risks that come with those rewards. Finally over at 4 we have the inventory screen. This is pretty self-explanatory, though you should know that while you can use torches and curatives mid-battle, you cannot use food mid-battle for healing. The important bit about [4] is that an enemy display panel pops up here when you hover over an enemy, showing you their resistances, what attacks they have and what effects each attack carries. This is pretty vital when dealing with crowd control since knowing which enemies are vulnerable to stun, bleed and blight can make or break a run. On Death's Door & Deathblow "Now, the true test. Hold Fast...or expire..." Death in this game is not as simple as dying at zero HP. Once a hero hits 0 HP, they enter a state called Death's Door. Entering the state of Death's Door brings about many consequences: Heroes are generally weaker in terms of ACC/Damage/Evasion, they take a big hit to stress and become more vulnerable to stress, and any loss of health will potentially be a deathblow. Deathblow is an interesting mechanic: Every hero has a 67% chance to resist a deathblow, with two traits and a handful of accessories manipulating that number, and the cap of deathblow resist being 87%. While in Death's Door however, hitting 200% stress as well will induce a heart attack and be a 100% kill even with deathblow resist. To escape Death's Door, simply heal the character in question and they'll be back in the fight, however they will have a milder version of the debuff that comes with Death's Door unless very specific camping skills are used to remove it. Outside of Heart Attacks, Death's Door can result a form of tanking I like to call "RNG Tanking"; While there isn't any traditional "tanking" in this game, a hero that takes a hit in Death's Door and resists Deathblow is damage not taken on any more important characters. This is the ultimate in risk taking, but it's also a valid strategy. While I am a very conservative player that gets attached to his heroes, keep this strategy in mind. For those looking for ways to subvert Death's Door in general, there are a few things to keep in mind. The aforementioned heart attack from 200% stress can put you straight into death's door if you are not in that state. Another thing to note is that DoT's such as bleed, blight, and certain unique attacks all contribute towards deathblow procs. Also, while not directly related to Death's Door, enemies that do stress damage have a propensity to aim their attacks on the most stressed person, so that can ramp up into putting a character in death's door abruptly as a mission advances. Avoiding Death's Door is all about risk management, however dealing with Death's Door can be a matter of urgency or a mission-saving gamble amusingly enough. Highwang fucked around with this message at 07:18 on Aug 20, 2016 |
|
#
¿
Jul 30, 2016 21:52
|
|
|
So given the time frame of recording, editing and getting setup for commentary, I'm cutting the house vote here. Welcome to our Dark Place. Gridlocked posted:I'm fairly sure you do get to see the enemy resistances when you mouse over them in combat now. Yeah I just noticed that this recording session. Gonna edit that in super quick. MelvinBison posted:I occasionally run into items that affect "Virtues" in some form; I thought they meant Quirks but I guess they're something altogether different. Virtues & Vices are part of the stress system, which will be covered when its relevant.
|
|
#
¿
Jul 31, 2016 02:39
|
|
|
Episode 2: Opening up Shop Today we see our first batch of recruits, dive into our first actual dungeon crawl, and get new stores. Now I'm looking for a bit of advice from the thread on a few things: -Where should our 4th mission take us? -What should my next info-post be? I'm torn between discussing the hamlet and detailing the Ruins
|
|
#
¿
Aug 1, 2016 19:04
|
|
|
Kacie posted:You took the Occultist but didn't buy bandages before walking into the Ruins? This is a thing I'm fully aware of, and the reason why I double-stack healers. Vestal can be the reliable heal, Arbalest increases the RNG of the occultist heal in my favor, and PD can remove the bleed. The bleed at any level is quite frankly a non-issue, especially when the trigger range is 50-80% across the levels vs a character's resistance. Buying bandages for any bleed that's not in the Cove is a waste. I'd rather buy them for the Weald so I can possibly make money back.
|
|
#
¿
Aug 1, 2016 20:24
|
|
|
JT Jag posted:In theory the Occultist and the Plague Doctor would combo well together. Healer as well as an emergency healer who can stop bleeding. My main issue with this is even with heal gear, PD is one of the worst healers next to Antiquarian and Crusader. I don't really like the idea of a low healer and a unreliable healer.
|
|
#
¿
Aug 2, 2016 00:18
|
|
|
Spudd posted:So you named your place Dark Place and not even one reference to Garth Marenghi's Darkplace? I was actually gonna do a thing in editing but wound up forgetting to do it because of how late it was when I edited that episode.
|
|
#
¿
Aug 2, 2016 18:54
|
|
|
chrisoya posted:You spelled it wrong, too. An author, visionary, dreamweaver of Garth Marenghi's calibre deserves better. I'm actually curious if I can edit a config file or something cause I looked all this up after recording and felt bad.
|
|
#
¿
Aug 2, 2016 20:14
|
|
|
Kurieg posted:Also the existence of the Abomination forces certain types of party comp. Abomination Risk. Donate today to have the risk of it on your Darkest Fiesta team! Gilgabot demands it!
|
|
#
¿
Aug 2, 2016 23:24
|
|
|
Our Bleak Inheritance "Welcome home...such as it is. This squalid hamlet, these corrupted lands, they are yours now. And you are bound to them..." The estate is your base of operations, and its very much an XCOM-esque base. Your rewards from each dungeon run are spent here in order to manage your adventurers, make them stronger & more adept, and get new recruits. For the most part, you will be dependent on money. A variety of things use cash in order to improve them: you need money to improve an adventurer's equipment, an adventurer's talent, to de-stress them, to buy accessories, and to buy supplies for your next adventure. To improve the quality of your hamlet you need heirlooms, and there are four types of heirlooms to look out for: Paintings, Statues, Deeds and Crests. Its important to know what to prioritize during development and when to develop them as you play Darkest Dungeon; You can't ever be put into a losing condition by mis-managing your township, however the difficulty curve can go from a half-pipe to a cliff-face without certain key updates. We don't exactly have everything updated and ready, so let's look at an alternate reality to show what our town can have. The Stagecoach "Word is travelling. Ambition is stirring in distant cities. We can use this." 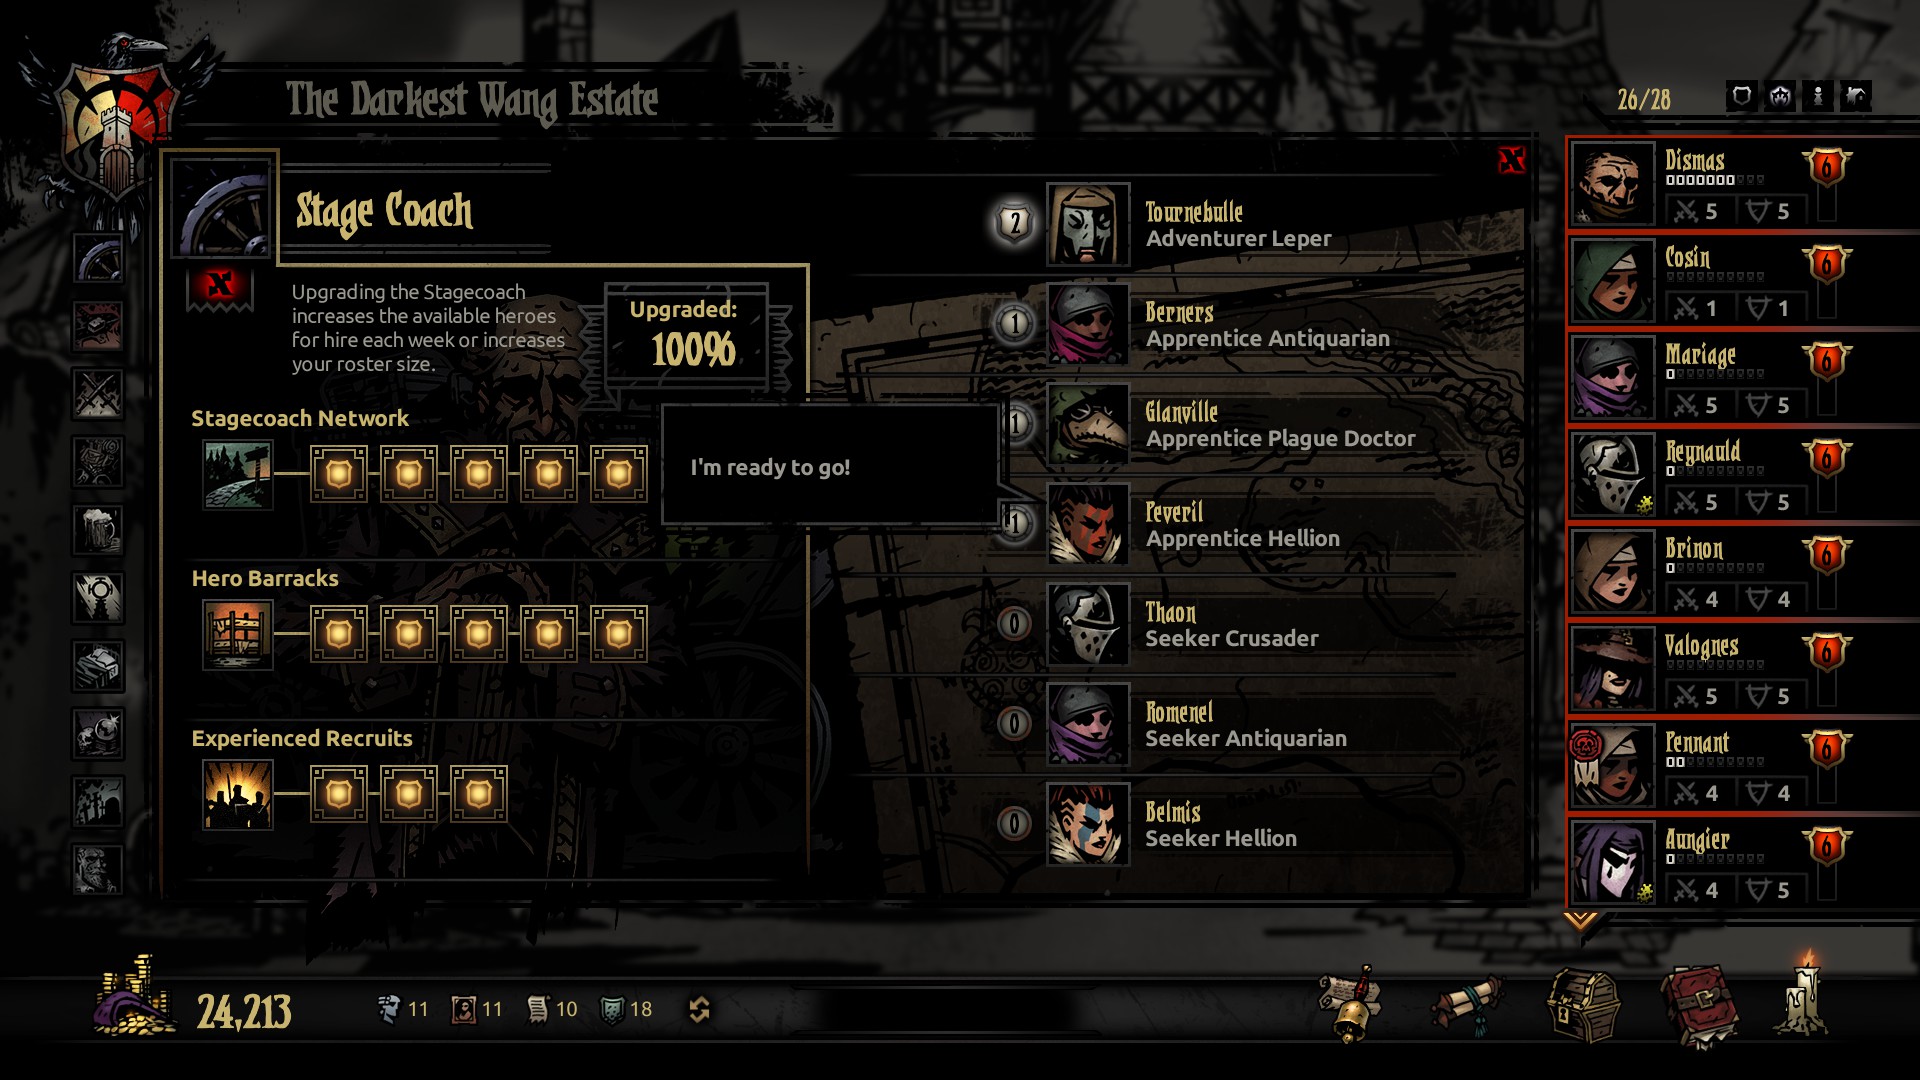 The stagecoach is where you go to pick up new recruits. What you get, for the most part, is entirely random: The first two recruit you get at the start of the game will always be a Vestal and a Plague Doctor, but after that there is no pattern to who shows up in your stage coach. Taking a soldier has no upfront cost and there is no maintenance fee for your soldiers, so feel free to fill up your roster to the brim. However the rub lies in that your barracks are restricted: Depending on how much you upgrade it, the barracks can only hold 4-28 heroes in your town. You can dismiss heroes at any time, so you can clear out any chaff that isn't pulling their weight, however keeping a balance of heroes in your roster is vital in keeping operations going without a hitch. Stagecoach is also the only part of your hamlet that uses every heirloom. The stagecoach is a fairly important part of your estate just because it affects how many heroes you hold. Most of the service uses Deeds to upgrade so my priorities focus on getting my roster capacity up ASAP then set it aside until I have spare heirlooms. -Stagecoach Network The Network influences how many people can fit in your clown-car of a taxi, and it upgrades in a linear fashion. Every upgrade you put into this, you get one extra hero permanently to choose from from the next week onward. The Stagecoach requires Deeds and Crests to upgrade Stagecoach Network is a nice luxury to have, but honestly its the lowest priority on my list for the stagecoach and just in general. I usually get it to where I have four recruits coming in a day then leave it at that until like the extreme endgame. -Hero Barracks The Barracks is where your heroes live at in your estate. Simply put, its your hero capacity. You start with a capacity of 8 and it increases by 4 for every upgrade you put into it. The Barracks requires Deeds and Crests to upgrade. This is the most important upgrade tree for the stagecoach, and 2nd important in general for the estate. Priorities vary based on the player, however I find it to be one of the top things to upgrade in general. More heroes mean more healers afterall. -Experienced Recruits Once you get enough treasure building up and put into the estate, more seasoned adventurers start getting interested in your estate. Each level you put into Experienced Recruits gives you a chance of getting a pre-leveled adventurer in your stagecoach, complete with maximum armor and skill levels for the level they're at. Their skills and traits are still random however. An interesting bit of trivia as well, this was not added until either just before the game's full release or just after, so those who played this game a lot during early access will know how enticing this tree is. Experienced Recruits requires Paintings and Statues to upgrade, and you cannot touch this tree either until you reach certain tiers of the Blacksmith and Guild as well. Experienced Recruits is a nice thing to have, but I never really focus on it until the endgame. Its a service meant to help bounce you back after a hefty loss later on. However, its also a great way to save money and time training up a new recruit. Getting that bit of a kickstart can help in general if you get a recruit that you haven't trained up at all. The Tavern "Fresh kegs, cards, and curtained rooms promise solace to the weary and the broken alike" 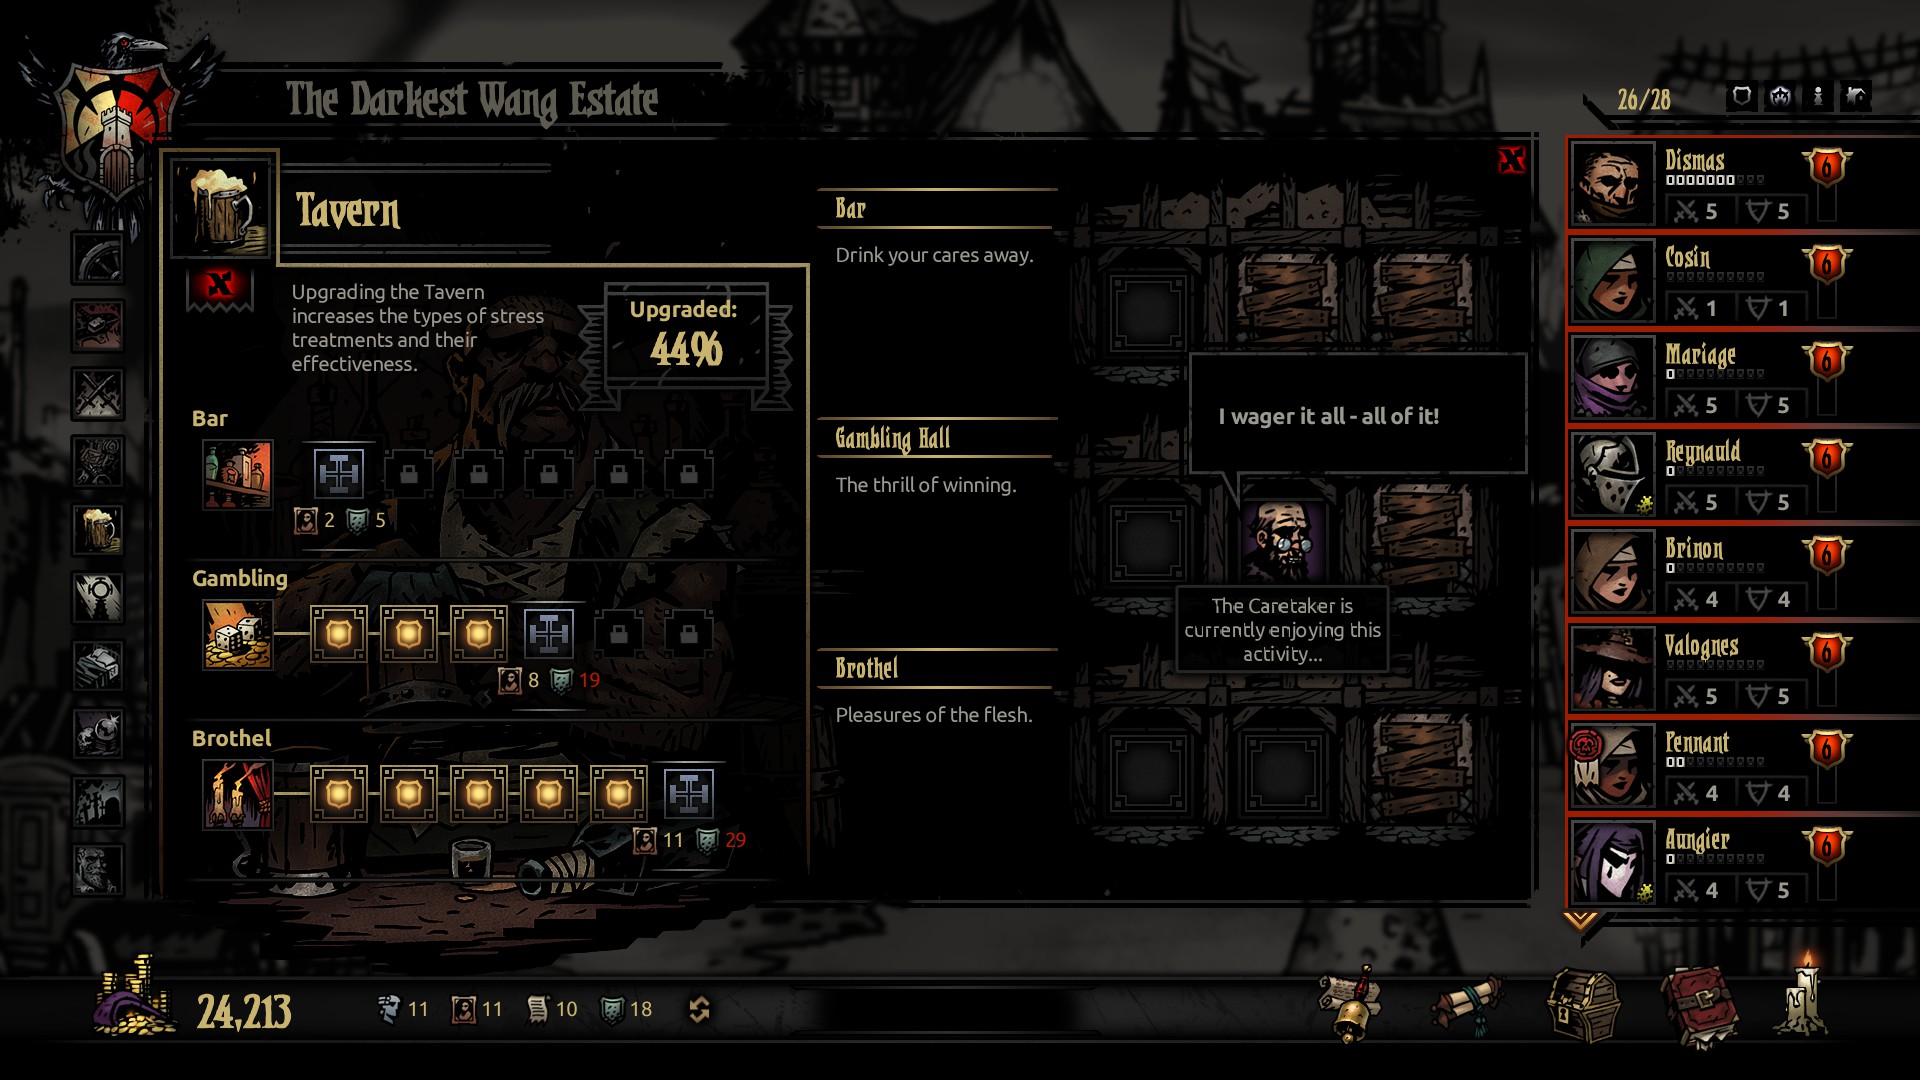 The Tavern is one of your two services that exist to de-stress your heroes. You have three choices when sending out heroes to have a fun time: The Pub, The Gambling Hall, or The Brothel. The services each offer a different amount of stress relief for an increasing amount of coin. Each service also comes with a bit of risk for its use, and some also come with a few benefits that can randomly occur. The Caretaker can also be seen partaking in revelry here, so he can tie up one of the rooms with his fits of madness. The Tavern needs Paintings and Crests to upgrade each service. In general, the tavern is one of the two things I rarely upgrade if ever. At most, I will get the Brothel to level 3 just to get the second room open and subvert the Caretaker if he decides to hang out here, but honestly I have more important places to put my paintings. For beginners though, this is probably a godsend since upgrading each service reduces its costs and increases removed stress alongside the capacity upgrade, so there's some merit to upgrading the place if you're still getting a handle on this game. -The Bar Nothing like several glasses of your favorite alcohol to help forget about the troubles from a hard days work. The Bar is the cheapest service at the Tavern, and also provides the least stress relief. If your adventurer is only a little unhinged, or if your purse is tight, the bar's a good choice to send your soldiers to unwind. Beware though, the tavern's cheapness comes at a hidden cost: It can randomly impart either a temporary debuff on your hero or your hero can gain a quirk of dependence, only ever wanting alcohol to unwind. -The Gambling Hall When you're constantly on the brink of death, the thrill of victory is a great way to feel the rush of life once more! The Gambling Hall is the middle ground of stress relief, providing a decent amount of relaxation for a pricier cost. The main draw to the Gambling Hall is that it not only has the most positive benefits, but one of those benefits is basically a rebate on your costs, so there's the off-chance that this will bring back some money when all's said and done. He can also lose more cash as well, it is gambling afterall. Gambling is also an addicting thing however, with this service running the risk of having one of three quirks appearing. -The Brothel They say the best way to soothe one's soul is the warmth of another human. The brothel is the best play to remove stress from a hero, however its also the priciest service. If you got a hero that has gone off the deep end, this is probably one of the two services that you will be using to bring him back. The Brothel does give the off-chance of giving a temporary +5 to speed for a hero after a fun night, however that fun night can also be a rip-rousing night and exhaust the hero with -5 speed. The Brothel also comes with the risk of having your hero afflicted with Syphilis, but we have a hospital and a couple heroes that are keen at dealing with such frivolities. The Abbey "A man in a robe, claiming communion with god. Madness..." 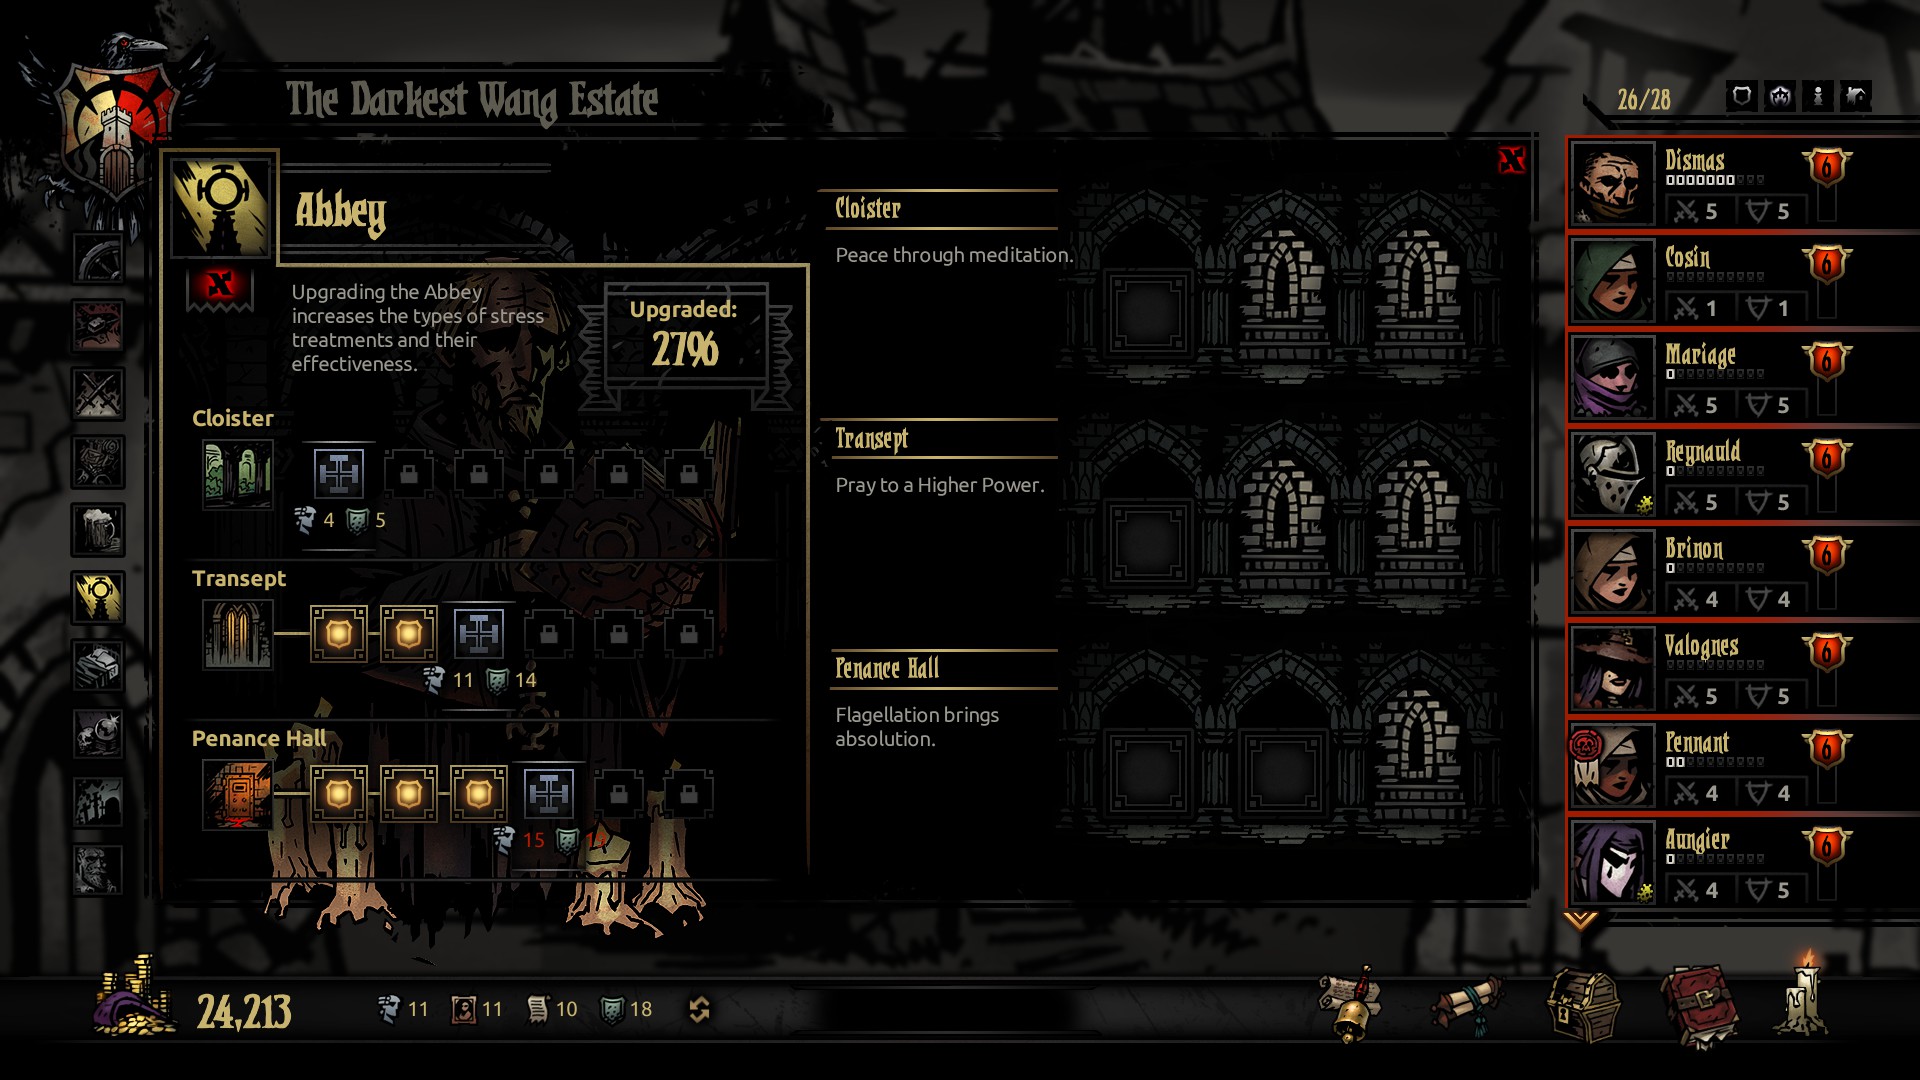 The Abbey is your other local source of stress removal, offering promises of forgiveness and absolution to relieve the weight off a hero's soul. Mechanically, there's no real difference between the Tavern and the Abbey; both services offer variable costing services of stress removal at the risk of dependence or other more intimidating quirks that can appear. The main difference is that the Abbey uses Statues and Crests to upgrade, which technically is cheaper but I have more important places to put my statues toward. The Abbey, much like the Tavern, is a service I don't focus on. I just unlock the 2nd Penance Hall room if necessary but for the most part it remains untouched. As with the Tavern however, it can help out new players a lot when they're struggling with money or stressed out heroes. Oddly enough, there are traits that make people dependent or skeptical of the Abbey, however this does not add the "religious/atheist" tag to someone. A missed opportunity imo. -The Cloister The cloister is a place where heroes can empty their minds and meditate, dispelling the horrors of their mind and steeling their soul for the trials to come. The Cloister is the cheapest service and offers the least stress resist. This service however is mathematically the best possible service to get in terms of risk: You have the chance of getting two positive quirks from this service, and the negative quirks are often times unremarkable. However, there is the off-chance that your hero donates 1000g after using this, so there's still an element of risk involved. -The Transept The Transept is the middle ground of the abbey, providing decent stress removal at a moderate cost. The Transept also has the benefit of having the least negative outcomes from its use, however you can't gain anything positive out of prayer (a metaphor?). Amusingly enough, prayer can make you a god-fearing man, which is the game's way of saying the hero is dependent on prayer now. -The Penance Hall The Penance Hall is the best service in the Abbey, providing the most stress removal at the highest cost. Flagellation is interesting because it can empower a hero after overcoming such hardships with +20% damage for a mission, or the blood loss could weaken them with a -20% penalty. The Guild "Every creature has a weakness. The wise hero trains for what she will face" 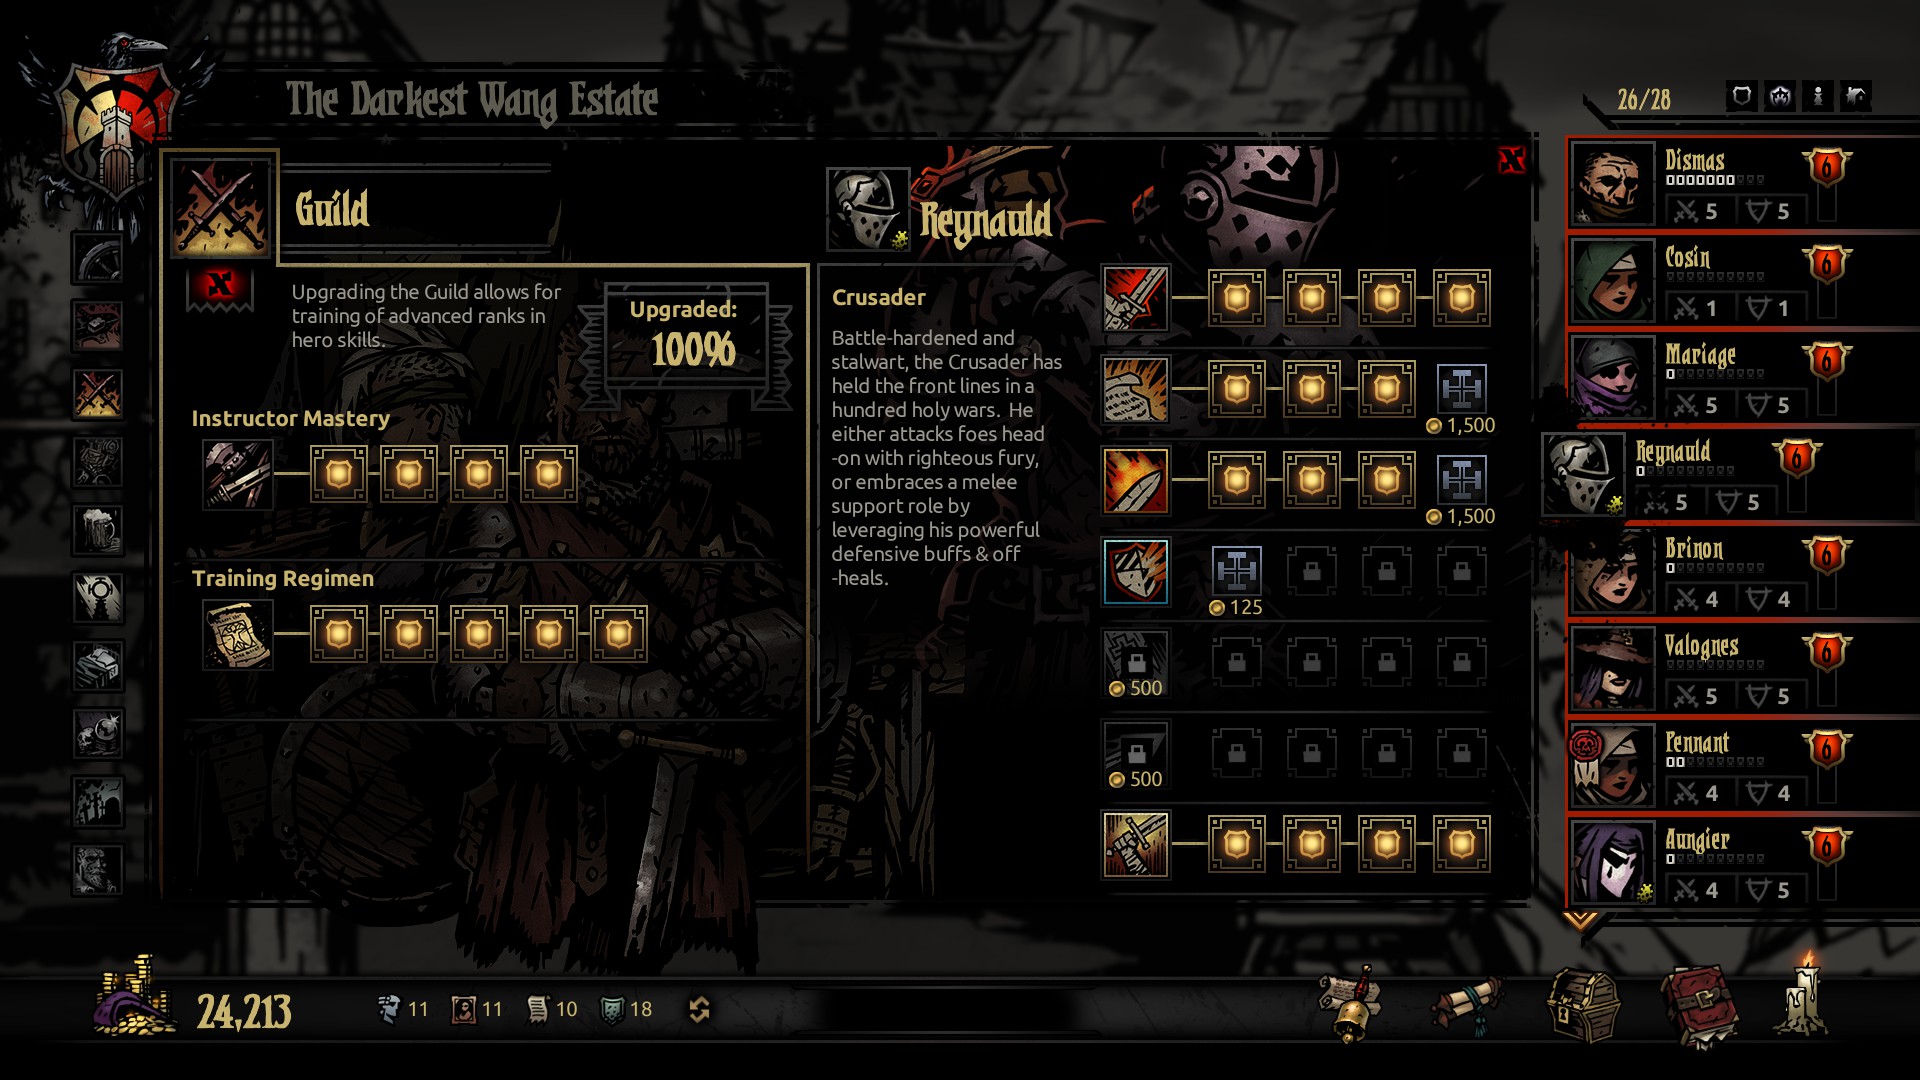 The Guild is where your heroes train in the art of war. For a small cost, you can train your heroes in new skills and make their currently learned skills much better. The Guild takes Paintings and Crests to upgrade, and you only have two trees to worry about when upgrading this service. The Guild is the second-most important service in this game quite frankly, mainly due to how this game handles stat growth. Darkest Dungeon doesn't do growth and stats like most RPGs; Stats are more dependent on how developed your heroes are rather than how high their "level" is. To wit, a character's accuracy is entirely dependent on what skill and skill-level they use, modified by any traits you may have. Because of this, The Guild becomes a key factor for survival since a higher level skill is more likely to hit the ever-growing strength of the horrors that lie in wait. The skills in general also get better, increasing the likelihood for their status effect to proc alongside providing higher numbers for your heals and buffs. This is where a majority of your portraits should be going. Its directly related to your efficiency in battle afterall. -Instructor Mastery Instructor Mastery determines how high your heroes can train their levels, with each upgrade unlocking a higher tier of skill when a hero meets the appropriate level. Focus on this first and foremost. You want your heroes at the best of their abilities afterall, and how can they possibly do that when their instructors got their degree at Phoenix University? This skill is also one of the two skills that unlock pre-leveled heroes in the stagecoach, so its something you want. -Training Regimen This upgrade tree reduces the price of learning and upgrading skills, reducing the gold cost by 10% per each upgrade. A nice upgrade, but not necessary if things go well. The Blacksmith "Fan the flames! Mold the metal! We are raising an army!" 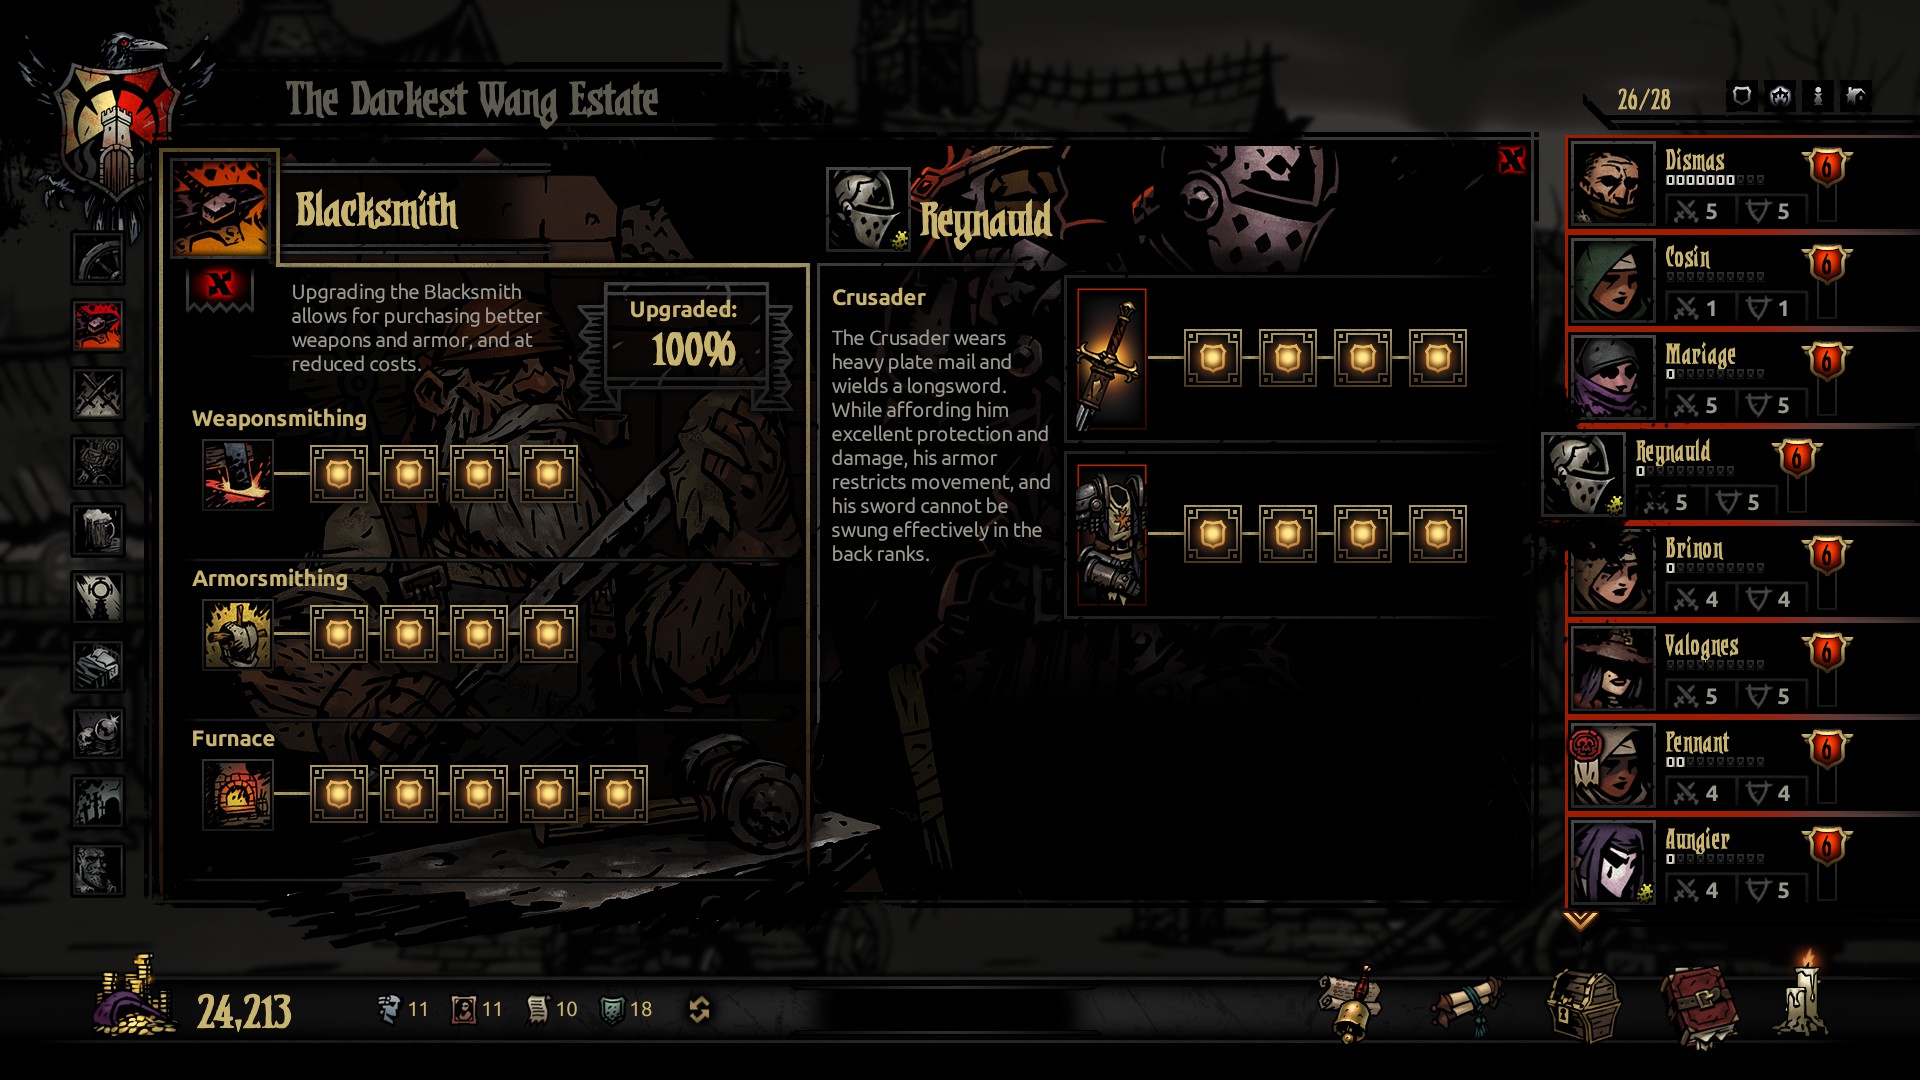 The Blacksmith is where you go to spend coin on gearing up your adventurers. Depending on your hero's level and the blacksmith's upgrades, you can give each hero a better tier of weapon and armor. The Blacksmith takes Deeds and Crests to upgrade, and this service has three upgrade trees. The Blacksmith is the most important service you can focus on. As mentioned before, adventurer growth is dependent on their development, and the items gained from the blacksmith affect a good majority of stats on a character. A hero's weapon will determine their damage, critical hit rate, and most importantly speed. A hero's armor determines their max HP and their dodge rate. Five key stats of a hero's growth are highly dependent on the capacity of the blacksmith. This is where a good majority of your deeds are going to go, and the first thing you should focus on upgrading in your town. -Weaponsmithing Weaponsmithing determines how high a weapon tier you can buy, with each level unlocking a better weapon. As mentioned before, weapons determine your damage, crit rate, and speed in battle. Technically upgrading this affects your survivability in battle, however this tree is second priority on my upgrade list. I feel like armor inches out ahead in terms of importance since its directly affecting survival, but having better damage and speed can end battles faster after all. -Armorsmithing Armorsmithing determines how high an armor tier you can buy, with each level unlocking better armor. Armor affects max HP and Dodge, which means you'll be able to dodge more hits and take more hits in general, keeping you in the dungeon longer. I grab this first, because survival is key in storming the Darkest Dungeon and a better shield is necessary for that. -Furnace The Furnace reduces costs for upgrading an adventurer's weapon and armor, with each tier reducing the cost by 10%. A nice thing to have, but somewhat unnecessary. Last on my priority list for this service. Sanitarium "The front line of this war is not in the dungeon, but rather, inside the mind." 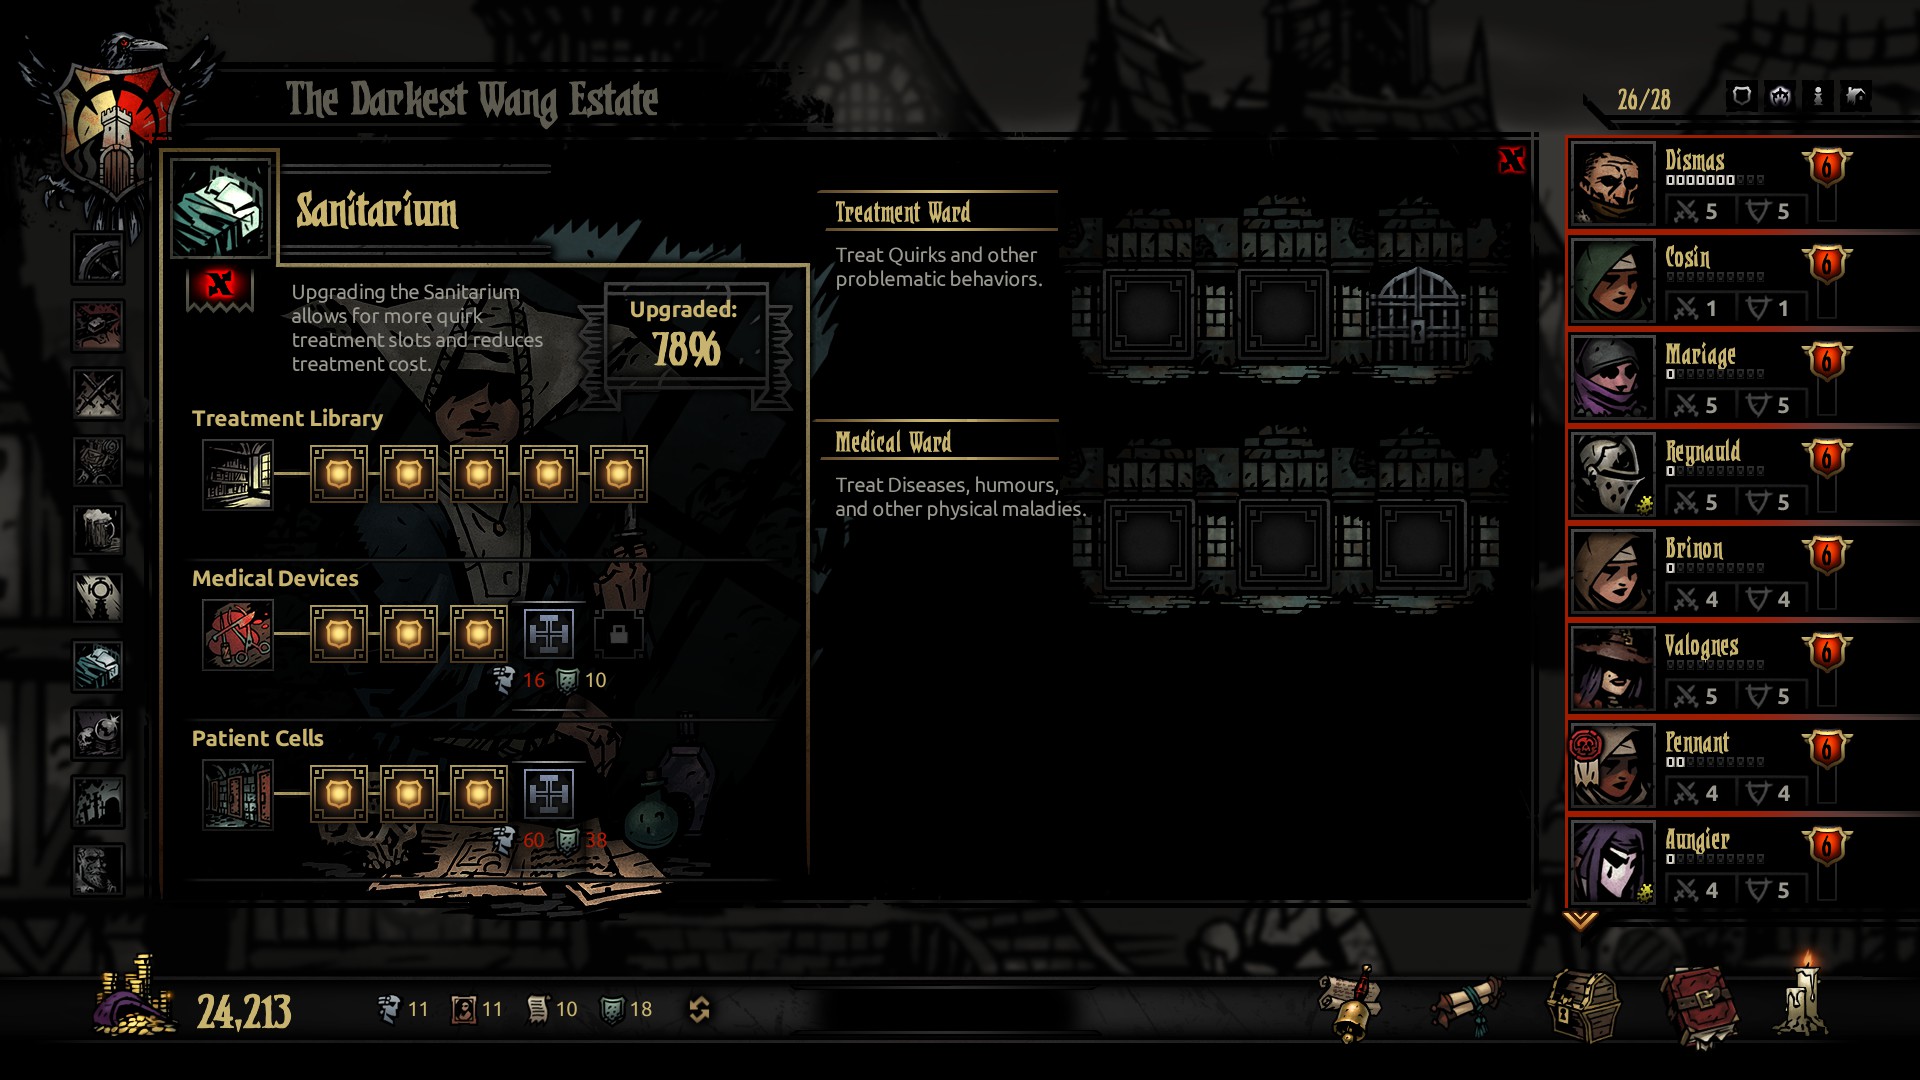 The Sanitarium is the place to go in order to fix your broken heroes, allowing one to remove bad quirks, lock in positive quirks, and remove diseases they may be suffering from. The Sanitarium takes Statues and Crests to upgrade, and there are three upgrade trees to focus on. This service is a very "take it or leave it" thing to some people, and for me I take this service quite seriously. poo poo like Kleptomania, Syphilis, The Black Plague and Slowdraw are things I will spend any amount of coin to remove because of how debilitating they are. Alongside that, I'm the kind of guy that demands the best out of my soldiers, so I will spend that little extra cash to reinforce awesome traits like Quick Footed(?), Irrepressible and Hard Noggin to give my heroes the edge they need to fight off this corruption. The costs are a bit much, however the headaches they save me from suffering is a great price to pay in the long-run honestly. -Treatment Library This upgrade tree reduces the cost of Quirk Management by 10% for each level you put into it. If you like to fine-tune your heroes, this will be important since locking in a positive trait or removing a severe negative trait is expensive as hell and this helps. Not my top priority however, but something I focus on. -Medical Devices Leveling up the Medical Devices tree reduces Disease Treatment by 10% for each level, alongside increasing the chance of removing one extra disease. Probably the least prioritized tree to me since disease removal has a very low base cost, and some heroes are pretty good at removing a lot of diseases. Not a bad thing to invest in though since it gives you more value for disease removal. -Patient Cells Improving your Patient Cells will increase the capacity of the sanitarium's services, alternating between increasing the medical ward and the treatment ward. I focus on this first and foremost since more slots means I can fix more people in their downtime while the main team goes off an adventure. A costly endeavor though, but worth it. Nomad Wagon "An increasing stockpile of curious trinkets, gathered from forbidden places."  The Nomad's Wagon is the place to go if you want to get accessories, for a nominal fee. Each week she will have a different selection for sale, with each trinket varying in rarity and cost. The Nomad Wagon only needs Crests to upgrade, and it has two upgrade trees to follow. Honestly, I don't make use of the Nomad Wagon that much, mainly due to how costly an accessory can be. It also doesn't help that you can get accessories easier from adventuring and slaying monsters, so I try to make better use of my cash. However, the wagon does provide a second avenue to get some neat and rare accessories that unlock versatility in a hero, so don't dismiss it as easily as I do. -Wagon Size This upgrade tree increases how many trinkets are available for purchase, making two more available with each week. Much like the Stagecoach, this is a nice way of increasing the odds of getting what you need. -Merchant Network This reduces the price for trinkets at the Nomad Wagon, reducing prices by 10% per upgrade. A very important upgrade tree to me, just because of the exorbitant prices that the Nomad demands. Survivalist "Alone in the woods or tunnels, survival is the same. Prepare, persist, and overcome" 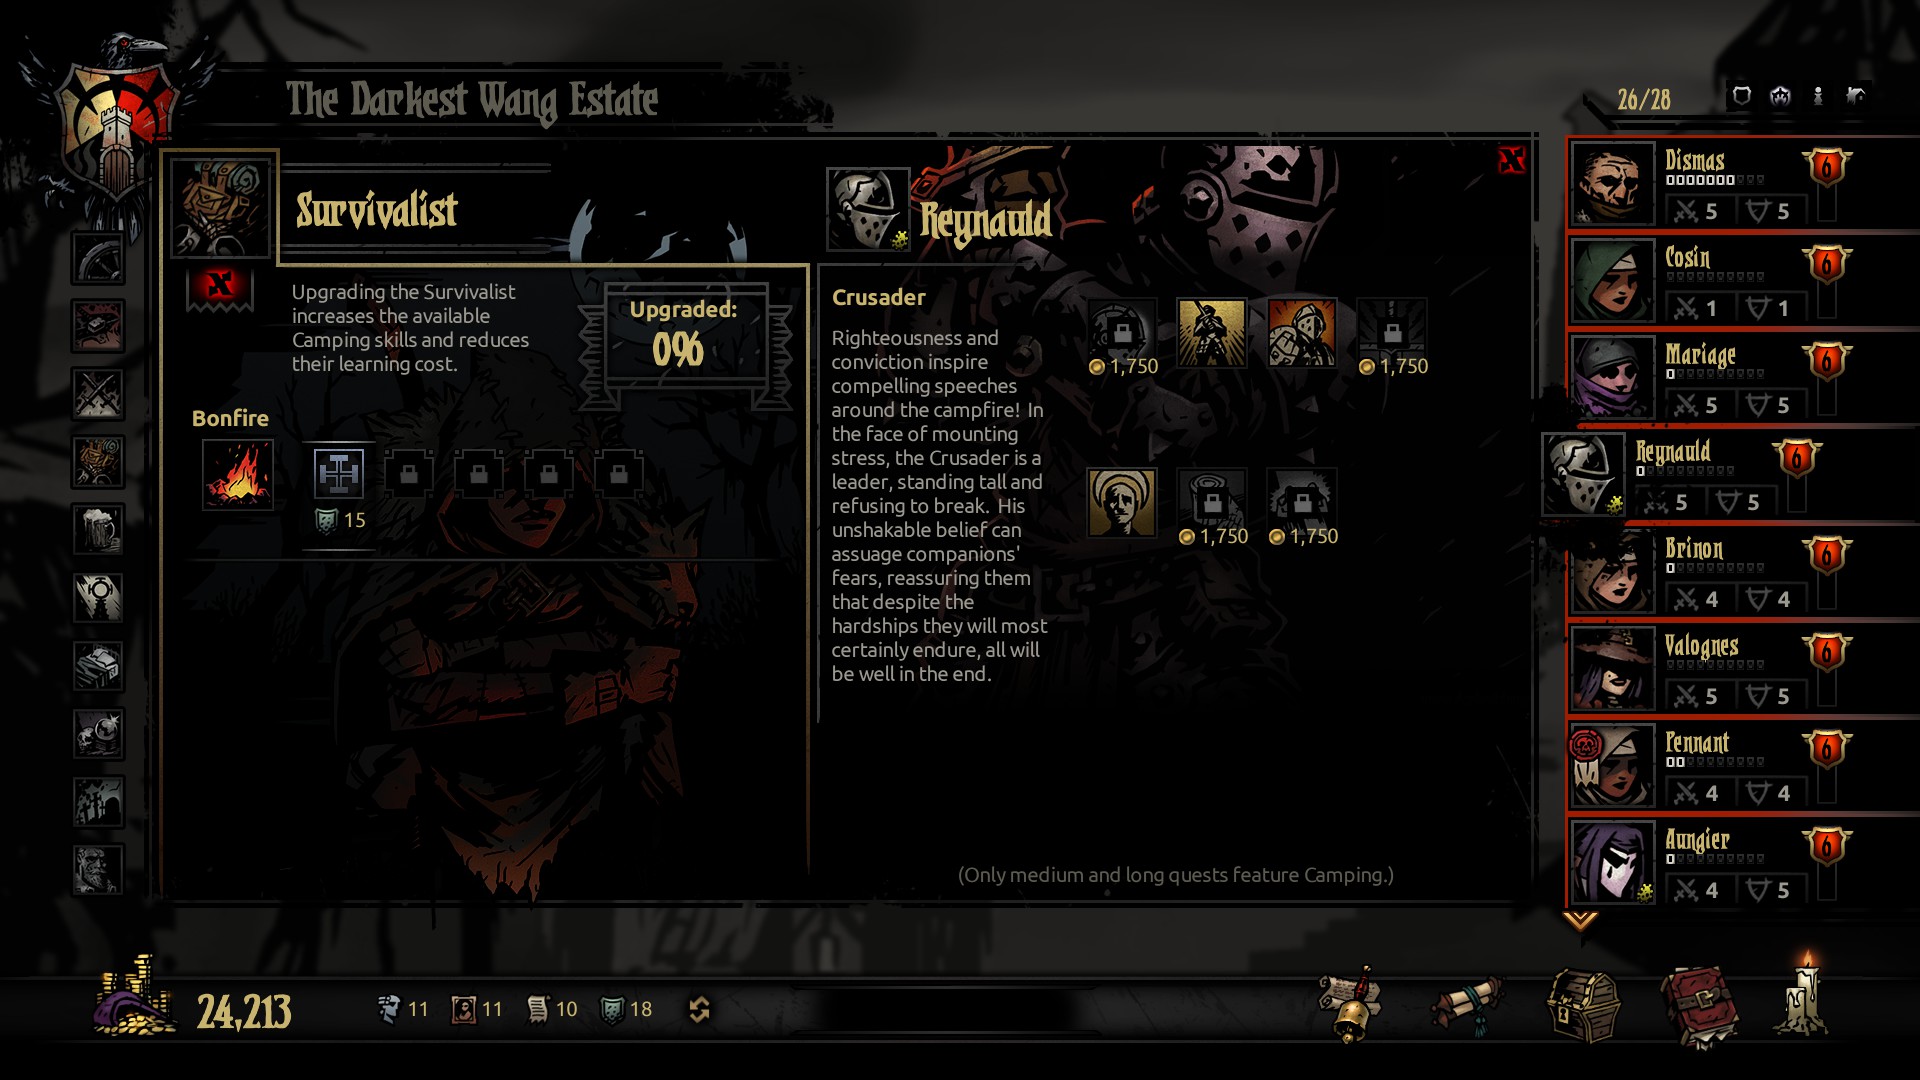 The Survivalist is where you go to unlock camping skills during your medium and long missions. Every hero has 7 camping skills, with 4 being unique to the class and 3 being generic skills available to everyone. The survivalist only needs Crests to upgrade and only has one upgrade tree to focus on. The Survivalist is probably the most deceptively important service you will never update. The cost of unlocking a skill is relatively low, and often times you can make due with the camping skills most heroes start with. Its nice being able to specialize your heroes further though and the survivalist allows you to do that. -Campfire Upgrading the campfire reduces the cost of unlocking camping skills, reducing it by 10% each upgrade. Ultimately unnecessary, but hey its money saved! The Graveyard "Most will end up here, covered in the poisoned earth, awaiting merciful oblivion" 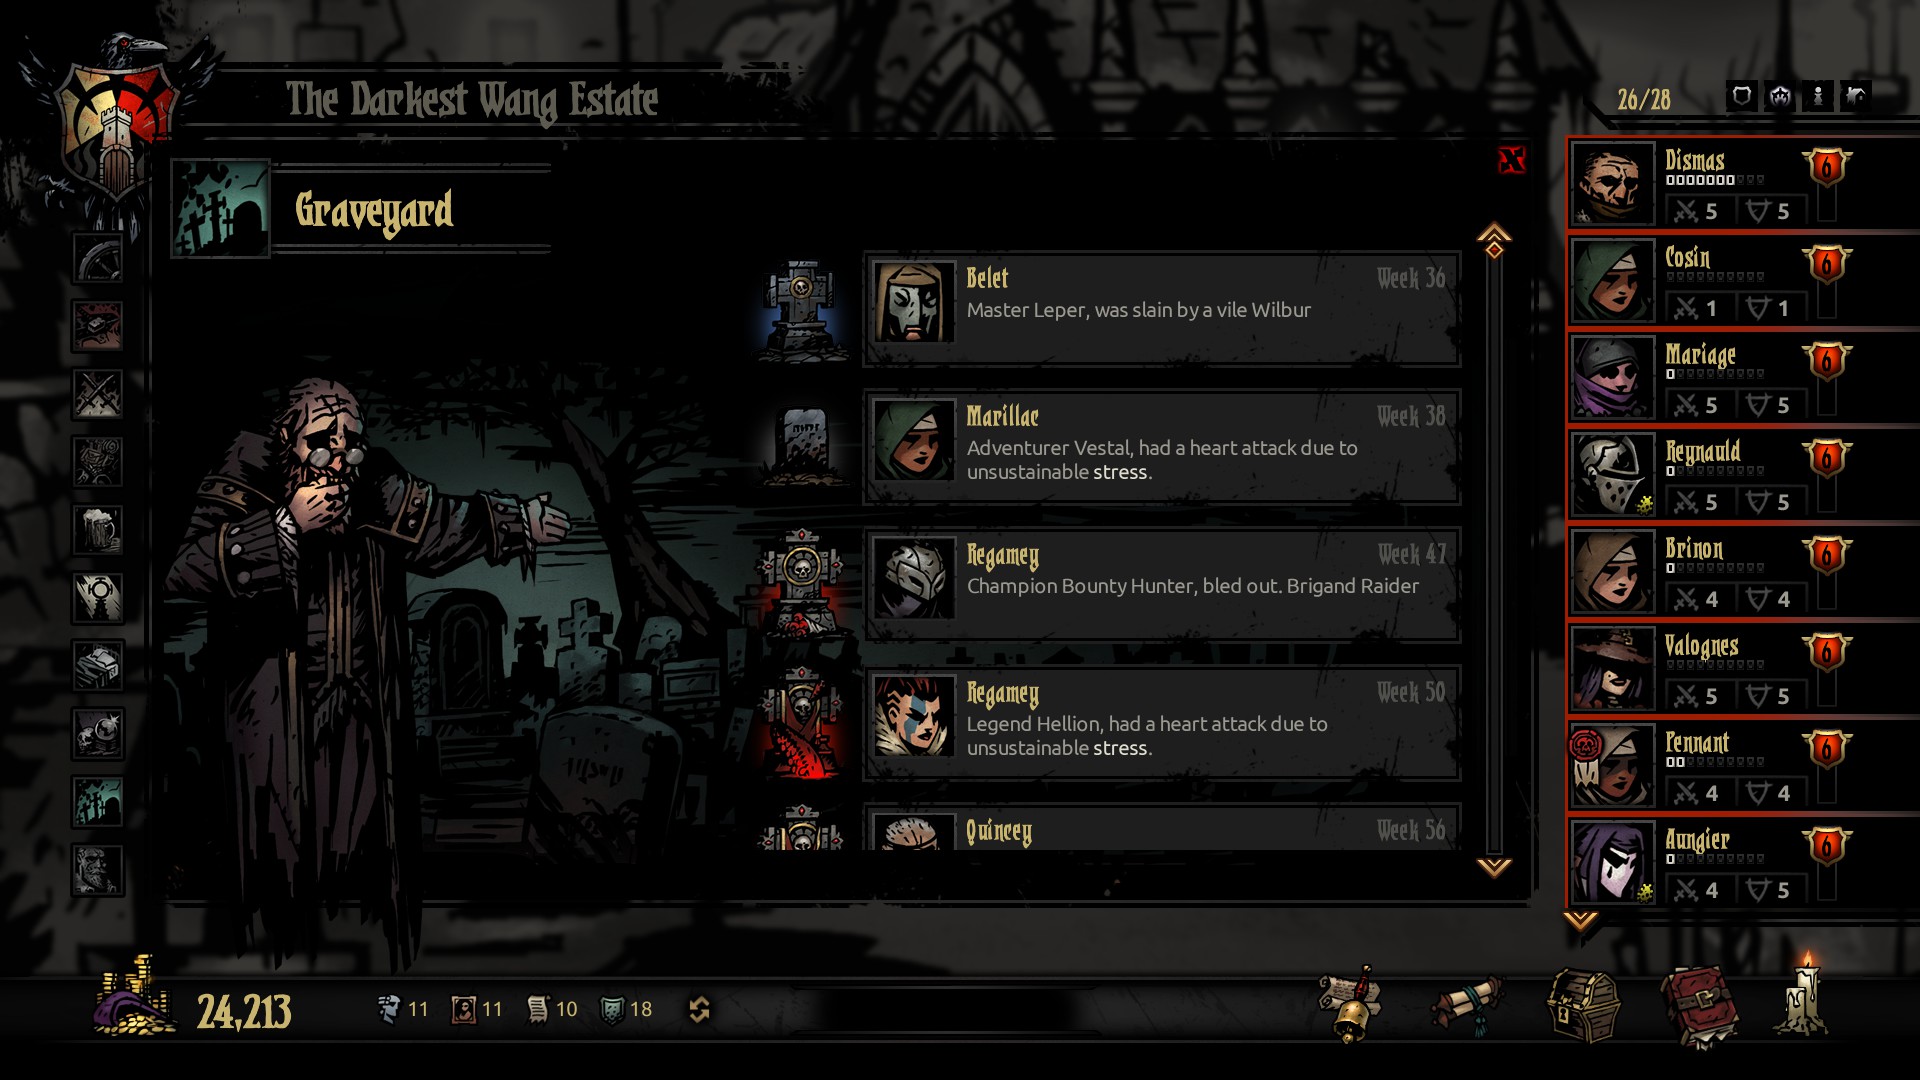 The Graveyard is just a listing of everyone who died, detailing their class, level, and what they died to. A memorial to your wasted time and efforts. Ancestor's Memories "In time, you will understand the tragic extent of my failings..." 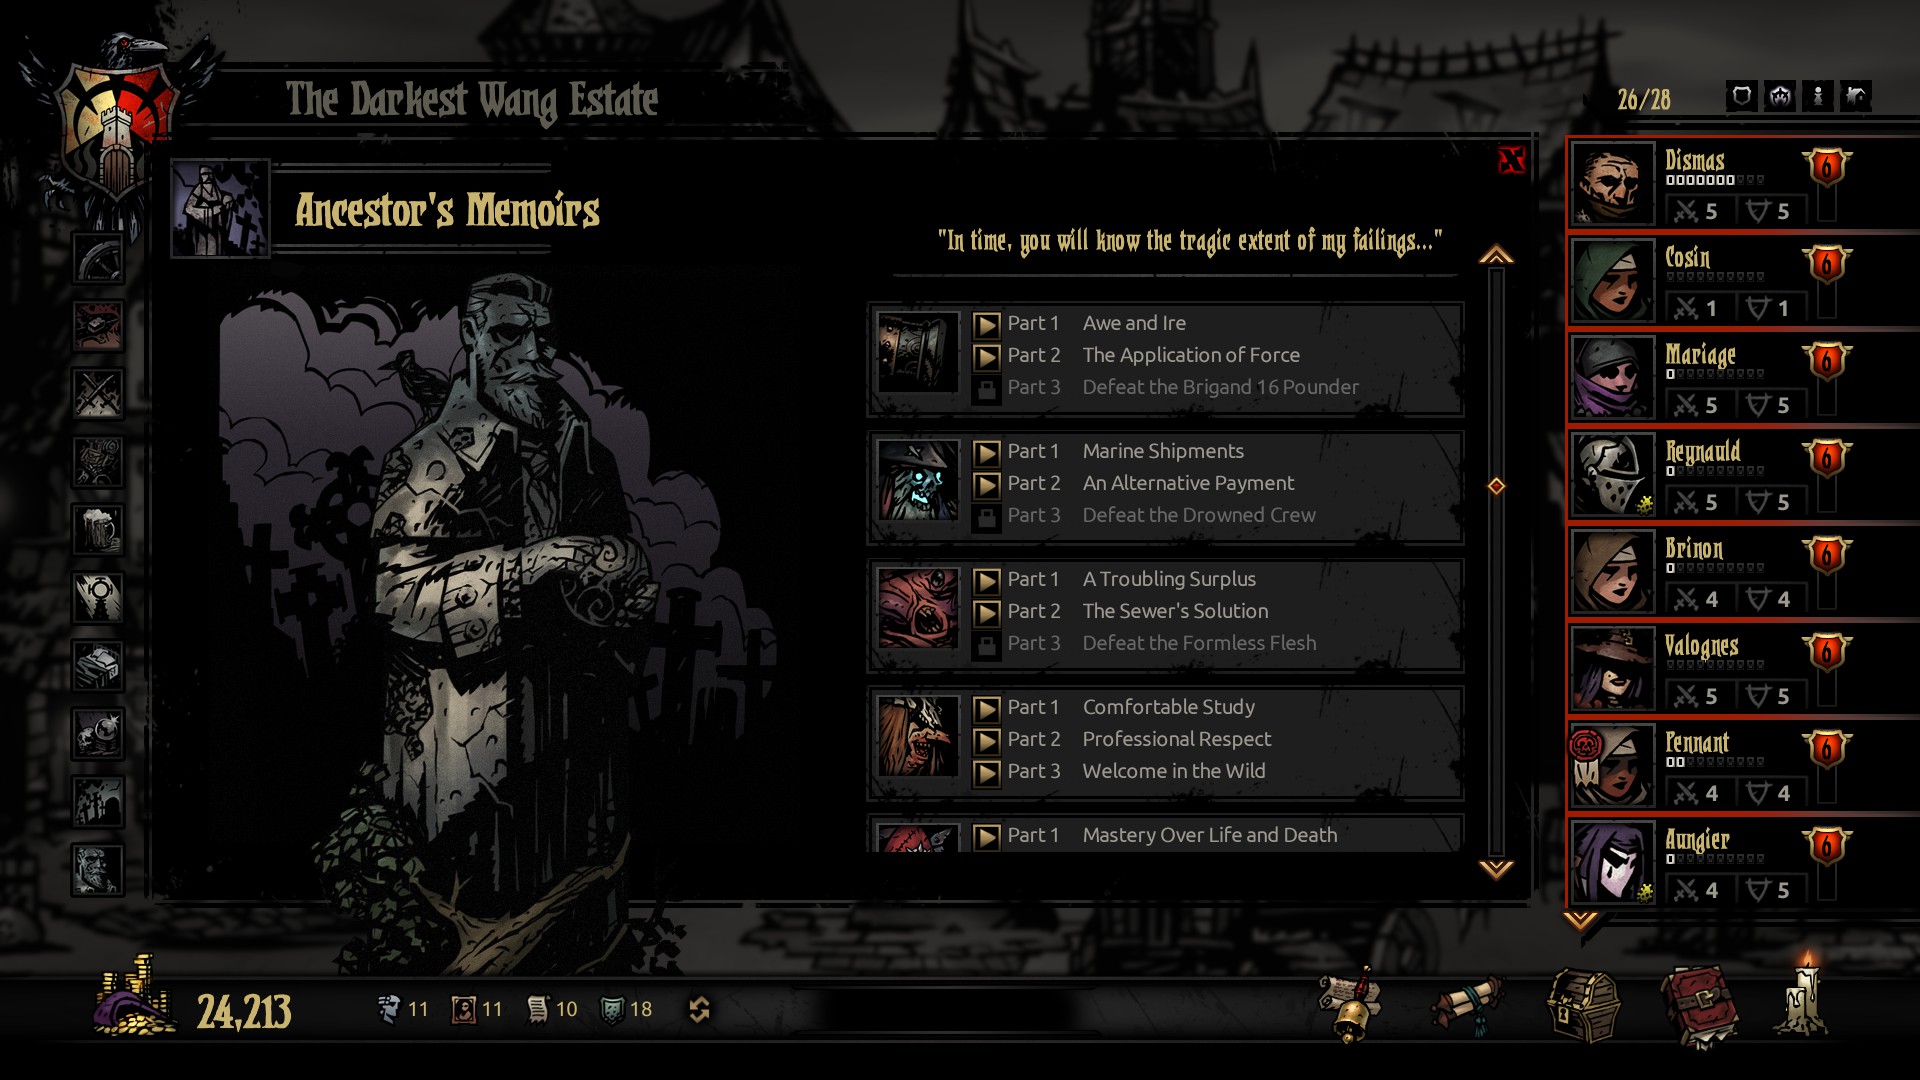 The Ancestors Memories, located in the center of town as a statue, is an archive of the events that have occurred in the game. If you want to re-live the stories of each boss, read up on those journal entries you picked up, or are like me and want to do dumb poo poo for a LP, this is where you go. Highwang fucked around with this message at 20:00 on Aug 12, 2016 |
|
#
¿
Aug 4, 2016 02:23
|
|
|
A bit of a heads up, I will not be accepting people that don't put in the effort to specify at least one class. What good is a soldier that knows not his lot in life?Fat Samurai posted:gently caress that, they are things to be used and discarded when broken. Only those with good traits and not too damaged deserve to be somewhat fixed and given a sharper stick. The rest get shoved into the dungeon for one last supply run and then get the boot. You're a cruel man. A dull rod can be a club and a simple stick can pierce hide when sharpened enough. I believe that any character can be good with enough...training...
|
|
#
¿
Aug 4, 2016 09:59
|
|
|
citybeatnik posted:WELP things have obviously been rebalanced since the last time I played. And I now know why walking about with no torch can be a terrible idea. Live and learn. Think of all the wondrous treasures you are fore-fitting by lighting your torch though! Seriously though, dark runs are a thing. They just require a certain kit.
|
|
#
¿
Aug 4, 2016 20:39
|
|
|
For those who care about such frivolities, I've added a spreadsheet with recruitment data to the OP So many gloryseekers. Fills my dark heart with glee.
|
|
#
¿
Aug 4, 2016 23:35
|
|
|
Skippy Granola posted:Yo, highwang, where can a sexy young Leper named Leppy Granola catch a stagecoach to Garth Mawanghi's Darkplace? I already have you listed! 
|
|
#
¿
Aug 5, 2016 06:20
|
|
|
ousire posted:I remember getting my butt kicked in this game and looking up some guides; they seemed to agree on the "use em and lose em" strategy for the early game. Hire everyone you can and just throw them through easy missions until their stress is too high, then just kick them out instead of bothering to heal them. Only bother to save people with good traits, and start training those up for the harder missions. Is that still an effective strategy for a new player to this game? Viable and preferred. It saves money. If you wanna see, dare to compare with the up and coming episodes 5-7 on what I do. I have a very "my way or the highway" mindset though. Games never feel fun unless I can do it my way, and the game allows that. Its wonderful.
|
|
#
¿
Aug 5, 2016 08:24
|
|
|
double nine posted:Out of curiosity, what's the update schedule going to be like? Once a week, whenever you have time, on the first wednesday after a waning moon, unless that date can be devided by 3, ... ? I'm going for twice a week, Monday and Friday if I can. To wit: Update 3: Welcome to Sunny Weald Today we're checking out a new zone and watching what happens when you ill-prepare your budget! Also thanks to everyone who voted in the poll, next dungeon is going to be The Cove Finally, some trivia: About 7 minutes in I make mention of 80% PROT Maggots. During the unveiling of the Houndmaster in early access, this was also when PROT was coded into the game and the values were loving everywhere. A notable example being maggots that had 8 health but 80% prot, and you would fight packs of four. This was the slowest fight just because you had to do roughly 8 hits per maggot since you would only do 1 damage. Luckily that was removed in about 1-2 days but it was still pretty funny. Highwang fucked around with this message at 17:08 on Aug 5, 2016 |
|
#
¿
Aug 5, 2016 16:58
|
|
|
Zanzibar Ham posted:Okay, but the first fight against the mushroom people and their mushroomy pets wasn't set to always show up when you first go into that one area? No that's just poo poo luck. Oddly enough, the Weald is a place that gets easier as the difficulty goes up just by merit of less chances to fight that pack of crap.
|
|
#
¿
Aug 5, 2016 18:08
|
|
|
Sjonkel posted:Can you talk a little about how you choose a party? Started playing this after seeing this LP, but having problems picking good parties. Maybe you can also use a minute in each video on how you choose that particular party? My standard logic is based on this checklist: -Main healer? Vestal or Occultist if its an Abom run. Vetsal in 4 or 3, Occult in 3 -Backup healer/Offensive support: Arbalest, Occult or PD. Arbalest usually goes in 4, the rest in 3 -Front-line damage: I need a guy who's able to take and deal hits, whether its spike damage or some goofy poo poo. Usually depends on where I'm going. -Finally, damage. There's a lot of flavors of damage, so I think of where I'm going and respond to that. I can make an info-post if people would like. Right now I just woke up for the 2nd time today so the brain servos are still booting up.
|
|
#
¿
Aug 5, 2016 21:05
|
|
|
Rocket Baby Dolls posted:Edit Edit: After watching the first video you mentioned two other classes. If Offensive Jester isn't an option then I'd like either an Offensive Occultist or an Offensive Vestal. If you get in, I can't guarantee a build for you since the latter two classes need some rather rare trinkets. Offensive Jester though is no big thing despite being a class I struggle with to say the least.
|
|
#
¿
Aug 6, 2016 22:32
|
|
|
RickVoid posted:I might be putting this game back down for a while. Last night I lost two Master of Arms, Reynauld (right after fixing him in the sanitarium) and Dismas (who would have jumped to level two afterwards) in back to back missions. And then the game crashed on the way back to town. I killed the Necromancer though, so go me? Game autosaves in every action/room module, so you didn't lose any progress. Its how they prevent save-scumming. Don't worry bruh. Fat Samurai posted:
|
|
#
¿
Aug 7, 2016 00:45
|
|

|
double nine posted:So I started a new campaign because ... I can't help myself sometimes and after the first non-scripted mission ... Eh. Nothing about that's debilitating barring Klepto. Fragile is a bit unsettling but he has high base HP so its not so bad.
|
|
#
¿
Aug 7, 2016 22:00
|
|

|
New update: Episode 4: Innsmouth this is not You asked for it, we're going to the Cove! Complete with pain incarnate and one hell of a graverobber! Not sure what I should detail next: Team composition & Preparation, or detailing The Ruins?
|
|
#
¿
Aug 8, 2016 19:30
|
|
|
A cosmic horror approaches these lands. These fiends feed on the very essence of life, slaying all who stand in its way. Our corrupt government doesn't even seek to stop these creatures, but instead seeks to capture and exploit them for their own use! Good hunter, it is up to you to stop these astral parasites and once again bring peace to these lands. Can you stop the looming threat that is...the Metroids?
|
|
#
¿
Aug 9, 2016 03:29
|
|
|

|
|
#
¿
Aug 9, 2016 06:01
|
|
|
Eddy Rasta posted:If I could make a request for an infopost (and a general line of discussion), I'd be very interested in knowing what Highwang and other thread posters feel are good positive quirks to prioritize when locking things down, and bad negative quirks that need to go, vs ones that you don't have to worry about too much. I have a vague idea already, after poking around on the wiki and playing the game a little bit, but the severity of quirks (aside from Kleptomania, which very quickly becomes apparent as a horrible quirk) is one of those things that feels a bit overwhelming at first. Quick post since I'm being a lazy rear end in a top hat: Always seal: +2 Speed, +10% prot. Seal if you want but not necessary: +crit, +hp, -Stress, Attack+ if Torch @ 75% Dont even bother: Location-specific traits, race-specific traits The one exception: Occultist with Eldritch Hater/Slayer Always remove: Kleptomania, -Virtue %, -speed, -acc, -dodge, -death blow resist Annoying but not necessary to remove: -hp, -crit, Addicted to [x] Don't even bother: Location/race specific traits Keep these bad behaviors: Obsession with curios barring hylomania. Basically an auto-examine, rarely 100% fucks you over and takes a bad trait out of the cycle Priority diseases to remove: Black/Red Plague, Tetanus, Rabies, Tapeworm, Lethargy, The Ague, Syphilis(poo poo gently caress THANKS ORCUS FOR REMINDING ME OF THIS AWFUL THING) Highwang fucked around with this message at 01:43 on Aug 10, 2016 |
|
#
¿
Aug 9, 2016 23:13
|
|
|
Gridlocked posted:What is the disease that gives you a huge damage buff? I like that one to the point of keeping it on dudes. Rabies Used to be serviceable until they quite recently doubled the acc penalty[-5 to -10], so you would need to wear double accessories to offset that penalty. Not worth taking now imo. Just take Dismas' head.
|
|
#
¿
Aug 10, 2016 00:58
|
|
|
Team Composition & Preparation "The cost of preparedness - measured now in gold, later in blood." Darkest Dungeon is a game that has a fair amount of RNG, namely with what heroes you get and what afflictions will send them for a week in the Sanitarium. However, the game also gives you a good amount of control over what you can do, and a lot of that comes down to preparation. Everything you do before town reflects how much you can respond to the bum hands the game can deal you when you go on missions. Today we're gonna discuss a little bit on what you can do as a player to reduce the element of risk that comes with each expedition. Team Composition 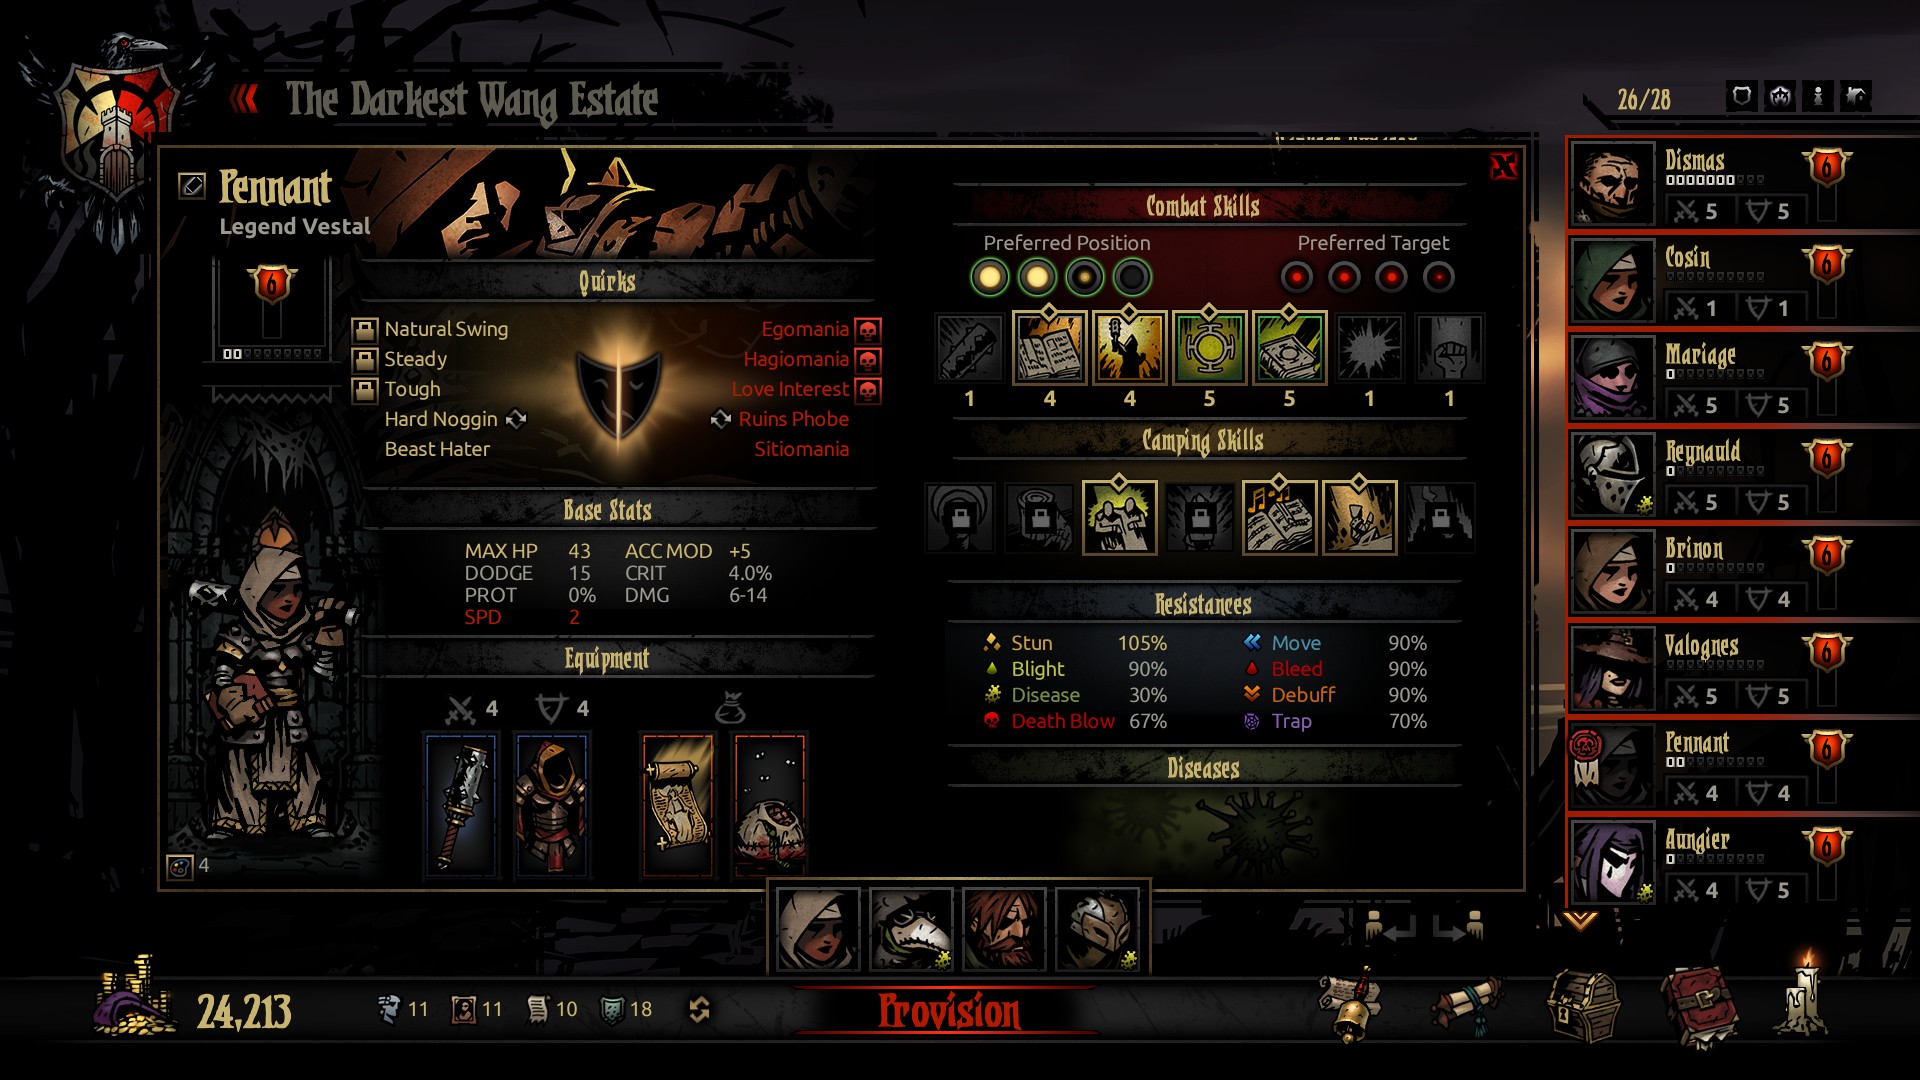 The big factor in surviving a dungeon, naturally, is who you choose to bring along. A team of four Hellions is probably not going to go very far due to a lack of good healing, and if they do it's probably going to take loving eons. While the game has a lot of flexibility, there is a predictable formula on who to take and where to put someone in a party when determining your party, and knowing this formula is one of the key things to learn for this game. There are a lot of team compositions that I default to in general, however that would take up a huge glut of text and my time so for now I will cover a basic overview of each position, the risks that come with each position, and what I usually put in each spot. A bit of a notice, a lot of my mindset is based on 200+ years of pattern recognition in regard to AI logic and enemy priorities, and its mostly theory bullshit. I can't say my tips in this regard can be considered fact, however its a good assumption. Rank 1: The Fist-Puncher -Rank 1 is the classic tank spot, the place where you set your high HP characters and let them soak up all the damage while dishing out damage. In Darkest Dungeon, that's sort of the case still. There's no guarantee that an enemy will hit your rank 1 units even if you use the mark mechanic, however many enemies in the front line will focus on your front line in general so its smart to keep your beefy units up there. Said beefy units will also only be able to attack from the front line so they will be at home here anyway. Interestingly enough, there are a few accessories that favor dealing damage from rank 1 so the developers clearly wanted Rank 1 to be reserved for the chufty brawler type. Make sure your support units are never up here, mainly because a lot of healing & support spells cannot be casted at rank 1. Usual Suspects: Crusader, Man-at-Arms, Hellion, Leper Alternative Characters: Point-blank Highwayman, Blink Graverobber, Finale Jester, Transformed Abomination Rank 2: The Every-man -Rank 2 is the best slot in this game because drat near anything can go here. In general you put a wide-range damage dealer here to damage nearly every range, however with alternate builds you can also get crowd control and healing done from this slot as well. Its hard to cover the wide gamete of things to do here because of how versatile the 2nd slot can be. A thing to note: Anyone that is usually in rank 1 can also be put in rank 2, so if you want to double-up on tanky front-line offense then that option's there. Make sure that you configure your heroes to operate for the 2nd row, it'd be really awkward if you put your vestal here and not give her any of her rank 2 attacks. Usual Suspects: Bounty Hunter, Highwayman, Graverobber, Houndmaster, Abomination, any Rank 1 dude Alternate Characters: Offensive Vestal, Stun Occultist Rank 3: Offensive Support -This is where you start going into more support/control territories. Enemy AI is odd to where only enemies in rank 3/4 will try to attack your rank 3/4 characters, and there are only a select few enemies that can damage HP to a threatening degree. Your squishier characters are going to wind up here because of this, alongside the fact that most of their abilities only operate from this position. Another thing to note: many of your offensive options in this slot don't do a lot of damage but rather exist to supplement your front line with things like hexes, stuns and marks. Sadly this game doesn't have the traditional nuker so you won't be seeing a strong dedicated attacker in this slot. Instead you get off-attackers and the like. A common alternative set of heroes to put here are the "railgun" users: Heroes that have attacks that not only move them up one and can attack nearly any row, but also require to be in the back ranks to work. Usual Suspects: Vestal, Occultist, Arbalest, Jester Alternate Characters: Plague Doctor equipped with her knife, Cry Havoc Houndmaster, Pure-gun Highwayman, Dart Graverobber, Crowd-control Bounty Hunter "Railgun" classes (Crusader, Graverobber, Jester, Highwayman) Rank 4: Primary Support -Much like with Rank 1/2, you'll be seeing a lot of the same classes from rank 3 in rank 4 as well. A thing to note however, if you put someone in rank 4 they will not have a lot of their offensive options available to them. The only real exceptions to this is the Arbalest (who is built for this) and really situational builds such as the railgun crusaders. Usual Suspects: Plague Doctor, Vestal, Arbalest, Antiquarian, Occultist Alternate Characters: Support Man-at-Arms/Houndmaster, Crowd-Control Bounty Hunter, "Railgun" classes Provisions 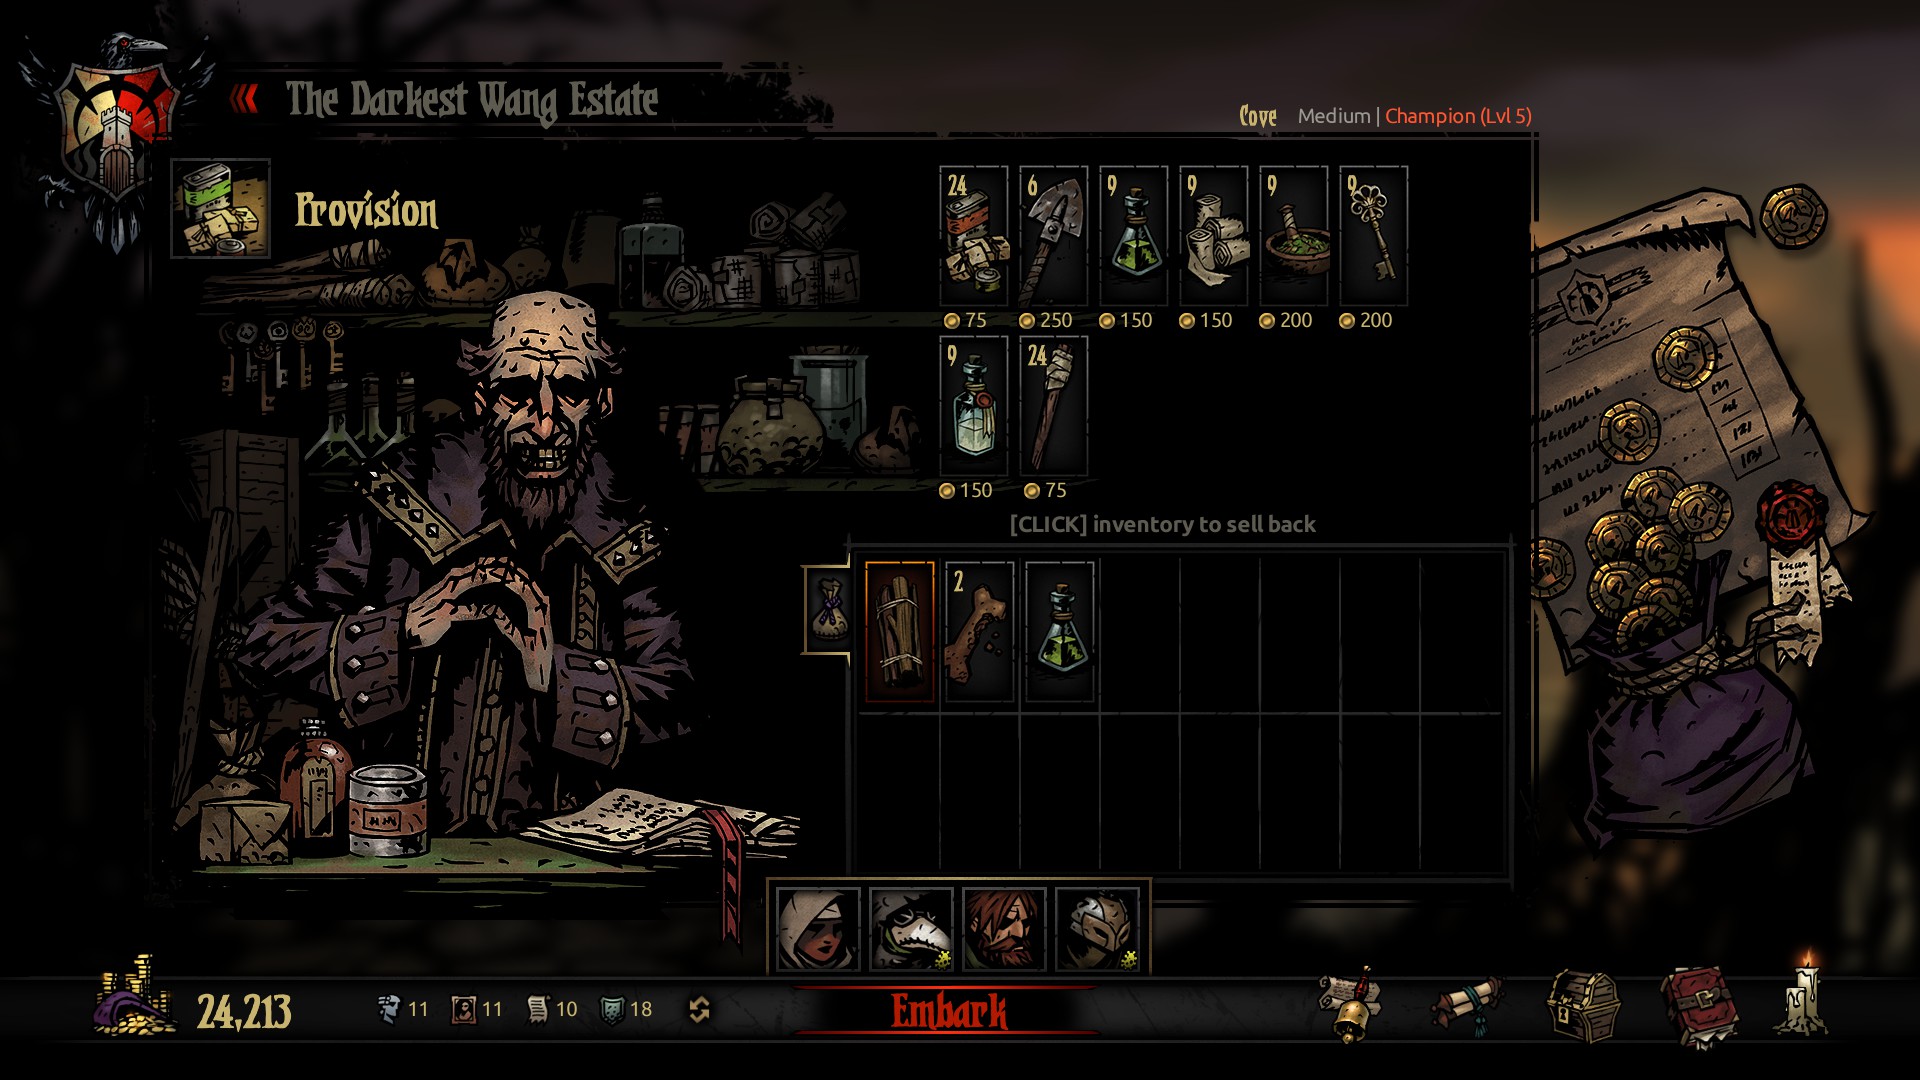 Provisions are the second half of preparing for a dungeon, and they're just as important in various ways. In order to get provisions, you need gold; I haven't been calculating exactly how much I typically spend on provisions, however if I had to ballpark it I would say Reserve at least 3-6k gold purely for getting provisions depending on mission length. Each item has a distinct use in a dungeon, along with an alternative use. Being the greedy rear end in a top hat I am, I often use most of my supplies for the express purpose of getting more loot, however new players can use these items when they're in a bind in order to turn the tides of battle. I will be listing these items from left to right for spacing purposes. One thing to note: Various classes will bring a supply with them into the dungeon, either for their own use or just as an in-general thing. You can save a small bit of coin like this, but I find it a waste of space in some outside-cases. Amusingly enough, this was added after a small houndmaster buff since the developers thought it odd that the houndmaster was the only one actually preparing for things to go wrong. Food, Importance: Maximum -Food is the life-blood of your team, since your heroes are human afterall. The primary use of food is staving off the starvation mechanic: If you don't have enough food to feed your team, whether on the road or while camping, everyone suffers 20% hp damage and ~20 stress damage. The starvation encounter usually appears anywhere between 2-4 times a mission, so I typically bring 8-12 food on a short mission, 20 on a medium mission, and I buy out the store for a long mission. Food also has the side benefit of providing a little bit of healing should you be unlucky enough to not have a vestal or occultist. If you are ever in a dire enough spot rely on this, buy out the store period. On an aside, Food is often in abundance in the Warrens and the Cove depending on what curios you interact with and how. Its up to your discretion on how to act on this however. I often stick with my normal ration load-out and use any I pick up as a healing item. Shovels, Importance: High -Shovels, much like food, are a deterrence against a debilitating encounter in a dungeon. Should you ever run into a wall and not have a shovel, you will take 20% HP damage, 20 stress damage, and go down a tier on your torch. Each dungeon, in my observations, have a varying amount of wall spawns however which can influence how many shovels you can carry with you. Outside of that, shovels interact with various curios in order to give you a bunch of loot or ruin your life, mostly the former. From my experience, I typically bring Three shovels to the Ruins, Two to the Warrens, and Four to the Weald and Cove. Positive curio effects: Locked Strongbox/Sarcophagus/Display Cabinet, Shallow Grave, Barnacle-covered Chest (All treasure) Negative curio effects: Bas-Relief (100 Stress damage) Note: Grave-robbers will start a mission with one shovel. Torches, Importance: Variable -Torches primarily exist to increase your light meter, which can determine survivability or profitability. For a standard run, I typically bring 6 torches on a short mission and 8 for Medium/Long missions, relying on campfires to restore my torch in the later bits. Torches also interact with assorted curios in a variety of ways. A simple tool, but very helpful. Positive curio effects: Alchemy Workbench (Maximum Torch); Pile of Scrolls (Random negative quirk removal) Negative curio effect: Pile of Books (100 stress damage) ????: Shambler's Altar (summons a unique fight) Skeleton Keys, Importance: High/Medium -Skeleton Keys do exactly what you think they do: Unlock things. There really isn't a bad outcome with using keys, so the only bad part of taking a key is the occupied inventory slot. Keys, to me however, are important early on because they are the key to getting a set of trinkets that can offer extra damage and, more importantly, extra healing. Once you get those accessories, the sole purpose of bringing keys is with the intent of making big money. I usually bring One key to every dungeon, and 2-3 to the Ruins mainly to gamble on secret rooms. Positive curio effects: Anything with "Locked" in the name (Money) Antivenom, Importance: Medium -Antivenom isn't complicated, its primary use is to remove blight from a hero. However, it can also interact with various curios to make them "safe" and get you riches. I have a weird mindset with the curative items: I usually rely on either self-restoratives, plague doctors or camping skills to remove things such as blight, however using items such as this is a free-action so its no real waste to bring one aside from the used inventory slot. I mainly bring Antivenoms to the Weald since there's both a wealth of blight enemies alongside curios that are affected by it. Antivenom can also be useful against a boss in the Warrens, and it has a middling use in the Cover for one curio. I never really bring it to the Cove however due to how little I encounter said curio. My usual logic is Bring 2-3 Antivenom to the Weald and Warrens, depending on mission length. Positive curio effects: Left Luggage, Old Tree (Treasure); Brackish Tide Pool (Restore 5 HP & Stress) Note: Plague Doctor starts a mission with one Antivenom Bandages, Importance: Medium -Bandages are primarily used to stop bleeding, and its a free-action in combat. Much like the other restoratives, it can also be used to interact with curios for cash. I mainly bring bandages to the Cove, for their exact purpose! Cove is really bad with bleeding so I take band-aids there even if I have a plague doctor or any skills to remove bleed. The Warrens also has a boss that can consistently cause bleed, so its useful for that instance. As for curio effects, the weald and warrens both have curio effects that give you cash for them so it has some good worth. My mindset is usually bring 2-3 bandages to the Weald and Warrens, 4-6 to the Cove depending on mission length. Positive curio effects: Mummified Remains, Eerie Spiderweb, Rack of Blades (Treasure) Note: The Arbalest starts a mission with one bandage Medicinal Herbs, Importance: Low or High -Medicinal Herbs are primarily used to remove debuffs, and using one is a free action in combat. Much like other restoratives, it can also be used on curios for varying results. I have a odd relationship with the medicinal herbs. I rarely use them since a debuff is never really crippling enough to ruin a run. It can be used on curios, but I'm usually not a huge fan of the interactions since they are so rare to see. However, with the arrival of the Cove came a curio that removes a negative quirk at random, so if I ever go to the cove I bring those for the sheer purpose of saving cash. A common thing people do in combat however is use the herbs when hit with a self-induced debuff, such as the hellion's moves or the jester's finale. This would make said skills more viable, but I'm not a huge fan of wasting inventory space just to make a skill viable. My usual mindset is bring 2 medicinal herbs to the Warrens and Cove purely for curio interactions. Positive curio effects: Alchemy Table, Iron Maiden, Dinner Cart, Makeshift Dining Table, Beast Carcass, Fish Carcass (Treasure); Moonshine Barrel (Damage Buff); Eerie Coral (Remove Negative Quirk) Note: The Leper starts a mission with one Medicinal Herb Holy Water, Importance: Low to medium -Holy water is an item used to buff all your resistances (barring stun) by 30% for 4 turns, and using it is also a free action in combat. Much like other provisions, Holy Water can also be used on curios to gain varying effects Holy Water is an item I rarely use for treasure hunting, and almost never use for its intended purpose. The curios it interacts with are so rare and some appear in all dungeons, and often times the results are temporary so I rarely bother with it. One rare curio however, the Eldritch Altar, will remove a negative quirk with holy water; however said curio also appears in every dungeon and rarely so its never a guarantee like Scrolls or Coral. In terms of combat, I almost never use it for combat purposes, however Iron Chitlin clued me into a neat facet of info: certain boss gimmicks are coded to rely on debuff resist to resolve, so bringing four holy bottles to certain boss fights can increase your rate of survival. My usual mindset is Bring 2 holy bottles to the Ruins, and maybe one to the weald or cove if you're daring purely for curio effects. Positive curio effects: Decorative Urn, Pile of Bones (Treasure); Fish Idol, Altar of Light (Buffs); Confession Booth, Holy Fountain, Pristine Foutnain (Restoration); Eldritch Altar (Negative Quirk Removal); Troubling Effigy (Random Positive Quirk) Negative curio effects: Occult Scrawlings (-20 Dodge Debuff) Note: The Crusader starts a mission with one Holy Water Dog Biscuit, Importance: zoinks! -The Dog Biscuit is the unique item for the Houndmaster, boosting their accuracy, and damage for 3 turns on use. The biscuit has a sort of Elixir-mindset to me, to where I never really use them because I think I'll need them later. To wit, they often wind up wasting space for me. With this LP though I've been committing to using it whenever I feel threatened in a fight, and the difference is pretty noticeable. You can also use it on one specific curio for a goofy effect: Feeding it to a giant oyster will give you a huge dodge buff, so its fun in the Cove as well. Each Houndmaster starts with 2 dog treats. Firewood, Importance: Cozy~ -Firewood is used in a medium or long mission to consume food for HP/Stress heal, along with activating camping skills. When you camp, there's a chance that you will be ambushed with an encounter afterwards unless you use a skill that prevents this. You get firewood for free when you start a medium-length mission, and two for a long mission. Firewood's nice, but its not vital. If you're low on food, this can also be a detriment since camping without food will actively damage you. Interesting trivia: Once upon a time, you used to be able to throw away your firewood at a Sacrificial Altar in the Warrens for a Damage/Accuracy/Crit buff, but that got removed at some point I am unaware of. Sad really, it was a good risk-reward mindset. Highwang fucked around with this message at 08:51 on Aug 11, 2016 |
|
#
¿
Aug 11, 2016 01:39
|
|
|
Xenoborg posted:Still just watching ep 3, but it seems like you are way undervaluing dots. Dots are the counter to high prot like maggots or mushroom golems. The highwayman and jesters bleeds do 6 or 9 prot ignoring damage at level 0 on top of 3-9 they do up front. It also seems like you are giving the jesters ballard more credit than its worth. Sure it buffs good things, but just 3% dodge and 2% crit and 2 speed? Having the whole battle end 3 turns faster by just using your AOE dots comes out way ahead. Keep an eye out for episode 7
|
|
#
¿
Aug 12, 2016 06:06
|
|
|
Episode 5: Keep the Tip A hero rides again as our new Leper is taken through a trip in the wonderful Warrens. Next infopost is going to detail the ruins, though its gonna be a big post so expect that sometime after next video. Things to note: -Did a little research on the warrens after this batch of videos, the worms in this area do double damage on marked targets. Another thing that makes the warrens a bit daunting. -Our occultist doesn't have any crit modifiers whatsoever. However, his melee attack Sacrificial Stab has a crazy base crit mod of 10% on top of the 7.5% that comes from his weapon. -We didn't see much of the diverse cast of the Warrens sadly, however I wasn't joking about the place being rife with disease. The worms come with a 5% (1/20) chance to cause any disease, and one type of pigman has a whopping 33% (1/3) chance to cause any disease. They also are some of the fastest units in the level, so get ready to send people to the doctor. Highwang fucked around with this message at 20:20 on Aug 12, 2016 |
|
#
¿
Aug 12, 2016 19:26
|
|
|
New Update: Ep 6, The Ancestor's Guide to pissing off Iron Chitlin Today's episode is full of screaming and general anger. Please enjoy.
|
|
#
¿
Aug 15, 2016 19:05
|
|
|
FicusArt posted:How much more ready can you be for a hard fight than "Completely fresh from town and fully ready for a whole dungeon" Full team of at least lvl 1 gear. Lvl 2 gear on my damage team. Damage accessories. A reliable healer. Being entirely dependent on the Occultist for healing is not great imo.
|
|
#
¿
Aug 15, 2016 20:25
|
|
|
Wayne posted:Iron Swan kind of has a meta choice, since [especially on higher difficulties] back rank targets have much higher Dodge than the front-rank, so you basically choice between maxing out her damage and/or bleed chance and unloading on the front rank, or getting accuracy for the back rank. Plus once that 4th target is dead Iron Swan has no other use. I take Iron Swan with full knowledge of this. Rank 4 enemies, by design, are purely glass-cannon offensive because a majority of your team can rarely attack the back row with 100% damage. If I can remove that attack spam ASAP, Iron Swan has fulfilled its purpose. Get the Rank 1 +damage accessory and some speed and I never have to worry about spilled cups and mean words. I will say though, with the recent recordings I have been seriously re-considering "If it Bleeds" since its not as good as it was during E-A. That and I may have to reconsider my Leper mindset because Leppy Granola gets validation. Highwang fucked around with this message at 01:53 on Aug 16, 2016 |
|
#
¿
Aug 16, 2016 01:44
|
|
|
A Curvy Goonette posted:I'm really enjoying these videos, they're oddly relaxing. Its an inverse bell curve imo. Late game has numbers to bring back the bullshit. Hopefully that'll be demonstrated in oh sayyyyyyyyyyyyy 4 months?
|
|
#
¿
Aug 16, 2016 02:55
|
|
|
The Ruins "Come explore the rich history and deep culture from our family line" Post theme: https://www.youtube.com/watch?v=9r3WbeZMbwY The Ruins is the first dungeon you will explore when starting out, and it�s possibly the tamest dungeon in general when it comes to themed mechanics. The main theme of this area is a focus on the Unholy, namely centered around skeletons and the undead. In terms of combat mechanics, the enemies here mainly focus on regular damage or high stress damage, with some stun procs and very rare chance of bleed procs doled out from enemies. For future adventurers, we advise bringing a crusader here since he's the only character that has an anti-Unholy property in one of his skills. Alongside him, the enemies within the Ruins are heavily resistant to bleed but extremely weak to stun and blight, so bringing a plague doctor or any alternative classes with those skills can be a godsend to you. In order to maximize your treasure output as well, It is recommended that you bring two skeleton keys and two holy waters for curio exploitation, along with 3-4 shovels for both wall surmounting and backup curio exploitation. [timg]http://lpix.org/2541349/2016-07-30 17-27-40.mp4_snapshot_00.06.48_[2016.08.17_11.47.10].jpg[/timg] Common enemies: -The Bandit team, The Cultist Team, Spiders, Maggots, and the Madman Exclusive Enemies (for now): 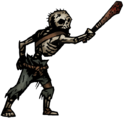 Bone Rabble (Threat Level: Mild) Bone Rabble (Threat Level: Mild) -These are the common front-line enemies you'll see in the Ruins, boasting very little health, evasion, and generally no threat. These enemies have two attacks: The most common attack, "Bump in the Night," is just a basic attack used in rank 1-3. In rank 4 however, in the extremely rare circumstance they wind up there, they have a move called "Tic Toc" that pushes them forward one. These guys exist to fill out the ranks though, and you either one-shot these to remove the action queue or just ignore them until the rest of the threats are gone. 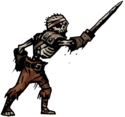 Bone Soldier (Threat Level: Medium) Bone Soldier (Threat Level: Medium)-This enemy is the advanced version of their rabble counterparts. With a longsword and some patchworked pieces of armor, these enemies come with damage reduction, more damage, and an alarming crit rate to boot. Much like their club brothers, these guys have "Graveyard Slash" at ranks 1-3 for general attacking, and "Graveyard Stumble" at rank 4 in order to get them back in the fight along with doing small damage. Depending on your circumstances, you may have to address these enemies first so you don't lose a life, but an enemy with a stun is just as good at removing him from the fight until the other threats are gone.  Bone Defender (Threat Level: SNORE.) Bone Defender (Threat Level: SNORE.)-This enemy is the hardy tank of the bone patrol, boasting a wealth of protection along with a decent amount of HP to work through. However their attack capacities are very limited: The main attack you have to worry about is "Dead Weight," a shield-bash that both stuns the victim and pushes them back one in order to screw with your formation. Their other attack, "Axeblade," is just raw damage and a pitiful amount at that. Their final attack is a desperation attack done at ranks 3&4 called "Clumsy Axeblade," with the express purpose of moving them up one to attack. 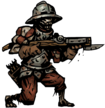 Bone Arbalest (Threat Level: High) Bone Arbalest (Threat Level: High)-With high raw damage, decent HP and the capacity to hit basically everyone, the Bone Arbalest is one of the main threats to deal with in the Ruins. Alongside all this, the AI has a fondness of attacking specifically rank 3 and 4 in order to wear down your healers, so this rear end in a top hat has earned his spot as a high priority target. You also find these guys in the far back rows of the enemy team, so reaching them is a chore in general as well. Their main attack, "Quarrel," can hit rows 2-4 for a decent range and a roughly 1/5 chance to crit as well. If you're smart however and pull them forward, they can use the skill "Bayonet Jab" from ranks 1-2 for mild damage and also a free move backwards for them. The big issue is that their decent HP pool and their usual position make them a trial to kill, with the Hellion being one of the few people that can reliably one-shot them at rank 4. Kill or stun them first and foremost. Plague Doctors trivialize these jerks.  Bone Courtier (Threat Level: gently caress) Bone Courtier (Threat Level: gently caress)-This jerk. Oh wow. This guy has low hp in general but he has a gross amount of dodge, so hitting him is a chore. He only has two attacks, however one of those is the biggest pain in the rear end. "Tempting Goblet" can be used in rank 2-4 and causes high stress damage. Alone this is not a threat, but these guys love to come in both pairs and with Cultist Mages so stress damage comes in tides with these guys in tow. I aim for these guys first since they output stress damage way more than your team ever hope to heal reliably, and they can easily bring you out to the brink of madness with their dumb cups. Their other attack however, "Knife in the Dark," is used in front ranks as well and does middling damage. Stuns and Pulls are good ways of dealing with this jerk if you get tired of missing with his high evasion. Grave Robber and Arbalest are great counters for this guy; The Graverobber has both high accuracy and high speed for attacking but her damage range can make her sort of unreliable for the kill, while the Arbalest has a high accuracy/damage/crit rate but is generally slow so the Courtier can possibly get a cup attack out before her. I really hate this enemy btw. Curios & Effects: 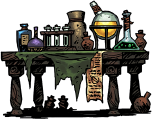 Alchemy Table Alchemy Table-This curio is rather rare, and I often never prepare the proper means to interact with this curio. If you use Medical Herbs on this curio, you will be rewarded with a set of gold drops for your efforts. If you use a Torch in this curio, it will provide a potent mix that maxes out your light meter on the spot, which is very useful. If you decide to risk flat-out interacting with it however, you have a 50% chance of getting Blighted, a 25% of getting a small amount of gold, and a 25% chance of nothing happening.  Altar of Light Altar of Light-This is a very nice curio, since interacting with it will always give you a +20% damage buff until you decide to camp if ever. If you have Holy Water to spare however, this buff gets increased to 30% extra damage. A nice curio to see, however I feel like the holy water is wasted here since it can be better used elsewhere.  Bookshelves Bookshelves-Ugh man. gently caress books. The bookshelf has a variety of events, both good and bad, and nothing you can do will make this a surefire safe thing. Among the things that can happen, starting with greatest frequency, are these: Absolutely nothing, Finding a map of the dungeon, A stressful book for stress damage, A random positive quirk, a journal entry for slight backstory, and a random negative quirk. I hate these things so much because I always feel like I get the worst part of it, however it�s one of the few places you can get journal entries for 100% completion so it�s a necessary thing to interact with.  Confession Booth Confession Booth-The confession booth is a great thing to see...if you have holy water to spare and don't have any curious heroes. Using Holy Water on a Confession Booth will sanctify it, restoring 30 stress from whoever used the curio at the time. This is a pretty great and *cheap* stress healing alternative compared to camping or the town services, so if it�s necessary this can be a cash-saver for stress removal. If you risk using it without any meddling however, the booth has a 50% chance of stressing out the user further, 25% chance of giving you some small change, and apparently the off-chance of removing a negative quirk from a hero. This curio is why I've been bringing more Holy Water to the Ruins, it�s a very useful cabinet.  Decorative Urn Decorative Urn-This is the reason why I carry Holy Water to the ruins. A relatively rare curio, if you happen to find one in your adventures, pouring Holy Water into it will dissolve the ashes in the urn to reveal many gems and possible trinkets lying within, giving a hefty boost to your income. Another interaction, which is insanely dumb, is whacking it with a Shovel to get the negative trait "Guilty Conscience" and nothing else. An unmodified interaction has a variety of effects: ranging from some small treasures, absolutely nothing, getting Blighted or getting Diseased randomly or specifically with "Creeping Cough." Always keep one Holy Water on you in the Ruins, because this alone is worth that investment.  Holy Fountain Holy Fountain-A nice curio, interacting with this on its own will either give you some free cash or heal a small amount of stress and regular HP alongside removing all status effects. However, if you use Holy Water on this, you get double the amount of healing that you'd get from the vanilla interaction. A nice effect, possibly run-saving if you have holy water and need some healing on a person. 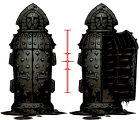 Iron Maiden Iron Maiden-The Iron Maiden is a relatively rare curio in the Ruins, and one I never prepare for. If you use Medicinal Herbs to interact with it, the maiden is cleansed and you get two pieces of free loot of any kind. Risking a normal investigation though can bring about the same loot reward along with possibly nothing, making a hero claustrophobic, or having the hero gain either a random disease or specifically Tetanus. Given how rare this appears, I never bring medicinal herbs to the Ruins. It rarely feels worth it.  Locked Display Cabinet Locked Display Cabinet-One of the many reasons I bring Keys to the Ruins. Unlocking it with a Skeleton Key will give you a mix of up to 5 gold rewards and heirlooms. Conversely, it�s also why I bring extra shovels because bashing it with a Shovel produces the same, albeit smaller, result. You should never interact with it on its own if you can, because the cabinet is trapped with a chance of either blight or bleed, and using bandaids/antivenom on it will not neutralize this trap. Worth buying the key quite frankly, plus you should have one key on hand at all times for the secret gambit.  Locked Sarcophagus Locked Sarcophagus-Quite literally the same as a Display Cabinet, right down to interactions and trap effects. However, its less profitable in general, so if you find yourself low on keys/shovels and have both these curios in the dungeon then go for the Display Cabinet first.  Sarcophagus Sarcophagus-The unlocked version of the last curio, however with much different effects. No real way to interact with it with an item sadly. More than often you�ll get a pile of loot varying from gold to heirlooms. Other times however you will get either nothing or the negative trait Thanatophobia, which makes them fear death. No real reason to fear this honestly.  Stack of Books Stack of Books-Did I ever mention how much I hate books? The only way to item-interact with a stack of books is a Torch, which will hit you with 100 stress for "desecrating knowledge." This could be a decent way of gambling with afflictions, but I really wouldn't recommend it. From a vanilla investigation you get the following: Heavy stress damage, A random positive quirk, nothing, a random negative quirk, a decrease of the light meter, or a journal entry. Much like bookshelves, the bookstack is the only way to get the backstory of this game and at a gamble as well. I really don't like books.  Suit of Armor Suit of Armor-This is a great curio. You can't item-interact with it, however you can only get a positive result from normal interactions. The usual reward from this is a buff for your hero's PROT and DODGE until camping, however there's the off-chance of getting either the Ruins Adventurer or Ruins Tactician trait from the Suit of Armor. A ray of sunshine among this dreary game. [Images courtesy of this Darkest Dungeon Wiki] Highwang fucked around with this message at 01:34 on Apr 11, 2017 |
|
#
¿
Aug 17, 2016 20:05
|
|
|
New Update: Episode 7: Dead Rising Totally didn't name this episode because My favorite 360 game is no longer trapped in exclusive hell Also, new poll! We will be fighting the rest of the bosses in 6 episodes, so first off you guys get to determine who we fight first!
|
|
#
¿
Aug 19, 2016 19:23
|
|
|
LogicalFallacy posted:Just a note, chirurgeon is the ancestor of the more familiar word surgeon, and should be pronounced as such. Apep727 posted:I was going to point that out. I'm always a bit confused about how the 'ch' is supposed to be pronounced, though. I know it's supposed to be a hard 'k', but I always want to go with the English 'ch'. With that in mind, its probably pronounced with the hard "ch" to it, like "ch-ur-jun" rather than "sur-jun" Olde English gives me a lot of trouble.
|
|
#
¿
Aug 19, 2016 21:40
|
|
|
Jenner posted:Just found this thread, loving it, is it too late to be signed up as a Hellion, Grave Robber or Antiquarian? If not NBD I'll still follow the LP. The quick and dirty of it: When you hit 0 HP you are put on Death's Door. Any loss of HP is now a roll of the dice to determine if you live or die, starting at I believe 66%. If you're at 200% stress and on Death's Door, that stress becomes a guaranteed deathblow. This can be used as a means of "RNG Tanking" as well, which was a flaw I found with the initial game's release. I should probably hash this into the flow of battle explanation.
|
|
#
¿
Aug 19, 2016 23:20
|
|
|

|
| # ¿ Apr 29, 2024 08:52 |
|
|
citybeatnik posted:I call shenanigans re you mentioning the 1st head being a guaranteed drop in the first secret room you find, since I finally found one and all I got were the uber-valuable gem drops. Wow really?! Well poo poo, ever since secret rooms were added all I ever got was Dismas' head instantly then either the heal head or the prot head. This is actually the *longest* I've gone without the heal head. I'll be sure to mention that in our next queued video, which is ep 10.
|
|
#
¿
Aug 20, 2016 06:25
|
|