|
Yeek Oozeboy. The grimiest made
|
 #
?
Jun 27, 2017 22:19
#
?
Jun 27, 2017 22:19
|
|


|

|
| # ? Apr 18, 2024 16:40 |
|
|
something Paradox Mage pls
|
|
#
?
Jun 27, 2017 22:44
|
|


|
I'm gonna suggest Doomelf Paradox Mage - their two-step-teleport racial and passive debuff-duration reduction are really handy to have on a class that gets so much benefits from teleports / out-of-phase equipment. Failing that, maybe Shaloren Rogue? I haven't tried that combo yet, but I imagine cooldown-reduction makes rogues better at what they do while debuff-cleansing covers one of its weaknesses.
|
|
#
?
Jun 28, 2017 02:55
|
|

|
By popular demand, it seems we will be Skeletor the Skeleton Paradox Mage. For those who wanted to see other classes, we might be getting around to those eventually. Of course, those who wish to contribute their own runs are free to do so, provided they try not to get ahead of the main LP.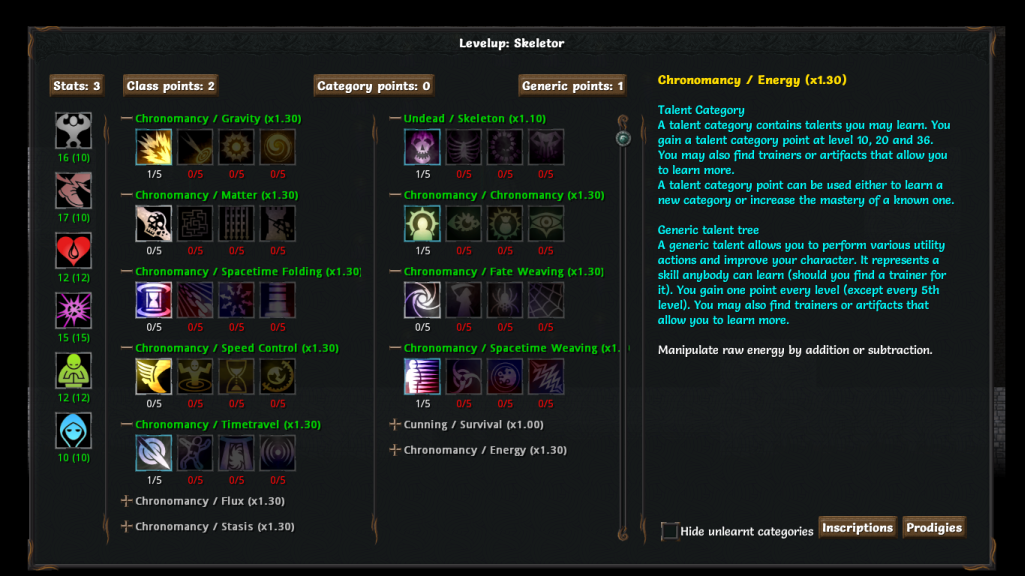 And upon character creation, we are unceremoniously dumped into our talent management screen. There�s a lot to deal with, so I�ll break it down bit by bit. Firstly, we get three stat points every level up. Stat points can be invested in any one of our six stats, and stats can only be invested in until they hit 60 via investment (though they can still be raised through other means).  Strength is the main stat of almost all melee characters, and even those that don�t primarily use Strength still find it useful. Every point of Strength increases physical power by 1, max encumbrance by 1.8, and physical save by 0.35 � essentially, how hard we hit, how much we can carry, and our resistance against physical effects. In addition, wearing heavy/massive armors (and even some of the better light armors) requires a certain amount of strength.  Dexterity is the main stat of ranged weapon users and dagger-users such as the Rogue, though most melee characters find it fairly useful to level alongside Strength. Every point of Dexterity increases Defense and Ranged Defense by 0.35, Accuracy by 1, and our chance to shrug off critical hits by 0.3%. �Defense� in Tome refers specifically to our chance to dodge weapon-based attacks � it�s rarely high enough to rely on for most classes, but extra dodge rate never hurts. Accuracy is always helpful, but it�s crit shrug off chance that makes investing in Dexterity a priority on higher difficulties. When you shrug off a crit, you ignore the crit damage multiplier and the attack does normal damage � a very helpful occurrence when enemies start rocking 250% crit damage multipliers.  Constitution�isn�t really the main stat of any class. Every point in Constitution increases our max HP by 4, our physical save by 0.35 and our healing modifier by 0.8%. Almost no skill trees scale with Constitution, and the 4 HP per Con point is fairly negligible when a t1 health boosting item can give +40 HP or so. As a result, Con tends to be a dump stat for most classes � investing in it isn�t really a mistake, especially if you�re feeling a little too flimsy, but it�s not really a priority and those stats are usually better invested somewhere else.  Magic is the main stat of, well, any magic-using class. Pretty much what it says on the tin, every point of Magic increases Spellpower by 1 and spell save by 0.35. There�s rarely any reason for non-magic users to invest in it, but some do for certain specialty builds that I�ll get to later.  Willpower is the main stat of Mindpower-based classes. Every point of Willpower increased Mind power by 0.7, mental save by 0.35, and spell save by 0.35. In addition, investing in willpower increases your maximum stamina/psi/mana, lowers your equilibrium/paradox failure rate, and increases the amount of vim regained per kill. Willpower will probably be our secondary stat after Magic.  Cunning is the secondary main stat of Mindpower-based classes. Every point of Cunning increases mind power by 0.4, mental save by 0.35 and crit chance by 0.3. A popular secondary or tertiary stat for most classes � more crit chance is always nice to have. Next to the stat screen are our talent trees. Five of them are unlocked, four are locked � unlocking them requires a category point, a resource gained at certain levels. Investing in a skill requires spare skill points, as well as being able to meet the level and stat requirement for investing in it, and usually requires at least one point in the preceding skills in the tree as well. Since we�re a fresh new character, we can only invest up to 2 points in any of our five starting skills. Let�s take a look at what we have. 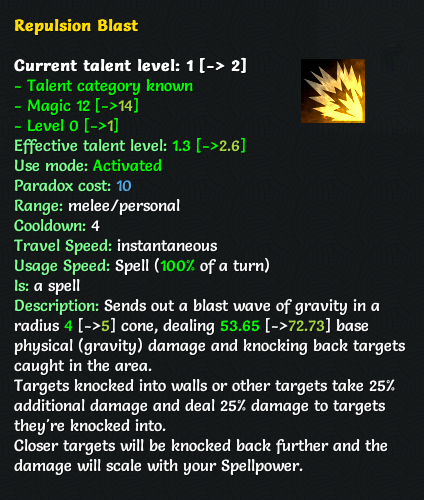 A simple �go away� talent for when enemies are getting too close. We won�t be investing in it too heavily, but it makes for a decent AOE move to clear out weak enemies, and to shove away pesky warriors.  A fairly standard beam spell, one of our bread-and-butter damage talents for the early game. Turning it into an AOE damage area is a neat trick, but one we won�t be using much for now � hitting the enemy with the beam is usually much more efficient. 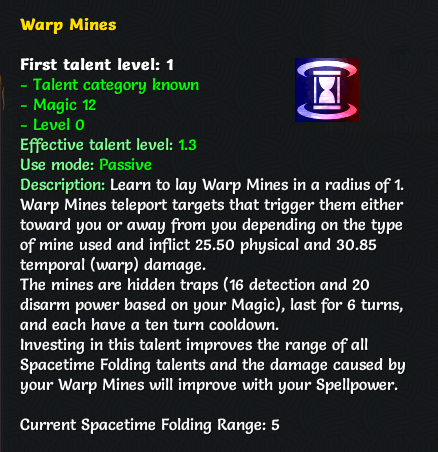 We�ll be skipping this talent, at least for now. Warp mines aren�t an especially damaging talent, and we have better ways to stay out of the way of enemies or move them out of our way. They can be useful, but as with any trap-based talent, there�s a lot that can go wrong � you have to predict an enemy�s path, ensure they don�t have a talent that can just pull you over to their side or vice-versa, and even if they cross it there�s a chance they might just shrug off said effect and/or disarm it. 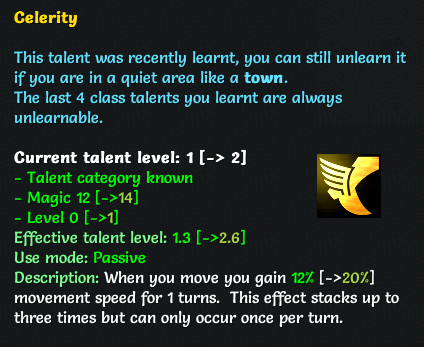 One point in this makes life a little bit easier. Just being able to move at slightly above 100% movement speed ensures that you can always outrun an average enemy with no speed boosts, as long as you have space to maneuver. 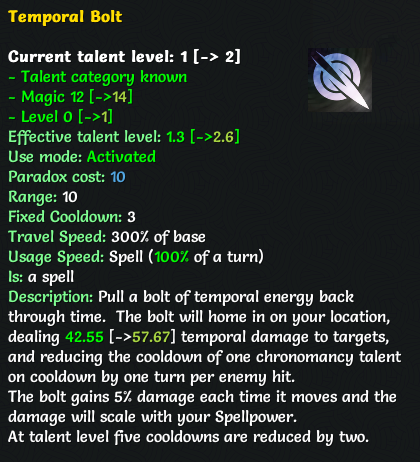 The second part of our basic offensive combo. Temporal Bolt is a bolt spell with a few quirks � it manifests from the target you first aimed it at (rendering it undodgeable for that particular target) then slowly heads towards you. The cooldown reduction and damage increase are neat little quirks, but for the most part we�ll just be casting this because we want the thing we cast it on to be dead. We invest a point in Repulsion Blast, Dust to Dust, Celerity and Temporal Bolt. One thing to note is that effective talent level is the number of talent points multiplied by the talent mastery of the skill tree, displayed as the number next to the name. We have a talent mastery of 1.3 for all Chronomancy skill trees, and thus an effective talent level of 1.3 for those talents. It�s a minor detail for the most part, but some skills gain additional effects at higher levels � such as Temporal Bolt, which reduces cooldowns by 2 turns per enemy hit at talent level 5. Thanks to our talent mastery, we would actually hit this with 4 points invested in T-Bolt. To the right of our talent trees are our generic trees. Investing in generic trees requires generic points, a slightly rarer resource than class points. We gain one class point and one generic point every level, but every fifth level, we get two class points and no generic points. Thus, we have to be a little careful when it comes to generic investment. For generic trees, we have three chronomancy trees and our Skeleton racial tree. Let�s take a look at them. 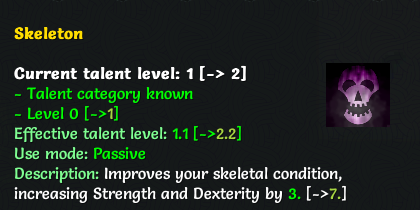 We won�t be investing more points into this for now, as we don�t need additional Strength or Dex for now. We might do so later though, as it provides a substantial boost to those stats, and we might need them in the future. 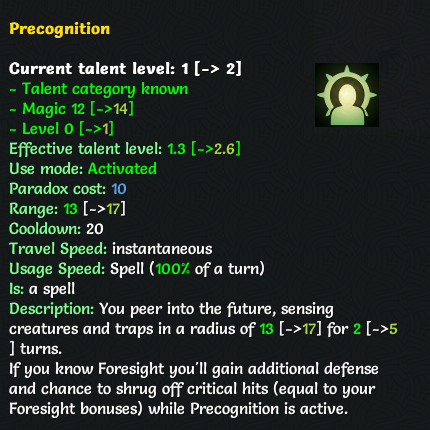 Precognition allows us to spot enemies and traps in a large radius, even ones far out of our line of sight that are blocked by walls. A very useful skill for scouting, though there�s an even better one that I hope to pick up later should I have the opportunity to. 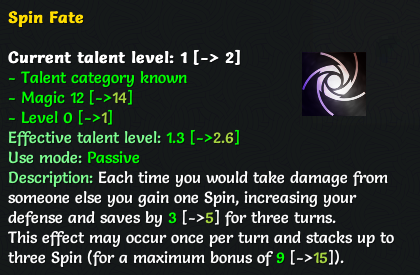 The extra defense/saves from stacking Spin are fairly negligible for now, but get better later on. I need a point invested in this talent to access the far more useful skills in the tree later on down the line, anyway. 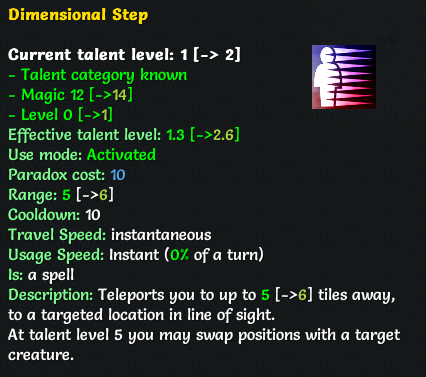 Our primary mobility talent. A low-cost, low-cooldown, perfectly accurate teleport is an immense advantage, and many other classes would kill for it. Being an instant-cast talent is just the icing on top of the cake. To the right of our generic trees, we have two buttons � inscriptions and prodigies. Buying an inscription slot will cost us one cat point and give us the ability to use one more infusion or rune. Prodigies are special, powerful skills that can be learned only at level 30 and 42. They tend to range from �could possibly be useful in a very niche build� to �powerful enough to base an entire build around�, and we�ll find out more about them once we hit level 30. Now with all that taken care off, let�s jump into the game. 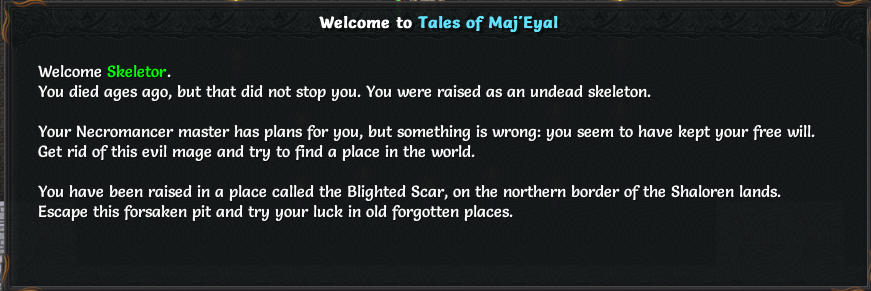 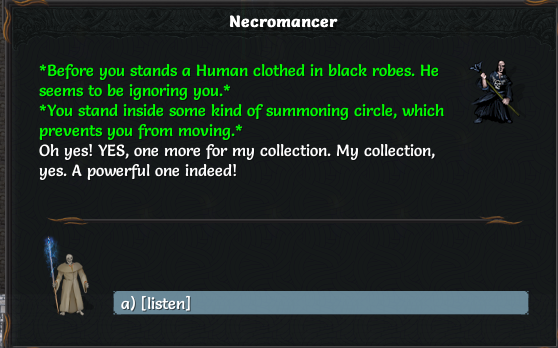  A powerful tool against my enemies! Yes, yes. They all hate me, but I will show them my power! I will show them! SHOW THEM! A powerful tool against my enemies! Yes, yes. They all hate me, but I will show them my power! I will show them! SHOW THEM! I am not a tool! Release me! You cannot talk. You cannot talk! You are a slave, a tool! You are mine! Be quiet! I am not a tool! Release me! You cannot talk. You cannot talk! You are a slave, a tool! You are mine! Be quiet!As his mind drifts off you notice part of the summoning circle is fading. You can escape! 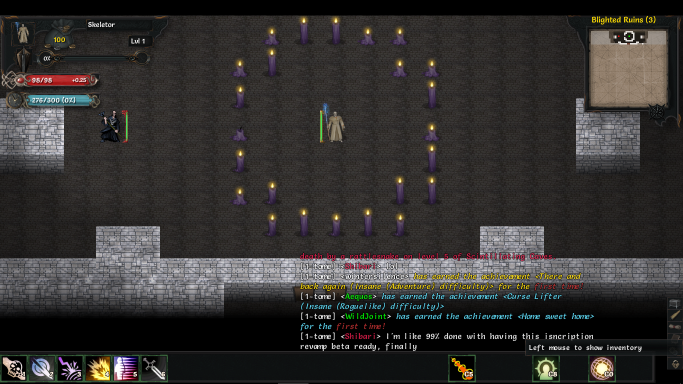 And we finally get to make a move. Let�s look at the UI for a bit. In the top left corner, we have our important stats � gold, level, EXP, HP and Paradox. If we learn any skills that require resources other than paradox, those will appear there too. In the top right corner, we have the dungeon minimap. Below the minimap, any active buffs/sustains/debuffs will be displayed � we don�t have any of those affecting us at the moment. At the bottom of our screen is our talent bar. Talents can be used by clicking on them, or pressing the corresponding number key. We can also see the in-game chat above the talent bar. The chat will display people�s achievements, deaths, and whatever they happen to be talking about. You can ask questions about Tome matters, and will generally get at least semi-helpful advice in response. Red names are developers, and those guys are usually happy to chat � there�s one talking about an upcoming rune rework right now. If the chat window annoys you, it can be moved around or turned off. It will slowly fade out if you don�t interact with it for a while. Now before we actually do anything, let�s check out our character sheet. 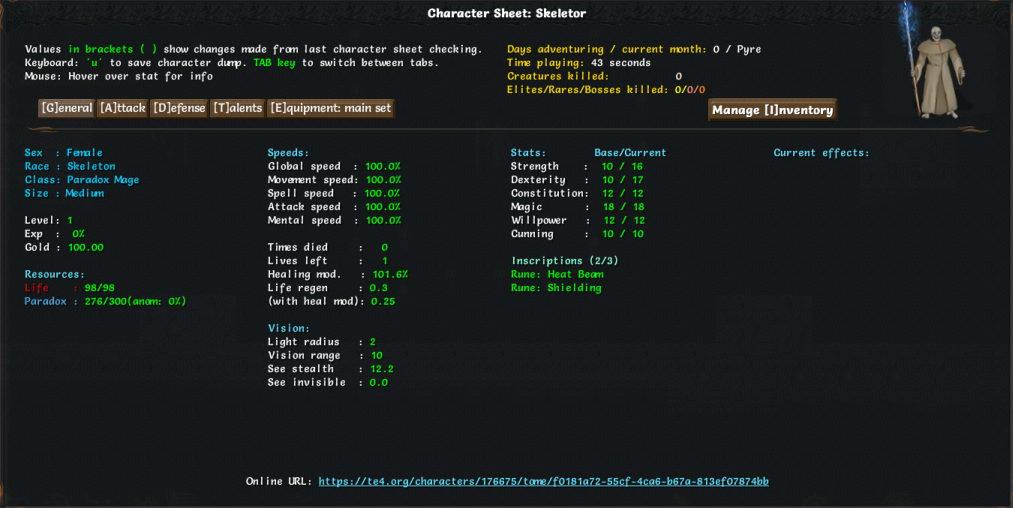 Our character sheet displays all of our important stats. It can be a lot of information to take in, so let�s break it down. Speed is an indicator of how quickly you can perform various actions. Global speed is a multiplier to any action, while movement, spell, attack and mind speeds are your speed of movement, spellcasting, attacking and using a mind-based power respectively. If you have 200% movement and 200% global speed, you would be able to move four squares in a single turn. Most cases are rarely as clear-cut as that, though � you might have 120% movement speed, in which case for every five steps you move, you would be able to take a sixth step without using a turn to move. Below that are our lives and healing modifier. We only have 1 extra life at the moment, but we�ll gain more as we progress � though of course we might lose some as well. Healing modifier is a property that boosts anything that restores health, including regeneration effects. We start with a small bit of health regeneration � enough to heal us if we�re safe, but too little to be helpful in battle. Our vision stats are at the bottom. Our sight range is 10, so we can see anything in a radius 10 range that isn�t blocked by walls. However, our crappy starting light only gives us 2 light range, so we can only see in radius 2 in poorly-lit areas such as indoor dungeons. We have a slight chance to see stealthed/invisible creatures � a very useful feature, but we don�t have quite enough of it to see anything decently well-hidden. Our base stats are displayed here, along with any modifiers caused by equipment/starting stat modifiers/effects. Below that are our inscriptions; we start with basic Heat Beam and Shielding runes � more on those later. To the right of that are the effects currently affecting us � empty at the moment, but a very useful feature later on when we want to check the exact nature of the debuff an enemy just hit us with. 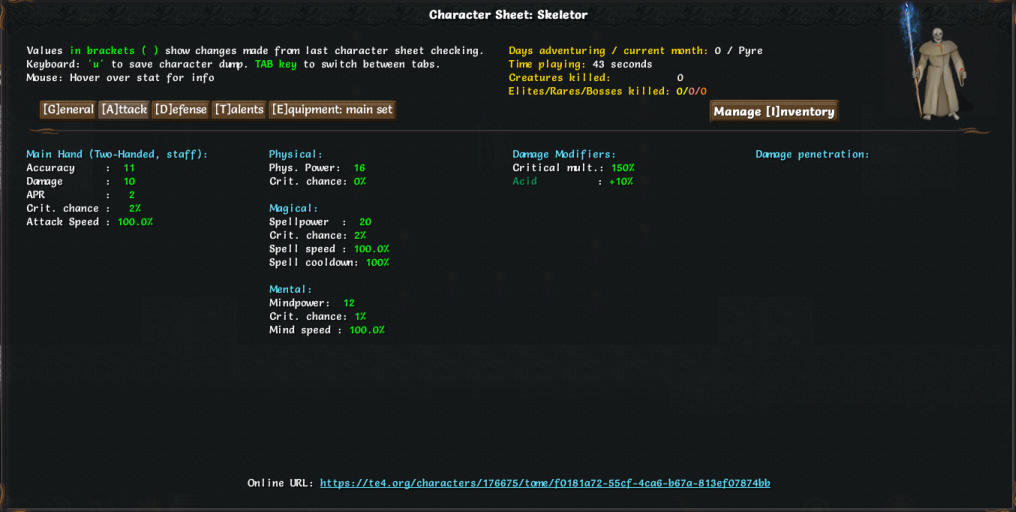 Let�s check out our offensive stats for a bit. The leftmost column shows our melee stats. We won�t really be using those, being a mage, but it�s always helpful to know them. APR is Armor Penetration � the amount of armor we can ignore per hit, while the rest are fairly self-evident. To the right are our Powers. Physical, Spell and Mind power are used in the damage calculation of physical skills, spells, and wild-gifts/mental skills respectively, as well as when applying an associated debuff. Each of them also has a separate crit chance, so it�s important to check what type of crit chance an item gives you. Spells have an additional stat for spell cooldowns � there are many items and skills that reduce spell cooldown rate, and being a Paradox Mage we have access to several of those skills ourselves. Damage modifiers are next. Right now, we have a crit multiplier of 150% - this applies to any critical hit, regardless of type. We also have a 10% bonus to acid damage thanks to our staff � we�ll change that in a bit. To the right is our resistance penetration, used for calculating how much damage we do against enemies that resist said damage type � we don�t have any at the moment. 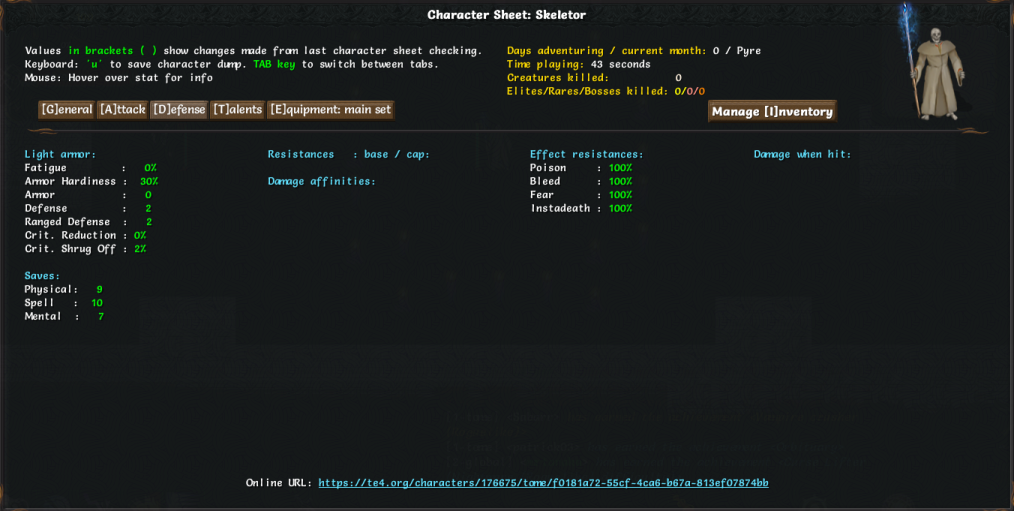 Next is our defensive stat screen. Let�s break it down again. To the left is our equipment bonuses from items/other skills. Fatigue is a property inherent in heavier armor and items, and affects various resources. In our case, the higher our fatigue, the higher chance we have to fail when casting a Chronomancy spell. It�s not a major concern in most cases. Armor is a property that reduces the damage of any melee/ranged attack that hits us. Armor reduction is actually applied before any damage multipliers, making it far more useful than it initially seems. Armor hardiness refers to the percentage of an attack that can be reduced by armor � for instance, if we had 50% armor hardiness and 10 armor, and were hit by a 10 damage attack, the most we could do is reduce the damage to 5. Defense and ranged defense refers to our chance to dodge melee/ranged attacks � useful on some classes, but ultimately armor is usually more important. Finally, crit reduction/shrug off shows how critical hits affect us � crit reduction will reduce the critical multiplier, while crit shrug off is the chance to ignore the critical multiplier altogether and just take normal damage. Below that are our saves. Our physical/magical/mental save is calculated against our opponent�s corresponding power when they attempt to inflict a debuff � with high enough save, we can just shrug off the debuff entirely. Not an especially major concern, but high saves certainly don�t hurt. Next to those are our resistances and damage affinities � of which we have none at the moment. Resistances are damage-type specific, and usually cap out at 70%. Our primary defense against spells/mindpowers, which aren�t usually affected by armor. Affinities are rare and also damage type specific � if you have 50% fire affinity, you heal for 50% of every fire attack you take, though you�re still damaged by said attack. To the right are our debuff resistances. Debuff resistance works independently of saves, and give you a flat percentage chance to ignore said debuff should someone attempt to inflict it. Being a skeleton, we start with 100% Poison, Bleed and Fear resistance. All players also start with 100% Instadeath resistance, which refers specifically to certain skills with a �save against this or you instantly die� effect. Being one-shot from regular damage in a single turn is still entirely possible. Finally, we have retaliation damage over to the right � the amount of damage enemies take when they hit us in melee. It�s not an especially major concern, but it�s good to know. 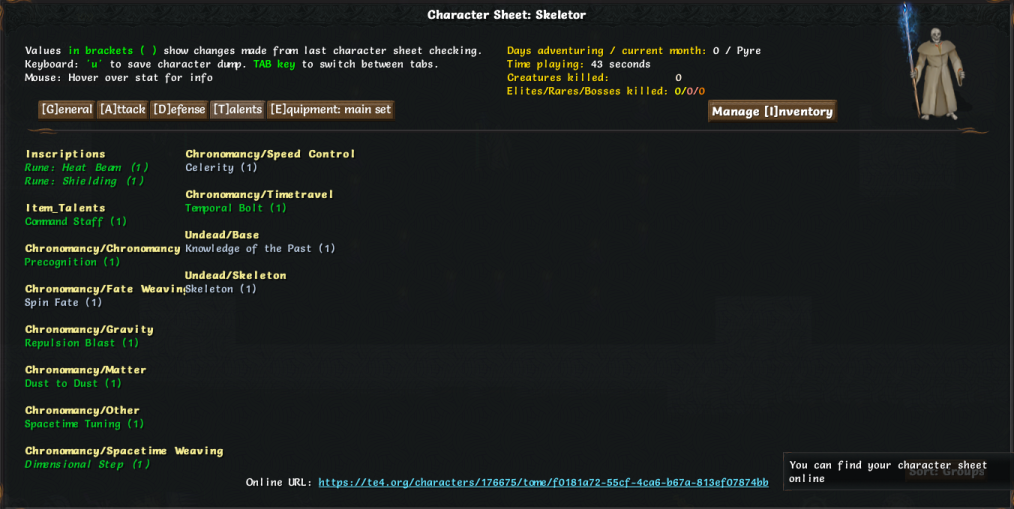 We can also check our talents here. In addition to the talents we invested in, we have a few others. Let�s check them out.  Command Staff � This talent is inherent to most staves, and allows us to change the damage bonus of our equipped staff. We�ll be using this to change our lightning bonus to a temporal damage bonus. Command Staff � This talent is inherent to most staves, and allows us to change the damage bonus of our equipped staff. We�ll be using this to change our lightning bonus to a temporal damage bonus. Rune: Heat Beam � One of our starting runes. An insta-cast spell that does fire damage over time and removes one physical debuff. The damage is negligible, but the debuff removal is helpful. Rune: Heat Beam � One of our starting runes. An insta-cast spell that does fire damage over time and removes one physical debuff. The damage is negligible, but the debuff removal is helpful. Rune: Shielding � Another starting rune. An insta-cast spell that gives us a damage shield of 130 for a few turns. While the shield is up, the next 130 damage we take will be directed to the shield. Rune: Shielding � Another starting rune. An insta-cast spell that gives us a damage shield of 130 for a few turns. While the shield is up, the next 130 damage we take will be directed to the shield. Spacetime Tuning � A skill that comes with any paradox-using spell. Spacetime Tuning can be used to set our default Paradox level, and whenever we rest, it will adjust our Paradox to the default level at the rate of 10 Paradox per turn. Can also be used to check our various Paradox-related modifiers. Spacetime Tuning � A skill that comes with any paradox-using spell. Spacetime Tuning can be used to set our default Paradox level, and whenever we rest, it will adjust our Paradox to the default level at the rate of 10 Paradox per turn. Can also be used to check our various Paradox-related modifiers.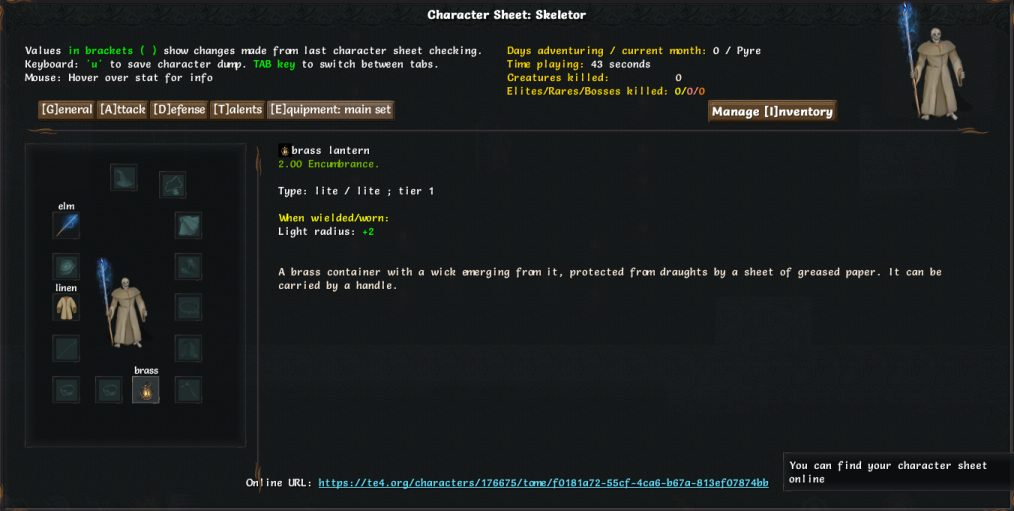 Finally we have our inventory sheet, but we can also just open up our inventory to check. Right now, we don�t have anything except a crappy lantern, a basic staff, and a linen robe that offers functionally no protection. 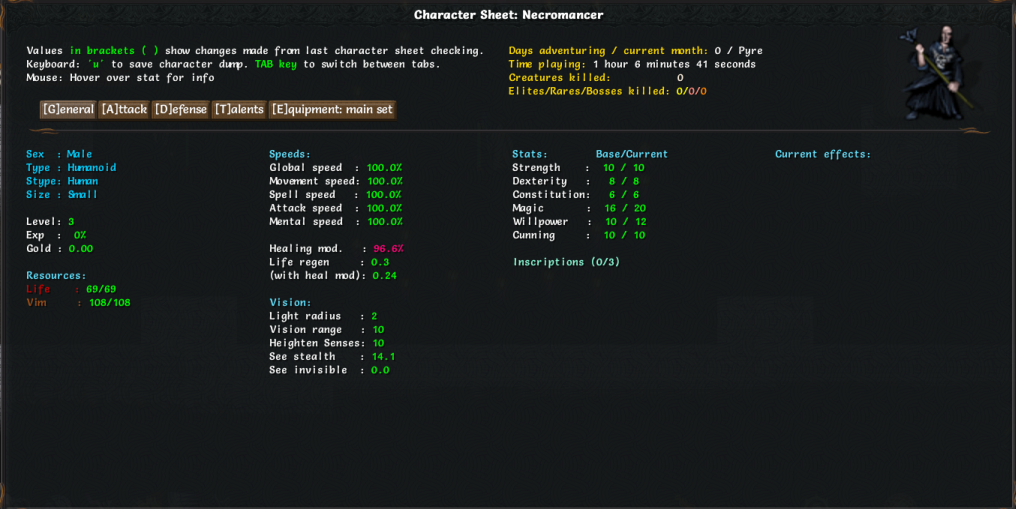 We can also check the necromancer�s character sheet by right-clicking on him. There�s not that much useful information, but we can check out his talent sheet to find out he has Soul Rot � a decently hard-hitting Corruptor bolt spell. 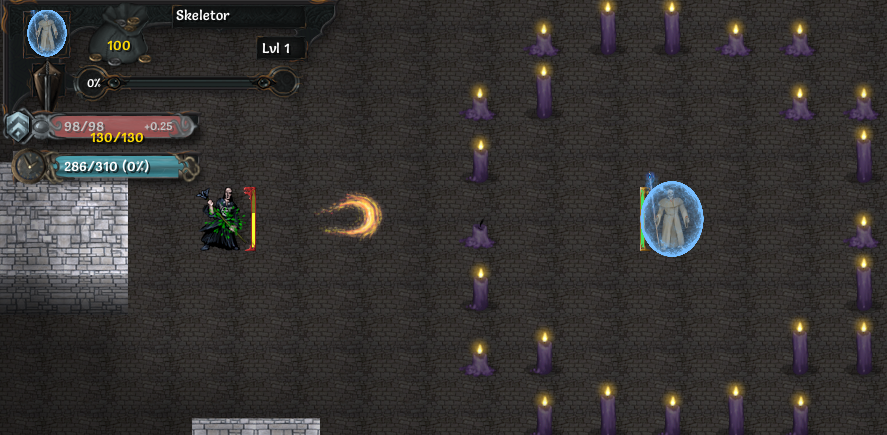 Finally, it�s time to battle. We shield up and hit him with a Temporal Bolt, and he responds with a Soul Rot. We simply sidestep it, then hit him with Dust to Dust to finish him off. He falls to his knees. Please spare me! I am pitiful. I will not stop you. Let me leave! No! But, but, you were my� you� you need me! What do you think you will do on the surface? Everything you meet will try to destroy you. You are strong, but you cannot resist them all! So what do you propose? I can give you a cloak that will conceal your true nature! With it all people will see when they look at you is a normal average human. You can go about your business. Please! Thanks for the information. Now you may die.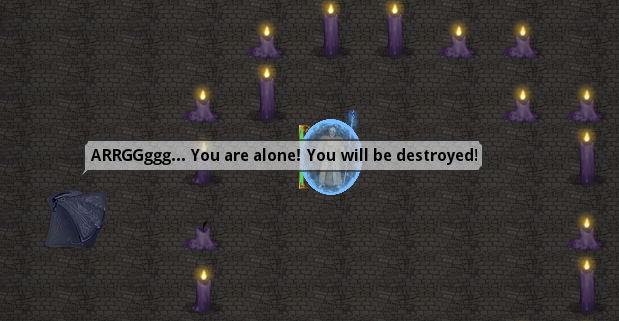 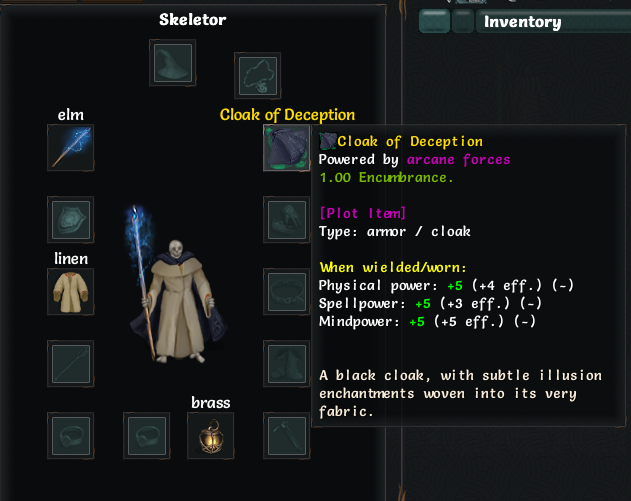 And with that, we pick up the Cloak of Deception. While equipped, we appear human to others, allowing us to walk around on the world map and enter towns without everyone immediately turning hostile. We can ditch the cloak later on in the game, but we�ll keep it on for now. Now, on to dungeon exploration proper. 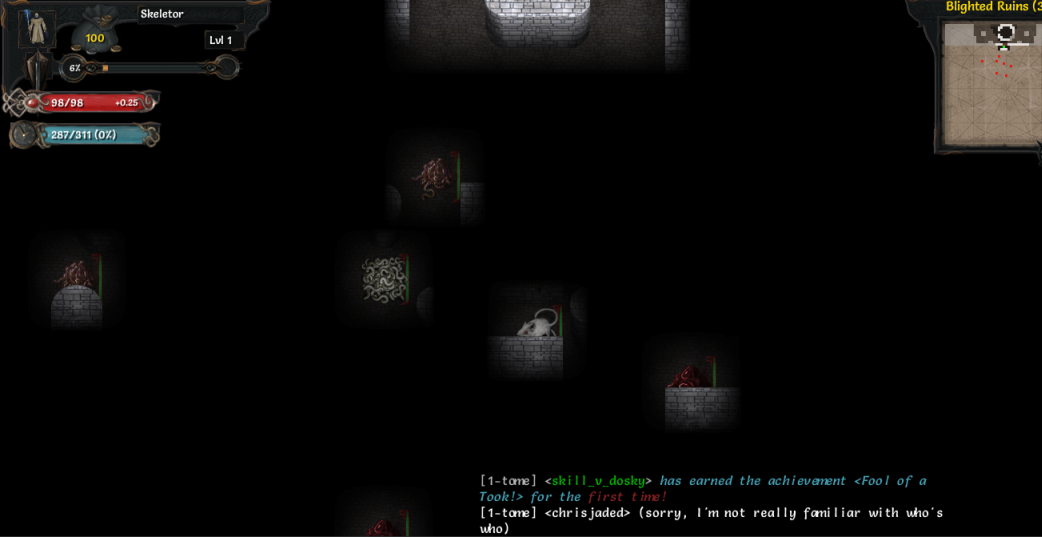 As we move through the dungeon, we use Precognition to do a bit of scouting, and check out the enemies we�ll be fighting in a bit. The pale blobby things near the top are Fleshy Experiments. These guys can hit us with Virulent Disease, which will damage us over time and decrease our stats. A little annoying, but we can ride it out with Damage Shield if we get hit. The mouse and white worm mass are fairly common enemies. There�s not all that much to them, and the most dangerous thing about them is their ability to lull you into a false sense of security. The red blobby things at the bottom are Sanguine Experiments. They can hit us with Blight Bolt, a fairly hard-hitting blight spell. We can�t dodge these as easily as Soul Rot, but we won�t die from one hit. We�ll just have to take care not to fight too many of these things at once. Incidentally, for those tired of moving around manually, pressing the �z� key will autoexplore for you, stopping once you run into an enemy. It�s extremely unlikely to autoexplore straight into your death, but it can be possible to autoexplore into a very bad situation, so use with as much caution as you think is appropriate. You can probably guess how much I use it by the fact that the �z� key on my keyboard is entirely worn out. 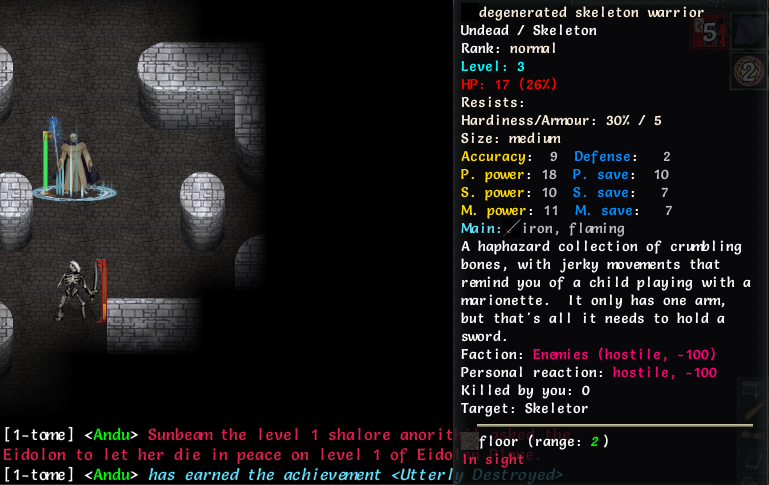 While clearing out those guys, we run into this boy. There are skeletal enemies of almost every sort in the game, and they range from barely a threat to extremely lethal. This guy is probably the weakest of them all, though, so we just blast him and move on.  Hey, someone left their diary here. Wonder what it says.  Sure worked out well for him! Incidentally, reading this note carefully warns us of a potential threat up ahead. There�s a surprising amount of lore in this game, and occasionally they can offer surprisingly useful tips. 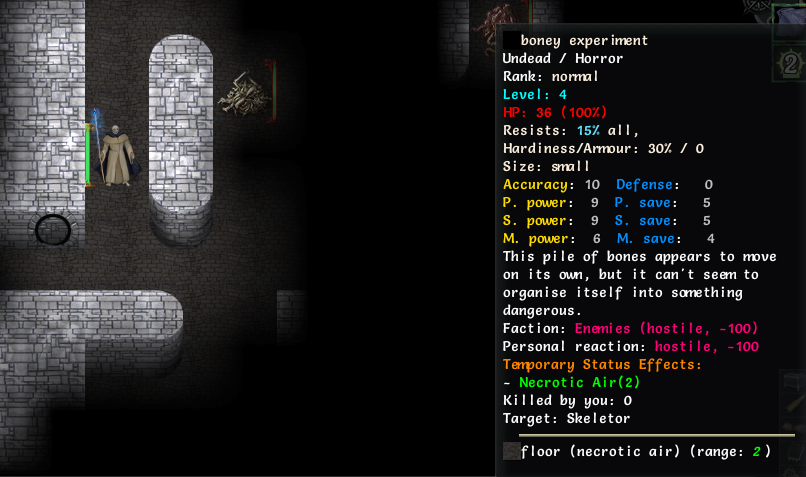 Boney Experiments are the last of the Experiments found in the dungeon. They can Bone Grab us, teleporting us to their side, damaging us over time and pinning us to the ground. Not a big threat in and of itself (at least, not from this guy), but can be a problem if he drags us into the range of several Blight Bolts. 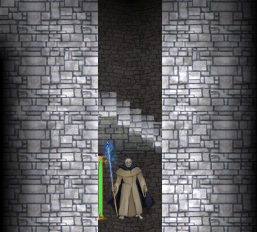 And we find the stairs to the next level. Before we head upwards, let�s see the stuff we found. 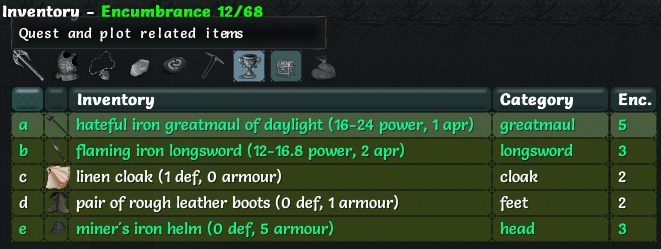 Equippable items have a material tier from T1 to T5, and a color based on the egos (bonus effects) they have. In general order of rarity: - White: Basic item with no modifiers. Thankfully, we won�t be seeing much of these. - Green: An item with one or two lesser egos. - Blue: An item with at least one greater ego. - Purple: An item with at least two greater egos. - Pink: Items dropped from rare enemies when slain. They eschew the whole �ego� thing for various randomized bonuses, some of which can�t ordinarily be found on that type of item. These can range from nearly useless to very, very powerful. - Orange: Randomized artifacts. Can be found very rarely, or from killing a boss. Have up to three greater egos, as well as possible other bonuses. - Yellow: Standard artifacts. Our Cloak of Deception is one of these, though admittedly not an especially interesting one. These are usually dropped from killing a boss, though if an enemy is generated with one equipped, they will drop it upon death, and sometimes they can be just found lying around. These usually have specialized effects that cannot be found on other items. Out of all of these items, the only one we might actually have a use for is the miner�s helm, which increases our currently nonexistent armor by a small amount. We don�t have the skill to wear it yet though, so we�ll just hang on to it for now. All the rest are instantly transmogrified. The Transmogrification Chest is one of Tome�s more helpful features. Once you reach a certain point in your first run, you can obtain one, and all your future characters will also start with one. The chest has near-infinite storage space, and will automatically store any items you pick up as you go through the floor. Once exiting a floor, you can move the items you want to keep to your regular inventory, and the chest will automatically sell the rest. We can only carry a small amount of items thanks to our limited encumbrance, so the chest is very helpful. 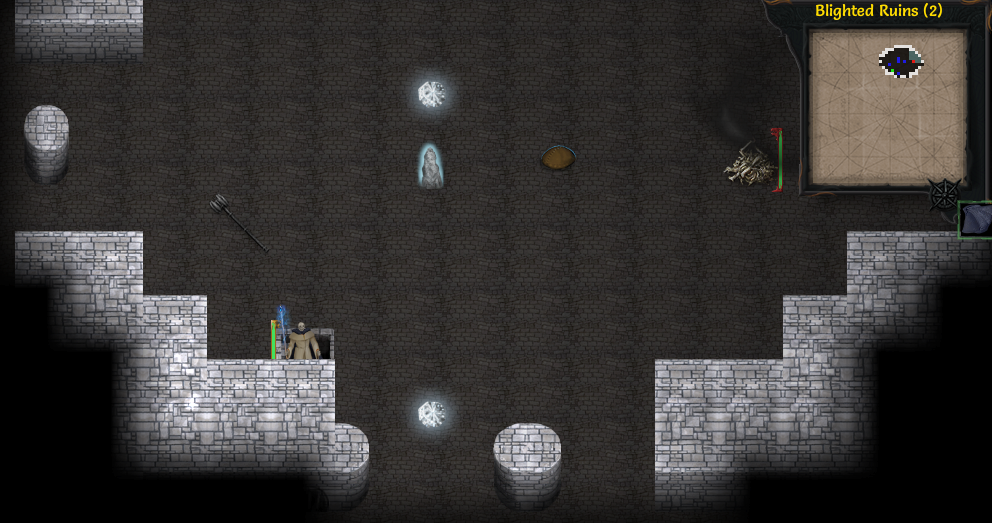 Anyway, on to the next floor. We can see a few items scattered around, and up to two different field effects at work in this room, which is slightly interesting. These are usually minor details, but they can be helpful to take note of. The glowing thing in the middle is a glimmerstone. When affected by the glimmerstone, our next attack has a chance to inflict Daze, an effect which renders the enemy unable to move until they take damage. The black smoky aura near the boney experiment is Necrotic Air, which reduces our healing modifier by 40% and raises all the resistances of undead (such as ourselves) by 15%. 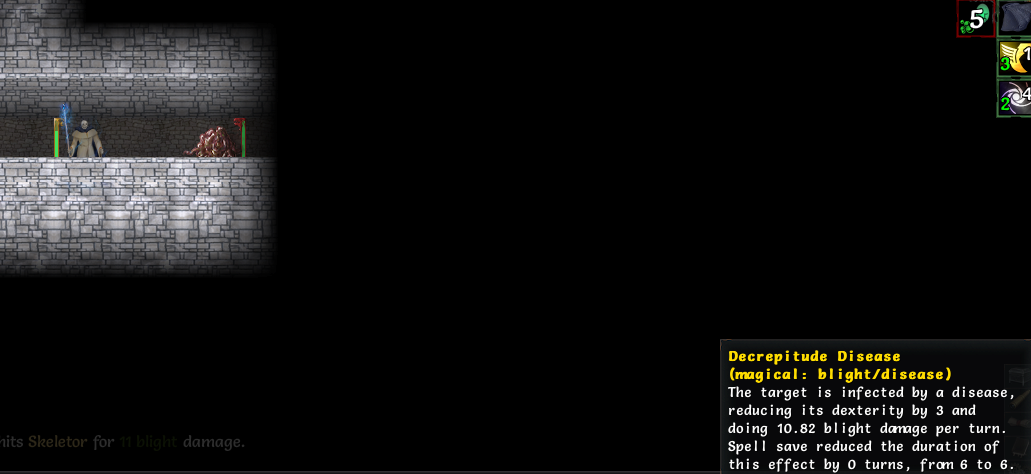 This particular Fleshy Experiment managed to land Decrepitude Disease on us, which is a little annoying. It reduces our Dex by 3 and does about 10 Blight damage per turn for 6 turns. We can just wait this one out, but diseases later on in the game will be far more debilitating.   We also find some more pages from the departed necromancer�s diary. Looks like he�s been busy. 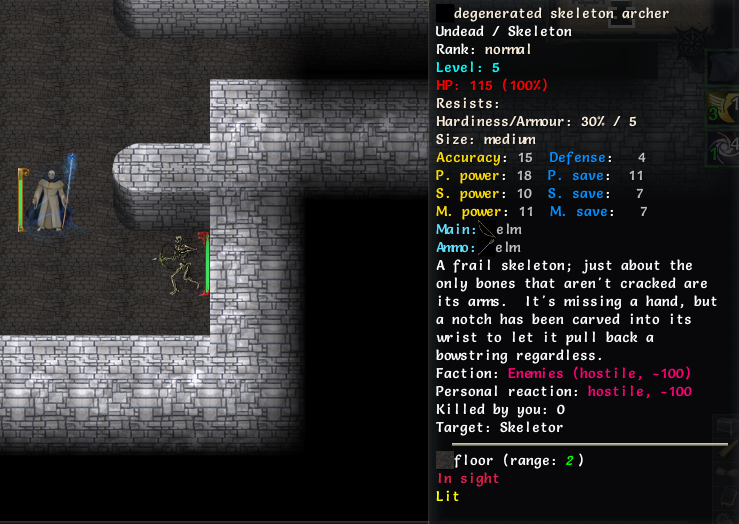 We run into our first new enemy in a while. Degenerated Skeleton Archers are a slight step up from degenerated skeleton warriors. Ever since the new archer update, all archer enemies have gained a substantial boost, and even this guy is a legitimate threat if we don�t take him seriously. We shield up and finish him off, dodging as many arrows as we can. 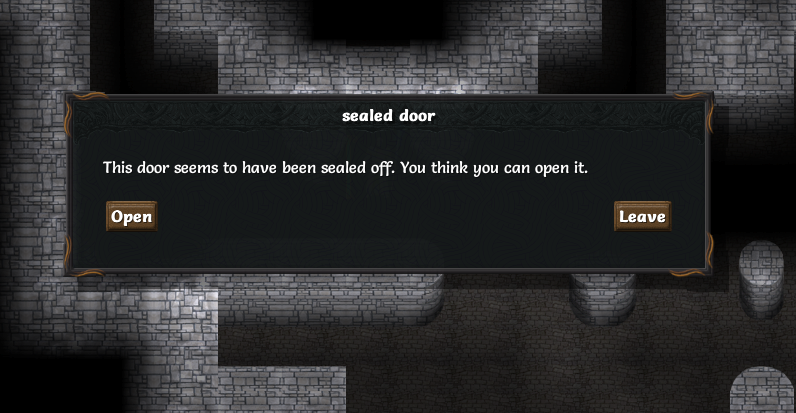 This indicates that the area we�re about to enter is a vault, an area that usually has tougher enemies than the surrounding dungeons, but also a wealth of potential loot. Vaults play by their own rules � you can�t dig through most vault walls, teleport from outside a vault to inside with a random teleport, or scout an unopened vault from the outside. Fortunately, there are only so many vaults, and once you�ve played for a bit, you can get a general sense of what vault is what. This vault is a relatively safe one for us to deal with.  Opening the door and casting Precognition reveals a trap in front of the door and an Armored Skeleton Warrior heading towards us. This guy can be pretty tough to take on in melee � he�s significantly higher-leveled than most of the trash we�ve been fighting, and has a few bulwark skills to make life difficult if he can get in range. 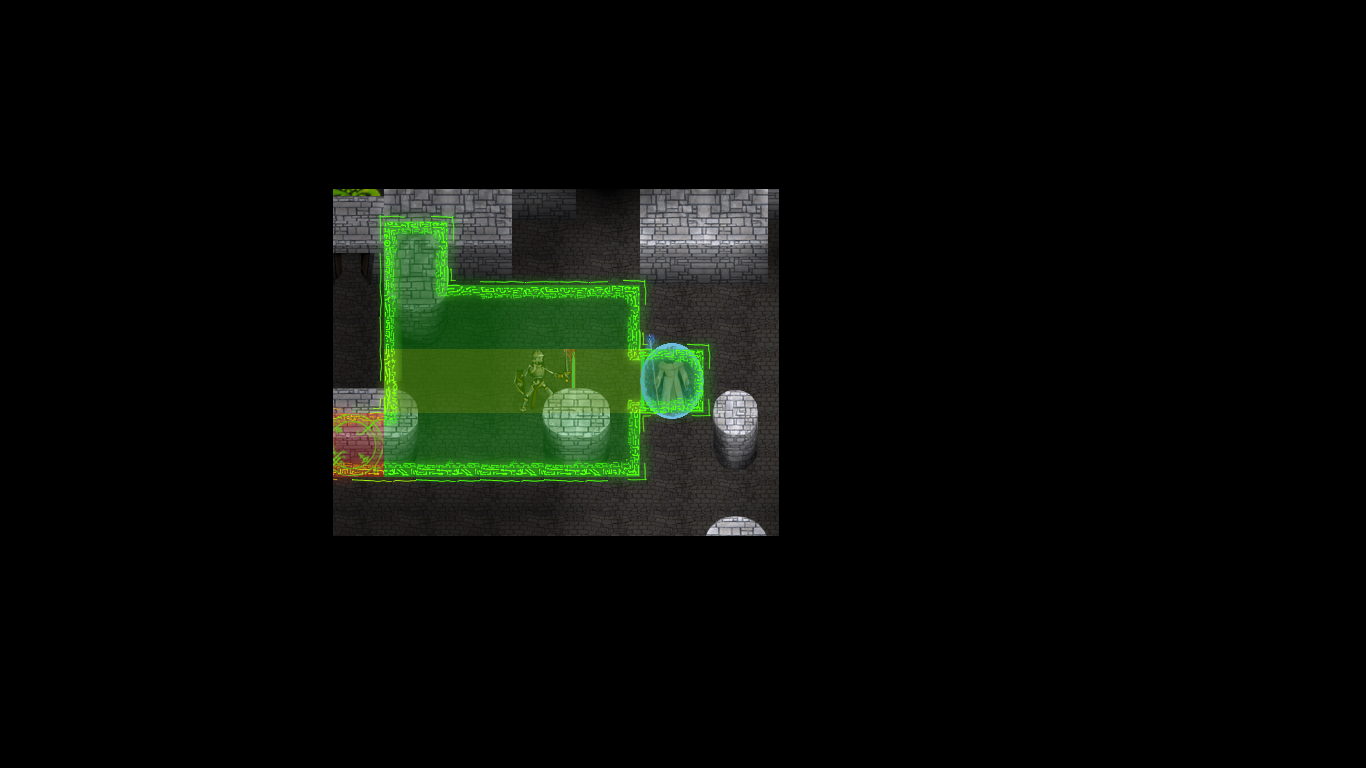 Fortunately, we are a mighty mage, and we can just Repulsion Blast or Dust to Dust away at him from a distance. He closes in on us once or twice, but it�s no big deal � as long as we immediately move away from him, he can�t hit us, and Celerity giving us a slight movement speed bonus ensures that we can always outrun him as long as we keep moving. Eventually, we finish him off. He drops a little bit of gold, but more importantly, the vault is now slightly more unguarded. 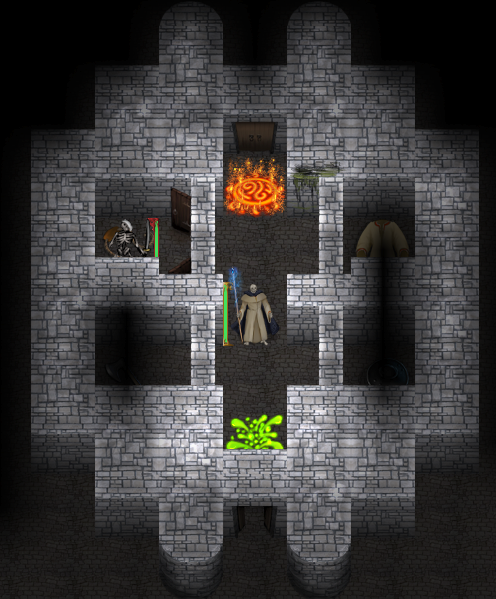 Dimensional Step allows us to teleport right over the traps. There are other ways to get around the traps, including just sucking it up and tanking it � the damage might be annoying, but we could probably wait it out. The trap on the top spawns a small array of fireballs that will explode in a turn or two, the trap at the bottom spawns a poison gas cloud that damages us if we linger in it. These small rooms have Degenerated Skeleton Warriors, nothing special. We clear them out, grab the loot and head on up. 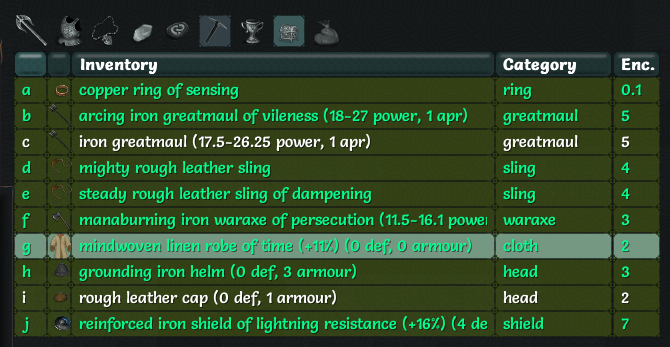 Out of these items, the only ones useful to us are the robe and the ring. The robe gives us a helpful boost to temporal damage, and the ring gives various vision-related boosts and a small amount of Blindness immunity. 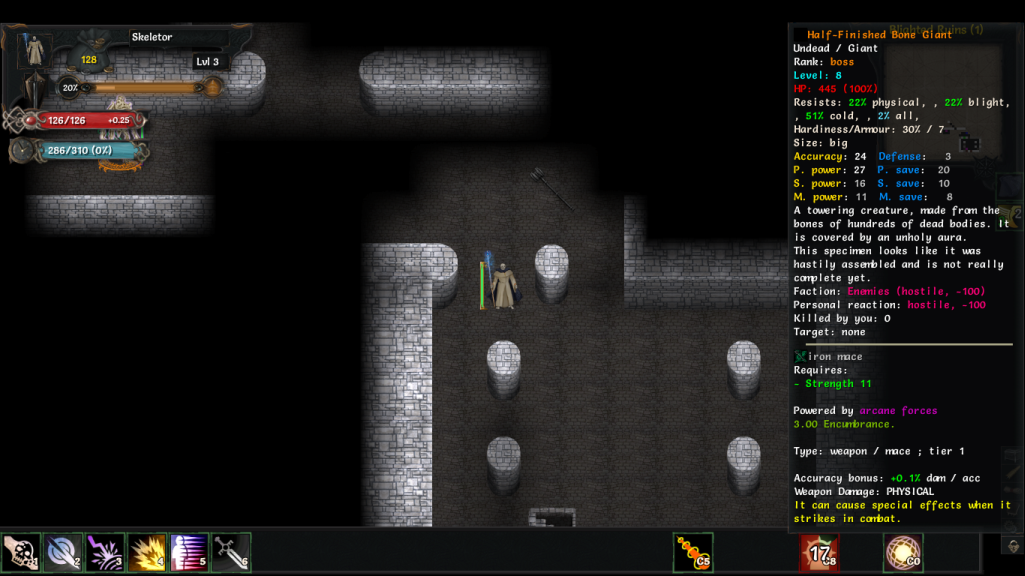 As we head up to the final floor, we cast a Precognition to scout our surroundings � and it sure was a good thing we did. 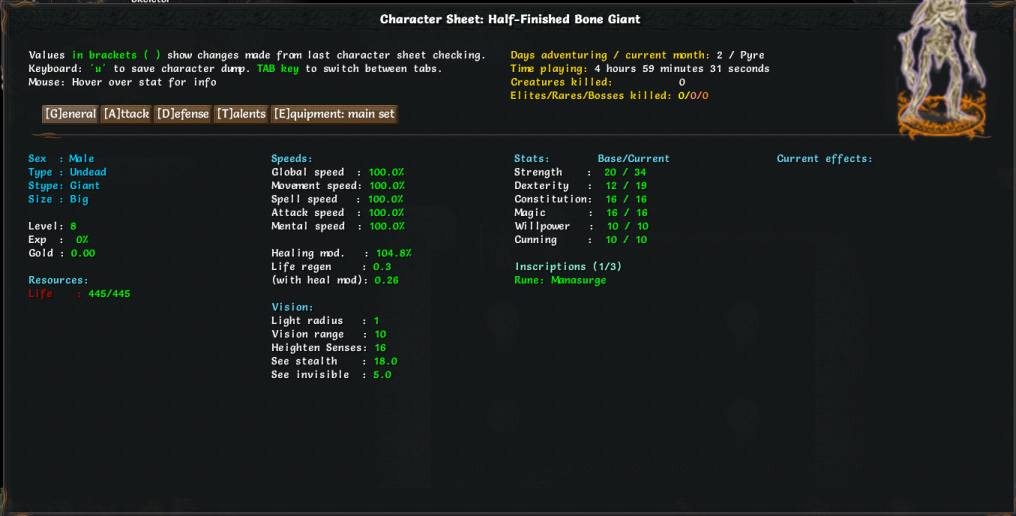 The Half-Finished Bone Giant is the �masterpiece� referred to earlier, and the boss of the undead starting zone. He hits decently hard in melee, has a ranged AOE attack that does physical damage and can cause bleeding, and has a Bone Shield that absorbs a lot of damage for a few turns. Fighting him isn�t actually necessary � all we need to do to exit the starting zone is to find the stairs to the mainland. Nonetheless, we can probably take him, if we�re careful. 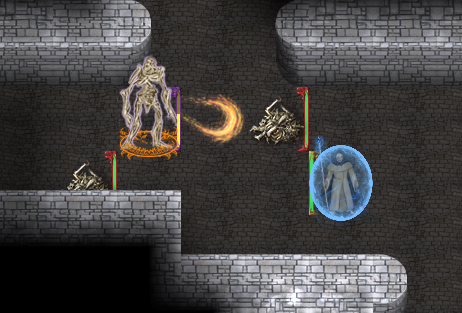 We land some Temporal Bolts and Dust to Dusts on him, and then a Boney Experiment nearby Bone Grabs us! Annoying, but we�re still out of his melee range, and we fortunately managed to shrug off the pinning effect. 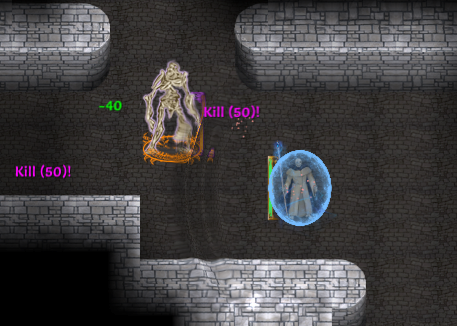 Also, we managed to hit all three of them with a Repulsion Blast, though the Bone Giant unfortunately managed to resist the knockback. 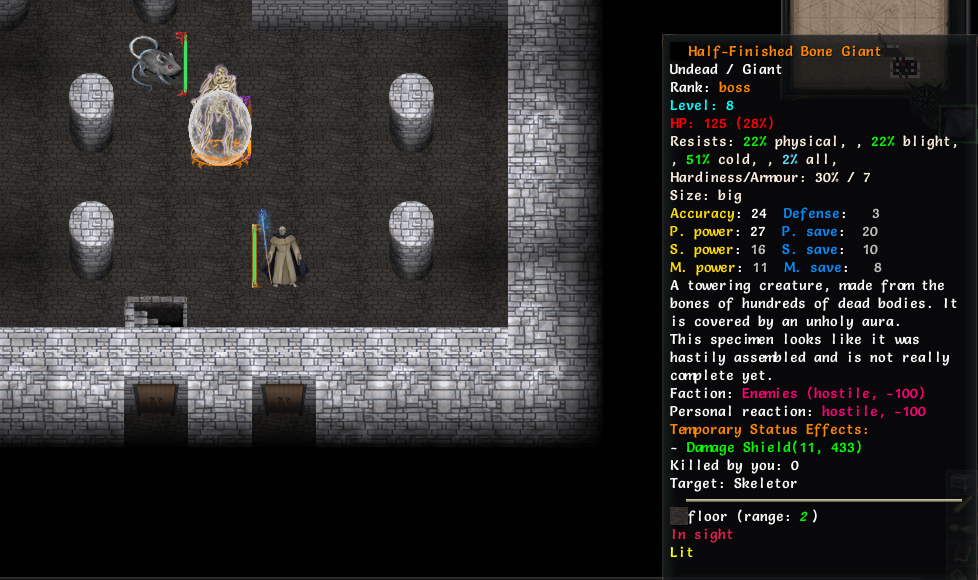 We keep walking backwards while blasting him. At low health, he activates his Bone Shield � a very buff damage shield that lasts for a long time. We�ll just wait this out � breaking it through damage would take almost as long, making it a fairly pointless endeavor. As long as we stay out of melee range, the only attack he can use is Throw Bones, which hurts slightly, but we can deal with it. We�d be in more trouble if we weren�t a skeleton, since it can inflict Bleeding. 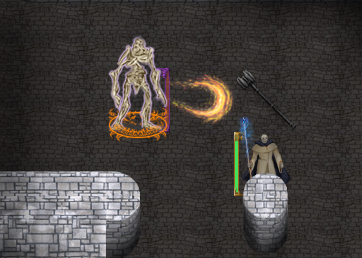 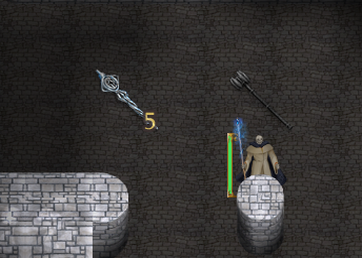 Eventually, we wear him down to his last sliver of health, and a final Dust to Dust finishes him off. We collect a few items from his boney corpse, including a couple of artifacts.   The Cloud Caller is a hat that increases our lightning and light damage, and comes with an activable lightning beam. The Rod of Recall is a special item dropped by the first boss we kill. When activated while in a dungeon, it will instantly teleport us to the world map after 40 turns. This is mostly more for convenience than anything, but if there�s a tough enemy blocking the way to both stairs and you�re in a safe spot at the moment, you can Rod of Recall out and come back later. 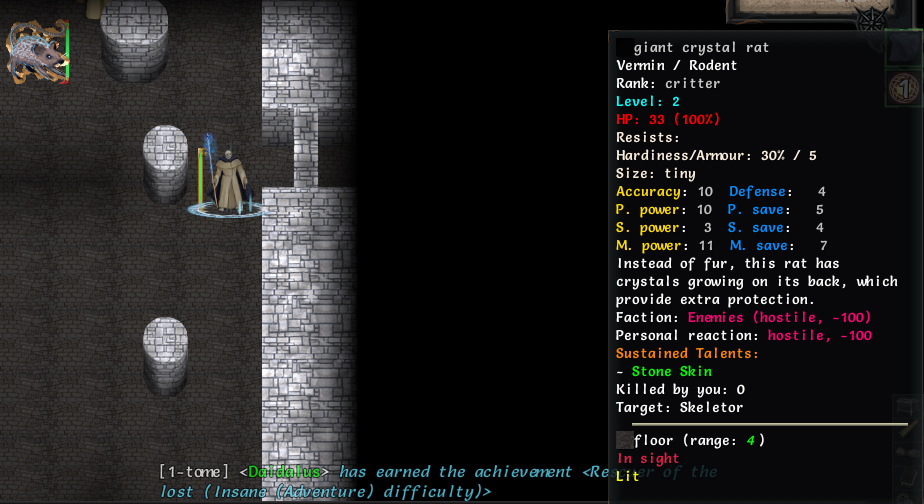 We clear out the rest of the dungeon. On the way we run into a couple of new enemies. This giant crystal rat is slightly tougher than a regular rat � it has an armor-boosting sustain and a physical bolt spell. It�s still a rat, though, so it dies in one hit. 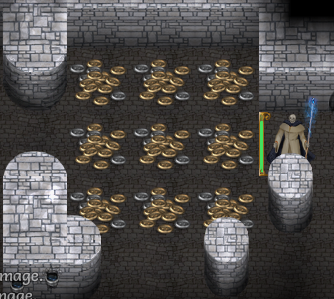 Also someone left a big pile of gold lying around, which is nice. 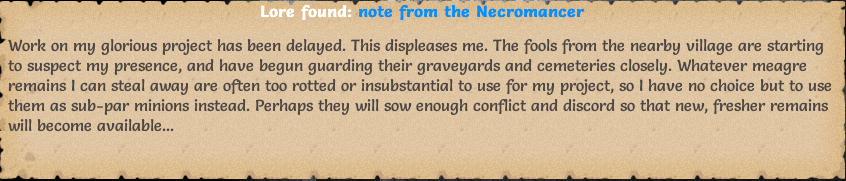 We find another page from the necromancer�s diary. Well, that certainly explains all the experiments. Incidentally, this is the last time we�ll see them � presumably, all the necromancers we�ll be facing in the future could afford better fare. 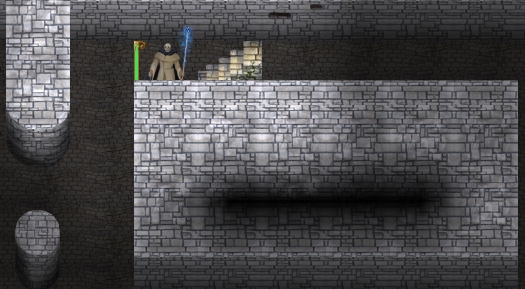 We found the stairs and can exit to the world map now. There�s no heading back here once we exit, but that�s fine � there�s nothing on interest left here anyway. 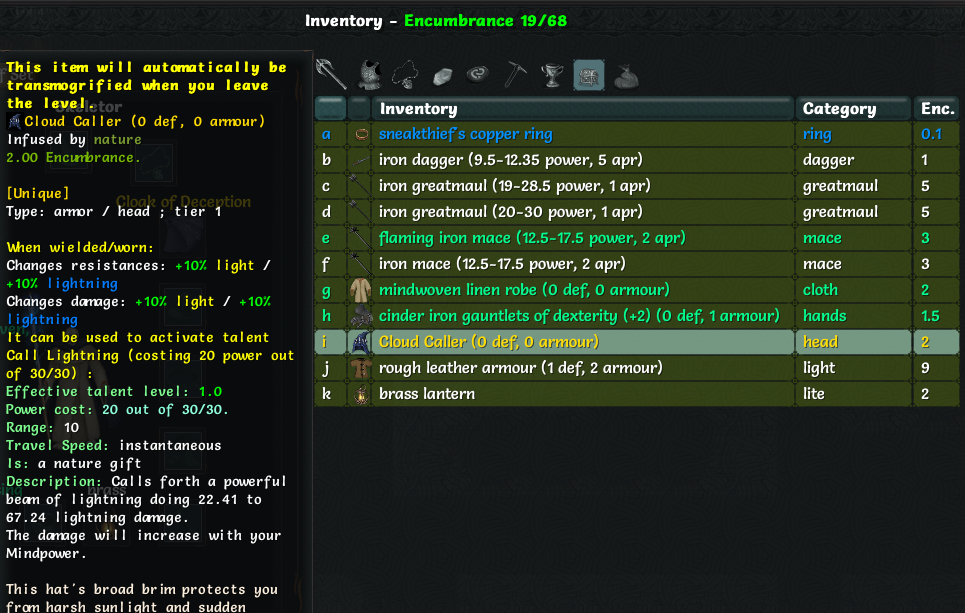 Before we go up, let�s settle a few more things. Here�s the items we picked up on this floor. The blue ring gives +4 Cunning and Dex and a little bonus accuracy, which is always helpful. The Cloud Caller�s effects can be seen here � even though it�s not too useful to us, we�ll probably wear it for a bit. The rest are fairly useless, though we might hang on to those gauntlets until we find better gloves. 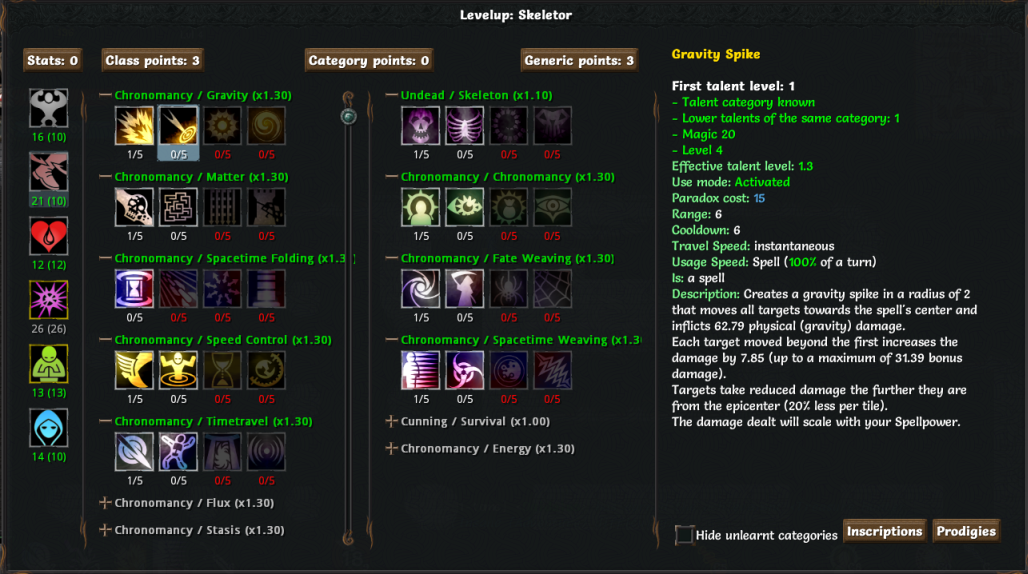 Since we hit level 4, we also opened up the next tier of skills. I�ve been putting off stat investment for a bit, which was probably a little irresponsible of me, but I like investing in things all at once. Later on, as leveling becomes slower and slower, we�ll probably invest our new points immediately whenever we level up. We level up our Magic to 26 and our Willpower to 13, then look at our new skills. 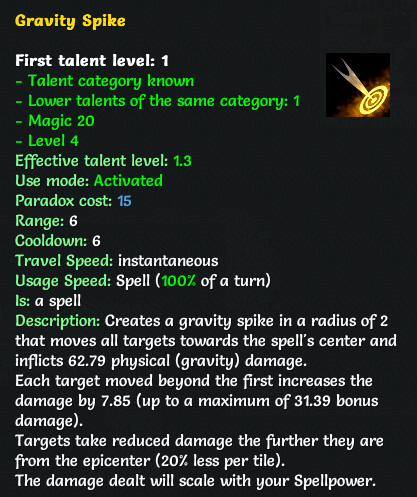 We�ll put a point in this since it makes for a useful �go away� talent, but won�t be using it for damage too much � unlike Repulsion Blast, this one can damage us. 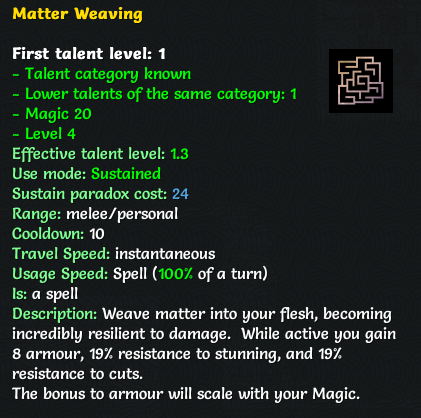 We�ll probably be leveling this one up quite a bit. Bonus armor is always helpful, though we don�t need the cut resistance as we�re immune to bleeding. The stun resistance is the bigger deal, though � being stunned is one of the worst effects that can be inflicted on us, and I�ll explain why when we get stunned. Incidentally, this spell is a sustain. Sustains are similar to passive skills, but require resources dedicated to them � a 10 stamina sustain would lower your maximum stamina by 10, for instance. This sustain will raise our minimum paradox by 24 � not a major issue, since we�re sticking with a default of 300 anyway. Sustains are hard to remove, but there are various skills dedicated to doing so. Some sustains will actually drain their associated resource every turn � those usually tend to be especially powerful ones.  This one is a fairly minor effect, but more speed never hurt. We don�t have a spare point to put in it yet though.  This one is a fun spell � it does temporal damage and causes the target to disappear into a time rift for a few turns, until Time Skip�s effect wears off. Landing this against a tricky target can often give you some much-needed breathing room. Repeatedly Time Skipping a target causes them to build up resistance to it, though, so you can�t keep an enemy out of time forever. We also have three generic points to spare � let�s see what we can get. 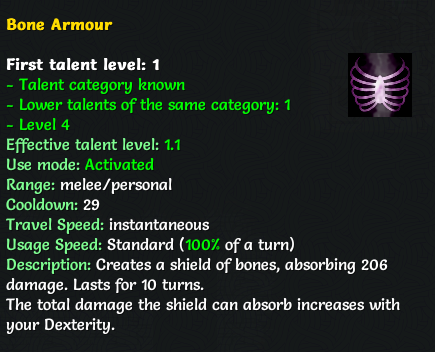 We now have a bone shield of our own. Bone Armor is a very strong shield that lasts for a very long time and scales with Dexterity. It has a fairly long cooldown, though, and is non-instant, which means that it activates at the end of the turn we used it on. 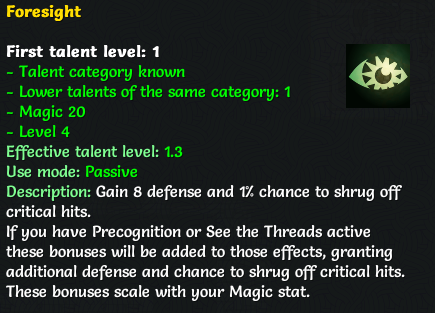 A decent passive, but we don�t have a spare point to put in it yet. 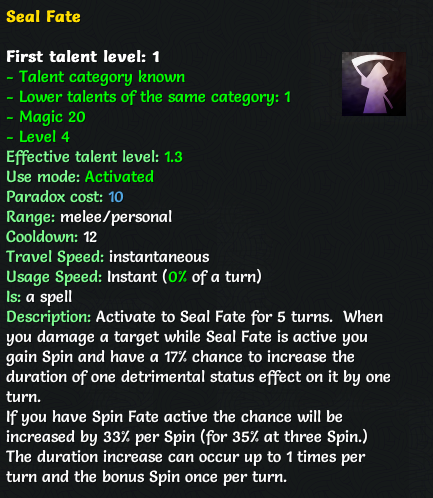 Seal Fate is actually the cornerstone of one particular Paradox Mage build � more on that later. Even if you�re not using said build, though, it�s a pretty useful skill � extending debuffs is always useful. 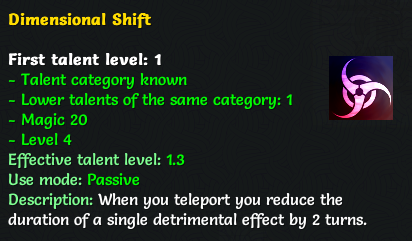 Dimensional Shift is an incredibly helpful passive, burning off our debuffs whenever we teleport � and we teleport a lot. We�ll probably be maxing this one out. 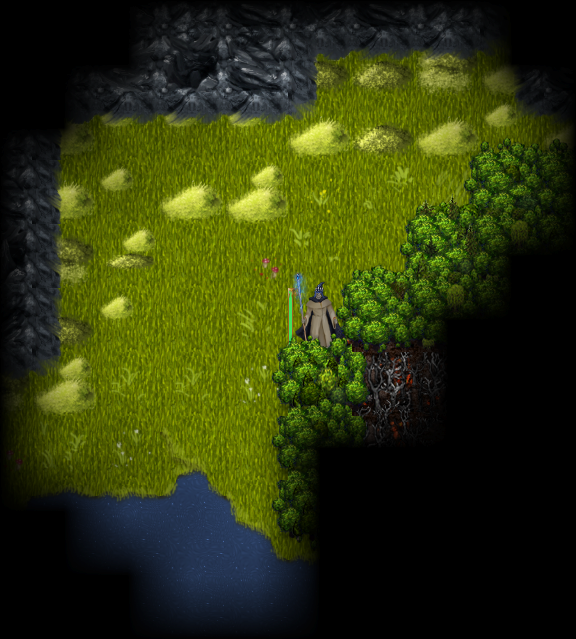 Finally, we emerge from our starting zone and onto the world map proper. We�ll be doing a more thorough exploration of our new surroundings in the next update.
|
|
#
?
Jun 28, 2017 15:44
|
|

|
Is it a mod that makes them show what they're holding in their hands? I don't remember it (but I haven't played since right after Possessors went in). Are you using any mods in general? Prism fucked around with this message at 16:30 on Jun 28, 2017 |
|
#
?
Jun 28, 2017 16:17
|
|

|
I don't think it's a mod, I'm not using anything that should affect it at the moment. I'm a pretty big fan of addons/mods and like running as many as is reasonably possible without the game crashing, but for this run I'm keeping this minimalist and just have a few to help me show off additional content. Right now I have one for choosing escorts, one that unlocks additional race-locked dungeons, one to avoid patrols, and one that spawns the Merchant/Dark Crypt on the map so we can do those only when we're good and ready.
|
|
#
?
Jun 28, 2017 16:26
|
|
|
Inadequately posted:I don't think it's a mod, I'm not using anything that should affect it at the moment. I'm a pretty big fan of addons/mods and like running as many as is reasonably possible without the game crashing, but for this run I'm keeping this minimalist and just have a few to help me show off additional content. Guess it just got added since the last time I played then. Which is good! It's good that it keeps getting updates.
|
|
#
?
Jun 28, 2017 16:33
|
|
|
Prism posted:Guess it just got added since the last time I played then. Which is good! It's good that it keeps getting updates. I think it may be an options thing, it's been in there since well before Possessors. Also Skeletal Warriors are probably the first proper risk of death for a lot of players, those bastards and Skeleton Master Archers stay scary throughout a lot of the game.
|
|
#
?
Jun 28, 2017 21:02
|
|


|
PurpleXVI posted:Also Skeletal Warriors are probably the first proper risk of death for a lot of players, those bastards and Skeleton Master Archers stay scary throughout a lot of the game. They hold the record for most overall player deaths of anything in game, with Armored Skeletal Warriors coming in fifth (presumably since they are signficantly less common). Both hit hard relative to their level and have some nasty tricks if they get next to you.
|
|
#
?
Jun 29, 2017 00:50
|
|

|
I dont know posted:They hold the record for most overall player deaths of anything in game, with Armored Skeletal Warriors coming in fifth (presumably since they are signficantly less common). Both hit hard relative to their level and have some nasty tricks if they get next to you. Oh, yeah, derp. I was thinking of the Armoured variety, in terms of warriors. Master Skeletal Archers also know how to pin you in place with shots and then kite you around, so if you're a heavy melee class that can't quite close(for whatever reason), they can mess you up.
|
|
#
?
Jun 29, 2017 07:22
|
|
|
Inadequately posted:
I realize everyone has moved on, but this is important. Why is this skeleton wearing pants?
|
|
#
?
Jun 29, 2017 07:45
|
|


|
Scaramouche posted:I realize everyone has moved on, but this is important. Why is this skeleton wearing pants? Because pants were slightly less distracting than black censor bars (though both would be preferably to ghoul dong hanging out), and I am nothing if not thorough. Also because I couldn't be arsed to put a shirt on him as well.
|
|
#
?
Jun 29, 2017 08:30
|
|
|
Because of the skeletal nipples??
|
|
#
?
Jun 29, 2017 11:15
|
|

|
Scaramouche posted:I realize everyone has moved on, but this is important. Why is this skeleton wearing pants? Because of boners.
|
|
#
?
Jun 29, 2017 11:50
|
|

|
So wait, Skeletor is female?
|
|
#
?
Jun 29, 2017 18:03
|
|
|
Anfauglir posted:So wait, Skeletor is female? That would help explain why Skeletor is constantly trying to capture He-man.
|
|
#
?
Jun 29, 2017 19:15
|
|

|
The world map is a big place, but there�s only a few areas we�re interested in right now. For now, let�s go shopping.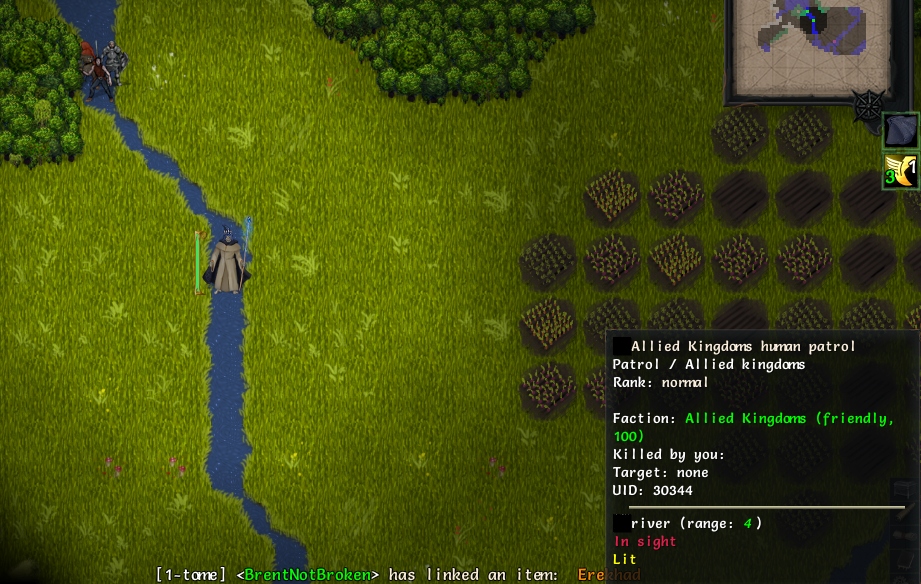 We pass by an Allied Kingdom patrol on the way. There are three types of wandering patrol we can encounter on the world map: - Allied Kingdom patrols: These guys are chill to everyone except undead. Fortunately, right now we�re wearing the Cloak of Deception. If we took it off, they would become hostile. - Zigur patrols: These guys are hostile to all magic users � as long as you know a spell talent of any kind, including a rune, these guys will be hostile to you. - Adventuring party: These guys are hostile to everyone. Adventurers are jerks. In all cases, should we encounter a hostile patrol, we�ll be drawn into a small forested area, facing about two or three elite enemies at once, with an exit to the world map on the other side. The best thing to do is to check if any of them can see you from your spawn position, and Rod of Recall out if they can�t. Failing that, just beeline for the exit portal. Actually staying and fighting is often a losing proposition. If you�re tired of dodging patrols, there are also addons you can install that allow you to evade them should you encounter one, or choose to stay and fight. I highly recommend them � patrols are one of the more annoying features of the game and are often functionally unwinnable with just a little bad luck and the wrong build.  This particular town is called �Last Hope.� They can sell some pretty valuable stuff, and it�s a good idea to stop by there first. 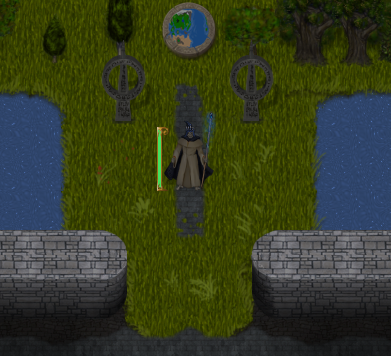  We enter Last Hope, taking a handy brochure from the entry sign along the way. 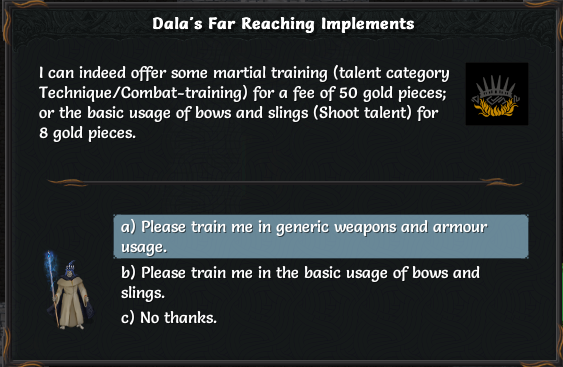 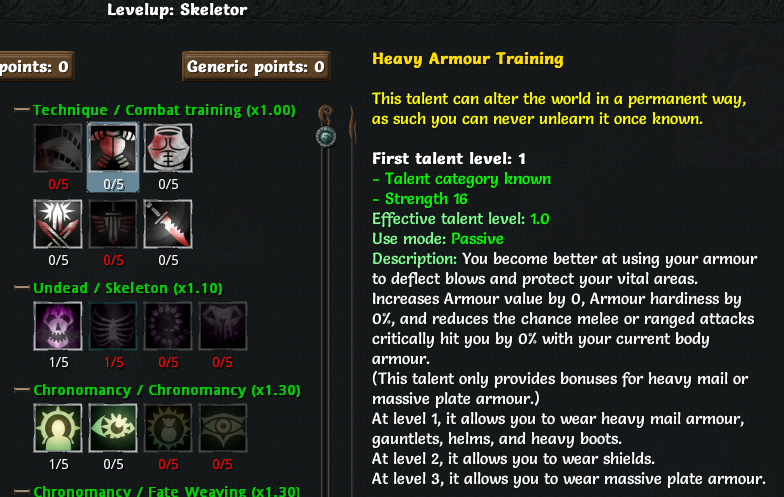 This is why we entered Last Hope first. Almost all classes � all weapon-based classes, at the very least � start with the Technique/Combat Training generic tree, but if you don�t, you can purchase it for 50 gold at any Last Hope weapon store. Being a Paradox Mage, not too many skills in this tree are of immediate relevance save Heavy Armor Training. A single point in this allows us to wear heavy armor, armored boots and gauntlets, practically tripling the amount of equipment we can wear. We�ll be investing a point in this as soon as we get one. 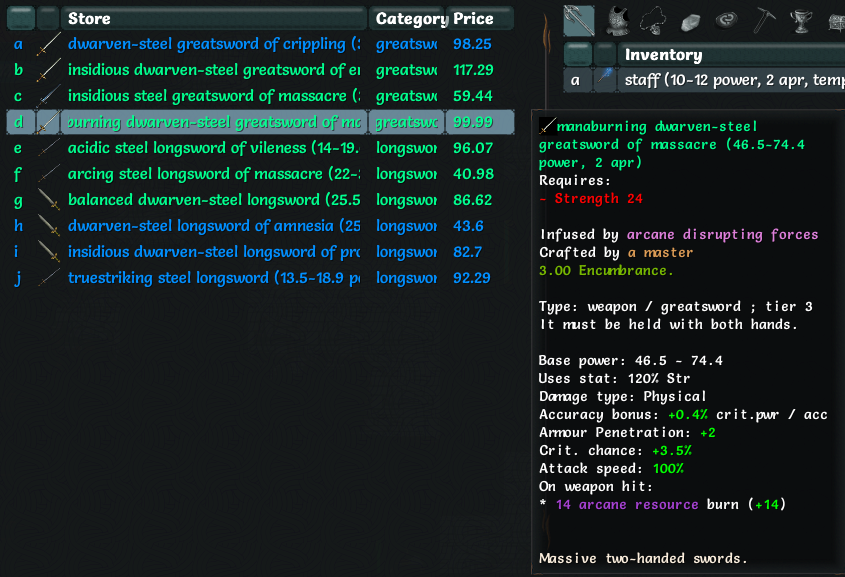 Since we�re here, let�s check out some of their melee weapons. We skimmed over them in the last update, but we might as well take a look for now. There are three types of common strength-based weapons � swords, axes and mauls, and their 2-handed equivalents � greatswords, battleaxes, and greatmauls. They differ mostly in their accuracy bonus � more on that later. The highlighted example is a t3 manaburning greatsword of massacre. �Manaburning� means that it reduces an opponent�s magic resource(s) with every hit, �of massacre� is a useful ego that just increases the damage it does. Some other points of note: - Requires Strength 24: We need 24 Strength to wear this. Note that this doesn�t mean base strength � we can fulfil the stat requirements for any item or skill through stat bonuses from equipment and even temporary buffs. �Statsticking� your way to a difficult-to-obtain skill is a common practice. - Infused by arcane disrupting forces: Items can have various power sources. The only ones really of note for the most part are �powered by arcane forces� and �infused by arcane disrupting sources�. In the former case, the item is inherently magical, and cannot be wielded by Antimagic characters. In the latter case, the item is inherently antimagic, and may cause you to fail spellcasts with one equipped. If you are neither antimagic nor a spellcaster, you can wear both types of items at once without any issue. - Damage Type Physical: The most common damage type for weapons, though very, very rare weapons exist that do elemental damage. It�s generally hard to go wrong by stacking physical damage bonuses for weapon-using classes. - Uses Stat 120% Strength: �Uses Stat� is a vitally important factor in how hard a weapon actually hits. There are some talents that modify this value, and those are usually important enough that major builds revolve around them. - Accuracy bonus: Every weapon type has a different accuracy bonus. Every point of accuracy you have above the defense of your opponent goes to the accuracy bonus, ensuring that having accuracy above the minimum amount needed to actually hit is never wasted. Swords have an accuracy bonus of +0.4% critmult per point of accuracy. - Crit chance and attack speed: Generally self-evident. Some weapons have an attack speed higher than 100% and will hit faster, but if you have more than one weapon equipped, your weapon-using skills (including bump attacks) will use the speed of the slower one. 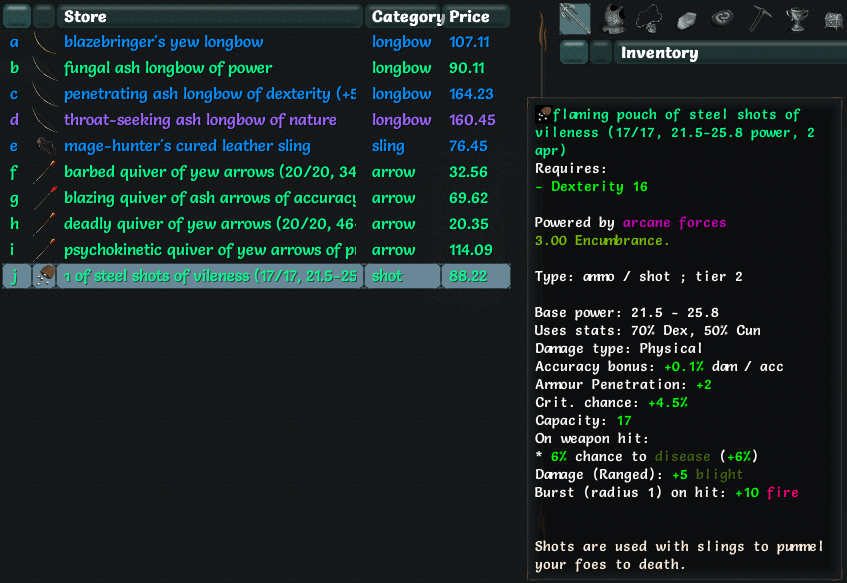 The ranged weapon shop�s inventory. Ranged weapons are different in that ranged weapons themselves have few properties � only firing speed, attack range, accuracy bonus, and maybe some additional bonuses depending on their ego. Most damaging stats come from the ammo type instead. The shots highlighted here, as we can see, scale with Dex and Cunning instead of strength and do bonus fire and blight damage with a chance to disease when fired. Ammo will slowly refill by one shot/arrow per turn whenever you rest, though most ranged-weapon using classes have skills that boost reload rate. 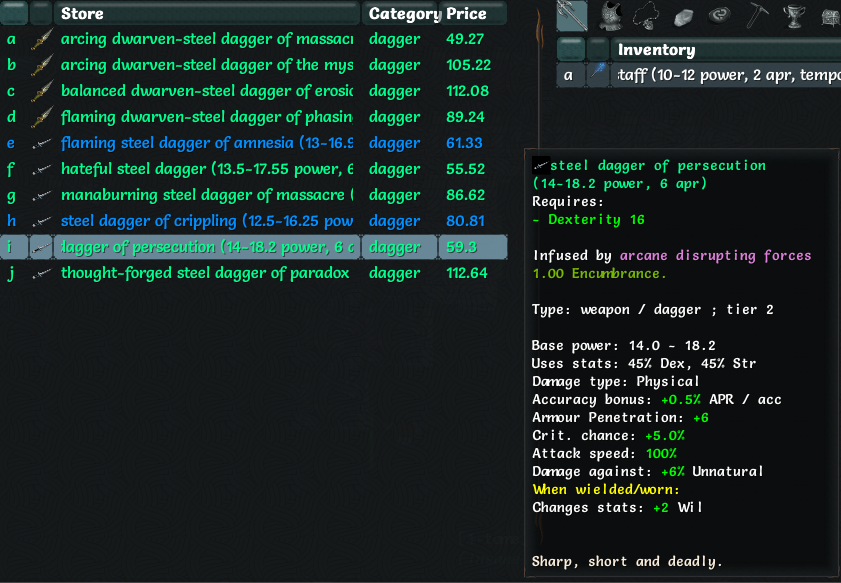 Daggers are one of the two weapons that can be used in both the mainhand and offhand slot, though the downside to this versatility is that they don�t hit nearly as hard. They scale with Dex and Strength instead of pure strength, though Rogues have a skill that changes them to scale off Dex and Cunning instead.  We found the infusion store. Being an undead, we can�t use any of them, but we can take a look at them to see what we�re missing out on. As you can see, there are two types of infusions: blank white ones, and infusions that scale with specific stats � the healing infusion of the wizard, for instance, would heal more HP as our Magic increased. - Healing infusion: These infusions are insta-cast infusions that will heal the displayed amount of health whenever used. These are always useful � instant skills and healing are a good combo. - Insidious Poison infusion: These infusions will poison enemies for a few turns and reduce their healing, as well as removing one magical debuff. These are fairly rarely used. - Regeneration infusion: These infusions will regenerate a large amount of health over a few turns. They usually heal more health than healing infusions if you can wait out the entire regeneration duration, but they are not instant. Now before we get into Movement and Wild infusions, we really have to get into Stun. Being Stunned is probably one of the most crippling debuffs in the game. This is also compounded by Stun being one of the most common debuffs in the game. When stunned, all your damage is reduced by 60%, and your movement speed is reduced by 50%. The worse part of Stun, however, is that upon being stunned, three random non-instant skills are put on cooldown, and any other skill you use will not cooldown until Stun clears. On higher difficulties (and even in normal, near the endgame) enemies can and will happily chain-stun you to death while you stand there unable to do anything. Wild Infusions are instant-use infusions that reduce your damage taken for a few turns and remove one associated debuff. They are most often used for, you guessed it, clearing stuns. Movement infusions give you a very large movement speed buff for a couple of turns, allowing you to close in on/run away from enemies easily. Almost as important, though, is the fact that they give you the �Free Movement� buff for several turns, a buff which prevents you from being stunned, pinned or dazed for its entire duration. On Insane and up, being hopped up on Free Movement whenever you enter combat is pretty much necessary for surviving the early-game until you hit 100% stun resistance, and being unable to use either of these is pretty much the number one reason why Undead are considered bottom-tier races (that and the ghoul�s -20% global speed penalty, which would be crippling on anyone). We�re not completely helpless � we have our heat beam rune, which will clear out one physical debuff, but it has a far longer cooldown than a wild infusion would. There�s a couple more infusion types not currently being sold in this shop � we might find them lying around later. 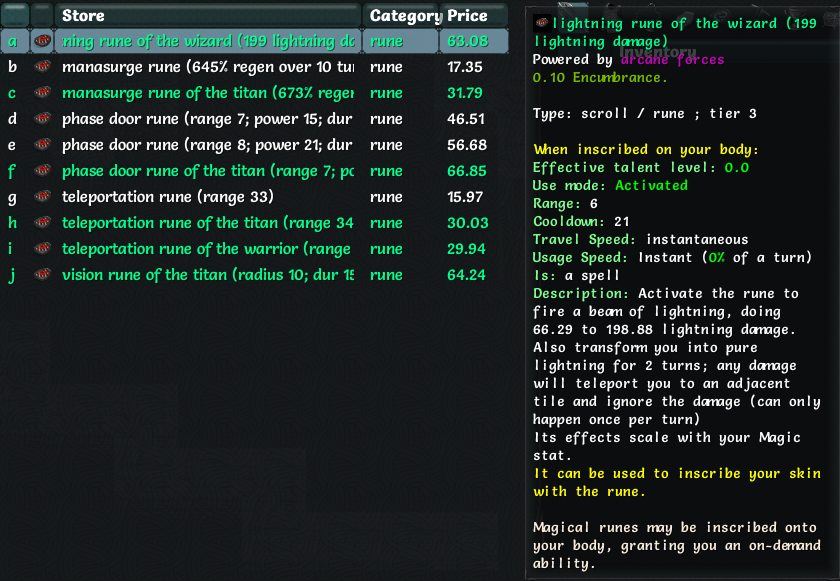 Since we�re undead, we�ll just have to make do with the rune shop. Let�s see what they�ve got right now. - Lightning Rune: Fires a beam of lightning and gives you Lightning Surge for a couple of turns, which teleports you to a nearby tile instead of taking damage. Can be fun, but shield runes are usually better for mitigating damage you can see coming. - Manasurge Rune: Passively increases your mana regeneration when resting, gives you a mana boost when used and increases your natural mana regeneration rate by a massive amount for a few turns. Most mana-using classes will want one of these, at least for the early game. - Phase Door Rune: Teleports you randomly in a small radius, and gives you an Out of Phase bonus for a few turns after teleporting, which raises your defense and all your resistances, and reduces the length of any new debuffs inflicted on you while active. The Out of Phase bonus is the main reason to use a Phase Door rune should you find one � if you have the option to, a Movement Infusion is usually a better escape option. - Teleportation Rune: Teleports you randomly in a large radius. Only useful as a last-ditch option, when you�re absolutely sure anywhere else would be better than where you currently are. Does not give you an out of phase bonus. - Vision Rune: Maps out the area around you in a large radius, boosts see stealth/invis for a few turns, and grants you Telepathy for a certain creature type, allowing you to sense them even if you can�t see them. A fairly pointless rune. 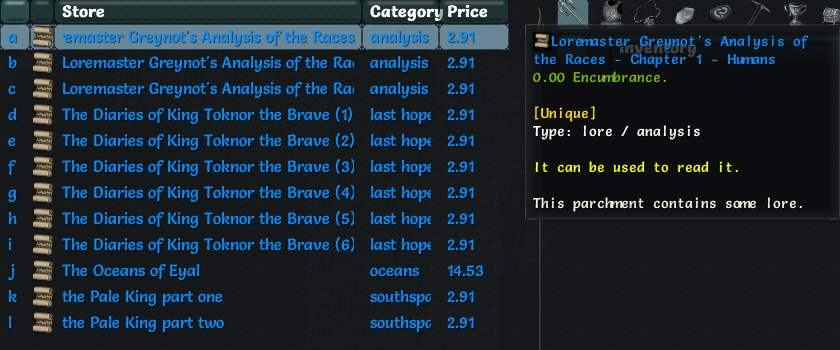 The library � it�s more of a bookstore, though. We don�t have the time or money to spare at the moment, maybe later. 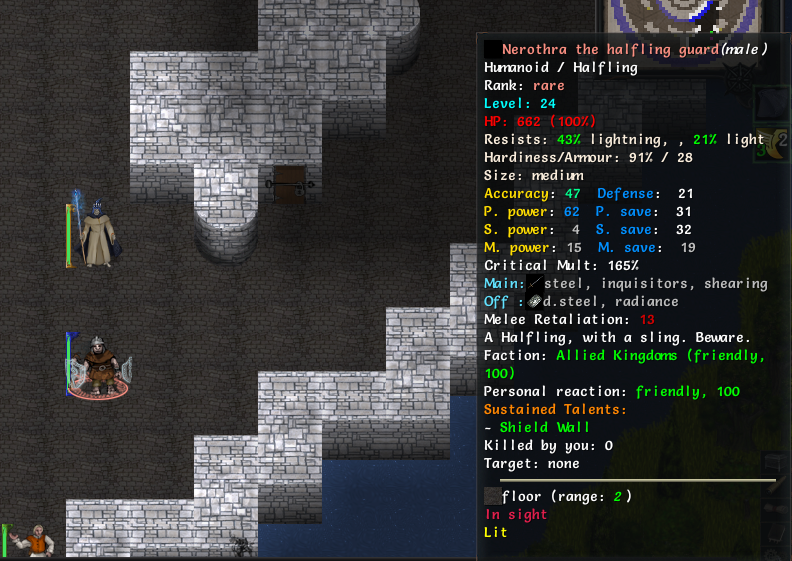 Our first rare of the run, and it�s a�Halfling guard just minding his own business. Rares have higher HP and stats than regular enemies of the same type, and a set of random skills. We don�t want to fight him right now, but there�s something else we can do with him. 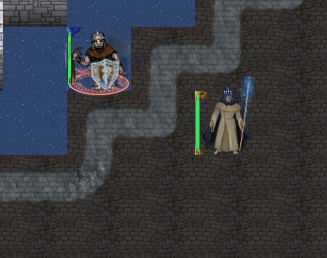 Step 1: Swap places with guard until guard is standing in water. Step 2: Wait. 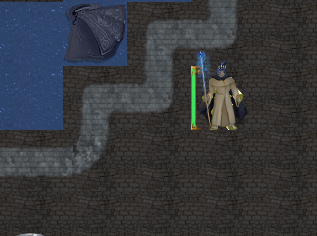 Step 3: Collect loot. What happens is that anything that needs to breathe � such as puny, non-skeleton creatures � have an Air resource that slowly drains whenever they enter water. When their Air runs out, they start taking heavy HP damage, eventually suffocating and dying. This is a mechanic that can be taken advantage of pretty much only in towns with water. It�s fairly pointless to do unless the NPC is a rare or randboss, in which case they drop an item and give EXP when drowned, and as such is only really useful on higher difficulties where rare/randboss NPCs have a decent chance of spawning in towns. Some people frown on it, but �Rod of Insta-drowning� is a fairly common addon for a reason. 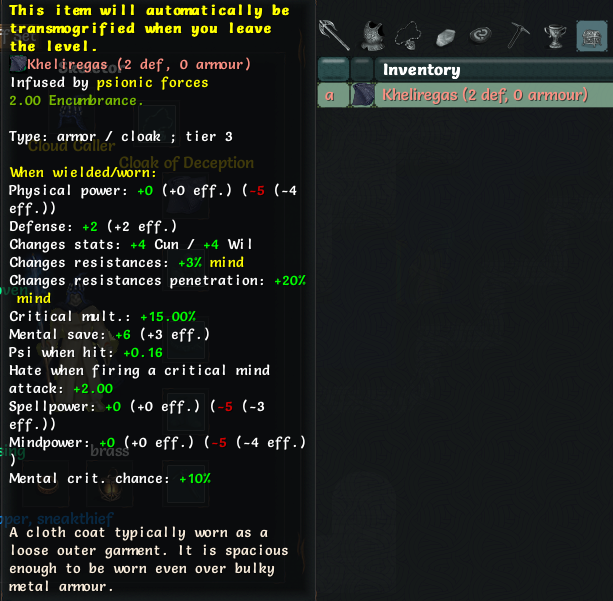 For our effort, we get our first rare item. This cloak gives various mindpower-related bonuses, which isn�t so helpful to us, but the stats and bonus critmult are nice. We might hang on to it, but we�ll have to remember to put the Cloak of Deception back on whenever we exit a dungeon.  Speaking of which, let�s check out the armor shop. We have five armor-related slots we can fill � body armor, gloves, hat, cloak and boots. Of these, body armor is probably the most important. There are four types of body armor � robes, light armor, heavy armor and plate armor. Robes and light armor can be worn by anyone as long as they fulfill the stat requirement (usually a small amount of strength), heavy armor requires a decent amount of strength and a point in Heavy Armor Training, and plate armor requires a lot of strength and three points in Heavy Armor Training. All body armor has three inherent properties � the bonus to armor, bonus to defense and increase in fatigue they give. Naturally, the heavier the armor, the heavier the fatigue, but the larger the armor bonus. The rest of their properties depend on their ego. This troll-hide light armor could be nice if we could get it � it gives a pretty hefty increase to HP, healmod and life regeneration. It�s out of our price range for now, though. 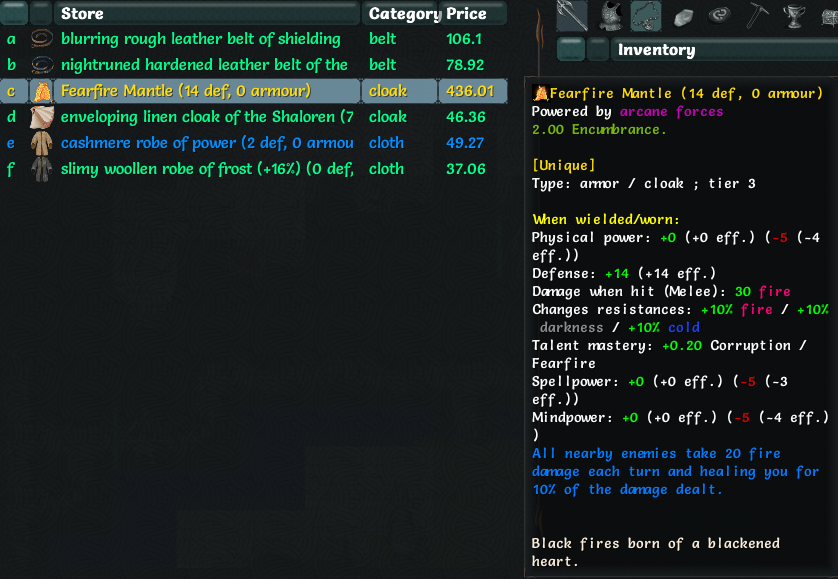 Speaking of out of our price range, this guy just� has a legendary cloak woven of pure hellfire hanging off the rack. It�s a nice cloak for fire-users � a category that does not include us, so we�ll probably leave it even if we scrape up the cash. 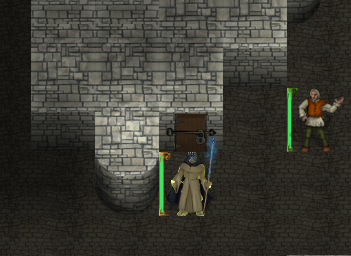 A dwarf in stained, battered armor opens the door.  Say, you interested in dismembering stuff and getting paid? Always. By the corpses of the gods, I love adventurers. Was about to become one myself when it suddenly hit me. And by �it�, I mean �my wife�. Har! What do you propose? I propose that I give you a list of monster parts to fetch, then you go and fetch them, then I make some blindingly amazing brews with said monster parts, then I get accepted into the Brotherhood of Alchemists. Sounds like a plan. I make excellent plans. And brews, which the Brotherhood will make me call �elixirs� once I�m in. And I�ll obey, because they have ways of getting what they want. Now where were we? Aiding you with getting into some Brotherhood. What�s in it for me? Oh, easy. You get a swig of each brew, of course. They�ll put hair on your chest, and possibly your eyelids and fingernails. And, if your aid proves the deciding factor, then I�ve got a real treat for you: perhaps the last Taint of Telepathy left in Maj�eyal. I accept. One last thing. There�s a few other fellows angling for the same slot in the Brotherhood as I am. They�re not going to be sitting on their hands while we�re at work here, so best move quick-like. Now, which of these do you want to help me with first: The Brew of Brawn, Stoneskin or Foundations? Or Elixirs, rather. Not Brews. Best get in the habit now, I suppose. Say, you interested in dismembering stuff and getting paid? Always. By the corpses of the gods, I love adventurers. Was about to become one myself when it suddenly hit me. And by �it�, I mean �my wife�. Har! What do you propose? I propose that I give you a list of monster parts to fetch, then you go and fetch them, then I make some blindingly amazing brews with said monster parts, then I get accepted into the Brotherhood of Alchemists. Sounds like a plan. I make excellent plans. And brews, which the Brotherhood will make me call �elixirs� once I�m in. And I�ll obey, because they have ways of getting what they want. Now where were we? Aiding you with getting into some Brotherhood. What�s in it for me? Oh, easy. You get a swig of each brew, of course. They�ll put hair on your chest, and possibly your eyelids and fingernails. And, if your aid proves the deciding factor, then I�ve got a real treat for you: perhaps the last Taint of Telepathy left in Maj�eyal. I accept. One last thing. There�s a few other fellows angling for the same slot in the Brotherhood as I am. They�re not going to be sitting on their hands while we�re at work here, so best move quick-like. Now, which of these do you want to help me with first: The Brew of Brawn, Stoneskin or Foundations? Or Elixirs, rather. Not Brews. Best get in the habit now, I suppose.We pick the Elixir of Foundations � it gives us an additional two generic points on completion. Right, here�s the list. Oh, one more thing. Got me some fellas out hunting for this stuff, and I�ll not play favourites. One of them brings me those ingredients before you do, and you�re out of luck. Hurry back. Oh, and one last other thing�if you have the time for another errand, though I�ve got no reward for this one. Well, I�ll see if I can help. Well, it�s like this, one of my wife�s friends has gone missing. A young alchemist in training, called Celia. Thing is, her husband died recently, and the grief done drove her mad. She used to go out to his grave every day, until one day she didn�t come back. Personally, I don�t think she was able to live without him; the two were inseparable. If you get a chance on your travels, could you pass by the mausoleum to the east and check�well, you get the idea. It�s funny what Death can do to people, how it can take over their minds�sometimes they forget it�s the living that matter. See she gets a proper burial � treated respectfully, eh? I�ll do what I can.And with that, we have our first Alchemist quest. There are four alchemists scattered around Maj�eyal, each competing for that coveted Brotherhood spot. Ingredients are automatically obtained by killing the associated monster, regardless of whether we have a quest that requires them or not. Every time we complete one alchemist quest, another alchemist will complete an elixir at random. If we help an alchemist to complete their third and final elixir (regardless of whether we helped them create their first two or not) we get an additional reward from them. Out of all the Alchemist quest rewards, the most valuable by far are the Elixir of Focus and the Elixir of Foundations, one of which we just picked up the quest for. Focus gives you 2 additional skill points, while Foundations gives you two additional generic points. Everything else, including the bonus rewards, is small potatoes compared to those. The final part of Ungrol�s dialogue unlocks an additional dungeon/sidequest for us. The Mausoleum is a pretty high-level zone, and a fair chunk of my deaths have come from underestimating it, so we won�t be going into it until much, much later. Now, let�s see what Ungrol wants. We can check our quest list, and thus our alchemist quest ingredients, with the �j� key. 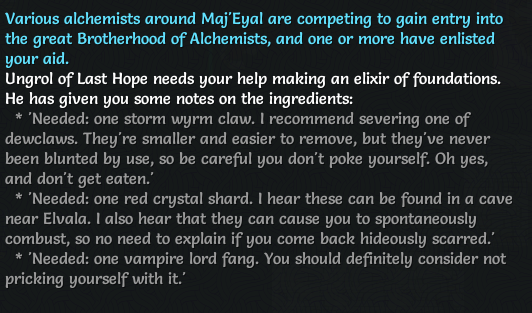 Well, this isn�t so bad. We can probably get most of these ingredients by about mid-game or so, unless we�re very unlucky. Sometimes, alchemist quests can ask for ingredients that are practically impossible to get until very late in the game. That�s about all we can do in Last Hope. Let�s keep shopping.  As we head out, some guy accosts us. We�ll be settling this matter soon enough � there�s no penalty in leaving it for later.  There�s a town that could be accessed here, under different circumstances. Zigur, the home of the Ziguranth, will only reveal itself to non-magic users. In order to access it, we have to first step foot on the world map with no magic resource bars to our name. This is relatively trivial for most nonmagical classes, and even some magical classes can accomplish this by uninvesting their skill points and exiting their first dungeon to the world map. Unfortunately, being a Skeleton Paradox Mage, this option is doubly-barred to us � neither skeletons nor ghouls can enter Zigur, and we would have been pretty hard-pressed to clear our starting zone with no skills. Zigur can sell pretty high-level gear (up to t3 gear), but will stock no arcane-powered items, and much of it is antimagic. Zigur is also the home of the Antimagic trial, a trial you can take at level 10. Defeating a gauntlet of mages unlocks the Antimagic generic tree, a tree that grants you additional offensive measures and defenses against spellcasters, but prohibits the use of spells and arcane equipment from then on.  This town is Shatur, the home of the Thaloren. It�s tucked away in a corner near the top of the map, hidden behind some trees. Many people forget about this town, and for good reason � almost nothing in-game mentions its existence, and there�s no plot-relevant reason to ever visit. 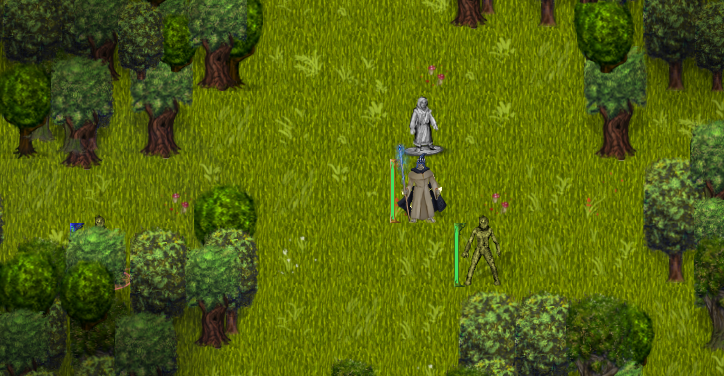 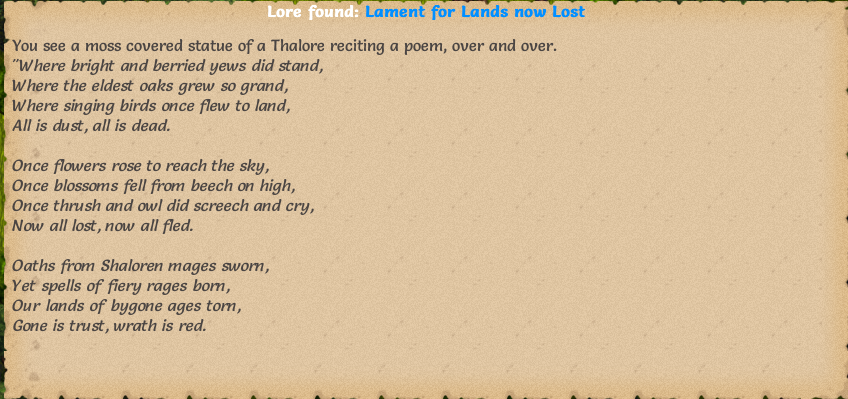 We enter Shatur, and grab a handy brochure from the town statue. We also see a Thalore necromancer nearby, trying to hide behind some trees. Looks like he�s trying to stay undercover. 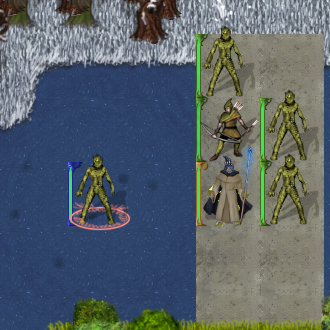 Not gonna happen. 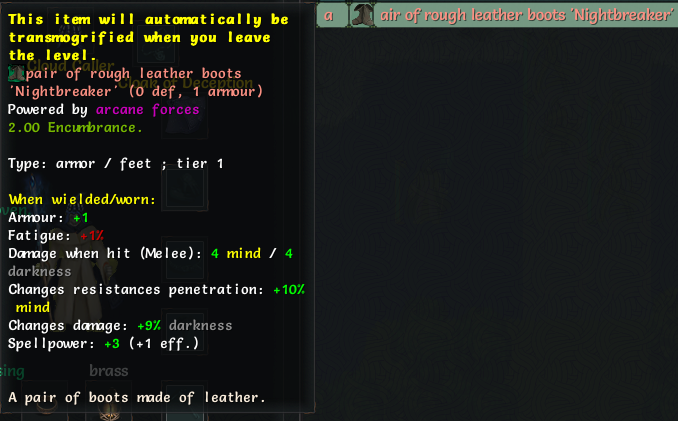 From his death we get enough EXP to level up, and a pair of rare boots. Well, we can always use the extra spellpower, though the rest of these bonuses won�t be of much use. 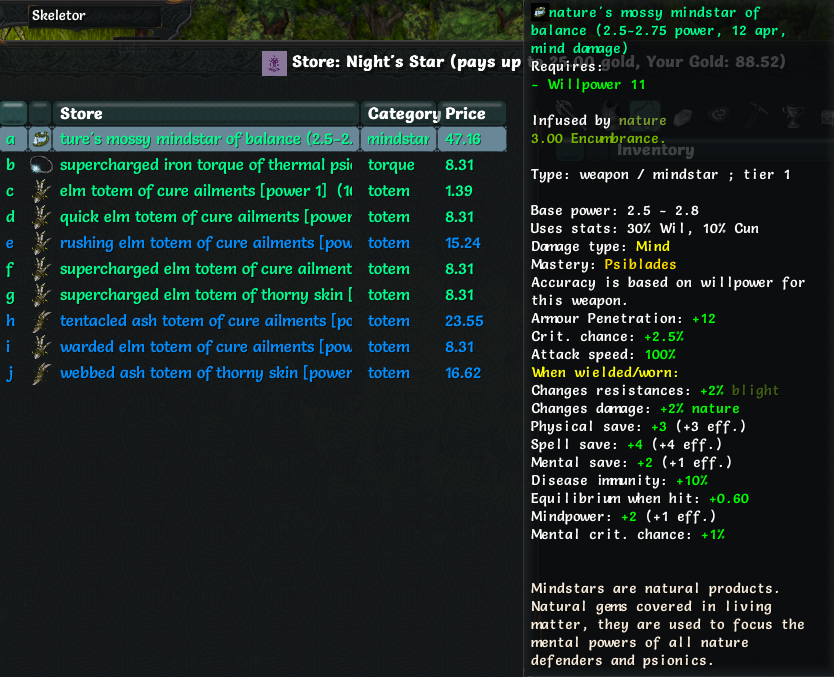 Shatur has a few melee weapon shops, one armor shop and an infusion store. As before, those aren�t really useful to us, armor shop excepted. We can check out this one store here, though. This store sells mindstars, torques and totems. Mindstars are an interesting weapon. Generally aimed at mindpower-using characters, mindstars offer various mindpower-related bonuses. Mindstars can be used both mainhand and offhand with no offhand damage penalty, have very high Armor penetration, and use Mindpower to calculate their accuracy (though this does mean they get no accuracy bonuses). Even with these quirks, base-level mindstars are fairly useless when it comes to actually hitting things � as you can see, their stat scaling and damage are pathetic. This changes if you purchase their associated weapon mastery talent, Psiblades, from Zigur. Most weapon mastery talents will boost your Physical Power and increase the damage done with their associated weapon, which is a pretty good effect in and of itself. In addition to that, Psiblades will boost their stat scaling, Armor penetration, bonus mindpower-related stats, and give them a fancy lightsaber-esque effect. As a result, high level mindstars with maxed-out Psiblades make for more than adequate melee weapons. Torques and totems are tools, and they go in our tool slot. They usually have one base effect, and additional bonuses depending on their ego. This shop sells one torque of thermal psionic shield (reduces all fire, cold, lightning or arcane damage we take by a flat amount for a few turns), a few totems of cure ailments (heals one poison or disease), and a few totems of thorny skin (buffs armor and armor hardiness for a few turns). We�ll skip these for now, but keep them in mind. 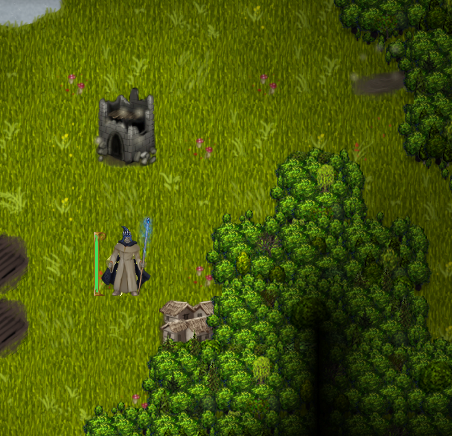 We head out of Shatur, and find the small town of Derth over to our right. 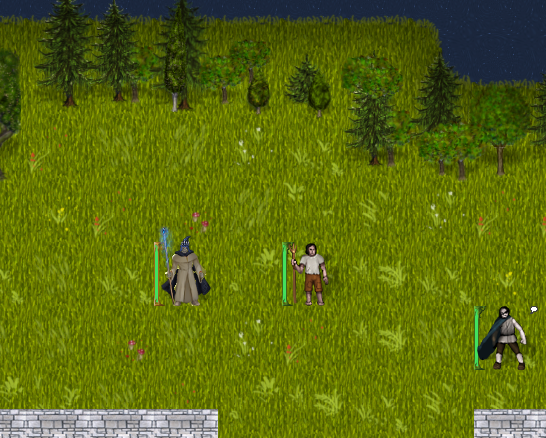 Derth doesn�t have any explanatory brochures or anything � it�s just plain old Derth. What it does have is this shady-looking guy over in the corner.  I am strong! What do you have to offer? I am strong! What do you have to offer?You can feel the man smiling inside his hood.  I have wealth and glory to offer, and some very valuable combat experience from fighting our men�So, what do you think? Are you up to it? I am ready for battle. Let�s go! I have wealth and glory to offer, and some very valuable combat experience from fighting our men�So, what do you think? Are you up to it? I am ready for battle. Let�s go!The man smiles in approval. Excellent! A great fighter is always willing to head into battle. You certainly won�t regret meeting us, indeed� So, are you ready to fight? Sounds like fun. I�m ready!The man quietly walks away, making a gesture for you to follow him. 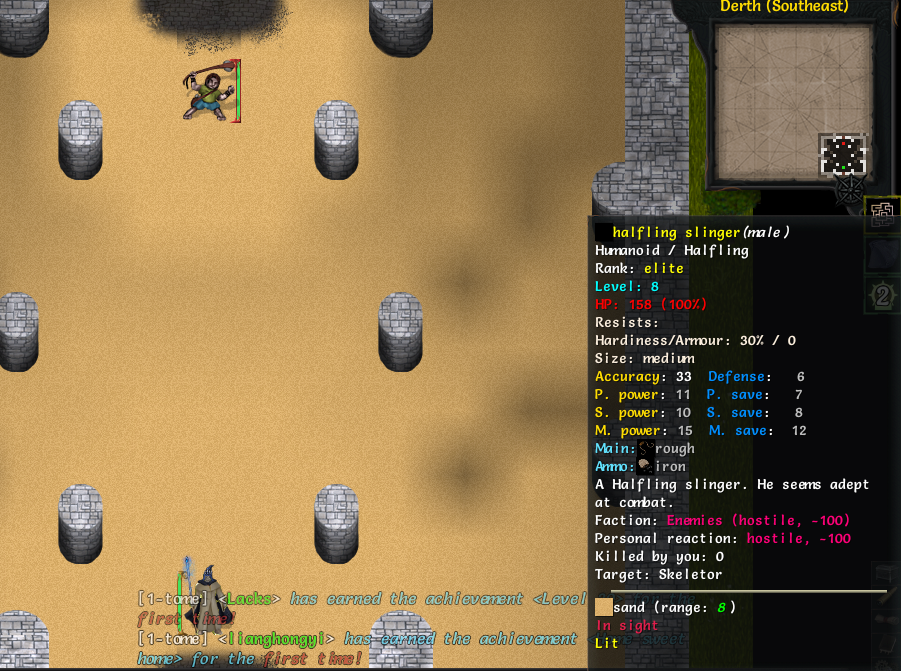 With that, we�re tossed into a short arena gauntlet. This Halfling slinger is our first opponent. He can be difficult to close in on with melee because he has Inertia Shot and Heave, two talents for knocking us back, and will just run away when he can�t use either. It�s no great concern for us, though. We finish him off with one Dust to Dust/Temporal Bolt combo before he even fires a shot. 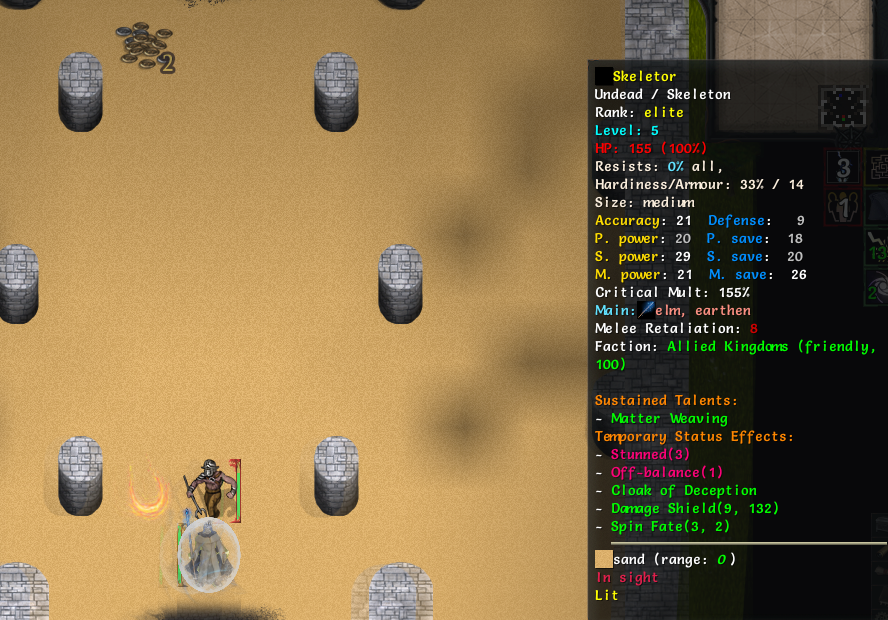 The second the slinger goes down, the next guy makes his opening play. The Gladiator is one of the tougher arena opponents � they like to Rush in to daze you, Shield Pummel to stun and damage you, then disengage and repeat. We shield up to avoid the damage, but we still got stunned. He also knocked us Off-Balance, which further lowers our damage.  We Dimensional Step away, and Dimensional Shift clears out the remaining turns of the Stun, thankfully. As he rounds the corner, we hit him with Time Skip � that�s him trapped in the time rift there. We�ll rest up and recover some paradox while we wait. 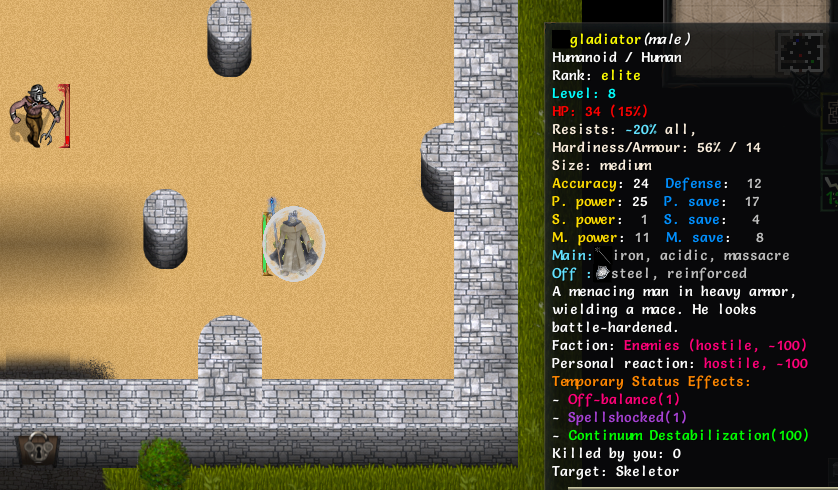 We hit him with a Repulsion Blast as he emerges. As you can see, Time Skipping him knocked him Off-Balance as well as inflicting Spellshock, which lowers his resistances. However, it also gave him Continuum Destabilization, a buff that increases his resistance to space-time manipulation effects. If we keep on hitting him with teleportation/time removal spells, he�ll shrug off more and more of them. Not that it�s a concern, because one more Dust to Dust will finish him off. 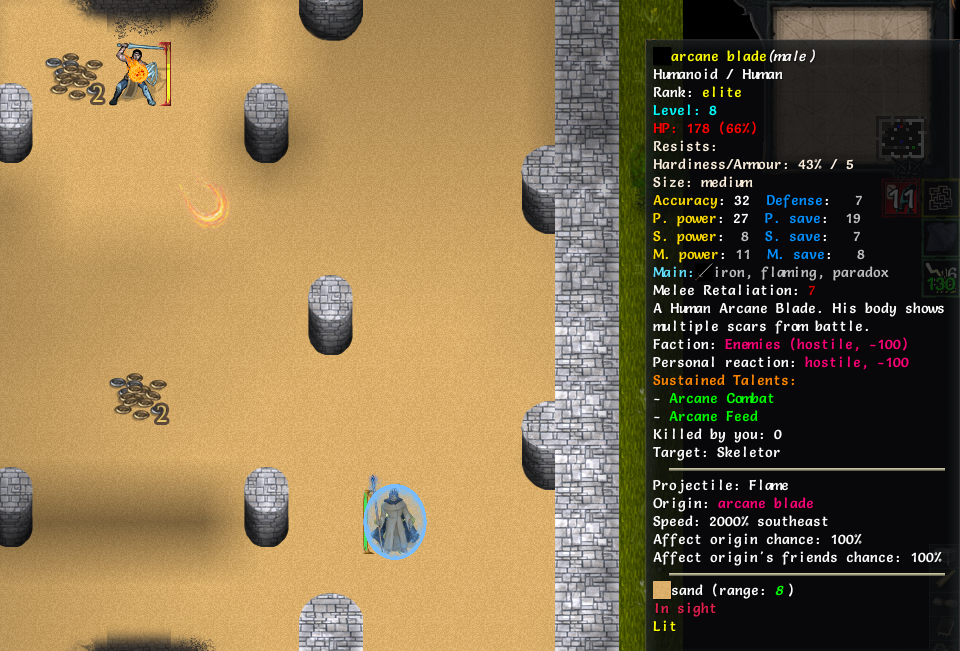 We finish him off and our final opponent spawns in. Arcane Blades can be tough, but this guy won�t really leverage Arcane Combat � he just stands there and tosses Flame at you whenever it goes off cooldown. Not a big threat compared to the gladiator, but chances are you might have used up all your healing/debuff removal skills by this point, in which case the fire damage might be hard to deal with. 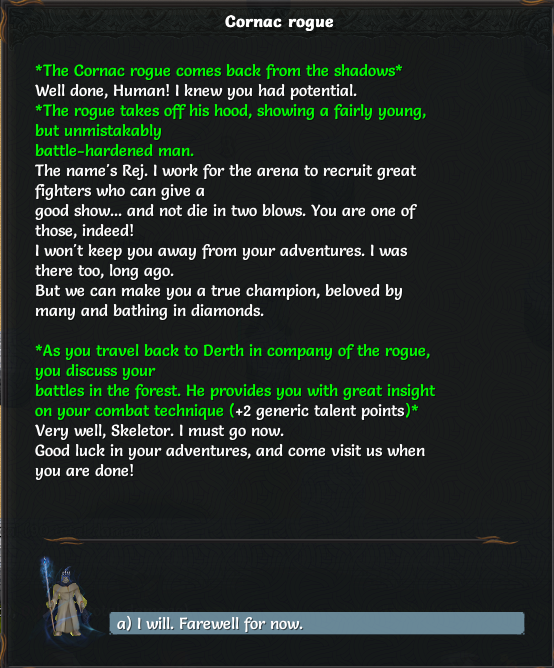 We trade bolts and beams back and forth for a bit before he goes down, and we get our true reward. Completing this arena quest gives you 2 extra generic points, and unlocks Arena mode if you haven�t already done so. If you�re having trouble with this quest, you can put it off until later, but it�s vitally important that you complete it before you hit level 14. 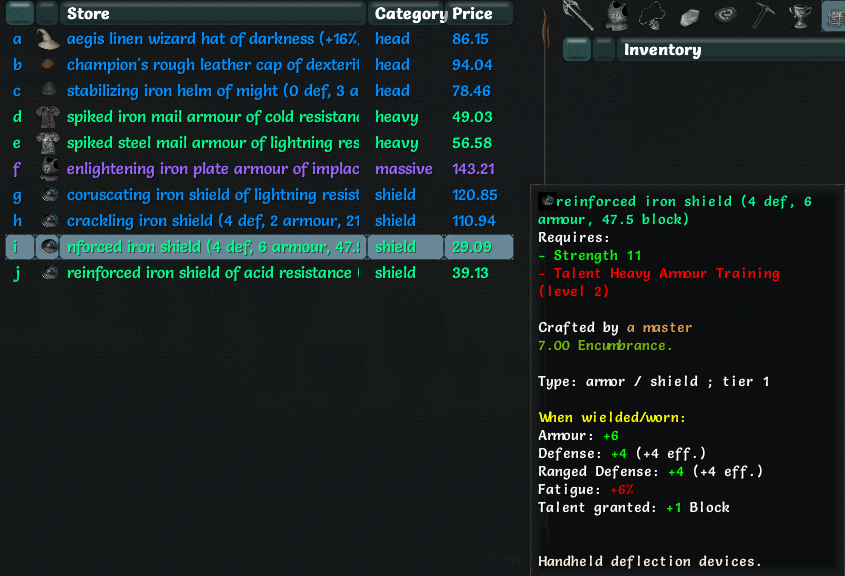 Now that that�s over with, it�s time to go shopping. We ignore the infusion shop and weapon shops, and check out the armor store. Not much of note, but this store sells the first shields we�ve encountered this game. Shields are offhand items that can only be worn with level 2 Heavy Armor Training. They grant additional armor, defense and the Block talent � the turn after using Block, the shield will absorb some amount of all melee attacks that hit you while blocking, up to its block value. It has a cooldown and is a non-instant talent, so its use is slightly limited. There�s usually no reason for non-shield using classes to use shields. 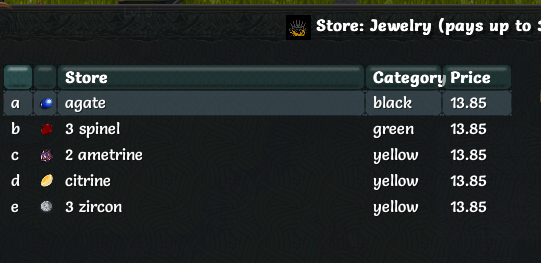 This store sells gems, which I haven�t mentioned yet. We�ve been picking up a few of those, but they�re of no use to us at the moment. Gems are really only used by Alchemists and Mindslayers � the former requires magical gems to power almost all their spells, while the latter can TK-wield them for a stat boost or consume them for psi. For the most part we�ll just be selling ours. There are a couple of ways in which they can be useful for us, which I�ll mention when they become relevant. 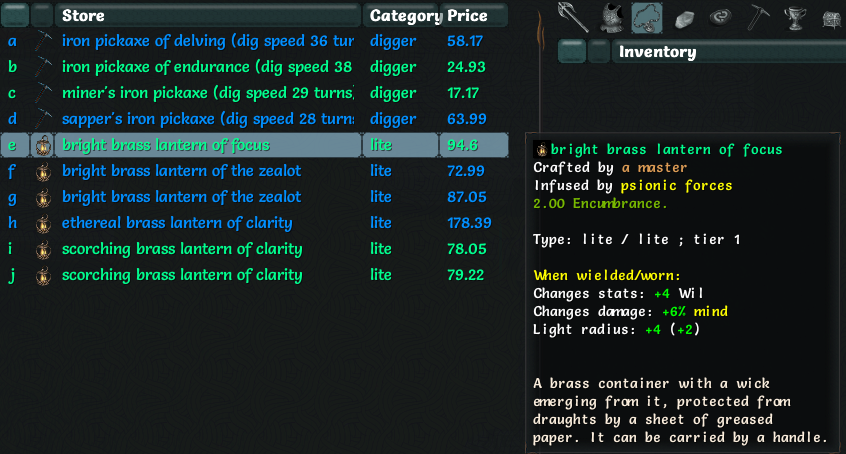 This store sells pickaxes and lights. Having a pickaxe in your inventory allows you to use the Dig talent to remove a diggable wall, although the long cooldown means you can only effectively use it outside of combat. They can also be equipped in the tool slot for their other miscellaneous bonuses. Lights, as previously mentioned, go into your light slot and boost your light radius. More light radius would be nice, but the only non-antimagic bright lantern on sale is a little expensive. 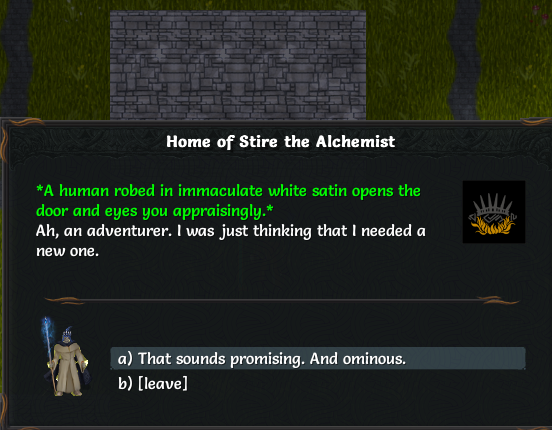 Finally, the unmarked house belongs to Stire the alchemist, another potential quest-giver. He doesn�t offer the Elixir of Focus, though, so we ignore him for the moment. 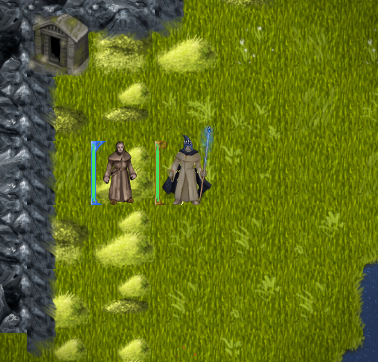 As we head out of Derth and downwards, we pass by this chap standing in the middle of nowhere. Before you stands a young man, a novice mage by his looks.  Good day, fellow traveler! What brings an apprentice mage out into the wilds? Ah, my story is a sad one�I should not trouble you with it, friend. It is no trouble at all. Please tell me. Well, if you insist�I am a novice mage, as you might have noticed, and my goal is to be accepted in Angolwen and be taught the secrets of the arcane. Who are the people of Angolwen? The keepers of ar�er, I do not think I am supposed to talk about them, sorry my friend� In any case, I must collect many items. I have some already, but I am still looking for an arcane-powered artifact. You do not happen to have one, I imagine�Well, if you do, tell me, please! I will keep that in mind. Good day, fellow traveler! What brings an apprentice mage out into the wilds? Ah, my story is a sad one�I should not trouble you with it, friend. It is no trouble at all. Please tell me. Well, if you insist�I am a novice mage, as you might have noticed, and my goal is to be accepted in Angolwen and be taught the secrets of the arcane. Who are the people of Angolwen? The keepers of ar�er, I do not think I am supposed to talk about them, sorry my friend� In any case, I must collect many items. I have some already, but I am still looking for an arcane-powered artifact. You do not happen to have one, I imagine�Well, if you do, tell me, please! I will keep that in mind.We don�t have one yet, but they�re not especially rare. I�m sure we�ll find one that we don�t need sooner or later. 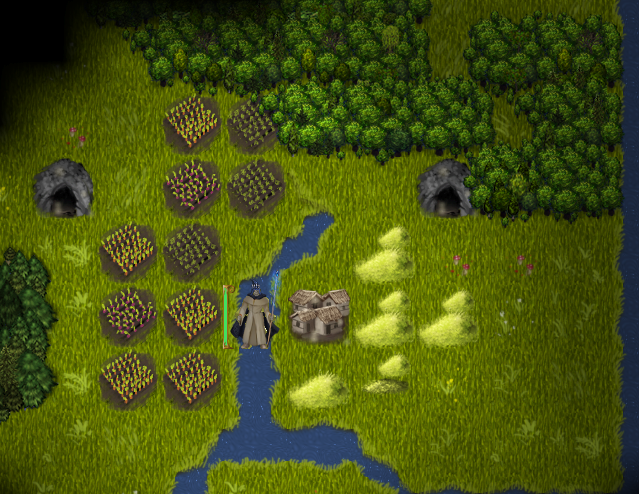 The hometown of the Shaloren, Elvala is also hidden by some trees, near the bottom of the left side of the map. 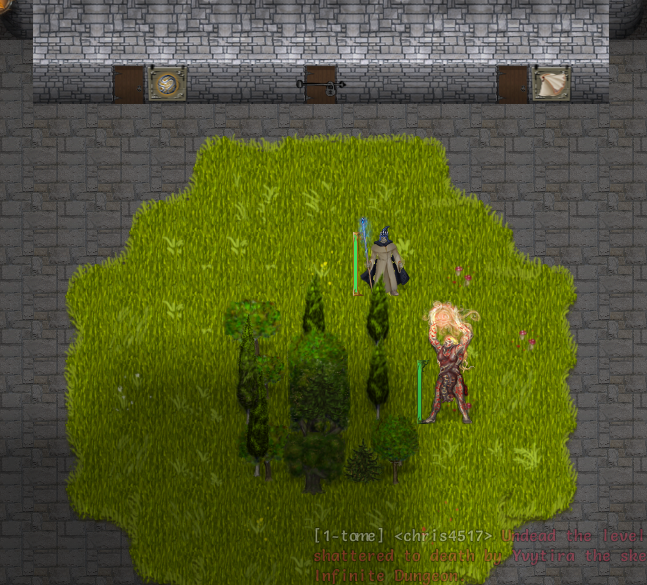 No brochures, but it does have some ogres just hanging out and chilling in the park. 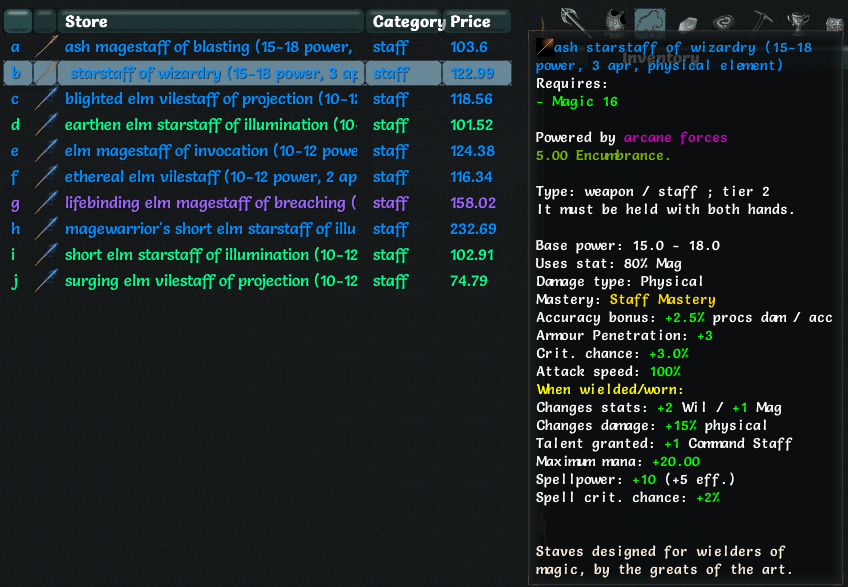 A shop in Elvala sells staves, which is as good a time as any to go into them. Staves give a large bonus to spellpower and a small bonus to spell crit chance. They also give a bonus to one particular damage type, which can be tuned with Command Staff. Staves can boost any damage type except Nature and Mind � those are purely the domain of mindstars. Staves aren�t really meant for hitting in melee, but they have one interesting quirk. As you can see, the accuracy bonus is +2.5% Proc damage per point of accuracy. This is a pretty ridiculous accuracy bonus, and with certain very specialized builds/classes, staves can become very powerful weapons. For the most part, though, you�re better off just holding one to boost your spellpower and sticking to blasting people with spells. 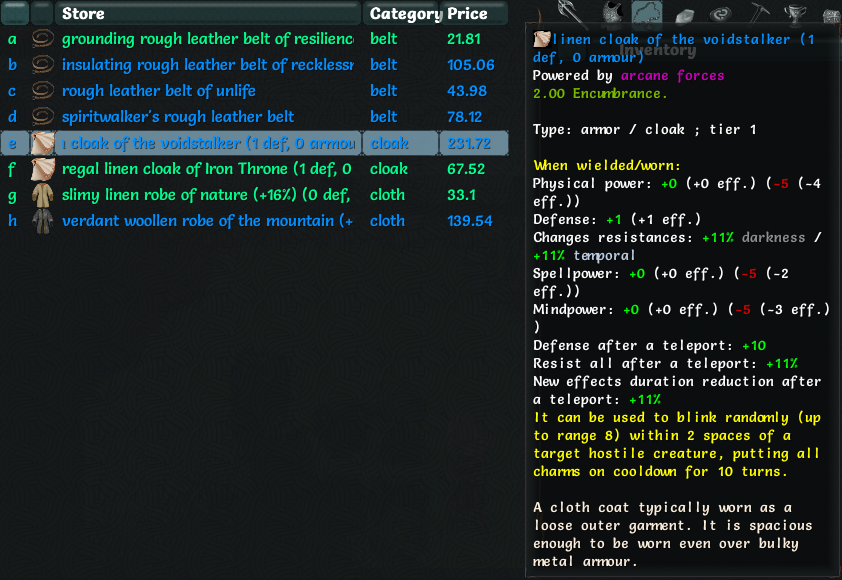 Elvala also has a sword shop and a rune shop with nothing of particular interest in it. Their light armor shop has an interesting cloak, though. While phase door runes will only give an out of phase bonus when using them specifically, Voidstalker items will grant you an out of phase bonus whenever you use any teleportation skill � and they can be stacked for even larger bonuses. Very nice on a Paradox Mage, but unfortunately it�s out of our price range for now. 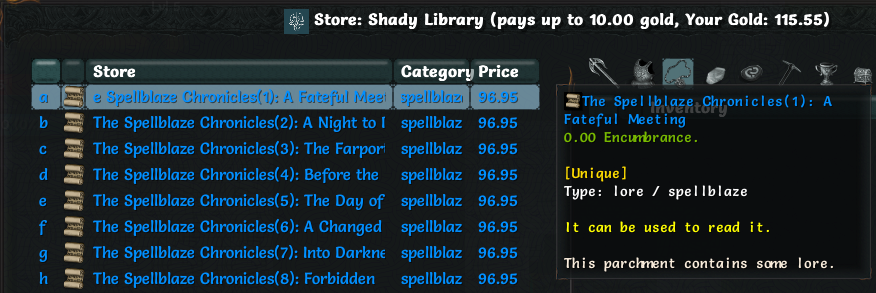 All the local bookstore contains is a trashy romance novel. Pretty pricey one, too. We leave it alone for now. 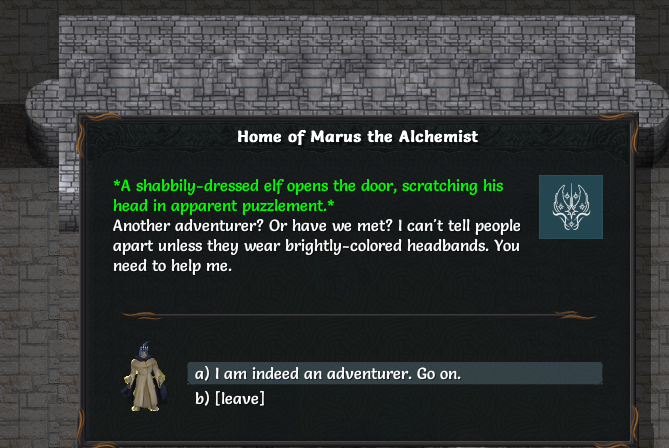 Finally, Marus the Alchemist lives in the center of Elvala. Another potential quest-giver, but he doesn�t offer the Elixir of Focus, so we won�t take him up on any of those offers for now. 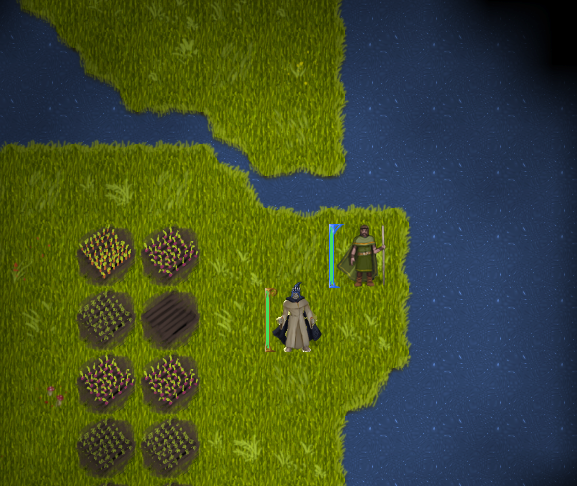 You know who does? Agrimley the Hermit, a reclusive bugger who can show up at several different points on the map, usually tucked away in a well-hidden spot. This is probably one of the more convenient locations that he can be encountered in. After a great deal of pounding, a Halfling wrapped in charred, smoking robes opens the door. He looks irritated.  IT�S NOT ENOUGH THAT I WORK ALL MORNING TO MAKE A POTION THAT ENDS UP NEARLY BLOWING MY rear end OFF, BUT NOW I�VE GOT IDIOTS BEATING DOWN MY DAMNED FRONT DOOR WITH WHAT SOUNDS LIKE A BATTERING RAM, AND YES, I HEARD IT, THOUGH I CAN HARDLY MAKE OUT A DAMNED THING WITH THESE BLEEDING, CONCUSSED EARS. WHAT DO YOU WANT? Perhaps there�s something I can help you with. SPEAK UP, HAMBRAIN. I�VE JUST GOTTEN MY EARDRUMS BLOWN OUT BY YET ANOTHER BY-THE-PYRE POTION GONE SOUTH, REMEMBER? THRICE-DAMNED THING WAS GOING PERFECTLY TOO. TOKNOR�S TACKLE! I SAID, MAYBE THERE�S SOMETHING I CAN HELP YOU WITH. STILL CAN�T HEAR YOU, BUT LISTEN UP. THE BROTHERHOOD OF ALCHEMISTS IS ACCEPTING THE FIRST NEW APPLICANT TO DEMONSTRATE, AMONG OTHER THINGS, THREE VERY COMPLICATED ELIXIRS. I WOULDN�T BOTHER TRYING TO JOIN SUCH A GROUP OF ADDLE-BRAINED DEGENERATES, BUT IT SO HAPPENS THAT THE BROTHERHOOD OF ALCHEMISTS HOLDS THE SECRET CURE FOR THE COMMON BLOWN-OFF rear end, WHICH IS OF SOME INTEREST TO ME. HOW CAN I HELP? THE BROTHERHOOD KNOWS DAMNED WELL WHAT ADVANCES IN THE FIELD OF ALCHEMY WOULD DO FOR EVERY CIVILIZATION IN EXISTENCE, BUT THEY HOARD THEIR FEW WORTHWHILE SECRETS LIKE A GREAT BROWN WYRM SITTING ON ITS PILE OF CRAP. YOU KNOW WHAT? I DON�T EVEN WANT THE rear end-CURE FOR ME. I�M GOING TO STEAL EVERY SECRET THEY�VE GOT, WRITE THEM DOWN, MAKE A HUNDRED COPIES, AND NAIL ONE TO EVERY TREE IN EVERY VILLAGE IN MAJ�EYAL. THAT�S NOT A VERY HERMIT-LIKE ATTITUDE. AND THEN WHAT WOULD THEY DO? ONCE THEIR PRECIOUS SECRETS � WHICH, IN ALL PROBABILITY, EITHER DON�T EXIST OR ARE THINGS LIKE RECIPES FOR ELIXIRS OF WHO-GIVES-A-FLYING-DUCK � ARE OUT IN THE OPEN, THE BROTHERHOOD OF ASSWIPES WILL HAVE NOTHING TO HOLD IT TOGETHER BUT ELIXIRS OF THEIR TEARS AND WIDESPREAD DISDAIN FROM THE REST OF THE WORLD. SPEAK UP, THEN. ARE YOU IN OR OUT? I�M IN. IT�S NOT ENOUGH THAT I WORK ALL MORNING TO MAKE A POTION THAT ENDS UP NEARLY BLOWING MY rear end OFF, BUT NOW I�VE GOT IDIOTS BEATING DOWN MY DAMNED FRONT DOOR WITH WHAT SOUNDS LIKE A BATTERING RAM, AND YES, I HEARD IT, THOUGH I CAN HARDLY MAKE OUT A DAMNED THING WITH THESE BLEEDING, CONCUSSED EARS. WHAT DO YOU WANT? Perhaps there�s something I can help you with. SPEAK UP, HAMBRAIN. I�VE JUST GOTTEN MY EARDRUMS BLOWN OUT BY YET ANOTHER BY-THE-PYRE POTION GONE SOUTH, REMEMBER? THRICE-DAMNED THING WAS GOING PERFECTLY TOO. TOKNOR�S TACKLE! I SAID, MAYBE THERE�S SOMETHING I CAN HELP YOU WITH. STILL CAN�T HEAR YOU, BUT LISTEN UP. THE BROTHERHOOD OF ALCHEMISTS IS ACCEPTING THE FIRST NEW APPLICANT TO DEMONSTRATE, AMONG OTHER THINGS, THREE VERY COMPLICATED ELIXIRS. I WOULDN�T BOTHER TRYING TO JOIN SUCH A GROUP OF ADDLE-BRAINED DEGENERATES, BUT IT SO HAPPENS THAT THE BROTHERHOOD OF ALCHEMISTS HOLDS THE SECRET CURE FOR THE COMMON BLOWN-OFF rear end, WHICH IS OF SOME INTEREST TO ME. HOW CAN I HELP? THE BROTHERHOOD KNOWS DAMNED WELL WHAT ADVANCES IN THE FIELD OF ALCHEMY WOULD DO FOR EVERY CIVILIZATION IN EXISTENCE, BUT THEY HOARD THEIR FEW WORTHWHILE SECRETS LIKE A GREAT BROWN WYRM SITTING ON ITS PILE OF CRAP. YOU KNOW WHAT? I DON�T EVEN WANT THE rear end-CURE FOR ME. I�M GOING TO STEAL EVERY SECRET THEY�VE GOT, WRITE THEM DOWN, MAKE A HUNDRED COPIES, AND NAIL ONE TO EVERY TREE IN EVERY VILLAGE IN MAJ�EYAL. THAT�S NOT A VERY HERMIT-LIKE ATTITUDE. AND THEN WHAT WOULD THEY DO? ONCE THEIR PRECIOUS SECRETS � WHICH, IN ALL PROBABILITY, EITHER DON�T EXIST OR ARE THINGS LIKE RECIPES FOR ELIXIRS OF WHO-GIVES-A-FLYING-DUCK � ARE OUT IN THE OPEN, THE BROTHERHOOD OF ASSWIPES WILL HAVE NOTHING TO HOLD IT TOGETHER BUT ELIXIRS OF THEIR TEARS AND WIDESPREAD DISDAIN FROM THE REST OF THE WORLD. SPEAK UP, THEN. ARE YOU IN OR OUT? I�M IN.He hands you a slip of paper with the names and properties of some elixirs on it. THE INGREDIENTS OF THESE SUCKERS ARE SORT OF A TRADE SECRET, SO I�LL TELL YOU ABOUT ONE AND WE�LL SEE HOW THAT GOES. OH, AND I�LL MAKE ENOUGH FOR YOU TO HAVE A SWIG WHEN I�M DONE, SO GOOD FOR YOU. WHICH ONE WILL IT BE? JUST POINT AT THE DAMNED LIST. I HAVEN�T HEARD A THING YOU�VE SAID YET. I HOPE TO HELL YOU�RE NOT STANDING THERE TRYING TO SELL ME SOMETHING.We indicate the Elixir of Focus, of course. HERE�S THE LIST OF THE STUFF I NEED. MOST OF IT WILL TRY TO KILL YOU, SO I HOPE YOU�RE NOT INCOMPETENT. I�VE GOT PLENTY OF INCOMPETENT HELP ALREADY. I HOPE FOR YOUR SAKE THAT YOU�RE SMARTER AND FASTER THAN THEM. I�LL BE OFF.Let�s see what Agrimley wants. 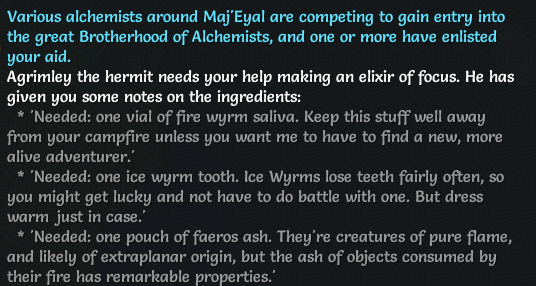 Ugh, Agrimley wants teeth from up to two different wyrm species. That�s going to be a bugger to get unless we get fairly lucky. If we don�t, we�ll only be able to complete that request pretty late in the game. We�ll just have to complete Ungrol�s request first and cross our fingers. There�s a one-in-twelve chance that Agrimley will finish the Elixir of Focus upon completion of Foundations, which is unfortunate, but that�s life. Anyway, that�s the shopping over and done with for now. Some okay stuff that�s out of our price range for now, so we�ll keep killing things and see how things turn out. We�ll be back to your regularly scheduled dungeon-crawling next update. Inadequately fucked around with this message at 06:38 on Jul 1, 2017 |
|
#
?
Jul 1, 2017 03:14
|
|
|
Hoo boy, that graveyard quest.
|
|
#
?
Jul 1, 2017 06:12
|
|


|
I can't remember, do the shop contents in Last Hope still update at various story intervals? I seem to remember they did at one point, but there's literally only one point at which I ever bother to return to Last Hope, aside from turning in the alchemist quest. Speaking of, the Alchemist Quests are... somewhat annoying in execution. You've got fifty levels before you hit your cap, every fifth level gives you +2 class points and +0 generics, every other level gives you +1 of each(aside from the vast last and very first levels). So that's ~60 class skill points and ~40 generic skill points you get by just normally levelling up(ignoring the extra rewards of the 50th level because in my experience I usually don't get that one until the final battle is halfway through), meaning that +2 of each is a pretty decent percentage of your total available skill points throughout the game. But, you can be randomly screwed out of getting some of them if the first potion that autocompletes after doing one of those two potions, is the other one, or if what you need to kill for them just doesn't spawn(there's also a couple of things that can pop up on the list that literally only spawn in one zone the entire game, or two if you're starting as a Yeek). I'm also pretty sure that there's one or two ingredients that, at least in earlier versions of the game, you couldn't actually get from their associated creature until you had the requisite alchemist quest. Or maybe the game just bugged out on me regularly during those versions.
|
|
#
?
Jul 1, 2017 11:38
|
|
|
The shops will restock a few times, whenever you complete specific plot-important quests. Those quests are so late in the game, though, that you'll almost certainly have found better stuff than what the shops are offering. The main reason to check the stores at those points are to look for specific rare egos and to buy high-level infusions/runes, which can be pretty uncommon.
|
|
#
?
Jul 1, 2017 17:27
|
|
|
I feel like the Mausoleum quest shouldn't even activate until after you're done with Dreadfell. It's just going to kill anyone who can't make it through there.
|
|
#
?
Jul 1, 2017 17:35
|
|


|
wiegieman posted:I feel like the Mausoleum quest shouldn't even activate until after you're done with Dreadfell. It's just going to kill anyone who can't make it through there. Well, if you want to make it easier on yourself, you can always pop in before the Dreadfell, Recall out, do the Dreadfell, then hit up the Mauseoleum and it'll be at a lower level.
|
|
#
?
Jul 1, 2017 17:41
|
|
|
quote:This store sells pickaxes and lights. Having a pickaxe in your inventory allows you to use the Dig talent to remove a diggable wall, although the long cooldown means you can only effectively use it outside of combat. They can also be equipped in the tool slot for their other miscellaneous bonuses. Also, it's not really a 'cooldown' per se - you can use Dig over and over again...it's just Dig takes a full 20 turns (or whatever) to complete the action. PurpleXVI posted:there's also a couple of things that can pop up on the list that literally only spawn in one zone the entire game, or two if you're starting as a Yeek
|
|
#
?
Jul 1, 2017 17:50
|
|


|
Inadequately posted:Staves aren�t really meant for hitting in melee, but they have one interesting quirk. As you can see, the accuracy bonus is +2.5% Proc damage per point of accuracy. This is a pretty ridiculous accuracy bonus, and with certain very specialized builds/classes, staves can become very powerful weapons. For the most part, though, you�re better off just holding one to boost your spellpower and sticking to blasting people with spells. I know what this is, but it might be a good idea to explain what the accuracy bonus is and how you get it for the people who don't (unless you did and I missed it).
|
|
#
?
Jul 1, 2017 19:00
|
|
|
MagusofStars posted:You can also be hosed over by 'alt' versions of the zones - some of the one-zone only enemies *also* only appear in the normal version of the zone, not the alt. Most notably, Luminous Horrors and their related cousins only appear in normal Lake of Nur or a vault which may or may not pop up. Generally the ones I have the most trouble locating tend to be vampires lords(since they're a mid-tier, so while Elders pop up in the dozens by the end-game, a bit of bad luck can leave you missing lords for a long time) and those disease-related bugs from the Yeek starter areas since they only have one other place in the game where they tend to spawn. As for luminous horrors, I could swear I'd met them in the Dreadfell wandering around normally before, but that may have been an old version. Aside from that, yeah, Lake of Nur normal and vaults would be it.
|
|
#
?
Jul 2, 2017 00:28
|
|
|
Lazy Bear posted:Magic is evil. EVIL. Evil and bad and wrong. You need to channel the forces of nature and become an immortal juggernaut. Oh please. Name one occasion widespread use of magic has led to bad results. Edit: also the alchemist quest dialogue always tickles my funny bone. Double edit: there's another way you can theoretically get hard to obtain quest ingredients. It will, however, eventually kill you. Goatse James Bond fucked around with this message at 02:13 on Jul 2, 2017 |
|
#
?
Jul 2, 2017 02:01
|
|

|
Prism posted:I know what this is, but it might be a good idea to explain what the accuracy bonus is and how you get it for the people who don't (unless you did and I missed it). I did - it's explained when discussing the various combat stats of melee weapons. Mini-update later today, maybe. Inadequately fucked around with this message at 03:41 on Jul 2, 2017 |
|
#
?
Jul 2, 2017 03:14
|
|
|
Inadequately posted:I did - it's explained when discussing the various combat stats of melee weapons. Sorry - I worded it badly, I mean specifically the 'procs' part as opposed to regular damage like the shots listed have got, as on first look the staff doesn't have a proc - there's no on-hit effect. ...actually, come to think of it, I'm not sure I know what the difference is between the staff 'procs dam' and the shots 'dam' is.
|
|
#
?
Jul 2, 2017 03:49
|
|
|
MagusofStars posted:I almost always buy a cheap pickaxe the first time I visit a town. You can usually get one to drop at some point, but Dig is sufficiently useful that it's worth dumping 15-20 gold to grab one. If you complete that lumberjack quest, part of your reward is a free pickaxe.
|
|
#
?
Jul 2, 2017 14:46
|
|
|
Meanwhile, in an alternate universe�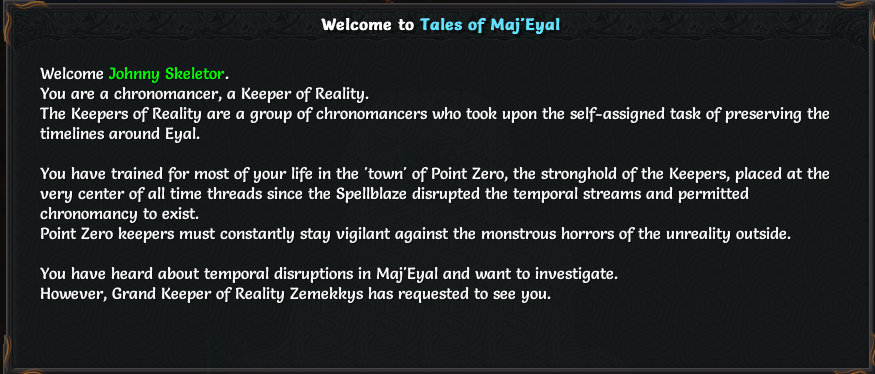 THE ADVENTURES OF JOHNNY SKELETOR, TIME COP 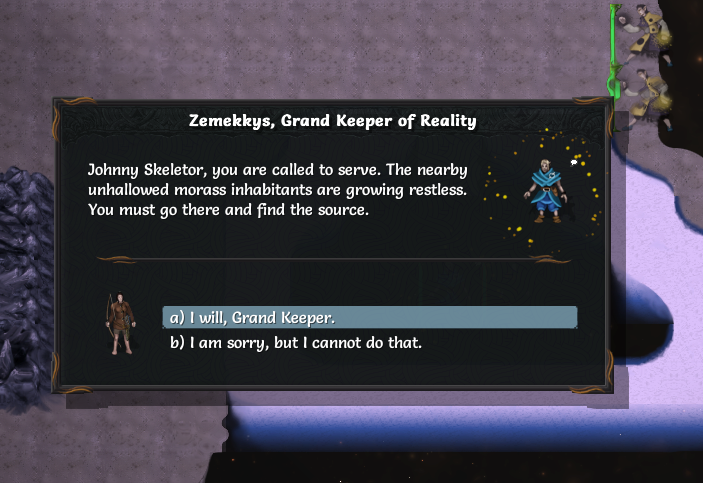 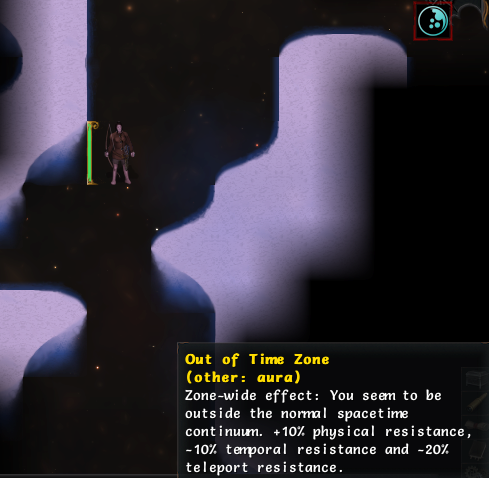 And with that, we�re unceremoniously tossed into outer space. This is the starting zone of non-undead Paradox Mages and Temporal Wardens. Incidentally, we�re one of the latter right now, so let�s take a look at what we have. 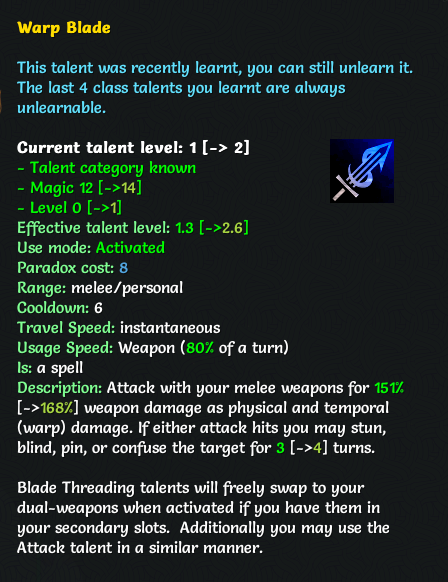 Hit a dude extra-hard with a chance to inflict a crippling debuff. Pretty good all-round. 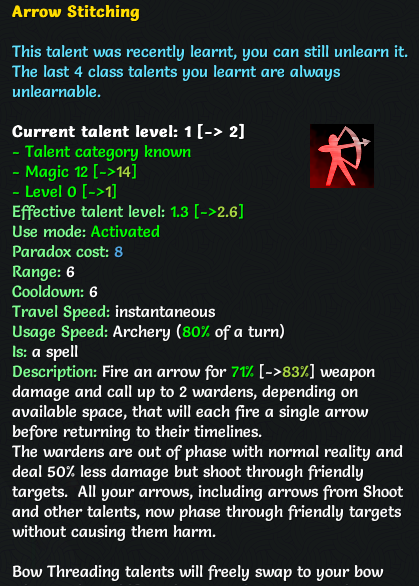 Fire a hail of arrows with the help of your future/alternate selves. The beginning of what is going to be a fairly common theme in TW skills � temporal duplicates. Also, Arrow Stitching gives you/friendlies immunity to your own projectiles, which is a bigger deal than you would expect. 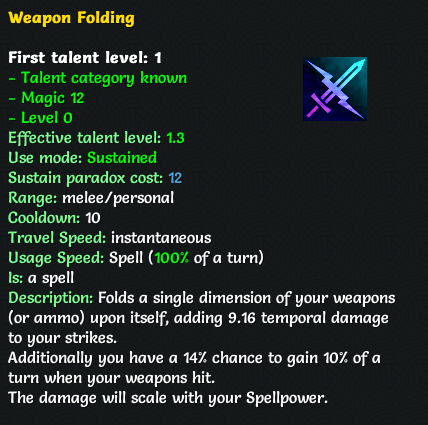 All our attacks do extra temporal damage, rad. The fractional turns we get from this skill will add up over time � once we gather enough of those, we get a free turn. 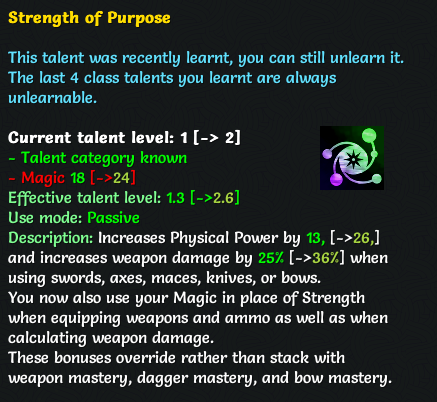 An all-purpose weapon mastery skill that applies to almost any weapon we might care to use, and changes our strength scaling to magic. Prior to the introduction of this skill, Temporal Wardens required investing in pretty much every stat and weapon mastery skill, making them an incredibly clunky class to use if you wanted to leverage their gimmick of being an all-rounded weapon master. 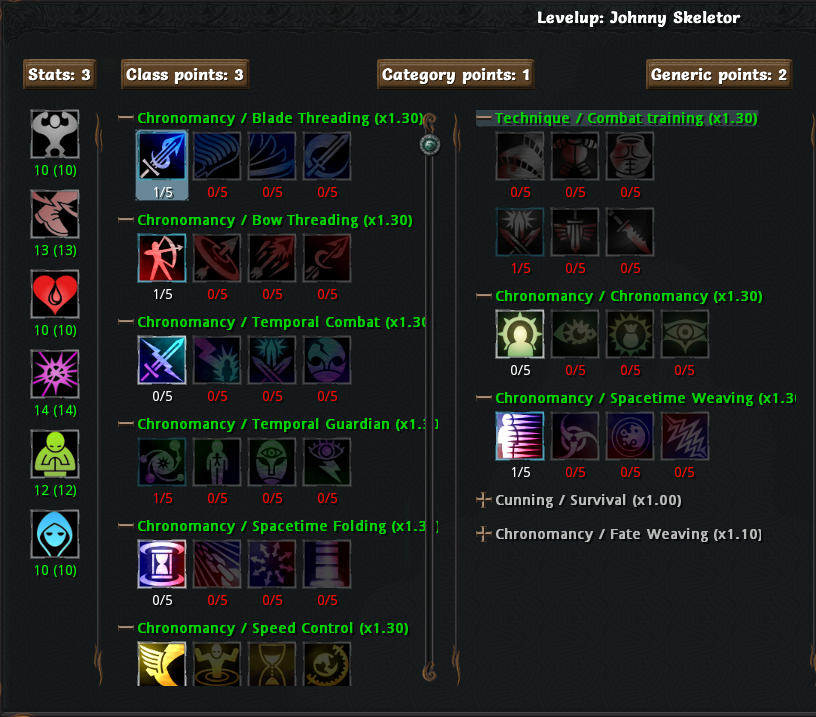 And our other options are fairly similar to a PM, as you can see. No racial tree cause we�re a Cornac, but we do start with extra points.  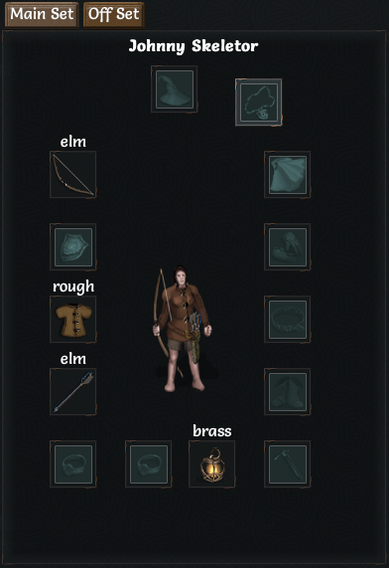 To better explain the auto-swap thing, we have to take a look at our inventory. As you can see, we have two weapon sets that can be equipped at the same time � one in our main set, one in our offset. Every class has this feature, but most don�t make much use of it because there�s no real reason to do so � one weapon set usually suffices, and switching to the alternate set costs a turn � the same length of time it would take to just equip another weapon from your inventory instead. The Temporal Warden is a special case � they will automatically switch to the appropriate weapon set without wasting a turn when using a melee/bow skill. As a side note, pressing �q� will switch to your offset, where you usually have nothing equipped. It�ll be immediately obvious if you do accidentally do this as a weapon user because you can�t use any of your skills, but can be harder to catch on to as a mage/caster. Worth checking if you find your damage output dropping for no discernable reason. 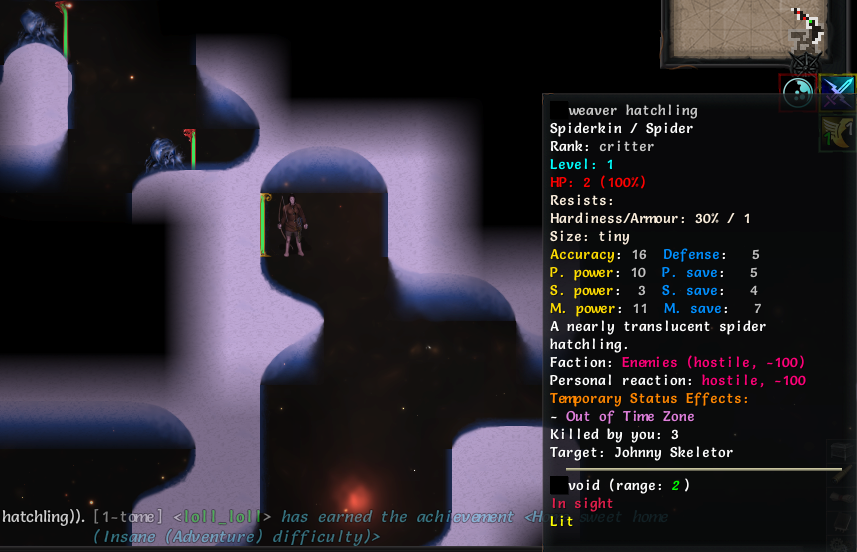 Anyway, on to clearing out the restless inhabitants of this unhallowed morass. Who are tiny little time spiders. These guys can teleport around, but they don�t really do much except get in our way � they have next to no HP, as you can see. 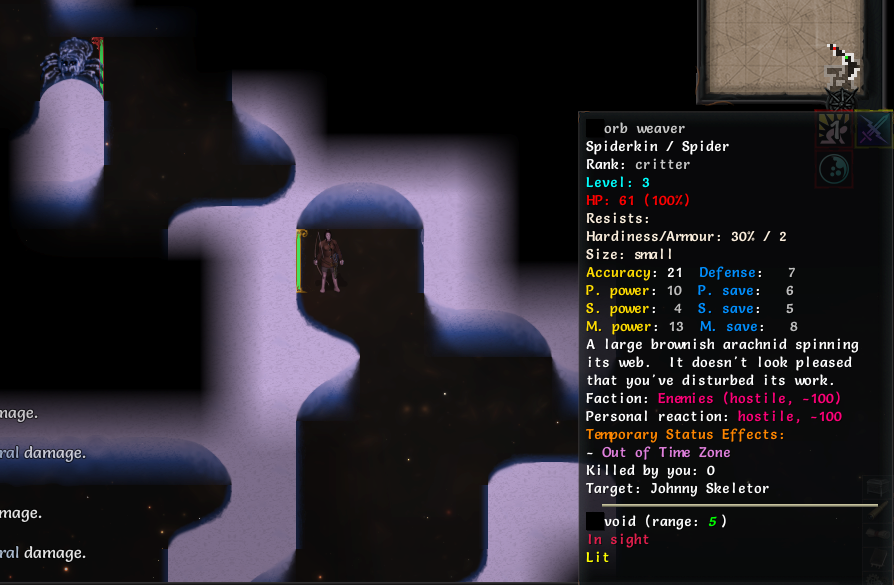 We attracted their big brother. This guy can lay down webs which will pin us if we walk over them. We�ll have to be careful about where we walk. 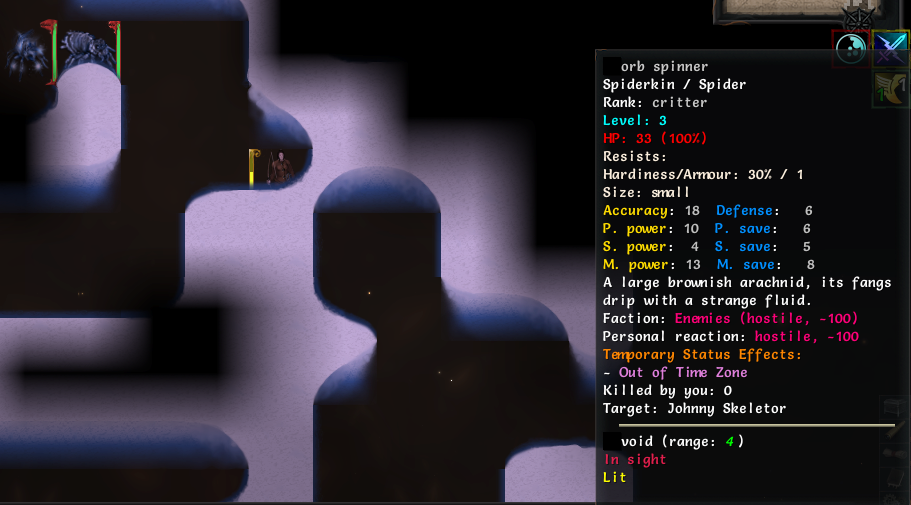 And now for a proper challenge. These guys will hit us with Temporal Bolt, a spell I�m sure we�re all familiar with by now. 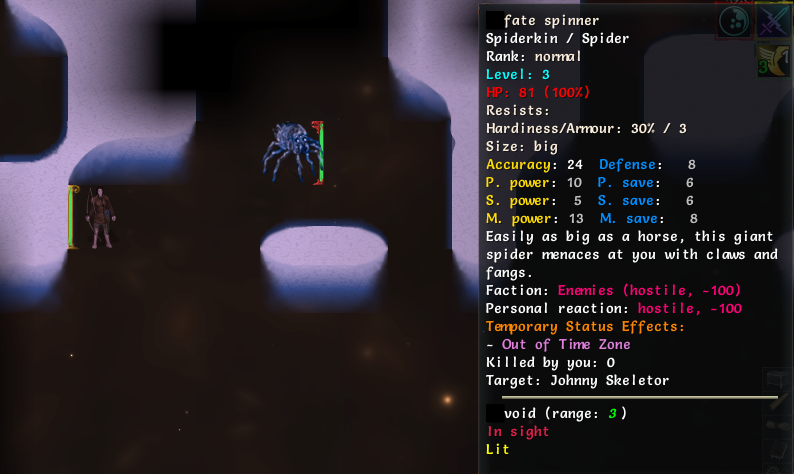 These guys will lay Warp Mines that teleport us towards them, then bite us. They can also teleport themselves with Dimensional Step. We�ll just shoot them from a distance.  Okay, he doesn�t feel like being shot, so we�ll just stab him in the face instead. 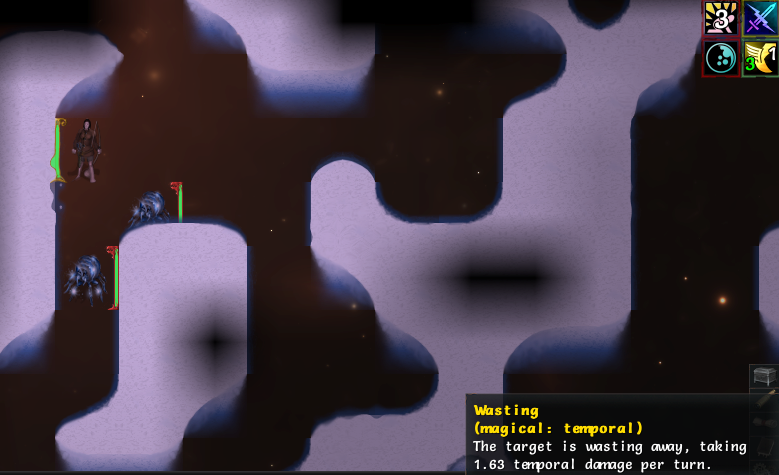 The weaver hatchlings may be weak, but they aren�t completely toothless. Each bite from them (as well as any other spider around here) inflicts Wasting, doing a small amount of temporal damage per turn. Repeated bites will stack the Wasting effect, so we can�t be too careless. 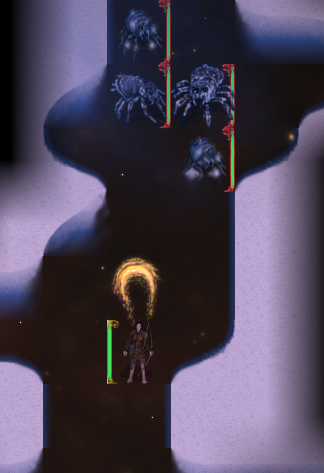 Also, they get in the way while we�re trying to shoot the orb spinners. Shoo.  We found the stairs. Or what passes for them in outer space, anyway.  Guess what awaits us on the next level? Hint: more spiders. 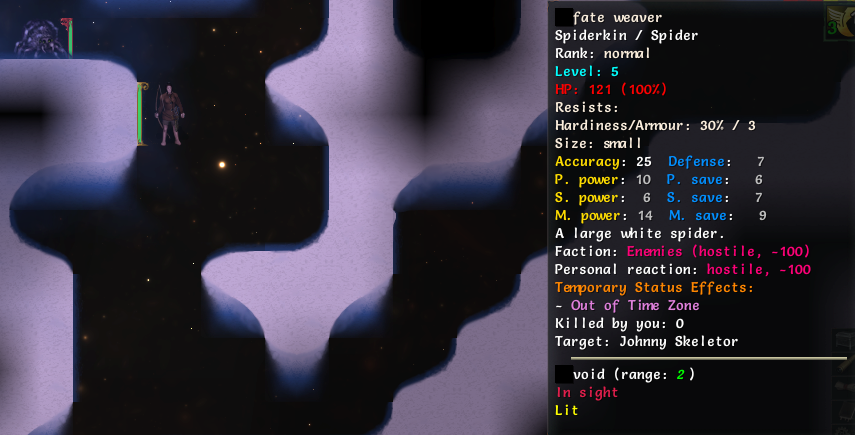 The fate weaver�s a new one. They can displace some of the damage they take back onto us with Webs of Fate, and hit us with Rethread, a beam of temporal damage. We hit level 4 with the EXP from killing it. Cornacs level up pretty dang fast compared to anyone except Yeeks, but especially compared to Skeletons, the race with the largest EXP penalty in the game. Might as well take a look at the new tier of spells we�ve unlocked. 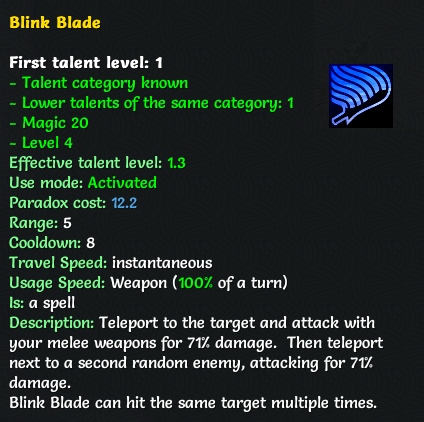 Blink Blade is a pretty fun all-purpose move. Can be used to hit multiple enemies in the same move, or to hit the same guy twice if there�s no one around. Since it�s a long-distance move, it can make for a decent distance-closer. 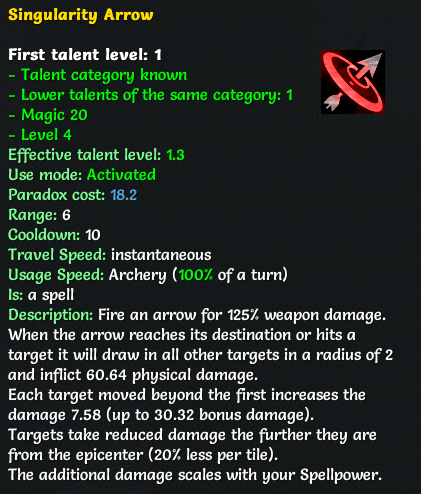 The TW�s first AOE spell, and a fairly solid one. The radius of the spell will increase if we level this one up. 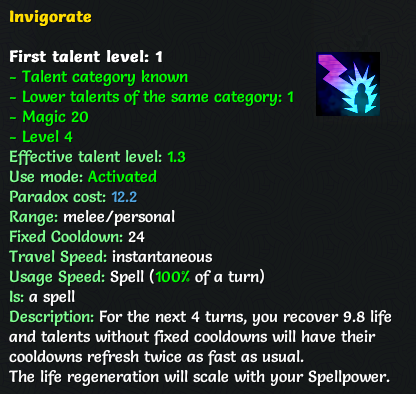 Invigorate is a pretty fun skill. The life regeneration is okay, but the double-speed cooldown is the real draw. The length of Invigoration will increase with spellpower (and thus with Paradox). 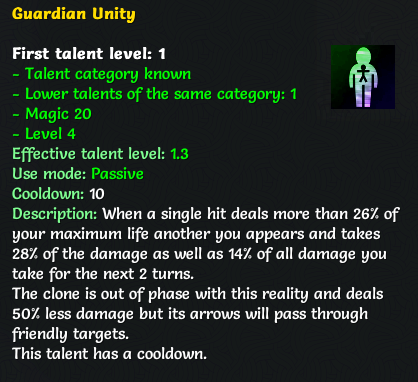 The Temporal Warden�s primary defensive talent. Featuring the return of temporal duplicates. The rest are skills we�ve already seen, so let�s move on. We put a point in Blink Blade for now. 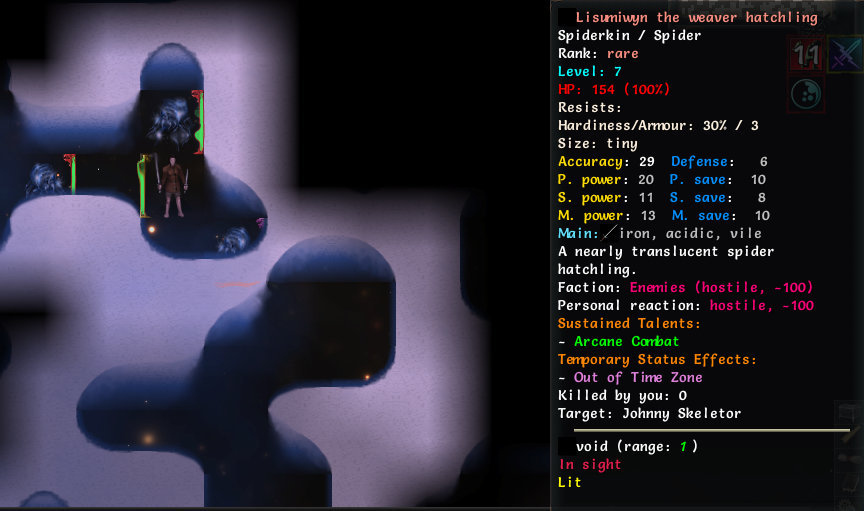 Whoa, a rare hatchling with Arcane Blade skills. We stab him to death, since our melee weapons do more damage. AB enemies aren�t too tough since they don�t leverage their AB skills optimally (though to be fair, an AB doesn�t either until about mid-game at the earliest). 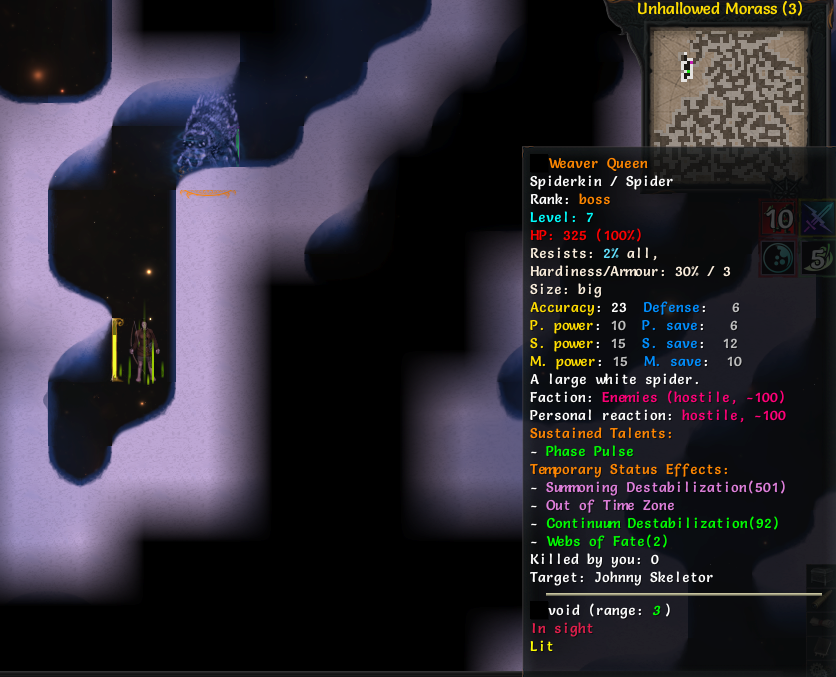 We found spider mom. The Weaver Queen can cast Webs of Fate and Temporal Bolt, as well as summon other spiders to her aid. 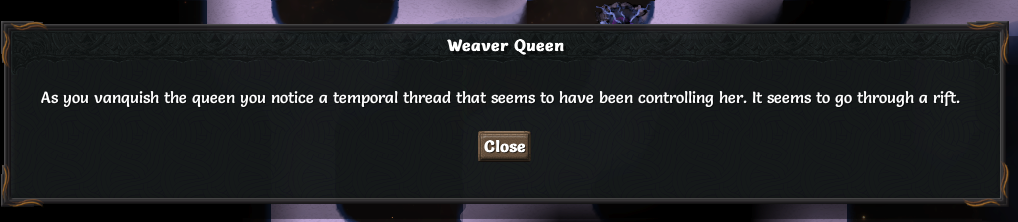 She teleports away a few times, but she doesn�t have any significant healing skills and we do (thanks to regen/healing infusions), so we just keep stabbing her whenever she shows up. Eventually, she goes down without much of a fight. 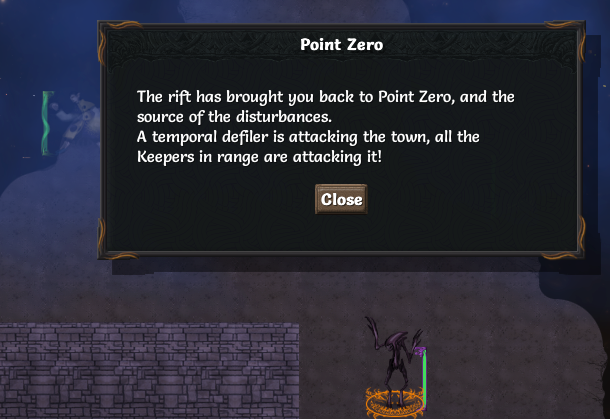 But it�s not over yet. 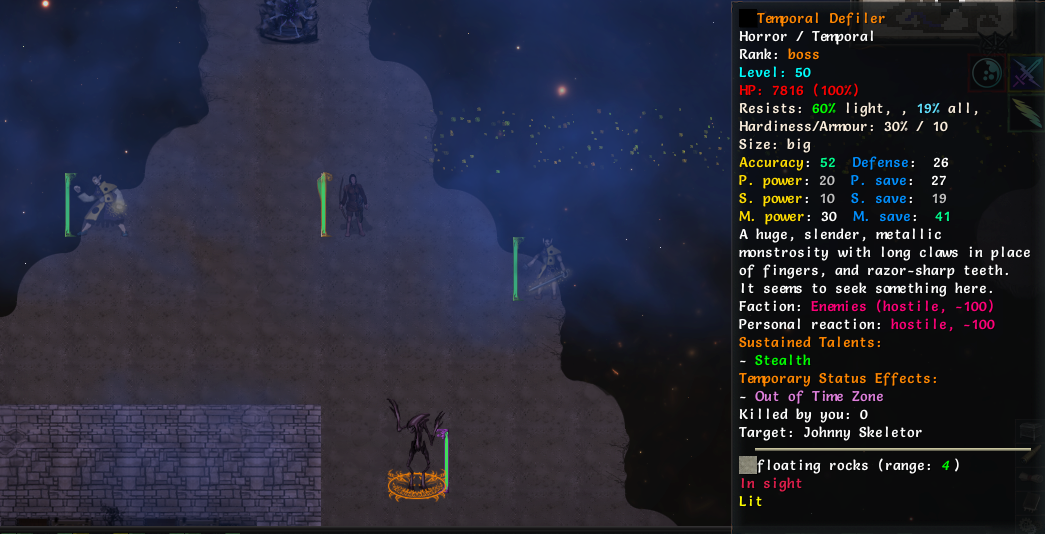 Whoa. That�s quite the first boss. Fortunately, we aren�t facing it alone. 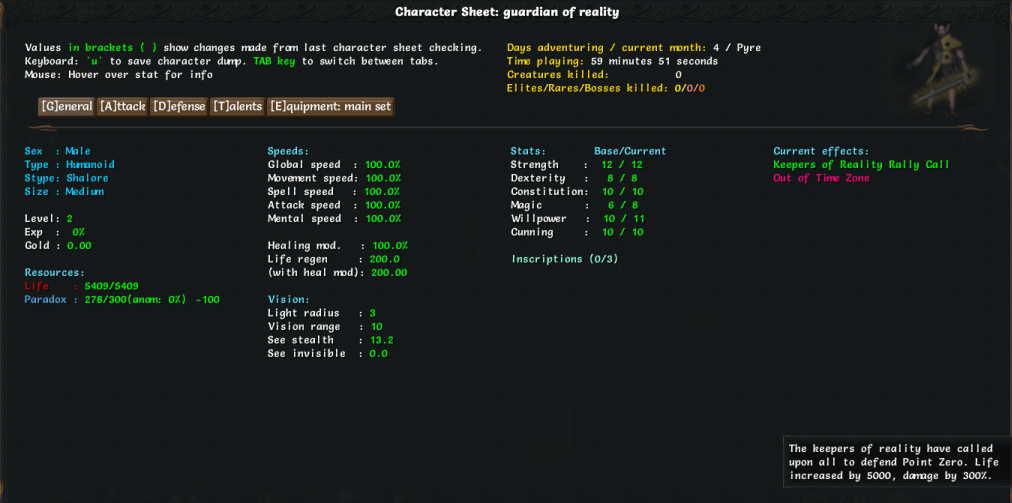 With the Keepers of Reality by our side, we have a significant damage increase and a massive health increase, allowing us to go toe-to-toe with this thing without much worry. 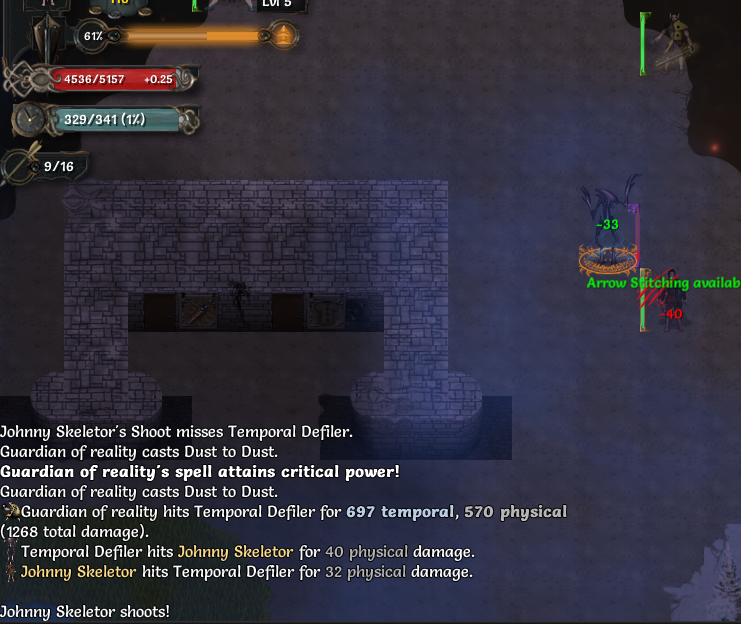 We don�t do all that much to it, even so. It still has enough defense to comfortably evade most of our attacks, and the few that land barely scratch it. Pretty much all we really accomplish is wasting its time while the Keepers of Reality blast it with Dust to Dust. 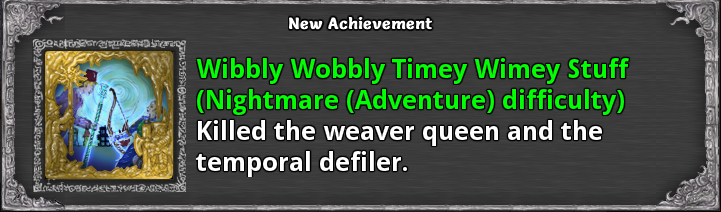 Still, we get credit for the eventual kill, and we get some free loot along the way. 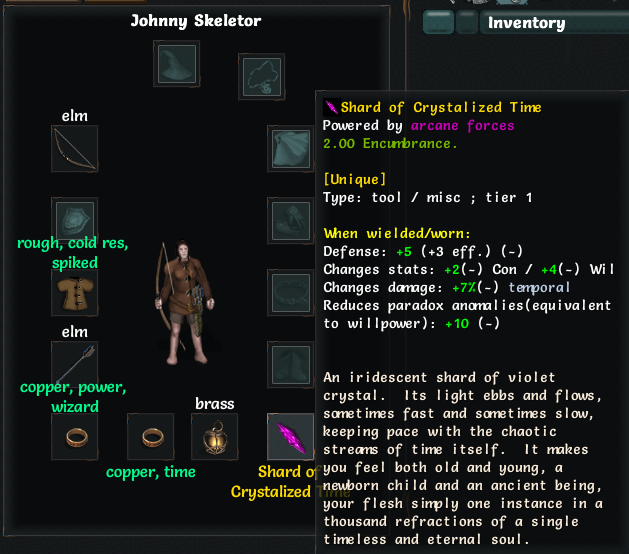 The Shard of Crystallized Time is a pretty nice item for a chronomancer to have. We�ll find better eventually, but there�s not all that many useful t1 tool slot items that surpass it. Now with that done, let�s take a look around. 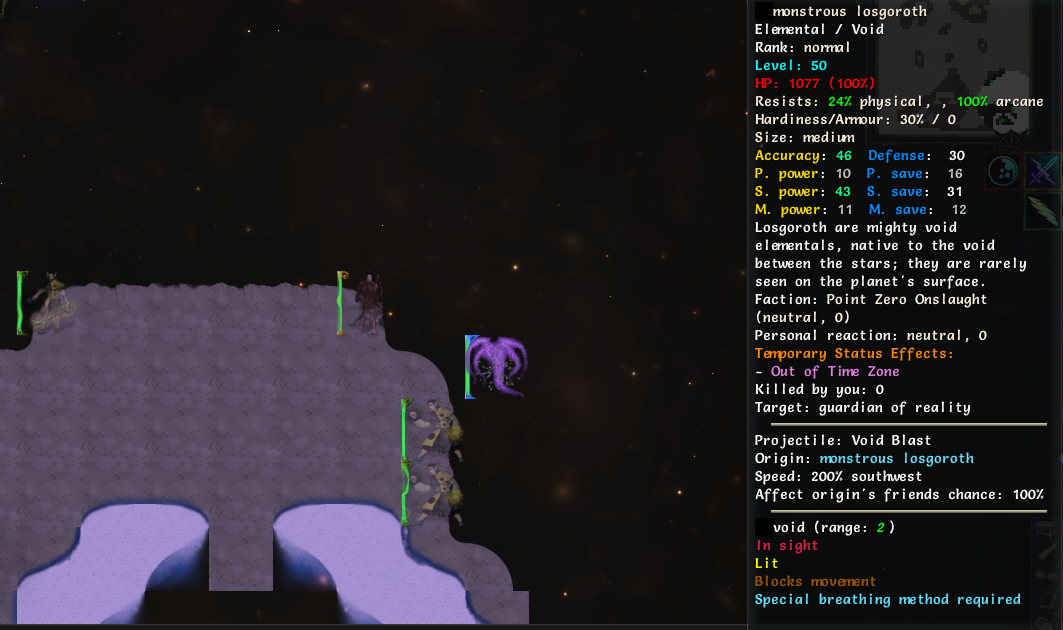 These Monstrous Losgoroths come strolling in from time to time. The Keepers of Reality generally blast them away before they�re an issue. 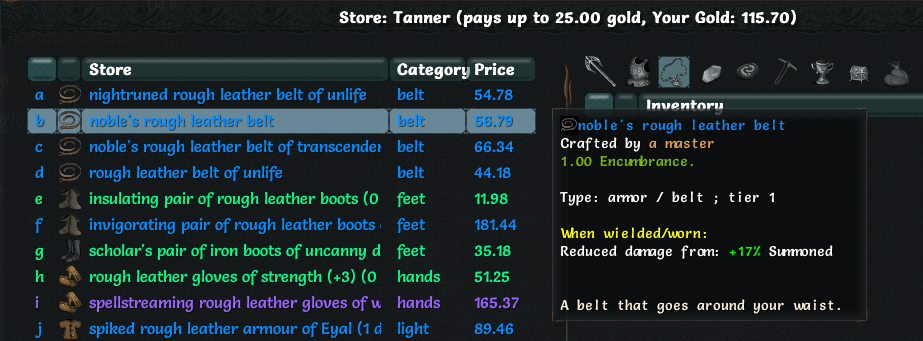 They have some stuff for sale. Their stock is pretty average for a transdimensional shopkeeper, though. 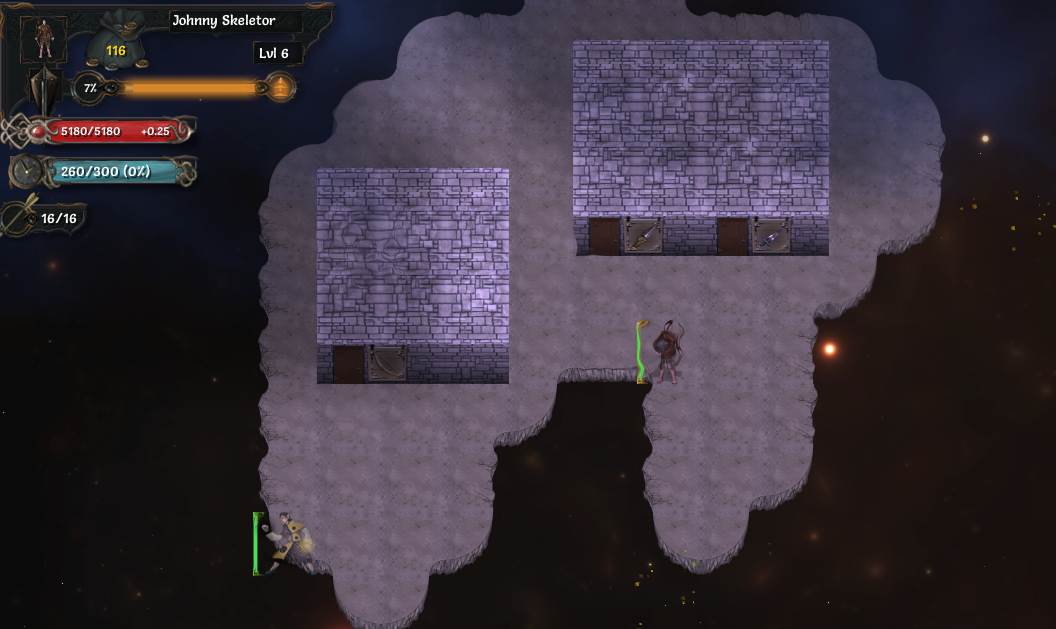 We can stroll around from floating island to floating island, but most of these guys are too busy blasting monsters to chat. 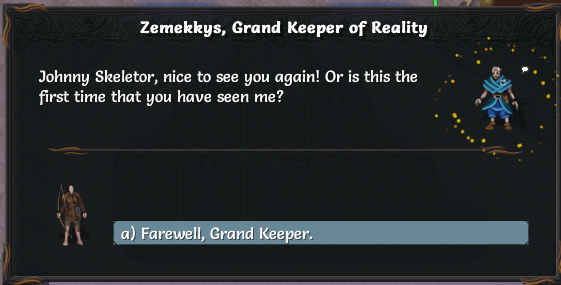 We can chat with the big boss, though he doesn�t have much to say. He does warn us about a potential meeting with his younger self coming up in the future, though. I wonder what that�s about. 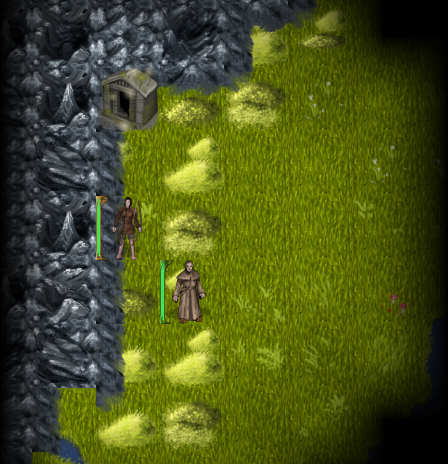 Well, there�s not all that much else to do here, so we finally teleport to Maj�eyal proper. We can teleport back here with the Timeport: Point Zero spell, though there�s not all that much reason to do so. Johnny Skeletor promptly announced his retirement from being a Time Cop, and went on to live a rich and fulfilling life with a large and happy family. We�ll be back with more adventures of Skeletor-Prime next update, probably involving getting shot in the face by snakes or something.
|
|
#
?
Jul 2, 2017 15:01
|
|
|
Man remember when we got the creator to remove those creepy Orc birthing warrens? good times. (They... are still gone, right?)
|
|
|
#
?
Jul 2, 2017 17:15
|
|


|
I have to admit, I'm probably one of the few people who didn't like the Temporal Warden rework. Previously, the TW's either focused all bow, or all dual-wielding(or it was at least possible to do so), now to leverage the class at all you need to focus on both. I feel it's a shame that there's no longer two different specializations to choose, and the weapon-swapping mechanic just feels fiddly to me. Plus, I think the Temporal Warden ended up with less mobility talents after the rework, some of my fondest ToME memories were endlessly kiting enemies as one of the early incarnations of the Temporal Warden. Also yes, the Creepy Birthing Warrens are still gone. They fitted, fluff-wise, but the descriptions were... lemme put it this way, to anyone who didn't see them. The final boss was described as "covered in quivering vulvas" or something similar. The only issue with removing them is that now the entire western half of the East has literally only one dungeon, which is a shame. That continent really needs more content.
|
|
#
?
Jul 2, 2017 17:30
|
|
|
If you start as an undead Paradox Mage/TW, do you actually get the Point Zero teleport or do you basically miss that entire town? I mean, obviously you're not missing anything in skipping a level 1 dungeon (plenty of other Tier 1 dungeons), but it seems really weird to not have the class-specific town available.PurpleXVI posted:Also yes, the Creepy Birthing Warrens are still gone. They fitted, fluff-wise, but the descriptions were... lemme put it this way, to anyone who didn't see them. The final boss was described as "covered in quivering vulvas" or something similar. The only issue with removing them is that now the entire western half of the East has literally only one dungeon, which is a shame. That continent really needs more content.
|
|
#
?
Jul 2, 2017 19:07
|
|
|
Wait, why are you starting a new character? Did I miss the previous one dying somewhere?
|
|
#
?
Jul 2, 2017 21:22
|
|

|
He just wanted to show off another class for a little.
|
|
#
?
Jul 2, 2017 21:26
|
|

|
Unimpressed posted:Wait, why are you starting a new character? Did I miss the previous one dying somewhere? Skeletons don't do the unique Paradox Mage/Temporal Warden starting zone (since they do the unique Skeleton/Ghoul start instead) so it was shown off with a human. MagusofStars posted:If you start as an undead Paradox Mage/TW, do you actually get the Point Zero teleport or do you basically miss that entire town? I mean, obviously you're not missing anything in skipping a level 1 dungeon (plenty of other Tier 1 dungeons), but it seems really weird to not have the class-specific town available. Unless it's changed, if you don't start there, you'll never go there.
|
|
#
?
Jul 2, 2017 21:40
|
|
|
Going with slightly smaller images this time, to ease up on loading times. Let's hope they're still legible. Hopping to another universe messed up the timeline somewhat. Nothing that especially affects us very much, though. 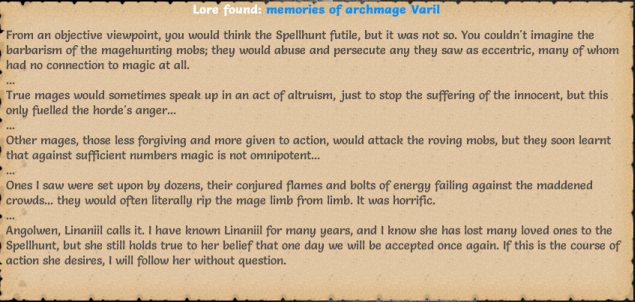 We found another guy�s diary in the necromancer�s lair. Guess that explains why the necromancer was so secretive. Aside from the whole �raising the dead� thing, that is.  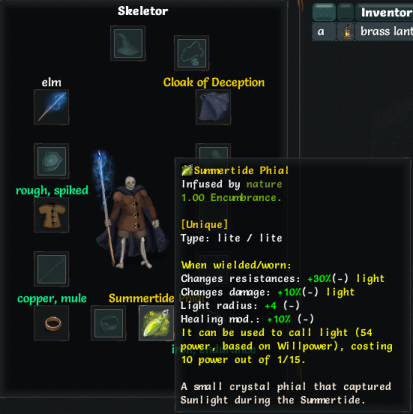 We got a different item off the Bone Giant this time. The Summertide Phial is a common early-game artifact light. 4 light radius, bonus healmod and a boost to light damage/resistance makes for a pretty good lamp, so we�ll be hanging on to it for a while. 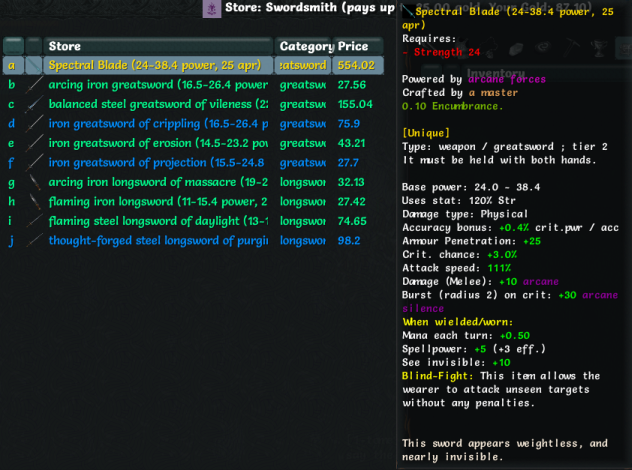 The Fearfire Mantle is no longer on sale, but this store is selling the Spectral Blade instead. It�s kind of an odd artifact, but it could be useful on an Arcane Blade early on. 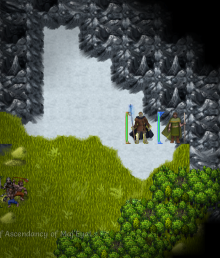 Agrimley shifted his secret hideout, and now lives in the mountains instead. Not too much changed ingredient-wise � Agrimley still wants stuff that�s going to be hard to get until near endgame, Ungrol has a relatively easier request by comparison. 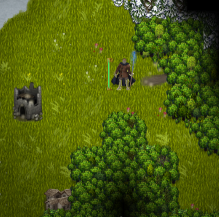 Anyway, on to Trollmire. The Trollmire entrance is the path to the forested area, located slightly above Derth. Most race/class combinations start off in Trollmire, and those that don�t are advised to exit their starting dungeon and head over to Trollmire if possible, since Trollmire is the easiest of the dungeons. 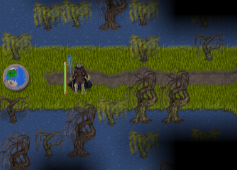 Looks like we got the alternate version of Trollmire. Most of the early T1/T2 dungeons have a regular and alternate version, with a 50% chance of getting either on. Regular Trollmire is a densely forested meadow, while Alt Trollmire is a densely forested bog. We�ll be encountering a couple more types of aquatic enemies as a result, but they�re not too difficult to handle. Incidentally the water here is shallow, and as such we don�t lose Air while standing in it (not that we would anyway, on account of being a skeleton). 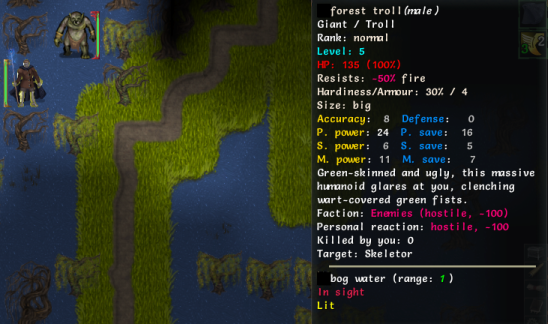 Trolls are, as you might expect, the most common enemy in Trollmire. They come in three varieties � forest, cave and stone troll. Trolls are big and bulky, but don�t have many other tricks up their sleeve aside from that, making them easy prey for most starting adventurers. They�re also weak to fire, but that�s not something we can really take advantage of at the moment. 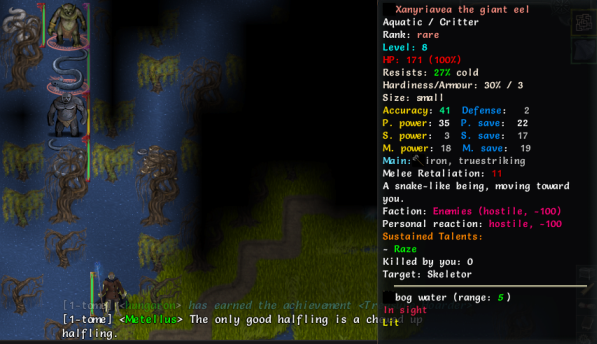 As we�re on Nightmare difficulty, we�ll be facing more rares than we normally do. Both this eel and this troll appear to be wyrmic buddies, so we�ll have to be careful not to get too close. Raze is an interesting skill introduced in Embers of Rage � it adds a slight bit of darkness damage to every damage instance you land on an enemy, up to 15 times a turn. On certain builds, this can add up to quite a lot of bonus darkness damage if you rely on multi-hit moves and weapons with additional damage procs. 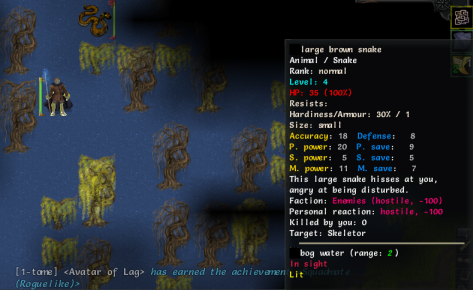 Snakes are a semi-common enemy here. A regular snake isn�t too much trouble, but they have one noteworthy trait � they move at 130% global speed. Running into an early-game snake archer or brawler is often a run-killer. No, I don�t know how the snakes punch, either. 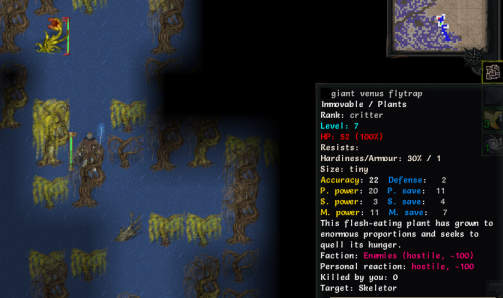 These guys are not to be underestimated. Venus Flytraps can use Spit Poison, which does a heavy amount of nature damage over several turns. Fortunately, we�re a poison-immune skeleton and can ignore that. 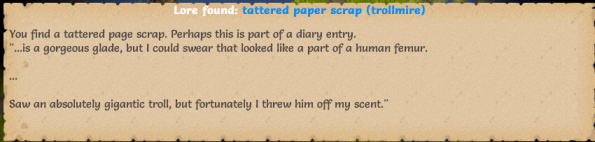 TOME tends to rely on the �dropped diary entry� method of fleshing out their dungeons, as you might have noticed. This one warns us what to expect at the end of Trollmire (spoiler: it�s a big troll). 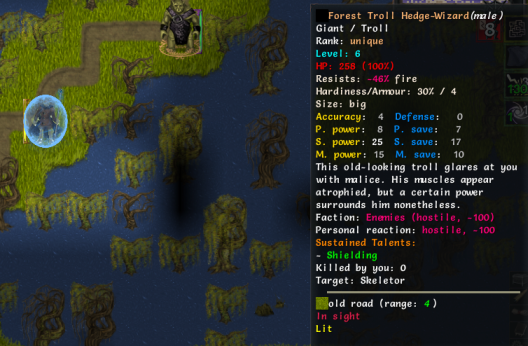 Well now. The Forest Troll Hedge-Wizard is a semi-common boss that can pop up in random areas, most commonly in Trollmire. He�s a fairly tough customer if Trollmire is your first dungeon � he knows high level Manathrust and Flame, and will raise a magical shield that reflects damage when low on health. At our current level, we can take him on without too much difficulty. He has a very useful artifact for magic-users associated with him � let�s hope he drops it this time.  Jackpot. The Rune of Reflection is a powerful Shielding rune that scales with Magic at a level higher than any other rune/infusion. In addition, half the damage that the reflection shield takes will be rebounded back at the attacker � the only shielding rune to do so in the game. Incidentally, the Rune of Reflection doesn�t count as a regular shielding rune and thus doesn�t trip the �two similar runes per character� rule � if we really wanted, we could run the RoR alongside two other shielding runes, which would give us four damage shields alongside Bone Shield. We won�t be doing that, though, because there�s only so much raw damage mitigation can do and we need those infusion slots for debuff clearing. 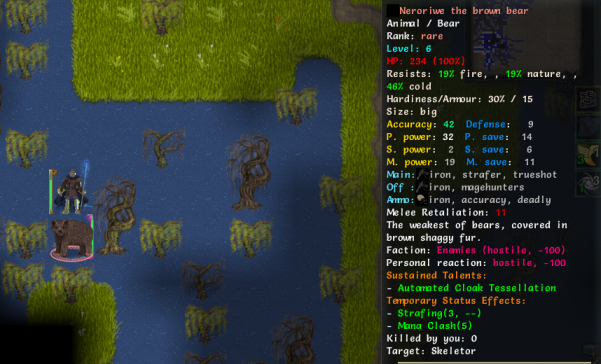 We enter the next level, and � oh no. Oh dear. 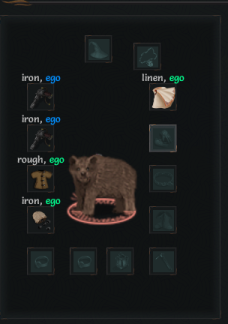 Tinker classes were kind of skimmed over in the introduction, so it�s time to go a little bit more in-depth into them. Tinker classes use steam for both their skills and their regular attacks. Steam is a resource gained via implanting a steam generator into yourself, which takes up an infusion slot and gives you a large amount of steam regeneration per turn. To make up for the loss of an infusion slot, steam-based weapons and skills tend to be a lot more powerful than usual � a fact which tinker rares are all too happy to leverage. As you can see, the bear is currently wielding two guns. Gunslingers are a glass-cannon tinker class focusing on high damage and mobility, with not much in the way of defensive skills. The bear is currently shooting two bullets per shot at 600% shot speed, which means we�re taking a lot of damage and have functionally no way to dodge it. In addition, the antimagic gun triggered Mana Clash, which drains our magical resources and causes the bear�s attacks to deal additional manaburn damage over the course of several turns. Fortunately, Paradox is not affected by manaburn damage, so that�s one thing we don�t have to worry about. Also, thanks to the Rune of Reflection, we can reflect half of the bear�s incredible damage output back at him, before finishing him off with Dust to Dust. 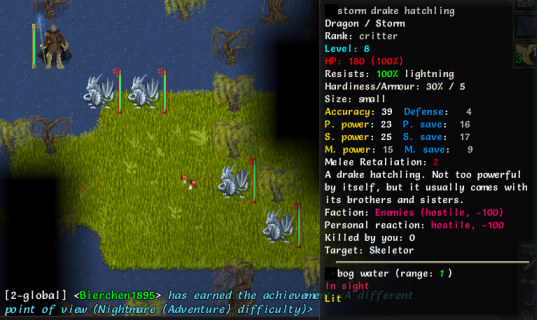 Our first dragons�kind of. Hatchlings are weak, but they hit harder than you might expect. In addition, meleeing them causes you to take elemental retaliation damage, which can really stack up if you rely on multi-hit moves. All dragons are immune to their associated elemental damage � being storm drake hatchlings, these guys are immune to lightning damage. 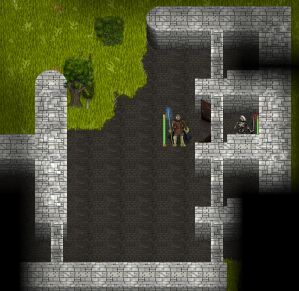 We also find the remains of an old castle. There�s nothing of interest in these ruins besides a lone degenerated skeleton warrior hanging out in one of the tiny rooms, though. 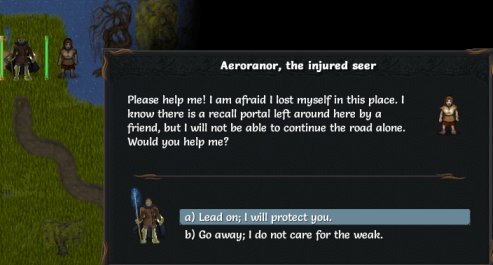 On the third floor of Trollmire, we get our first escort quest. Escorts can randomly appear in certain dungeons in the first half of the game, and nine escorts are guaranteed in every game. To complete an escort quest, we have to guide the escort to the escort portal, which spawns randomly on the floor should we accept the quest. Escorts will beeline for the portal, but they don�t move very fast, so catching up to them isn�t too much of a problem for the most part. However, escorts are very weak, and will die to even bog-standard enemies should they get into a fight. Escorts will usually retreat while calling for help if they spot an enemy, but don�t be too surprised if their AI messes up.  We can ask escorts to wait a few turns if we find a particularly tough enemy, but after waiting for a bit they will charge on ahead and ignore any other requests to wait for a while. We can also ask them where the portal is, and they�ll give a vague direction/distance estimation. Of course, �very close, to the east� can mean �three steps away�, or it can mean �three steps away, behind a wall that requires navigating around the entire floor to bypass�. 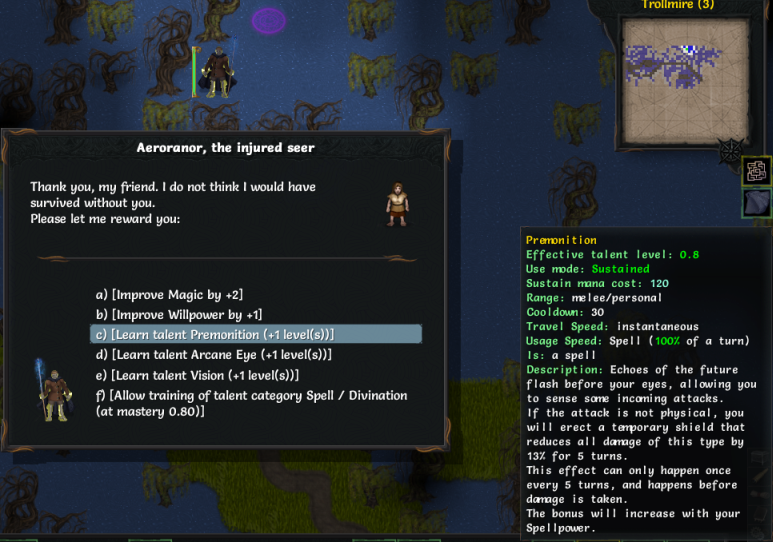 The rewards are well worth it, though. Successfully completing an escort quest grants you a choice of a stat boost, one talent level of an associated skill, or the escort�s entire generic tree (locked) at talent level mastery 0.8. This is one of the few ways in which you can learn generic trees/skills outside of the one you start with, and as such escorts are extremely rare and valuable (and in some cases, critical for pulling off specific builds). Failing an escort quest has no penalty, but we wouldn�t get a reward out of it. From this seer, we pick up a talent level of Premonition (not to be confused with our scouting skill, Precognition). Premonition is a costly sustain that reduces elemental damage taken � every time we take elemental damage, we gain bonus resistance to that element for a few turns, though we can only gain the Premonition resistance bonus to one element at a time. It�s a costly sustain at 120 mana, but we can afford it since we�re not using mana for our spells. If we had no spells or runes, we could betray this seer to Zigur instead. Betraying a magical escort grants you alternative rewards, usually wild-gifts or other mindpower-based talents instead of spells. Of course, you can�t just kill them yourself � you still have to escort them to the portal. 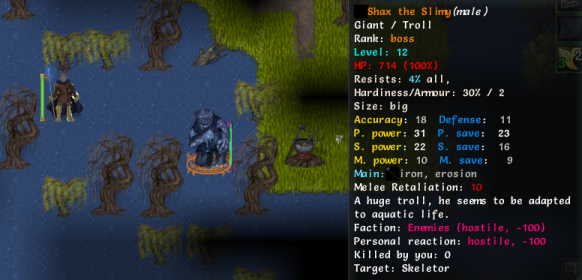 With that over, we continue onwards, eventually encountering the first boss of Trollmire. On regular Trollmire, we�d be fighting Prox the Mighty, a beefed-up stone troll who likes using Knockback to launch us away. As this is Alt Trollmire we�re fighting Shax the Slimy, a troll wizard who likes to cast Water Bolt at us, a low-level spell that does a small amount of cold damage. Neither of them are a particularly difficult challenge at our level, and a few Dust to Dusts and Temporal Bolts clears out Shax the Slimy without too much trouble. 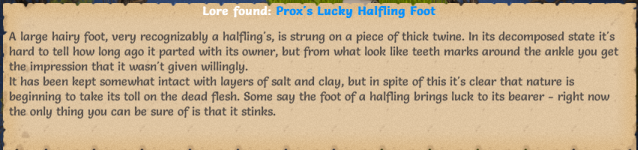  Killing Shax drops the artifact associated with Prox, as well as giving us another freebie.  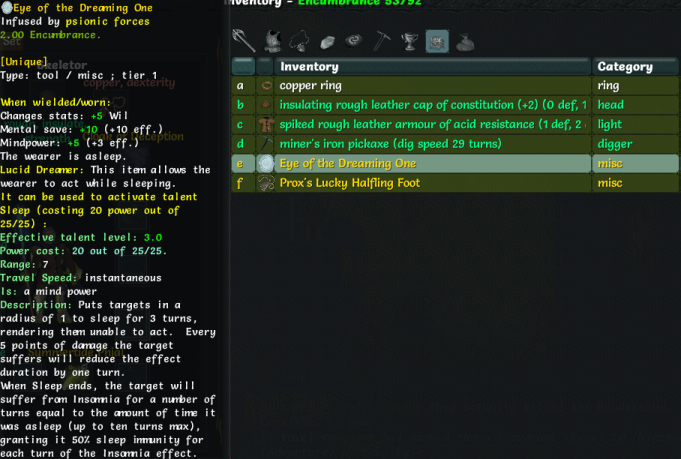 Both these artifacts go into the tool slot, so we can only wear one of them at a time. Prox�s foot is an artifact that passively detects traps, gives us a small Luck bonus and a small chance to shrug off stun/daze/pin effects. The Eye of the Dreaming One gives us a Willpower and mindpower bonus, and grants us Lucid Dreaming, which is sleep immunity of a sort � we can still act and move around should we be put to sleep, but are more vulnerable to certain sleep-related debuffs as a result. We can also activate it once every 25 turns for an AOE talent that puts enemies to sleep for a few turns. We�ll go with the Eye for now � the bonus Willpower will help with Paradox management, and the sleep move can come in handy. 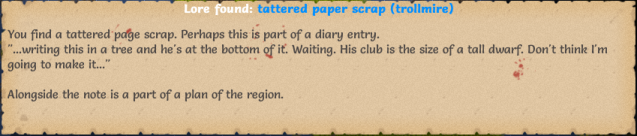 Shax also dropped this note. Looks like we�re not quite done with Trollmire yet. 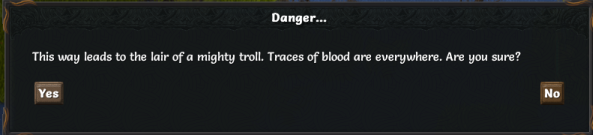 We get this warning upon attempting to enter Trollmire 4. If Trollmire is your first dungeon, then it�s a very good idea to heed this warning, head out and gain a few more levels before coming back. Trollmire 4 is a very large difficulty spike from the rest of Trollmire.  And this is why. Bill the Stone Troll is, in addition to being one of the few Tolkien references left in the game, an extremely powerful boss to be facing so early on and more than a match for most early-game characters. He has much more health than Shax/Prox, hits like a truck, and can activate his custom weapon for an armor-sundering attack. It�s entirely possible to get one-shot by Bill as one of the less defensive classes if he gets a good hit in. He also comes with a complement of regular trolls, which we cleared out without too much trouble. However, there�s a very low chance that a high level mountain/patchwork troll might spawn here, just as an additional gently caress you. Pointless additional fact: his full name is, according to the Tolkien wiki, �William Huggins�. 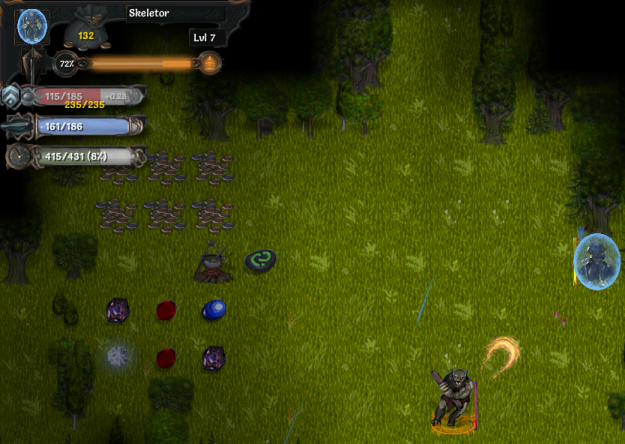 Our strategy for taking him on is pretty much the same as the Bone Giant fight. We can�t stay out of melee range forever because he can Rush up to us, but we can Repulsion Blast or Time Skip him, or teleport out of the way. As long as we don�t stay adjacent to him for more than a turn, he can�t use any of his really hard-hitting moves. After a bit of dancing around the area while spamming Temporal Bolts and Dust to Dust, Bill collapses and we pick up our reward.   We�re rewarded with his associated artifact, Bill�s Tree Trunk. It�s a decent weapon for 2-handed users, and can carry you well into the t2s should you choose to use it. It hits harder than most common t2 weapons, has higher armor penetration than normal, and can be activated for an additional armor-sundering attack. Of course, we have no use for it, so we promptly sell it off. And with that, we�ve completed Trollmire, picking up some decent loot along the way. We have one more loose end to tie up just outside it, however. 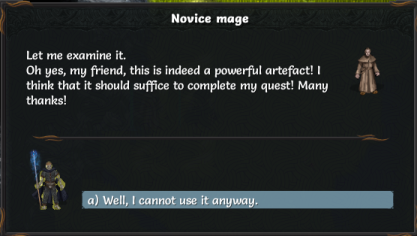 Since we currently have no use for Prox�s Lucky Foot, we turn it in over to the novice mage, allowing him to complete his quest. So you have enough magical items now? Ah yes! I am so glad! I will be able to return to Angol�er�Oh well, I guess I can tell you; you deserve it for helping me. During the dark days of the Spellhunt many thousands of years ago, Linaniil, the great mage of the Kor�Krul, worried that magic might disappear with her generation and be lost to mortals should they need it again. So she set a secret plan into action and built a secret place where magic would be kept alive. Her plan worked and the group built a town called Angolwen in the western mountains.He marks it on your map, along with a portal to access it. Not many people are accepted there, but I will arrange for you to be accepted inside. Oh! How could such a place be kept secret for so long�This is interesting indeed. Thank you for your trust! And with that, the portal to Angolwen is revealed on your map. Opening up the portal to Angolwen also unlocks the Archmage class, if this is your first time completing the quest. Depending on your luck, Archmage might actually be the first class you unlock � probably the only class with an easier unlock requirement is Summoner, which simply requires you to witness the act of summoning. Presumably, summoning is not a particularly complicated discipline. 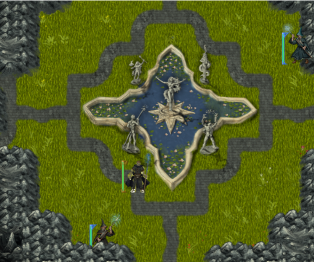 High level mages of all stripes can be found hanging around Angolwen. Here�s a couple of them chilling around this fancy fountain. 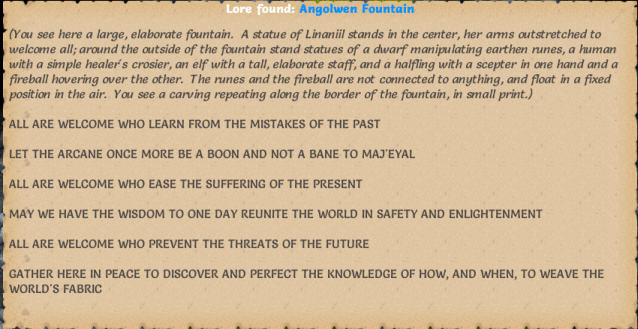 A very fancy fountain indeed. 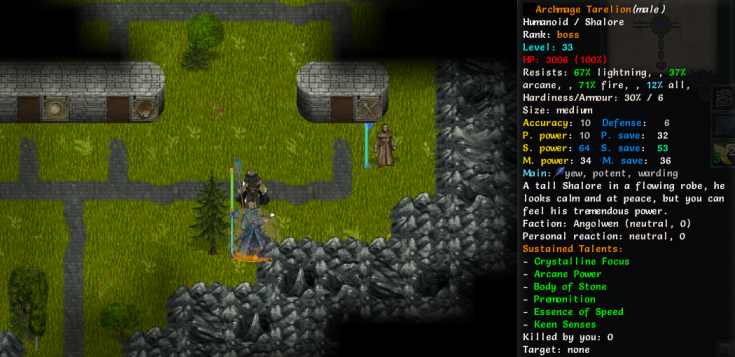 Above the fountain, we find some magical shops, guarded by an archmage of unimaginable power.  All he wants us to do is support the local library, though. 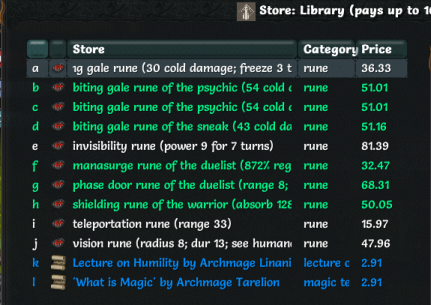 We might as well do that � these books are pretty cheap. Maybe we�ll find some neat spells in them or something. 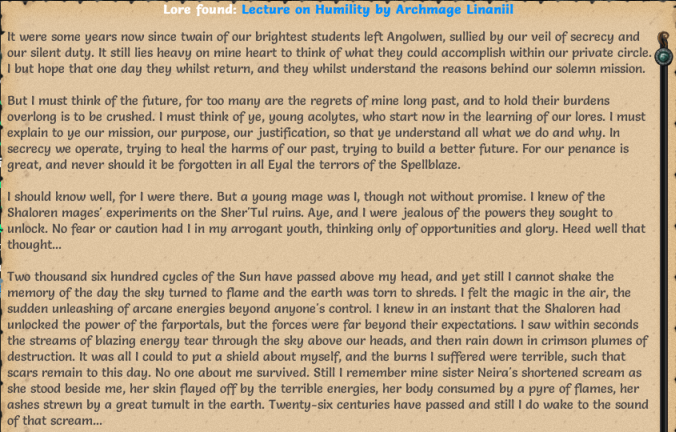   No spells in this one, but we do get a bit of an Eyalian history lesson. There�s some names and concepts in there that might be worth keeping in mind for future events. 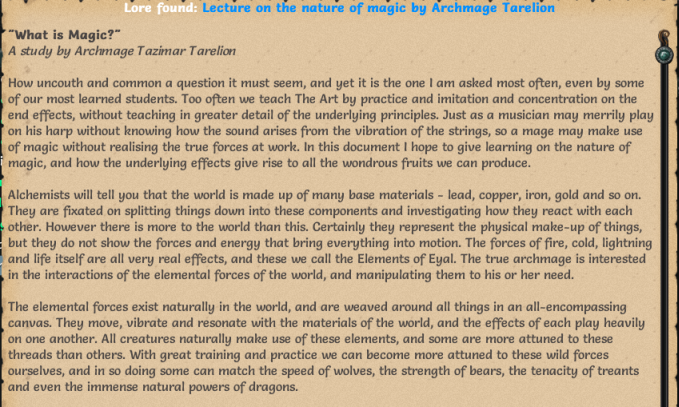 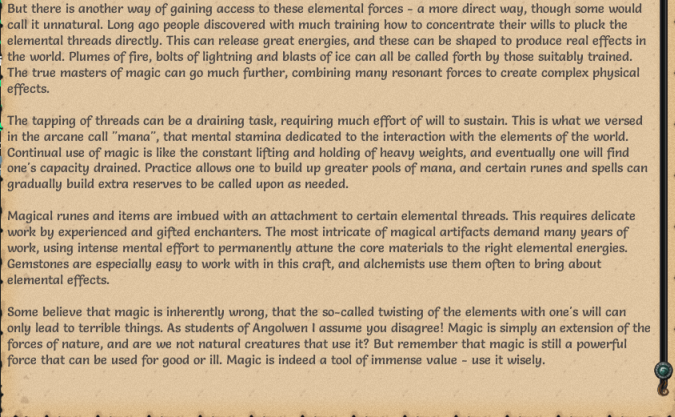 No spells in this one either, but we found out a bit more about how magic works. Of course, as a mighty Paradox Mage, we can just warp the fabric of reality directly, no mucking about with this �mana� stuff required. 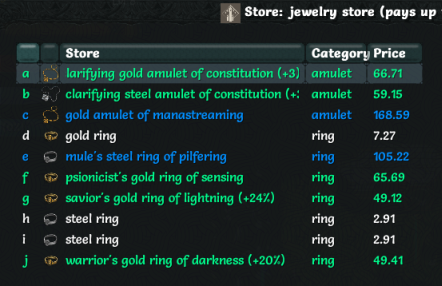 Aside from the library, Angolwen also contains staves, runes, infusions and jewelry for sale. Nothing that particularly interests us at the moment, though the jewelry store has an additional feature. 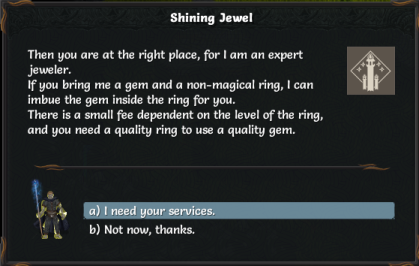 If we have a blank white ring and a gemstone of the same tier, we can commission a custom ring, imbuing the ring with the innate properties of said gemstone. It�s generally not worth it for the most part, unless you have one of the few artifact gemstones in the game � we won�t be seeing them for quite a while, though, since they�re all high-tier artifacts. 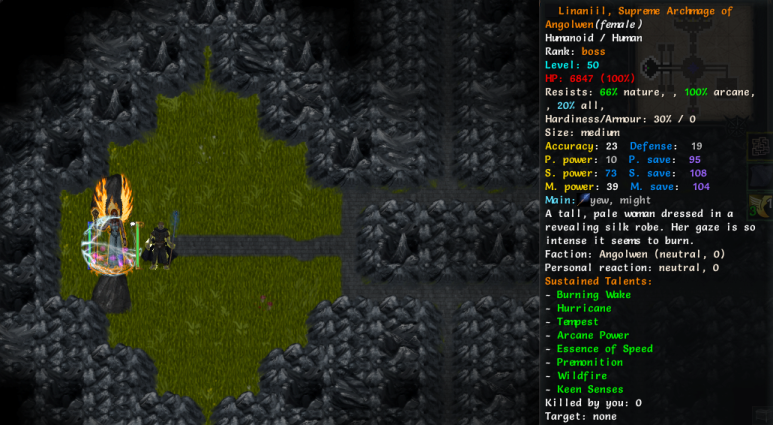 There�s nothing much of interest to the right of the fountain. Who�s this over to the left?  It�s Linaniil! Right now she doesn�t have very much to say to us, though. That�s about all there is to Angolwen. More dungeon-crawling coming up in the next update. Inadequately fucked around with this message at 17:20 on Jul 5, 2017 |
|
#
?
Jul 5, 2017 15:15
|
|
|
Images are fine. That gunslinger bear (WTF, game?) is one of the problems I have with TOME. You'll be wading through trash mobs and suddenly a rare will appear with a random combination of stuff that will be a hard counter to your character and kill you in two turns.
|
|
#
?
Jul 5, 2017 17:12
|
|
|
Images are just fine. Another issue with rares is that some classes are much more dangerous as rare enemies than they are in a player's hand, because, not needing to care as much about dying, they can leverage glass cannon stuff better. Archer rares can be scary. As for unlocking Summoners... conceptually it's probably the easiest unlock, but I think in my last five runs or so, I think I've encountered a grand total of one summoner-classed enemy. Though I guess there might be one guaranteed in the main storyline if he counts. One of the big issues with actually infusing a high-level ring or amulet with a high-level gem, is that "white" rings and gems are hideously goddamn rare.
|
|
#
?
Jul 5, 2017 20:05
|
|
|

|
| # ? Apr 18, 2024 16:40 |
|
|
Gunslinger bear is awesome. I can totally picture a bear wearing the typical Wild West sheriff's garb (although in this case it's probably more like a mad scientist bear). Can rares only spawn with classes you've unlocked, or are any of them fair game? Also, I can see snake brawler working better than snake archer; D&D at least allows you to use any part of your body for unarmed strikes (and yes, all of the requisite off-color jokes have already been made), so headbutts, body-slams, and tail strikes are all fair game. Do dungeons respawn, so if you don't get all of the rares/bosses on one go-through, can you go back and try again? If not, is there a way to pass items around between characters at all, so if a mage character gets a really good weapon (for example), could you stash it for a fighter you make later? I unlocked Summoner on the first level of Trollmire with my first character. I'm pretty sure you don't need to fight a Summoner-classed enemy; I fought a tree that summoned bees and unlocked the class. I think later versions of the tree can also summon bears, though probably not gunslinger bears.
|
|
#
?
Jul 5, 2017 23:50
|
|