|
Commander Keene posted:Do dungeons respawn, so if you don't get all of the rares/bosses on one go-through, can you go back and try again? If not, is there a way to pass items around between characters at all, so if a mage character gets a really good weapon (for example), could you stash it for a fighter you make later? And yes, you don't need to see a summoner, just the act of summoning, so trees in the Trollmire spawning bees qualifies you for it.
|
 #
?
Jul 6, 2017 00:04
#
?
Jul 6, 2017 00:04
|
|


|

|
| # ? May 1, 2024 16:25 |
|
|
Commander Keene posted:Gunslinger bear is awesome. I can totally picture a bear wearing the typical Wild West sheriff's garb (although in this case it's probably more like a mad scientist bear). Can rares only spawn with classes you've unlocked, or are any of them fair game? Also, I can see snake brawler working better than snake archer; D&D at least allows you to use any part of your body for unarmed strikes (and yes, all of the requisite off-color jokes have already been made), so headbutts, body-slams, and tail strikes are all fair game. All classes are fair game for random rares, even if you haven't unlocked them yet. Unless that's been changed in recent versions since I got all the unlocks. Commander Keene posted:Do dungeons respawn, so if you don't get all of the rares/bosses on one go-through, can you go back and try again? If not, is there a way to pass items around between characters at all, so if a mage character gets a really good weapon (for example), could you stash it for a fighter you make later? Dungeons aren't randomly respawned/repopulated later. And there IS a way to pass stuff between characters. Essentially, once you reach the same early-game point that unlocks the Transmogrification Chest for all characters, you also gain access to an extradimensional storage vault where you can stash stuff, if you've either bought the game or donated to the creator(it's also up for free, full download, so you can miss out on it that way). The more you've donated, the more accessible slots you have. Anything you stash, though, if it lacks stat requirements, like a lot of artifact rings, cloaks and amulets do(generally only body armor, shields and weapons have stat reqs, as I remember it), it gets level reqs slapped on it. Which cap out at level 35 for 5th-tier items. Meaning that if you toss a full set of 5th-tier artifact gear in there, the next character can only equip most of it once they're a good way into the game. Of course, you can reach the stat requirements on a lot of the 5th-tier gear that has them by something like, what, level 10? So for those, it's rarely an issue.
|
|
#
?
Jul 6, 2017 00:23
|
|


|
Bought the game because of this thread (and the Steam sale). Tried making a shadowblade, which died quickly. Made a dwarf alchemist to try and unlock stone warden, which also died quickly. However, dwarf alchemist number two has been doing alright. Unlocked archmage, summoner, wyrmic, and yeeks so far. I did burn through all my extra lives unlocking yeeks, though. Probably shouldn't have tried to clear that particular dungeon in one go at level 10. But I'm level 14 now and have just gotten word of a dire situation in Derth, so I should probably be contemplating my next character. e: Guess not. Turns out those things were weak to fire damage. Hello Sailor fucked around with this message at 15:45 on Jul 6, 2017 |
|
#
?
Jul 6, 2017 15:30
|
|


|
Probably one of the simplest characters to get started with is the Summoner, they're a pretty tough and capable class, as a Wilder they're hard to lock down the way magical or physical classes are, and you can unlock them pretty early on, too. Their resilience gives you some good breathing room to learn some of the trickier parts of the game.
|
|
#
?
Jul 6, 2017 16:16
|
|
|
Just play a Wildfire archmage, and burn the world to save it.
|
|
#
?
Jul 6, 2017 17:46
|
|


|
At my current rate, unlocking the archmage trees via elemental damage is going to take about 20 alchemists. Presumably it speeds up dramatically if they live past the early levels, but that sounds like playing it safe.
|
|
#
?
Jul 7, 2017 01:51
|
|
|
Wait, armor reduces ALL damage? Not just physical? I've been playing this game wrong the entire time.  Also, adventuring parties will carry a completely random potion ingredient, so it can be worthwhile to beat them up. They do stop spawning once you return from the east, though. I don't know if the other patrol types also carry random potion items, either.
|
|
#
?
Jul 7, 2017 03:39
|
|

|
Yes, armor will reduce damage from any weapon-based attack, but not physical damage from spells/spell-like talents. We hit level 8 from clearing out the Trollmire. Let�s look at our new skills. 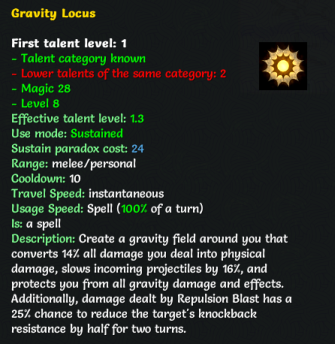 Gravity Locus is a sustain that converts some of our non-physical damage into physical damage, slows down projectiles headed towards us and protects us from the effects of our own gravity spells. It�s worth keeping on for the projectile slowing effect alone.  Materialize Barrier creates a short wall in front of us. It�s useful for slowing down enemies for a few turns while we make our getaway, particularly in an area with narrow corridors. 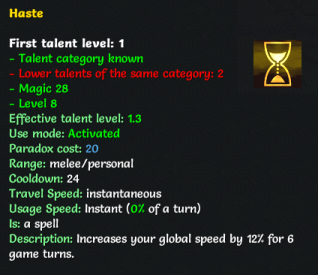 Haste gives us more speed. Fairly straightforward.  Temporal Reprieve is a fun spell that I probably don�t use as much as I should. The �safe place� in question?  Just a tiny floating island in the middle of outer space. Temporal Reprieve is used mostly to wait out debuffs and spell cooldowns � there�s not all that much else to it.  Our third racial, this one is a passive that reduces the lengths of all debuffs inflicted on us. A very useful racial that we�ll be maxing out eventually. Incidentally, we�re unlocking these racials relatively quickly because we�re a skeleton � most races unlock a new racial once every eight levels instead.  A sustain for emergency situations, Contingency will automatically deactivate and cast the set spell whenever our life drops below a certain damage threshold, though it has to be a spell that only affects ourselves with no fixed cooldown. Unfortunately, that rules out both Temporal Reprieve and Bone Shield, so Contingency is set to sustain our Reflection Shield for now. 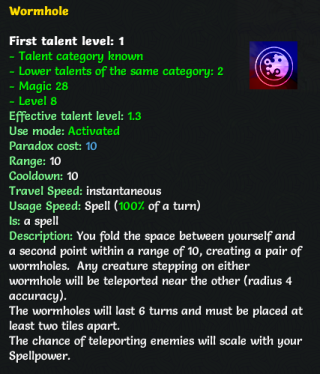 Wormhole is a spell I don�t really use much, since in most cases Dimensional Step is usually sufficient. Could be useful if you really needed to rapidly teleport to Dimensional Shift off a large number of debuffs.  We now gain additional bonuses from our stacks of Spin (which, if you recall, we gain whenever we take damage). It�s a minor effect, but every little helps.  Anyway, onwards to the next dungeon. There�s a couple of different options you can pick for your second one, but most people usually do the Ruins of Kor�pul, the dungeon located next to Trollmire and above Derth.  We enter Kor�pul and are immediately accosted by a repented thief. Early escorts might be annoying, but they usually have a higher life expectancy than late-game escorts, who are often tossed into unwinnable situations immediately upon spawning.  Looks like this is regular Kor�pul, which means we�ll be facing undead for the most part. This guy is a skeleton warrior, a slightly tougher version of the degenerated versions we�ve been fighting up until now. If this was Alt Kor�pul, we�d be facing rogue-type enemies for the most part � thieves, assassins and bandit lords. They can be a bit of a pain if you haven�t been investing in accuracy due to their naturally high defense. 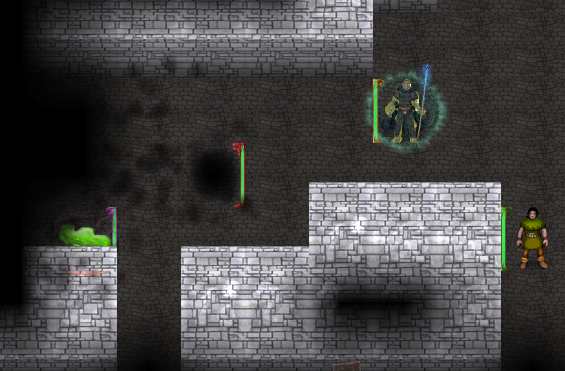 Oh boy, a rare Doomed ooze. Doomed don�t do a lot of damage by themselves, but their shadows can really, really hurt if they get their act together. We take out this guy before it�s an issue, though.  Oh no. I do not need this.  This hornet is a sawbutcher, the second tinker rare of the run. Sawbutchers are tremendously strong melee attackers who can defeat almost any other melee class in prolonged combat, thanks to their multiple melee-damage reducing skills and their overwhelmingly strong saw attacks. Luckily, they don�t have as much defense against long-range spells � at least, this one doesn�t. Time skipping it and Temporal Bolting it when it emerges takes care of it.  Escorts won�t push past you if you block the only path to their destination, so if you�re in a corridor you can take the opportunity to rest by blocking their path.  We escort the thief successfully and claim our reward. Thief escorts give a variety of useful skills, and any one of them would be a welcome addition to our arsenal. We pick Heightened Senses, which increases our see stealth/invisibility stats and allows us to �sense� enemies in a radius of five, even if our light radius doesn�t reach them.  Another day, another convenient diary entry lying around. 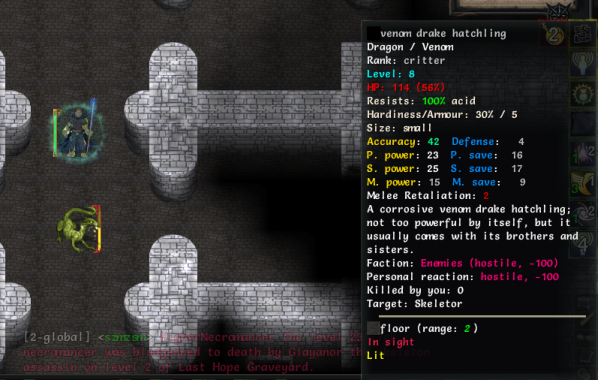 Yet another dragon hatchling encounter. Venom dragonkind have acid-based attacks and are immune to acid damage. 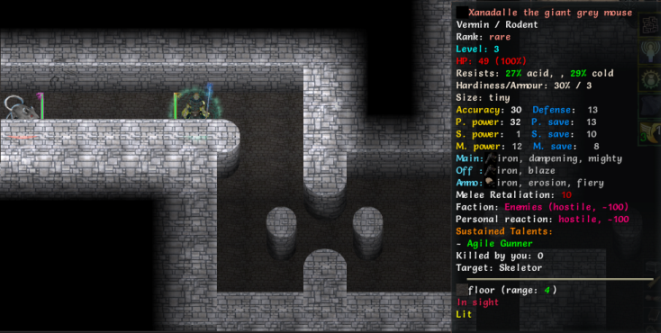 A mouse with guns! It dies in a single hit because it�s still a mouse, though.  We found a skeleton party! They don�t seem to like us crashing the party, though.  We also found another diary page. I wonder what a �Sun Paladin� is.  We found a vault, too. This vault type is pretty common � it�s made of a few small rooms connected together, with powerful enemies in them. It�s not too difficult to handle, because you shouldn�t be facing more than one opponent at a time unless you really mess things up.  Once we�re in the vault, we can scout it with Precognition. The molds aren�t too much of a problem � the main challenge is that skeleton archer. With the Reflection Shield up, he does a pretty good job of killing himself, though, and we clear out the rest without much trouble.  Nothing much of note in that vault, but the other vault on the floor opens with a nice treasure to make up for it.  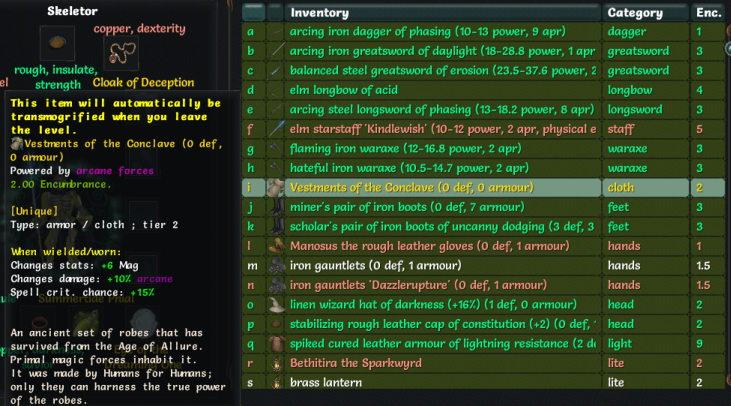 Okay, an average treasure. The Vestments of the Conclave give a minor bonus to magic, arcane damage and spell crit chance, unless you�re a human � in which case you get a slightly larger bonus to magic and arcane damage, and a bonus Cunning boost. There�s a few artifacts like this that give additional race-specific bonuses, including a couple specifically for undead. They aren�t particularly useful for a Paradox Mage, though.  We scout out this vault too. As with the last one, there�s only one real threat � in this case, the skeleton mage over in this room. They know Manathrust and Flame at a decently high level, and hit much harder than you�d expect. Skeleton mages are notorious for being the number one cause of death for necromancers � friendly skeleton mages don�t understand the concept of �collateral damage�, and will happily Manathrust straight through you to hit a mouse on the other side. Fortunately, necromancers get a skill which reduces friendly fire damage later on.  The second floor is mostly more of the same, except for a tricky bit with a skeleton warrior Berserker which I forgot to screenshot. Berserkers can hit us with Warshout, which confuses us for a few turns. Confusion is probably the second-worst debuff in the game behind stun � whenever we�re confused, we have a chance to fail any non-instant talent we use (even basic bump attacks), or move in a random direction instead of the desired one.  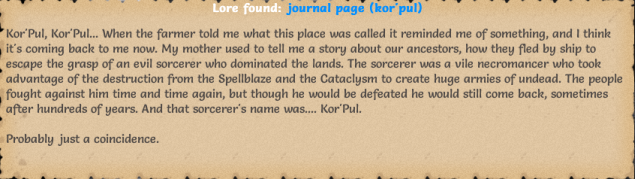 Also, more notes from our Sun Paladin friend. Apparently he�s been busy.  While clearing out Kor�pul 3, we find our first chest. Chests will contain items of varying quality, ranging from a bit of gold to powerful artifacts. However, they can also be trapped chests, unleashing either a few random enemies or one or two rare/randboss enemies upon use. Of course, if you�re confident, those rare enemies can be a prize in themselves, since defeating them guarantees you a decent item.  This chest was trapped, but it just unleashed a small horde of enemies. Multiple enemies are generally the easier alternative for the most part, since none of them will be rares and thus will be comparatively easy to take down. As for the chest itself, it just contained a regular gem, nothing special.  We find the sun paladin�s last note. I wonder what he was going to finish up with. 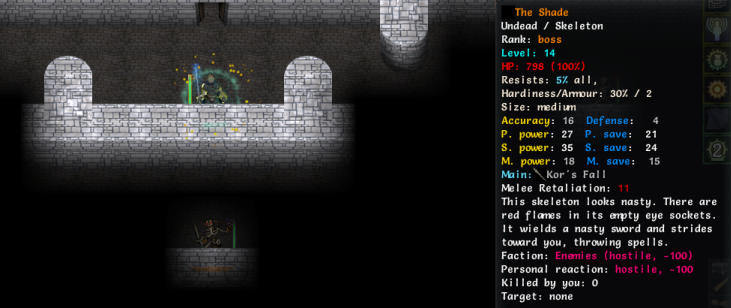 A little Precognition, and we can see why that last note was left incomplete. The Shade is a powerful skeleton mage, and there�s a little bit of a trick to him. If we try to explore normally, The Shade will see us long before we see him, allowing him to get the drop on us with his powerful spells. He likes to begin the battle with Freeze, a spell that does a large amount of cold damage to a single target with a high chance to freeze them, followed by casting Manathrust on the helpless player while retreating, and then repeating the combo when necessary. If we had entered Alt Kor�pul, we�d be fighting The Possessed instead, a bandit wizard who focuses on physical damage spells like Pulverizing Auger and Earthen Missiles instead. Both are pretty tough challenges in their own right � The Possessed is probably the harder hitter damage-wise, but The Shade�s freezing ability can�t be underestimated. 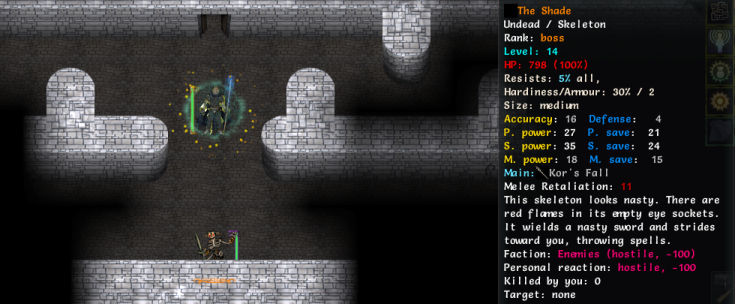 Instead of walking up to him and exposing ourselves, we dig out the wall in front of us, opening up a clear path. Of course, this doesn�t neuter him entirely, just takes away his overwhelming advantage to make it a fairer fight.  The Shade attempted to Freeze us, but the Rune of Reflection mitigated the damage, and we managed to shrug off the Frozen effect. He follows it up with Tidal Wave, an AOE spell centered around him that slowly spreads out over time, doing cold damage and pushing away anyone in its radius.  The Rune of Reflection reflects his Manathrust damage too, and with his two major damage dealers turned back onto him, The Shade is in pretty bad shape. Time Skip and a couple of Temporal Bolts finish up the rest, and we hit level 10 with the EXP from killing him.  He drops the Coral Spray upon his death � not his associated artifact, actually, but it might as well be given its effect. The Coral Spray is a shield that has a chance to unleash a cone of cold damage upon blocking an attack, freezing opponents in place. A fun early-game shield if you can find it. 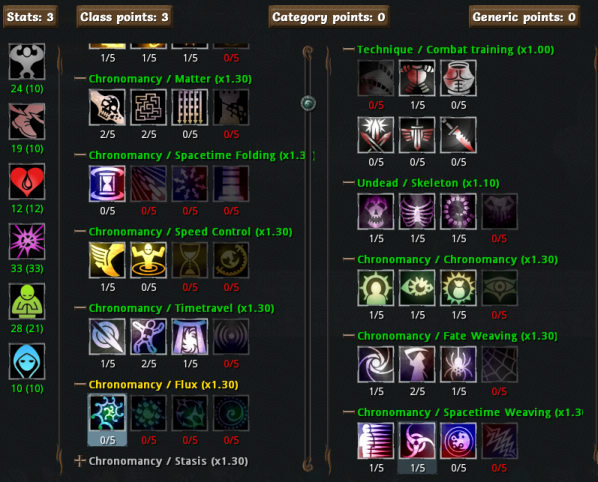 More importantly, hitting level 10 gave us our first cat point, allowing us to unlock the Flux tree � the first major game-changer in our arsenal. With the points we�ve been saving, we can invest one in the first three Flux skills right away. 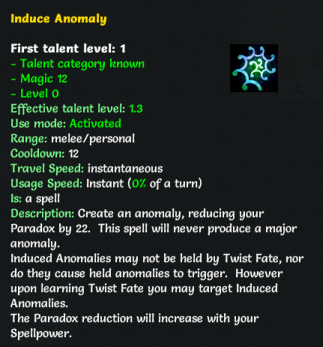 Induce Anomaly will automatically trigger a random minor anomaly, but reduce our Paradox by a large amount. We won�t be using this skill much until we hit level 12 and obtain the final Flux skill, which gives us a little more control over this skill. We can take a closer look at some of the minor anomalies now, at least. I haven�t been mentioning them because they haven�t been an issue for the most part � I�ve been pretty careful about managing my Paradox so far. 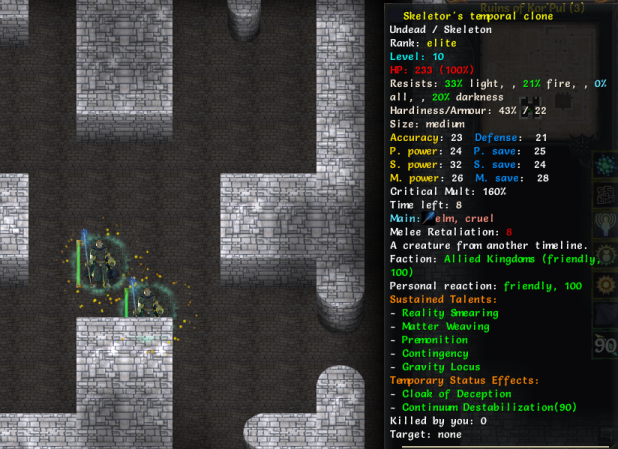 This anomaly creates a temporal clone of a nearby creature. Fun if it�s yourself, lethal if it�s the boss that�s already giving you trouble. Even cloning yourself can be an issue, though � hitting your own clone with AOE attacks turns it hostile.  This anomaly buries us in a stone barrier for a bit. Annoying, but can actually come in pretty handy if we want to take a breather. Archmages/Stone Wardens/Arcane Blades have access to Stone Wall, a spell which can directly trigger this effect, and it accounts for a significant part of their defensive abilities. 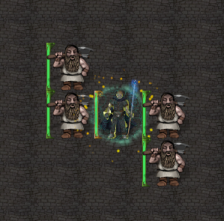 This anomaly is my favourite one � it just summons a bunch of very confused bystanders for a few turns. They start out as neutral and will attack whichever side first damages them, but since they�re weak low-level NPCs they don�t usually have much bearing on the battle either way.  Also, while we were mucking about with the space-time continuum, we found this note from a parallel universe. Wonder what the deal with that is.  Anyway, back to skills. This sustain reduces all damage taken by 30%, but will boost our Paradox when we take damage instead. We�ll have to be even more careful with our Paradox now, but it�s a small price to pay compared to dying. We also need to sustain it to combo with our next skill. 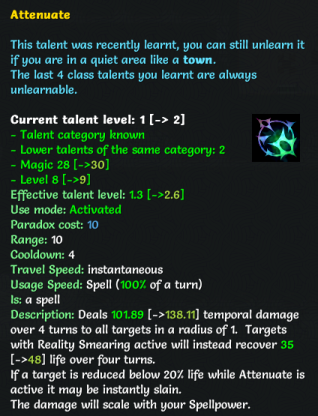 Attenuate is an amazing offensive spell, and is going straight into our offensive lineup alongside Dust to Dust and Temporal Bolt. Some key points about Attenuate: - Being an AOE spell with a very high range, Attenuate can be cast around corners to nick enemies standing close enough, without having to get into their line of sight. - Hitting a target with Reality Smearing active will heal them instead of damaging them. This usually just means �us� in most cases, but we�ll have to keep it in mind if we come across any Paradox Mage rares. - The chance to instakill an enemy under 20% health comes in more useful than you might expect. A lot of enemies start pulling out their major defensive abilities at that point, and can survive for a long time at negative health thanks to certain skills. - Hitting someone with Attenuate active on them increases the Attenuation damage and the Attenuation duration slightly. - Attenuate combos amazingly well with Seal Fate. At max level, Seal Fate has a 40% chance (that increases per Spin stack) per damage instance to increase the duration of one debuff by a turn, and can proc up to five times a turn. The Seal Fate + Attenuate combo is the core of one particular Paradox Mage build, and while we won�t be relying on it to the absolute exclusion of all other attacks, Attenuate is still going to be a fairly major addition to our offensive lineup. This seems like a good point to end the update. We�ll be testing out our new toys on the next two t1 dungeons in the next update.
|
|
#
?
Jul 7, 2017 08:50
|
|

|
God stop making me want to play with Paradox Mages again, I've got like 500 other Steam library games that need finishing.
|
|
#
?
Jul 7, 2017 09:02
|
|
|
Paradox Mages are far from my favourite caster class, actually (that would be the oozemancer), but I'm giving them as fair a shake as I can for the LP. I certainly won't deny that they're a very strong class with a lot of equally viable builds, though that can also be said of most of the really well-designed caster classes.
|
|
#
?
Jul 7, 2017 12:02
|
|
|
One minor typo - your picture for the "Contingency" skill crops off the actual name of the skill.
|
|
#
?
Jul 7, 2017 15:31
|
|
|
Yeah the description was too long for the game to fit both the title and the description, so I just went with the description cause the title seemed pretty self-evident if you read it.
|
|
#
?
Jul 7, 2017 16:18
|
|
|
Inadequately posted:Paradox Mages are far from my favourite caster class, actually (that would be the oozemancer), but I'm giving them as fair a shake as I can for the LP. I certainly won't deny that they're a very strong class with a lot of equally viable builds, though that can also be said of most of the really well-designed caster classes. Honestly, I like playing the Oozemancer after getting trounced because even after several nerfs and bugfixes, they're still a bit OP and a pretty easy class to play, with very few counters if built well. Paradox Mage is a bit more fun because they're potentially strong, but just that bit weaker that they require slightly more care and finesse to play. Anorithils are a bit too repetitive and have too few active skills compared to passives and sustains, for them to be fun for me. Necromancers are long overdue for a workover to unfuck them and make their minions less of a hazard to themselves(and generally less useless). And Archmages are just so drat fragile.
|
|
#
?
Jul 7, 2017 17:40
|
|
|
drat, I arrived too late for the voting. These kinds of threads are always great fun. I always want some of the less popular classes to get shown off, though, if only because I'm genuinely curious what I'm doing wrong for some of them. (I find it very hard to get a lot of the classes past early or midgame, so I end up playing the same handful a lot. I'd love to see a How2Anorithil because the damage they do just doesn't seem to be high enough to stay competitive by midgame, even on Normal. (See also: how to get a Alchemist/Doombringer past midgame, how to get an Arcane Blade/Reaver out of the early game, etc.)
|
|
#
?
Jul 7, 2017 20:09
|
|
|
Anorithil: Basically you build around Corona and an endless parade of crits to just whittle enemies down. You are never going to do some BIG NUMBER damage, but you do a lot of little numbers that add up. Alchemists are just about pumping your Golem and Bombs, plus use Staff Mastery as a spammable attack. Not too much here honestly. The rest are way more complex. Arcane Blade in particular is such a difficult class to play that I'm stunned it's still unlocked by default because it's basically suicide for newbies. That said, if you can make it work, it's ridiculously strong damage output, like "one-shot bosses" level of strong.
|
|
#
?
Jul 7, 2017 20:35
|
|


|
MagusofStars posted:The rest are way more complex. Arcane Blade in particular is such a difficult class to play that I'm stunned it's still unlocked by default because it's basically suicide for newbies. That said, if you can make it work, it's ridiculously strong damage output, like "one-shot bosses" level of strong. Okay, like. A year or so ago, on ToME's chat channel, someone popped in asking how to do Arcane Blade right. People tried to suggest things, he was staunchly resistant to all suggestions, said the game wasn't fun as an Arcane Blade. People suggested other classes to play, he insisted none of them were any fun. And eventually it comes up that this one guy has been playing NOTHING BUT CORNACE ARCANE BLADES for close to FIVE YEARS, and has never once managed to get past the Dreadfell with it. Far as I know, he's still trying, and still stuck.
|
|
#
?
Jul 7, 2017 21:46
|
|
|
Are you not supposed to play cornac arcane blades? I've never really played with the class.
|
|
#
?
Jul 8, 2017 00:26
|
|


|
TheGreatEvilKing posted:Are you not supposed to play cornac arcane blades? I've never really played with the class. It's just that if you can't make it past the same place over and over and over and over again and don't find it fun ... well maybe juuuuuust maybe you should try one of the other 40 classes or other 20 races?
|
|
#
?
Jul 8, 2017 02:34
|
|
|
MagusofStars posted:Anorithil: Basically you build around Corona and an endless parade of crits to just whittle enemies down. You are never going to do some BIG NUMBER damage, but you do a lot of little numbers that add up. Adding to this. It's super easy for an Anorithil (particularly as a shalorian) to get their crit rate to or at least near 100%. The way corona works is each time a spell crits, then corona will spawn an auto targeting corona bolt for each nearby enemy. So you cast an attack and it crits, you spawn some bolts. But wait, you also have an aura that auto hits nearby enemies and can crit. More little bolts. You have your circles which are instant cast and can all crit, some even have multiple crit rolls, you can potentially get 7 crits on a single turn from casting circles alone. An endless wave of little rear end in a top hat bolts. So sample turn: You have 5 enemies near by and cast all your circles and then an attack spells, you have the auto attacking hymn up. You spawn 45 bolts in a single turn and machine gun the hell out of everyone nearby. Anorithils suffer from having only a single way to play them, but they are still pretty fun.
|
|
#
?
Jul 8, 2017 03:00
|
|

|
I don't think it's the specific race/class combination, but just the fact that he spent five years trying and failing to put one viable build together for the only race and class he ever played in this game, and that he adamantly refused to play anything else, claiming they "weren't fun".
|
|
#
?
Jul 8, 2017 05:51
|
|


|
vdate posted:drat, I arrived too late for the voting. These kinds of threads are always great fun. I always want some of the less popular classes to get shown off, though, if only because I'm genuinely curious what I'm doing wrong for some of them. (I find it very hard to get a lot of the classes past early or midgame, so I end up playing the same handful a lot. I'd love to see a How2Anorithil because the damage they do just doesn't seem to be high enough to stay competitive by midgame, even on Normal. (See also: how to get a Alchemist/Doombringer past midgame, how to get an Arcane Blade/Reaver out of the early game, etc.) I'm quite glad nobody voted for a Yeek Anorithil or something along that line, because that's one of the classes I've never been able to wrap my head around. I know how the Corona/Circles engine works in theory, just never had the patience to get to that point myself. Anorithils really suffer from not having a basic spammable spell like the Paradox Mage's Temporal Bolt/Dust to Dust early game - the closest thing they have is Moonlight Ray, and you still have to do the whole 'build up positive energy - convert to negative' circuit first before you can cast it. Decent at those other ones, though. Alchemist: 5/5/5 throw bombs ASAP, preferably acid or lightning infusion. Your main advantage is the ridiculously large bomb AOE, allowing you to easily hit enemies around corners and outside line of sight. Look for items that give you extra summons to distract enemies, and if an enemy is heading towards you that you can't take out with your next attack, it's often better to reposition yourself. Unfortunately, Alchemists don't get better once you get them past the mid-game - that's more or less the point where their gimmick starts hitting diminishing returns, and the endgame is mostly 'more of the same, just longer'. Doombringer: By midgame you should have maxed out the two generic skills that increase damage done/reduce damage taken based on how much vim you have, which drastically increase your survivability. Put a point in Fearscape Shift, Blazing Rebirth and Cauterize Spirit - they're all great escape talents. Doombringers really shouldn't have problems with most enemies by that point due to their overwhelming damage potential - remember, you can use Reckless Strike to completely bypass defense and armor - but it's a good idea to keep your escape talents off cooldown whenever you first enter battle so that if things go wrong, you can pop them and run away. Arcane Blade: For most of the early game, you play them as a crappy mage - hit enemies with beam spells from as far away as possible, teleport/run away whenever they start getting close, always have a damage shield up when an enemy is in sight. Once you've maxed out Arcane Combat + the proc spell of choice (preferably pulverizing auger/earthen missiles) and gotten a good multi-hit move, you can start taking on enemies in melee, but remember that you're still a glass cannon - if you can't kill whatever you're aiming at in the first 1-3 rounds of combat it's time to run away and prepare for the next skirmish. Also, they run out of mana fast. If you ask people how to deal with this they'll mostly go 'just stack mana on spellcrit lol' which is worthless advice under Insane - it simply isn't a common enough ego without the mountains of randarts/rares that you get on Insane. It's better to stack mana-increasing items, and maybe consider picking up Hidden Resources as a prodigy. Reaver: If you're having trouble with the early-game, it might also be best to play them as a crappy mage with Soul Rot, Drain and Virulent Disease until you can max out Bone Shield and Infestation and wear heavy/massive armor. Once you can manage that you actually have some decent defenses, and can decide whether you want to stay as a caster reaver or go melee instead - both have their pros and cons. Inadequately fucked around with this message at 06:04 on Jul 8, 2017 |
|
#
?
Jul 8, 2017 05:55
|
|
|
MagusofStars posted:It's fine. He probably keeps opening vaults in loving Dreadfell, like a moron.
|
|
#
?
Jul 8, 2017 07:50
|
|
|
 Moving on to the next two dungeons. We�ll start off with Norgos� Lair, the dungeon to the left of Shatur and the starting dungeon of Thalore characters. 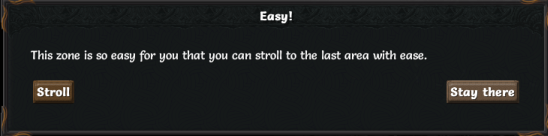 Upon entering the dungeon, we get this pop-up. This shows up if you enter a t1 dungeon above level 10, allowing you to skip directly to the final floor. It�s up to you whether to take the deal or not � you can always go back and clear the remaining two floors if you feel like it. In case it hasn�t been mentioned yet, enemies/bosses do not respawn. If you really want to maximize your loot/EXP, it�s best to clear everything you�re capable of clearing. 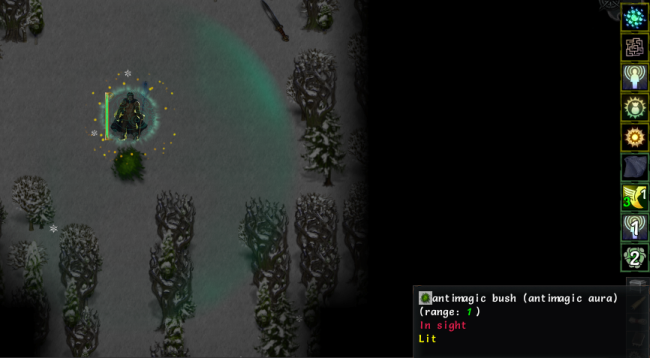 Norgos� Lair is a densely forested snowy meadow � more akin to a regular dungeon than the fairly open area that Trollmire was. This works out fine for the most part - fighting in corridors is preferable to open areas for most classes, summon-based classes excepted. Antimagic Bushes are a semi-common feature here � these give bonus nature resistance/resistance penetration and lower the spellpower of anyone standing around them. Venus Flytraps often spawn around them, just to make them even more annoying.  Looks like this is regular Norgos� Lair, which means that we�ll be facing common animals for the most part � bears, wolves, snakes and the like. On Alt Norgos, we�d be facing additional enemies � shivgoroths, ice elementals with a penchant for cold damage AOE/projectile spells. Regular Norgos is a double-edged sword � certainly, regular animals are easier to face than shivgoroths and greater shivgoroths, but we have a much higher chance of running into a rare snake capable of tearing us apart. Rare snakes are probably the biggest threat of Norgos� Lair, and we�re pretty lucky to have avoided them so far.  We do find this Cursed bear, though. Cursed rares can be surprisingly strong in the hands of the AI, though this one doesn�t have too many threatening skills. We�ll have to stay out of that Gloom aura, though � it has a chance to inflict a debilitating mental effect every turn we stand in it.  The return of gunbear. Are tinker rares actually more common, or do they just seem that way because they�re much more of a threat than non-tinker rares? It�s probably a little of both.  Not that fighting all those rares is helping out our item situation any � all the rare items dropped on this floor were antimagic. Rude.  Our luck finally runs out on Norgos 2 and we run into our first rare snake. This one is a summoner, but for some reason he decides to close in on us and try to stab us with psiblades instead. 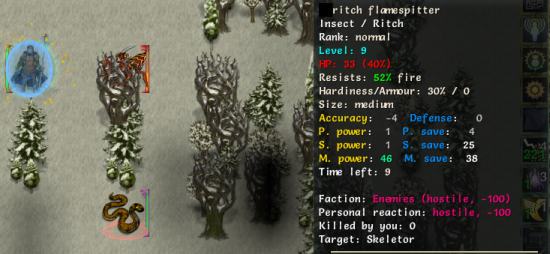 Ah, there we go. Flamespitters are the first ranged summon available to summoners. Not very sturdy, but they hit hard � they spam a long-ranged fire attack every turn until taken down, and can rack up a ton of damage if they aren�t taken down in time.  We take down the flamespitter, and a war hound is summoned in response. War Hounds are the first melee summon available to summoners, bulky attackers who can both dish out and tank damage in equal measure. A high leveled summoner can actually decrease an enemy�s physical resistance by summoning a war hound next to them, which makes them worth using throughout the entirety of the game. Summons can live for a short while after their summoner dies, but they will eventually disappear once their turn limit runs out. This one decided to kill itself by biting my Reflection Shield instead.  We run into our first horrors of the run. Horrors are a varied group, and all of them are various shades of nasty. These guys are devourers, who always come in groups of three. 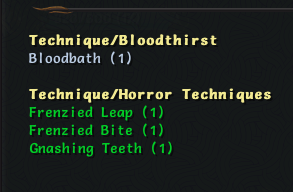 Devourers come with a set of custom skills. Gnashing Teeth will damage a target and attempt to inflict bleeding � if successful, all nearby devourers will be sent into a frenzy which increases their global speed and crit chance. Frenzied Leap/Bite can only be used while Frenzied � one is functionally a short-ranged teleport, the other a bleed-inflicting damaging skill. Bloodbath is the odd one out � it provides a stacking boost to HP/stamina regen whenever you score a critical hit, and has nothing to do with bleeding despite the name. Thankfully, we�re a skeleton, and thus bleeding-immune. We stack Attenuates on them while walking backwards, and the Devourers fall without ever getting into melee range.  On the third floor, we run into the boss of the dungeon, the eponymous Norgos the Guardian. He�s a big bear, but he doesn�t have very much else to him � he hits hard and can Stun us if he gets into melee range, but that�s about it. In Alt Norgos Lair, we�d be facing Norgos the Frozen instead � a bear who can cast Frost Grab to pull us into melee range and Ice Storm to damage anyone standing nearby. On the other hand, Norgos the Frozen is completely immobile, and thus can do nothing to you if you stand out of his line of sight. 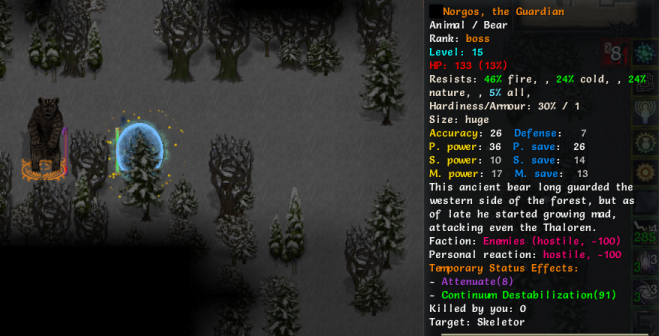 Attenuate + Seal Fate combo in action � those extra turns of Attenuation are all from Seal Fate extending it. It�s not an especially interesting playstyle, but it is a fairly safe one.   Norgos dropped Sludgegrip, another common early-game artifact. They�re meant for oozemancers but work well on most classes - +4 Cunning and Willpower is a decent stat boost early on, even if you can�t leverage its other bonuses. With that done, we mop up the rest of Norgos� Lair. There�s not much else of interest, just more common bears/wolves/snakes, and we don�t get any good loot out of it either. Time to move on.  Heart of the Gloom is to the right of Shatur and Norgos� Lair. It can be a very challenging zone if you�re unprepared, so it�s best not to rush into it. 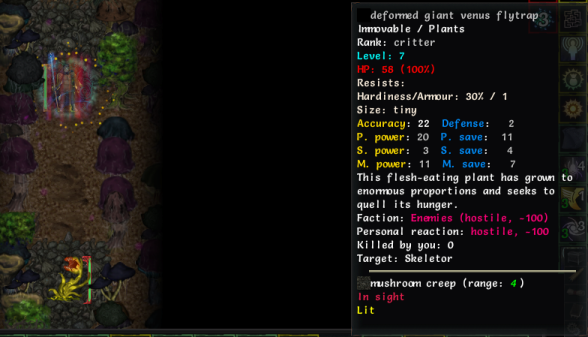 Looks like we got regular Heart of the Gloom, which means Cursed/Doomed themed enemies. All the enemies here are �sick� or �deformed�, often have Gloom surrounding them, and can use Dark Tendrils and Agony. The former is a slow-moving projectile that leaves a trail of creeping darkness behind it and pins us if it hits, the latter a mental debuff that does an increasing amount of mind damage over several turns. In Alt Heart of the Gloom, we�d be facing Mindslayer/Solipsist themed enemies instead. All the enemies would be �sleeping� or �dreaming� and would know Forge Shield/Pyrokinesis instead, allowing them to reduce damage taken and cast AOE fire attacks.  As you can see, big open areas with lots of Venus Flytraps and bulky enemies are common here. If Creeping Darkness hits you, you�re in for a very bad time � the poison effect from multiple Spit Poisons will stack. This dungeon is probably where that skeletal poison immunity shines the brightest. 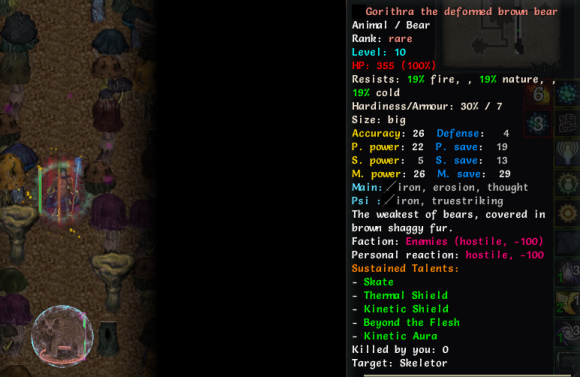 Of course, a mindslayer bear has to spoil the whole aesthetic. Mindslayer enemies start off with a whole slew of sustains and effects � this bear is currently shielded against both physical and elemental damage, moves at 1.3 times our speed, and can stab us with a TK-wielded sword for bonus damage if he gets close.  On Heart of the Gloom 2, we run into our first Honey Tree. Honey Trees are an immobile enemy that can summon bees and bears to their aid. Cute, but not too much of a threat for the most part.  Creeping Darkness in action. The projectile isn�t very fast and not too hard to outrun, but it actively tracks you and lingers for a very long time. If you�re not currently in trouble it�s often more convenient to just take the hit and wait out the pinning effect.  We run into our first Blighted Soil patch on Heart of the Gloom 3. Standing in Blighted Soil reduces our disease resistance and gives all our attacks a chance to infect the target with a random disease (this effect appears to work both ways). Blighted Soil is why we can�t let our guard down entirely against Venus Flytraps in this dungeon � we�re poison-immune but not disease-immune, and Blighted Soil patches are common in those big enemy-filled rooms, just to add insult to injury. 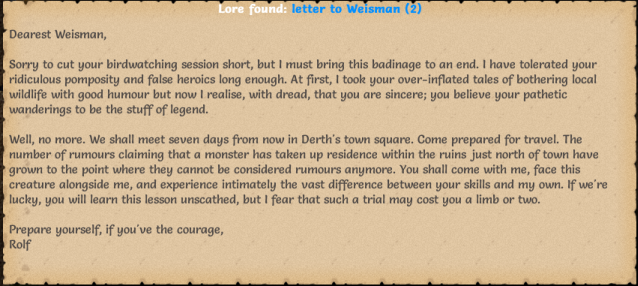 We find some lore that doesn�t relate to the current dungeon at all. The saga of Weisman and Rolf is one that will stretch through the game, but sadly we won�t get closure to it with our current race/class combo.  With the rest of Heart of the Gloom 3 cleared out, there�s no one else left to take care of but this guy. The Withering Thing himself is not all that much of a threat � he can Blindside us to teleport to our side, but that�s about it. The main threat comes from his Shadows � the Shadows can also Blindside us and pelt us with spells, and as long as he survives, he can continually summon Shadows as they�re killed off. If we were in Alt Heart of the Gloom, we�d be facing The Dreaming One instead. The Dreaming One uses Sleep and Slumber to put enemies to sleep before blasting them with Distortion attacks. Can be a difficult fight, but generally considered an easier foe than the Withering Thing. 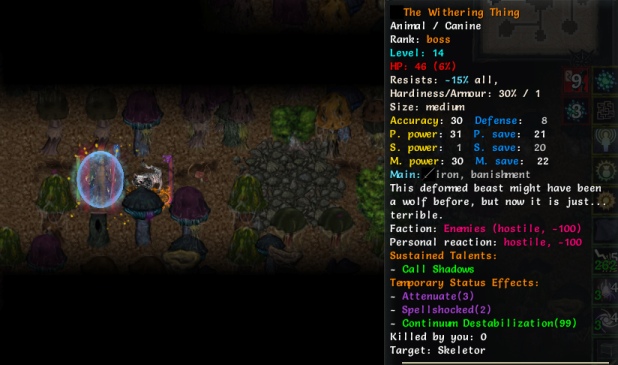 The fight with the Withering Thing goes pretty well, all things considered. We Time Skip him and clear out the Shadows while he�s gone. There�s a cooldown on Call Shadows so he can�t summon them non-stop, and by himself he�s not that much of a threat.   From his death we get his associated artifact, the Withering Orbs. They add a little bit of mind damage to weapon-based attacks, and grant a small amount of see stealth/invis. Probably their most useful associated trait is Blind-Fighting, a passive which ensures you take no penalty from attacking a stealthed/invisible target, even one you don�t have enough stealth piercing to actually see. The Dreaming One�s associated artifact is, as you might expect, the Eye of the Dreaming One. Of course, since we�ve already got that, it would have dropped something else had we fought it. More importantly, we hit level 12 from killing the Withering Thing, the level requirement for unlocking the fourth-tier talents in all our currently available trees. Let�s take a look at them. 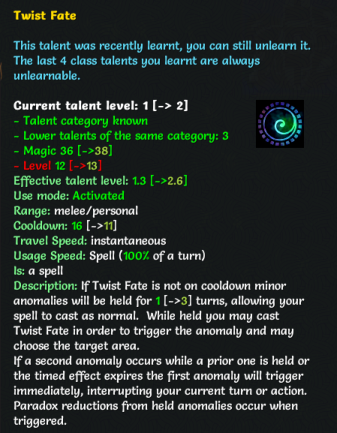 Twist Fate allows us to �hold� anomalies for a turn or more should we accidentally trigger one � once the time limit is up or if we trigger another one, the held anomaly will automatically activate.  When activating held anomalies or using Induce Anomaly, we can now roughly aim our anomalies at a targeted area. This allows us to target our more crippling anomalies at opponents, while saving our beneficial anomalies for ourselves. Actually using anomalies to our benefit is still a chancy thing, but it�s definitely more reliable than allowing them to fire randomly.  This one doesn�t do all that much damage, but the AOE slow always comes in handy. Certainly worth a point if we can afford one.  Kind of a double-edged sword � while having Dust to Dust dig out walls can be useful for exploration, it can also open up pathways to enemies that we would rather not grant them. The passive effect removal chance comes in handy, though. 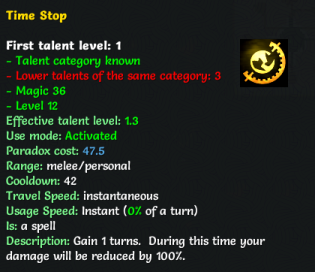 Upon activating this spell, we immediately gain 1-3 turns (depending on talent level), while the rest of the world is frozen. During this time we can�t do any damage to opponents, though that�s usually not the best use of it anyway. Time Stop is more useful as a distance-closing/escape talent, for casting buffs/debuff-removal spells, or for waiting out cooldowns/debuffs. Since it has no fixed cooldown, it plays well with Contingency. (Though, I guess if you had any projectile attacks, you could carefully time it so that your projectiles would hit your opponent once time resumed. Who would be tedious enough to do that, though?)  The biggest game-changer in our offensive lineup since Attenuate. The key point about Echoes of the Past is that the bonus temporal damage scales with the enemy�s missing health, which makes a larger and larger difference the more HP the enemy has and the more damage it takes. The go-to skill for boss-killing and for when you want a major source of burst damage.  On the generic side, we�ve unlocked our fourth racial. Reassemble heals a large amount of health and will eventually grant us an extra life should we max it out. A non-spell source of healing is helpful, on the off chance we get silenced.  This one is a fun one. It might be easier to explain it in action, though.  Upon using See The Threads, events play out as usual for the duration of STT, until�  �See The Threads expires, and we�re sent back to the turn we first used it. This happens two more times, and then�  �you get to choose which timeline you prefer. If you die in any of the timelines, See The Threads immediately unravels and returns you to the start, but you don�t lose a life. See The Threads can only be used once per zone level, which limits its use somewhat. Once you�re experienced enough it�s not all that useful, since if you can foresee a situation in which See The Threads might come in handy, you generally already have a rough idea of how it�s going to play out. The most common uses of it are probably for escaping Ambushes in as much safety as possible (since each ambush counts as a separate zone level), and for using one turn before killing a boss, allowing you to reroll its artifact drop.  Shifts a percentage of the damage we take over to a nearby enemy for a few turns. Simple and effective. We�ll be relying on this spell a lot when we get it.  A fun but unreliable sustain. Not worth teleporting just to trigger this effect, but if it ever actually procs then it makes for a nice bonus. That�s a lot of new skills, but unfortunately we don�t have the points to unlock all of them right now. Now that the influx of new stuff is slowing down, we can focus on fleshing out the skills that we really want/need. 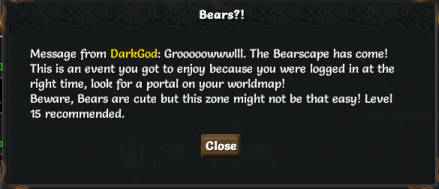 On our way out, we get an additional bonus. The Bearscape is an event dungeon, triggered whenever Darkgod is in a capricious mood. Once activated, it will linger on that character�s save file, but can only be entered once. Most event dungeons are level 20+ zones (despite the �recommended level�), so we won�t be seeing it for a good long while. 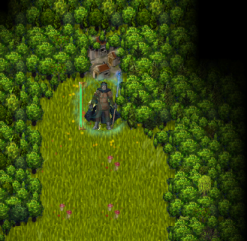 One last loose end to tie up before we go. This zone was unlocked by agreeing to the lumberjack�s request for help outside Last Hope, several updates ago.  Well, that doesn�t sound good. We�d better hurry.  The lumberjack�s village is currently being menaced by Ben Cruthdar, the Cursed. Ben will attack any lumberjacks that he comes across, and will more or less one-shot them for the most part. The more lumberjacks that survive, the better a reward we get. Ben himself is a decently tough character � he starts off with several Cursed melee skills, though thankfully Rampage isn�t among them. He�s nothing we can�t handle at the moment � we just have to keep him away from the lumberjacks.   If this is your first time completing this quest, this unlocks the Cursed class. 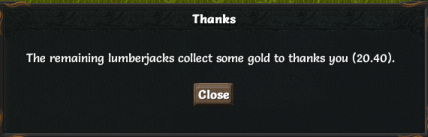 The lumberjacks will reward you with a random t1 pickaxe, and a variable amount of gold depending on how many of them were saved. There�s an achievement for saving all of them, and funnily enough it�s most easily earned on insane � there�s a decently high chance that a random lumberjack will spawn as a powerful rare/randboss and annihilate Ben before you even get there. That�s about all that needs to be done for now, I think. The remaining two t1 dungeons coming up in the next update. Inadequately fucked around with this message at 17:53 on Jul 9, 2017 |
|
#
?
Jul 9, 2017 11:13
|
|
|
Just a note: at least as of the current version you can Stroll a T1 dungeon at level 9. I did it today on my current run.
|
|
#
?
Jul 9, 2017 13:47
|
|


|
Thanks for showing off See The Threads! That looks so fun, and the idea of using it for rerolling artifact drops is hilarious.
|
|
#
?
Jul 9, 2017 14:32
|
|

|
I appreciate all the detail you are discussing in this thread.
|
|
#
?
Jul 9, 2017 16:52
|
|

I made this ages ago to commemorate my first victory and advocate for playing rogues.
|
|
|
#
?
Jul 11, 2017 02:34
|
|


|
Funnily enough I haven't quite managed a rogue win yet post-1.5 despite their numerous buffs. Maybe I'll give them a proper shot eventually. The last two t1 dungeons are located above Elvala. We�re headed to the Scintillating Caverns first. 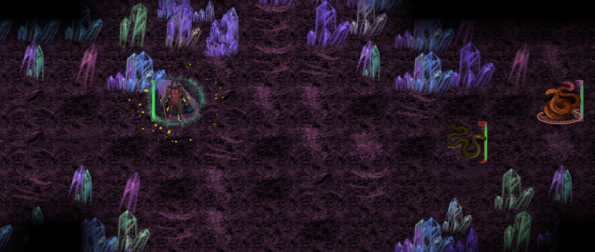 The Scintillating Caverns are the starting area for most Shalore/Ogre characters. It�s generally recommended to exit and head for the Trollmire instead, as the Scintillating Caverns can be rather difficult to handle with some classes early on. Regular and Alt Scintillating Caverns are pretty similar � the former consists of three large sprawling floors while the latter consists of six fairly small floors, but they�re pretty much the same as far as general aesthetic/enemies go. Also, there�s another summoner snake over to the right. As rare snakes go, summoners aren�t that much of a challenge � summons are cooldown-based and thus don�t benefit from the snake�s global speed boost all that much.  Living crystals are the main challenge of the Scintillating Caverns. Essentially immobile magical turrets, crystals will spam their associated elemental spell whenever it goes off cooldown. Their only mobility skill is Phase Door, which can make closing in on them a pain. This blue one only knows Tidal Wave, which isn�t much of a problem since we can stay out of wave range and pelt it with beams.  Not a dropped diary entry for once, though it might as well be.  These white crystals are slightly more challenging to take on. As you can see most crystals are immune to their associated element, but extremely vulnerable to their opposing one. Projectile attacks are the most common type of attack here � thankfully we have Gravity Locus slowing them down.  This red area is a Spellblaze Scar. Standing in its aura will grant us a bonus to spell crit chance and increased fire/blight damage, but critical spellcasts will cost more mana/vim/energy. No idea if it works in a similar manner with Paradox.  These red crystals cast Flame, as you might have guessed. Try not to fight one near a Spellblaze Scar.  A psyshot crystal, of all things. Psyshots are the last of the tinker classes introduced in Embers of Rage. They�re an odd class � kind of a mix between a mindslayer and a gunslinger, alternating between debilitating psionic attacks and gunshots. Ordinarily they would wield a gun in their main hand and a mindstar in their offhand, but this one appears to have forgotten their mindstar. We stand out of gun range and blast it to death.  On Scintillating Caves 2, we run into our first Bulwark rare. Bulwark rares can be a challenge for melee characters � their Shield Wall sustain gives them very high armor, as you can see. It�s not as big a deal for us, since our attacks aren�t affected by armor. 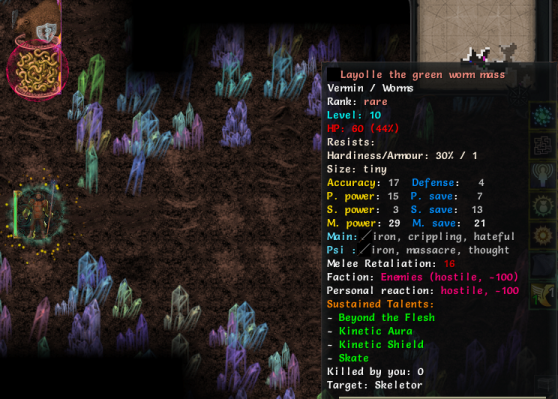 Also, a mindslayer worm mass decided to join in the party. We stack Attenuate on both of them, and both are erased from reality before they ever get into melee range.  Black Crystals are probably one of the biggest threats in the Scintillating Caverns. Their spell of choice is Blight Bolt, a palette-swapped Soul Rot that does very high blight damage with an increased critical chance.  We find another page of the research journal nearby. Interesting info, but of no real use to us. Shimmering crystal! These guys are special � they don�t have a proper projectile attack like all the rest do. 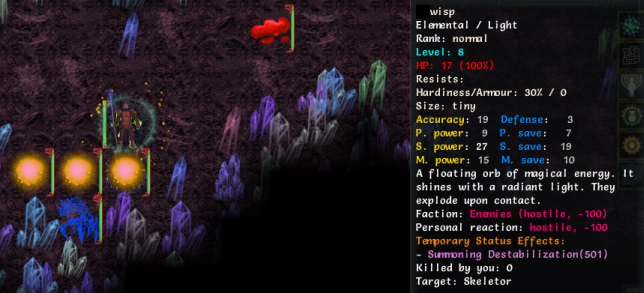 Instead, they summon wisps, elemental creatures of pure light whose only attack is to hone in on us and explode, doing a small amount of AOE light damage. We take them all out with Echoes of the Past before that happens.  More research journal goodness. We�ll find out the results of the blight damage experiment soon enough. 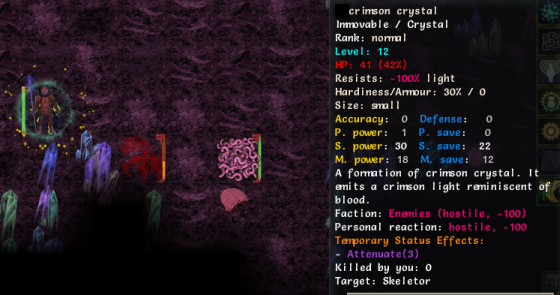 We run into our first crimson crystal on Scintillating Caves 3. They cast Blood Grasp, a hard-hitting blight projectile that heals them if it hits us. 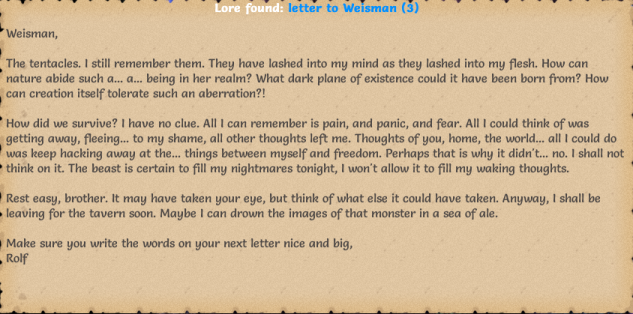 The continued saga of Weisman and Rolf. Looks like they�ve gotten themselves into a spot of trouble. 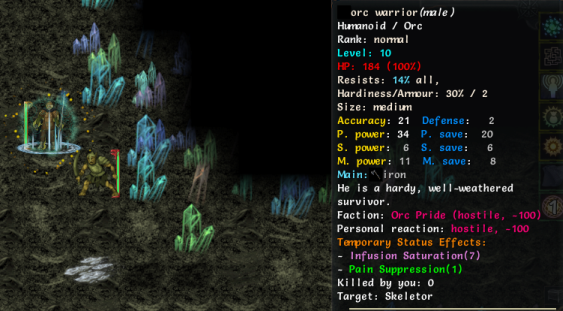 Our first orc! Despite the fact that orcs are supposed to be extinct and their big reveal is a major turning point in the story, orc enemies will occasionally pop up prior to that point with no acknowledgement whatsoever. This guy is just a bog-standard warrior, and we promptly erase him from existence.  The final boss of the Scintillating Caverns. Essentially just a souped-up crystal amalgamation.  As you can see, it knows several different types of elemental projectiles, and will alternate between them before Phase Dooring away. Elemental Bolt is one we haven�t seen yet � it�s just a slow-moving bolt that does random elemental damage if it hits us.  Gravity Locus + slow-moving bolt spells means we can stroll around its spells with ease while carefully lining up our own shots. The main reason it hasn�t died yet is because it keeps Phase Dooring away. 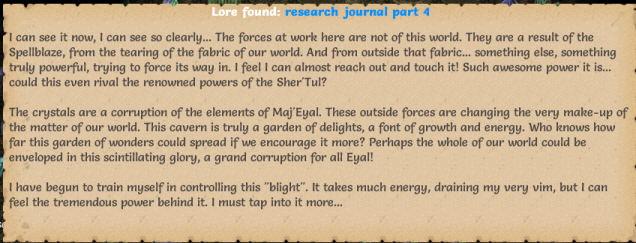 While trying to chase it down, we run into another page of the research journal. That�s certainly an ominous note to end on. I wonder what became of this guy? 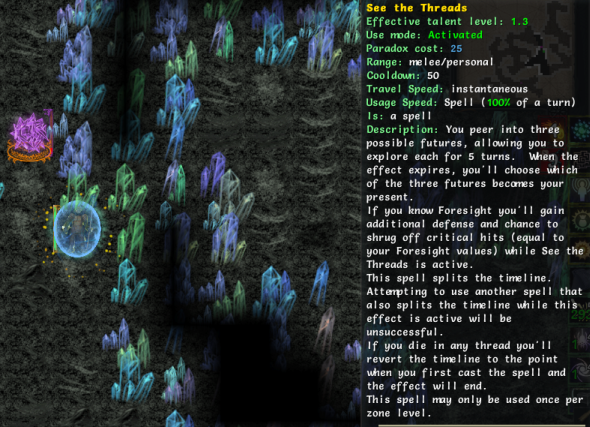 We finally manage to corner the Spellblaze Crystal again. Just for fun, we cast See the Threads before finishing it off with Echoes of the Past.  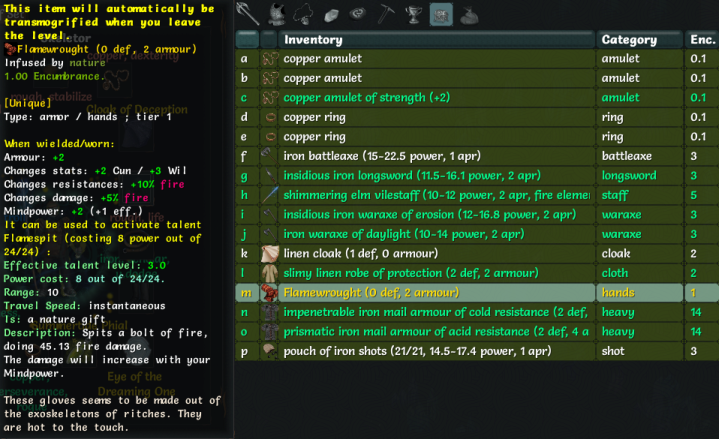 On timeline 2, it drops these Flamewrought gloves. These gloves grant you the ritch�s Flamespit ability as an activable effect. Decent early-game gloves for mindpower classes, since the gloves have a fairly low cooldown.   On timeline 3, it drops Kor�s Fall, the artifact associated with The Shade. Kor�s Fall gives an all-round bonus to defiler-related elemental damage, grants a fairly large spellpower/spellcrit bonus for a t1 staff, and can be activated for a low-cooldown Bone Spear. A good early-game find, but outclassed by any solid t2 staff or higher for the most part.   We go with timeline 1, where the Spellblaze Crystal actually drops its associated artifact. The Crystal Focus is one of the earliest artifact gems that can be found. It gives a bonus to magic and elemental damage, and can be activated for a special feature. 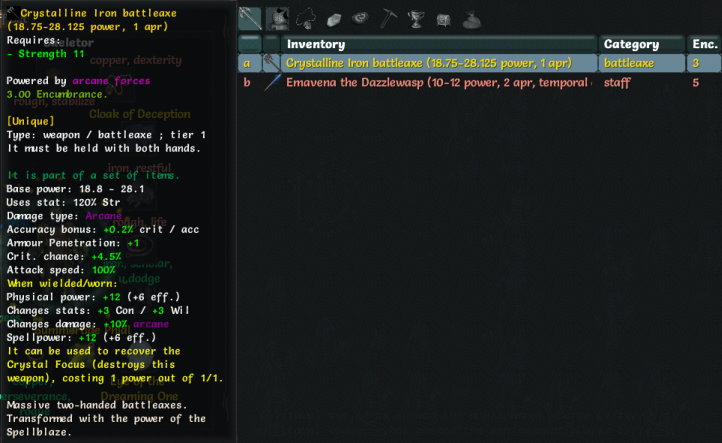 Using the Crystal Focus prompts us to choose a white (egoless) weapon. Upon using it, we get a Crystalline weapon, with additional bonuses granted by the Focus. Crystalline weapons grant a spellpower increase, bonus Con and Willpower, and do pure Arcane damage when attacking. The higher-tier the weapon used, the stronger the bonuses. Prior to 1.5 the Focus could only be used once, but now Crystalline weapons can be used to recover the Focus, though the fused weapon will be lost. Gloves and shields count as weapons and can be fused with the Focus, but ranged weapons cannot. Crystalline weapons are kind of gimmicky, but they can work if you find good arcane-damage boosting gear early on. As you can see, crystalline weapons are also part of a set � there�s another artifact we can find that boosts them even further, but we won�t be finding that until late-game at the very least. 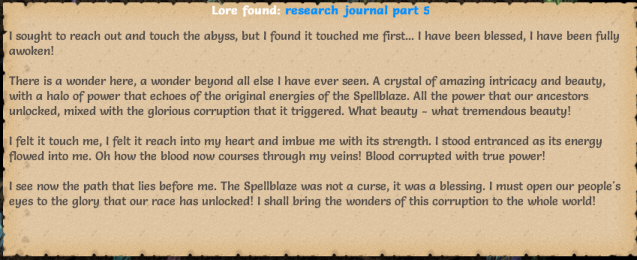 We mop up the rest of the Scintillating Caverns. On our way out, we find the last of the research journals.  Anyway, moving on. We�re done with the Scintillating Caverns, so we head over to the Rhaloren camp (it stands for �renegade Shaloren�) over to the left of Elvala. 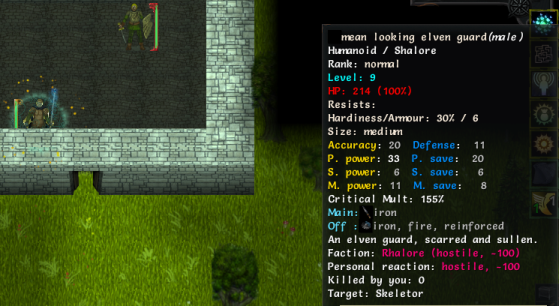 Looks like we got regular Rhaloren Camp, which means big open spaces for the first couple of floors, broken up by a few scattered buildings. Alt Rhaloren Camp is all dungeon, all the way. The latter is slightly easier (big open spaces are not an advantage for very many classes), but the former is nothing we can�t handle. Mean-looking elven guards are the most common melee enemy here. Their main purpose is wasting our time while stronger enemies blast us from a distance. 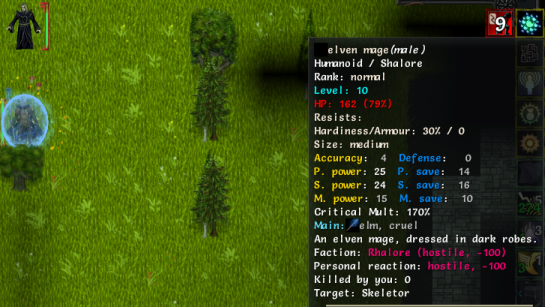 These guys are the real threat. Elven mages will cast Shock and Earthen Missiles, and with these big open areas we could be facing a lot of them all at once. As a mage ourselves they�re not too much of a threat, but melee characters could find closing in on them a troublesome task.  Elven tempests are the other common mage-type enemy besides the Elven Mage. They don�t hit as hard, but we can�t dodge their attacks. Instead of projectile attacks, they cast Lightning, a beam of pure lightning damage with a large damage variance range. They�re also surrounded by a magical Thunderstorm, which automatically strikes nearby enemies with lightning damage every turn. Oh, and what�s that just above us?   The Blood of Life! A semi-common artifact, using it grants you a whole extra life. Invaluable on roguelike mode, a nice bonus if you can get it on Adventure mode. Unfortunately, it�s useless to us � it doesn�t work on undead.  More Weisman and Rolf. As you can see, these letters are out of order, though the general gist of the story isn�t too difficult to piece together. 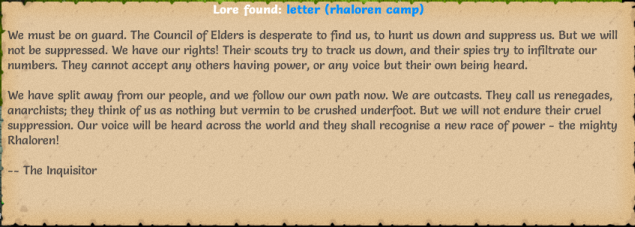 One of the guards dropped this letter. I don�t think this whole �rebellion� thing is working out very well for them, all things considered.  Bad idea time! While the Rhaloren Camp by itself isn�t too much to handle, provided you�re careful, Rhaloren Camp vaults are something else. These vaults are especially notable for high-level enemies even by vault standards � we�ll have to get ready to run at a moment�s notice if things turn bad.  We cracked open the vault and an Elven Warrior popped out. Not too much trouble, but significantly higher-leveled and tougher than the plain old Elven Guards we�ve been erasing by the dozens. Note that most high-level elven enemies know Timeless and are happy to use it at a moment�s notice � if your strategy relies heavily on debuffs, the best thing to do is to inflict some other minor debuff on them so they waste it. For instance, setting him on fire with our Heat Beam rune makes him easy prey for Attenuate, and the rest is simply a matter of waiting it out.  Most of the other rooms in this vault are beefed-up elven guards and mages � slightly tougher than the ones we�ve been fighting outside the vault, but nothing too challenging. The final room of the vault? That�s another thing entirely. Elven Blood Mages are essentially corruptors by another name. They come with a host of high-leveled corruptor spells, and their specialty is the Corruption/Blood tree, which grants them high blight damage, high disease chance and an increased spellcrit chance. We can probably damage-shield away his spells, but if he inflicts a particularly nasty disease on us, we might have a problem. This guy is enough of a threat that we�ll burn our See The Threads for this level on him � not that there�s anything else we need to use it on. 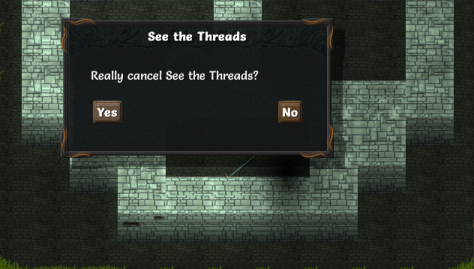 Thankfully, he decides to skip his most threatening attack, Blood Spray. Instead, he focuses on raw blight damage, which Reflection Shield promptly tosses back at him. We finish him off, wait out the other two timelines and collect our loot (a fairly average steel sword, but it�s the thought that counts). Incidentally, most buffs can be canceled early by right-clicking on their icon and choosing to manually cancel them. Can be useful if you�ve accidentally activated the Rod of Recall early, for instance. 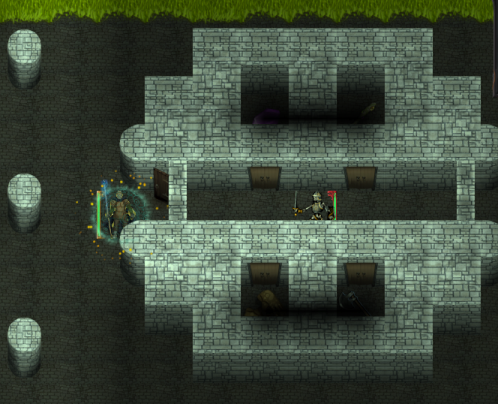 There�s another tiny vault here with an armored skeleton in it. They weren�t a challenge at the start of the game, and they�re not a challenge now either. Of course, there�s nothing good in it either. C�est la vie. 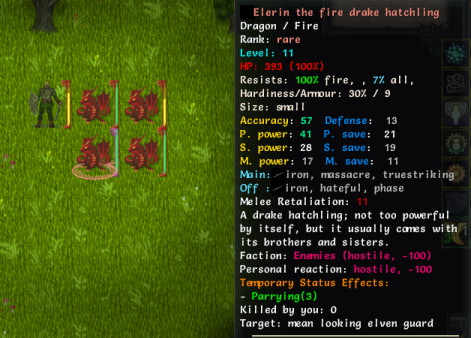 On the second floor, we encounter a strange sight. Rhaloren camp guards and commonplace enemies belong to different factions, and as such will fight each other on sight. This guard is currently failing to do any damage to a rogue fire drake hatchling whatsoever.  We found another letter. Should probably have gotten around to guarding those caverns slightly faster.  A temporal warden hatchling! We can see the much-maligned Warp Mines in action here � stepping on the red ones will randomly teleport us away from the hatchling, while stepping on the blue one will teleport us towards it. 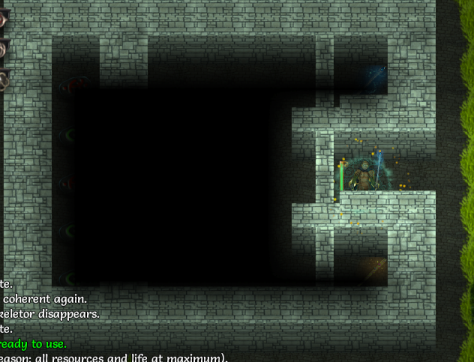 This vault is deceptively simple, but can be brutal if you�re unprepared. What�s in it? 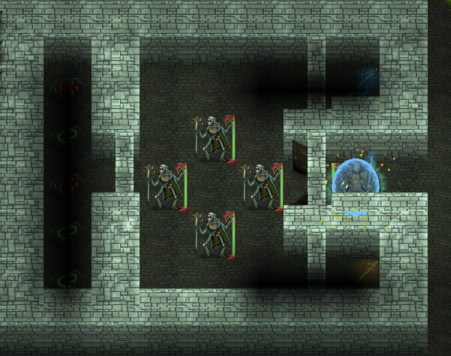 Four Skeleton Mages, Manathrusts primed and ready. We shield up, drop an Attenuate on them and immediately bugger off, finishing them off with Dust to Dust when they walk into our line of sight.  Rhaloren Camp 3 is a proper dungeon � no more big open spaces for us, thankfully.   We find the final two Rhaloren Camp letters. Where�s this Inquisitor fellow anyway?  Oh, there she is. Like the Shade, we can dig out the wall in front to reach her, but there�s not as much of an advantage in doing so this time. We gain the same amount of initiative by just walking through the doors at the side. The Rhaloren Inquisitor knows both Flame and Soul Rot � spells we�re fairly capable of dealing with by now. Her most interesting trait is probably her Rod of Annulment � a magical artifact that randomly puts three of our skills on cooldown when used.  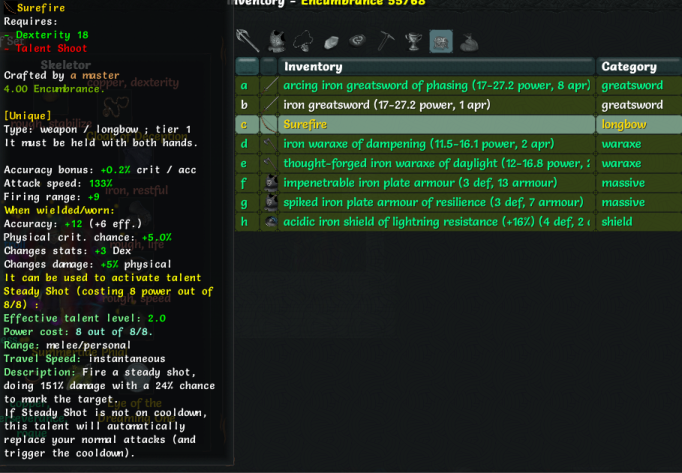 We do the usual See the Threads routine before we finish off the Inquisitor. On timelines 1 and 3 she drops Surefire, a nice early-game bow for bow users if you can find it.   On timeline 2 she drops Stormlash, one of the few whips in the game. Whips are very rare exotic weapons that scale entirely off Dex. In the base game, all whips are standard artifacts, though there�s addons that can change that if you like. There�s a couple of interesting builds they can be used for, but not on a Paradox Mage. Since we don�t need either of these, we just pick a timeline at random. 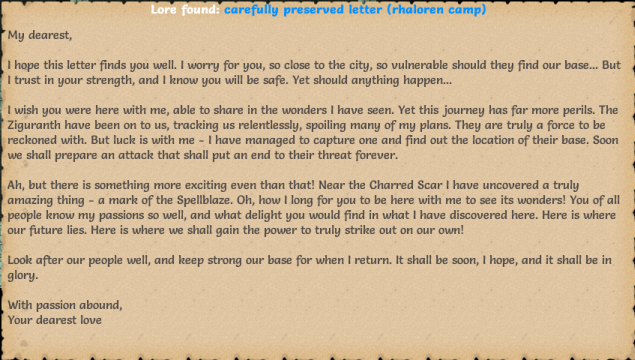 The inquisitor also drops one final letter. We�ll have to check out this �Mark of the Spellblaze� sometime in the future. 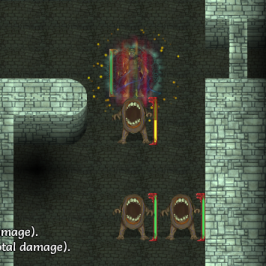 With that done, we clear out the remainder of the Rhaloren Camp. The only other noteworthy thing is this devourer gang hanging around, which we promptly Attenuate away. 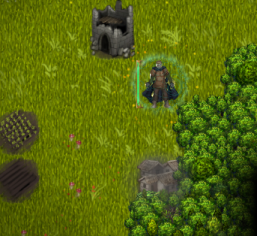 We hit level 14 for clearing out the Rhaloren Camp, triggering a new sidequest. Looks like Derth is having some bad weather � we�ll deal with that later. Before we head for the t2 dungeons, there�s one more piece of business to settle. 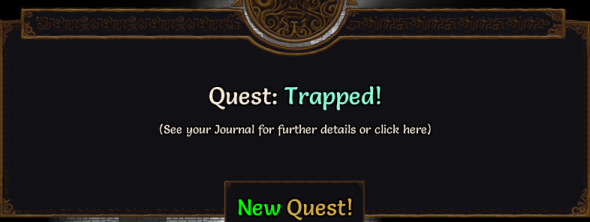 This quest has a chance to randomly trigger once you�re above level 6, though it seems to require wandering at least slightly off the beaten path. A voice will call to you from underground, and choosing to follow it takes you to an underground dungeon with no exit save the Rod of Recall. You only have one shot at it � refusing it or recalling out of the zone once you enter locks it off. If that isn�t to your taste, there�s an addon that turns it into a zone that can be entered once you hit level 6, though the caveat about only having one shot at it still applies. 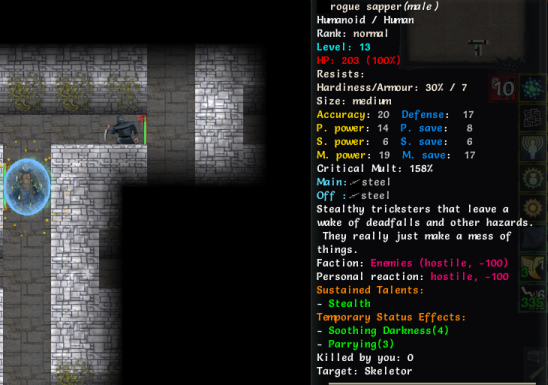 The first floor of this area is a labyrinth filled with rogue and thief-type enemies. The rogue sapper is a special variant focusing in traps � his modus operandi is to stealth up, lay down traps and run away. If you�re a rogue and know traps yourself, you can manually disarm his traps for a chance to learn their schematics.  We beamed him to death, but triggered his ambush trap, which summons a host of random rogues around us.  Bandit Lords can summon additional rogues as well � battles can really get out of control if you don�t finish them off quickly. 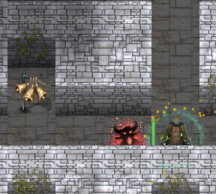 A couple of traps we spotted with Precognition. The ambush trap (the screaming one) will summon rogues out of thin air if set off, the alarm trap (the bells) will just teleport nearby enemies to our location.  We find a very nice prize in a chest � a set of high level artifact arrows! They�d be really helpful if we were using a bow, but sadly we aren�t. Oh well, moving on.  The second floor contains a whole host of surprisingly non-hostile rogues, as well as this guy.  Before you stands a menacing man clad in black.  Ah, the intruder at last� And what shall we do with you? Why did you kill my men? Ah, the intruder at last� And what shall we do with you? Why did you kill my men? I heard some cries, and your men�they were in my way. What�s going on here? Oh, so this is the part where I tell you my plan before you attack me? GET THIS INTRUDER! I heard some cries, and your men�they were in my way. What�s going on here? Oh, so this is the part where I tell you my plan before you attack me? GET THIS INTRUDER!- [Attack!] - Wait! Maybe we could work out some sort of arrangement; you seem to be a practical man. Choosing to side with the Assassin Lord unlocks the Poisons talent tree for rogue classes if you haven�t unlocked it yet, and the Tricks of the Trade prodigy. In almost all cases, it�s better to attack the Assassin Lord and save the merchant, for reasons we�ll find out later. 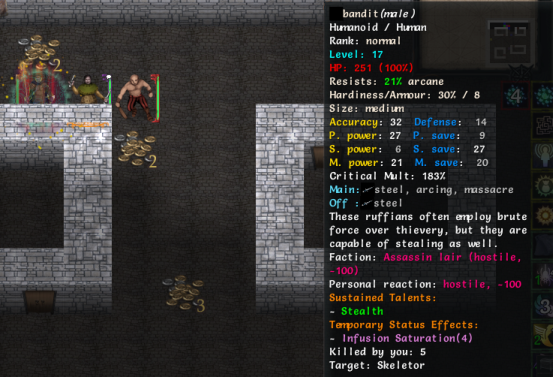 Naturally, choosing to fight turns all the rogues hostile, as well as the Assassin Lord himself. He can be a challenge if you triggered this quest early � he has very high Stealth and can stay stealthed for a very long time with Shadow Dance, can inflict a multitude of crippling poisons (one thing we don�t have to worry about, at least) and can assault us with Shadowstep and Shadow Veil for bonus darkness damage.  Killing the Assassin Lord generates the exit to the dungeon. If the merchant is still alive, exiting the dungeon through the stairs automatically counts as a rescue � even if you accidentally hit him with an AOE attack and made him hostile. If you�re planning on killing the Assassin Lord and saving the merchant, the safest course of action is probably to attack one of the neutral rogues upon entering the floor. This will cause them all to be hostile and come towards you, thus directing the fight away from the merchant.  Rescuing the merchant rewards us with a small amount of gold, and unlocks the merchant�s shop in Last Hope. 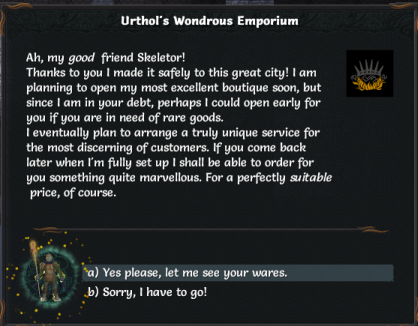  The merchant�s shop can sell some pretty good stuff � no artifacts this round, but t3 items are common. The true benefit of saving the merchant won�t become apparent until much, much later in the game, though. That�s about it for this update. We�ll start clearing out those t2s in the next one.
|
|
#
?
Jul 11, 2017 10:42
|
|
|
Ah, the T2 dungeons - one cakewalk, one cakewalk with a chance of dangerous layouts, one boss that's either a joke or a nightmare depending on your class's reliance on sustains, and one zone that just wants you dead, and it wants you dead now. For a fairly long time that last one stopped me dead in my tracks, before I learned how the game worked. (Specifically, nine deaths out of ten you'll either die of a big ol' damage spike, or you'll be shredded while utterly helpless under the weight of a million skillion debuffs.) It was a little frustrating at the time, but frankly it's probably a good idea - if you don't learn the right lessons from the T2 zones, you won't survive the T3 dungeon, let alone the rest of the game. It'd be nice if the game made it a little clearer which of the T2 zones were which, though.
|
|
#
?
Jul 11, 2017 16:17
|
|
|
I think the most dangerous T1 dungeon for me was always the one with the Withering Thing.
|
|
#
?
Jul 11, 2017 16:57
|
|
|
 For our first t2 dungeon, we�ll be heading for the Old Forest. Like the Trollmire, Old Forest enemies are mostly big and bulky with nothing else particularly noteworthy about them, so it�s a good place to start.  Or at least it would be, if we hadn�t gotten Alt Old Forest. As you can see, the forest got taken over by crystals, so now we�ll have to fight them alongside the regular animals that infest this area. We�ve been thoroughly introduced to them in the last update, and these guys aren�t much more threatening than the ones we last fought.  A commonplace treant. These guys are mostly just big slabs of HP with decent nature resistance. Despite being �immovable�, they can walk around just fine.  We�ve been fighting giant ants here and there, but Old Forest is ant central. Not too threatening by themselves, but they can come in very large quantities and overwhelm you if you aren�t paying attention, since a lot of them have long-ranged attacks.  We find some Old Forest lore � looks like there might be more to this place than there is at first glance.  This green area is a Font of Life � living creatures standing it in have increased health regeneration and equilibrium reduction. Being a skeleton, we don�t benefit from it in any way, but at least we aren�t damaged by it.  This semi-vault is common in the Old Forest and Trollmire � it�s a small building guarded by a slightly higher-leveled skeleton mage than normal. 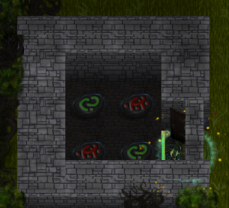 The building it guards holds a small selection of runes and infusions, which can be helpful � those can be fairly rare. 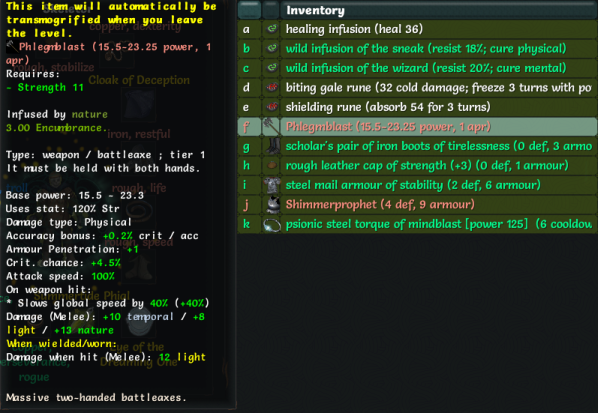 Not too much loot of note on this floor, but we do find an axe with a funny name.  On Old Forest 2, we find an interesting prize. Tinker escorts are extremely rare and valuable � we�ll have to do our very best to get them escorted safely.  Thankfully, the portal is relatively close by, and the tinker is escorted without too much difficulty. 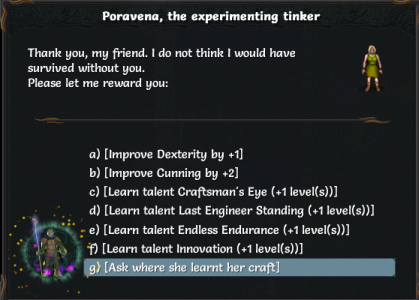 The tinker offers a few tinker skills � mildly useful, but what we really want is to find out where she learned her craft. This opens up a mini-dungeon to the north that we�ll be checking out later. Now, time to crack open this vault to the left. 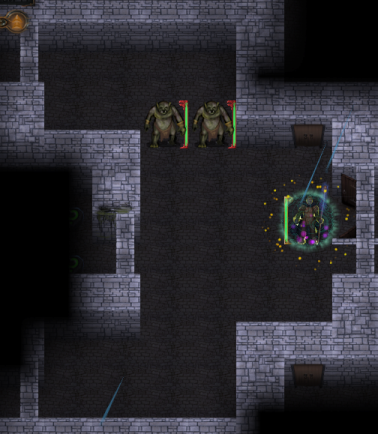 This vault is commonly found in the Old Forest � it�s a small castle overrun by trolls. They�re common forest trolls and pose no threat whatsoever. 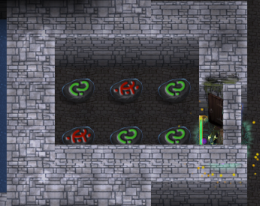 We clear out the trolls and claim our prize, a small selection of infusions and runes. A shame we can�t use the vast majority of these.   We did manage to get one more prize out of it, however. One of the trolls dropped these fancy gloves. Very useful early-game artifact for a Paradox Mage, as you can see � bonus temporal damage, temporal resist piercing, and a chance to proc a free Dust to Dust whenever we cast a spell.  Demon statues! These were introduced in the �Ashes of Urh�rok� expansion. Touching them gives us some lore on the demon depicted, and can trigger a random effect. Depictions from top to bottom: Demon General Khulmanar, water imp, Champion of Uhr�rok.    Every demon statue can be activated once for a random effect. Demon statues will either grant you a buff, inflict a nasty debuff, do absolutely nothing, summon a random demon or grant you an artifact. The effect/demon summoned/artifact chance appears to be completely independent of the type of demon statue activated.  It�s usually worth trying for that artifact chance, but make sure the general area is clear in case things turn bad. In this case, the statues blinded us for a bit, glowed brightly and did nothing, and summoned a wretchling pack nearby.  Wretchlings are low-level acid themed demons. They always come in packs of three, completely resist acid damage, and like casting Acid Cloud, an AOE spell that does acid damage to anything in them for a few turns. They�re not much of a threat individually, but getting trapped in overlapping Acid Clouds while fighting other enemies can be a challenge.  A rare Berserker mountain troll! He confuses us with Warshout, which is a little annoying. We�ll have to try to get some confusion resistance once we�re good on stun/freeze.  Some more demon statues lying around. From top to bottom: Forge Giant, Corrupted Daelach, Wretch Titan.    None of these statues did anything interesting when activated.  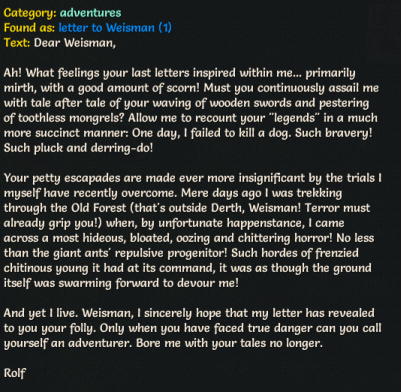 We find some more old forest lore, and another letter in the Rolf-Weisman saga. (The Rolf letter wasn�t screenshotted in time, so we had to look it up from our collected lore, accessible via the options menu.)  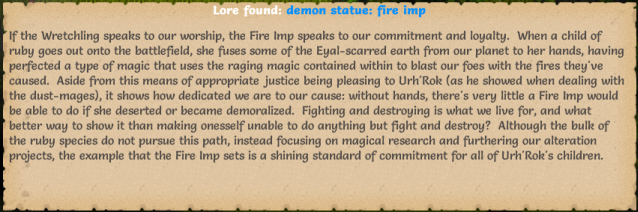  A fire imp statue on the left, a daelach statue on the right. The fire imp statue actually gave us a buff when we activated it, the other one did nothing. The buff went to waste since there were no enemies nearby, though.  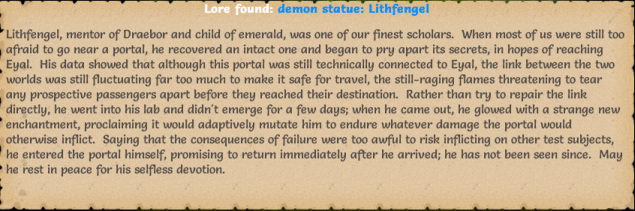 This one inflicted us with a nasty disease. Rude, but appropriate, I suppose. 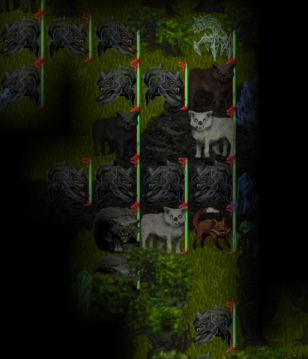 I say, that�s quite a lot of wolves. Fortunately, only one can hit us at a time, while we can clear out vast swathes of them with Repulsion Blast and Attenuate.  A warrior escort on Old Forest 3. Early escorts are easier to save than late escorts, so it�s a good thing they�re all showing up here.  This guy�s journey was a little more�eventful than the tinker�s, but we get him to the portal all the same. 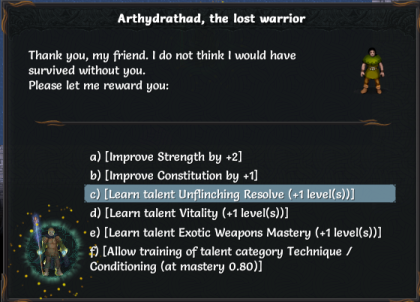 Warrior escorts give rewards from the Conditioning generic tree, for the most part. We pick Vitality, which reduces the length of poisons/diseases/wounds and gives us a slight bit of life regeneration when we hit 50% health.  It might be hard to tell from the couple of glimpses at it, but 90% of this floor�s space is taken up by a huge fuckoff castle. This isn�t guaranteed � it�s a rare vault that usually shows up only in the Old Forest. The outside of it is guarded by a myriad number of aquatic creatures, trolls and minotaurs � not a threat individually, but a challenge when assembled together.  We clear out what remains of the floor before we even think about cracking open the castle, finding another page of Old Forest lore on the way.  Time to crack this sucker open. Let�s see what we�re up against. 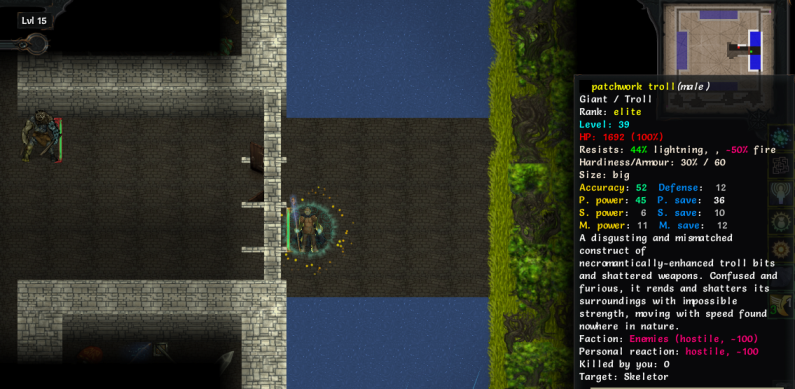 Some high level assassins and rogues (who promptly stealthed out of sight), a couple of minotaurs off to the side and�oh dear. Patchwork Trolls are a very high-level enemy that we shouldn�t be encountering until much, much later. Luckily, right now we have the advantage of distance, but we�ll have to watch out for those assassins dazing us with Shadowstep. Did I mention that it has 160% global speed? Because of course it does. 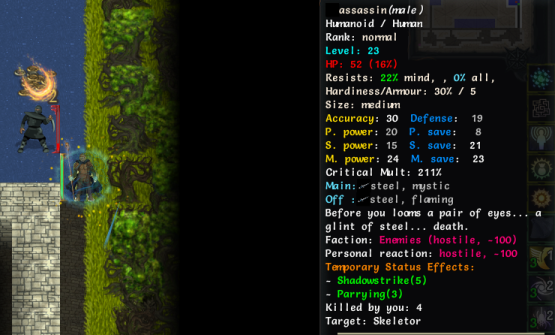 The patchwork troll isn�t our only threat, but the rest are barely a concern compared to what happens if that thing gets into melee range. We go with our usual strategy of �drop Attenuates on it while walking backwards�, clearing out a few of the rest with Dust to Dusts and Temporal Bolts on the way. Incidentally, after clearing out this guy, we went back up to check for the patchwork troll, finding it just in time to watch Attenuate remove it from reality.  You can imagine how much of a pain this vault is for melee characters. (Hint: a lot.) 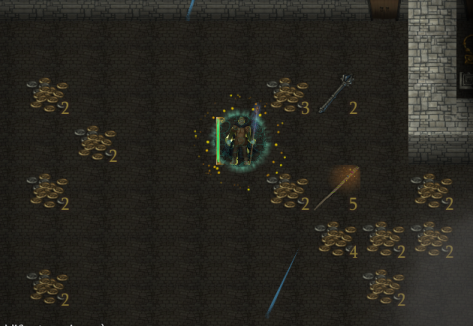 On the plus side, if we get through this, we�ll be rich. Or dead. Possibly both.  Rogue-type enemies are the order of the day here, broken up by the occasional troll and minotaur. That poison immunity is coming in real handy once more.  We haven�t properly introduced the minotaurs yet. They�re big beefy (hurr) enemies who can stun and sunder armor if they get close, as well as confuse us with Warshout. They�re not as much of a threat compared to some of the harder-hitting assassins, though.  We�re also getting a lot of good loot out of the deal. Most of it isn�t really Paradox Mage gear, but I can see a couple that might come in handy.  These rooms are nice and convenient. We can Attenuate away enemies while one troll clogs up the entrance and whiffs away at our Reflection Shield.  About half the rooms in this vault are actually inaccessible unless you dig to them. Only some walls are diggable though, and it�s often a matter of scanning them one by one until you find one with the �diggable� property. 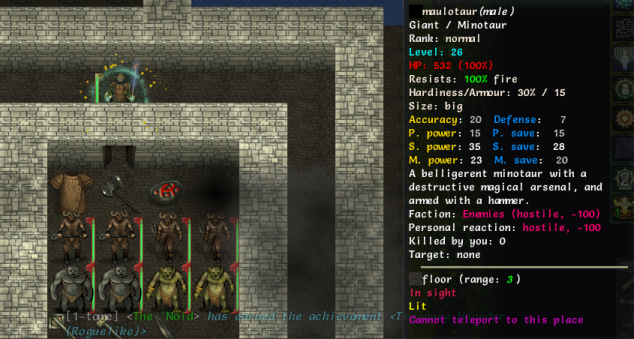 Minotaurs are no threat if they can�t get into melee range. Maulotaurs, however, are another matter. They know Flame and Fireflash, the latter being a slow-moving fireball that explodes in a very large radius. We get ready to teleport out at a moment�s notice, but this one decides to try to melee us instead and falls without ever casting a spell.  We clear out most of the castle, then switch out our armor for a more fire-resistant one, before getting ready to tackle the kings of the vault.  Drakes are the second tier of dragons above drake hatchlings. These Fire Drakes know Fire Breath and Wing Buffet at a decently high level � the former an AOE cone-shaped fire attack, the latter an AOE physical attack.  Our damage shields allow us to go toe-to-toe with them for a short time if need be, but we play it safe, dropping Attenuates on them before buggering off and beaming them from a distance. It takes a while, but eventually we clear out the last of the drakes, and start sorting through our loot.     A couple of artifact daggers off the various rogues. The Umbral Razor is useful for Shadowblades to hang on to, at least.   One half of an artifact mindstar set. Offers various thermal-damage related bonuses, gains additional power when paired with the Eye of Summer.   A belt that grants a lot of bonus encumbrance and some extra HP. Part of a very nice set � worth hanging on to in case we find the other set item.    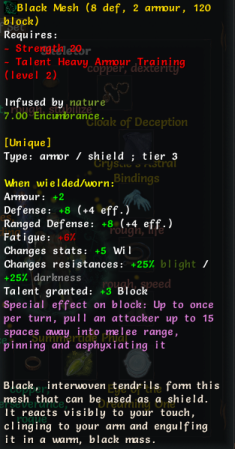 A couple of artifact shields. Both of them come with a decent set of resistances to common elemental attacks, and they�re useful for shield-users if you can find them this early.   The Skin of Many is an interesting artifact. It provides you with a small HP bonus, but gives you a stealth malus (because you�re wearing a suit made from constantly screaming faces). 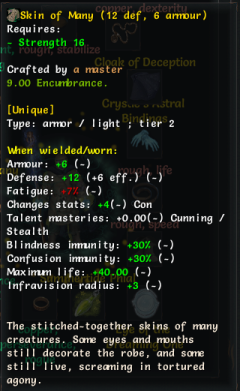 However, the Skin of Many likes being worn by undead, and will actually grant additional bonuses to them upon being worn. We might run with this for a bit � the bonus HP, blindness and confusion resistance could come in handy.  And of course, a metric ton of other loot � this is just page 1 of 8 or so. We hang on to the runes/jewelry in case they come in handy, since they weigh almost nothing, pick out a couple of interesting items, and trash the rest.  We head on to Old Forest 4, and are immediately confronted with�ourselves.  We scout ahead a little, and good thing we did too. Shardskin is the boss of Alt Old Forest � it�s slightly hidden behind trees at the moment, but it�s the big yellow crystal surrounded by fire. It can cast Blood Spray and Firestorm for AOE damage, and Bone Grab us to pull us into Firestorm distance. We can probably take him without too much difficulty � just as long as that escort doesn�t get impatient. In regular Old Forest, we�d be facing Wrathroot instead, a giant treant mage with a penchant for ice spells. Can be annoying if you haven�t got decent Freeze resist.  We pelt Shardskin with spells for a while, before we get Bone Grabbed out into the open. We don�t get to do the whole See the Threads routine with Shardskin because Attenuate removes it from existence early, but we get an okay artifact anyway.   This ring grants us additional Con and Willpower, bonus cold resistance and extra air capacity, though that�s not really a concern. It also can be activated for a Tidal Wave effect. We also grab an artifact t2 staff off Shardskin, but it�s outclassed by our regular green t3 staff. 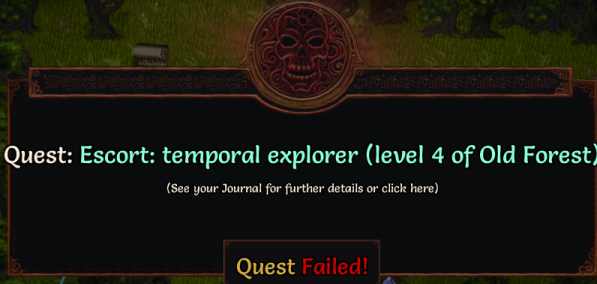 Unfortunately, an anomaly goes wrong and teleports us halfway across the map, and the escort promptly dies offscreen. The occupational hazards of mucking about with the fabric of reality.  Oh well. We find some more Old Forest lore instead, on our way to the exit.  Exiting the Old Forest takes us to another zone entirely. And what�s this? 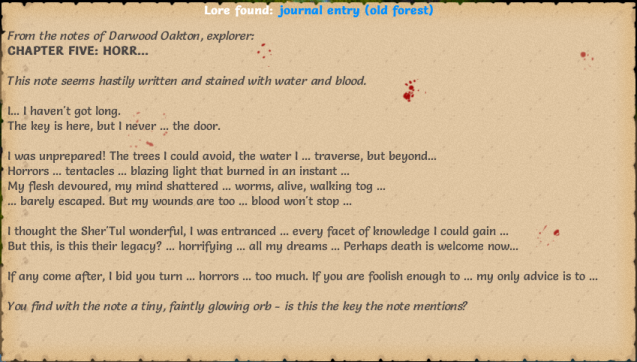 We heed the warning, and Rod of Recall out for now. Lake of Nur can be a very difficult zone, and the strength of enemies there varies extremely widely. We�ll be heading back once we�ve got a few more levels.  We�ll be getting around to the other t2 dungeons in the next update, but let�s finish off this update with a teaser. This cave is unlocked by successfully escorting a tinker escort, and picking the last option.  It�s a good idea not to go into this zone until you�re level 14 or so. These guys are tougher than they look, and know a few steamtech skills to boost their damage on top of it.  We clear out those guys, and find an interesting machine in the center of the cave.  Looks like we have a choice coming up in a few more levels. Learning from this machine requires 500 gold and a category point � we won�t have one to spare until level 20. We�ll have to put off learning another one of our own talent trees, but we�ll gain the tinker generic trees in exchange. Getting into tinkers can be fairly costly generics-wise, but can also be very useful. In addition, should we learn tinkers, unique gear and artifacts from EoR will start dropping alongside our regular gear. Picking up tinkers is a major game-changer, but it�s often worth it. We�ll think about it some more when we hit level 20. That�s all for this update � Maze and Sandworm Lair coming up next.
|
|
#
?
Jul 13, 2017 01:39
|
|
|
I was really interested to see the rewards for saving yourself, but it was necessary to ensure your tenure as an undead. I understand.
|
|
#
?
Jul 13, 2017 05:14
|
|
|
Since we didn't manage to save ourselves, might as well mention it. Saving a Temporal Explorer gives you a point in either Precognition or Foresight, or the Chronomancy tree if you don't have it. It's not a spectacular reward, but it would have been a nice boost to two talents we've been (and probably will continue) neglecting. If you betray your future self to Zigur, you get a choice between Sleep, Dream Walk or the Psionic/Dreaming Tree. It's a slightly more useful set of rewards - Sleep is a nice AOE sleep spell, and Dream Walk is essentially a free phase door. If you have the option to betray an escort you should almost always do so, since the 'betray' rewards are almost always more useful (especially given that if you have the option to betray them in the first place, you're probably not a spell user and thus won't have the Magic required to leverage their regular rewards).
|
|
#
?
Jul 13, 2017 05:25
|
|
|
If you plan on doing multiple runs, then it would probably be better to save all the tinkering stuff for a dedicated tinker class. As you said it is really point hungry, and significantly changes how the character is built.
|
|
#
?
Jul 13, 2017 06:07
|
|
|
The advice is appreciated, but please note that the game itself is about half a dozen updates or so ahead of the thread, and thus most advice is going to be wildly out of date at best.  Honestly, I'm not sure I would be capable of taking on the endgame at this difficulty without the extra safety net of medical injectors as a skeleton. The other bonuses are nice but it's mostly the lack of infusion access that seals the deal.
|
|
#
?
Jul 13, 2017 06:32
|
|
|
I think my favourite escorts are probably Sun Paladins or Anorithils, I always forget which one of them it is that gives access to Healing Light, which is a godsend for classes without any proper self-healing built in(assuming they use their Magic stat at all, at any rate), or access to the associated tree if it's a class with a bunch of generics to spare.
|
|
#
?
Jul 13, 2017 06:34
|
|
|
I always get amused slapping the light tree on a necromancer, I remember I had one character who was basically an anorithil with positive and negative energy having achieved lichdom
|
|
#
?
Jul 13, 2017 07:12
|
|
|
PurpleXVI posted:I think my favourite escorts are probably Sun Paladins or Anorithils, I always forget which one of them it is that gives access to Healing Light, which is a godsend for classes without any proper self-healing built in(assuming they use their Magic stat at all, at any rate), or access to the associated tree if it's a class with a bunch of generics to spare. Anorithil! Getting access to the Light tree is really great for races that don't have an innate skill for breaking/reducing negative status effects. The healing isn't bad, either. Coucho Marx fucked around with this message at 11:02 on Jul 13, 2017 |
|
#
?
Jul 13, 2017 10:58
|
|

|
Haha, lol, you mean you can sell yourself out to the Zigs? Isn't that basically just a very elaborate suicide?
|
|
#
?
Jul 13, 2017 17:03
|
|
|

|
| # ? May 1, 2024 16:25 |
|
|
Inadequately posted:The advice is appreciated, but please note that the game itself is about half a dozen updates or so ahead of the thread, and thus most advice is going to be wildly out of date at best. It's funny that skeletons can inject themselves with medicine. I'd assumed undead couldn't even though they could use other tinkers.
|
|
#
?
Jul 13, 2017 17:08
|
|