


|
The old post-processing thread is archived and there was a request for a new one, so here's my effort at a new OP. What Is Post-Processing? As the name suggests, post processing is all of the work that you do on a photo after you've taken it. It can be as simple as converting it to jpeg or as elaborate as spending many hours in Photoshop digitally retouching every pixel. In general it's mostly used to describe the ways in which a picture is visually altered from the source. I'm an ~Artist~ and I Don't Post-Process Because Only Unretouched Photos Truly Display my Skill at Opening and Closing Shutters. Yes you do. It's functionally impossible to have a completely unretouched photo. Even if you publish SOOC jpegs, your camera is applying a bunch of processing to those images automatically - and those processing preferences are configurable by you. If you shoot RAW (which you generally should), then you need to transform that RAW data - which isn't an image - into an image format using some kind of RAW processing software. The preview image and thumbnail for your RAW is an embedded jpeg - which has had all of the aforementioned in-camera processing applied (this is why your preview suddenly changes from a good image to a bad one when you load it in an image processing app). If you shoot film, your choices during development and then either scanning or wet-printing also constitute post-processing. Your undeveloped negative can lead to several wildly different images depending on your workflow and your darkroom skills. Obviously, if you digitise your image, you can process it just like any digital file as well. How Do I Do It? For the purposes of this OP, we are going to talk about digital post processing using one of the many image manipulation apps. Let's go through the common ones. Lightroom - This used to be the default choice for pretty much anybody who wanted to do proper post-processing. It's not simply an image manipulation program, it's also a workflow and file management system. Basically, it looks after every stage of the process from pulling your images off your SD card to uploading them to your publishing platform of choice. There are two versions, Classic CC which is the old-school desktop oriented client, and CC which is a cloud-based version that's designed for photographers who want to edit their files on multiple devices at the same time. Currently CC does not have all of the features of Classic CC so bear that in mind. Photoshop - this is the image manipulation program that became a verb for image manipulation. You can do pretty much anything to an image in Photoshop, it's incredibly powerful and you'll be learning about new things that you didn't know it could do for years after you start using it. Capture One - this is a competitor to Lightroom that's gaining a lot of traction. There are free versions that come with some Sony cameras and Fuji have discounts on it bundled with their bodies too. GIMP - if you hate yourself but you refuse to pay for a processing solution, this is pretty much where you are. Technically it's about as proficient as older versions of Photoshop, but the interface will make you want to stab yourself in the eyes. AfterShot - this is Corel's version of Lightroom. It's supposed to be pretty good and you buy it as a standalone one-time purchase rather than as a subscription which is a big advantage for some people. Paintshop Pro - this is Photoshop by Corel. Same deal as for AfterShot. The Adobe products (Lightroom and Photoshop) can be bought as one-time purchases, but it's not easy to figure out how to do this. Adobe really wants you to subscribe to one of their bundles so this is probably where you end up if you are looking at that. There are photography bundles that offer much better value than simply subscribing to one software product. typically you get Photoshop and one or both versions of Lightroom plus an amount of cloud storage for $10-$20 a month. Less if you have academic credentials. In addition to the programs listed above, there are a multitude of specialised apps and plugins that handle more specific processing tasks such as noise reduction, black and white conversion, HDR processing, or simply slapping a bunch of lovely filters all over your beautiful art. Most of those functions are possible within the main processing apps listed above, but these plugins generally have finer control and can often handle batch-processing. Most of the image management programs will let you open images in one of these external editors and then automatically reimport it to the main management app when you're done with it. Alright! I Have a Bunch of Bad Photos on my SD Card, Let's Make Them Awesomer! This is my workflow in Lightroom. You can probably adapt this to any of the other solutions if you want to, or you can develop your own. There are a bunch of different ways to achieve the same results in most programs, so my suggestions shouldn't be taken as gospel. Firstly you import the images. This is the Import window. You can open it from the Library tab of Lightroom.  On the left side is the navigator - you tell Lightroom where your original images are. In the middle is the file browser where you can select or deselect the images that you want to import. On the right are all of the options for importing. You can select where the original files will be moved to, select a location to copy a backup of the original files (you should do this) and select a collection to import them to. Collections are basically albums in Lightroom, it makes it easy to find and work on related images at the same time. I order all of my images in Lightroom in collections named either for the month and location (in this case Bangkok November 2018), or for a specific event or shoot if it's not just random walking around photos. I make a folder in my main hard drive with the same name as the collection to move the originals into and I make a folder with the same name on my backup drive for the backup copies. This makes it easy to find originals if I want to re-edit or re-export something later. If you are importing images into a collection that already exists, you can just select those previously created folders and the collection to import to from dropdowns. Other options in the right hand pane let you add keywords, change file names, and apply presets automatically. Now we've imported the photos, we head on over to the Develop tab. This is where most of the work is done.  As you can see, the layout is similar to the Import window. There are navigation options on the left as well as a preset list to apply VSCO style filters to your photos, a file viewer in the middle and all of the stuff we can do to the image on the right. At the bottom of the window, you can see all the images that I just imported. In this case these are just quick snaps from my balcony that I took to illustrate this OP, but there could of course be hundreds of them if you had a busy day or are dumping all of the pictures from your dream holiday or whatever. So the first thing we need to do is to cull the list to get rid of all the ones we don't need to work on. As I mentioned earlier, there are multiple ways to do most tasks and this is no different. My preferred way is via the rating function. You can rate images from 1 star to 5 stars and then filter based on that rating. All you need to do to rate an image is to hit the number key that corresponds to the rating you want to apply. If you have capslock on, the selection will automatically advance to the next image after you have rated each photo. In my case I use the following scheme: * - these are images that are going to get deleted. They are technically bad or I just don't want them cluttering up my hard drive. ** - these are images that I'm going to use in composites of some kind - HDR or panorama stitching for example. *** - these are images that I'm not going to work on but I want to keep in case I change my mind. **** - these are the images that I want to work on. If I have several very similar images and I'm not sure which I want to edit, I'll rate all of them 4 stars, pick the best one when I get to it and then demote the rest to 3 stars at that point. ***** - these are ones I'm going to work on and that I want to export in a special way for some reason. Here are my images after rating.  I can set the filter to 'Rating' and then select a number of stars to filter out all of the ones I don't care about.  First I choose equal to 1 star to show me all of the * images so that I can delete them. Then I click on the fourth star next to the filter to see all of the images rated 4 stars or higher. Now I only see the images that I care about. A note about how Lightroom handles files. Lightroom uses catalogues which are basically databases of your file locations and the edit history for that file. The original file is never modified directly by Lightroom. If you make a bunch of edits to an image in Lightroom and then open that same image in a different application, you won't see any of those edits. When you export the file, Lightroom makes a new version that has all of the edits applied to it. Until that point, the edited version of the image does not exist anywhere except in the preview window of Lightroom itself. This means that: Your catalogue is super important. If you lose your catalogue, you lose every edit you've made to every image in that catalogue. Back your catalogue up often. Your catalogue does not contain your original images. It's just a database that points to where they are. If you move files around after you've imported them, Lightroom will get confused and you'll need to point it at the new location manually. You can move files to new locations within the Lightroom navigation panel and this will automatically update the catalogue. Actual Editing You have a bunch of tools in the right hand pane of Lightroom to adjust various image values. Mostly these controls are sliders. To start with prefer a light touch and don't worry too much about the stuff further down the panel, all of the commonly used tool are towards the top. Remember that just because a slider can go all the way to the right, it doesn't mean that it should. At the very top is the histogram. This is a super useful resource as you edit. It's basically a map of where all of the pixels in your image are, distributed from the darkest ones (on the left) to the lightest ones on the right.  Below the histogram are the tools that directly modify it. Exposure, colour balance and tone. The tone controls let you adjust specific parts of the histogram without affecting the rest. For example the blacks slider lets you adjust how bright the darkest areas of the image are without affecting the rest of the image. This is very useful when you have a wide range of brightness levels in an image (this 'range of brightness levels' by the way is called Dynamic Range) and you want to lighten the shadowy parts but without making your daytime sky any brighter. A bit further down, you'll see the tone curve, this controls the contrast in your image and how fast the dark areas fall off to black and the bright areas fall to white. The steeper it is, the more contrast you will have. I like to apply a fairly strong contrast curve as follows (by default it is a straight line):  If you have edits that you want to apply to many images at once, you can do this quite easily Maybe you took a lot of images in the same lighting so they need the same colour correction, exposure balance and contrast curve for example. Make your edits to one image then click the copy button.  Choose the things that you want to copy to the other images then click Copy. Select the other images (if you want to select all of them Edit-> Invert Selection lets you immediately select all the ones except the one that you just worked on), right click on any image in the thumbnail strip and choose Develop Settings -> Paste settings and it will apply those settings to each photo you selected.  The big Paste button next to the Copy button only applies the edits to the first selected image which is not very intuitive. Anyway, that's my OP on getting started with post-processing. Feel free to tell me what a huge idiot I am in the thread and share your personal wisdom, ask dumb questions and get dumb answers. Helen Highwater fucked around with this message at 12:46 on Nov 10, 2018 |
 #
?
Nov 10, 2018 09:48
#
?
Nov 10, 2018 09:48
|
|


|

|
| # ? Apr 29, 2024 13:46 |
|
|
Thanks for taking the time to make this thread. How do you like to set up your tone curve? Do you typically stick with an S bend? How do you decide where to set your points? I usually stick to slider adjustments, but the way you describe the tone curve�s function, I think it�s something I�d like to start working with.
|
|
#
?
Nov 10, 2018 11:49
|
|


|
Usually I set it up just like that unless I already know I'm going to need a different contrast effect. After I've finished rating the images and I've selected the ones to work on, I'll set up the tone curve on the first one, then copy it to all of the others afterwards. For my personal taste, I like to set it up with those same values (or close to it) that you see in the screenshot. You can play around with it and see the difference it makes, it's a lot more controllable than just hauling the contrast slider around.
|
|
#
?
Nov 10, 2018 12:17
|
|
|
The open source raw converter/work flow application is darktable. Camera/lens support isn't as good as the commercial alternatives though. Adjust contrast, bring up shadows/down highlights, sharpen etc with a light hand. It is easy to over do and ruin detail, especially in skin tones. Definitely back up your raw converter's database or sidecar files along with your raw files.
|
|
#
?
Nov 10, 2018 15:16
|
|
|
As long as I can make a preset that maxes saturation and clarity then it�s good.
|
|
#
?
Nov 10, 2018 16:19
|
|

|
Aw, man! It sounds like you really know what you�re doing! Wish you�d made the op instead of HH...
|
|
#
?
Nov 10, 2018 16:30
|
|
|
rio posted:As long as I can make a preset that maxes saturation and clarity then it�s good. Make sure you shoot a few at 1 EV stops and merge for HDR, sliders at max.
|
|
#
?
Nov 10, 2018 17:47
|
|
|
uhhh maybe turn f.lux off when you're working with colour too
|
|
#
?
Nov 13, 2018 09:26
|
|

|
Lightroom users, do you set your color profile to adobe? I have a Dell Ultrasharp that's supposed to get 100% of AdobeRGB but lightroom has like 4 options for adobe color profiles and I don't know which to use.underage at the vape shop posted:uhhh maybe turn f.lux off when you're working with colour too This sounds like a joke, but I've gone through like 20 minutes of editing before realizing it was still on. 
|
|
#
?
Nov 13, 2018 20:15
|
|


|
poemdexter posted:This sounds like a joke, but I've gone through like 20 minutes of editing before realizing it was still on. Fun fact for people who don't pay attention to software updates: F.lux now has the option to automatically turn off when you run certain programs. So you can easily set it to always turn off whenever Lightroom/Photoshop/etc are running.
|
|
#
?
Nov 13, 2018 21:44
|
|


|
pseudorandom posted:Fun fact for people who don't pay attention to software updates: F.lux now has the option to automatically turn off when you run certain programs. So you can easily set it to always turn off whenever Lightroom/Photoshop/etc are running. Yep. That's exactly what I did after clicking it off and seeing my photo turn to garbage. Never again!
|
|
#
?
Nov 13, 2018 22:03
|
|
|
poemdexter posted:This sounds like a joke, but I've gone through like 20 minutes of editing before realizing it was still on. I have, more than once, woken up and wondered why all my pictures were so loving blue.
|
|
#
?
Nov 18, 2018 15:21
|
|

|
tk posted:I have, more than once, woken up and wondered why all my pictures were so loving blue. Lol. loving around with the LR app on my iphone without realizing night shift has kicked in yields similar results, I�ve found.
|
|
#
?
Nov 18, 2018 15:49
|
|
|
First off: thank you Helen Highwater for making this thread! I'll probably have plenty of specific questions about actually processing in the future, but first things first: I am trying to break my litany of bad habits when it comes to my LR workflow. I used to do all my post in CS5 and resisted getting LR for as long as I could. When I did get it, I still viewed all the catalog features as an annoyance and did my best to work around it: import the photos from a shoot, process, export, then delete from catalog. I know, I know. I'd like to clean up my act and get my workflow and storage system more up to date. I have a desktop PC I prefer to use for most post work, as well as a Surface Book 1 that I'd like to use on the road. Normally I import from SD card to my desktop (main SSD), do my post/export, and then take the originals + exported, processed photos and store in an external drive, delete from my desktop. I currently have two 1TB drives (platter) that I keep mirrored backups on. Since I'll be using two computers, it sounds like my best option is to get a USB 3.0 SSD (seems like there are some decent Black Friday deals out there) and use that for my catalog so I can switch between desktop and Surface Book, and keep a platter drive (possibly even both) as a backup. It seems relatively straightforward to take an existing catalog and merge it into a master, so anything I do on the road with the Surface could be added to my main computer when I get home. It sounds like USB 3.0 should be fast enough for this, any thoughts on this?
|
|
#
?
Nov 21, 2018 09:13
|
|

|
You can see in the screenshots that I have a bunch of external drives attached to my MacBook. One of them has my catalogue on it, one of them is where I import my originals, and a third one is where I save a backup copy of the imports to (which is also where my catalogue backups get saved to as well). This third drive gets synced to cloud storage continually via BackBlaze. The catalogue drive is a Thunderbolt drive, the others are USB3, none are SSDs. I don't really notice any appreciable performance hit from using external drives for processing. I was doing it that way because originally I was working on a MacBook Air with a 128GB hard drive, so I didn't actually have room for hundreds of RAW files. When I replaced it with a MBPro, I kept with that because I didn't see a lot of value in copying five years of photos to my internal HDD.
|
|
#
?
Nov 21, 2018 09:34
|
|
|
Ethics_Gradient posted:Since I'll be using two computers, it sounds like my best option is to get a USB 3.0 SSD (seems like there are some decent Black Friday deals out there) and use that for my catalog so I can switch between desktop and Surface Book, and keep a platter drive (possibly even both) as a backup. It seems relatively straightforward to take an existing catalog and merge it into a master, so anything I do on the road with the Surface could be added to my main computer when I get home. It sounds like USB 3.0 should be fast enough for this, any thoughts on this? If you�re willing to stomach the cost and throw caution to the wind, I�ve been enjoying the Lightroom CC cloud sync lifestyle for a bit now. Things I like: - Import once to any device and be done with it. At the end of a trip, worst case scenario is that hotel WiFi was slow and I have to let it finish cloud syncing. - Edit anywhere. I can do first pass edits on my iPad while sitting out on the balcony, then walk in to do a final pass from my nice big desktop display. - Access to my whole catalog no matter where I am, either through phone or a web browser. I never don�t have access to a shot because I forgot to export it. - I can do all my Flickr and Instagram (including phone-specific edits) from the bus. - I repeat myself, but never worrying about catalog management is great. Things I do not like: - It�s expensive. Especially as storage demands increase. - No snapshots, edit history, or virtual copies. Sometimes I like to keep multiple edits of a shot around. This is a pain in the CC world. - Weaker catalog management / metadata tedium. You can do title/caption/keywords for individual pictures, but that�s about it. No way to add location information; no way to bulk edit metadata for multiple shots. - I am trusting Adobe to manage my data.
|
|
#
?
Nov 21, 2018 15:57
|
|
|
Any tips for adjusting curves / colors / whatever to get some nice soft pastel colors? Aside from just shooting on portra in the first place. I�ve tried fiddling with them on my own but can�t really get any results I like.
|
|
#
?
Nov 21, 2018 19:36
|
|


|
Helen Highwater posted:You can see in the screenshots that I have a bunch of external drives attached to my MacBook. One of them has my catalogue on it, one of them is where I import my originals, and a third one is where I save a backup copy of the imports to (which is also where my catalogue backups get saved to as well). This third drive gets synced to cloud storage continually via BackBlaze. The catalogue drive is a Thunderbolt drive, the others are USB3, none are SSDs. I don't really notice any appreciable performance hit from using external drives for processing. I was doing it that way because originally I was working on a MacBook Air with a 128GB hard drive, so I didn't actually have room for hundreds of RAW files. When I replaced it with a MBPro, I kept with that because I didn't see a lot of value in copying five years of photos to my internal HDD. That sounds like a pretty good system. I'm giving away how little I understand this but: by 'catalog' do you mean just the catalog files, or also the image files themselves? I'd definitely want one single drive I can work off of, since I've only got the two USB ports on the Surface Book. Should have added, I was thinking that doing a separate catalog for each year made the most sense in my situation. tk posted:If you�re willing to stomach the cost and throw caution to the wind, I�ve been enjoying the Lightroom CC cloud sync lifestyle for a bit now. That does sound nice, but while I know I am about to have to bite the bullet and get CC (I at least get edu pricing, was actually the folio site tool that pushed me over the edge) I am really not about any of that cloud stuff and try to keep my subscriptions to an absolute minimum. Cost aside, it doesn't make much sense for me anyways as most of my travel I do doesn't necessarily have wifi at the end of the day. I actually got the Surface Book because I wanted full LR on the go, though I understand that will be coming to the iPad Pro in the near future. CodfishCartographer posted:Any tips for adjusting curves / colors / whatever to get some nice soft pastel colors? Aside from just shooting on portra in the first place. I’ve tried fiddling with them on my own but can’t really get any results I like. Lower contrast and saturation is a good starting point Speaking of which - I treated myself to a Behringer X-Touch Mini after I shot my sister in law's weddings earlier this year (two ceremonies, lots of pictures) and I can't stress enough how much more streamlined and enjoyable it's made doing post processing work - if you guys are looking for something photography related that's not obnoxiously expensive to put on your Christmas list, definitely recommend it. Here's a video of a guy introducing it, he has a wireless adapter thingie on it which I am actually kinda tempted by, but it's fine using it wired. I use mine at a standing desk, also have a cheap eBay USB foot pedal (3 pedals) that I use for forward, back, and undo - not strictly necessary but I like how it largely takes the keyboard and mouse out of the equation. Ethics_Gradient fucked around with this message at 23:42 on Nov 21, 2018 |
|
#
?
Nov 21, 2018 23:38
|
|
|
Ethics_Gradient posted:That sounds like a pretty good system. I'm giving away how little I understand this but: by 'catalog' do you mean just the catalog files, or also the image files themselves? I'd definitely want one single drive I can work off of, since I've only got the two USB ports on the Surface Book. Should have added, I was thinking that doing a separate catalog for each year made the most sense in my situation. You need to restart Lr to switch catalogues, and there's no real advantage to having multiple catalogues unless you want to keep personal and work stuff separate or something. Organising files by date/theme/event/etc is what Collections are for. CodfishCartographer posted:Any tips for adjusting curves / colors / whatever to get some nice soft pastel colors? Aside from just shooting on portra in the first place. I’ve tried fiddling with them on my own but can’t really get any results I like. Exposure, highlights, shadows to the right Contrast, vibrance, dehaze to the left. Split toning to warm the shadows a bit more than the highlights.
|
|
#
?
Nov 22, 2018 05:03
|
|
|
Helen Highwater posted:I have the catalogue on one drive and the image files on a different one. It doesn't matter where the image files are, they can be on the same drive as the catalogue or all on different ones. The catalogue is just a database of where the originals are stored and a list of the edits to each one, it doesn't physically contain your image files. Ah, OK - given the limited number of ports on the Surface Book I think I'll do mine on one. My reasoning for multiple catalogs was that I also have almost 15 years worth of photos (with some dry spells, to be fair) so having them all in one would likely make LR really chug.
|
|
#
?
Nov 25, 2018 04:32
|
|
|
I�ve started editing color negatives in LR, and hooooly poo poo is it ever challenging. I�ve had decent luck with a few indoor shots, but pictures taken outdoors, especially with lots of snow, turn out all kinds of hosed up.  Hoping I get a better eye for evaluating beforehand which shooting scenarios are going to be difficult to edit and learn to adjust composition/settings accordingly.
|
|
#
?
Nov 26, 2018 03:08
|
|
|
Convert the shot to monochrome by pulling saturation to 0 first to get a handle on the contrast. Adjust the color curves individually after the fact. Sorta like reverse Sergey P-G: http://www.vintagephoto.tv/photoshop_assembly.shtml https://en.wikipedia.org/wiki/Sergey_Prokudin-Gorsky
|
|
#
?
Nov 26, 2018 04:50
|
|
|
I'd like to bring attention to Anthony Morganti's youtube channel. He's really good at explaining at what each editing system does. He's not very "known" but he's good. https://www.youtube.com/user/AnthonyMorganti
|
|
#
?
Nov 26, 2018 18:57
|
|


|
Soulex posted:I'd like to bring attention to Anthony Morganti's youtube channel. He's really good at explaining at what each editing system does. He's not very "known" but he's good. https://www.youtube.com/user/AnthonyMorganti Seconding this, his lessons are clear, understandable, and broken up into digestible chunks. Lightroom question. I've been processing the 50/80MP shots produced by my camera's hi-res mode, and pretty often, Lightroom will slow to a crawl. What can I do to alleviate that, for that size of pictures? I have 16GB of RAM in this computer and a 4GB Geforce 970 video card. Not sure if I need to upgrade one of those (or both) or if it's something in the settings.
|
|
#
?
Dec 1, 2018 15:50
|
|


|
Anthony is fantastic for the retarded. Shoot film and make enlargements. Dying batteries and filters are the worst.
|
|
#
?
Dec 6, 2018 05:35
|
|
|
The Rat posted:Seconding this, his lessons are clear, understandable, and broken up into digestible chunks. What CPU do you have?
|
|
#
?
Dec 10, 2018 14:44
|
|

|
Intel i5-6600k 3.5ghz.
|
|
#
?
Dec 10, 2018 15:09
|
|
|
Hmm I find scratch disk on an SSD and my i7 is good enough If you can upload an example RAW somewhere I'll load it into LR and see if my machine chokes i7 6700k, 16GB and a 1080.
|
|
#
?
Dec 10, 2018 15:17
|
|
|
Hmm, I don't have a file host, but here's an example hi-res RAW file out of that camera type that I was able to find: https://www.imaging-resource.com/PRODS/olympus-e-m1-ii/YPB053638-HighRes.ORF.HTM
|
|
#
?
Dec 10, 2018 15:24
|
|
|
You putting noise reduction on?
|
|
#
?
Dec 10, 2018 17:00
|
|
|
Some, I think. IIRC it's on something like 25. I'll double check it when I get home from work.
|
|
#
?
Dec 10, 2018 17:25
|
|
|
I downloaded and imported that RAW into LR Classic CC latest version and applied some NR did some general tasks and LR was fine used about 4.4GB RAM usual CPU spikes when applying NR/sharpen etc but generally all fine no different to my 24MP RAWs from my Canon.
|
|
#
?
Dec 11, 2018 00:21
|
|
|
Good to know, thanks for trying it out! I'll have to dig through the settings before I do my next hiking/photo trip and see what I can change.
|
|
#
?
Dec 11, 2018 00:32
|
|
|
I have no idea if I'm literally the last person to have learned this, but I just found out about an interesting phenomenon with curves adjustments. This happens in both Photoshop, and Lightroom, as well as some other programs I have tried that have Curves adjustments as well as layer blending modes.  Take a look at these two. Notice how the top one has more saturation? The curves adjustment on the top image uses the Normal (or default) blending mode. The curves adjustment on the bottom bottom image uses the Luminance blending mode. The curve itself is the exact same in both images and no other changes have been made between the two. I'm going to quote from one of Adobe's blog pages here on their blending modes. quote:Normal � This is the default mode. Pixels don�t blend. Results are as expected � the contents of a layer are displayed without any blending. And also another page here on how Curves works quote:Adjust image color and tone with Curves Basically all the literature you are going to come across greatly implies that using Curves only effects the Luminance values, but you can clearly see that it also effects the saturation while using Normal blending mode. I've not actually found any reason why that is the case. I also want to say, I'm not trying to call out one or the other as being superior to the other. It's more of just an interesting thing that may trip you up if you are trying to preserve the saturation of your image and you've applied a curves adjustment and now it seems out of whack but you can't put your finger on it. Feel free to run this experiment yourself.
|
|
#
?
Dec 16, 2018 20:28
|
|

|
Yeah the Luminance blend mode looks terrible with curves. If I�m trying to compensate for a saturation shift I�ll just add a Hue/Sat adjustment layer and manually decrease the saturation until it looks good. And if you�re doing a local adjustment with the curves, you can either use a clipping mask on the hue/sat layer or group the layers and use a mask on the group.
|
|
#
?
Dec 17, 2018 17:21
|
|

|
What the hell is going on here with Lightroom Classic CC? Here's what shows up in the Develop module:  Here's what shows up in the Library module:  And when I export from the Develop module, I get this:  Why is the Library render so different from the Develop render, and why is final output different from either? I don't recall LR 6.0 ever doing this.
|
|
#
?
Dec 30, 2018 06:55
|
|

|
Myrmidongs posted:I have no idea if I'm literally the last person to have learned this, but I just found out about an interesting phenomenon with curves adjustments. This happens in both Photoshop, and Lightroom, as well as some other programs I have tried that have Curves adjustments as well as layer blending modes. Found a cool YouTube vid with the solution for that today, was called "horizontal curves". This should do what you want, add contrast without touching the colours. Unless I misunderstood, but then it's still a useful thing to know.
|
|
#
?
Dec 30, 2018 22:41
|
|
|
Phanatic posted:What the hell is going on here with Lightroom Classic CC? From some googling I found 2 possible fixes. One said that the develop module in LR uses a variant of ProPhotoRGB and the Library Module is displaying the previews which are AdobeRGB. To fix it you need to create a hardware created Monitor Profile. Using a Spyder or a similar device. You can see if this is the issue by setting the monitor profile to sRGB, if this fixes it you know you have a broken monitor profile. Someone else suggested unticking Graphics Processor here: Edit > Preferences > Performance > Graphics Processor And on an unrelated note, I really miss the Maps section in LR 6, finally when I had some spare time and wanted to spend it sorting and organising my library I need to buy Lightroom CC to be able to use Maps at all 
|
|
#
?
Dec 30, 2018 22:50
|
|
|
Helen Highwater posted:AfterShot - this is Corel's version of Lightroom. It's supposed to be pretty good and you buy it as a standalone one-time purchase rather than as a subscription which is a big advantage for some people. However, AfterShot Pro 3 poo poo the bed when I tried to use it just after New Years. It cannot import photos - it hangs and eventually crashes without accomplishing anything - and it's got other "Windows must close this program" problems. I tried again yesterday (and downloaded the most recent patch/update, from late 2018), no joy. I sent a Support Request to Corel back in January and another one yesterday but they seemed to be ignoring me. However, I just checked my spam folder and a tech person at Corel did reply with instructions to edit my registry. Blergh. Maybe I'll try it, see if I can resurrect AfterShot. Maybe I'll give up on it. In any case, I downloaded RawTherapee (RTP), the other open-source LightRoom alternative, after pondering the various offerings from ACDSee. Free is good, so it's worth a try. So far, I have used RTP to edit and upload exactly one image: 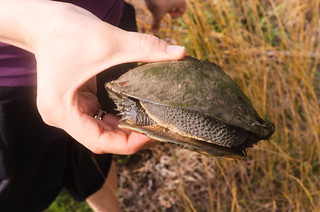 Road Turtle by Martin Brummell, on Flickr Road Turtle by Martin Brummell, on Flickrand the process wasn't particularly painful. The workflow of AfterShot is different from that of LightRoom (I used to run LR 3.6), but the overall setup is fairly similar. RTP is different again, but again it's fairly intuitive and the underlying idea - nondestructive edits, followed by export - is the same. I suspect (hope) I'll figure out ways to streamline things for how I like to work. My priority is to grind through large numbers of photos for good-enough edits to get them up on my Flickr, entirely to make myself feel less bad about the tens of thousands of photos I have looked at maybe once then ignored for years. So it's quantity over quality for me, and if I talk about RTP or AfterShot again it will be in the context of "How hard was it to plow through 900 photos last weekend?" Thanks for putting the thread together, HH.
|
|
#
?
Feb 7, 2019 05:48
|
|

|

|
| # ? Apr 29, 2024 13:46 |
|
|
Update: AfterShot 3 is un-hosed after a tech support person from Corel told me the simple steps to reset it. So it's back up and running, and nothing I've done (mainly rate thousands of photos) has been lost. I'm also already deep into my first pass through a big set of several hundred photos from last weekend in RTP, so I'm going to finish that clearly-defined job in RTP then try to make some decisions. The problem with switching software is the complete change in keyboard shortcuts and mouse movements even if the basic workflow structure remains the same. Maybe I need to change my workflow, and now is a better time than most to try something new. The critical issue has nothing to do with software and everything to do with self-discipline and motivation. Question for the thread: do you tend to work in long (multi-hour) stretches, or more frequent little sessions (say, 30 minutes or less)?
|
|
#
?
Feb 10, 2019 10:39
|
|