


|
 oh hey i wasnt able to check in until now. this is part of why i requested a reinforcement command. i'll catch up with the thread shortly
|
 #
?
Jan 19, 2019 07:16
#
?
Jan 19, 2019 07:16
|
|


|

|
| # ? May 4, 2024 05:28 |
|
|
Some admin to get out of the way prior to orders: Hob's map request:  Assignments: Glynnenstein and Hubis still unassigned. We also will need a commander for the pioneer company. OTF, I've put you in for one of the reinforcing pioneer platoons but there are a number of other positions available. Saros, it's up to you whether to have simplefish command all the Stugs or you could command 2 directly and 2 under simplefish. Orders spreadsheet: https://docs.google.com/spreadsheets/d/1xw2R9i3fktis59tRyoJWGkgBcG9xhsl_dJX09mojNgk/edit#gid=0 Fray, could you please let me know if i've made any horrible errors in the OOB. Requests: How many men in our Grenadier and Pioneer squads? Any auto weapons aside from the MG42 and Leaders SMGs? DSM, Could you get us more detailed overhead views? If you zoom in so that you can show the map in three or four pieces should do nicely. Also a full resolution picture from the editor. (If you can show the tile heights, I can do another contour trace easily enough.) Jaguars! fucked around with this message at 12:30 on Jan 19, 2019 |
|
#
?
Jan 19, 2019 12:26
|
|


|
8 man pzgren squads, 9 man pioneer. Exact weapon load out depends a lot on if Fray has changed it but occasionally some squads will have a second MG but mostly just bolt action rifles. Pioneer have six satchel charges per squad.
|
|
#
?
Jan 19, 2019 12:34
|
|


|
I'm happy to go 2 each on the stugs btw
|
|
#
?
Jan 19, 2019 12:51
|
|


|
Cool, that's about what I expected.
|
|
#
?
Jan 19, 2019 12:52
|
|
|
Yeah 2 each sounds good.
|
|
#
?
Jan 19, 2019 13:11
|
|
|
Jaguars, thanks for the map. If those really are 150 and 300 meter radius circles, then I've misjudged the map size badly. It looks like it's 2 kilometers wide and double that in height. Are you sure you didn't draw 150 and 300 meter diameter circles? In any case the road looks fairly safe from small arms fire. Machine guns and 75mm should be able to reach well enough, anything carried by infantry is going to have a hard time. Let us know what the plan is and I'll start drafting orders.
|
|
#
?
Jan 19, 2019 14:46
|
|

|
Oh yeah, my gently caress up, they're diameter, the scale is 1px = 2m and the map is 1200m x 896m Oporder in a couple of minutes once I think of a snappy operation name (probably not possible at 3am)
|
|
#
?
Jan 19, 2019 14:56
|
|
|
Operation Sichelschnitt. Or did we use that already?
|
|
#
?
Jan 19, 2019 15:00
|
|
|
Orders: Enemy situation: Of course there's unlimited ways for the enemy to deploy, they could frontload the lot, they could break it into tiny ambushes, but here's what I think is most likely:  It seems bad, but think of it this way. Imagine how we'd the area, and then take away 1/3 of the player commands. IMO, the US simply won't have enough troops to defend more than selected strongpoints. The Abbey is almost certainly the most heavily defended area. As well the strong structures, wall obstruction and approaches that stop long range observation, troops in the tops of the tallest buildings likely see much of the hills on the axis of our advance. I would expect this to be a full platoon with supporting MG teams and Mortars, and AT guns in the vicinity ambushing likely vehicle routes. Mortars could be based behind, in the courtyards or in the SW corner of the map. The Hamlet is next most likely but how heavily defended it is depends on whether the US gets points from defending it or not. It's not a great position to defend against vehicles as our stugs can sit back and pound the buildings, while AT guns would be exposed to flanking. My estimate of strength ranges from a squad with a couple of MG teams to a max of a platoon saturating the area + surrounds. The Peripheral forests of the Abbey are likely to contain squads in foxholes to maximise casualties on the approach. Estimate of strength: 1 Platoon. When we don't attack this way, these forces are likely to leave their foxholes to either defend northward or attack into our spawn. This possibility must be guarded against. The big forest directly north of us isn't very important, but it is a good place to defend, so caution is required there too. The blue zone is fairly open terrain that we can dominate fairly easily. The big risk is AT ambushes either by bazooka teams or AT guns across the valley. It's important not to be roadbound as this is likely to be the best covered route. Good scouting and advancing methods will get us through here. The light blue zone is so close to our spawn and unable to be supported as to be a suicidal deployment area. This is a zone where we can take some early risks if desired to speed up our advance and grab the whole area in minutes. The orange zone near the rail station is well covered with long sightlines and so is likely to be the base of long range fire by small teams. I would expect at least 4 AT guns if not more deployed in long range positions throughout the map. Apart from this zone, AT guns could be placed on the west side of the river wherever the ground is high enough to see past the forests, so do your best to ID those areas as well. Tank destroyers or light armoured vehicles are possible in place of some AT guns, but are pretty hard to predict so will have to be dealt with on the fly. The best way is probably to attempt to bypass them and set ambushes fro when they are forced to redeploy. Mines are possible but it's fairly predictable as the can only have placed a small amount that will only be effective at chokepoints. These will be at the approaches to the bridges and pre-existing openings in the abbey walls. Thus, to use the bridges as crossings will need infantry (preferably engineers) to sit close stationary close to the bridges and try to determine if there's any mines laid. Luckily, it's looking like we should be able to ford the river at other places. I consider it more likely that they will recieve tanks as reinforcements than start with them, but the contingency plan for tanks is to slow our advance right down and attempt to take all areas not dominated by the tanks. We'll end up spending a lot of time tank hunting with small units sneaking into ambush positions. When our reinforcement tanks arrive, their primary task will be to set up an anti tank defense that stops enemy tanks from flanking our infantry advance. Mission: Battalion Mission: To manoeuvre to gain a crossing of the river and attack the Abbey or other concentration of strength from the Northwest, North, North East and East in order to clear the map of significant resistance within 90 minutes. 9th Panzer-Grenadier company (Hob) Attachments: Battalion XO team / Halftrack and the starting pioneer platoon. Once we link up with the engineer company, you will likely give over some forces to strengthen their advance. Mission: To drive north-northwest in order to obtain the best positions for the Stugs to bombard the abbey, occupy access routes for an infantry atack on the abbey and minimize the hostile terrain that the Engineers have to traverse when they arrive at the north end of the map. Aim to complete this in 45 minutes after which be prepared to support the engineer advance followed by attacking the abbey. Regimental Pioneer Company (Engineers) Detachments: 1 Platoon is under 9th Company control. Some extra troops will be supplied for the attack on the hamlet. Mission: Capture the North (Rail) bridge and hamlet objectives, disrupt allied forces attempting to reinforce the abbey and provide suppression to the rear of the abbey. Armoured support group (Saros): Mission: I'm going to break it down a bit because it's pretty diverse. Recon and light armour: To determine safe routes accross the valley for infantry and armour and then to locate infantry positions and small ambush teams. Reinforcing light vehicles to perform the tasks to which they are best suited. Stug Battery: To create breaches and destroy defenses of the Abbey, and to destroy buildings and fixed positions as requested by the infantry. Provide emergency AT capability if required. Tank reinforcements: To establish an Anti-tank defense ASAP that allows the infantry to attack the abbey without having to face tanks. To support the Stug battery if required. I'm sure that's enough to chew on. I'll give more detail tomorrow, but it will be more in the nature of advice and doctrine than direct orders. Jaguars! fucked around with this message at 15:07 on Jan 19, 2019 |
|
#
?
Jan 19, 2019 15:00
|
|
|
9 Company, orders follow. Our immediate task is to support scouts who will beat a path for us to advance. We have plenty of time so there is no reason to hurry. -- Standard operating procedure: all halftracks at 25 meter distance from each other, 50 meter distance between platoons. Infantry stays near their halftrack until we need to assault or meet organized resistance. Whenever we are not on the move stay dismounted. Remember that we are facing Americans who have good integrated mortars in all their units. Do not stay under trees unless you absolutely have no choice. Airbursting shells will cause a lot of damage. We have StuGs to help us out. Keep your distance from them, they are sure to draw a lot of attention. Usual division of labor: we lure them out, StuGs take them out. I don't need to tell you this but I will: under no circumstance go into places where StuGs can not support you. That will get you killed. Two basic tenets of firefight: 1) more guns beat less guns 2) if its worth shooting at, shoot at it a lot When under fire, don't maneuver. I want everyone shooting back. We have 20 machine guns between us and two assault guns to back us up. It's going to be a bad day at the business end if we can just keep it together and concentrate fire. -- 1 Zug - Frangible cover, deploy your platoon facing north. I want your men to give fire support if our scouts meet any resistance along the highway north. 2 Zug - McBagpipes, deploy your platoon near the road behind Frangible. You're in reserve. Your responsibilities for now are twofold. Watch west for American observers and shut them down. Be prepared to mount up and leapfrog quickly over 1 Zug once scouts reach the first buildings along the road. You will take position in them and cover further advance while 1 Zug packs up and prepared to make the next leap. We will keep leapfrogging every 200 meters or so until we hit resistance or reach dairy farm. 3 Zug will take up positions near the road at back of our column once they arrive. Find the best available cover. Who was leading this platoon again? Dublish, send a squad of pioneers to clear the road heading north. Talk with Koolkevz so his armored car goes with you. First platoon will give you support until you're at the houses along the road, then 2nd platoon will move up to take positions and support you from there. You point, we shoot. Deploy your remaining men into positions where they cover the southern road and forest from abbey towards us. Shoot anyone who tries to gain eyes on us. Mines are priority. I don't want to lose anyone to mines but especially not a halftrack full of people. Keep it together, keep each other covered. Keep your distance in case of mortars. Hals- und Beinbruch, Kamarad. -- I will personally take up an observing position in the tallest house, top floor and watch west. Have the other squad in command team take up positions in the house next to it and watch north. Hide our halftracks behind houses so they can not be seen from the west. Dismount btn XO and have him enter a stone house in the rear. Hide the track. Hob_Gadling fucked around with this message at 02:23 on Jan 20, 2019 |
|
#
?
Jan 19, 2019 15:26
|
|
|
Man, getting re-installed from version 1 discs can be a pain in the rear end. Now that's done, I signed up for Pioneers 3rd Platoon.
|
|
#
?
Jan 19, 2019 16:00
|
|


|
Jaguars! posted:Some admin to get out of the way prior to orders: You can expect a pair of HMGs in each weapons platoon but otherwise it looks correct. I didn't mess with the infantry kit, so it should be a pair of LMGs in each PG squad plus the leader MP40. One LMG and MP40 in each pioneer squad.
|
|
#
?
Jan 19, 2019 16:02
|
|
|
simplefish posted:Fray, just a quick question - I think I know the answer already, but to clarify: Uuuuh, good question. I've always been a little off on this too despite being on a lot of teams that did it. I suppose since we're changing so much else this match we might as well set a policy on this too. Obviously it's hard to make a one-size-fits-all policy cause some things are much more gamey than others. Like, I don't have a problem with generic tests to see how two groups of tanks fare against each other; CM players do that stuff all the time just to learn the game. So here's my best shot at the issue:
If you test something I'd also like it if you post about it in the thread just so everything's in the open. I might decide something is over the line and say not to do it again, but I won't rip your head off or anything. Fray fucked around with this message at 16:20 on Jan 19, 2019 |
|
#
?
Jan 19, 2019 16:17
|
|
|
Hob, what do you want your attached pioneer platoon doing while the scouts do their thing?
|
|
#
?
Jan 19, 2019 16:46
|
|


|
I think pioneers have a company commander of their own. If not, detach a squad to go with the scouts and deal with obstacles. Minefields are priority. The main objective is to clear a route to the north.
|
|
#
?
Jan 19, 2019 18:19
|
|
|
And a request to StuG commanders: unless you have more pressing things to do, please put a shell in both level 2 houses closest to us along the highway. They're excellent observation posts and I'd rather play it safe.
|
|
#
?
Jan 19, 2019 18:27
|
|
|
Hob_Gadling posted:I think pioneers have a company commander of their own. If not, detach a squad to go with the scouts and deal with obstacles. Minefields are priority. The main objective is to clear a route to the north.
|
|
#
?
Jan 19, 2019 18:52
|
|
|
Ok, in that case. Dublish, send a squad of pioneers to clear the road heading north. Talk with Koolkevz so his armored car goes with you. First platoon will give you support until you're at the houses along the road, then 2nd platoon will move up to take positions and support you from there. You point, we shoot. Mines are priority. I don't want to lose anyone to mines but especially not a halftrack full of people.
|
|
#
?
Jan 19, 2019 20:37
|
|
|
e: Imgur resized these and basically halved the resolution. Anyone know of an alternative image host to give them the Full Glory? ee: The full-sized images are posted in the Discord #open-chat channel. I'm still investigating a way to get them embedded here in the full resolution.   The lines are at 10 meters and they aren't great so if someone wants to touch them up manually you're more than welcome to. Dark_Swordmaster fucked around with this message at 04:42 on Jan 20, 2019 |
|
#
?
Jan 20, 2019 00:42
|
|

|
Orders are as follows: Kill 'em all!
|
|
#
?
Jan 20, 2019 01:18
|
|
|
Dublish, addendum to your orders: deploy your remaining men into positions where they cover the southern road and forest from abbey towards us. Shoot anyone who tries to gain eyes on us.
|
|
#
?
Jan 20, 2019 02:06
|
|
|
Hob_Gadling posted:Dublish, addendum to your orders: deploy your remaining men into positions where they cover the southern road and forest from abbey towards us. Shoot anyone who tries to gain eyes on us. Got it, will have orders posted tomorrow.
|
|
#
?
Jan 20, 2019 02:08
|
|
|
I want to clarify the AOs you can reasonably expect to be operating in. Across the river it gets very fuzzy because we don't know exactly when or where the remainder of Pioneer company will arrive other than the north of the map. If hobforce needs to go through or round the back of the rail station woods then they can still do that. If you need to move into the other company's area, it just needs to be coordinated so that you don't run into the neighbouring troops. Armour group operates as needed, where needed. Planning is looking good so far, peeps.  - My best guess at reinforcements timetable: 3 Zug - 5 - 15 minutes Armoured group reinforcements 10 - 30mins Rest of pioneer platoon 30min + Jaguars! fucked around with this message at 03:40 on Jan 20, 2019 |
|
#
?
Jan 20, 2019 03:16
|
|
|
Hob_Gadling posted:
I'm leading it. I don't think I'm on map yet. I have our back when I arrive.
|
|
#
?
Jan 20, 2019 03:31
|
|
|
Since command structure is a bigger thing this time round, please correct my understanding before we begin if it's wrong. I think my chain of command is : code:If you are requesting armour support from me for something, I'd say please go through Saros instead so I don't gently caress up his plan responding to someone else. But if you speak to him then we all stay on the same page and he can order me to go help you out.
|
|
#
?
Jan 20, 2019 04:13
|
|
|
I also see that we have an unassigned Kubelwagen. Do we want to give that formally to Pioneer for arty spotting, 9th for arty spotting, or maybe Koolkevs to assist his scout car in scouting? In any case we should probably clarify whose it is
|
|
#
?
Jan 20, 2019 04:34
|
|
|
Dark_Swordmaster, thanks for the maps Quick question - how big is a grid square on these maps? And is there a link to a key anywhere, so I know what's a tree and what's a bush? Sorry for posting so much, just want to get it clear at the start
|
|
#
?
Jan 20, 2019 04:37
|
|
|
The full resolution maps are in Discord's #open-chat channel. I believe each square is 10x10 m but someone will correct me shortly.
|
|
#
?
Jan 20, 2019 04:41
|
|
|
8x8m action squares IIRC. Yeah, that's the chain of command. Kubelwagen is with the engineer's platoon HQ, I''ll correct that now. Orders format: Orders posts must be clearly labelled as such and must ID the unit involved. As a rule of thumb, all platoon orders that take more than one sentence to describe should be accompanied by a map. Each squad's route of movement should be shown separately unless you are moving in formation, in which case include a diagram of the formation including the spacing between units. ID each squad on the map. Don't forget small units like HQs. Company orders should tell the platoon commands what tasks they can expect as part of the company's immediate goal and how long it's expected to take. What the company will do after the task is complete should also be indicated. Between major tasks you can tweak or leave to platoon cmd. It is your responsibility to avoid platoons overlapping or clustering. Never order individual squads, that's platoon command's perogative. Indicating a few key positions you need occupied is acceptable. Link orders on the spreadsheet. The hash button below your avatar gives a URL that links directly to your post. If you are around close to the deadline, link any orders that aren't on the sheet. If you change your orders, make sure there is a single post that contains your current orders. Strikeout or wipe any redundant orders. Platoon basics: Has everyone here played before? I designed this crib sheet to allow an absolute beginner to carry out a dismounted advance to contact. Stolen from my doppelganger in the US forces shortly after the disaster at Foy late last year.  Pay special attention to the responsibilities section! As always, these are not hard and fast rules, they are there to make you think about why they are there before you break them. For a mechanized advance, be aware of of the weaknesses of halftracks. Observe possible bazooka sites before advancing within 100m of them. Be wary of moving into sightlines of more than 500m because of the AT gun threat. Don't be afraid to dismount troops to observe an open area. Stationary troops are the best spotters because there are so many eyes and the leader can use their binoculars. Don't be afraid to put out dismounts in front of the vehicles to scout either, the beauty of a mechanized advance is that once you determine a route is safe you can cross it in the blink of an eye. You can take time to observe and still be a lot faster than footslogging. Spacing and timing: I can't emphasize this enough. These are really important and neglected areas in goon CM. If your troops are getting suppressed by mortars or machine guns hitting the squad next door, your spacing is too tight. Think about the space you have to work in (simplest way to estimate: Imagine how a football field fits into it!). If you're trying to fit into a space less than 100m wide, you are only going to put one squad up front. Don't forget to check how far from your neighbour platoon you are too. Once you know how far you need to move, estimate the time available to you and consider what speed is most appropriate. Movement speeds can be found on the Combat mission Wikia. Spliting units: Splitting units has advantages and disadvantages. A platoon split into fireteams can cover hundreds of meters at once and is spread out enough to reduce the effectiveness of mortar fire. It allows your squads to perform complex tasks and gain multiple fire positions. However, you double your command and control needs which makes for mistakes. Sometimes the simplicity of working just three or four squads is more effective. Whole squads are effective for getting lots of guns onto a target as you can set a fire order and the Tac AI will focus on getting every troop in the squad into a position with LOS. A full squad also has more resilience, one or two casualties can make a fireteam completely ineffective. Ultimately it comes down to a choice you make based on the situation in front of you. Jaguars! fucked around with this message at 04:47 on Jan 20, 2019 |
|
#
?
Jan 20, 2019 04:43
|
|
|
Also to the above basics, keep in mind that maneuver doesn't kill the enemy. Shooting does. You can be accurate or shoot from a good flanking position but most often it is simplest to just stop and shoot a lot.
|
|
#
?
Jan 20, 2019 05:01
|
|
|
Pioneer Ko., 1. Zug Zug HQ, 1. Squad, 2. Squad:  Units start dismounted in the northwest corner of the deployment area. QUICK on yellow paths, MOVE on light blue, FACE in blue as shown. Vehicles will wait for the first minute, then follow at MOVE speed along the yellow paths. 3. Squad, 4. Squad:  Units start mounted east of the rest of the platoon. Vehicles QUICK north on the yellow paths, and DISMOUNT their squads. Squads will MOVE on light blue paths. When 4. Squad is dismounted, its truck should FAST to the road and continue north along Highway 3 until it reaches the hedgerow lining the west side of the highway.
|
|
#
?
Jan 20, 2019 07:43
|
|
|
Just a heads up that crib sheet is horrifically wrong about 'move' commands. You should never ever use move in combat it tells your men to stroll along at walking pace without any attempt to use cover. Its for traveling long distances without getting tired not for anywhere near combat. Here's a boot camp post I wrote up for the previous game. It's pretty german-specific in the second half but the fundamentals are valid. Saros posted:
Saros fucked around with this message at 13:37 on Jan 20, 2019 |
|
#
?
Jan 20, 2019 13:34
|
|
 If you have not read this do so right now it's crucial to understanding how to command in combat mission.
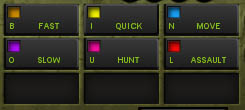


|
Auftr�ge 1. Zug 9. Kompanie First Platoon deploys as marked and rushes up to the first hedgeline in their tracks before dismounting. Scout teams are split off and pushed up as shown. The Platoon track is to be hidden behind the house and other tracks are to attempt to put as many trees between themselves and the direction of advance as possible. If we take contact immediately then I'll move those HTs out to support manually but I want them to remain mostly unobserved while I can. Wait until Second Platoon has leapfrogged through our positions and been set up for a minute before withdrawing everyone back to the tracks and leaping over Second Platoon thus:  Tracks again attempt to conceal themselves behind buildings and thickets. The position of 2nd Squad in that building is tentative, if there's no room with the pioneers in there then just leave them in the track for now. The scout team from 3rd Squad are to proceed at the Hunt, can't remember if that's pink or purple in game. Obviously if everything starts kicking off stop and come back to us and we'll see what's up.
|
|
#
?
Jan 20, 2019 21:53
|
|
|
PanzerGrenadiers Platoon 2 Initial Deployment Lets set up my teams as follows. 
|
|
#
?
Jan 21, 2019 03:42
|
|
|
How many minutes are we going to play this turn? Our platoon orders so far would be complete around the five minute mark. Lets try and get the rest of the orders done in 24hrs. If you feel I haven't given enough detail about anything don't hesitate to ask! Jaguars! fucked around with this message at 09:09 on Jan 21, 2019 |
|
#
?
Jan 21, 2019 09:02
|
|
|
I'm waiting on Saros
|
|
#
?
Jan 21, 2019 10:25
|
|
|
Tank orders are simple. Starting in the NE section of the deployment facing west and North. Splitting into two pairs they will wait at least one minute then advance at hunt speeds along the following routes making sure to stay behind our infantry. All units unbuttoned.  Armored car is released to scout towards the north accompanying the advancing infantry. Saros fucked around with this message at 14:50 on Jan 21, 2019 |
|
#
?
Jan 21, 2019 13:02
|
|
|
Are you going blue line or white line, or shall I put one to each of those areas?
|
|
#
?
Jan 21, 2019 13:33
|
|
|

|
| # ? May 4, 2024 05:28 |
|
|
Oops uploaded the wrong image. I'll go white.
|
|
#
?
Jan 21, 2019 13:55
|
|