


|
tithin posted:You can still do this - sort of. I'll elaborate more when you hit the appropriate building. Yeah, the HR department got several great upgrades in this game. After a certain point you can almost function without mines.
|
 #
¿
Mar 5, 2019 21:33
#
¿
Mar 5, 2019 21:33
|
|


|

|
| # ¿ May 28, 2024 23:40 |
|
|
There are some missions that mix it up a bit more. Also, the Ultimate Edition with all DLC is on sale over at GoG for about 1/3 the normal price.
|
|
#
¿
Mar 8, 2019 02:47
|
|
|
Gloomy Rube posted:Like apparently having bigger rooms is good? Sort of. Certain rooms create an interactive prop whenever there's at least a 3x3 space- the barracks generates a training dummy, library generates a research station, slaughterpen generates a pigpen, forge generates an anvil, that sort of thing. It generates an additional prop every time you expand the room at least two tiles out in a general direction, so you'd have two things in a 3x5, four in a 5x5, etc. There's also the concept of prop efficiency- the prop does its job faster for each adjacent fortified wall or door its 3x3 space is next to, up to a maximum of 250% efficiency when it's next to 7 fortified walls/doors. The efficiency meter is represented by a little gauge above the prop with seven slices that fill up when it's next to a door or fortified wall, and you can hover the mouse over the prop to see its exact efficiency. This replaces the DK2 system where being next to at least three squares of fortified wall gave you and additional item to play with in some rooms (racks in the torture chamber or training targets in the training room, for instance) so you could get more capacity out of a fixed floor plan (or do dumb like drag a line of a room down your hallway so you could have a 1x9 room or something). A consequence of this is that a 5x5 room with fortified walls and doors in any hole you feel like making will have all four props running at 250% efficiency, while going larger may mean you have props that aren't adjacent to enough walls/doors for maximum efficiency. Not all rooms care about this- some rooms only use size for capacity and don't spawn props, there are a few rooms with props that don't have efficiency meters, and rooms like treasuries and lairs can be set out in any format you like. Even for rooms with prop efficiency you're free to not care about it if you don't use the props enough that it matters or if you just want enough props to attract enough creatures.
|
|
#
¿
Mar 9, 2019 08:55
|
|
 I forgot a lot from DK2 I think.
|
Yeah, the HR department in this game receives some excellent upgrades and amassing a pile of prisoners lets you do some great things. Blood money is only the start of the new and improved prisoner economy. If you build a sanctum you can also start loving around with the power of sacrifices, though it doesn't get completely wild until the end-game. There are a few prime targets for conversion from the Empire's side- priestesses research and do rituals just as well as cultists but are much better supports in a fight due to their healing and revival spells, and the Empire's dedicated tank units are usually better at the job than your equivalents (dwarven vanguards especially so considering how early you can get them). Also of note if you're familiar with the old games is that you don't have to heal anyone in your dungeon or on your rack- prisoners eat rats and a rack in conversion mode doesn't lower the target's health.
|
|
#
¿
Mar 21, 2019 22:37
|
|
|
Garrisons are great, though you don't really need one larger than 3x3 since the towers don't stack, it's better to spread out a bunch of them to cover your perimeter. Basically what the aura does is strengthen all walls, doors and traps so that they not only take much less damage from attacks but also automatically regenerate health in the process. While the aura is up your enemies basically cannot chew through your defenses without either siege units (firebreathers for the Empire, high-end things for other Underlords) or having a ton of guys (which is totally manageable if you use AoE traps like the blade lotus, chilling traps, and the two traps you'll get later). The aura runs out after a few minutes and requires an augre (or juggernaut if you caught one) to wander up and smack the belltower to recharge it, but against a computer a garrison plus a good trap killzone makes that front basically a garbage disposal for your enemies giving you all the time in the world to play with your dungeon and convert/train/research your way to victory. Since you need to make sure the aura gets recharged regularly, it's good to put your killzones + garrisons on the perimeter of your dungeon so your augres can still wander over and deal with it rather than sticking them in the rear end-end of nowhere. Similarly, if you're trying to hang onto a gold shrine that's far from your dungeon, it's not a bad idea to wall it off (leaving maybe one door if you're in the habit of grabbing imps) and then stick a gold vortex next to each side so your workers can teleport the gold directly to your treasuries without having to run back.
|
|
#
¿
Mar 25, 2019 22:17
|
|
|
Gargoyle traps are a nice foundation for making a murderbox, since you put a gargoyle 2 tiles away from the entryway, put a freezing trap right in front of that, then a wall of three blade lotuses that all get to attack whoever comes through the doorway. The gargoyle ramps up the damage, the freezing trap (and nearby garrison belltower) prevents them from killing your traps unless they're a siege breaker, and the blade lotuses blenderize anything that gets close. Just make sure the hallway beyond the door bends away at the maximum range of the gargoyle so you don't have anything standing out of reach and shooting your blade lotuses. Then you just add in the bombards and the final trap to taste. AoE murderholes are really good at handling the blobs of enemies the game like to throw at you, and with enough overlapping AoE you can just melt heroes as they reach the doorway.
|
|
#
¿
Mar 31, 2019 05:13
|
|
|
Couple of other things that show up in this mission: -The Well of Souls is the last of the AoE murder traps, and damages every enemy inside its good-sized radius. It also works through walls, so you can murder workers as they try to weaken your walls/claim your tiles, or park it behind a bend in a hallway to damage anyone filtering into your murder hole. Once it damages enough things it summons a revenant to fight things for a little while, bogging down your enemies and ensuring that they'll spend more time in the AoE damaging aura. -The Spirit Chamber is the last of the XP-granting options, letting you channel XP into a unit in exchange for gold per second. You can also use lost souls created in the torture chamber- dropping one onto a creature getting XP in the spirit chamber gives that creature 100% of the soul's XP, so a level 10 soul can turn a level 1 unit into a level 10 unit. Comes in handy in the next mission. The chamber also attracts witch doctors, which are the only other healing unit you natively get outside of cultists. There are four titans in the game, three of which we've seen in this map: -The Behemoth was the one we summoned. Probably the best siege-breaker in the game, it can blow through doors and traps due to getting a big damage bonus against them, and also regenerates its health by default, or even faster when it's out of combat. Trains beasts in the arena if you don't give it any assignment. Not fantastic when fighting creatures though since it doesn't get any damage bonus against them. It can walk through lava, but all the other titans can fly so they can cross chasms while it can't. -The Eternal is the defensive titan Korvek summoned. It's not particularly fast but has an aura that halves the move and attack speed of enemies, and as long as it's alive it absorbs 80% of the damage directed at your dungeon core. It doesn't heal on its own (though it can be healed by your spells), but blocks half the damage directed at it. A gigantic pain in the rear end if it closes into melee with your units. Hangs out in the forge and makes parts if it doesn't have any assignment. -The Colossus is the shiny gold thing Kasita summoned. It hits fairly hard in melee, but its true power comes from its aura. Any gold that it encounters gets sucked up into your treasury, no matter if the gold is in gold veins, lying on the ground, a blood money statue or even in your enemy's treasury. Its aura also means that any creature who goes down in a fight while in the aura (friend or foe) will get turned into a statue like the blood money spell (and then sucked into your treasury), which means you can lose your own units and not get prisoners. It doesn't heal on its own though- you need to throw gold at it to make it better. -The Archon is the last of the titans, focused on magic. Has the same HP as the others, so it's not really any weaker despite being a ranged wizard. It heals for 3.5x the damage it does and has an aura that animates revenants out of whatever dies to really push into enemy territory (though you can lose your own units and it means you don't get prisoners). Researches sins in the library when it doesn't have an assignment. Since it can fly, attack from range and heal based on the damage it does it's a great target for your possession spell (which boosts the speed, damage and defense of the possessed creature) and you can use it to snipe various objectives. Its reliance on attacking to heal means it gets shut down hard by an Eternal titan.
|
|
#
¿
Apr 15, 2019 19:29
|
|
|
You don't need multiplayer, you can play with them in skirmish mode against the AI or especially in the My Pet Dungeon mode. Even if you don't have the My Pet Dungeon DLC, you still get 2 of the 8 levels in the base game. There's also the other mini-campaigns- for example the Colossus titan features prominently in the Heart of Gold campaign (since you're playing as Kasita).
|
|
#
¿
Apr 17, 2019 07:22
|
|
|
|
| # ¿ May 28, 2024 23:40 |
|
|
Well, you inspired me to pull the game out of my backlog and play through it, if that counts. I had a lot of help from the steam guides, especially the guide to units, spells and structures (though it doesn't cover some of the changes in the latest patches). Anyways, this mission introduces the last of the Underlord's forces, the most powerful unit on your side- the vampire. You don't attract vampires (or get them from graveyards like in DK2), you summon them with a ritual that also requires you to sacrifice three intelligent beings (enemy heroes or allied minions, it doesn't really matter). Vampires are the strongest unit HP-wise and hit like a truck, plus heal off of their damage and can summon allied undead at level 5. When they hit 0 HP you don't have to worry about them dying, they just respawn at their lair after a little bit unless they're finished off by either the Empire's Huntress or an enemy vampire (though they can be captured and subject to the usual fates of prisoners if you're against an enemy Underlord). The problem with vampires is that they don't eat food, they eat people from your prison, and high level vampires are pretty hungry. That steady stream of enemy heroes this map throws at you is enough to feed only one or two level 10 vampires, and a vampire who doesn't have people to eat quickly gets unhappy and rebels against you, fighting anything nearby until it's brought down (and subsequently destroyed- you can't imprison and reconvert mutineers). It's kind of a waste given the pile of heroes the game throws at your prisons when there are so many other fun things to do with them. There's the obvious route of conversion, especially for the level 10 Highguard since they're the tankiest non-boss unit on the Empire's side with both a high HP base and further damage reduction on top of it. But for units like the level 10 arcanist that comes with each wave, if you've had your fill of these glass cannons you can throw one the rack and then click the rack again to set it to "execute". This burns the subject to death and creates a spirit with that unit's XP (multiplied by like 1.5 or 2). Spirits are invulnerable, invisible and can go through doors, making them great scouts that won't get into fights with the enemy defenses or defender. Low-level spirits scout just as well as high level spirits, but high level spirits have another useful function- if you drop them on a unit that's channeling XP in the spirit chamber, all that spirit's XP goes to the unit. So a level 10 spirit turns a level 1 unit into a level 10 unit just like that. So you can easily use the level 10 arcanist to create a level 10 augre or something. But that's not all you can do with your units. One of the last things they put into the game with the 2.0 patch that came with the Under Games expansion is introduce the Sacrifice Ritual to the Sanctum. The way Sacrifice works is simple- fire up the ritual, drop three creatures into the glowing pentagram in the center of the sanctum and see what happens. A lot of combinations don't give you anything, but fortunately there's a guide to everything you can summon through sacrifices. In the campaign the sacrifice I use most frequently is Warden + Firebreather + (one of warden, firebreather, rat or pig) since that creates a Vanguard, which is a warden but with something like 90% more HP, and you can do that sacrifice from the moment you unlock the sanctum in a fight against a horde of enemy dwarves. You can do other sacrifices, but most of the time you need to sacrifice two to three of your units or imperial units to get one new unit so it's frequently about grabbing things you can't normally get for whatever reason. You can also summon some of the novelty units that you see in the campaign or the survival mode, like the giant ghouls or spirits that Draven uses, the arcanist dwarves that appear in the mage mission, or the half-dozen weird Chunders the game has. 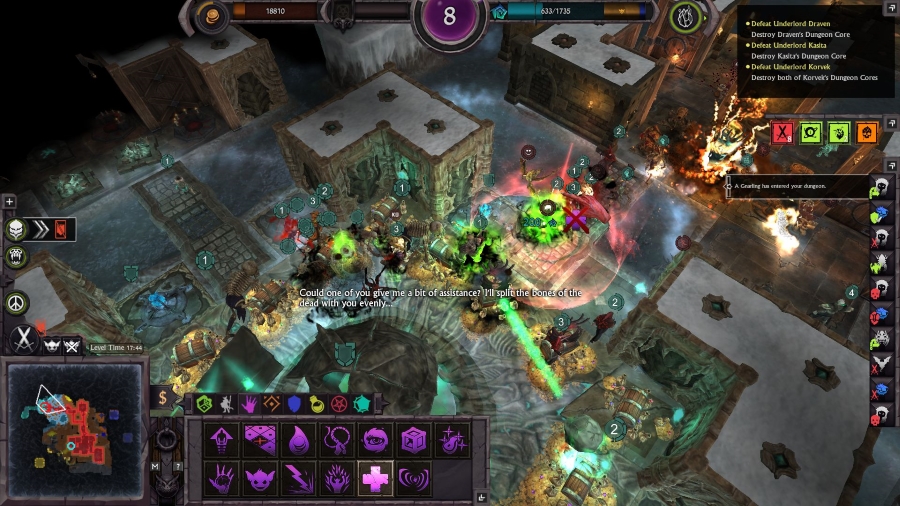 (You can see the giant ghoul to the left of the core). But once you have Vampires then things officially go off the rails. If you sacrifice three vampires (requiring a total of 9 sacrifices) you get one Baby Democorn, which is a demonic rainbow unicorn. Sacrifice three Baby Democorns (requiring a total of 27 other units) and you get a Democorn, which is a tougher version of the Baby Democorn. Three Democorns (81 sacrifices) and you get an Alpha Democorn, which at level 1 has about the same HP as a titan, and at level 10 (which you can easily get through using spirits) has about 7.5x that. It's more of a novelty unit than anything, but if you sacrifice a regular Democorn plus two of the same imperial unit you get the campaign boss version of that unit (and if you sacrifice a regular Democorn plus one imperial unit plus a necromancer you get the ghost boss of that unit- sacrifice a ghost boss with a priestess and one of either a rat, a pig or another priestess and you convert the ghost boss to a regular boss) Sacrifice a Democorn plus two Highguards? You get Emperor Lucius. So you can kill the level 10 final boss with the level 10 final boss. And the ghost of his dad. And a giant wall of angry unicorn. And a flying chunder and a baby behemoth and... If you want to gently caress around in this game, open up the sacrifice guide on a separate screen or your smartphone and just mess around on either this map or My Pet Dungeon.
|
|
#
¿
Apr 18, 2019 05:02
|
|