


|
That looks great. Is it extremely loud? I suppose on most motorcycles the exhaust isn�t in front of you.
|
 #
?
Mar 2, 2021 05:53
#
?
Mar 2, 2021 05:53
|
|


|

|
| # ? Apr 29, 2024 09:01 |
|
|
Toe Rag posted:That looks great. Is it extremely loud? I suppose on most motorcycles the exhaust isn�t in front of you. I guess that would depend on your definition of loud. But I would say it�s on par with my dyna which just has aftermarket exhaust on it.
|
|
#
?
Mar 2, 2021 06:11
|
|

|

|
|
#
?
Mar 2, 2021 13:43
|
|
|
So I have been practicing stainless welding on some scrap tube of the same type I�m using. Found that I prefer a #8 cup with a gas lens and using pulse. The pulse helps keep me from overheating the stainless. The Miller welding settings calculator for getting a good baseline on materials I am not familiar with. https://www.millerwelds.com/resources/weld-setting-calculators/tig-welding-calculator You tell it the thickness and type of material as well as what type of weld it will be. Then it gives you some basic settings to start with and sizes for tungsten and filler rod. *edit* I also replaced all the valve guide seals since I had one that kept coming off the valve guide?!?!!? I have never seen that before but the ones I put on I have experience with on other motors. I also put in the new springs since I just had them on the other head while I wait for the head with stainless valves to come back. Thankfully I ordered that leak down tester, I was able to pressurize the cylinders and do all the work without taking the head off. Valt fucked around with this message at 20:17 on Mar 7, 2021 |
|
#
?
Mar 7, 2021 20:11
|
|
|
Valt posted:Thankfully I ordered that leak down tester, I was able to pressurize the cylinders and do all the work without taking the head off. This always makes you feel like a rocket brain surgeon, nice.
|
|
#
?
Mar 7, 2021 20:19
|
|


|
I have been practicing welding on stainless tubing. I'm getting better and using the pulse setting has helped me a lot. Since it stops me from sitting in one spot and overheating the tubing. I also back purged this test piece and that made it better as well. Once I had the tubing welded I polished it with my tubing polisher and I'm pretty pleased how it turned out. Mind that this is just a test piece for me to practice my tig welding.   I also got started on changing my seat. Originally we had put down some stand offs on the frame as I was concerned I would sit to low on the bike. This turns out to be a non issue. So I can the stands off and I also shortened the seat pan, since I want to have a more vertical sissybar. I also put on my taller sissy bar that I made and I think I am liking the taller bar more. I just need to make the mounts for the seat and then its going back to the guy who originally made it. So that he can put the foam and cover on it. We had originally used black velvet on the top, but it faded really badly in the sun. So now the top is going to have newbuck leather and the sides will just be black leather.  
|
|
#
?
Mar 15, 2021 17:11
|
|
|
Well I finished modifying my seat pan today. Its currently just tacked in place so I can verify everything before fully welding it. So instead of the seat bolting to the sissy bar there is now a bung on the top of the fender and a tab on the back of the seat pan. I also had to change the front mount on the seat pan but I'm not happy with it yet. I mounts basically like a harley davidson seat does, with the bolt in the back on just a tab that slides into a mount in the front. It should be noted that most of this won't be seen after the seat is covered.  
|
|
#
?
Mar 21, 2021 04:41
|
|
|
Valt posted:Well I finished modifying my seat pan today. Its currently just tacked in place so I can verify everything before fully welding it. So instead of the seat bolting to the sissy bar there is now a bung on the top of the fender and a tab on the back of the seat pan. I also had to change the front mount on the seat pan but I'm not happy with it yet. I mounts basically like a harley davidson seat does, with the bolt in the back on just a tab that slides into a mount in the front. I completely spaced getting pictures of the finished welds. But the welds on the back tab are nice since it was all new and clean. I honestly should have just mig welded the front tab since it was spliced into what was there before. None of this stuff is load bearing and honestly is a copy of what harley does with their seats. I'm hopefully going to get the seat back before the 11th of next month. There is a swap meet happening in fredericksburg next month that I want to ride too. https://thetexasfandango.com/ Valt fucked around with this message at 02:40 on Mar 22, 2021 |
|
#
?
Mar 22, 2021 02:00
|
|
|
So I tacked the lower mounts in the taller sissy bar. I also got my bungs to for the top mounts on the fender. I'm going to have to take the fender off to weld the bungs on so there is going to have to be some layout before that happens. Once thats all done I will cut the back of the fender off so its closer to the sissy bar like it was before.  I'm not sure I'm sold on the vertical plate mount. But I think in either case I'm going to have two bars that hold the light in the center of the sissy bar. So from the back it appears to be floating in space. Thats actually going to be somewhat difficult because it will need to be centered in 3d space. Its getting the same tail light thats on the other sissy bar as well. I'm also going over to a friends house this weekend with the bike so we can work on the seats foam shape. 
|
|
#
?
Mar 26, 2021 15:54
|
|
|
This is my favorite thread. Please keep posting, you�re doing very cool work!
|
|
#
?
Mar 26, 2021 17:39
|
|

|
Never been much of a chopper guy but wide engines on skinny frames look so much better to me than the typical v-twins. The sound of a CB750 with a big bore kit and a hot cam are glorious.
|
|
#
?
Mar 26, 2021 17:51
|
|

|
moxieman posted:This is my favorite thread. Please keep posting, you�re doing very cool work! Yeah my progress has been pretty slow. But I'm starting to pick up the pace a bit now since I have everything I need. I need to take the fender off so I can get the bungs welded on but that isn't a easy task since the wheel has to come off. I'm also going to change the mounting of the oil tank so that it sits flush to the underside of the frame. But again thats kind of a undertaking since I have to drain the tank and fiddle with a bunch of stuff. But over all it will be a much cleaner look with the tank flush to the underside of the frame.
|
|
#
?
Mar 26, 2021 18:14
|
|
|
helno posted:Never been much of a chopper guy but wide engines on skinny frames look so much better to me than the typical v-twins. Yeah I saw the pictures of the blue 750 in the other thread. I think you would be surprised at how totally different of a bike it is with accelerator pumps on the carbs.
|
|
#
?
Mar 27, 2021 01:21
|
|
|
Well I got a lot done today. I finally got around to getting my mounting tabs for the fender welded onto my sissy bar. I also modified a tail light mount to mount my after hours choppers light, this is the mount that I got https://www.lowbrowcustoms.com/prod...NRoCyXoQAvD_BwE. This is how I modified it so basically the light sits just above the license plate.  I also temporarily mounted a solo seat since my other seat isn't going to be finished by next weekend. A bunch of us are going to ride out to Fredricksberg for the Fandango, which is a big swap meet and some vintage racing stuff. I will get pictures of the mount but its extremely basic since its just 1/4" flat bar and I put some hose over the bolts in the back of the seat so it doesn't mess up the frame. https://thetexasfandango.com/  Here you can see everything tacked in place. I actually goofed and the light mount is a bit cockeyed, but it just has a couple of tacks in it. Everything else is now fully welded as I verified it is where it needs to be. Now I need to take the fender off so I can weld the bungs into the underside of the fender. Plus I need to run some double sided tape under the fender so the wiring can be hidden. This is essentially how Dyna's and probably a lot of cruiser type bikes run the brake light and turn signals.   In non motorcycle news, the 49' in the background spun a rod bearing. So I bought another motor for $150, but its seized though I think I can pull a rod out of it and replace the one with the spun bearing in my motor. I also found that one of the tie rods was extremely bent, so thats getting replaced. Hopefully I can get it going within the month, it also needs a gas tank since the old one literally rusted a hole in it.  
|
|
#
?
Apr 5, 2021 03:00
|
|
|
Well I attempted to ride out to the Texas Fandango today on the Honda. I ran out of gas pretty early on which was annoying. Since because the way the tank mounts there is basically 0 reserve. But worse then that first gear appears to be hurt. Sometimes when I get into first I get a awful gear grinding sound. It had only happened a couple of times in the past month but it happened a bunch today. I ended just parking it and calling triple a since I didn�t want to hurt the motor. So tomorrow I�m going to pull the motor and split the cases. I obviously have other transmissions. But my concern is that the power level and violence of it with the hard tail and different carbs is just going to break the trans again. Valt fucked around with this message at 01:52 on Apr 11, 2021 |
|
#
?
Apr 11, 2021 01:48
|
|
|
Yikes I didn't realize that would be so much of a concern. e: in my experience the transmissions have been pretty bulletproof except the shift forks. GnarlyCharlie4u fucked around with this message at 07:51 on Apr 11, 2021 |
|
#
?
Apr 11, 2021 07:04
|
|

|
GnarlyCharlie4u posted:Yikes I didn't realize that would be so much of a concern. Yah I�m not really sure it�s just my hunch. But I will see if there is carnage in there today. I have certainly heard that the shift forks can bend. But that normally causes issues in all the gears. I also need to actually figure out why it�s blowing oil. I suspect it�s worn valve guides but it has new valve guide seals so I�m not sure if that would still cause that. The rings are new and it has good compression so it�s not that for sure.
|
|
#
?
Apr 11, 2021 14:11
|
|
|
Oh there was carnage.
|
|
#
?
Apr 11, 2021 20:14
|
|
|
Those ring segment looking bits are pretty alarming, they look like bearing retainers or something...?
|
|
#
?
Apr 11, 2021 22:34
|
|
|
Valt posted:Oh there was carnage. Ouch. Good call on AAAing it.
|
|
#
?
Apr 11, 2021 23:09
|
|
|
Slavvy posted:Those ring segment looking bits are pretty alarming, they look like bearing retainers or something...? Oh sadly no, it just got way more expensive. Thankfully I have another bottom end, but the main issue here is I can't get these pistons. So I have to get a totally different set of pistons then have another set of jugs machined for them.  
|
|
#
?
Apr 12, 2021 02:59
|
|
|
Oh dear.
|
|
#
?
Apr 12, 2021 03:03
|
|
|
Valt posted:Oh sadly no, it just got way more expensive. Thankfully I have another bottom end, but the main issue here is I can't get these pistons. So I have to get a totally different set of pistons then have another set of jugs machined for them. gently caress. Well if you need cylinders lmk. I've got a bunch of stocks lying around.
|
|
#
?
Apr 12, 2021 05:59
|
|
|
GnarlyCharlie4u posted:gently caress. I actually have several sets of jugs. What I'm probably going to do is use the 78 motor it just needs to be painted and get a clutch. But now I'm going to have to get new pistons and get those jugs machined. Thankfully pulling the motor out of the bike is trivial really.   
|
|
#
?
Apr 12, 2021 14:03
|
|
|
Alright well I just ordered a set of weisco 836 pistons. So now I need to get the other motor up on the stand and get it ready to be painted. I also need to pull the covers off the dead motor and give them another round of polishing. Before I put it all back together I think I'm going to get a barnett clutch for it too since I'm pretty sure that motor has a roasted clutch. I'm also looking at a much bigger cam then what I had originally put in it (363a). Plus I still have the other head with stainless valves in it. https://www.dynoman.net/engine/cams/webcams_honda.html Valt fucked around with this message at 16:08 on Apr 14, 2021 |
|
#
?
Apr 14, 2021 14:01
|
|
|
Well I ordered Weisco pistons but apparently cycle x was out of those but they had the 836 JE pistons in stock which are essentially the same thing. In that they are both forged pistons and 836, however the JE pistons are a 1/4 point of compression higher. They arrived today, so hopefully I can get everything dropped off at the machine shop on monday. I'm going to put the motor on my engine stand that I made so I can get it ready to be painted. Plus I'm taking the jugs over to a friends so I can blast them and get all the old gross paint off them. Here is a picture of the new pistons in comparison to a stock piston and the 850 pistons that were in the bike. The stock piston is on the left, JE piston in the middle, and the 850 piston on the right. 
Valt fucked around with this message at 01:49 on Apr 17, 2021 |
|
#
?
Apr 17, 2021 01:39
|
|
|
What a pain. Nice table though!
|
|
#
?
Apr 17, 2021 11:01
|
|

|
So I put the other motor on the engine stand today to start getting it ready for paint. I took the oil pan off just to make sure nothing horrible was happening and found a pile of RTV. Because whoever messed with this motor last used a gently caress ton of RTV on the side covers for no reason at all.   Thankfully everything appears to be okay. No wonder it was leaking oil, the trans cover was basically just finger tight. But all of the threads appear to be okay thankfully. I started trying to get the liners out of the stock bore jugs and put them into my other jugs since they are already blasted and clean. In doing so I noticed something odd. The big bore jugs are bored off center, literally .5mm. I don't know if that would have caused my failure but that CANNOT be correct at all. 
|
|
#
?
Apr 18, 2021 04:51
|
|
|
Valt posted:The big bore jugs are bored off center, literally .5mm. I don't know if that would have caused my failure but that CANNOT be correct at all.  how do you get to the point of having the tooling, knowing how it works, and still loving that up that badly. What the gently caress. how do you get to the point of having the tooling, knowing how it works, and still loving that up that badly. What the gently caress.The RTV bs is par for the course.
|
|
#
?
Apr 18, 2021 07:13
|
|
|
lmao
|
|
#
?
Apr 18, 2021 19:14
|
|


|
For the unlearned, what are we looking at here?
|
|
#
?
Apr 18, 2021 19:39
|
|


|
Horse Clocks posted:For the unlearned, what are we looking at here? The bores are off center. I still don�t know if this would actually cause a problem. But at the very least it shows that the guy that bored them didn�t know how to set them up. There is 0 reason you bore off center like that. Literally one side of the jugs is half a millimeter thinner. Which in the realm of engines is gargantuan.
|
|
#
?
Apr 18, 2021 19:48
|
|
|
Valt posted:Literally one side of the jugs is half a millimeter thinner. Which in the realm of engines is gargantuan. Ah I see it now!
|
|
#
?
Apr 18, 2021 20:26
|
|
|
Yeah. There are a lot of different parameters that matter for a cylinder bore (diameter, roundness, concentricity, smoothness) but all of those numbers are measured to the ten-thousandth of an inch. Except smoothness, which is measured in millionths of an inch. I'm not sure how critical the bore centerline is in this particular engine, as that depends on the design of the crankshaft and connecting rods and such. But being off by half a millimeter, .020", in any dimension is literally two orders of magnitude worse than you'd expect a good engine shop to be able to hold.
|
|
#
?
Apr 18, 2021 22:31
|
|
|
It will completely gently caress up the stresses bring driven through the conrods, as well as drastically accelerating piston wear, because depending on which way they're biased it's effectively increasing the amount of force being spent on ramming the piston sideways on the power stroke. Most engines have slightly offset bores in relation to the crank centerline for this exact reason, it is very finely calculated so I can't imagine just shifting everything half a mile will do if any good
|
|
#
?
Apr 19, 2021 01:04
|
|
|
Will that really mess up things that much? I know that the spacing of crank axis and cylinder axis are finely optimized slightly apart, but I gotta say I've put together a lot of motors modified in numerous different ways and I've never seen a problem obviously attributable to that of all things. Looks to me like one of the many measurements in an engine, like piston dome shape, which you could get fairly wrong and it wouldn't affect anything other than peak horsepower by a few percent. It's not like the wrist pin and cylinder aren't going to get lubricated or anything. Nothing's going to bind on anything else. But I dunno I've never bored a cylinder myself.
|
|
#
?
Apr 19, 2021 14:34
|
|

|
Rev. Dr. Moses P. Lester posted:Will that really mess up things that much? I know that the spacing of crank axis and cylinder axis are finely optimized slightly apart, but I gotta say I've put together a lot of motors modified in numerous different ways and I've never seen a problem obviously attributable to that of all things. Looks to me like one of the many measurements in an engine, like piston dome shape, which you could get fairly wrong and it wouldn't affect anything other than peak horsepower by a few percent. It's not like the wrist pin and cylinder aren't going to get lubricated or anything. Nothing's going to bind on anything else. But I dunno I've never bored a cylinder myself. Yah I�m unsure as well but it just seems wrong at the very least. I�m actually headed to the machine shop right now so I will see what they say. So just got back from the machine shop. He brought up something I didn't even think about, the bores might not be straight in the vertical sense. In any case he agreed that having the bores be that much off center is not good and wouldn't have helped anything. But if they weren't straight that would cause more problems. Valt fucked around with this message at 15:21 on Apr 19, 2021 |
|
#
?
Apr 19, 2021 14:38
|
|
|
Alright well I ordered my barnett clutch plates for the new motor, as well as gaskets for all the covers. I'm having a bit of trouble finding a head gasket though since I need one with the bigger holes for the head studs. It seems that only cycle x offers that in their MLS head gasket. I might just break down and buy that when I order my bigger head studs. I also ordered some new polishing stuff since my wheels are super worn out and I'm out of polishing compound. These wheels actually stick out a bit farther which makes polishing weird shapes easier. https://www.amazon.com/dp/B07D7M13BL?psc=1&ref=ppx_yo2_dt_b_product_details I think eventually I'm going to order a eastwood 1/2 polisher since my harbor freight one works but its pretty weak especially for doing stainless stuff.
|
|
#
?
Apr 21, 2021 14:45
|
|
|
Gave the trans cover and alternator cover a quick buff with my new buffing setup. I'm not really pleased with the finish buff as it tends to leave streaks on the metal. I ordered a different wheel to use for finishing to see if that makes any difference.  Here is a before picture of the motor just so you can see the transformation. 
|
|
#
?
Apr 22, 2021 01:18
|
|
|

|
| # ? Apr 29, 2024 09:01 |
|
|
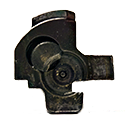
Well I'm still waiting on getting my jugs back from the machine shop but my gaskets arrived this weekend and I'm getting my clutch plates today. But this weekend my friend recently picked up a 56' panhead with a shovel top end. Its a numbers matching bike which means the frame, trans, and motor all have matching numbers. The frame has been choperized in the past and all of the floor board mounts have been removed and it was molded at some point. We dont know the last time the bike actually ran and none of us were particularly familiar with running a manual advance distributor. We got it to run with the distributor setup incorrectly and the wrong points. Which really says a lot about how simple these things are lol. https://www.youtube.com/watch?v=4ri2lsrj7P0 I also started trying to find a lower pulley for the mag since the flanges came off it. I attempted to tig weld it back in place temporarily which sort of worked but not really. I looked around for a pulley but of course its some modified thing or a unicorn pulley that doesn't exist. It has a 15 teeth and a 11mm bore, but the nose of it is like 9.5mm. So likely I'm going to have to get something that matches the nose bore and then put it on a lathe to take it out to 11mm. 
|
|
#
?
Apr 26, 2021 16:07
|
|