


|
I got the drawer slips installed today. First task is to surface the insides.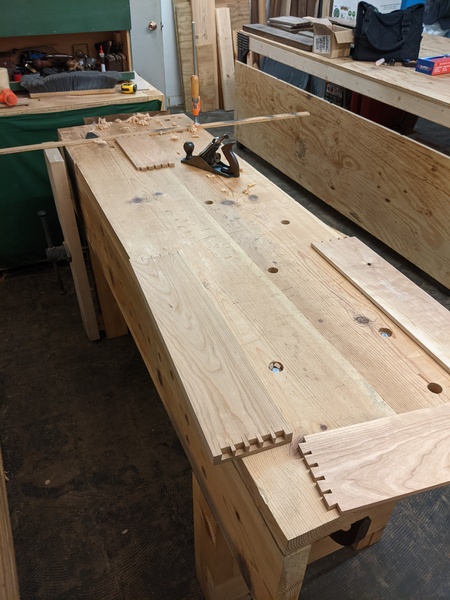 I mentioned earlier I was going to reduce the thickness of the slips as they're quite chunky on the inside. I figured I'd do it after cutting, since it's awkward to plane down a 4'-long thin strip. Except... the miters would be screwed up if I made them thinner after cutting them. Duh. Of course I realize this after cutting them. I thought about remaking the slips, which wouldn't have taken long. But this drawer's already got one screw-up (you guessed right, Just Winging It), so I'll just see it through. I've mentioned somewhere before that I like to practice new stuff once before I do it for real. This is why. I actually thought about making a tiny drawer for practice but figured it was too much work to be worth it. So I guess I'll have this slightly screwy drawer to remember this learning experience by. So the slips are a little chunky on this drawer. I'll do it better next time. 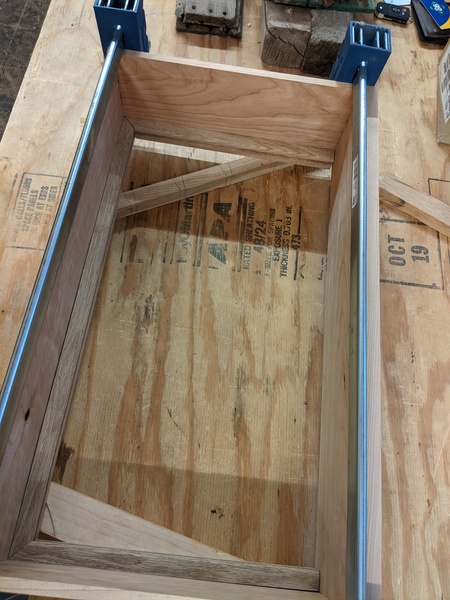 I rarely use sandpaper, so I didn't happen to have any on hand to finish surfacing the strips. When finishing, I use uncoated brown paper (like a grocery bag, or in this case, a chunk of the yard waste bags I use to collect shavings) to smooth each coat of finish. I think I picked that up from a Schwarz book. So I did that here to smooth the surface of the strips. Good enough. 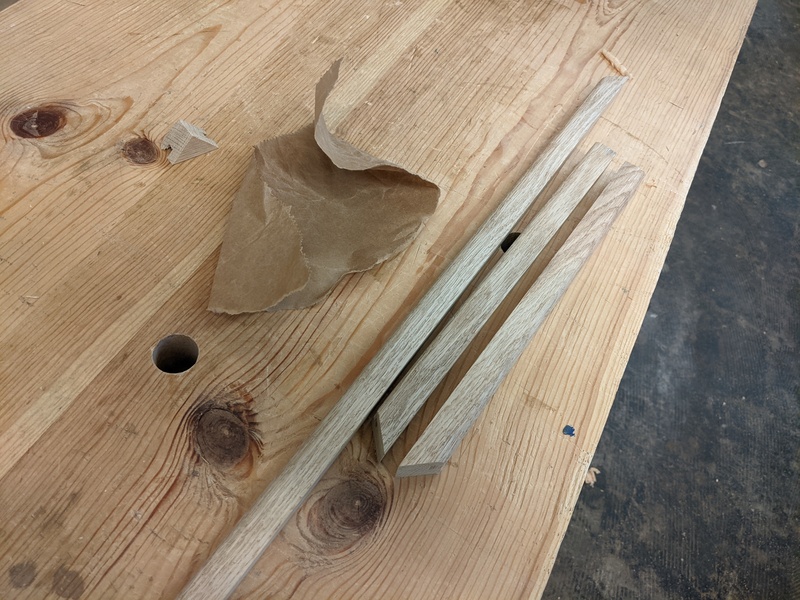 And here's the glue-up for the drawer slips. I didn't have quite enough small clamps, so I used one of my favorite clamping techniques, a slightly too long thin slip of wood which you bend into place to hold the pieces together. 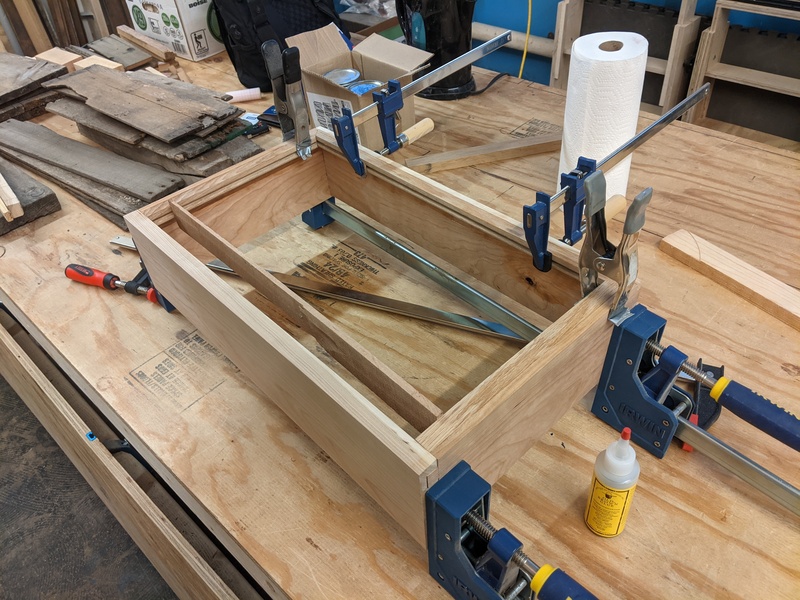 Then I wrapped up the day by prepping the next drawer front and resawing the sides for it. 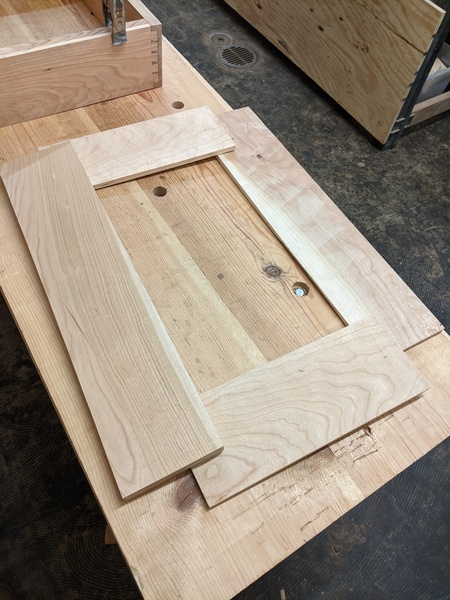
|
 #
?
Jul 25, 2021 23:15
#
?
Jul 25, 2021 23:15
|
|


|

|
| # ? May 5, 2024 18:59 |
|
|
So I'm planning to do the drawer "pulls" like the one in the bottom-left of this photo:ColdPie posted:Over the weekend, Matt Kenney (previously of Fine Woodworking magazine, now independent) posted a picture of himself being interviewed, and in the background I noticed this coffee table that's pretty similar in form to what I'm aiming for. I'm not sure what to do for the drawer pulls yet. I've thought about doing that open half-moon shape, like in the picture, and may just end up doing that. Next time I go to the shop is probably when I'll cut those. Is there any reason to not do that? If so, what do you recommend instead?
|
|
#
?
Jul 31, 2021 19:24
|
|

|
I went in earlier this week, but my home Internet has been down until last night, so now I will post about it! Last time, I glued the drawer slips on to the drawer pieces. While it was still assembled, I traced the size of the drawer bottom onto the 1/4" plywood, plus an extra quarter inch to slot into the slips. Cutting plywood with hand tools is never great. What I've found works well is to score the show face with a knife and then use a fine toothed saw to cut along a guide. Then I marked out the curve for the handle(?). I cut it by cutting straight down the center, then in towards from either side with a fretsaw. I honestly did a pretty crap job. I didn't manage to keep the blade parallel with the floor, so I ended up with some really wonky cuts. I smoothed it out as best I could with rasps. Turned out OK, a little lopsided, but hey this drawer is already a bit of a mess. Forgot to take pictures. Then I applied two quick coats of shellac to the inner faces in the parking lot. I didn't do any finish on the plywood bottom. I don't know whether I should have or not. 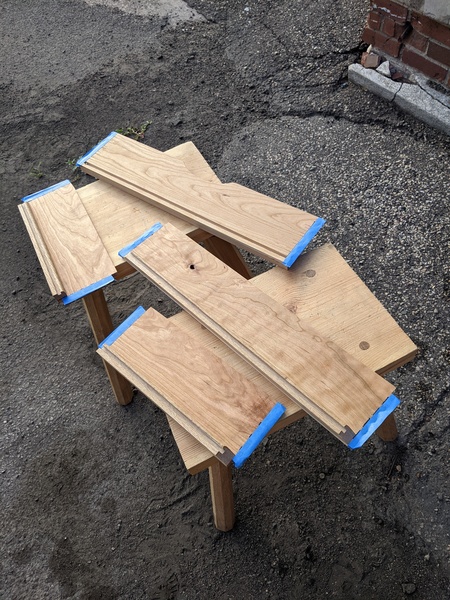 And glued it up. Was a bit difficult getting glue into the small dovetails. I ended up just putting a big drop into each gap and then using the toothbrush to clean up the squeeze-out. 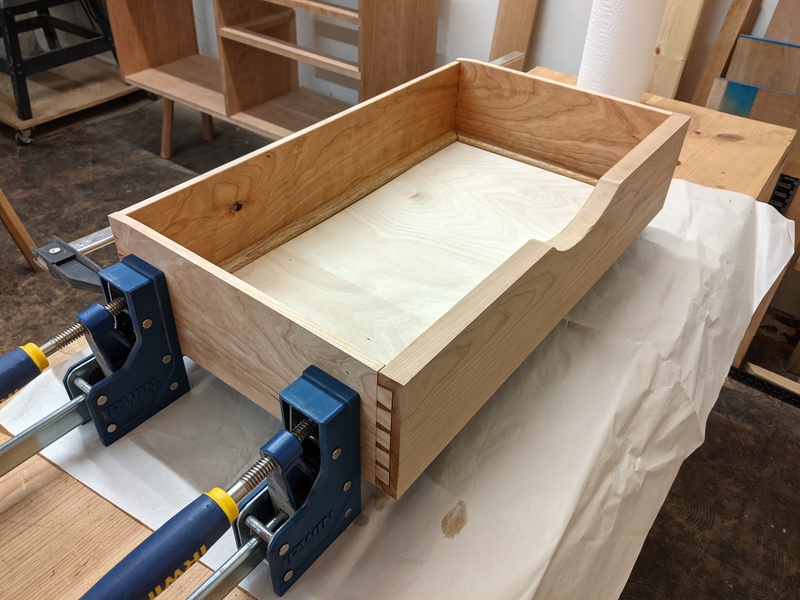 Went back in a couple days later to take clamps off and drat, it doesn't look half bad, even given all the mistakes. Next one will be better. You can see its components in the background. 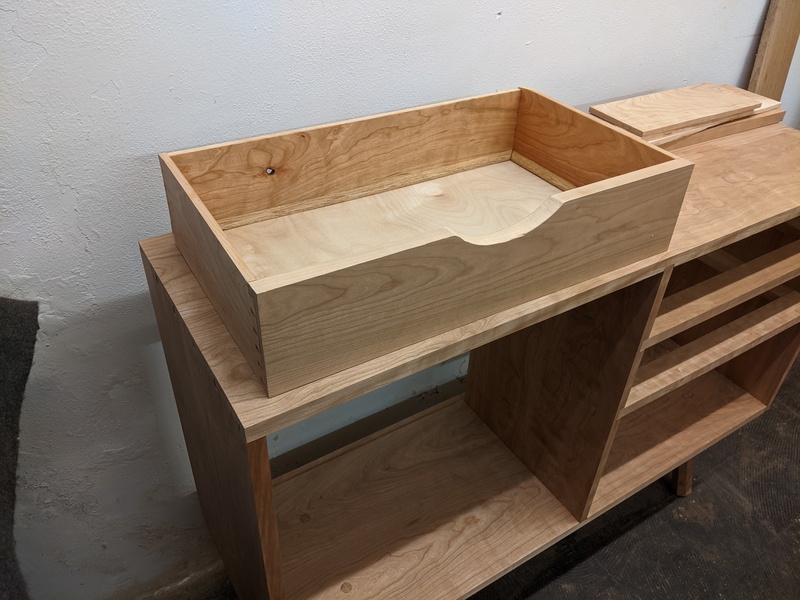 Next up is to do final fitting of the drawer into the case. The case is a tiny bit lopsided; remember wayyy back when I screwed up transferring the length from the bottom to the top? I accounted for that a bit when crosscutting the drawer face, so hopefully it won't be too noticeable. We'll find out! On a completely unrelated note, the building complex put on a small art sale last night. They featured some of the artists on their instagram, if you'd like to see some of the things people make for sale in the buildings: https://www.instagram.com/2010artblok/ ColdPie fucked around with this message at 19:24 on Aug 7, 2021 |
|
#
?
Aug 7, 2021 19:12
|
|
|
There may some mistakes in there, but they're small and don't look like they impact the functionality of the drawer. Looks like a nice and solid drawer to me.
|
|
#
?
Aug 7, 2021 21:01
|
|

|
Went in yesterday to wrap up the first drawer. Awkward planing ahoy.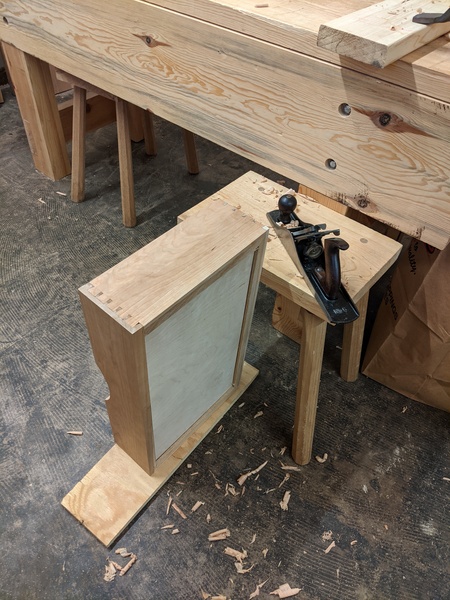 Mostly the bottom of the drawer slips needed to be taken down. It's a decent fit. A little bit sticky when it's first being inserted, but once it's about halfway in it's smooth. It is the most humid time of year, so I'm OK with it being a little tight right now. 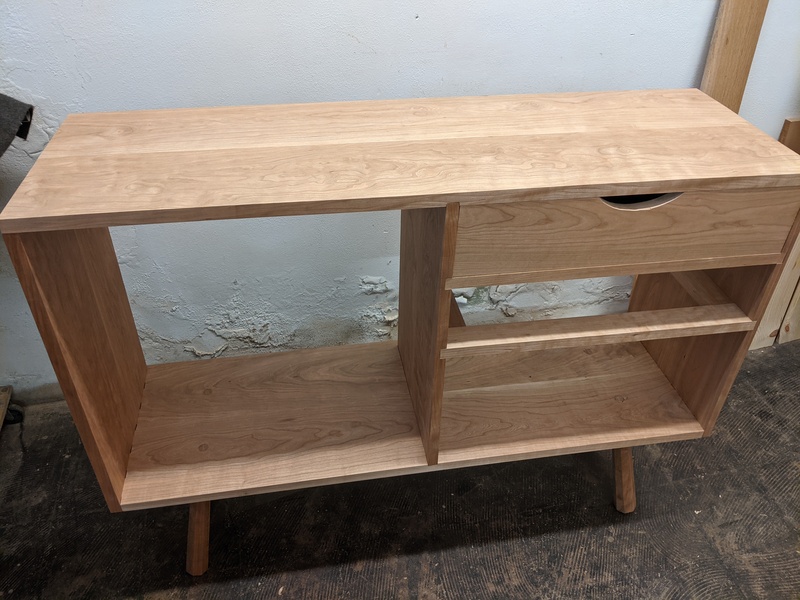 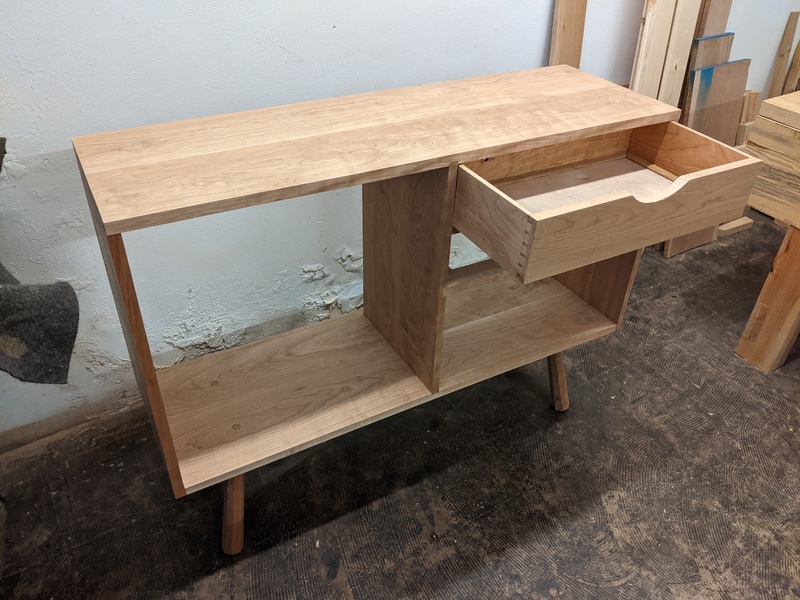 No reason to clean up the back of the drawer, so I didn't. Maybe some wood nerd in the future will see the tool and layout marks and get a kick out of it. 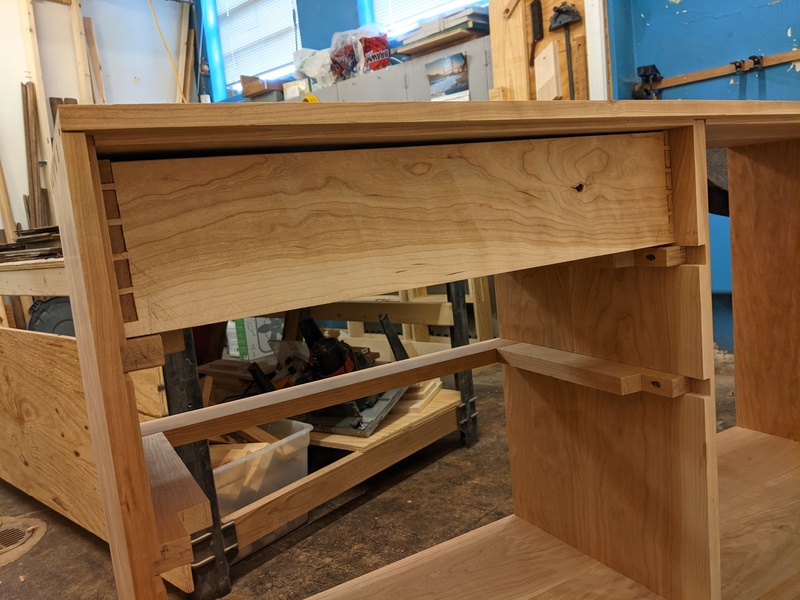 Here's the biggest mistake. I forgot to hide the groove for the drawer bottom in one of the tails, so there's this small gap in the sides. Oh well. 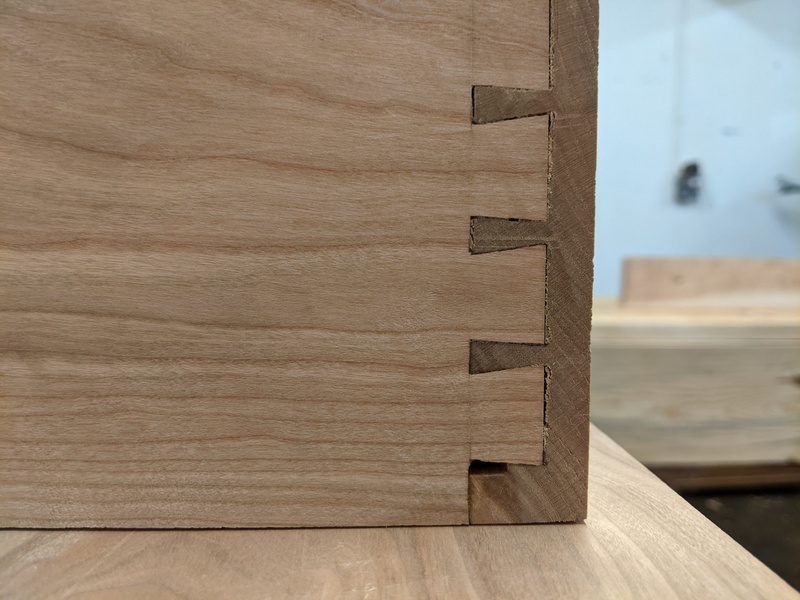 After that I prepped the stock for the next drawer to get it ready to lay out dovetails, and made the drawer slip stock for it. Sawdust line on the floor from ripping out the stock on the benchtop made me laugh. 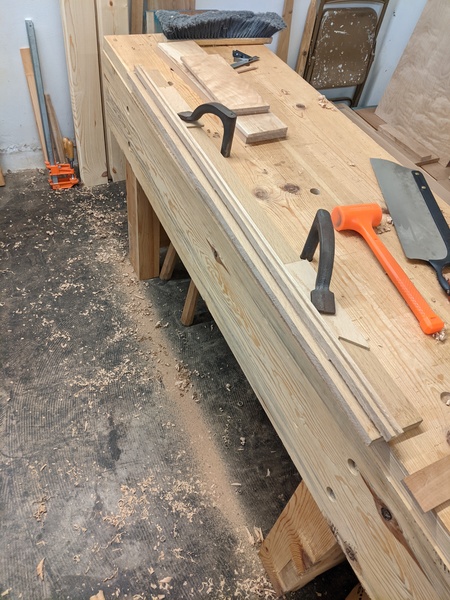
|
|
#
?
Aug 22, 2021 15:28
|
|
|
Good news: next drawer is nearly done. Currently in clamps for the drawer slips. I tried making the dovetail pins quite a bit smaller on this one and think it came out nice.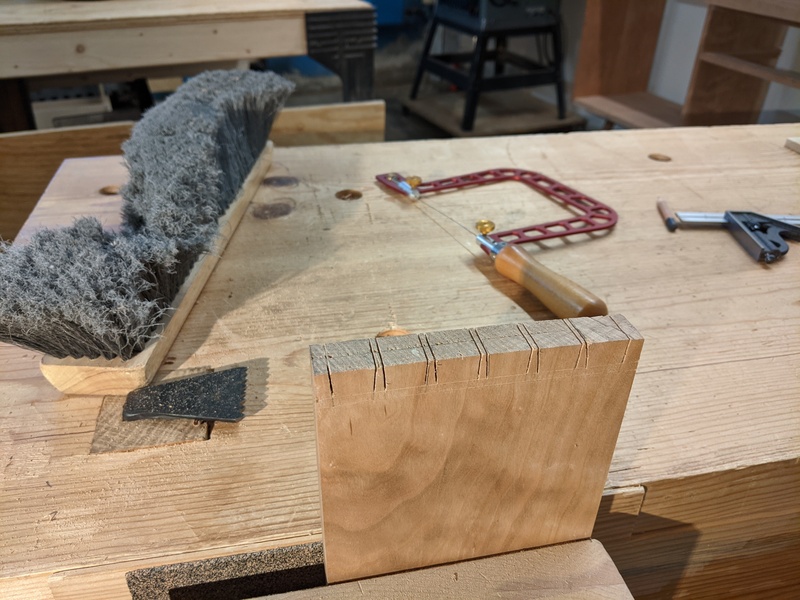 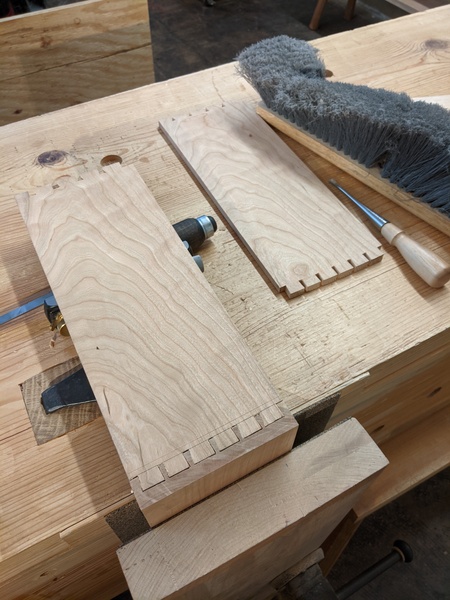 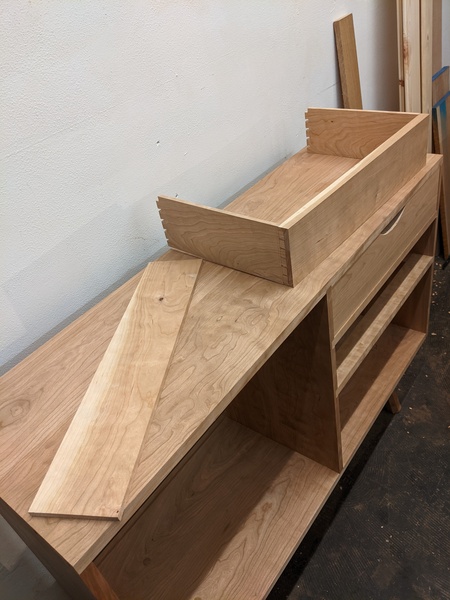 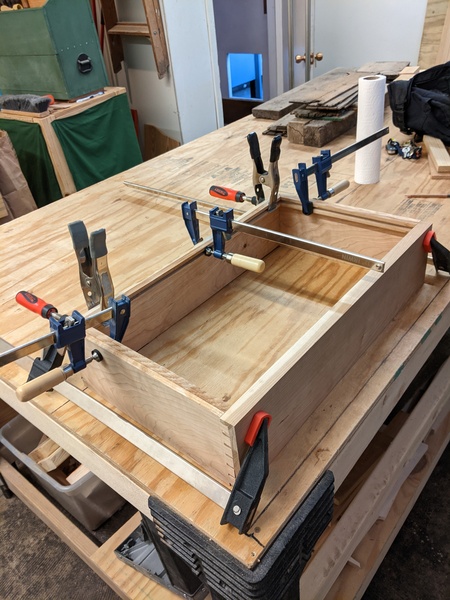 Bad news: Ugly Mallet gave its life while setting a holdfast.  So I bored out the old tenon and shaped a new handle out of some scrap cherry. Rest in peace, oak handle. You were comfy. 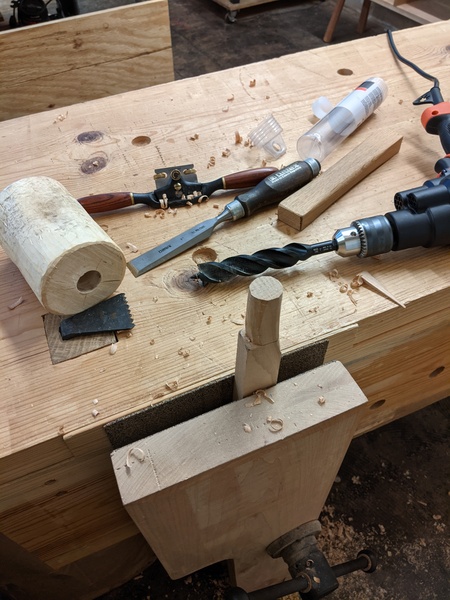 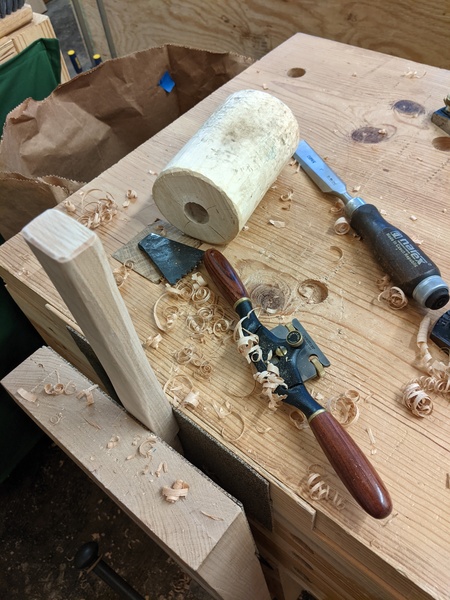 Forgot to take a picture of it assembled. Next time!
|
|
#
?
Sep 5, 2021 23:39
|
|
|
Lookin great. Those blind dovetails continue to look like they'd be tricky af
|
|
#
?
Sep 6, 2021 01:28
|
|


|
 Ugly Mallet we hardly knew ye Ugly Mallet we hardly knew ye
|
|
#
?
Sep 11, 2021 18:44
|
|

|
Went in yesterday. I realized I couldn't remember when I last sharpened stuff, so I started the day by giving everything a fresh edge. While I was cutting the groove for the bottom board into the front of the drawer, a little of the bottom popped off. I was cutting against the grain (no choice, due to the way the tool works) and it just snapped off at the far end. Glued it back on with a tape-clamp. 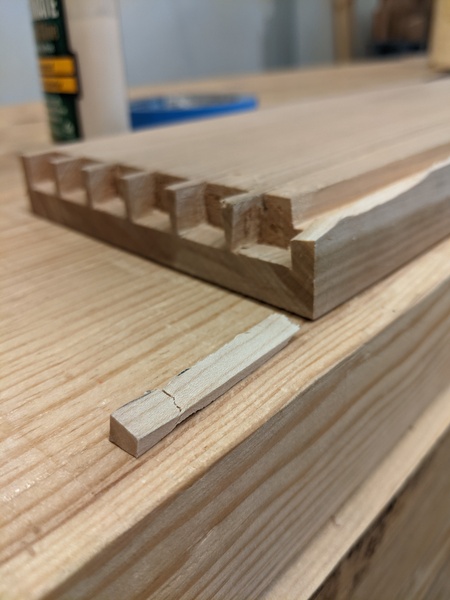 I took a different strategy this time for cutting the handle curve. I cut vertically down with a saw, and then used a chisel to clear most of the waste. Rasps took the rest of it down to the line. Worked way better than the mess I made with the fretsaw last time. 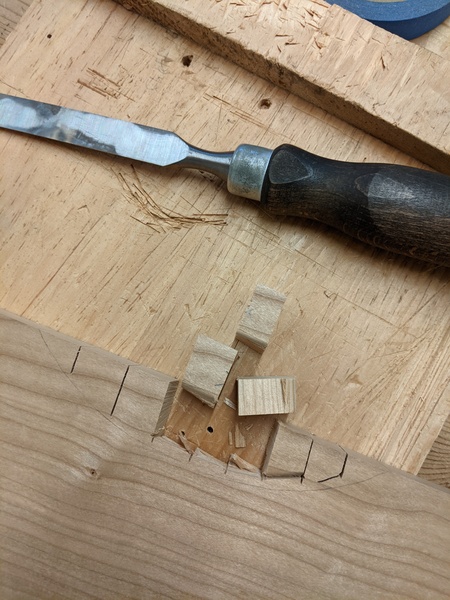 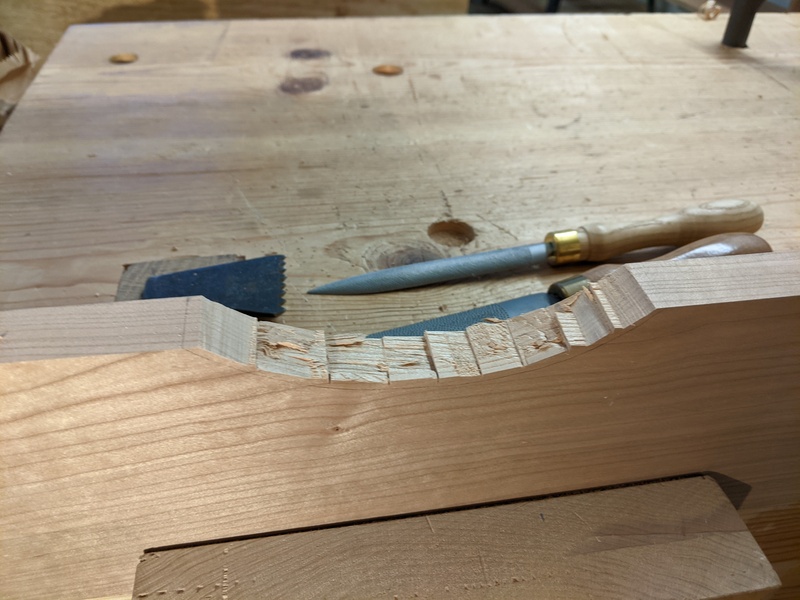 Smooth-planed the insides and then applied a couple coats of shellac. 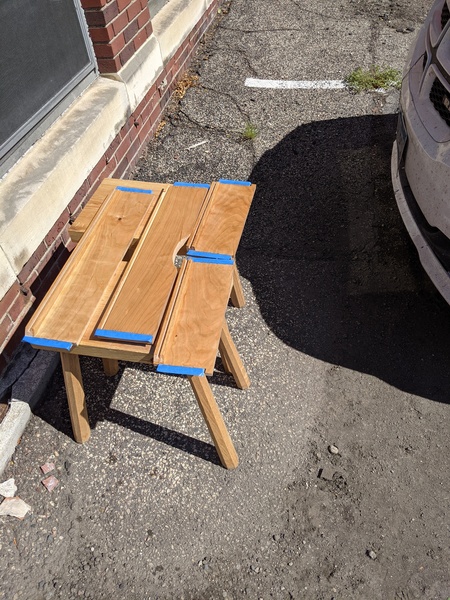 And drawer two is up in clamps. All that's left is fitting the drawer into the cabinet. 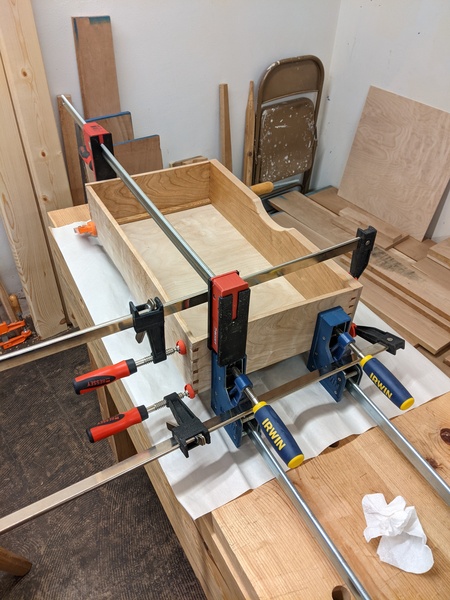
|
|
#
?
Sep 19, 2021 21:33
|
|
|
Second drawer is in! Only needed a little fitting.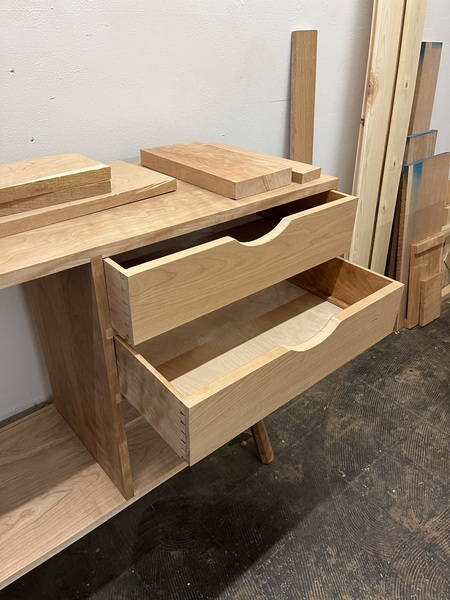 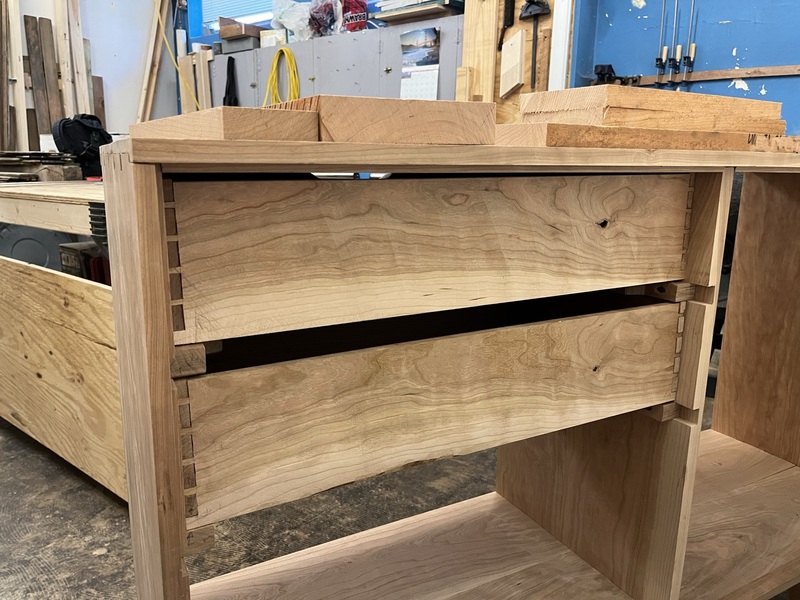 Today was all stock prep for the final drawer. Here's the boards going into it. Plan is to resaw the left three pieces and then glue them up wider for the sides and back. The right piece is from the biggest board in my stack, 13.5" wide and 8' long! We'll talk about it in a sec. 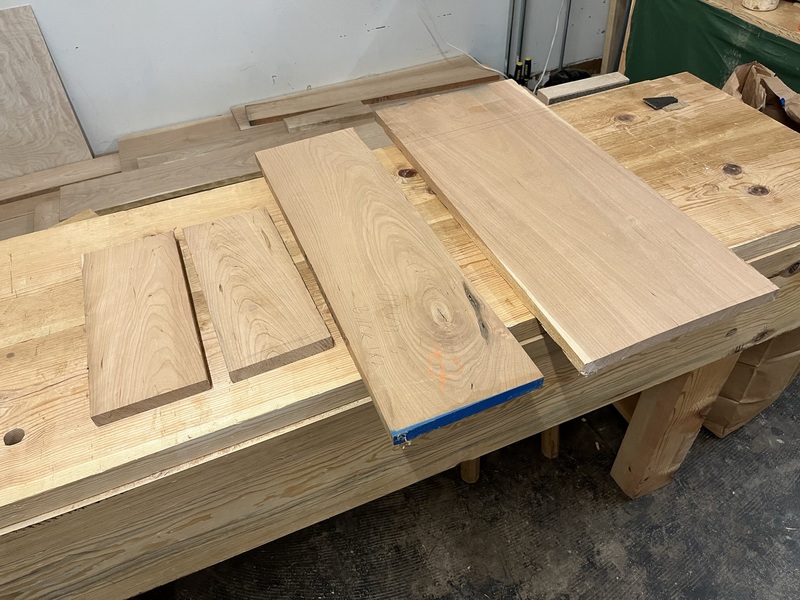 Here's one of the side boards right off the saw. Just a little planing makes this face nice. 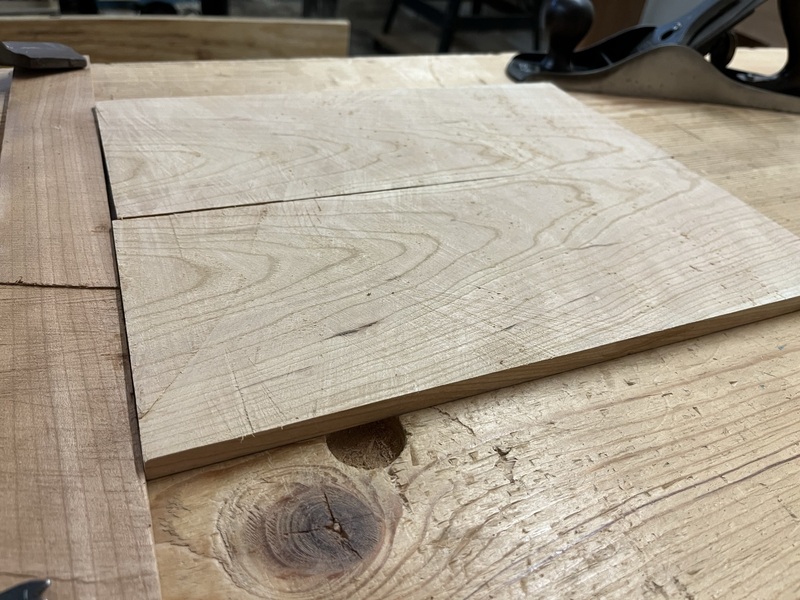 100% humidity in the shop today meant a lot of sweating while resawing. 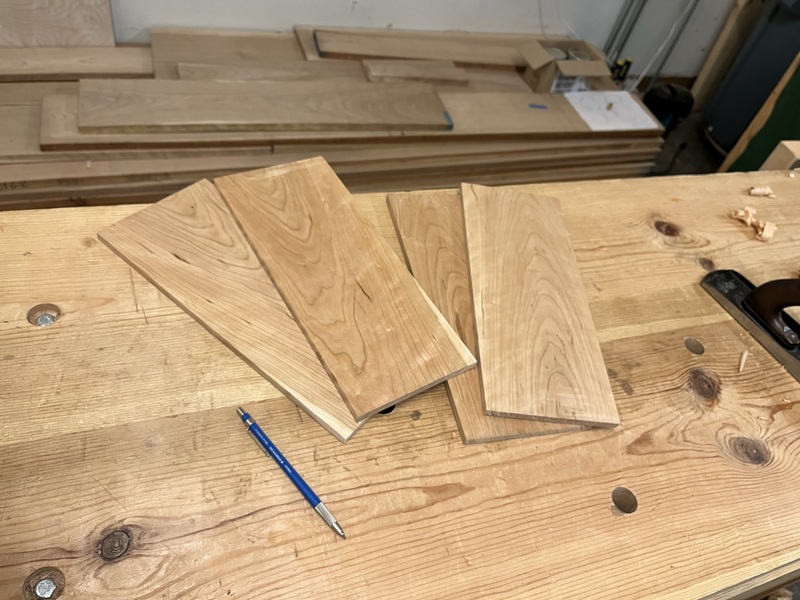 The back board was a good opportunity to use up some ugly wood. After ripping and crosscutting to size, I had to take out a little twist, which I don't think I've talked about here. My strategy is to think of the board in diagonal quarters, mark the high corners and work those down starting from the inside of those two quarters, doing more passes as I approach the corner. If you look close in this photo you can see the near and far corners have been worked down to take out the twist. Then it's just normal flattening for this side. 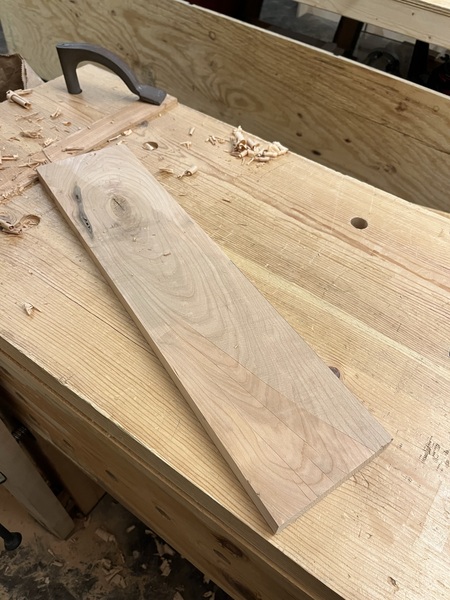 Rookie mistake is to repeat the procedure for the opposite side, but that just gets you two flat faces which may not necessarily be parallel. Right way to do it is mark the edges around the entire board to the thickness of the thinnest corner, then work the rough face down to that line. That gives you two flat and parallel faces. 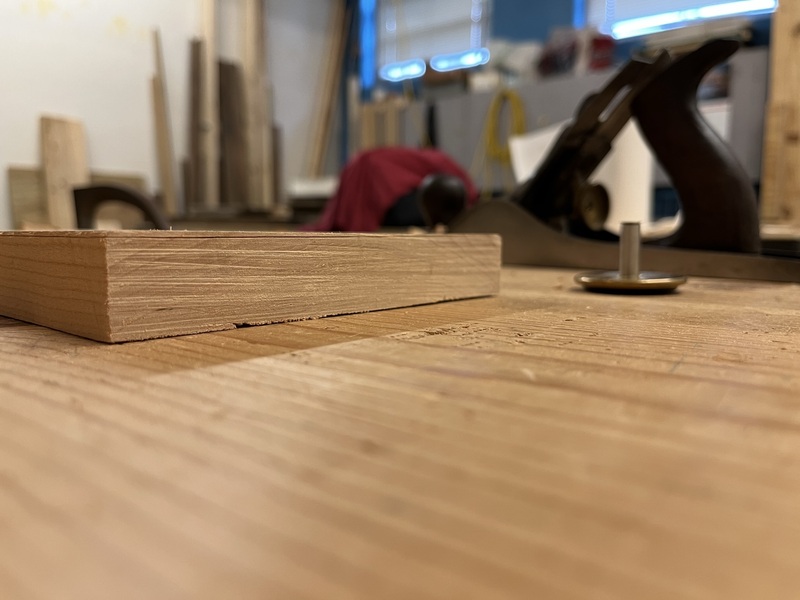 I decided to give my arms a break and put off resawing the back board to next time (ran out of clamps anyway). So I moved on to some prep for the drawer face. The grain on this board doesn't run parallel to the edges, which I think would look crummy, having the grain slope upwards on the cabinet. Luckily it is so wide I can remove some of the width and still have none of the sapwood. So I marked a center line following the grain direction, and then some lines for the ends perpendicular to that. 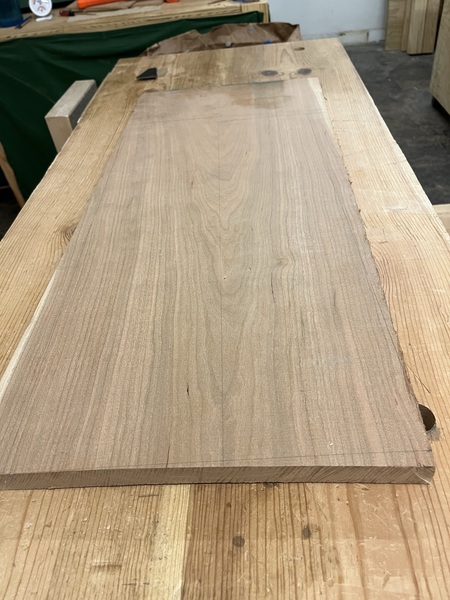 At this point it was nearly time to head to the bus so I quickly glued up the edge boards and called it a day. 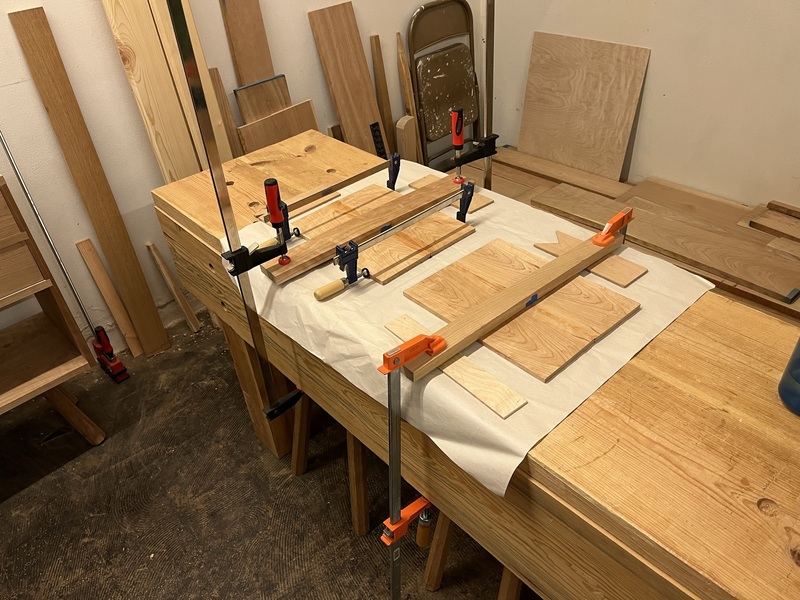
|
|
#
?
Oct 2, 2021 23:36
|
|
|
It�s very interesting to see how you work using hand tools only vs what I�m used to with machines. I usually do everything in batches to minimize machine setup time and keep parts consistent and more or less interchangeable, but that completely doesn�t matter when you do everything by hand. It just has to fit with its neighbors and they together have to fit in the drawer slot, who cares if the sides of this drawer are 1/8� thicker than that drawer. I imagine with it being so much more physical labor, it makes for more pleasant work to only resaw and plane down 1 drawer�s worth of parts at a time too. Planing drawer parts for 8 hours straight so you can dovetail for 8 hours next weekend sounds really needlessly exhausting and makes me really glad I�m not a preindustrial apprentice, lol.
|
|
#
?
Oct 3, 2021 02:02
|
|
|
Hello it's been a while. I have gone in to the shop a few times in October, but they've been very short sessions and it's all just stock prep for this drawer, which is boring. I realized I didn't show how I glue up thin panels. I think I got this technique from Philip Morley maybe? Anyway the idea is you put the boards tightly together and then tape them together along the seam. Flip the thing over, open up the seam and put glue in, then press it back together. Press it down onto a flat surface and you've got a tight join that usually doesn't need clamps along the thin edges. 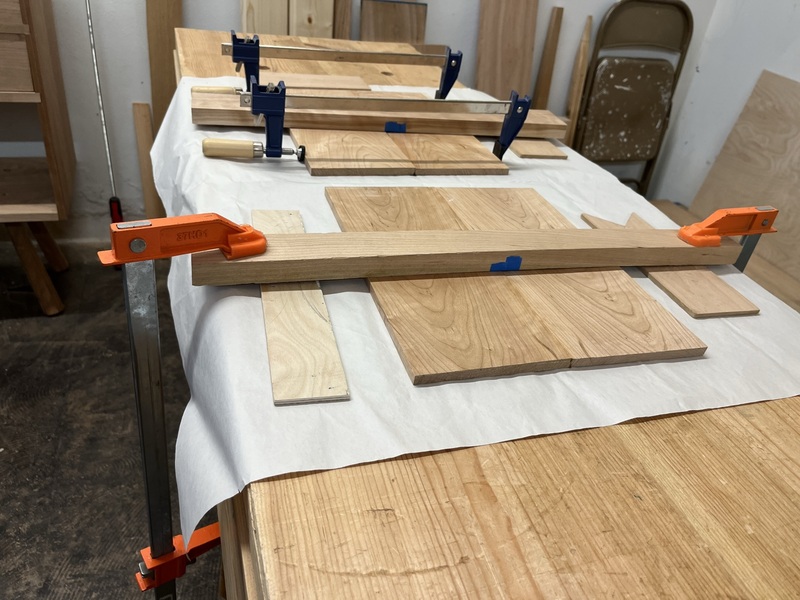 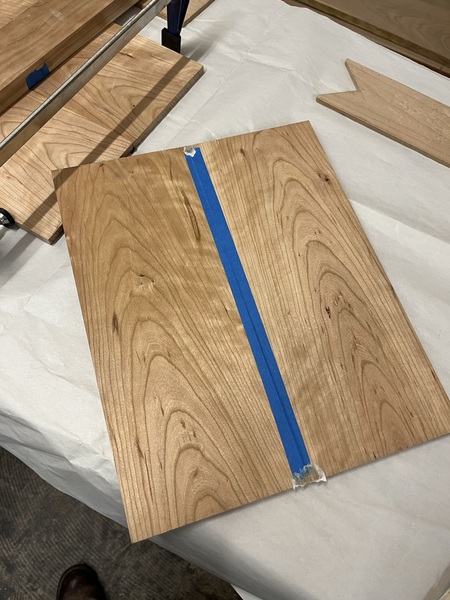 To get the wide front board down to size to fit into the drawer cavity, I bring it over to the cabinet to mark the required cut locations directly from the cabinet. Really only get one shot at using this board, so I triple checked every cut.  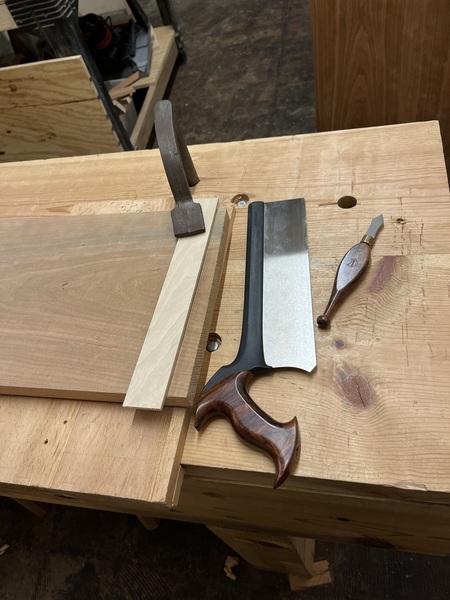 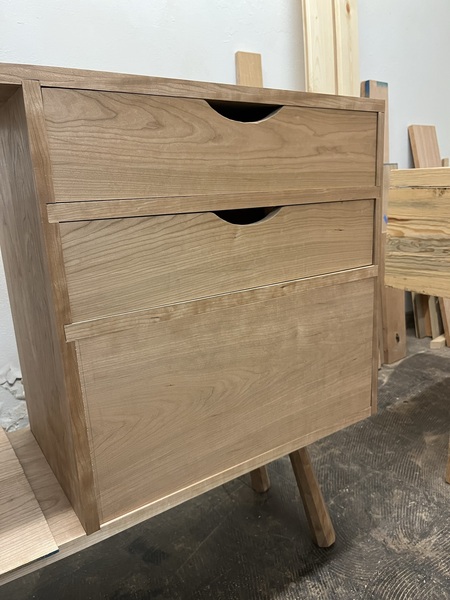 Here's an example of a board with a hollow in it, the inside face of the drawer front. One very frustrating mistake I made when I was flattening my very first panel (for the desk I'm typing this post on!) was trying to work on the not-yet-planed parts of the panel. The blade would never engage, because it was far down in the hollow, so I'd extend the blade and then the plane would jam into the wood near the edges of the hollow, making for a huge mess. Of course the right technique is to take the entire surface down to the bottom of the hollow, by working repeatedly across the entire board. 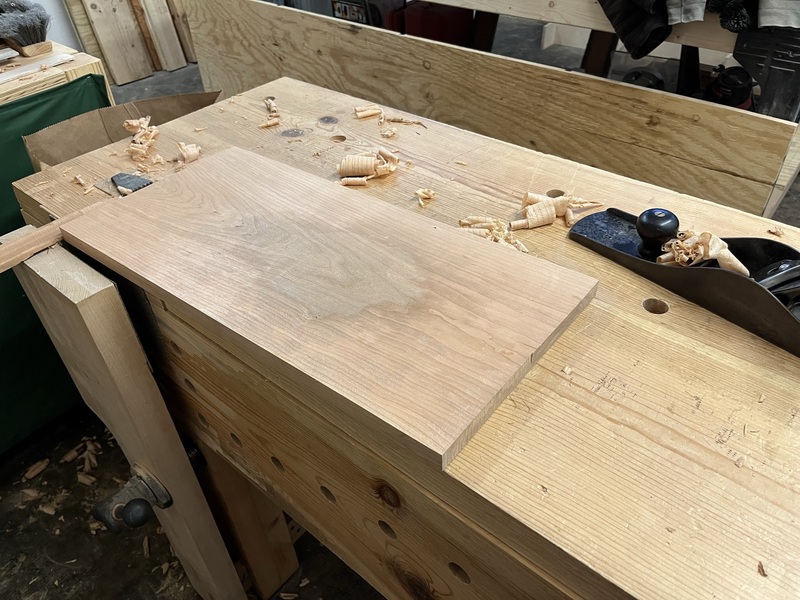 I also got the back board resawed and glued up, so now the stock prep is finally done. Next up, the last dovetails for the project. 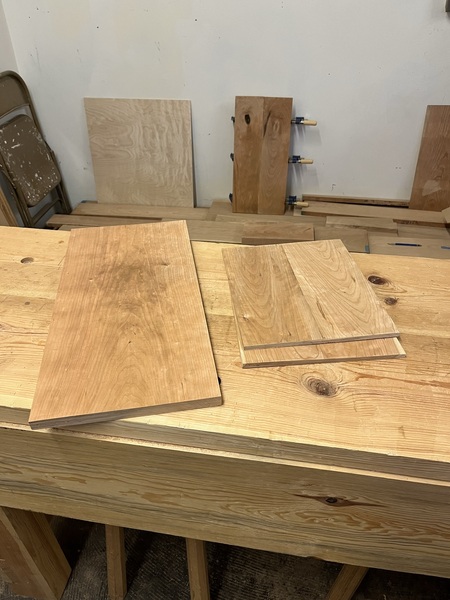
|
|
#
?
Oct 30, 2021 21:42
|
|
|
Kaiser Schnitzel posted:makes me really glad I�m not a preindustrial apprentice, lol. I think about this a lot. Someone has to do all the donkey work and it sure ain't going to be the shop master if he can avoid it.
|
|
#
?
Oct 30, 2021 21:48
|
|
|
As someone knee deep in shavings from doing the stock prep for an ATC, I'm feeling that.
|
|
#
?
Oct 31, 2021 13:46
|
|
|
Why not to wait three weeks between stock prep and joinery: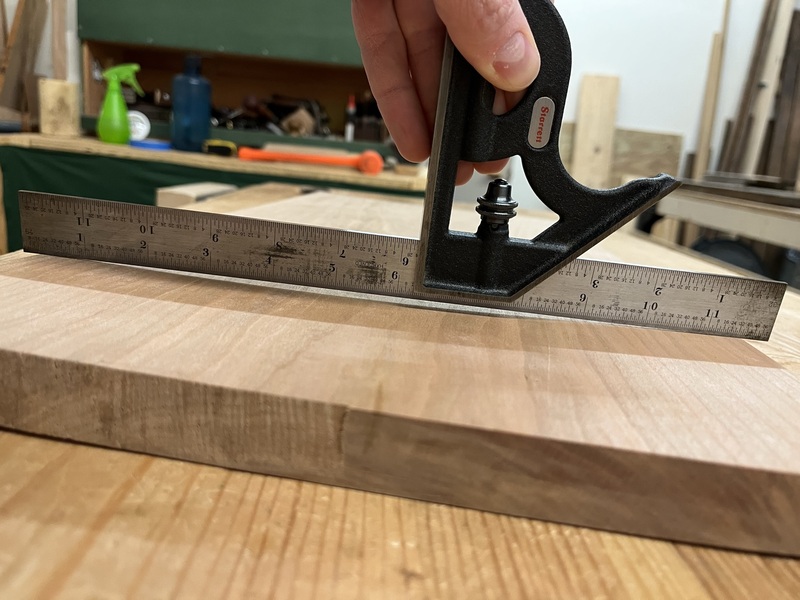 This board was flat the last time I saw it. Humidity has dropped 30% over the past month as we approach Minnesota Winter. You ever have crummy days in the shop? Woodworking is all about handling things that go wrong, but sometimes those things going wrong really get to me. That happened last Saturday. Went in in a good mood, intending to get at least two sets of dovetails done, then all the usual stuff went wrong, and I quit halfway through chopping the first set. Went in again yesterday and managed to finish the first set and the entire second set of half-blinds, all in less time than it took me to fail last Saturday. Nothing went particularly better this round. Just a mood thing I guess. Here's the scrap I used to figure out the tail layout. I ended up doing basically two sets of dovetails matching the size of the other drawers, separated by a large pin in the middle. So the tails on the large drawer echo the tails on the smaller drawers. 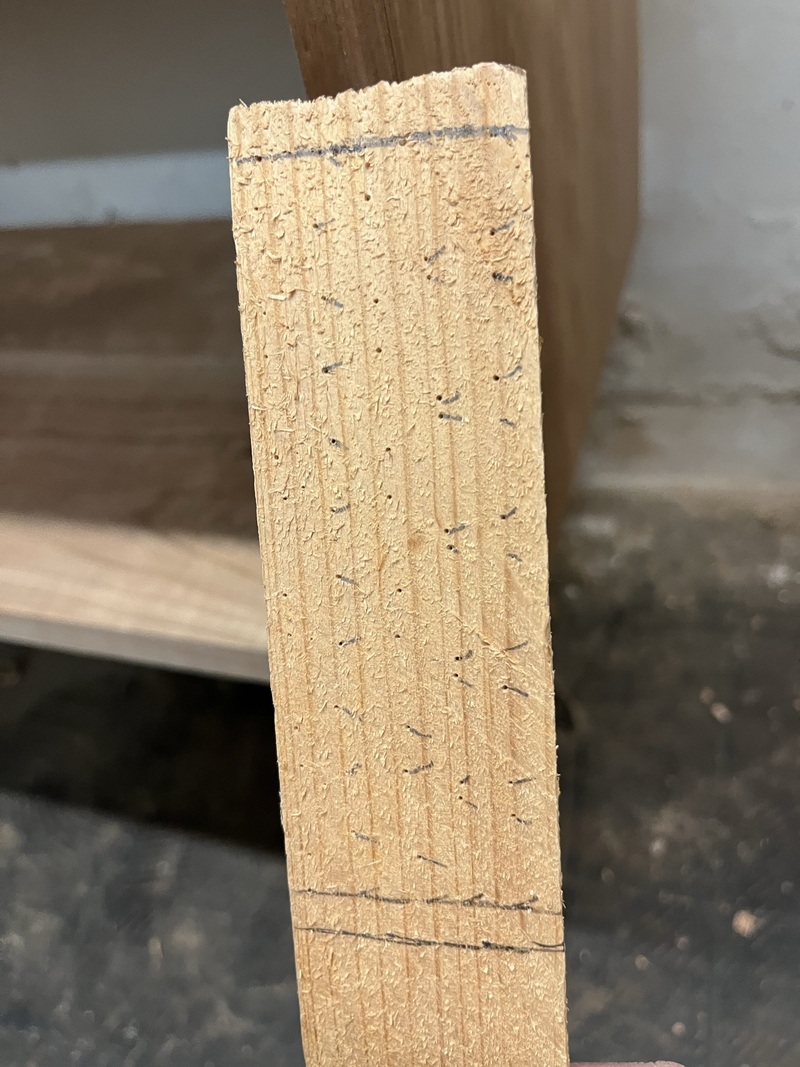 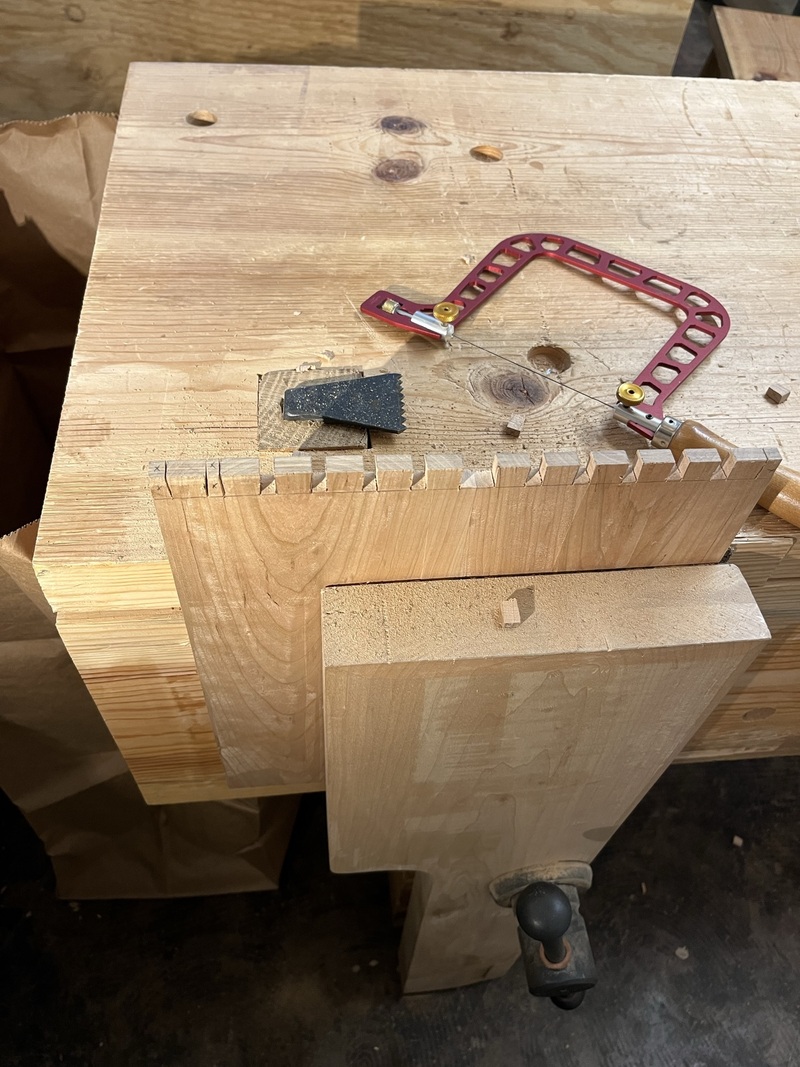 Didn't have enough time to do the back, but I at least got the hard parts done. It's a bit stressful working with this wide board, since I have very little material to replace it if something goes wrong, just the rest of that one 8' board. 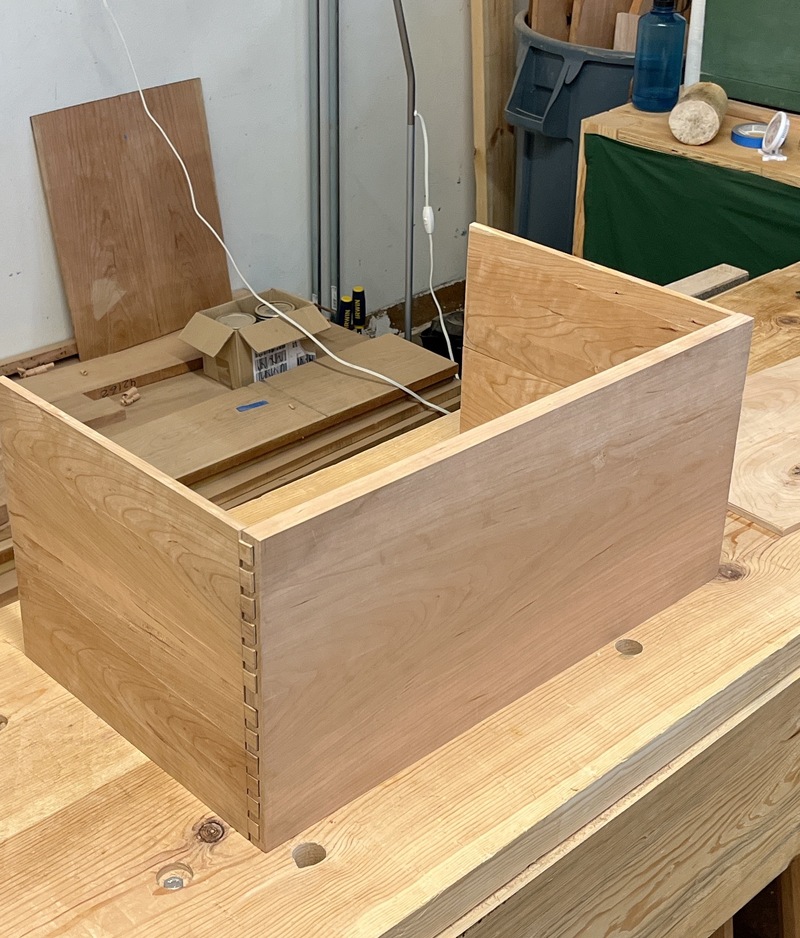
|
|
#
?
Nov 28, 2021 17:28
|
|
|
ColdPie posted:Here's the scrap I used to figure out the tail layout. I ended up doing basically two sets of dovetails matching the size of the other drawers, separated by a large pin in the middle. So the tails on the large drawer echo the tails on the smaller drawers.  gently caress gently caress gently caress that's alot of powderpost beetles i hope they aren't in his whole lumber pile gently caress gently caress gently caress that's alot of powderpost beetles i hope they aren't in his whole lumber pile  ' and then I read your post and realized they were just divider pricks, but they look exactly like bug holes. ' and then I read your post and realized they were just divider pricks, but they look exactly like bug holes.Just imagine how much worse your day would have been if they had been powderpost bettles!
|
|
#
?
Dec 2, 2021 03:14
|
|
|
It's that time of year when all your tool handles get loose. Got the very last dovetails of the project done today. 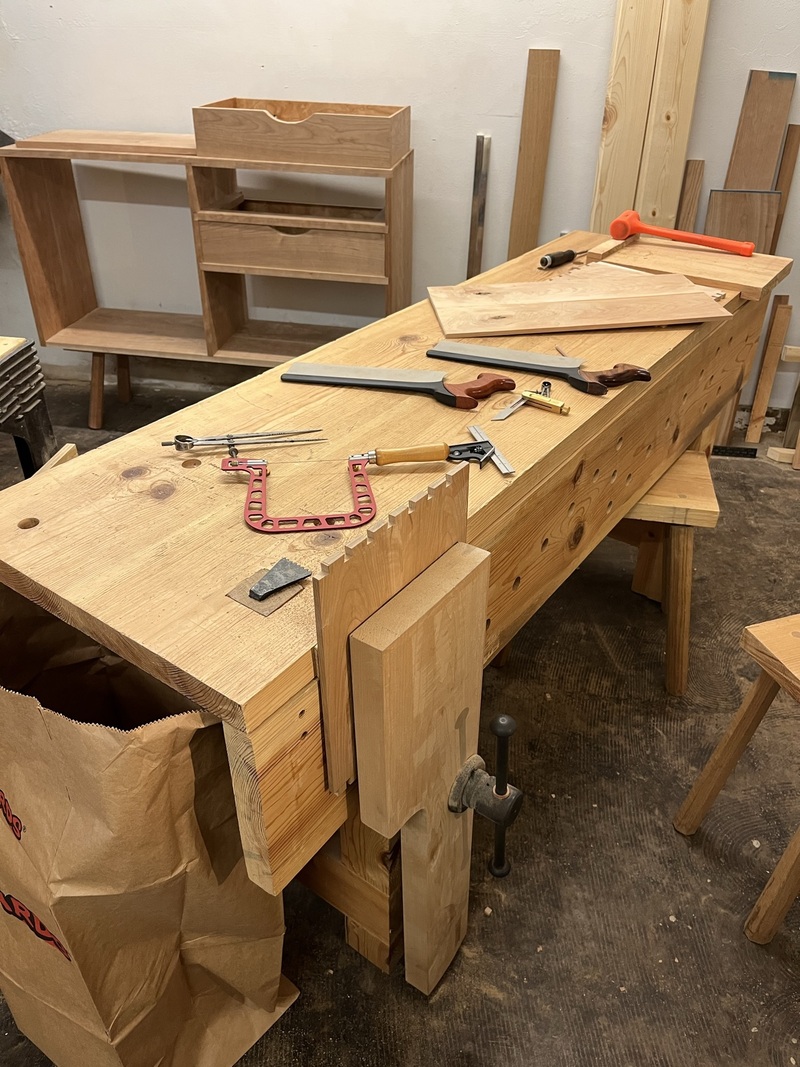 When I'm doing dovetails, it sometimes feels like my nice block plane gets used a shelf more than anything else. 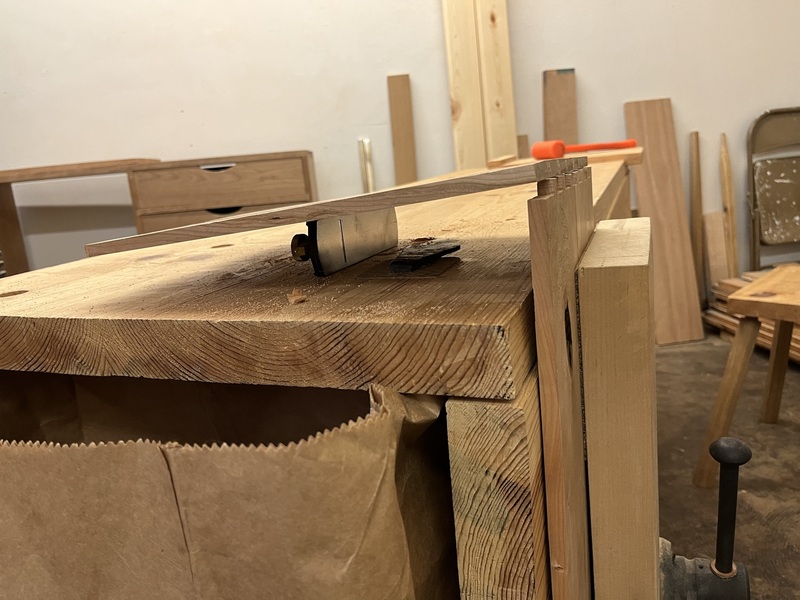 I also busted out the sticking board today to make the last drawer bottom slips. I wish I had made the base a bit wider, as it is it's usually too narrow to actually use. 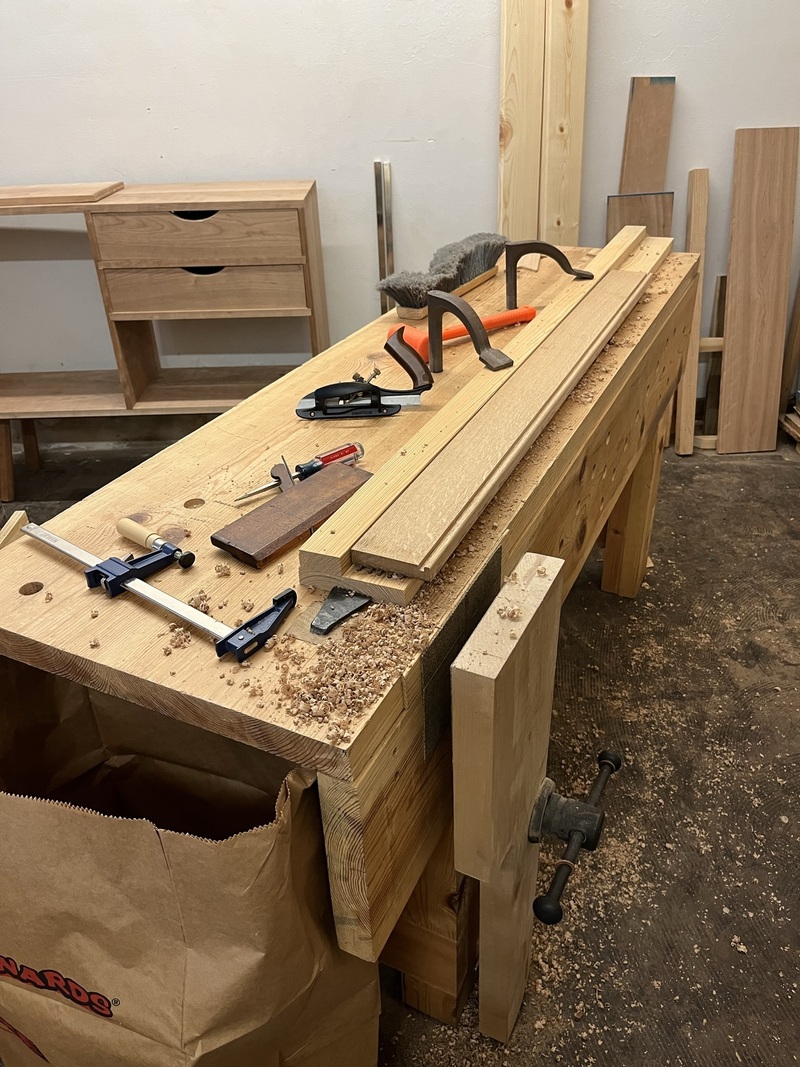 A Big Drawer. I didn't have time to smooth plane and cut the handle and apply finish and glue up today, so that'll be next time. Then it's on to the door. Guess I need to buy some hinges. 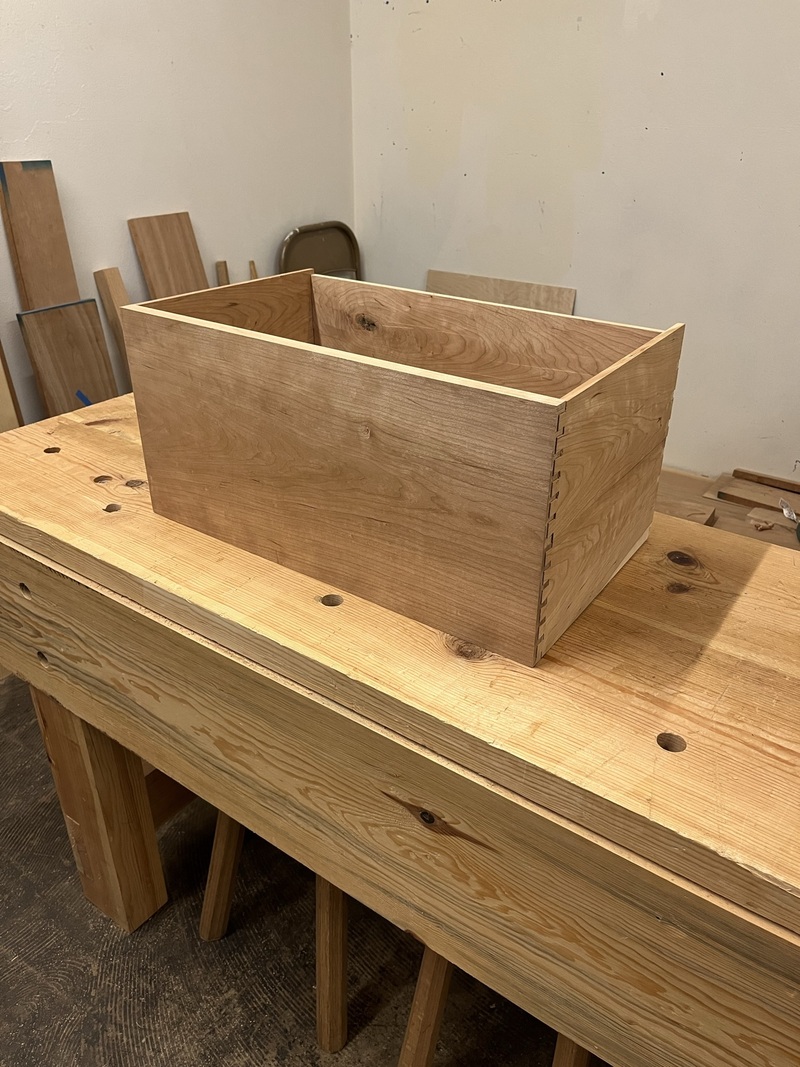
|
|
#
?
Dec 6, 2021 00:51
|
|
|
Last week I went in and glued on the drawer slips into the big drawer (unpictured). Today started with cleaning up the squeeze-out with hot water and a toothbrush. Unfortunately I think my hide glue is getting too old to hold up well. One of the side boards broke along the glue line while I was cleaning it. I've got more on order, but in the meantime I just used titebond on it. I stressed all the other glued up panels and they held up fine.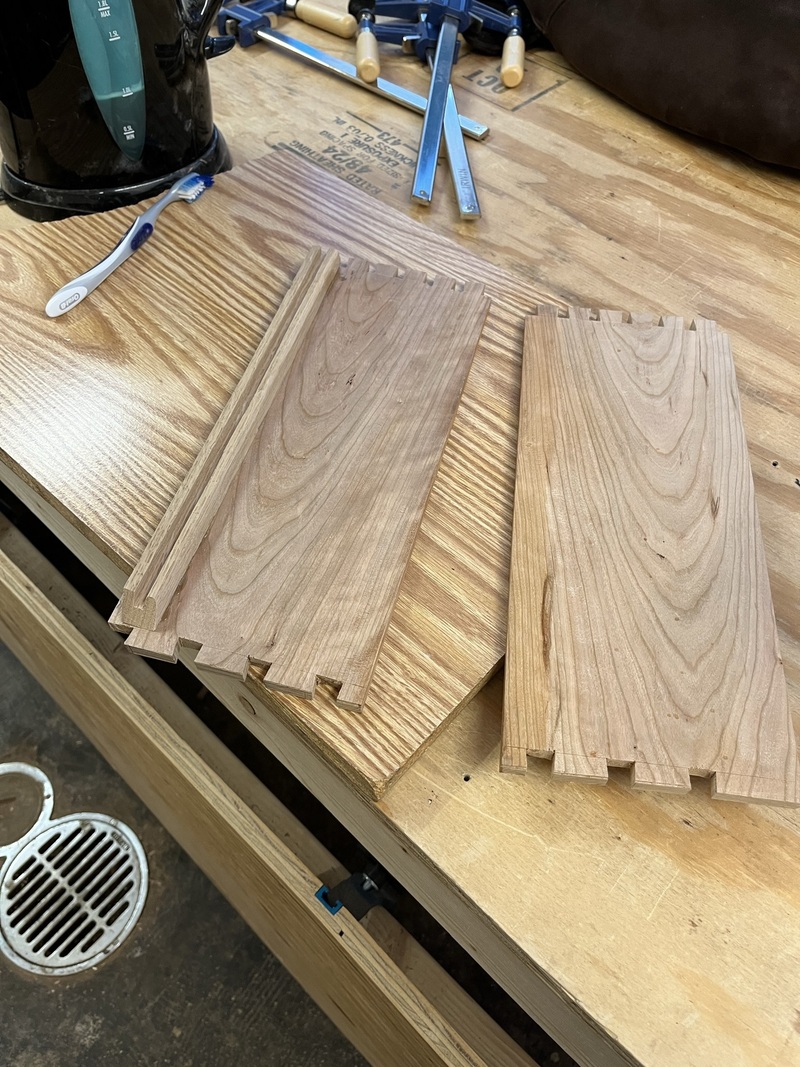 Then I shaped the handle on the drawer front. 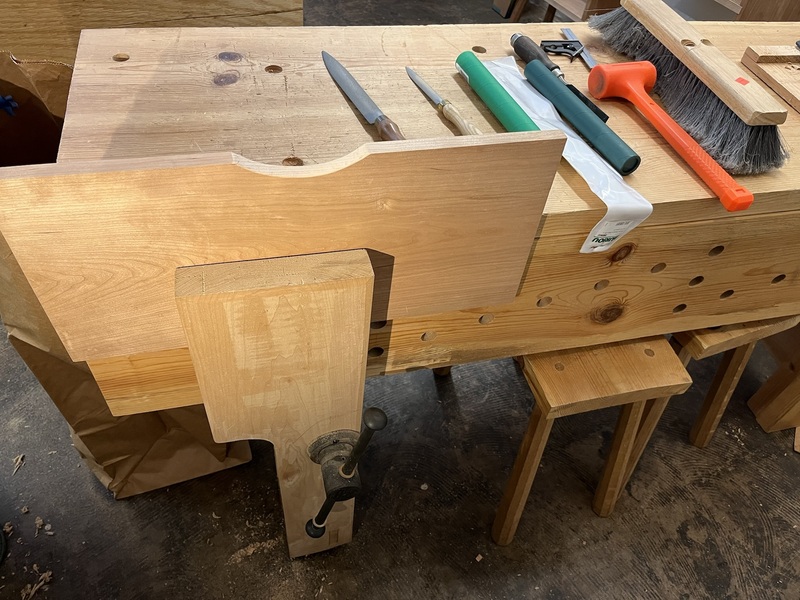 Looks good with all the others. While it was in place, I noticed it's fairly awkward to get your fingers past the horizontal divider and into the handle slot from that angle. I had the idea to shape the divider a bit, shaving a bit off the bottom of the dividers to make the drawers easier to open, and also I think it'd look neat. May play with that idea in some scrap first. 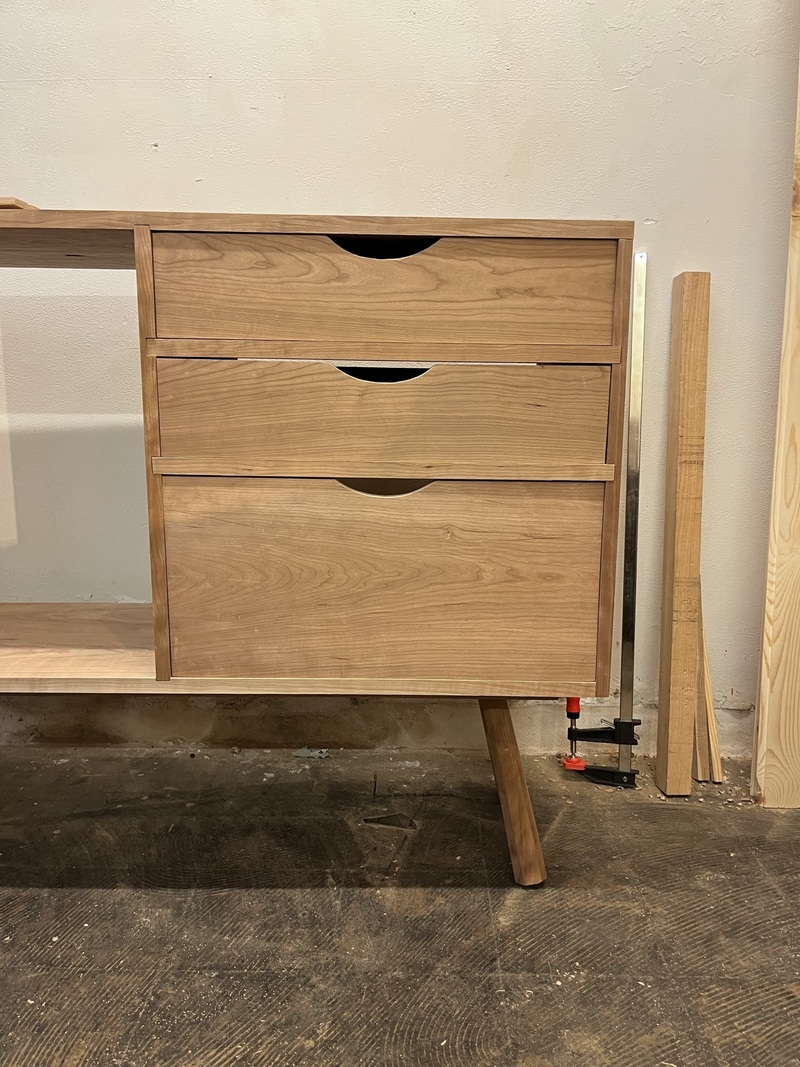 Now it's ready to finish the insides and then glue up. However I'm out of prepared shellac, so I mixed some up. I do about a 2:1 ratio of alcohol to shellac flakes. This thicker ratio then gets diluted down later with more alcohol to the desired consistency (usually another 2:1 or so). That lets you stretch the long dissolve time across a good amount of mix (I got this technique from Mike Pekovich). Unfortunately it takes about two days for it to dissolve, in my experience, so this won't be getting done today. Normally I use denatured alcohol from the hardware store, but my workshop-neighbor was getting rid of this Everclear a while back, so I used that instead. 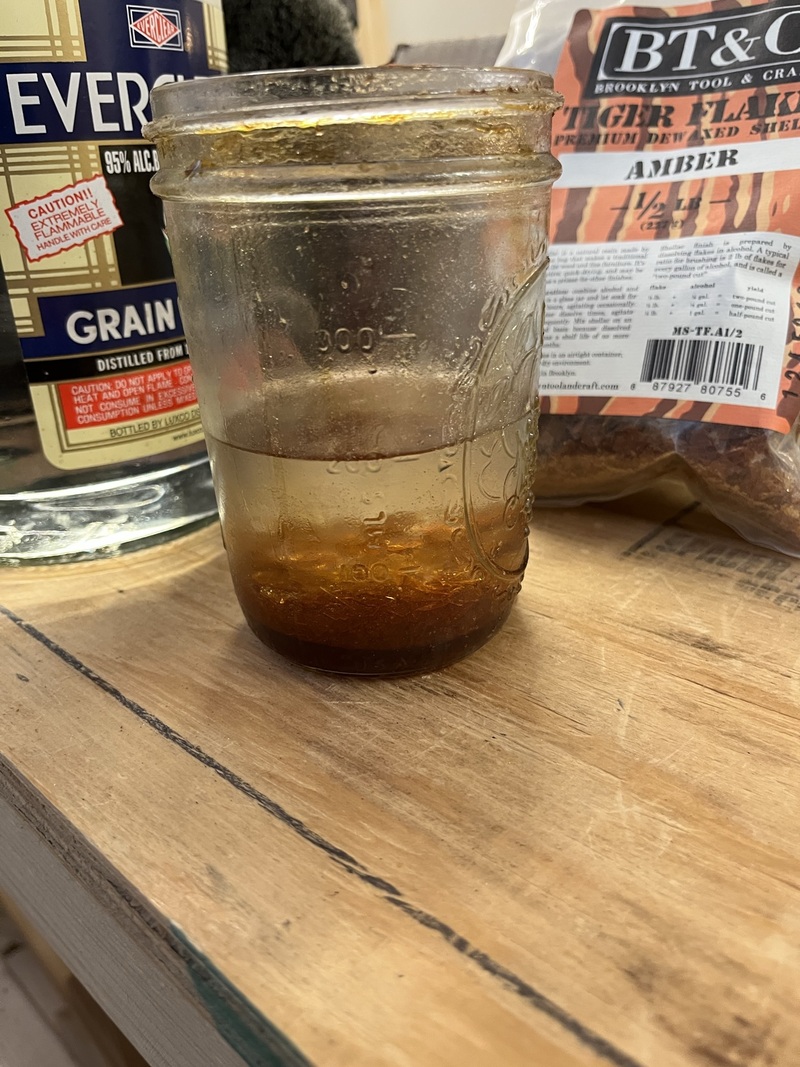 Moving on to the door. I had to remind myself of the intended dimensions from my cutlist... 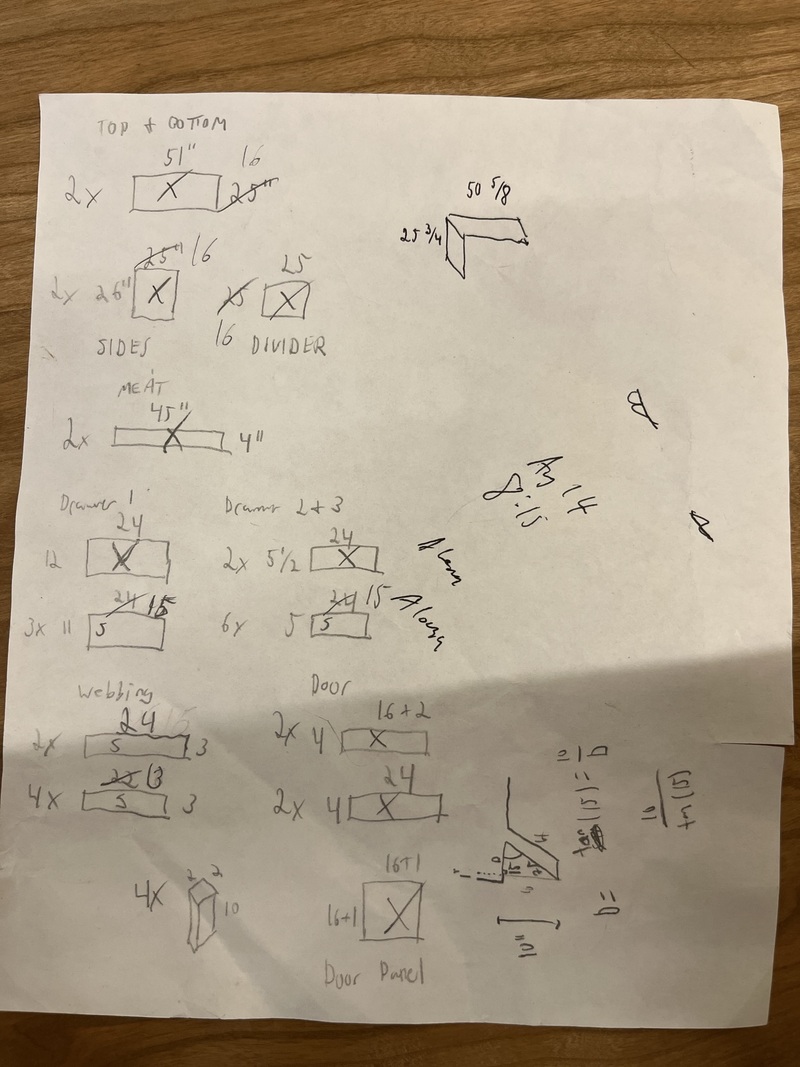 I used blue tape to lay out the pieces I plan to use for each part way back when I selected the wood for this project from the pile about 18 months ago. Each tape roughly marks where I need to make a sawcut, with final dimensions taken from the workpiece. The vertical door stiles will be taken from the left piece, and the rails from the right piece. I like this layout method because I don't need to do any thinking at this point. I can trust that my past self made the best decisions, compromising between using clear boards where it counts and crummy boards where they're hidden, so I can just follow the tape guides and get to work. 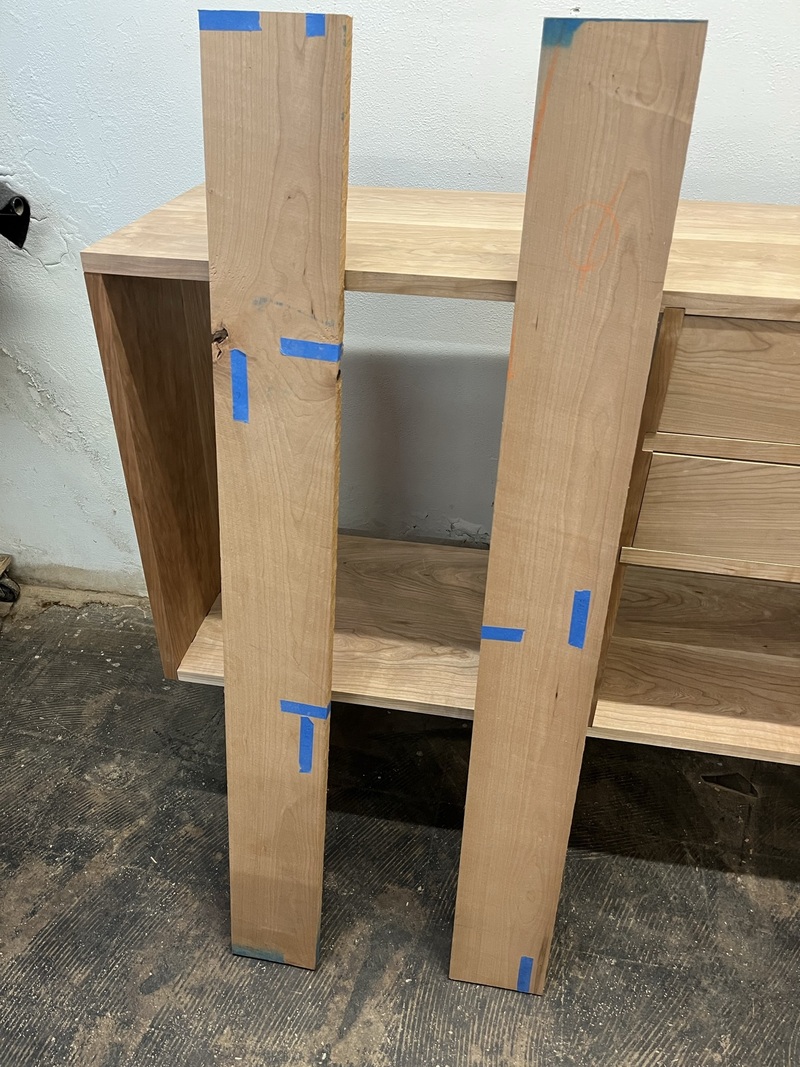 To get nice, square end crosscuts on narrow boards, I've taken to this method. I lay out the right angles where I want the cut to go, and then I cut down one edge and all across the face. Then the saw should follow the path of least resistance and cut straight along each line. It works pretty well and avoids having to shoot the end grain at all. 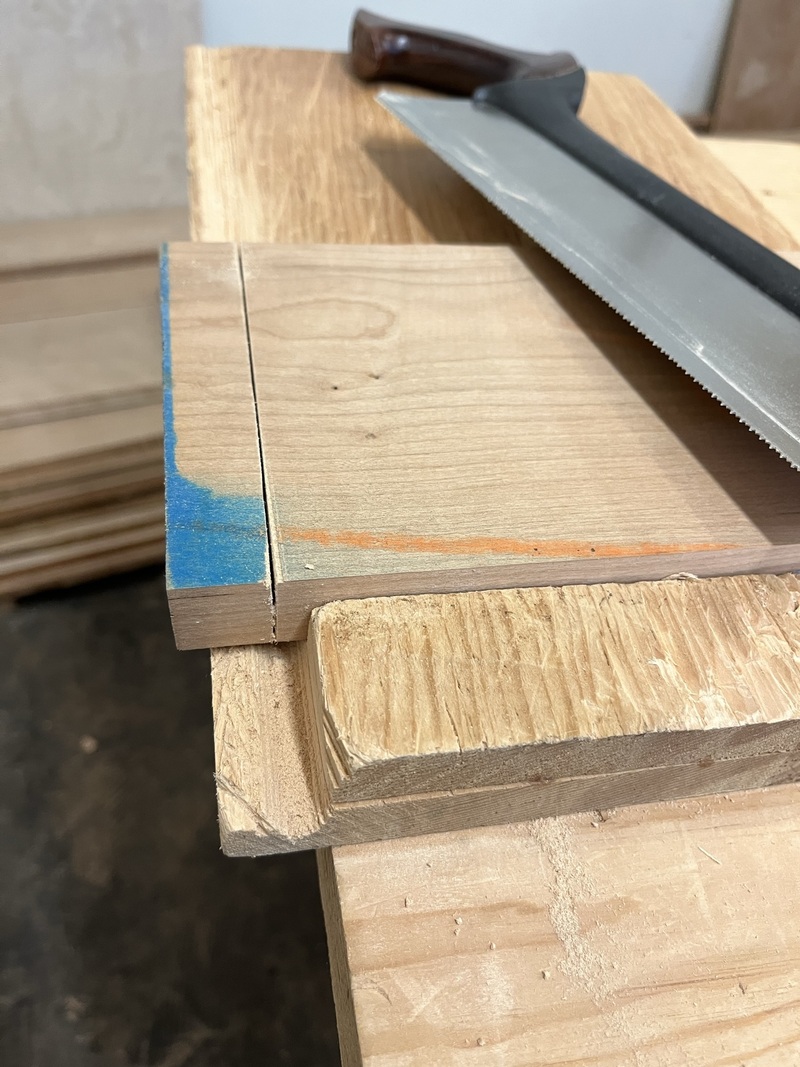 Wrapping up the day, I got the rails dimensioned (not yet squared up). Next up will be the stiles, squaring everything up, then on to joinery. And hopefully gluing up that last drawer. 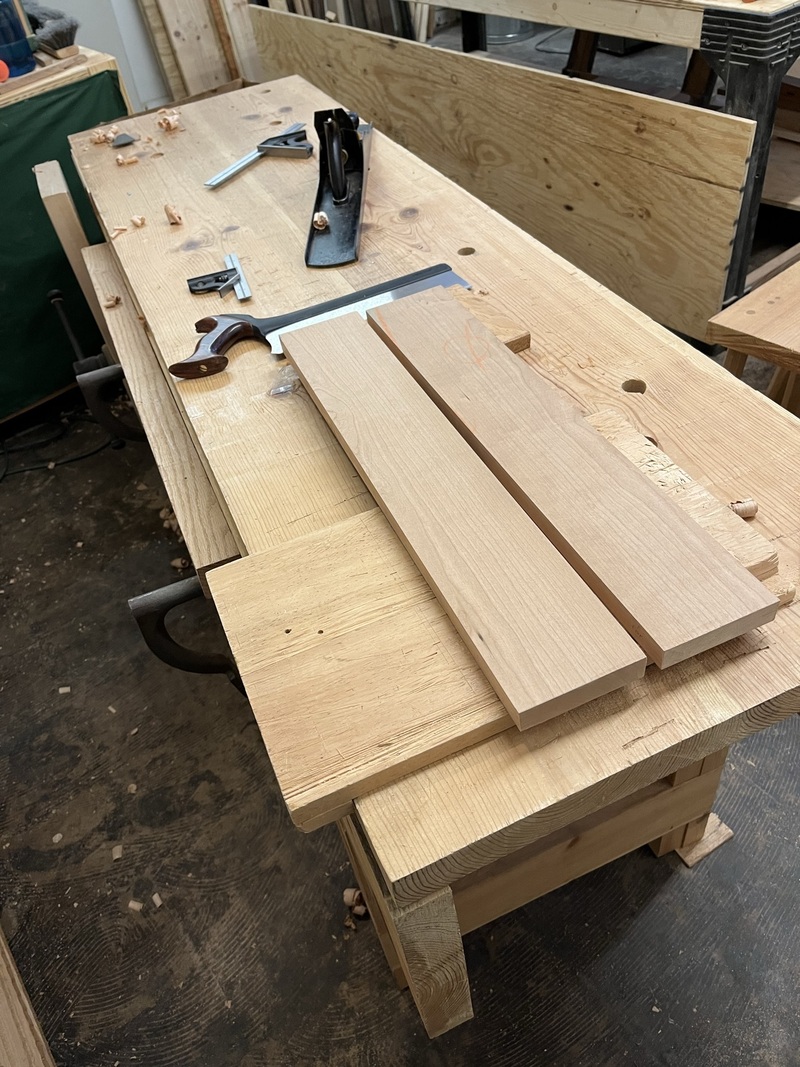
ColdPie fucked around with this message at 01:38 on Jan 2, 2022 |
|
#
?
Jan 2, 2022 01:35
|
|
|
Some good work in the shop today. I got inside of the the big drawer finished, cut the plywood for the bottom, and then glued it up. Normally I do this outside, but it's well under freezing, so screw that.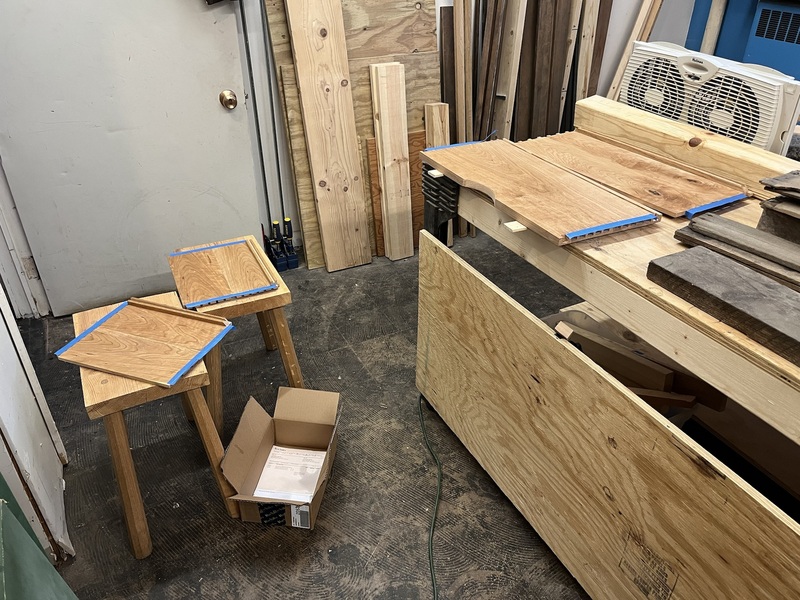 I really hope the drawer fits well enough. I have to admit I'm a little nervous about this one, it's definitely been a struggle. 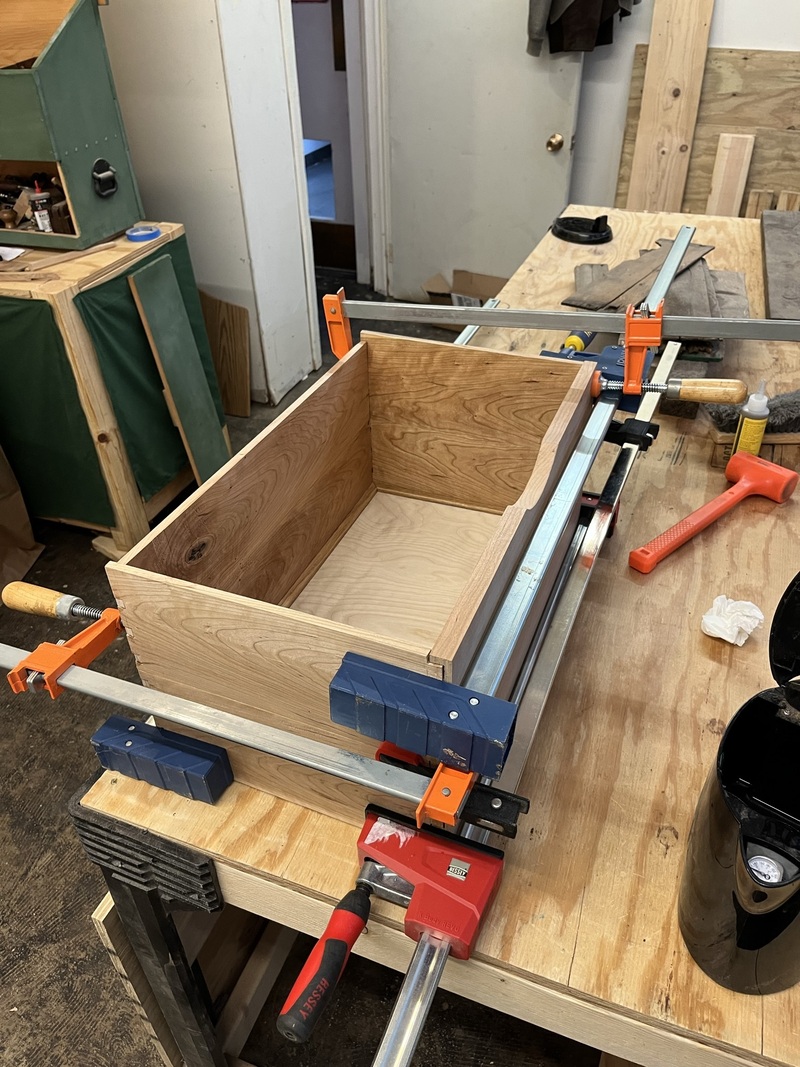 Also hinges and knob for the door came in from Horton Brasses. 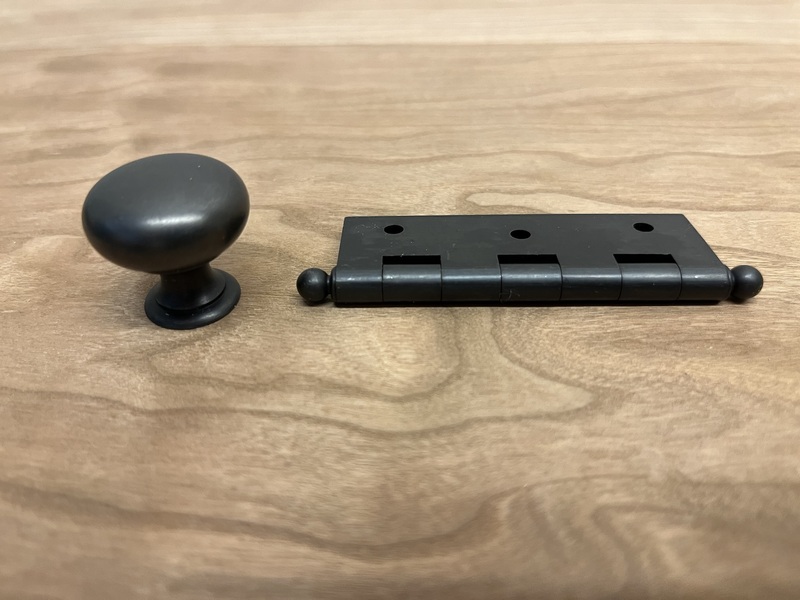 I also got in a pair of carving gouges, one wide and shallow the other narrower and deeper, to use for carving the door panel. It's my first time carving with gouges so I did some practice on some scrap.  Here's what I'm aiming for, from Christian Becksvoort: 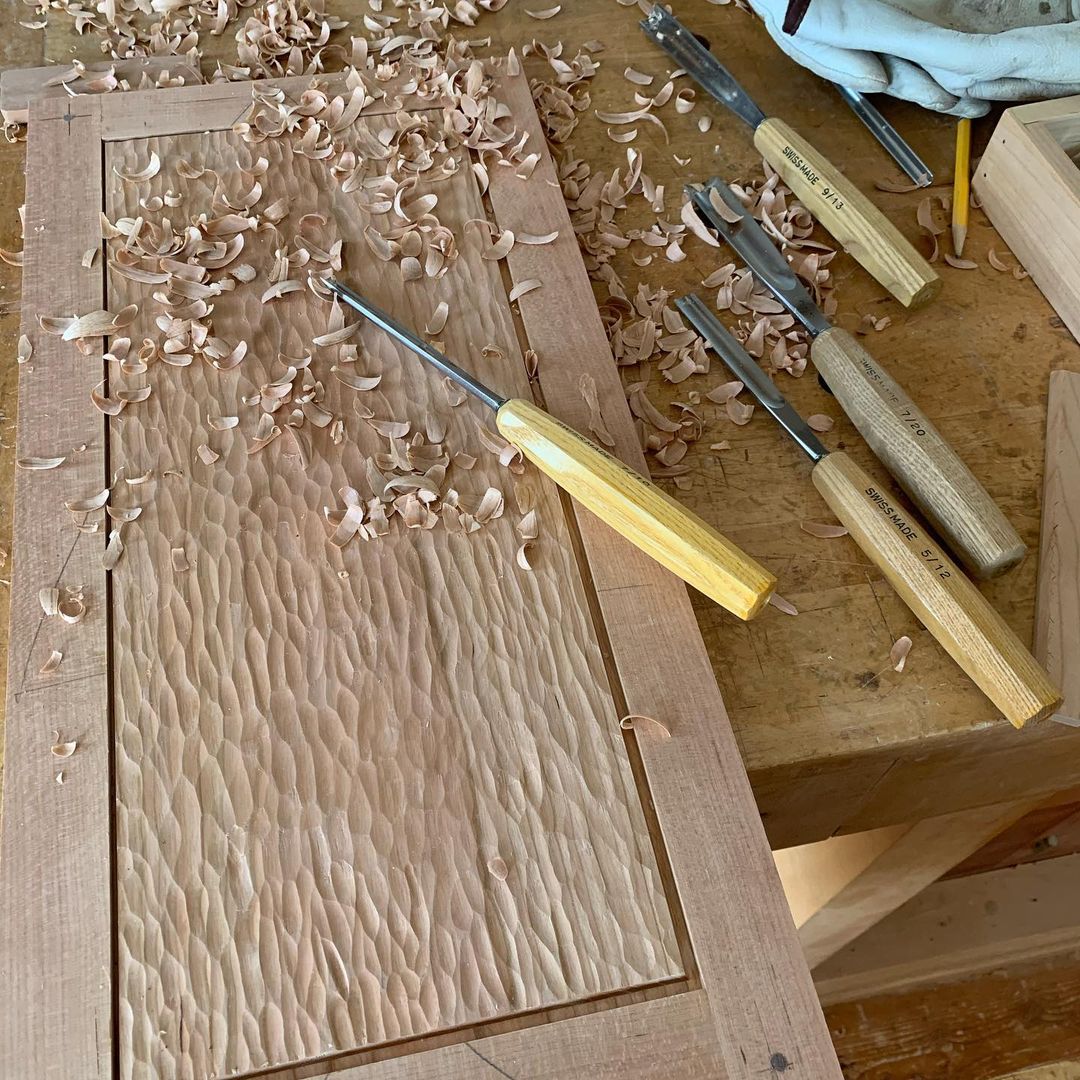 I'll probably do another practice panel, but I'm pretty happy with how it's coming along.
|
|
#
?
Jan 9, 2022 02:58
|
|
|
Texturing the panel like that is a lovely touch.
|
|
#
?
Jan 9, 2022 16:47
|
|
|
It fiiiiiiiiiiiiiiiiiiiits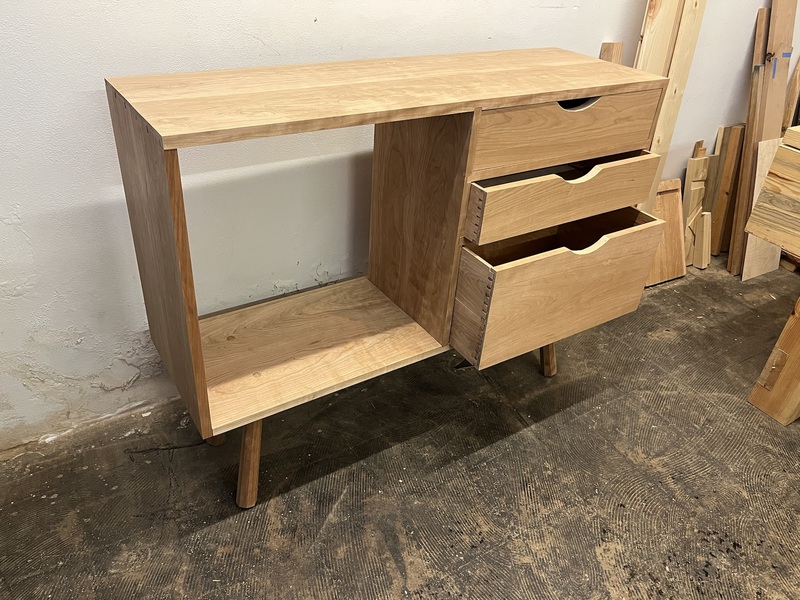 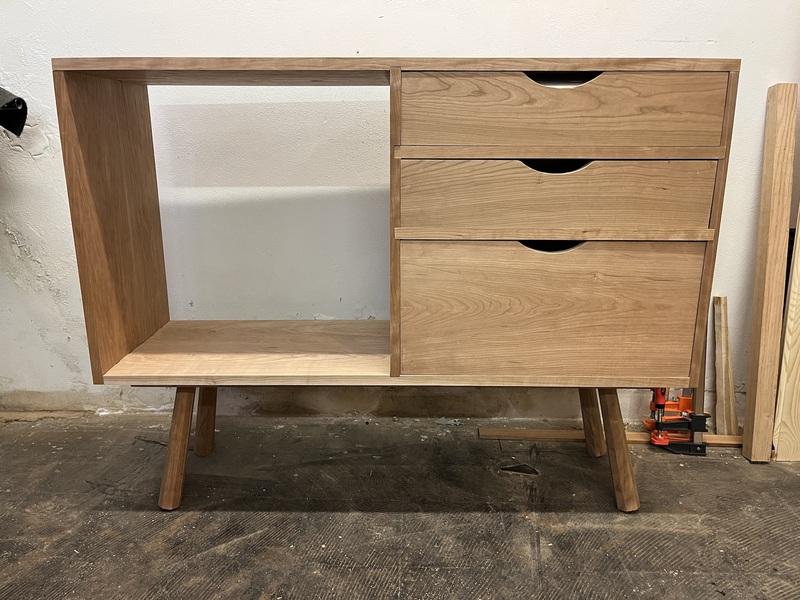 A tiny bit tight on the front, but that's perfect, I can take that down. The drawers were definitely the most difficult part of the build, so I'm very glad to have them all done and I'm reasonably happy with how they turned out.
|
|
#
?
Jan 15, 2022 21:57
|
|
|
Lookin real schmick! Drawers are scary but so satisfying when they fit and move well. I assume it�s pretty dry in the shop with the cold weather? Hopefully they won�t swell/stick too much when it warms up.
|
|
#
?
Jan 16, 2022 12:54
|
|

|
Granite Octopus posted:Lookin real schmick! Drawers are scary but so satisfying when they fit and move well. I assume it�s pretty dry in the shop with the cold weather? Hopefully they won�t swell/stick too much when it warms up. It's pretty dry! 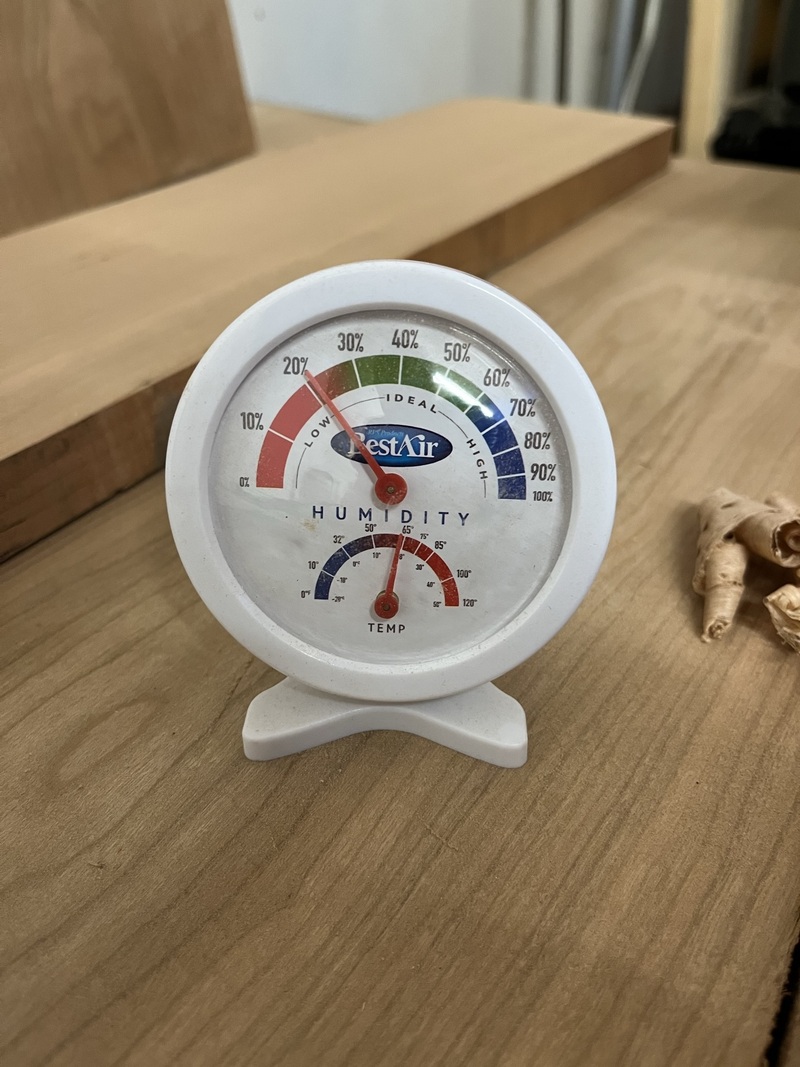 I've never had much of an issue with moisture movement on previous pieces, so I'm kind of erring on the side of leaving too much wood, since I can always take wood off later. That said, the upper drawers move very easily and I will be taking the big drawer down to fit about the same. The theme of the day is marking boards from other workpieces. It's stock prep time for the door panel frame, so I've got the stiles cut to fit the height of the cavity, and then marked out the width of the rails from those. 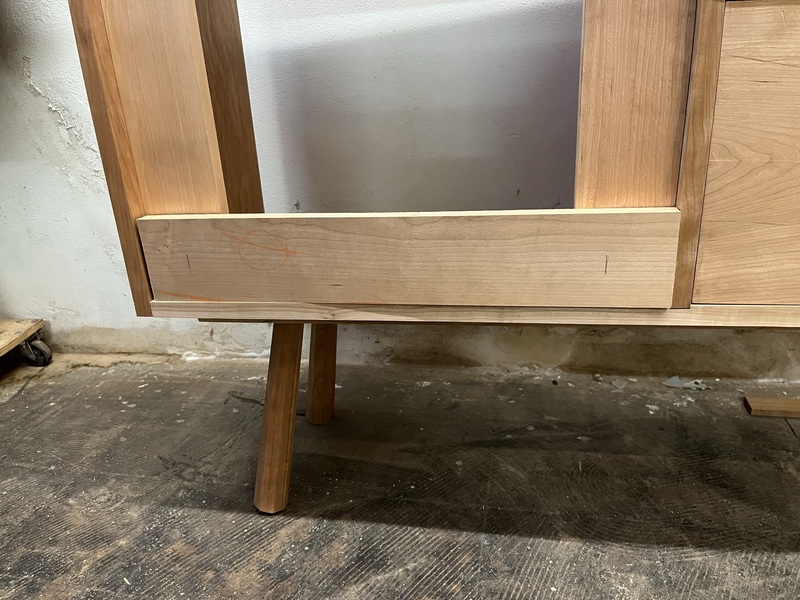 I don't know if I've posted about this, but this is what I look for to see the grain direction when choosing which direction to plane a board. It's not always this easy to find, but when you see these little chips, it's a dead giveaway. It's easy to mistake growth rings for grain direction, but they're not the same. 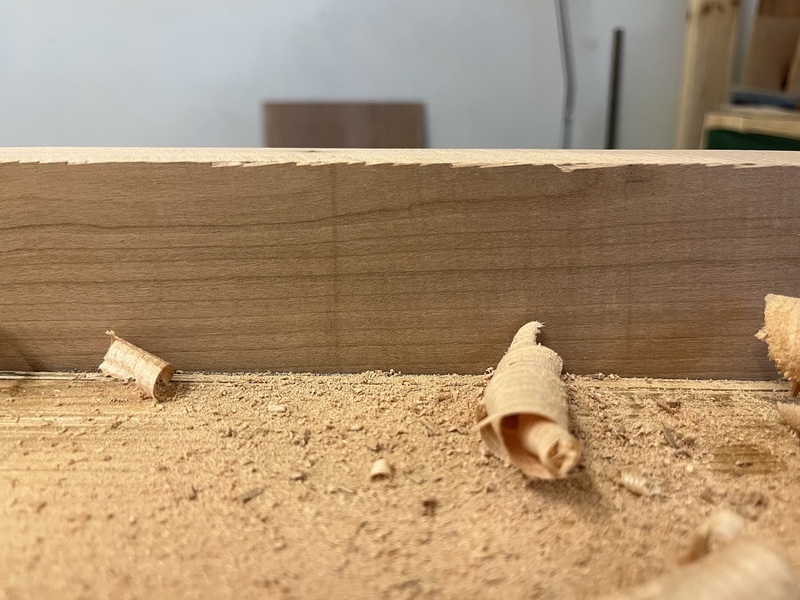 I mark all boards from one primary reference board, so errors don't accumulate. After some sawing and planing, we end up with boards of identical width. Also notice the planing stop marks on the ends of the rail boards. Those will be turned into tenons and hidden in mortises, so I don't care about the end grain appearance. Protecting end grain while planing suuucks so I love when I can just mash the thing into the planing stop and get to work. 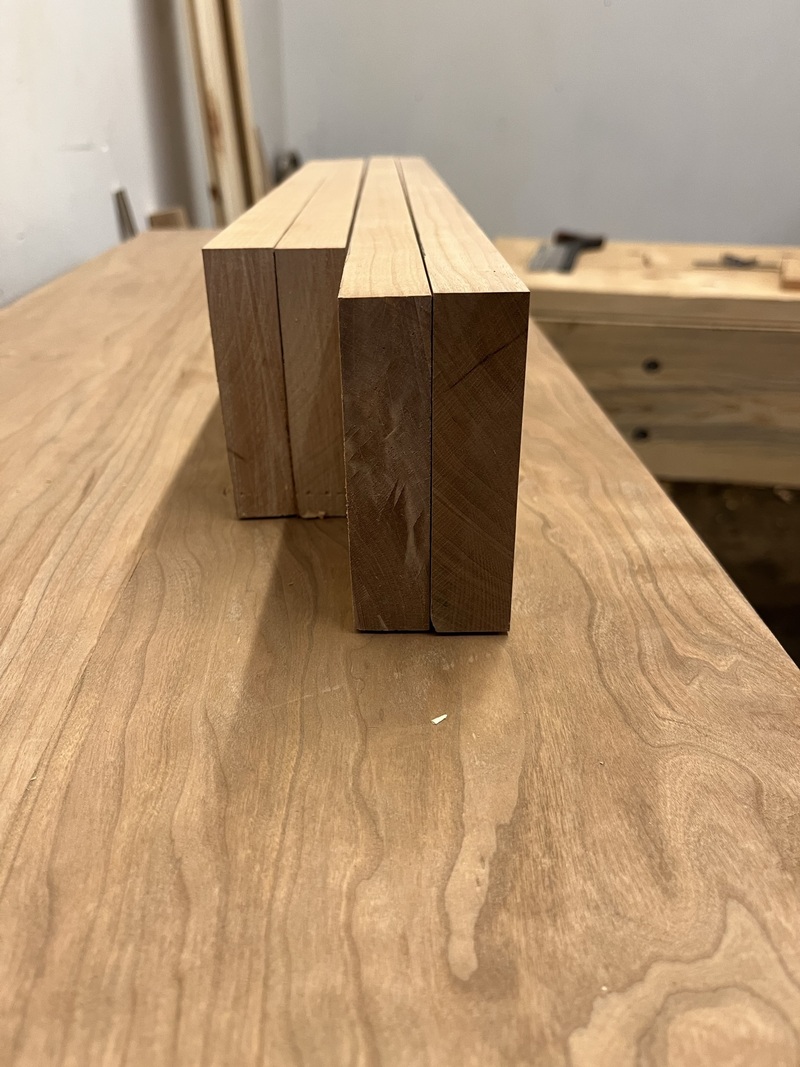 I thought it might be interesting to look at how I choose which board orientation to use for each piece. This is the bottom board of the door frame. The first side has a couple little pin knots but is otherwise clear. It's fine like this, but I think the knot looks a little distracting. So I flipped it over. 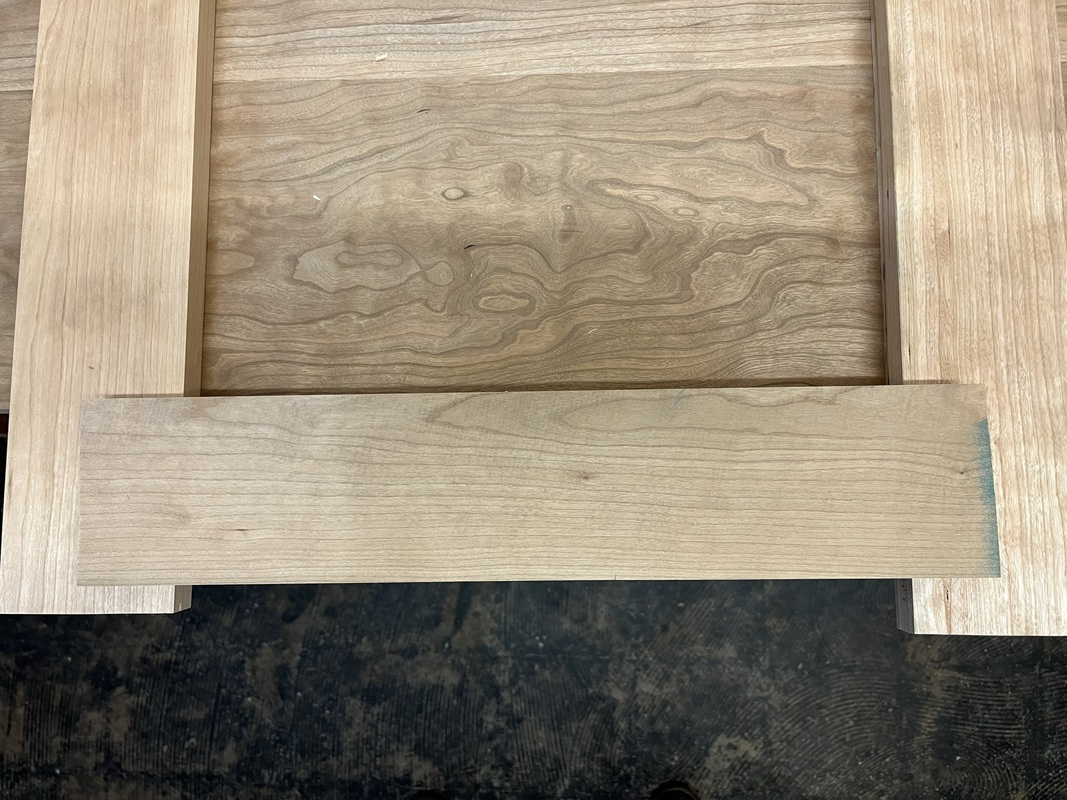 This side has arguably more defects. The knots are still there, but there are also some pitch pockets. I think those kind of draw you away from noticing the knots, and towards thinking about how wood is a natural material with imperfections, which I think is a cooler thing to think about than a couple knots in an otherwise flawless board. Not a huge deal either way, but when you're standing there thinking about how to orient your next work piece, you need something to base your decision on. 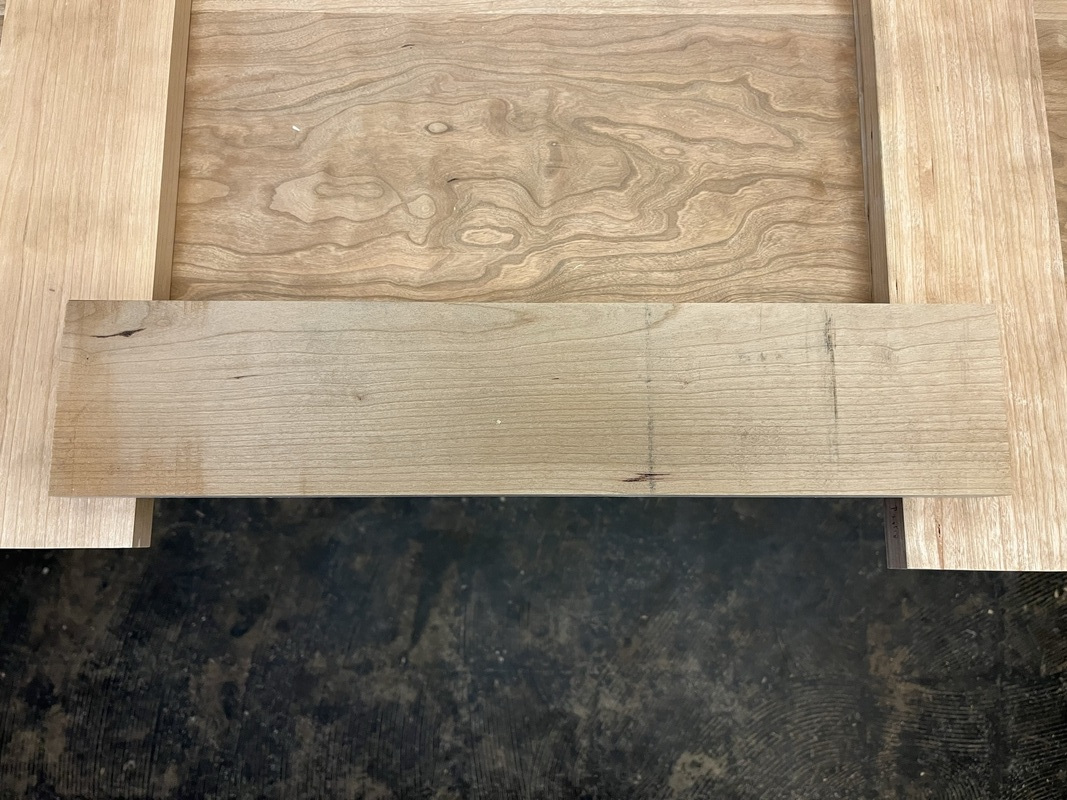
|
|
#
?
Jan 23, 2022 17:53
|
|
|
I have actually been going to the shop this month! But less than normal, and also for very short times and it feels kinda weird to post like two pictures of a half-complete tenon and call it an update. So here's a bulk update from the past few sessions. Marking out the tenon shoulder locations from the stile in place in the cabinet. 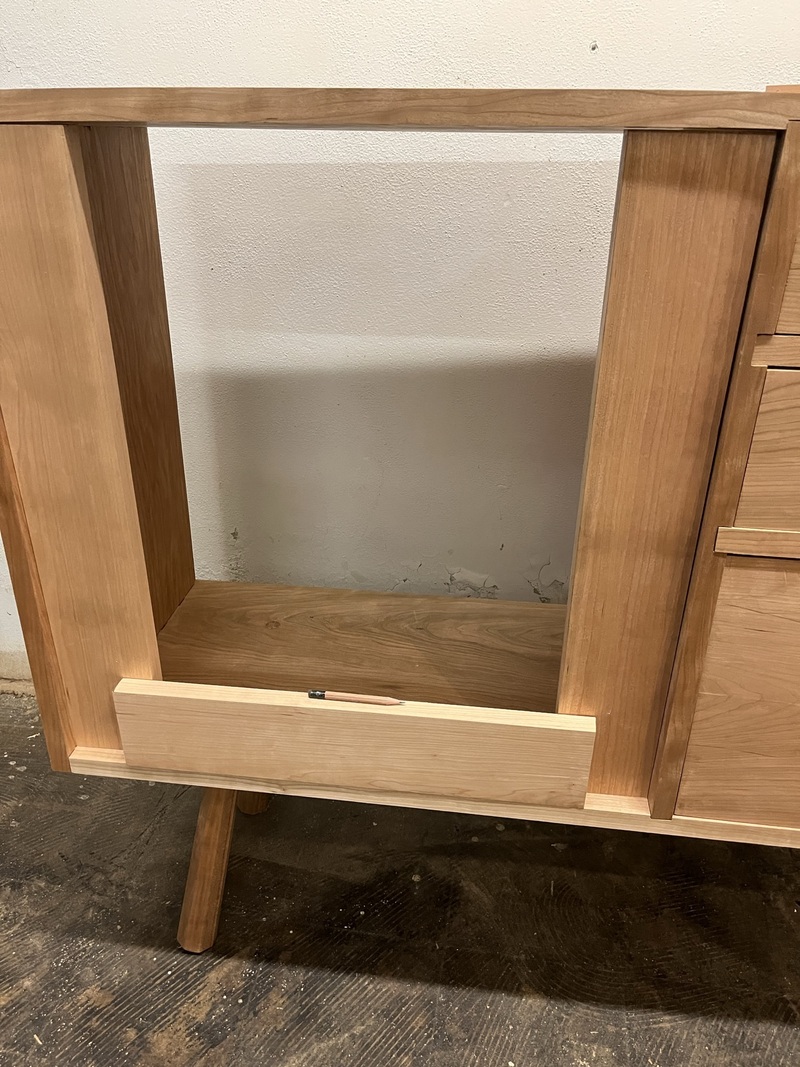 I use this handy double-edged marking gauge to lay out where to cut the tenon to match my mortise chisel's width. You set it properly once, then always mark every board from the show face, and this gives you consistently laid out tenons on every board. 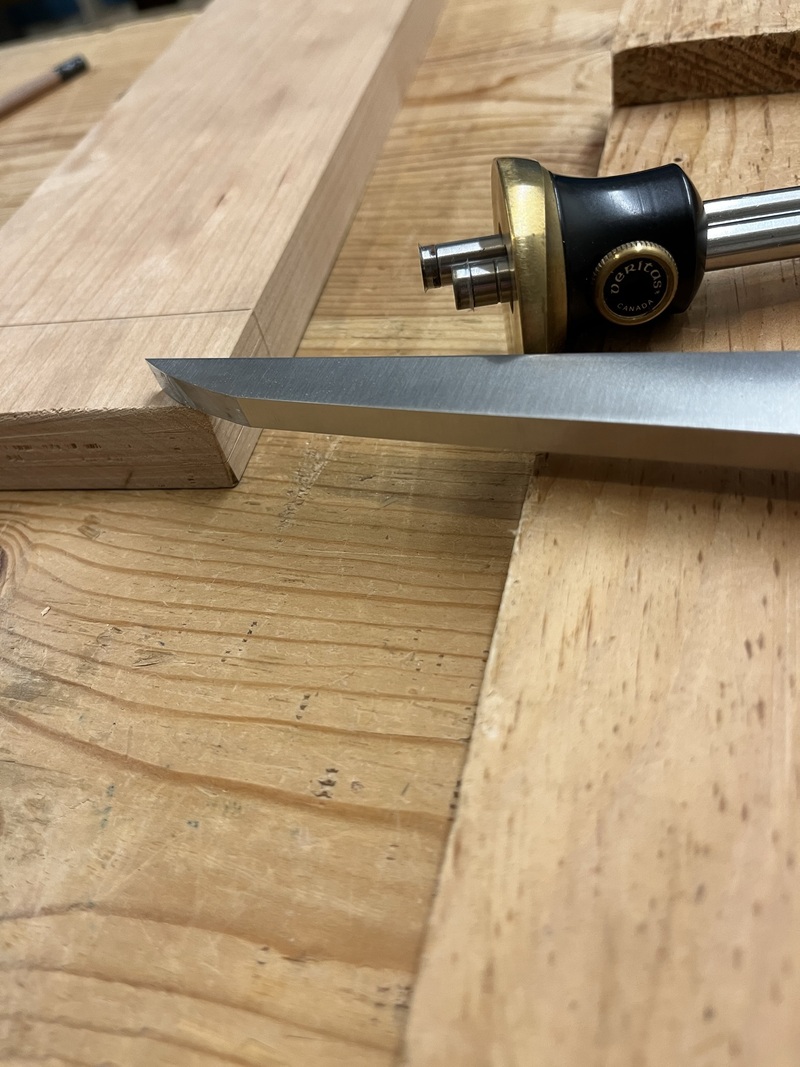 I decided it'd be easier to cut the groove for the panel before the joinery rather than after, so I did that to each board before working with it. 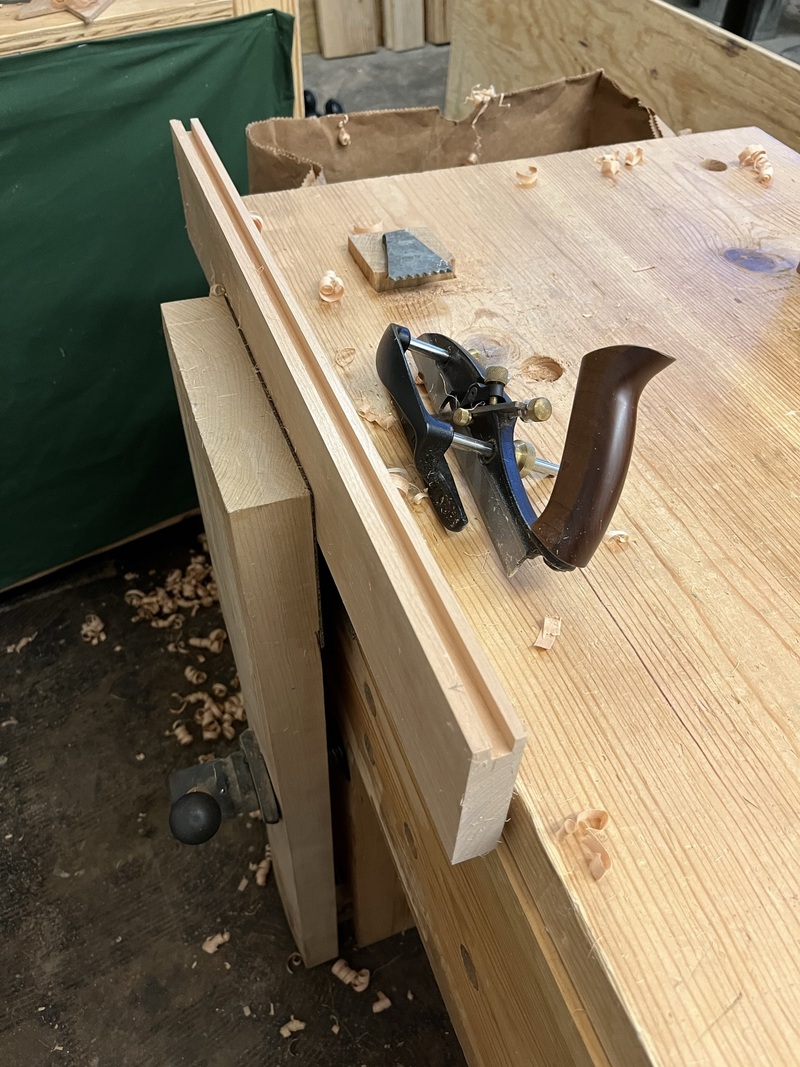 Here the first M&T is cut, so I put it into place to mark out the shoulders for the next tenon. 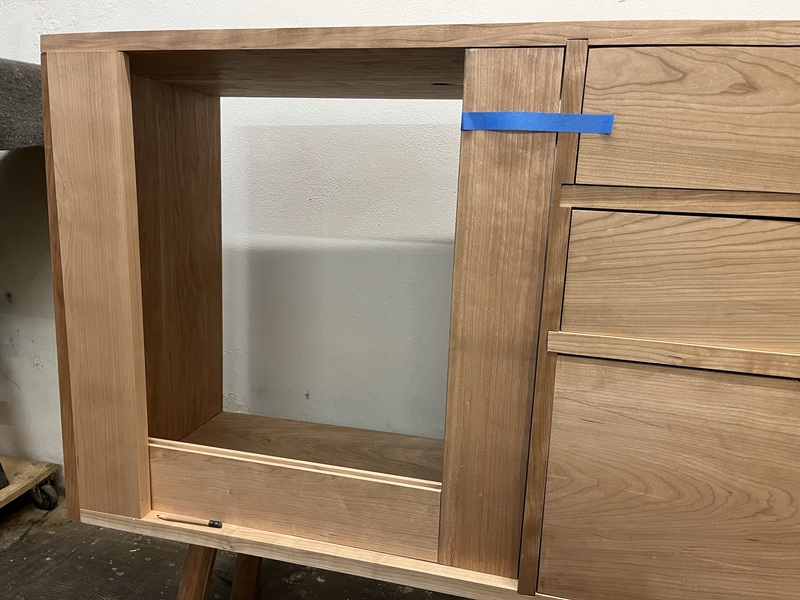 Interesting to note that it's not actually square. Remember many months ago when I made the case slightly out of square? Yeah, still accounting for that. 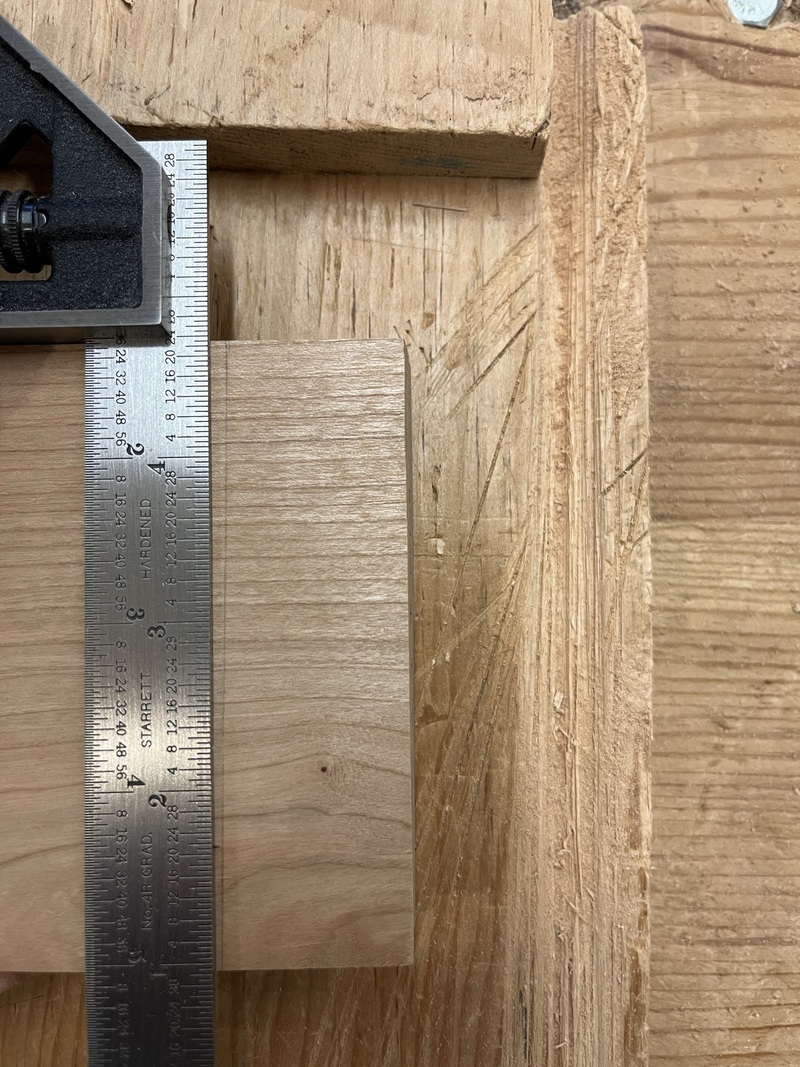 Here's the completed tenon side of the joint. Note the haunch on the far side! Since the grooves run the entire length of the boards, you need the little haunch to fill in the groove on the mortise board, or else you'd have an ugly gap on the top of your door. (Making stopped grooves with hand tools suuuucks.) 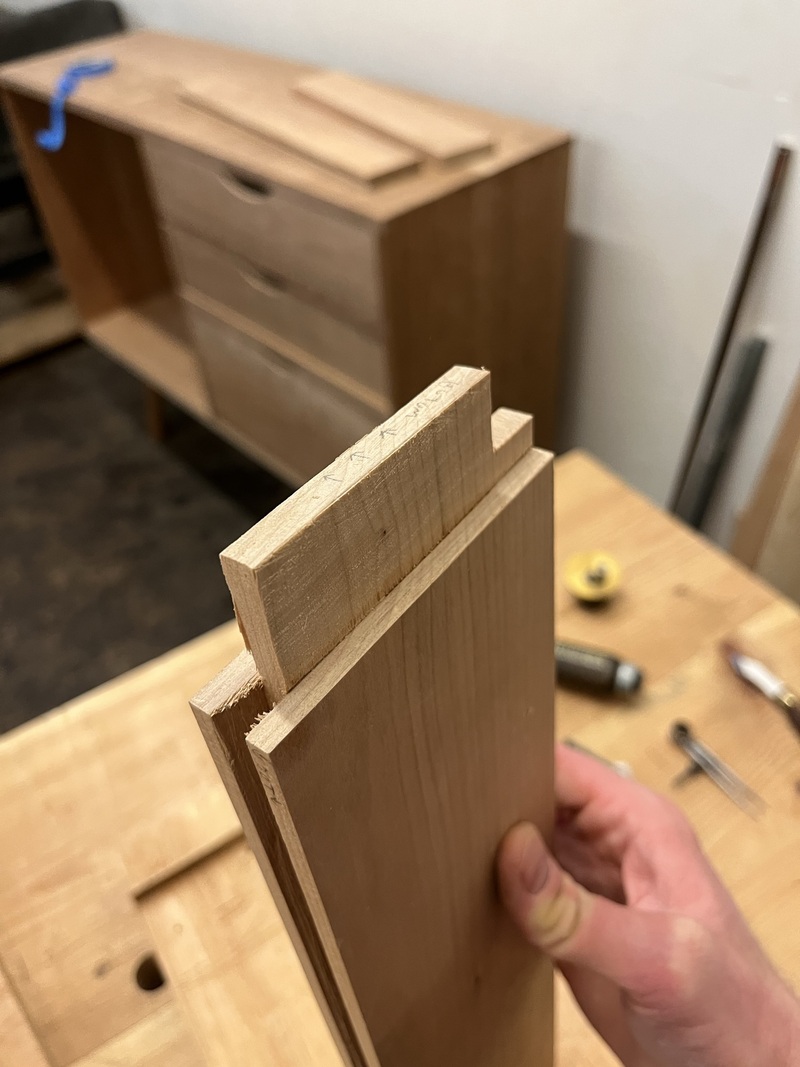 Fitting attempt. Almost there, though it's quite out of square. When this happens, I visualize where the wood would overlap if I "forced" the boards into square. 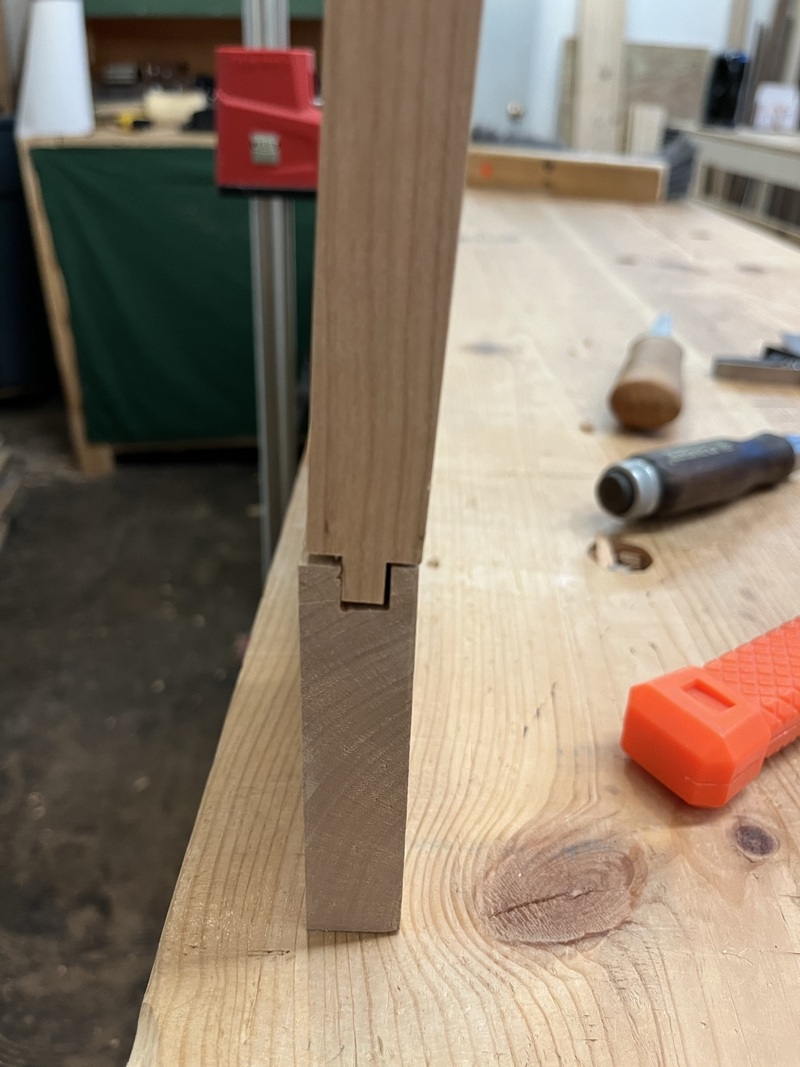 You can confirm whether the extra material is on the tenon or mortise. Here the mortise was out of square.  Two joints done. 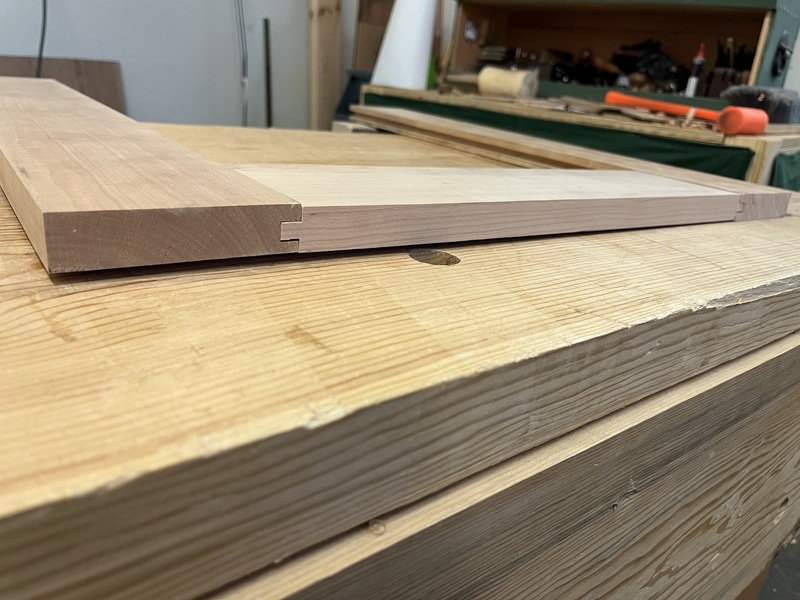 And now we have three fourths of a door frame. 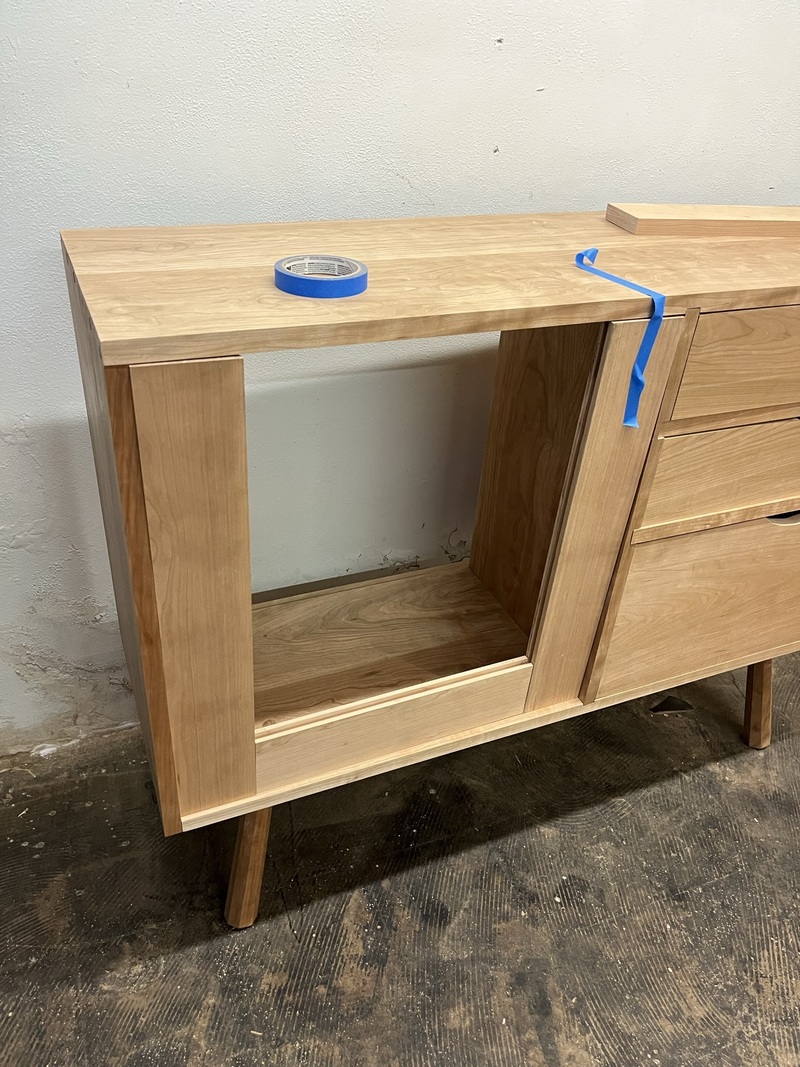 Before wrapping up for the day, I prepped and glued up the panel since that will be the next piece to work on. 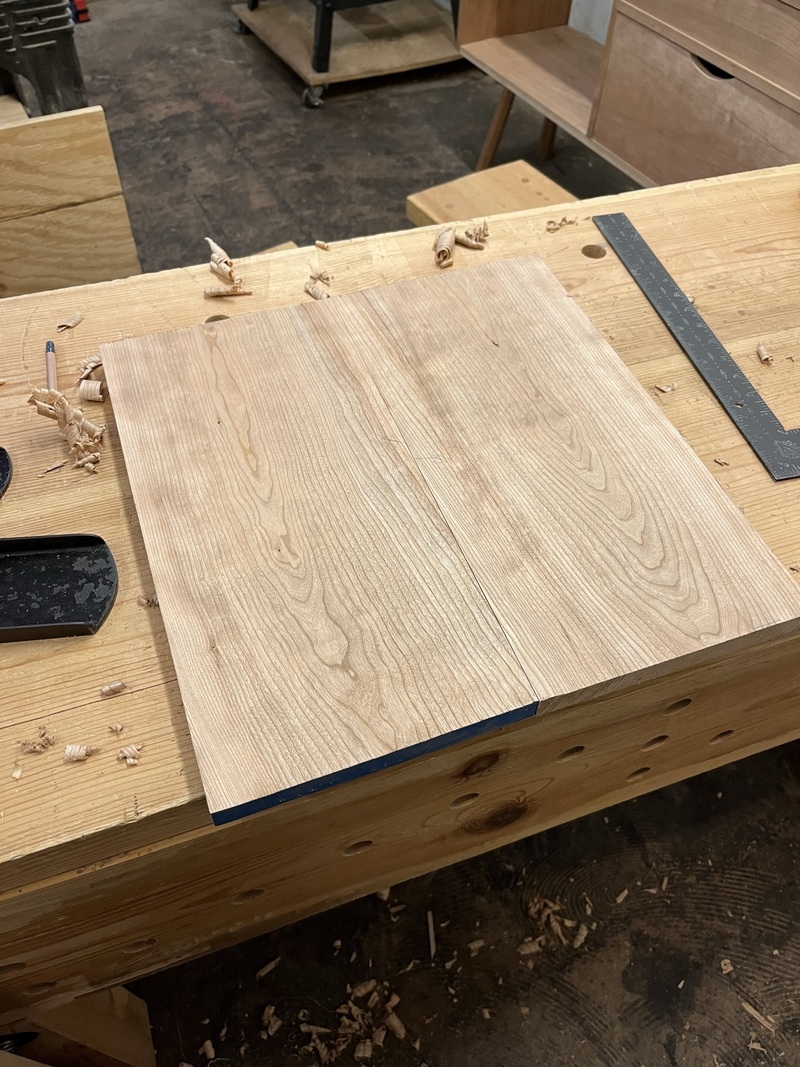
ColdPie fucked around with this message at 23:09 on Feb 20, 2022 |
|
#
?
Feb 20, 2022 22:57
|
|
|
A good week for door progress! I figure this will be relatable to people who post here in HCH. I haven't taken a non-holiday day off work since last November or something (we're involved with Valve's new Steam Deck product, so things have been hectic for that launch, which finally happened last week). Decided to take today off and chill at home. Do some chores, play some video games, whatever. One P.M. rolls around and ahhhhh I'm so bored. Off to the workshop! Guess I'm bad at chilling. Cutting those tenons. Similar to resawing a board, I work down one side following both guide lines, then flip it and go down the other, then cut straight across down the center to cut off the tenon cheek. 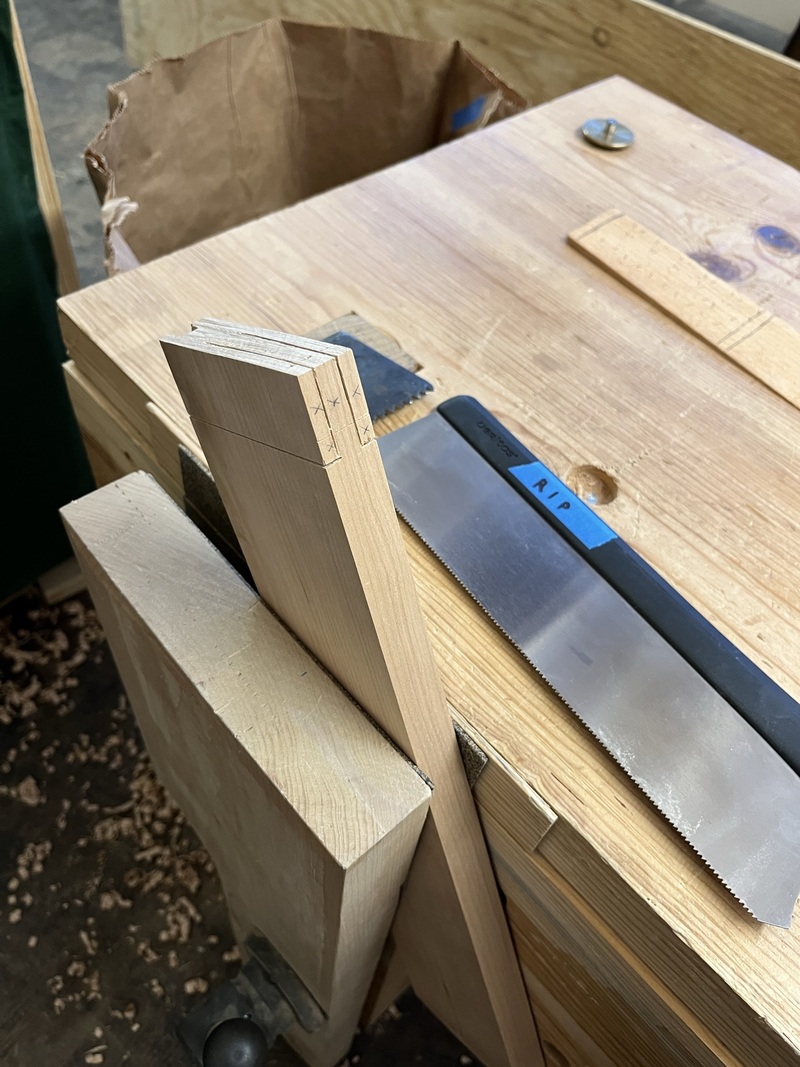 Chopping the mortise. I work from one end down to the other, each chop getting deeper. Then turn around and work back to the first side, leveling out the bottom. I miss Ugly Mallet. This plastic thing sucks. 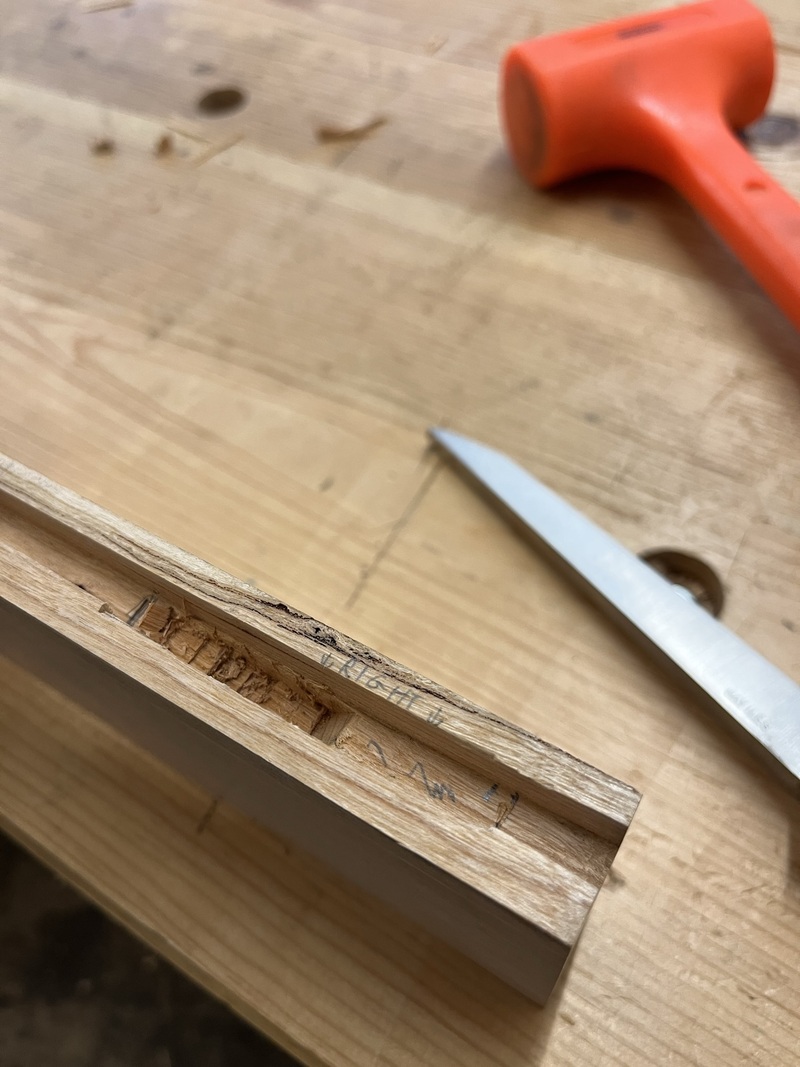 Here's the depth after one pass down and back. It's about 2/3 done. Another pass down and back finishes it off. 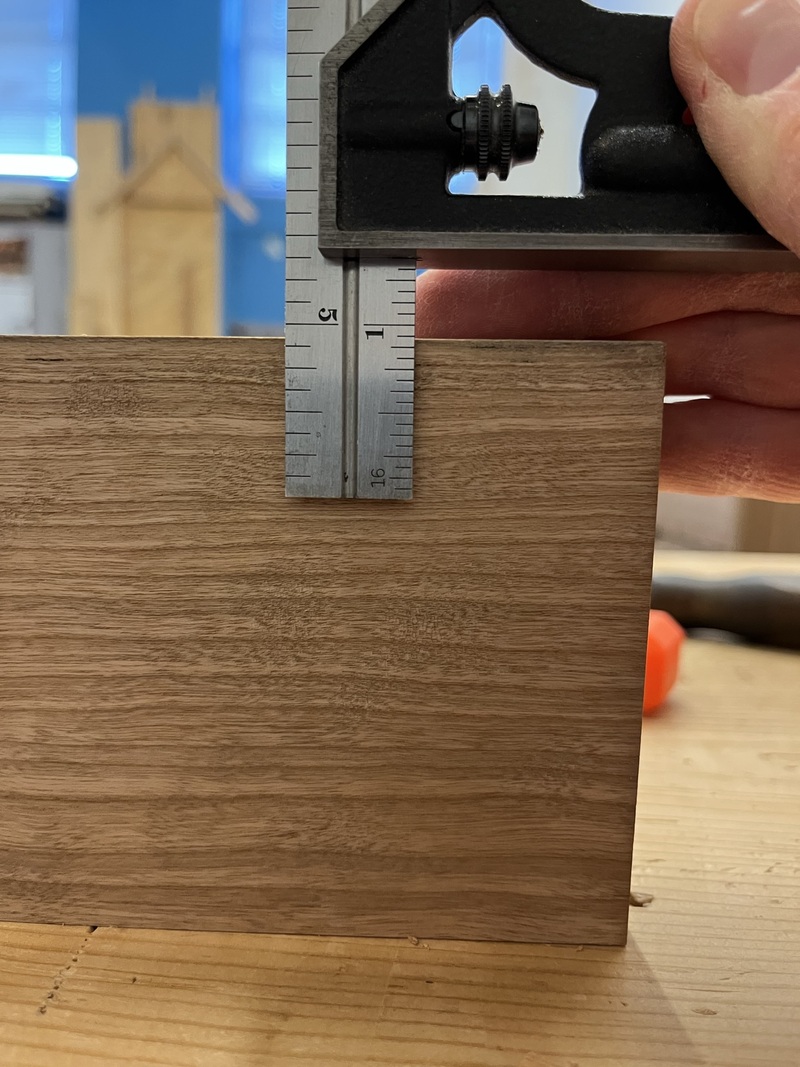 And the door frame is all together! (Take a close look at the left side of the upper drawer divider. That mis-alignment will come back up in a moment...)  Here's where today's progress starts. I flattened the show face of the door panel, then figured out where to center it in the frame. I put the glue line right in the center, then planed and cut the edges to leave enough for the 1/4" tongue to fit into the groove in the frame. 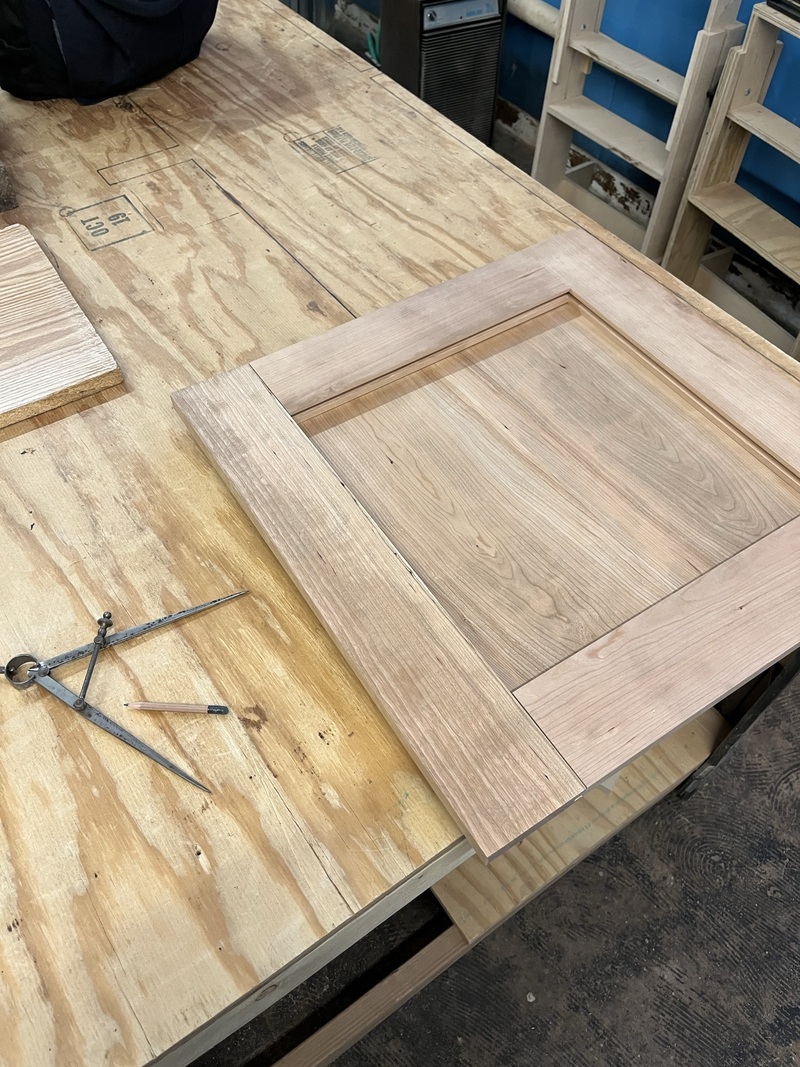 With it cut down to size, I started on carving it. I ended up doing three or four small practice boards to try to figure out a good technique. I settled on using the larger, flatter gouge to give the entire board a wavy texture. Then using the smaller, deeper gouge to give it some depth. I still haven't bothered to flatten the back face of this panel yet, so that's why that stick of plywood is under there holding it steady while I carved it. While I was working, I'd hit the bevel of the gouges with my strop to try to help keep its edge. The gloves are mandatory, lot of knuckle-banging when the gouge cuts. There was some reversing grain, which was annoying. After I finished the bulk of the carving, I went over it carefully to try to clean up all the tearout and smooth out the otherwise ugly cuts. 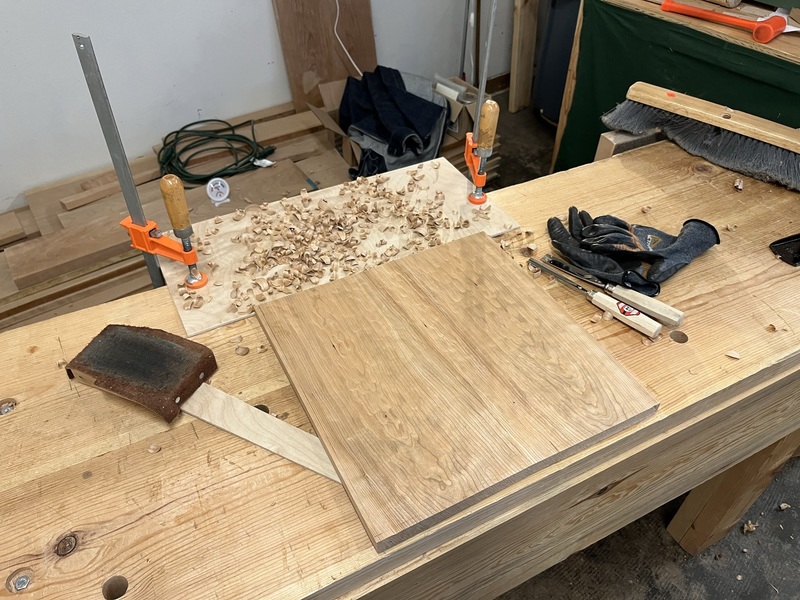 I think it turned out pretty good, but with these subjective things I like to sleep on it and give it a fresh look some other day. So I set this aside for today. Here it is roughly in place in the cabinet, with lots of raking light. 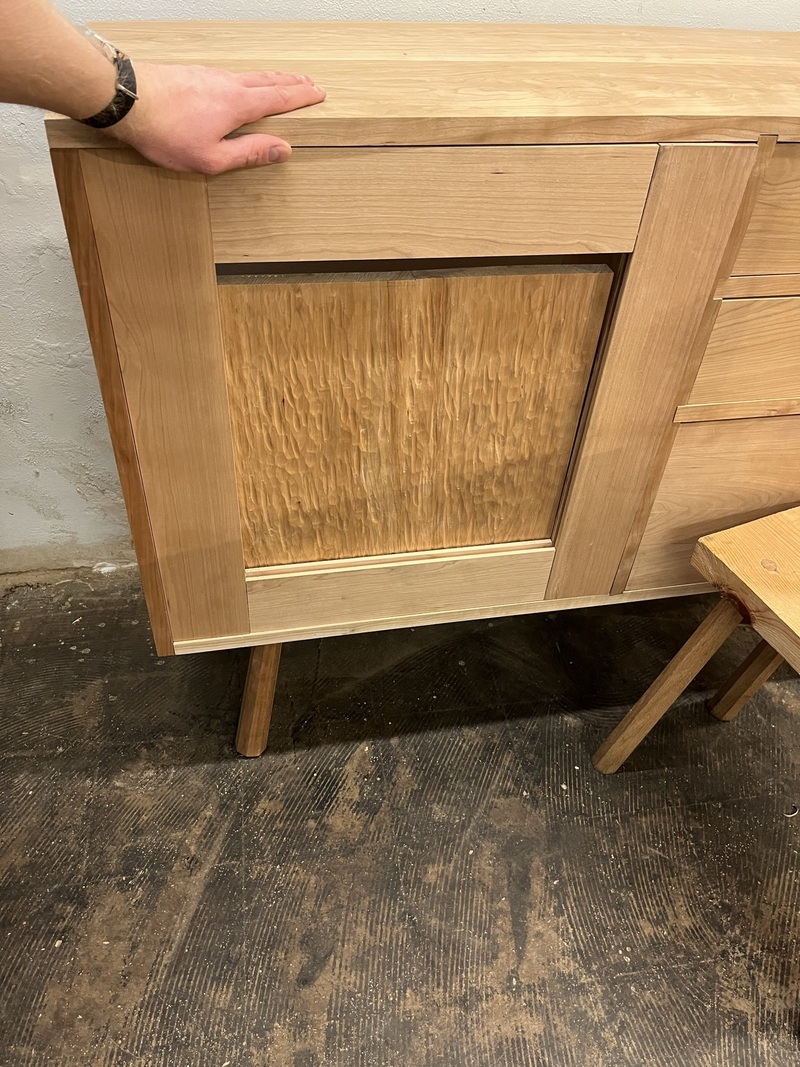 Remember my hide glue was failing a couple months ago? Yeah it failed here too, where I had used it to hold the drawer dividers into the front of the cabinet. It's not really a visible joint so I just slapped some Titebond on them. I tapped on all the other joints and everything else seems solid. This joint is all end-grain, and also not very tight, so it's not too surprising it was weak. 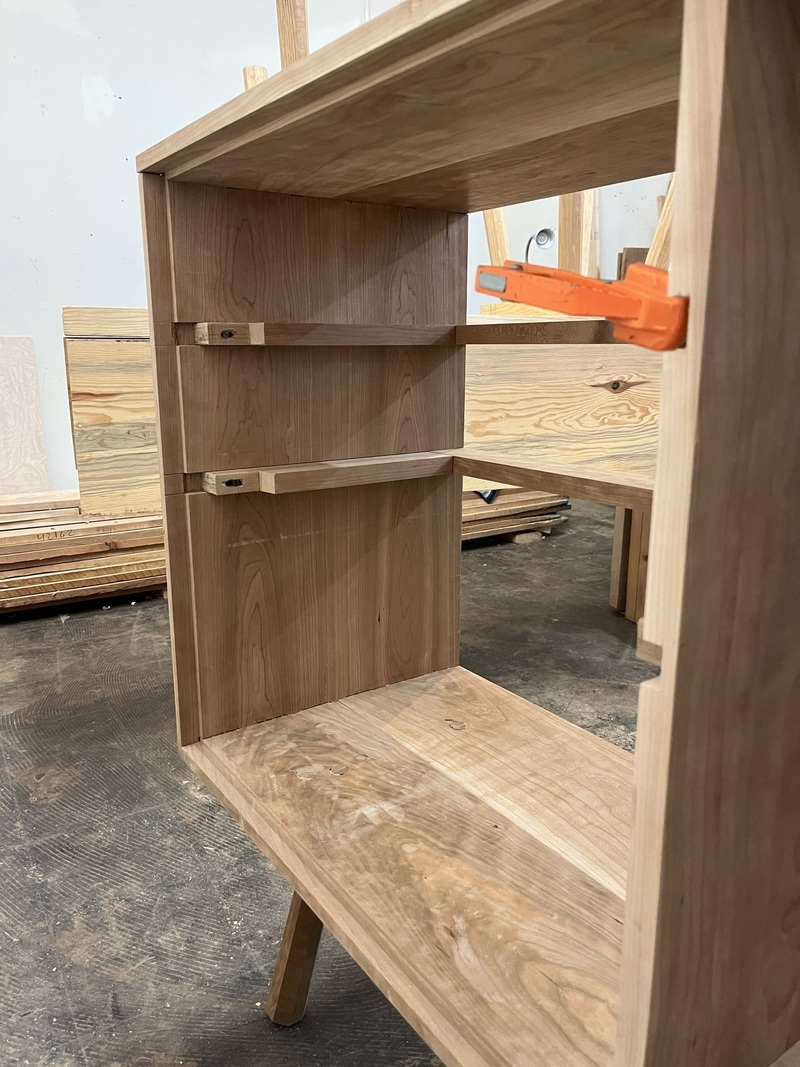 While that glue was curing, I moved on to the back. I bought some pre-fab tongue-and-groove paneling from Menards a while back. On another project, I used cedar, which I think looks nicer. But that's $$$ right now, and also hard to even find good-looking boards, so this time I used pine. I haven't been sure for this whole project how I would secure the back panels into this groove I cut in the case boards. On that other project, I nailed the boards into the internal shelving dividers, but there is no such dividers here other than the center vertical divider. 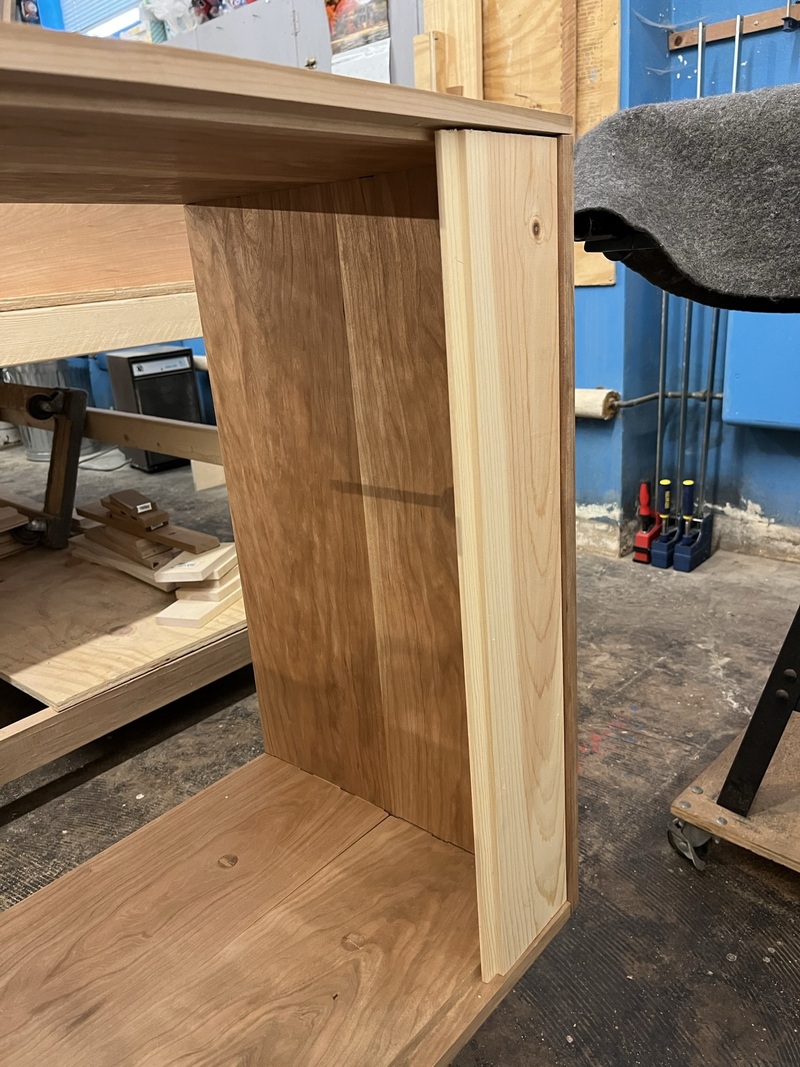 After thinking about it, the best idea I came up with was to glue in thin strips of leftover plywood, and cut grooves into the back boards to notch into. I think this'll work, but I'm open to other ideas if anyone has any. The end of this project is getting close... 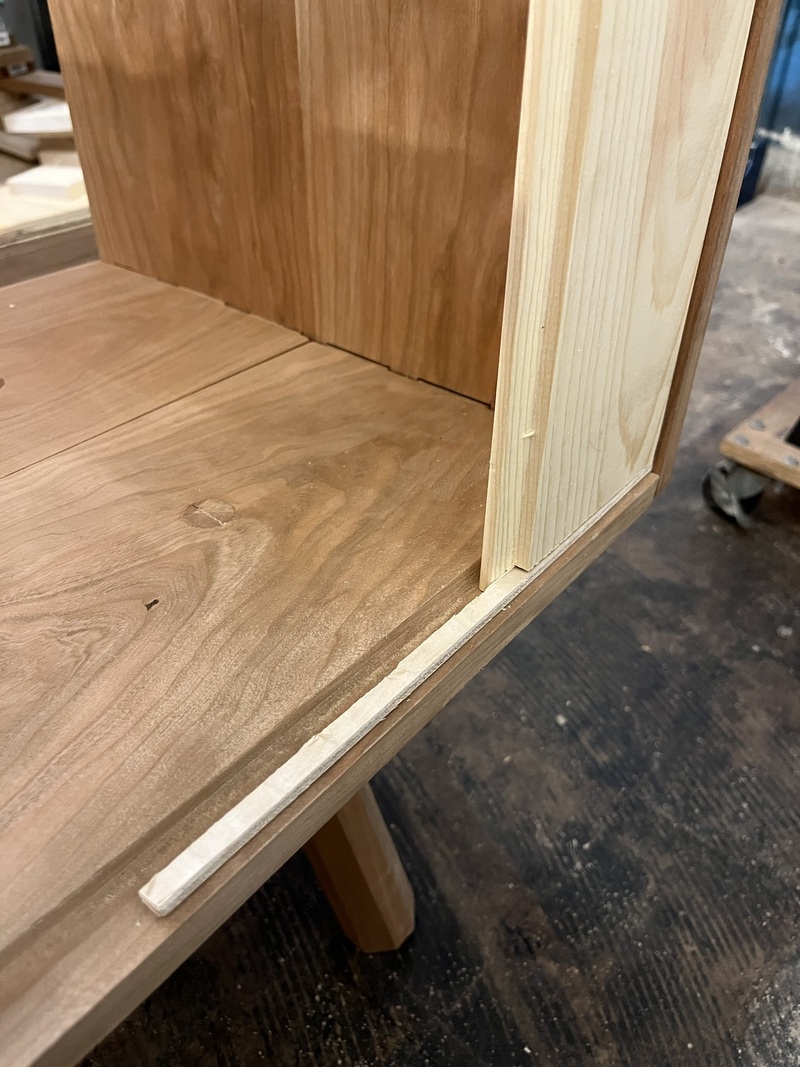
|
|
#
?
Mar 5, 2022 00:47
|
|
|
Just posting to say I'm following along and enjoying the thread, fun to see the project progress and know the feeling of thinking you're gonna chill for a day and next thing you know....
|
|
#
?
Mar 8, 2022 18:03
|
|

|
I noticed when I had all the drawers out, that they all have this knot in the same spot of their back boards. I didn't plan that, just used some ugly boards from the pile. I wonder if it's even the same knot, maybe the two planks from which I resawed these four boards came from the same part of the same tree.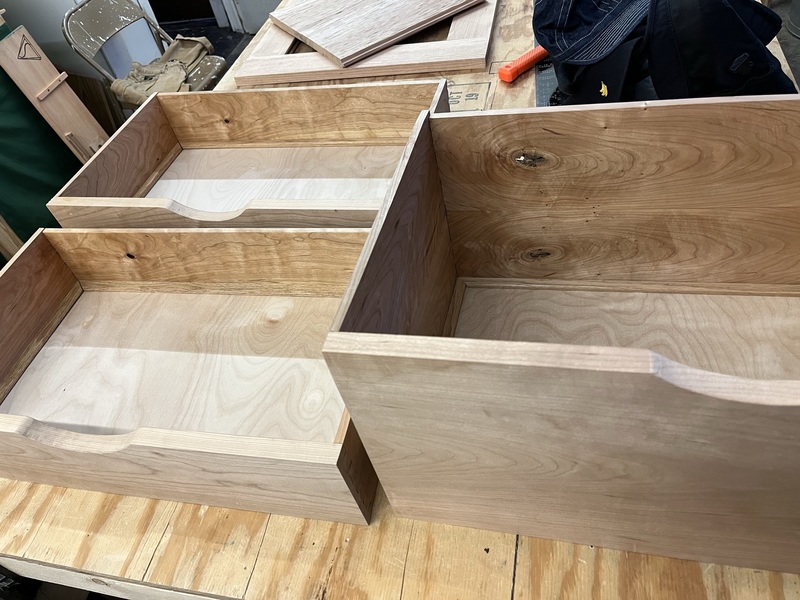 The door will need to be mostly done before I glue it up, so I started by smooth-planing the rails and stiles, and breaking all the interior edges since that will be impossible after glue-up. 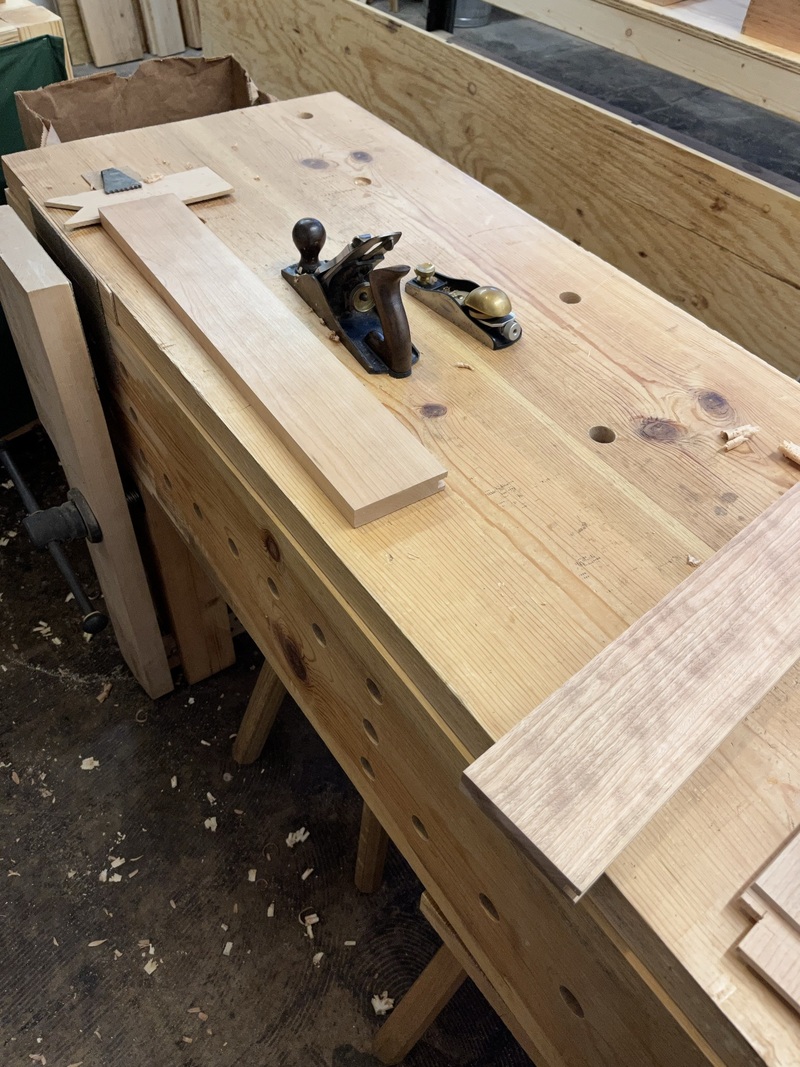 Then I worked on the tongue on the center panel, to slot into the grooves in the door frame. The long grain direction is easy, just using the rabbet plane with its fence to cut a rabbet in each side of the board. 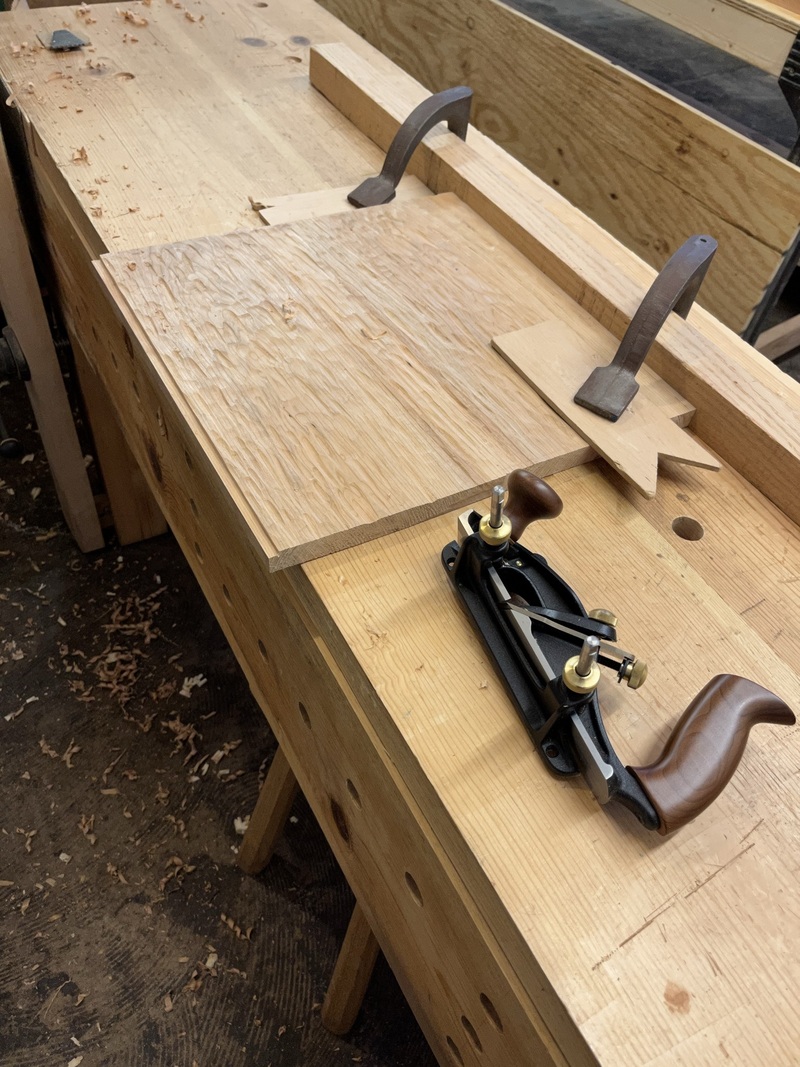 The cross grain direction is trickier. I used some scrap as a fence, and my rabbet block plane to take down the rabbet on each face. 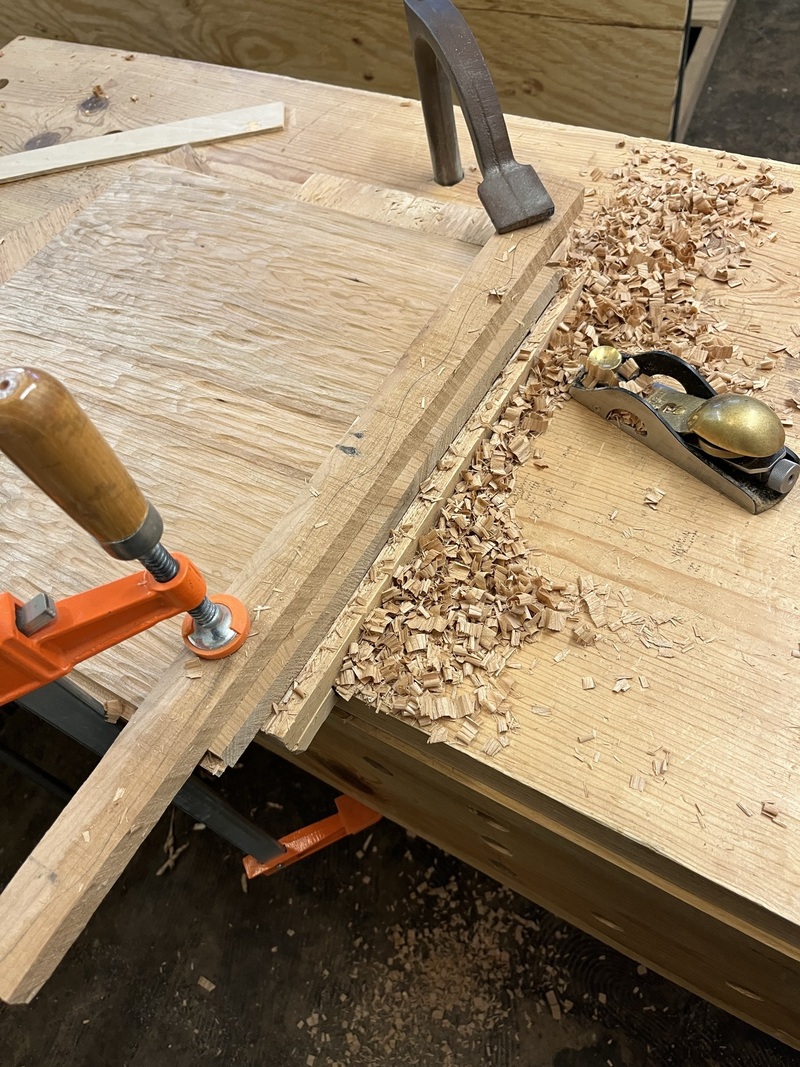 This plane has a nicker blade, which crosscuts the grain before the plane scoops it up, leaving a nice crisp edge. 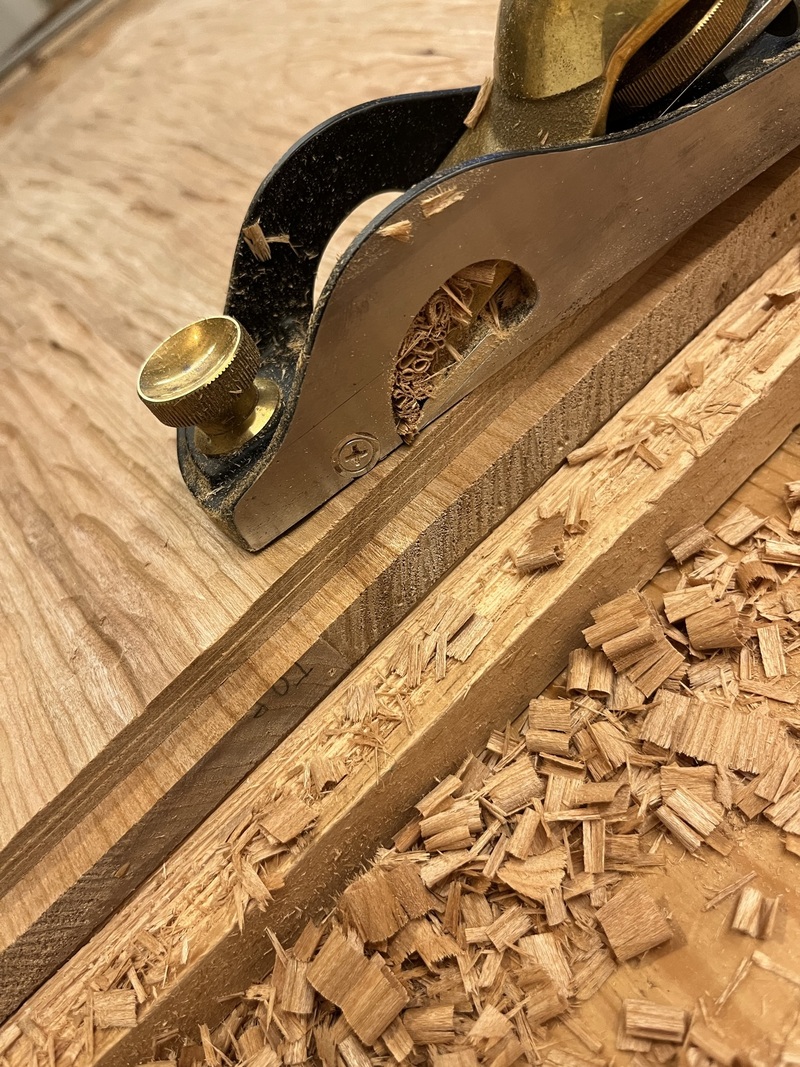 And hey, we have a door! While it was dry-assembled like this, I made a note of where the raised portion of the panel wasn't quite parallel with the sides, and took those down a little bit further with a block plane to make the gap more consistent. 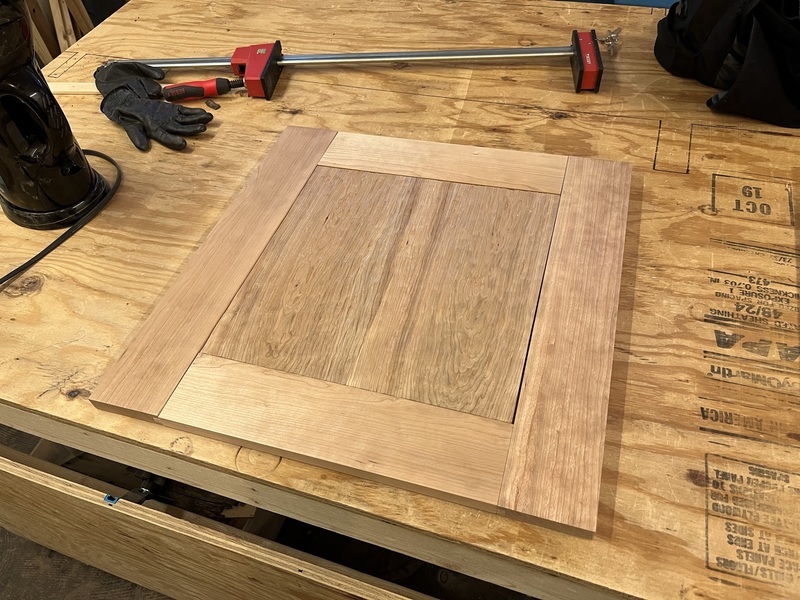 I also took a peek down into the groove, to see how much room for contraction/expansion there is. This is about a 1/16" gap. That seemed a little on the small side to me, so I took a couple light plane passes down each side to allow for more expansion. 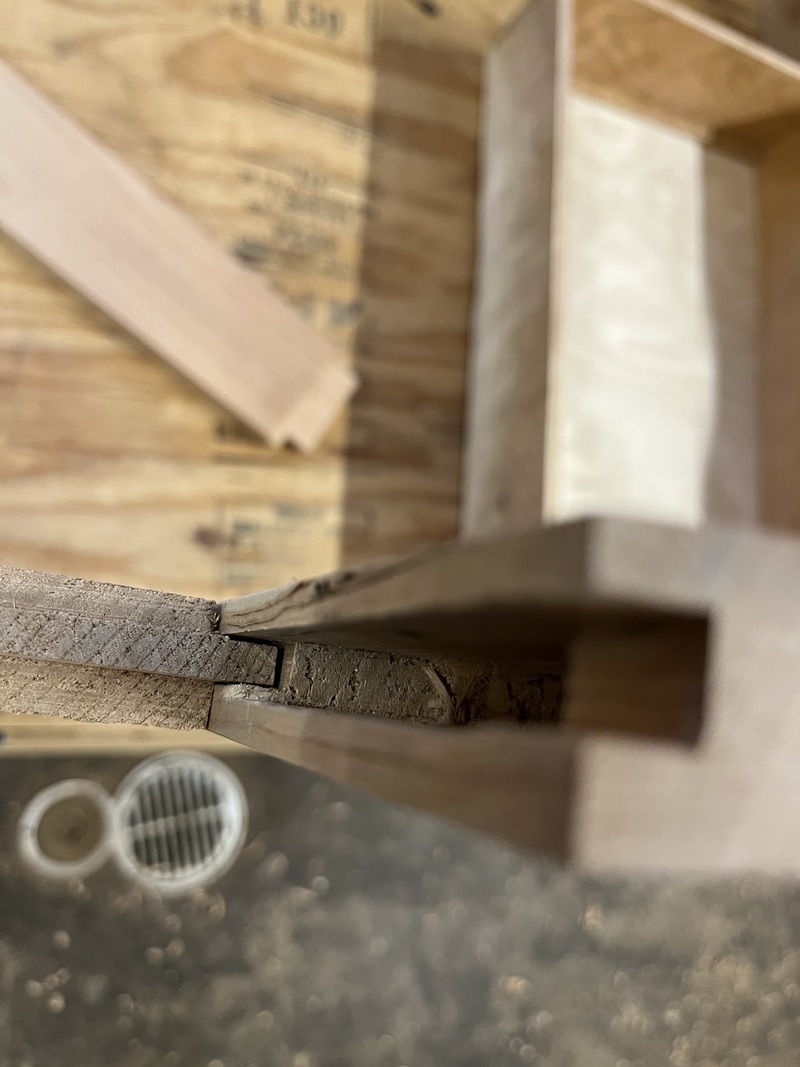 That's everything that needs to be done for the door. So I brought it outside to apply finish. Beautiful day, got up to 60 degrees (16 C) today. Applying the shellac brings out the carving on the panel even more, as the ripples now reflect light. 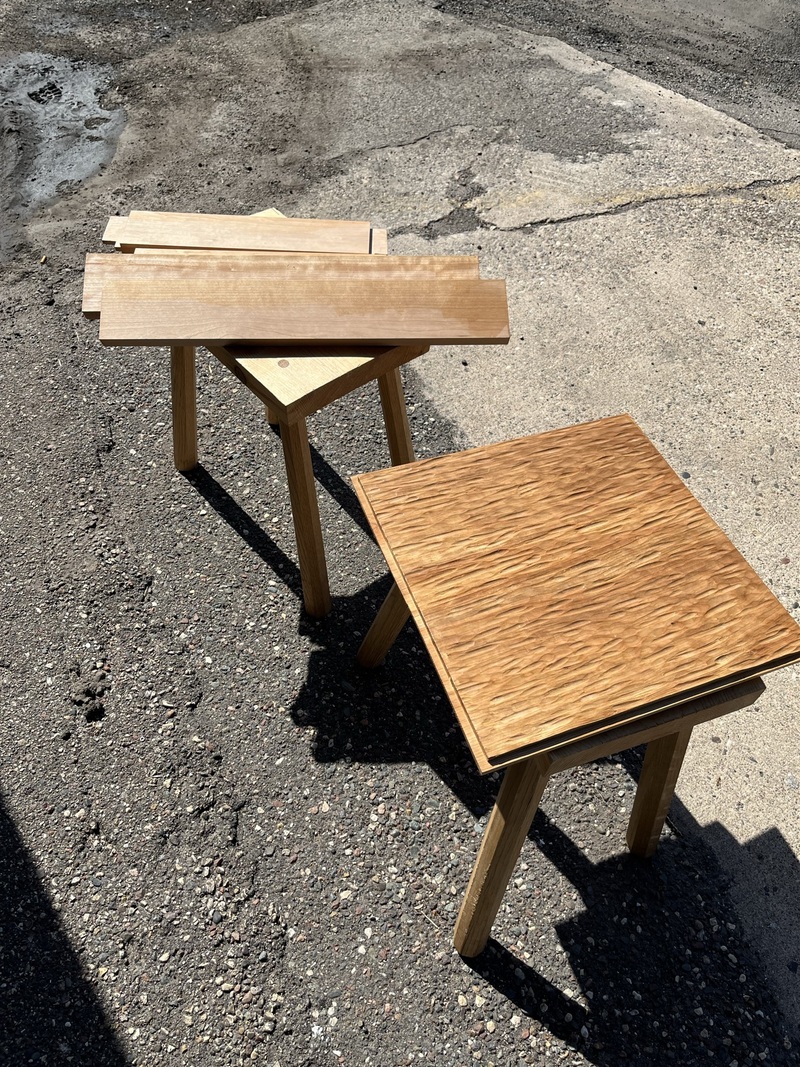
|
|
#
?
Mar 20, 2022 23:02
|
|
|
And for the second half of today, I got the back tongue-and-groove panels cut to length.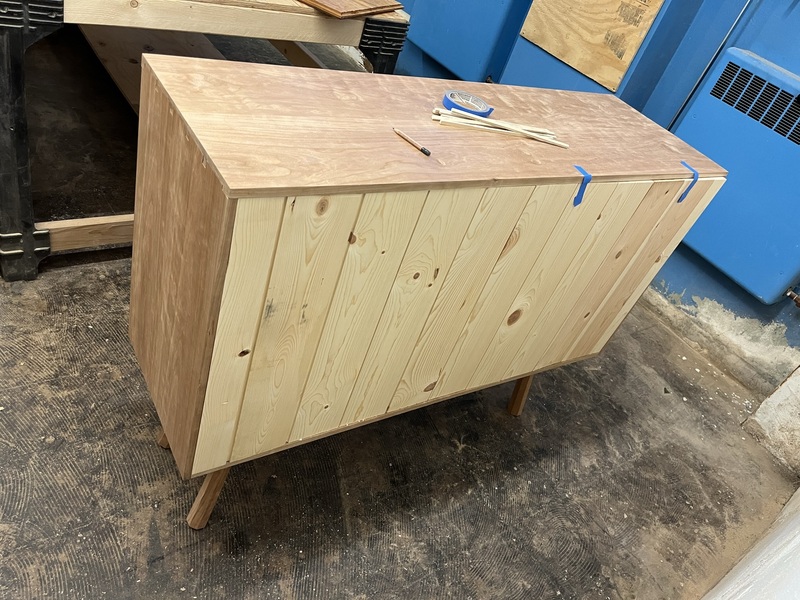 Eleven boards. The first and last boards are ripped, to remove the unneeded tongue and groove from each. 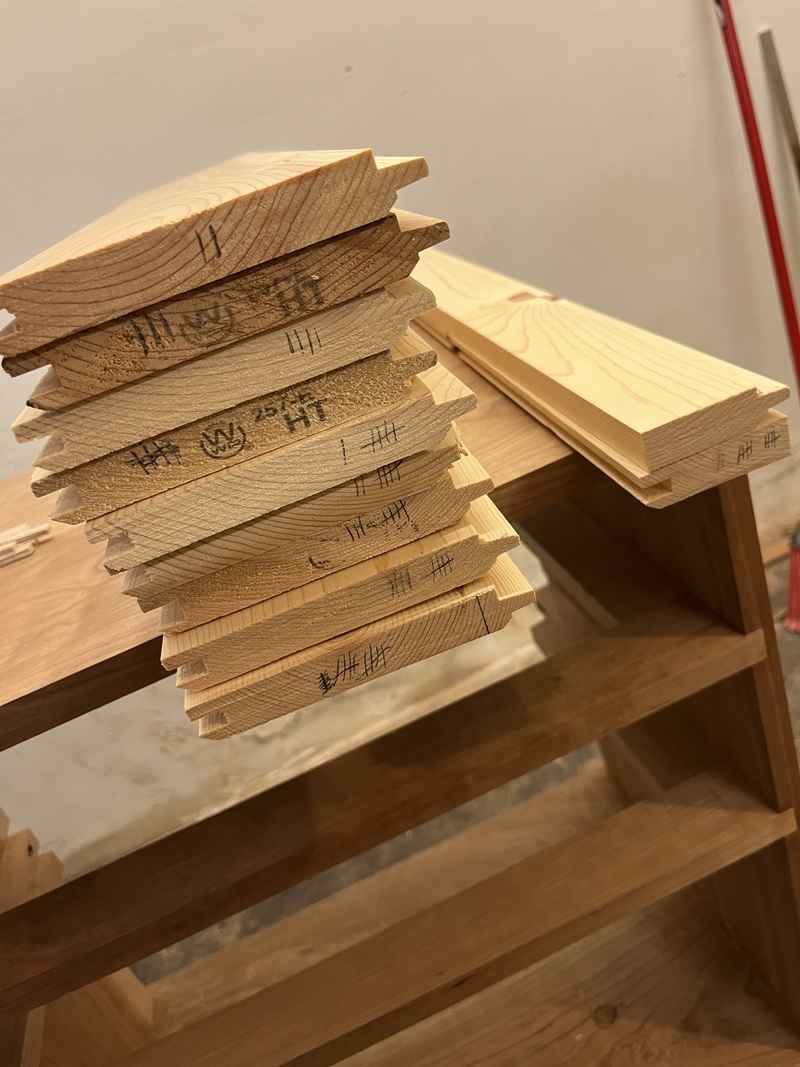 And I cut the rabbet in those boards to hold them into the back, as I described last time. I used that block plane again to cut these. I used the cutting wheel marking gauge to cut a deep line parallel to the end of the board. Then carefully slot the corner of the block plane into the knife mark to establish the edge, before bringing it down parallel to the face to cut to depth. I think I got this technique from Matt Bickford's book on how to use molding planes. 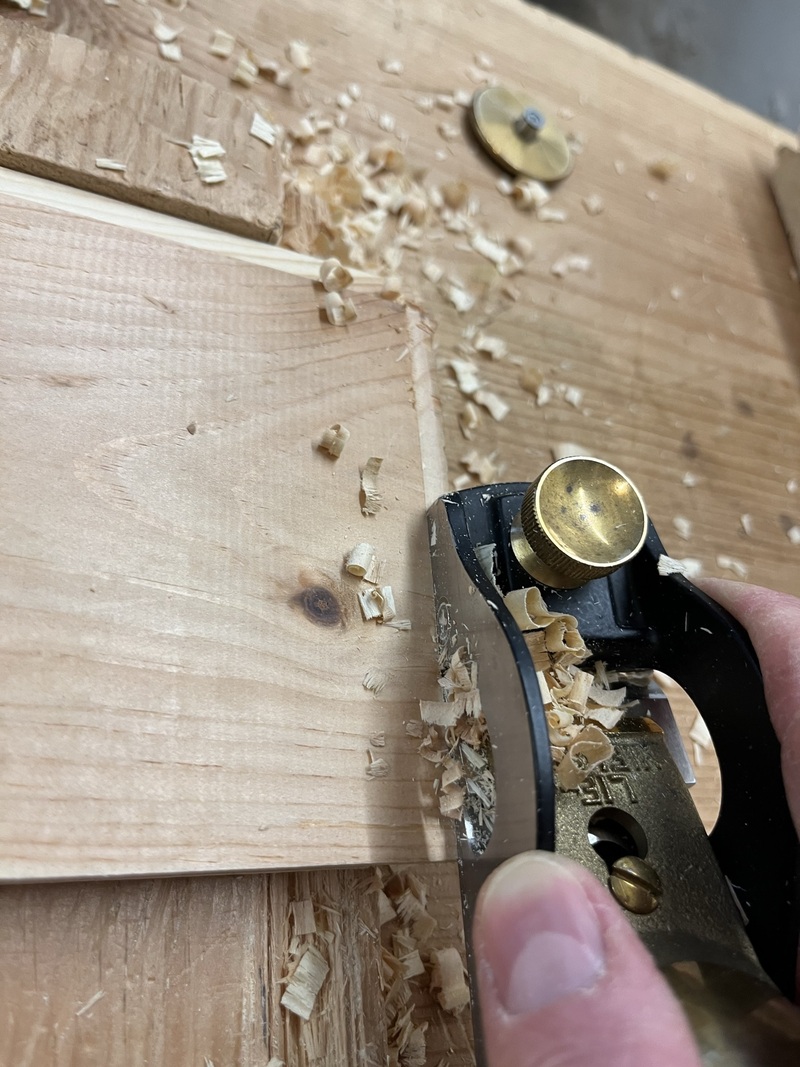 Eleven boards later... this pine smells terrible. 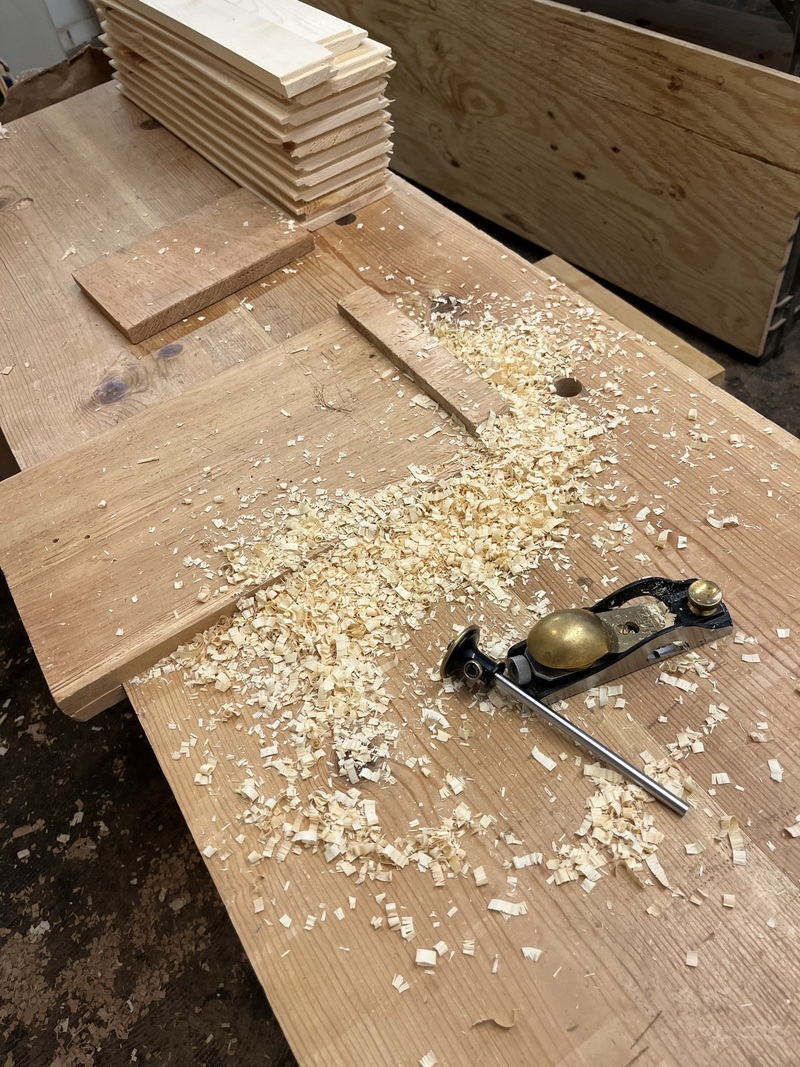 And that's the end of the major work to be done. Here's the entire cabinet in one shot, some assembly required. 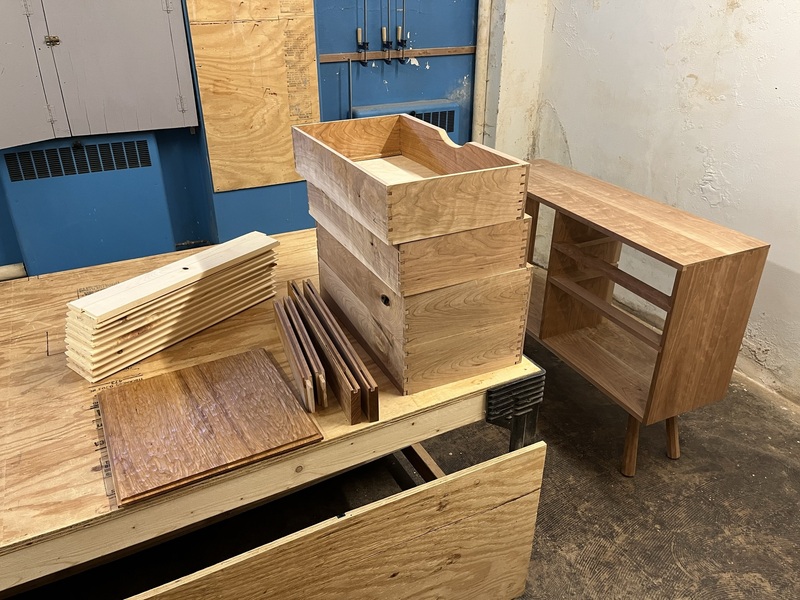
|
|
#
?
Mar 20, 2022 23:07
|
|
|
Getting very close now! Looks great.
|
|
#
?
Mar 21, 2022 10:59
|
|
|
Time for everyone's favorite: finishing. Looks great!
|
|
#
?
Mar 21, 2022 13:31
|
|
|
This is a great thread. Thanks op!
|
|
#
?
Mar 23, 2022 12:02
|
|

|
I had big plans for yesterday, but then I remembered with all the rain and snow melt that it's shop flooding season! My neighbor moved out of the shop last month, so I spent most of my time rearranging the shop to get stuff I care about out of the flood zone.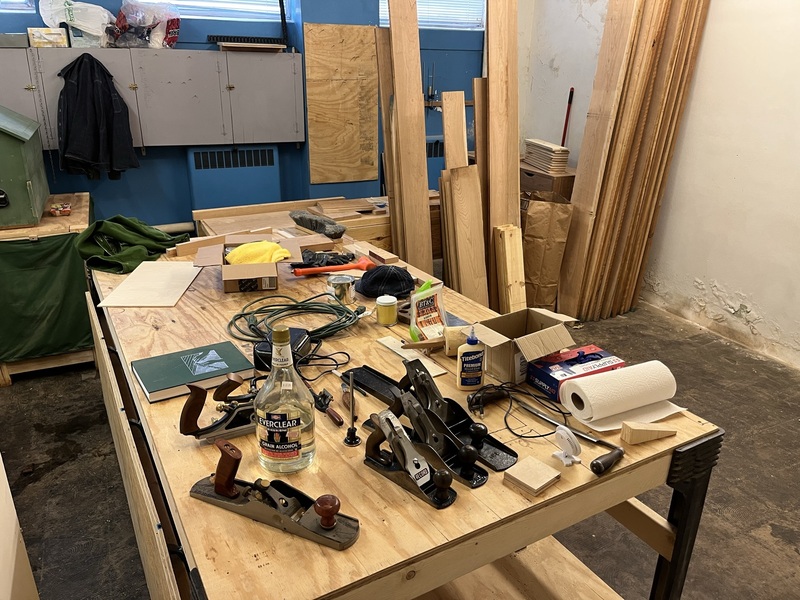 Whatever. Aside from that, I applied clear wax to the door panel. On previous projects, I've used wax from this guy that I heard about from Kaiser. However, I wasn't sure if I'd have enough, so instead I used this jar of wax that Chris Schwarz gave me when I bought a chair off him, like I talked about in the main woodworking thread. The wax provides a bit of protection from general wear-and-tear, and also water, alcohol, etc, on top of the shellac. Applying wax is pretty easy, just put on a thin coat with steel wool or a rag, let it dry for an hour or so, and buff off any excess with a rag until it feels dry. 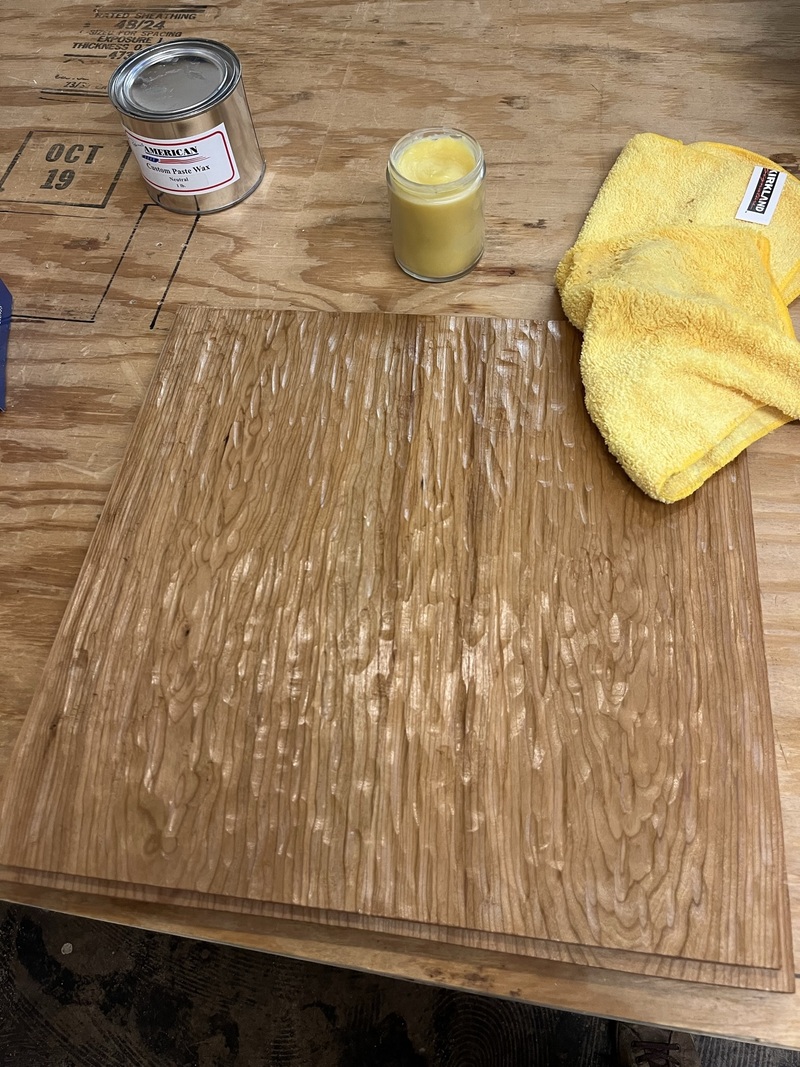 Then I popped the thing into clamps for the final glue-up. It'll need some final shaping to fit into the cabinet. 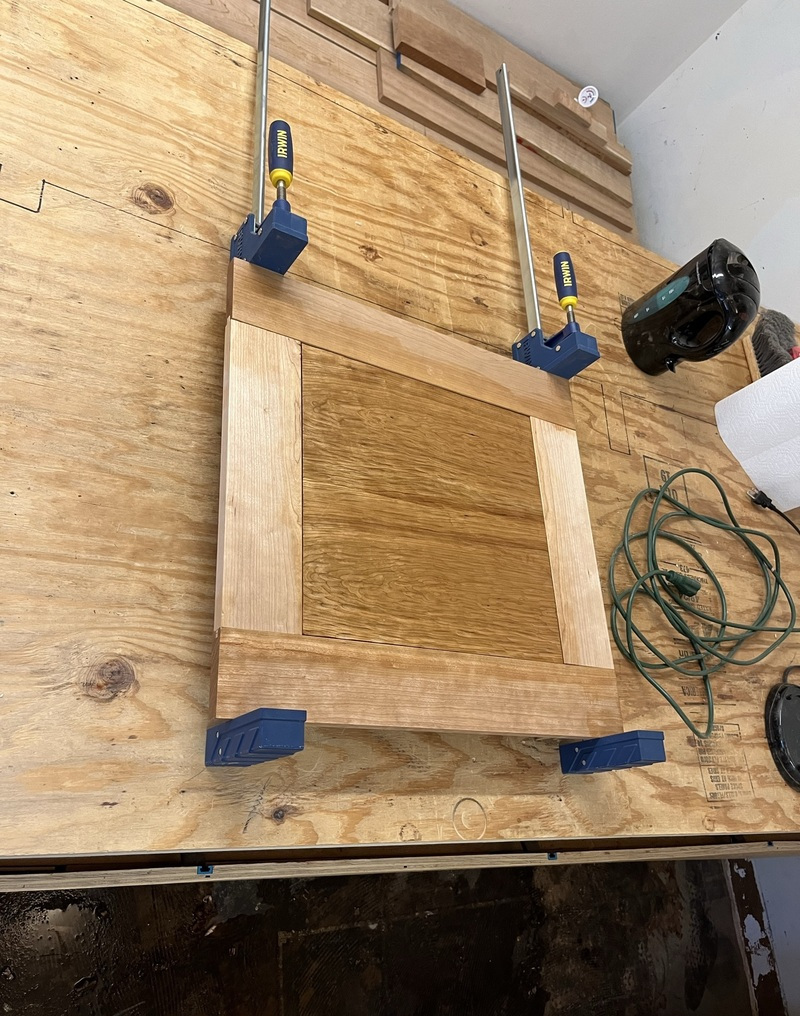
|
|
#
?
Apr 3, 2022 20:07
|
|
|
meowmeowmeowmeow posted:Just posting to say I'm following along and enjoying the thread, fun to see the project progress and know the feeling of thinking you're gonna chill for a day and next thing you know.... Granite Octopus posted:Getting very close now! Looks great. BigFactory posted:This is a great thread. Thanks op! Thanks, guys!
|
|
#
?
Apr 3, 2022 20:08
|
|
|
Went in a couple times after work, and a big session yesterday. I mentioned a long time ago that I wanted to try to carve some kind of relief into the drawer dividers, to give your fingers some more access into the drawer handle cutouts. I wasn't sure how that'd look, so I gave it a shot in some scrap, and... 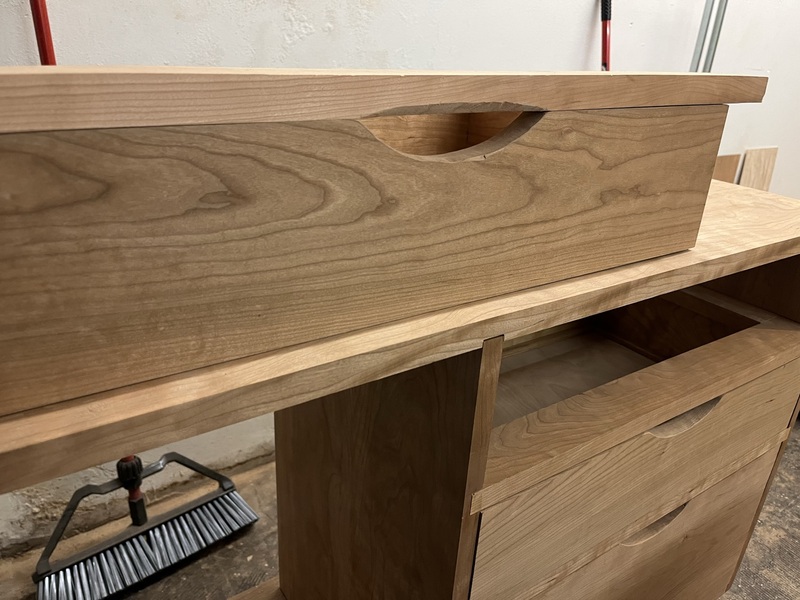 Eeugh. Do not like. I want to, like, photoshop some googly eyes on top of those lips. Compare: 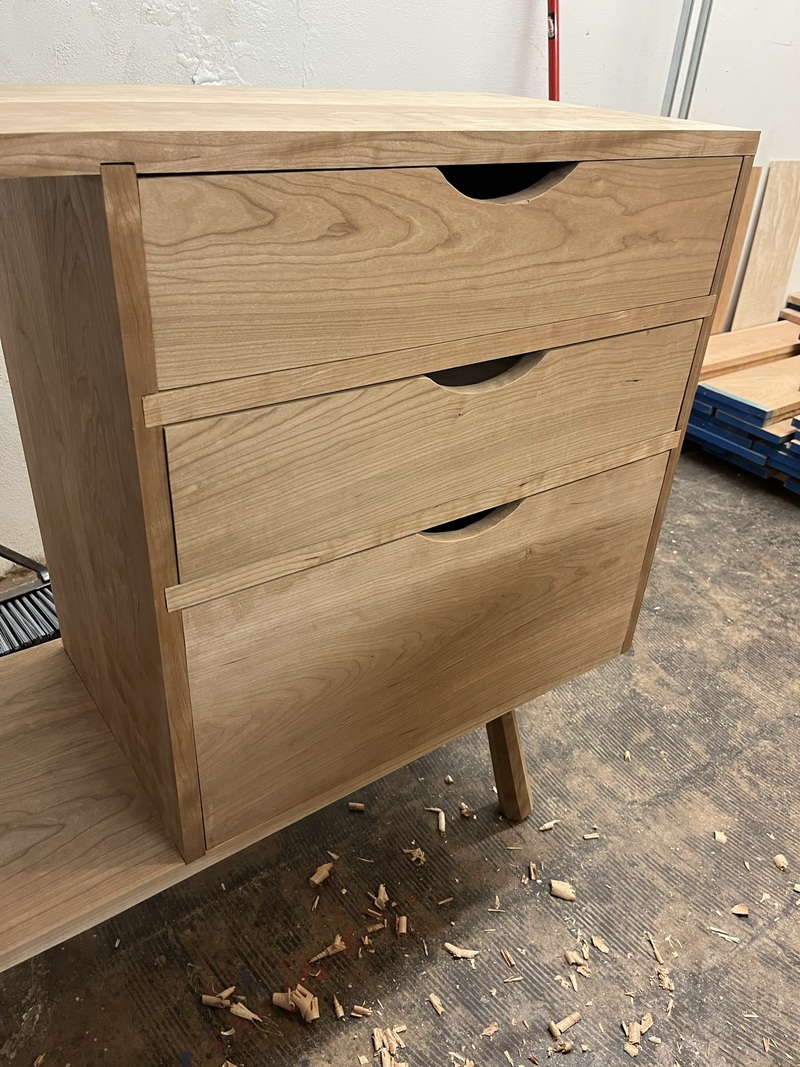 So yeah, I think I'll just stick with the straight edge on the dividers and use a rasp to deepen the drawer handles a bit more. Meantime, I glued the strips to hold the back panels in place, with my favorite clamp for small things: tape. I used hide glue, thinking it may be necessary to remove those strips in the future if for some reason I need to do a repair with the back panels off. 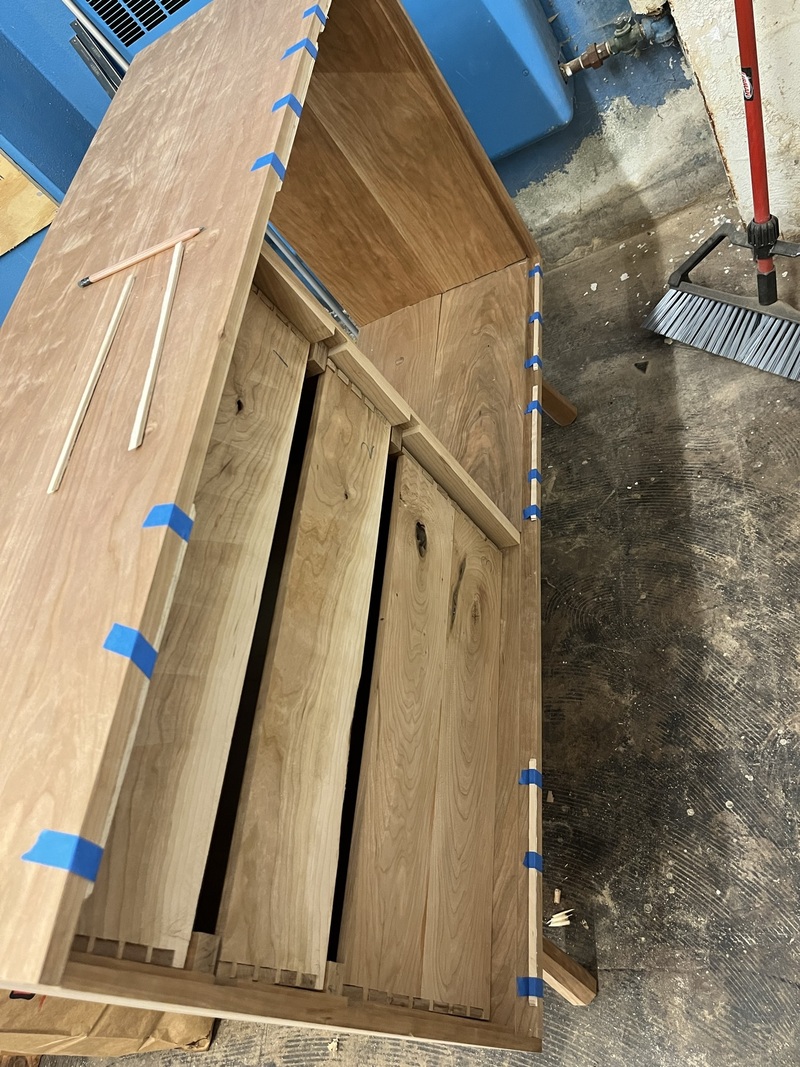 Then I moved on to cutting the mortises in the door for the hinges. On my previous cabinet project, I used a hinge strip to mount the door slightly into the face of the cabinet, which keeps the hinge from protruding from the cabinet. But I decided not to do that here, so the hinge will protrude a bit. To cut hinge mortises, I lay out the mortises with the hinges centered on the top & bottom of the door panel. Then use a chisel and cut it down to depth, then pare across the grain to remove the waste. 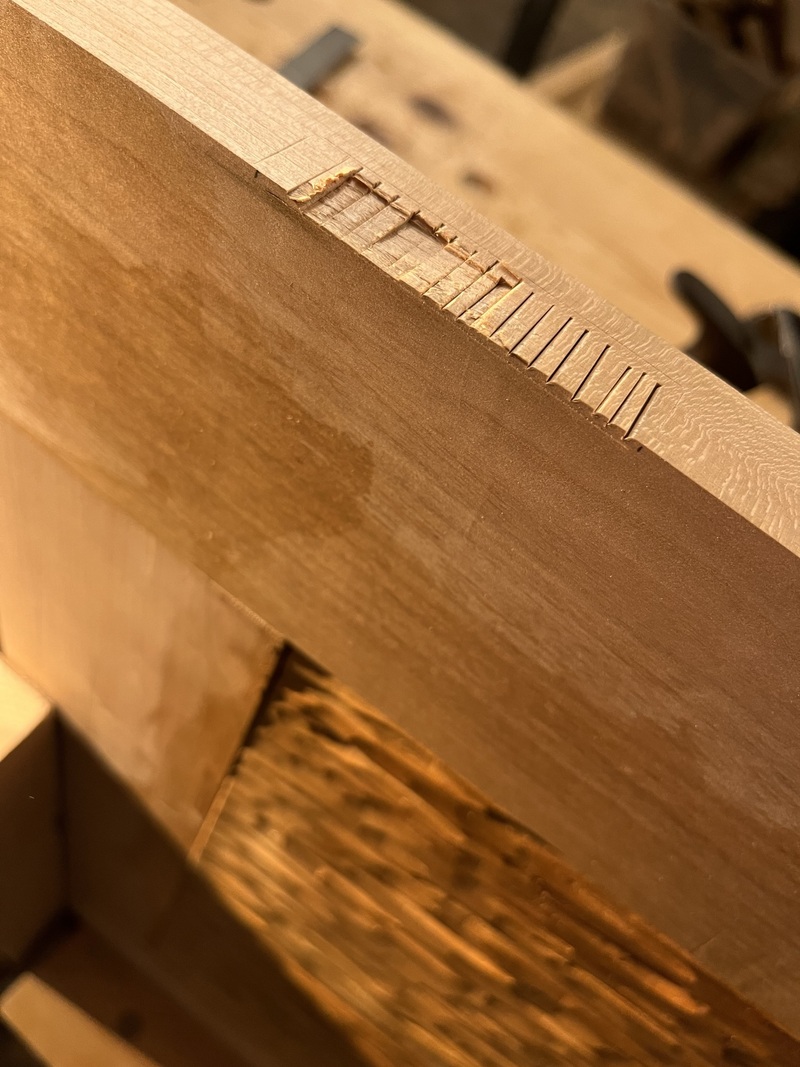 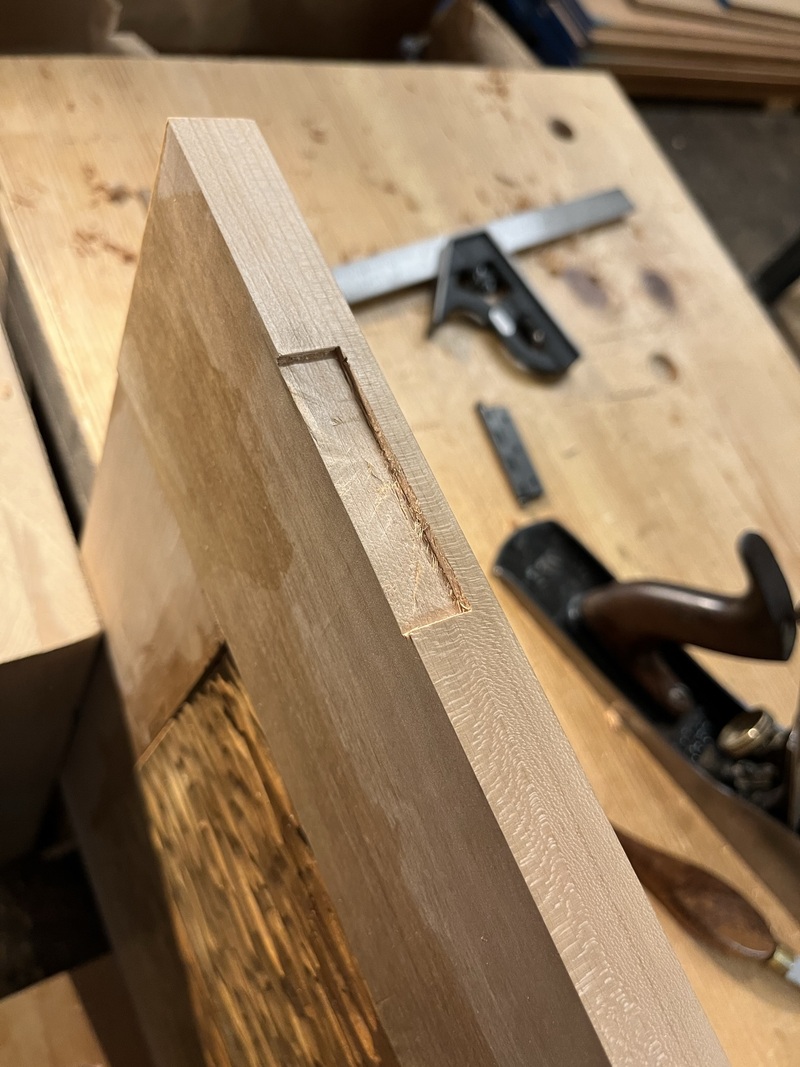 Then temporarily mount the door in place to transfer hinge locations to the cabinet. Don't forget to make an even gap between the top and bottom of the door, using some tape layers or some coins or something. 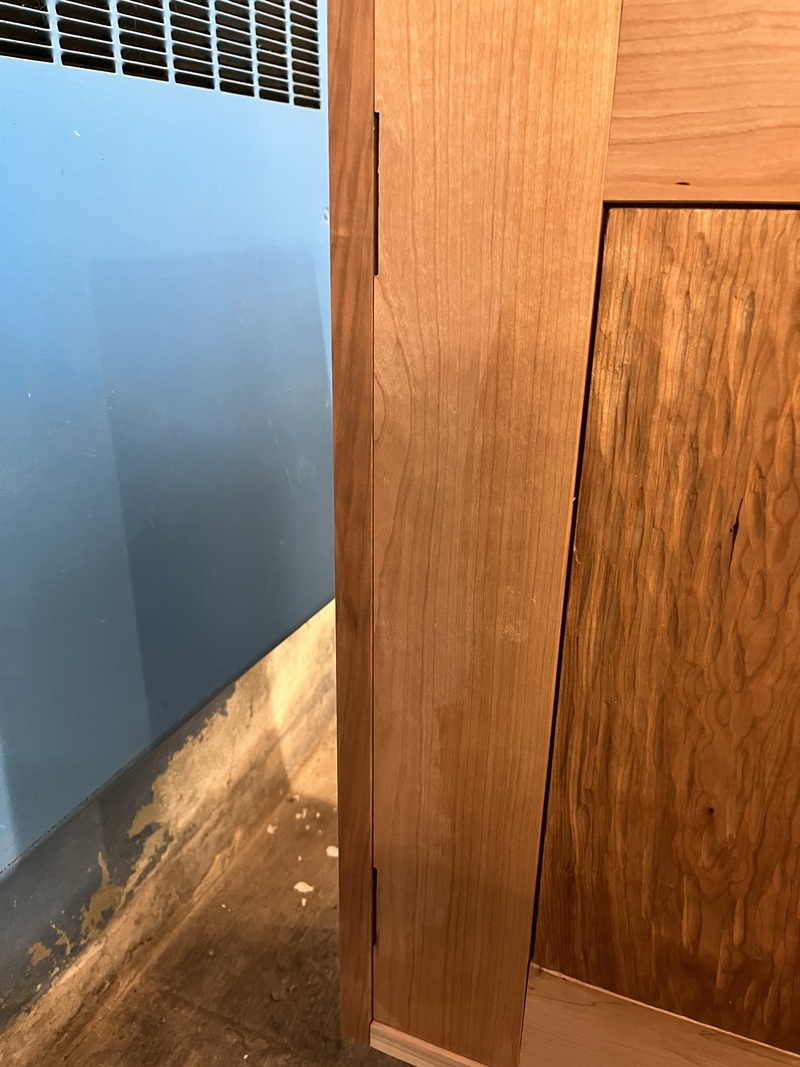 Solo lift the sucker onto its side to chop the hinge mortises into the cabinet. Let me tell you how nerve-wracking it is to take a chisel to the very visible, front face of cabinet at this point in the project...  I didn't like how the chisel was interacting with the wood grain, so I pulled out the router plane to bring it to depth more carefully. 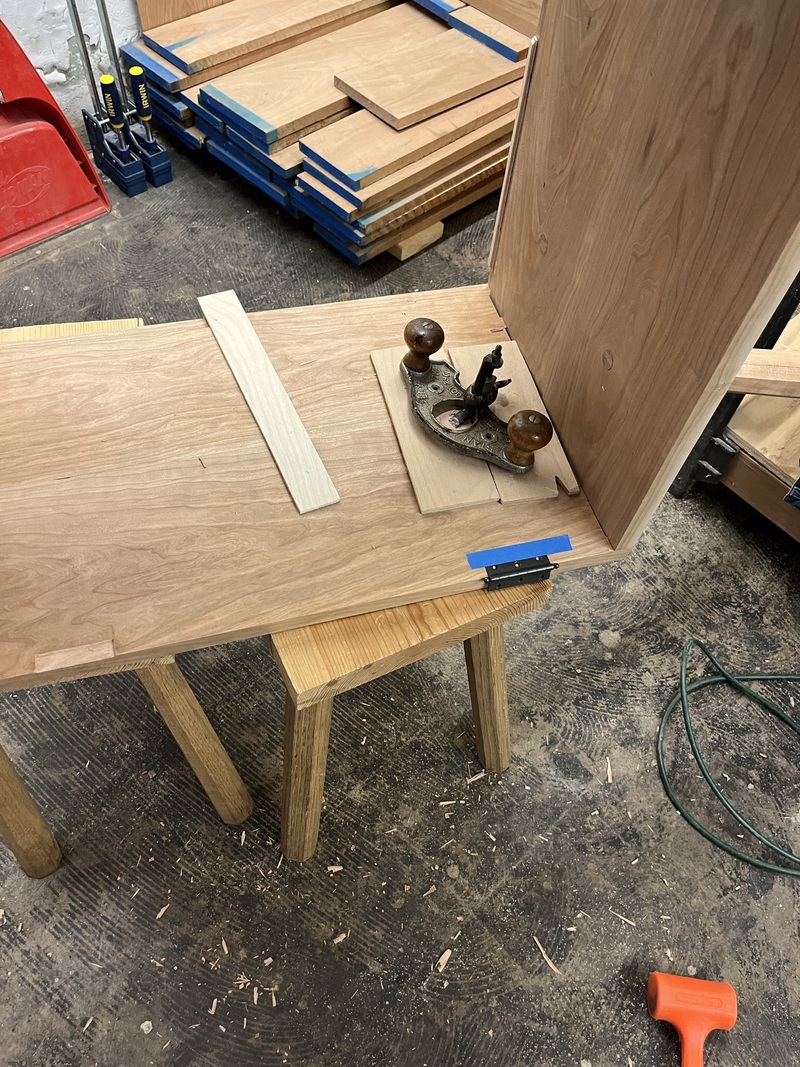 Then, drilling the screw holes for the hinges. I've tried just using normal twist bits for this on my other cabinet. After having to fill and re-drill the fourth hole, I just gave up and bought the self-centering drill bits. They work so well, big mistake to try without them. Lesson learned. 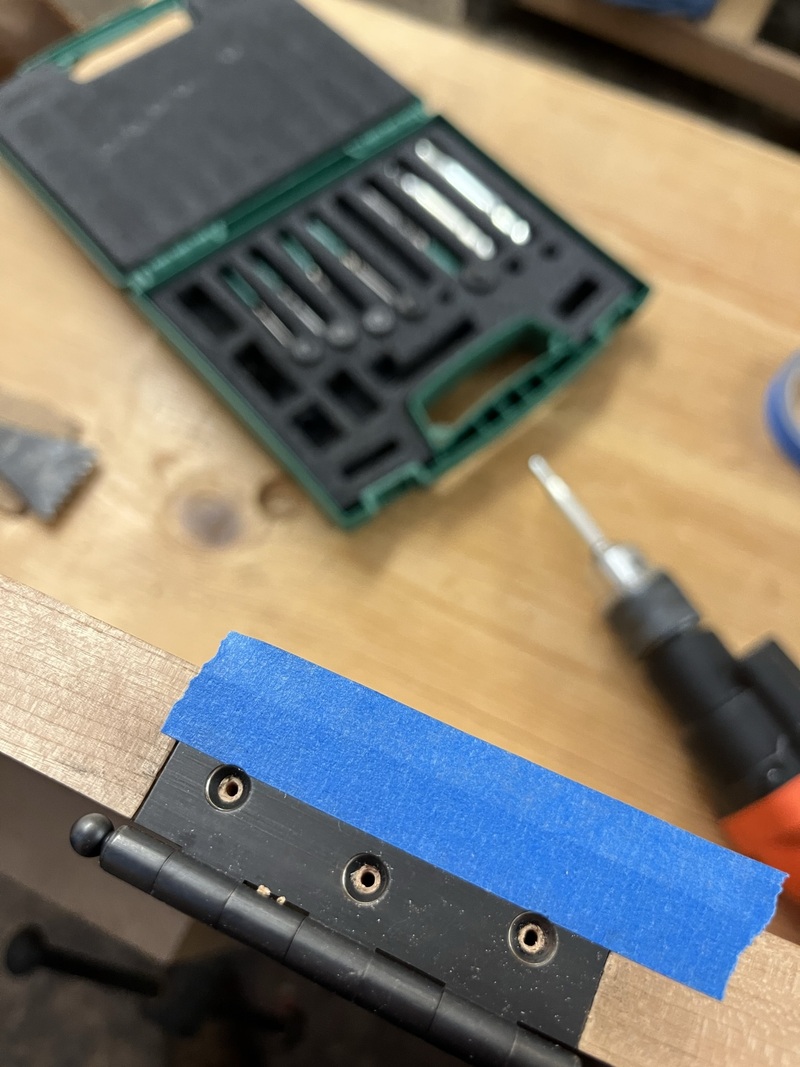 I noticed while I was drilling those holes that the bit didn't go very deep. I stupidly tried to mount the hinges anyway, forcing the screws in, and sure enough one head sheared off. Argh. I set the hinges aside at this point. I guess next time I'll try to trim away some wood and grab a hold with some needle-nose pliers or something... 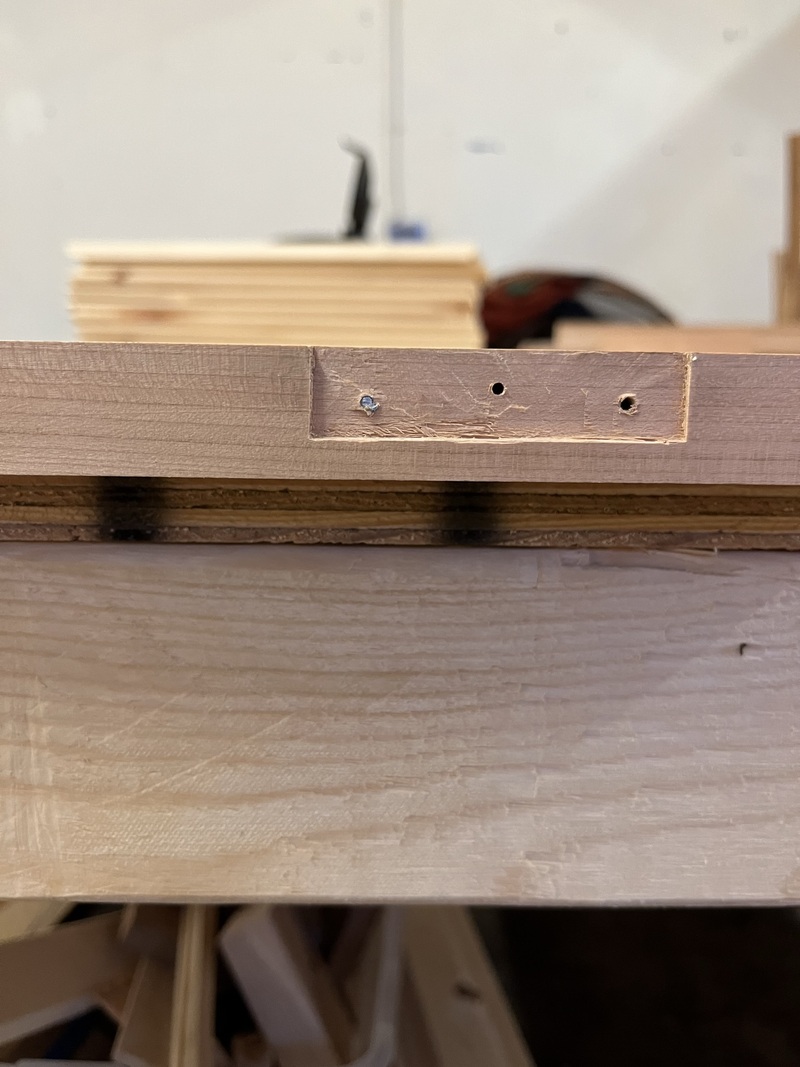 Next lift the thing upside-down onto the bench... 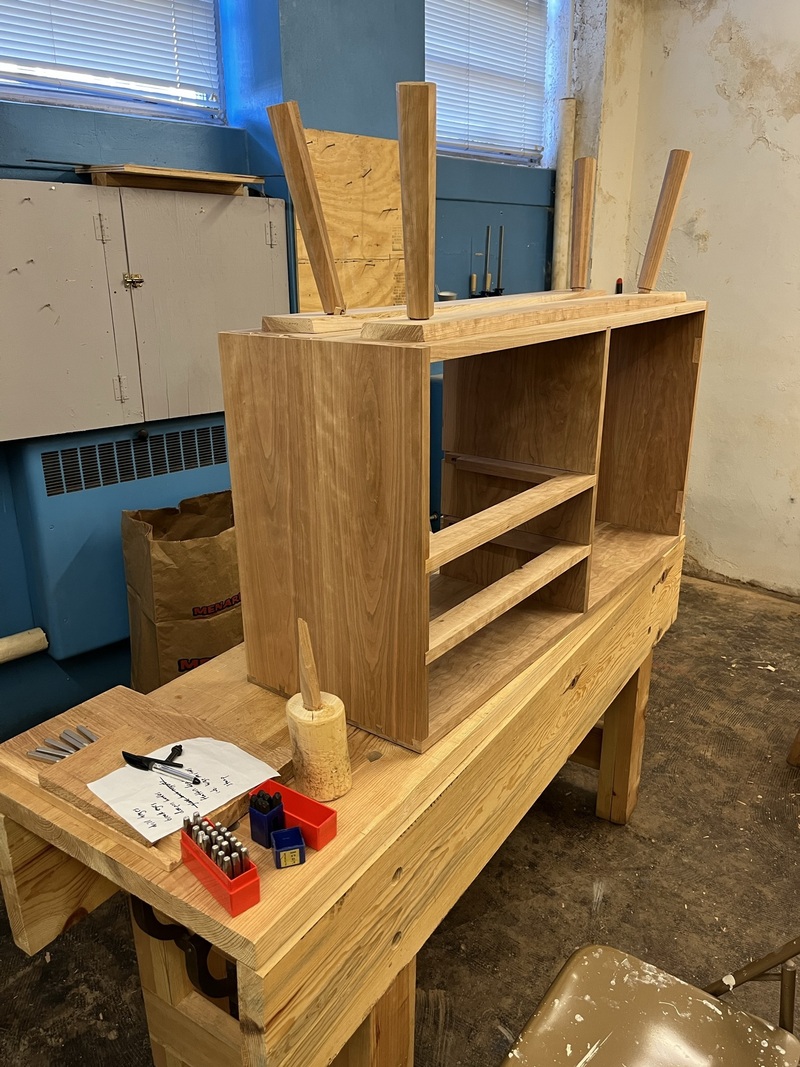 So I can stamp it with my name and the date I finished it. April might be a little optimistic, but who will know if I actually finish it in May? 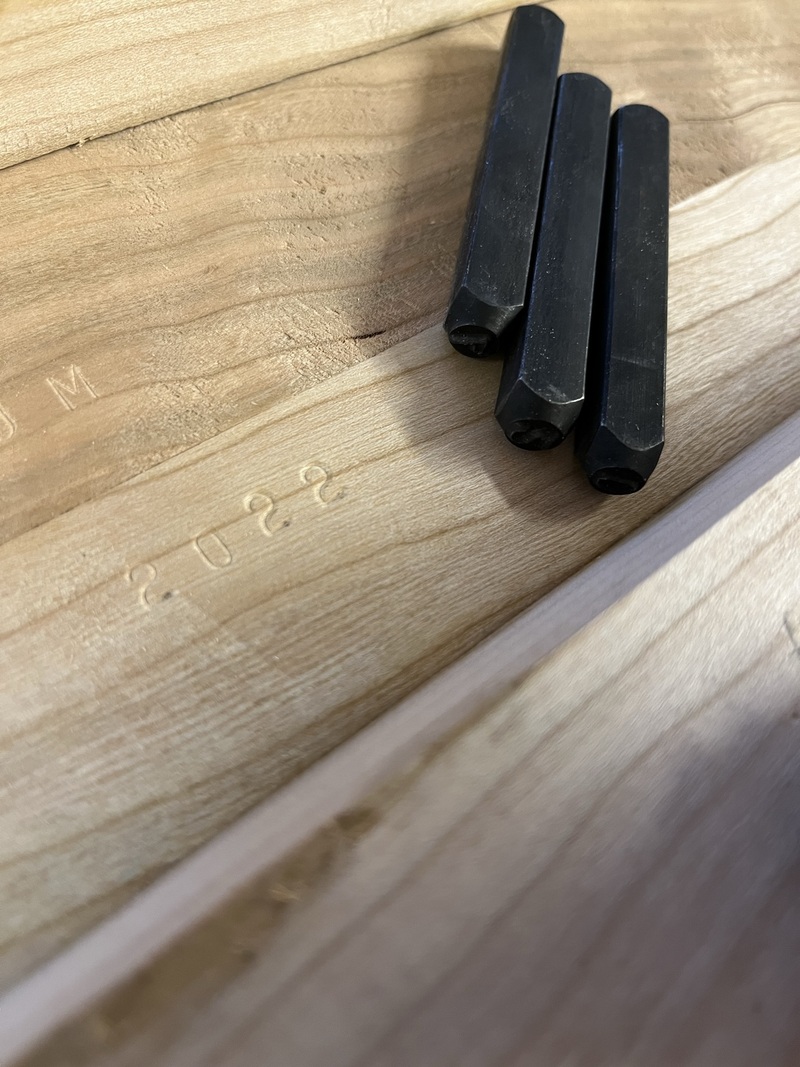 At this point, I'm down to a tiny number of things to finish, so I started a checklist so I don't forget anything. Once these tasks are finished, I will take it home, where I'll apply finish in our back yard, then do some final tasks like trimming the legs and putting it in place! 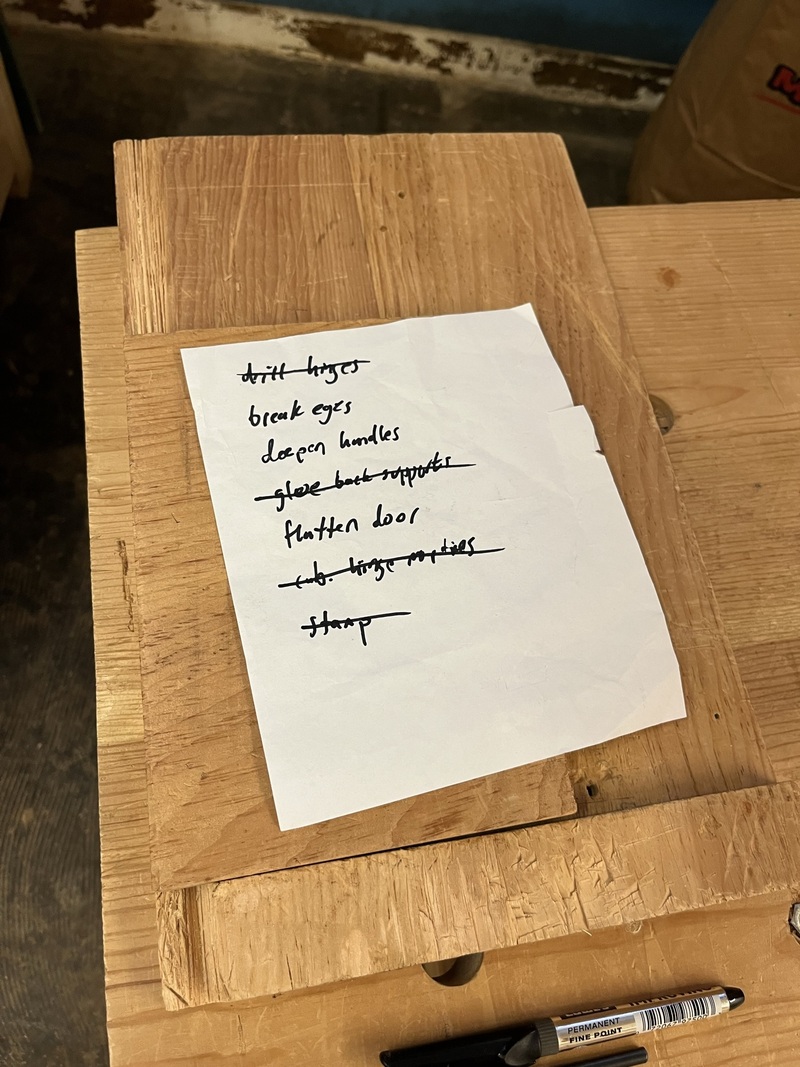
|
|
#
?
Apr 17, 2022 14:53
|
|
|
Looking very good but the relief on the dividers would look silly yeah. Router planes are my go-to for things like hinge recesses. Chisels work for clearing out the bulk of the waste, but for getting it nice and even you can't beat a router plane. Doesn't make it less nerve wracking to start on those recesses, but keeps the risks under control at least. For the screw holes I get them in the right place with a self-centering bit, because as you've found out, it's rather fiddly to do that with just a regular bit. Then drill them out a bit deeper with a same size regular bit using that hole if necessary. Lastly, drive a steel screw in and out before screwing in the brass screws, adding a bit of wax to make them go as smoothly as possible. Keeps dramas with snapped screws to a minimum, because nothing is quite as frustrating as having to extract a small broken screw when a project is almost finished.
|
|
#
?
Apr 17, 2022 16:59
|
|
|
I have on occasion just super-glued the screw head back onto the broken screw once the hinge was installed. On a small cabinet door 2/3 screws is probably good enough.
|
|
#
?
Apr 17, 2022 17:04
|
|
|
Meow Meow Meow posted:I have on occasion just super-glued the screw head back onto the broken screw once the hinge was installed. On a small cabinet door 2/3 screws is probably good enough.
|
|
#
?
Apr 17, 2022 17:20
|
|
|
Yeah, this was one of the steel screws included with the hardware  It was late in the day and the whole time I was thinking, "I should really drill these out further," but I'm dumb and kept going. This is actually a big part of why I don't like to use power tools: I know myself and how I sometimes make dumb, impulsive decisions even though I know better, and the stakes are much higher with a tablesaw than a handsaw. It was late in the day and the whole time I was thinking, "I should really drill these out further," but I'm dumb and kept going. This is actually a big part of why I don't like to use power tools: I know myself and how I sometimes make dumb, impulsive decisions even though I know better, and the stakes are much higher with a tablesaw than a handsaw.
|
|
#
?
Apr 17, 2022 22:34
|
|
|
I ended up using a plug cutter to clear out just enough material to grab onto the screw with the drill chuck.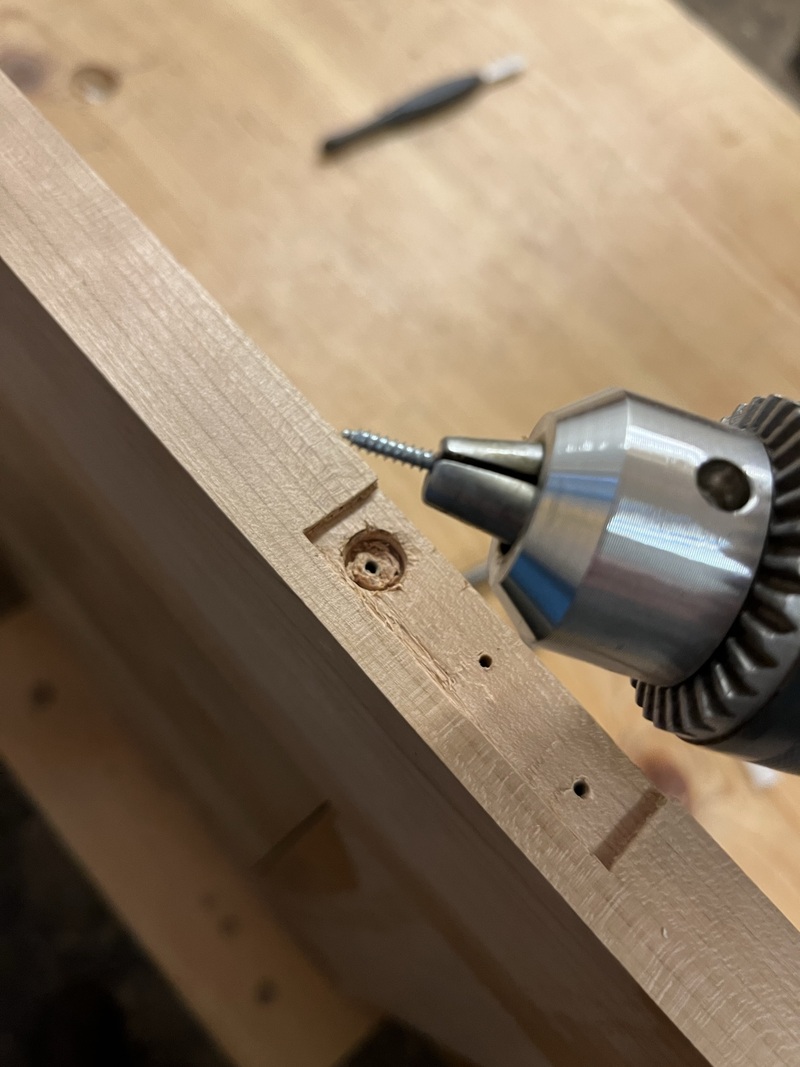 Anyway, next I mounted the hinges and test-hung the door. Ideally you only have to test hang twice: the first time to figure out where you need to adjust the door, and the second time to confirm it looks good. Then the last time you hang it is the very last time. Hanging doors sucks, I always build these little towers to balance it on so I can screw the hinges into the cabinet. 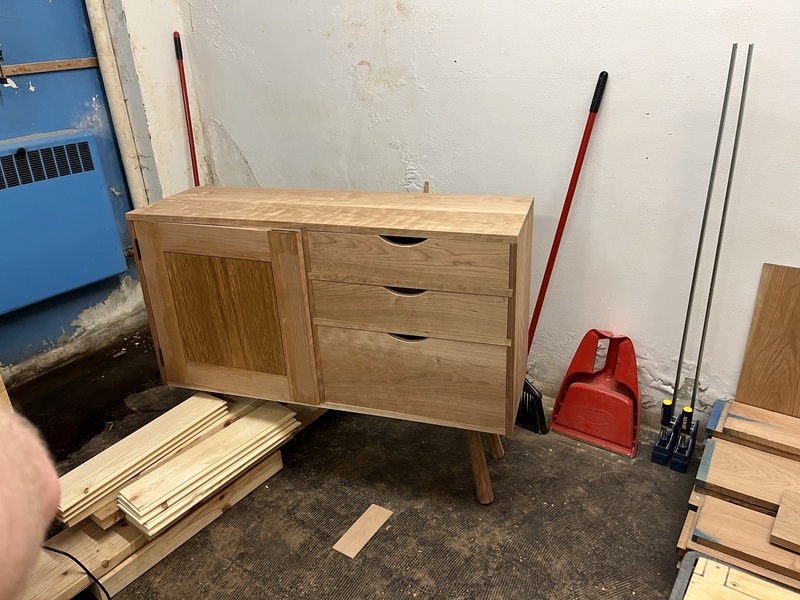 I had to take off quite a bit on the right and bottom of the door. On the right side, I take off a little bit of an angle to allow the back side to clear.  Next on to todo list is to deepen the drawer handles. I ended up just marking the drawer location on the benchtop, and adjusting the dividers to a good depth, then marking the point where I put the dividers. So I could transfer the exact same layout line into all three drawers. 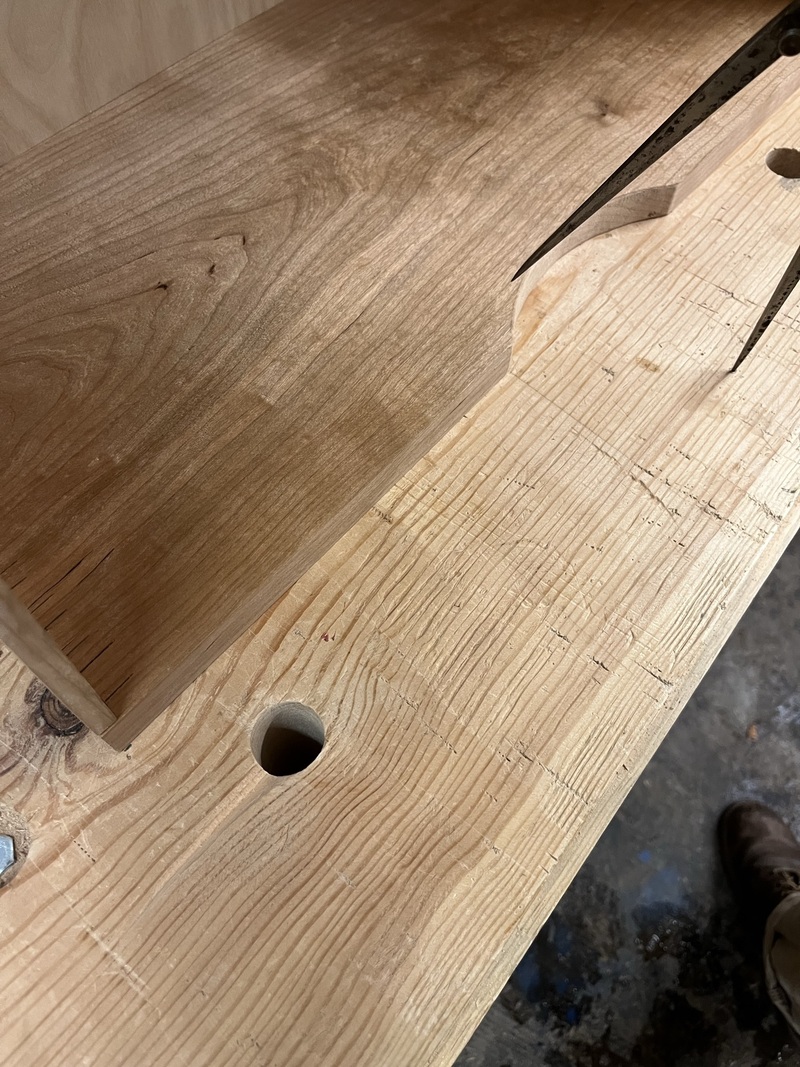 There was less than a quarter inch to take down in each drawer, so I just hit it with the rasp. This would've been a lot easier before the drawers were assembled. 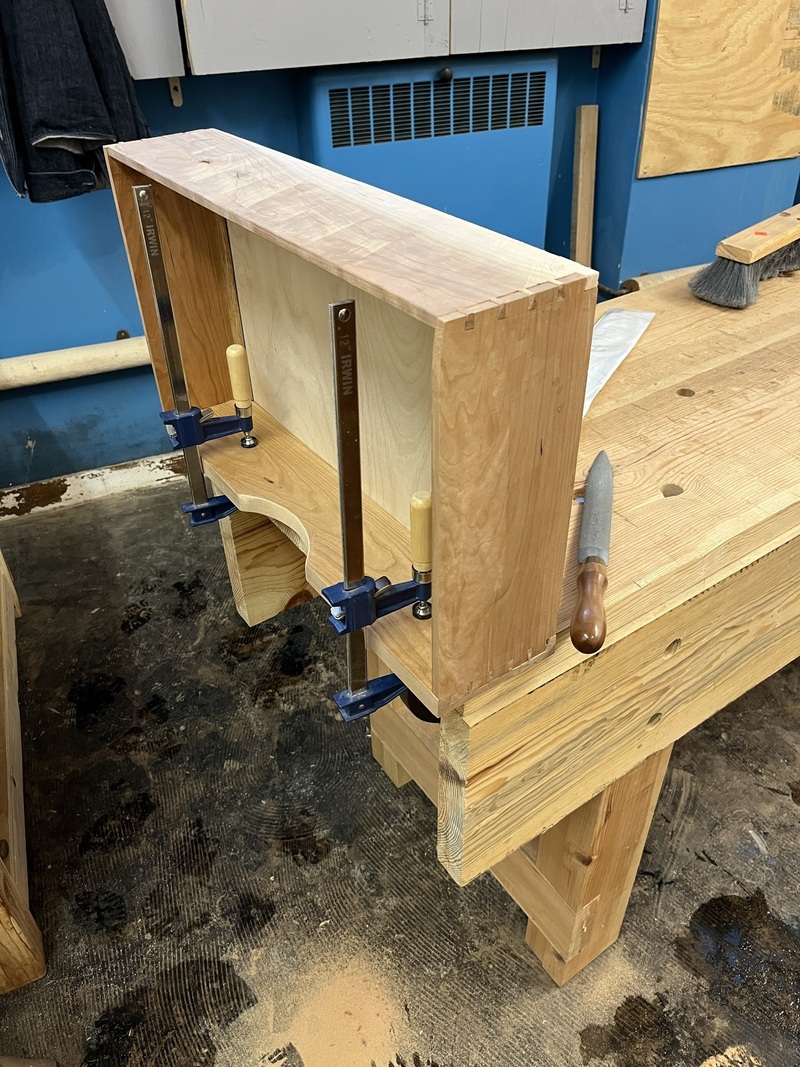 It's looking pretty good! (I nicked a corner off and glue-tape-clamped it back on. (Also note the water coming through the wall... April showers.)) 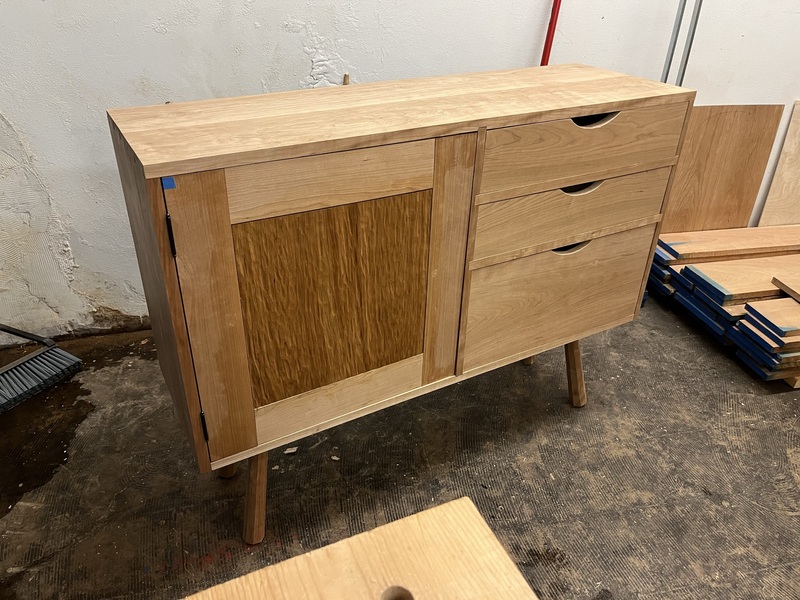
|
|
#
?
May 3, 2022 00:42
|
|
|
|
| # ? May 5, 2024 18:59 |
|
|
Also wanted to throw out a couple interesting things that came out in the past week or two. First, Chris Schwarz did a great handful of videos about cutting tapered tenons and mortises. https://blog.lostartpress.com/2022/04/14/tips-on-tapered-reamers/ https://blog.lostartpress.com/2022/04/20/tips-on-tenon-cutters/ https://blog.lostartpress.com/2022/04/28/cheap-5-8-tenons-the-movie/ Second, the June issue of Popular Woodworking had a fun article about building a little cabinet with hand tools. Reading that article felt a lot like reading my own thread here. 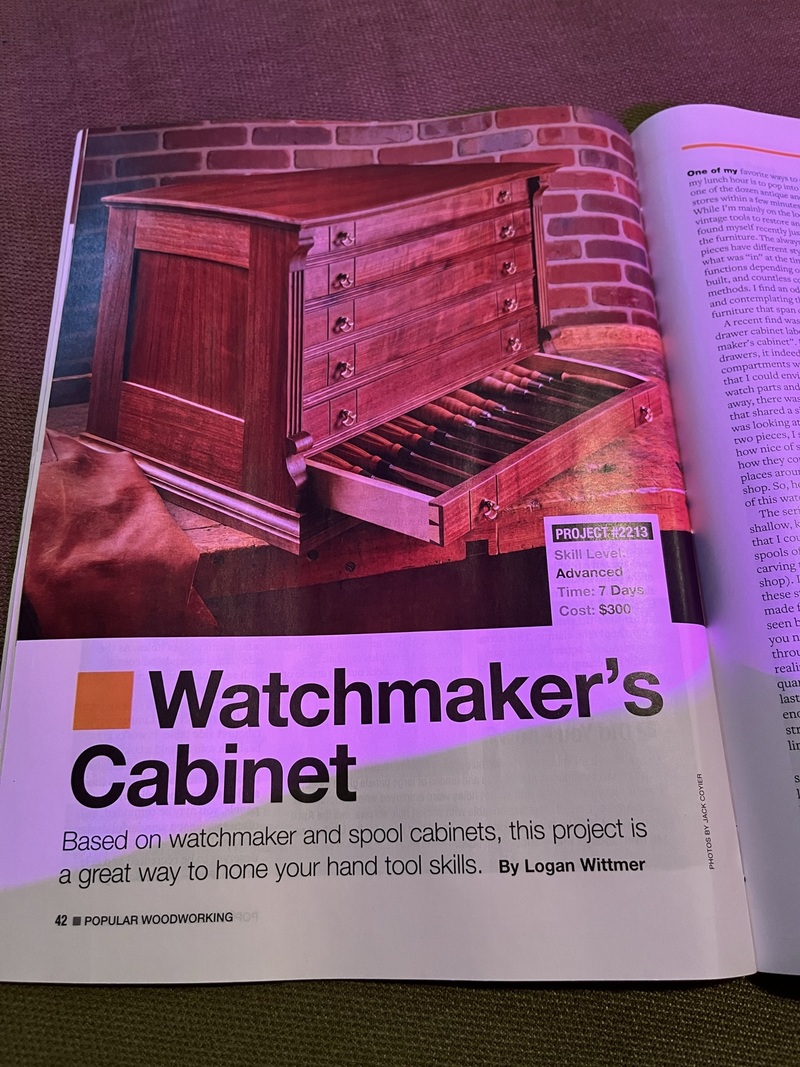
|
|
#
?
May 3, 2022 00:48
|
|